wm cheng
-
Posts
4343 -
Joined
-
Last visited
Content Type
Profiles
Forums
Events
Gallery
Everything posted by wm cheng
-
From the album: Wm_cheng's 1/3000 Yamato SDF-1 repaint
-
From the album: Wm_cheng's 1/3000 Yamato SDF-1 repaint
-
Has anyone ever used this stick? http://cyborggaming.com/prod/v9stickps3.htm It claims compatibility with Hawx and other flight sims (but I guess AC is too new yet). It's an awesome looking and feeling stick in person (I used two of them back when they were PC sticks and ripped them apart to just use the stick portion for the cockpit of the futuristic V-22 helicopters I designed for Resident Evil 4: Afterlife).
-

Any other "Thing" fans out there?
wm cheng replied to HappyPenguins's topic in Anime or Science Fiction
A decent review from a trusted source :-) http://io9.com/5850037/the-thing-prequel-is-a-fun-horror-film-with-one-fatal-flaw?tag=movie-review and to tout my own horn!... "...Then, when we finally get to the (beautifully designed) Thingship..." Go see it, support a fellow MacrossWorlder... And watch for my name in the credits! - too bad it was too dark to make up the Macross/Zentradi inspired details in the Alienship. -
Any other "Thing" fans out there?
wm cheng replied to HappyPenguins's topic in Anime or Science Fiction
This is an interesting read/short story from the Thing's perspective... http://io9.com/5849758/an-incredible-brilliant-short-story-told-from-the-perspective-of-the-aliens-in-john-carpenters-the-thing -
Yamato 1/3000 SDF-1 modification and paint up...
wm cheng replied to wm cheng's topic in The Workshop!
Lastly I have cut a pattern for the background to the city. It's been scanned at 600dpi with the ruler behind it for you to scale if you need to - but if you print it out at 600dpi, it should be size as is. I will use this to compile the various city backgrounds that have been used on these threads for the 1/2000 SDF-1 that other masters have toiled hard at creating! I have a bit of a surprise that I hope will work out for the azteking panelling paint surface treatment thoughout the ship (but that comes much later!) - some of you who know me from Starship Modeller might have an idea - but don't give it away yet. Lets hope for another few hours this weekend!
-
Yamato 1/3000 SDF-1 modification and paint up...
wm cheng replied to wm cheng's topic in The Workshop!
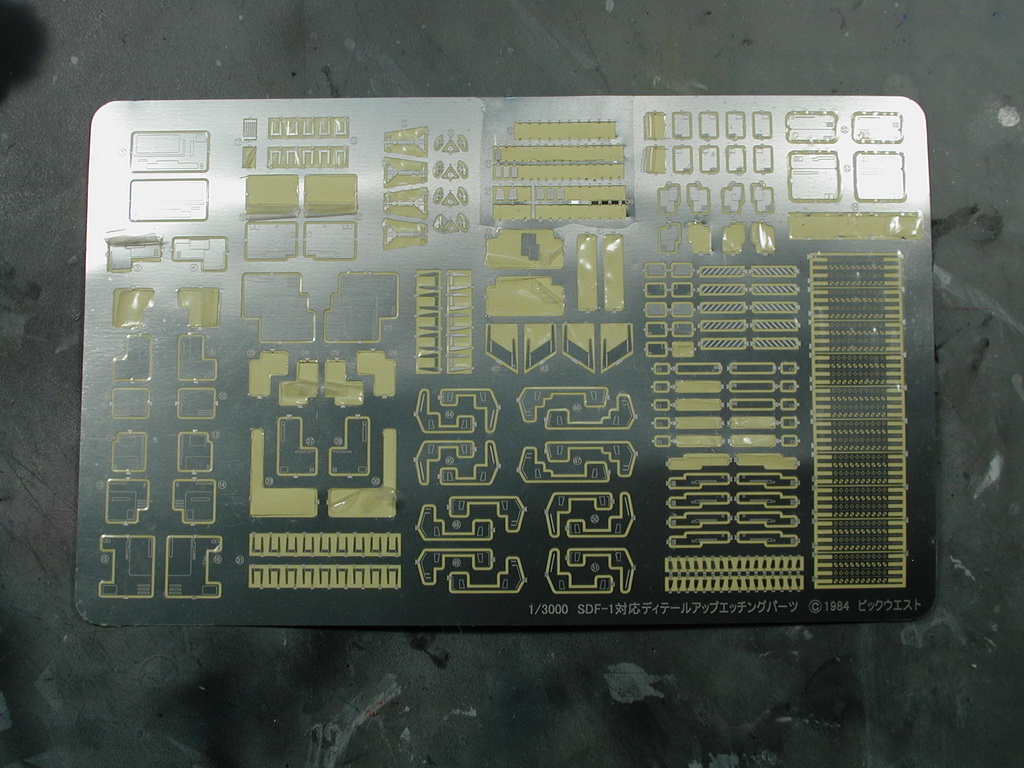
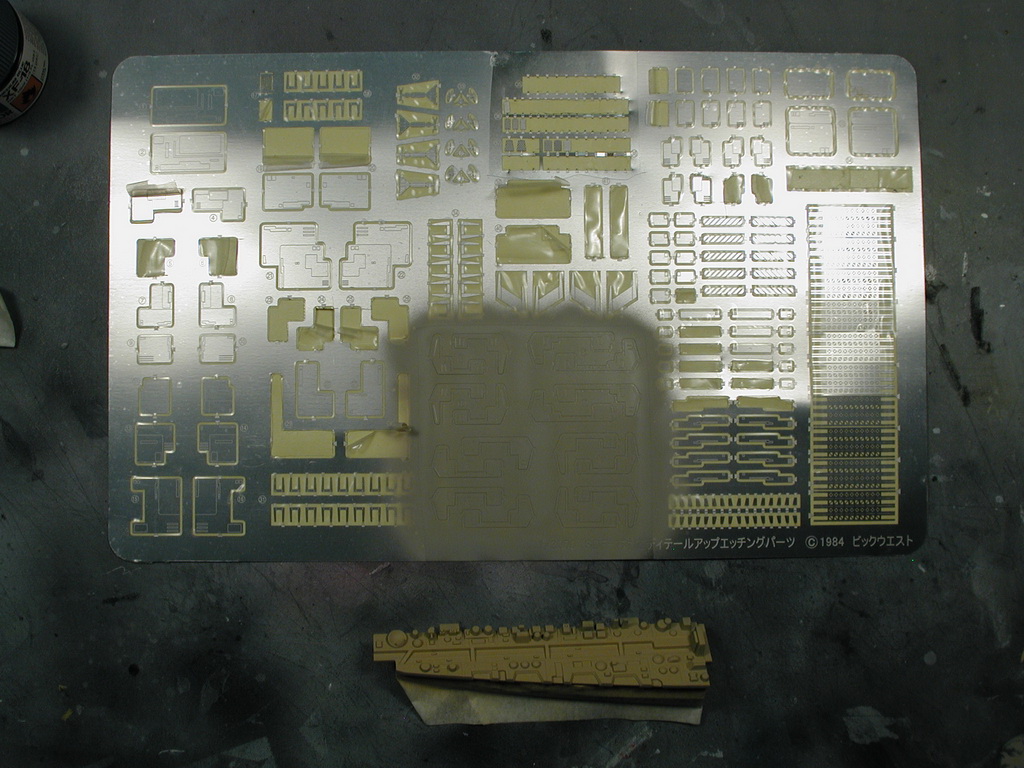
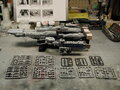
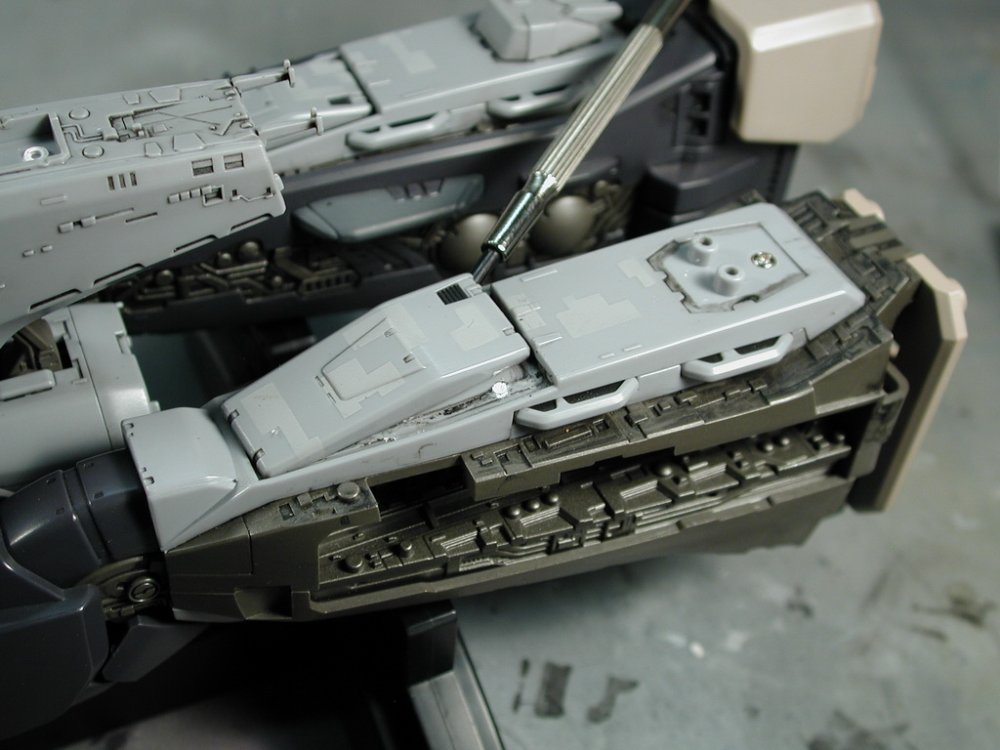
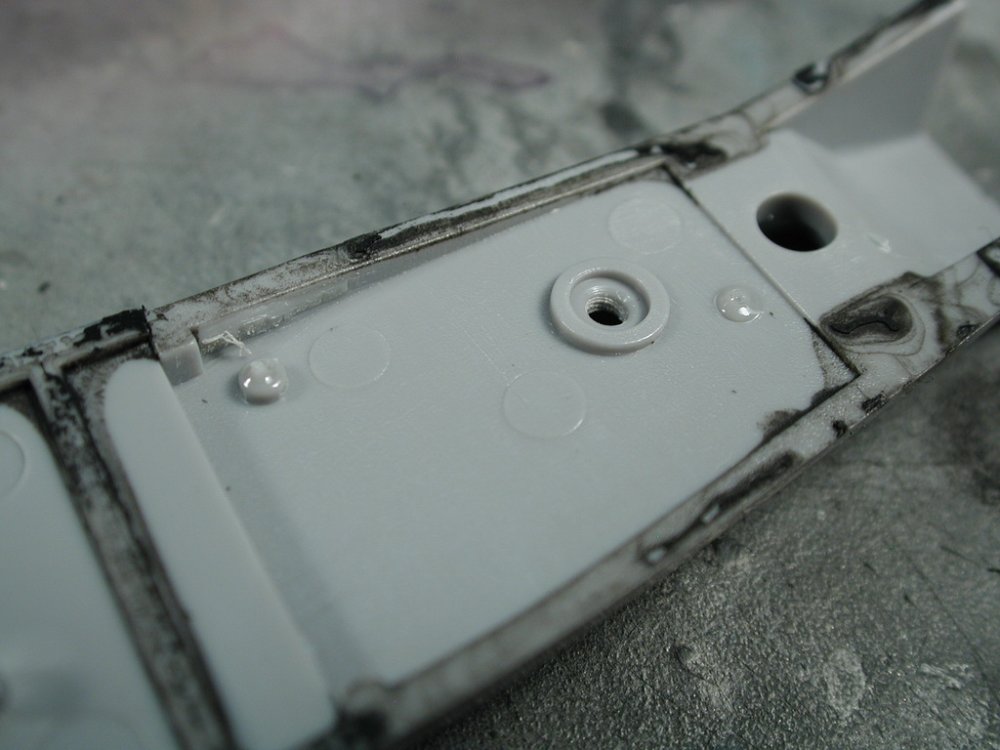
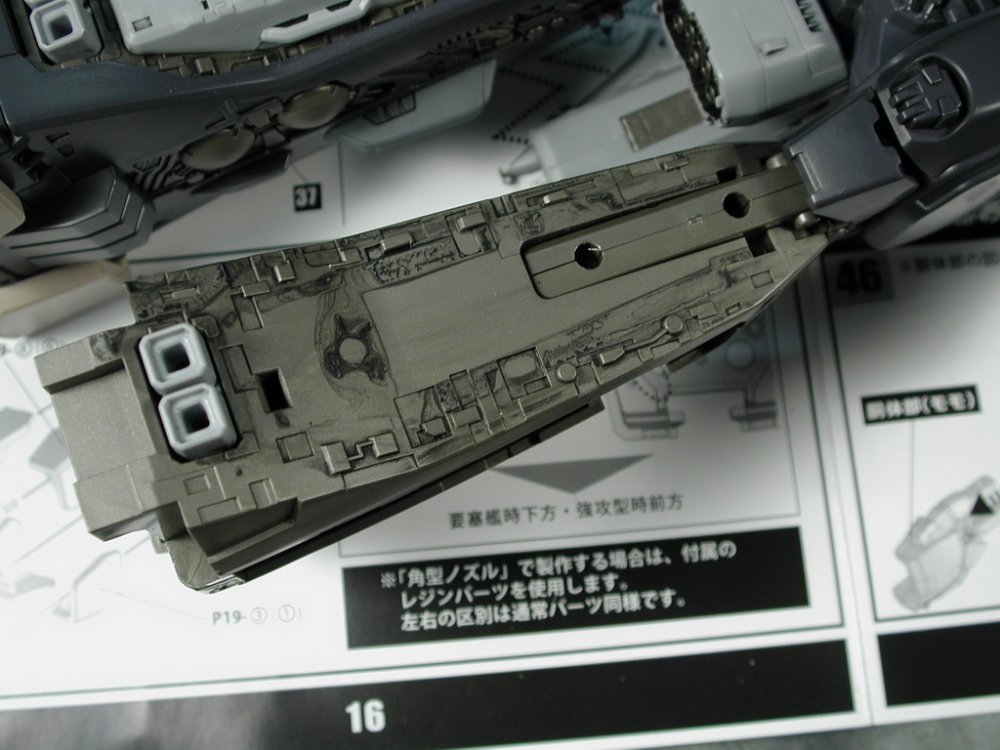
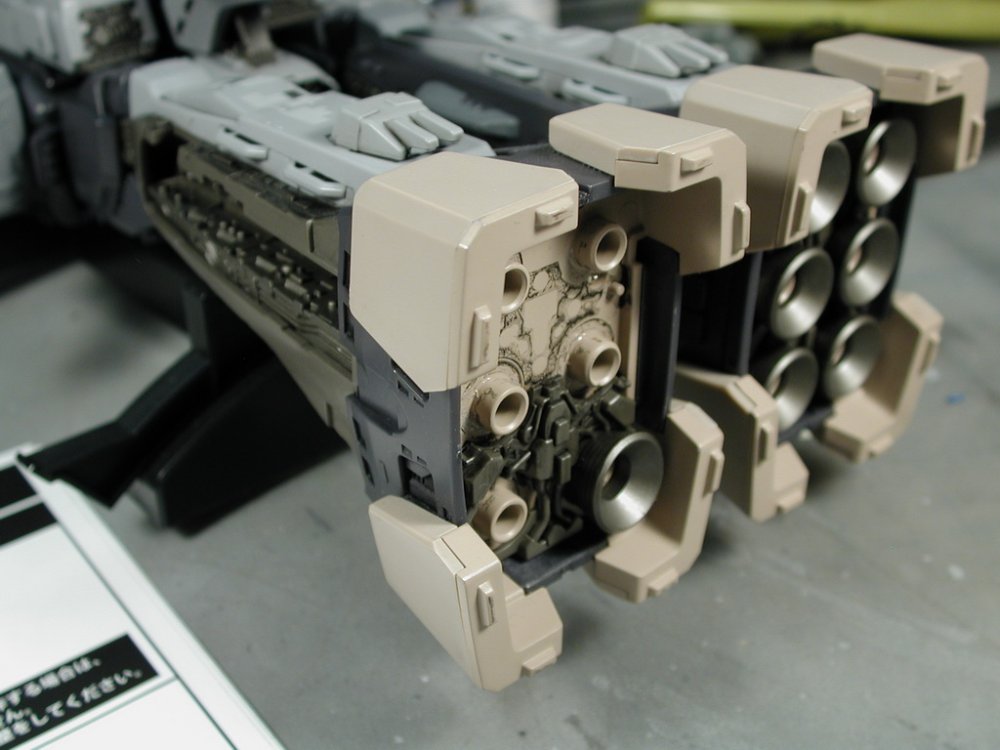
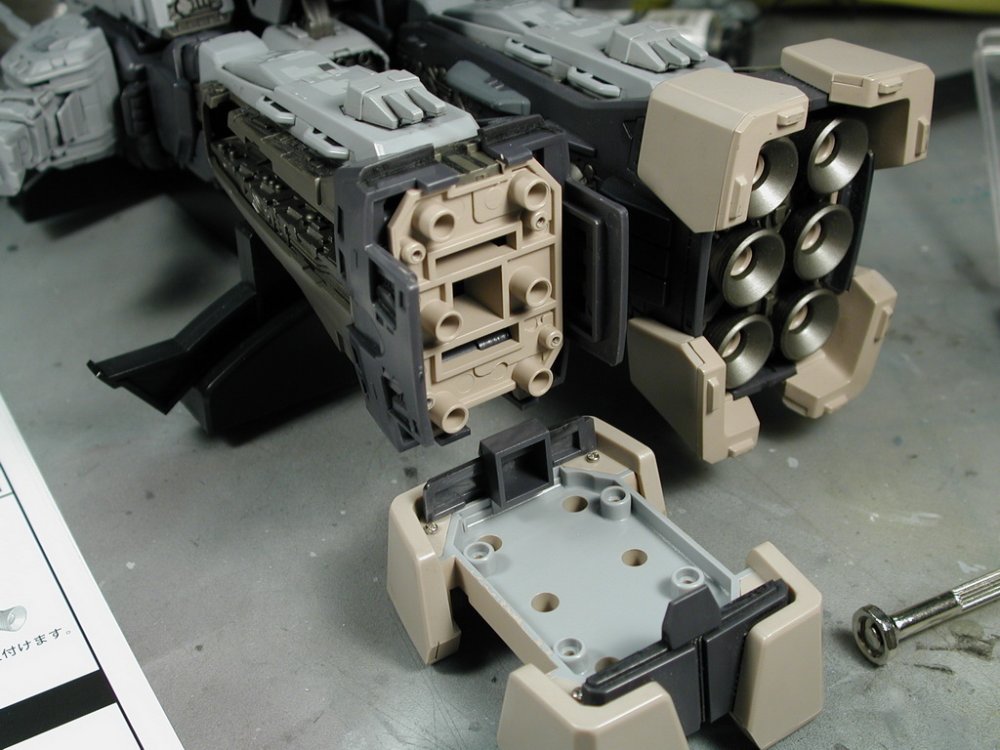
Hmm, why is it lumping all my separate posts into a single post - I want to break apart steps with corresponding attached photos, but its all lumping them together, even though I am replying in separate posts? It's difficult to see which comments belong to which attached image this way. Is there a new setting in this forum upgrade that I have to check off? What was better was in the old forums, I could attach images within the body of the post and then type some more and then attach other images within the post instead of having them all appear at the bottom of the post togeher - is this functionality still available? Anyways - here's a shot of the wonderful PE set that Manji was so kind to send to me. I really just wanted the tiny PE Valkyries and launch arms (have no idea how I'm going to paint them!) - but there was so much more stuff that I want to use the rest of them for body plating for the rest of the SDF-1. What was even more wonderful, was that Manji still had the plastic wrap left on it, so I could peel back portions of the wrap to start pre-painting some of these plates before they went onto the SDF-1 which saves masking later on. So I started to mix up different batches of colour based on where the plates go. Its okay to get the colours just close enough and not exact because you want the plates to have a slightly different tone than the plastic anyways - this will help with the azteking panels to be sprayed later on to create even more panel variation - but you don't want it to stand out too much to ruin the overall scheme of the SDF-1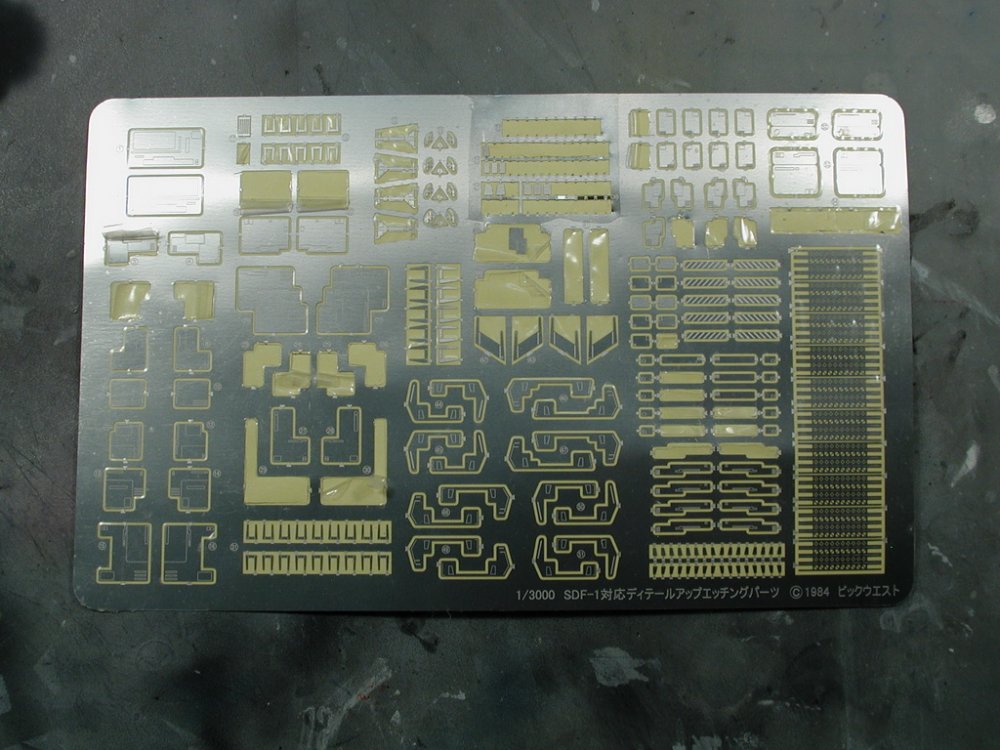
-
Yamato 1/3000 SDF-1 modification and paint up...
wm cheng replied to wm cheng's topic in The Workshop!
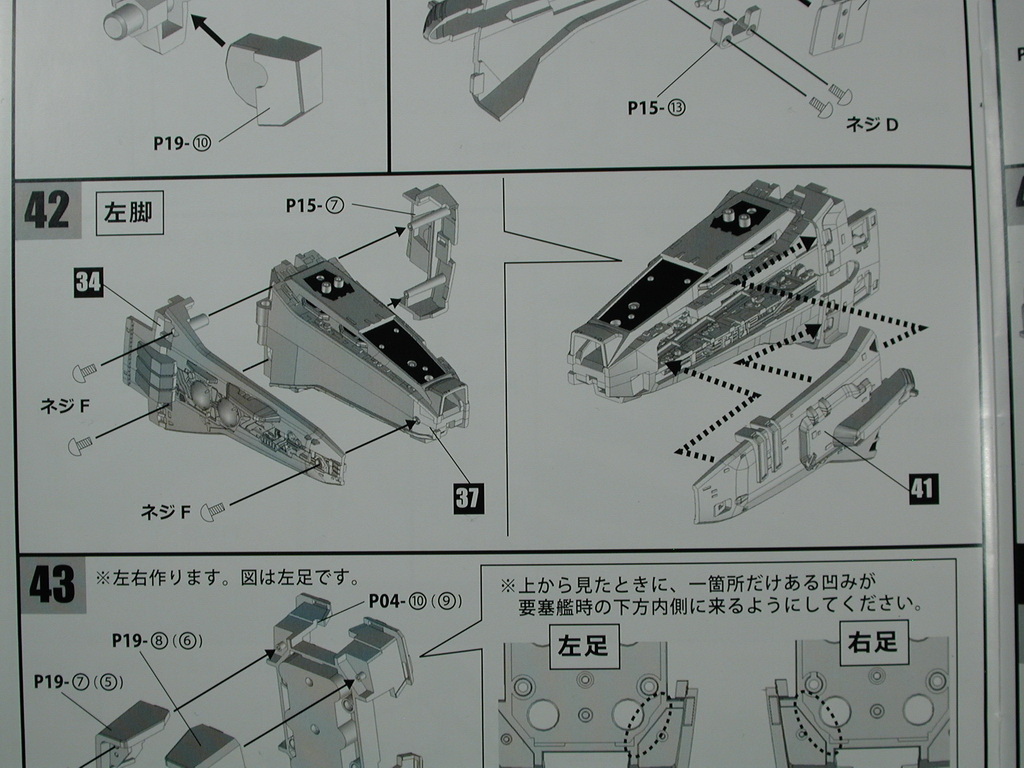
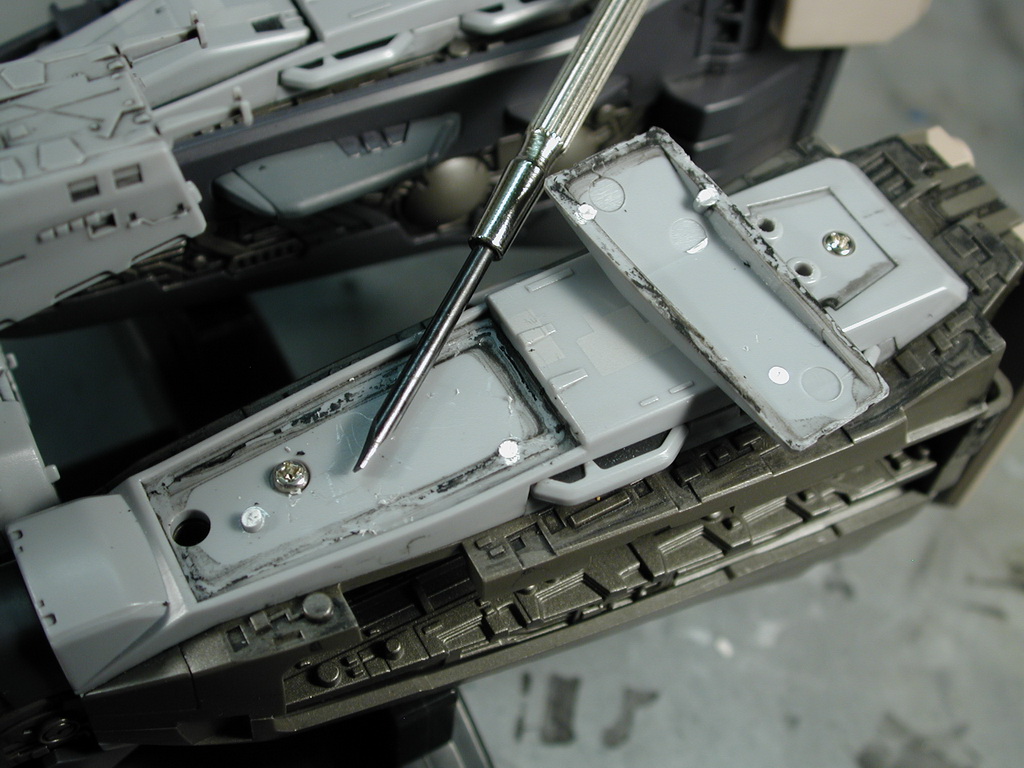
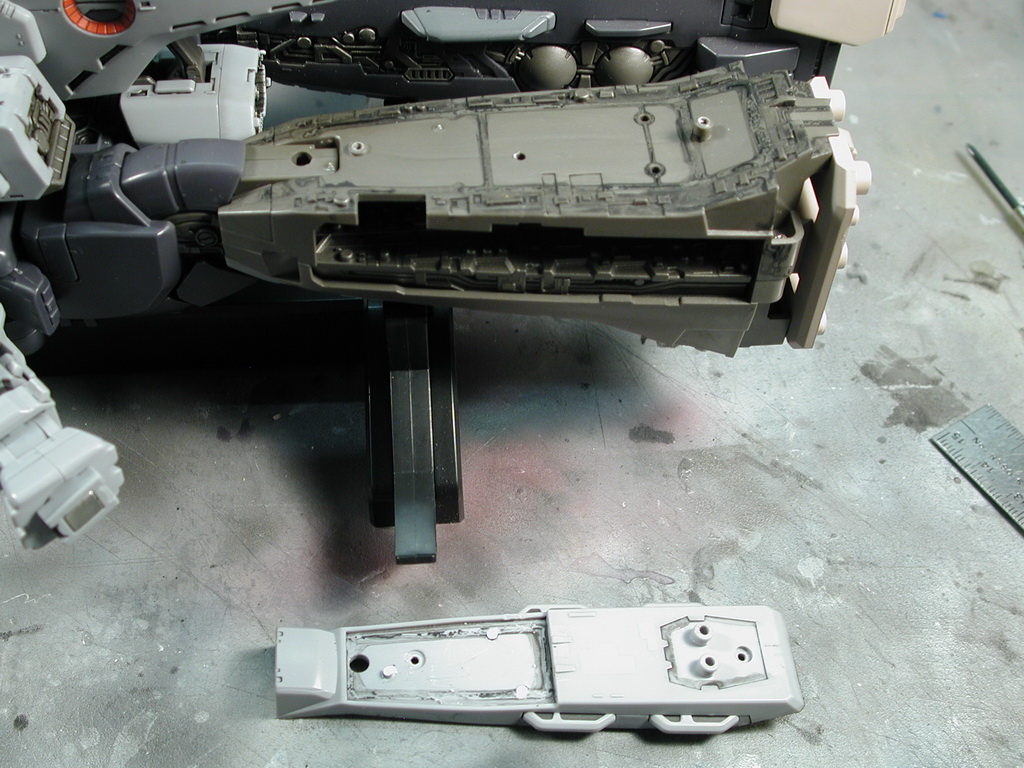
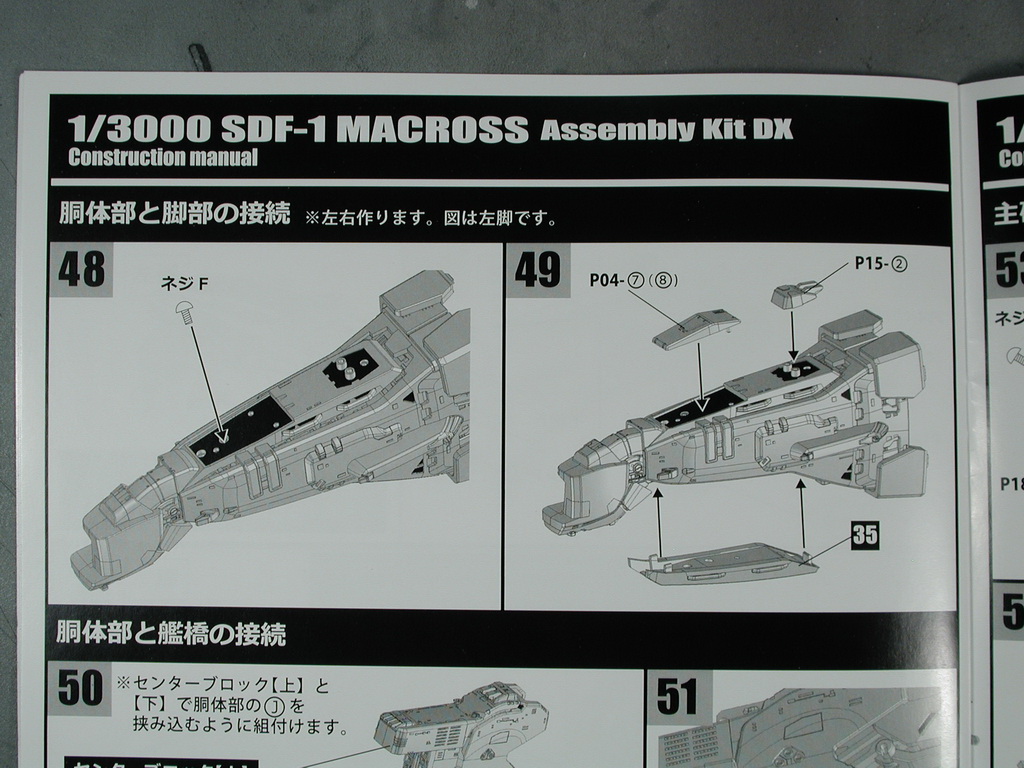
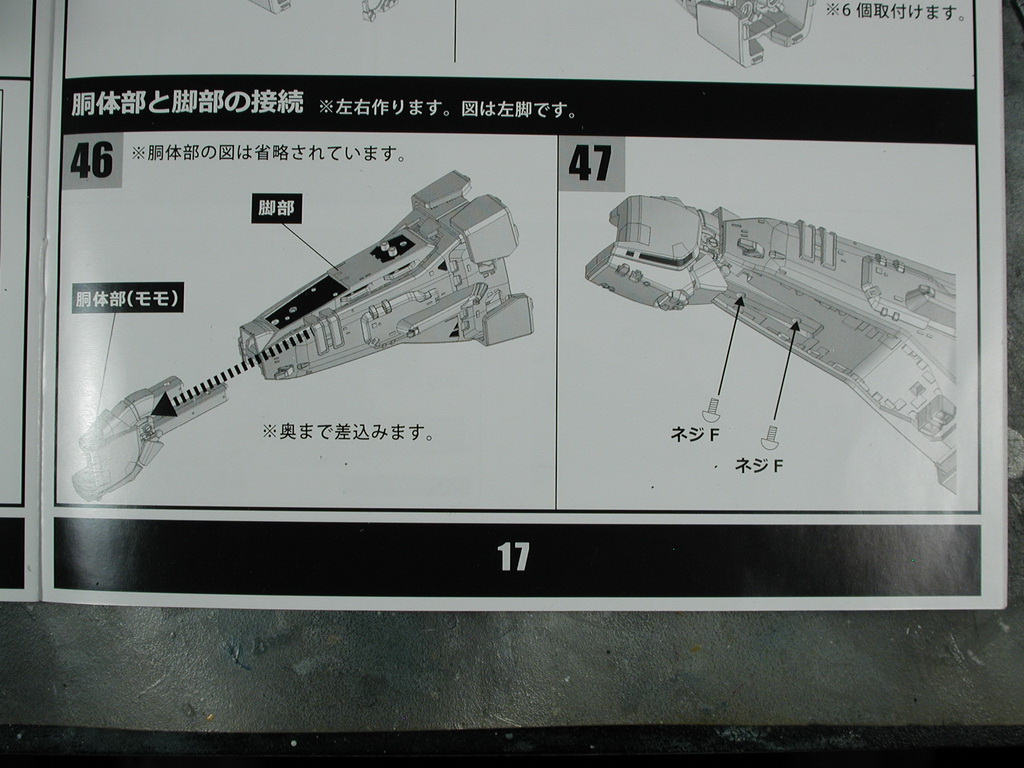
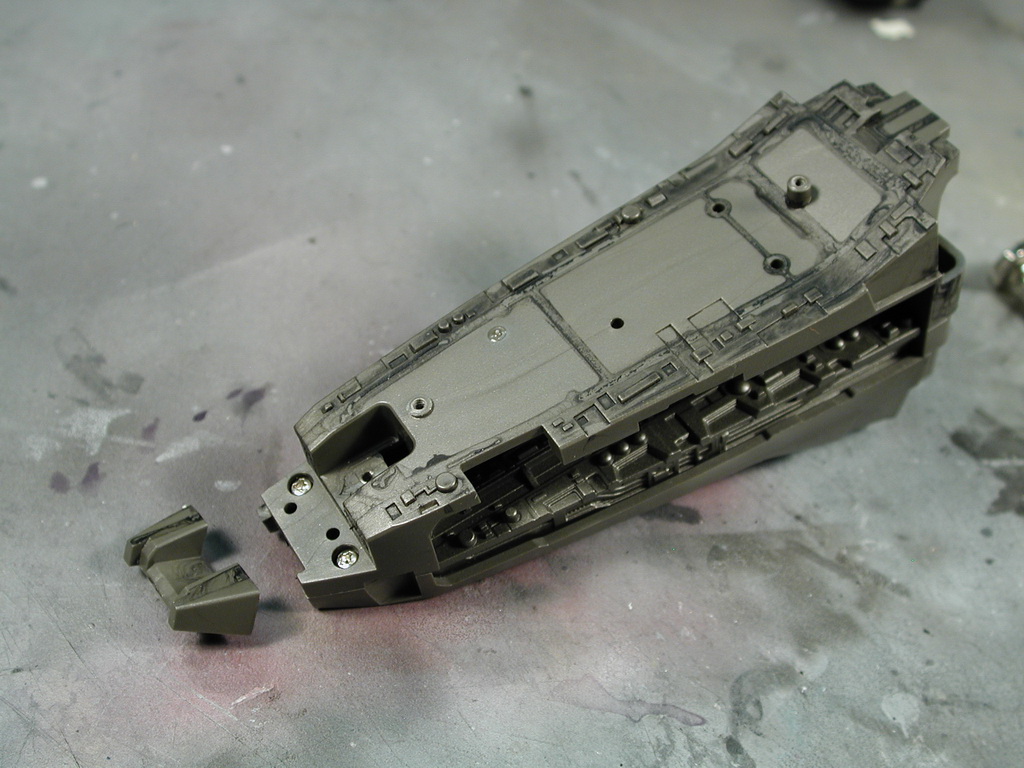
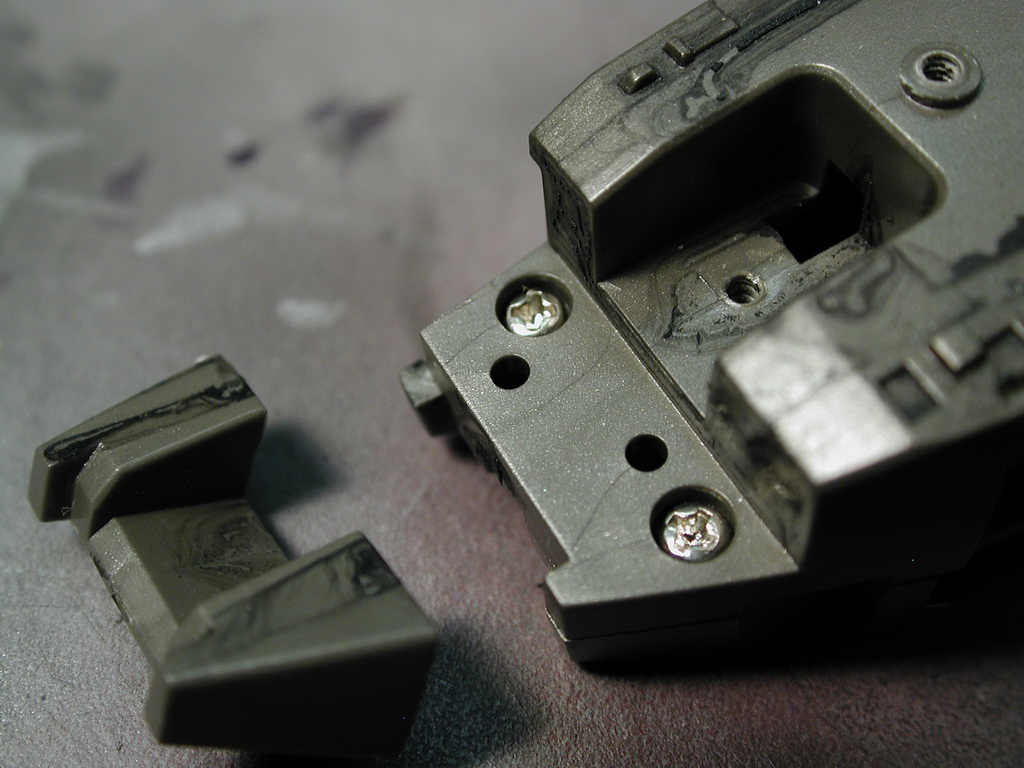
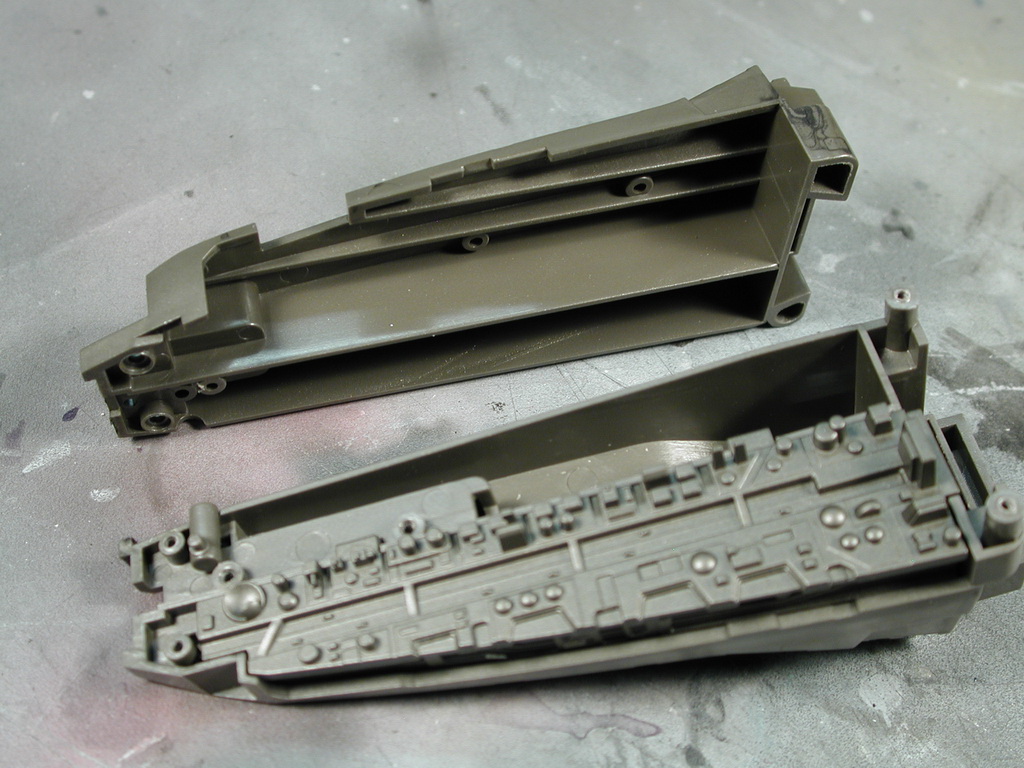
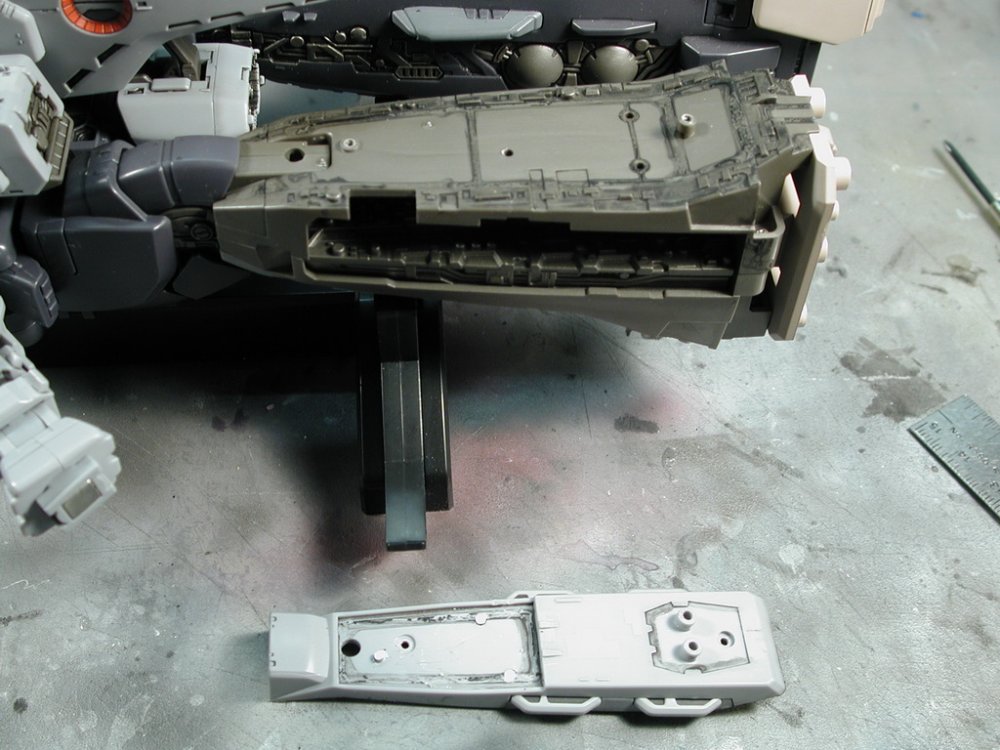
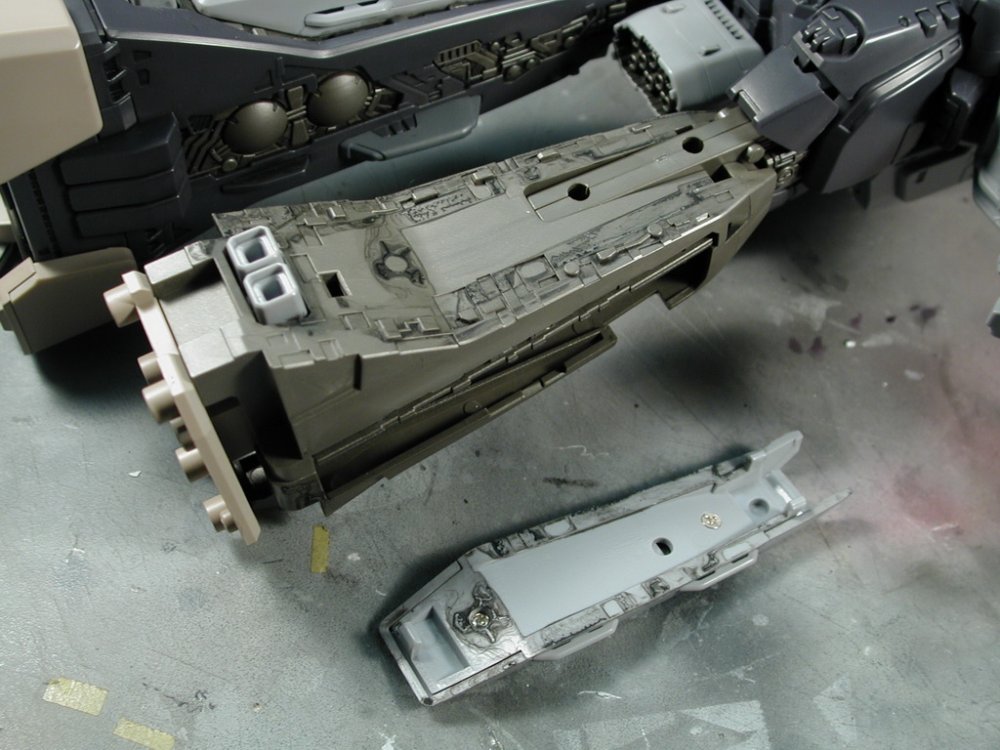
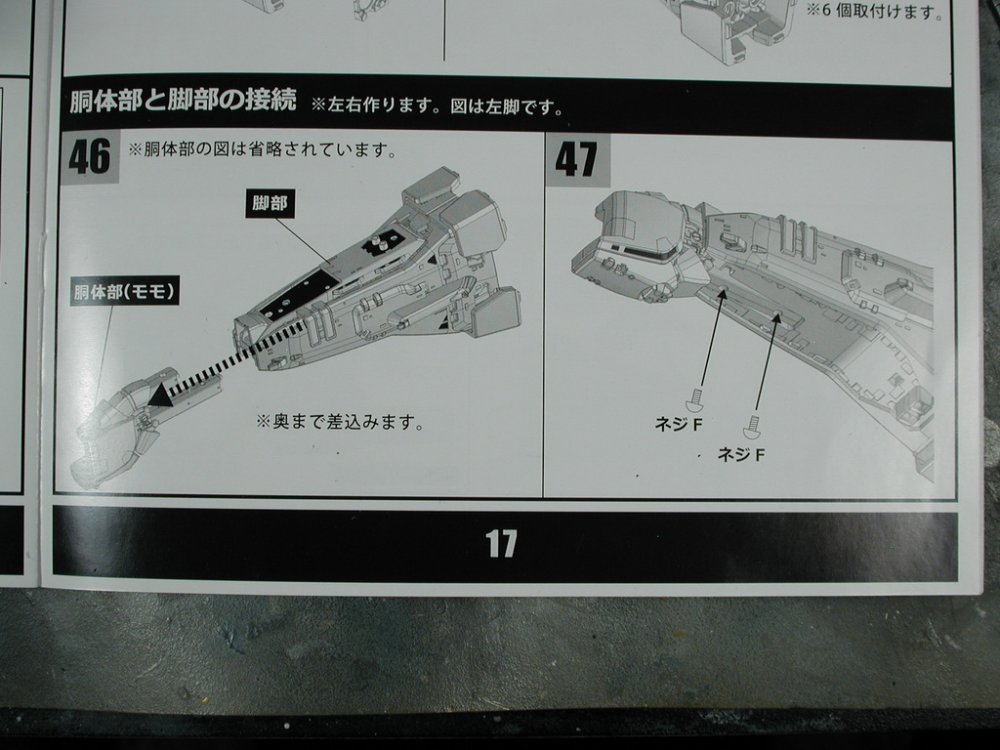
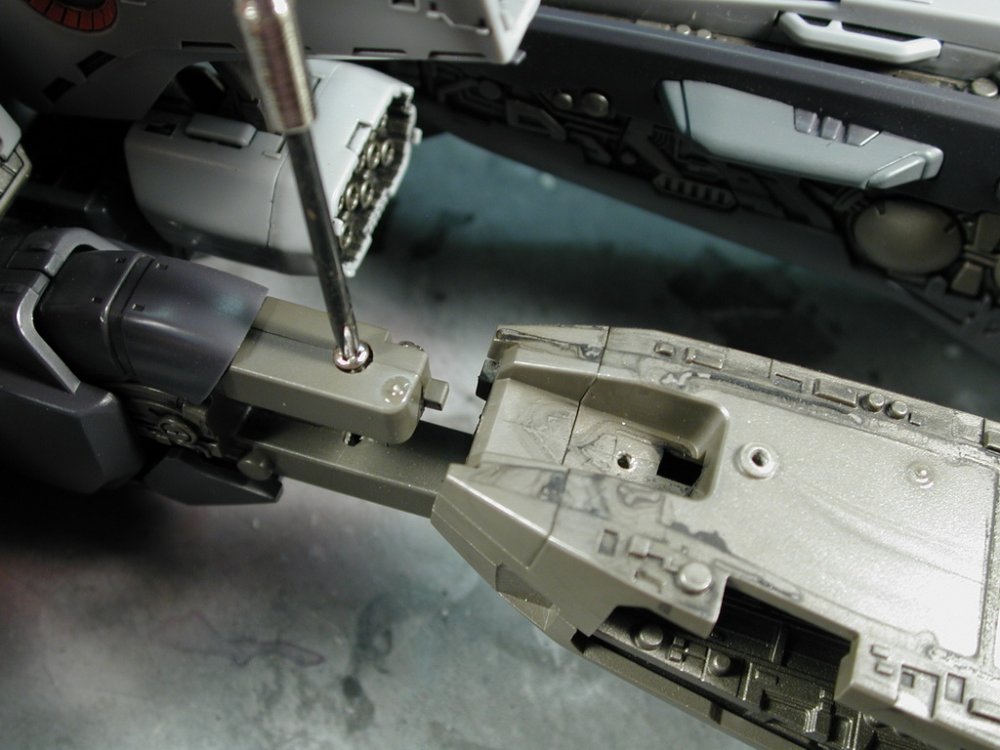
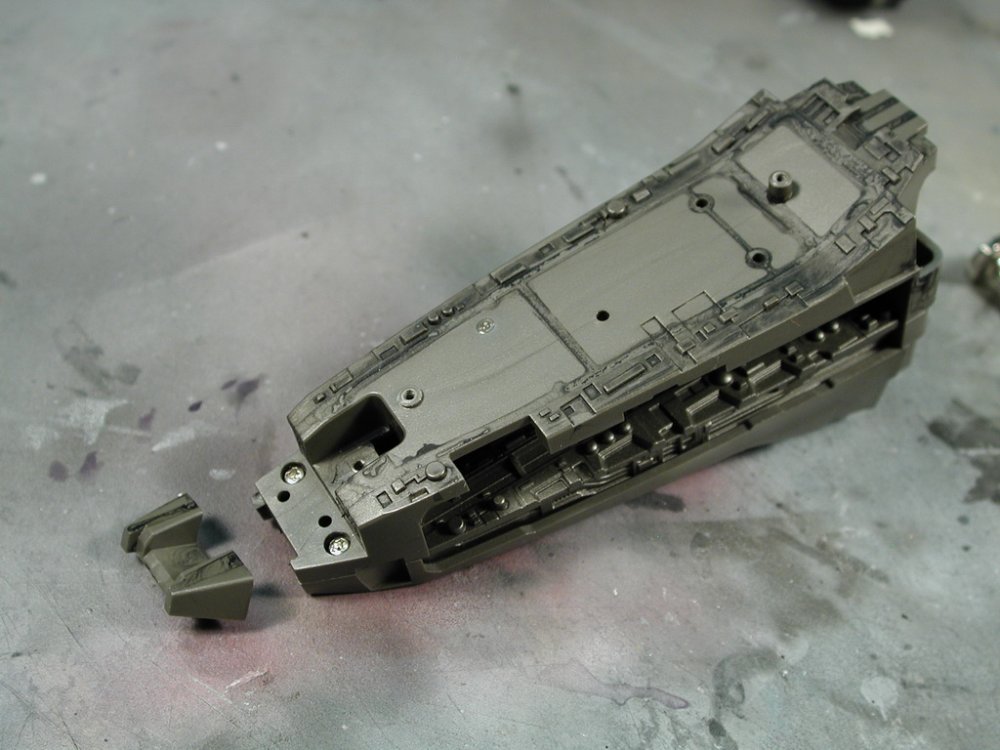
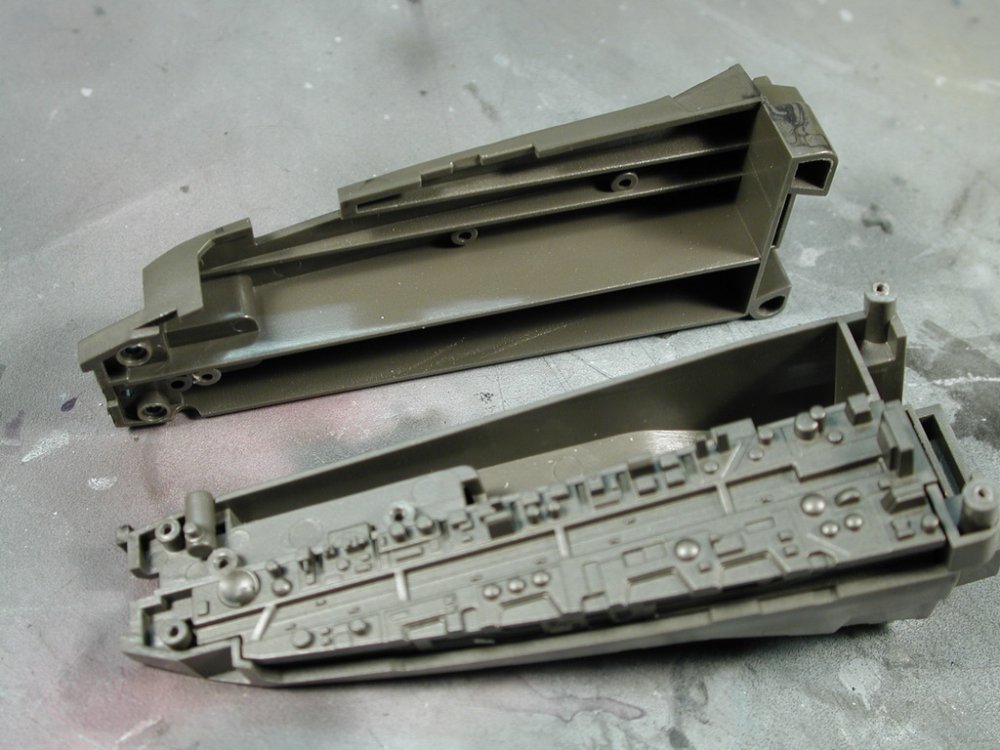
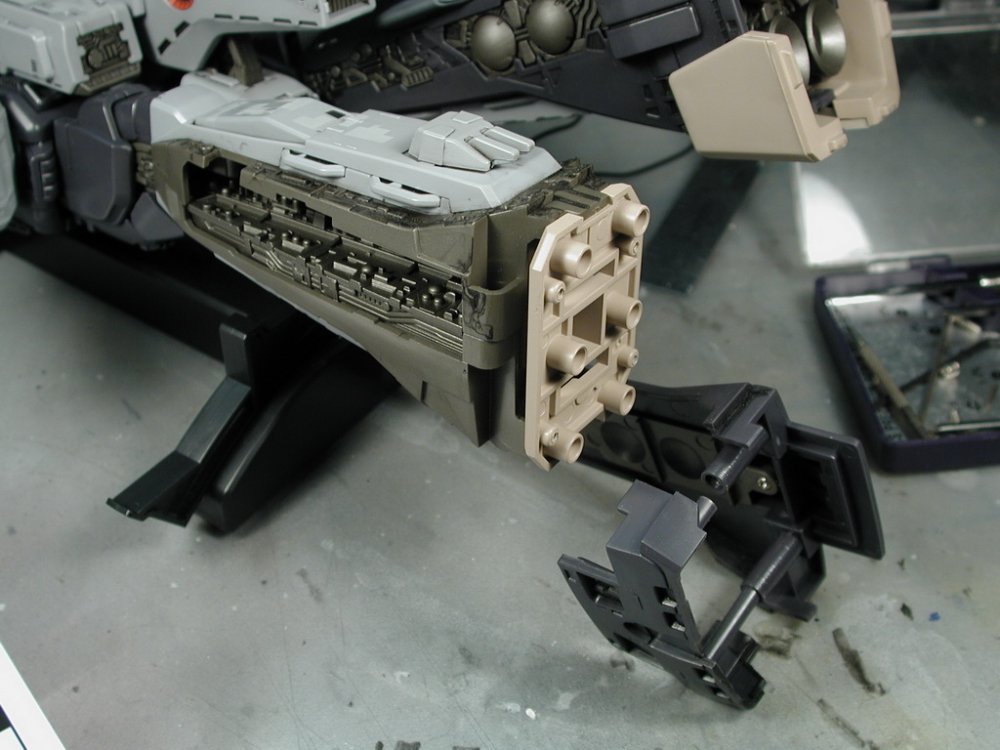
Next was the more obvious side screws which I tried back in January, but without knowing the hidden screws behind the engine bells - I was stuck. With that out of the way, I next proceeded to remove the side pieces with the 3 screws shown in the manual. I thought this was it, unfortunately, there is more, I had to remove the top plate to access the hidden vertical screws. Prying apart the rear turret wasn't a problem, however the forward plate was a much bigger deal. I ended up snapping the 3 pins that held it in place trying to pry it up. Upon closer inspection after I've taken it apart, I notice that there is quite a bit of crazy glue holding this piece via the 3 pins down to the larger plate - I don't think you can take the piece off without snapping the location pins off (I guess I have to glue it back on when it comes time to assembling it back together again. Now I can get at the city when the two haves come apart vertically... WRONG! There are still two more hidden screws right at the knee joint and there's a piece that covers it - however to get this little piece off to uncover the screws, I had to take the whole knee insert right out of the lower leg. Oh well, no shortcuts here I guess I had to take everything apart. But for the life of me I couldn't figure out how to slide the knee insert out of the lower leg. According to the instructions it just slide right out. Well, there is an undocumented screw that is holding this piece on! After a lot of headscratching, I started unloosening screws and found out that this upper screw to the knee piece is what was holding the knee insert to the lower leg. With the knee insert out, I can take apart that last piece that covers the two hidden screws that allows me to finally access the city piece!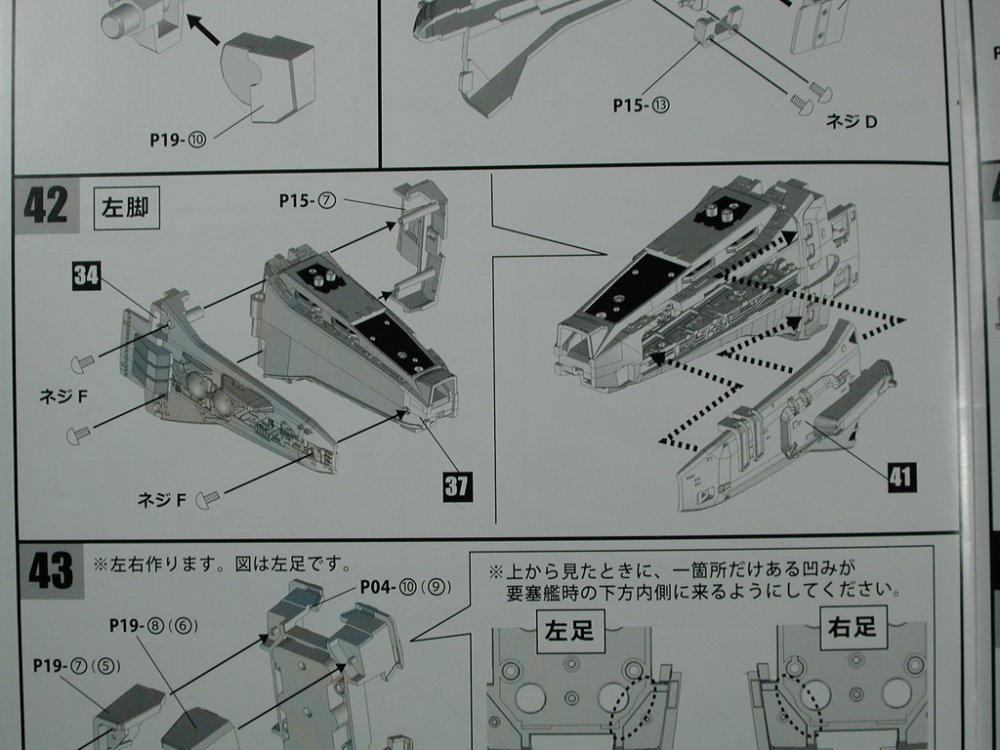


-
Yamato 1/3000 SDF-1 modification and paint up...
wm cheng replied to wm cheng's topic in The Workshop!
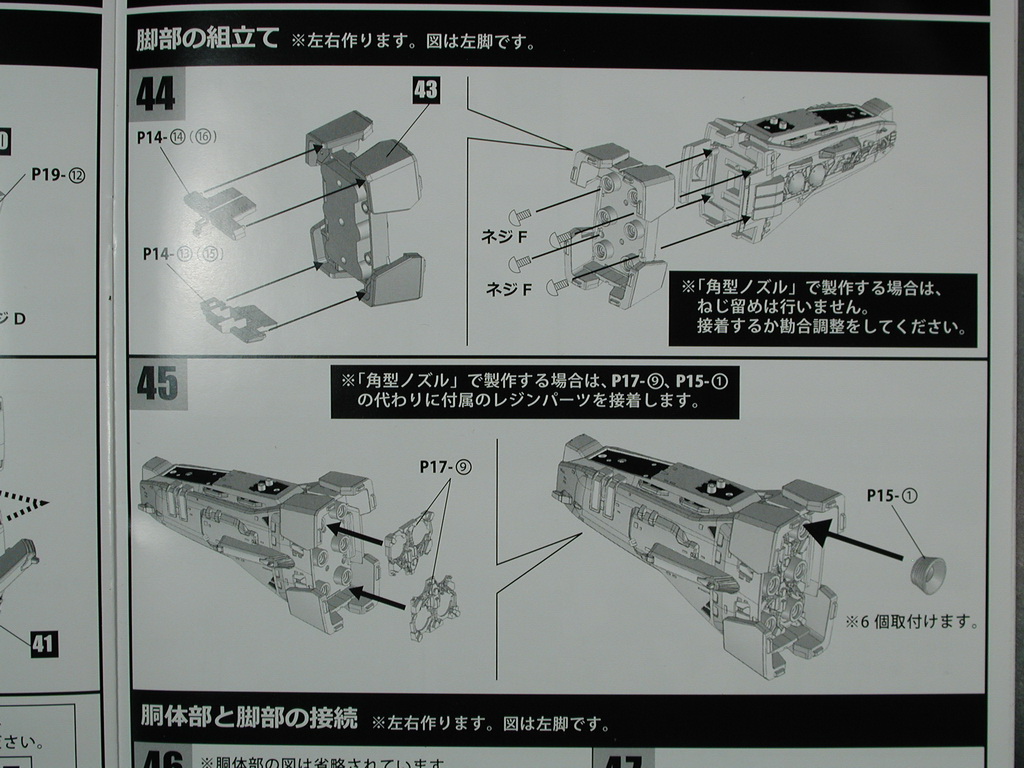
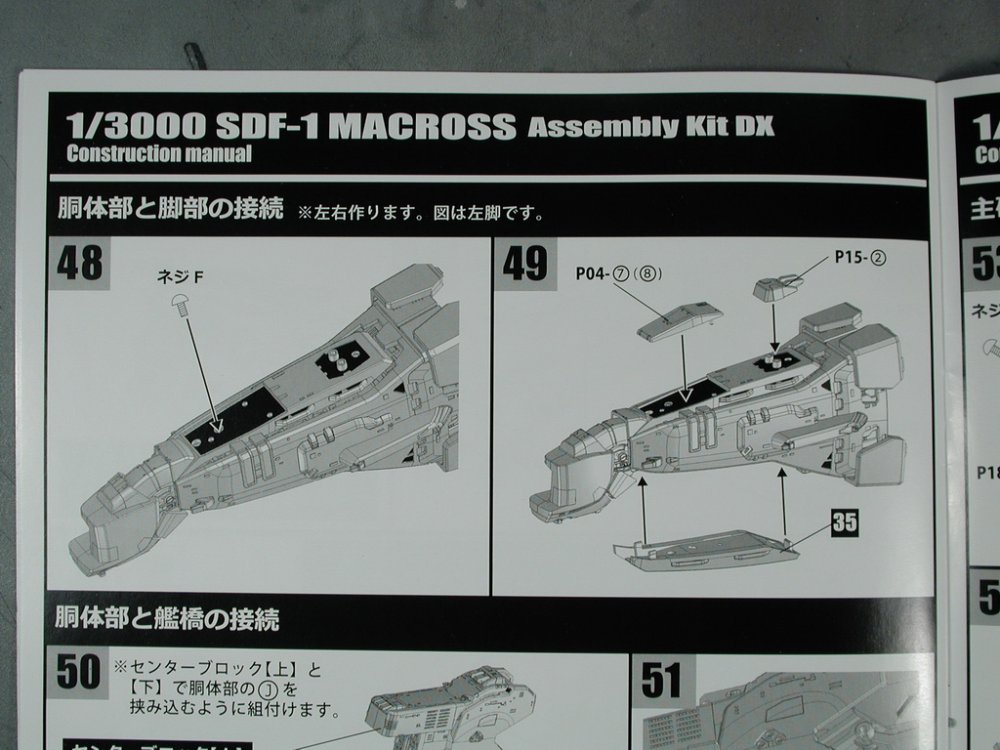
Ok, I got a kick in the pants from an amazing fellow MacrossWorlder here! Manji has been so kind to send me his leftover PE parts AND a assembly manual (for me to take apart the leg to get to the Macross City piece to paint) all for free!! I tried to pay him, but he wouldn't take it, so I thank you and dedicate this thread to Manji and the amazing people this site brings together. I managed to sneak a little bit of time over the long Thanksgiving weekend here in Canada. However I spent most of that time cleaning up the huge mess left behind on my work bench and the literal cobwebs and debris from being derelict for so long. Additionally, almost all my various glues has dried up on me too. I hope to sneak away 2-3hrs every Sunday till I get this baby done! The assembly manual was invaluable to disassembling the leg. I was hesitant at first dealing with this $400-500 toy, but procrastination pays off! Thanks to Manji's manual now, it gave me the confidence to start. From the manual, I loosen the rear engine bells first (they are just held on with a little dab of crazy glue) with my fingers and pull. Then I took a jeweler's screwdriver and carefully pried up the two engine piping detail plates to expose the screws hidden underneath them.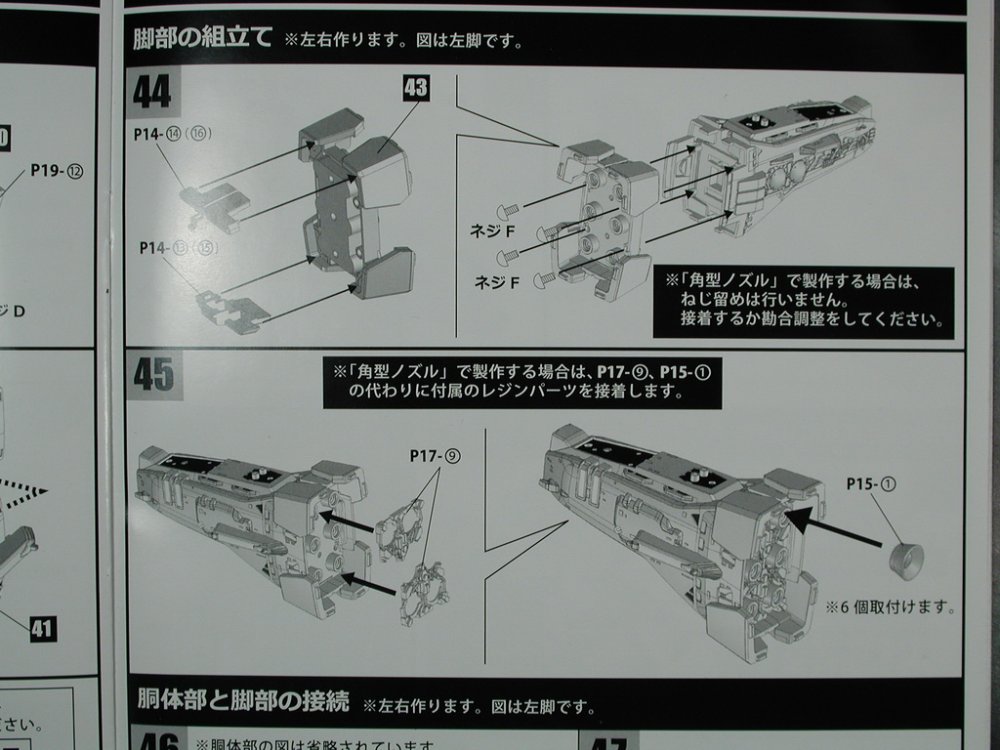
-
So does the retail version support any kind of flight sticks & throttle combinations?
-
Any other "Thing" fans out there?
wm cheng replied to HappyPenguins's topic in Anime or Science Fiction
A little more than the trailer... -
Any other "Thing" fans out there?
wm cheng replied to HappyPenguins's topic in Anime or Science Fiction
We saw the crew screening on Thursday and I must say it looked pretty freakin' great! (if I say so myself:-) There were a few glaring CGI elements that stood out, but on the whole, the physical effects will definitely make some hard-core gore effects people very happy. The overall tone of the movie is very straightforward and suspenseful which is a refreshing change of pace from recent modern "flash-cut in your face" movies. I felt it was nicely updated without it seeming modern. That being said, they did have to rewrite the ending in the alien spacecraft and that portion of the movie fell apart (which was the sets I concentrated on!) Most of it was edited out which was too bad. Plus the most awful glaring VFX effect was inside my set to hide something that was written out in the re-shoots. Anyways hope you guys like it. -
Any other "Thing" fans out there?
wm cheng replied to HappyPenguins's topic in Anime or Science Fiction
Ok everyone... lets calm down a little - its just a trailer (don't you hate trailers that show you the whole movie?!) - its not the whole movie! Believe it or not, there are other scenes we shot that didn't make it into this trailer!! Yes, extraordinary lengths were taken to get period 80's set dressing - we had fun playing the 80's board games in the art department! No there are no iphones or ipads, but period computers with the monochrome green screen when appropriate. Yes the "a$$holes" (including myself) definitely took apart the JC film frame by frame and analyzed it where appropriate - but remember this is the Norwegian camp before the JC movie, there wasn't much established in the JC movie on the "other" camp. I can't disclose, but all I can say is that it dovetails quite nicely to the opening scene in the JC movie. -
Sooo so dissappointed! I can't believe I waited all these years for this?! I would of just settled for an up-rezed version of AC5. Is it me or was the graphics quite poor - I was surprised it was a PS3 game. Miami looked totally flat, just a aerial photo pasted on and the ground cover in the helicopter missions looked awful. Too bad the AC5 flightstick & throttle doesn't work with this - the thumb controls totally lost me! Any plans on the full version being compatible with the flightstick & throttle (or putting those types of controllers out for the PS3)?
-
So did you try using the old AC5 stick combo with this demo? That's a deal-breaker for me - I can't do anything with my thumbs!
-
Will the new Ace Combat work with the old PS2 Ace Combat stick & throttle controllers?
-
Amazing minature model of the Hamburg Airport
wm cheng replied to wm cheng's topic in Anime or Science Fiction
They did a StarGate diorama there - so why not a Macross one! -
Variable Fighter Master File VF-1 Valkyrie Vol. 1
wm cheng replied to sketchley's topic in Movies and TV Series
Oh Good. Oh Crap! I'm glad that I didn't miss out on another one of these great books! Damn! I hope it comes true someday. -
I guess this is the closest thing to off-topic, but this model absolutely blew me away! You have to look at the Youtube video of the moving and lit elements. Imagine if they did that for Macross city within SDF-1?! http://www.dailymail.co.uk/news/article-1383532/Knuffingen-Airport-German-builds-worlds-largest-model-airport.html
-
Variable Fighter Master File VF-1 Valkyrie Vol. 1
wm cheng replied to sketchley's topic in Movies and TV Series
Hey does anyone know when this book above comes out? Is there a date? -
Hey, how did you get the PE parts for the first release toy? I'd love to know and get a set for my toy or if anyone is willing to sell me a set.
-
the "Everything I always wanted to ask about modeling, but were af
wm cheng replied to derex3592's topic in Model kits
Wow! How did you manage to get to buy just the PE part?! I'm looking for just the PE parts for the 1/3000 too - any suggestions on where to go? Please post pictures! Sorry I don't have much other hints on using PE parts that hasn't been mentioned here already. I usually brush paint the part it its to stand out from the rest of the body colour - otherwise I mask and airbrush once its already on the model. -
SOC GX-58 Earth Defense Force Flagship Andromeda
wm cheng replied to Kyp Durron's topic in Anime or Science Fiction
Thanks so much for the heads up! Just ordered it - killed me not to the first time around, but at this sale, I just had to bite. Unfortunately though, their S&H seems a bit high (and you don't get an estimate until you purchase) - I got dinged $67cdn for EMS shipping (no other option) and I'll probably get dinged again when brokerage and customs & duty get me (the deal isn't turning out so much of a deal in the end!). Just a word of warning to Canadian customers. Hope its worth it! -
New coming! 2nd wave of PE update parts for 1/72 Valkries
wm cheng replied to newca's topic in Model kits
Fantastic Newca! Thanks so much, just bought 2 sets of the bundle and another VF-25 & VF-19 - so glad you haven't forgotten about us 1/72 scalers! How about a flaps/spoiler set for the VF-1? Also what about 1/3000 scale Valkyries and launch arms for us early adopters of the SDF-1?! -
You are the master now! My daughter now has taken up all my free time. Been able to satisfy my modelling bug lately on a few SciFi movies (Resident Evil, The Thing, Total Recall & Pacific Rim) by building 1:1 scale models for sets - but that takes up all my time now. Look for Macross design cues in the sets of those films! In fact, they just interviewed me on my latest set on Total Recall where they asked for my inspirations and I mentioned Shoji Kawamori and Macross. If you want to see me, I think its called "Hollywood Builders: constructing Total Recall" - 1 hr special probably sometime next year on DIY Network and Discovery Channel (my guess is close to when Total Recall comes out to theatre). It will probably be on the Total Recall DVD/BR special features. I hope after Pacific Rim I might get back to finish up painting that SDF-1 toy and it probably will be a few years before I get back into modelling again - for the time being, I'm just a model kit/box collector! Or whenever you get around to that 1/72 Hikaru and Mimay in the VT-1 with her helmut off - my VT-1 kit is waiting for your pilots! ;-) In the meantime, keep up the amazing work, I can live vicariously through you!