wm cheng
-
Posts
4343 -
Joined
-
Last visited
Content Type
Profiles
Forums
Events
Gallery
Everything posted by wm cheng
-
AH! I didn't know there is a faint click or detent position to the forward heat shield - that must be it! Thanks so much - I really appreciate the pictures - I can't wait to get home from work now to try this. BTW - I love this Valk!! - now I know why its usually more expensive than the rest (but getting it on this sale is sweet!) Is there a super-thread dedicated to the VF-11B (I tried the search and didn't come up with anything) My only criticism is that the overall fuselage grey is a little on the dark side and should contrast more with the fast packs. Thanks everyone, what a great community ;-)
-
I just got my VF-11B from this sale - question to those experts here. How in the heck do you get the bottom portion (smaller) of the heat shield to stay up or lock into the upper portion of the heat shield when in the Battroid mode? It keeps falling back down into the nose cone - is there something I'm missing? Also, the cockpit escape module seems really loose, it doesn't fall out per se, but it does move around as I do barrel rolls!
-

Yamato 1/3000 SDF-1 modification and paint up...
wm cheng replied to wm cheng's topic in The Workshop!
Thanks guys! I'm currently in Germany giving a presentation at the FMX 2012 conference - so I'm out of town! BUT, I'm not really anywhere near done yet, still many loose ends to tie up and those tiny photo-etched Valkyries and launch arms too! -
Yes, I too would love to get more detail on how the buttons are mapped - can't even find a web site that will discuss the stick in any detail!
-
Yamato 1/3000 SDF-1 modification and paint up...
wm cheng replied to wm cheng's topic in The Workshop!
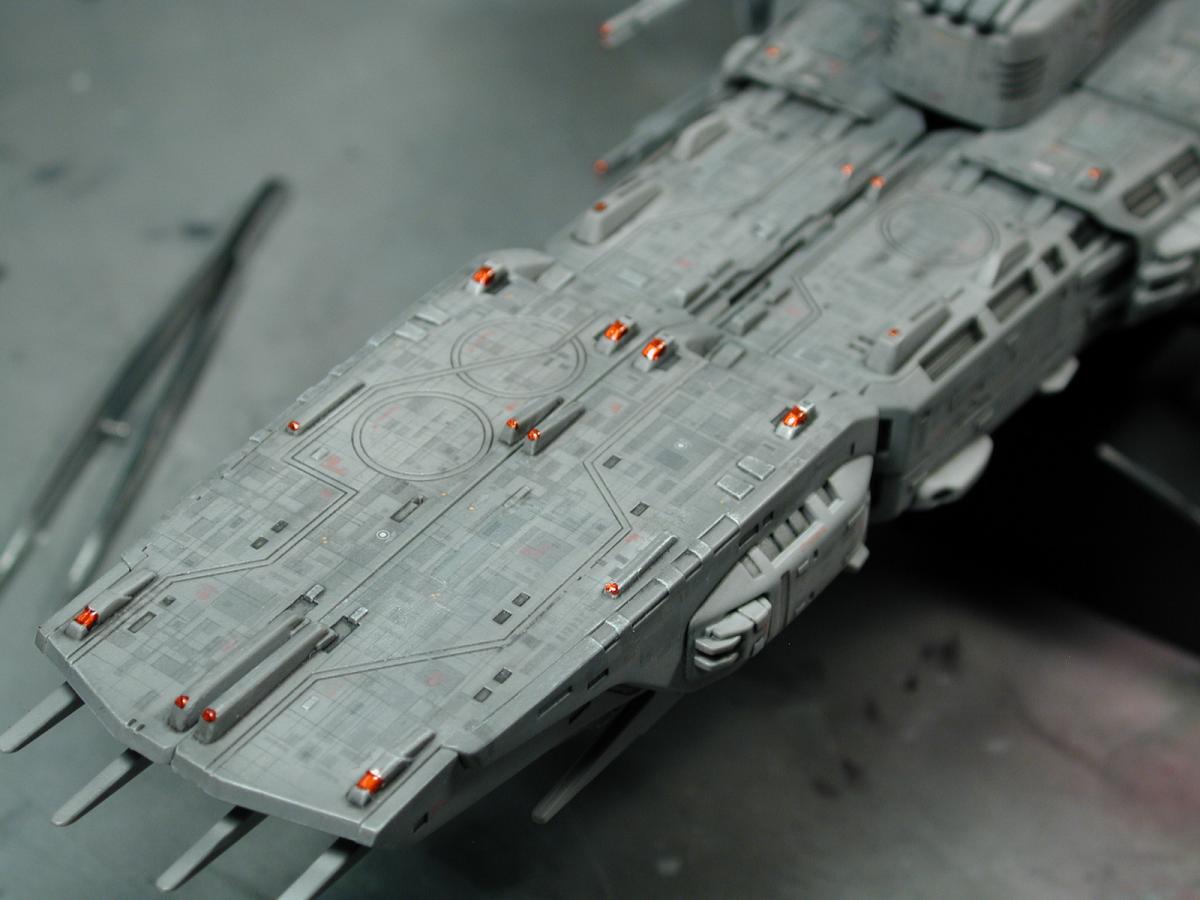
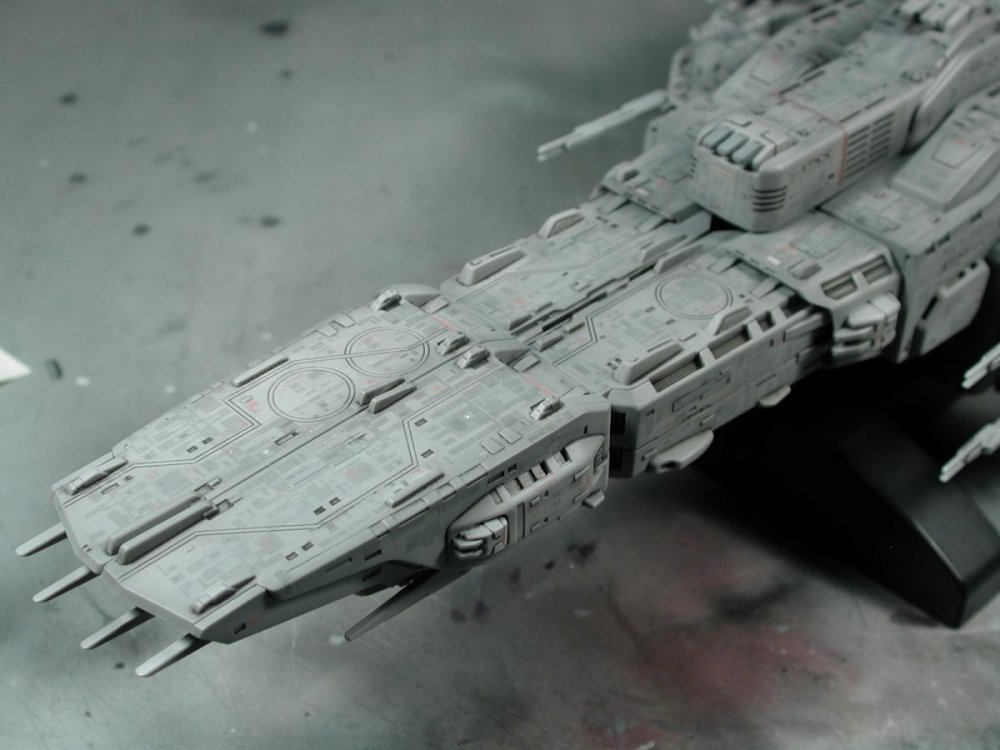
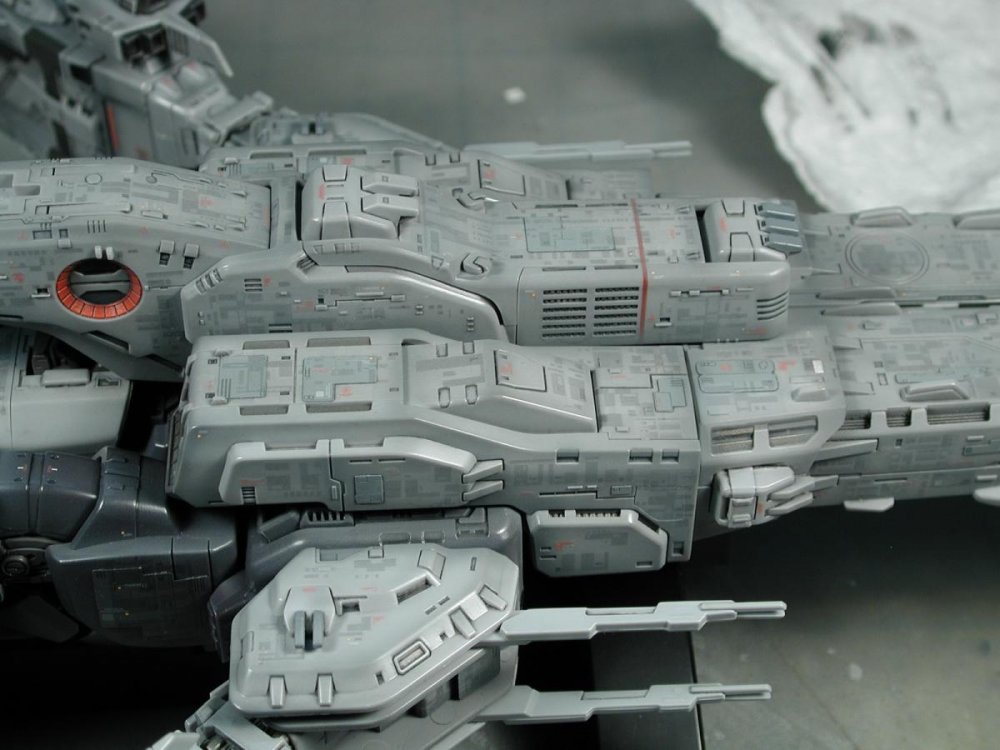
I got a little time to do some pencil panel lines all over the SDF-1 - the key is subtle here! But it was a lot of surface area, at least some of the flatter areas like the rear engine tan portions are a bit more detailed now. Some light grey/white drybrushing to pick out the raised details, Unfortunately, when I started to dab around for the nav lights, I used the Tamiya marker chrome on a fine 000 brush, and didn't realize I got some on my palms! Argh! I accidentally transferred some tiny hits of silver around the toy. I thought, I'd use some organic solvent to wipe away the bits of silver, but unfortunately, the solvent ate through all my layers of clear-coat and greys!! So I've gotta do a bit of a repair job to that tiny section I tested it on - well, one step forward - 2 steps back! I did add the Tamiya red clear over the tiny hits of chrome silver to simulate the red nav lights all over the SDF-1. So here it is for now... still a ways to go!!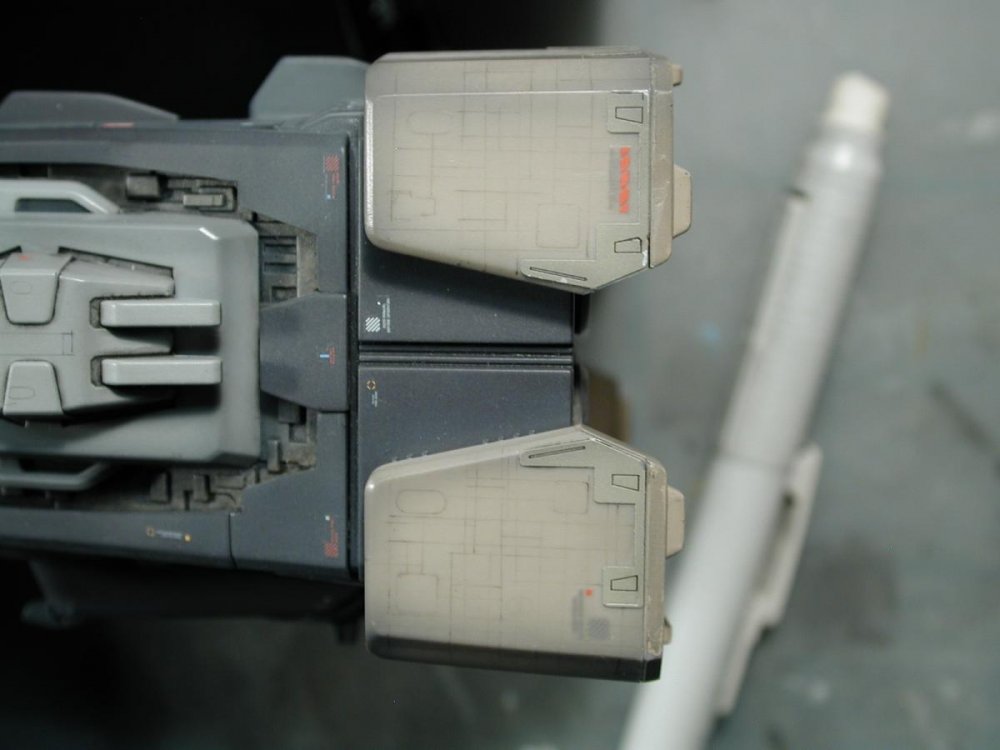


-
Ah! Don't give me a heart attack like that... Nope, HKC is 12,440Y and HLJ is 9,400Y
-
Yep, got my first VF-11B!! Been waiting for the price to drop, why is this sucker so expensive compared to the others? Yay! at least I'll be able to zoom this around in the near future - I'll grow old if I have to wait till I build my Hasegawa 1/72 kit!
-
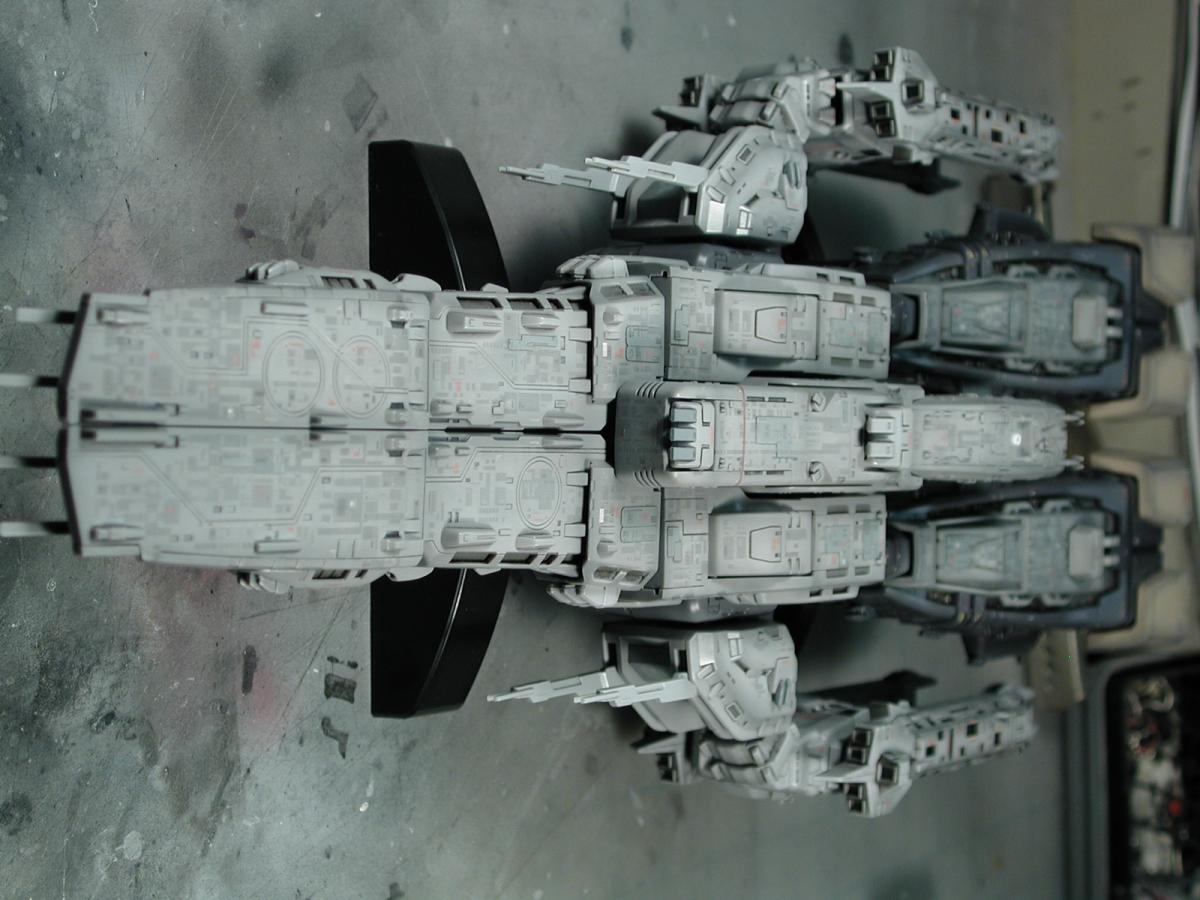
Yamato 1/3000 SDF-1 modification and paint up...
wm cheng replied to wm cheng's topic in The Workshop!
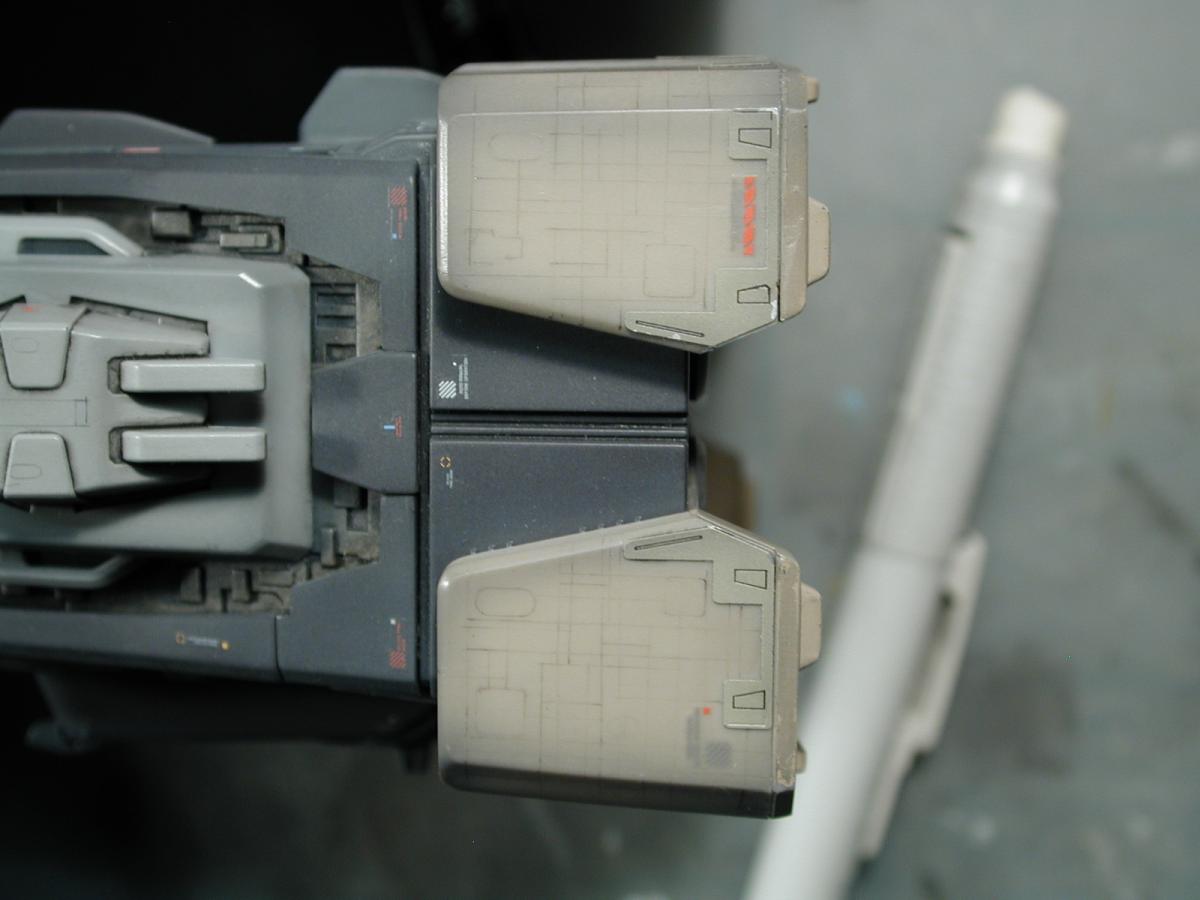
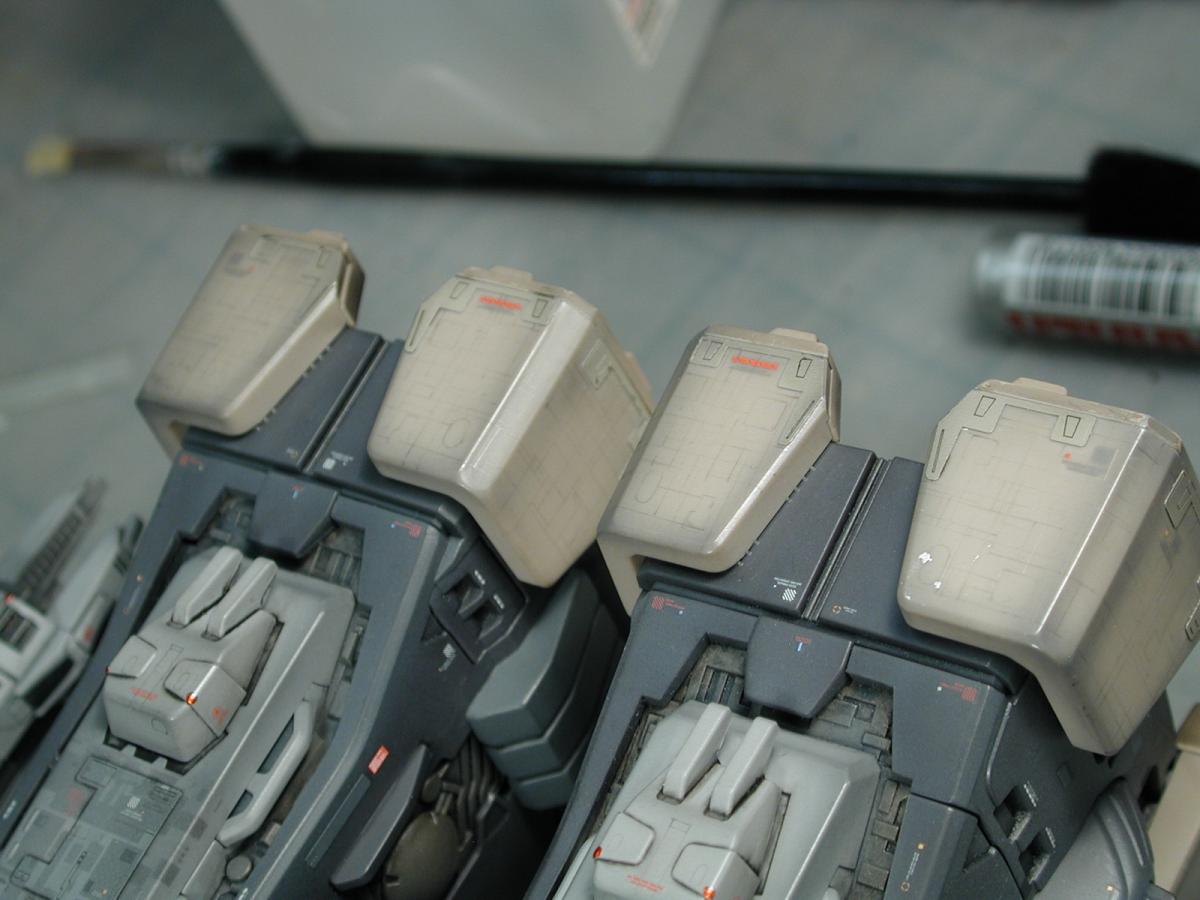
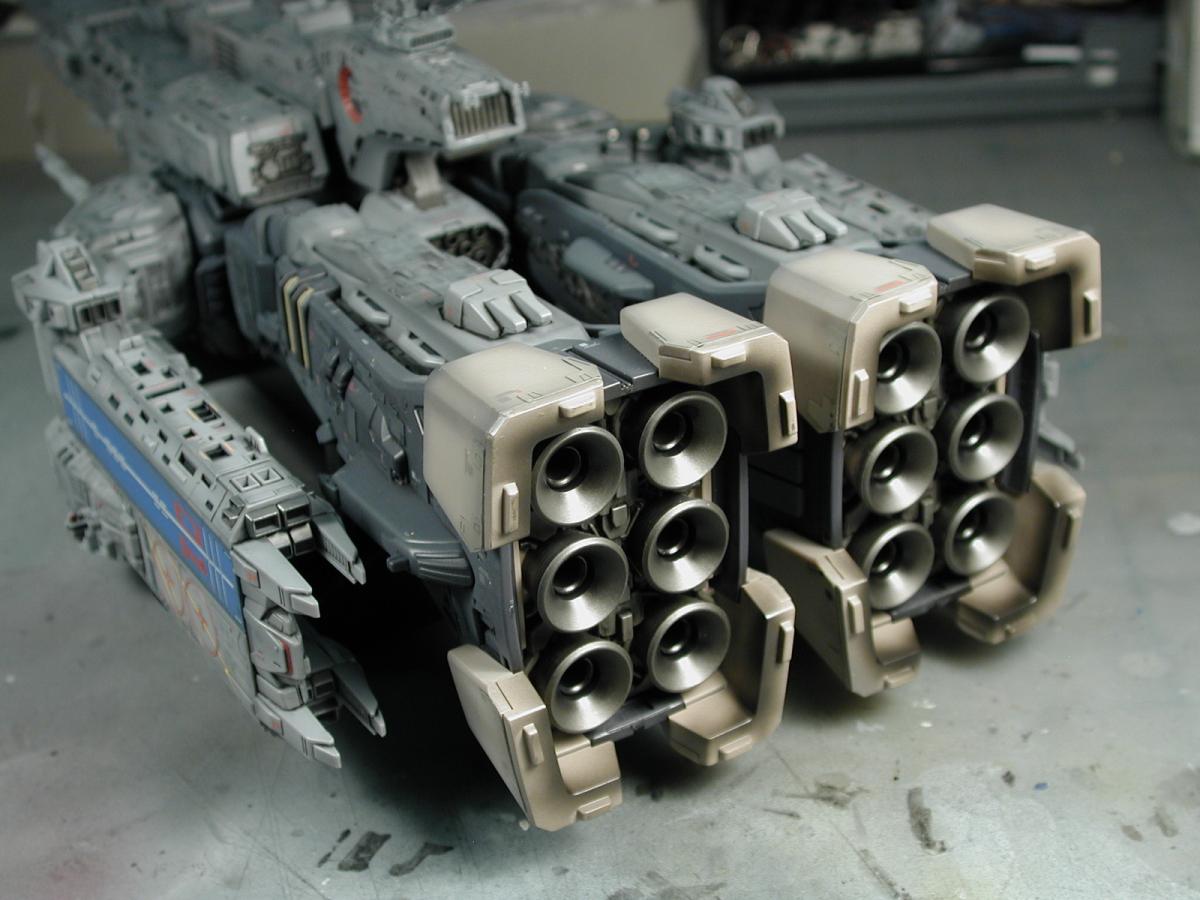
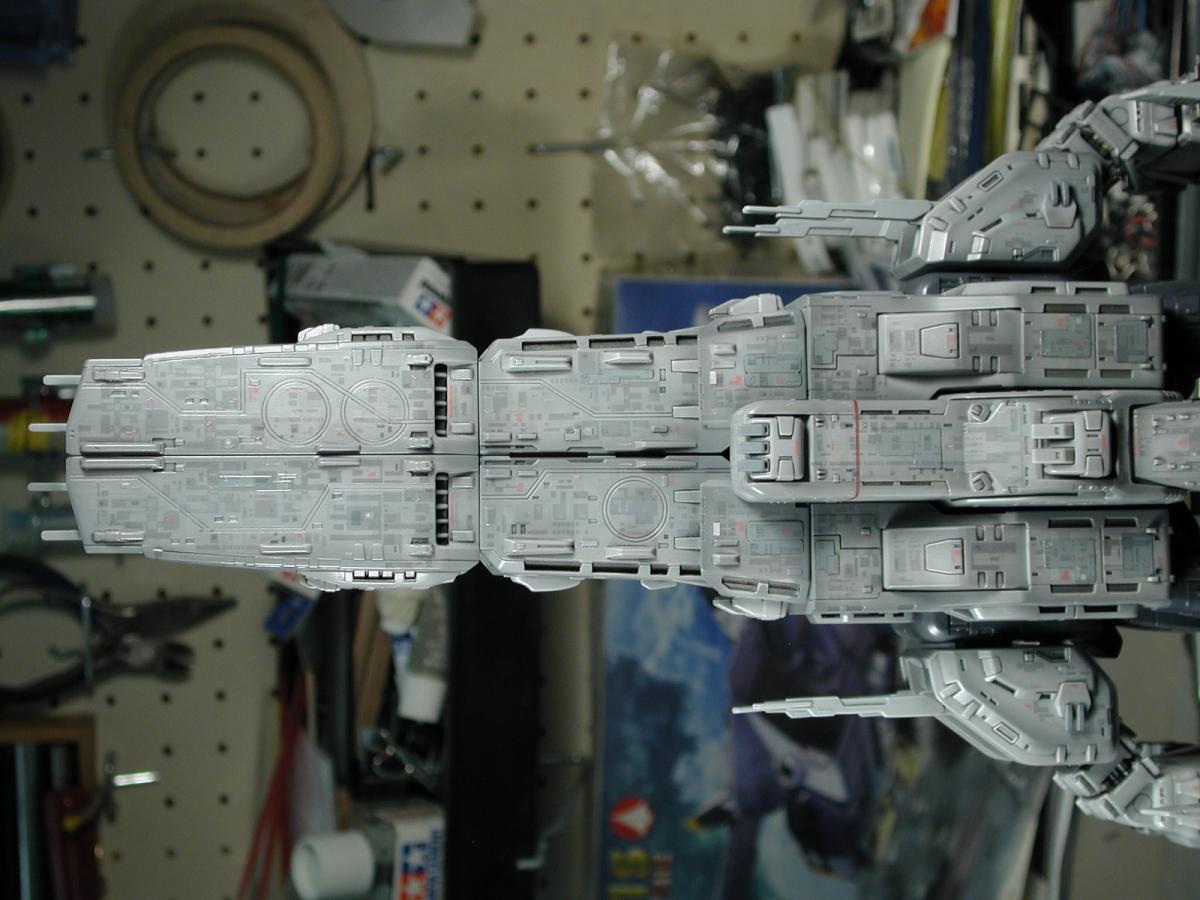
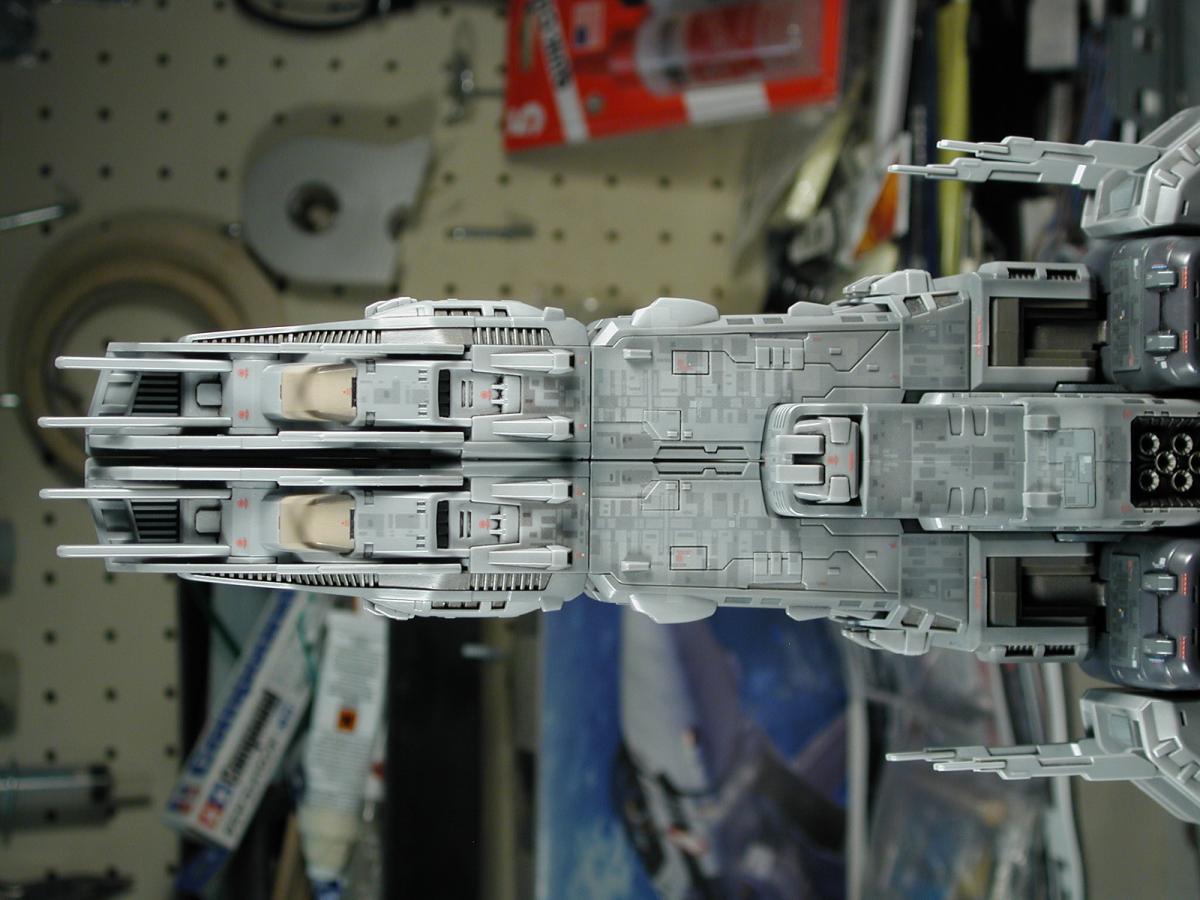
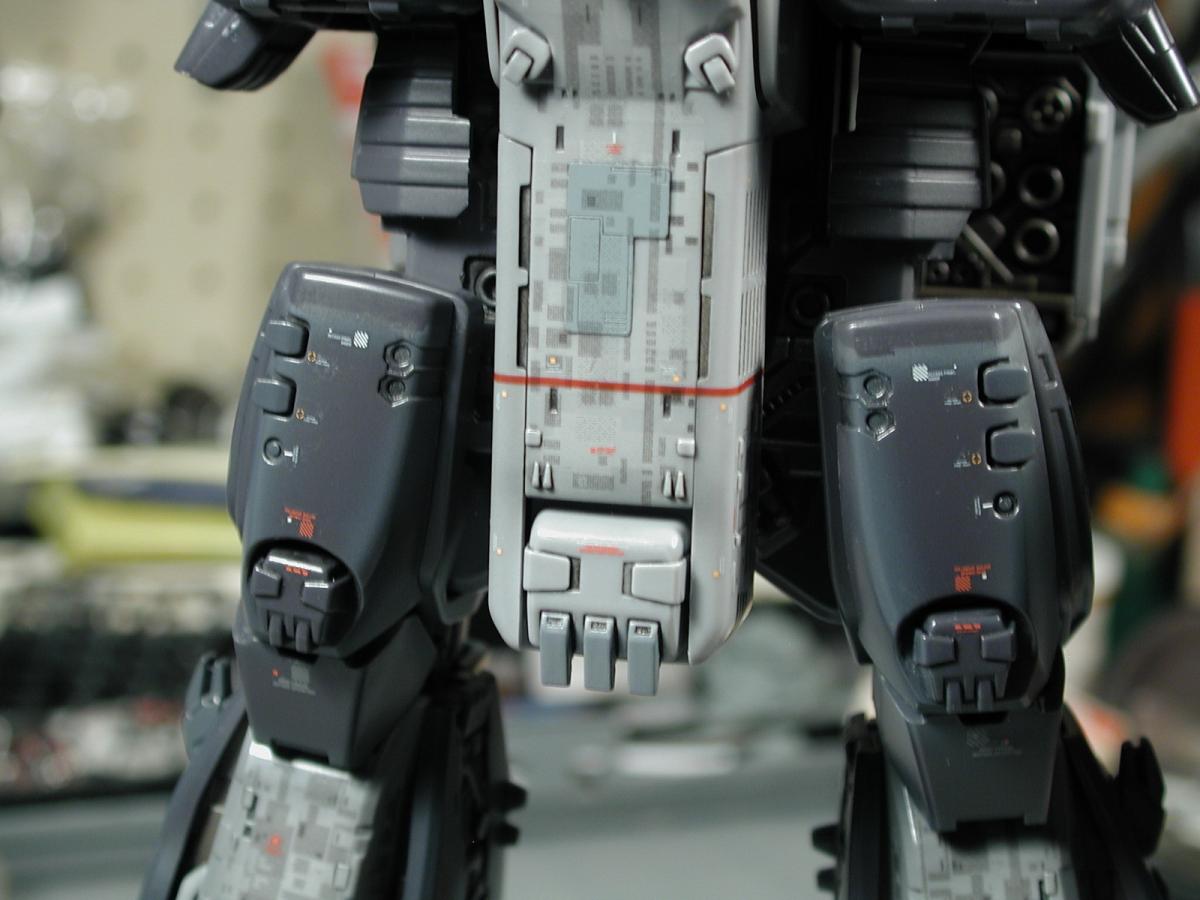
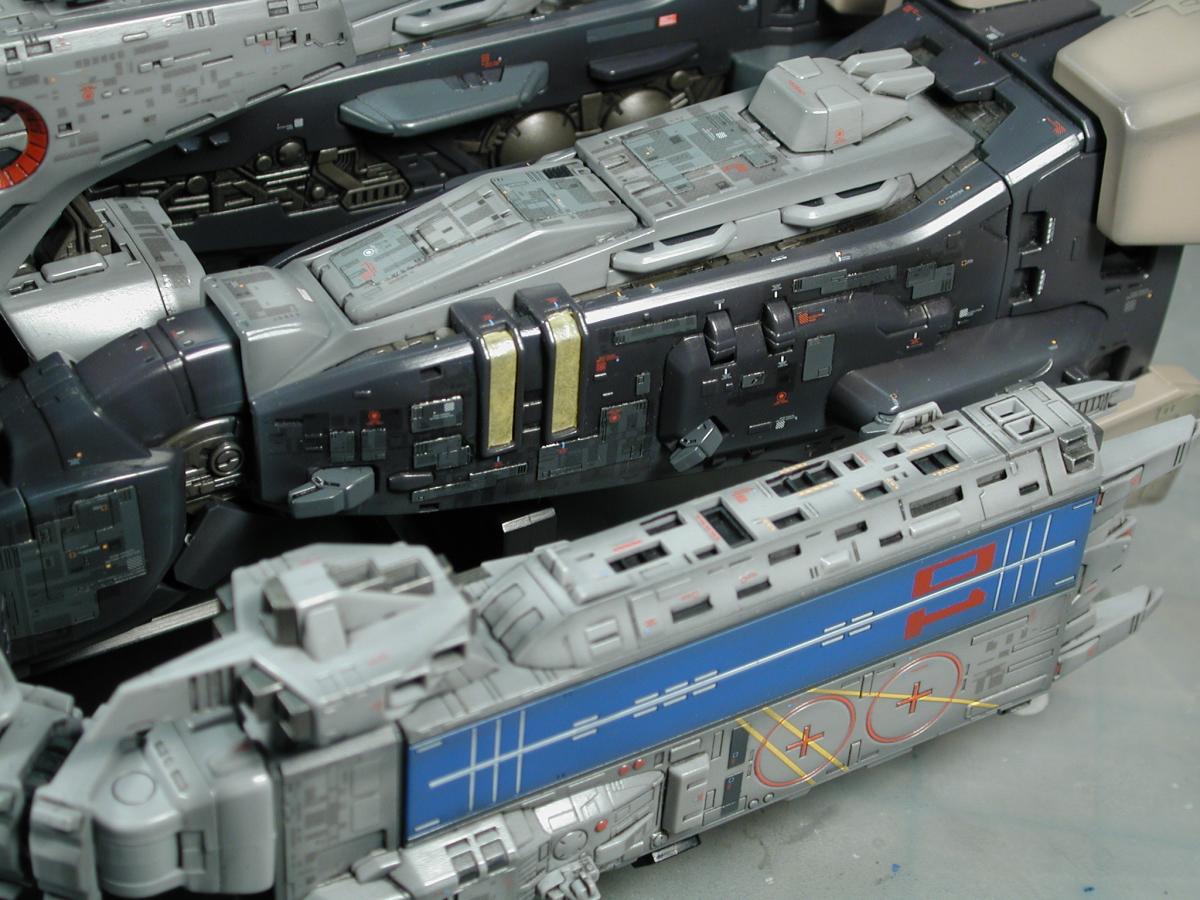
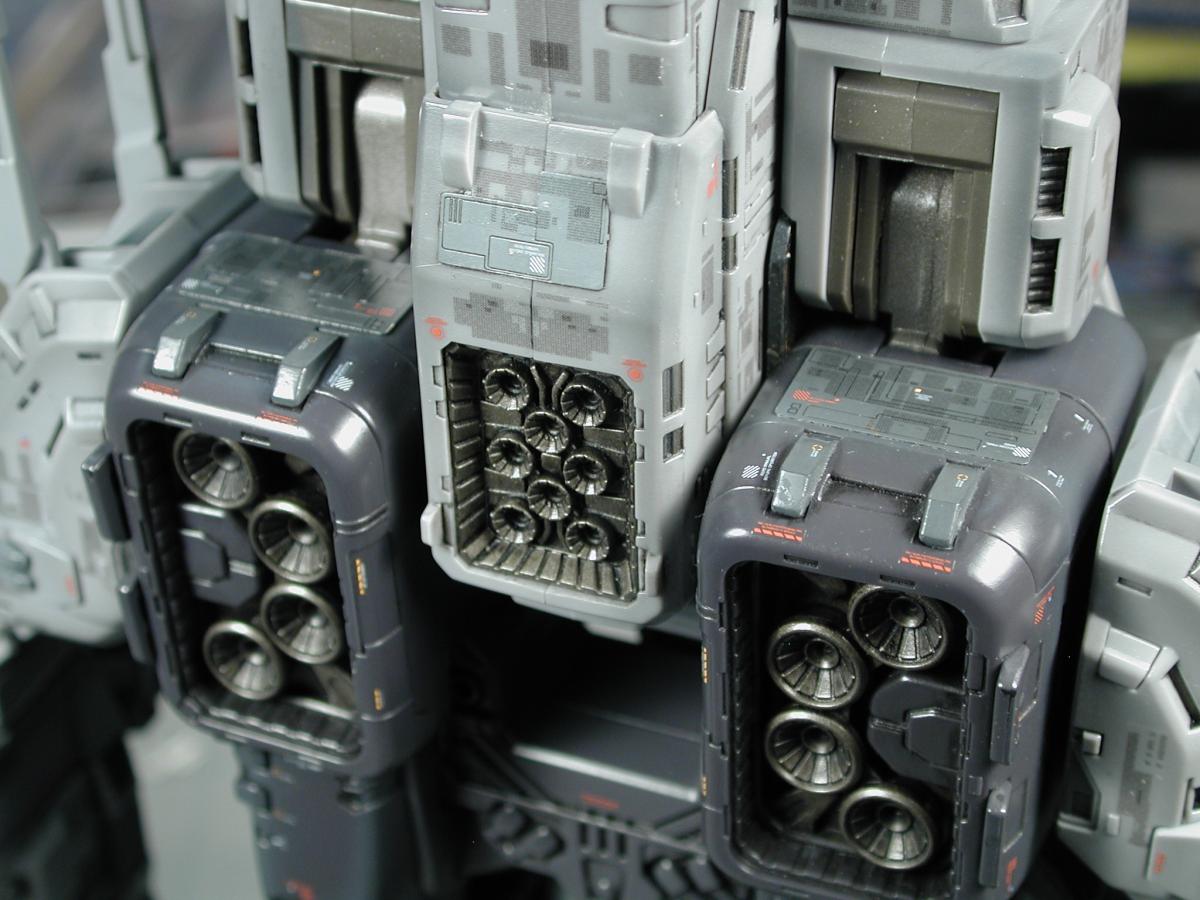
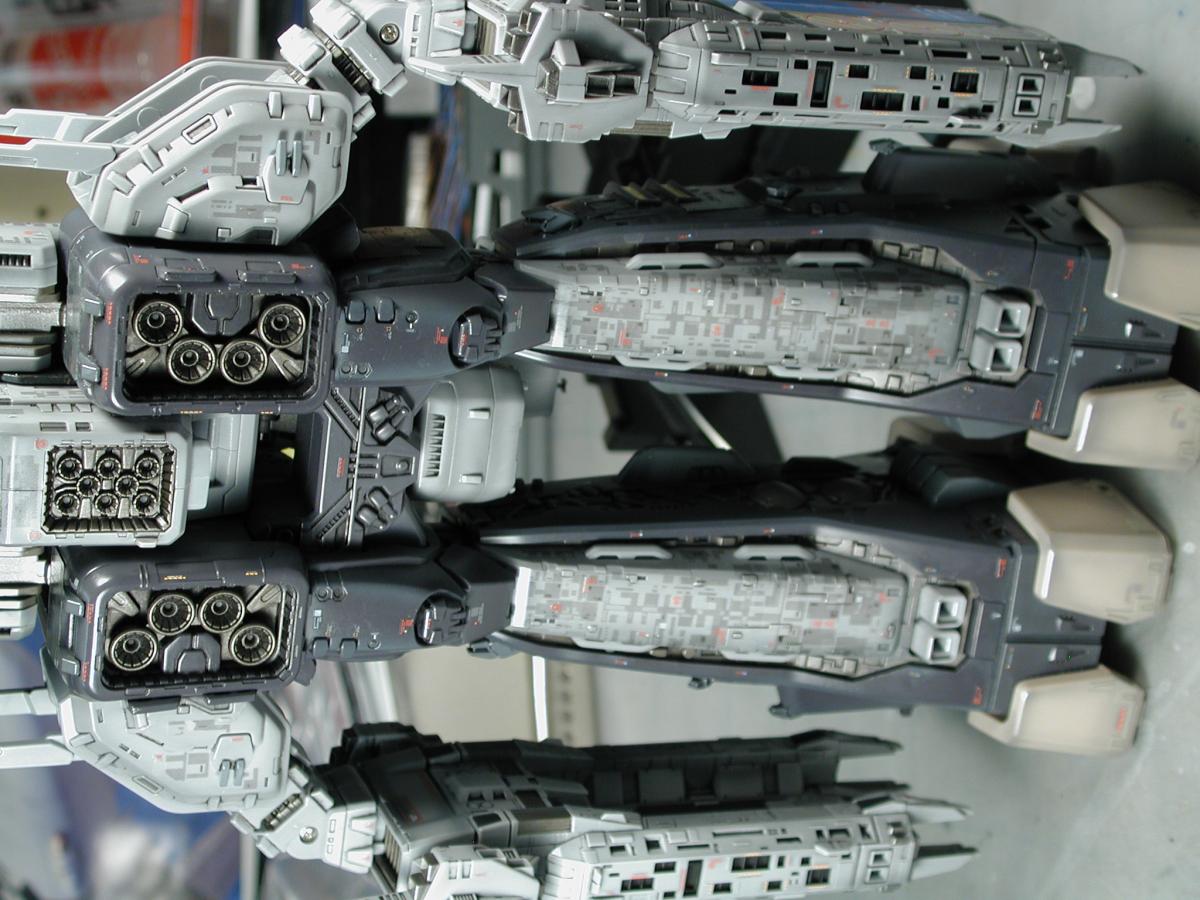
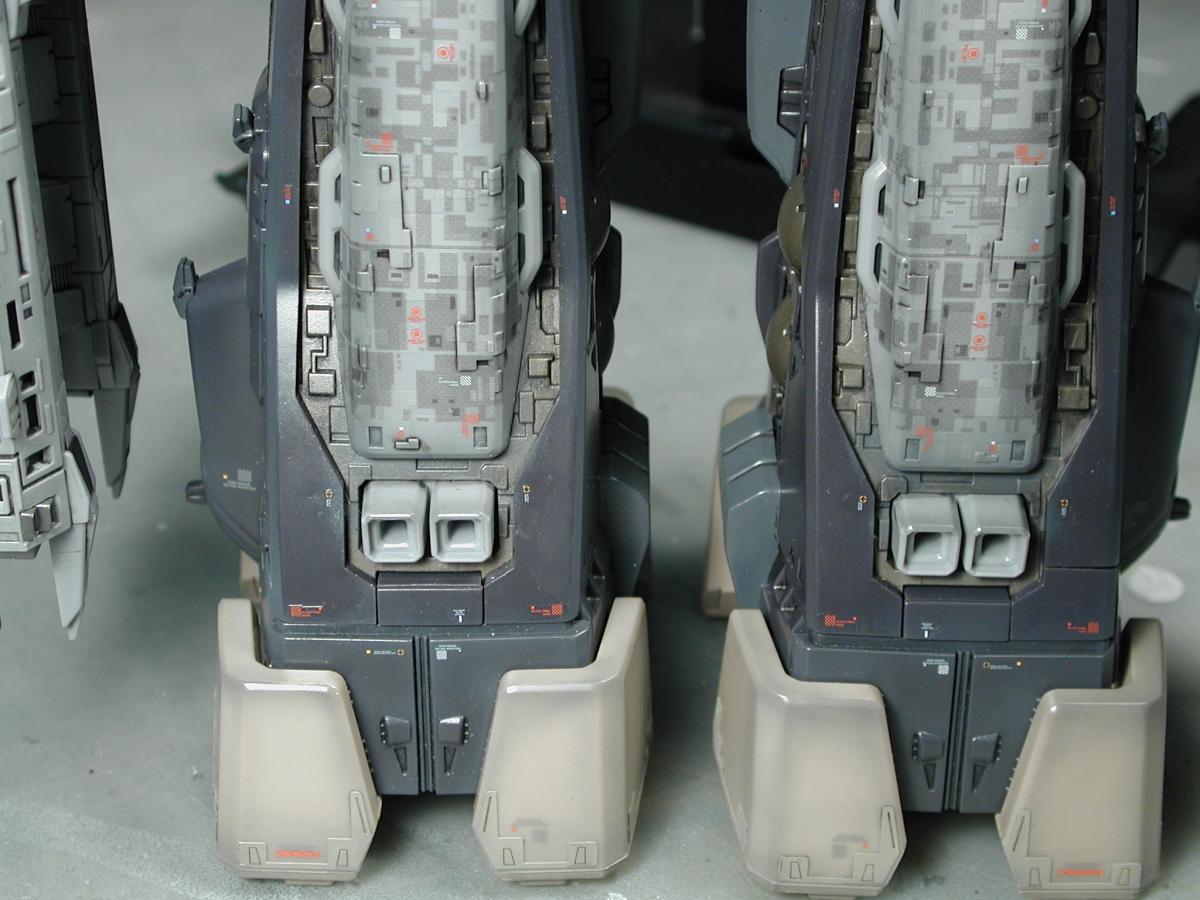
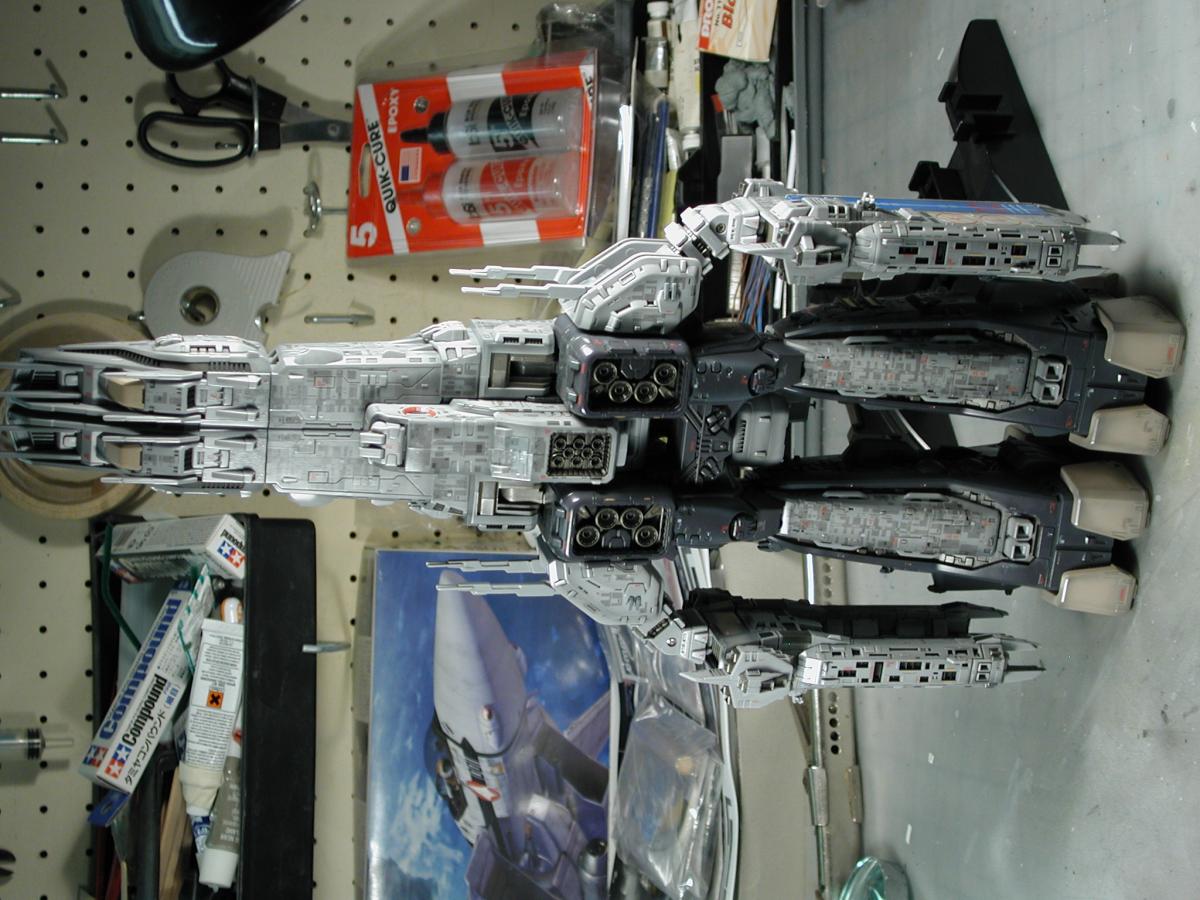
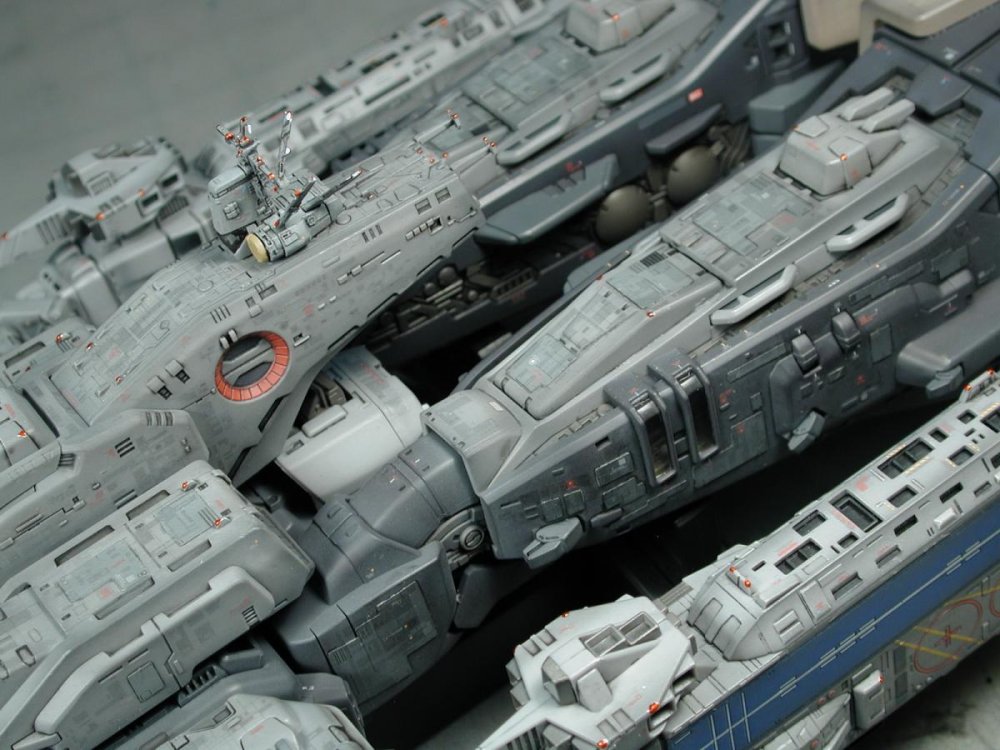
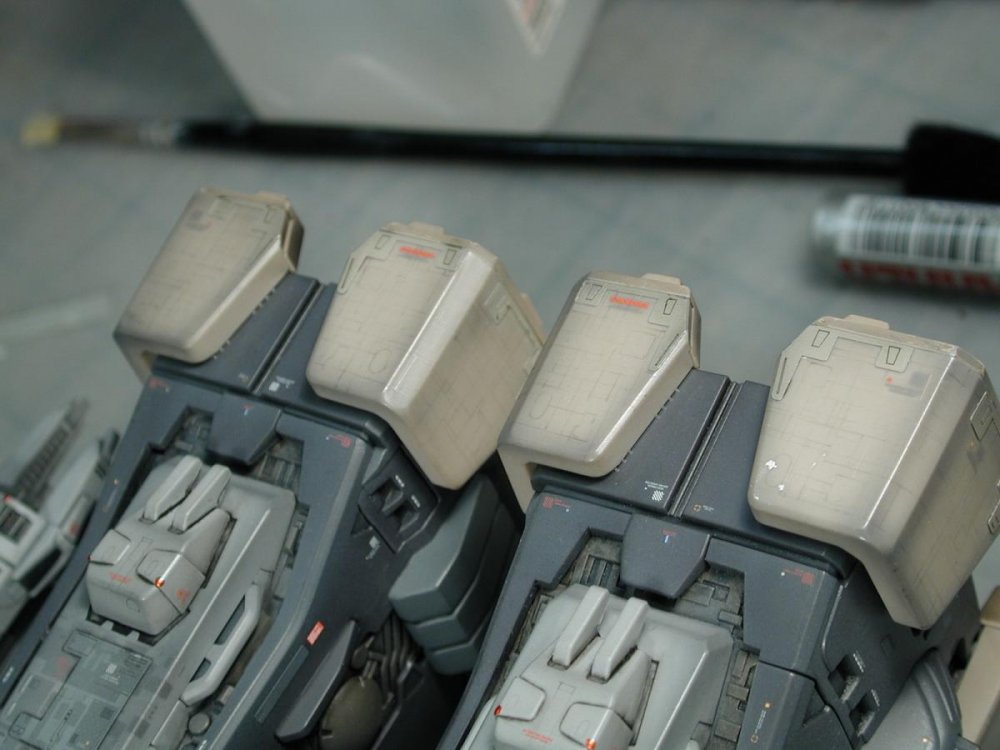
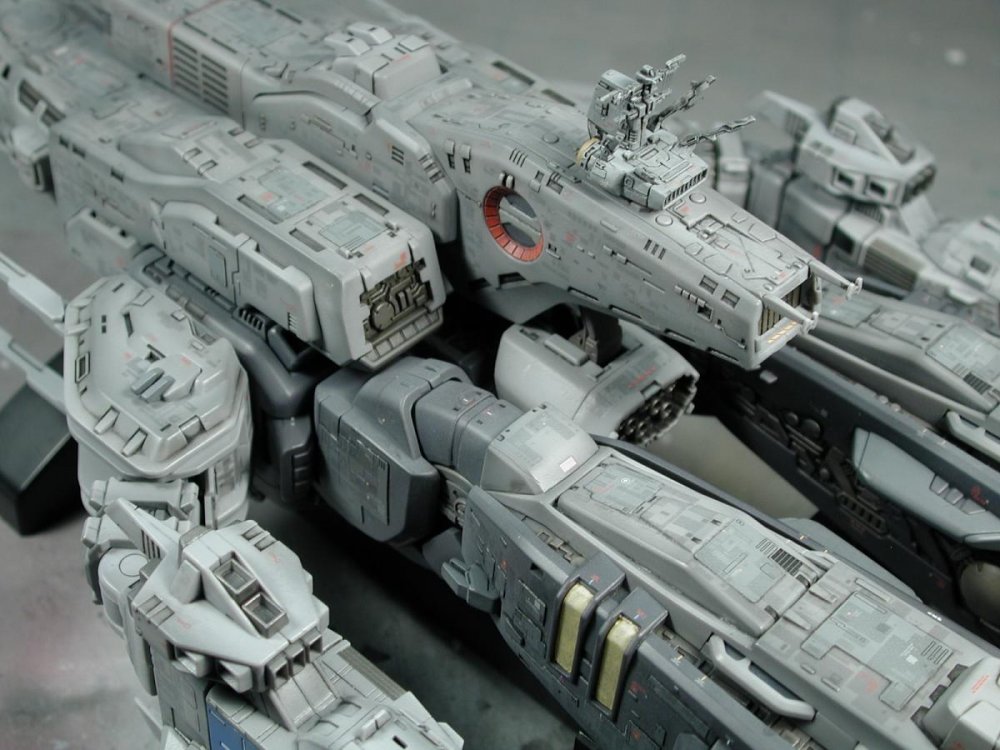
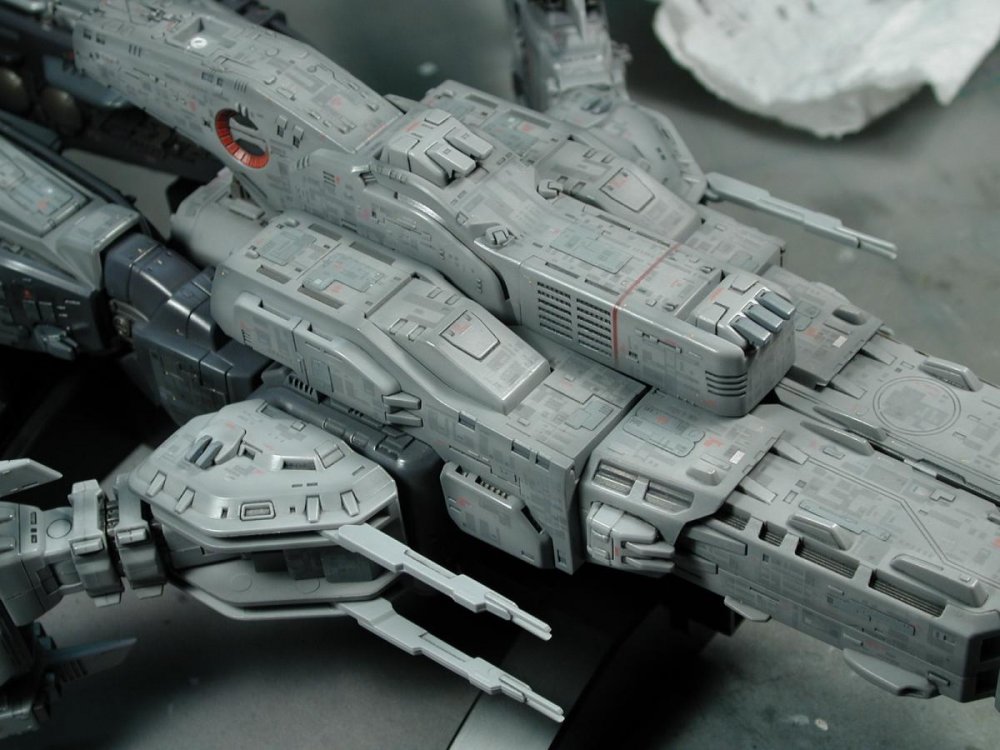
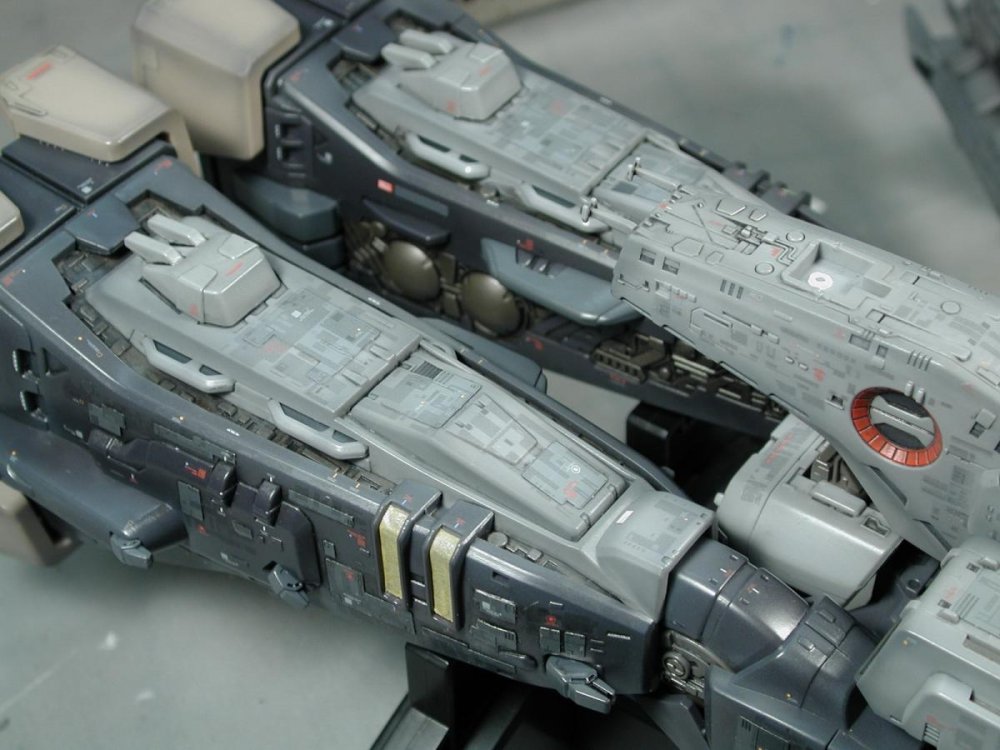
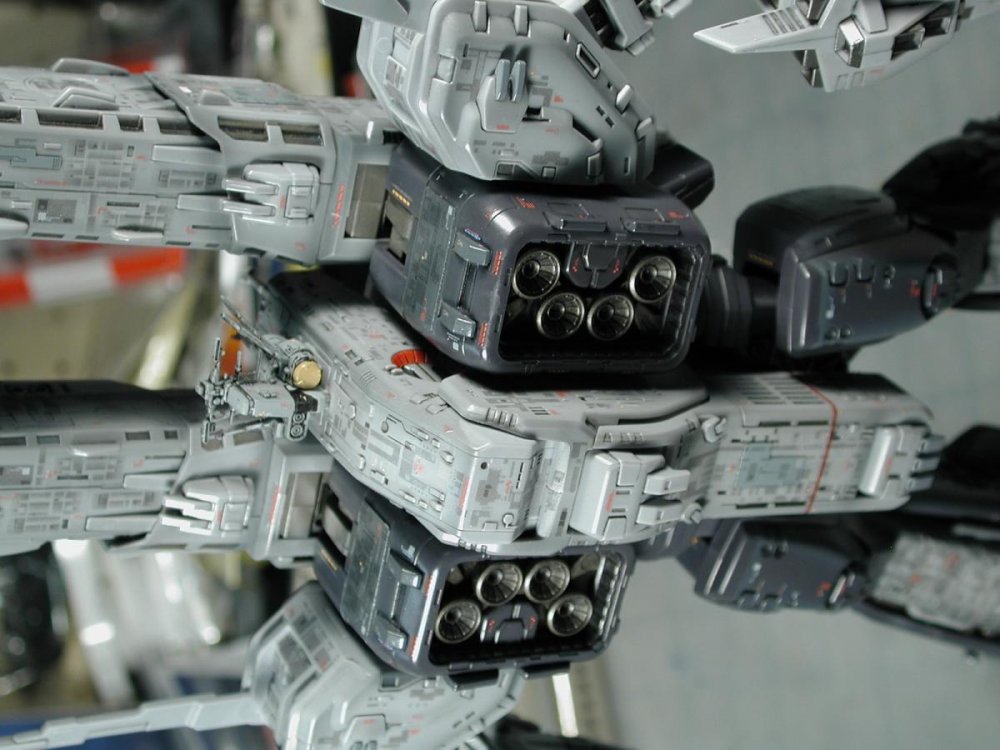
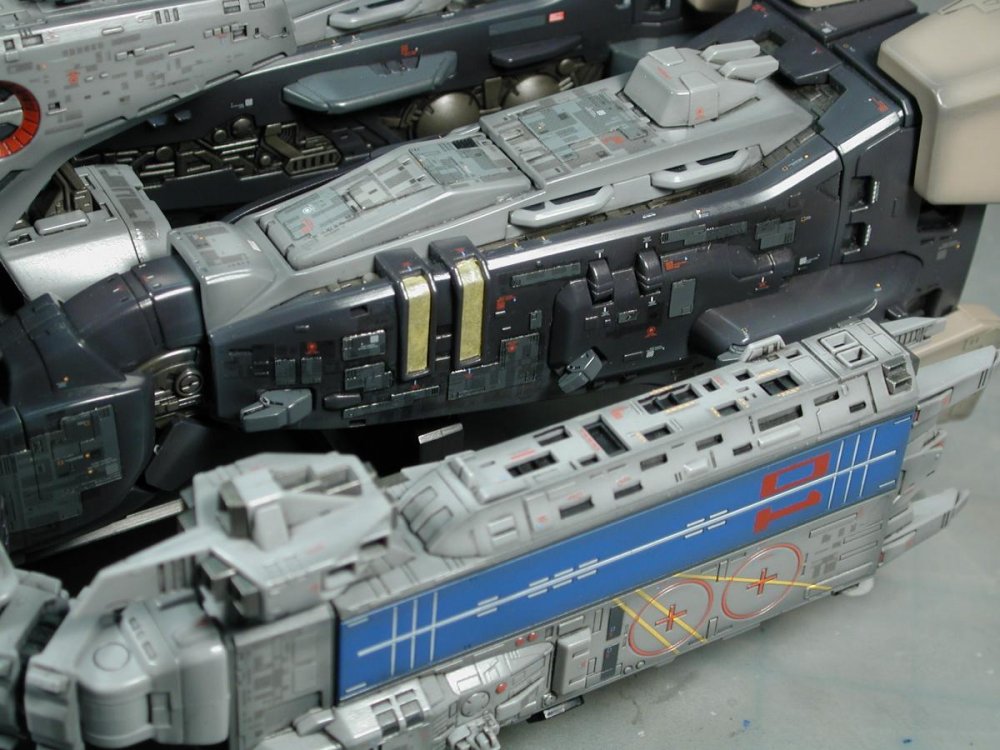
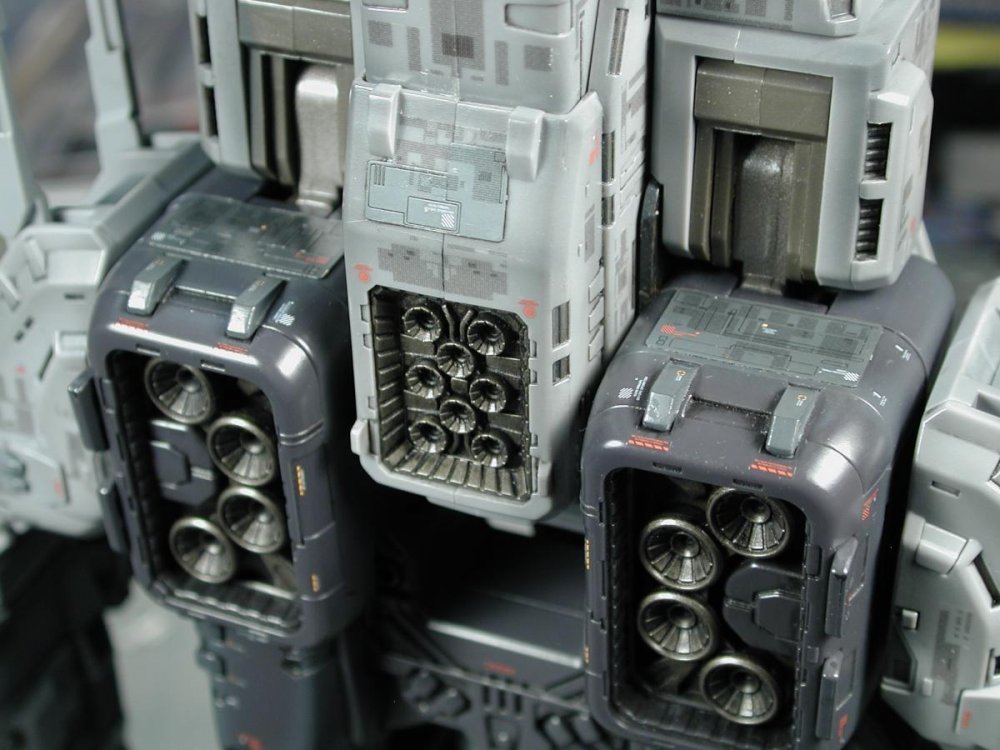
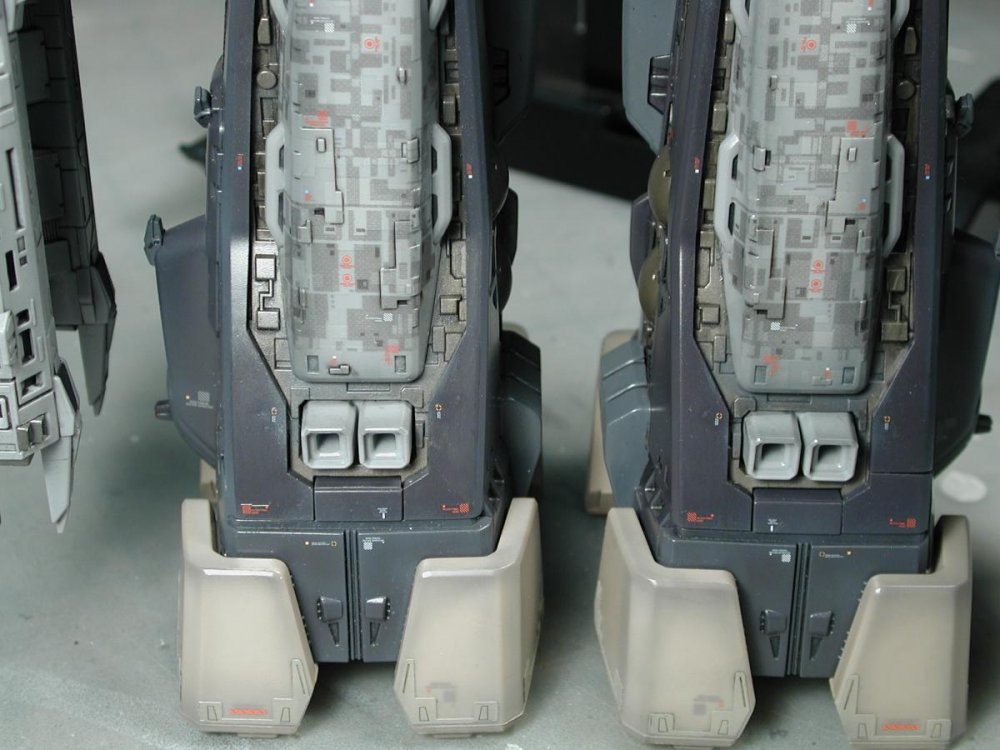
The second oil wash did wonders popping the details out! The overall flat/matte clear-coat lightening everything quite a bit, including the dark grey areas, I always thought they were too contrasty, but now they might be too light and blended into the overall scheme a little too much. I still have a dry brushing stage to go to pick up the highlights and then a mechanical pencil pass like they did on the Star Wars Star Destroyers, but I am glad I'm finally finished with the decal stage! The panelling ended up to be a much bigger job than I had anticipated. I airbrushed the interior of the engine bells Alclad Burnt Exhaust - I hated the tan colour of the plastic in there. I then "charred" the edges of the ends of the legs to tie them into the engines The final parting shot...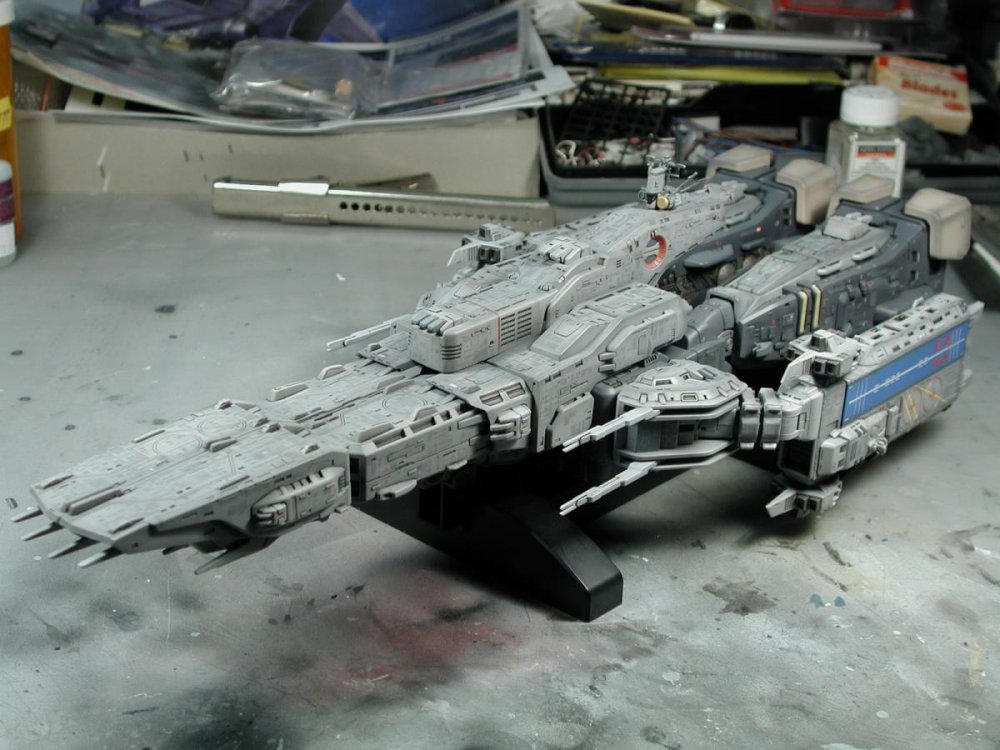


-
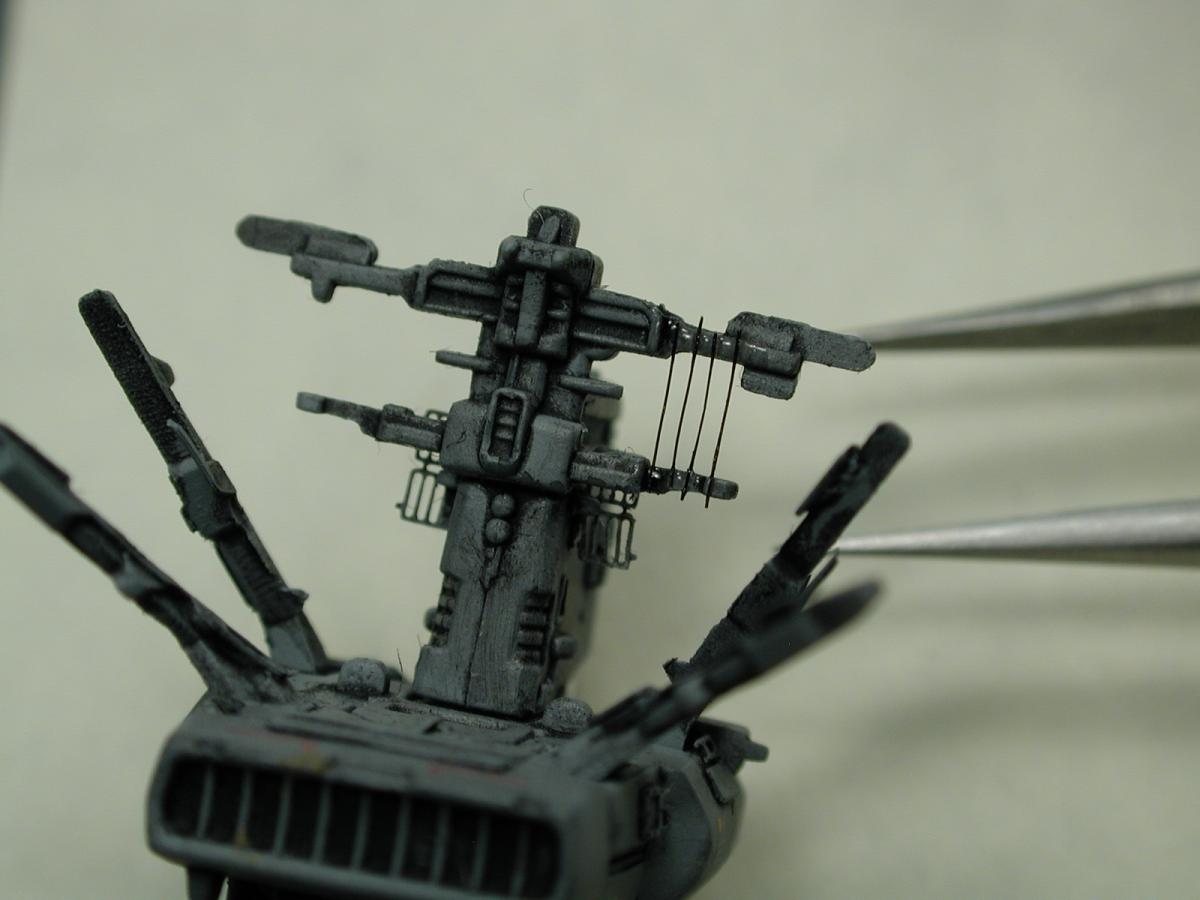
Yamato 1/3000 SDF-1 modification and paint up...
wm cheng replied to wm cheng's topic in The Workshop!
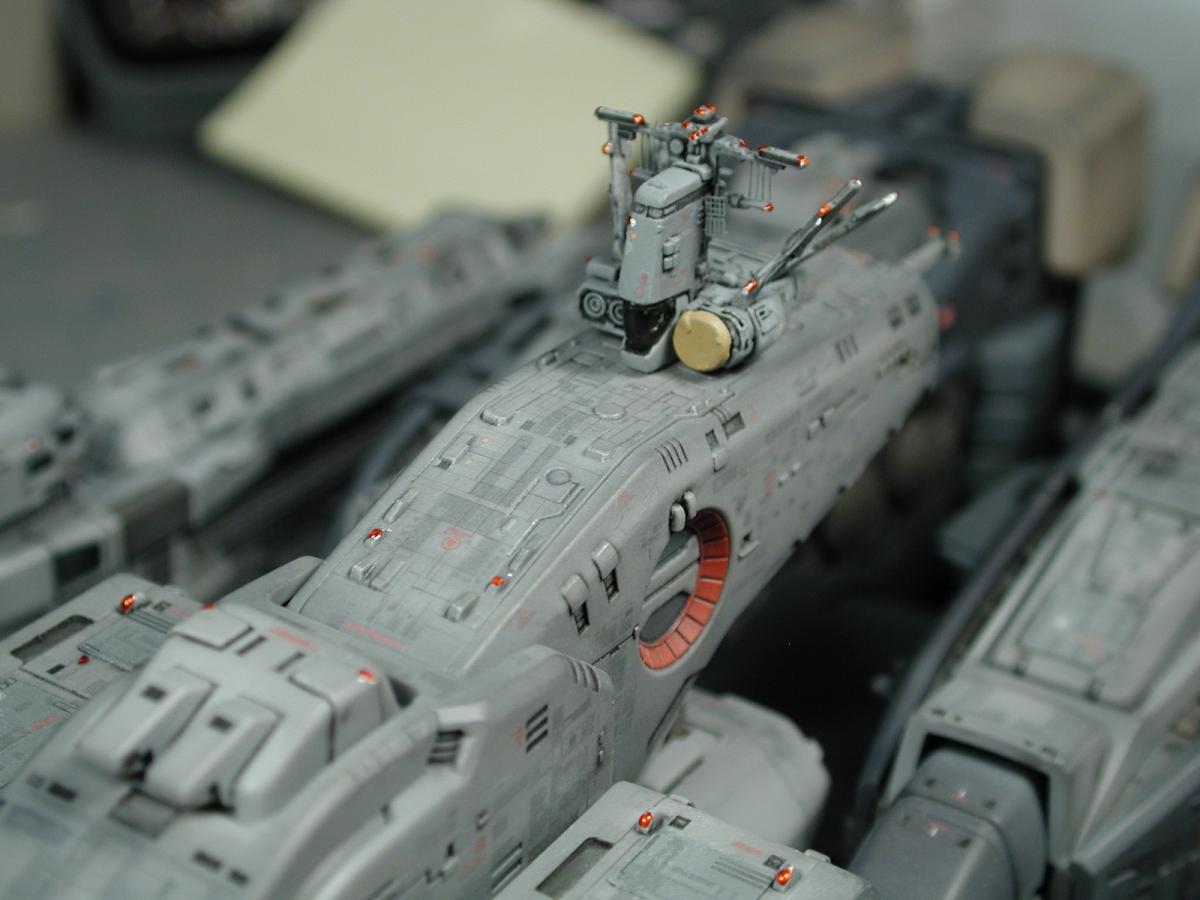
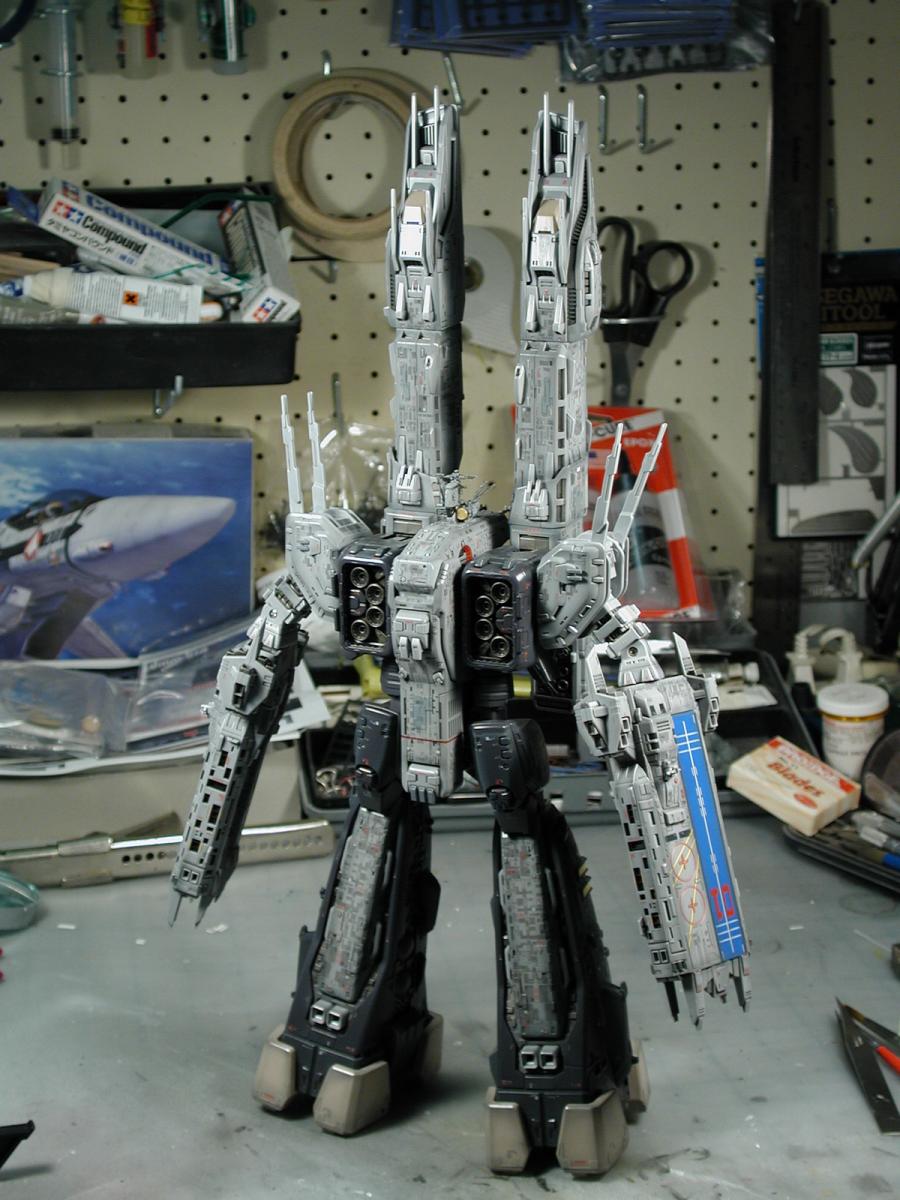
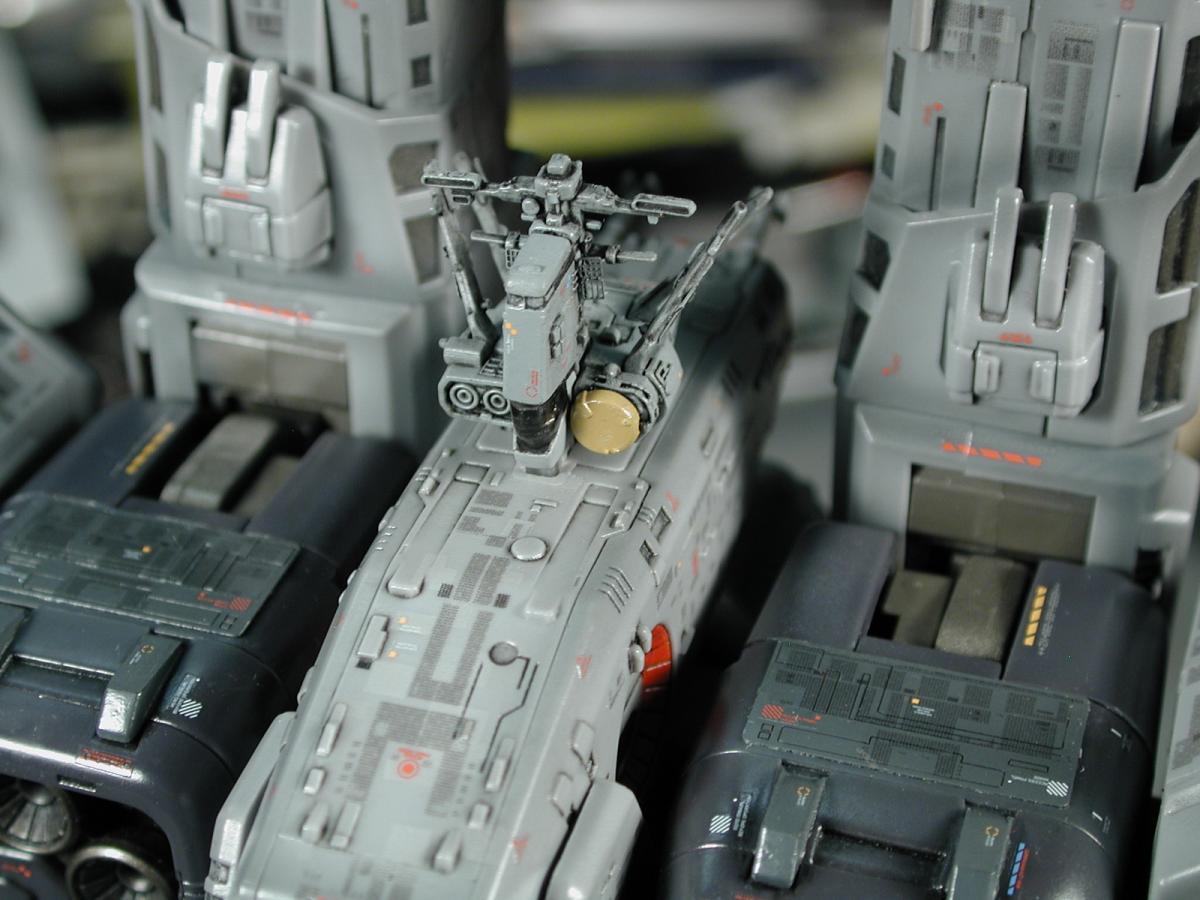
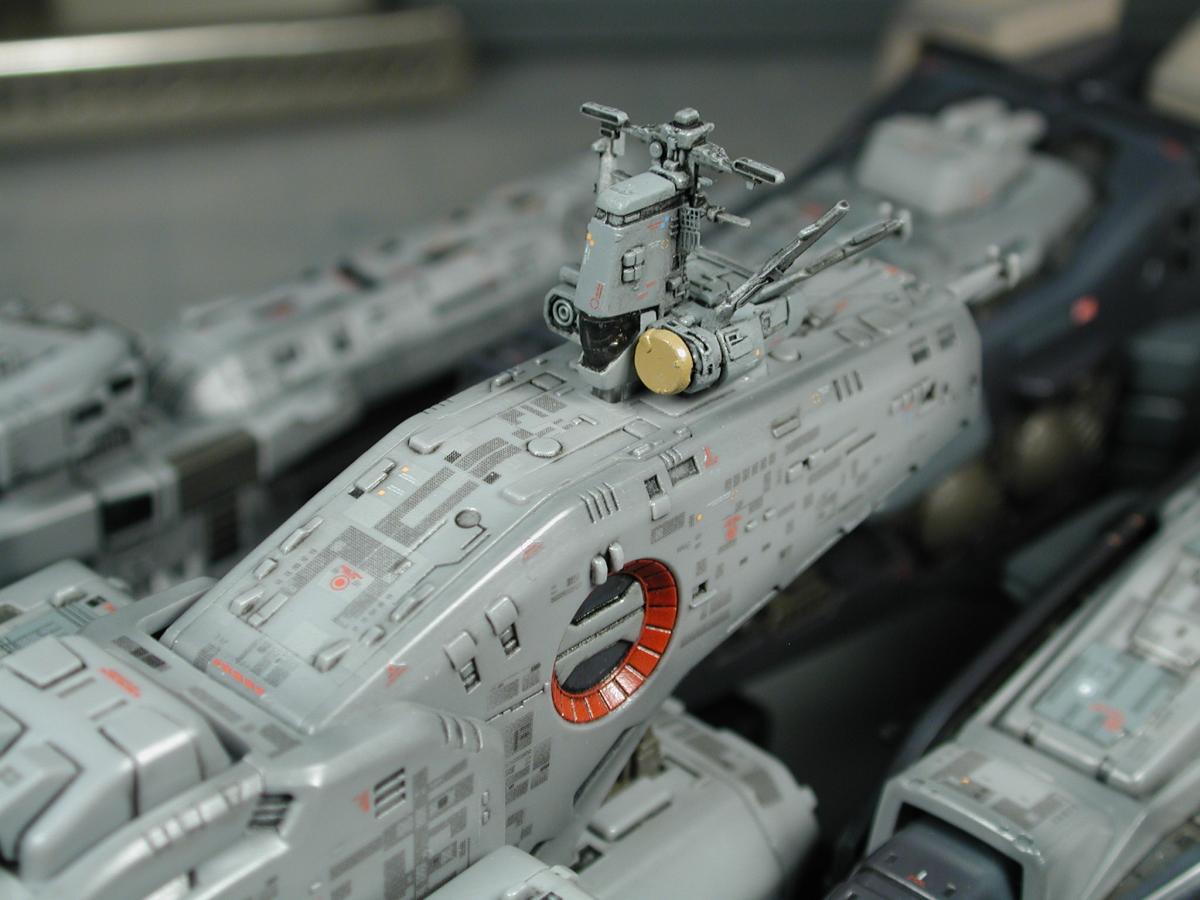
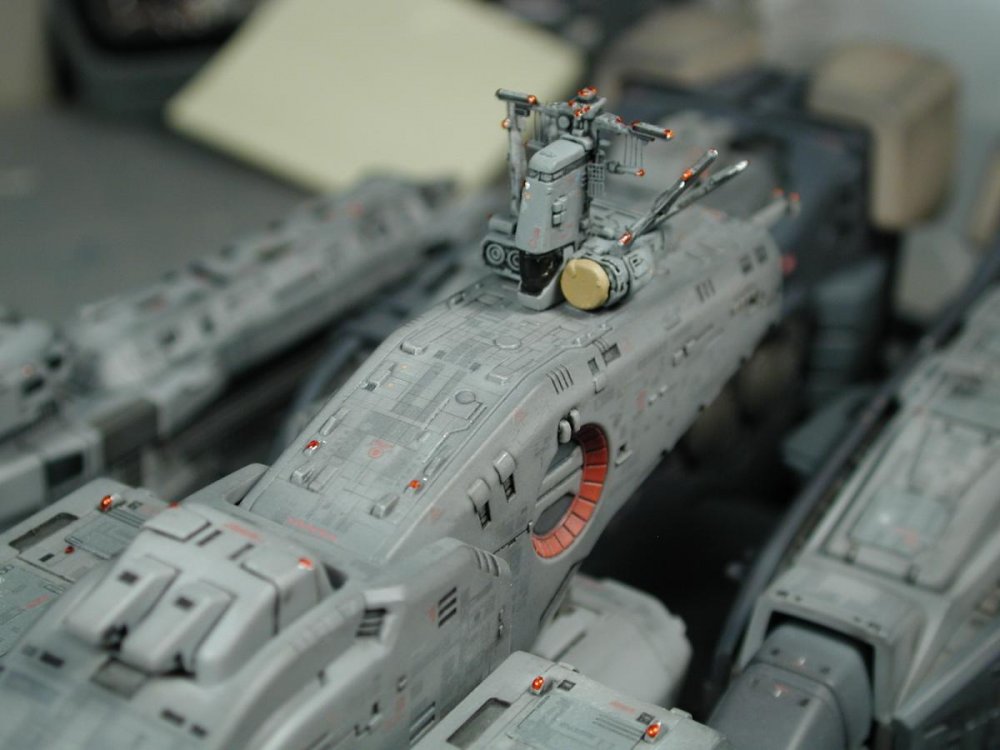
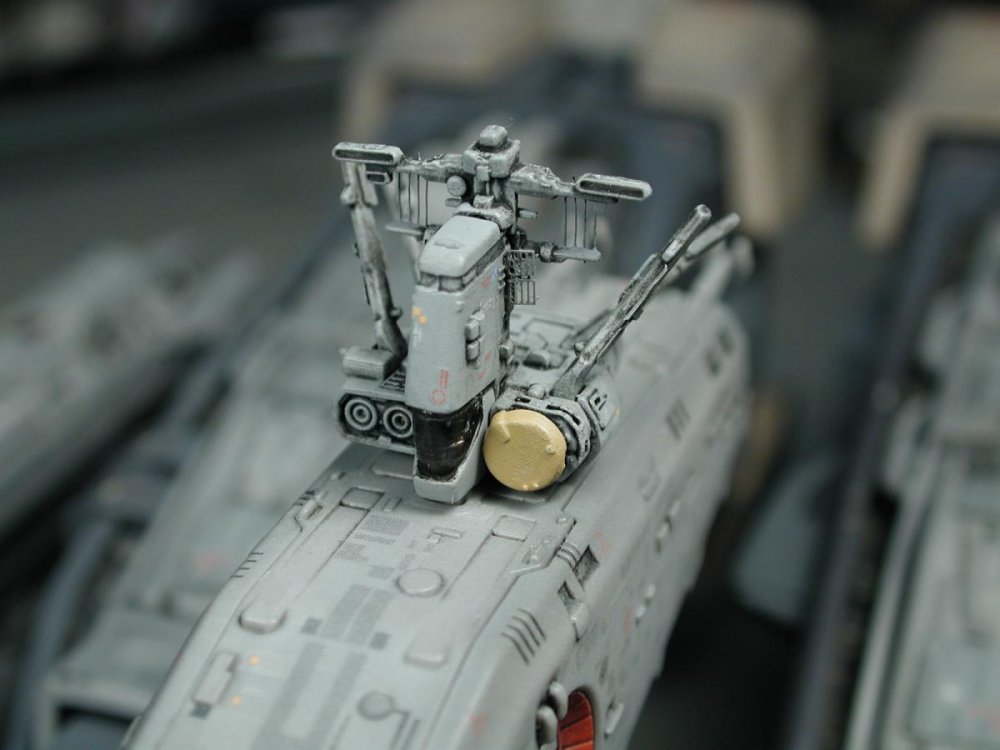
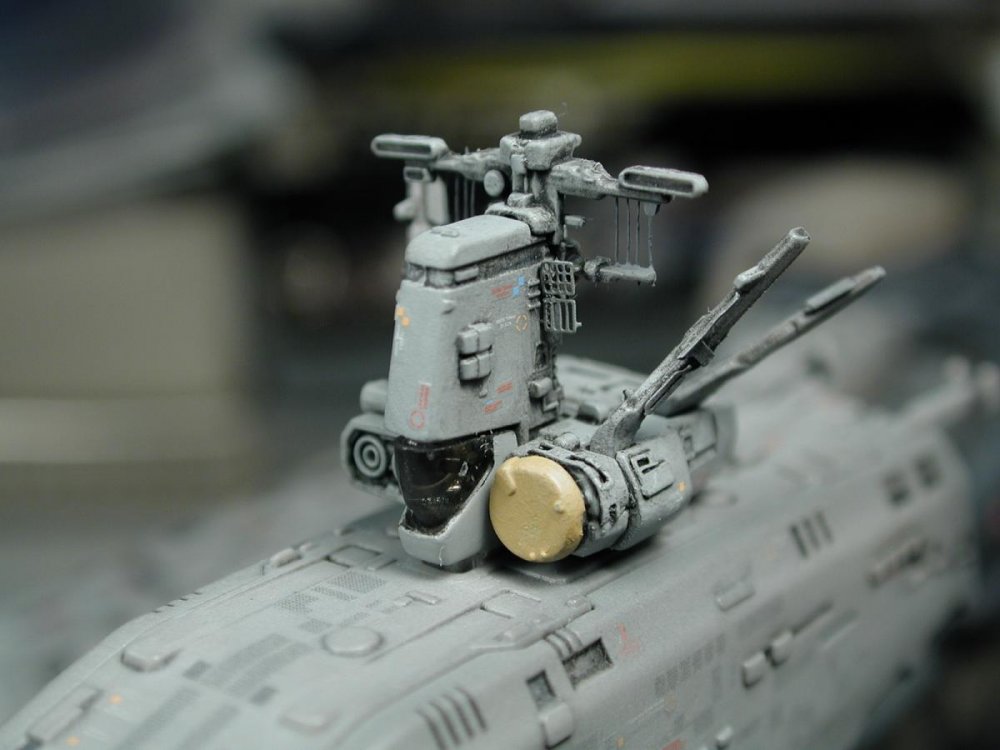
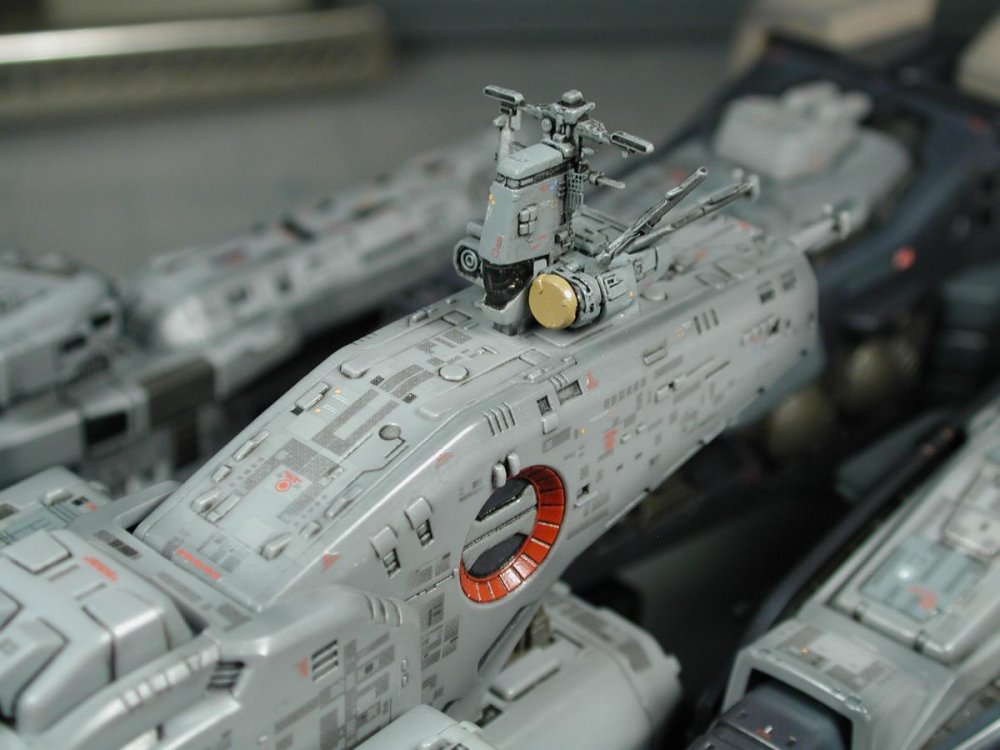
Well, I've really put a bit of myself into this build! It's my hair!! Someone earlier on suggested that I use human hair for the antennas vertically spanning between the radar array since I couldn't get stretched sprue thin enough and strong enough to hold. Well, originally I had planned 8 per side, but I guess either age, eyesight or just being old got the better of me so I just ended up with 4 per side. I then painted them grey, so they looked less like hair and it thickened them up a bit - but they were strong!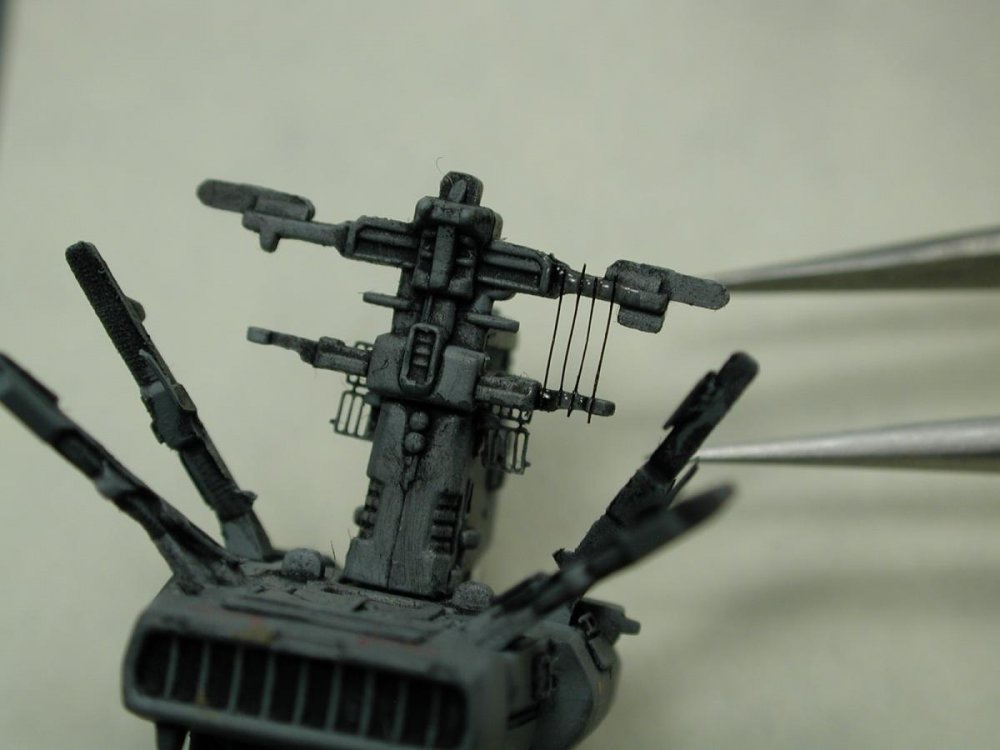

-
Gorgeous clean builds! Congratulations on a wonderful collection. Flawless finish as always CW!!
-
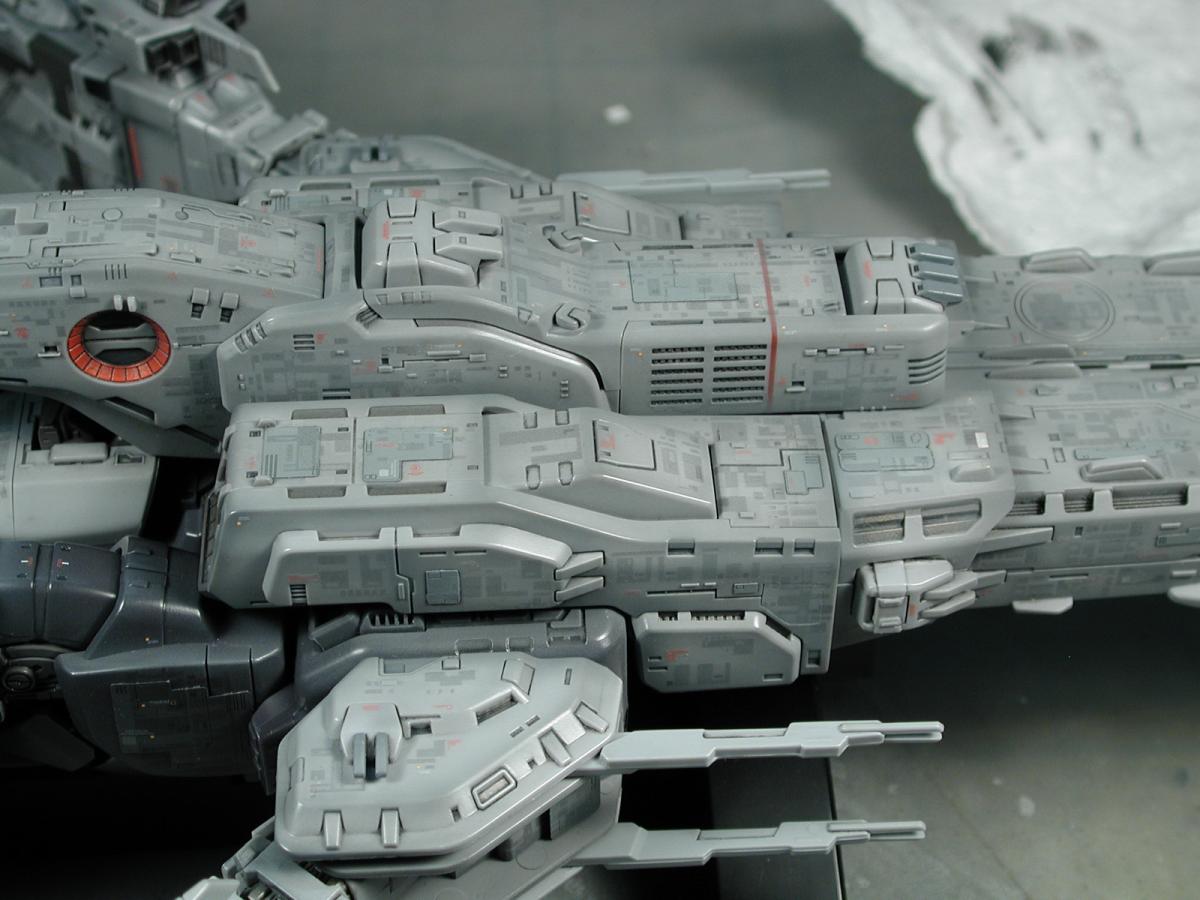
Yamato 1/3000 SDF-1 modification and paint up...
wm cheng replied to wm cheng's topic in The Workshop!
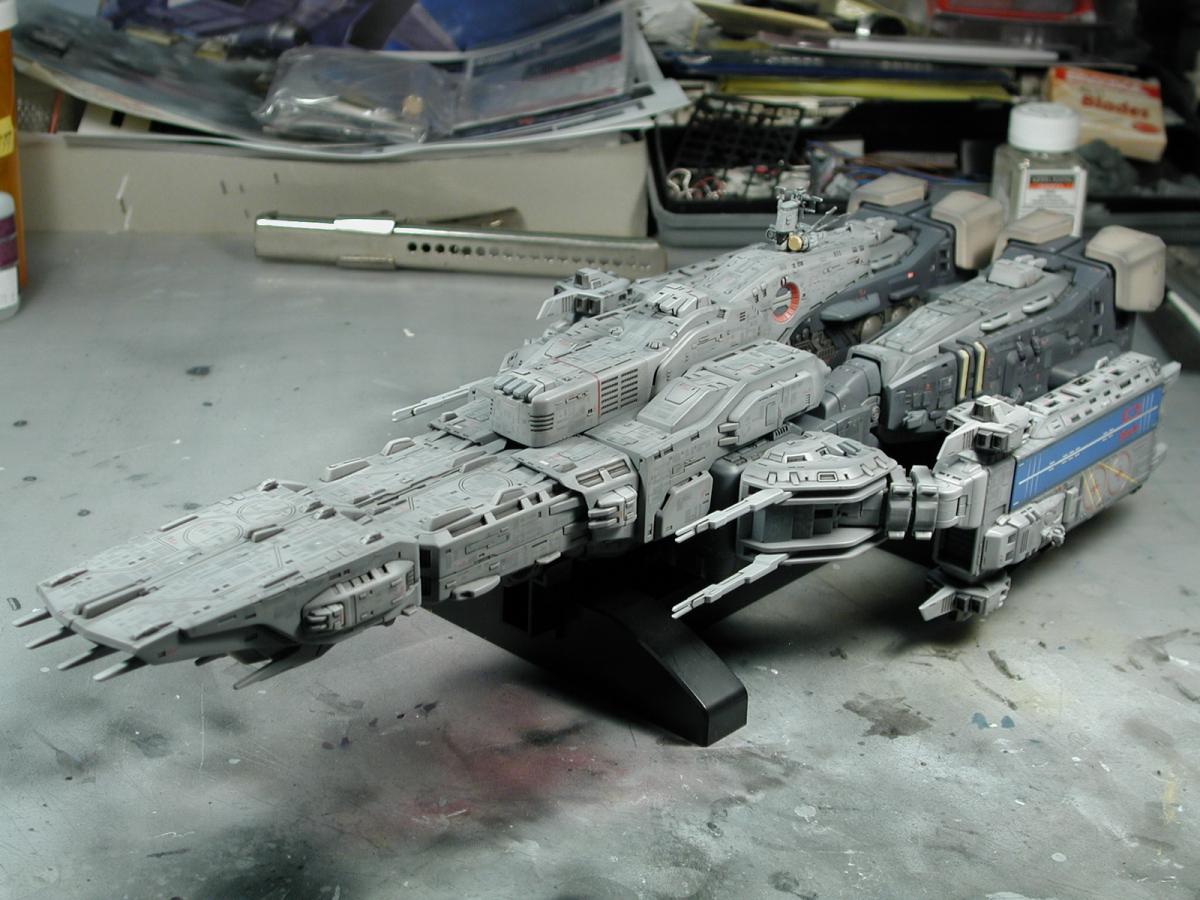
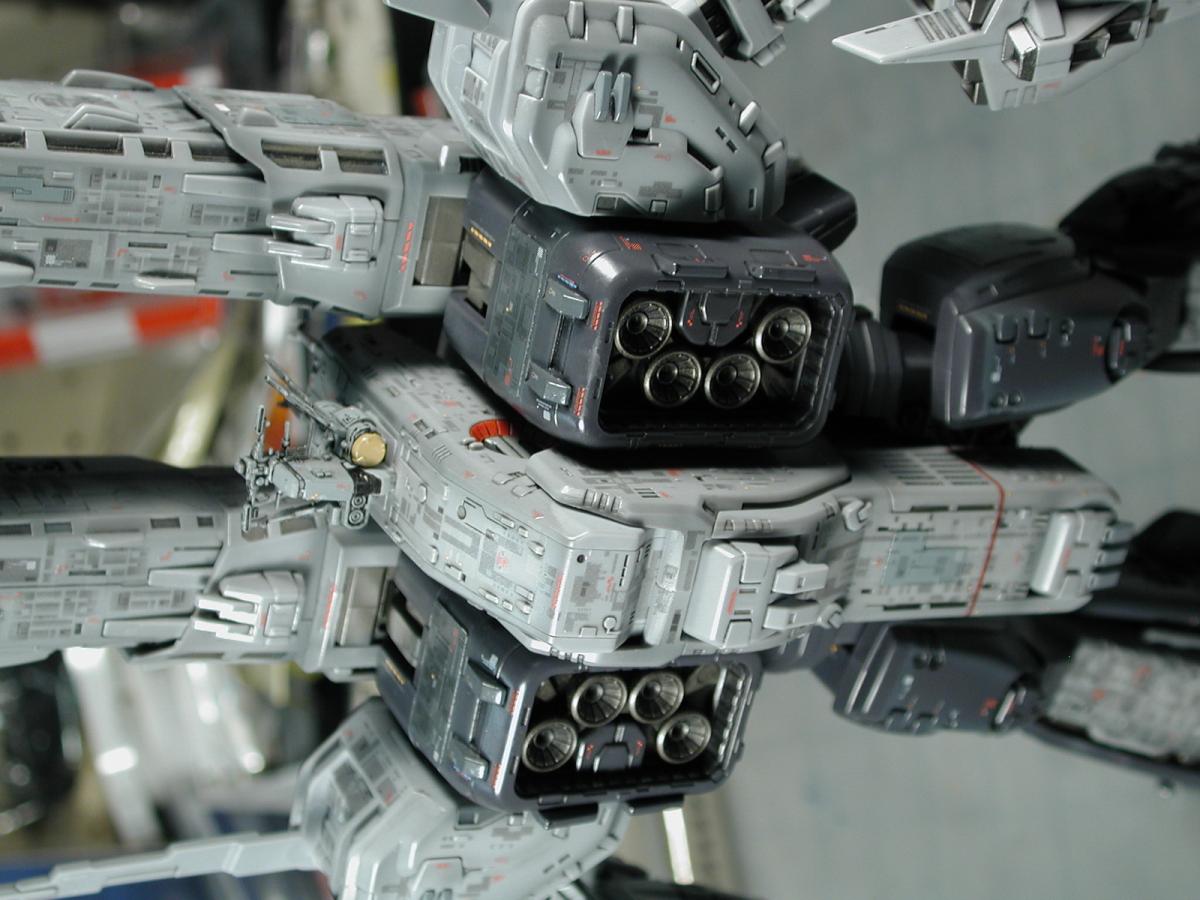
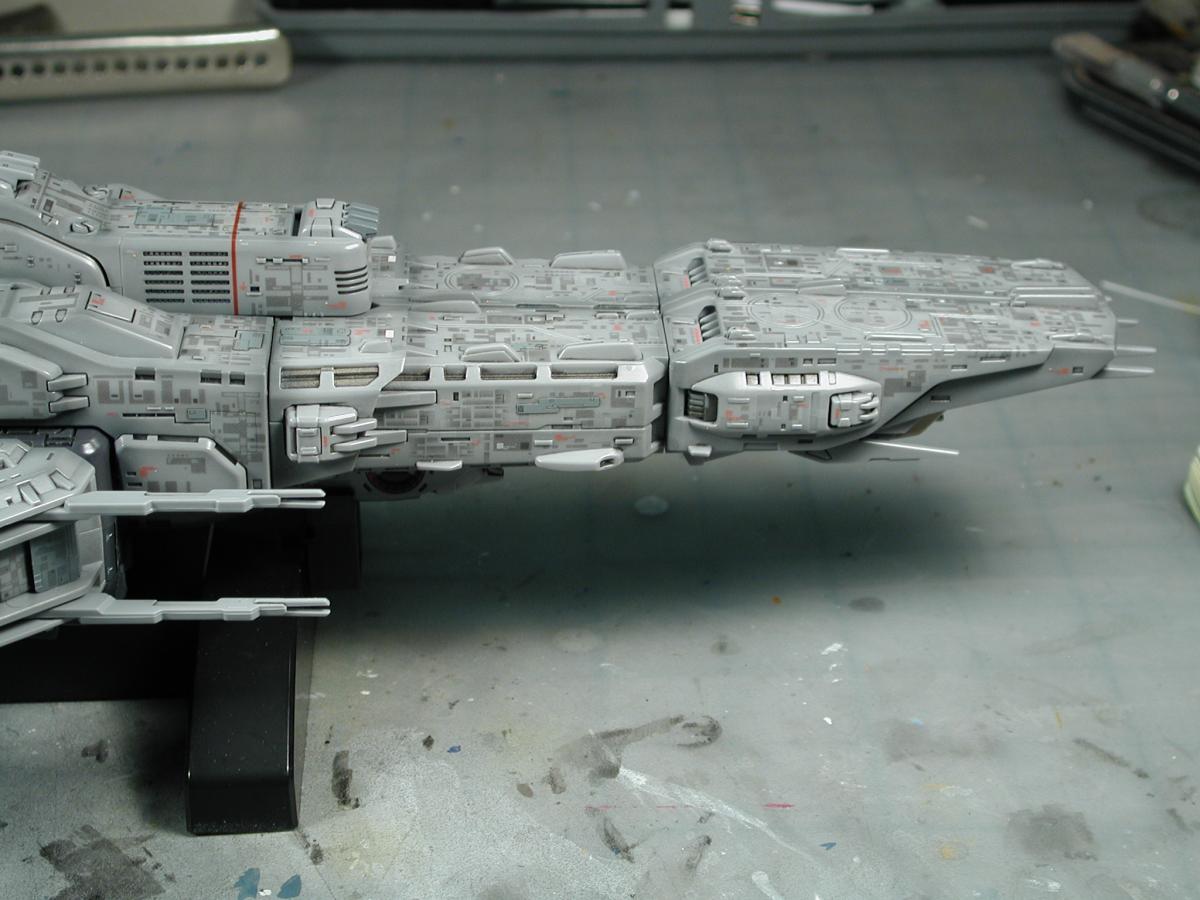
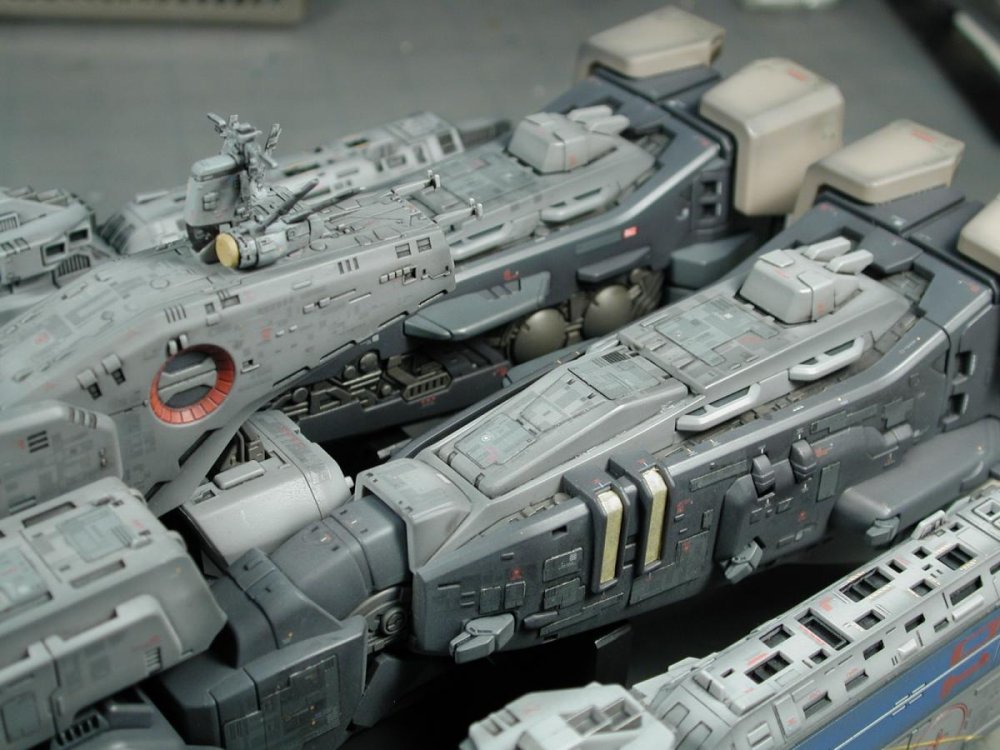
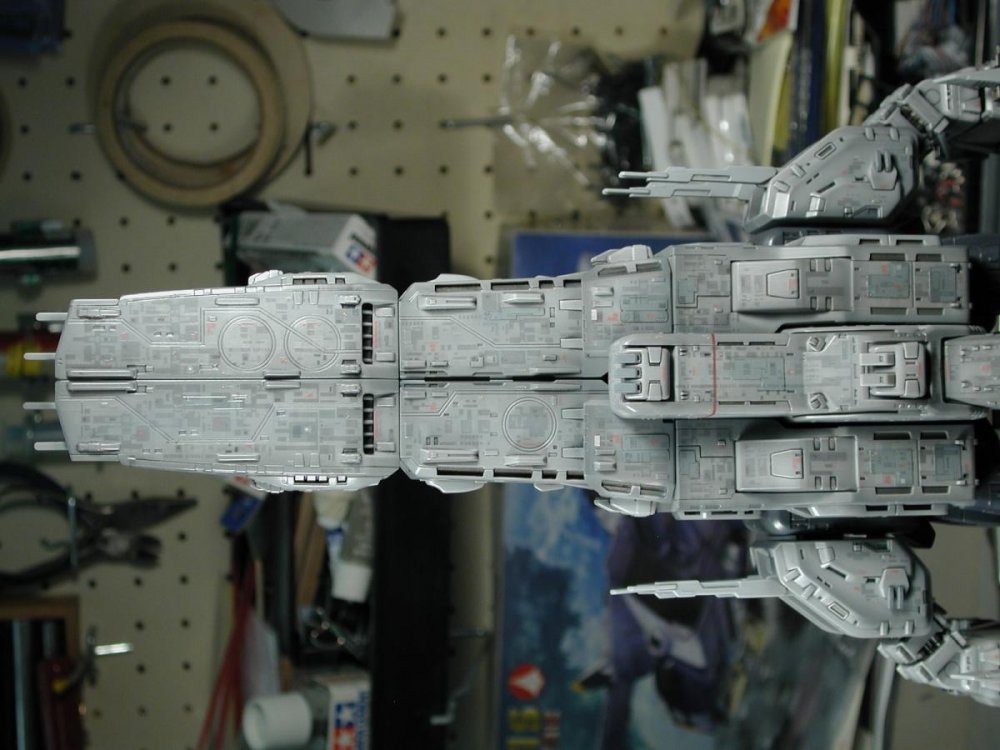
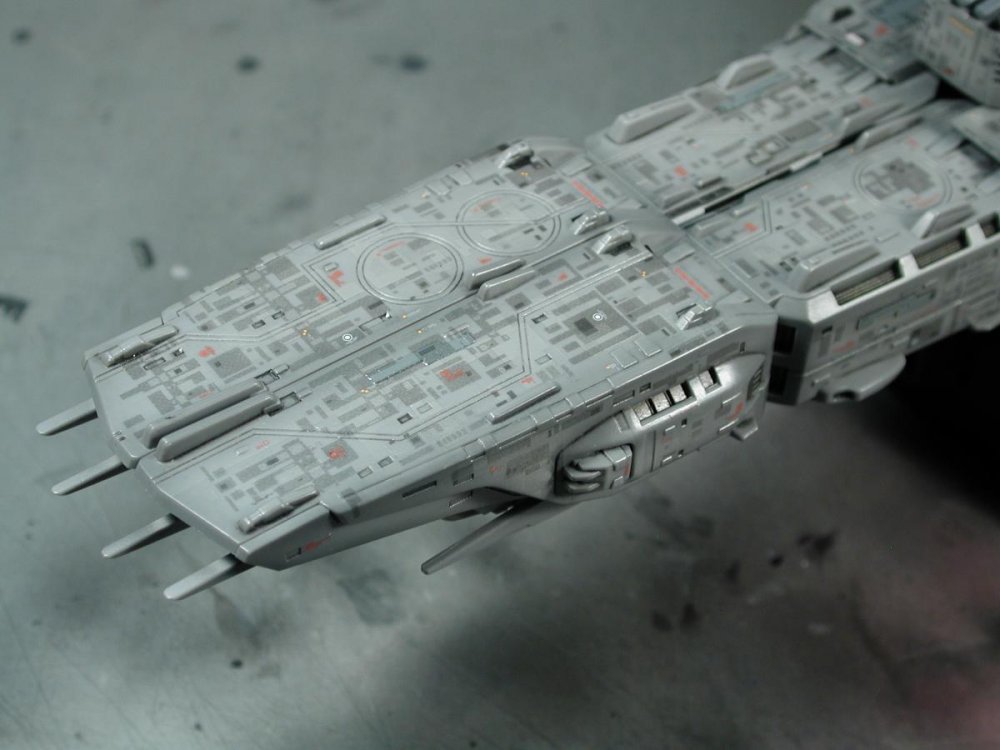
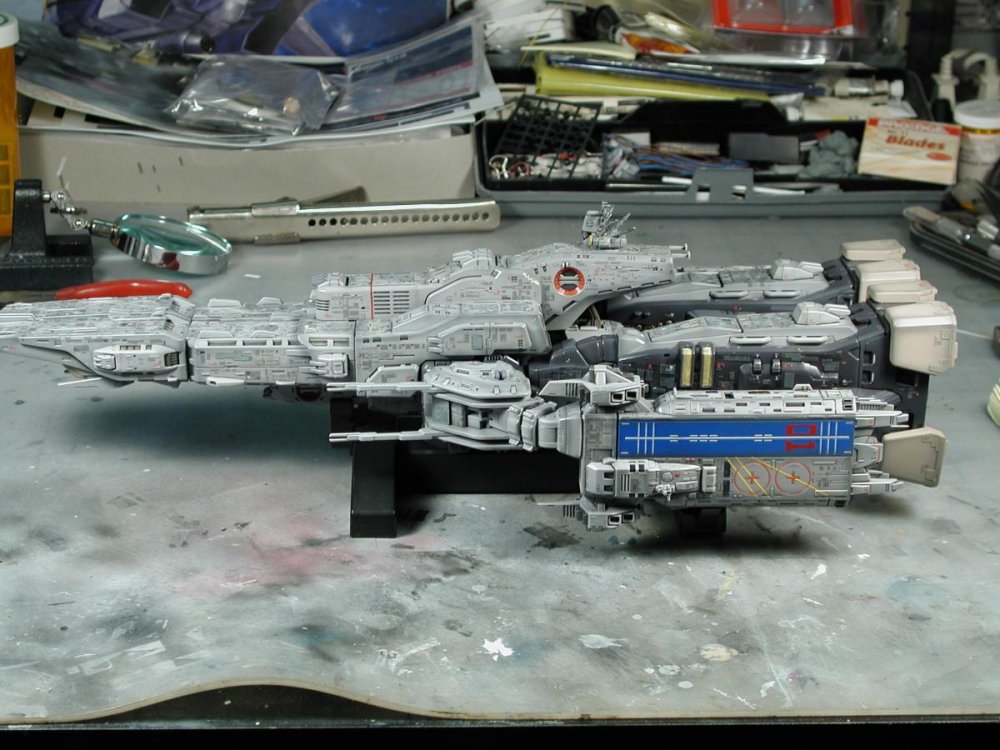
Lol! Thanks. Well, I finally got the panelling toned down to what I wanted - I sprayed a few light coats of grey over the decals, and they now look more painted on than decals, more subtle surface texture than markings. This overall "graying" is intentional since large objects then to "haze out" in the distance and lose contrast - its a trick to create scale as well as the flat/matte finish. However, it toned everything down, some of the deeper vents and details were lost due to being sprayed over with grey. All the details don't "pop" anymore. So I now have to add another step and clear coat this light grey spray with a glossy coat so I can do another dark oil wash to pick out / punch up the details before I can seal everything in with a flat/matte finishing coat. After that, I in tend on dabbing tiny bits of chrome silver to the tips and clear red over them as navigation lights all over and start to detail the interior of the chest nozzles, I'll paint them in a gun metal silver to be clear-coated in red clear. I also intend to do some weathering of the rear main engines in Alclad Burnt Exhaust. Hopefully this will be as far as I can go finishing up the surface of the SDF-1 this weekend because I start work on Monday again - argh! I still haven't gotten to those wonderfully tiny photo-etched launch arms and Super Valkyries yet, but that will have to come later.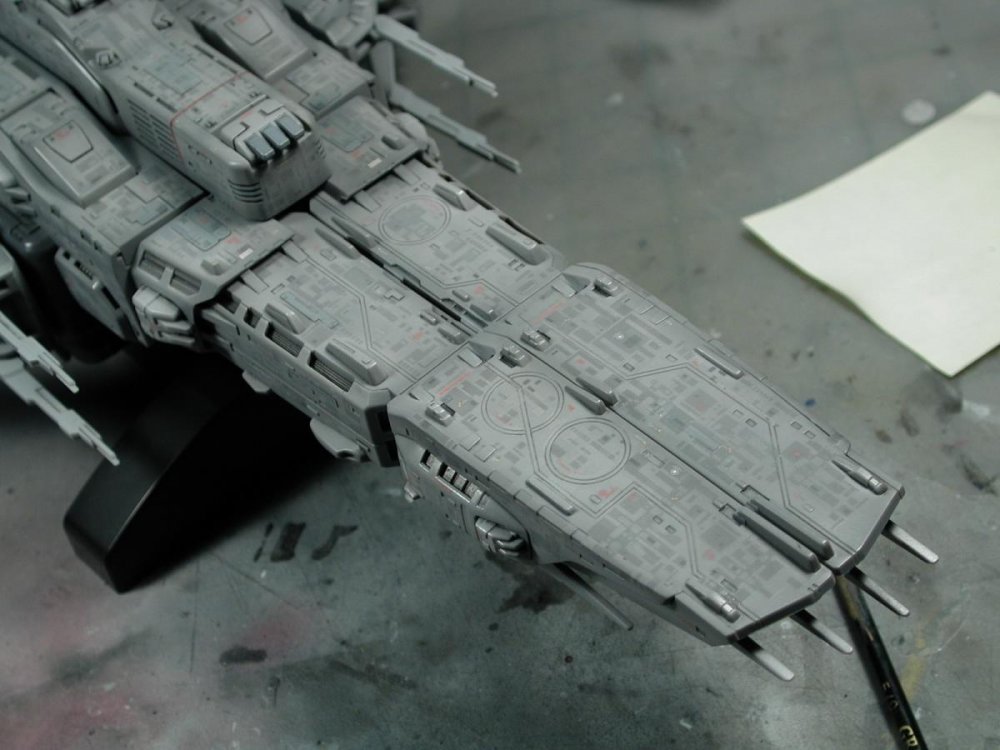


-
Yamato 1/3000 SDF-1 modification and paint up...
wm cheng replied to wm cheng's topic in The Workshop!
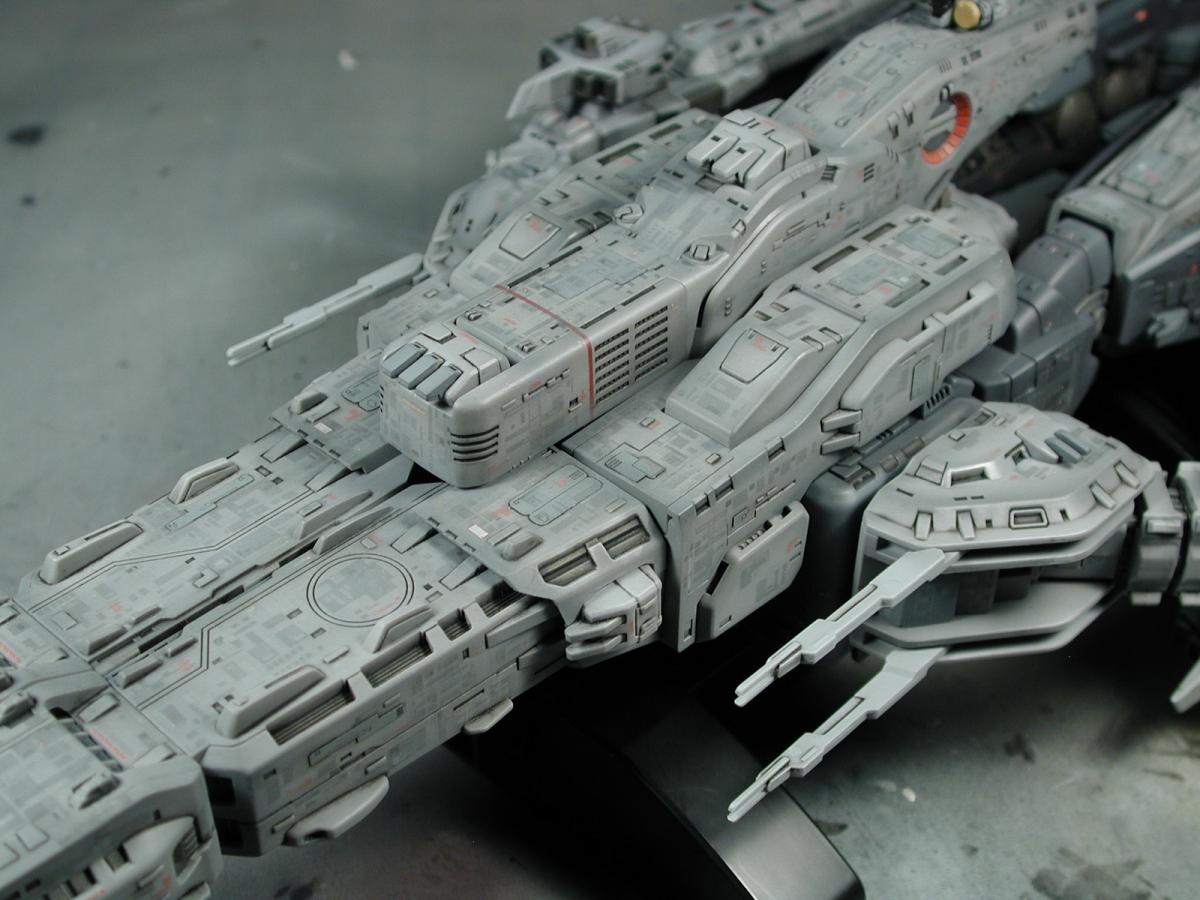
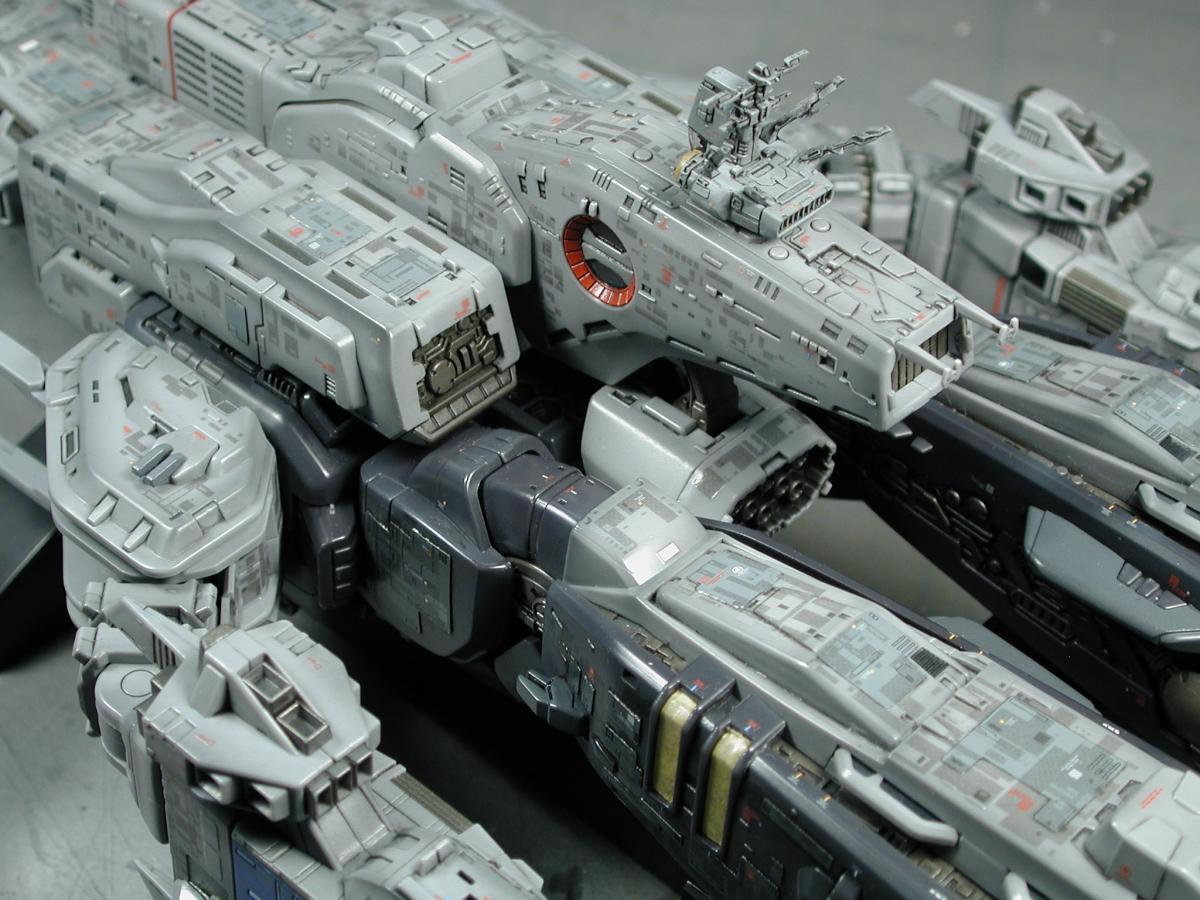
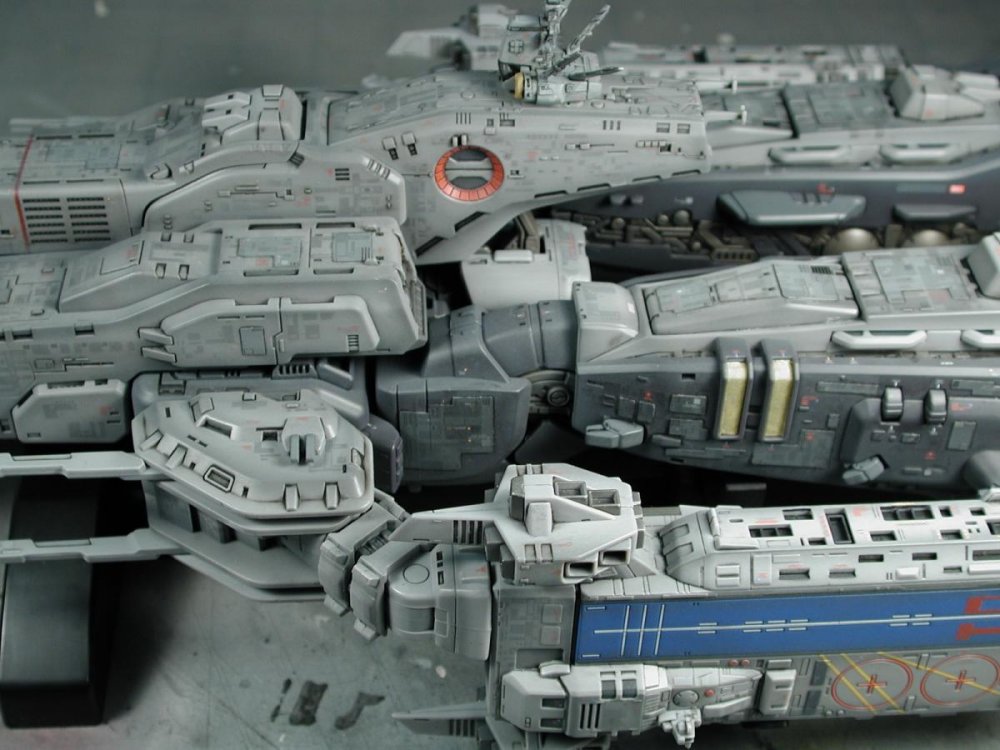
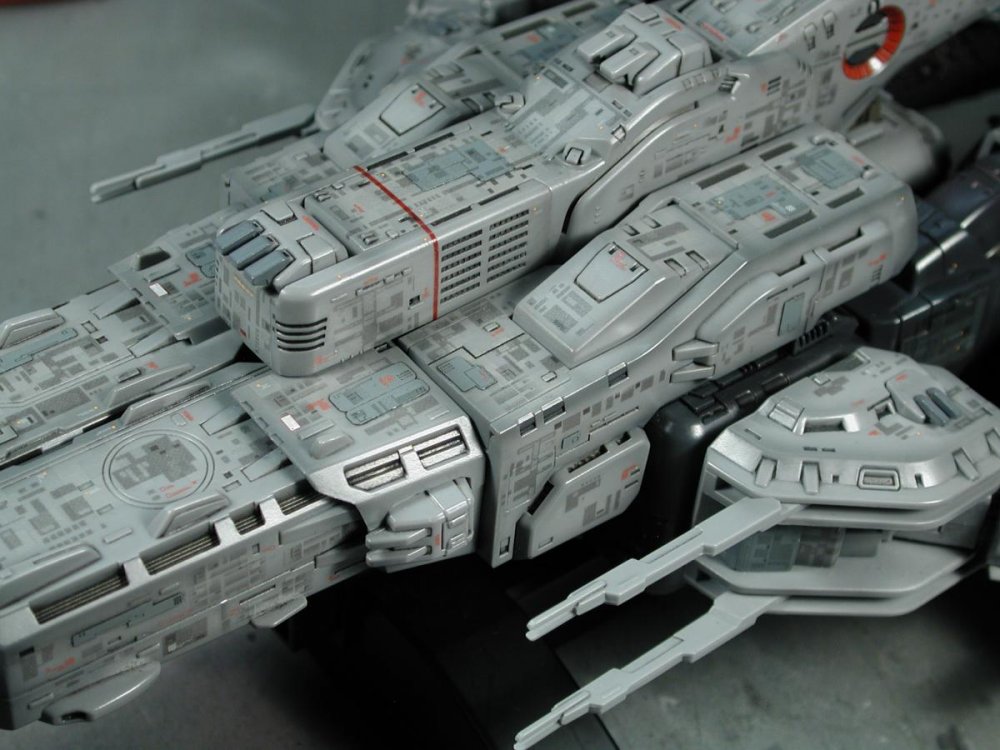
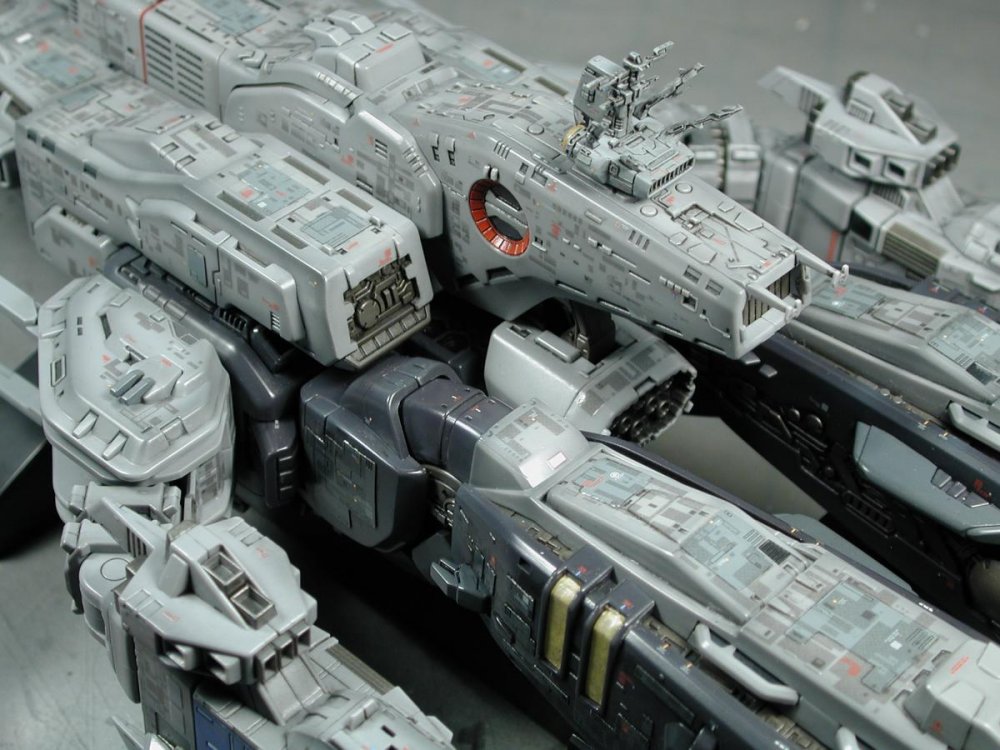
Boy are you right! Everytime I look at it I think, hey there some good spots for more decals!! This really is so detailed for a toy... Yamato has really outdone themselves on the sculpt and the amount of details they put into it, I'm constantly amazed as I transform this baby and discover new spots they populated with "gak" I HAVE TO STOP!! or I'll never finish. So after another few hours of applying decals (which I thought I was done yesterday!) - I finally clear-coat sealed the decals in with a thick glossy finish. I will let it dry overnight before I start to dust it with the flat Neutral Grey to tie everything together and a few coats of flat/matte clear coat.


-
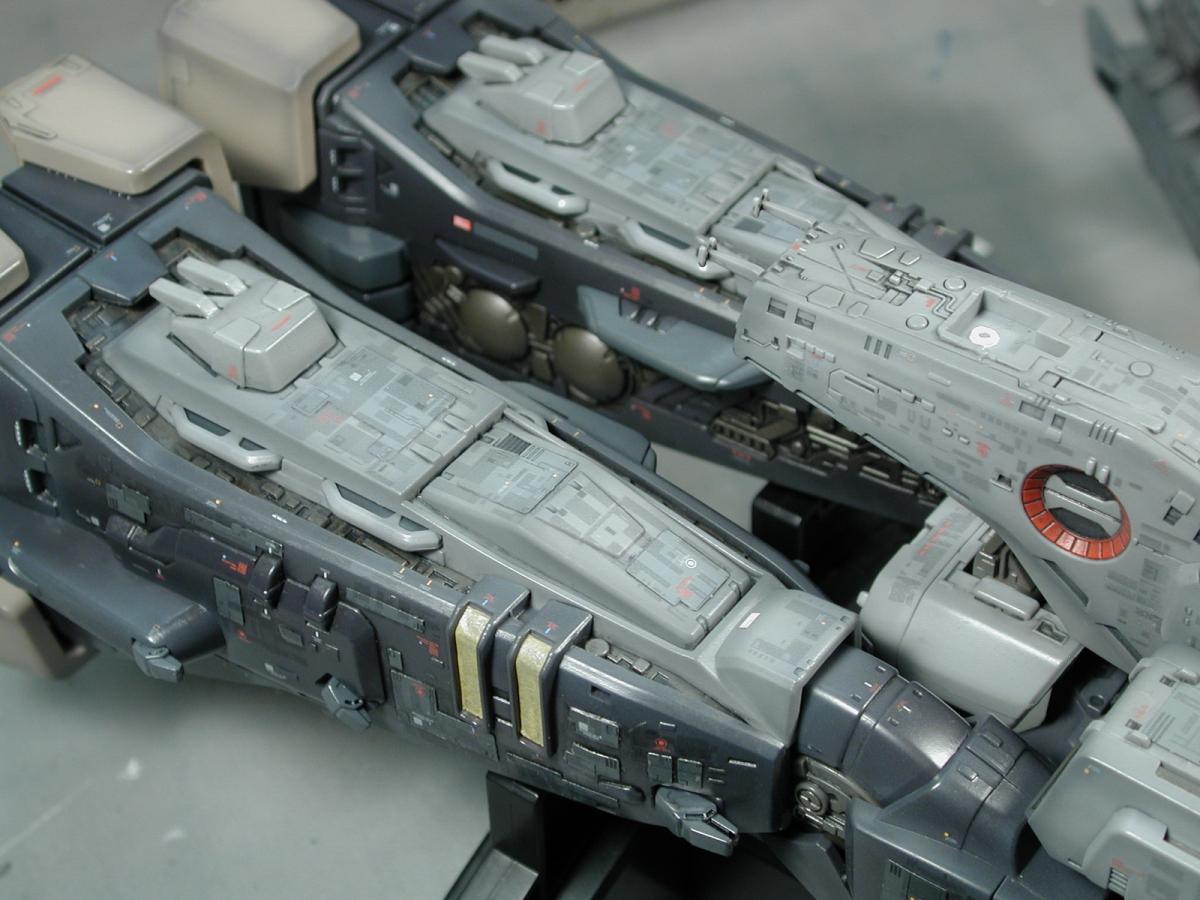
Yamato 1/3000 SDF-1 modification and paint up...
wm cheng replied to wm cheng's topic in The Workshop!
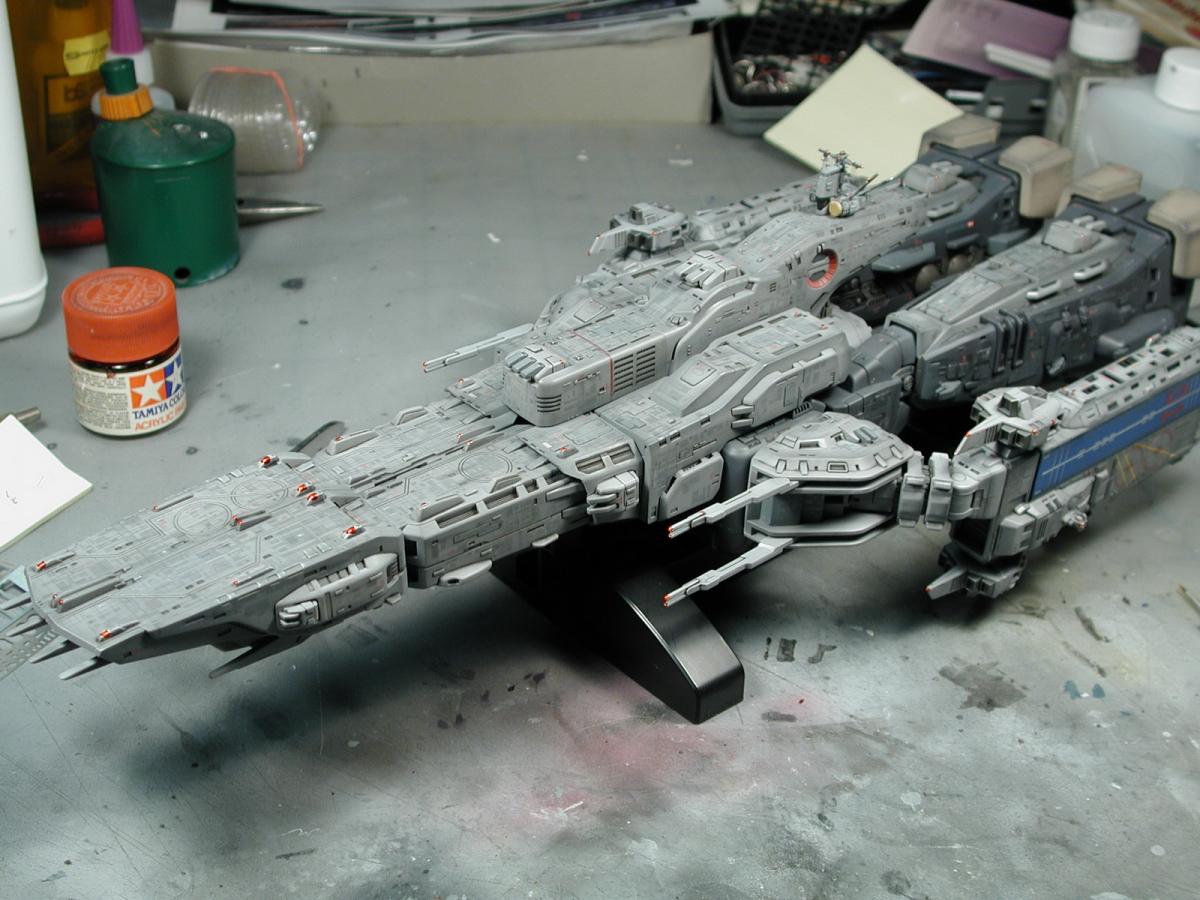
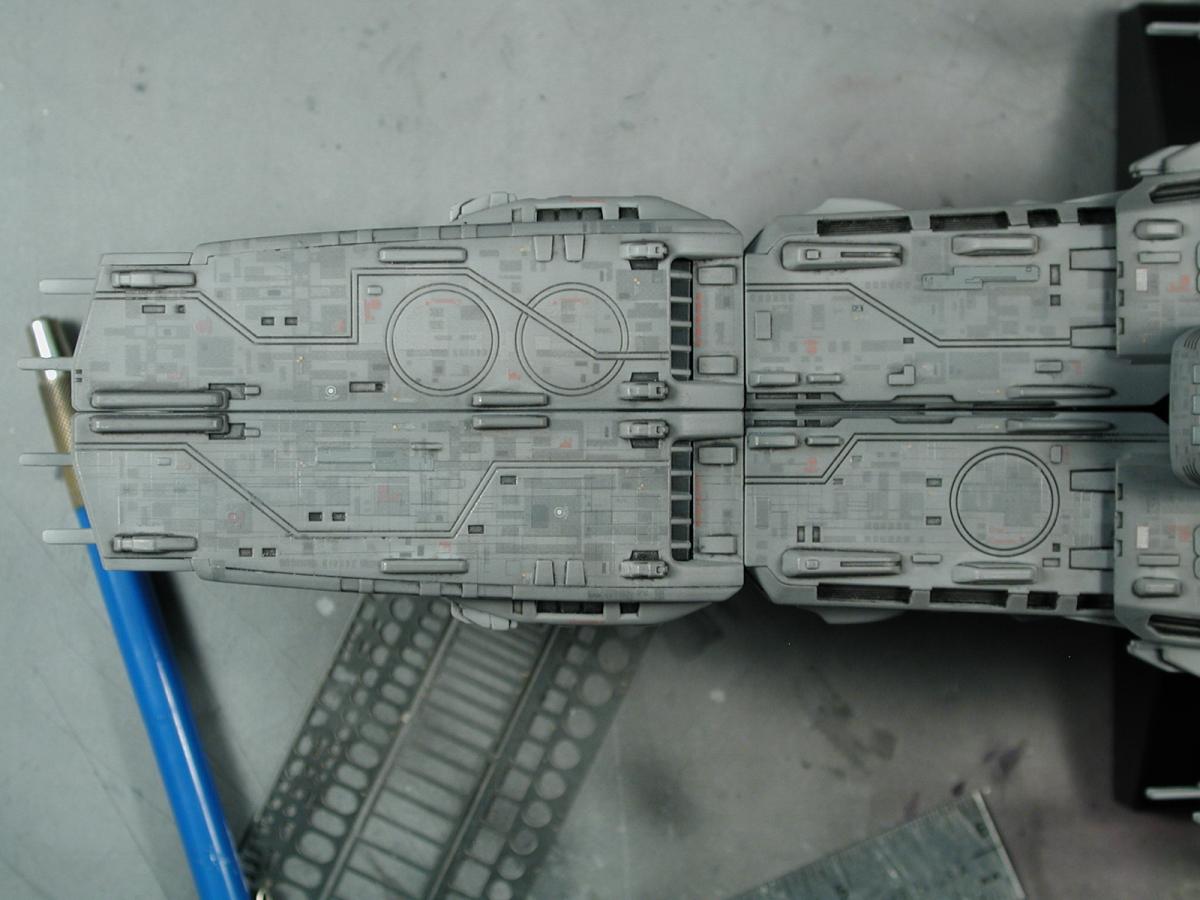
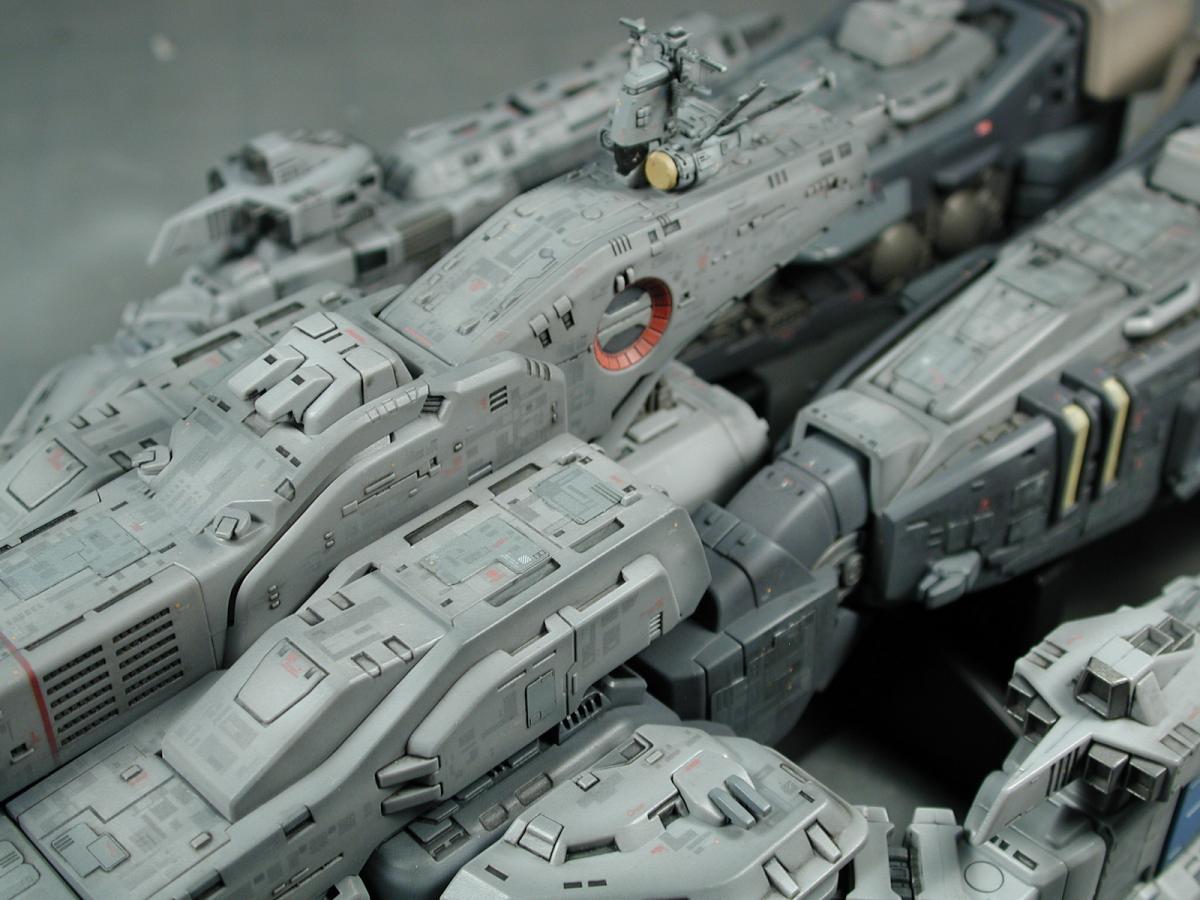
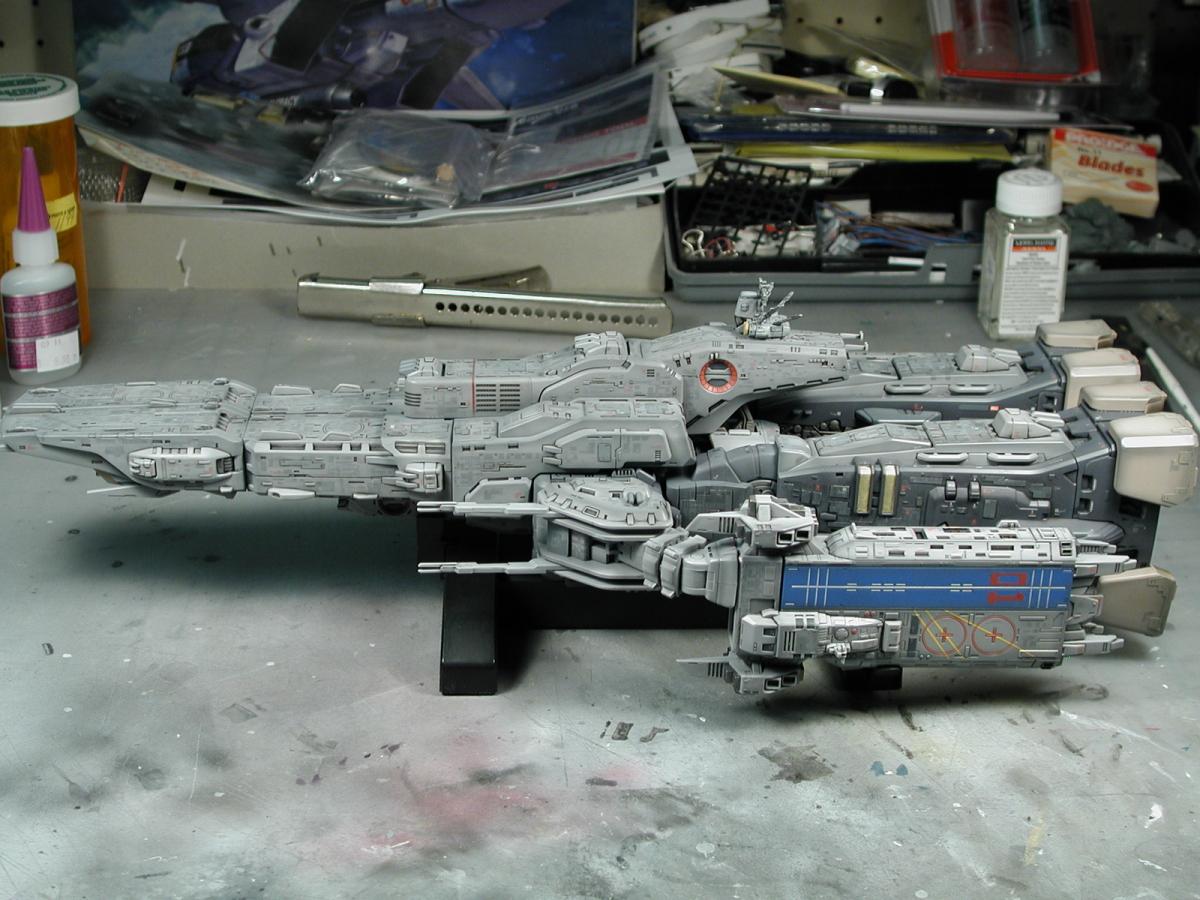
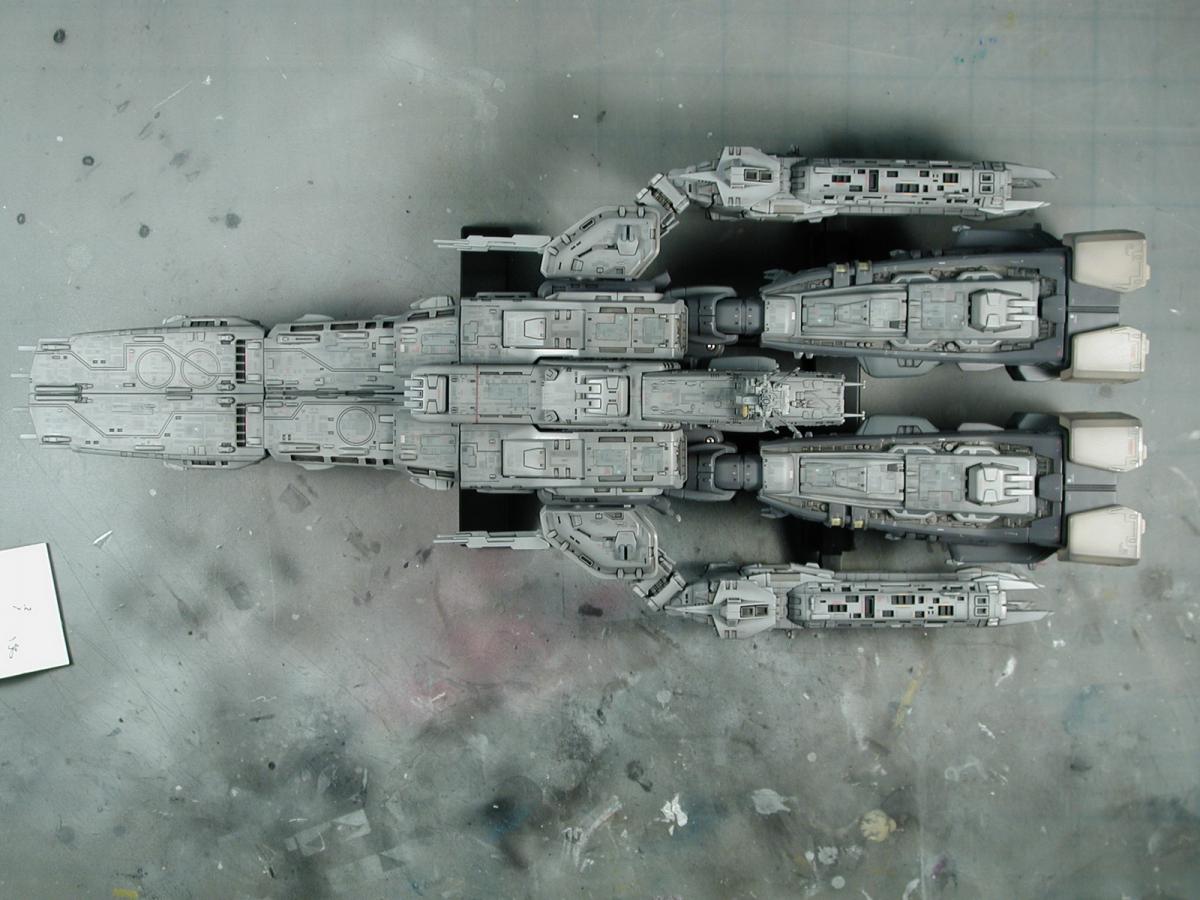
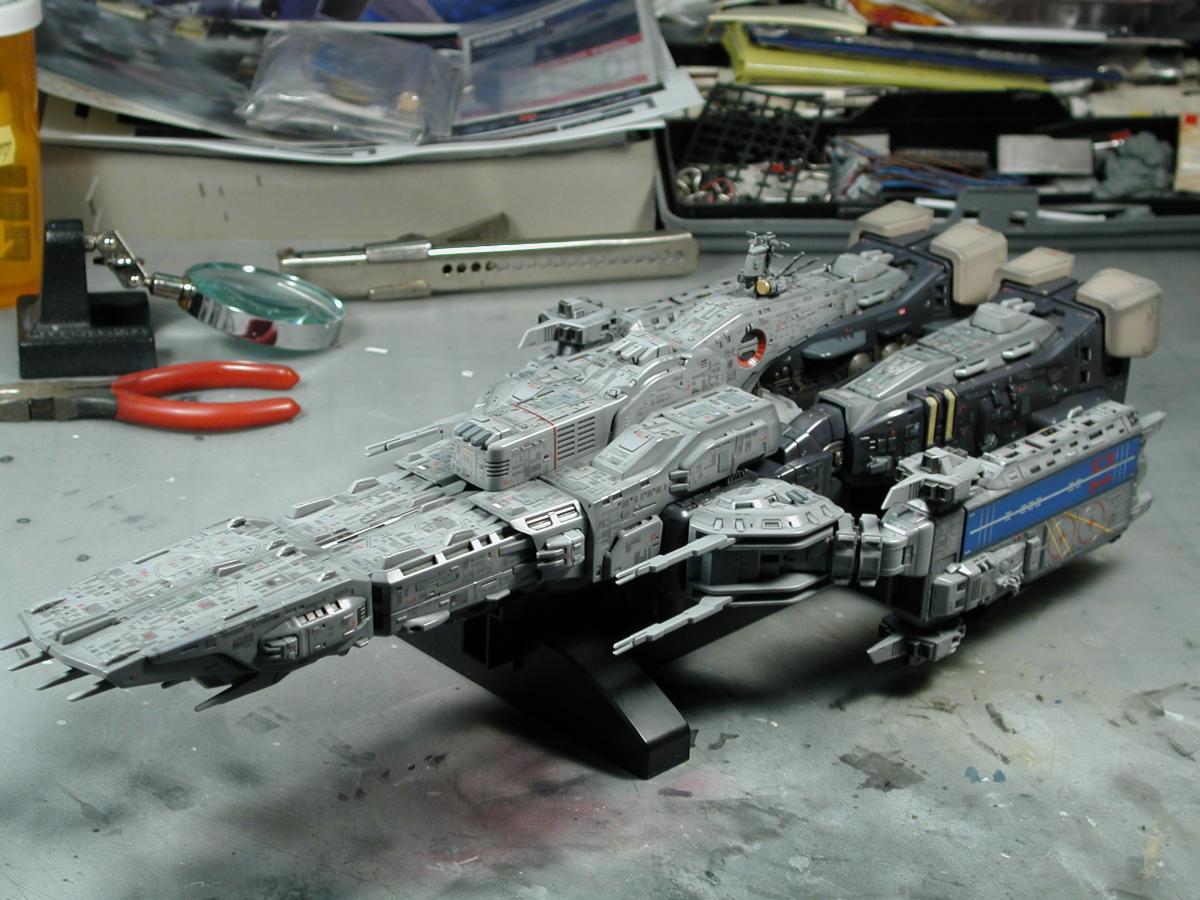
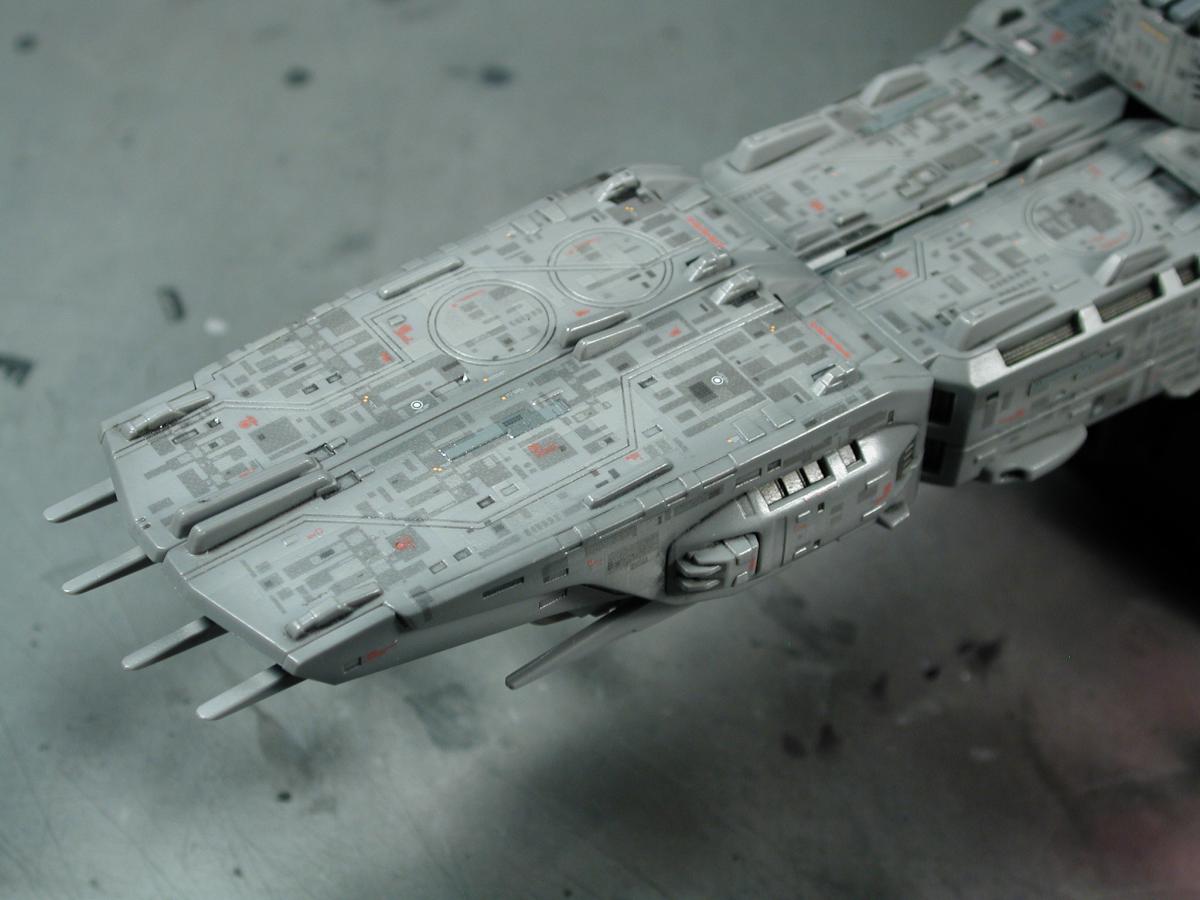
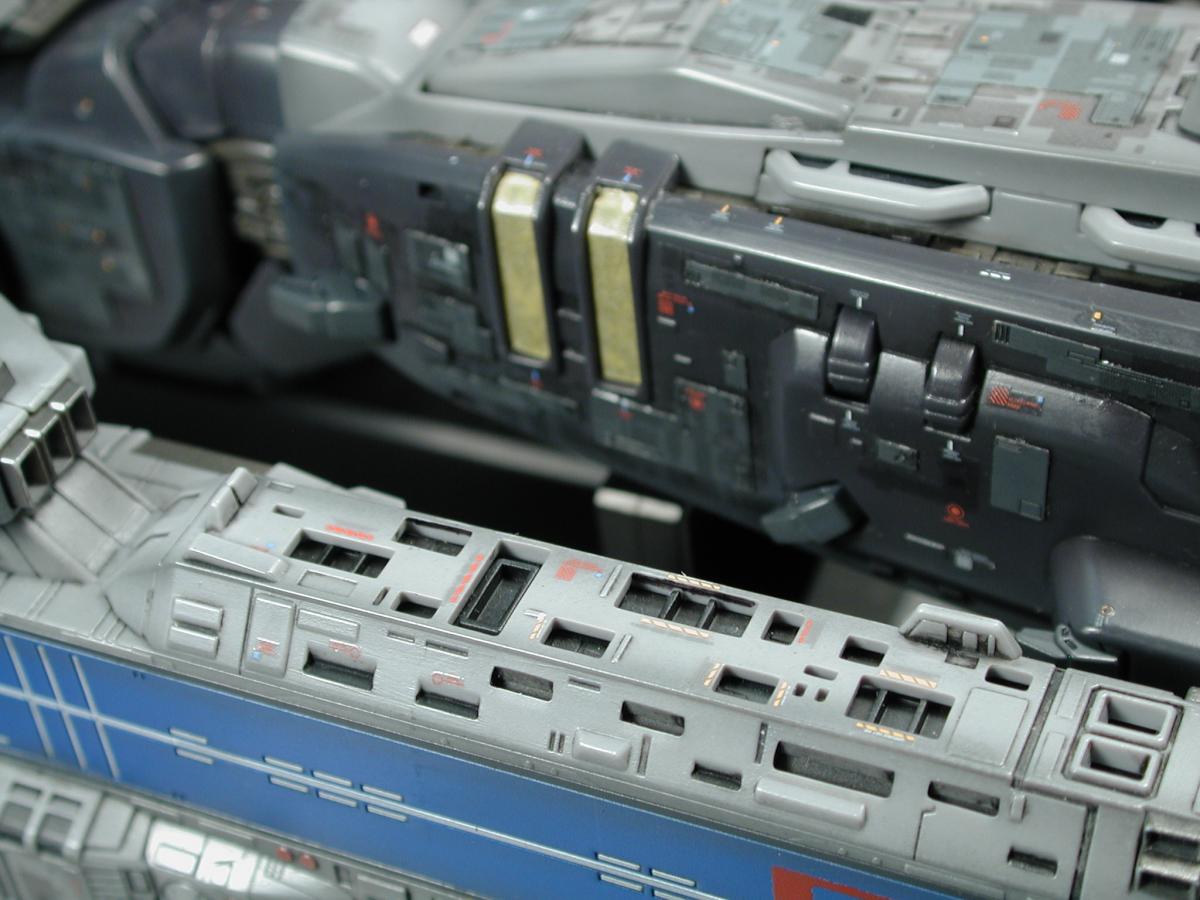
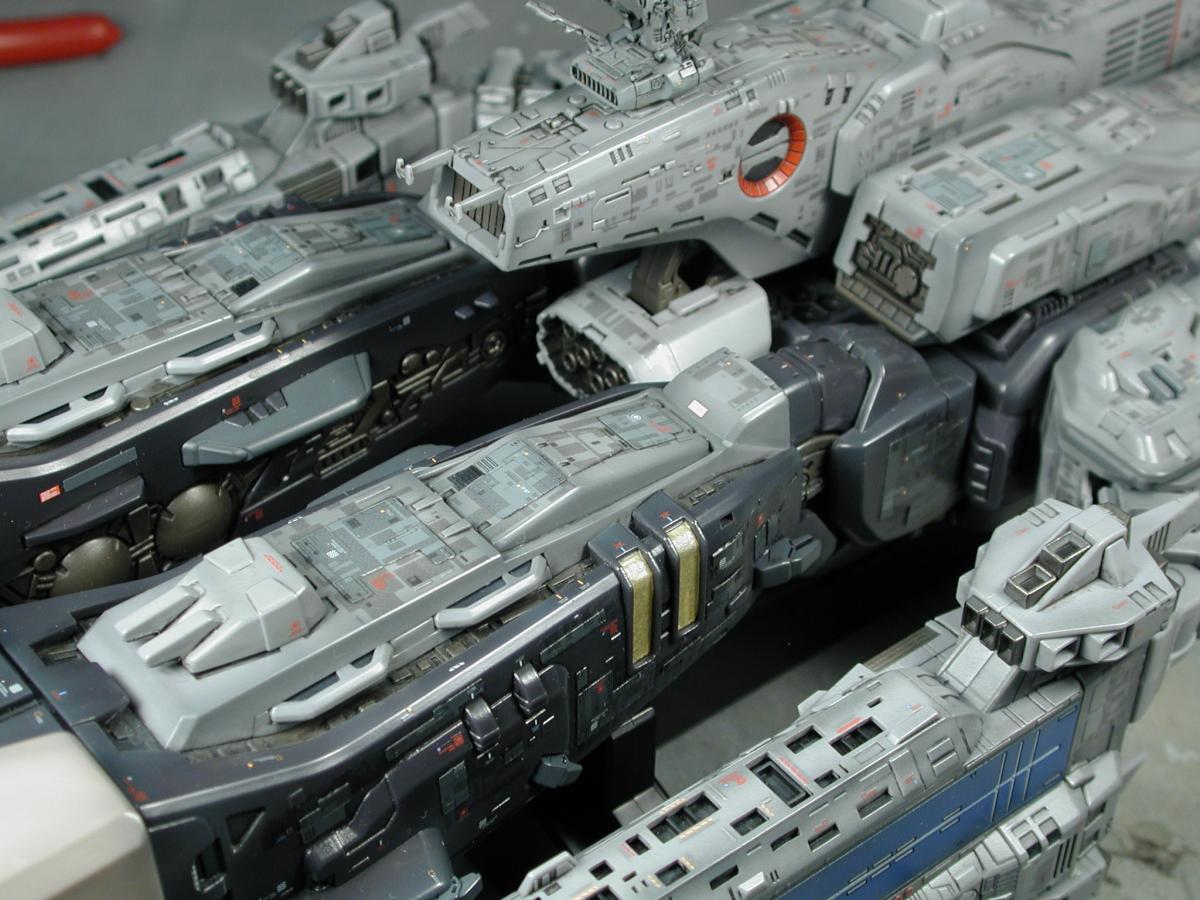
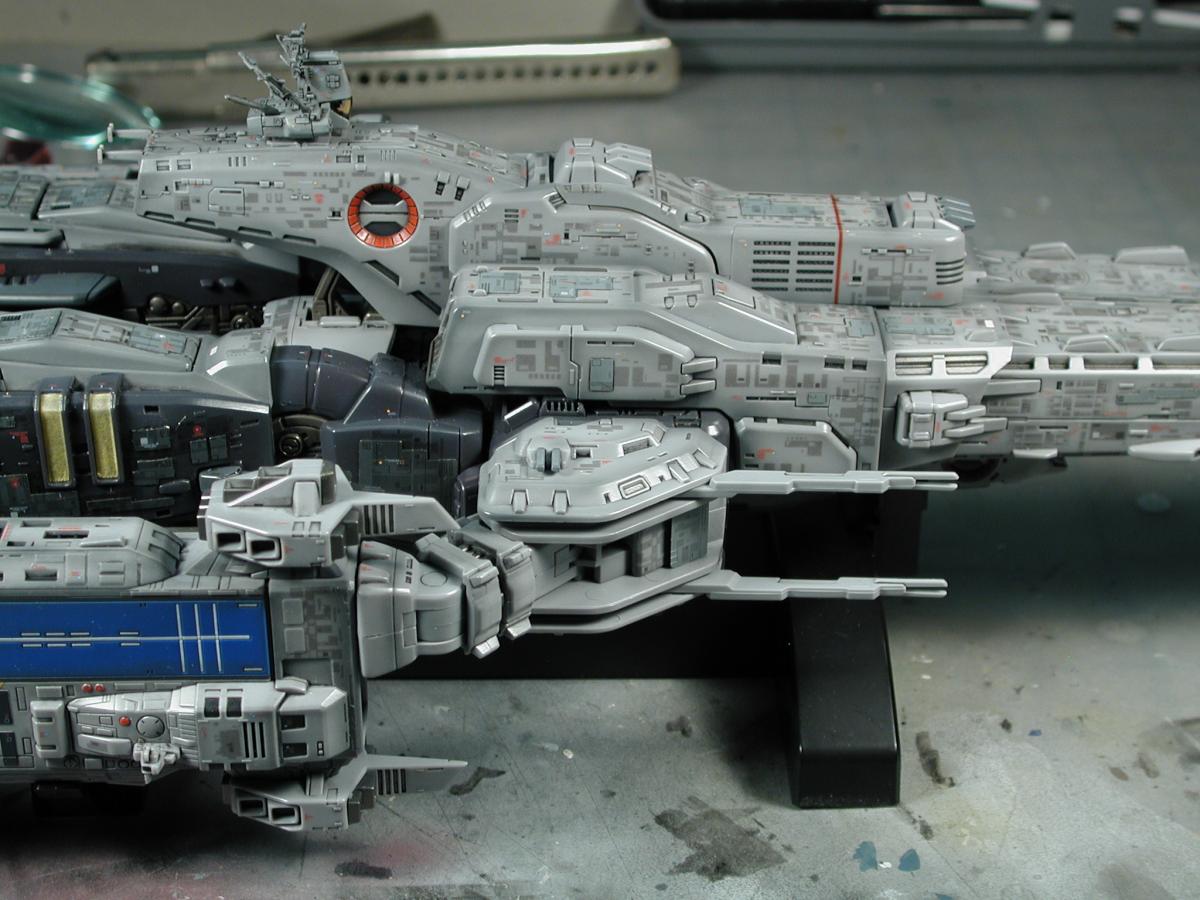
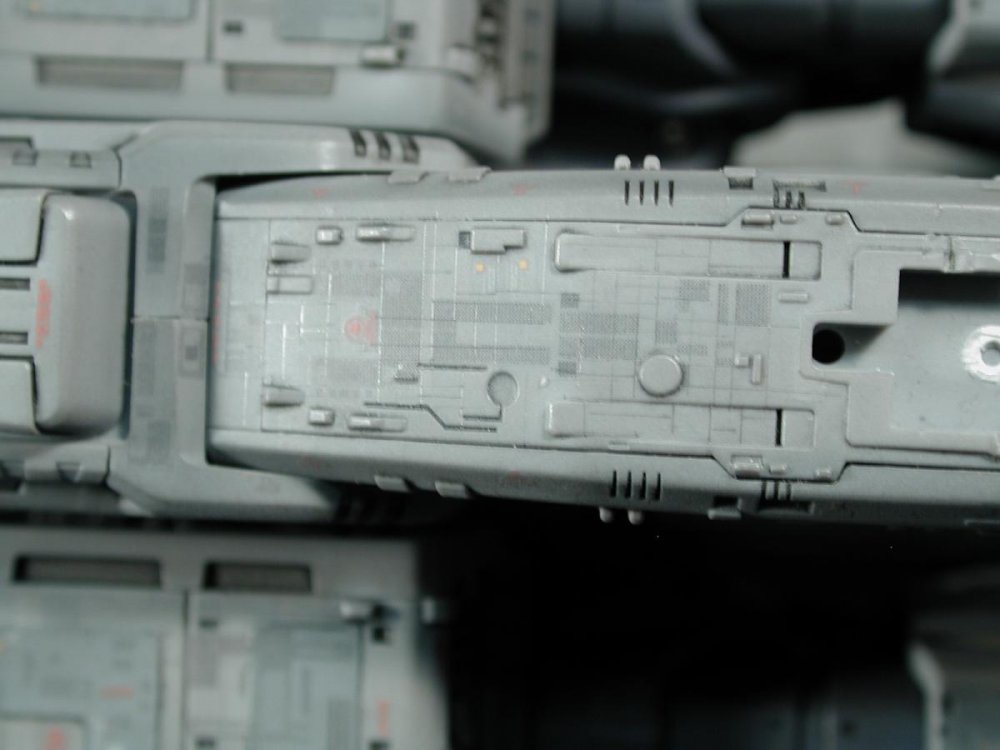
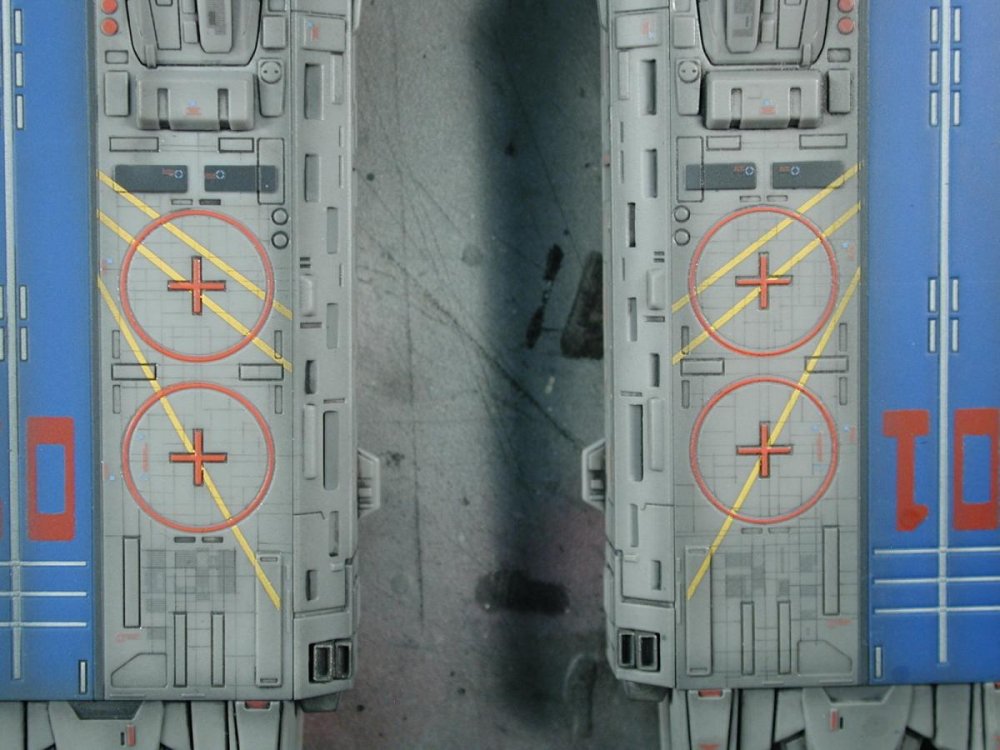
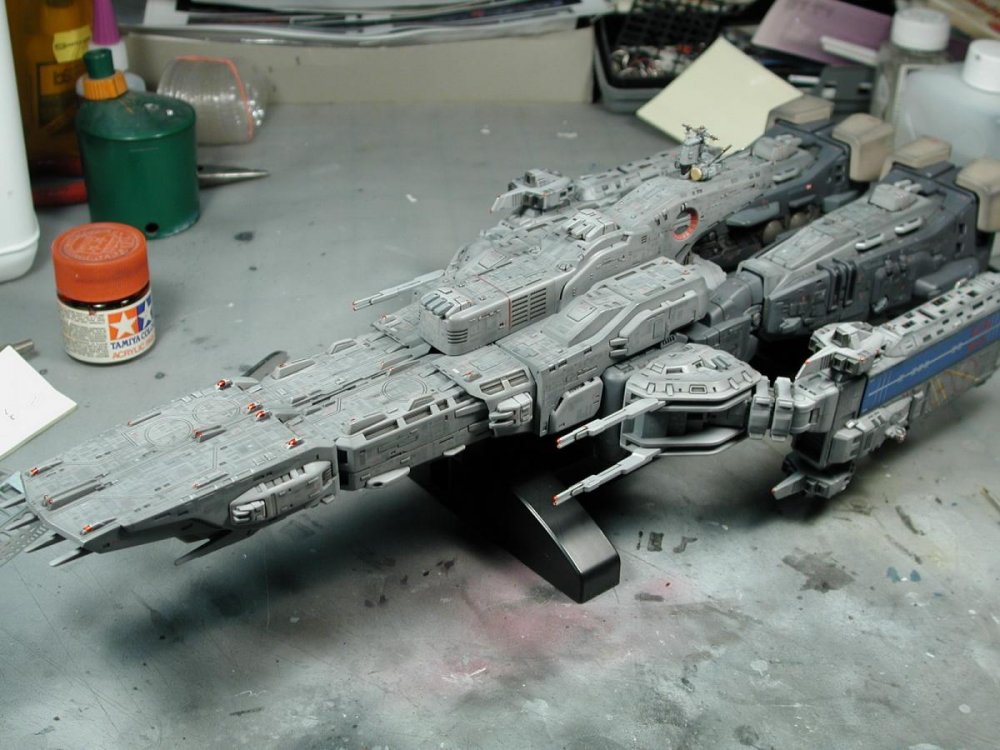
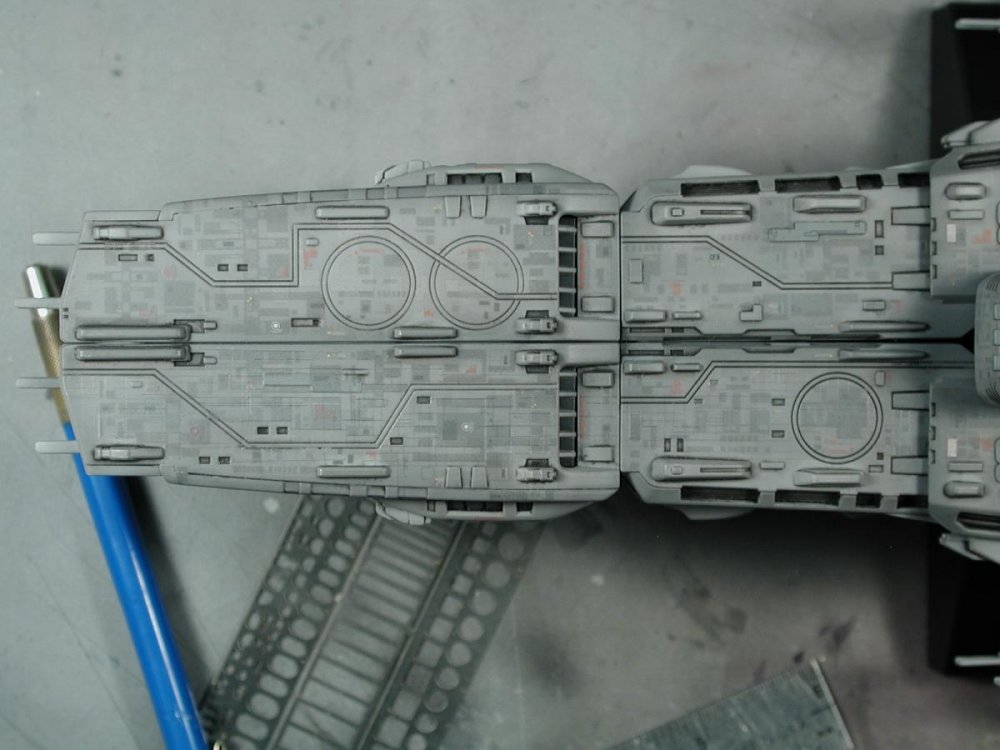
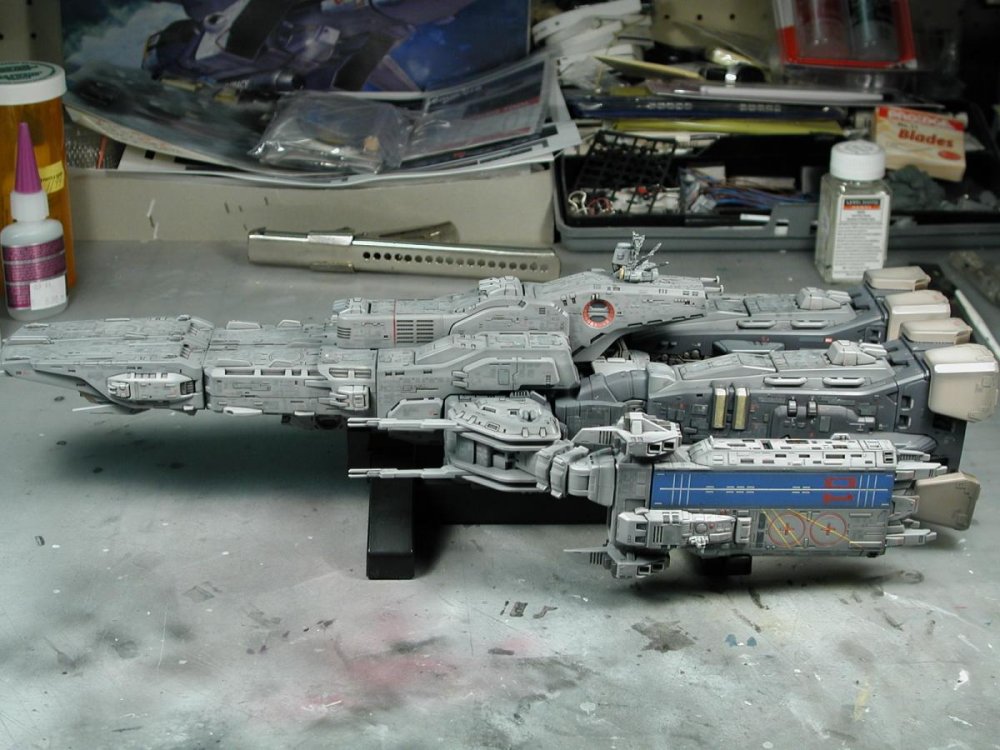
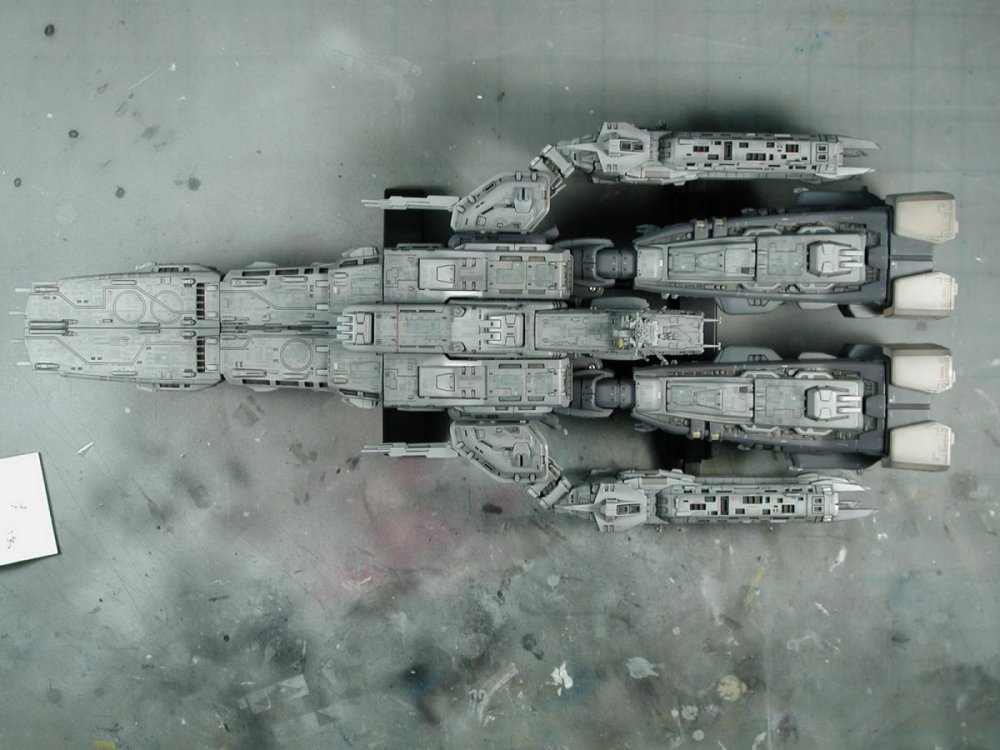
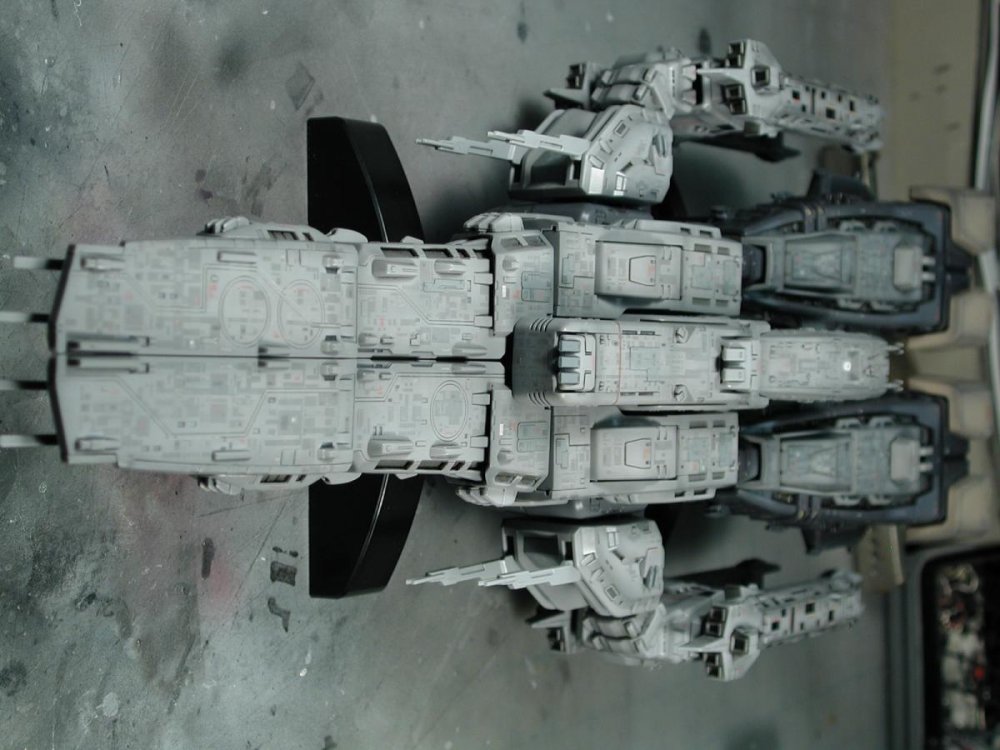
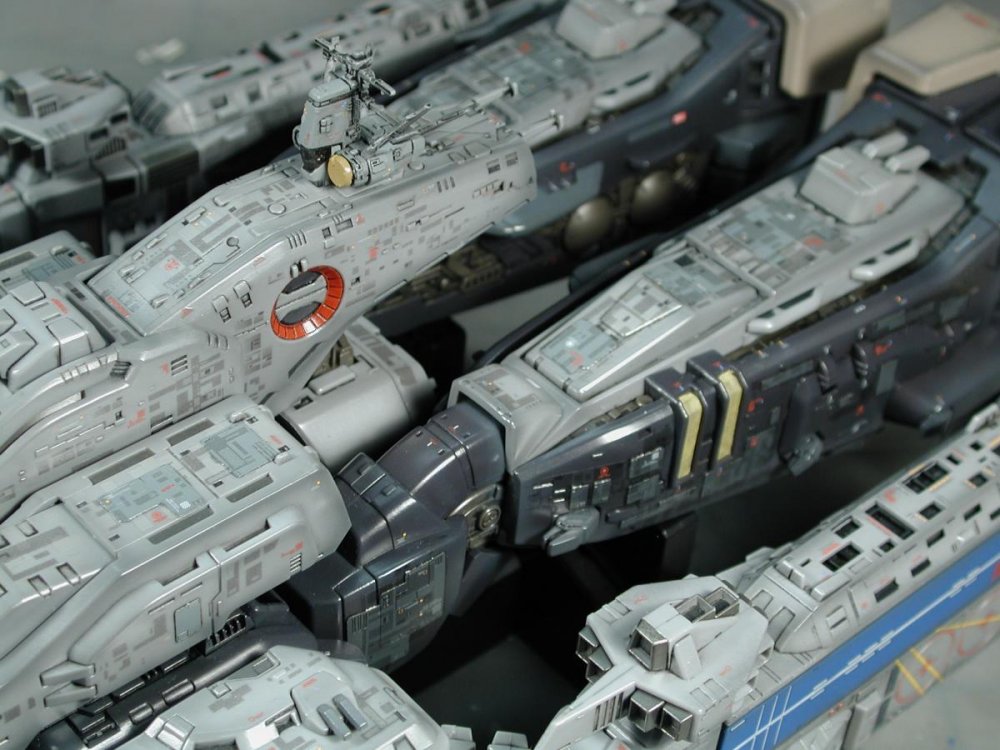
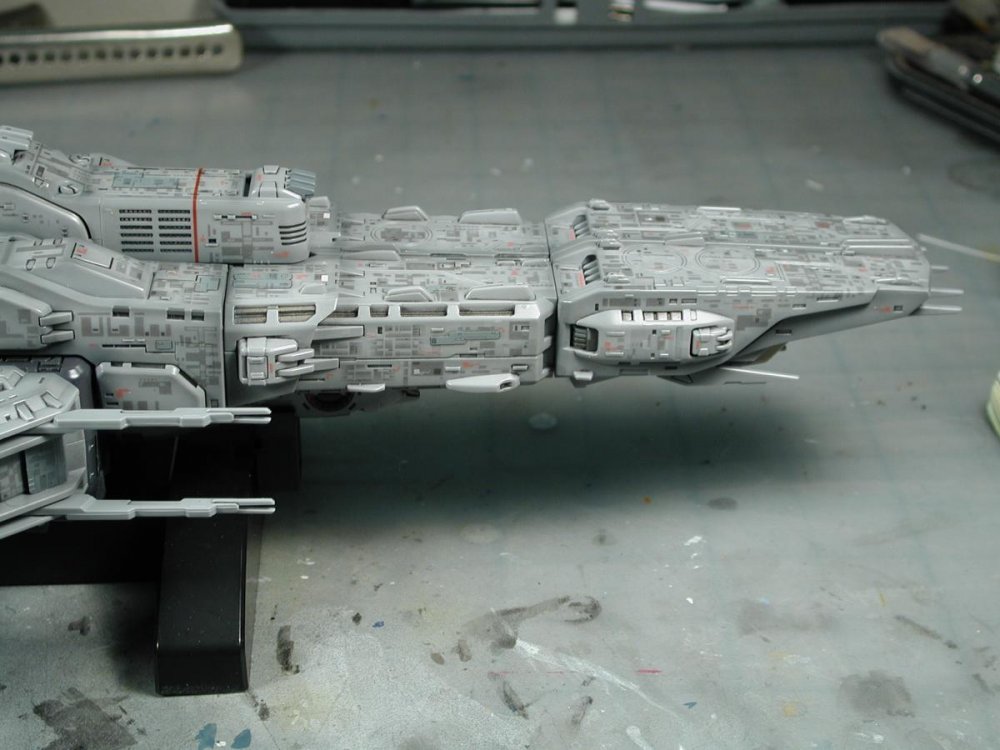
Just finished up on my last job and have a week in between jobs so I thought I'd finish up this baby! Unfortunately, I got really sick on the last day of work (just as your body slows down, it thinks its a good time to get sick!) and I've been in bed the last few days. However, as soon as I had a bit of foggy vision, I hit my bench to start decalling again! OMG!!! I have never decalled so much... - I've must of spent days and days just applying decals. The aztec panels were a huge job to cover the entire toy, now comes hundreds of these tiny warning stencils all over to give it that mottled scale look with splashes of red and white like the animation. I think its these hundreds of tiny decals that will give it a sense of scale in the end - but the process is tedious. After 3 days of decals, I thought it looked pretty good, at a point I would stop and possibly clear coat it to protect them. So I stop here to take some photos, and oh man! it doesn't look like much in the photos, especially in the full shots, it looks like I hardly decalled it at all!! So I took some close ups, but you really don't see how many decals I put in unless you're in person, it is one of those models that look really different in photos than it does in real life (or maybe I've been working too close to it!). This overall shot looks like I've done nothing!! so discouraging... I zoomed in closer and start at the front... I liked that the decals on top of the panelled decals are so small that you can't make out any words... I chose all the smallest decals I could find from those sets (they are fantastic for this application) I couldn't resist putting the bridge on, even though I'm not finished with it... There are these yellow caution stripes that I thought worked pretty well around the launch bays... Everything still has the gloss coat over it so its shiny and allows the decals to adhere better - after I will seal it in with a matte flat coat which should lighten the overall tone and blend it all in... All those odd Photo-etched panels now work themselves into the darker grey scheme a little better and the decals provided a much needed layer to tie them into the overall darker leg area... I tried to pan along the length of the SDF-1 (might work if you enlarged the web browser) I almost forgot about the underside! so many tiny pieces... Mico pieces? ;-) Final parting shot for now... Hopefully something more to post in the next 2 days!


-
Let us know how you made out? I'm curious and in the same boat too.
-
Thanks for all the feedback, I guess I watched on the sidelines as AC6 sailed by on the XBox, I can watch this AC:AH sail by too.
-
Call me old folgie! Thanks for that Amazon review... I was afraid of that. I really just want a HD version of AC5! I want to like AC:AH so badly, but the controls is a no-go for me unfortunately.
-
It's so ingrained in my consciousness that it oozes out my pores! ;-) I don't think about it that much, but it comes instinctual. Hopefully there is always a reason for it and its not just shoe-horned in there.
-
Has anyone tried this game with any type of flight stick? I know the old Ace Combat 5 HOTAS doesn't work with it. How about this one? http://www.cyborggaming.com/prod/v9stickps3.htm Although AC:AH is not on the list of compatible games - does the game have to be specifically written for the stick or will the stick just re-map the thumb controls? I'm part of the "old generation" - I can't fly with my thumbs!
-
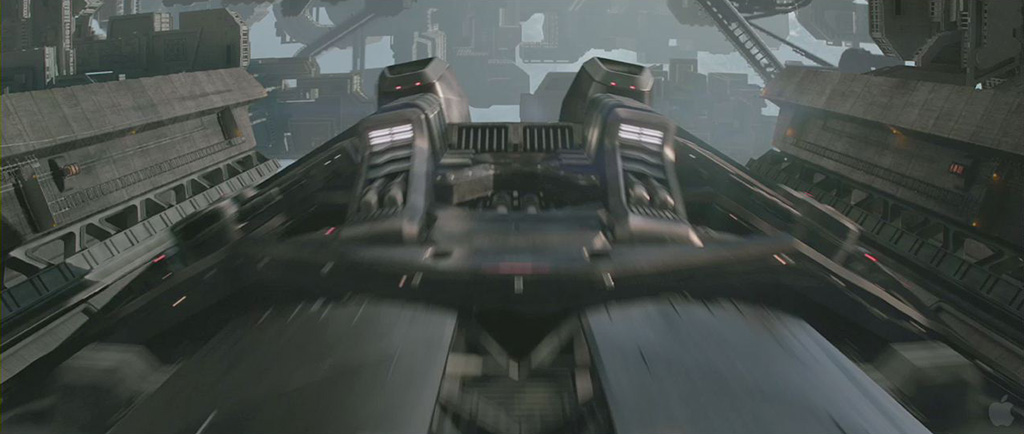
Thanks, at least it will pay for the upcomming VF-4! Did you notice the VF-1 intakes laid vertically in that screen grab of the trailer? Look for the Vernier thrusters liberally sprinkled thoughout the rest of the sets ;-)
-
Oooh! That looks great, I wonder if it will be compatible with any kind of flight stick? like this maybe? http://www.cyborggam.../v9stickps3.htm Too bad Ace Combat Assault Horizons is NOT on the list of compatibles...
-
Yep, I designed the China Fall (set and virtual).

-
ARGH!!! New trailer is up! http://trailers.appl...es/totalrecall/ I think it visually looks great! damn good design if you ask me Come on out and support a fellow MacrossWorlder! ...at least I got what I wanted out of it!

-
I would of thought they didn't charge you till the order was in? (standard practice for pre-orders) So is CD Japan charging us now prior to July 26th?!
-
+1
-
That would be my Holy Grail! It's because they are waiting for me to buy the resin version first!