wm cheng
-
Posts
4319 -
Joined
-
Last visited
Content Type
Profiles
Forums
Events
Gallery
Everything posted by wm cheng
-
Fantastic job vf_1s!! Are those the supplied stickers or did you somehow get waterslide decals? It looks great - congrats on a wonderful custom (how Yamato "should" have sold this toy!)
-
This interpretation is designed by none other than Syd Mead!!
-
Make it in Toronto!!!
-

1/48+fp's, 1/60+fp's, 1/72, 1/2k, 1/3k,1/100 and now 1/144
wm cheng replied to VF-18S Hornet's topic in Toys
You did it again! Absolute masterpieces MJ!! They're not toys anymore... they're models... congrats. -
What happened? I did mine and even the "post shading" in pencil and it worked out great. Was there a specific part what wouldn't come out like a painted surface? Did you press too hard with a really hard lead and etched into the surface?
-
What shop is AE?
-
Hey, that's a shot from my set!
-
1/48+fp's, 1/60+fp's, 1/72, 1/2k, 1/3k,1/100 and now 1/144
wm cheng replied to VF-18S Hornet's topic in Toys
RIGHT BACK AT YOU MJ!! What a great community we have here. -
I used some 1/72 Hasegawa VF-1 spare decals - they are a tad bit too small IMHO, but the 1/72 VF-0 skull & crossbones were just a bit too big. I looked at some of my spares box decals for the VF-103 squadron jolly rogers for F-14 in 1/72 and those skull & crossbones were a tiny bit big. Thanks to your adapter EXO. The black stand is temporary, I'm in the process of switching over all my Bandai Action Bases to the clear/translucent ones, so I don't know what I'll do with the adapter colour yet - the clear bases look less noticeable in a glass shelved case.
-
1/48+fp's, 1/60+fp's, 1/72, 1/2k, 1/3k,1/100 and now 1/144
wm cheng replied to VF-18S Hornet's topic in Toys
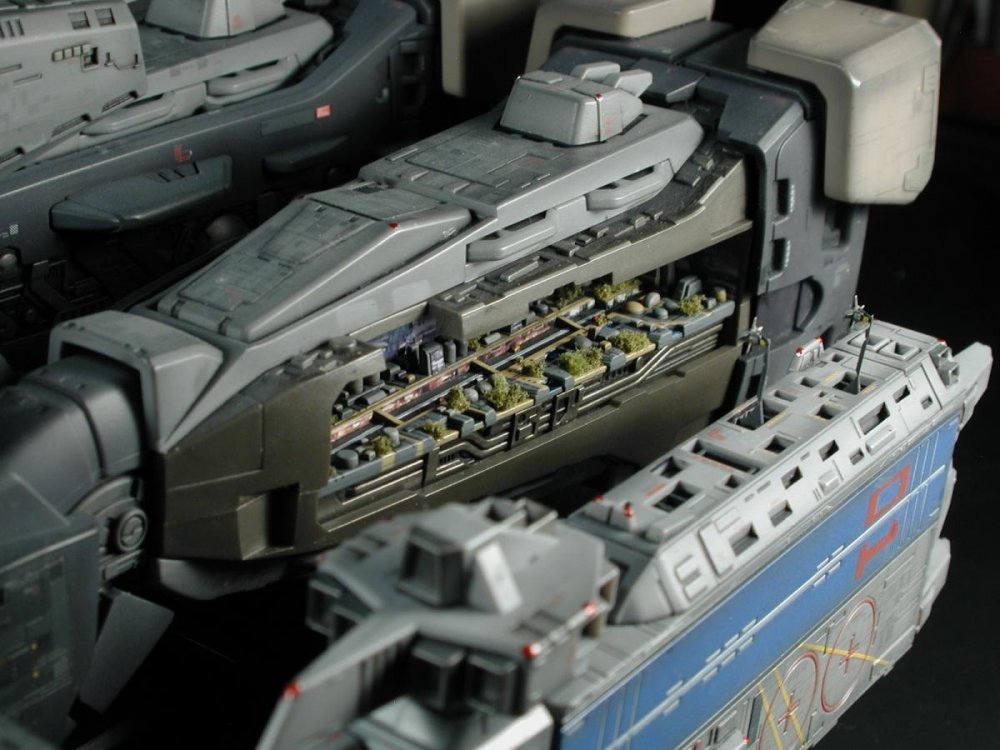
Beautiful! The LEDs in the engines look fantastic. Did you put LEDs in the city? Absolutely gorgeous. -
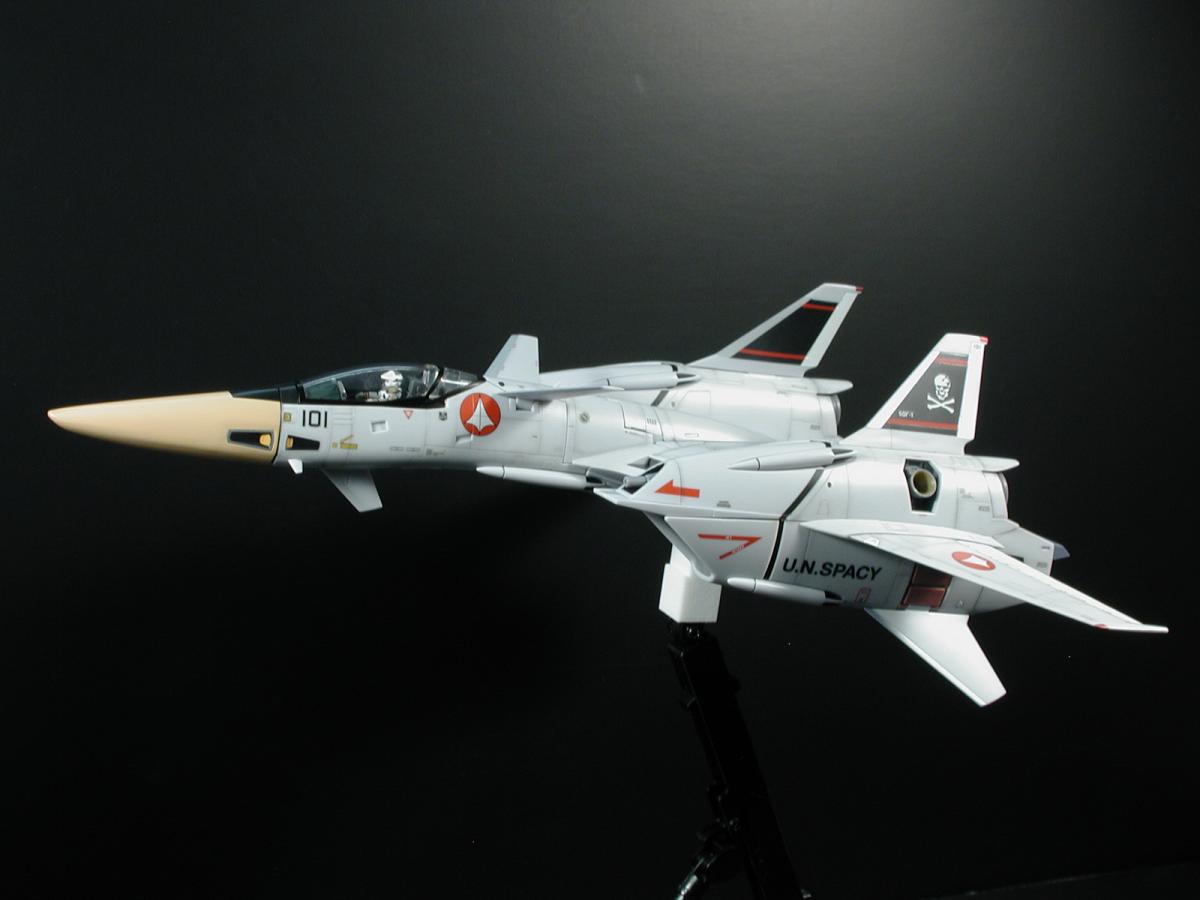
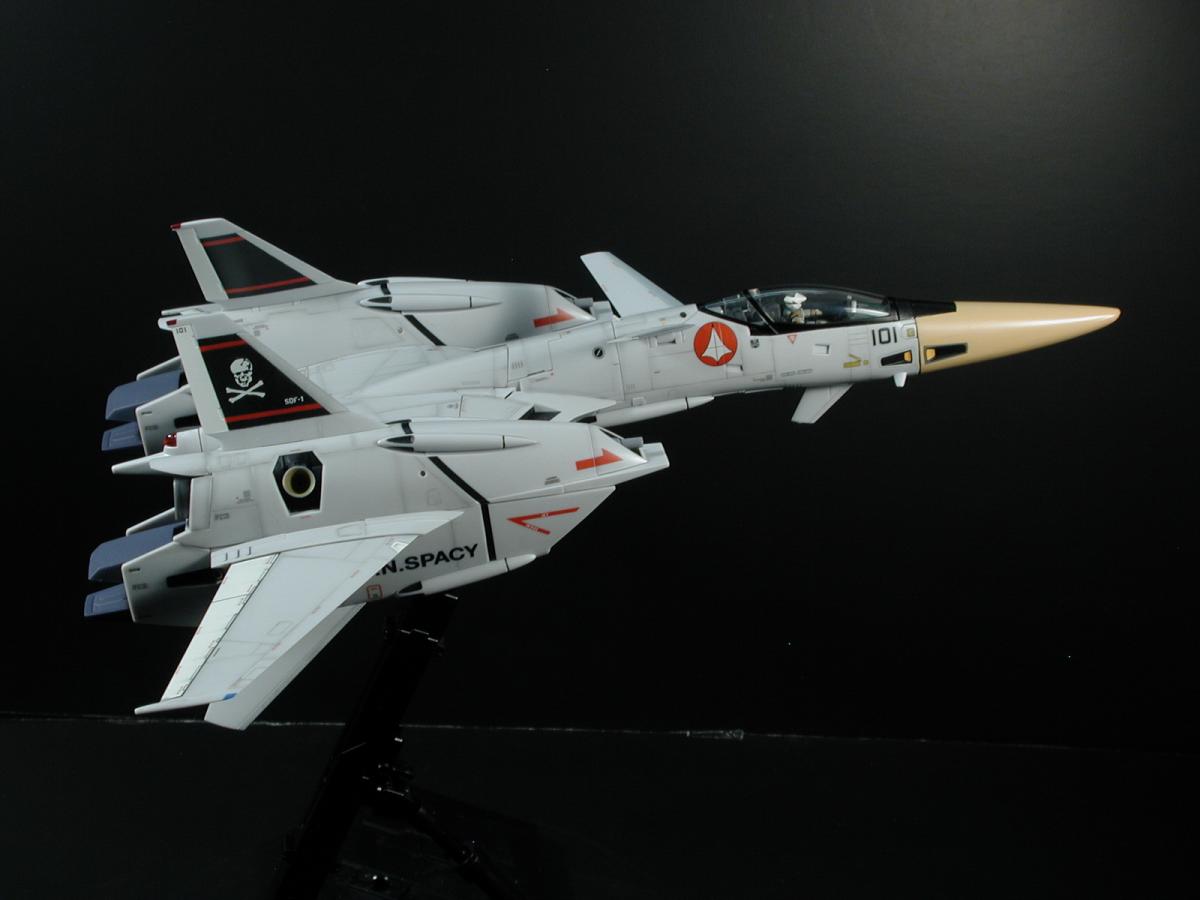
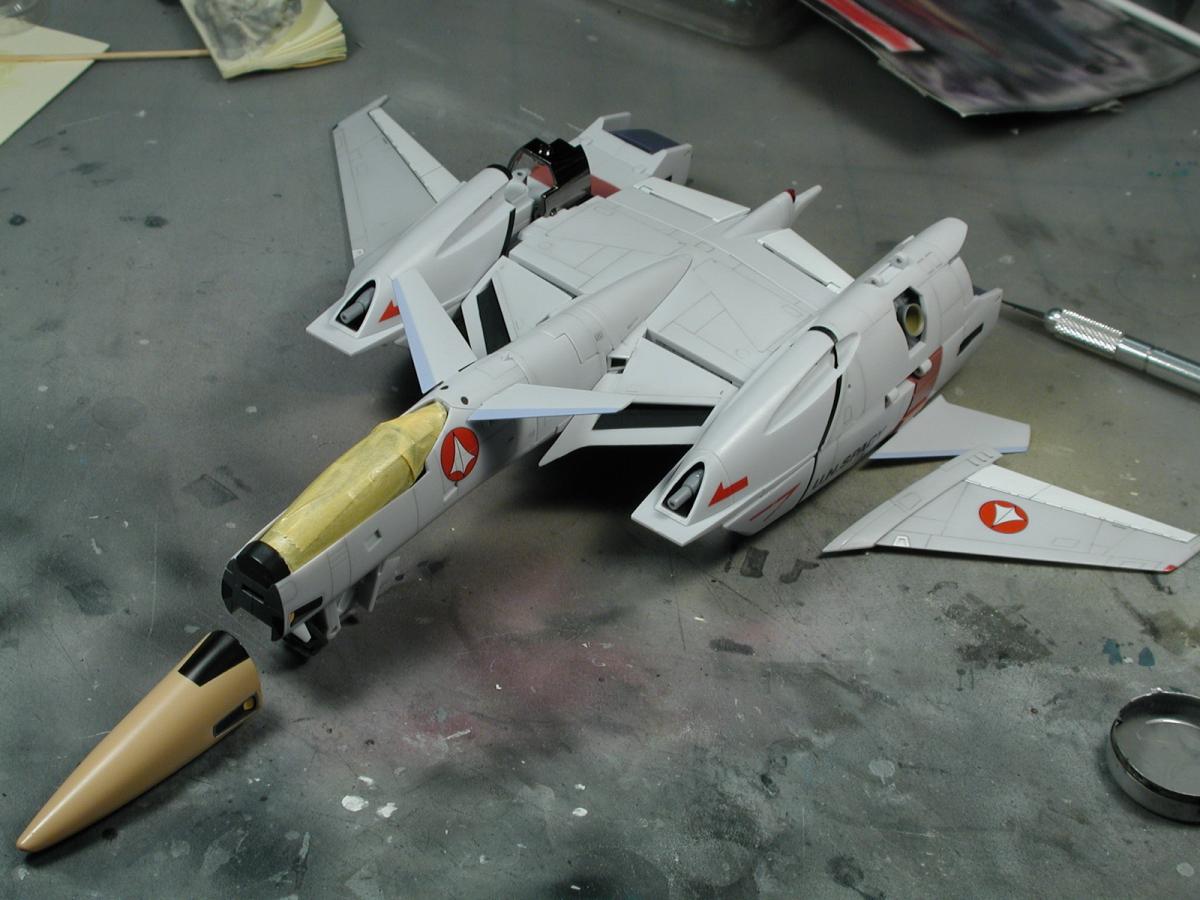
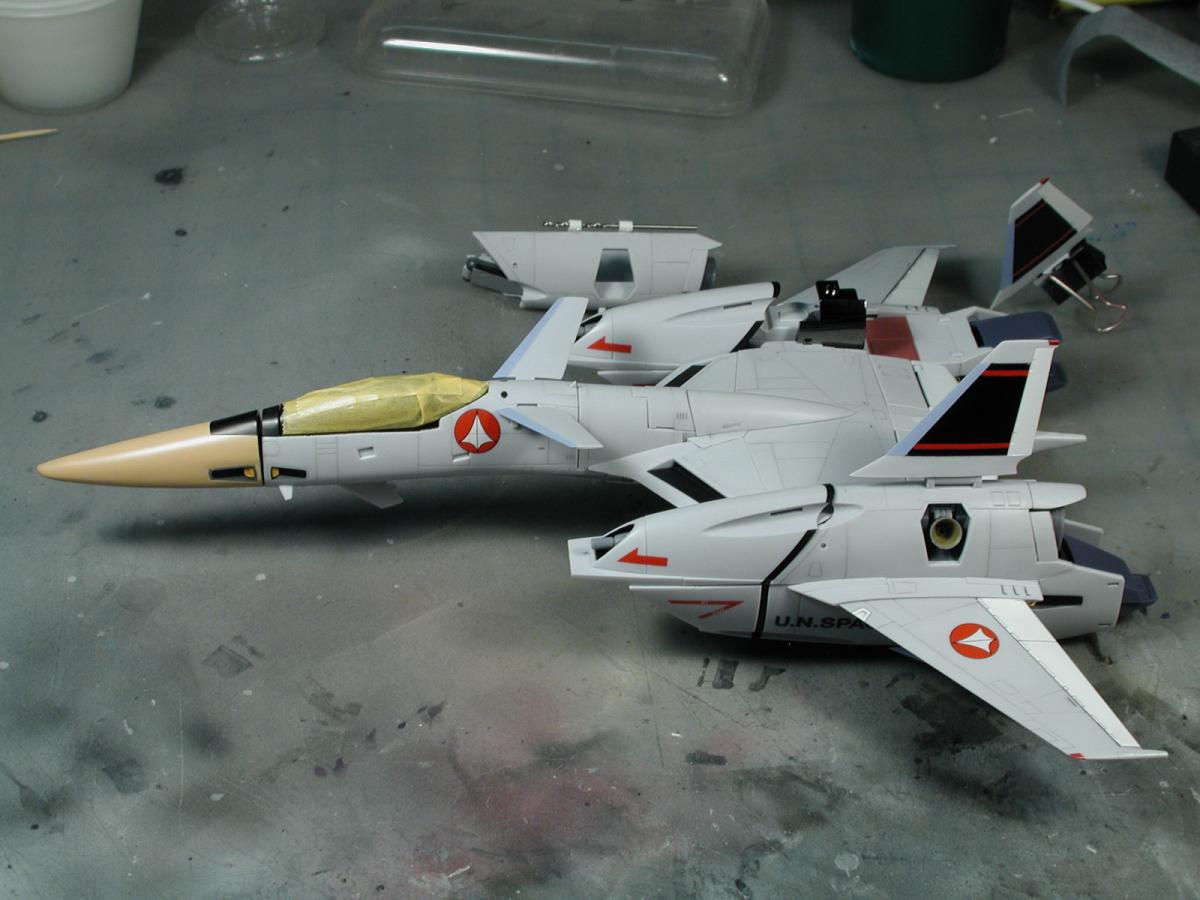
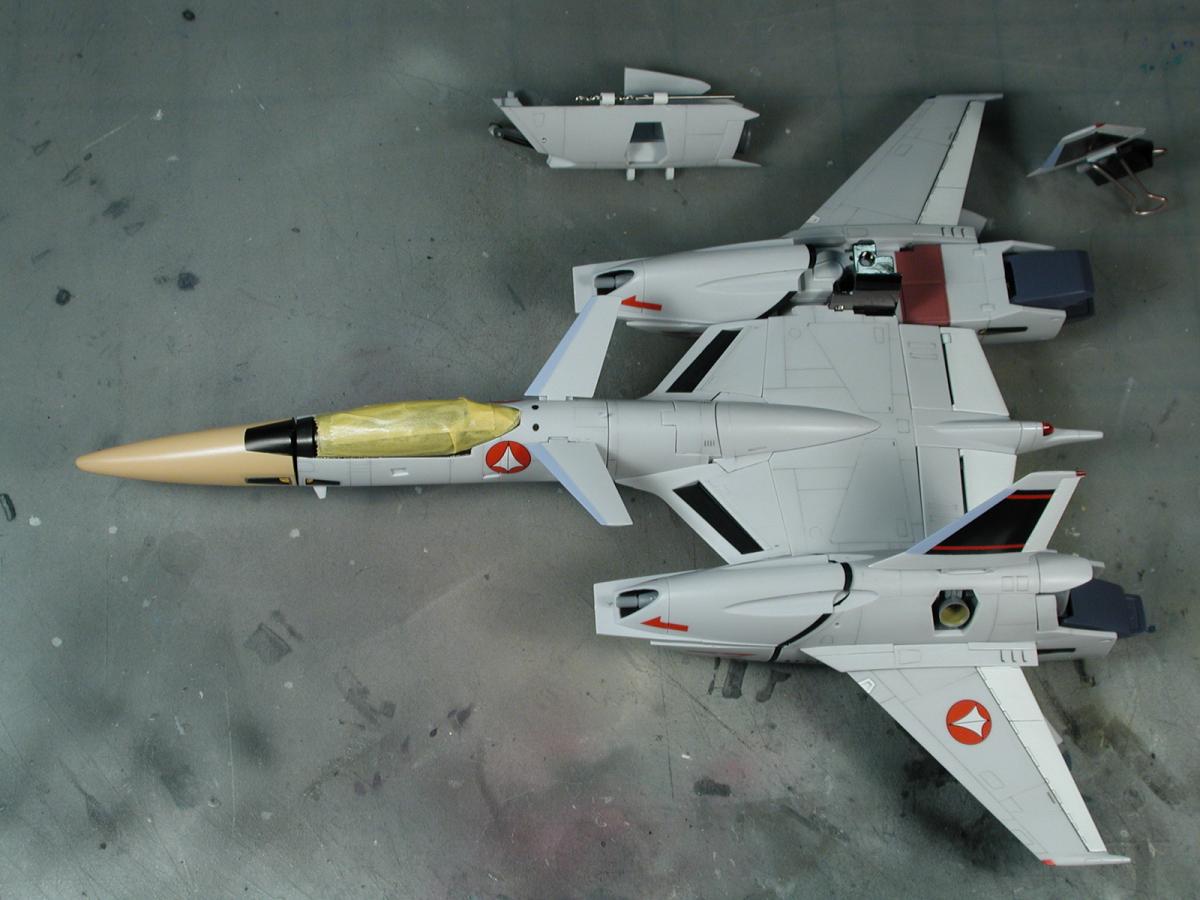
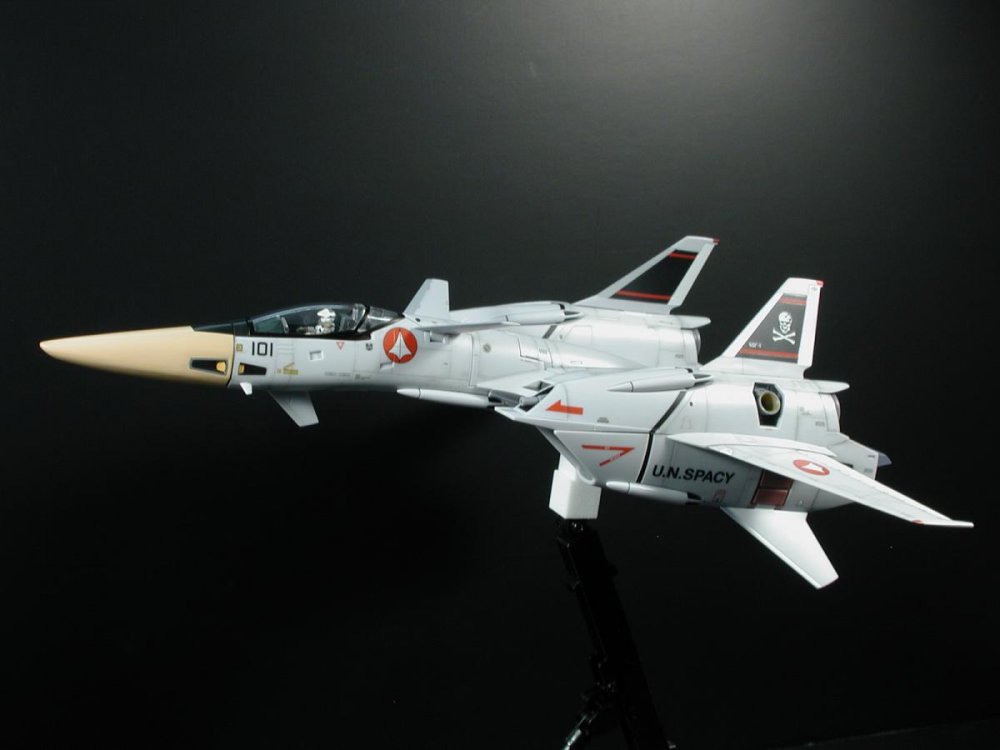
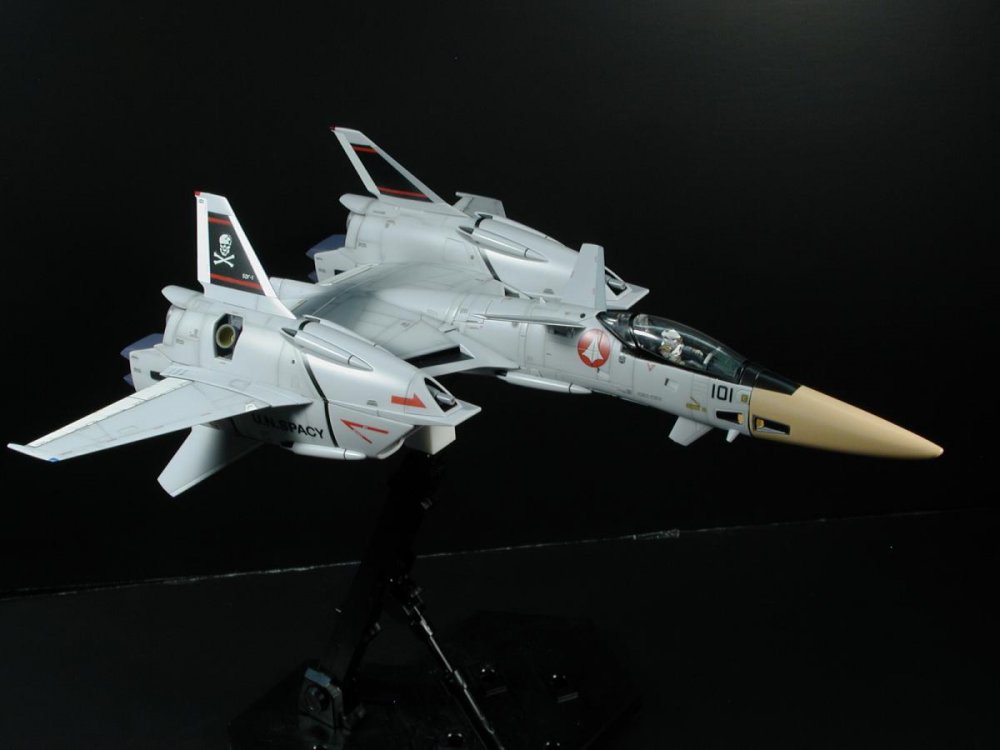
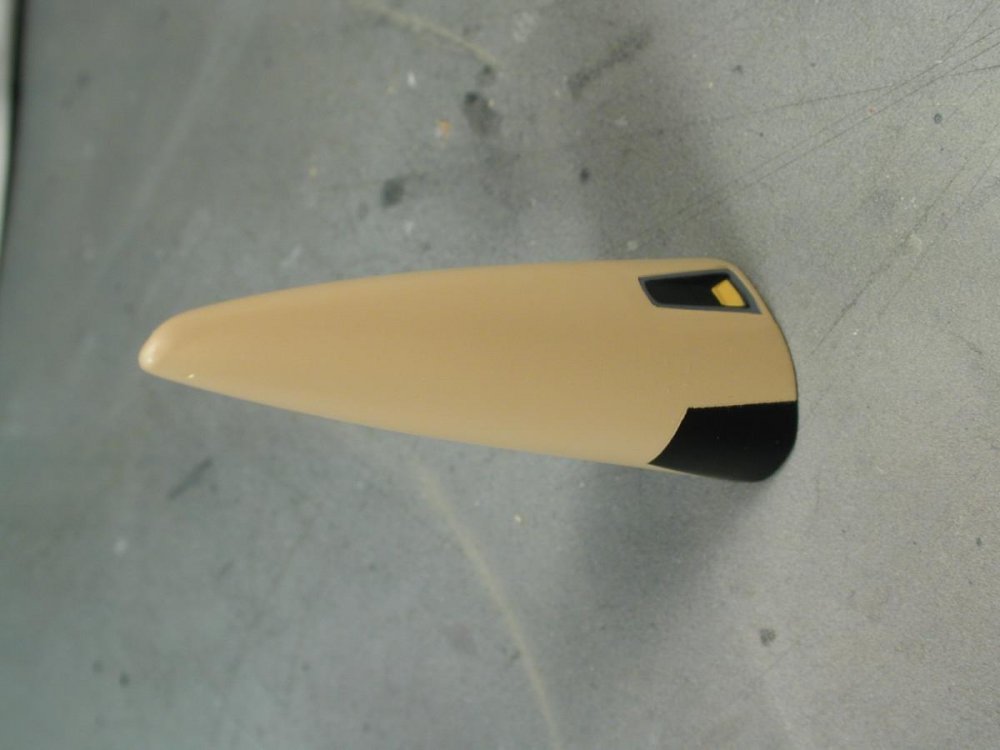
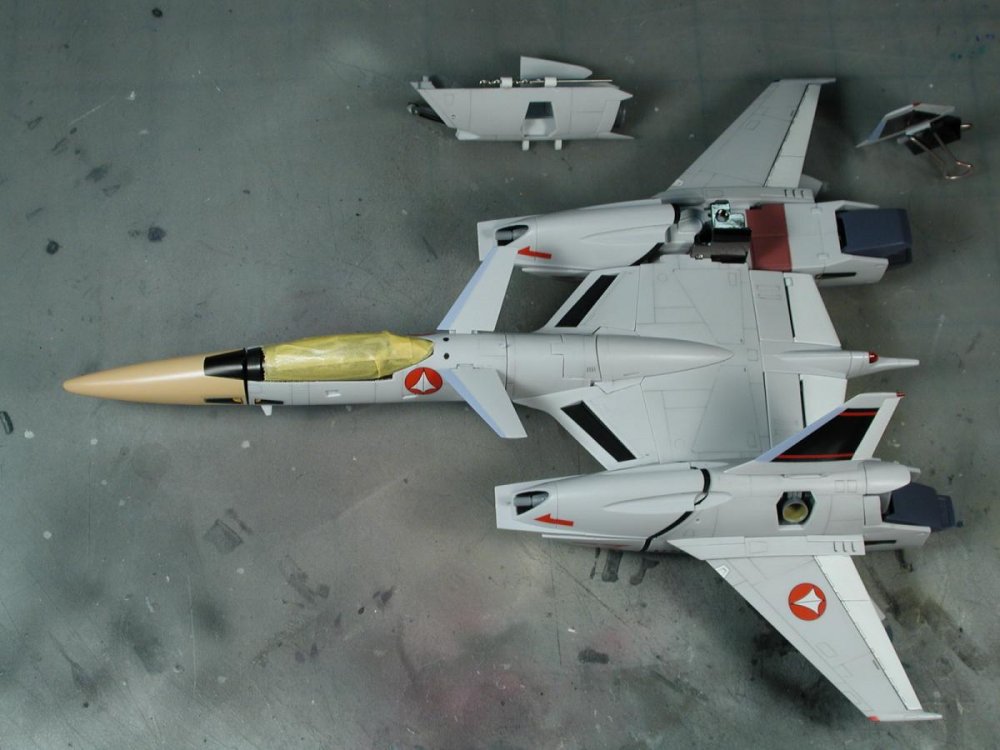
I was going to get Radome Tan, but when I saw it at the hobby shop, it was too light, it would look great against a white background as it was frequently the case with the old 70's Tomcats, but I didn't think Radome Tan would show up too well next to the grey of the VF-4G, so I opted for the ModelMaster Enamel Tan instead. Its a shade darker and I think stands out better from the grey of the plastic.
-
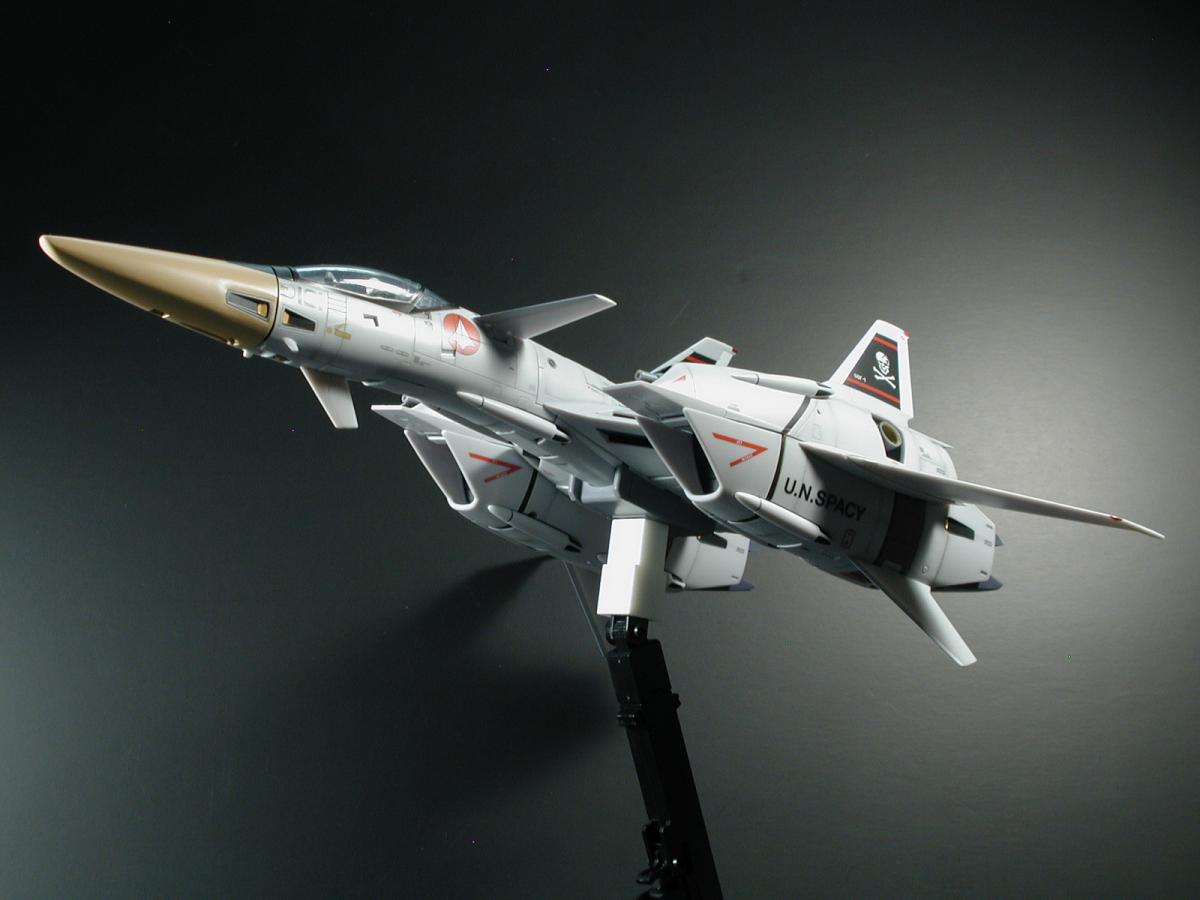
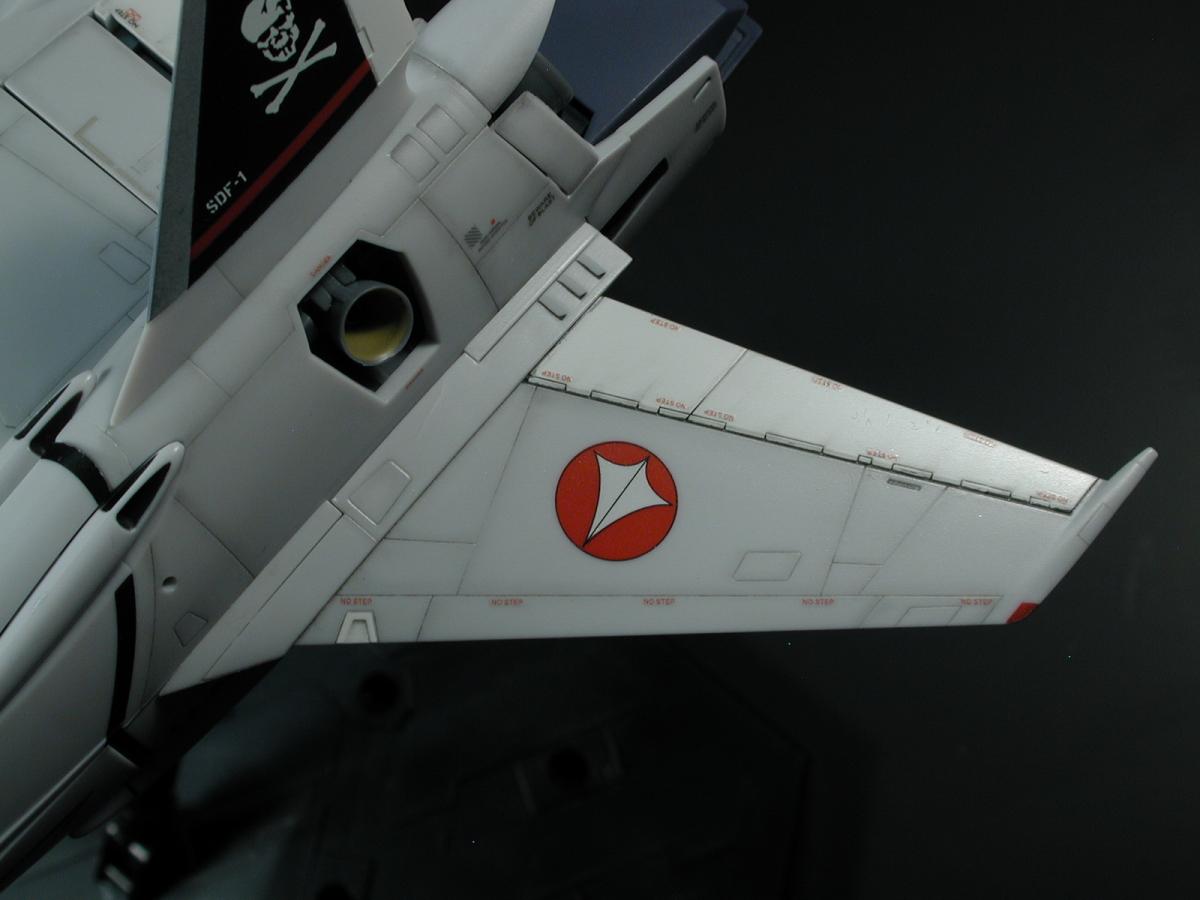
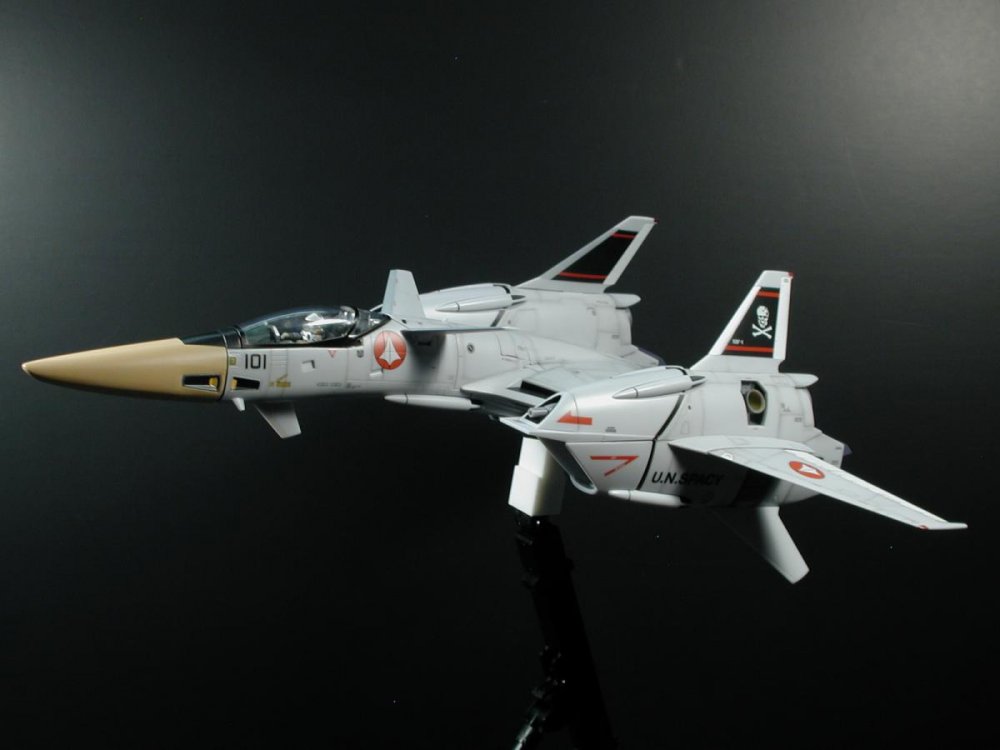
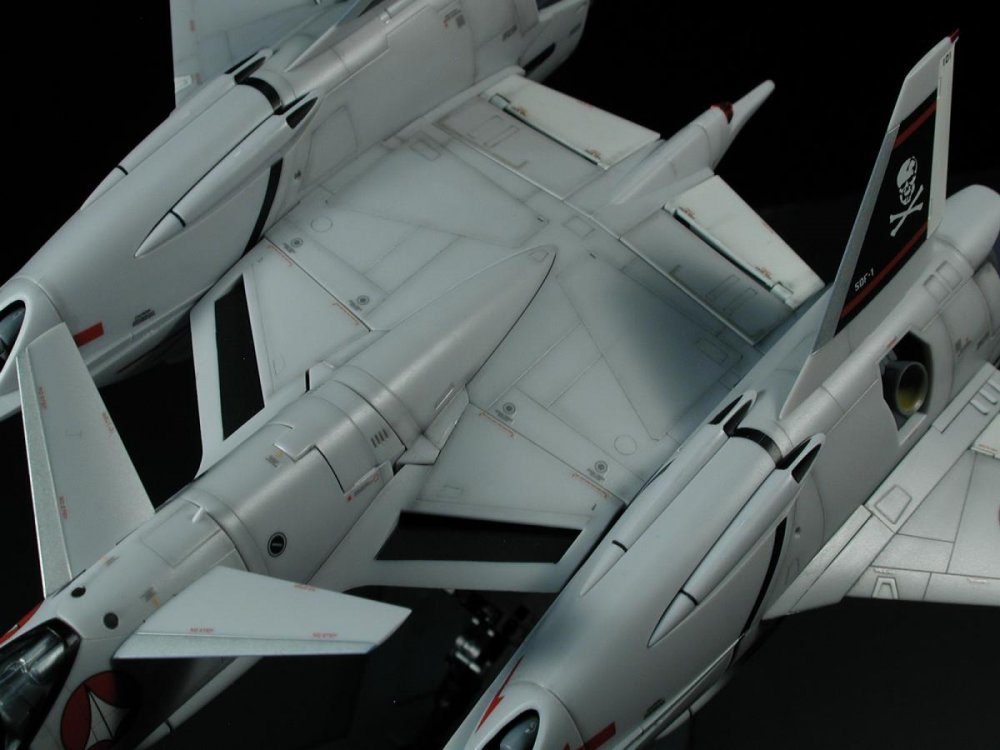
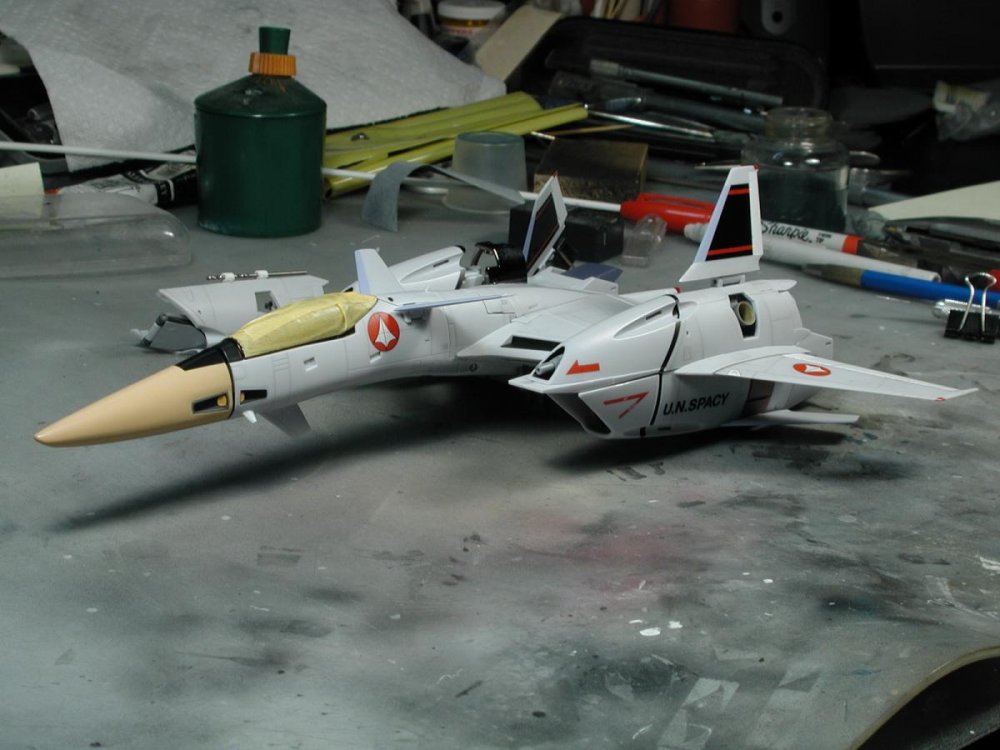
Thanks everyone for the kudos! It seems like I've been waiting for this bird for forever, and I'm really glad I just had a little break between jobs to do this one up. No one should worry about weathering it up, by using a pencil and smudge stick, you can always erase it if you don't like it, or by using an oil wash, if you don't like it, just wipe it off with some varsol and a paper towel. Try it out, its easier than you think, and I usually use methods that allow me to "experiment" in case I don't like it. I used waterslide decals, I didn't use the stickers (as I find the film too thick). That's why I used "SDF-1" - I don't have any "Megaroad-01" decals which I would have preferred if the font was right - somehow I don't see getting opaque white Megaroad-01 waterslide decals anytime soon. I wished I had the white H. Ichijo for the black canopy rails too, but I didn't have any spares at the moment. I wish I could print my own white decals. You can get smudge sticks at any art supply store, its just really tightly rolled up paper into a tube. It comes in several diameters and you can shave it down with an exacto knife to any tip shape you want. It's used for pencil sketch shading. While you're there, you should pick up some grey kneadable erasers too, they're little rectangles like plastercine or clay that you can mold into any shape, they are great for picking up excess graphite or erasing the shading. I get some graphite that's usually leftover at the bottom of my rotary mechanical pencil sharpener, dab my smudge stick into it, then draw a bit onto a scrap piece of paper to remove the excess graphite and "sketch" and trace over the existing panel lines, concentrating on the corners and going in the direction of the airflow. I do this directly onto the bare plastic toy (before the decals). Then I decal and of course some rubs off during the handling for the decal process, so I then darken and redo any areas that have come off in my hands during the decal process. Also you can gauge how dark to make it better once the decal are on to balance it out. Finally once you've darkened logical areas such as access panels, engine nacelles and the like, protect it all with a clear-coat - I used ModelMaster Acryl Semi-gloss - its a perfect match for Yamato's plastic (maybe on the slightly duller/matte side which is more realistic). I clear coat protected most of the weathered areas and the decal areas to seal them in and protect them, but left the clear coat off on the undersides or wherever it doesn't need protection as the more you have on, the more chances it could get scraped off. I left the red on the legs because I thought it would go better than the brown (which I thought a little weird - hardly ever see brown on a navy jet). Since I wasn't doing the back head panel and tailcone in tan nor the whole bird in white, its already off-cannon enough. Plus if I did that leg panel in brown, then I'd have to do the intakes in brown too (which would make the forearms look odd in the Battroid mode) and the foot/nozzles should be brown too. Thanks for commenting everyone!
-
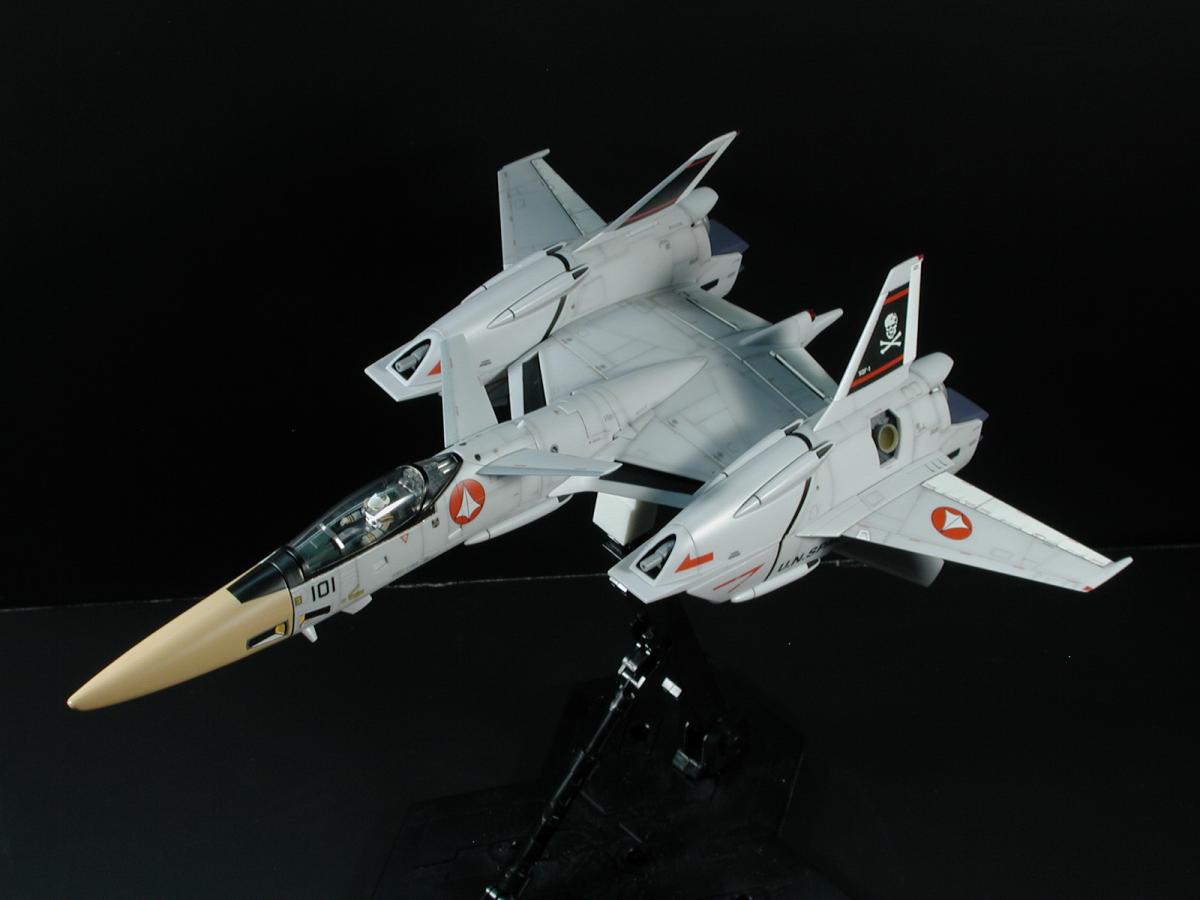
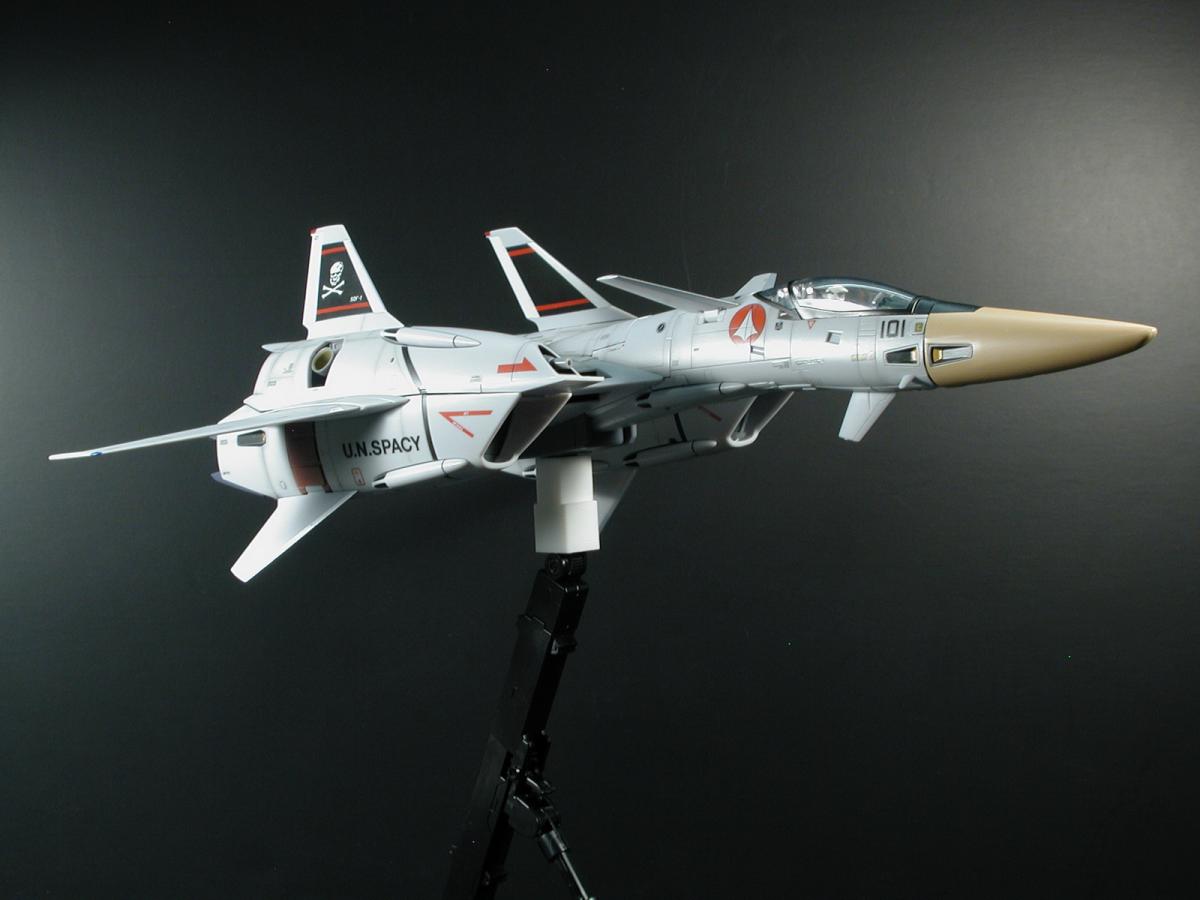
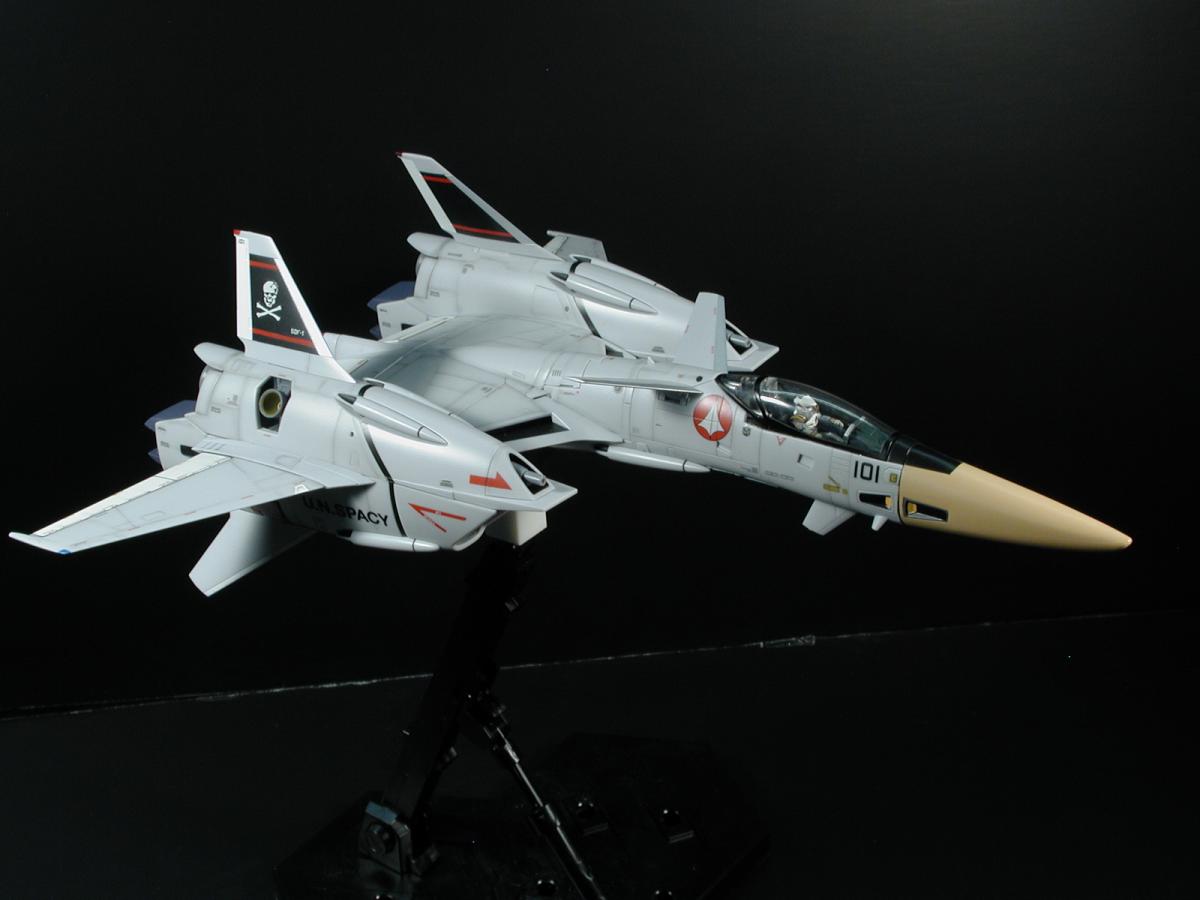
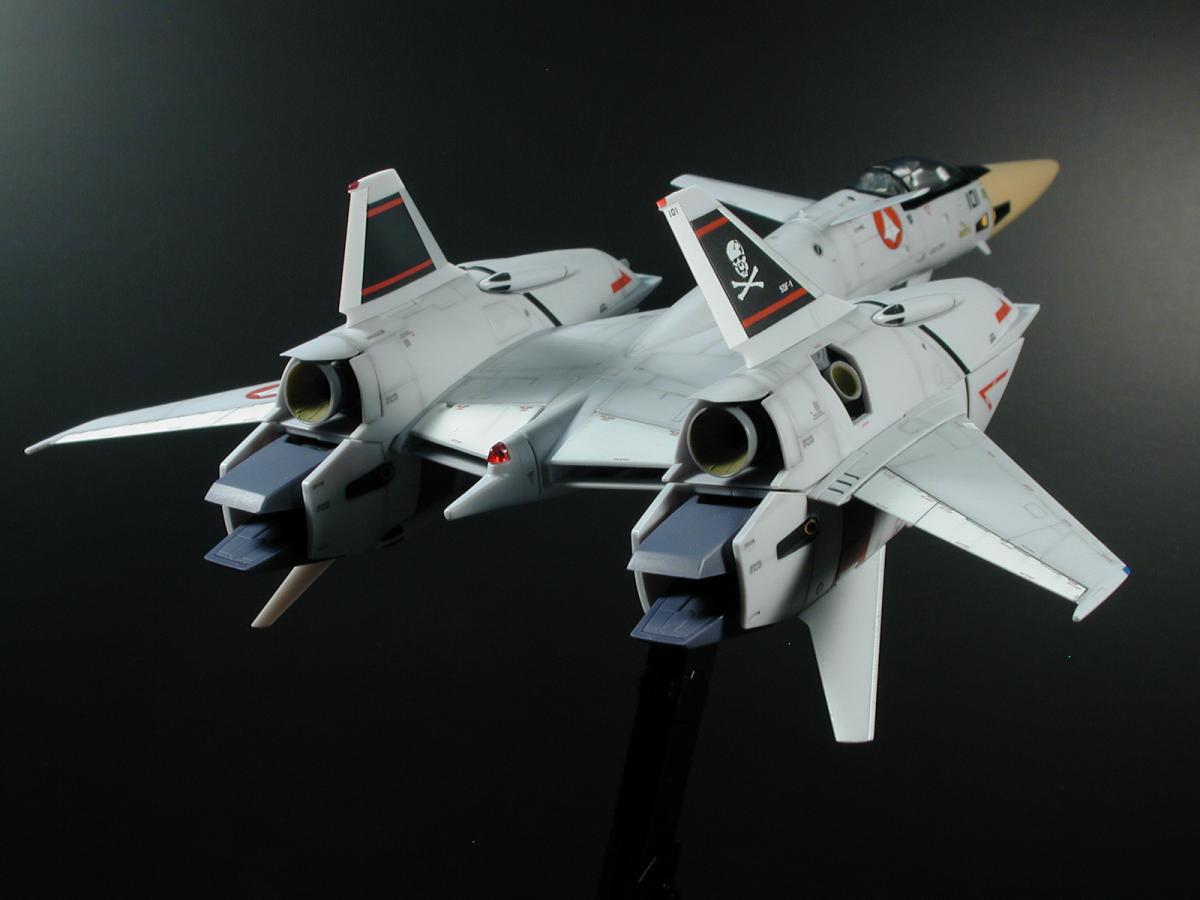
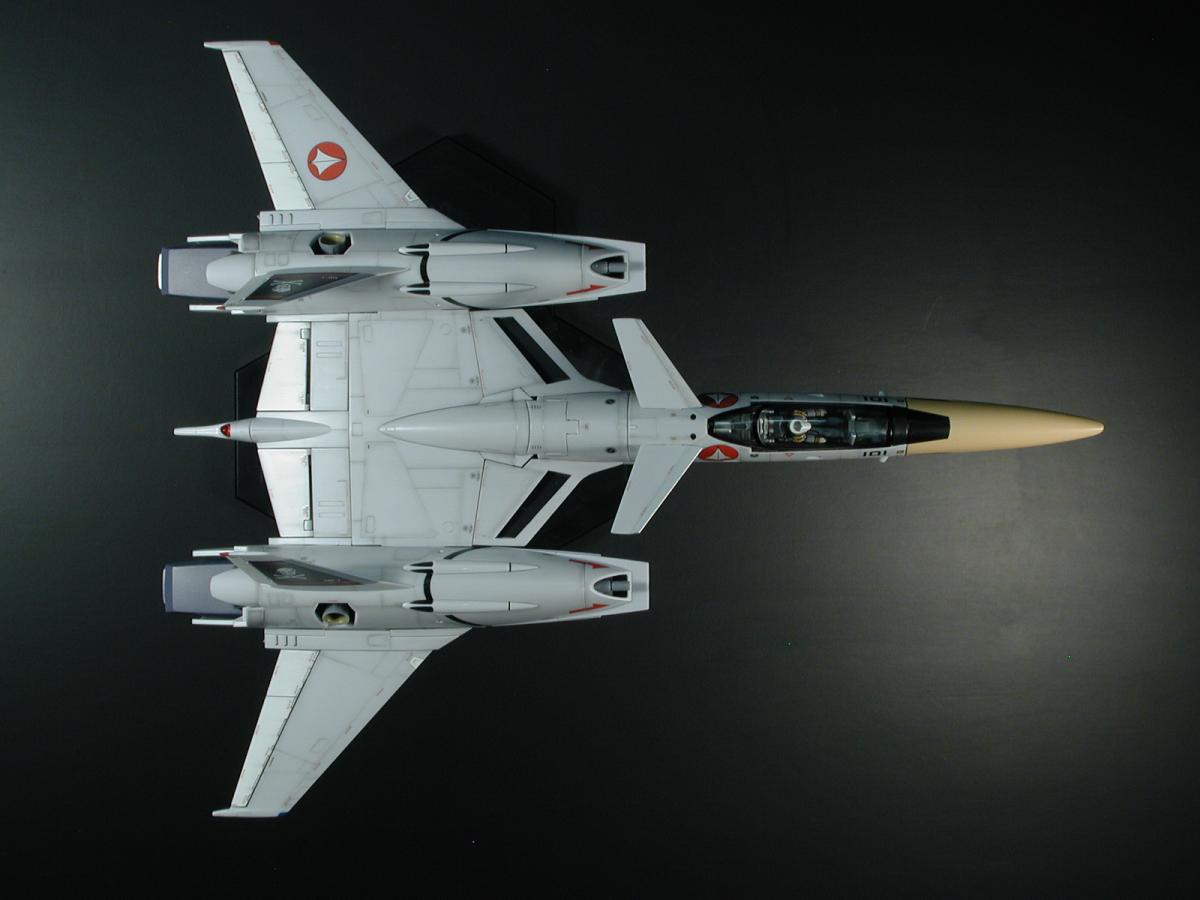
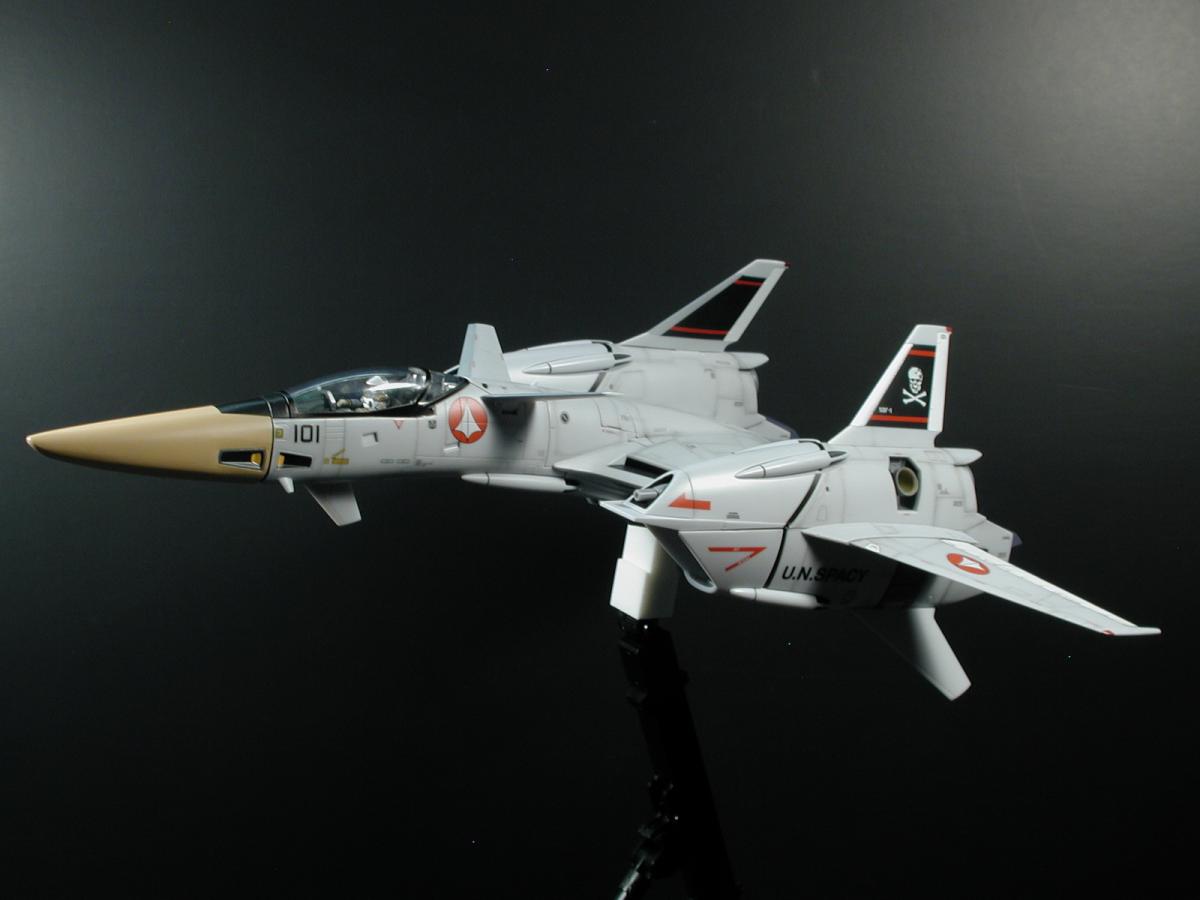
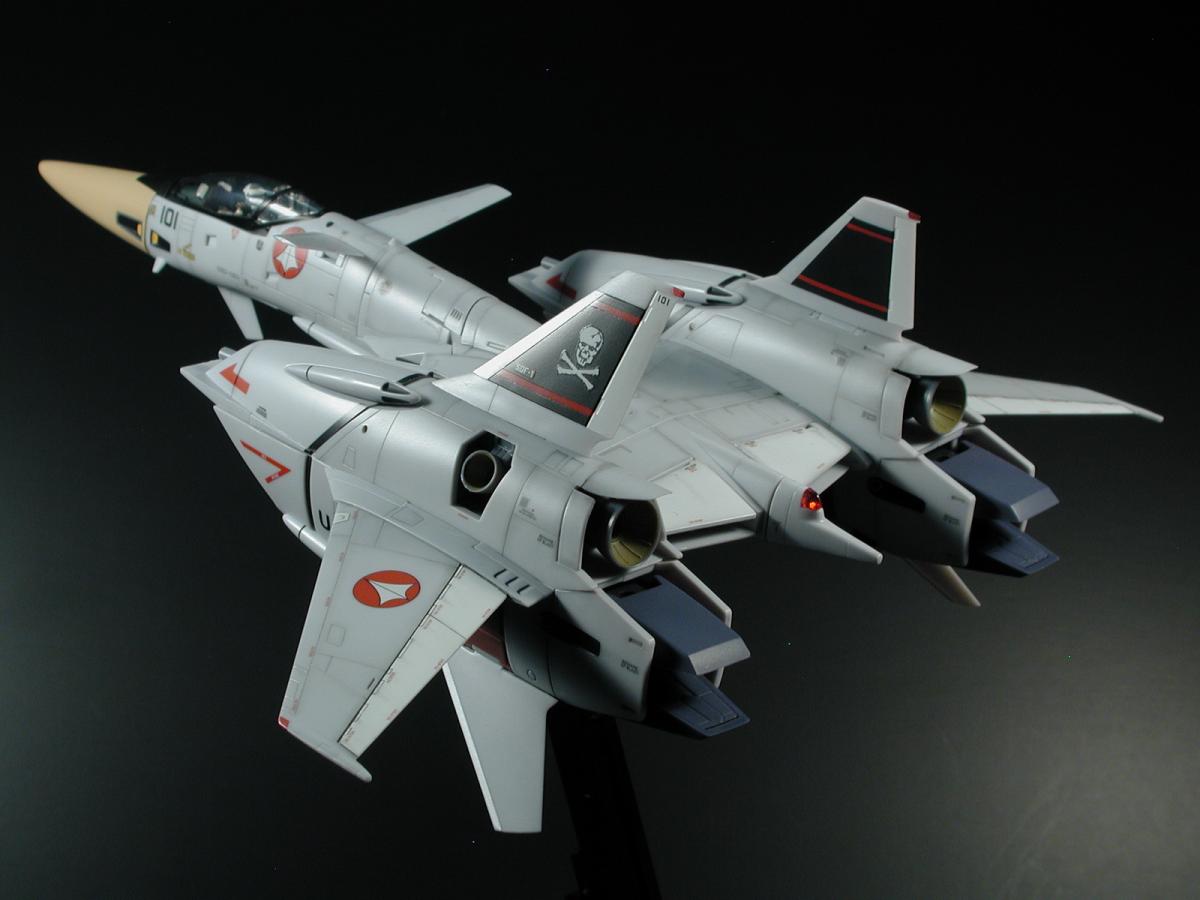
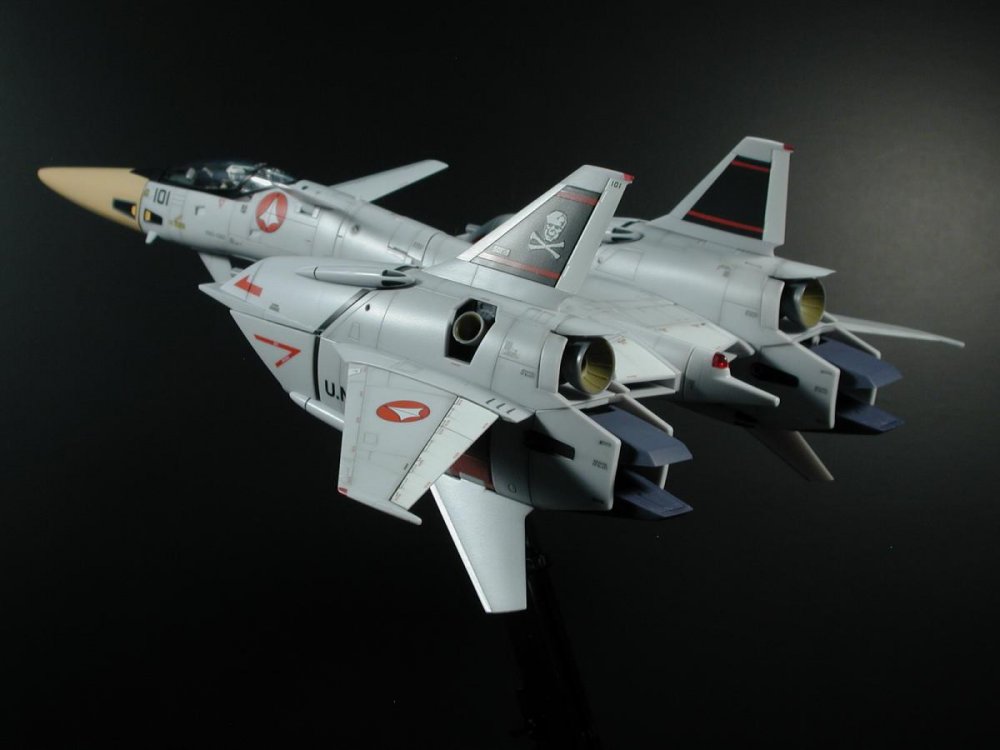
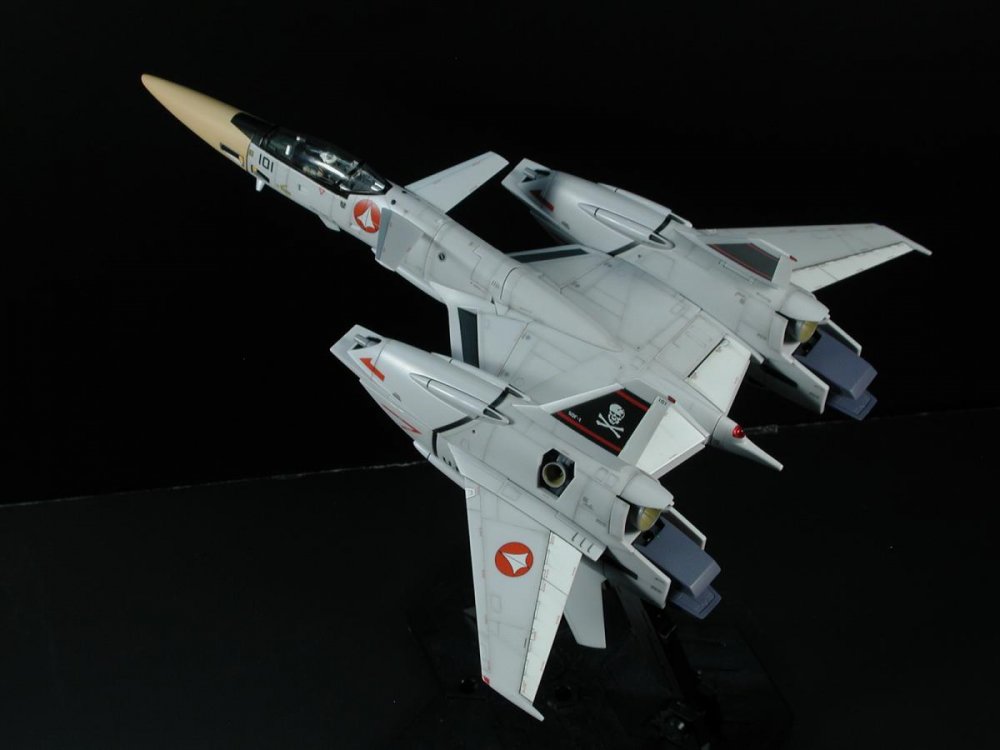
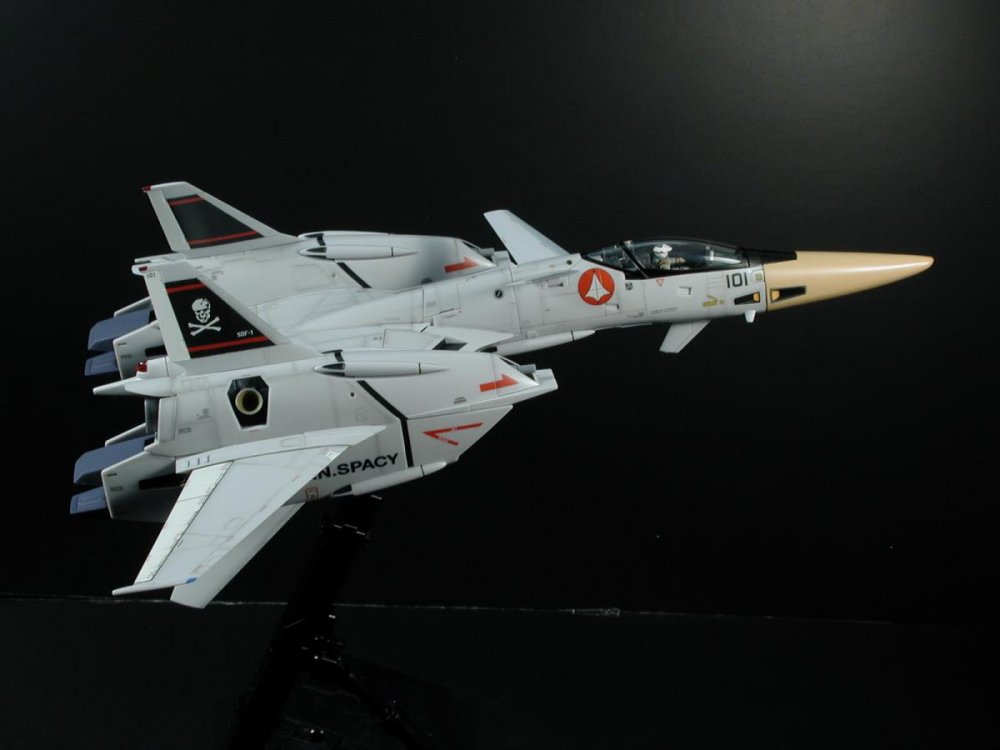
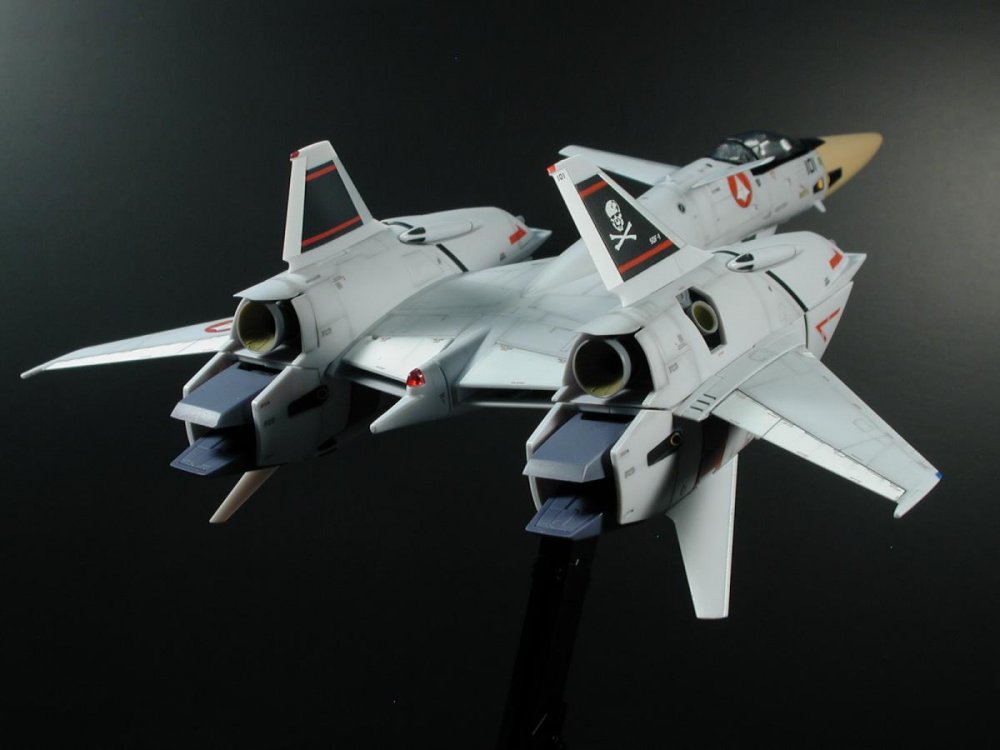
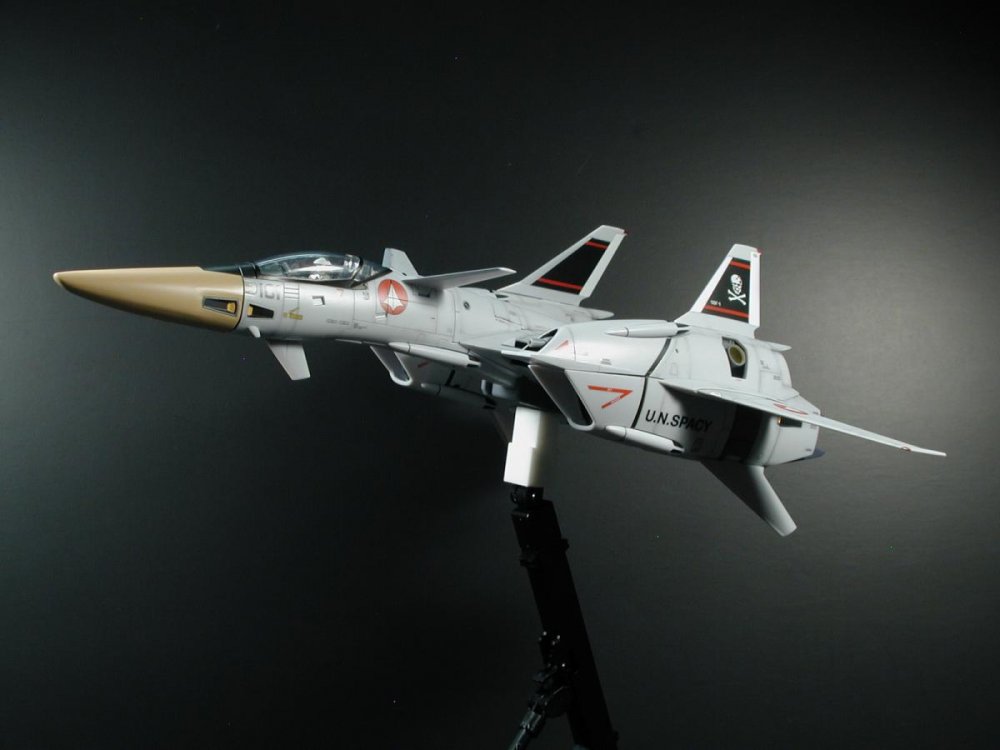
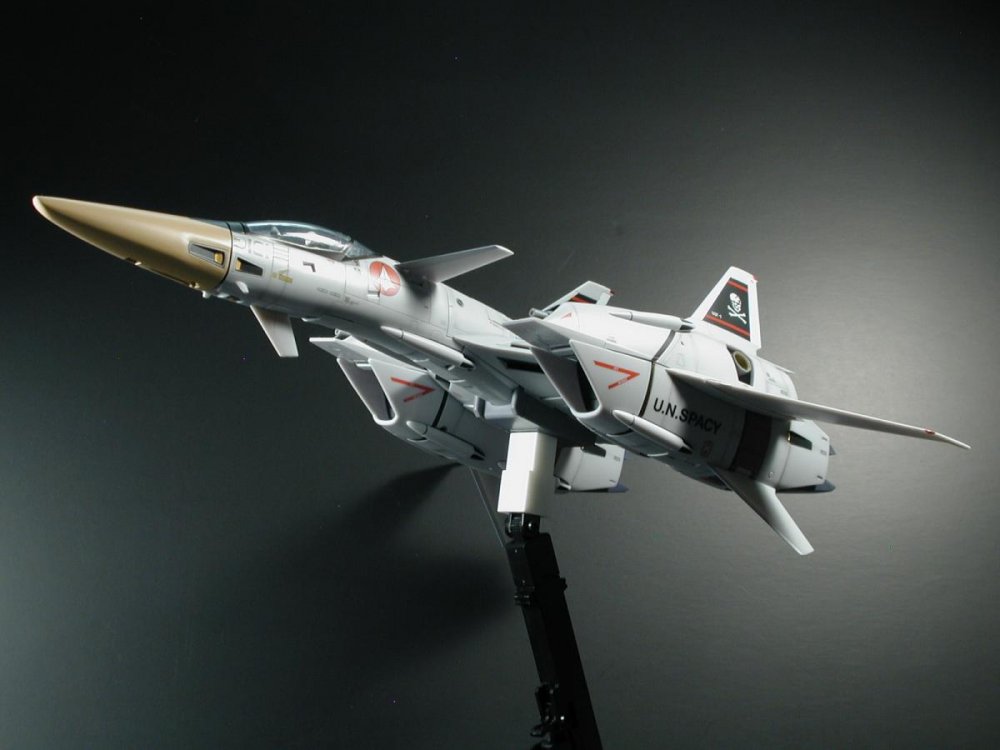
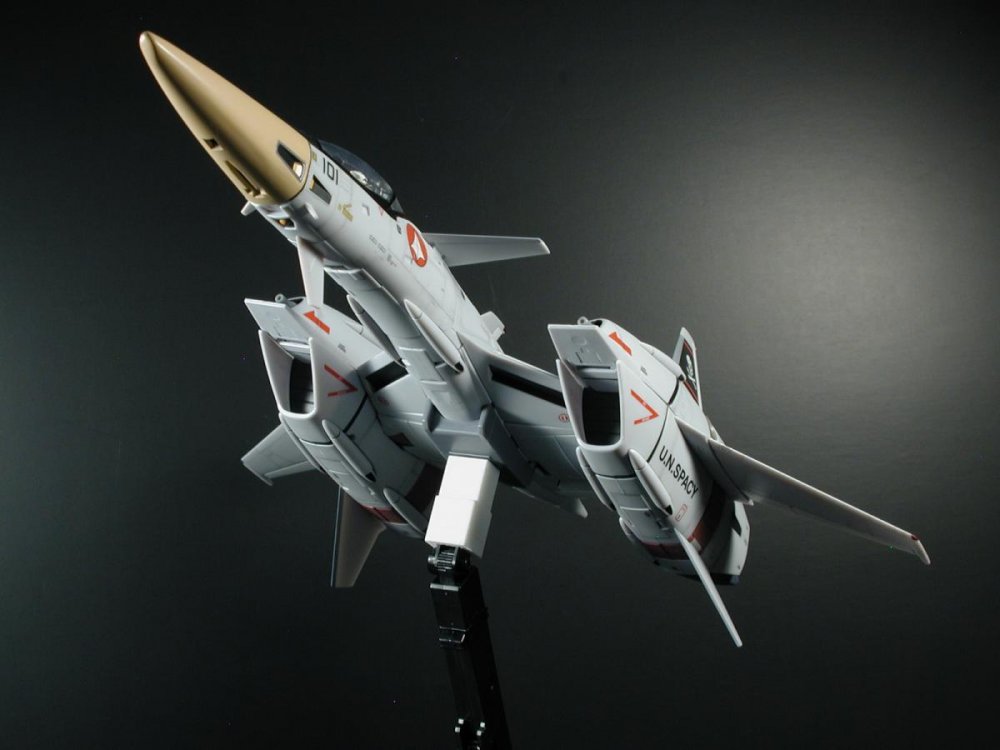
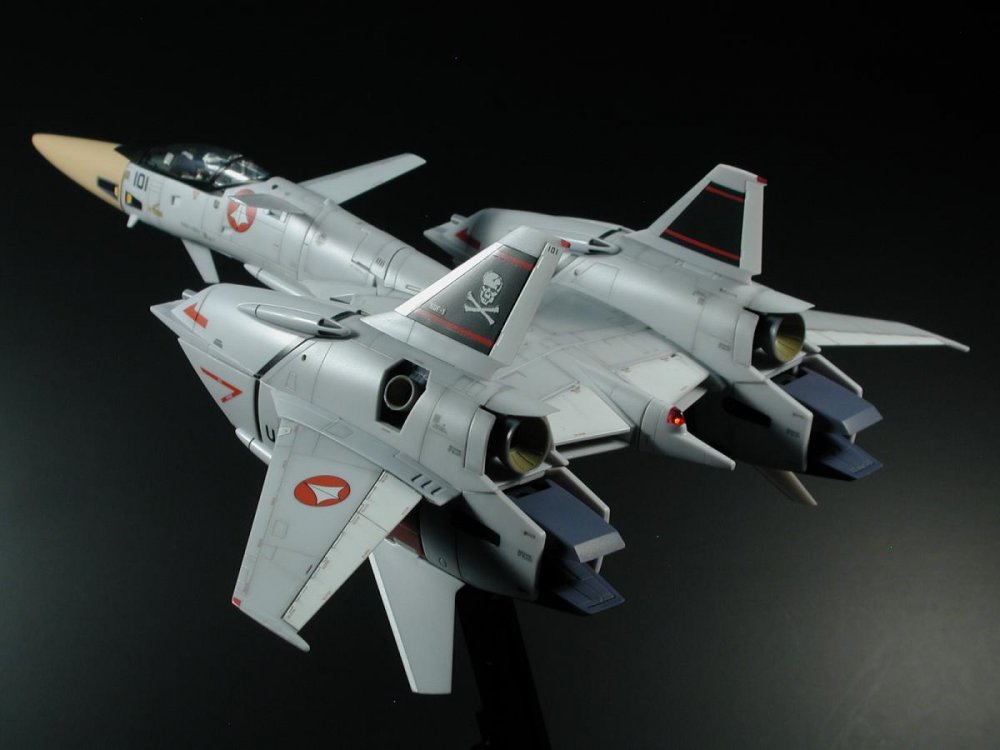
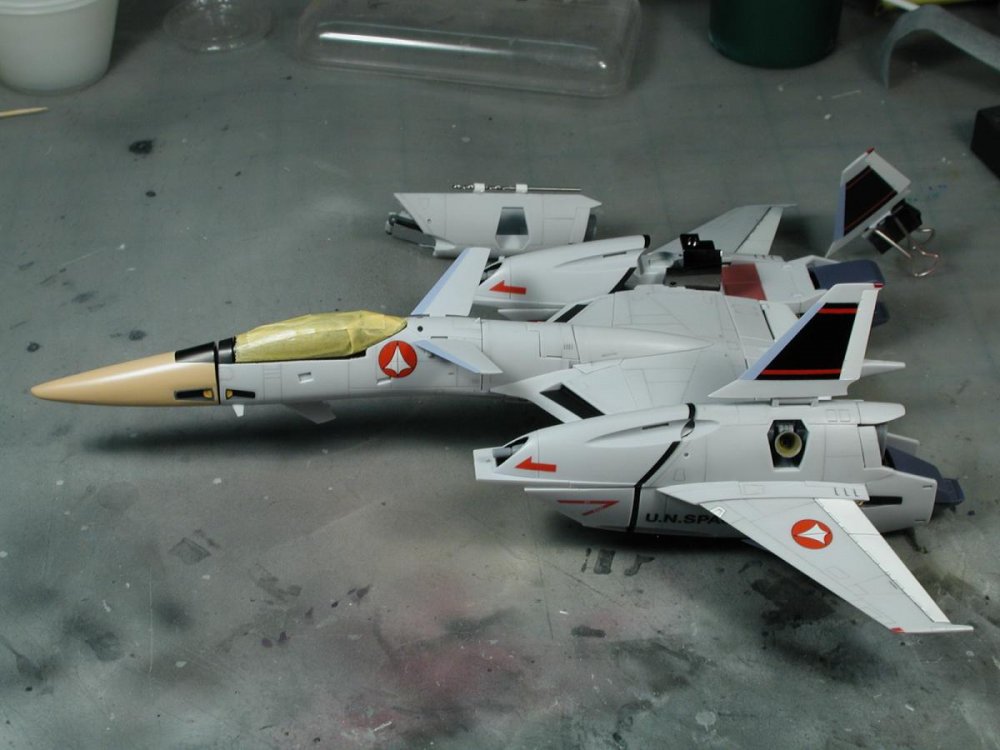
Yay! I finally finished it last night and I've allowed overnight for the semi-gloss clear coat to dry. I LOVE THIS TOY!! It's my favourite from Yamato - tied with the SDF-1. I've always loved the VF-4G since FB 2012 and didn't think this would ever really see the light of day. Now the only other far-fetched toy left for to die happy would be the VF-2SS (which doesn't seem so far-fetched anymore!) There really isn't a bad angle (I couldn't pick which was my favourite photo, so I hope you don't mind just dumping them all here). Sorry for the soft focus, I just threw up a black background on the workbench with my old Nikon 990 to quickly take snaps (hopefully I'll do some decent stuff later on, but don't see when I'll get the time to) I just want to zoom this baby around, so smooth and aerodynamic, Yamato really captured this one in my books! Maybe just a tad needle like from only the top view, but all the other views look amazing. The 101 modex and skulls were from the 1/72 Hasegawa leftovers, the modex was the largest of the free numbers on the decal sheet. The rest are just pieced together from whatever I had left lying around. It would have all gone together much faster if I didn't have to "rebuild" that wing hinge that I stupidly broke, but so far it seems to be holding well and still allows for transformation (yipee). As I started taking apart the various wings and nosecone, it's really apparent that the remarkable feat of engineering Yamato has done to the internal structure that allows for the transformation (ie; within the nose cone, there is an insert part made of softer flexible plastic that allows for the clips and fin to slide into the slots of the underside of the nose cone - amazing!). So many wing/fin joints extend to allow access to the pins (I'm sure they allow for assembly - but it makes taking apart a breeze!). In the end, I'm happier with this 70s gull grey/white scheme than if it came all white - its more interesting and I find it nostalgically completely compatible to the era in which it was designed. Since it wasn't cannon anyways, I decided to forgo the tan on the head piece and tailcone - it just seemed to flow more naturally and more aircraft like this way. I toyed with the idea of making the conformal missles white as a contrast against the body of the plane (like 70s missiles), but masking and repainting the four tail nozzles each got the better of me and came back to my senses (mostly because I was running out of time). Most of the panel lining was done with a light grey wash of artist oils, some of the engaving was too shallow to hold much paint, and I went over those with a sharp mechanical pencil. I then did some of the "post-shading" with a smudge stick and some graphite from the mechanical pencil. I just wanted to give it some weight and wear, but I wanted to keep the weathering light as I don't think this would have seen much action being a new and well kept fighter. Enjoy! Details of the weathering and panel lining... One of my favourite parting shots...


-
The glow-in-the-dark stickers look great! I was debating on putting them on (laziness won out!). How did you do it? It was a rub-on transfer right? Did you cut them out into smaller sheets before applying?
-
I just used Tamyia masking tape (love that stuff!). If you press hard around the area, you will see the engaved panel line telegraph through, I took a very sharp knife and lightly cut tracing around the panel line - try not to dig into the plastic. No I didn't prime, I thought about it, but then I didn't want to build up the layers which might be worst when rubbing. I used enamel paint (being better than acrylic) but I couldn't find a suitable lacquer (which is more durable). I don't think much rubs against it except for the underside pegs, but they seem to only go into the holes, so I think we're good, most would be some chipping around the holes/slot on the underside which I am prepare to live with considering how few times I intend to transform it.
-
Me too!
-
They are going to be silver (Alclad Metalizer) but it will be the last step after the clear coating... (to keep it looking like Aluminum)
-
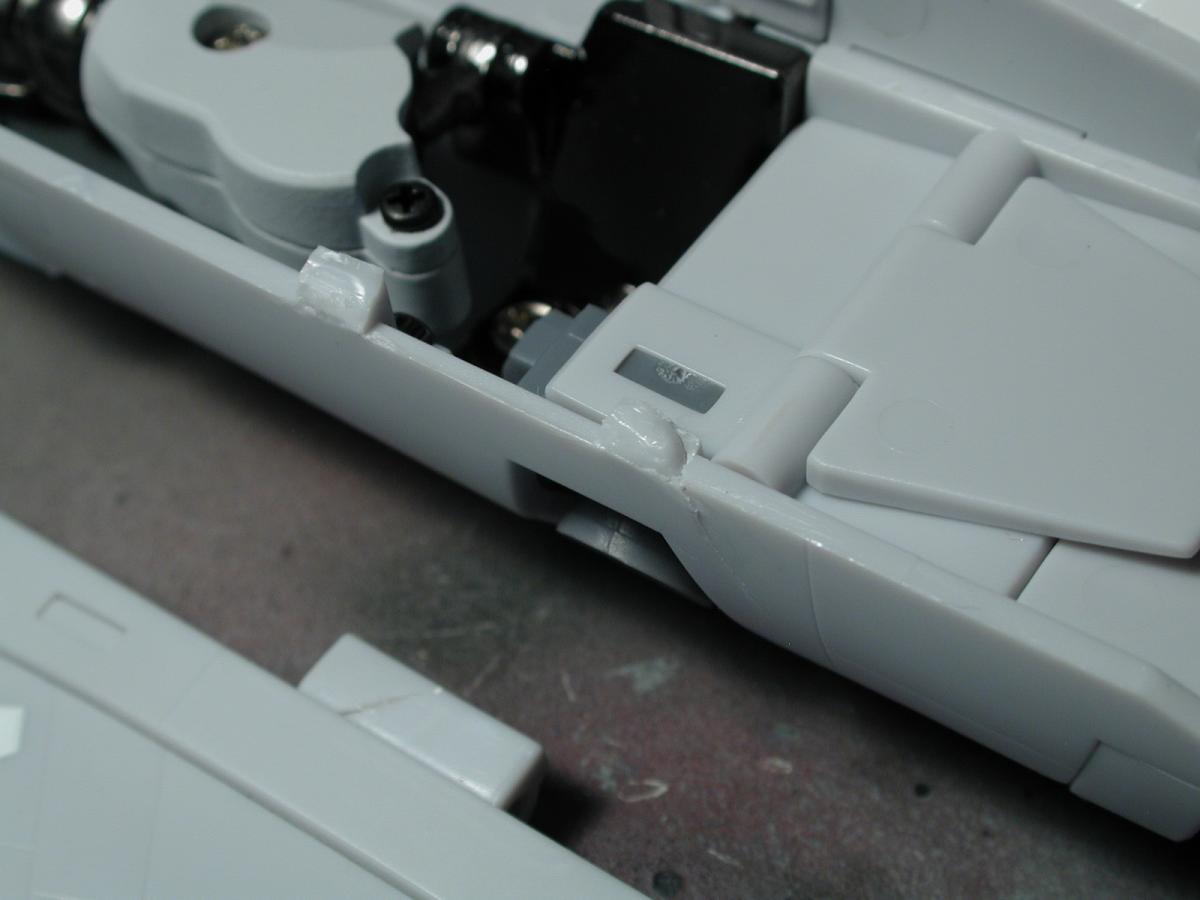
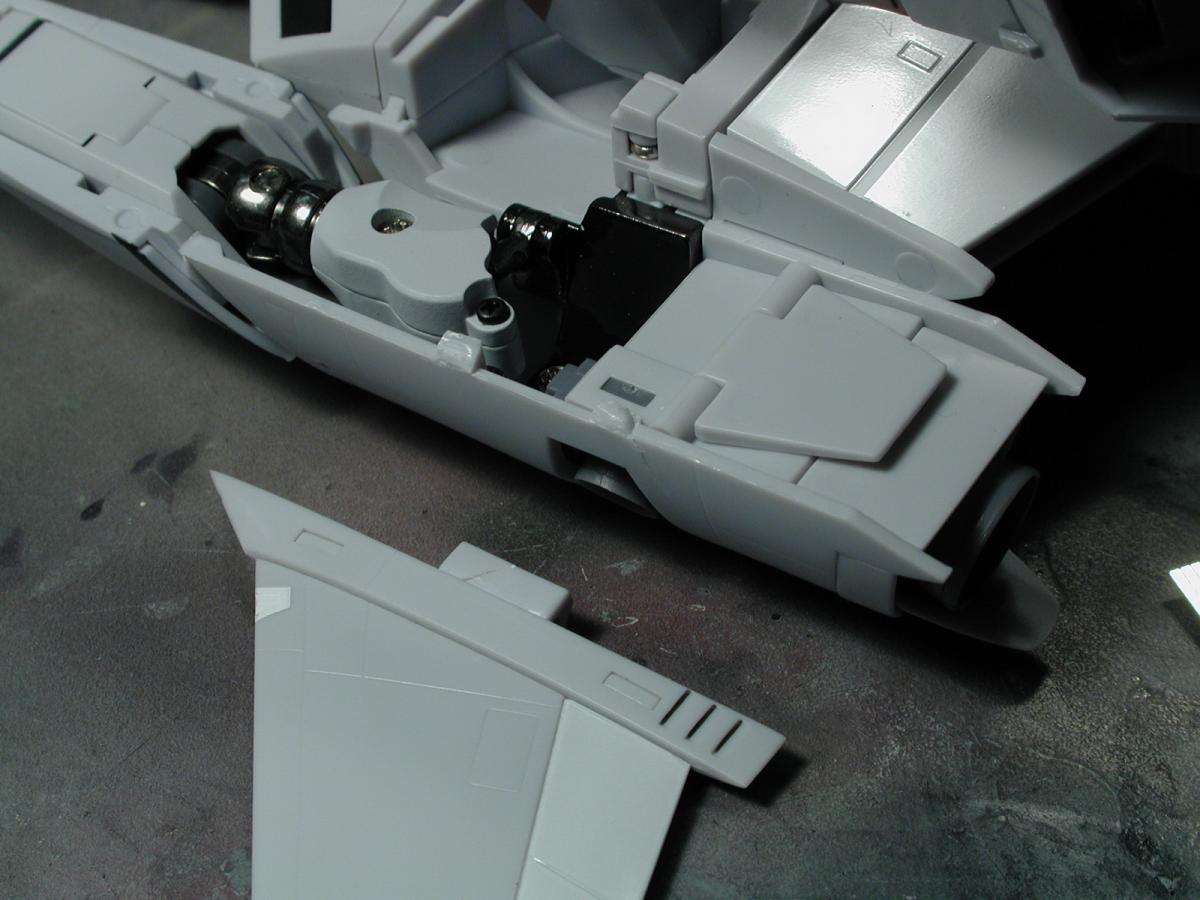
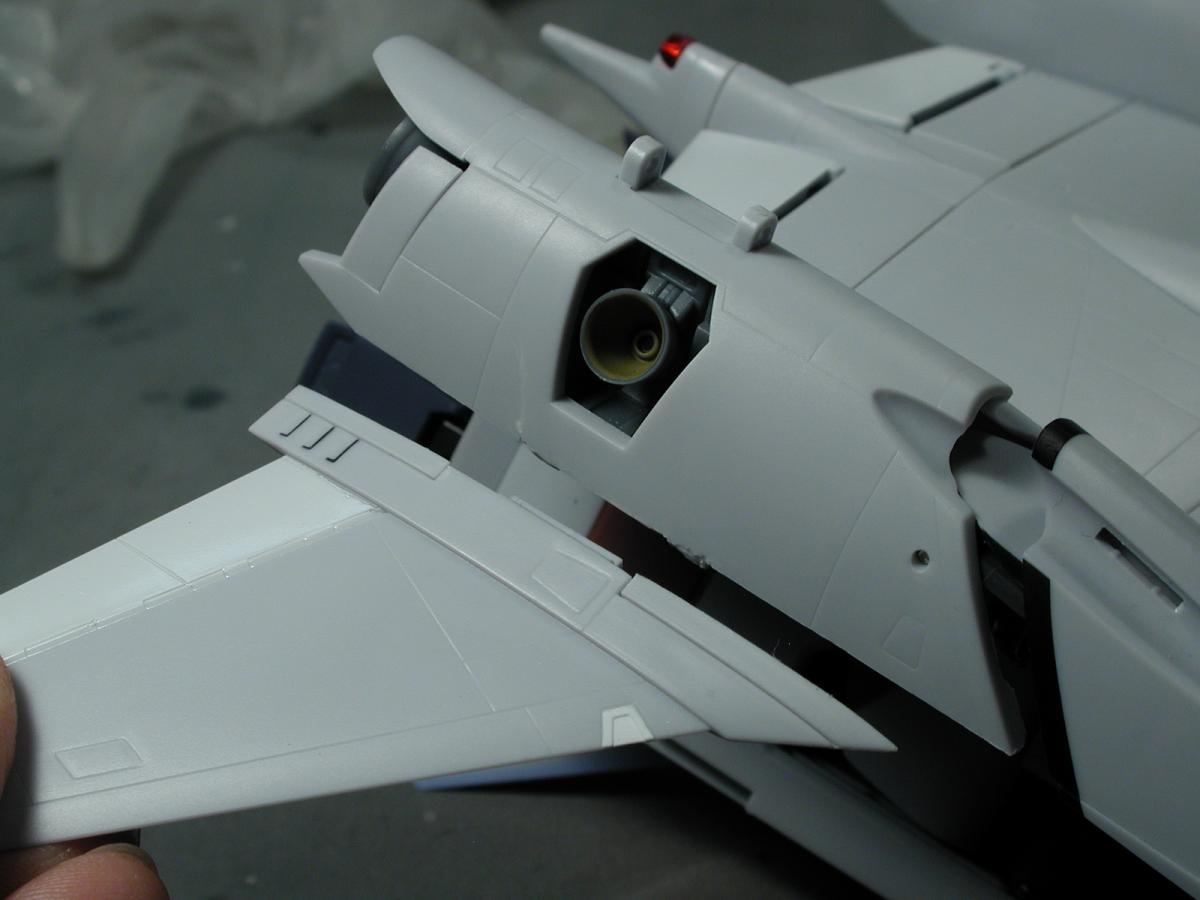
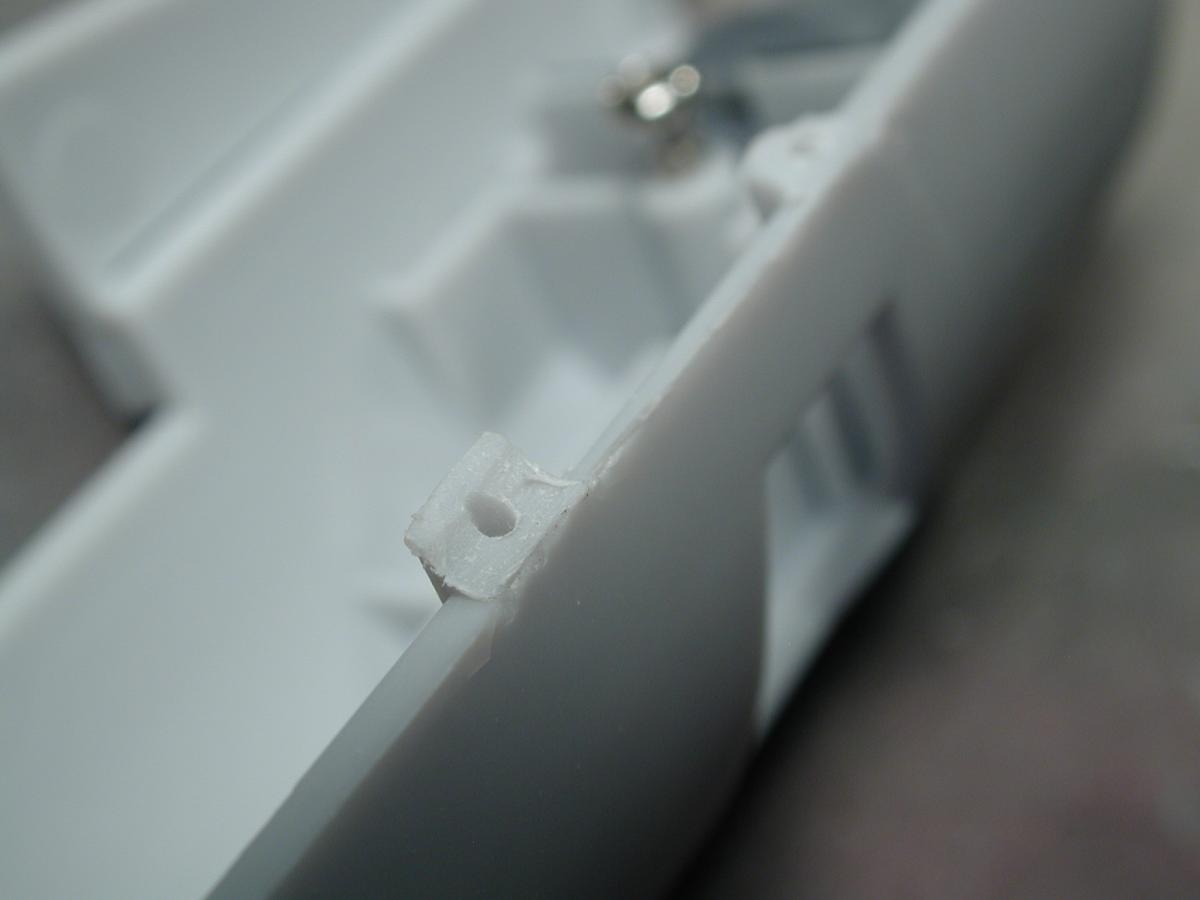
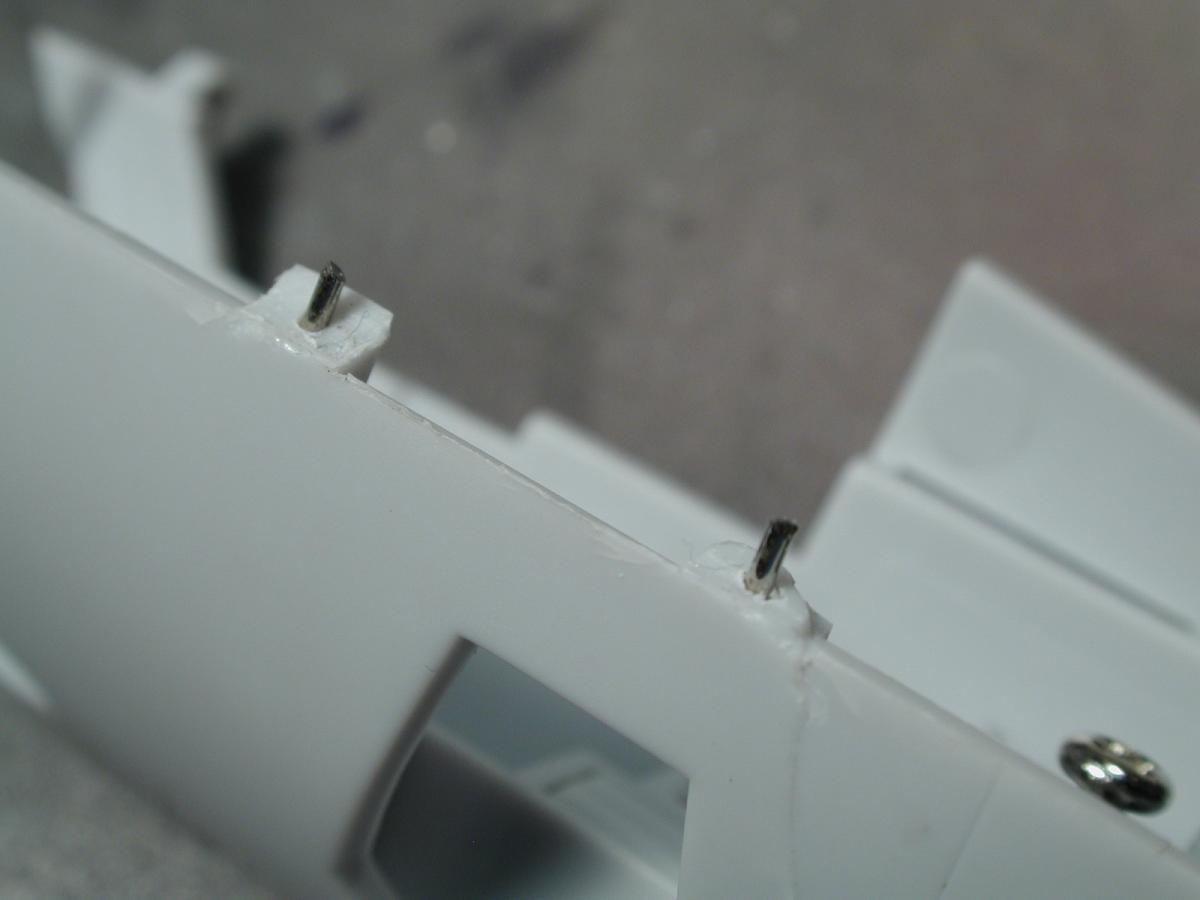
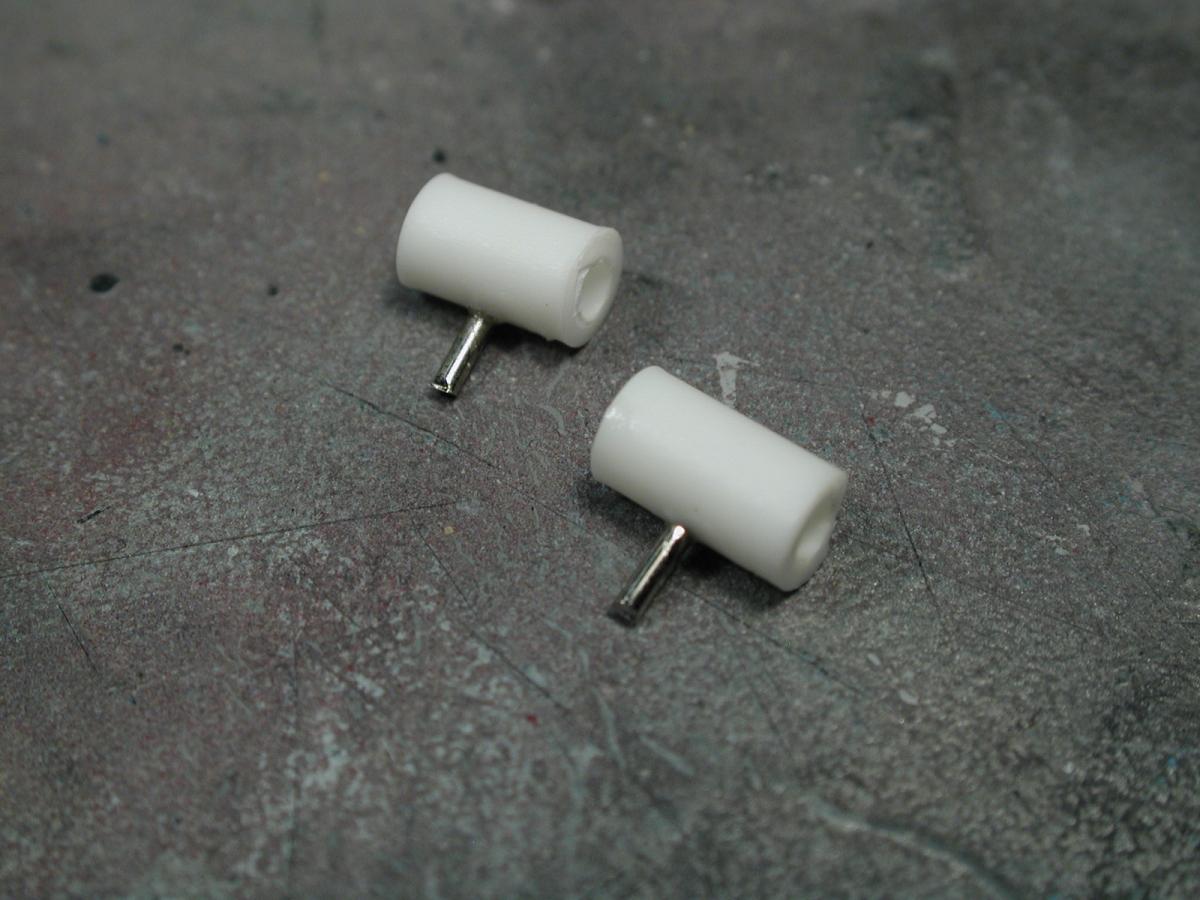
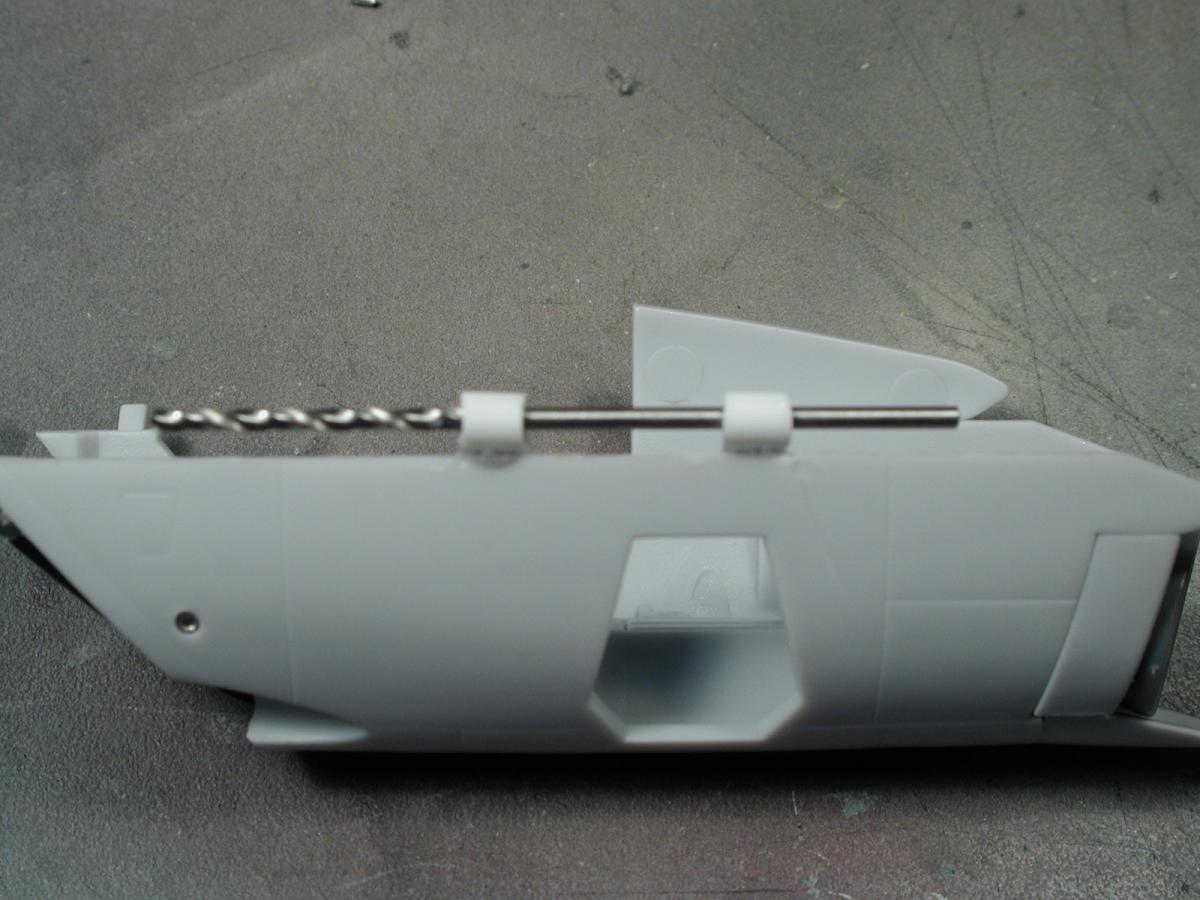
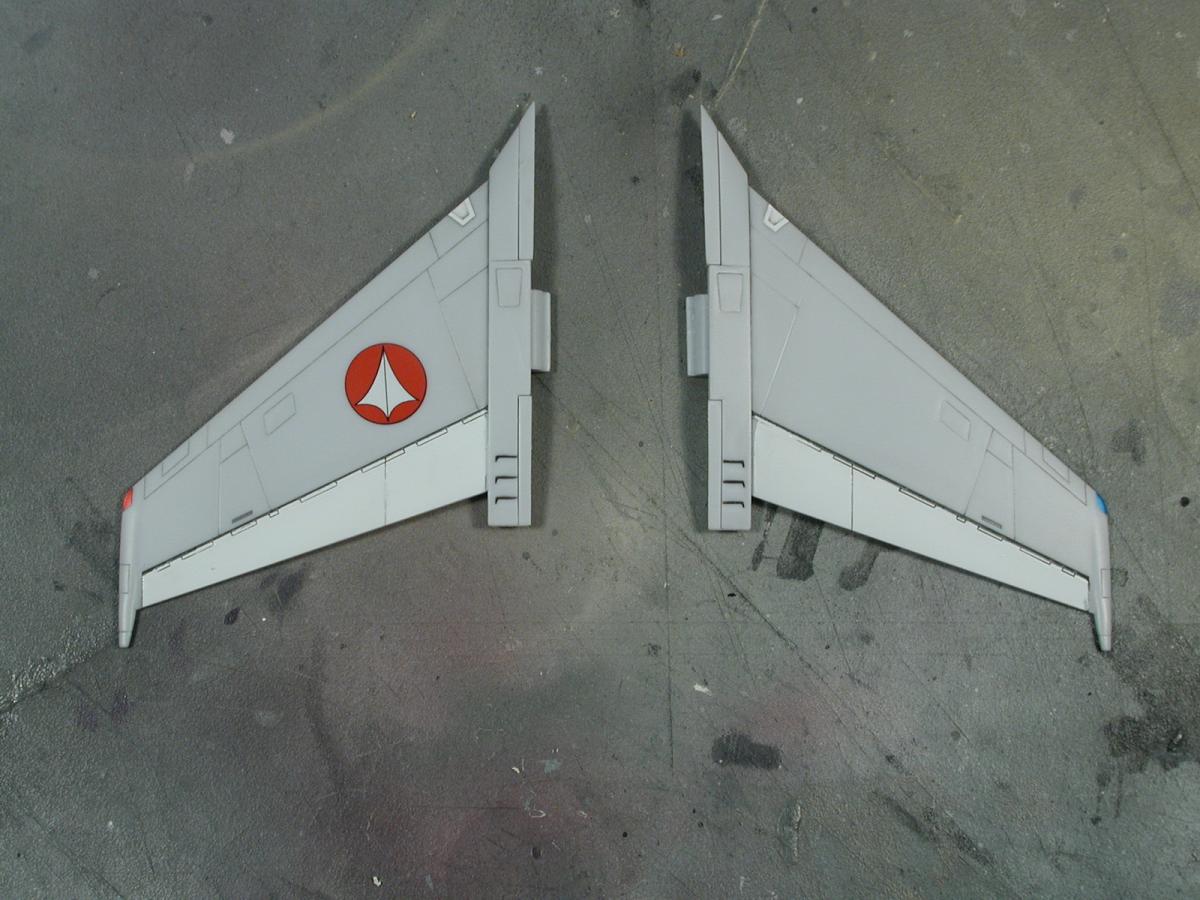
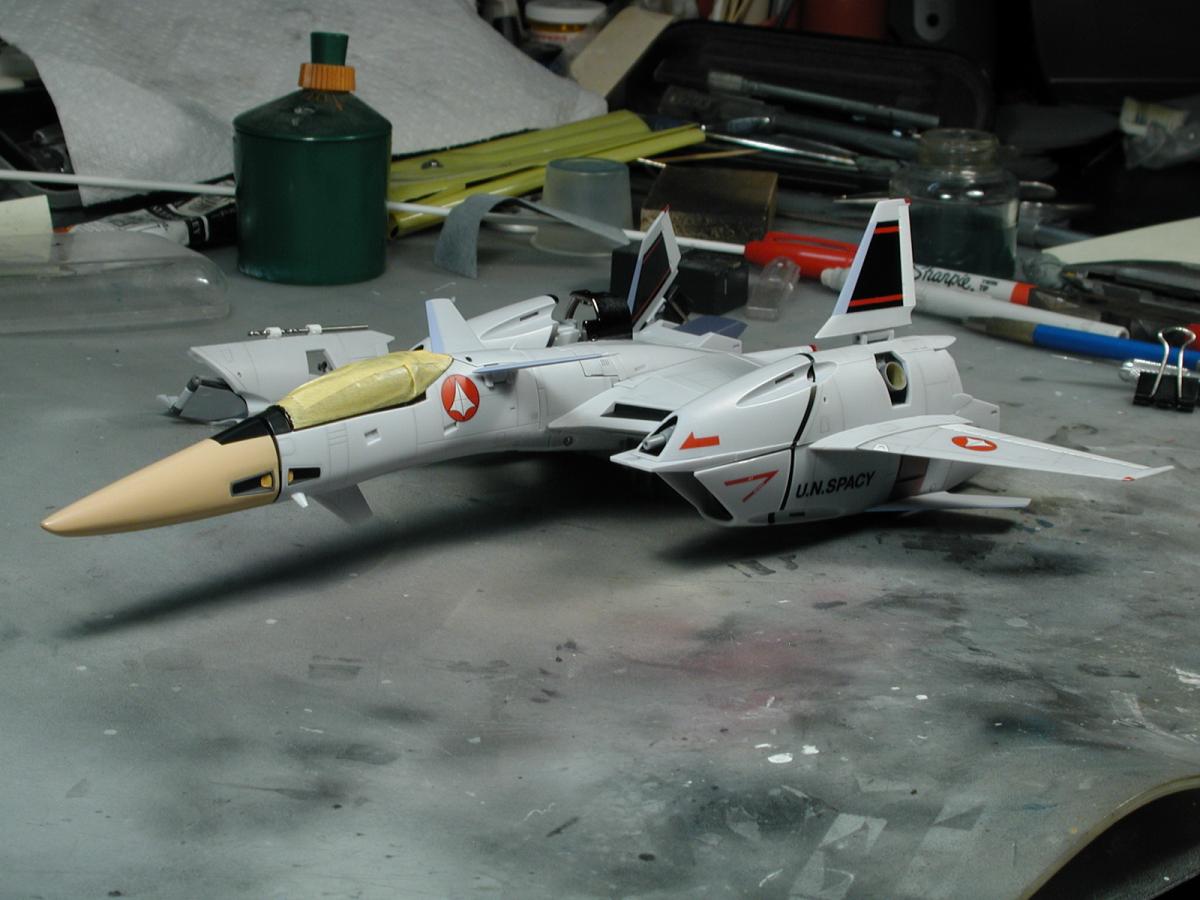
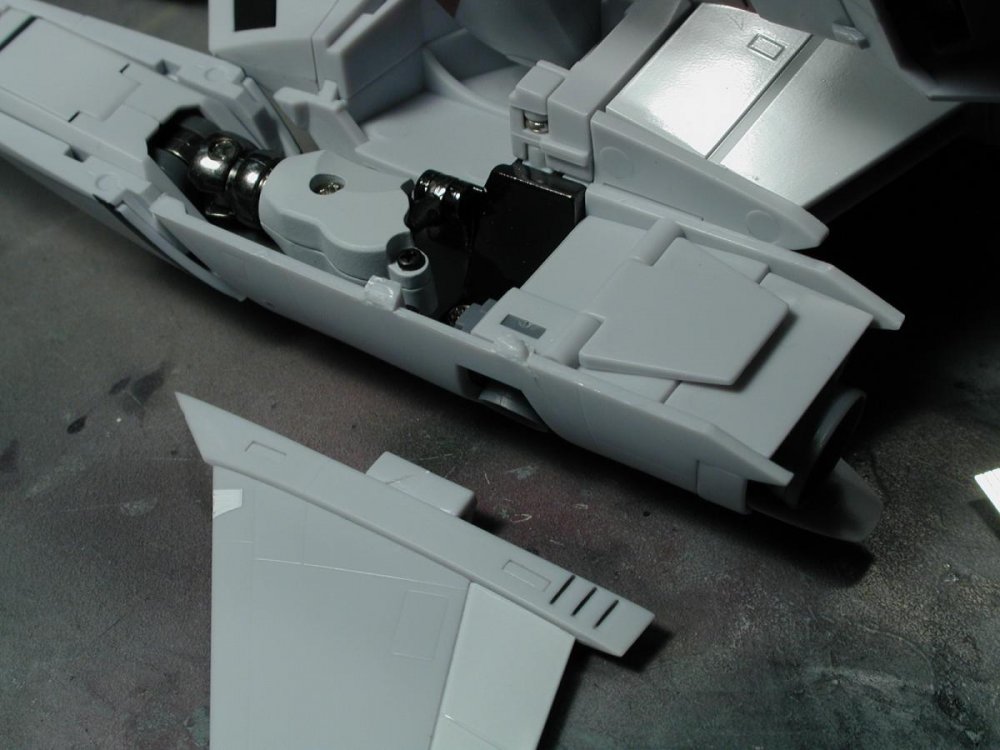
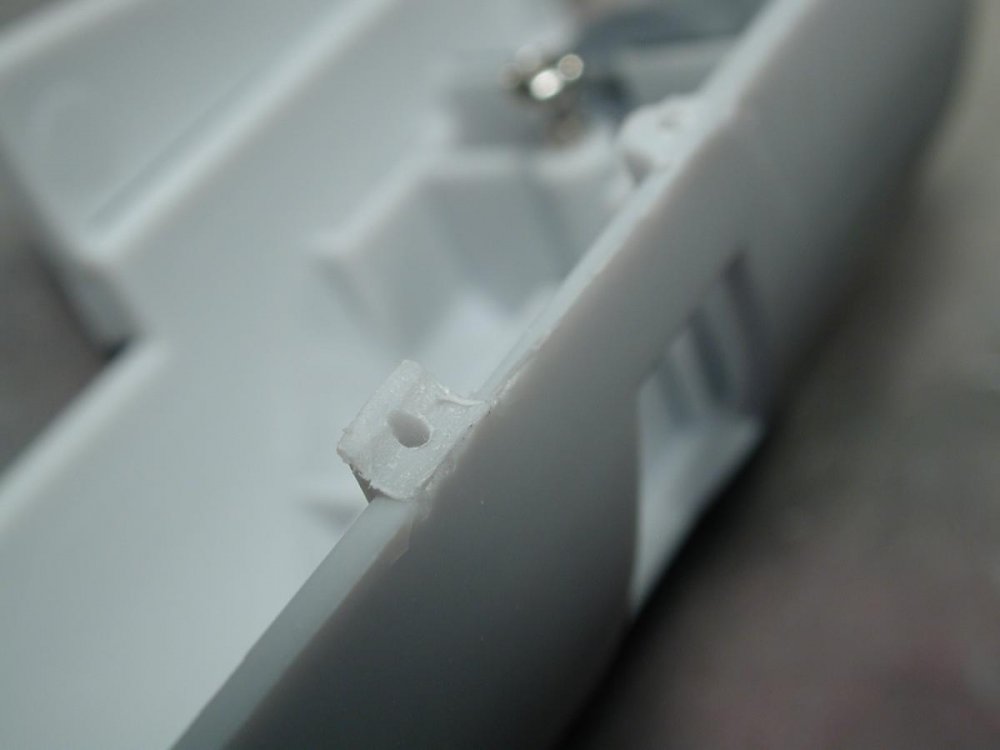
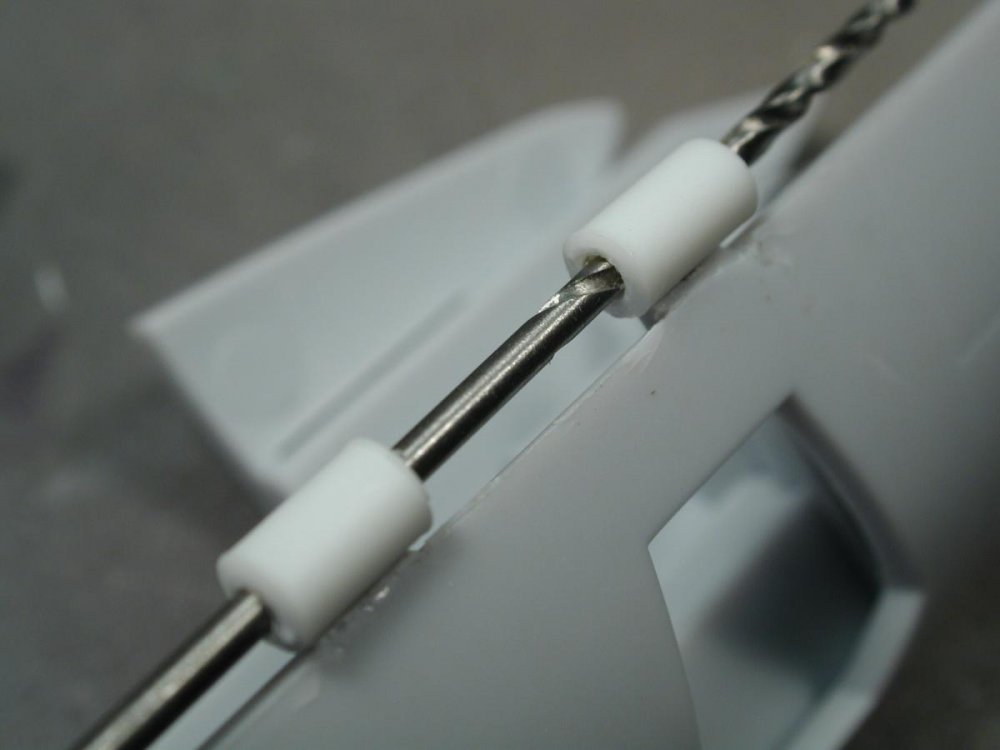
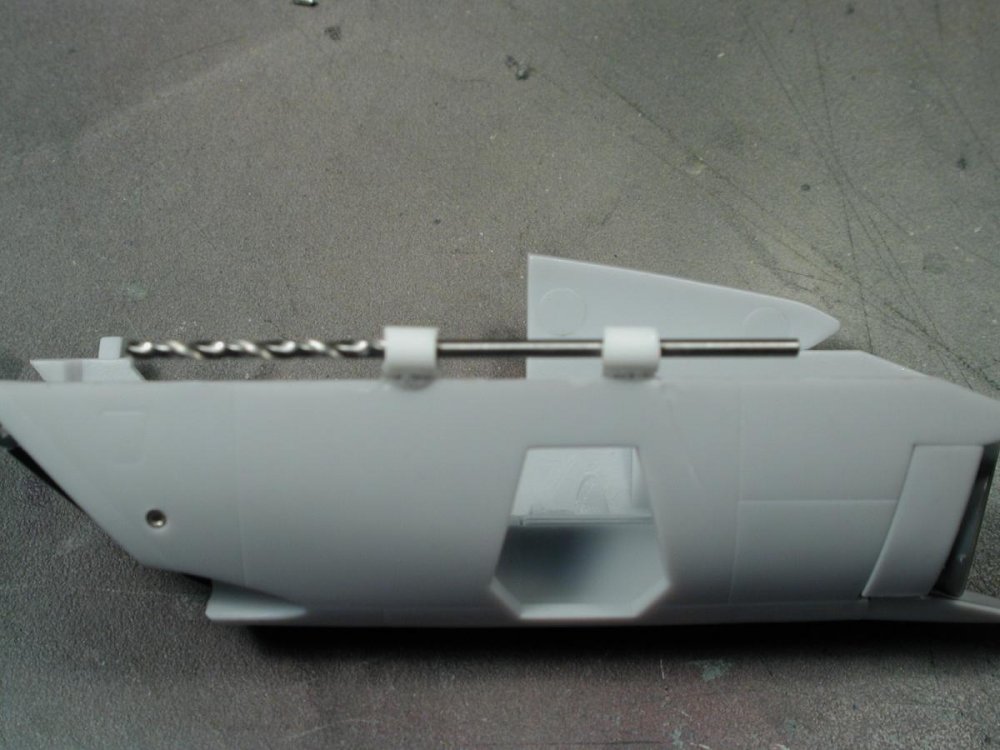
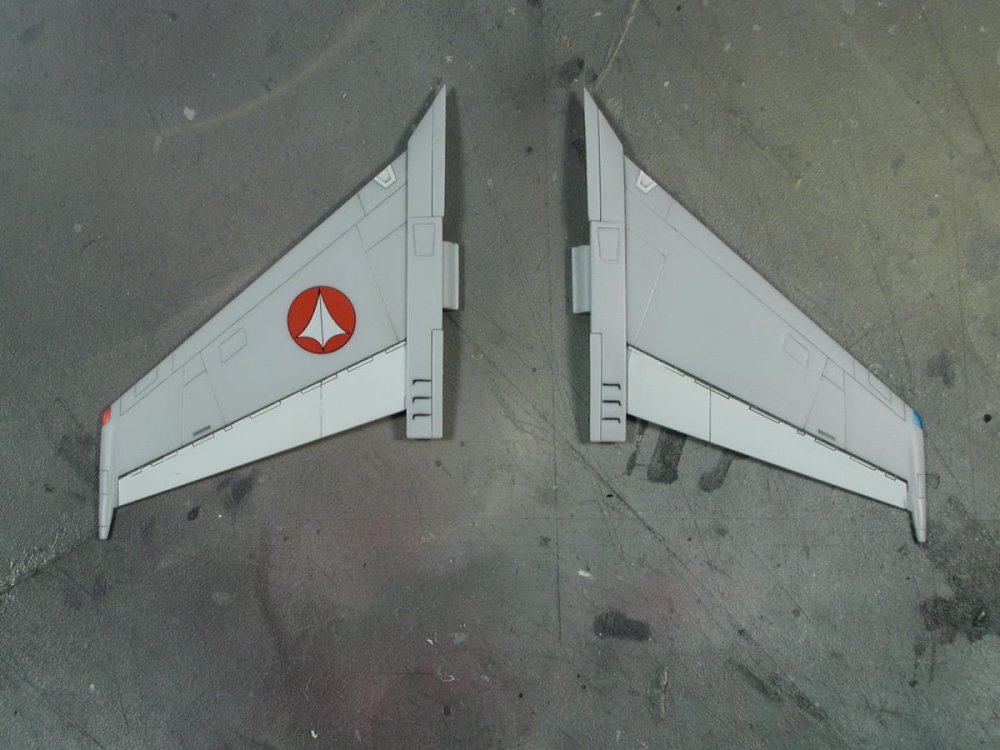
Well, here's some shots of my hinge breakage. Note to everyone else, do not work on the bird while its together, take it apart to start sanding and masking. I must of damaged my hinges while I was trying to sand the nosecone until I figured out I could take the nose cone off with just two screws inside (argh!) A sleep does wonders - after tossing and turning all night thinking about the broken hinges, I came up with a way to "rebuild" the hinges. There really was nothing to salvage, the plastic just crumbled. So I sanded it down and found some stock plastic tubing. I then drilled a hole down and added a cut piece of pin as a metal reinforcement like you would pinning a resin model - hopefully that will take most of the stress. Here's a shot of the finished nosecone... A shot of the finished wings with the white moveable surfaces (before decals and weathering) And this is where I am tonight... leaving it to dry and cure. It takes a lot of getting used to working with enamels (being an Acrylic guy) - it seems to take forever to dry/cure and it forms a seemingly dry skin, but its quite soft underneath. I think I've been fiddling too much before it's dried properly and I have a few tiny nicks and dings here and there, but I'm not going to strip it and start over again. I think after I do the decalling and weathering, that should hide some of the sins. Additionally, Mr. Colour solvent/thinner removed the "Made in China and Big West" copyright tampo really easily. Gotta keep telling myself to just leave it alone! Its soooo hard, I just want it back together again to zoom around...


-
Unfortunately I ordered through NY - not as good as HLJ (but they were first to be available). I doubt I'd get any service since it was my own stupidity. Do you think they would take pity on me? I would gladly pay for the piece! I was thinking that after the major painting and masking, I'd try to attempt a repair with 5min epoxy. To those that are sanding the nose seams down, make sure you paint the seams with Mr. Surfacer 1000 after the initial sanding, then re-sand as the sprue marks and the square corners of the seam actually has divits that needs to be filled and may telegraph through the paint job (if you really care about hiding the seam).
-
ARGH! Disaster... while I was trying to sand the nosecone to get rid of the molding seam and sprue marks, I somehow accidentally broke the wing hinge to the upper nacelles. I don't get it, I was being so gentle. I didn't even noticed that I could actually remove the nosecone via two screws first and work on that separately from the rest of the plane. Damn! I can try to glue the hinge back together, but that hinge seems to be stressed so I doubt it would take the strain. Worst case I can glue the wing permanently to the upper nacelles which would only affect the Battroid mode (luckily I always intend on displaying it in the aircraft mode since its so sexy that way anyways) It still sucks though. I post pictures when I'm done.
-
Yamato 1/3000 SDF-1 modification and paint up...
wm cheng replied to wm cheng's topic in The Workshop!
Yes, but the trick is the underside, the "leg/intake/engine" portion of the fast pack sits flat against the underside of the horizontal portion of the Valkyries, concentrate the glue to the underside and build it upside down, the top will take care of itself if the bottoms are aligned properly. Also the thicker crazy glue will help, and do one fast pack at a time - the rest is just patience and where your personal frustration point ends up being -
Yamato 1/3000 SDF-1 modification and paint up...
wm cheng replied to wm cheng's topic in The Workshop!
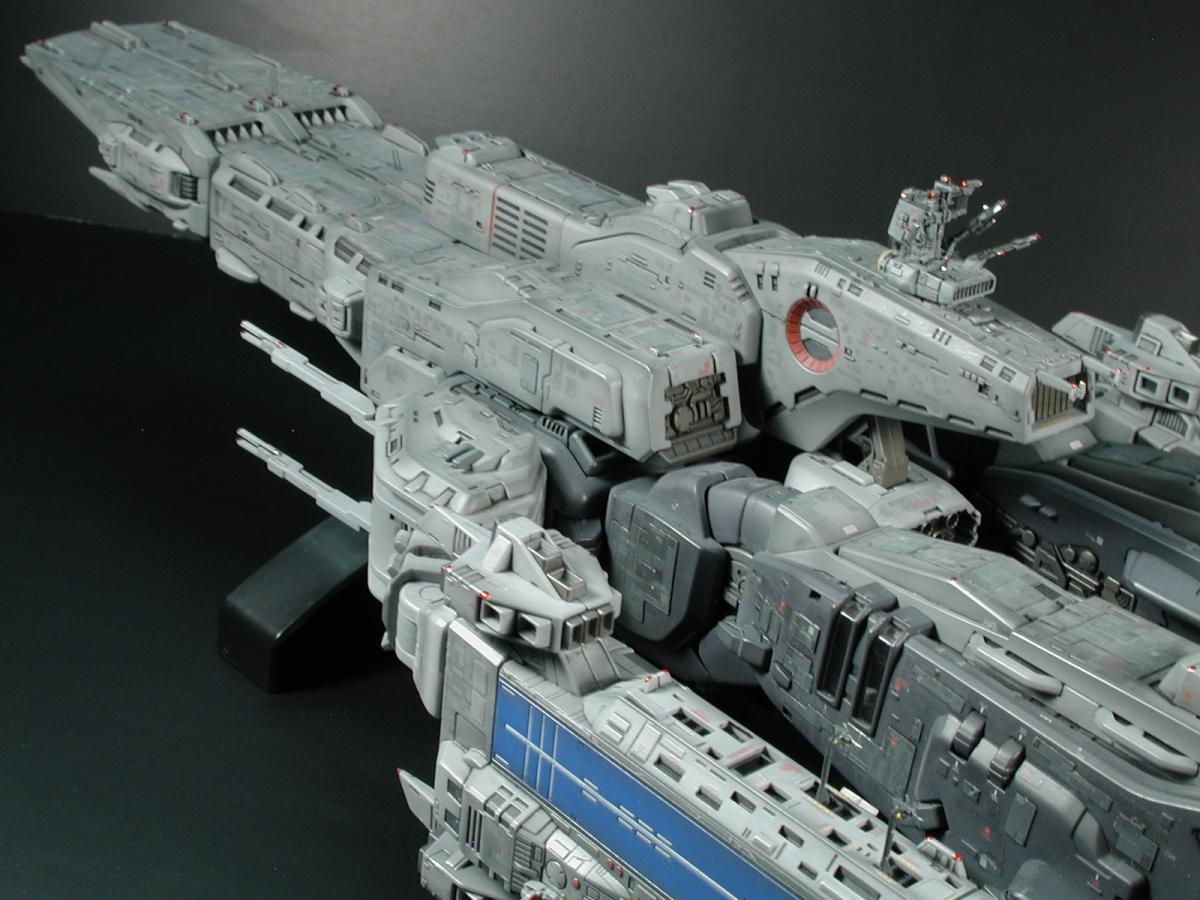
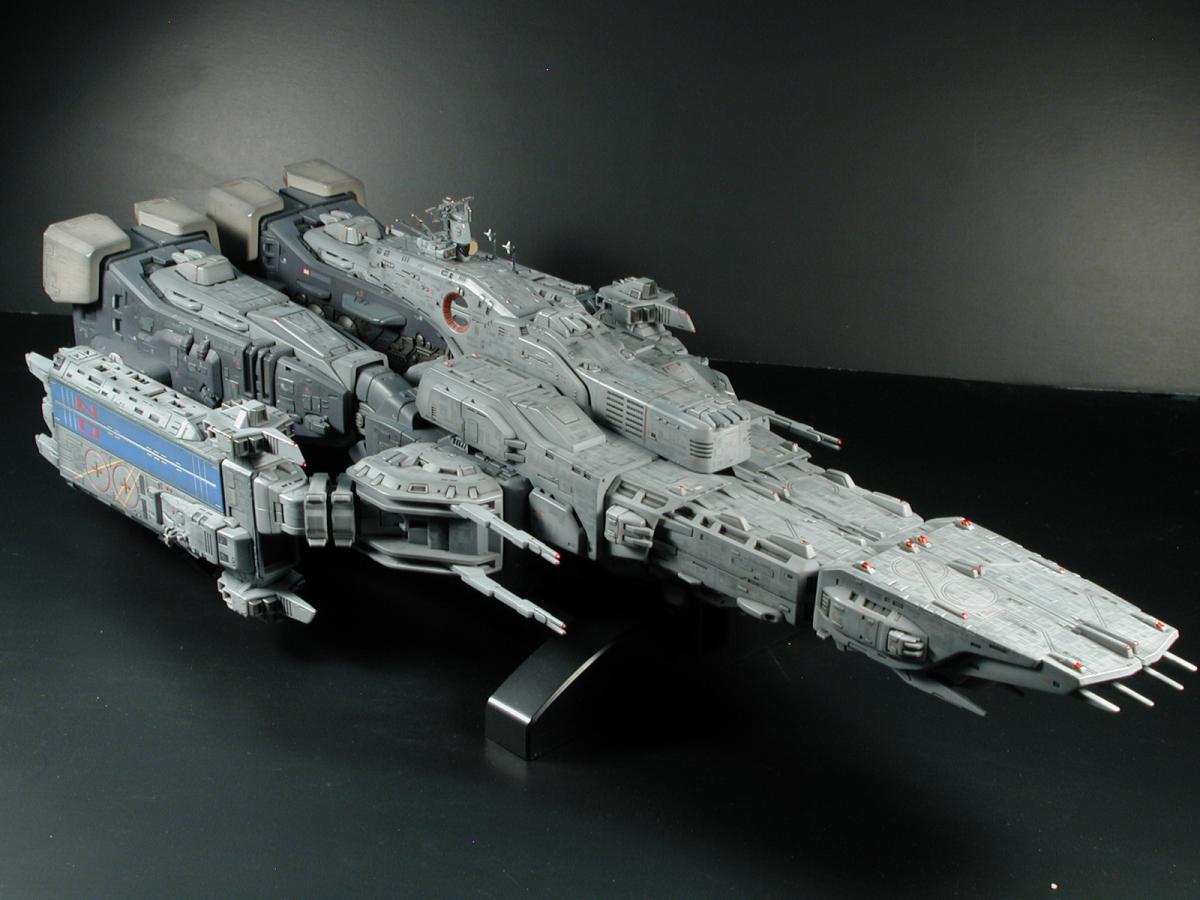
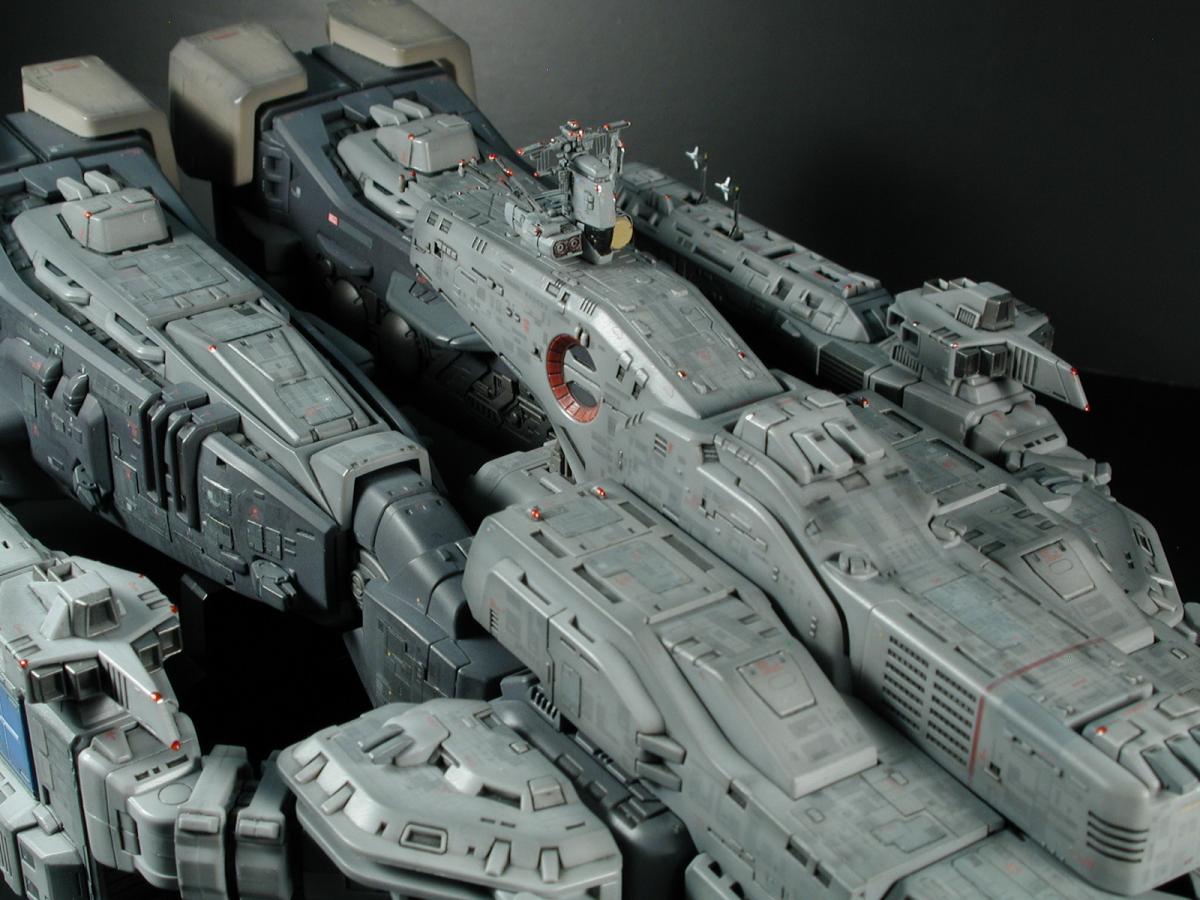
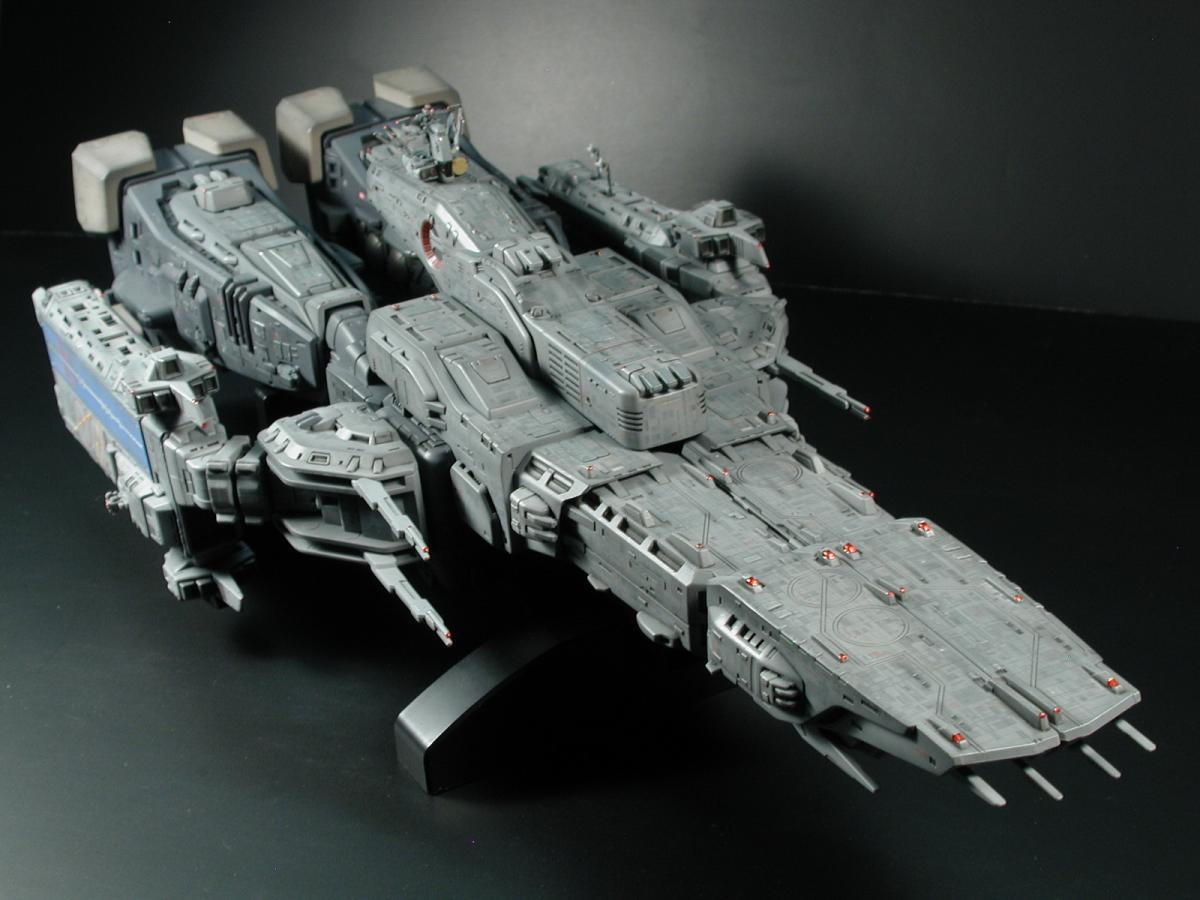
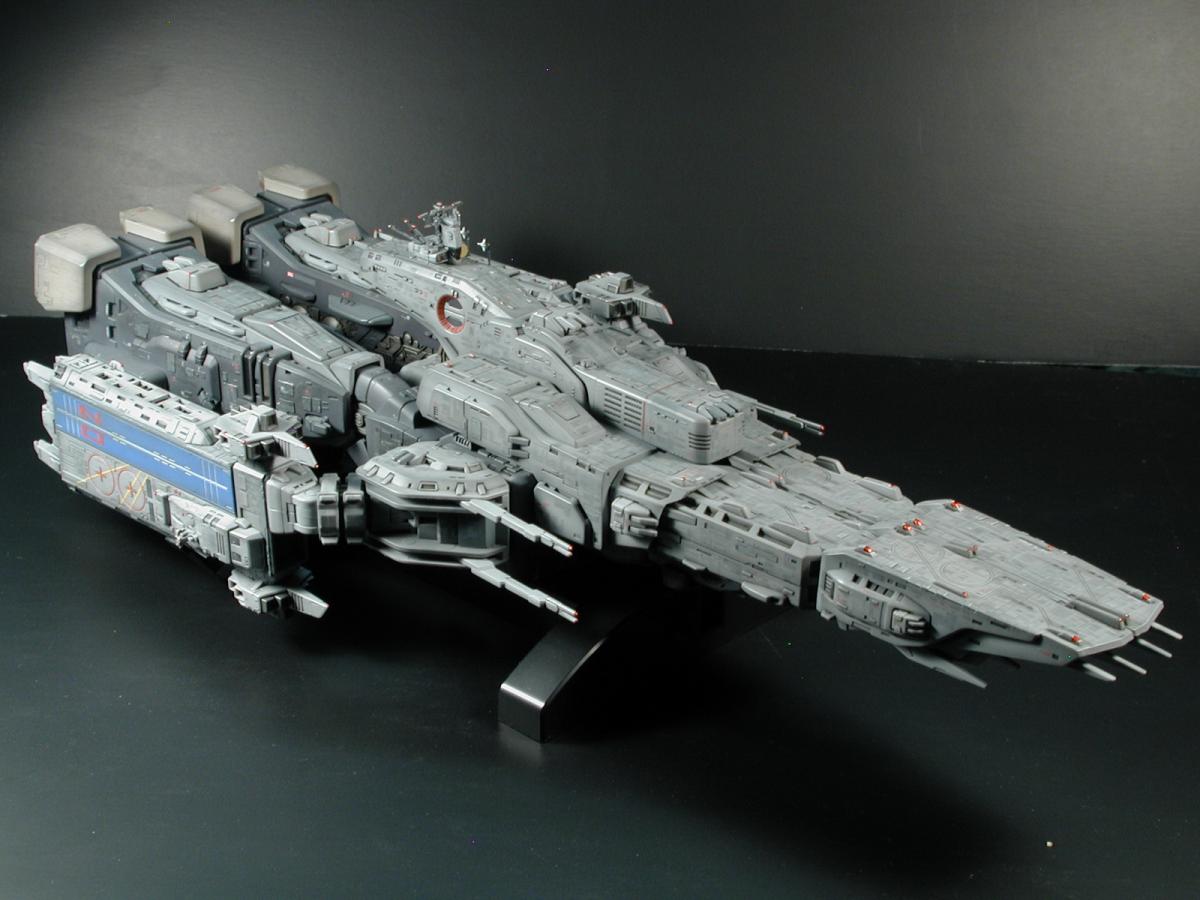
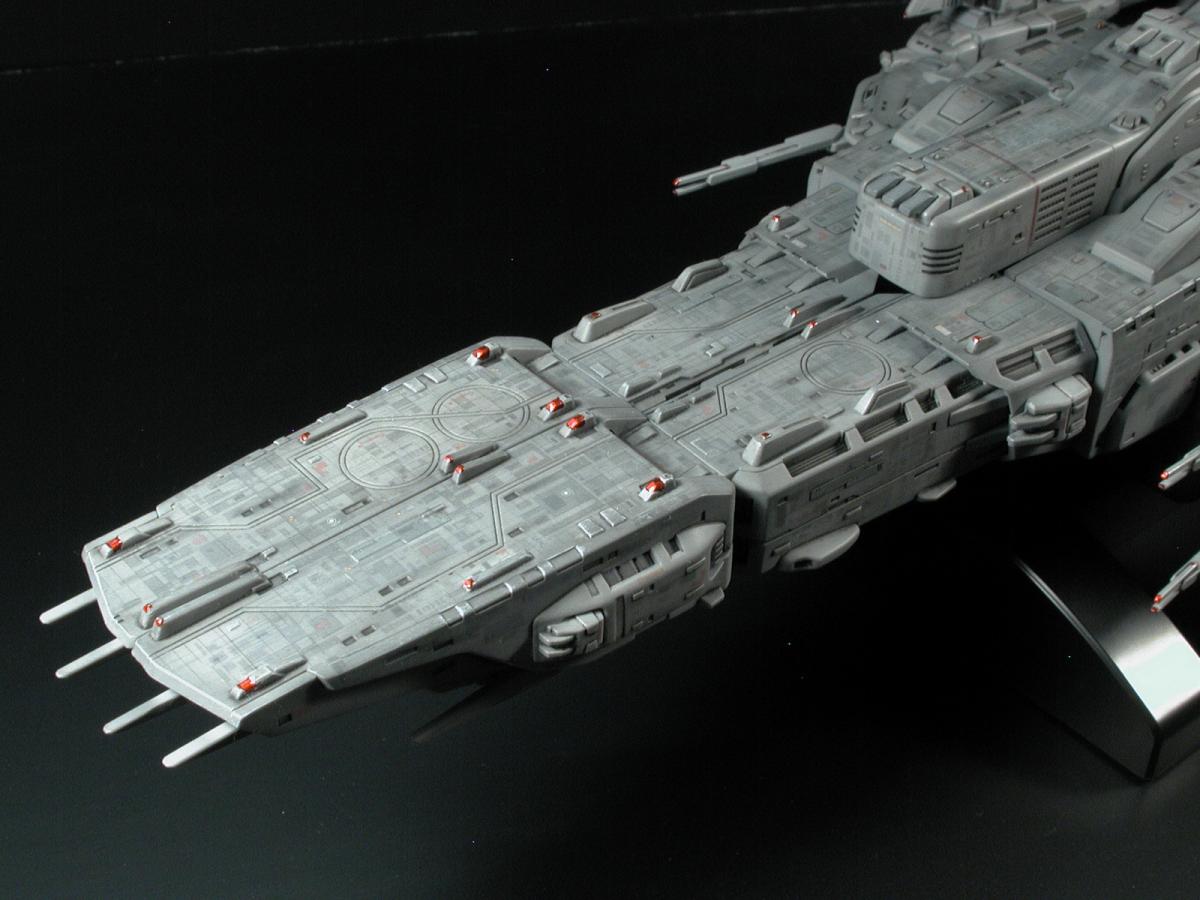
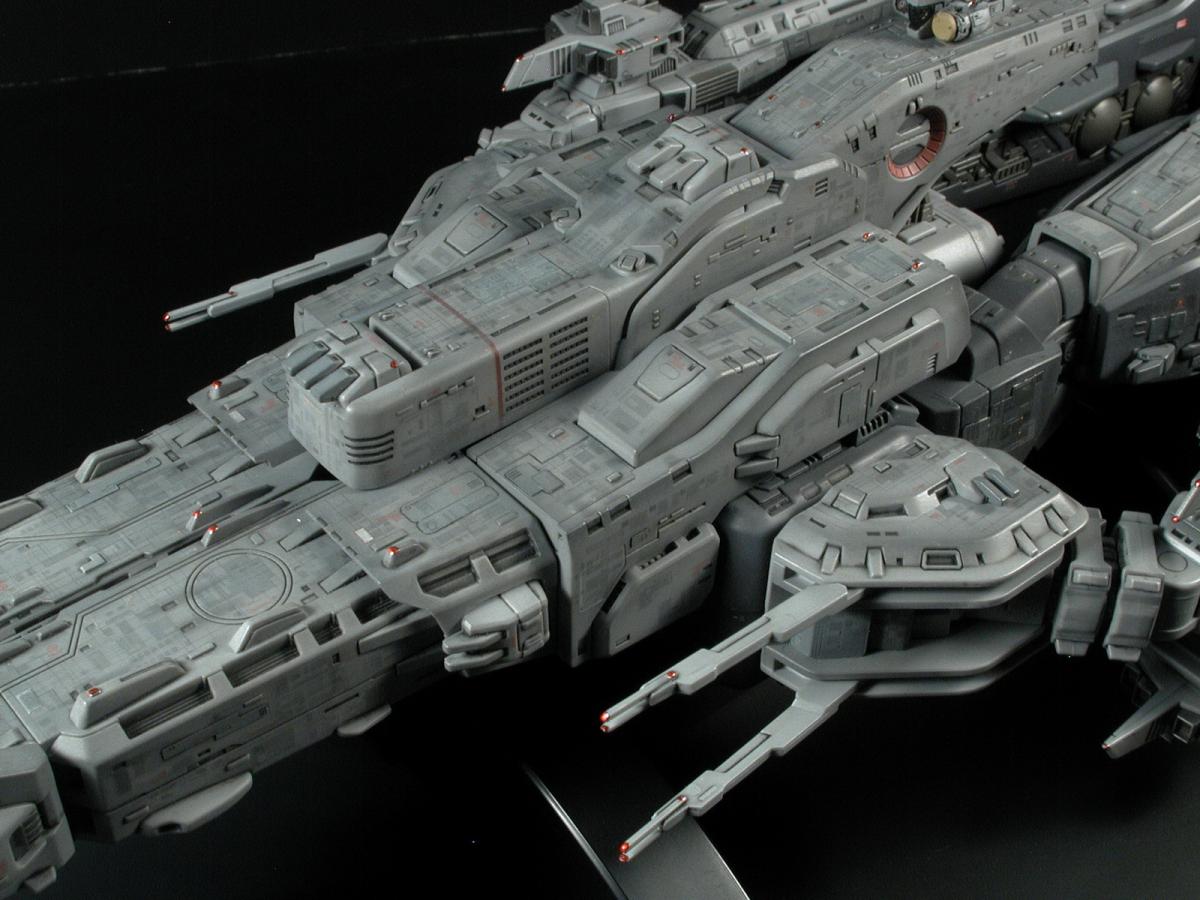
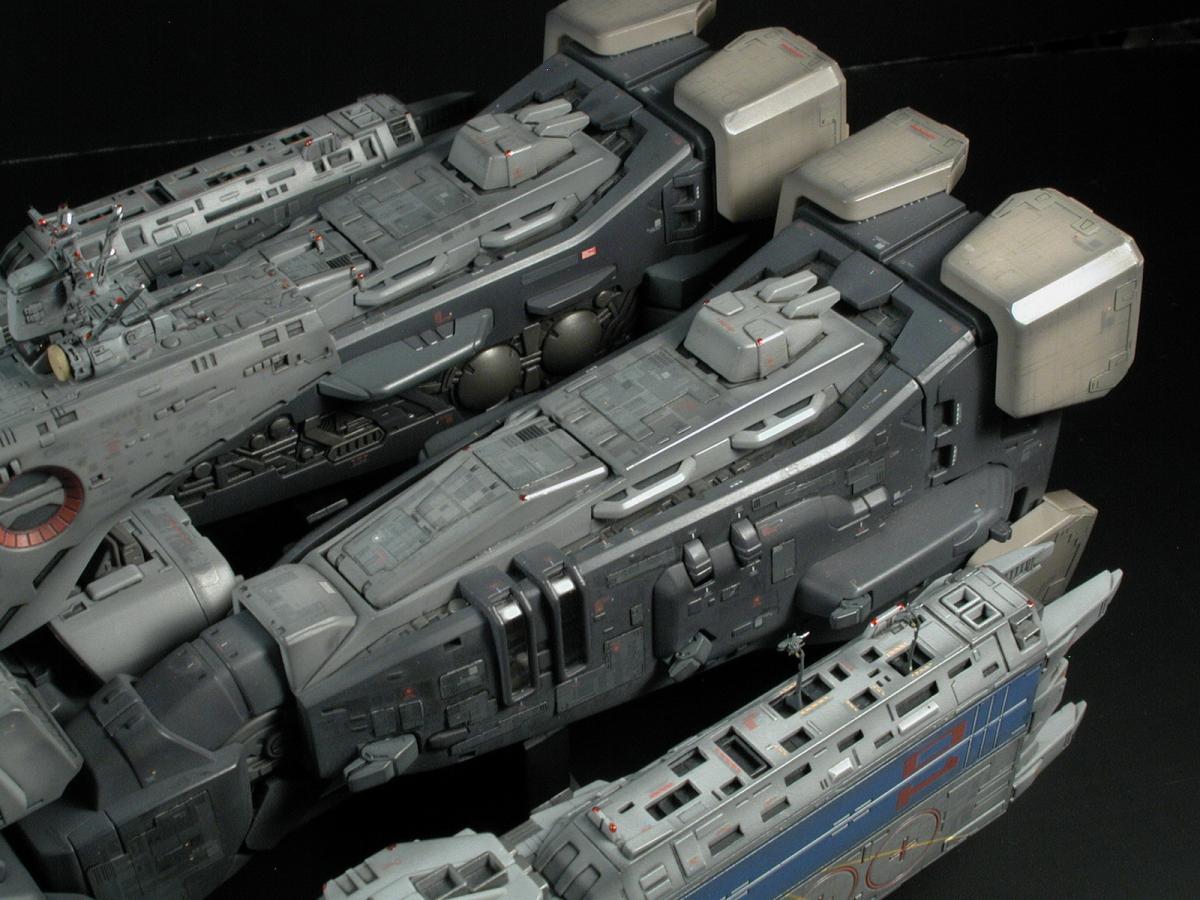
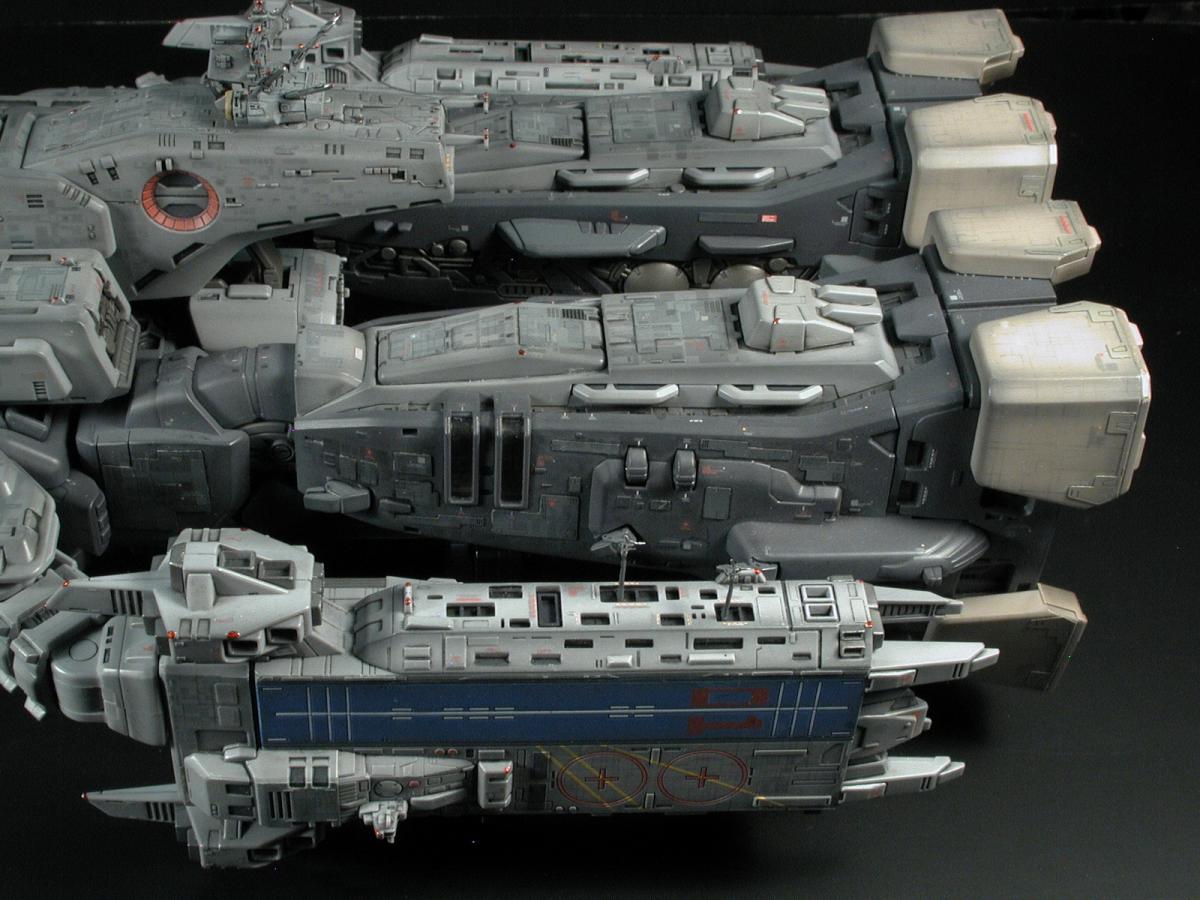
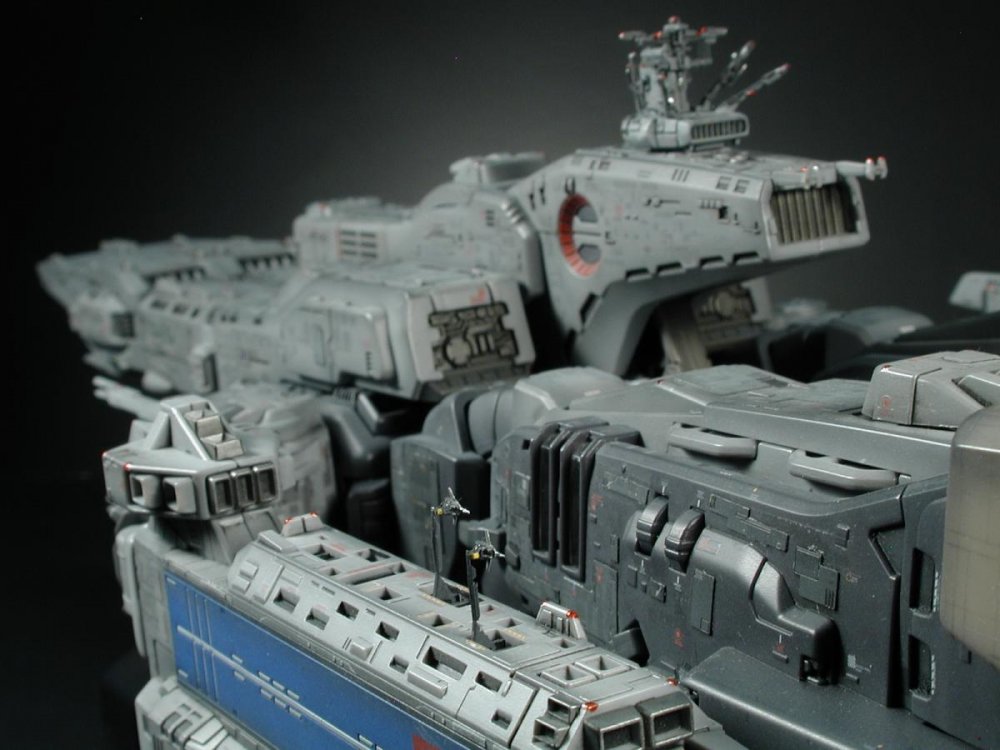
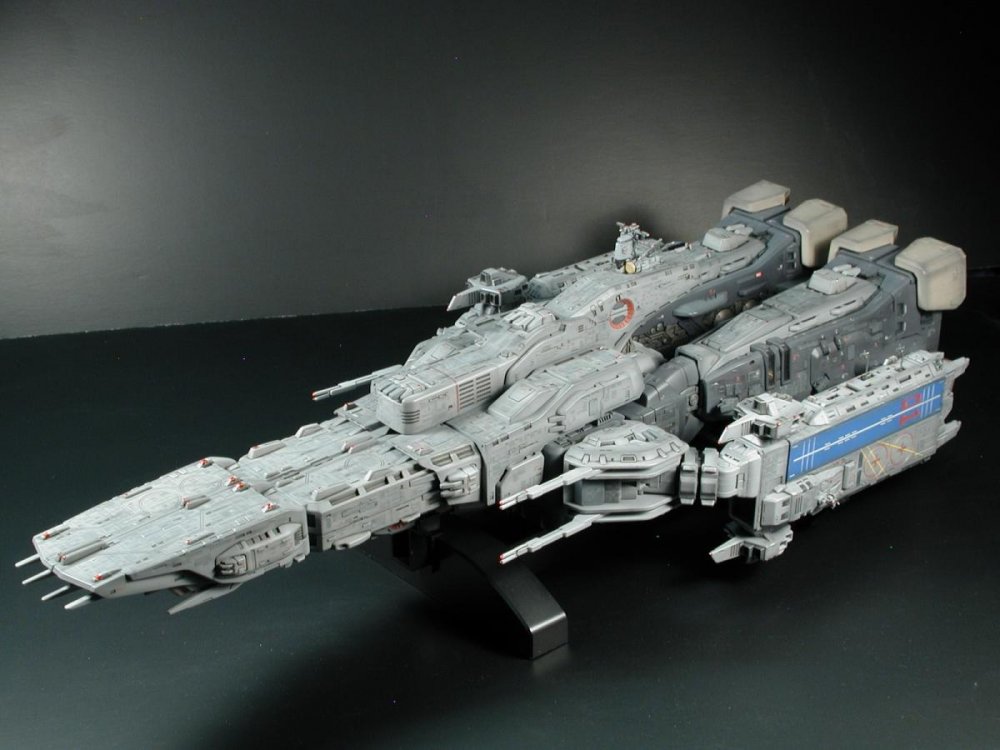
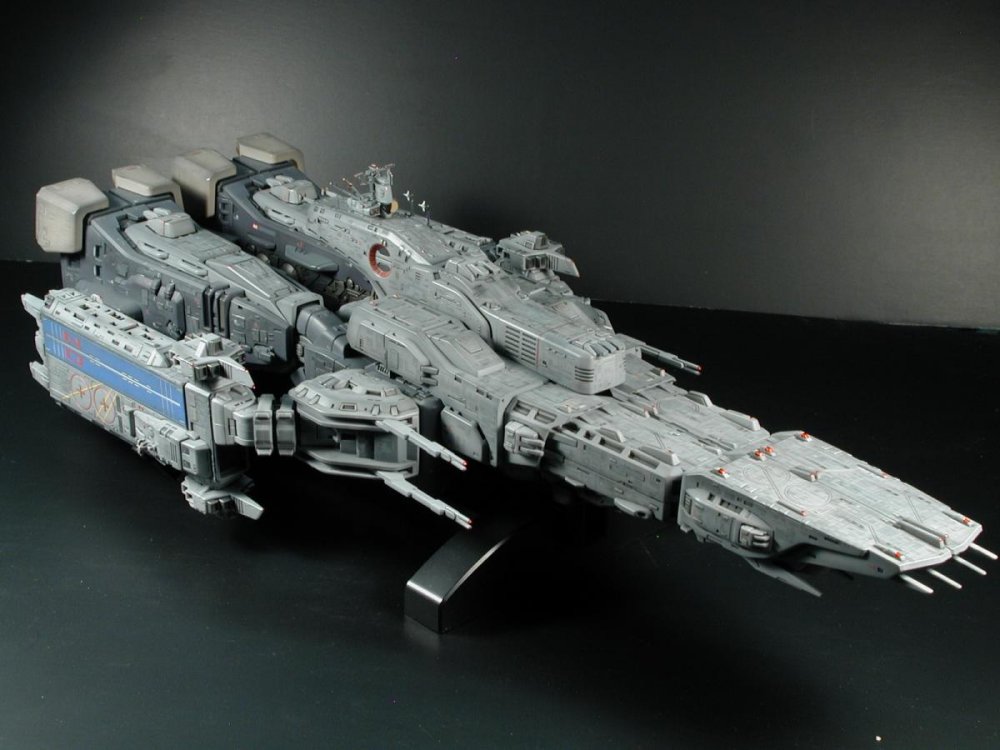
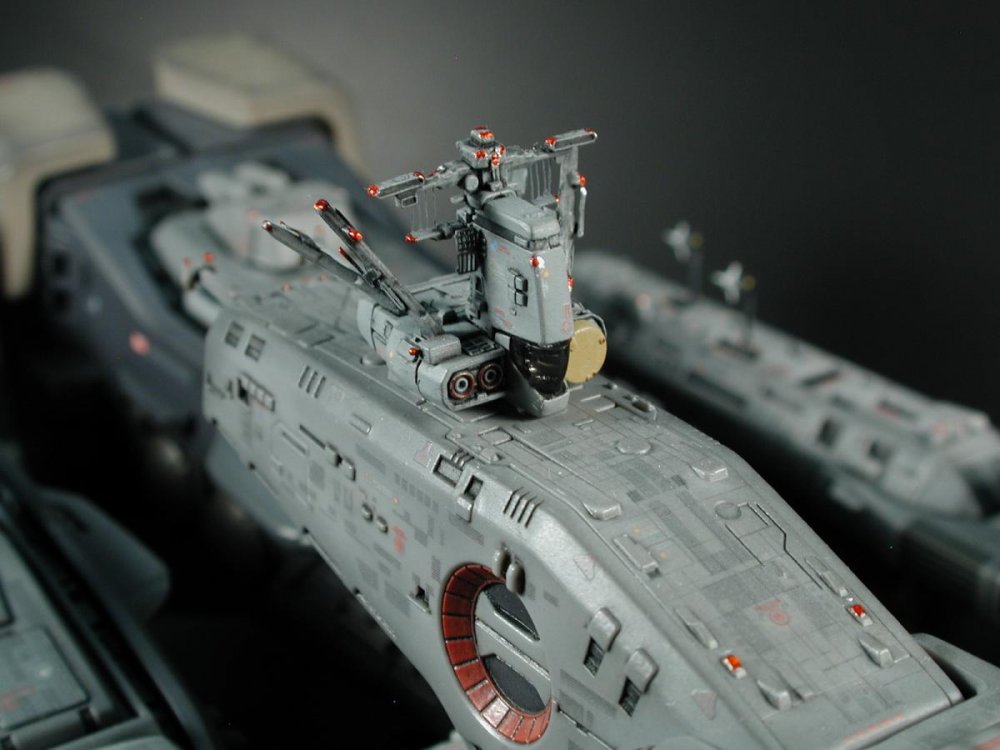
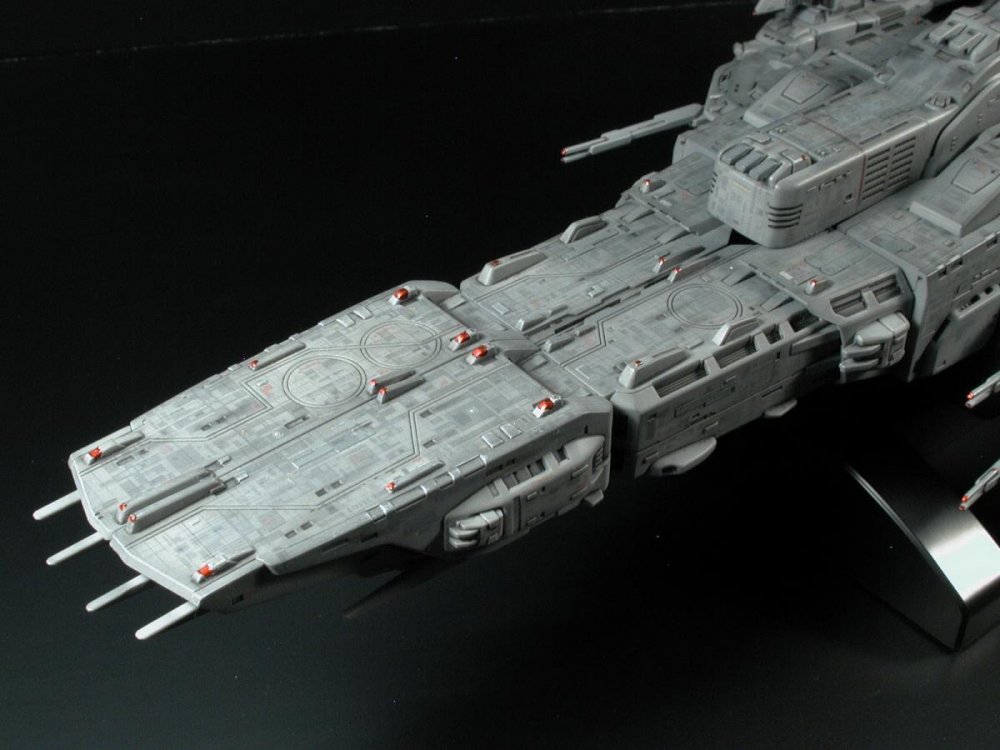
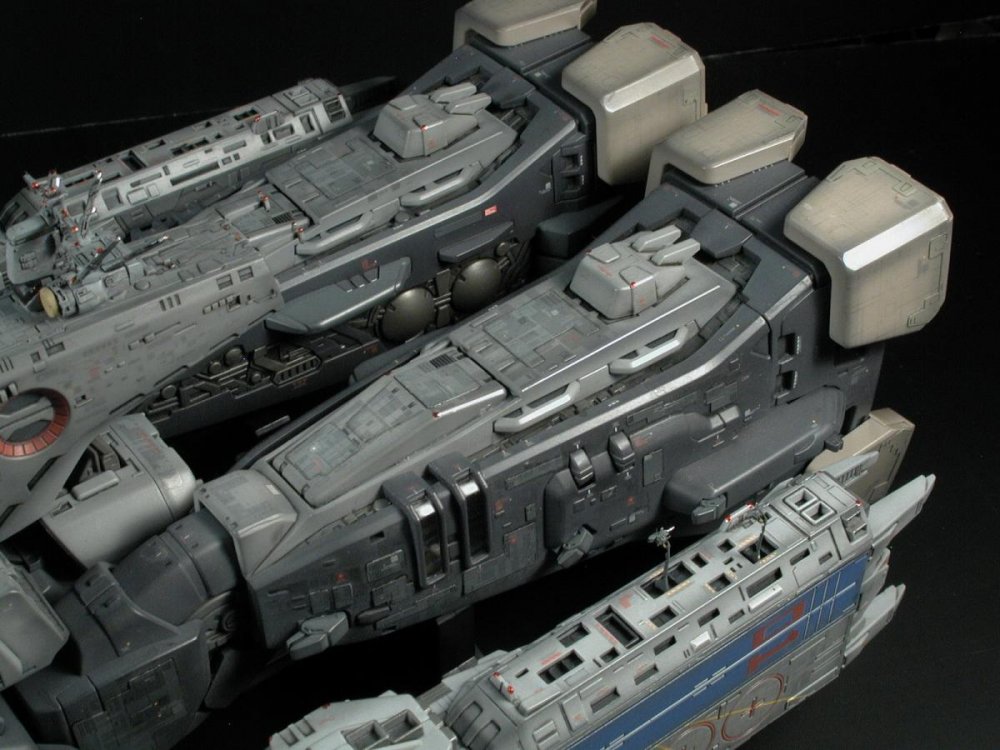
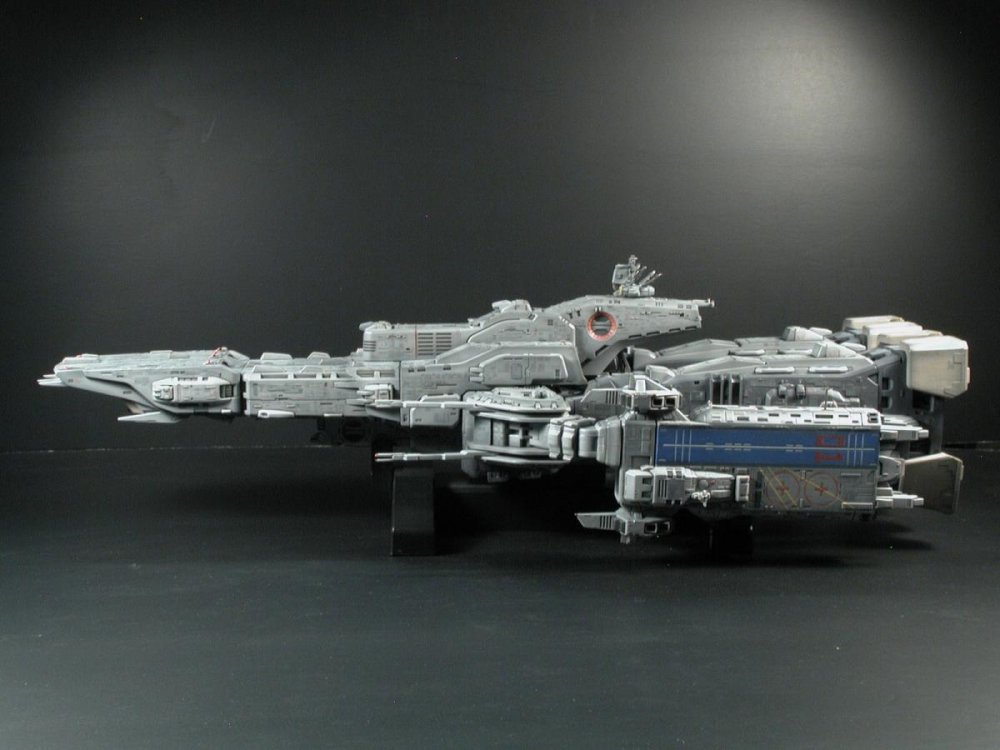
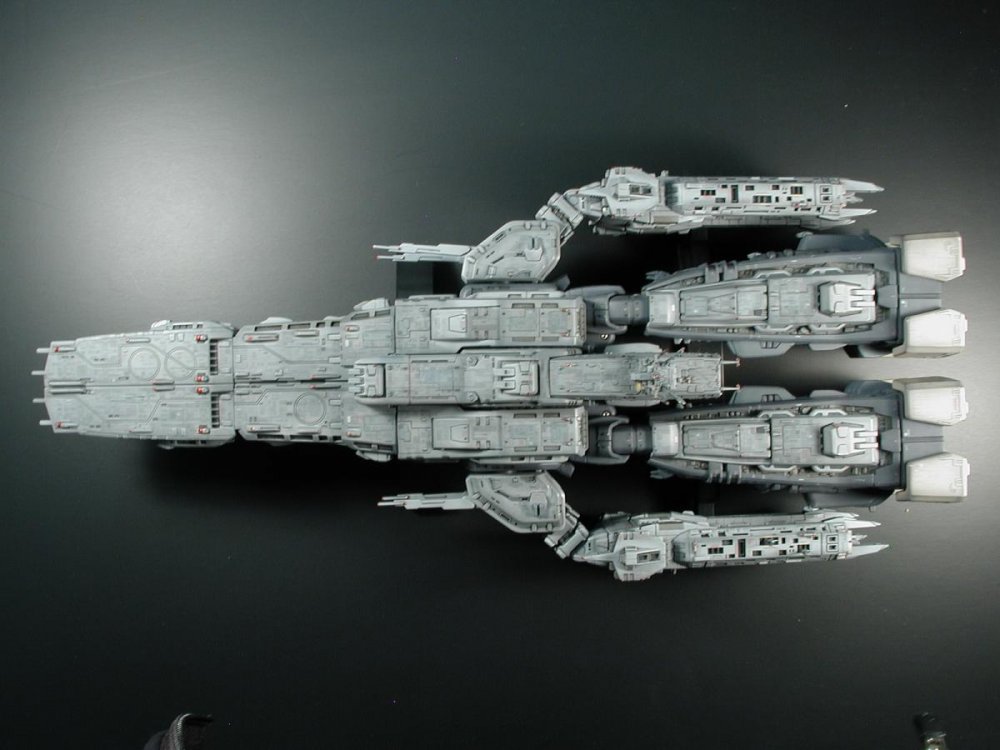
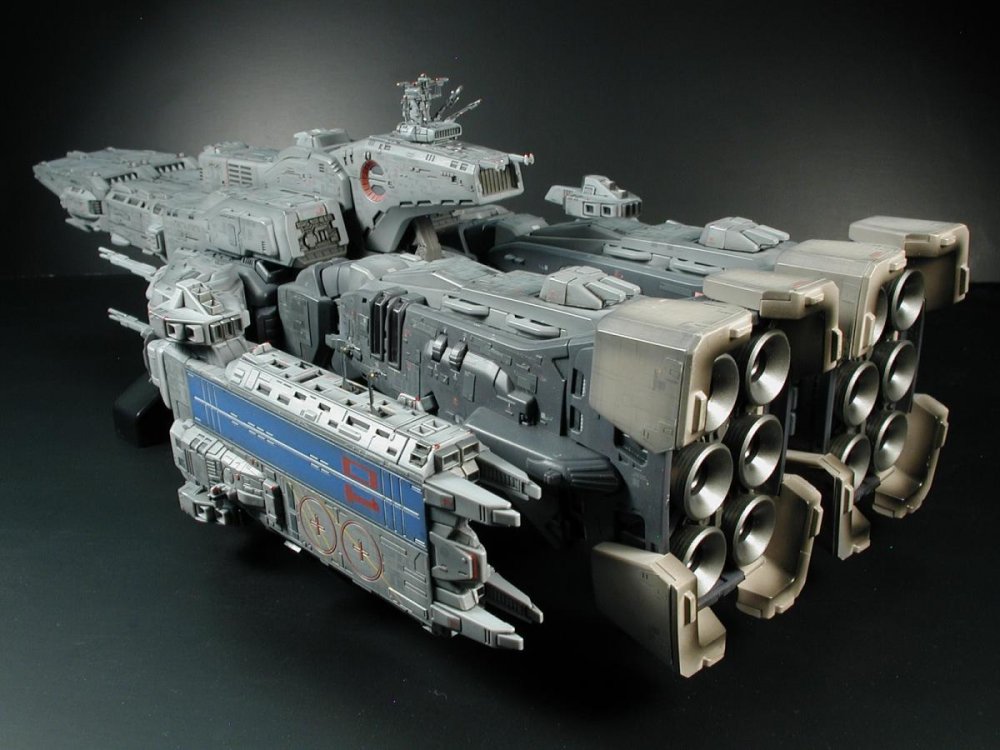
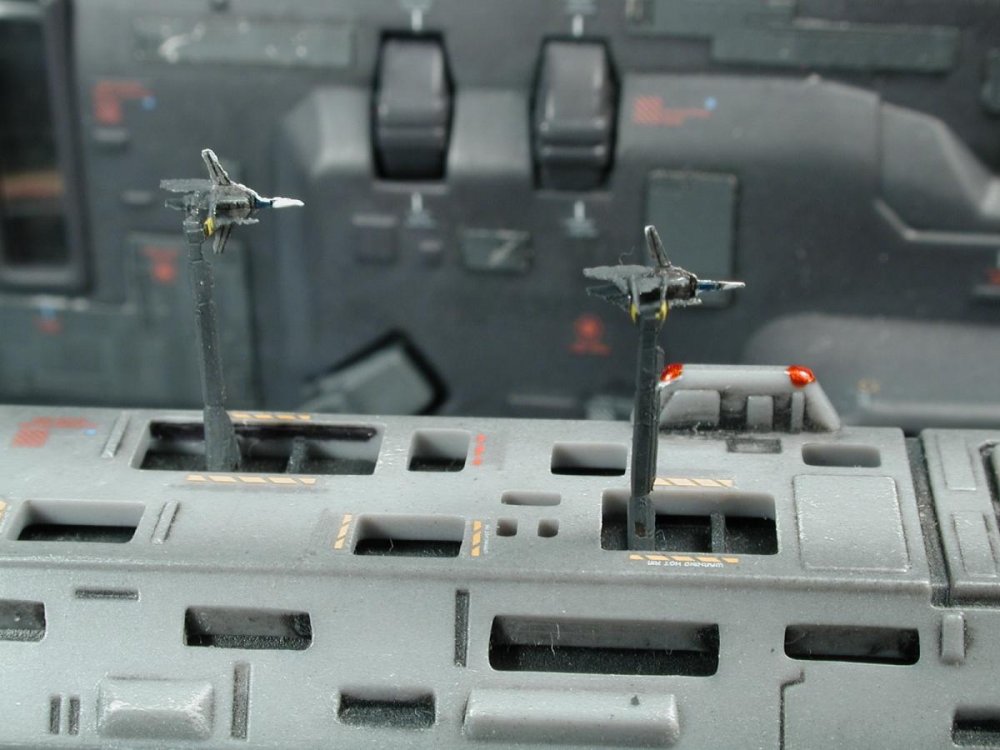
I purposely made the conscious decision that this was a painted toy and not a model, so I left a lot of the delicate "needle-like" antennas all over this ship off - I'm not sure if I made the right decision now, but I had intended to transform it once it a while (otherwise I would have puttied and sanded every seam). Some of it is my laziness and just wanted to cut down the scope of the work involved, but basically every one of my "real-world" fighter models that had delicate pilot tubes and lightning rods (F-16) have broken off over time despite my careful handling. Oh well. The photos do get progressively better as I shoot it - like everything, I get rusty when I haven't done it in a while. Well, overall I am very happy with how it turned out and admire the ones on these boards that have gone through the extra effort of lighting them - BRAVO! That's just beyond me at the moment. Maybe in 10yrs or so when I'm no longer the center of my daughter's universe I might return to modelling like I once did, but for now, toy collecting has taken over and will have to do for now. Yamato has really outdone themselves with this stellar offering and I wholeheartedly recommend this toy to anyone still sitting on the fence about it - its truly remarkable. This and the new VF-4G Lightning has to be my all-time-favorite offerings from Yamato.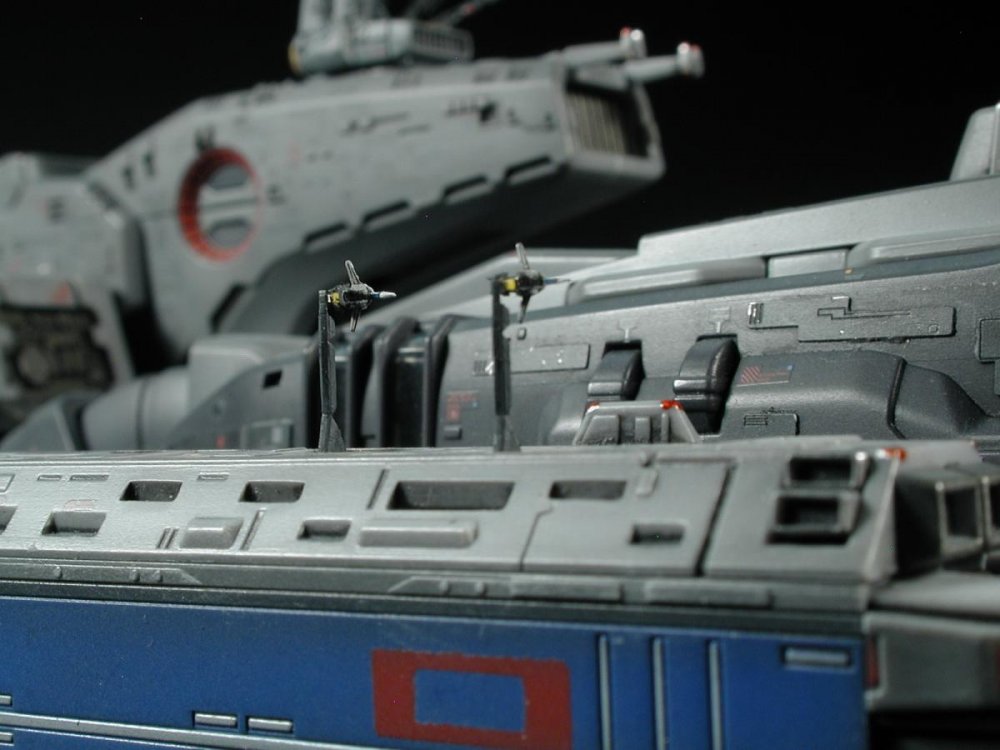


-
Yamato 1/3000 SDF-1 modification and paint up...
wm cheng replied to wm cheng's topic in The Workshop!
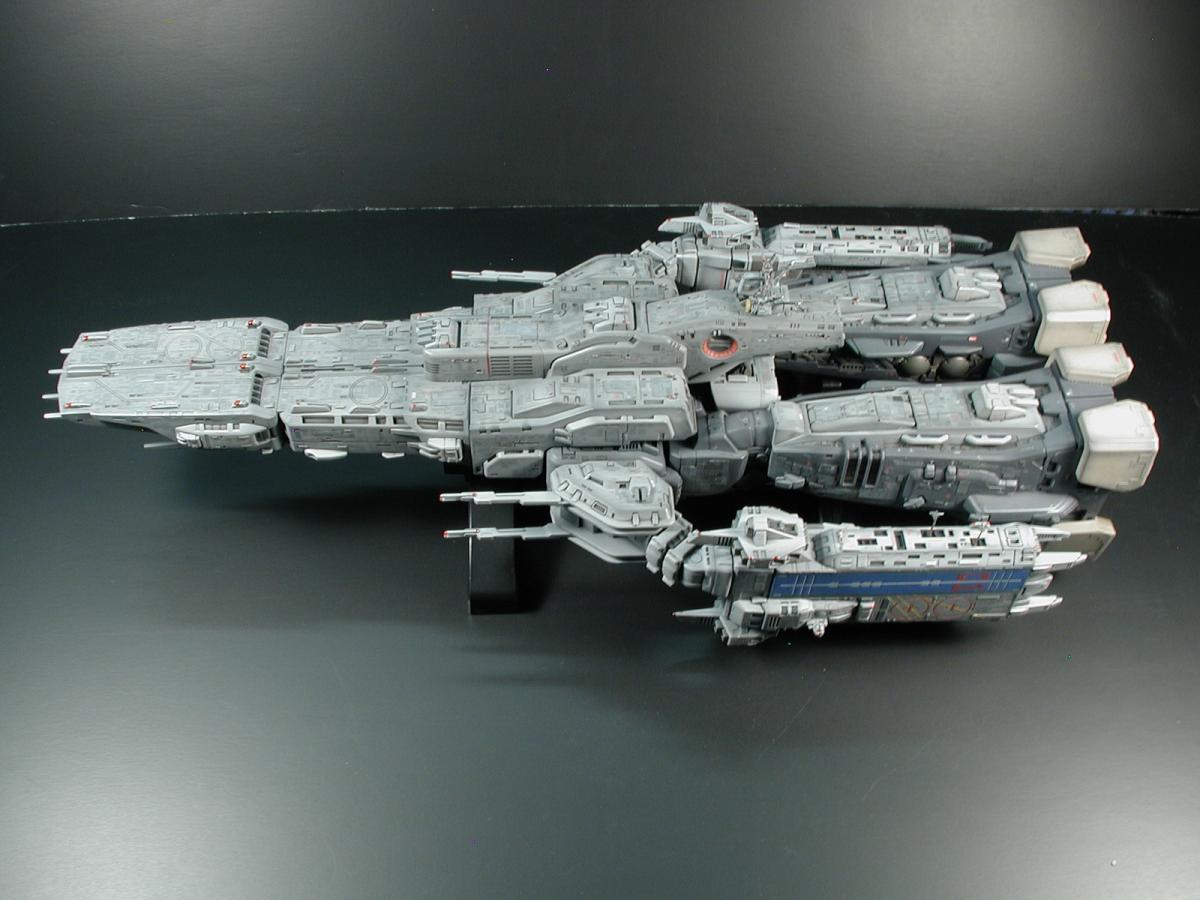
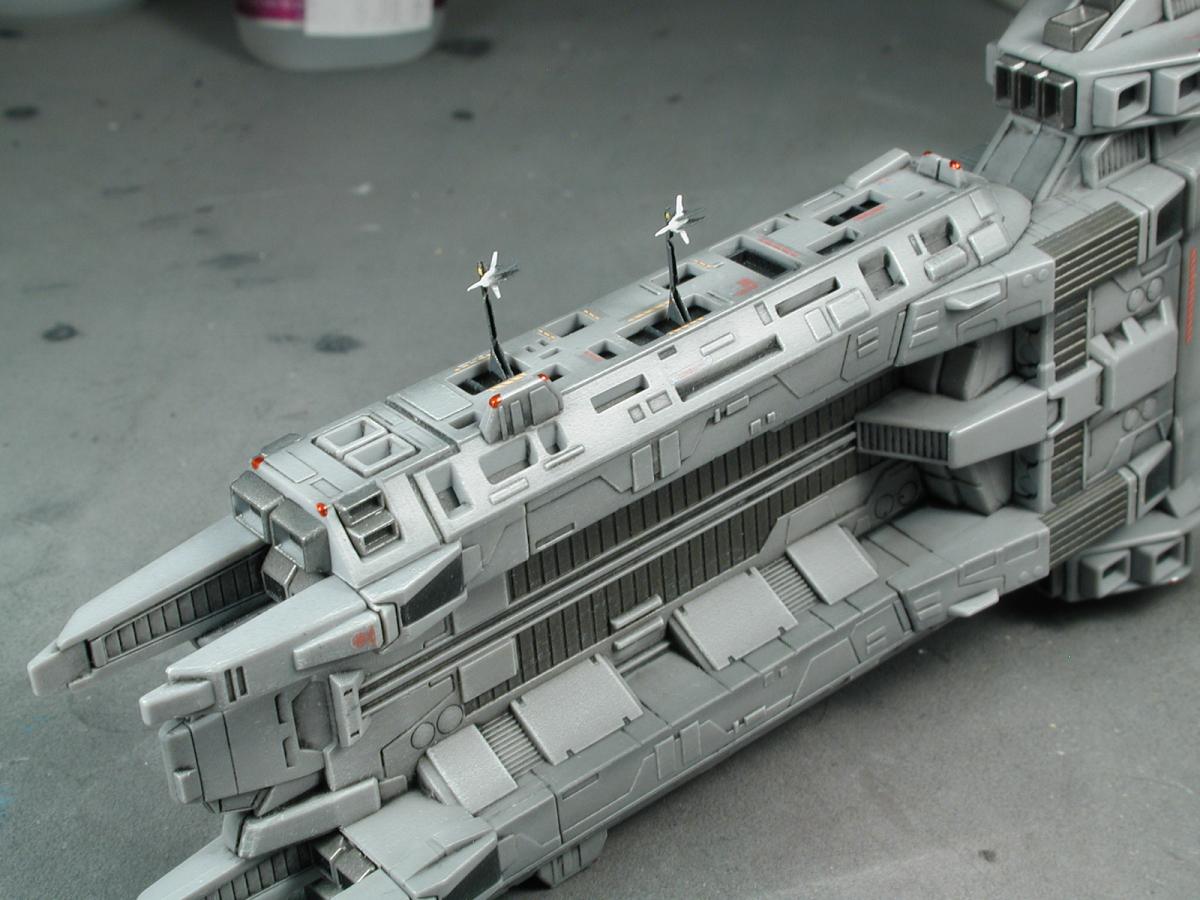
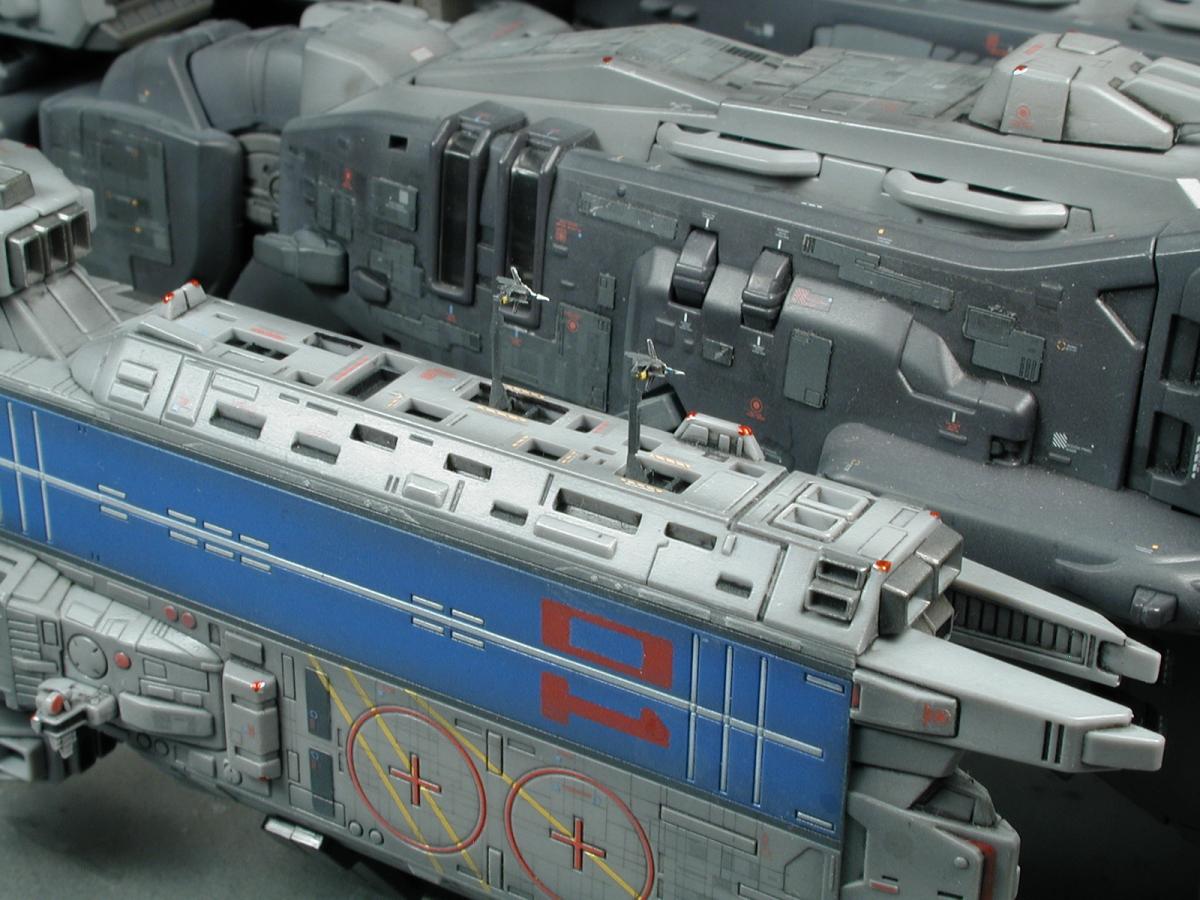
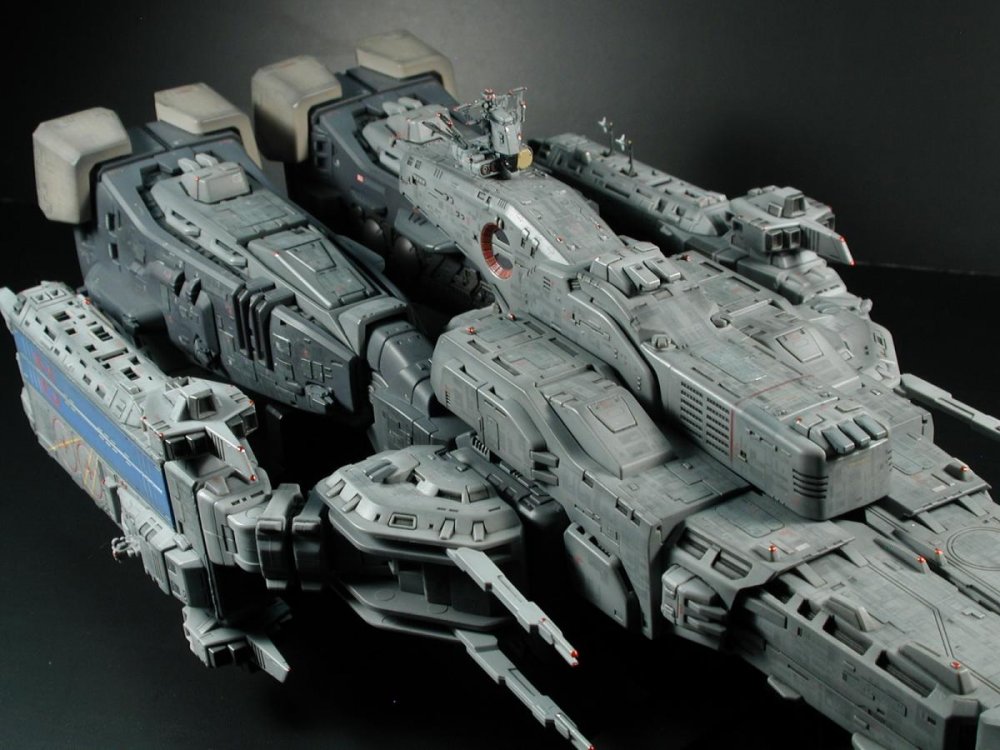
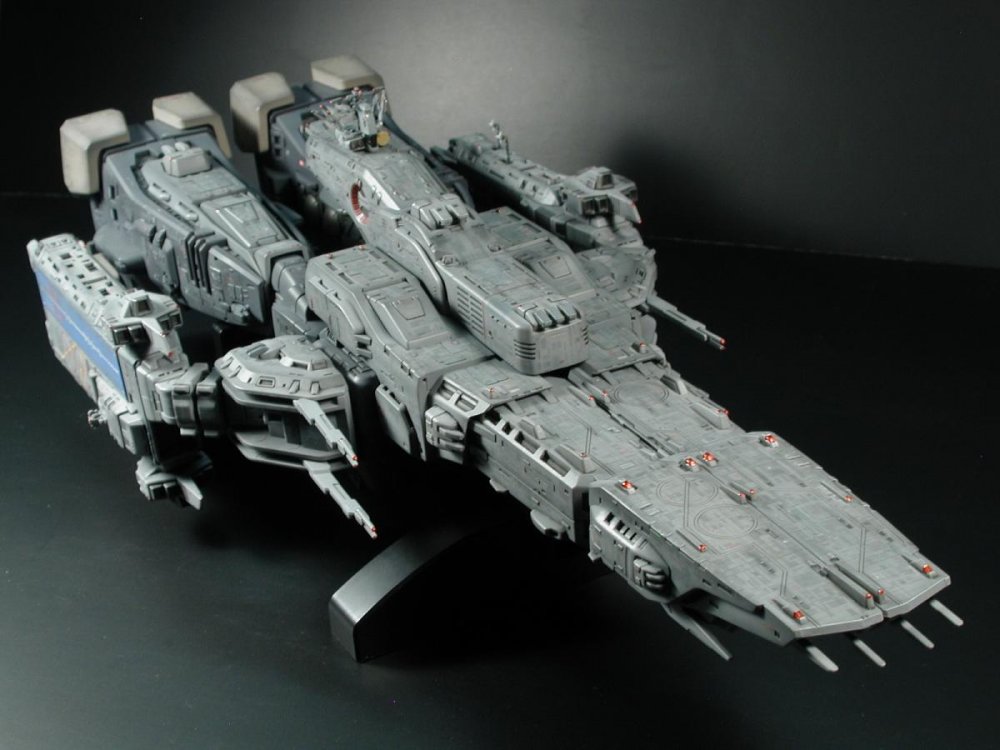
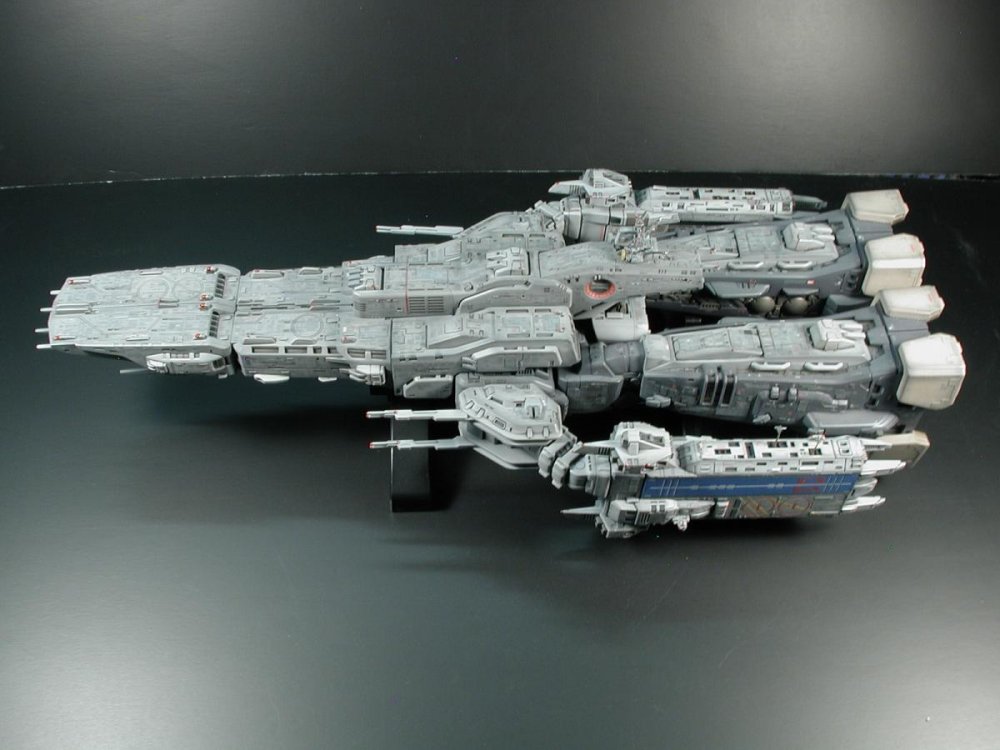
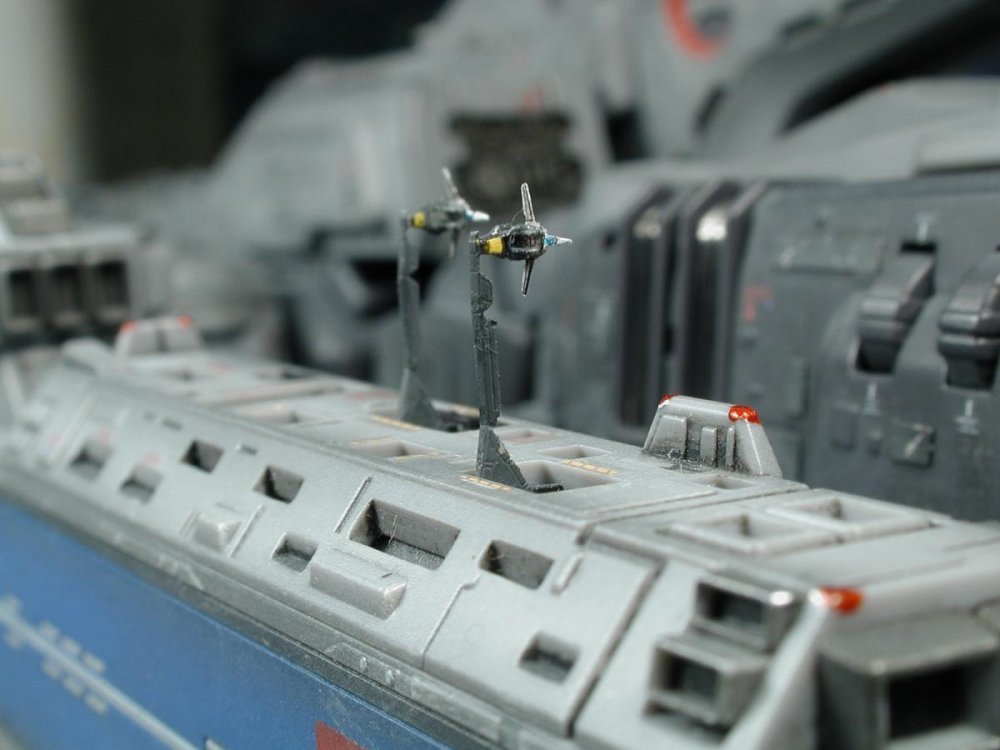
So lastly, I took some quick pictures of my baby. I couldn't go outside to get proper lighting (its fricken cold in Canada in the winter!) so I probably won't get decent shots till the Summer. This will have to do under proper shots are done. This is just on my workbench with whatever black foam core I could find lying around the basement so you get the idea!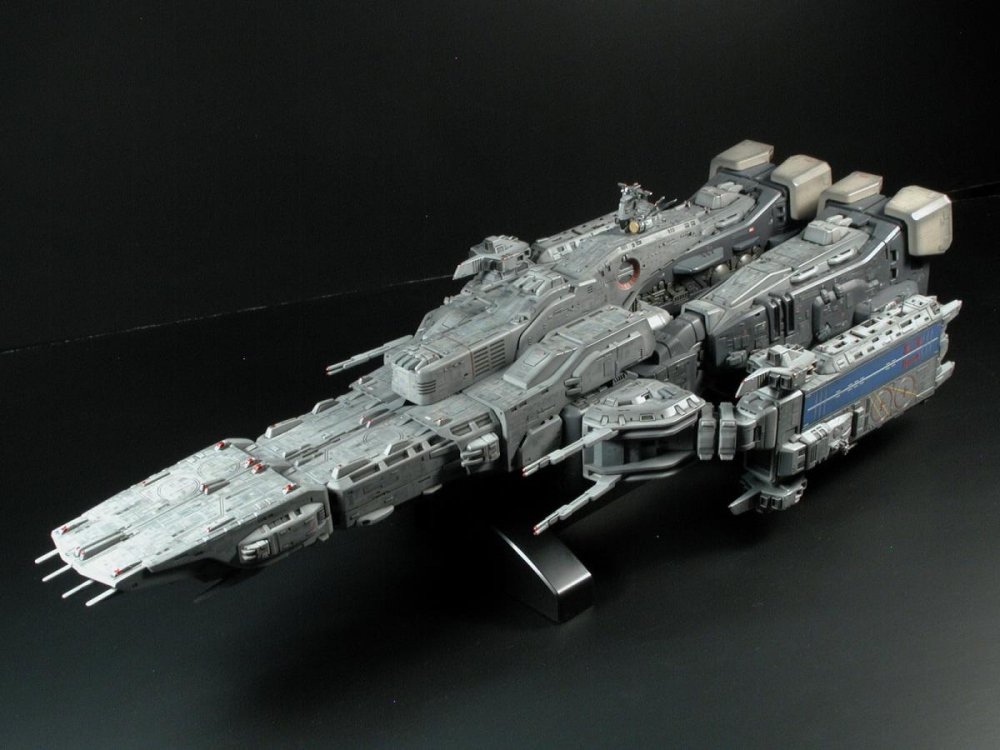

-
Yamato 1/3000 SDF-1 modification and paint up...
wm cheng replied to wm cheng's topic in The Workshop!
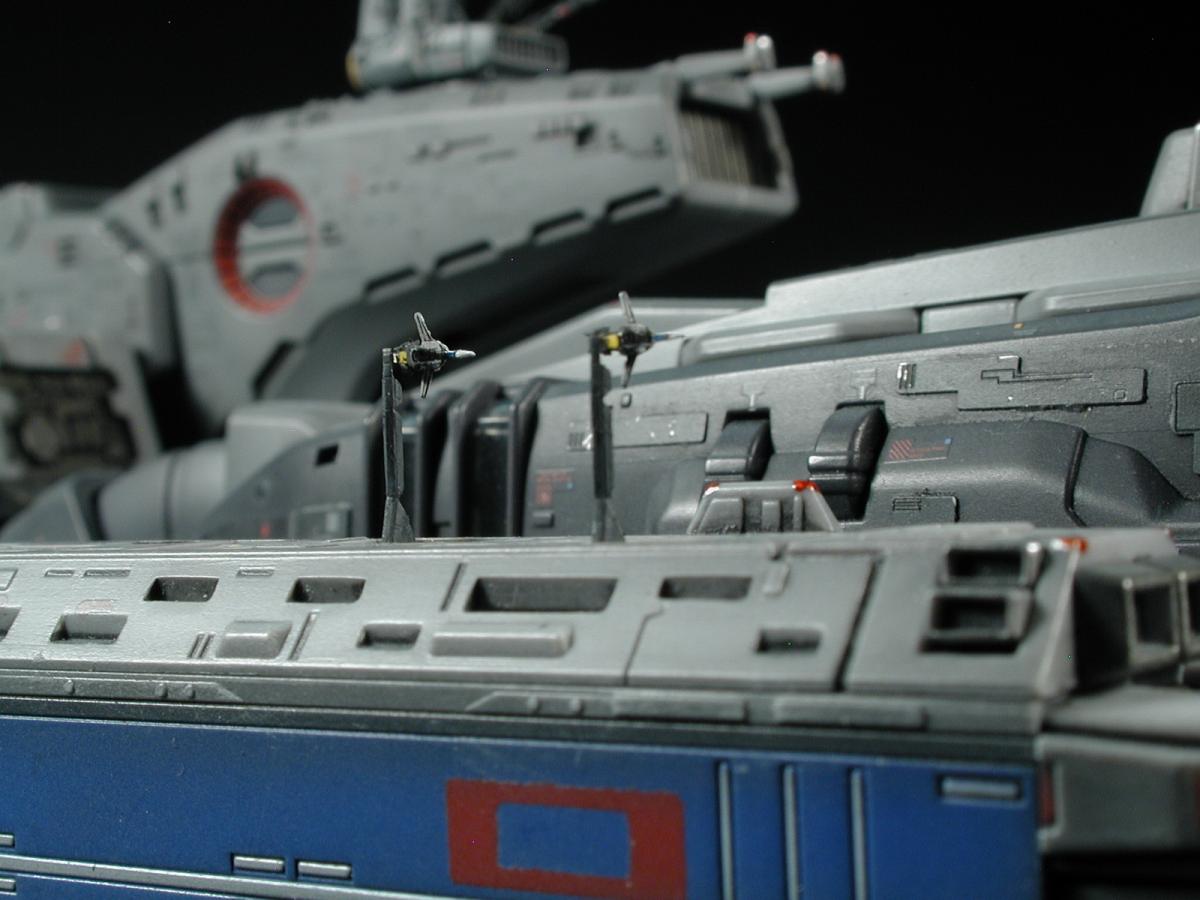
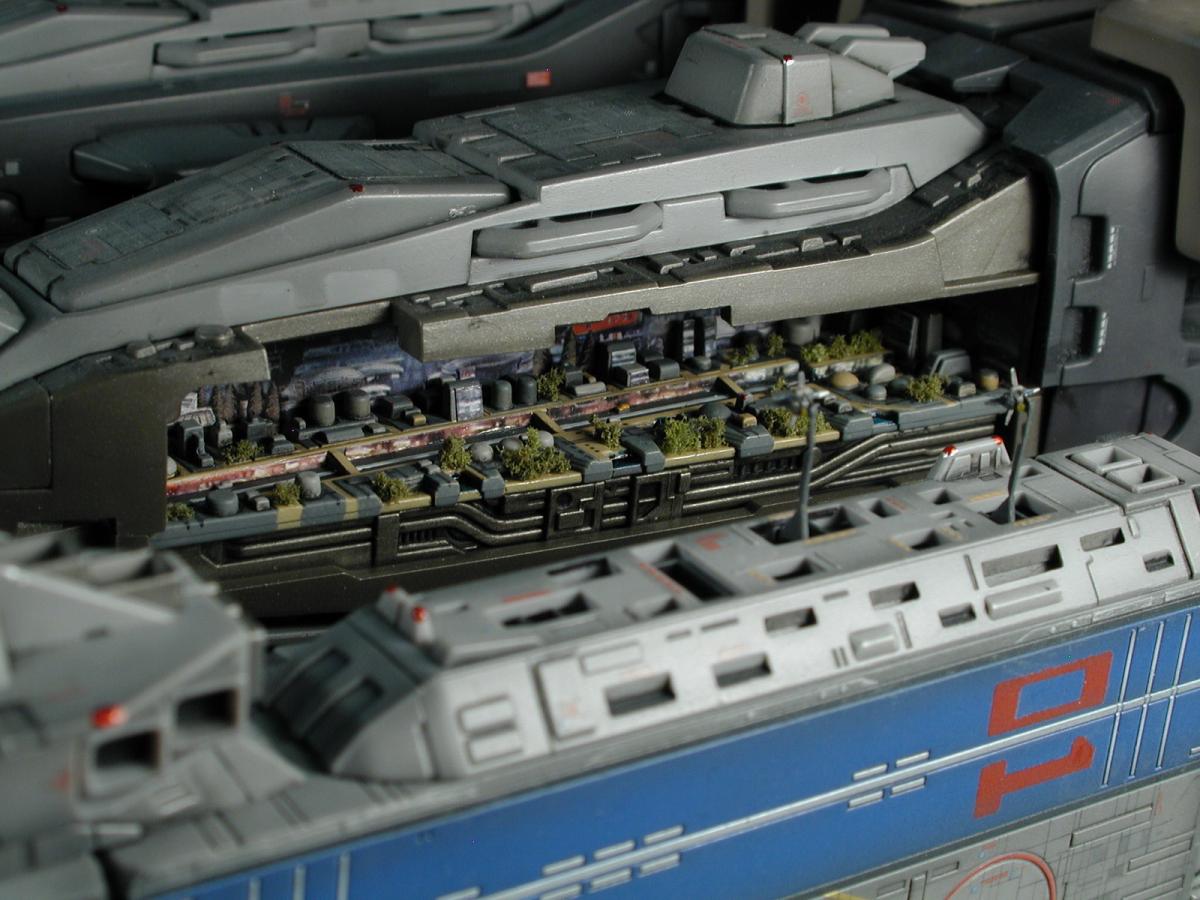
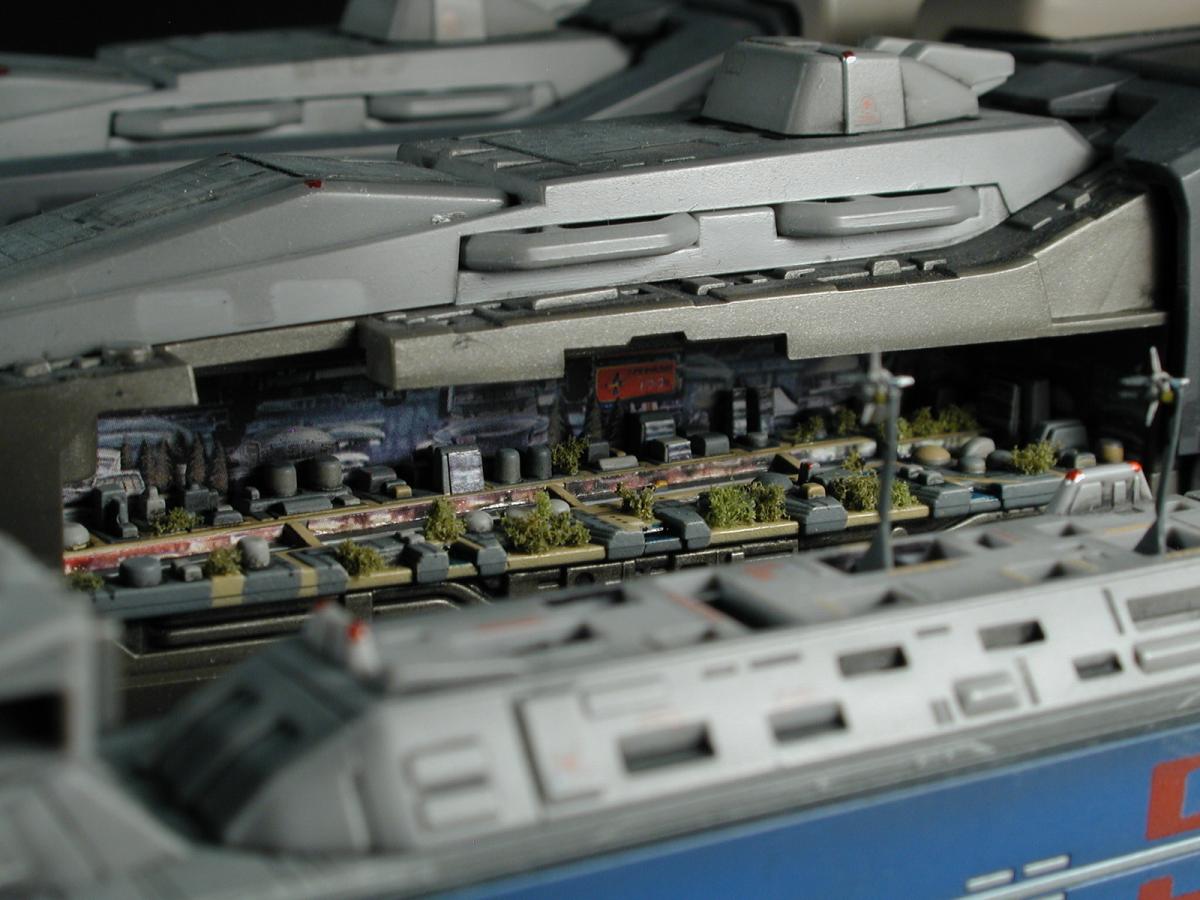
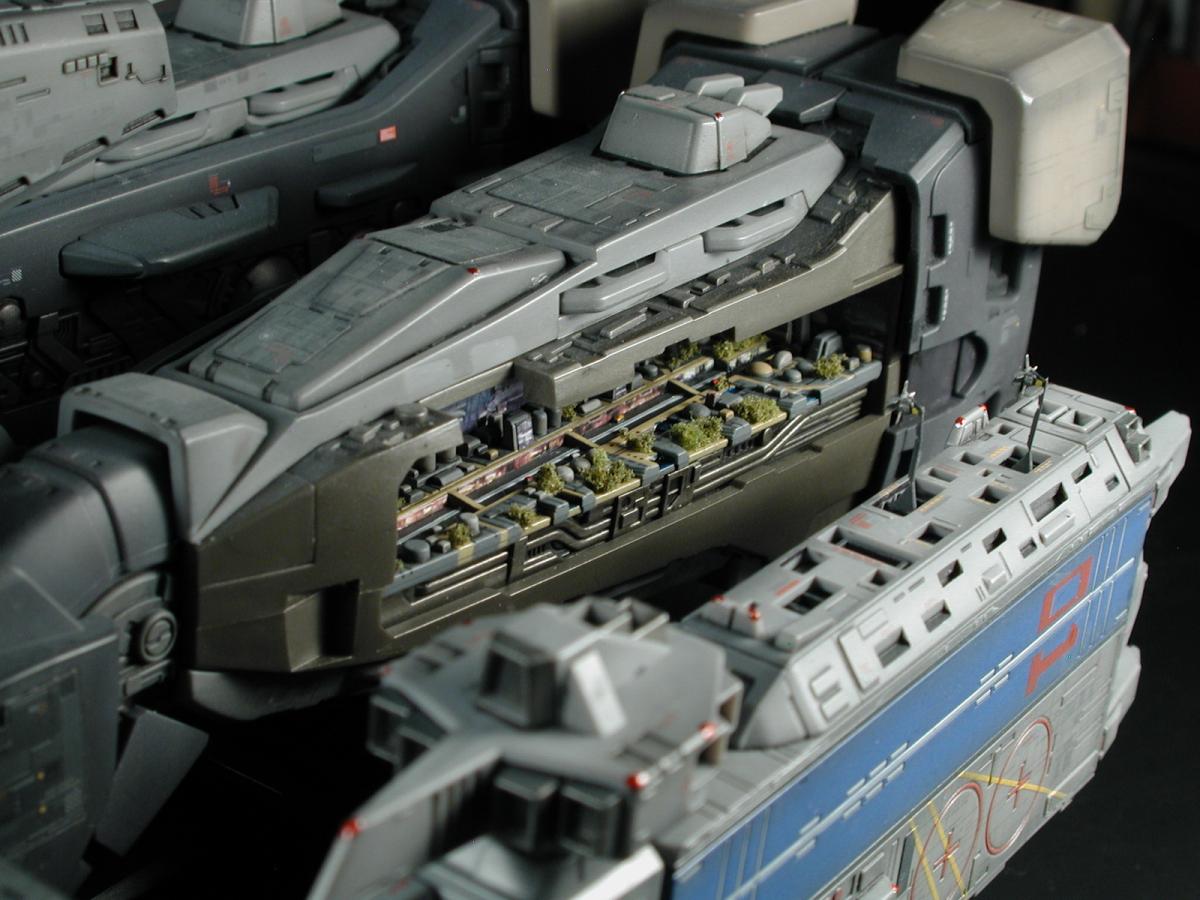
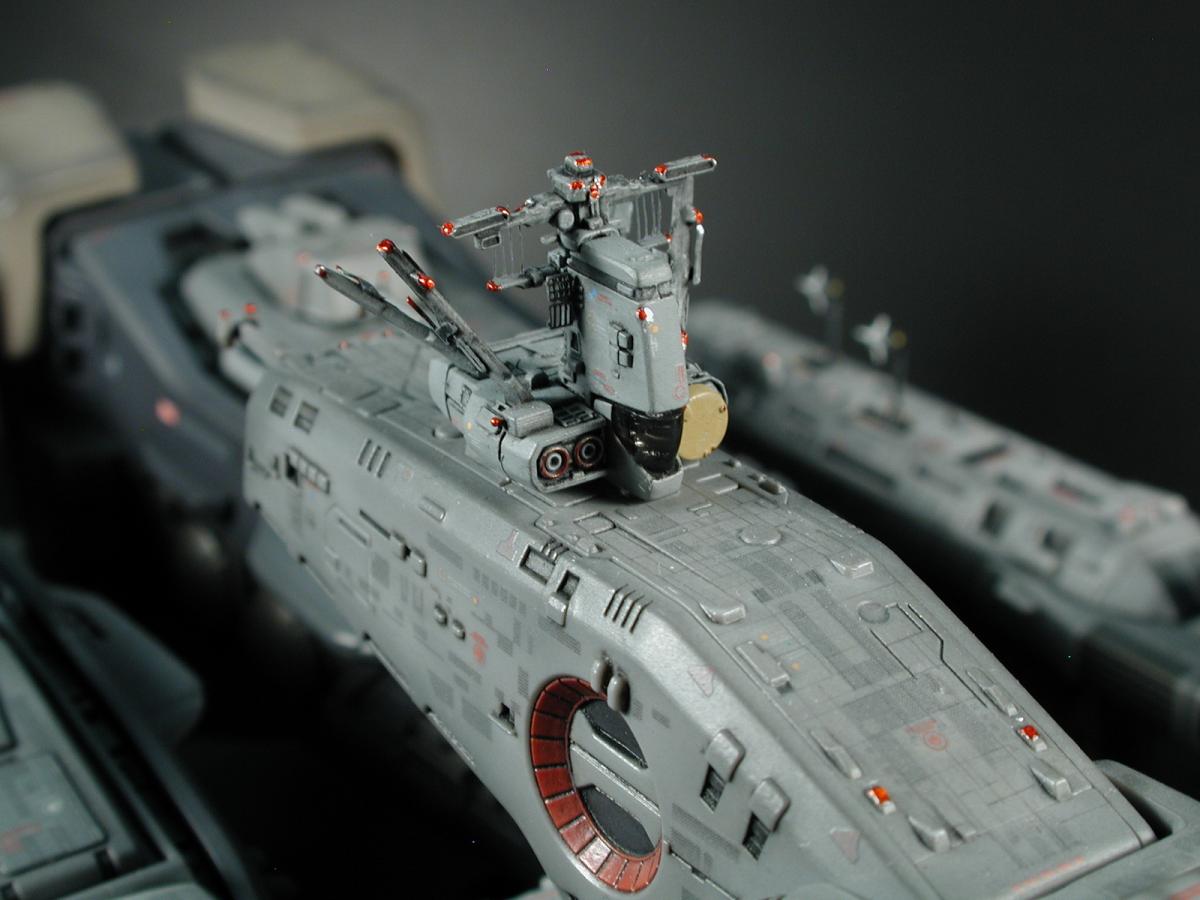
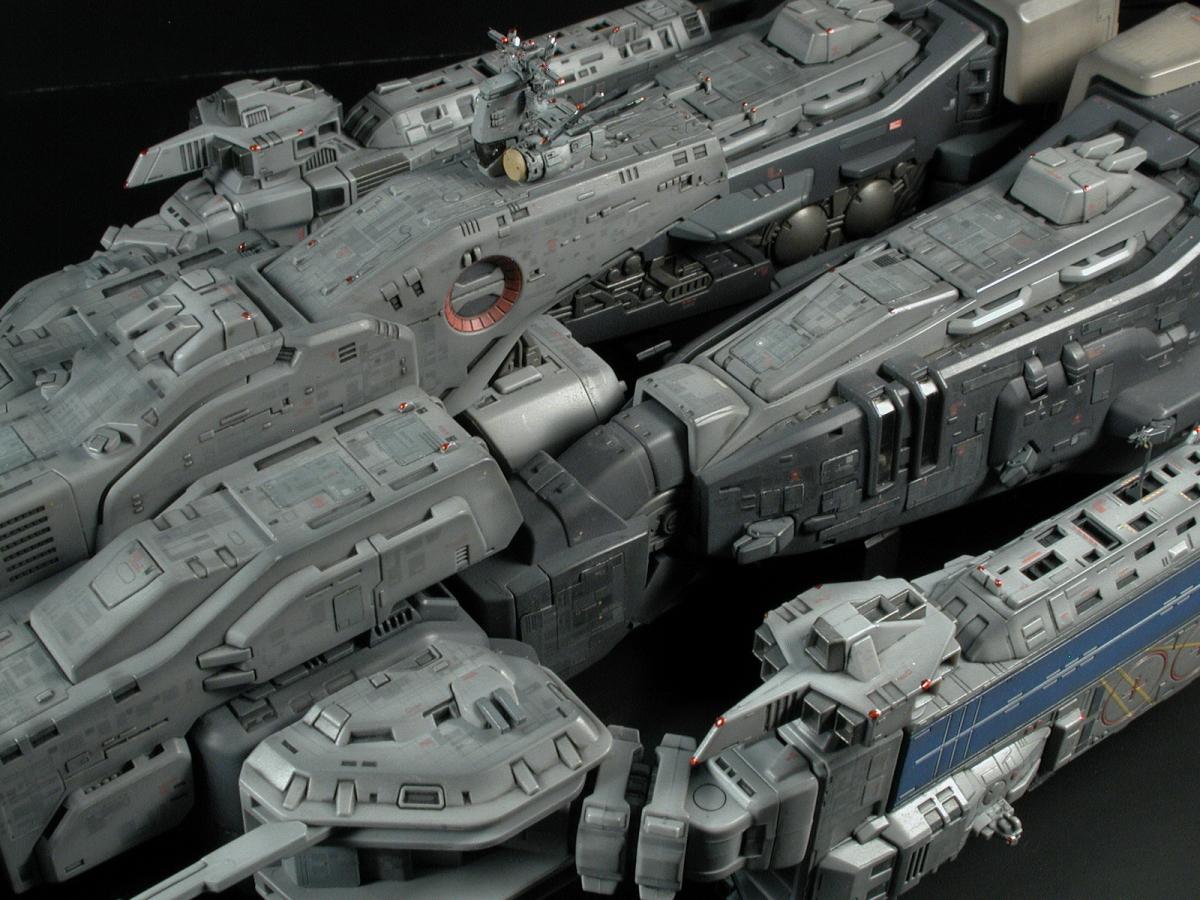
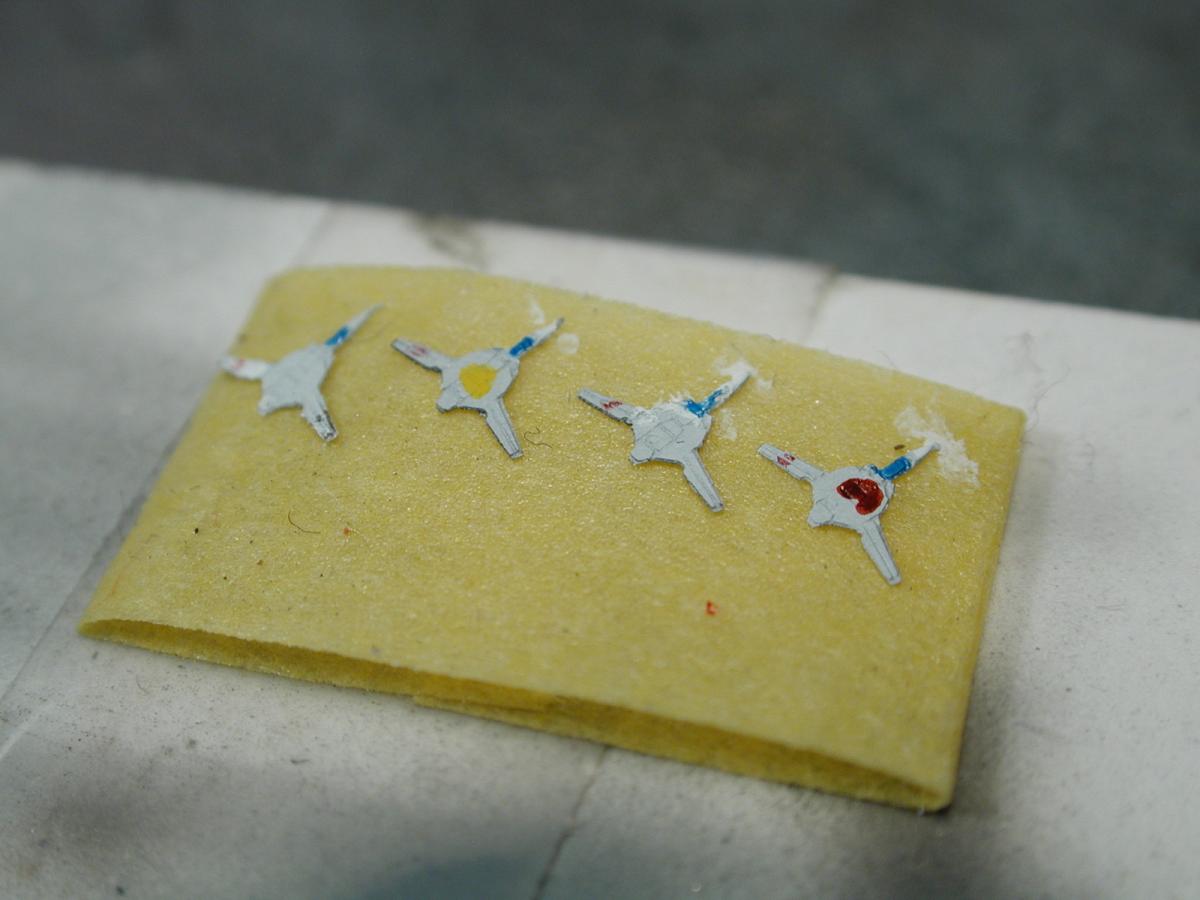
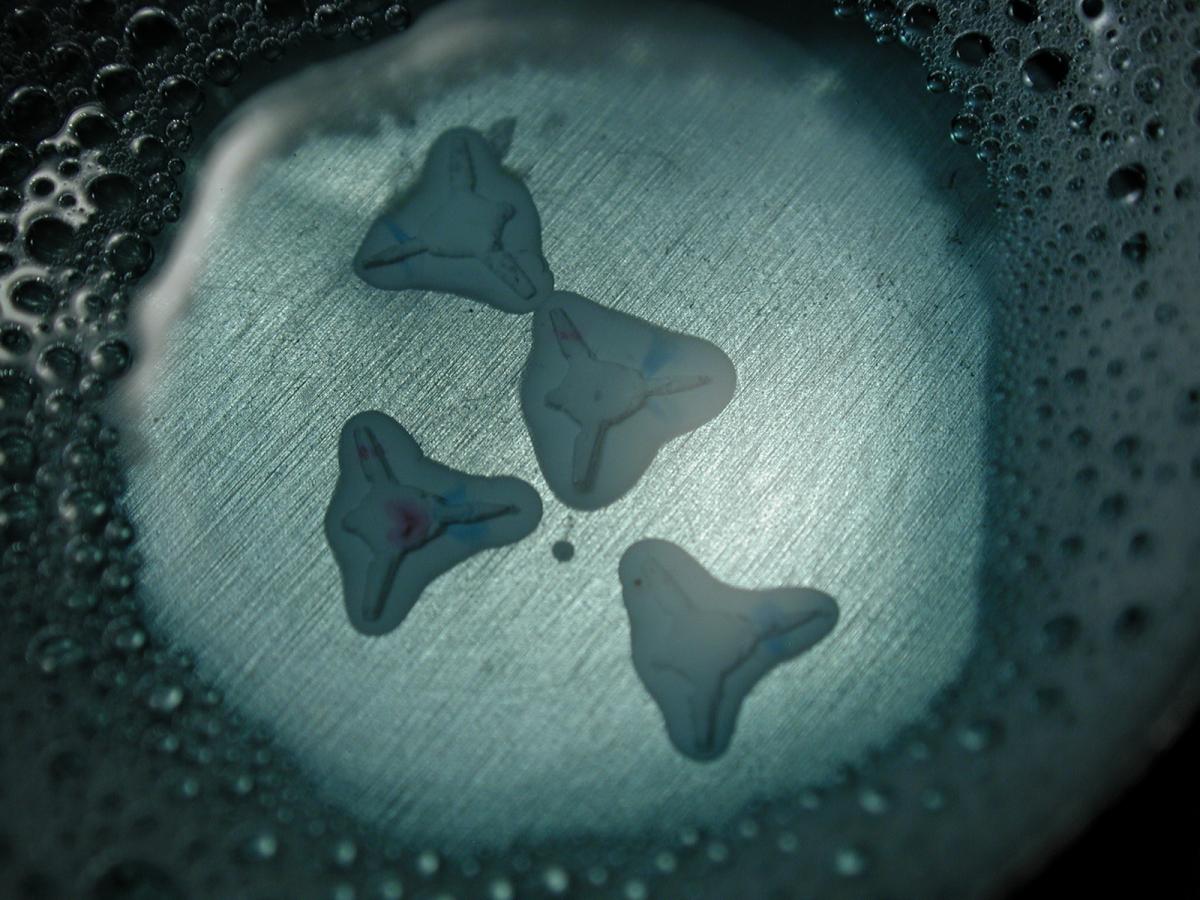
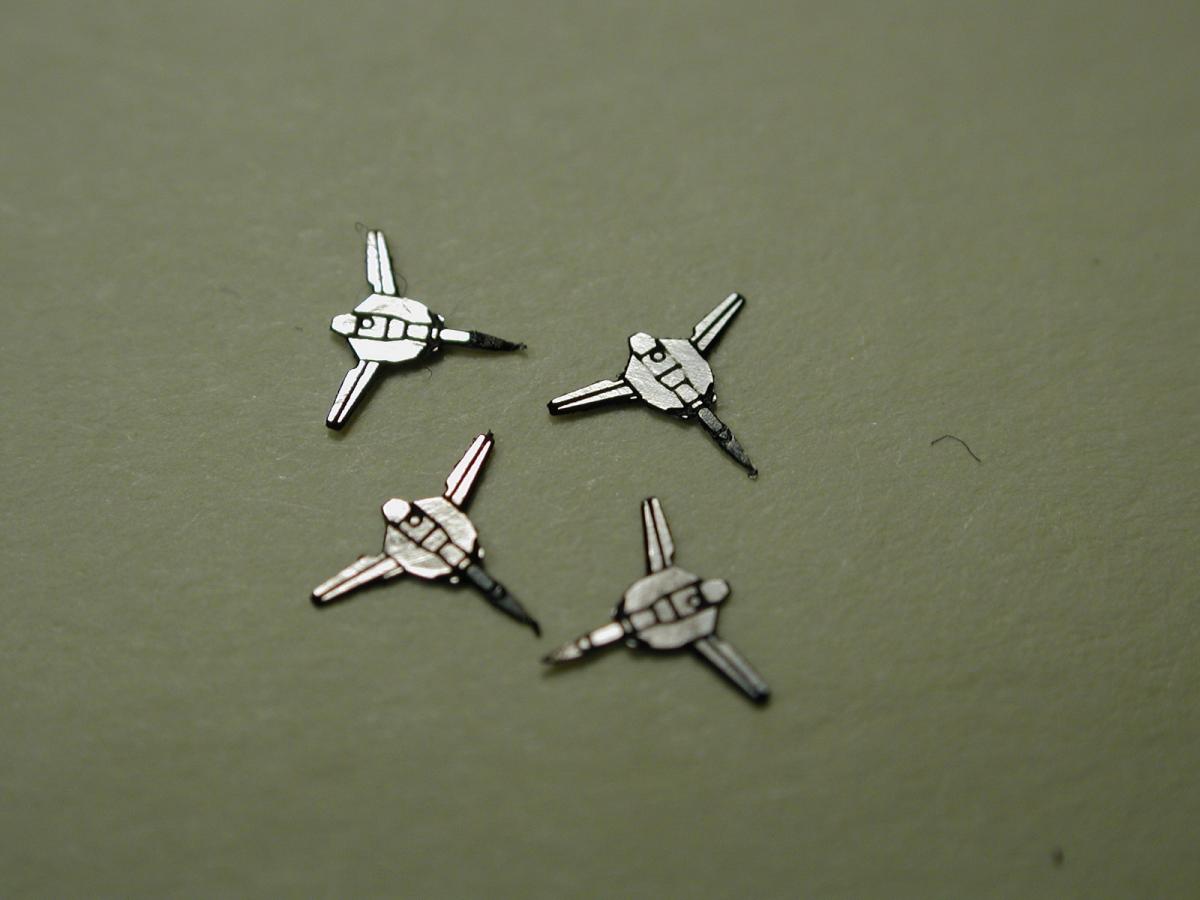
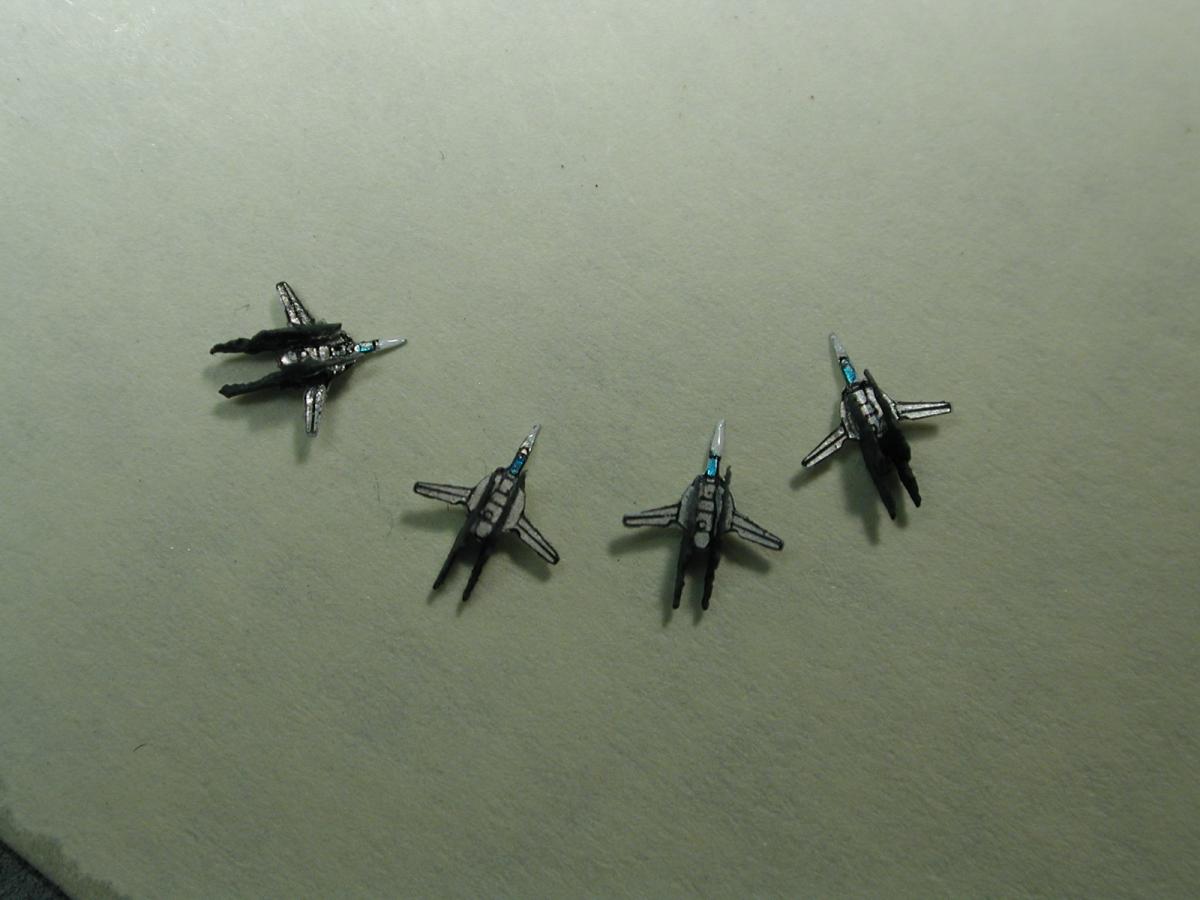
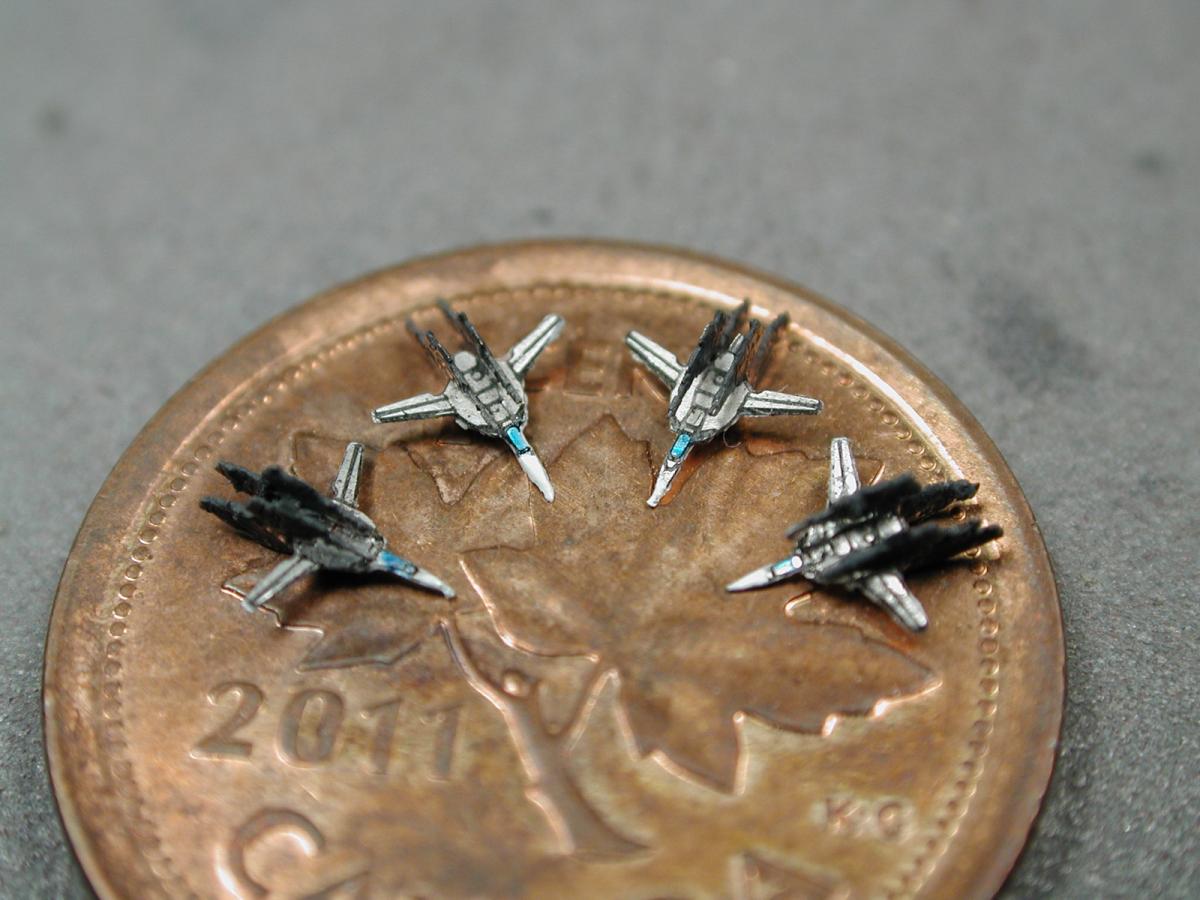
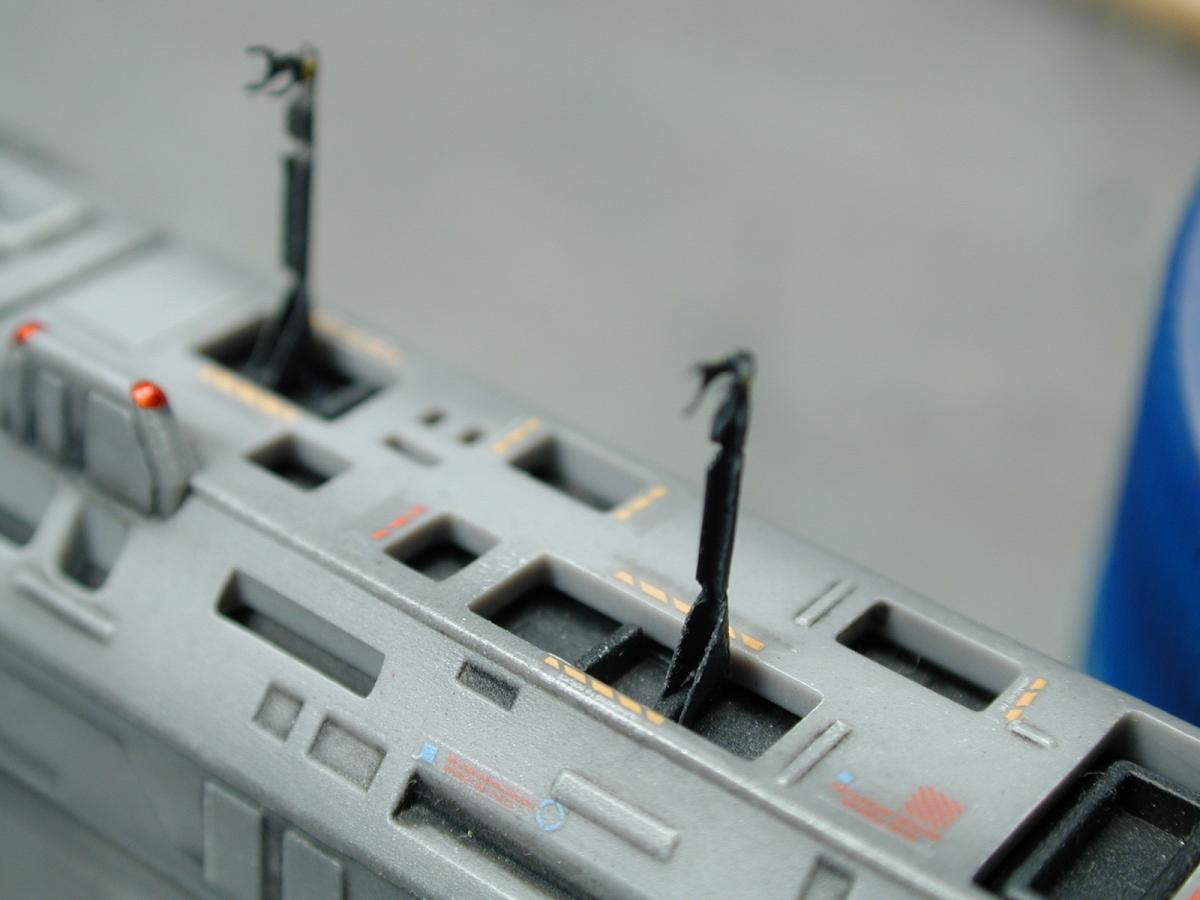
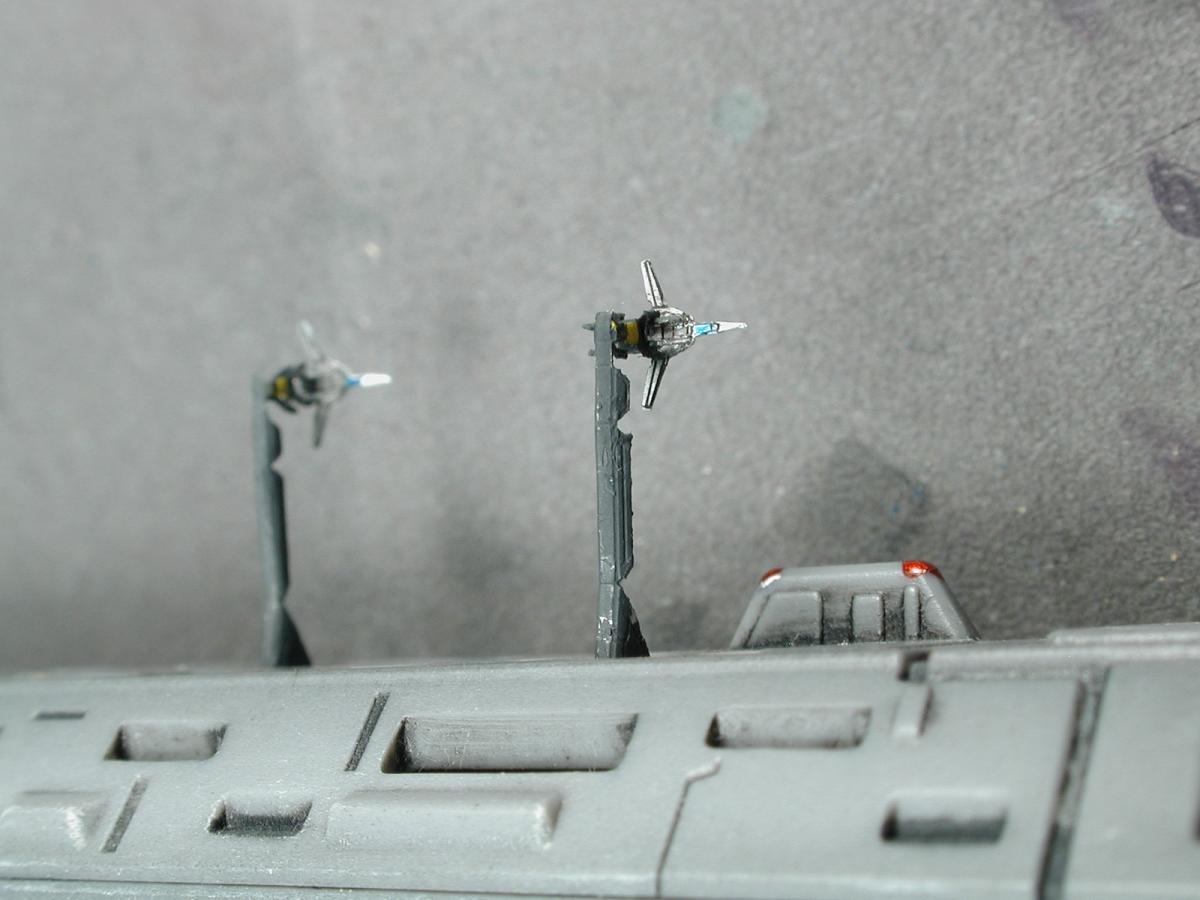
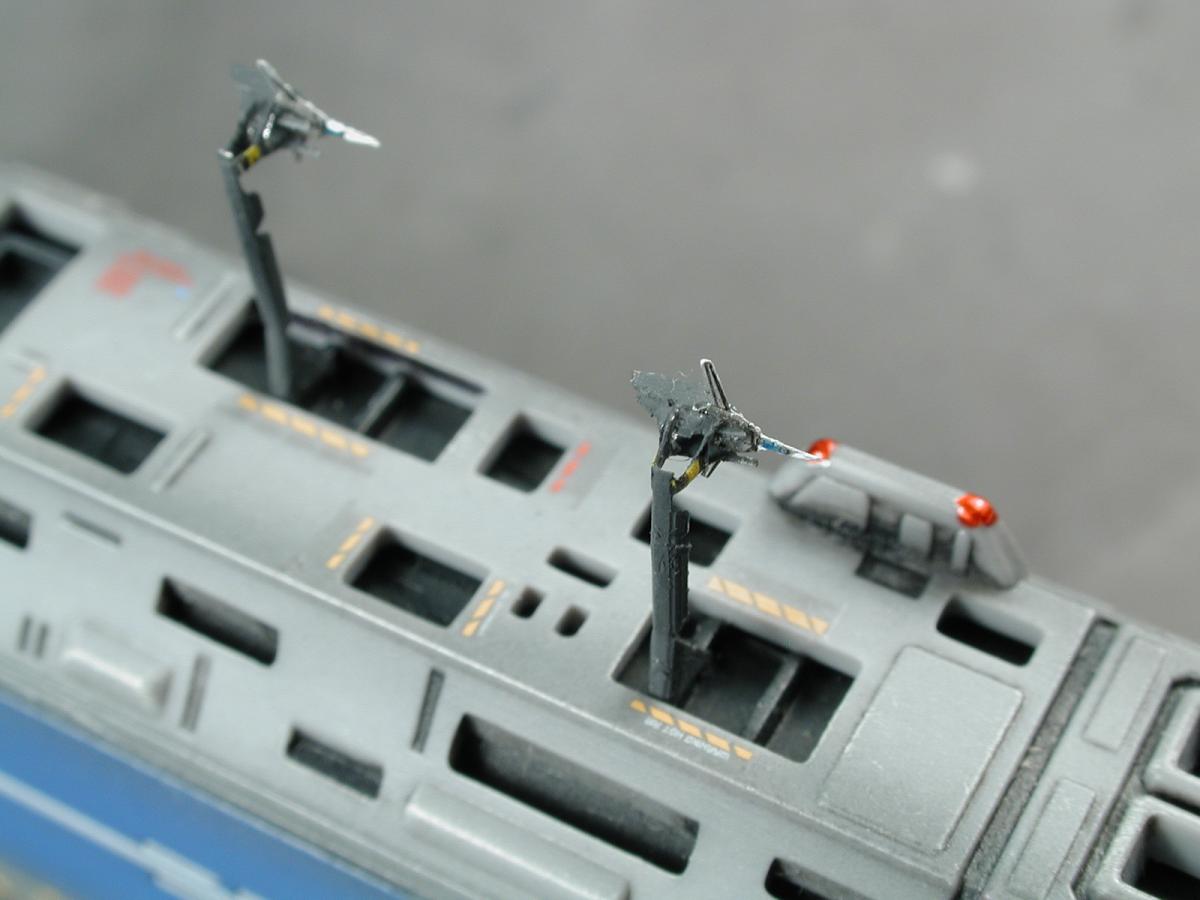
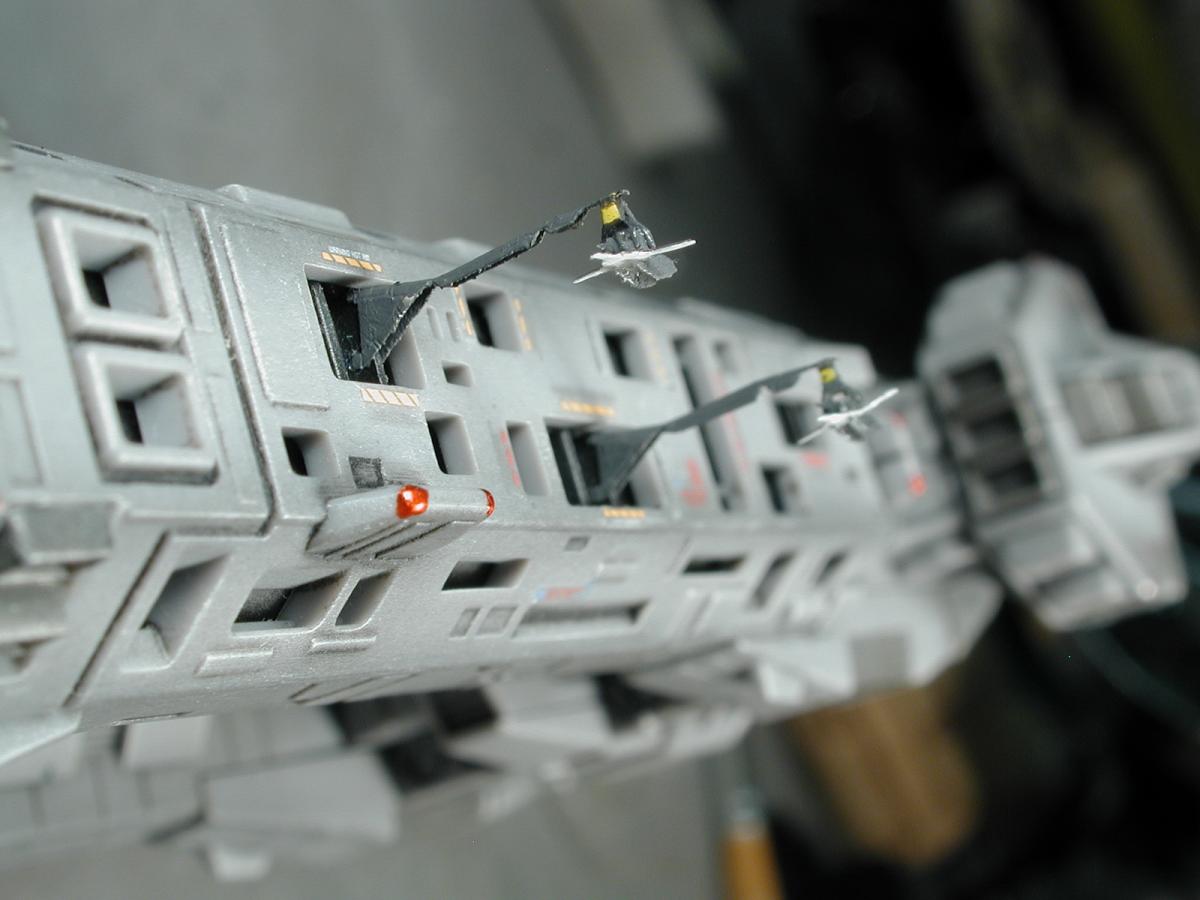
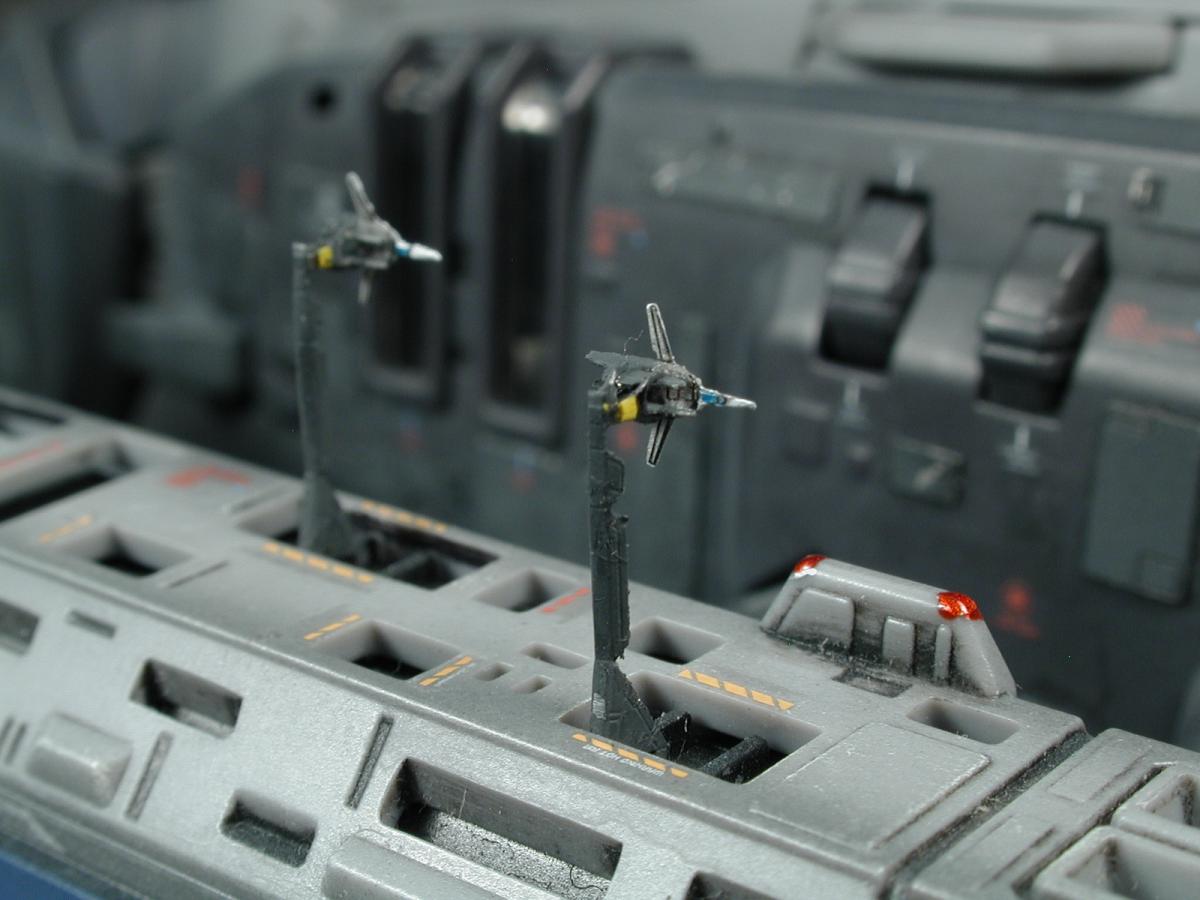
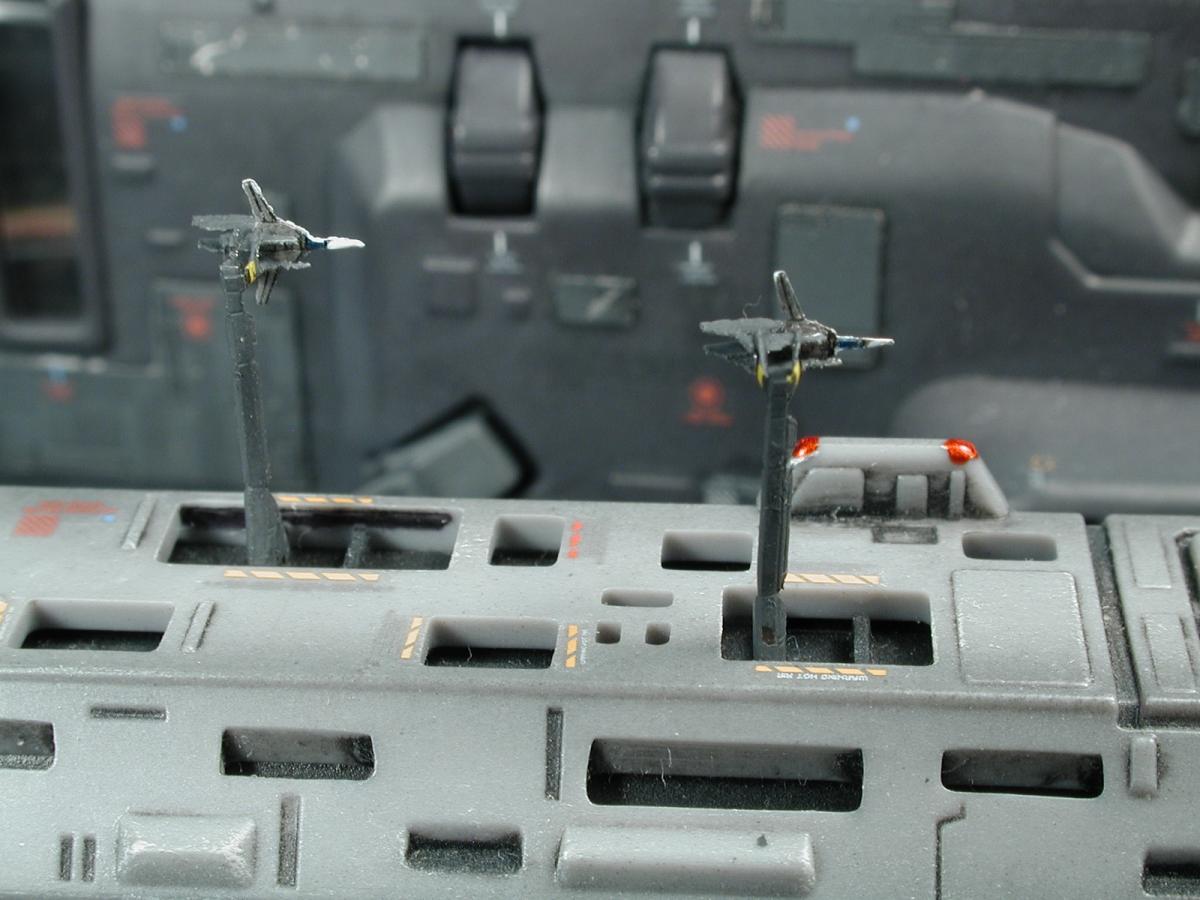
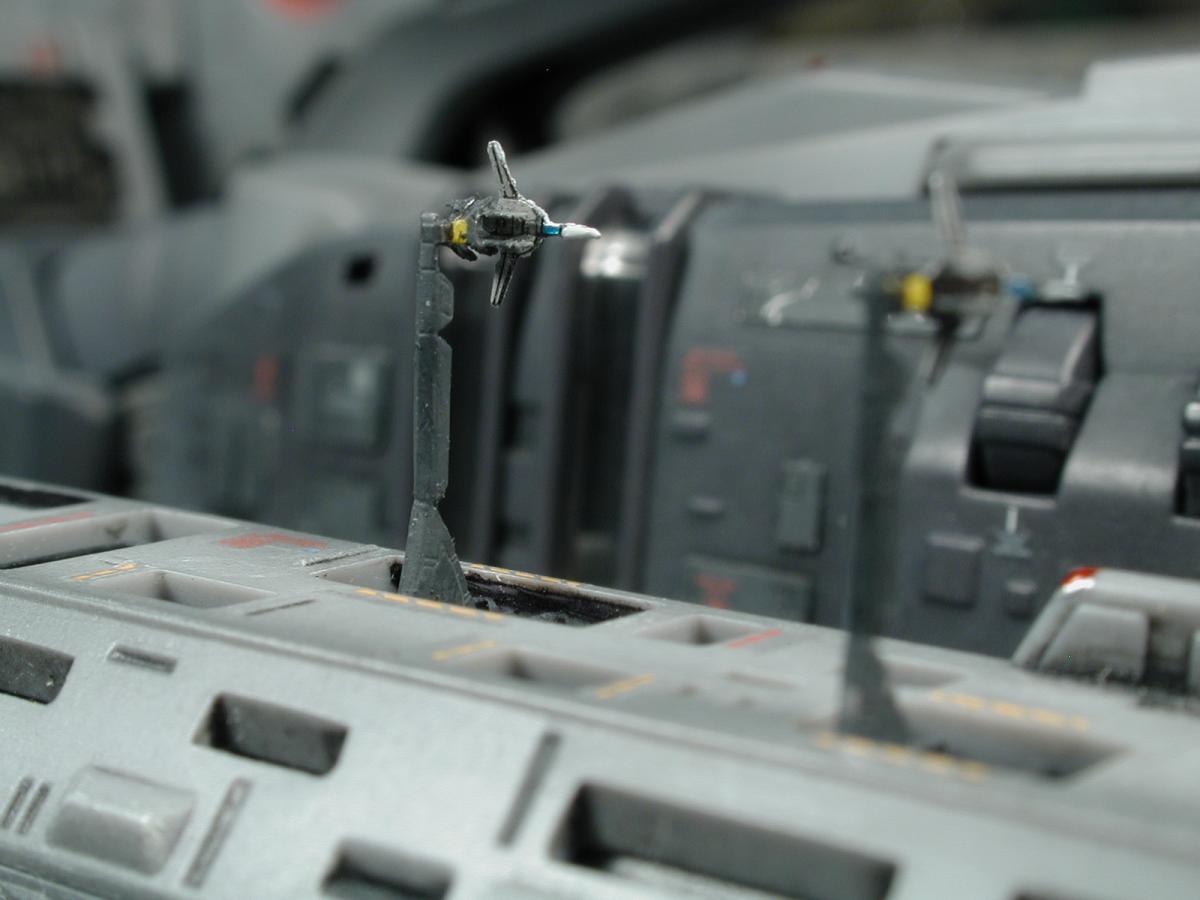
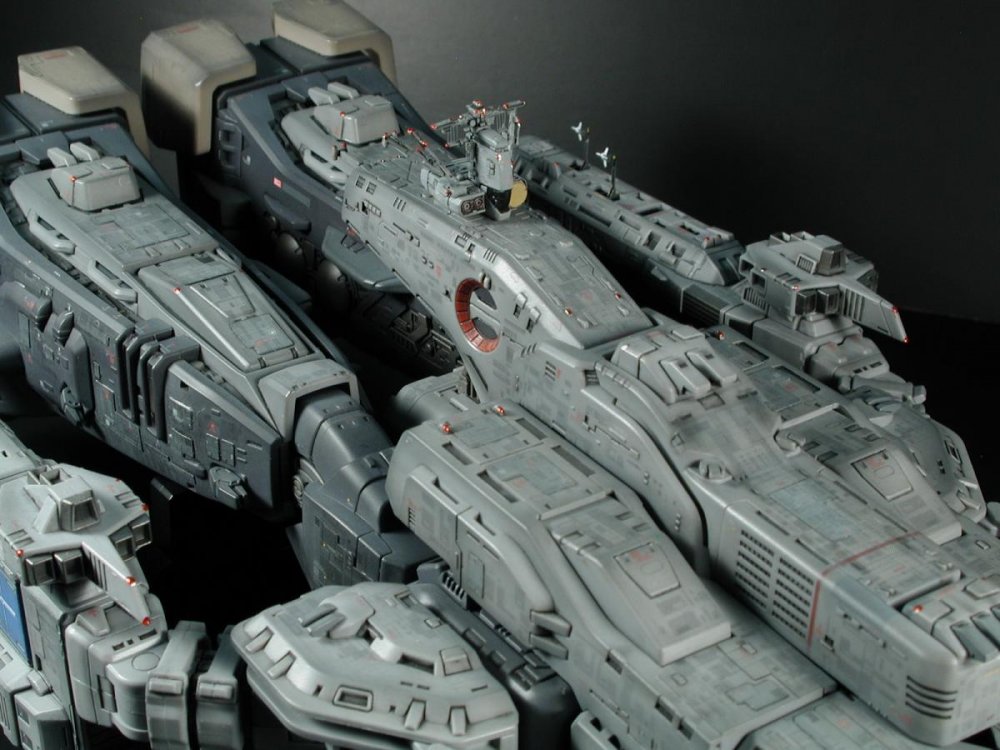
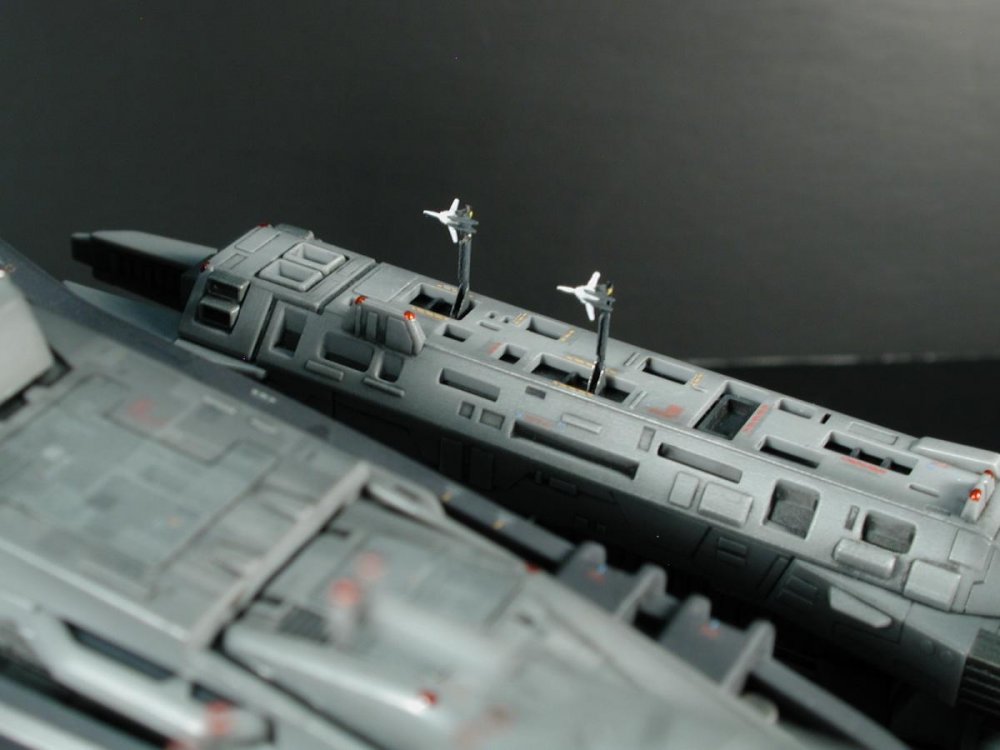
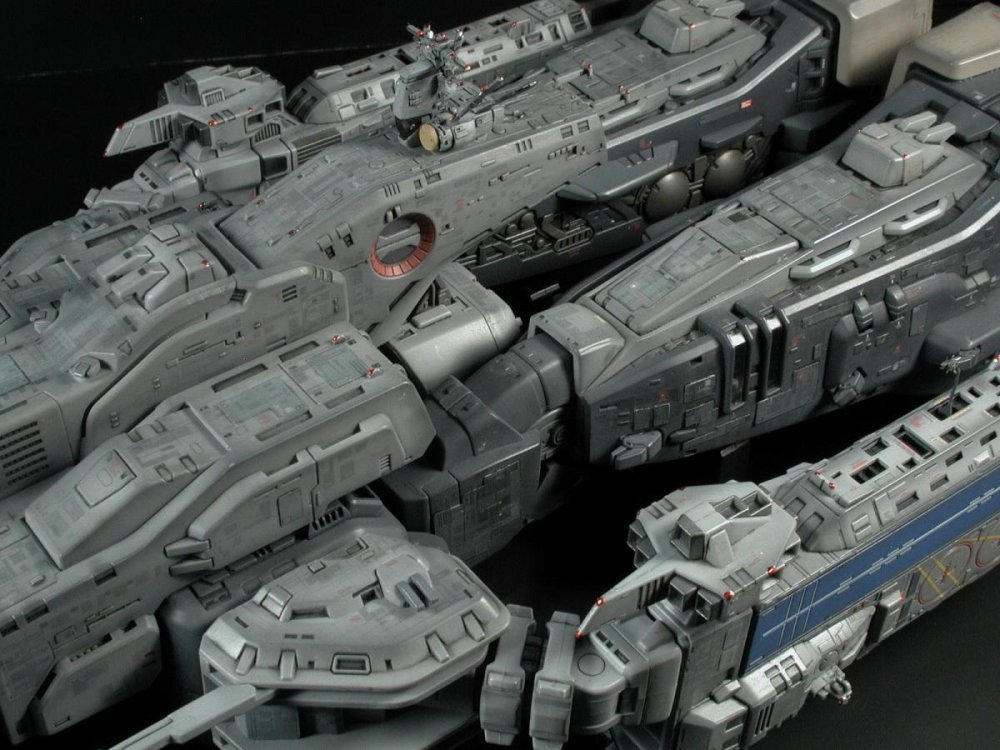
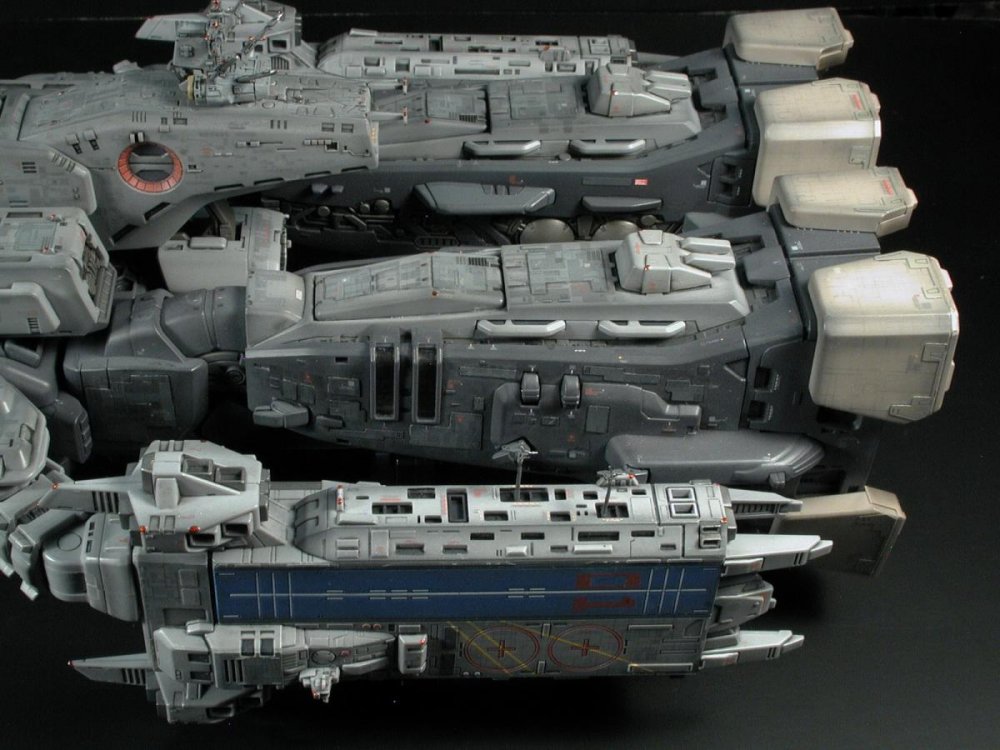
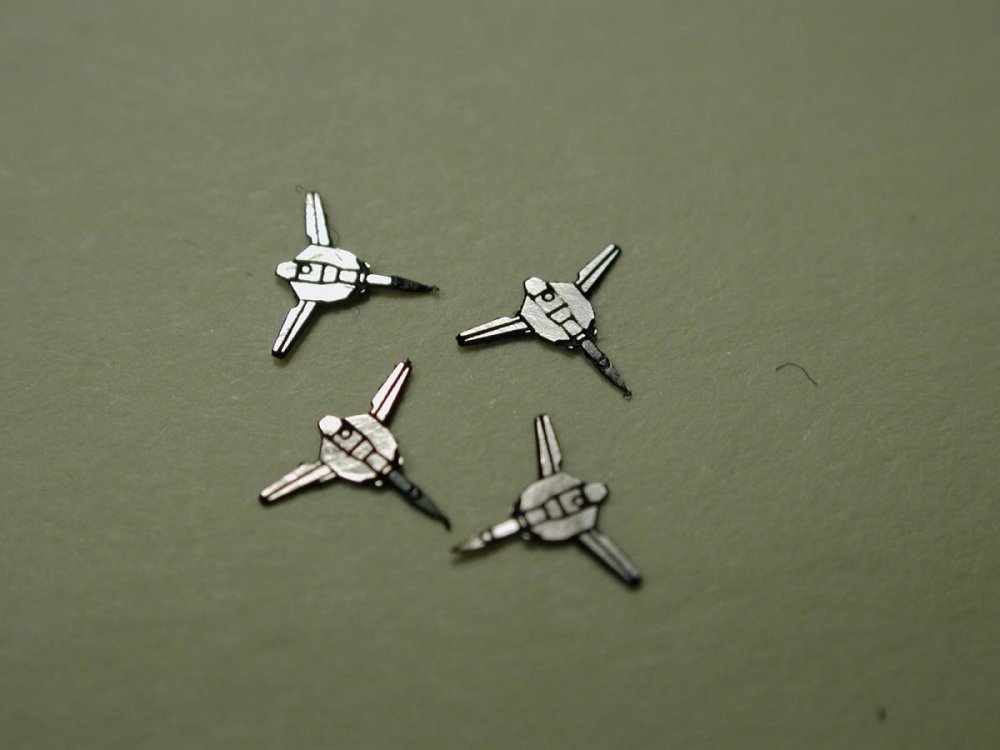
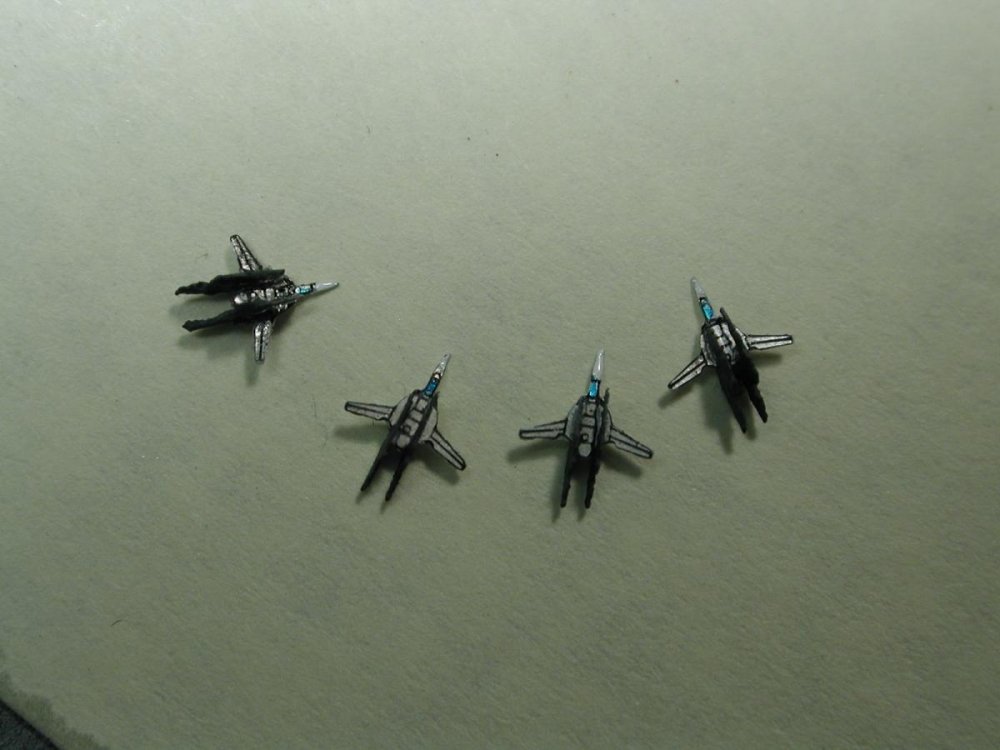
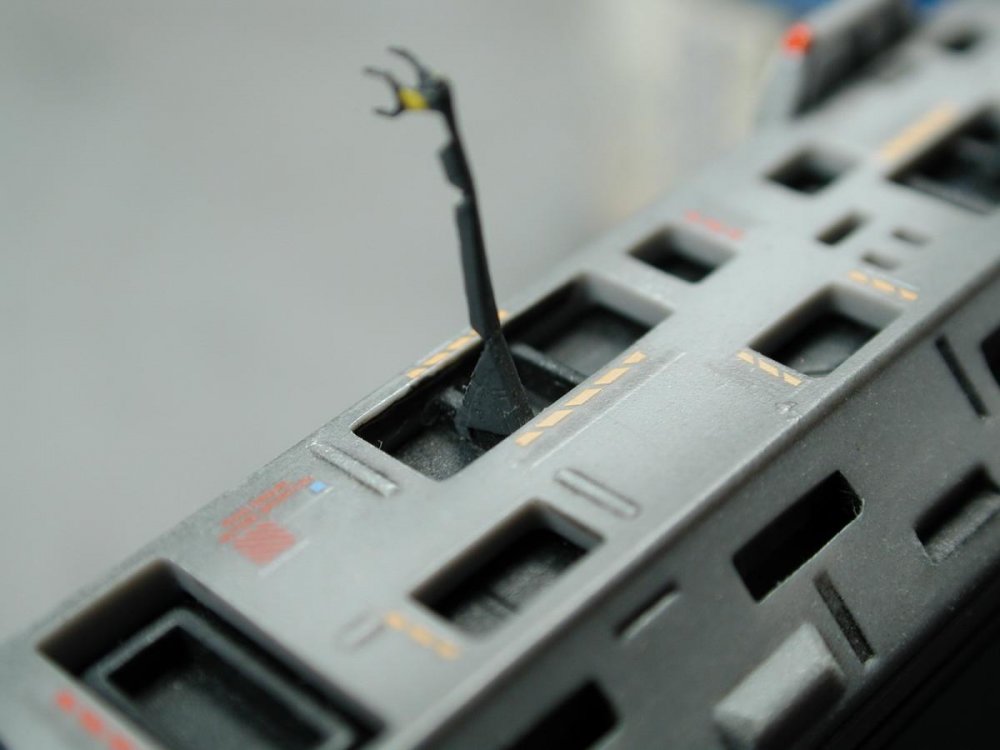
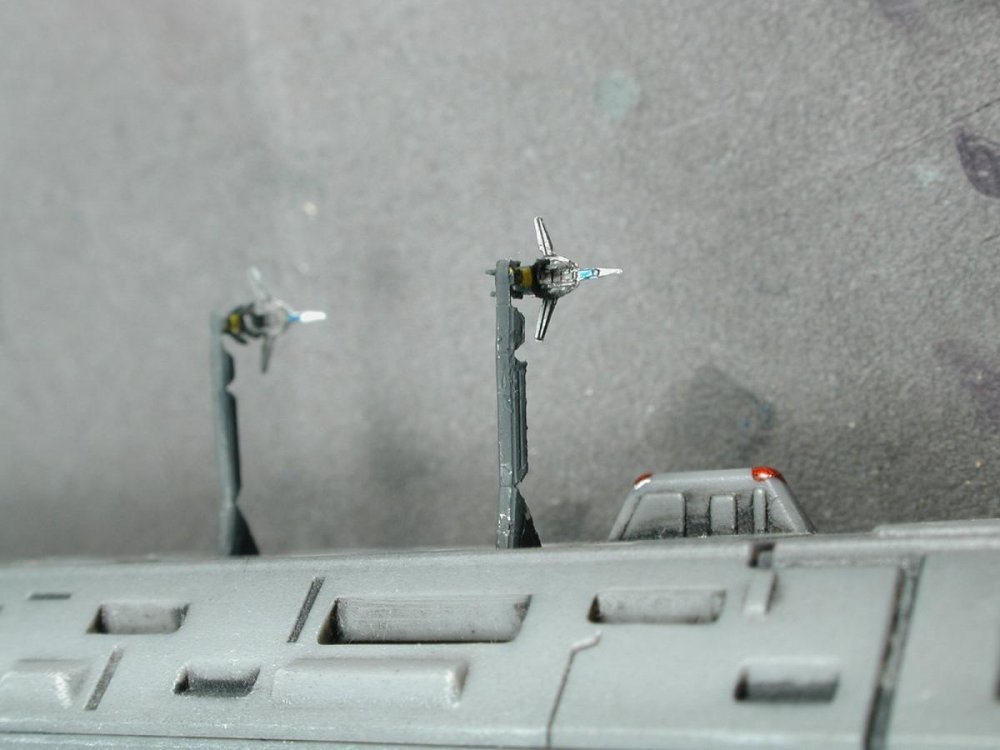
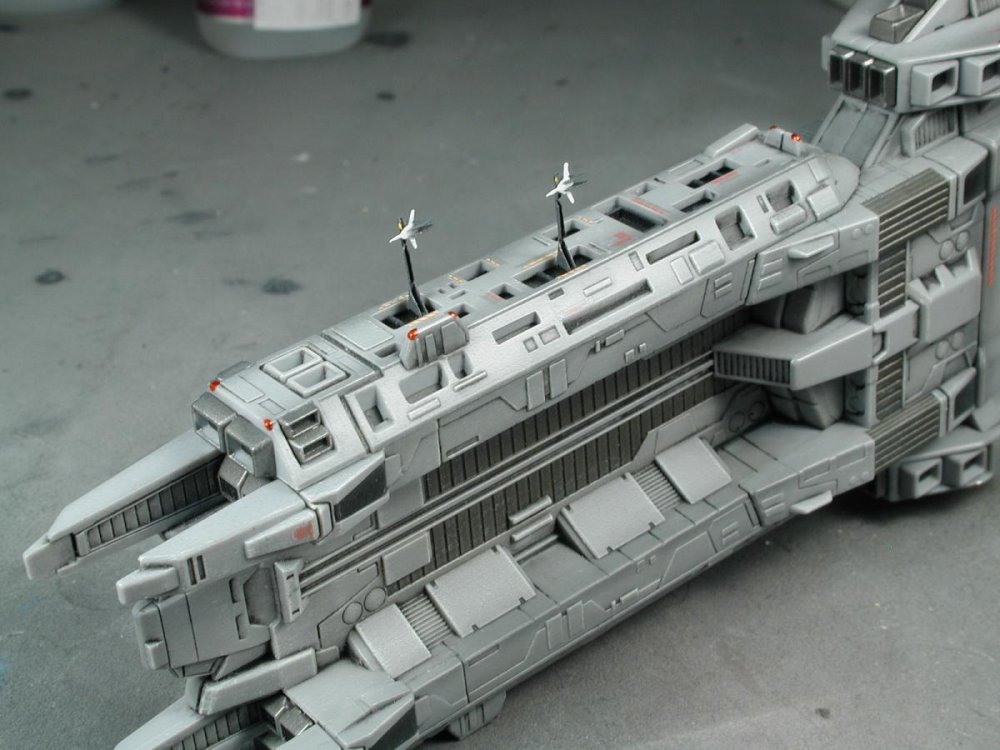
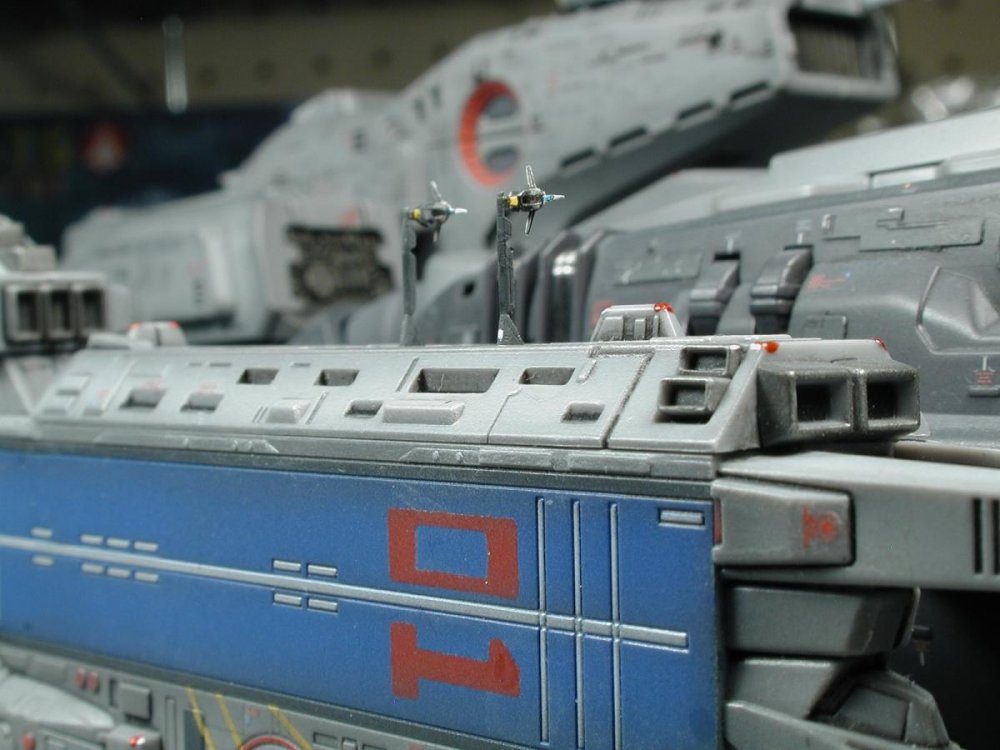
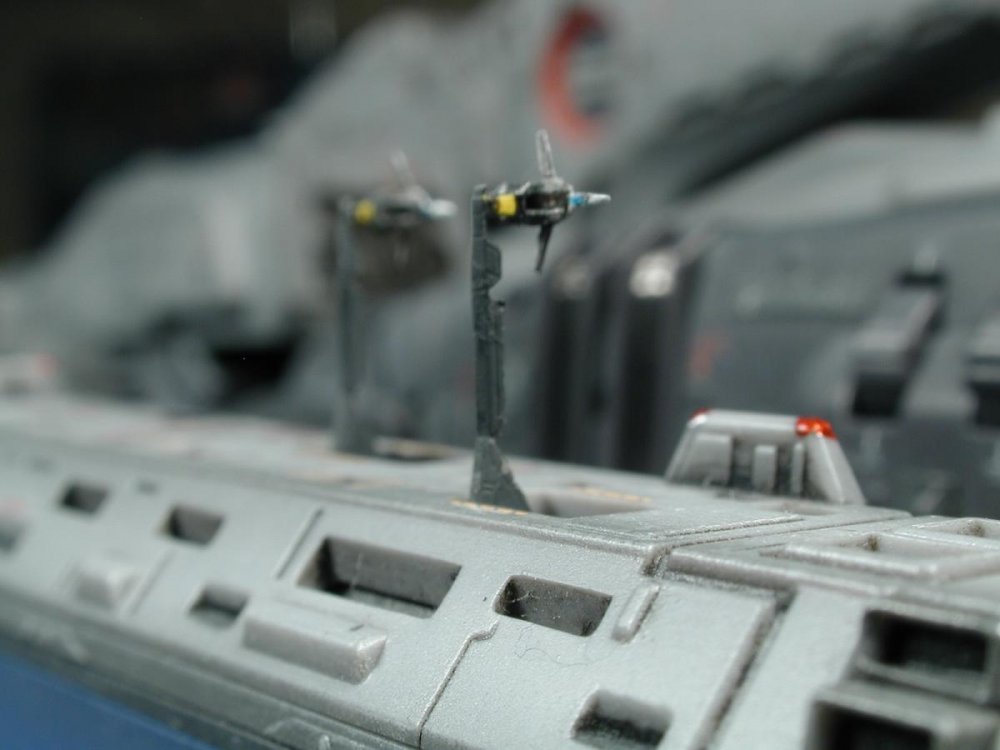
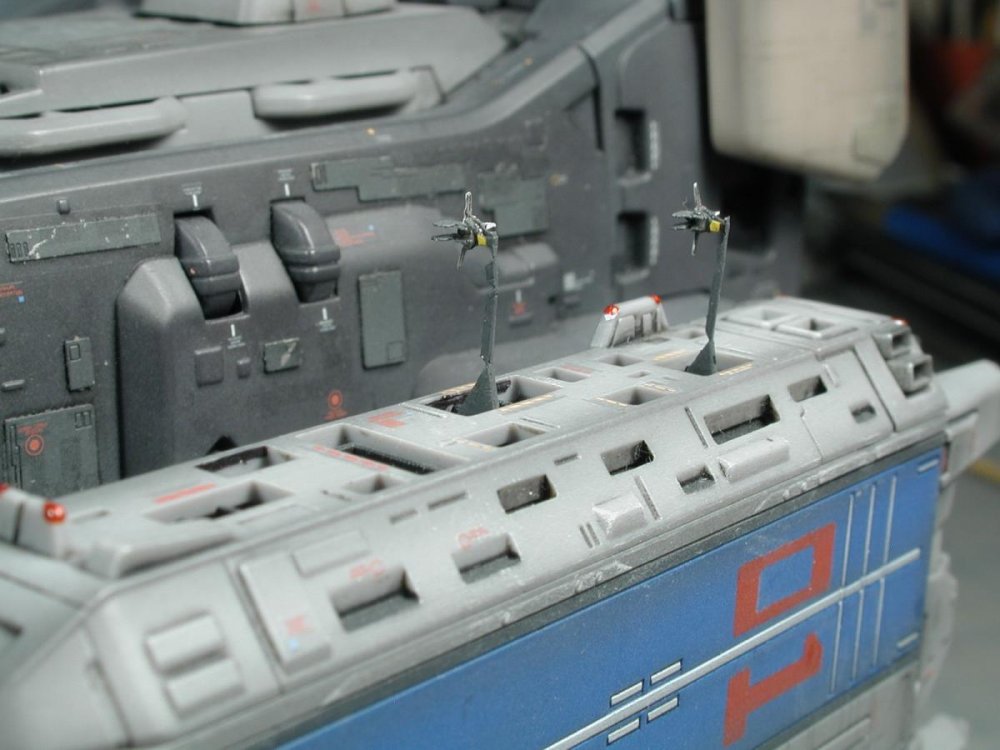
Yay! I'm too chicken to start right in on the VF-4 modification to FB2012 colours - so I thought I'll warm myself up by finishing off the SDF-1 finally after all these years ;-) Just to back up a bit, I tried to paint those tiny photoetched 1/3000 Valkyries and it turned out to be a disaster. I tried 3 times, and each time it got worst. When I sprayed them white, I lost all the etched detail so the wash wouldn't sit inside the lines anymore because the white paint was in them (so shallow) and I tried to paint the red, yellow and blue squadron colours with the finest brush I had, but it was just too small for my old eyes. I ended up each time bathing them in Windex to strip the paint off and start over. So in the end, I left the top bare metal (luckily its silver and not brass) and did a dark black wash to pick out the PE details and painted the flat underside white. Yes, those PE backpacks are a b#$@h to glue together, they fit perpendicular to the valkyrie and there's a left and right pack, one has the beam canons! It took me about 3hrs to get the four Valkyries assembled and I ended up with one crappy tester, one ok passable, and two decent planes. Luckily I had lost 2 of my launch arms, so I can only use the 2 good planes that turned out anyways. These next photos show how I'm attaching the PE launch arms, I just folded the base and that friction pressure is what's grabbing onto those molded vertical ribs within the black opening - its just friction fit, I thought I might just put a dab of "white" glue to hold them in place, if I were to handle the toy a bit more (for now I'm just leaving them). And with a tiny dab of thick crazy glue, they held. You have to play with the "claws" a little bit (pry them open with some 000 tweezers) depending on how vertical you got your fast packs glued onto the Valkyries. Luckily I had to only choose the 2 best ones that turned out of the 4 that I made. Then a little "twisting & turning" once its mounted to get them aligned and true the way I wanted them to appear on the ARMD openings. So here are some better shots of the ARMD with the attached launcharms and Valkyries finally attached to the rest of the SDF-1! (I need to dust this baby a bit when you're taking macro photos so close, every piece of dust shows up!)


-
Please, everyone should do it, its not a huge undertaking and everyone will have their own unique take on it. Variety is the spice of life, and I want to see and learn from others too!