wm cheng
-
Posts
4338 -
Joined
-
Last visited
Content Type
Profiles
Forums
Events
Gallery
Everything posted by wm cheng
-
I love that grey/tan - is not so saturated, much more realistic. Damn, I hope its not going to be another pre-order ordeal again.
-
Thanks! I finally bit at that price (makes me feel better its even coming from HLJ). Now where is the best price to pre-order the armor packs?
-
Thanks! I don't know yet, I'm getting it for sure though, but no one has approached me about any of my artwork or drawings for the book (however, all of my artwork is the property of the Producers and studio, so they don't really need to talk to me at all).
-
I just saw it with the crew screening in Toronto and it's AWESOME! There's some obvious dialogue which will help out the 11-12yr olds in the audience. I hope it will blow their minds out of the water as Star Wars did for me. It's pretty fantastic and the action doesn't let up. It really does show that ILM can actually do robots properly (I wasn't sure after the Bayformers) and someone actually understands mass, weight and inertia. I gotta go back and see it in IMAX now in a theatre full of real audience. Guillermo was so kind and gracious that he even showed up to thank us and introduce the film. This was pretty much the top of my career so far - so much fun. Please everyone go see it and I can't wait to hear what you guys think of it. (look for Macross references in the Conn Pod interiors!)
-
Yeah, I'm getting that feeling too. I'm just glad NY allowed me to get some sleep and get my toy too - that, I'm willing to pay an extra $20 bucks or so for. Worst, NY might just throw up their hands and people on the other side of the pond loses this opportunity. My "marked up" RVF-25 shipped today - woohoo!
-
Yep... since 2013-06-14 11:54:10 Preparation in progress still...
-
Simply amazing... way to go KyeKye...
-
There's a Brera renewal?! Can you give me some info on this?
-
Yeah! I can't believe there is someone to actually take my money this time... it's amazing what this hobby has turned into!!!
-
Is there a list somewhere of the visual changes? cuz, I can't see any. I love the live action version of the Yamato and can see the differences there.
-
Go for Roy's VF-1S - the yellow/black/grey just has a more realistic look - think of it next to a Jolly Rogers F-14.
-
Yep, I paid for my pre-order at NY too - its only $20 more, but they were the only ones that gave me a chance at this toy. I kind of think of it as a little loyalty back I guess - hopefully they will keep being good to me (at least until the VF-25S re-stock ;-)
-
Thanks for the encouraging words all. That's why I post it here, hopefully it will save others from the same mistakes. I am constantly learning all the time and with the internet, I learn that much faster. I didn't know the black gloss undercoat was enamel by Alclad - now I do. Thanks for the brake fluid tip, good to know even if I don't do it on this baby, at least I've learned something new. I think I will try the ProModeller's wash (Flory) if I can find some local hobby shop with it around here - its clay based and water soluable, so it seems very inert. Well we'll see when I can start up again. I need a little time to lick my wounds (plus I'm starting another film on Monday, so it might be a while). Thanks for all the support though.
-
I might try those panel line washes instead of mixing my own artist oil wash all the time... any good ones to suggest? What's their solvent? How do they react? Yes, but I'm lazy... we'll see, it might not be out of the question.
-
Thanks for the comments... Ah! Noyhauser, I didn't know the Alclad was a enamel... I thought it was lacquer based. That explains it. I look at the bottle now that you said it, and its says in big letters "Alclad II Lacquer" and the side even has Alclad Lacquers and address (but I realize that is just the name) on the other side in small letters it says "Contains Mineral Spirits" which is a clue to enamels but no where on the bottle does it say enamel. I was surprised as I thought it would be great at self levelling - but it didn't. The Alclad grey primer is fantastic at self-levelling, so I thought this was the same thing, just in black - boy was I wrong! Thanks for the tips, but I just don't have the time, energy or patience to sand and re-scribe anymore... unless my HLJ order doesn't come through and Bandai no longer makes these kits, $25 isn't worth my time to fix it. I'd rather start over, if it was a small patch, then I'd re-consider, but its everywhere and I'd loose too many of the small details in the crevices. Oh well, its a learning experience.
-
Funny, this is the first time I've used the Alclad gloss black undercoat - I thought that since so much bare metal was showing, I'd properly prepare a good surface for the Alclad. All the other times in the past, I just spray directly over the plastic (ironic eh?). I thought about "battle-damage" - but the damage just isn't in the "right" areas. I also tried re-spraying over the affected areas, but there is such a height difference between the plastic, basecoat and metalizer that it all shows through, now I just have a silver colored piece of poo! I'm also very particular about the final finish, so there is no way to salvage this unless it's a complete strip back to bare plastic - the problem is I hardly ever have any spare time, so if I have any time, I would like to build a new one instead of repair a failure - my time is too precious these days. I already re-ordered them from HLJ, but they're on June restock - I hope I don't have any problems getting them again, they are a nice little kit (as far as Bandai kits go) - very Anime, not very realistic as aircrafts go, but nice for Bandai.
-
Also its just not the horrible screened colours, its the decal film itself. It doesn't react to the traditional Micro SOL or Micro SET decal setting solutions at all. However, it seems to only work with Mr. Hobby SOL decal setting solution, but it doesn't react to a little, then all of a sudden, it cracks and disintegrates when a little too much is applied. They seem brittle and inflexible as compared to other decals.
-
I agree with Chronocidal 110% - he basically said what I feel exactly... and I've built waaay too many models (including the Bandai 1/72 VF-25F & S)
-
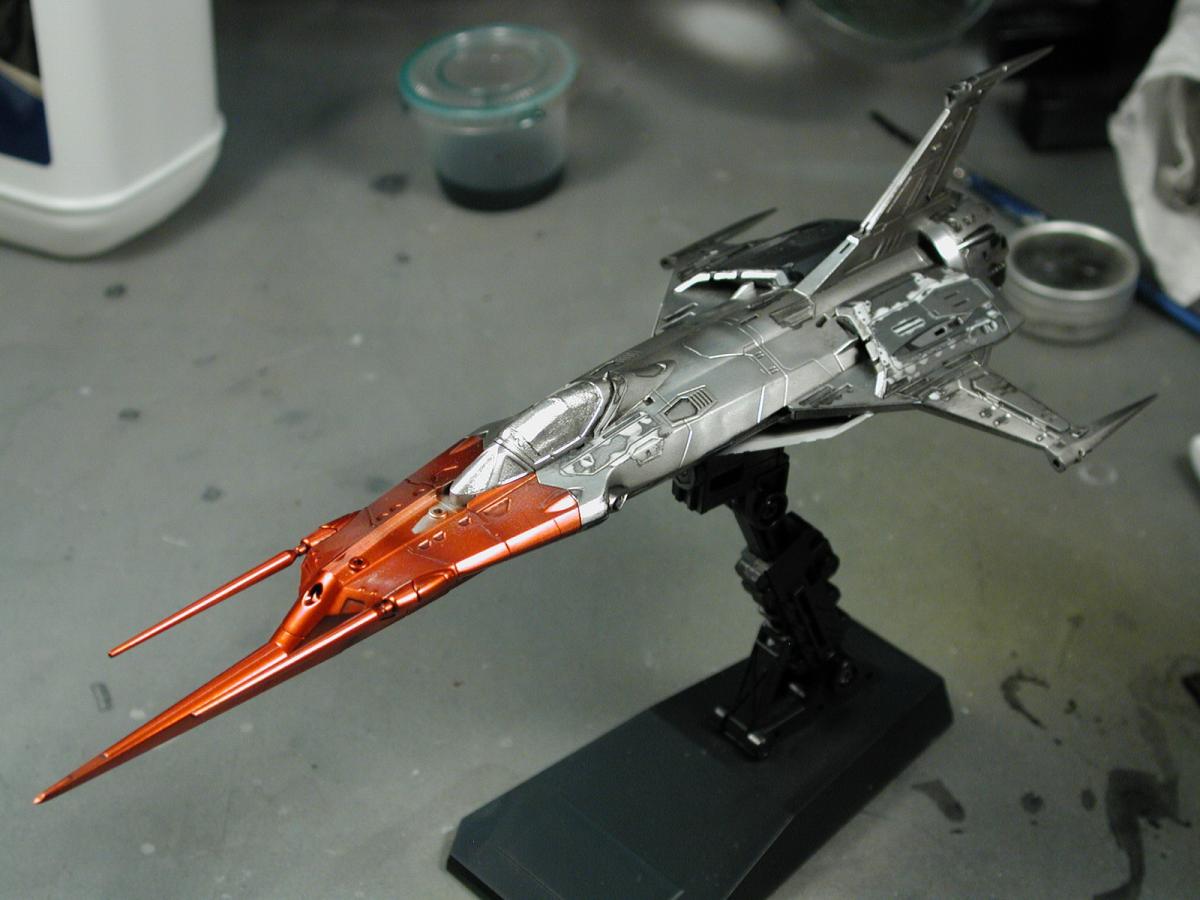
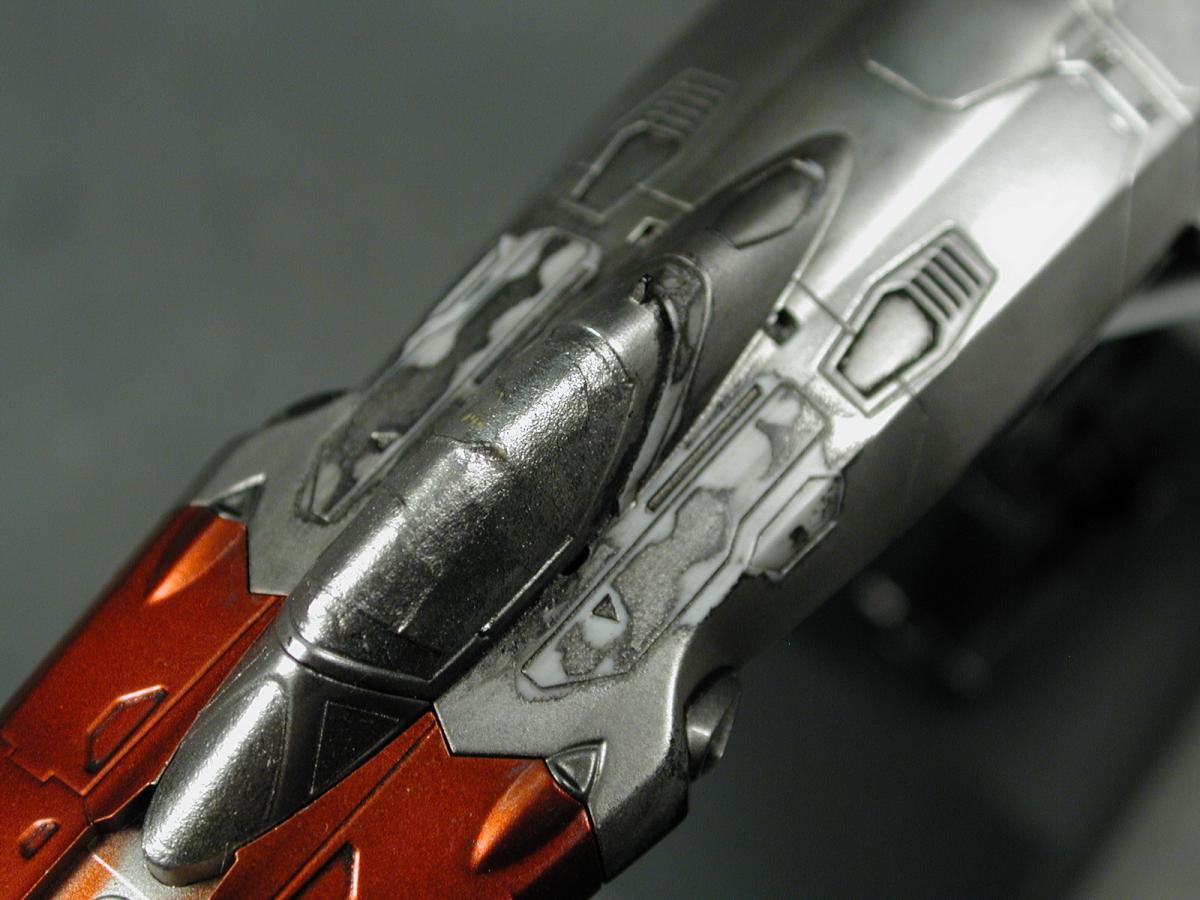
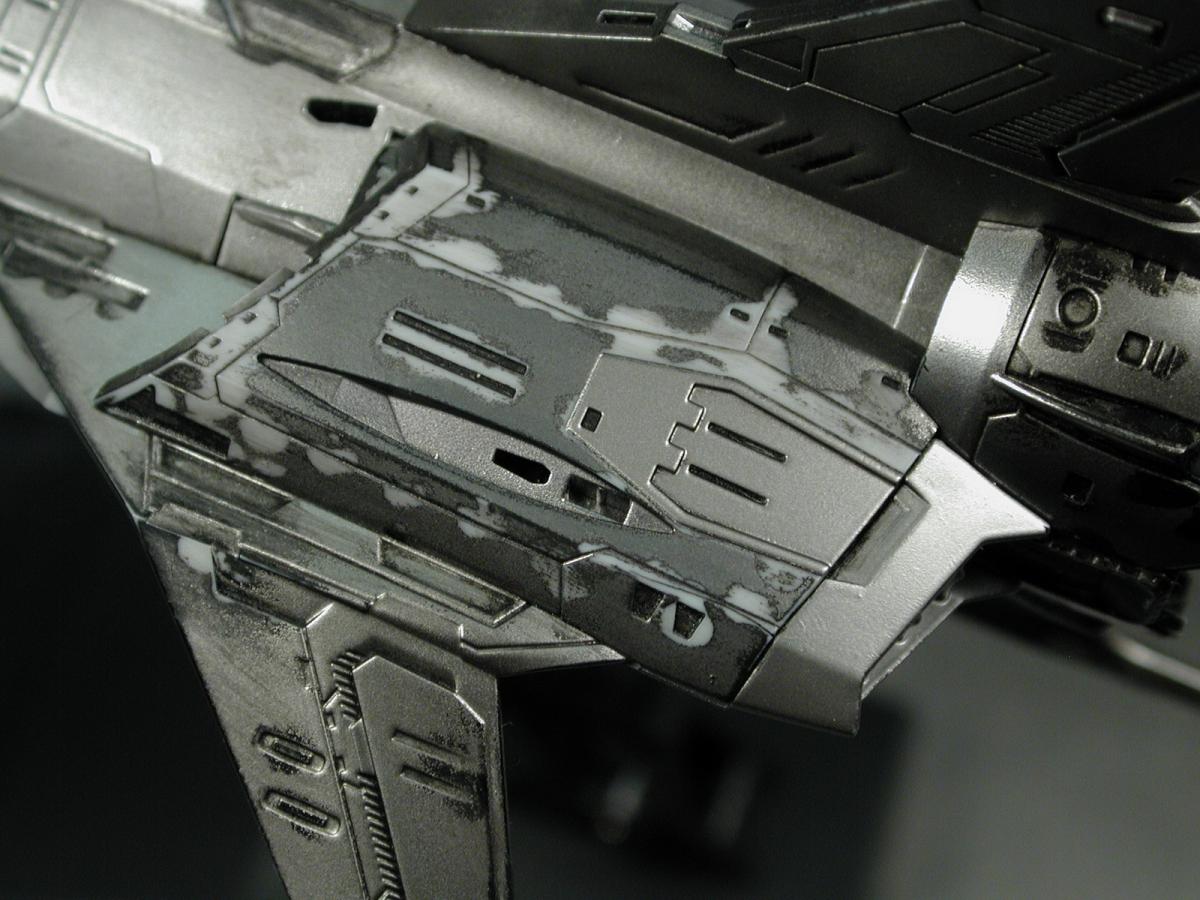
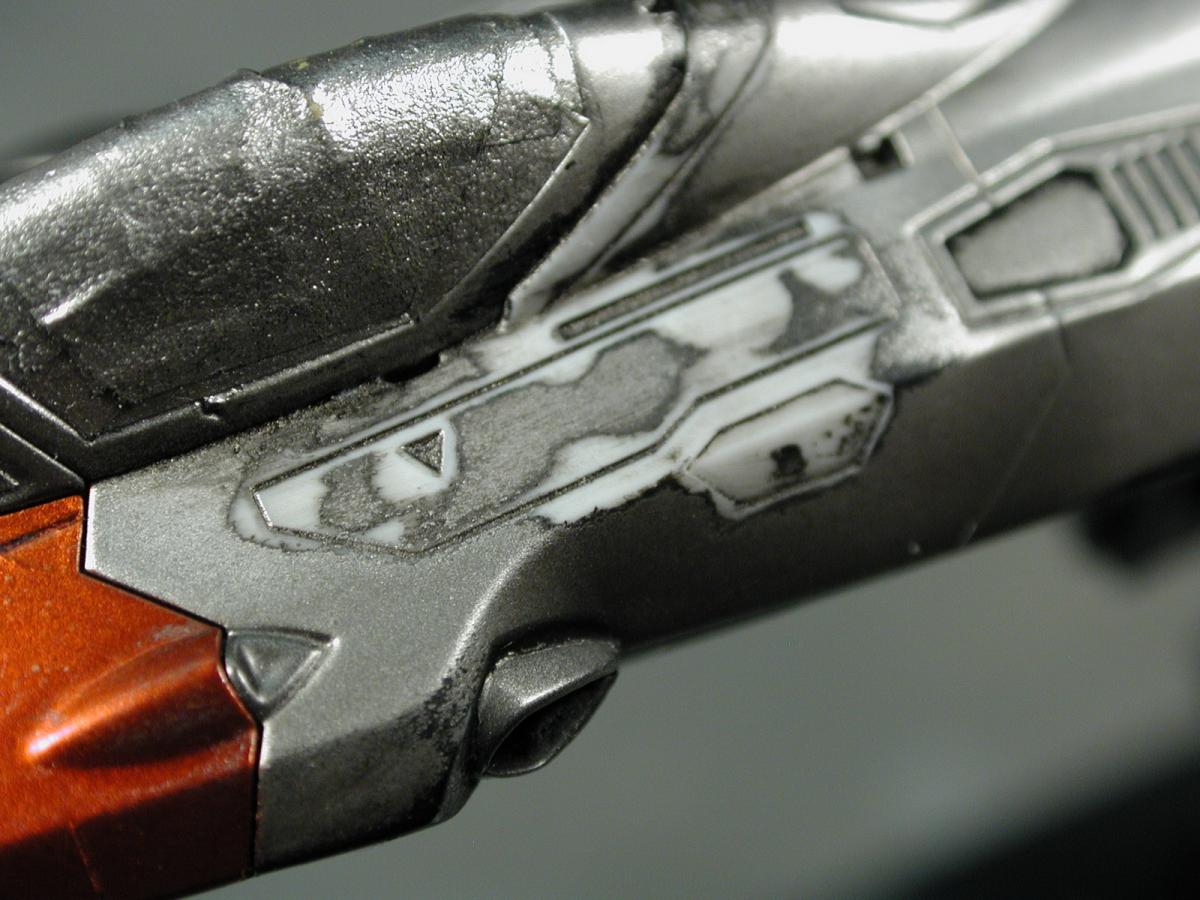
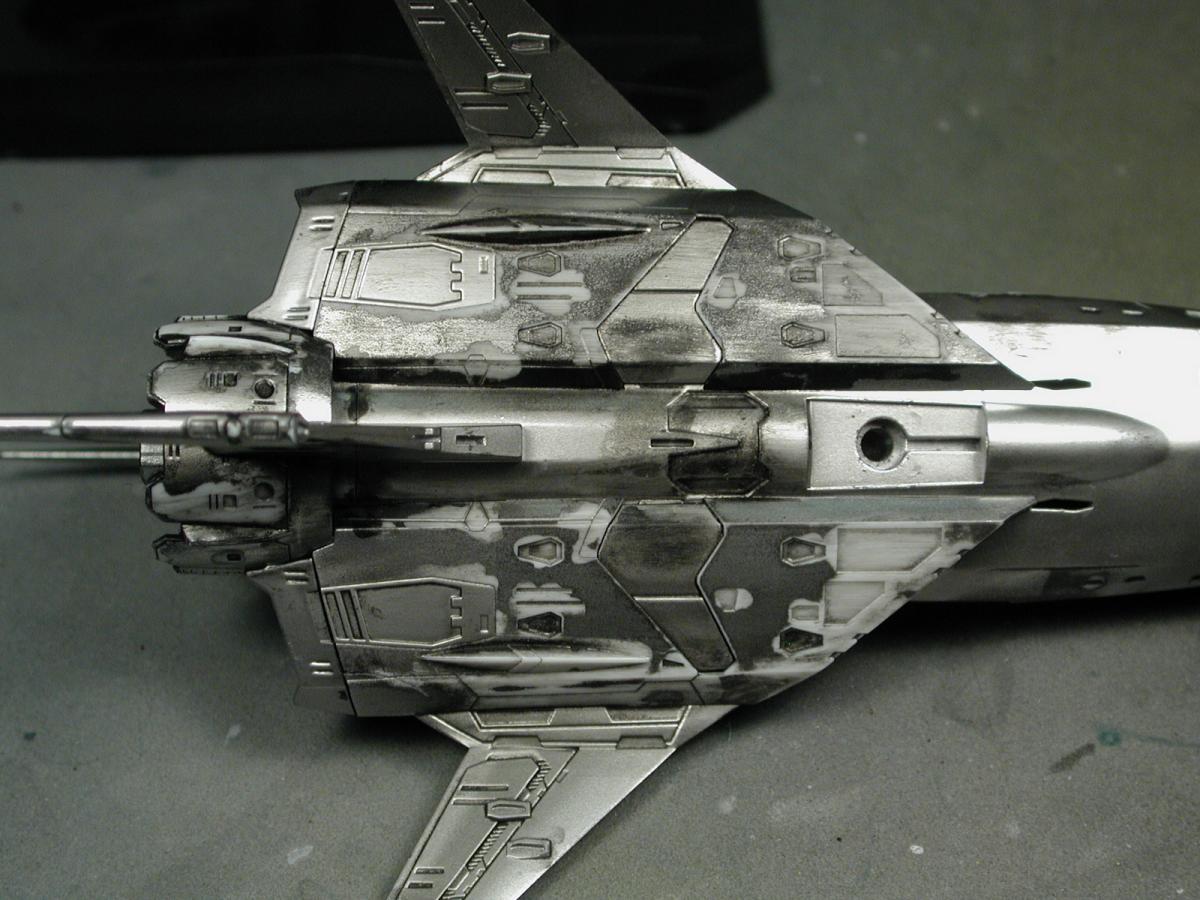
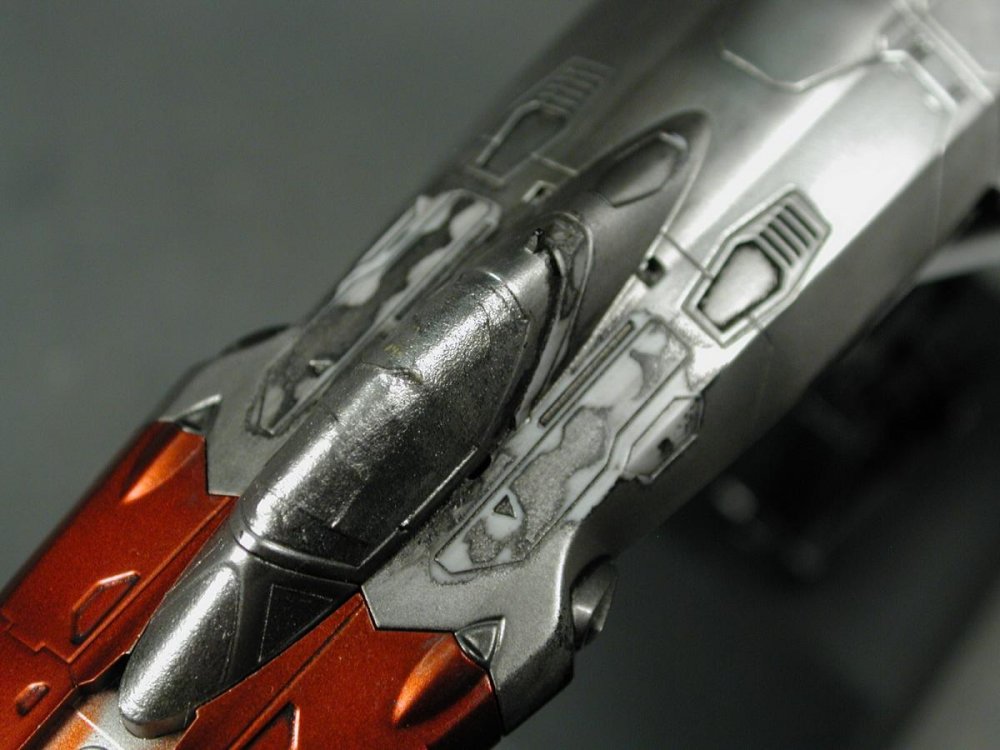
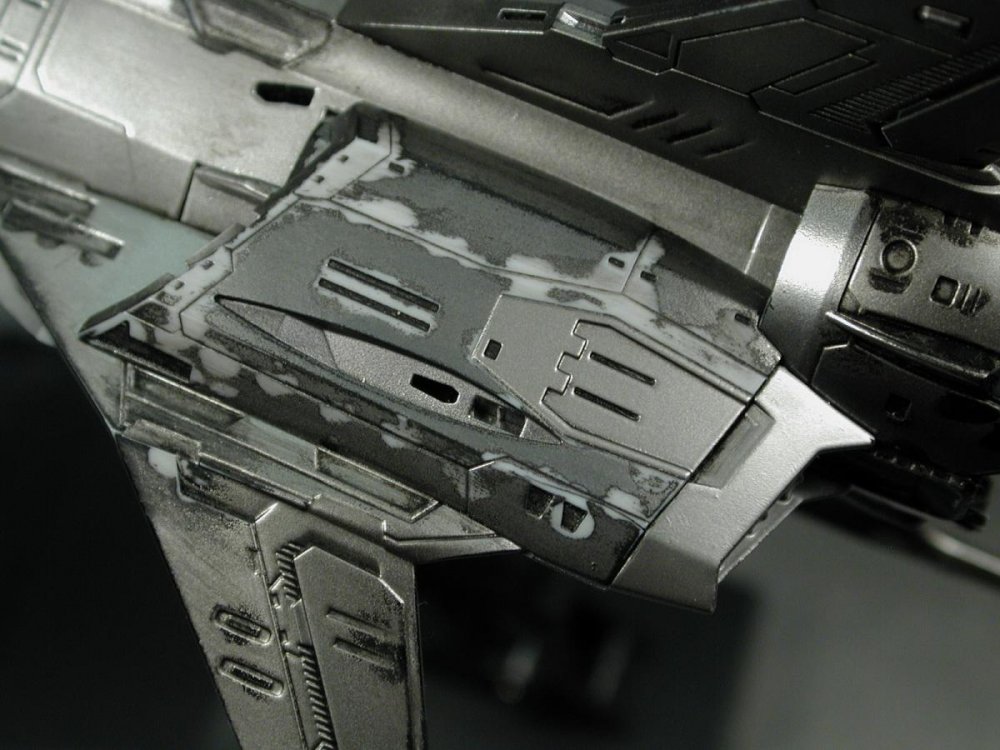
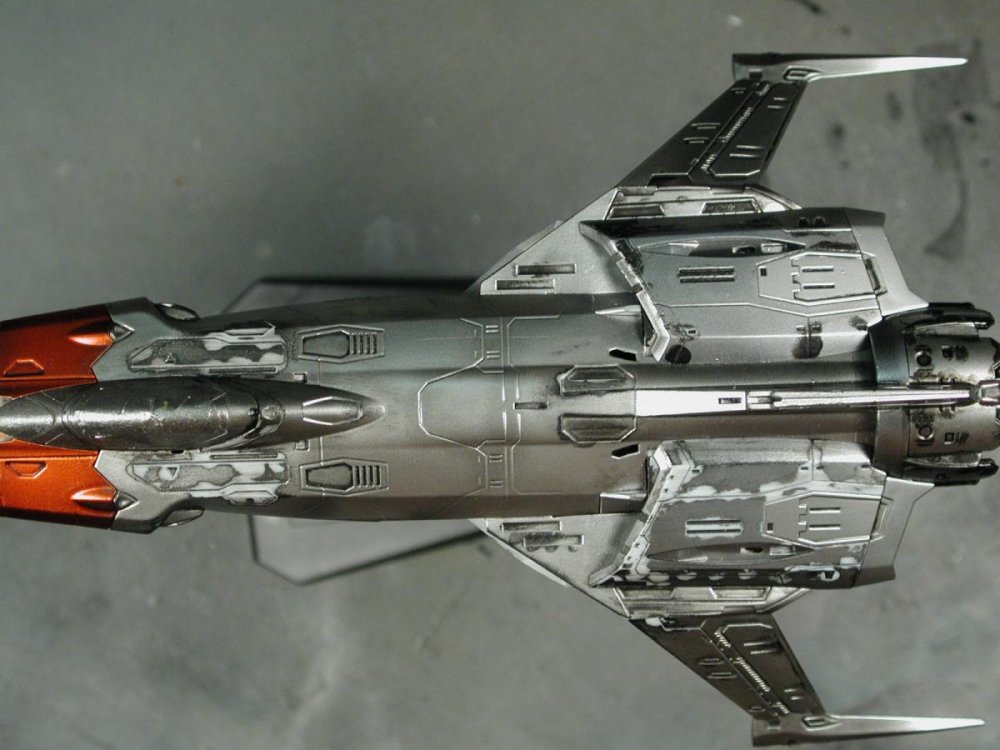
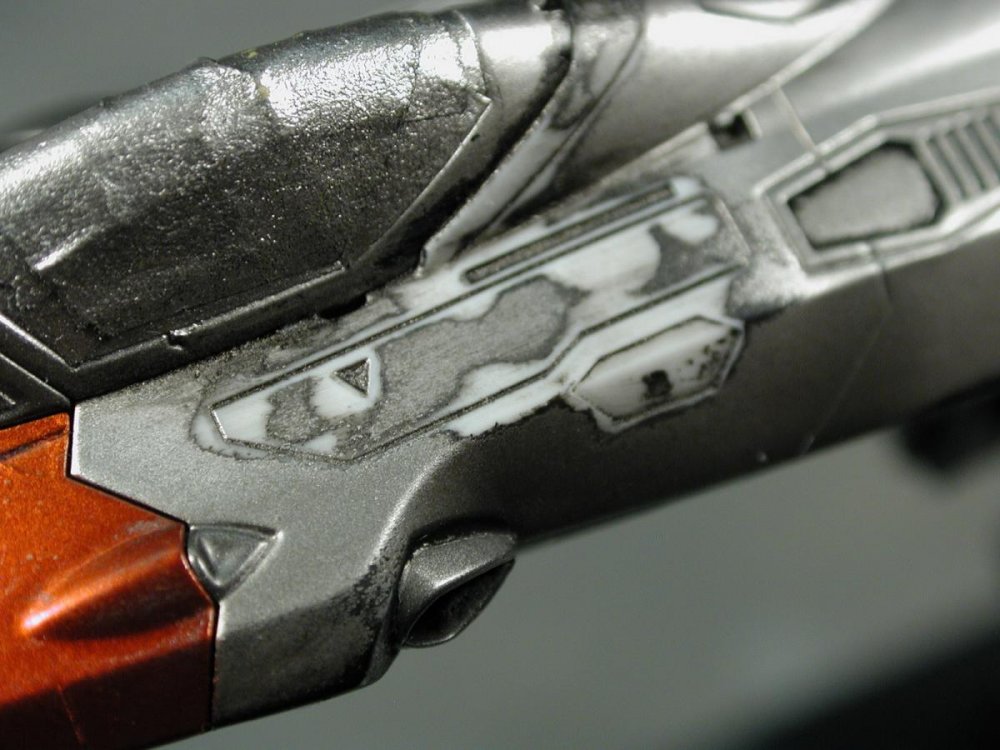
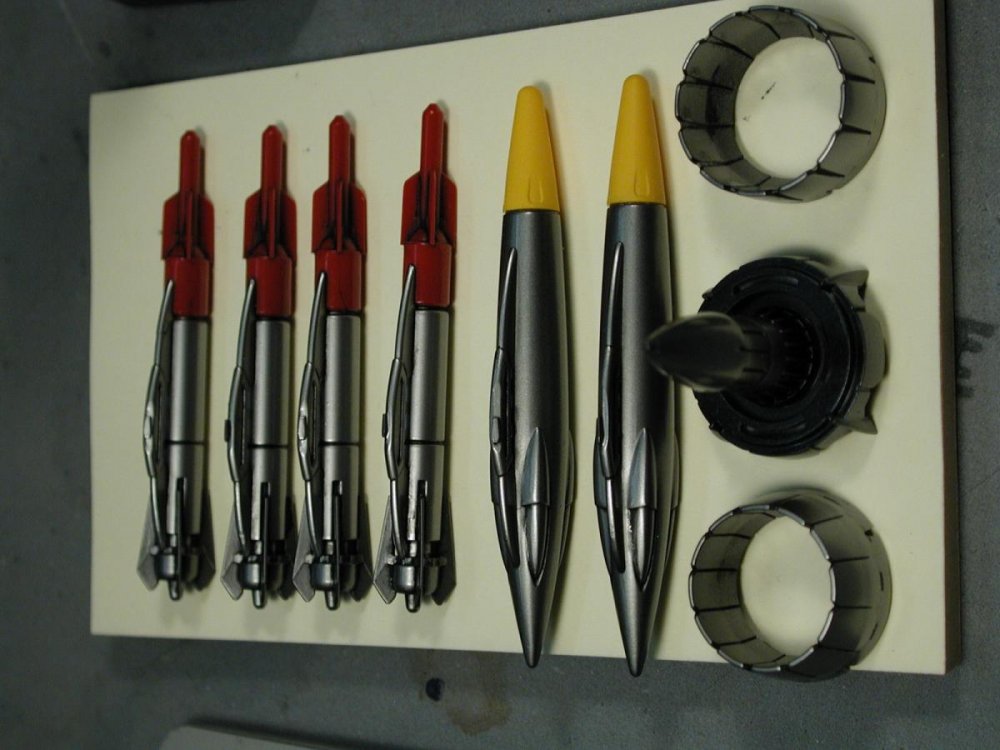
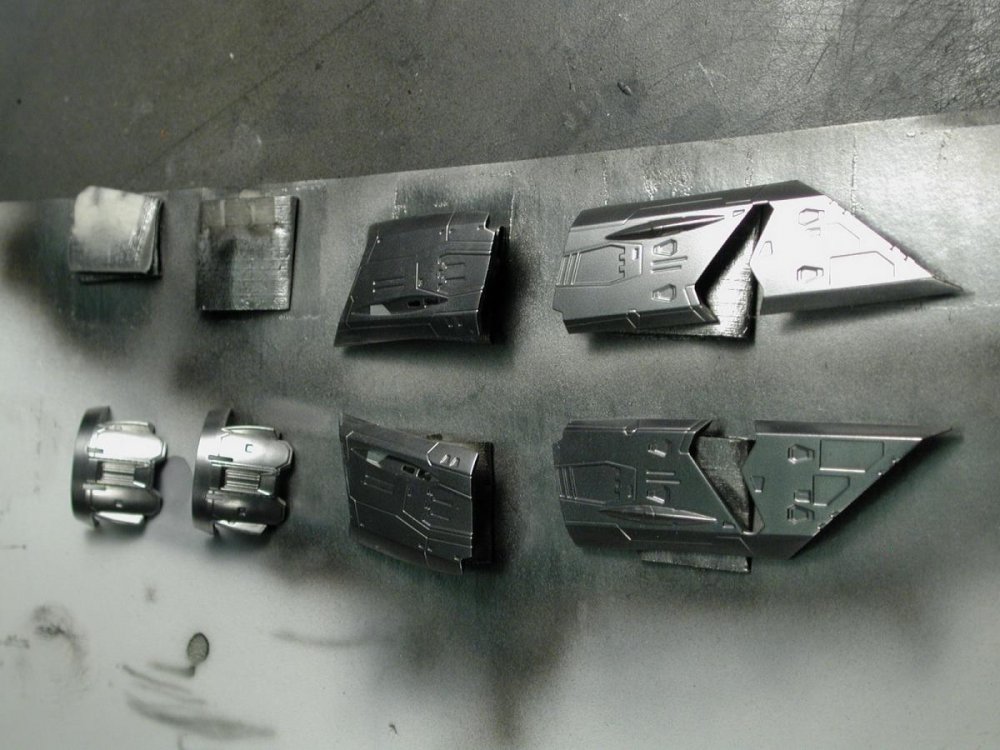
ARGH! DISASTER STRUCK... Well, I gotta chalk this one up to a learning experience... so close to the end and I f@$k it up. I don't really get it still though. It looks like my varsol thinned oil paint wash reacted with the Alclad metalizer paint somehow. I'm sure I've done an oil wash over Alclad directly before in the past. However I've never built a silver plane before with so much Alclad showing. But I have done an oil wash over Alclad steel for my VF-25 legs and never had this reaction. Firstly, when I go to wipe off the excess oil wash, it didn't come off, it was etched into the silver, then I used a little more varsol (mineral spirits) on my paper towel and it took the oil wash off, but it also took what was underneath off too, right through the Alclad and even though the lacquer black gloss undercoat too! Some we see bare grey plastic showing and some we see the black undercoat showing through. You can see the nose portion where I sprayed Tamiya clear red over the Alclad was perfectly fine. Curiously, the damage seemed to only affect Polished Aluminum and Stainless Steel (unfortunately the majority of what I chose for the fuselage) - the Dark Aluminum and Magnesium seems unaffected. You can see panels I had masked off in the Dark Aluminum and Magnesium to be fine as well as the missiles and wing tank. Another note though, the missile tips and wing tank tips are friction fitted over top of the body, the fit is really tight. What happens is when you put it on, it all looks great, however if you do an oil wash to pick out the details, it often reveals that there are hairline cracks that form on the missile tips (red) or tank caps (yellow) due to the great pressure which isn't seen until the oil wash gets pulled into it. This occurred with my VF-25S armored reaction missile tips as well. That combined with the lacquers I spray reacts with the Bandai plastics and makes them weaker I find. It looks great when you just use the bare plastics since you can't see the hairline cracks, its only if you paint them or do an oil wash. So what I've learned is that not all Alclad metalizers are the same. It seems that Dark Aluminum, Magnesium, Steel and Jet Exhaust are fine to do an artist oil wash over top of directly. However, Polished Aluminum and Stainless Steel (and I would guess Chrome) seem to be much more delicate and would require a clear coat to protect it before any oil wash. It's funny, I was going to clear coat the whole thing this morning when I got the yellow leading edge bits on, but was worried that with the layering of the gloss black undercoat and metalizer plus this new gloss coat (glossy coats are really thick) that I might lose some of the panel details (ironic as Bandai often has such deep trenches!) so I thought I'd do the oil wash directly and seal it in with the gloss coat before decals. Now I know, always seal in the Alclad with a clear coat first (at least the shinier colours) before an oil wash. I don't think its worth my time stripping it all back to the bare plastic to start again. I'll try to buy another kit to start over - I gotta get the 02 one anyways to do build it with the gears extended and folded up.


-

Bandai 1/72 fully transform able VF-1 plastic kit for Macross 30th Ann
wm cheng replied to Vi-RS's topic in Model kits
I would very much like to see build-up threads on this kit when it arrives. Please, whoever is ordering, please take the time to post a thread on your experiences during building and for a little while after the build to see how it holds up. I for one would be very interested. -
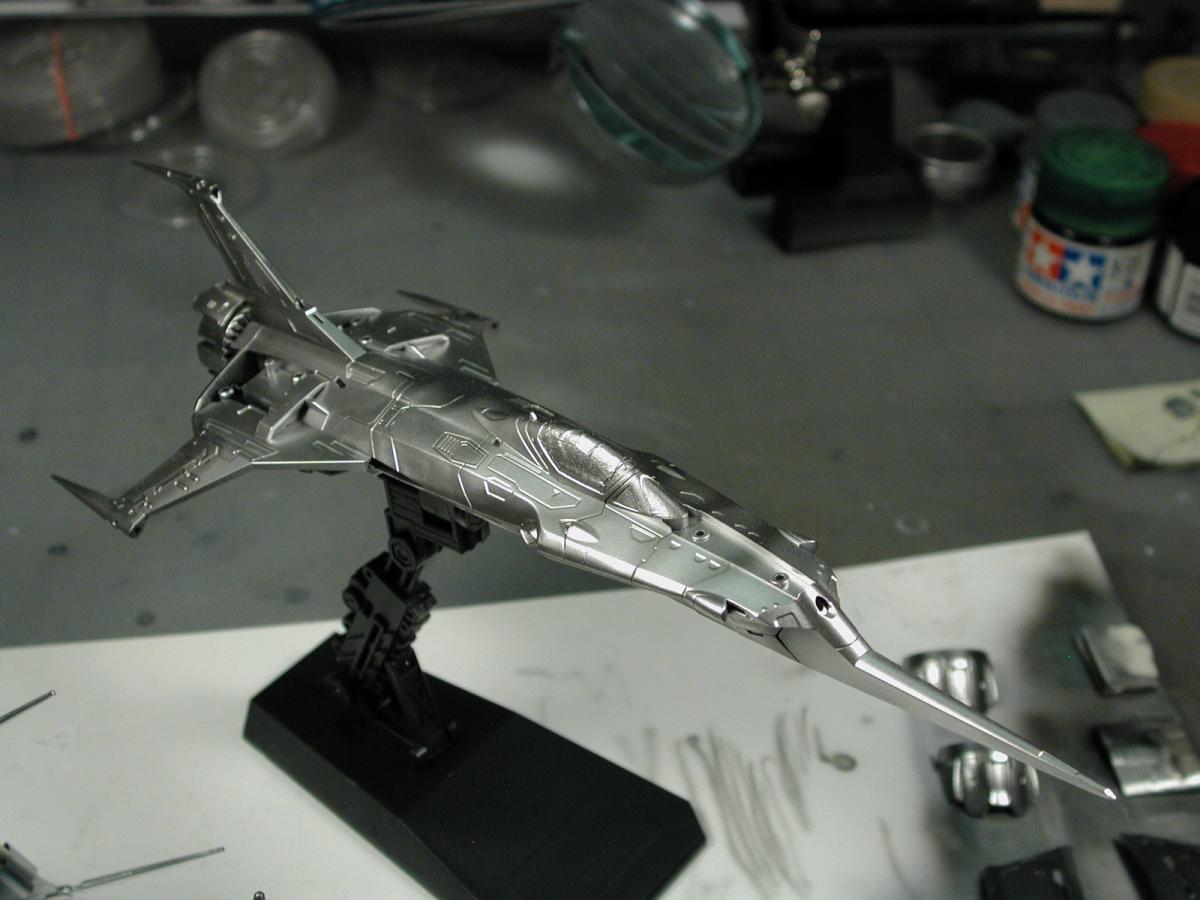
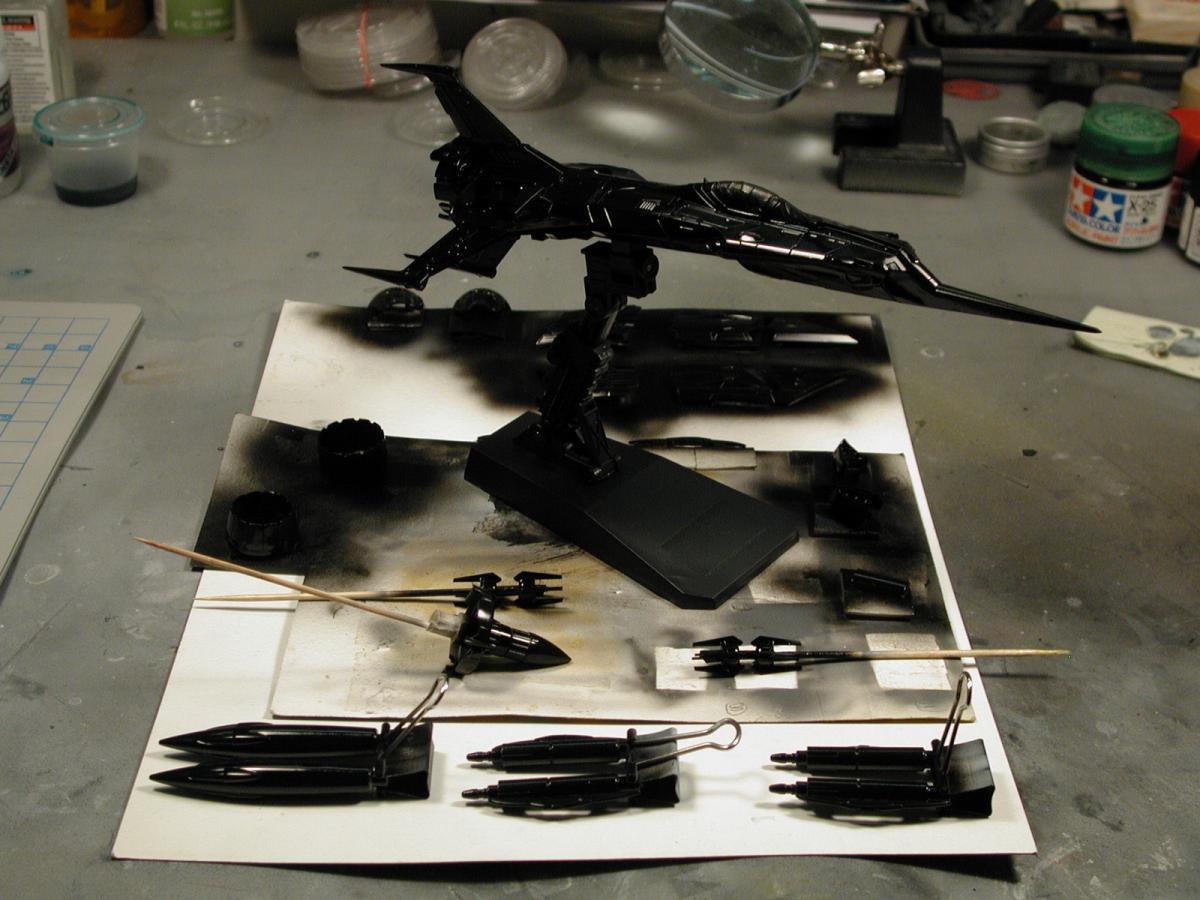
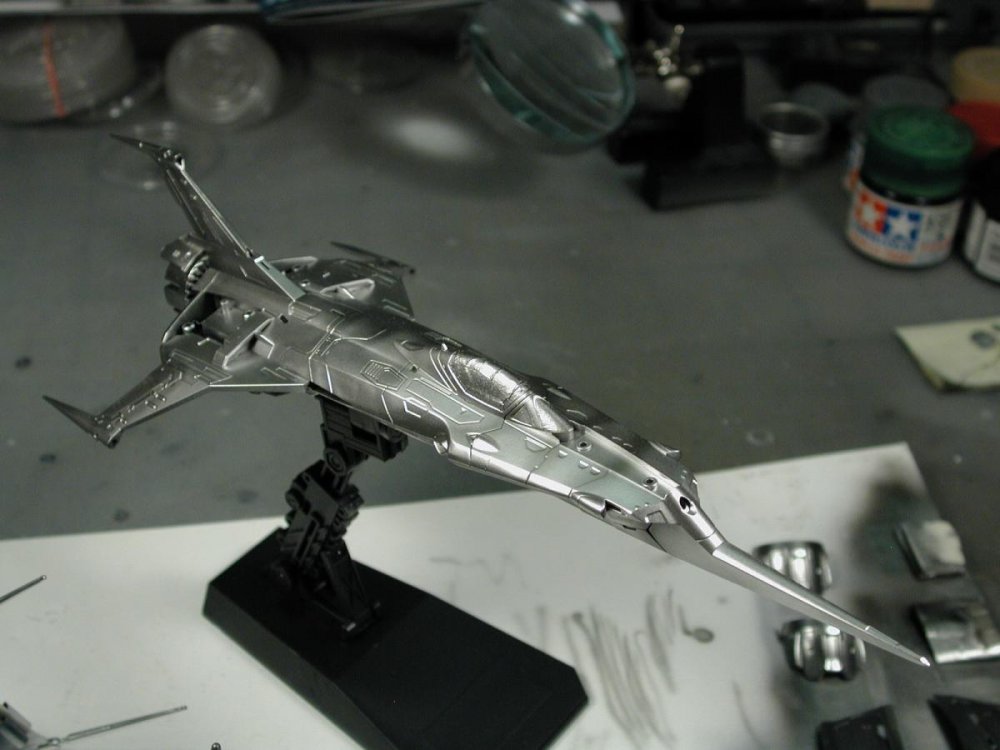
I never did build one of those P-51 Mustangs or those beautiful F-104 Starfighters - but now I know the love of bare-metal finished planes! Here's she is with four different Alcad colours ranging from Polished Aluminum for the fuselage, to Stainless Steel, Dark Aluminum and Magnesium. There isn't as much difference as I would have thought (easily blended with any weathering). There's a little post-shading I did with Magnesium over the Polished Aluminum. I'll spray the clear red over the nose sections to give that a metallic sheen. I'll mask a few panels to give it a darker sheen on the fuselage and I'm almost ready for decals. I do like how this particular kit has broken out all the colours as separate pieces, now I have to spray all the leading edges yellow. I even liked how ridiculously deep the panel lines are (typical of Bandai) - it helps because I had to spray a thick glossy black undercoat which would of obscured all Hasegawa panel lines! Nice little kit so far...


-
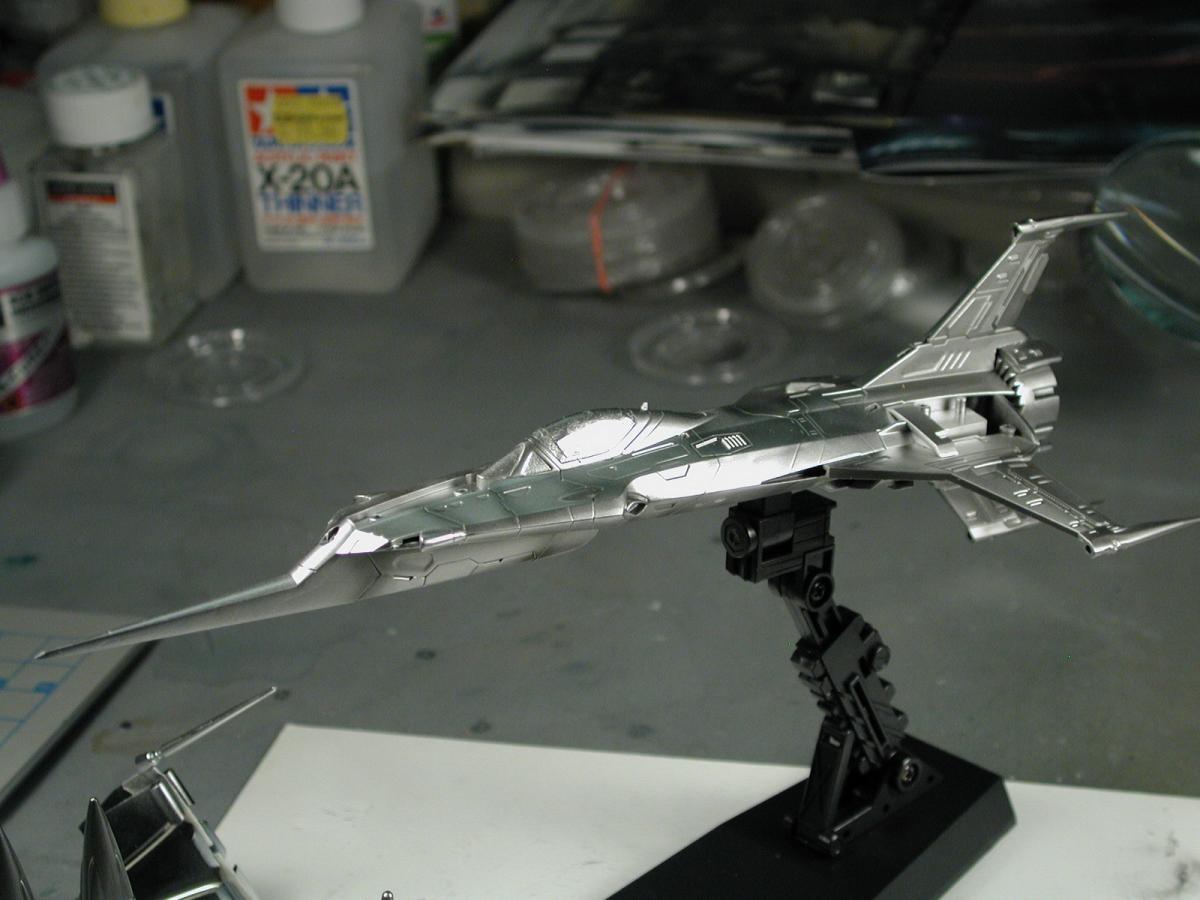
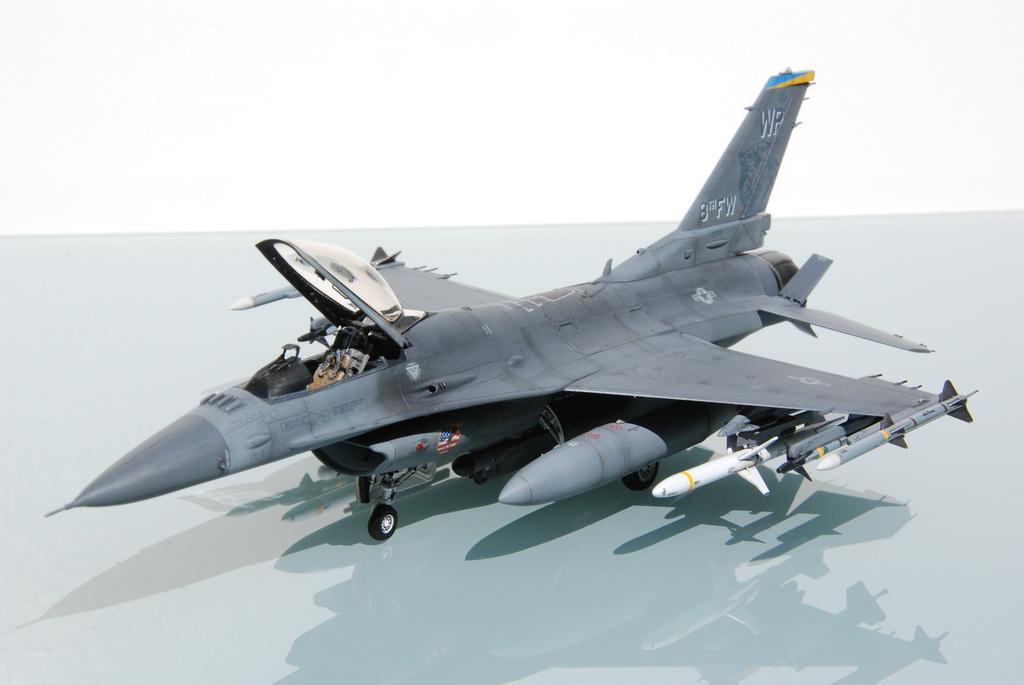
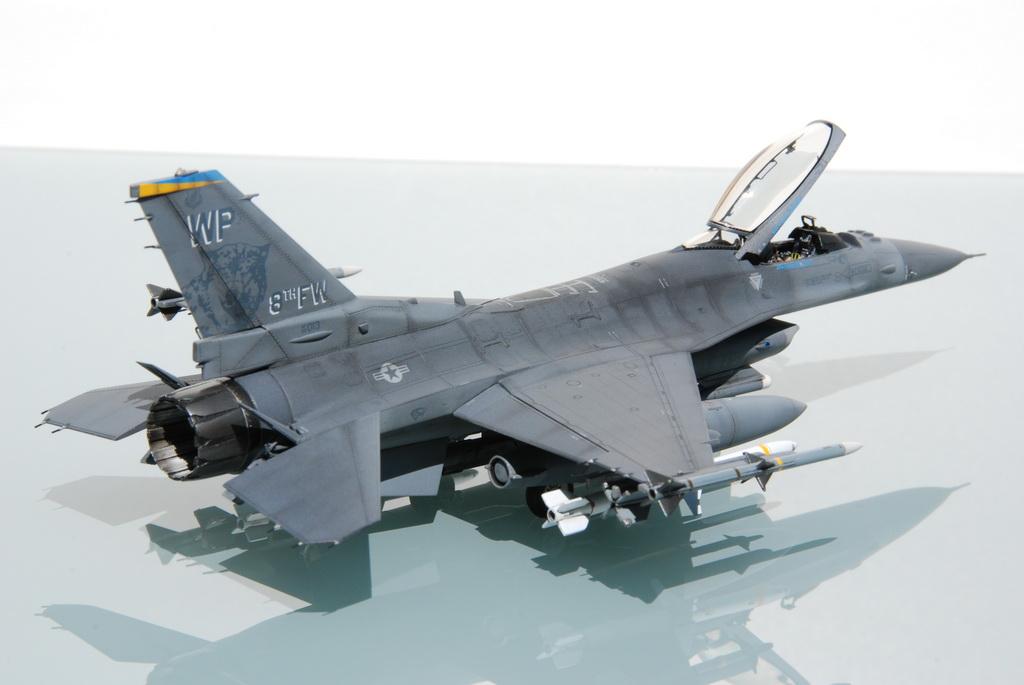
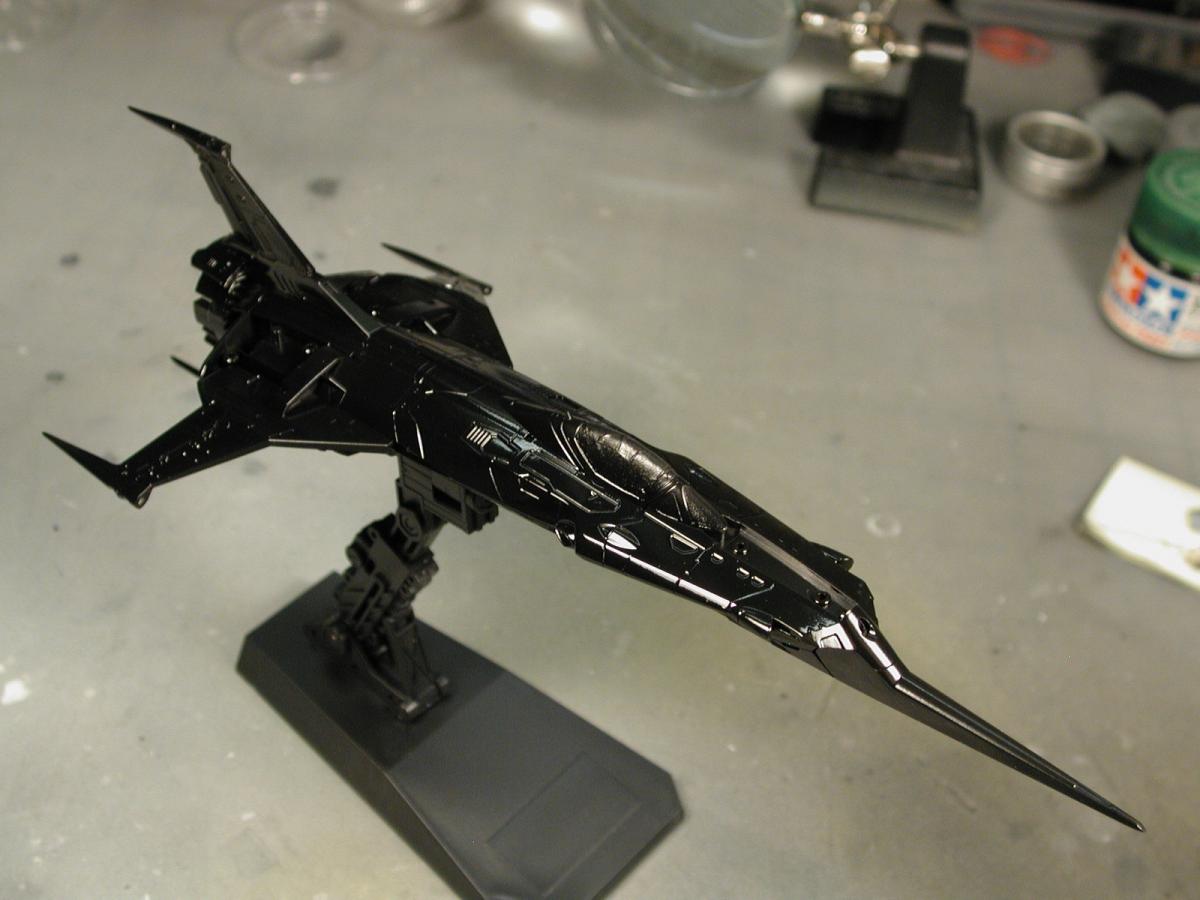
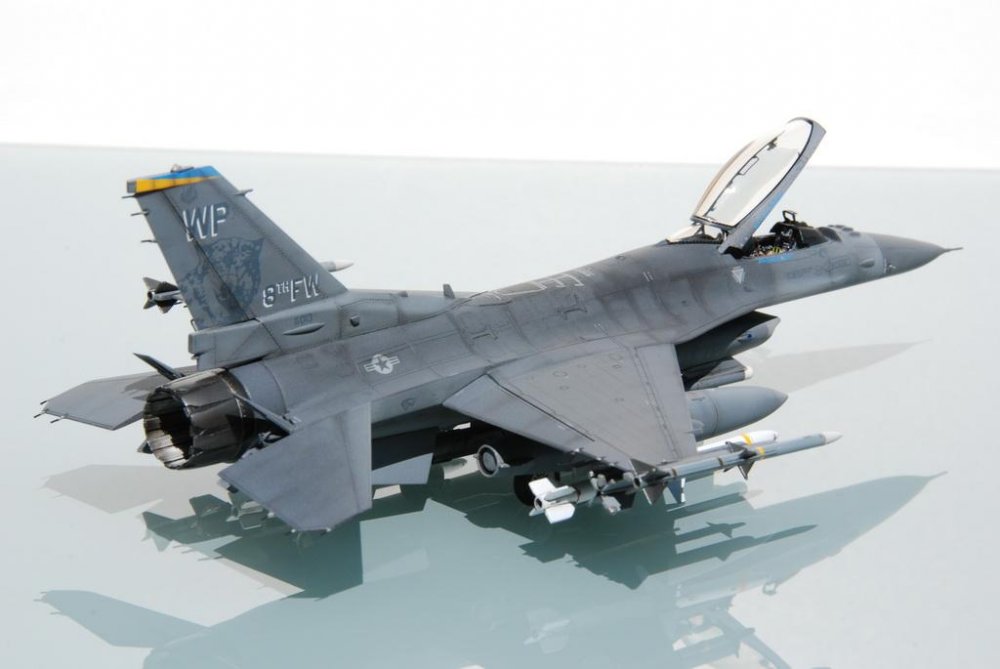
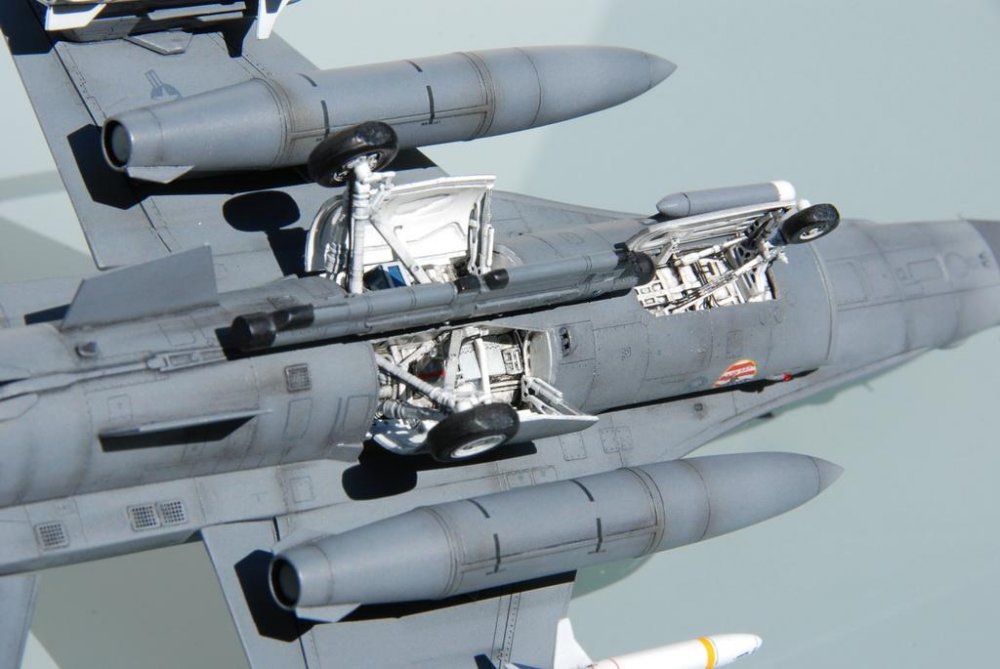
Thanks Noyhauser, I loved the Academy F-16 kit! Here's my build a few years ago... I was going to get the Academy F-18C kit when the new Hasegawa F-18F kit came out, so I opted for that instead - always a sucker for the skull squadron. Back to anime for the moment, just a small project to hopefully finish by weeks end (before I start a new job!) Nope, its not stealth... its just the glossy undercoat in preparation for the Alclad Polished Aluminum.


-
Thanks, I guess HLJ doesn't normally carry this eh?
-
Where online would one recommend Canadians to order from? NY has been my saviour (at a mark up) but if these are easier to get, where should I go instead?
-
Hey Noyhauser, I'd like to know how you feel about the Academy vs. the Hasegawa F-18s? The Academy new tool F-16 blows the old Hasegawas out of the water - I was very pleasantly surprised.