wm cheng
-
Posts
4338 -
Joined
-
Last visited
Content Type
Profiles
Forums
Events
Gallery
Everything posted by wm cheng
-
NO YOU CAN'T - beautiful work!
-
Ah, thanks. I'm never logged out so I didn't know. Also I don't frequent those "other" parts of the forums.
-
What is this Items of Interest section?
-
 Me too!!! I love how they updated the look but definitely kept the feel of the old.
 -
I wonder if maybe that half plastic ball as initially supposed to be some kind of rubber like material that can be compressed. Maybe they designed the two metal halves to compress the rubber ball to give it friction. Then somewhere along the line, they cheaped out and decided to make the ball out of regular plastic and forgot to resize it because it no longer compressed? Just a guess - maybe I'm giving Arcadia too much credit. I haven't transformed my VF-0D fully yet, just partially to paint it up to weather and correct the color - now I'm afraid to. After being burned twice by Arcadia for the YF-19 AND the VF-0D - I swore off them, but that VF-0S was tempting (since I never got a Yamato one due to the floppy neck of my VF-0 low-viz) but now seeing all these problems crop up - its cemented my decision on swear off Arcadia unless something changes.
-
STAR WARS Merchandise Episode - 2
wm cheng replied to Black Valkyrie's topic in Anime or Science Fiction
New Bandai kits that are banned in North America? -
I WANT THAT TOY!!! Wow, 28,000 GBP... who do they think they are... Arcadia?!
-
YES!
-
I'd have to disagree, the Timothy Dalton movies have absolutely no redeeming qualities whatsoever and should be placed 99th and 100 with License to Kill at the bottom - I can't think of any worst Bond movie than that, even Never Say Never again isn't worst! Back to Spectre, I was a bit disappointed, but Mendes can't film a decent ending! Just like how Skyfall derailed when they got to the ancestral home, Spectre falls apart in the 3rd Act. They should write the endings first and then work there way back other than "oh crap, we're running long, better end this thing..."
-
Yup, exactly the same here! I will get the VF-2SS and VF-4 though. Hasn't anyone said anything about the really thick black stripe along the front fuselage or the really overly large sized "001"? These are kind of like my old ARII 1/100 transforming plastic kits I built when I was in high-school, they had metal hinges and metal landing gears, but the rest were plastic.
-
I think the YF-30 was the version 1 so this VF-31 would be version 2
-
Wow, I must admit, I was skeptical... but I'm impressed with this sculpt so far. I even like Bandai's "non-canon" additional details, it seems to make sense. I hope the chest intakes actually recess in a bit instead of just a flat drop and painting it black. However I won't hold my breath for decent landing gears. Time and time again Bandai has proven to me it has no ideas how to make decent aircraft like landing gears - at best they will be fat and chunky (ie: Yukikaze or Yamato 2199)
-
YES!!! basically the Club-M 1/48 kit in a durable/playable toy form.
-
So its not only me that noticed where the pod went in Battroid mode?... I was hoping for something a little different. The pod arm was above the back on the old YF-30, but this version looks like the pod arm is below the aircraft, how would that swing up and over the head when its in Battroid? Does it say anywhere that its "Perfect Transformation"? or are we just assuming? - not to ring any alarm bells... I like the aircraft mode, sleek, but I wished the wings swung or folded into itself a little more to minimize the growing back kibble - I know its been said before, but I whole heartedly agree that this just seems like a lazy way of getting stuff they didn't need in the transformation out of the way. (when only viewed straight on from the front!) Wished the fold crystals/sensors were clear instead of just a paint app.
-
So what's the story on VF-4 and VF-2SS? Are they including them in the 1/100 line or not?
-
Macross Δ (Delta) - announcement thread
wm cheng replied to renegadeleader1's topic in Movies and TV Series
I thought it was supposed to have a brand new transformation, the VF-31 is just the same old transformation as the 25 with some wing bits that go the wrong way... so its just the SV-262 that's the new transformation? I'm a bit underwhelmed. The story better be good, the character artwork isn't as good as the old Mikimoto stuff - its looks the newer simplified art. I wished the schemes were a bit more military than air-show flash. -
I might be a cranked arrow delta with a forward swept tip instead of a cranked up tip...
-
I feel your pain. My daughter is 9 now, but I started her when she was 4, I always thought she liked it, but when she turned 7, she sat me down and said; "Daddy, I don't really like Star Wars you know... I only watch it for YOU, you seem to like it so much!" She's like Star Wars Rebels ok, but she'll watch it with me if I plead with her now. The things she does for her daddy
-
Gotta be one of my personal faves!!! Just too afraid to transform it - but it sure is pretty sittin' there waiting for me to zoom it around the room.
-
Get an Iwata, its worth it. I learned on a Badger 200IL for 15yrs, then got 2 Iwatas an HP-BC and HP-C and they are light years ahead. I can't even really compare them to the Badger as they aren't even in the same ballpark.
-
Umm... yeah, I don't think any Badger is ever $400 - even Iwatas (the Ferrari of airbrushes are hardly more than $250usd) In fact $90 for a Badger seems a bit expensive, you can get a much better gravity feed dual action Iwata for $90-$100usd. Don't let that ridiculous MSRP fool you.
-
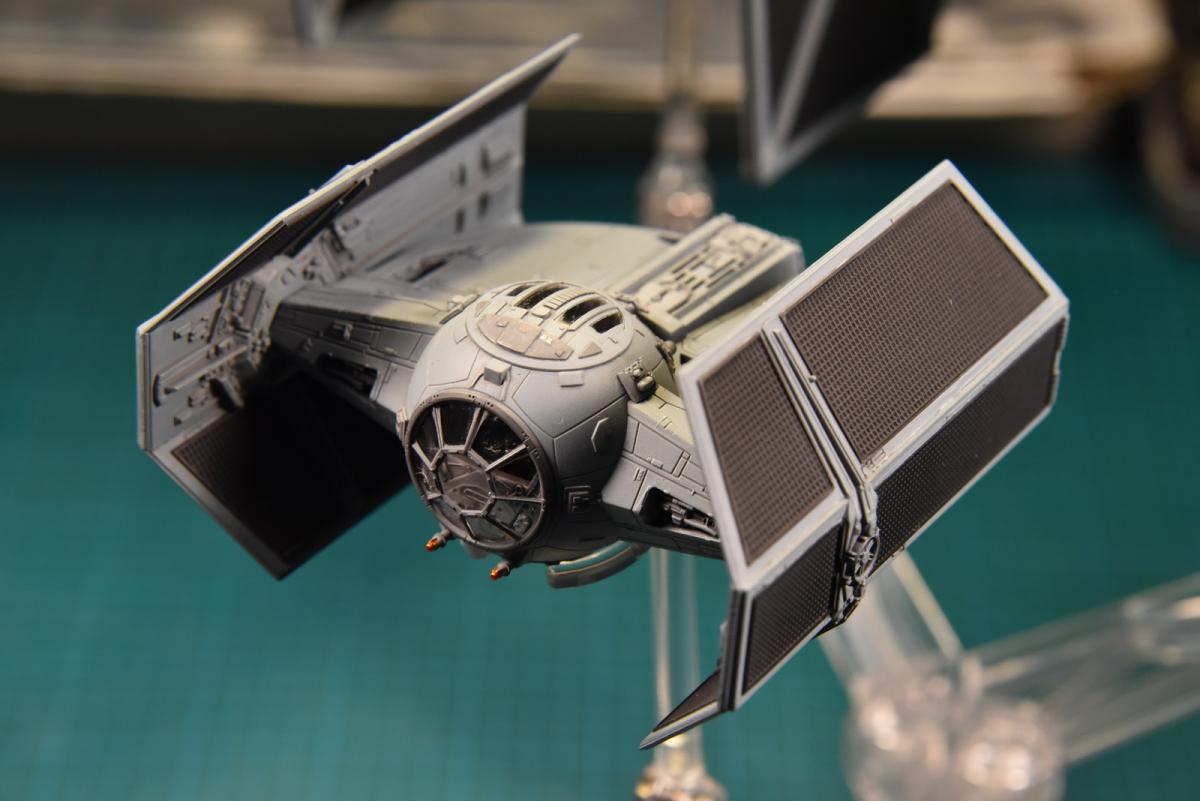
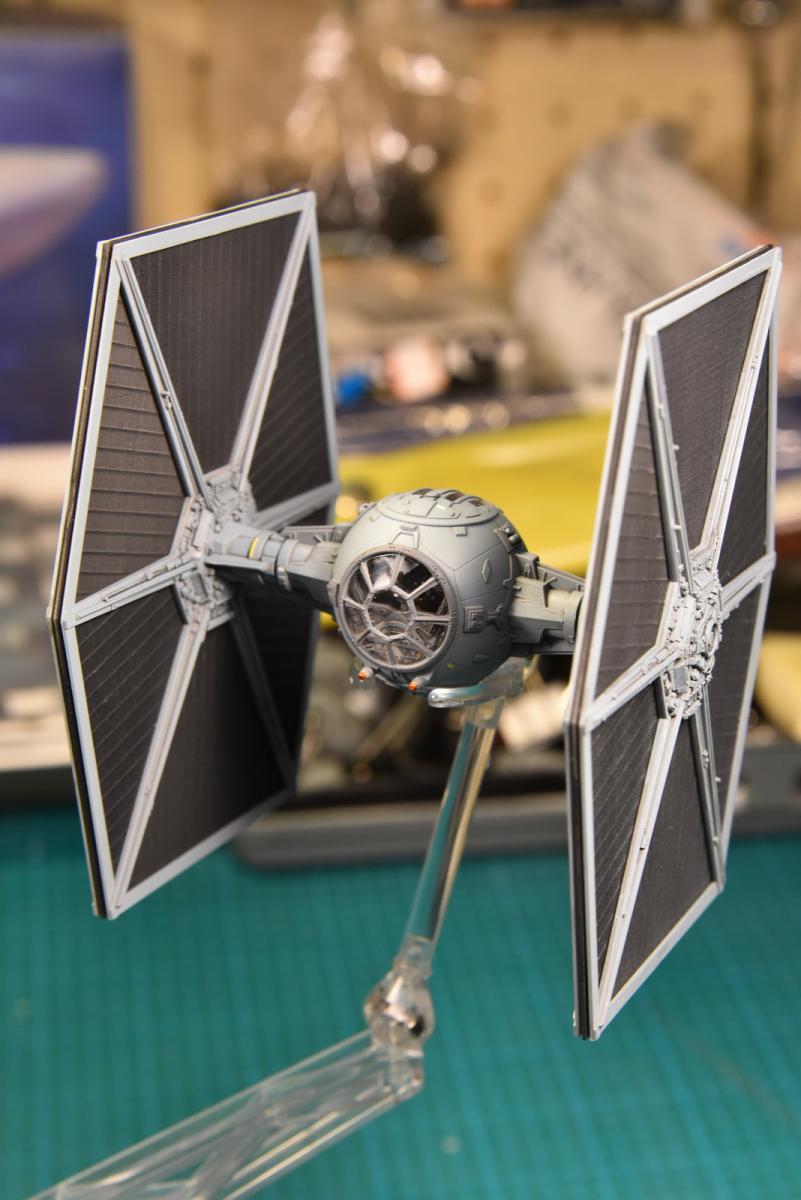
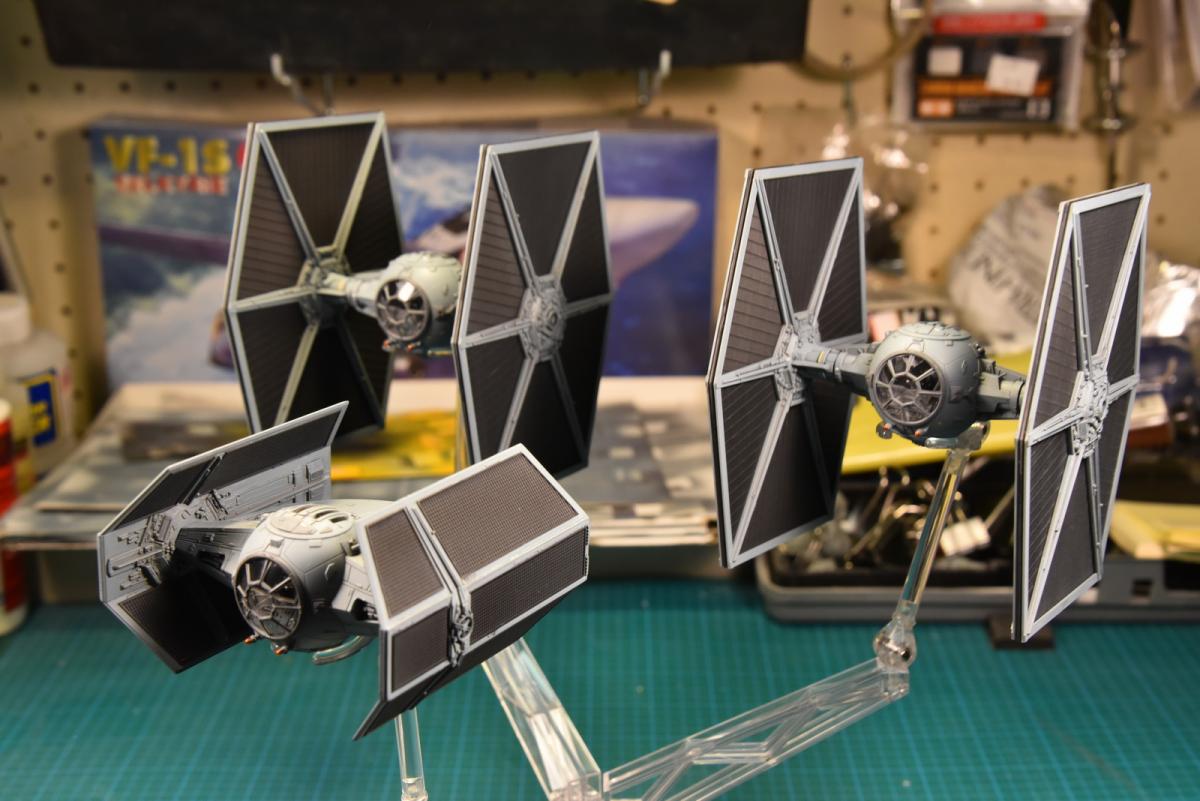
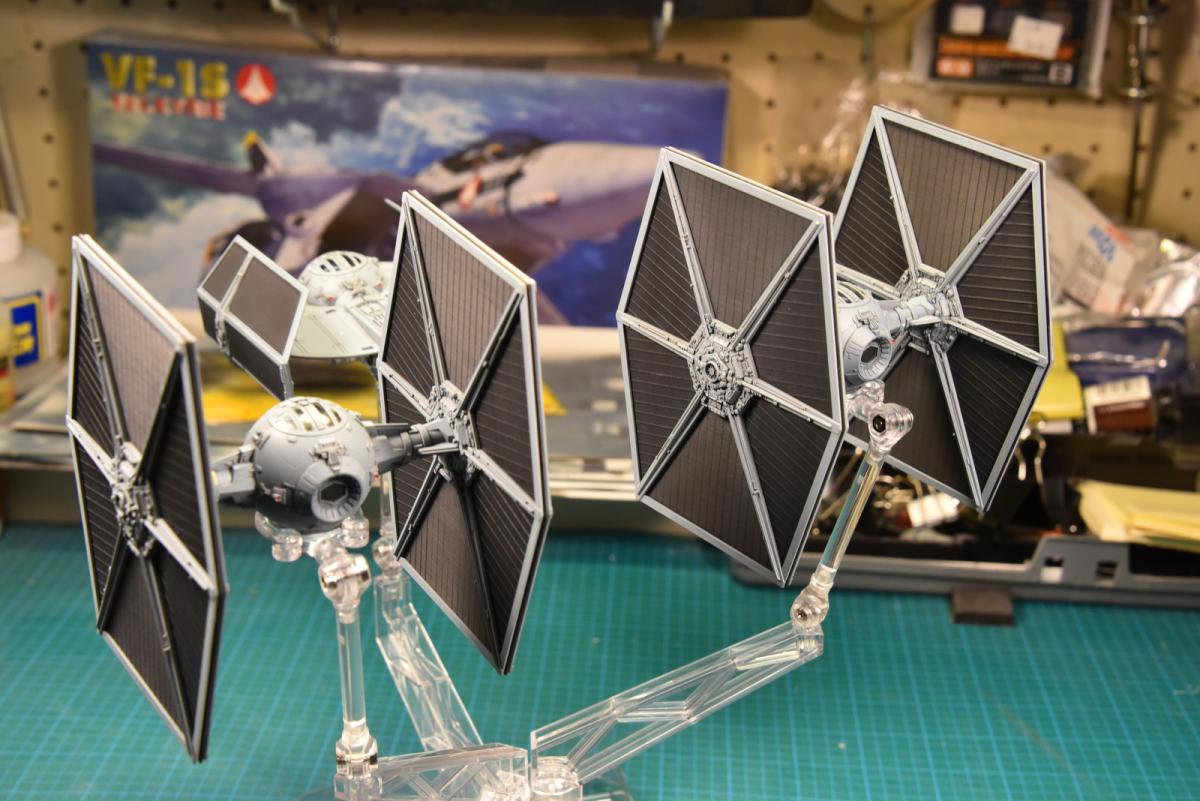
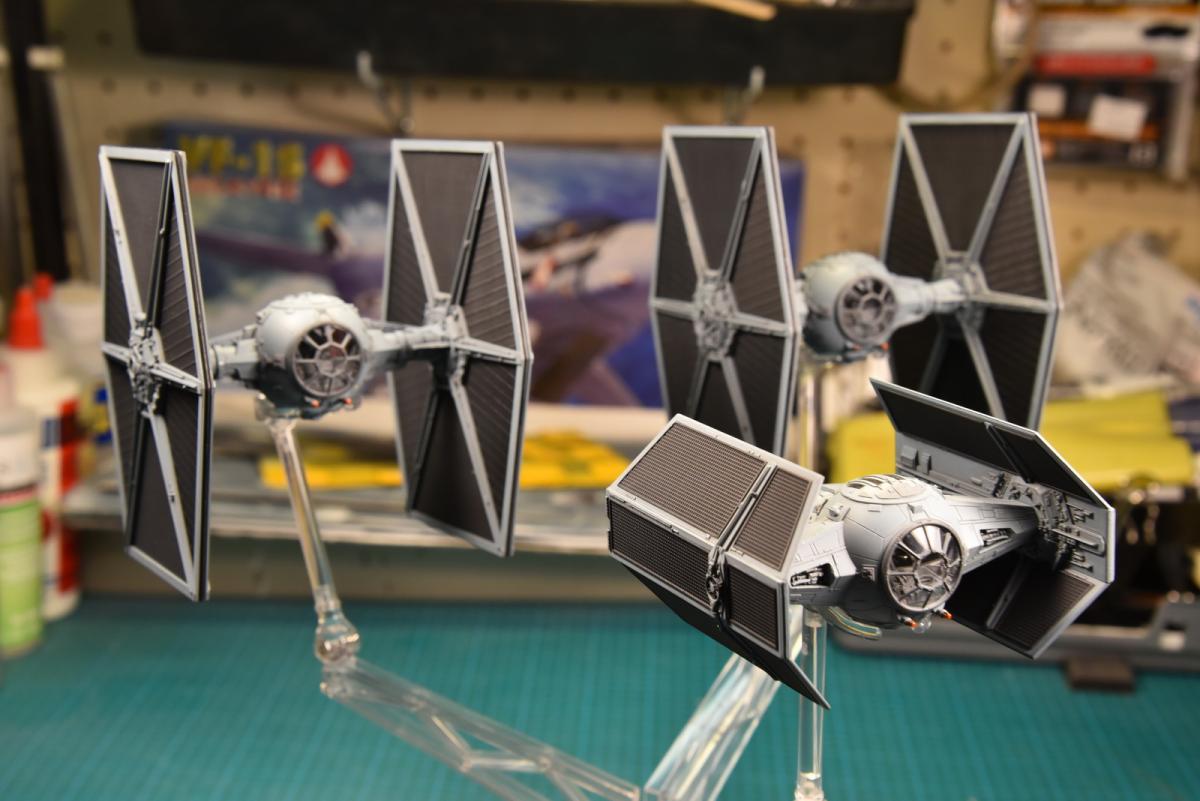
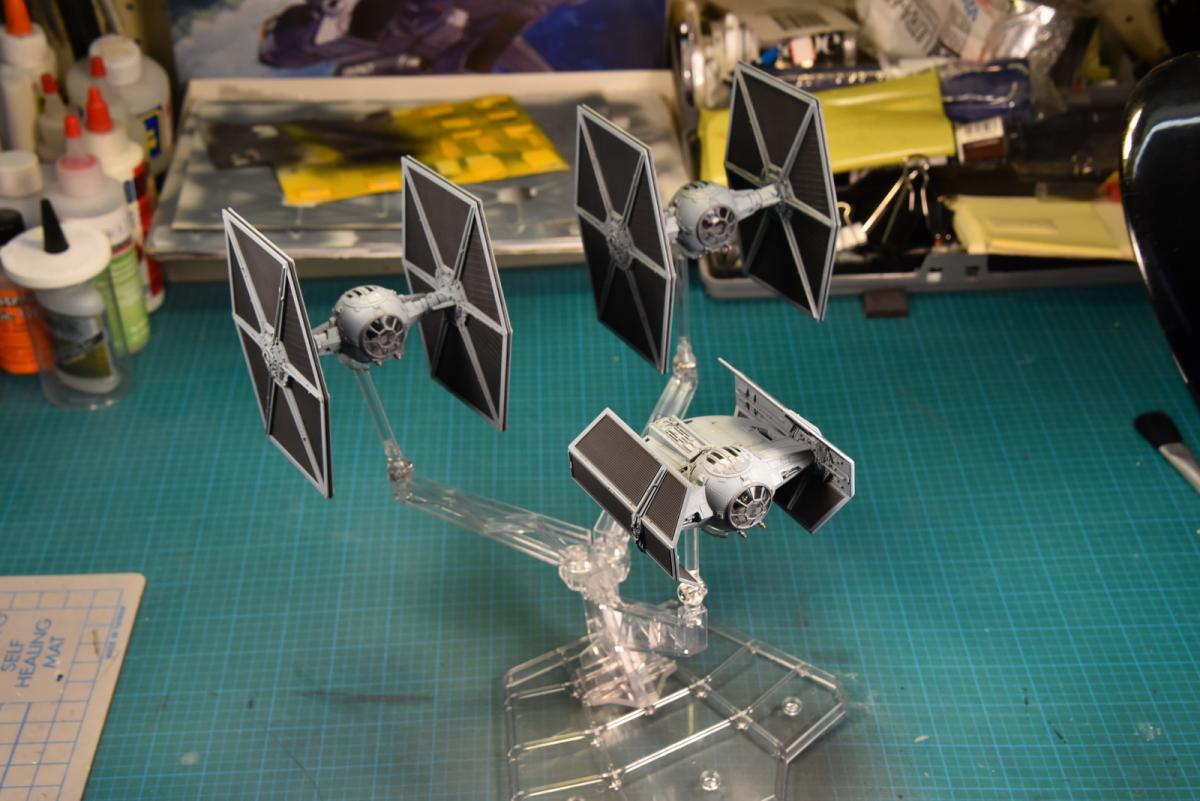
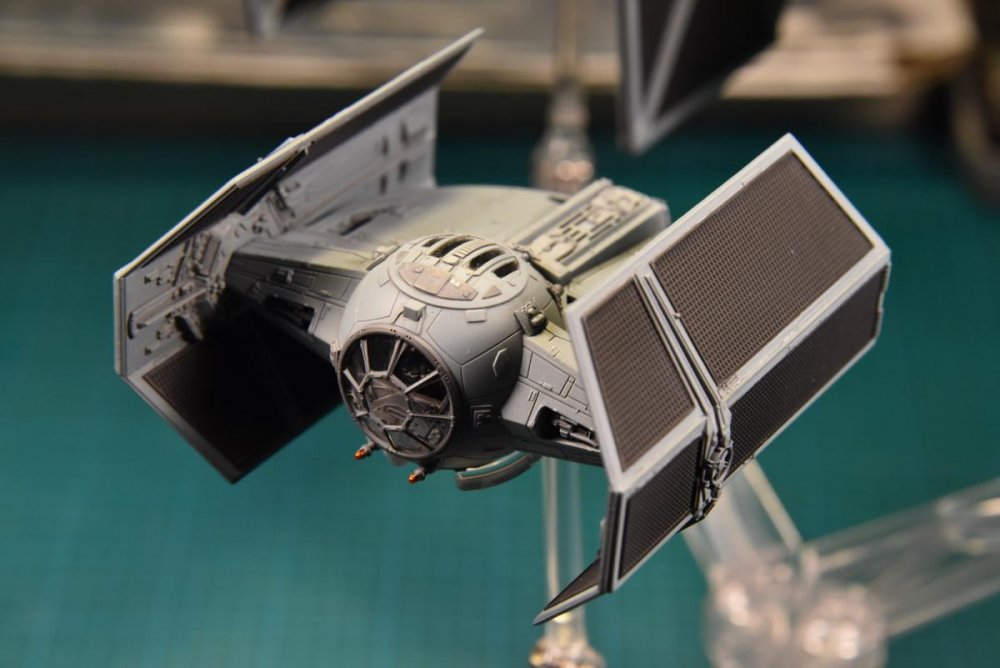
Jumping on the Star Wars bandwagon! This is what I've done with my last few weeks off. They are the FineMolds 1/72 Tie Fighters - this is what I had envisioned when I first saw the Bandai Trident stand, so I kind of got the stand first, then bought the models to go with the stand (ass backwards!) a few years ago. After getting the amazing Bandai Y-Wing fighter recently, I thought I'd build these first to get myself back into the hang of building models. I've been out of the game for a while, just weathering and detailing toys for the last few years. It was a sobering experience. They are pretty incredibly detailed models for such a small scale (my last Star Wars model was the 70s MPC/AMT X-Wing which had to modify extensively which turned me off Star Wars models for a while). I highly recommend them, don't know what they're like compared to the new crop of Bandai Tie Fighters though. The Tie Fighters are by far the best kits I've built in a while (beautifully detailed, great hiding of seams and easy paint masking), while the Advanced Tie (Darth Vader's tie fighter) wasn't as well engineered as the original tie fighters - masking the black panels on the solar wings was indeed a pain! p.s. Oh, a bit of advice, you can hardly see any cockpit details after you're finished (I spent so much time detailing and carefully painting the cockpit)


-
Wow! That VF-0S is starting to look really good. But after being burned twice by Arcadia and that insane price - I just gotta pass, in fact I'm probably passing on all the Arcadia stuff if they keep pricing themselves at this level and giving us the same bare crap. I don't mind paying these prices, but this is what I expect in the +$3-400 range! http://www.hlj.com/product/SET88021
-
Beautiful! Dying to find out about the price.
-
Macross Δ (Delta) - announcement thread
wm cheng replied to renegadeleader1's topic in Movies and TV Series
What does it say? "...October 29th... 12 what, episodes?