-
Posts
4276 -
Joined
-
Last visited
Content Type
Profiles
Forums
Events
Gallery
Everything posted by wm cheng
-

Bandai 1/850 Enterprise A photos...
wm cheng replied to wm cheng's topic in Anime or Science Fiction
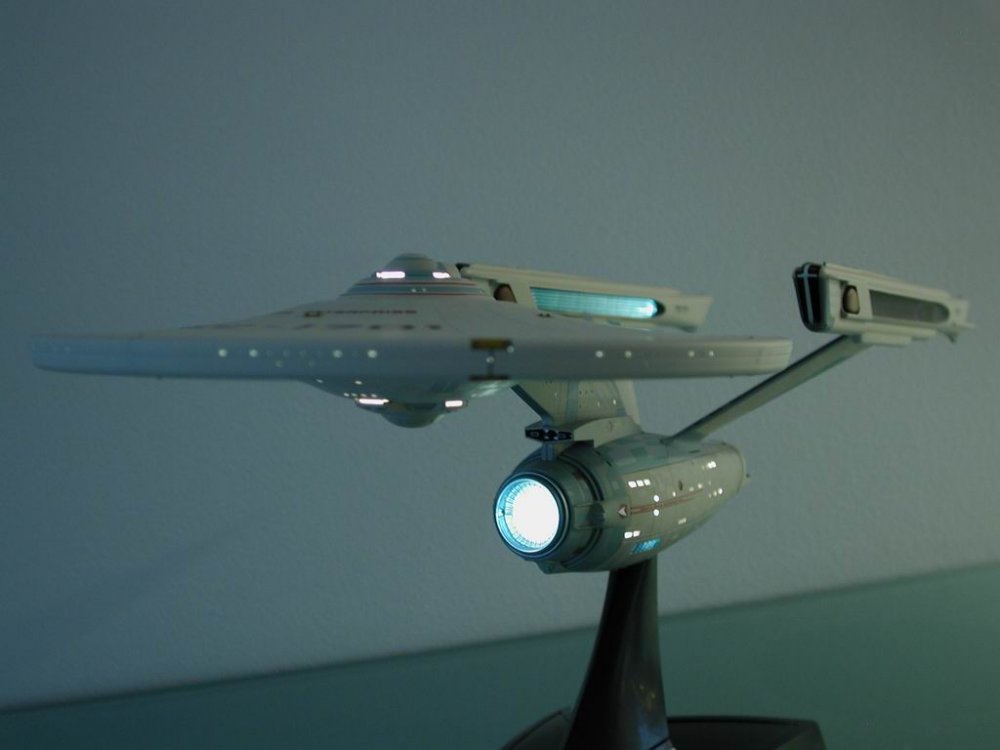
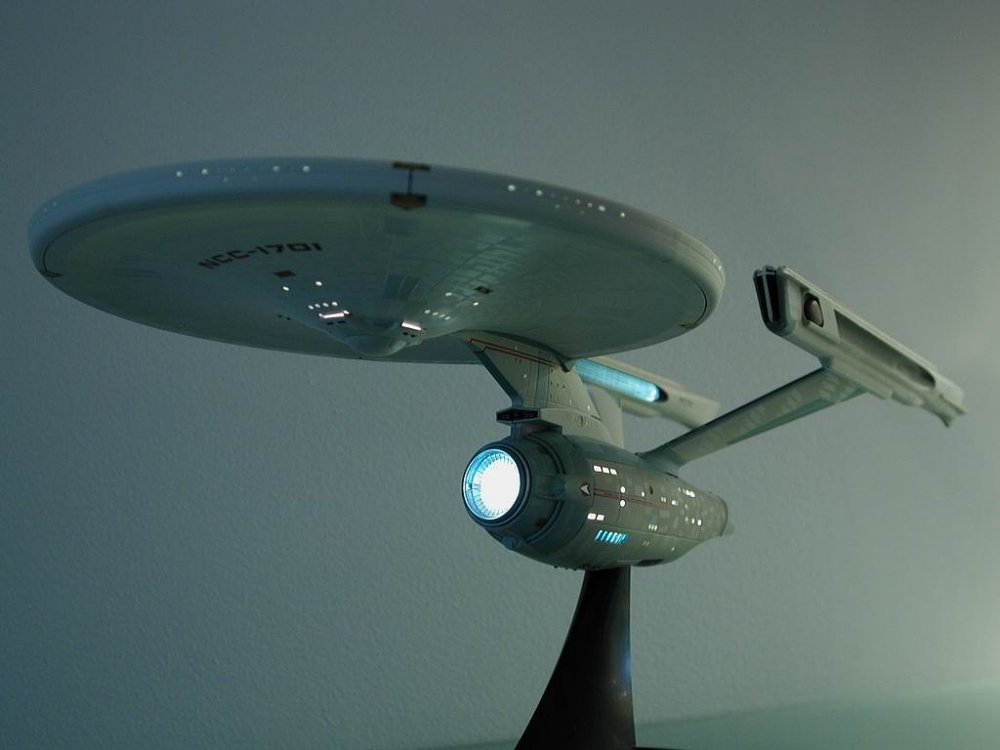
Oh yeah, I airbrushed the front clear deflector array in a clear blue and gradiated it to a darker blue near the edges. The included piece was just clear. -
Hey all, This is what I've been doing for the past few days. I thought it would be a really easy build 3-4 hours since it was all painted and everything - but a few things bugged me and I ended up taking up more time to correct them. Overall it's an excellent kit, amazingly well engineered and its lit to boot! Additionally, the entire kit is pre-painted with all the subtle aztec panelling and really fine federation stenciling. After seeing what they could accomplish in printing these kits on these complicated surfaces, Yamato has no excuses in giving us a sticker sheet for a $200 toy! I pretty much built it straight out of the box, but I did drill out the lower arboretum windows (large blue ones) on the secondary hull and the rear lounge windows behind the bridge on the primary saucer section. I don't get why these were just printed on, there was obviously light behind them. I filled all the windows in with Krystal Keeler - a kind of white glue that dries absolutely transparent and glossy to simulate the windows instead of just drilled holes. Lastly the biggest job was to eliminate the crack/seam separating the two halves of the warp nacelles. Of course since I had to fill and sand the seams, I had to spend the next 2 hours trying to mix paint to match the pre-painted surfaces so I can repair what I sanded. I also filled in the crack/seam in the front of the saucer section that just stood out like that ugly gap in your front teeth (those who own this model knows what I am talking about). Overall I think I found a pretty good match and I am happy with it - its kind of a cross between a toy and model. Here's some shots, excuse the blurriness, I didn't properly set up a tripod for these slow exposures to show off the lights.
-
Hey fellow Torontonians and GTA MWers! Pacific Hobbies is gone - sniff... sniff... Man it was a good hobby store - now where can I go for models? I know about Animextreme on Spadina, they have toys, but the model selection is pretty dismal - lots of Gundam (like everywhere else ). There is also Fata models also on Spadina, but their model selection is really small too. I hate waiting for HLJ and paying the exorborant duties and taxes, but are there no more good hobby stores that sell Japanese models besides Gundam??? Pacific hobbies was the only store that I have seen that had almost the entire line of Hasegawa Macross kits in stock. Please let me know if there are other bricks & motar alternatives.
-
Damn! they are re-issueing a VF-1S Roy's colours?? I wish I knew - its too expensive for me to get it again Its one of my favourite colours schemes - I guess Hikaru's VF-1S will have to do... Yes, I did an oil wash on my 1/48 Yamato Valk - I mixed up a light grey for the panel lines and a darker grey for the moveable surfaces - black is still too contrasty. The wash is a much finer line than marker - plus you can mix the colour to your liking. Nope, I haven't recieved my decal set yet, Anasazi has been kind enough to let me know whats happening, there was a screw up with his decal paper supplier, so he is behind a week or so. He didn't expect over 90 orders from us - so he's trying his best to keep up with demand. I will post a soon as I recieve them and apply them to my naked bird.
-
Hey mechamaniac, Its the same process I use for my plastic models. Look here: http://www.macrossworld.com/cgi-bin/mwf/ik...=8;t=4555;st=20 Its on page 2 about 3/4 the way down - I hope it helps. I used the same stuff on the fast pack - just artist oil paints thinned down with low-odour varsol (mineral spirits). I didn't leave the stuff on too long on the silver painted stuff (you never know - but it was fine) - but its safe on the coloured plastics.
-
First you need to have the thinner made for it - I don't thin it down as much as paint - but maybe 2:1 clearcoat:thinner sounds about right. Basically you want as thick of a clear-coat as your airbrush can handle without clogging up (clear-coats especially flat/matte tends to clog up in the airbrush faster than paints) - the thinner is just to make it flow better. So its an experiment with your particular airbrush and the paint, but I usually use 2:1 or so - I don't really measure. I vary it sometimes too, like white would be 3:1 or even 4:1, but dark or metallics could be 1:1 or 2:1. Good luck.
-
I hope my wife lets me buy the Hikaru VF-1S and the fast packs together I don't know if I can wait for them to be separated again Hey Recon, I just painted them by hand with a brush - the old fashion method. Its a small enough area, and the delineation between the parts are pretty clear. I still need to give the nozzles that little spritz of black, the silver is too bright, and the little black hole at the end looks a little out of place.
-
Is anyone bugged that the packs came in green instead of the blue that we saw in the Yamato photos? I would of personally preferred the blue - more DYRL like. Just nitpicking... Don't shot me. Still can't put this toy down - just love it to bits still.
-
I'm one of those unlucky few that even has a bit of that problem when I roll it without the fast packs. It doesn't collapse, but it does move back a bit - especially now with the fast packs - so I don't think I'll tempt fate and make an already poor situation worst. Unless I can figure out a way of tightening it though. Man, I am one of those who rolls it around - I mean its a toy!, and I zoom it around too - I don't necessarily do that to my models, but I can with this toy!
-
I will definitely post when I do the decals - must give our bud Anasazi37 some free advertisement for his awesome work!! No, unfortunately I am afraid to open this baby up (this VF-1S already has a loose front gear ) and modify the landing gear to eliminate that damn diagonal seam. Man, couldn't they just follow one of the panel lines - instead of a diagonal slash, even if it was horizontal would be good Its just the angle of the photo and that the gears are retracted so the seam is closed up for the moment. Of course this means when we apply the decals, we have to cut a slit in the decals so that they open along the seam instead of tearing, when the seam opens up to extend or retract the gears.
-
Yah, I've put on a dark oil wash on the missiles and engine compartment goodies and the details just pop out!! I also put a panel wash on the exterior of the fast packs too. I was going to give the nozzles and main engine bell a shot of airbrush black to simulate some burn, but I'll do that after the decals - I was going to give the fast packs a flat matte clear coat finish when I decal them to help seal in the decals - after that I will give the edges a light dry brushing. I painted the double barrelled gun port and rear exhaust port in Tamiya gun metal.
-
Very cool, please post pictures as you progress. Man this thing will be huge, can't wait till you start! Good Luck!!
-
Hey Recon, I haven't started on that YF-21 yet. In fact, I was working on that Bandai Enterprise - I thought it was going to be a 4 hour job! Its all prepainted and everything. Well, the seams I just couldn't bear to leave them like that - so I am in the middle of filling and sanding and trying to mix up a close enough approximation of the pre-painted colours. I'm not going to go overboard, but I just want to fix up some of the main bigger seams, and drill out some windows that they omitted (ie: the upper saucer lounge windows and perhaps the secondary hull aboretum widows if there is any light that gets to them. Well, its going to take a little more time than 4 hours, so the YF-21 will be put off a little until I finish this. It is next up, unless I find a real job in the mean time
-
Hey Brian, do you have a FTP site for uploading, I have some, but they are close to 50Mb.
-
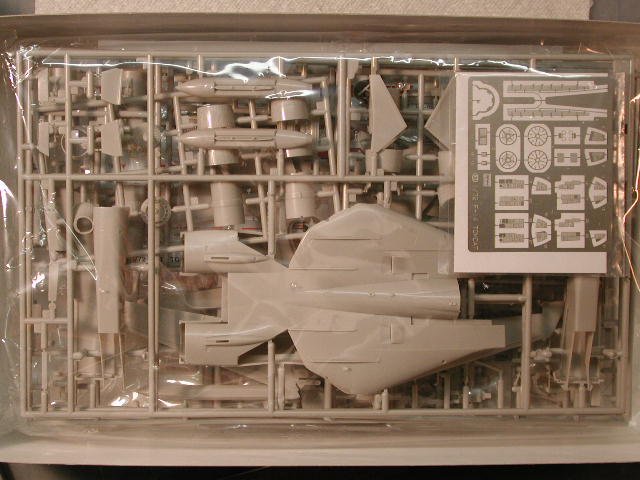
And of course the photo-etched parts. Now I just need to find myself a set of decent 1/72 resin seats.
-
-
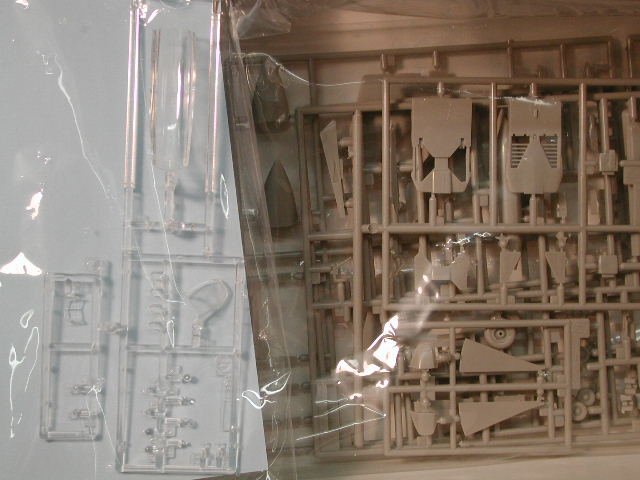
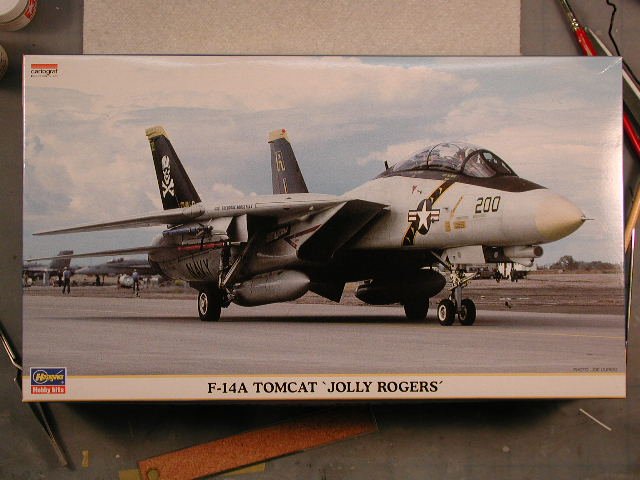
Hey there, I too agree that I believe that its a F-14D, the shots of the tail-cone shows the newer engines, unlike the traditional distinctive bell-shaped cones of the older F-14 engines. Yes, I know the old Hasegawa kit is really bad - to that end I did a bunch of research and opened a bunch of boxes at the local hobby store and ended up with what I think of as the best F-14 kit in 1/72 scale that I have come across. This is a limited edition Hasegawa kit - additionally, I was looking for the jolly rogers squadron to eventrually place this model next to Roy Focker's VF-0 whenever I get these things completed. This kit had all recessed moldings and bolts whenever approporate in true Hasegawa form. It comes with very clean and crisp decals by Cartograf (very high quality) and photo-etched parts for the canopy rails, cockpit interior and afterburner cans. I know there are some companies that list 1/72 scale photo-etched parts, but if you try to purchase them, they are very rare and hard to come by - this kit includes them! The up side, the wings are molded in separate pieces so that the forward slats can be built extended and the rear flaps can be built lowered - now the down side is that because the wings are so over-engineered, they do not sweep forward or back - you have to choose to have it fully forward or swept back. Unfortunately its an A variant, but with the optional parts to make it B and if you can get the proper tailcones, it might even become a D, since I see the proper gunport vents on the supplied sprue. Unfortunately, there are no missiles just the underside tanks, you need the Hasegawa missile set to complete this bird. Overall, the detail is excellent - more in keeping with a 1/48 than such a deminuitive 1/72 scale and I would recommend this kit highly to anyone looking for a F-14 kit especially if you can find it.
-
I love my recast of the VF-2SS in 1/72 scale and would highly recommend it. Although, the canopy that comes with it is really thick, and is foggy - not totally transparent and the fast-packs are meant to be built with it on or off, it would take a bit of modification to get them to be removeable. Overall, the lines are excellent, and follow the line-art quite accurately - although serious structural pinning is required as some of the attachment points are quite small and delicate.
-
Wow, it looks great!! Now I know what I'll be doing to ignore the relatives this Christmas!! Can't wait.
-
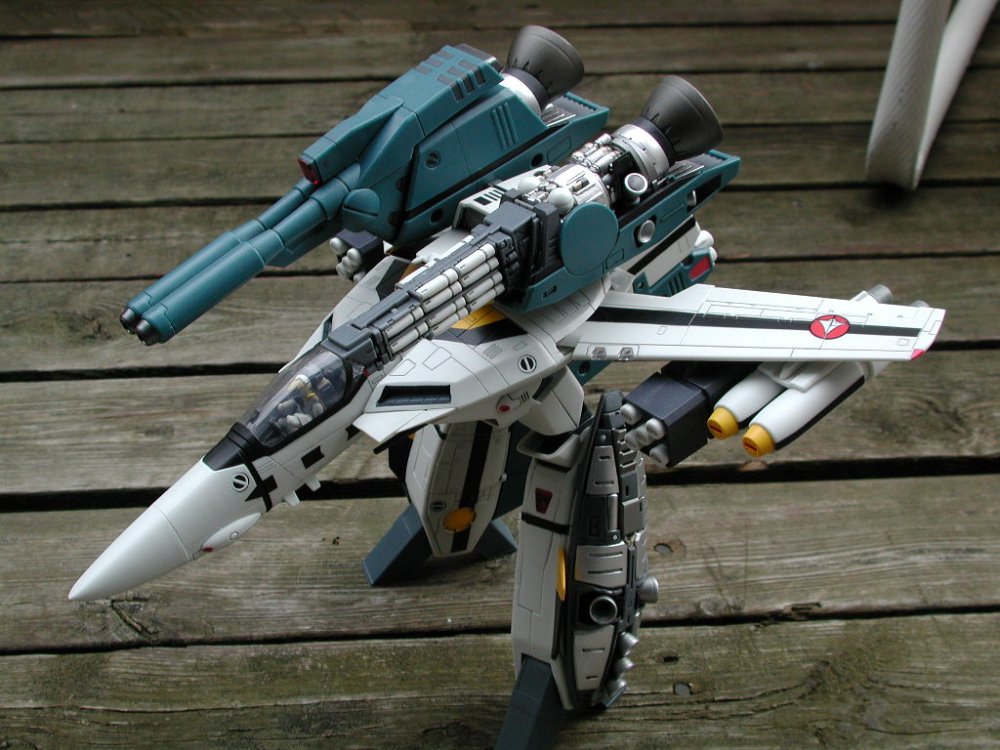
I found that wriggling it worked best - just becareful that you always hold the backpack in place to relieve any strain off those two precious hinges. The first time I removed the right side pack, the metal pin stayed with the backpack, and I had to take a pair of pliers and wriggle it out that way. I have since crazy glued the metal pin portion to the right fast pack - but I don't think I'll be removing it on a daily basis. (Maybe its Yamato's plan to get us to buy another set to play with without the fastpacks ) Try a little white glue on the micro missiles, its non-permanent, it you ever want them off again, you just pull them, and the white glue just peels off the plastic. I did a dark oil wash on the missiles and fastpack internals, and it really picked out all the details - they look great! I can't wait for the decals!! Thanks, I'm glad I'm not the only one with these problems - misery loves company No really, I love these toys, and I am so glad/thankful to have them - its just a little realism injected into an otherwise awsome experience.
-
Looking great!!
-
Hey Gubaba, I did a VE-1 some time ago where the gears are up and outlined the steps to modify the Hasegawa kit to have the gear doors closed - its the same steps for all the Hasegawa Valkyries. The forward gears are on the bottom of page 1 and the rear gears are somewhere down on page 7. Good luck. http://www.macrossworld.com/cgi-bin/mwf/ik...ct=ST;f=20;t=33
-
Hey guys, the original (reduced) pictures of my model is here: http://www.macrossworld.com/mwf/index.php?...ct=ST&f=3&t=697 Scroll midway down to the second page, there are some better shots when the sun came out. This is the Yukikaze series, but its not the Superslyph, there is a shot of it with the Superslyph in the background on the top of page 2. This is the replacement aircraft for the Superslyph called the FRX-00 Mave. Enjoy! (p.s. - let me know if anyone Photoshops this into a more realistic background)
-
Yah, the gun handle is completely collapsed, and the gun is tight to the underside of the arm missile packs - its the downward angle of the entire Valk that tips the forward part of the gun down. The leg connection peg to the arm is just a shallow disk, and the new connection point with the arm missile launchers are really just a half-circular depression in the pack. Nothing really clicks in - unless I'm missing something. Its just tat I usually display the Valk with the gears down sitting on a surface - and the dragging gun pod looks wierd.
-
Way Cool starship!! Back to the decal stuff for a second, a good friend Recon recently asked some very good questions that I hope to provide some light on my personal way of applying decals I hope might benefit any of you here that might need tips for applying decals. I used to, but with good decals like Hasegawa - I don't think you need to. Make sure that it is lying on a glossy surface first. Then if you want, you could put down some MicroSET first (avoid using MicroSOL - its really powerful stuff - only as a last resort) - MicroSET is so much weaker and its safer to put down. If I need it afterwards - after the decal position is finalized, I might very gently brush a little MicroSOL on the edges or any problem areas, but leave it alone at this point. I haven't encounted the curling before, but if they float, then I would put a bit of paper towel to soak up or "wick" some of the excess water from underneath the decal. However, the decal must be wet or at least moist when you are moving it around into final position - keep brushing water on it to move it around. The curling might be solved by putting it in the water for longer - try putting in for 10-12sec for the larger pieces, they should move slightly while in the water. MicroSET and MicroSOL does not get rid of bubbles, all they do is soften the decal to lay flatter and confirm to irregular surfaces or allow detail from underneath the decal to "telegraph" through. No, they work best when the decals are still wet, and that there is water underneath to "wick" the MicroSET or MicroSOL underneath for a more even coverage. I would say feel free to put brush some MicroSET on before or during decal placement and repositioning if you like, but only use a little MicroSOL after the final position has been achieved - and leave it alone after the MicroSOL. Yes, as soon as they are in position, I would "wick" away any water to prevent them from "floating" and use a tissue to "press" down on them tight to the surface. I usually fold the tissue a few times to get a softer cushion and press down hard to get some of the details to read through. I may paint some MicroSET or MicroSOL on them again but just around the edges and the recessed panel lines they cover. Remember, the setting solutions only soften the decal, they do not "sink" the decals - for that you have to press down on them with a tissue. I have noticed that flat/matte finishes tend to trap more bubbles underneath the decals too - causing a silvering to occur - make sure you give the model a clear-coat of gloss (I used semi-gloss because of experience - but gloss works better) before you apply decals. You don't have to wait to blot out excess water - just as long as you are satisfied with the final positioning. But complete each individual decal at a time. Yes again, I think you've got it! I only panel wash on top of the decals to reveal again what they cover, you don't have to do the entire plane again. I usually do semi-gloss coat to help even out the edges of the carrier film but I think I will try a gloss coat now - the glossier the clear-coat the heavier/thicker it is and more able to cover this slight bump. Then finish it in whatever final sheen you want the whole thing to take on. I find semi-gloss to be good with planes - flat seems more appropriate for armours - or mix the two, like semi-gloss for the Valkryie and flat for the fast packs or even the two finishes on the same plane like my FRX-00 Mave thread.

