-
Posts
4266 -
Joined
-
Last visited
Content Type
Profiles
Forums
Events
Gallery
Everything posted by wm cheng
-
Thanks Peter, Yes I did do one on the old boards - however they aren't up at the moment, I think Shawn has had some problems with them lately. There is a thread posted here: http://www.macrossworld.com/mwf/index.php?...t=ST&f=23&t=691 of my older stuff posted, but they are all locked up in the old forums for the time being. Do make sure to post pictures of your model when you build it. Good luck, Wm
-
Can anyone provide the link at HLJ for these things - the link earlier in this thread is no longer working - are they still selling these? or was it pre-order only.
-
Hot babes in Architecture ?!!? Man, boy did I miss out! We either got the "womyn" (man hating ultra-radical feminist) or the climbing urber-arts dressed completely-in-black psuedo intellectuals both of which you don't want to be caught in a dark alley somewhere if you're a man And anyone up after 3 or 4 days straight without sleep or shower before a deadline wasn't so fresh
-
I have never taken decals off (personally) but if they are properly applied - I would imagine that they would be difficult to take off. So I would suggest only applying decals if you want the markings on to keep as your own toy or sell it with the decals applied. If they are applied properly - I don't believe they would deminish the value of the toy. Check out my 1/48 decalled bird (I have no intentions of removing the decals later on - and I have recieved numerous offers to purchase - not that I'm selling) http://www.macrossworld.com/mwf/index.php?...t=ST&f=4&t=2463 I feel decals are more durable (if properly applied and sealed) there are no raised edges to the graphics that sometimes gets caught on things or dust gets trapped under and eventually peels off. If not properly applied, they can "flake" off or if not sealed (since they are so much thinner than stickers) they can be scratched or damaged. With that said, I find them much more realistic than stickers - however, they require so much more effort to put on (especially when you apply them to bare plastic). Essentially, like most things in life, I find that the end result is directly proportional to how much effort you put into it. You get what you put into it MicroSOL is a liquid that is used when applying decals - it is a decal solvent. So it softens or "melts" the decals slightly so that they will "stick" adhere better to unsual surfaces. I use a lot of this stuff on the Yamato toy since unlike most models which will have a smooth painted surface, the bare plastic of the toys actually have a slight texture to them - they are minutely pebbly and this is what the MicroSOL overcomes, and makes the decals conform to the slightly pebbly texture.
-
I would look for a good sized local hobby shop first and also branch out into hobby train stores too - Train enthusiasts build most of their buildings from stryene sheets and you can get quite a good selection at these types of stores.
-
I've used my ModelMaster Acryl clear coats (which I use on models) on the toys, and so far they seem to hold up well. Now, I don't transform them everyday though. The Tamiya clear coat - only the glossy clear coat can be applied straight or thinned from the bottle, the flat must be mixed with a paint. Good luck.
-
I for one would love to see a step-by-step of your amazing custom... thats really great work!! What happened to the rear rudders when you fold back the two packs on either side of the backpack? Exactly what extra pieces were needed - which recasts was required for this transformation? I only have one of the Bandai kits - and may consider your process (someday... ) but you did a really fantastic job creating the hinges. Kudos, lets see some more pictures please.
-
Who will get them in first!! More specifically, who can get them in Toronto first!! Man we need a price - whats in the full set!
-
I think spraying the inside rear nozzle of the missiles really adds to the realism. Now I wish there was a easier way to attach and detach that gun strap.
-
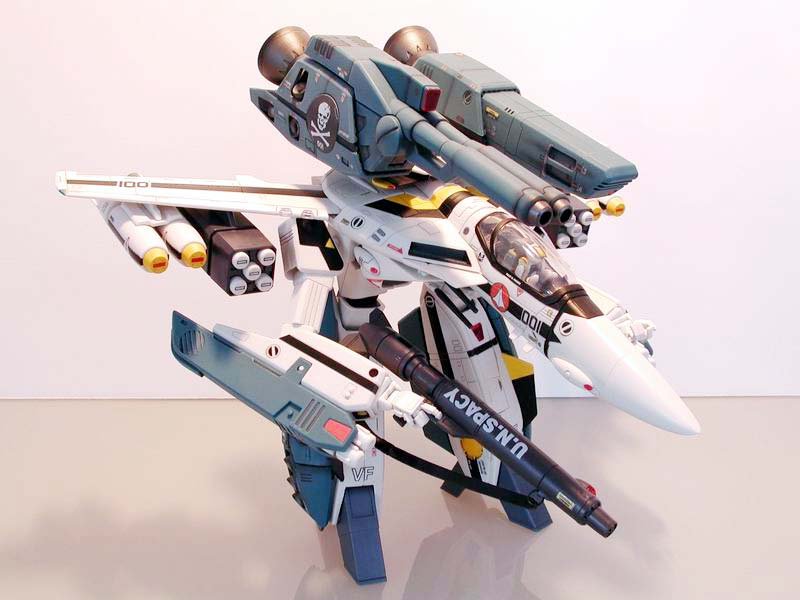
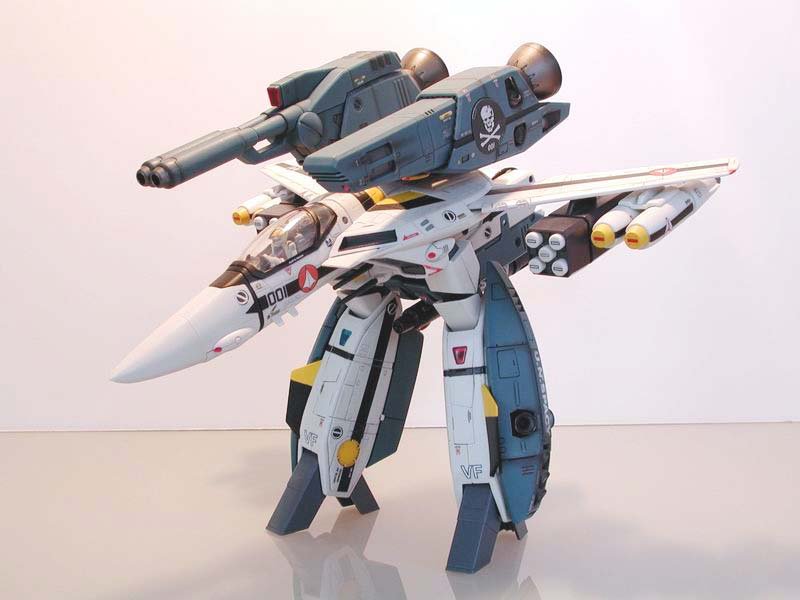
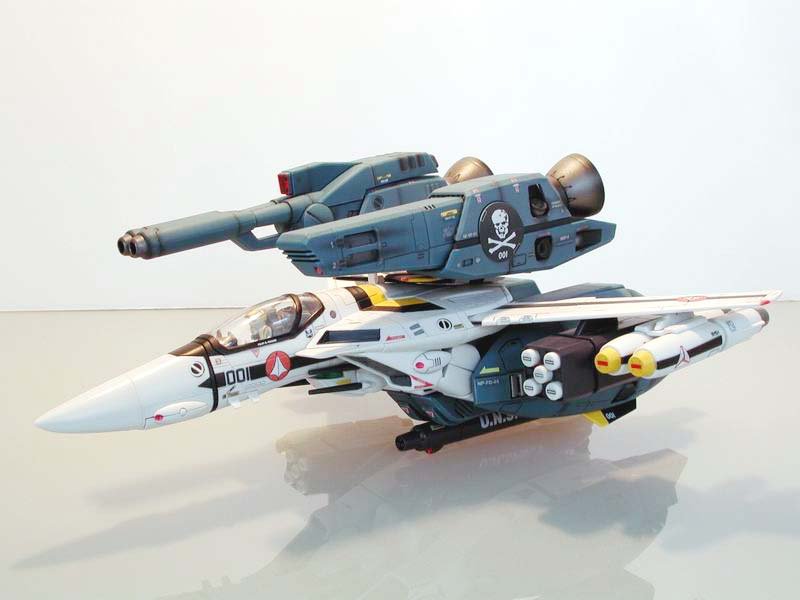
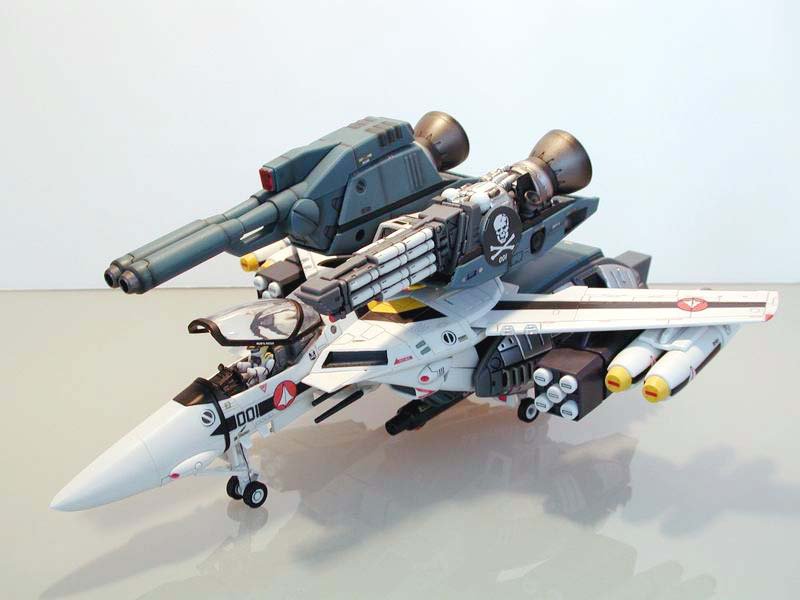
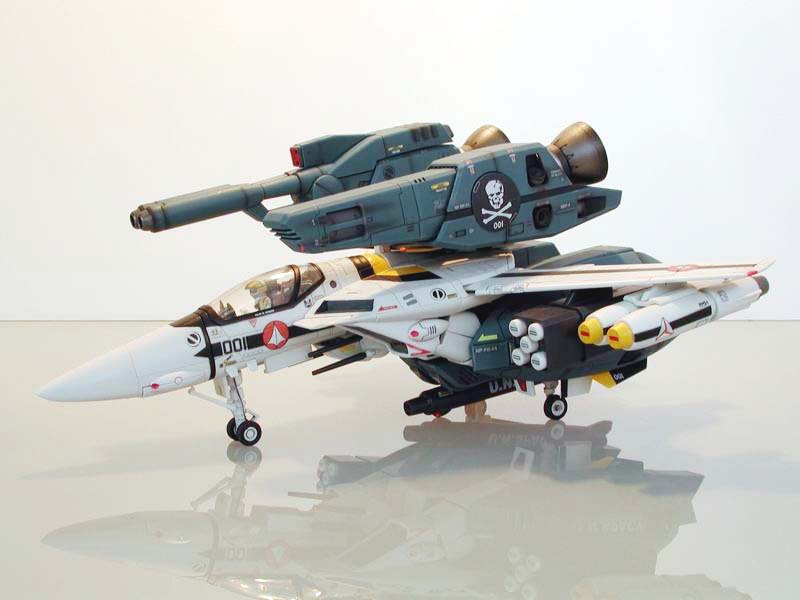
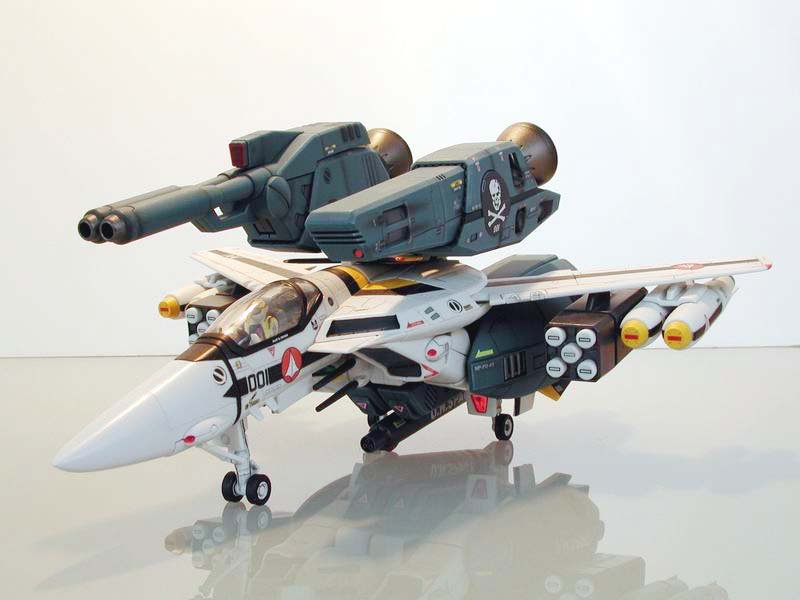
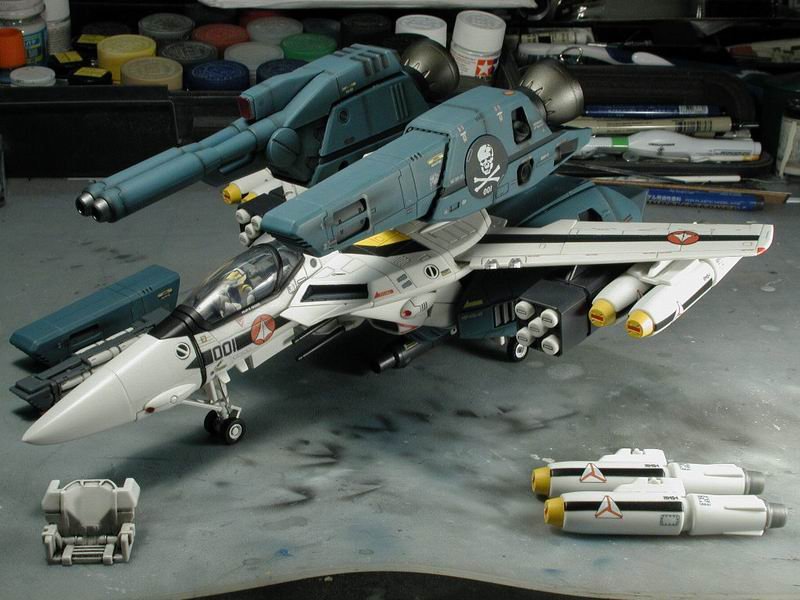
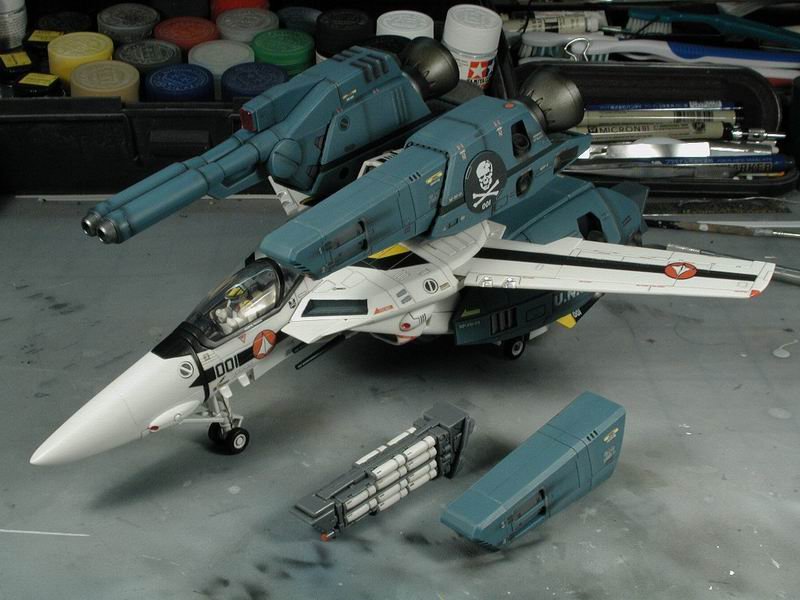
Well, here's a shot with the RMS-1 missiles done and clear-coated in semi-gloss. I also did a wash of that central piece that re-inforces the area behind the head. You can see that Anasazi was kind enough to provide those details that the Hasegawa weapons kit had on the missiles as decals to apply. Unfortunately, the white triangles shows a bit of bleed through of the stripe underneath, I would suggest scraping the black stripe off in that area first. Do you guys still want me to hog up more bandwith by taking some decent pictures of this in the sunlight against a more neutral background? Man detailing these fastpacks are more time consuming that the Valkyrie itself!! Yes, I know the feet are not weathered like the rest. However, in fact the Valkyrie itself isn't really weathered, I just did a light panel wash in light grey on it. The Valk is pretty much like the anime - hence the grey feet and gun. If I were to dress it up - I would re-spray the gun and feet in metallic gun metal then weather that up - but I feel that would be too much - I think the packs provide the contrast. Also, the packs don't really transform or sit against anything - they are just attached - so I feel there will be less wear on them. The feet will support the Battroid or Gerwalk, I am afraid that if I "burn" the feet a bit, no matter how many clear coats, they will eventually chip or scratch. Well, thats my reasoning for being lazy Enjoy...
-
Hey pfunk, I use my trusty 16/17yrs old Badger 200NH bottom feed with a fine tip and needle assembly. Its a very simple single action cheapie - but it does the trick. The bottom feed is great, it can accept a bottle or a cup. Highly recommend it!!
-
-
Last parting shot with the internal micro-missile launcher - now I'm off to decal the RMS-1 missiles... I might have some finish photos soon in the various configurations.
-
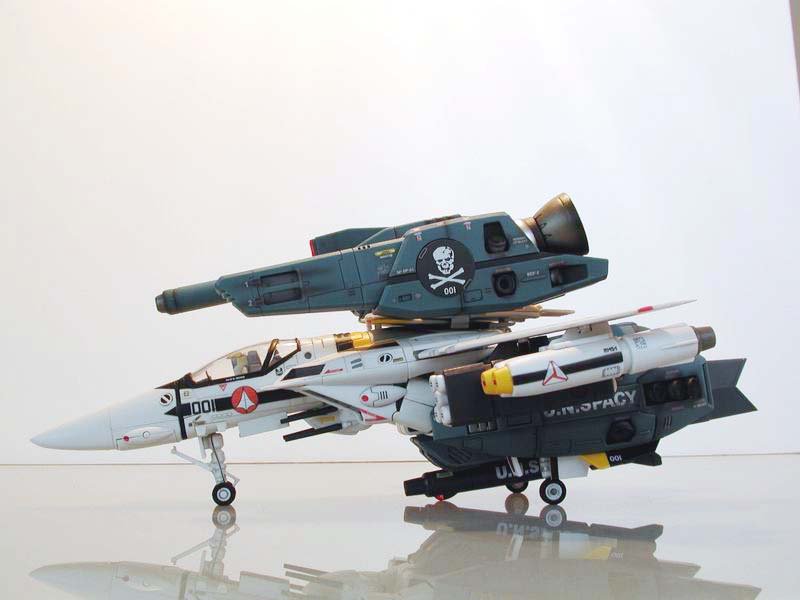
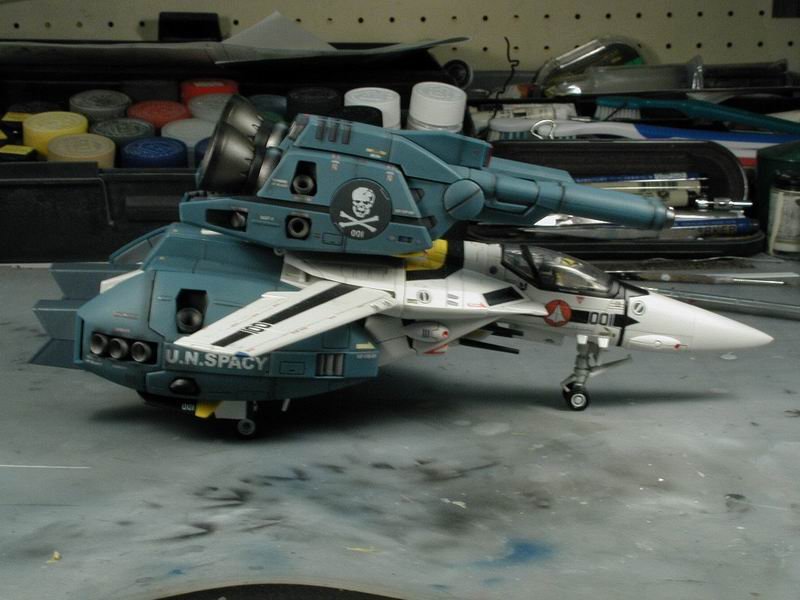
Side view (excuse the blurriness again) - but I think I have cured my wanting for the 1/48 scale resin model (for the time being)...
-
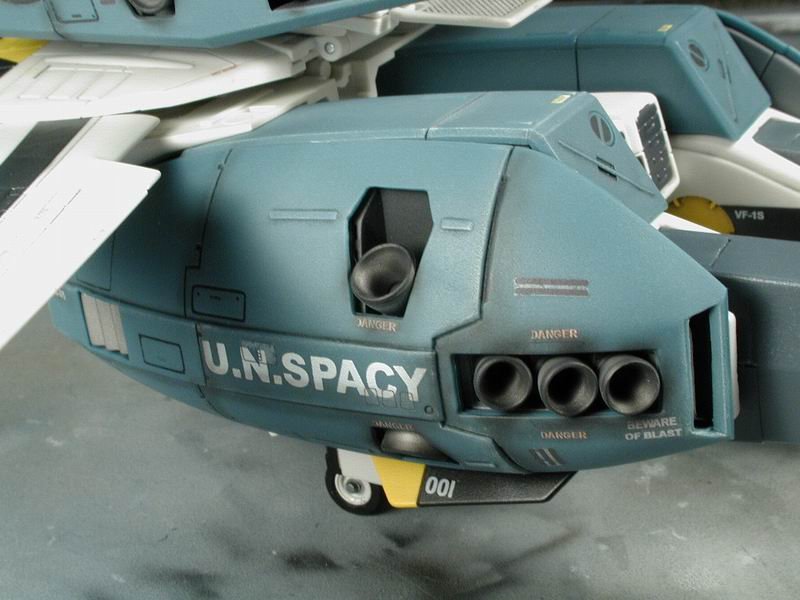
Close up of the leg packs - I love those little panels Anasazi provided to go over the U.N. SPACY white letters like the Hasegawa panel lines.
-
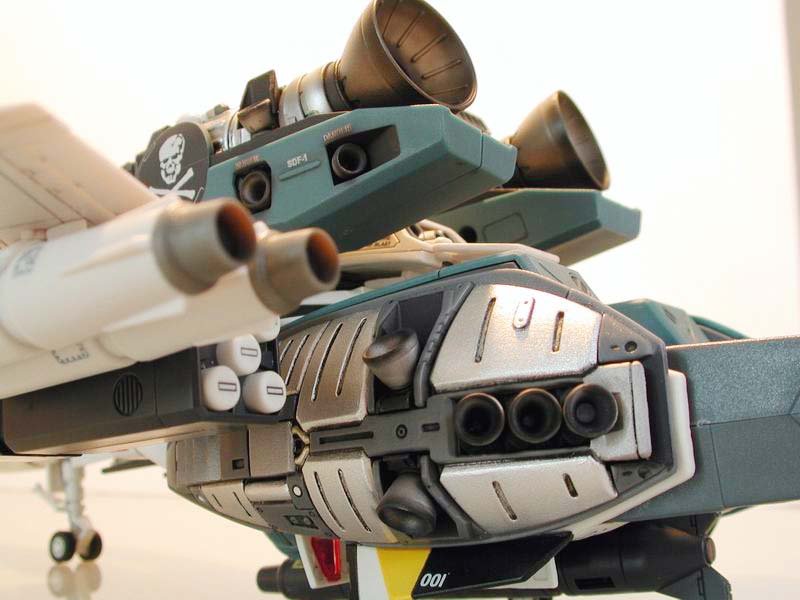
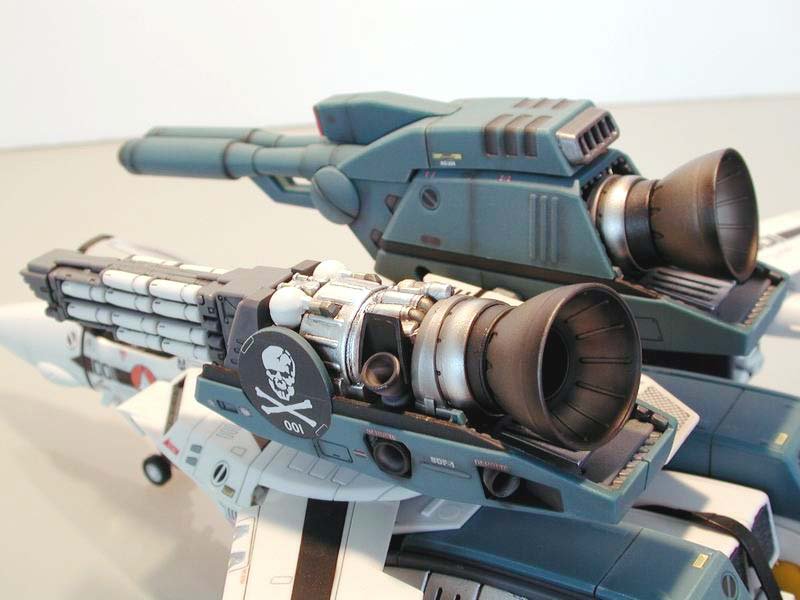
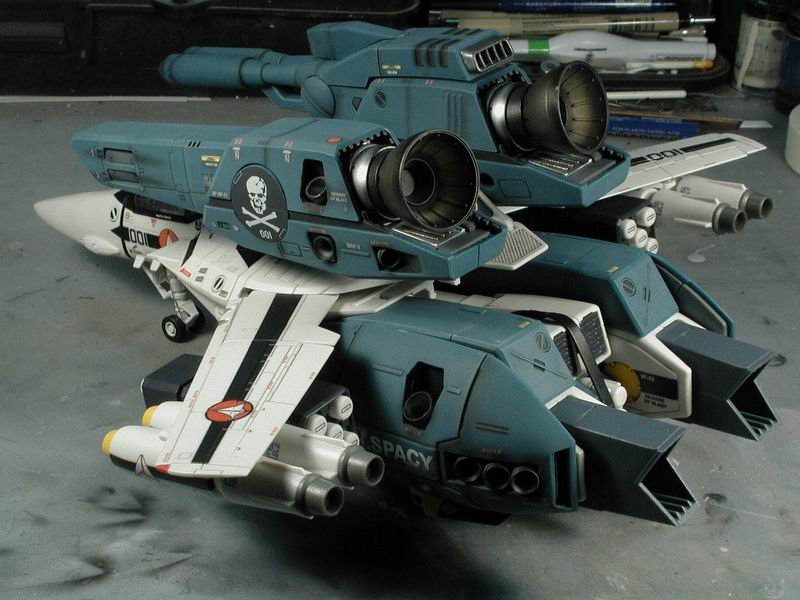
Close up of the back fast packs (sorry for the blurriness - slow exposure) You can see a bit of the silvering at those little rectangular access hatches. While the decals are great when applying to a light background, the darker textured background has proved slightly more problematic.
-
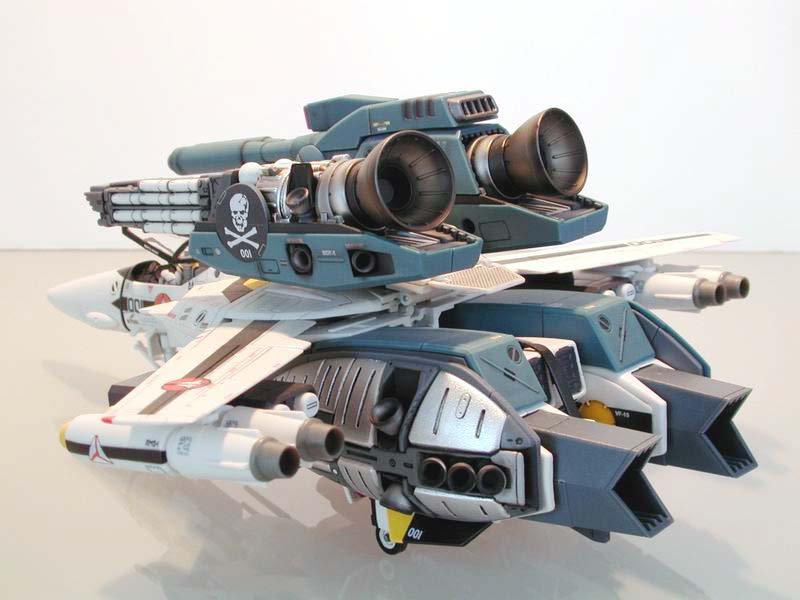
Here's a rear shot - I might of gone a little heavy on the forward micro-missile launchers and the rear leg pack manouvering thrusters? <_<
-
The matte finish does provide a nice contrast to the Valkyrie - as well as the weathering - the Packs are well used The matte finish also lightens up the plastic and brings out the blue in it (which I like more than the green anyways IMHO).
-
Here are all the fast packs done!! Yah! not bad for a toy! Now I didn't go overboard and repaint them or fill the seams - I do want to play with them and I might take them apart for repairs or mods. I decalled them onto the bare plastic (although now I reccommend some surface preparation first either with a gloss coat (like future) or a glossy finish paint - since the flat finish does bring out the silvering - believe me, I've tried to eliminate it as much as possible (I think I'm pretty good at decalling too ) but its next to impossible when its sitting on this bare textured plastic surface). I would not recommend putting the little panel details that Anasazi has so thoughtfull provided (silvers in the middle) and trimming as close to the image as possible. I liberally put several coats of MicroSOL to get the decal to stick down - during the decal process when its still wet, and afterwards a few times to get them to lay flat. Then I lightly post-shaded with flat black all the nozzles and some panel lines and over some white stenciling to tone them down a notch. I then sprayed down a rather heavy coat of ModelMaster Acryl clear coat flat matte finish to protect the decals and the light black post-shading. I sprayed rather heavily especially around the nozzles - since the rub against the plastic when removing the panels to show the internal machine guts (becareful when removing). All the internal mechanisms were given a black artist oil wash to pickout all the wonderful engraved details that Yamato provided. Lastly, I did a white dry brush over just the corners, highlights and certain panel lines - very subtle. I feel this should adequately protect this toy - I play with it a few more months and give you an update as to its durability.
-
Here's a shot with the flat base clear coat protection - it seems pretty tough although I would still becareful while transforming - it is a $300+ toy (cdn) I took apart the rear bell nozzle and sprayed it with a flat black, I finished the exterior in a semi-gloss to preserve the metallic sheen, and I sprayed the interior with a flat clear coat - these clear-coats are necessary since the light weathering of the flat black is delicate and can scratch off unless its protected by the clear coats.
-
I do wish the packs were bluer like they were in the initial Yamato teaser photos - I guess someone could totally re-paint them, and eliminate that seam down the center of the forward micro-missile launchers. These water slide decals from Anasazi will be so much thinner than any stickers, the edges already almost dissappear without the clear coat seal!! Man!, I already spent a day at this !! Hopefully there will be more to show tomorrow.
-
Hey all, I just couldn't wait, I spent the better part of the day decalling the fast packs when I got my set from our resident decal master Anasazi! Now, I just applied the decals with a lot of MicroSOL solution to aid them to sit directly on the plastic better. Unfortunately, the Yamato plastic has a bit of a texture to it, so its important to get the decal to sit and conform tightly to reduce the silvering on them. In hindsight, I would suggest people to coat the packs in future or gloss finish first, then decal - it would help. I intend to do a burnt black light airbrushing around the forward micro-missile ports on the back packs, and around all the manuvering nozzles (they are just too bright) as well as the main rear bell nozzle. Then I intend to seal the decal in with a clear coat of flat matte finish. So just like my model in the background, the Valkyrie is in semi-gloss, and the packs will be finished in flat matte (this will tie the finish of the decal into the packs). I intend to do a little white dry brushing over the corners and ridges after the clear coat - it is a toy after all , I didn't want to go crazy and turn it into a model or something. Gotta get some sleep now...
-
Wow fantastic!!! Hey Grayson, your stuff is really comming along - I love the CF colours, hmm... maybe I should do one someday - I must admit, I hadn't thought of doing them since I was kind of fixed on doing at least one of all the box art covers Your's turned out great!! Man!, those wing tip lights are tiny! you're crazy The exhaust cones turned out great. I tend to agree the post shading is a bit on the heavy side, you could lighten them up by masking (with post it notes - unless the decals are properly sealed under a thick clear coat) at some of the panel lines and lightly spraying a lighter tan colour from front to graduated towards the rear of the plane. It would tend to wear the panels a bit, vary the tan shading, and lighten up the dark post shading. Look to the desert storm vehicles for inspiration. Thanks for sharing, keep up the great work!!
-
Official - Weapons Banter Thread
wm cheng replied to Mechamaniac's topic in Hall Of The Super Topics
Hey thanks Bsu & all, I tried a google search and came up with only US and UK dealers. I would really appreciate any leads you might have for Canadian or Toronto dealers. How realistic are they? Are they plasticy? Thanks. -
Official - Weapons Banter Thread
wm cheng replied to Mechamaniac's topic in Hall Of The Super Topics
Hey thanks for the quick reply, Hmm... to bad they are prohibited now. So can anyone tell me more about these airsoft pistols, I don't really care about shooting them - I just want the most realistic ones they make, or are they all "plasticy"? What is Gasblowback? Does it work without firing a plastic BB? Are there better companies than others? Is there a brick & mortar store in the Toronto area I can go see them or are there any good distributors within the Canadian border that I should try?