wm cheng
-
Posts
4343 -
Joined
-
Last visited
Content Type
Profiles
Forums
Events
Gallery
Everything posted by wm cheng
-
A few more hours today - just a ton of sanding and re-sanding. David, man, those AMT/Ertl Star Trek kits sure bring back nightmares!! They must be one of the worst kits in history - did you ever build the "Airwolf" kit of the Bell 222 by AMT/Ertl - just about made me swore off models all together! Its easier to leave the styrene strips long so you can hold on to them while you're gluing them in place. Then snip them a tad long (we'll sand them down later) I've decided to only do the strips to the top and bottom.

-
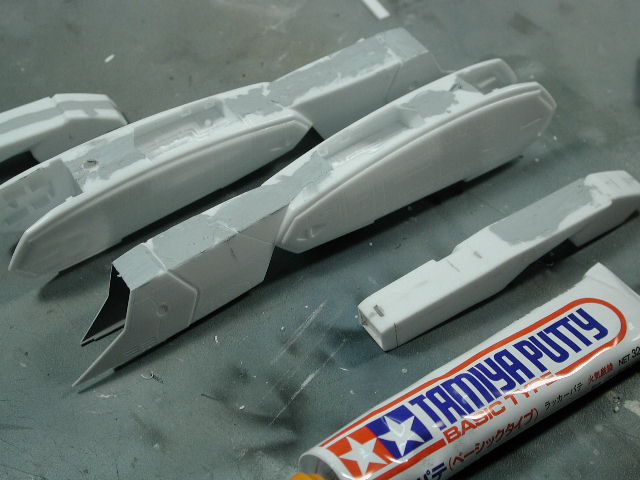
Exactly what Grayson is saying. Man, when I switched from testors to Tamiya putty - it was like night and day - its worth the little extra for the Tamiya putty - but think of how much time and aggravation you'd save. Then I discovered Mr. Surfacer - and wow! for small seams its just beautiful. I'd start with a 200 grit sanding film (sanding wet) and then work your way up to 600/800 grit - becareful not to use too coarse of a paper especially on soft plastics. I am going through sanding process right now with the VF-0 to get rid of seams, you might want to hop on over to page 10 of my VF-0 thread. I always try to run my nails across the seam slowly, if it catches on anything, then keep sanding away!! At least your primer is doing the job of showing you where you still have to fill and sand. I almost always have to go back and repair or re-fill or sand some part after the first initial light coat of primer or paint. Good Luck - sorry can't help you with the bra or shoes
-
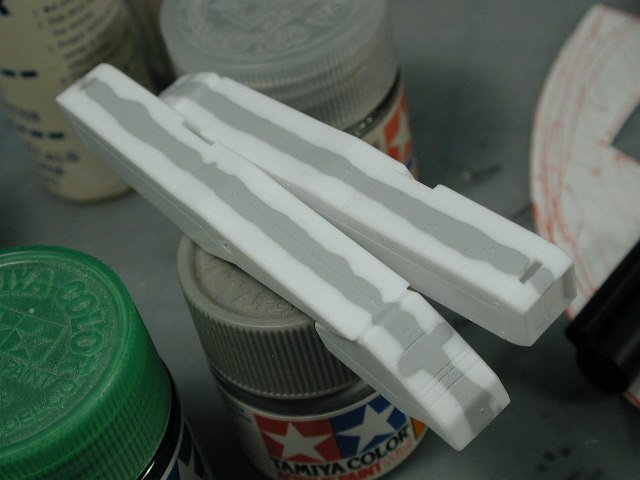
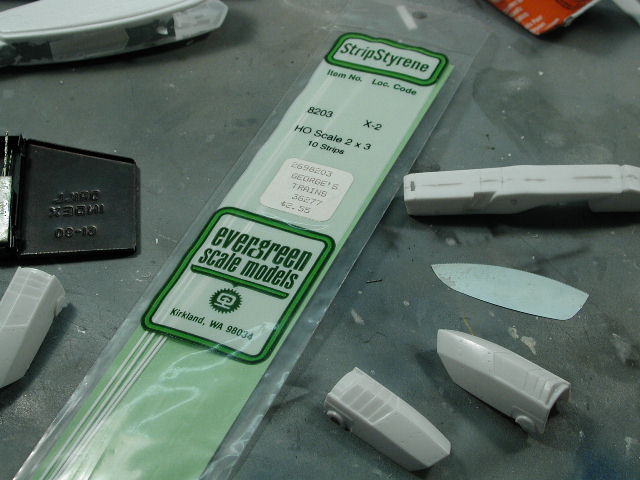
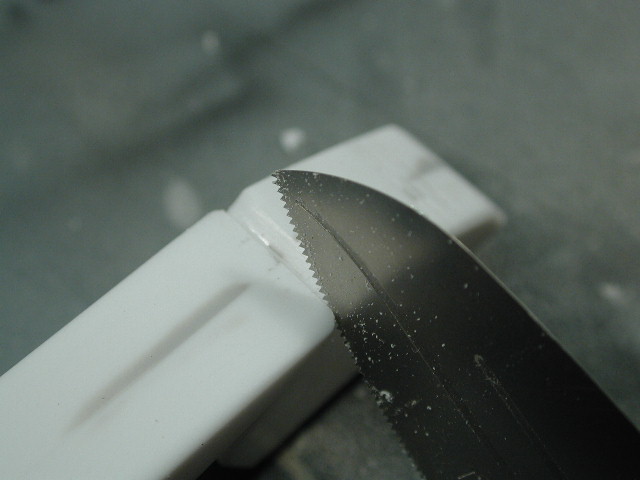
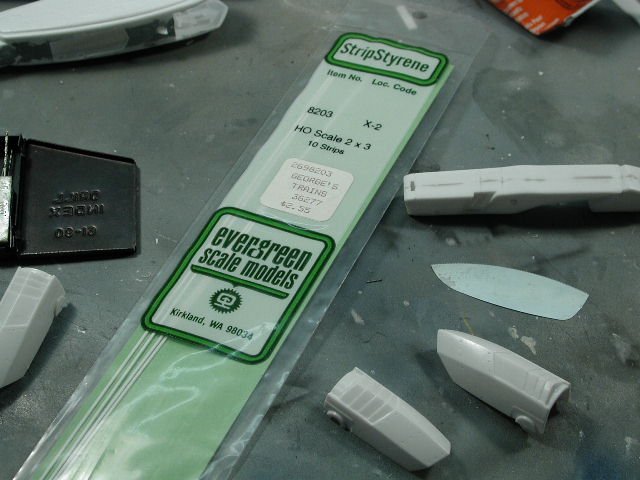
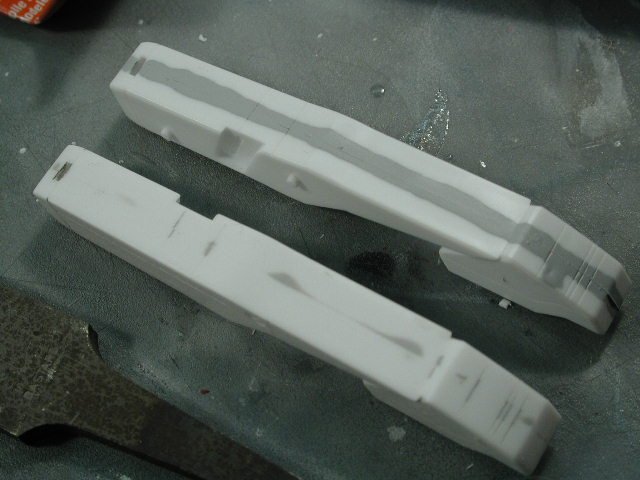
These are the little styrene strips that you can buy at most model train stores - I'm too lazy to cut even strips from a sheet of styrene so I bought the ones already cut . Isn't civilization great I plan on gluing these to the insides of the nozzles to create that ribbed look. I'm sure Hasegawa will come out with a photo-etched part for this shortly after we make these ourselves But until then... Hopefully there will be more tomorrow.
-
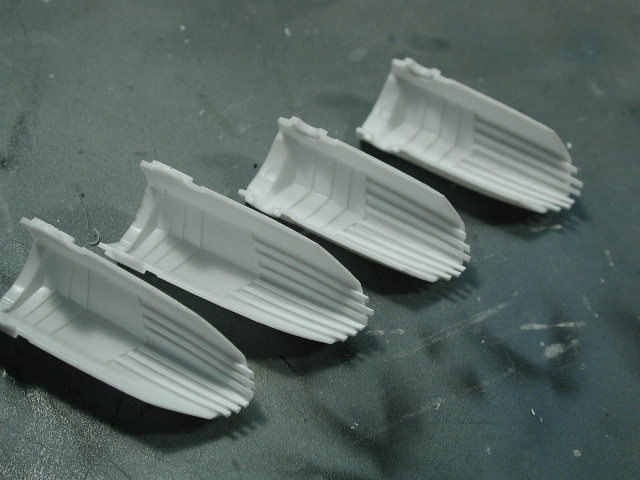
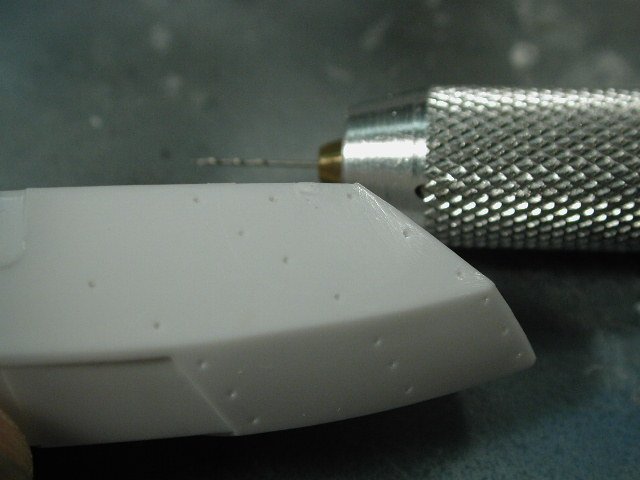
Here's a shot when they are done. I did them before sanding the edges and the sprue attachment points since I didn't want to accidentaly sand away the very faint depressions away marking where I should drill.
-
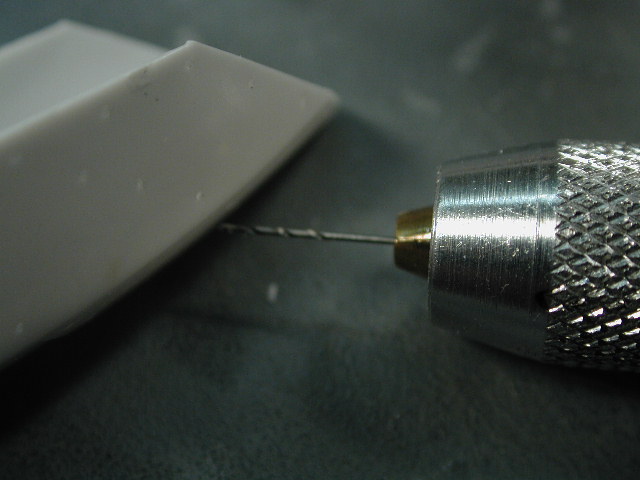
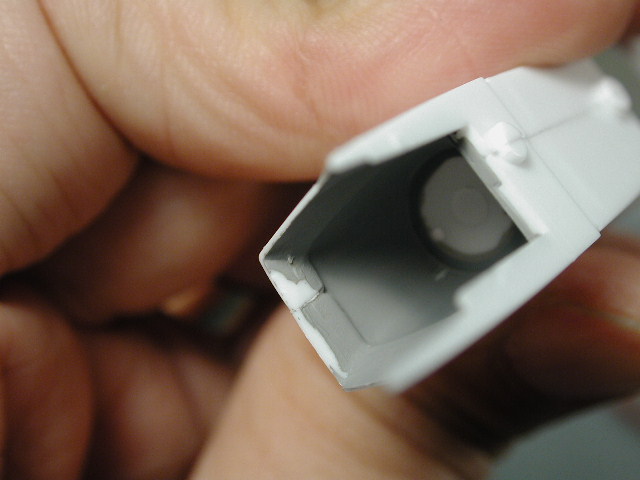
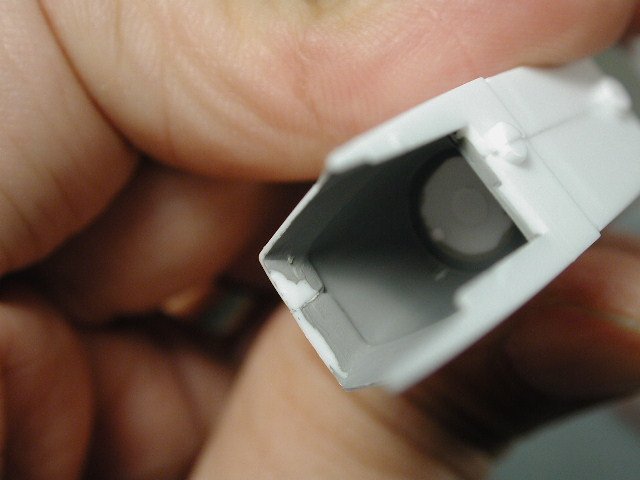
I am using the pin vise to drill out the depressions that Hasegawa tried to make in the side of the afterburning cans. Its really easy since they already marked them - just not deep enough. The hardest part is not going through the plastic and creating a hole.

-
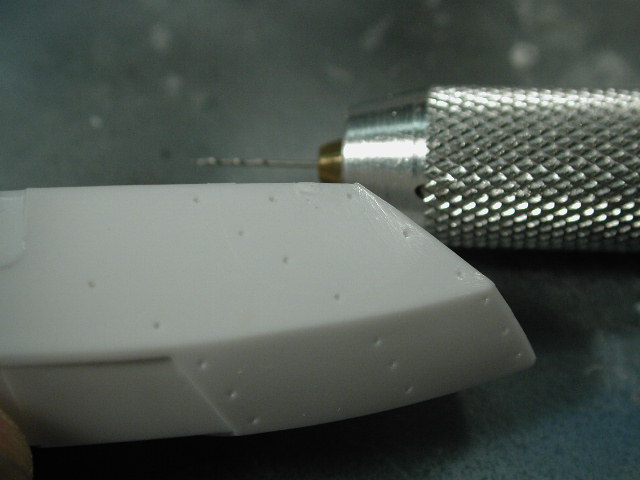
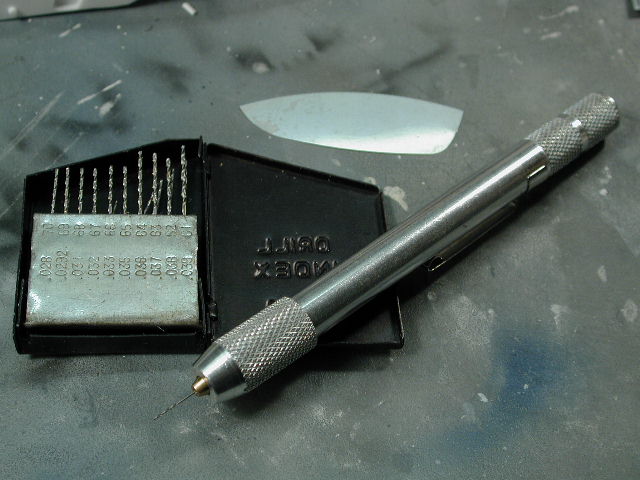
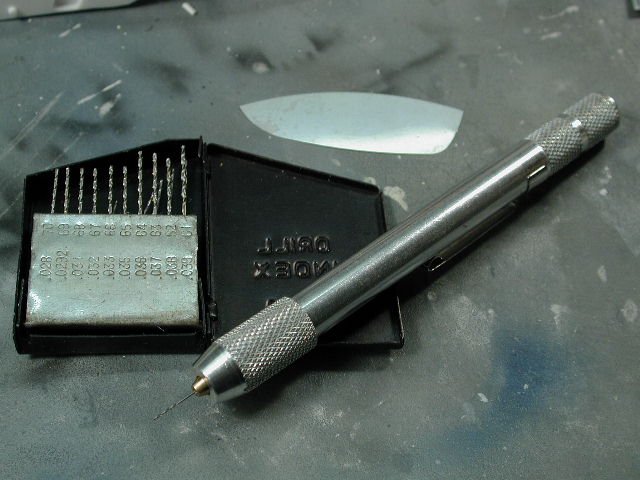
Here's a shot of a pin vise - you can get these at most local hardware stores for cheap. They usually come with a small assortment of tiny bits stored in the shaft. I like these since they are hand-powered and can be extremely precise and careful with them. You should hold them in your thumb and index finger with your "peter-pointer" finger on the top of the shaft - and just roll your thumb to twist the shaft allowing your "peter-pointer" finger on top to apply the downward pressure. But let most of the bit do the work since the plastic is extremely soft. In the background I got a case of smaller drill bits of varing sizes - this is just the cheap one (made in China) for around $10cdn. The very fine bits can snap quite easily if you're not careful and allow it to bend - but for $10 for such a variety pack - they are almost disposeable. Let me know if any of you have had better luck with the expensive ones not breaking (I would guess you get what you paid for - but that's not always the case )
-
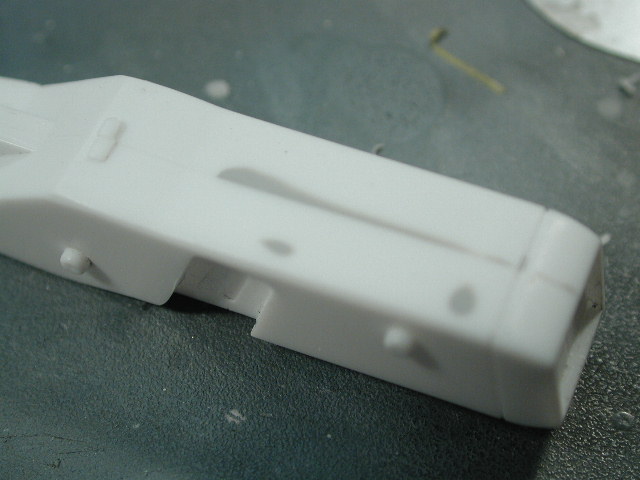
Here are another two below the seam that should be filled in - however, when the arm is in place, it will mostly be obscured by the back pack anyways. So its not as vital to fill these as the ones on the shoulders - but hey depends on your mood on sanding (I'm still debating on wether to fill the injection pin holes in the landing gear doors - that's how lazy I am these days!)

-
You can see a sink hole (actually on a little depression) towards the top above the seam you see a little round smudge of Mr. Surfacer, doing its job filling it out. Funny I haven't really come across sink holes on Hasegawa kits before...
-
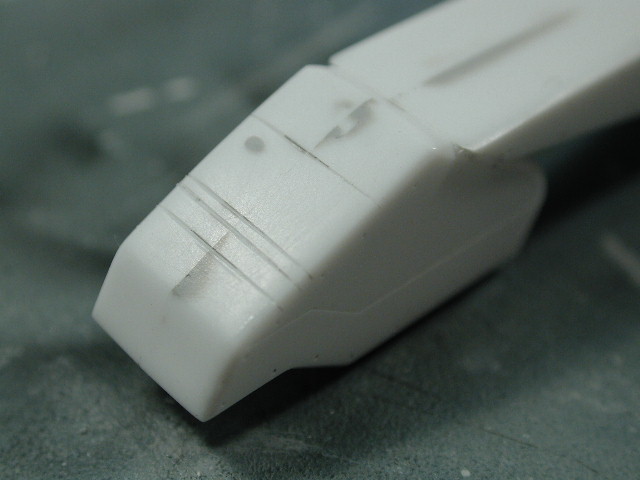
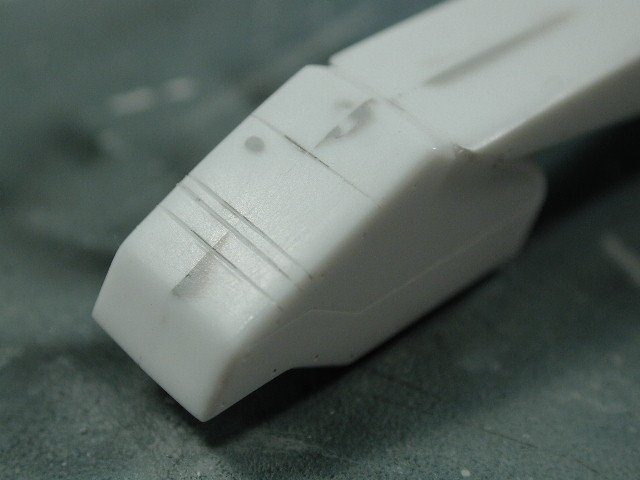
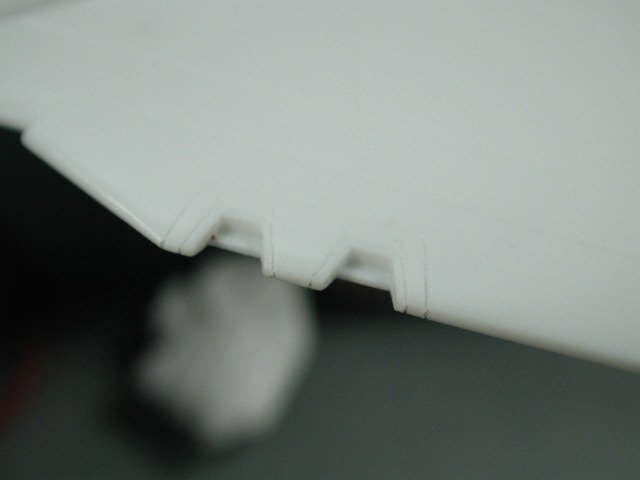
I added this scribed line in since it should look like the arm can separate from the shoulder piece - and made it quite deep.

-
Remember to scribe back any lines lost due to sanding...

-
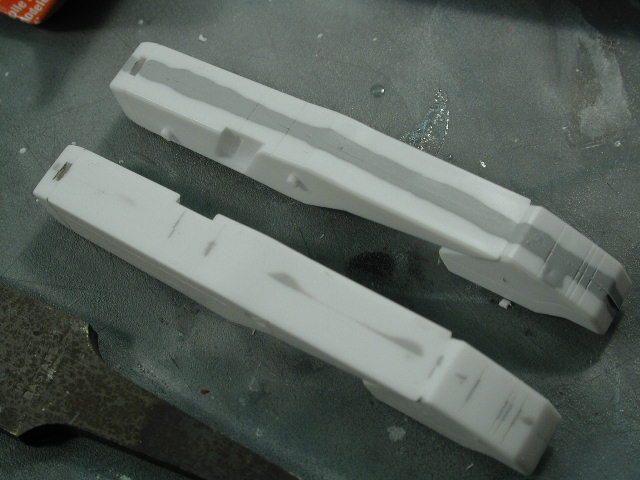
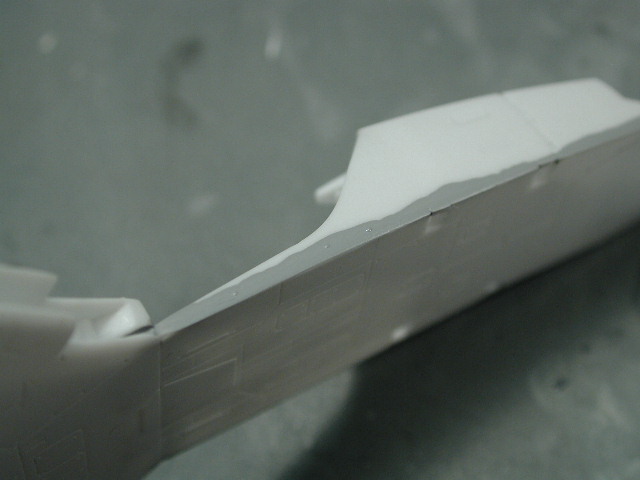
The leg halves didn't go together quite as smoothly - there was a bit of hieght difference between the two halves. I think its my fault for not properly aligning them while the glue was still setting. But since this is a major seam and highly visible, I am going to use Tamiya Putty to build up both sides to match exactly while filling the seam. Additionally it will eliminate that wierd scribed panel lines which don't meet at the bottom surface of the intakes (on the outside) and allow me a blank slate to rescribe that line in afterwards.

-
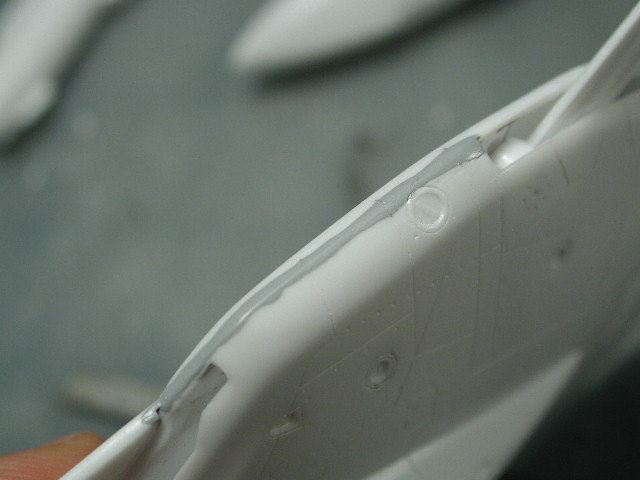
Ok, a few more hours - just sanding. Here's a tough spot, I scraped away at the plastic to get both sides level (inside the intakes - lower lip) and I will fill it with Tamiya Putty - its a bit more of a gap than Mr. Surfacer can handle.
-
If you haven't put me down for one of the Boosters, Jessie from the last thread, then add me to this one (especially if it includes the launcher)
-
As always, great job Devin!!
-
More sanding - one finished, one just begun... sigh... sanding sanding sanding I'll sign off for now.
-
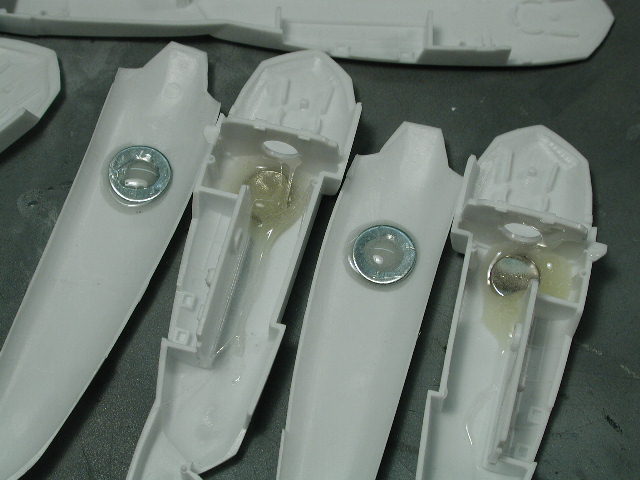
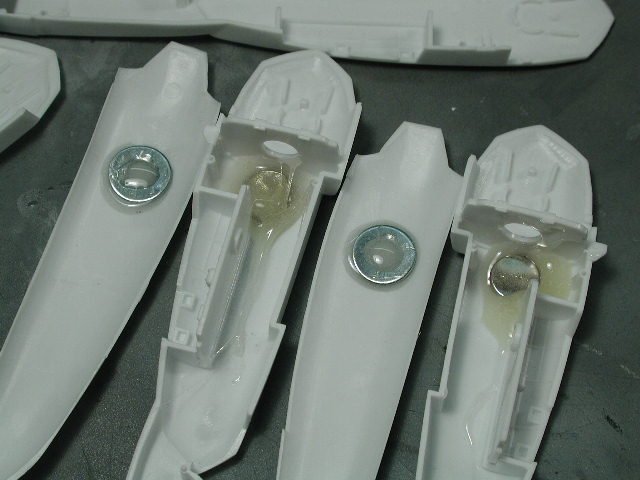
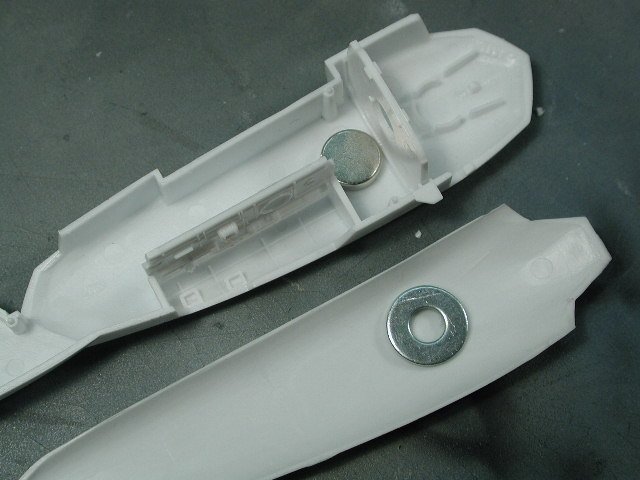
I glued the two halves together, here you see the pack on - the magnets work really well.
-
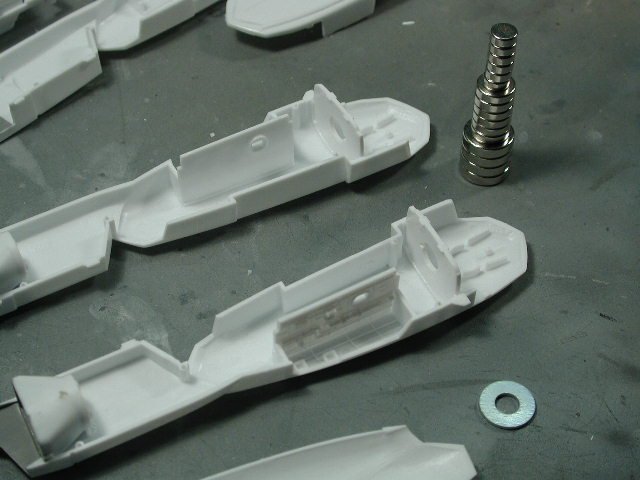
Here's the 5-min epoxy "goop" I laid in. Inside the leg can be messy, it just has to prevent the magnet from falling around. You should be neater on the packs, since we don't want the epoxy to be scratching our finish off our legs when we are done. When I test fit them, the washers are actually always at least 1/8" from the surface of the plastic, plus the thickness of the plastic, its magnetic field was strong enough to get pass 1/4"! Two might be more secure if you are zooming it around, but for me, I think one will surfice for my needs.
-
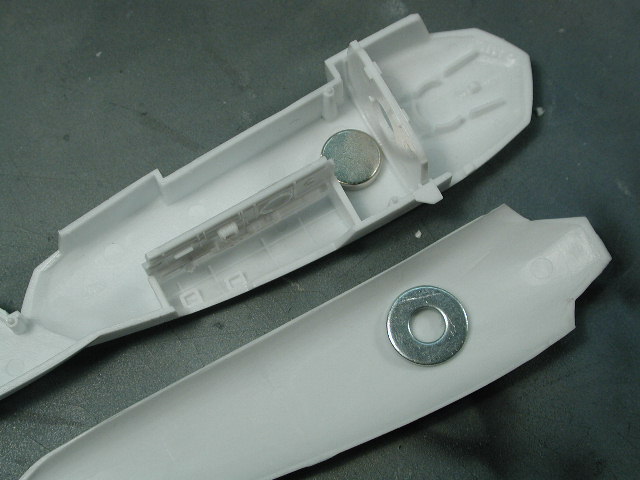
Here's a dry run to get the approximate location on the fast packs. You could put two in to be more secure, but I only chose one. Luckily, the insides of the packs never touch the surface of the legs, only the perimeter of the packs are touching the legs, so there is no need to counter sink the metal washer. Additionally, this also prevents the surface of the leg from marring (I was afraid of this before I began). To make sure the metal is no way near the actual surface of the leg, I also very slightly bent it with a pair of pliers so that it more closely resembles in inside curvature of the fast packs.
-
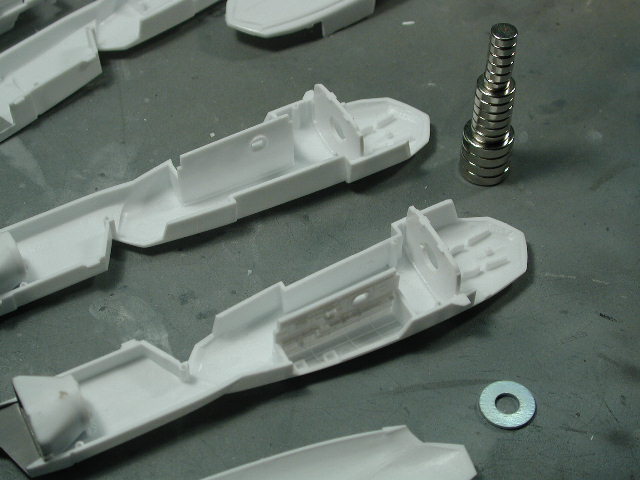
Well, here are those rare earth magnets. I got them from Lee Valley Tools here in Toronto - as you can see they come in various tiny sizes to choose from. Here's is their site, they deliver right to your door. http://www.leevalley.com/wood/page.asp?pag...ID=&ccurrency=1 http://www.leevalley.com/wood/page.asp?pag...currency=1&SID= I ended up using the middle ones I think they were 3/8" but its always good to get a few varieties. I glued in all the pieces that connect/bridge the two leg halves to make sure that the magnet would clear any plastic. I decided to be lazy and use a metal washer for the fast pack side. These little magnets are so strong, I don't think I need two magnets, one on either side. I will just put the magnet inside the leg and attached the washer to the inside of the fast-packs. I wasn't really planning on detailing the inside of them anyhow, so I will just surface mount them.
-
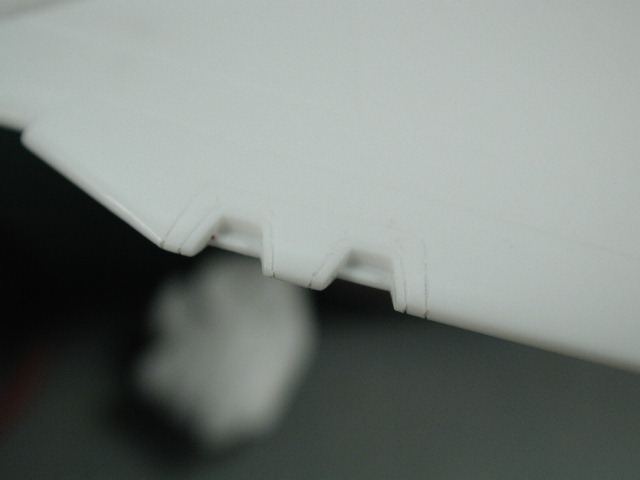
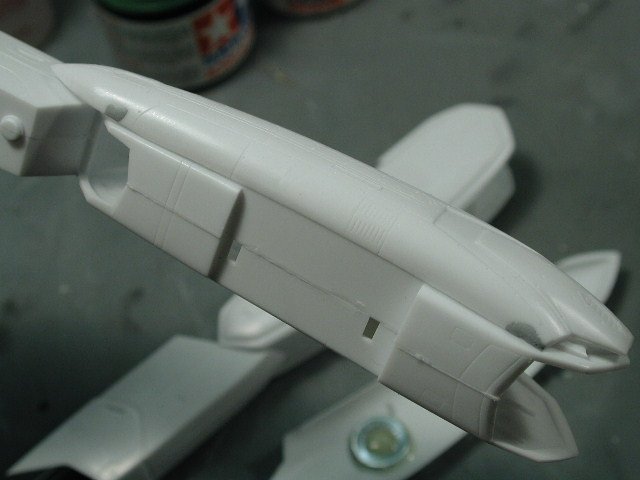
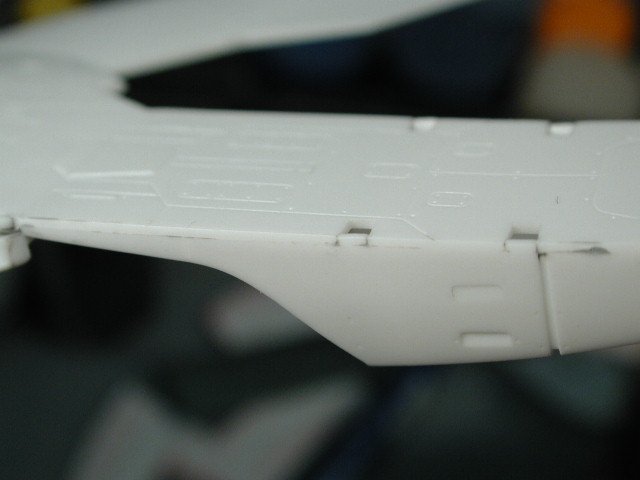
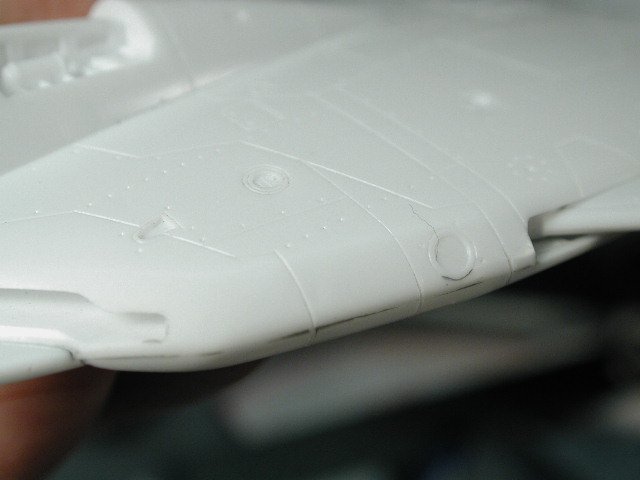
I also sanded the wing edges, since its molded this way (top and bottom one piece - except for that stupid insert), there will be a separation seam in the mold process that we need to get rid off. Additionally, we need to continue the panel lines around the leading edges to join up with the panels on the underside. Luckily Hasegawa was dead on in lining them up.
-
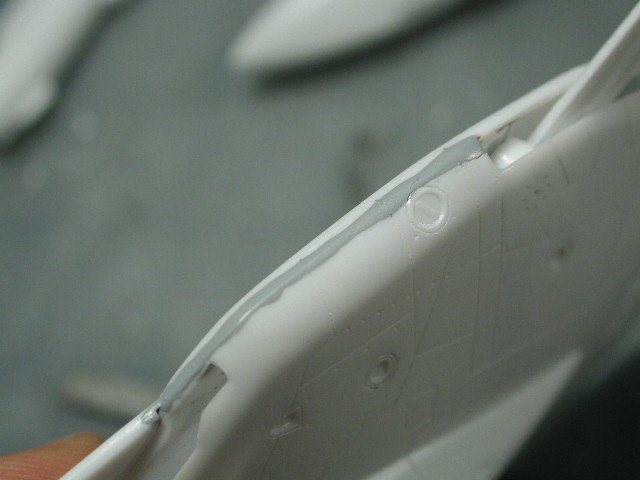
But if you see any of the fine lines filled in with the grey of the Mr. Surfacer, it means that it did its work!!
-
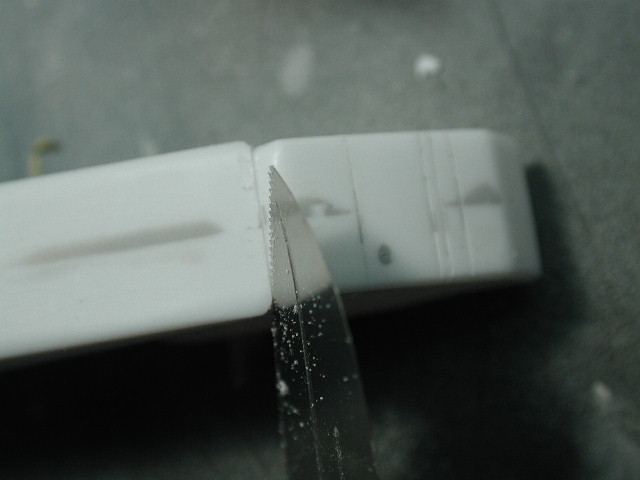
You see, when you're done, there's really very little visible left of the Mr. Surfacer - noticed the panel lines re-scribed through the seam (that's with the photo-etched saws from Hasegawa mentioned earlier)
-
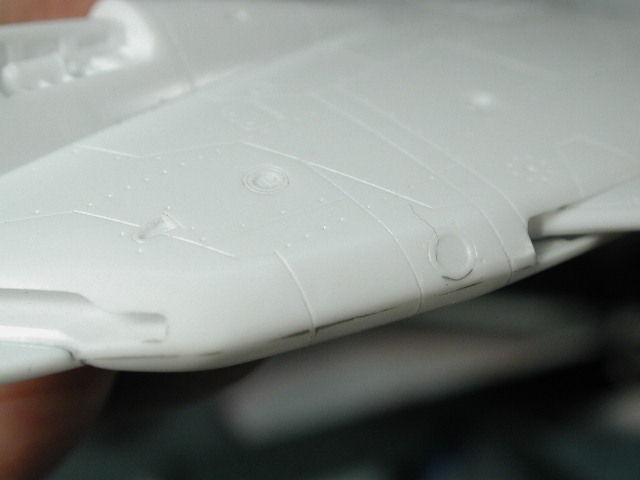
Another good area to check, since its so flat, any imperfections will show up easily.

-
Here's an important seam to get perfect, its really visible when you are finished, and remember to scribe back those panel lines that run across the seam. Had to becareful especially around that vernier (circle with the handle through it) to not loose it, since the engraving is quite light - luckily, a decal is provided for this so we don't have to rely on the wash to pick it out
-
Hey everybody - long time no see... Well, I only got a few hours on it today - it was good to get back into it though - will try a few hours in the next few days as well. Not much interesting to report - basically I am at the sanding stage - a lot of boring sanding, washing, inspecting, re-applying Mr. Surfacer in spots that need more filling and then more sanding and washing and inspecting... repeat and rise This is the part I hate about modelling, but if you don't do it properly, you'd be sorry when you start painting. Here's a few shots of where we left off last, after sanding down the major ridges, I applied Mr. Surfacer 1000 (since it was very minor seams).