wm cheng
-
Posts
4343 -
Joined
-
Last visited
Content Type
Profiles
Forums
Events
Gallery
Everything posted by wm cheng
-
I finally took off the mask and canopy. I carefully sliced the mask and fuselage all the way around to break the seal first - this helps eliminate any chance that removing the canopy can tear away at the paint.
-
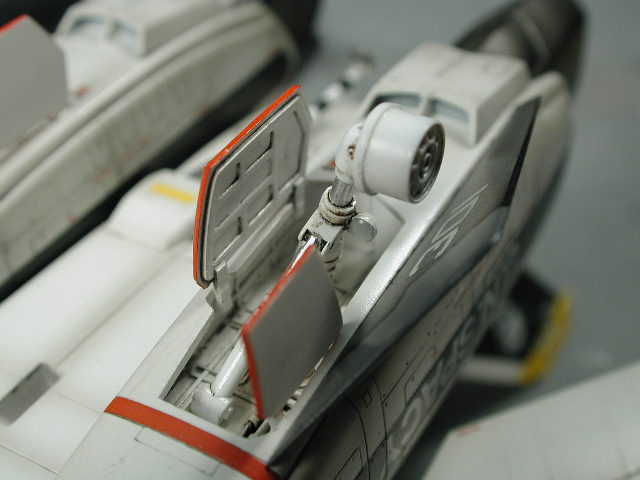
I added a drop of white glue to the landing lights - it should dry clear, and I would dab it with a bit of future once dried.

-
I also glued the gears in, paying careful attention that the forward gear is perpendicular, and that the rear gear hubs are perpendicular (the rear gears should splay out a bit).

-
Here's a shot of the landing gear doors crazy glued in. The forward doors fit really well - almost snaps into the indents Hasegawa provides. The rear doors don't really fit that well. The big square holes are nice, if only there were equally big square pegs to go into them! Unfortunately, the gluing surface is only at the edges of the body panels, so not too much holding them on there. We'll see if the crazy glue is any better than normal glue at these doors - its faster though, but I doubt that they would hold up better.

-
Ahh, Stamen beat me to the punch. Hope thats okay with ya HelloHikaru - I don't have the SV51 kit.
-
Hey thanks all for the kudos! It is always appreciated. Please, I want to see as much modelling going on as possible (of all skill levels). It will get me through the dry patches when I work and can't model (I can live vicariously through you guys ). If anything, I would like to encourage as many people to start or start up again - its a lot of fun especially when you try something out for the first time and it works! I learn so much from all of you - thank you. Part of the reason I share my build ups here is to get feedback - I find I wouldn't of thought of new things to try or details to emmulate if I were to work on my own. Sometimes I find that I get into a rut and like to stay safe (don't want to ruin the precious model - especially when your nearing the end) and only advance when there are problems or errors that I have no choice but to try and solve. I need to see your stuff and learn from you and others - I don't function well as a hermit Especially post problems, maybe we can all help out, but we can certainly learn from them and either avoid them or use the solutions. I love my models so much more after I incorporate all the input I get here on these boards. For those of you following my work, I found that with each model I have improved my skills, if any of you remember my first foray back into Macross (or modelling after a long University/Work break) was that resin VF-2SS which now I am a bit ashamed to put next to my sucessive pieces of work. This VF-0 is definitely my proudest. I love to sketch and paint, so now I feel as though I am doing both on the models I build! Argh!! your right Mule!! @$%! I didn't realize. Well, the wings ARE in - I don't want to risk it by taking them out - its a really tight fit. I would suggest (maybe in my next round when I build another VF-0 again - doubles are really low on my list) at a stage before I glue the top/back fuselage in, I place the wing in the proper position, and lightly trace out the profile/edge of the sweep in both positions (flight mode fully swept and battriod mode full swept) it would be interesting to see a division in the sweep marks. I am definitely going to do it on my next VF-1 (I might do Roy's VF-1S to put beside this baby). Hey Grayson72, I used around 75:25 (Dark Grey: Neutral Grey) - just eyed it. Knowing that I will lighten it up at the end after the decals with a thin coat of the light grey/white I used for the fuselage. The final effect should be closer to the decal grey of the forward part of the ventral fins and the grey patch where the swing wings sweep. Hey David, I don't really do anything special gluing the landing gear parts. Although I am going to try using crazy glue (instead of cleaning off the paint and using regular glue) this time around. I just hold the gears straight until they set. I usually wait till the gears set before I glue the tires on - that way I glue the tires and set the plane on them - it kind of self levels. I put something up against the front double wheels against each wheel on both sides so that they don't splay out due to the weight. Well, I'm off to do the landing gears, and maybe if there's time, un-cover the canopy!! yaaa!
-
Its funny the packs don't have the perfect contour to fit onto the legs - its notched out for the ventral fins, but doesn't quite make contact properly. Its hardly noticeable though. Maybe I get to peel back the canopy tommorrow or the landing gears and doors, I don't know which yet.
-
Glad I used those magnets!! Hmm, in flight mode looks better all the time - excuse me while I zoom it around the room a bit
-
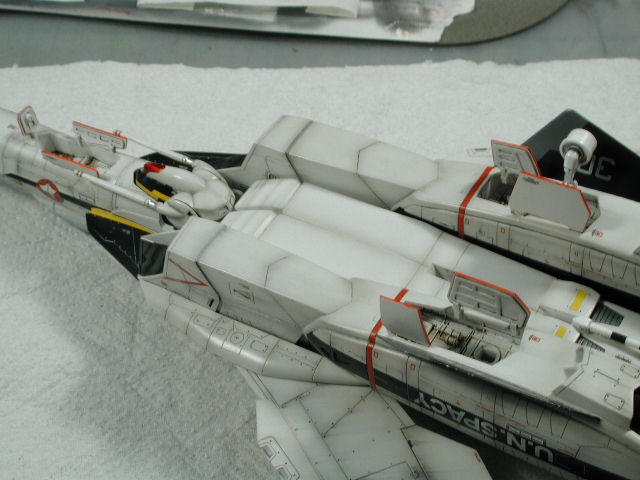
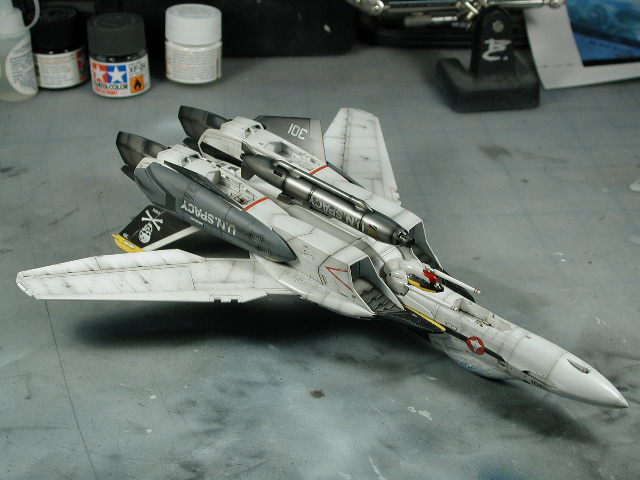
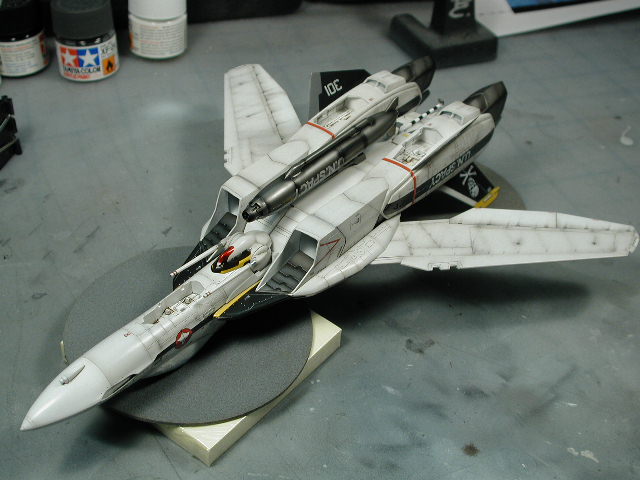
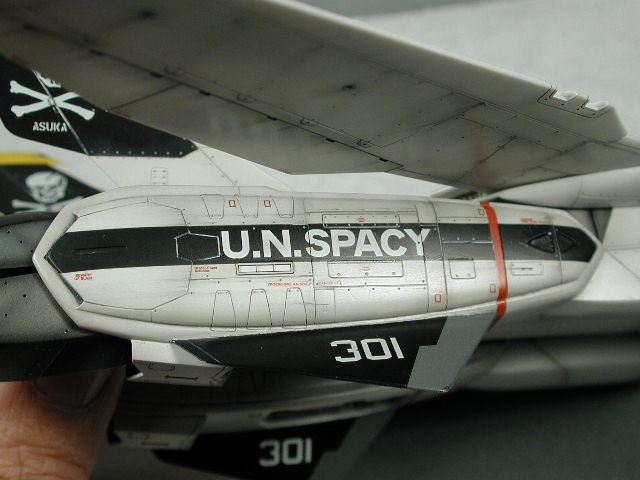
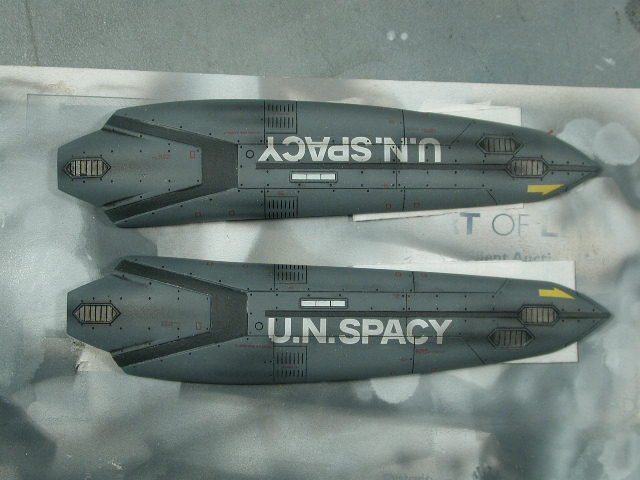
Here's the fast packs after some light streaking of the light grey to hit/highlight all the forward surfaces, and some darker thinned black to tie the UN Spacy lettering and missle exhaust stains. I clear-coated the entire thing in Flat finish in keeping with all my other Valkyries where the plane is semi-gloss with a sheen and all the fast packs are flat finish - the contrast is quite nice (if I do say so myself )
-
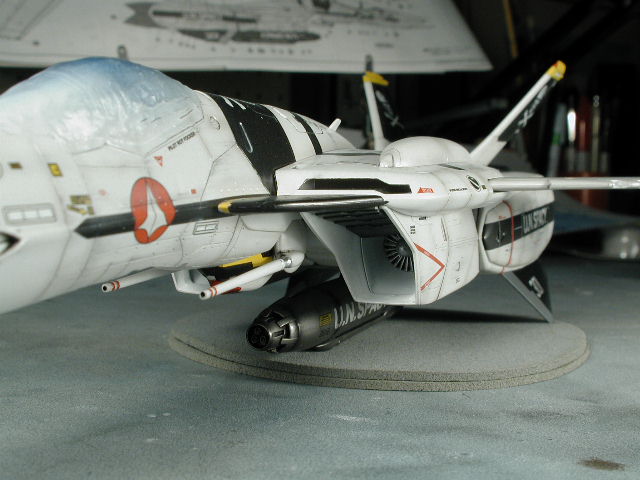
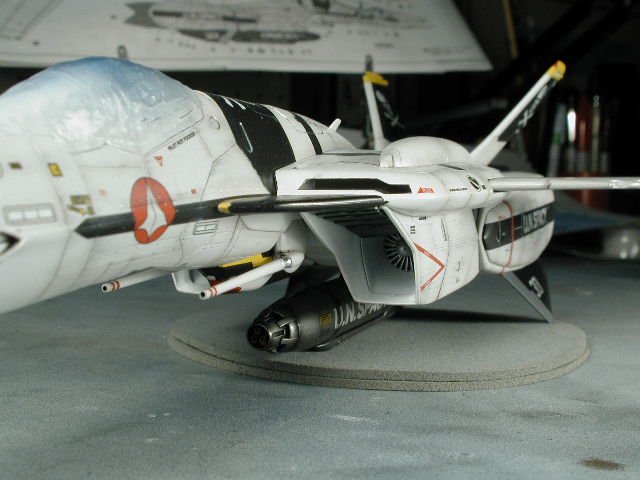
Here's a shot where you can just see into the intakes and the spinners with the grey intake contours fading to the white near the front opening - this effect gives it a more sense of depth. You can see the drilled out head lasers too.
-
Hmm, the black still looks pretty black in this photo. Well take my world for it, it ties in better - I'm not just a sucker for pointless work (really I'm not)!

-
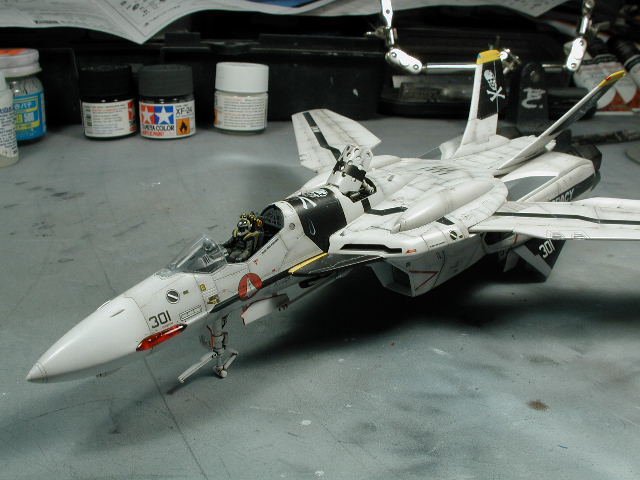
This is the part where I always wished I decided to do the plane with the landing gears up!! I hate having to make this decision everytime - it looks so much better and sleeker in-flight mode, but the gears allow it to sit and be displayed with the cockpit canopy open. Oh, well... I guess thats why I need at least two.

-
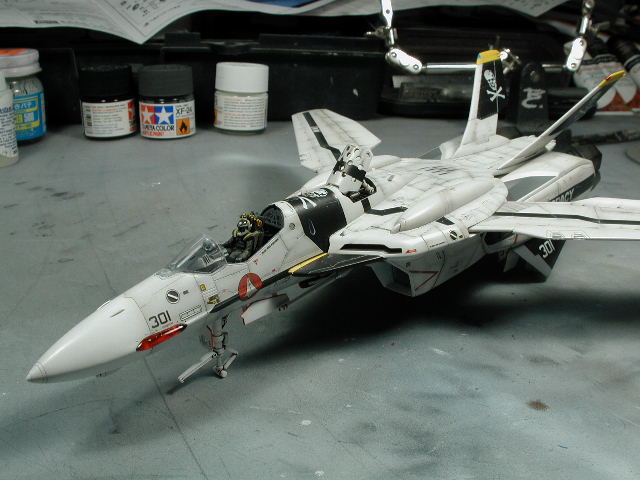
Yaay! I finally glued the head on - I waited till I was finished with all the clear-coats and dustings until I put the head on, since I did the red nav light in an ultra gloss clear red, I didn't want anything that might dull it down. I also airbrushed a thinned black on the gun pod's lettering to tie it into the panelling and blend it in more. I still have the silver and clear red to do on the gun pod, but I will wait until the landing gear is in place to protect it - right now the plane rests on this gun pod. and and red I do would be damaged. I love the arresting hook - god bless Hasegawa's hearts to even include the white and black striping for this piece!

-
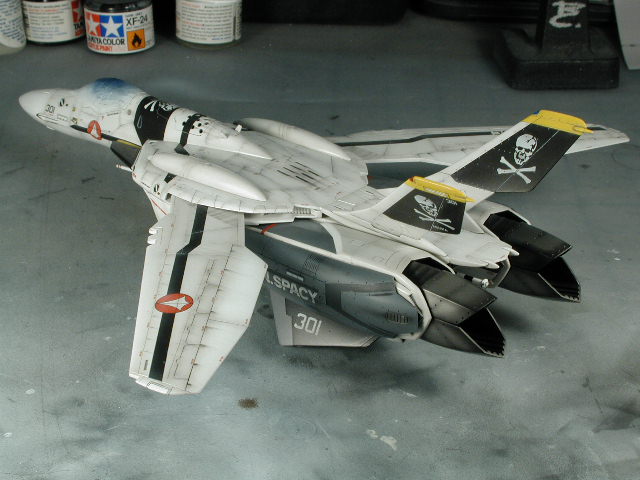
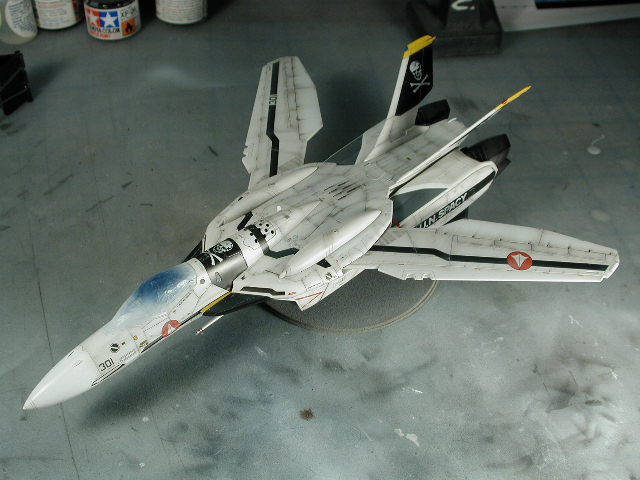
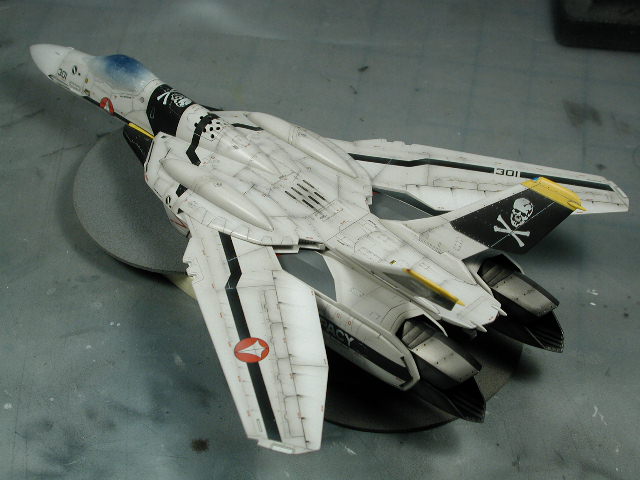
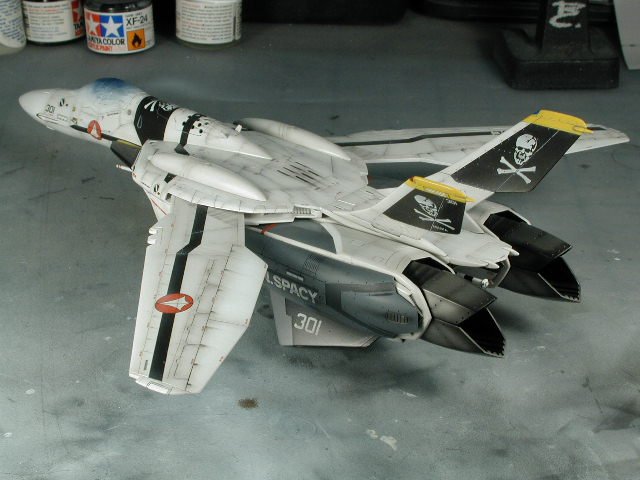
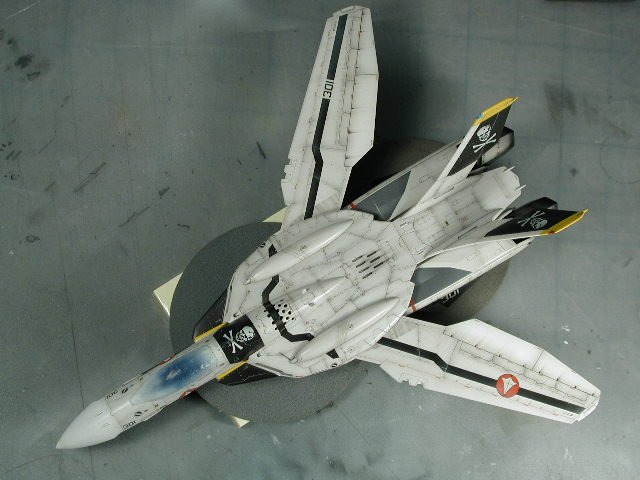
Overall shot from above.
-
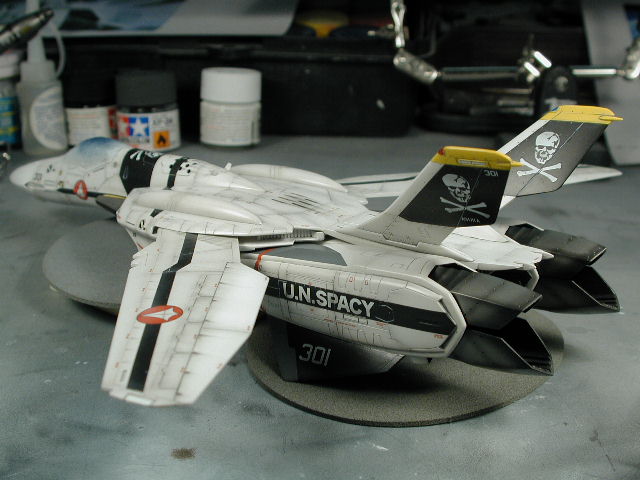
I've given the black areas a very light dusting or shot of the light grey body colour to lighten it up just a tad and all the leading edges of the black gets another shot of this light grey. It just blends in the decals a bit more so they look a bit worn and not so "black" against the body of the aircraft. I also took a few shots of thinned black and hit the white skull and lettering on the black so that they were toned down a bit too and tied into the weathered nature of the overall paint scheme. The light grey shots also toned down the red UN Spacy kite symbol so it doesn jump out at you to much. This is a very important step to tie the overall decals into the paint finish. Once I was satisfied, I clear-coated the entire thing again to protect this light dusting, since its very fragile and this light dusting scratches off easily if not protected.

-
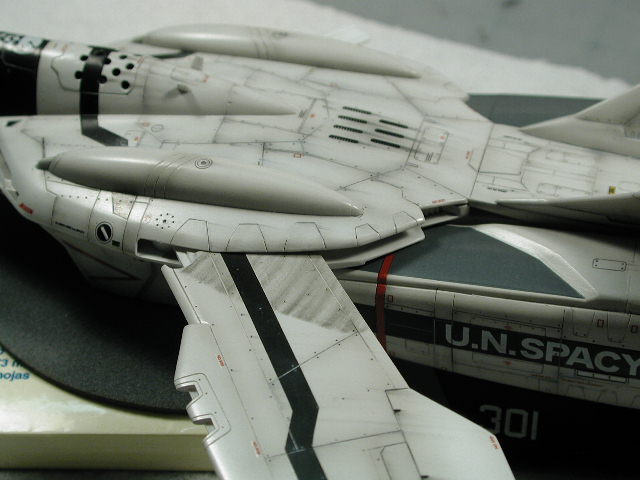
In the swept back position - they are completely hidden. Hmm, I might change my mind on doing my future F-14 with the wings swept forward...

-
Ahh, I just can't wait, I pushed the wings right in (I hope I don't have to remove tem again)

-
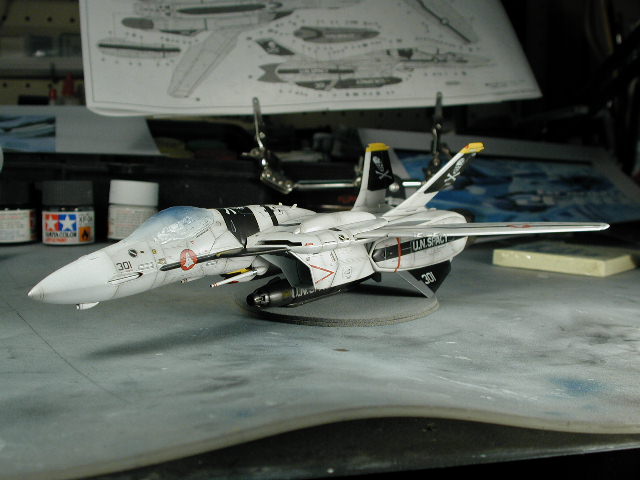
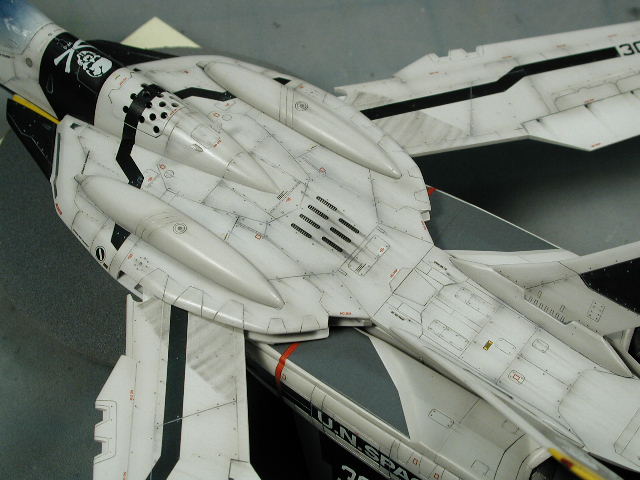
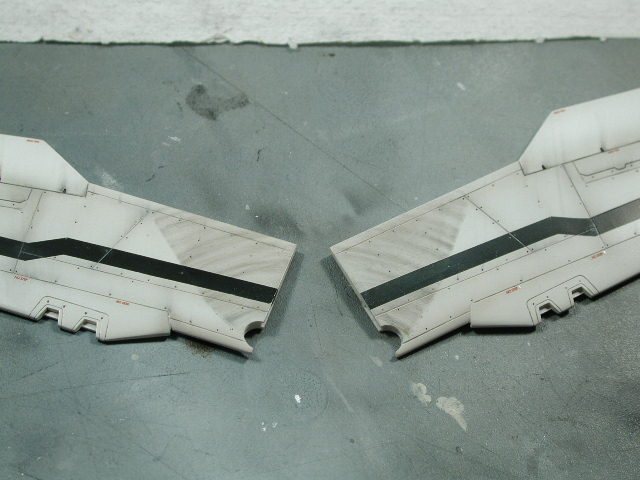
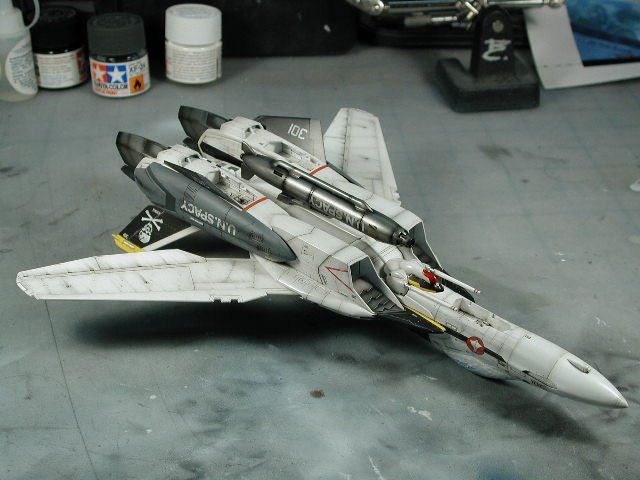
I am pretty happy with them - it does make the bird look dirtier though. Note, I haven't pushed the wings all the way in yet (I want to make sure I don't need them out again - its pretty hard to take them out afterwards - its a really tight fit)
-
This shot shows both sides of the wear. I will spray a thicker coat of clear-coat to protect these sweep wear areas once I am satisfied with them.

-
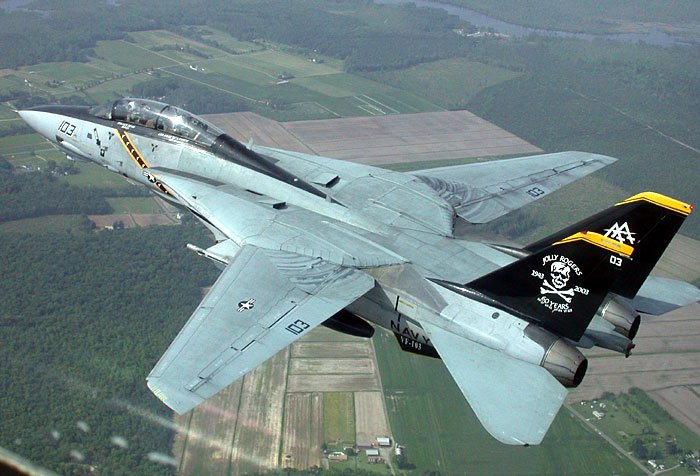
Here's one of the shots of a real F-14 (thanks David H.) showing the wing sweep areas, its a little too pronounced here in my opinion, but I like the tail insignia
-
This looked pretty cool - but I decided it was a little too dark, so I lightened it a bit more with a eraser.

-
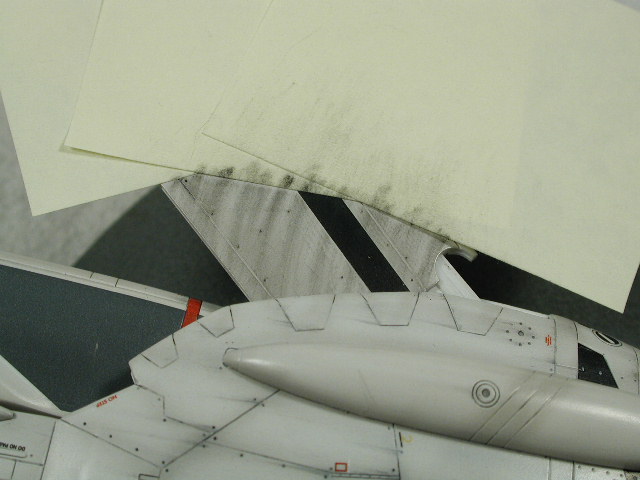
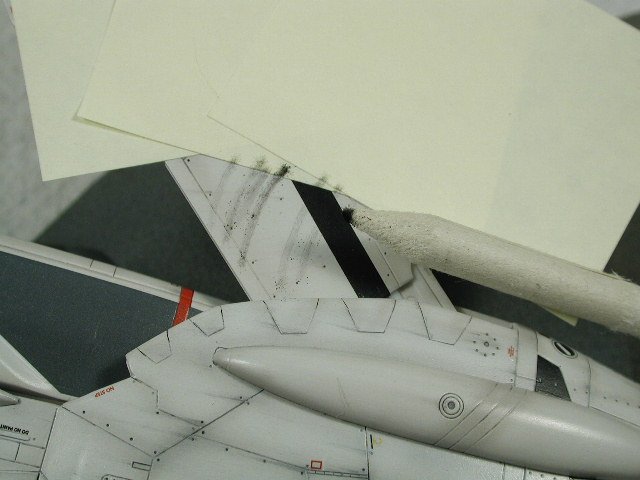
Then I smudge it a bit more with the stick and some paper towels, always trying to work with the curve of the arc from the post-it side towards the fuselage.
-
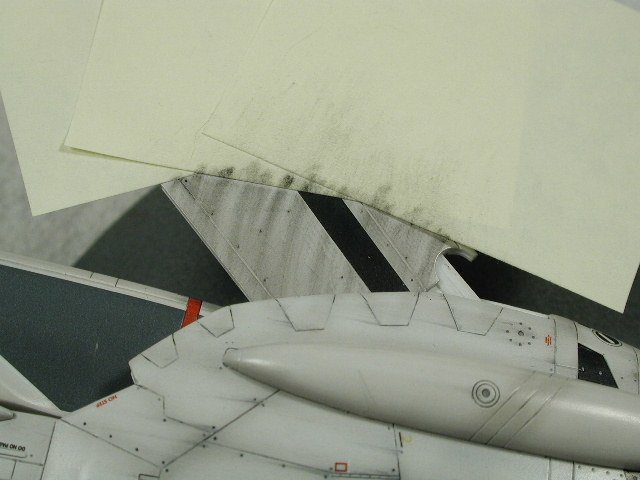
Then I took some of my conte/pastel chalk and created some shavings which I used the blending stick and dipped a little into the filings. Using the blending stick, I "drew" some arcing lines from the post-it note edges towards the fuselage.
-
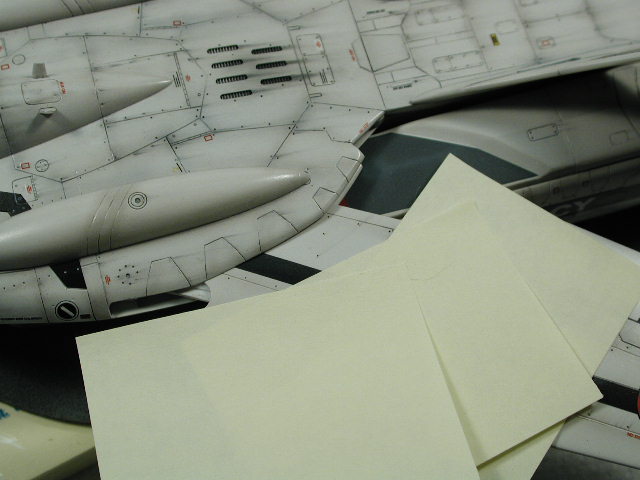
After "talking" with David - he convinced me to create sweep marks on the wings just like the F-14 Tomcat. He sent some amazing photos that shows what these sweep marks look like - so I thought I might experiment here on this bird before I do it on my future F-14. Since I have already decalled this section and clear-coated. I would have to be very careful when masking, I used post-it notes to try and trace out the contour of the fuselage when the wing is fully swept.

-
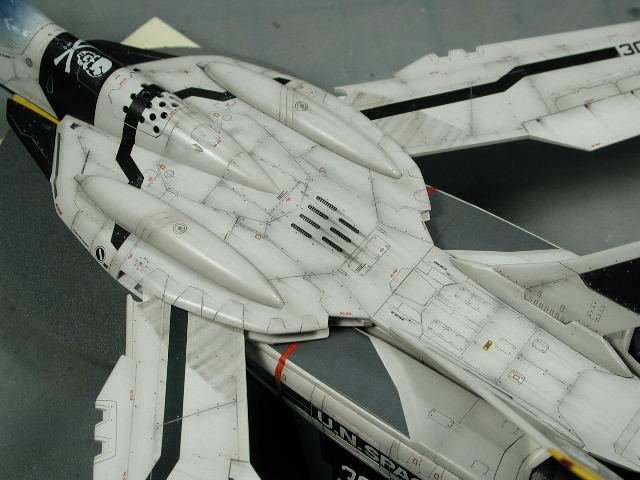
Here's a shot showing the leg decal integrated into all that nice panel details with the various white and grey/black wash process completed. Funny, the instructions call for several of the small red data stencil decals to be placed right in the black stripe - but the red is not backed with white. So the red stencilling dissappears against the black stripe. So I took a bit of artistic licence and put some of the stencilling above or below the stripe. The "Beware of Blast" should be below the stripe - it will look better next to our other Valks.