wm cheng
-
Posts
4281 -
Joined
-
Last visited
Content Type
Profiles
Forums
Events
Gallery
Everything posted by wm cheng
-

WM Chang! Could I get some shot of your VF-1 Cockp
wm cheng replied to broadshore's topic in The Workshop!
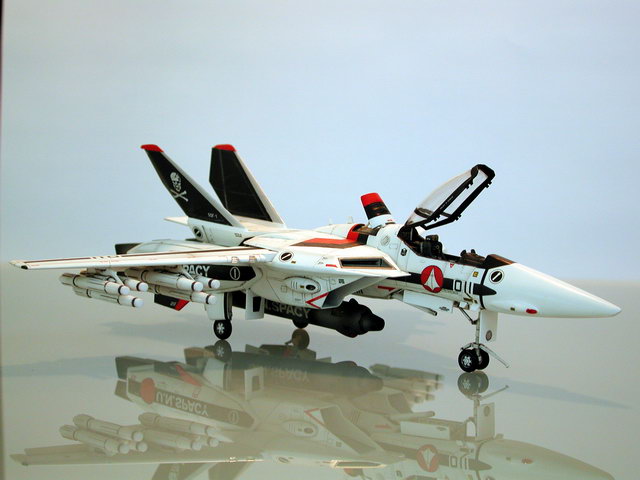
Last one... I would be less timid on the weathering (especially after the VF-0) the next time I build one of these again. I can't wait to get back onto the VF-1 + Booster!!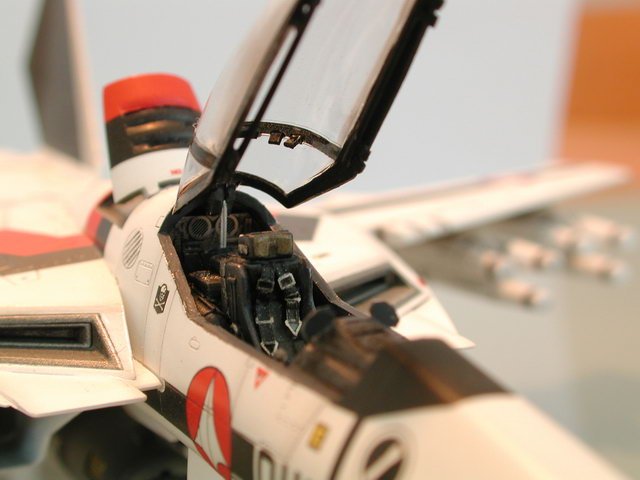
-
WM Chang! Could I get some shot of your VF-1 Cockp
wm cheng replied to broadshore's topic in The Workshop!
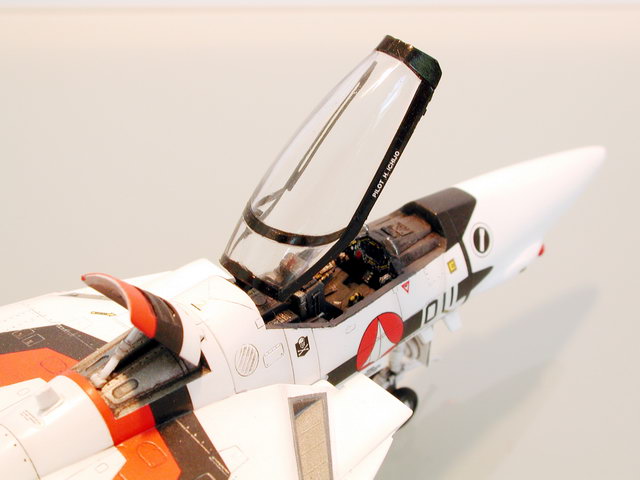
Oh, yeah, there's a paperclip (non-corrugated kind) holding up the canopy - the real metal shows up well as an hydraulic actuator.
-
WM Chang! Could I get some shot of your VF-1 Cockp
wm cheng replied to broadshore's topic in The Workshop!
-
WM Chang! Could I get some shot of your VF-1 Cockp
wm cheng replied to broadshore's topic in The Workshop!

-
WM Chang! Could I get some shot of your VF-1 Cockp
wm cheng replied to broadshore's topic in The Workshop!
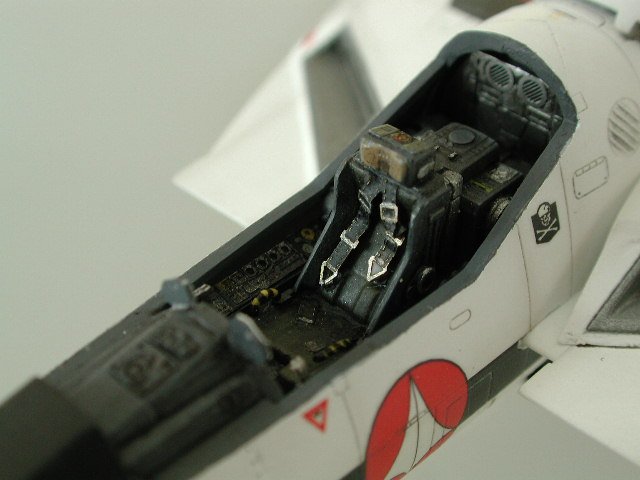
Boy... I haven't looked at these shots in years... This one shows off the bits in the canopy frame well.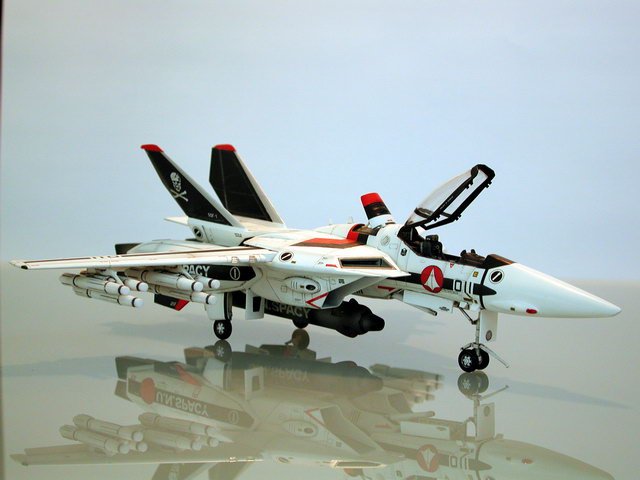
-
WM Chang! Could I get some shot of your VF-1 Cockp
wm cheng replied to broadshore's topic in The Workshop!
-
WM Chang! Could I get some shot of your VF-1 Cockp
wm cheng replied to broadshore's topic in The Workshop!

-
WM Chang! Could I get some shot of your VF-1 Cockp
wm cheng replied to broadshore's topic in The Workshop!
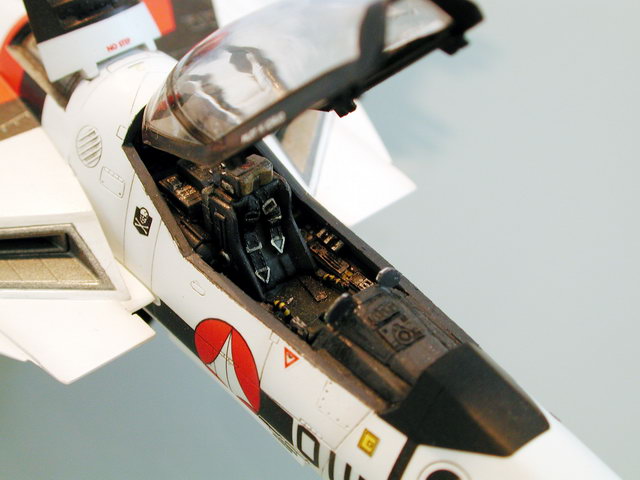
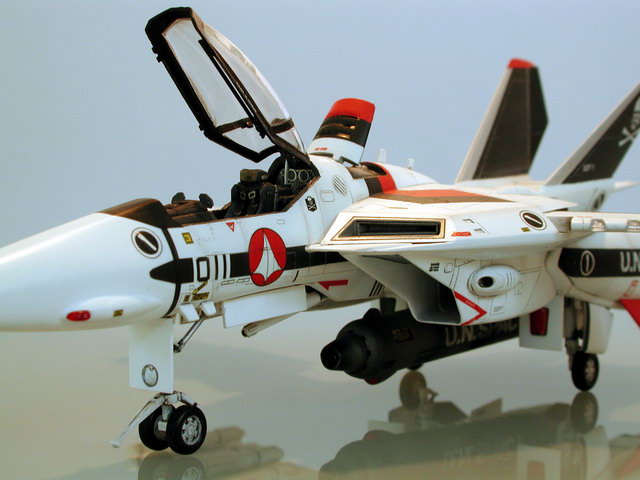
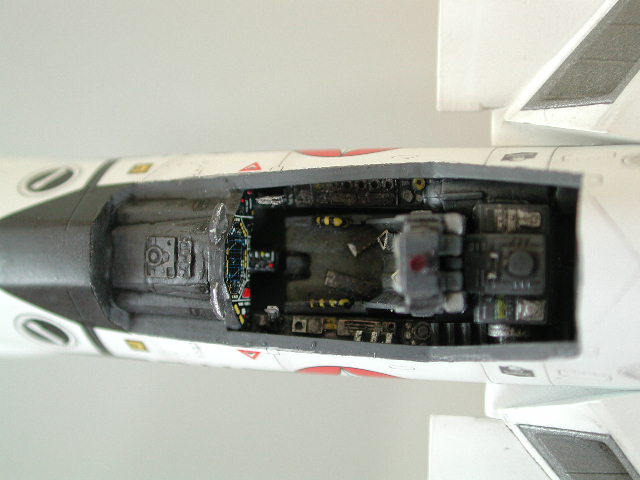
hEY Broadshore, its chEng!... Ask and ye shall recieve... Okay - word of warning, this is not accurate to the lineart of Macross. In my over-detailing zealousness I forgot to look up my art books before going to town in "gaking" up the cockpit. In fact, the Hasegawa kits have it right, the side consoles are indeed featureless armrests and are supposed to be green cushions with no controls on them. But I like to show a little more detail when it comes to cockpits - especially since the model has all those realistic rivits all over it anyways. The side consoles where built up with spare photoetched console pieces (mostly WWII aircraft) but layered up to appear more complicated. Same with the forward bulkhead where the HUD should be. I re-built the mirrors, since I felt that the Hasegawa ones were just too thick. I glued various bits and pieces of styrene to the canopy frames as per the lineart of my various Macross books to represent the latching mechanism. The back bulkhead is a piece of photo-etched add-on by Hasegawa especially designed for the VF-1. The seatbelts are from a WWII aircraft. I wanted to drill little latch openings on the fuselage frame but couldn't figure out a way to get such a small hole to be rectangular.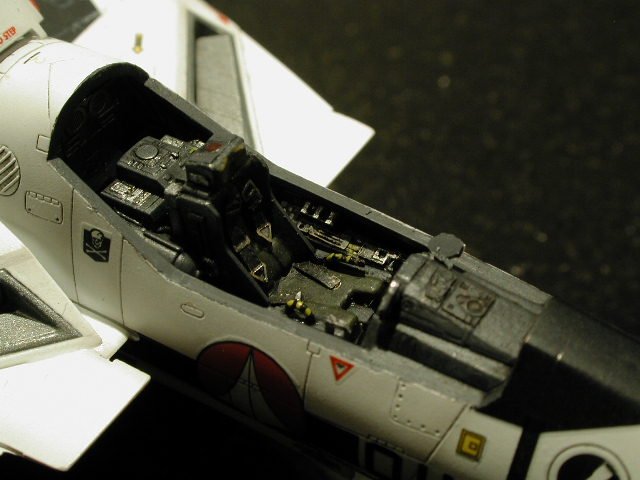
-
EXCELLENT WORK!! Fernado... And I didn't even like this design to begin with - but thats it, now I've gotta get one of these. You've convinced me! Wonderful stance... thanks for the photos - can't wait to follow through on your painting techniques. A truely unique model - keep up the great work! Wm
-
Why not an 1/32 Scale Tamiya Valkyrie (like their F-16 Viper) while were're at it, with removeable thermonuclear engines with supplied engine cart, operable flaps and brake, rubber tires, white metal cast landing gears and maybe a retractable pilots ladder!
-
In oils, I get White, Black and Brown - from that you can mix almost anything you need, the browns are good for a bit of rust and brake/hydraulic fluids. The white is good to do panel lines on black surfaces, and the white & black together gets shades of grey for the actual panel lines or streaks. In chalks, I've only used the same; White, Black & Brown also. Pick a medium brown, so that you can always lighten it with the white or darken it with the black. Good luck.
-
Yep, you've got it Sar. The extra "revit" details are actually already on the kit, just really faintly (I guess the way its released from the molds) all I did was use a pin-vise with a very small bit and drilled out the faint impressions. I only made an indent, I didn't drill all the way through. Very easy, because its very soft plastic. The shading is done after I did a black oil wash on the parts to pick out the detail. Then I airbrushed really thinned flat black and just airbrushed where I wanted the shading to be. I immediately protected this very thin delicate layer with a semi-gloss clear-coat when I was happy with the finish. The little "fence" after the wing sweep is a piece of corrugated styrene that you could pick up at most hobby/train supply stores - there are quite a variety of textures to choose from. The magnets (rare-earth magnets to be exact - very strong, its needed since there's a bit of plastic to work through) are in the leg portion, and the steel washers are on the back of the fast pack portion so that they will become removeable after the model is built. Good luck, lets see some pics...
-
You're right, 1/72 scale is much smaller, a lot of weathering techniques for larger scales don't look right in 1/72 scale, I had to re-learn/experiment with a lot of techniques before I can get something I liked that looked proper in this scale. I had to forgo some weathering like watermarks in 1/72 scale, that I find only sucessfully achieved in 1/32 scale. From what I gather 1/35 scale is military tanks and vehicles, not many planes made in that scale - so aircraft weathering is pretty different from vehicular weathering - a lot less drybrushing. Good luck & post...
-
Yep, its not a microscale product. Its a japanese product, I buy it at several local hobby stores in Toronto. Wherever you find Gunze/Mr. Color products, you can find Mr. Surfacer. There are two grades (that I know of) a Mr. Surfacer500 and a Mr. Surfacer1000 - the later being finer and more viscous for smaller seams and finer sanding.
-
Primer (optional depending on plastic colour) Basecoat paint (Tamiya acrylic) Clearcoat (Model Master Acryl - actually a laquer) Post shading (darker tone of basecoat very lightly) Clearcoat gloss/semi gloss (to protect the delicate post shading) Oil wash (for panel lines) Clearcoat gloss/semi gloss (to protect panel lines) Decal Oil wash (just over decalled areas to pick out the panel lines) Post shading (very light dusting to take the decal brightness down to look like paint) Clearcoat (final finish) I use the multiple clearcoats as a stop to "undo" - whenever I reach a stage I like, I seal it in with the clearcoat so if I goof up in the next stage, I can remove the next stage only down to my last clearcoat stage without have it affect my basecoats. Thats why I paint with acrylic, but use a laquer clearcoat, so the solvents don't interfer with each other. Good Luck, Wm
-
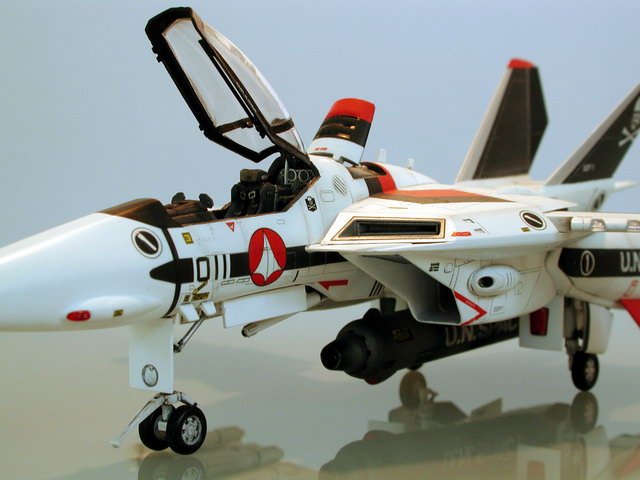
Rate it in terms of what? Detail or accuracy: 9.5 (excellent engraved details) Seams or fit: 8 Engineering: 9.5 Difficulty to assemble: 3 (easy) Paint: 1 (very easy - all white ) I'd say the VF-1 fighter was the easiest to build and would recommend as a beginner model - all you have to do is paint it white and everything else could be done with decals.
-
Ugh! Stay away from that stuff like the plague. The liquid that oozes from it melts plastic quite easily, and when hardened its really tough to sand down. The Tamiya putty is much better, finer to sand for bigger gaps. Better yet, the Mr. Surfacer is great for smaller seams.
-
Thanks so much Jim, It means a lot. I have just recently heard of the ARC site through David H. our resident aircraft expert around here - and I am checking it out - very nice site. I'd like to learn more about real world aircraft too and apply it to these Macross models. Please consider posting some of your work here too. Looking forward to it. Wm I just wished I had more time to do more models more frequently!
-
All the new Battlestar Galacticas are on eMule/eDonkey network. They have aired on SkyOne in the UK - I am downloading episode 11 today - but they have all 11 so far. So for those who can't wait, I'd recommend getting them that way - all the commercials are cut out! Unfortunately its only a 12 episode season for now.
-
Oooh! I like that grey scheme better- damn, I might need to get another VF-0D! Any real aircraft modellers out there? How would one reproduce that light whitesh grey around some of the panel lines in the CGI rendering? Any real world references? I've read some good weathering details on the navy's TPS grey schemes, but they only really work on 1:32 scale aircraft, its just too hard to replicate it in 1:72.
-
WCG Ha!! LOL That's a good one! gotta tell the wife! HWR MII, I too want to build a Hikaru's strike battroid at the end of DYRL (pretty far down on my list though) with the gun pointing at you, but I fully understand that I will have to do some major modifications to the shoulders and hips to get the battroid into that pose. There's certainly some animation magic going on in that pose - you can't even get a Yamato toy to do it properly. At least its an excellent base to build/modify upon.

-
Hey what's going on? Why is everyone bashing Hasegawa lately? I don't want to rant - don't read this with CAPs on - but I just have to pipe up. I love them (no, I don't work for them or have any family members who own stock in them ) They are my favourite aircraft injection styrene manufacturer if not the world's best manufacturer (with the possible exception of Tamiya when they make their own kits instead of reboxing others) in a rapidly dwindling hobby. Details withstanding, the quality of the styrene, the decals, the engineering with respect to build steps and painting is unequalled. How much bitching would be going on if AMT/ERTL got the licence to Robotech and were the only kits available? Does anyone remember (or worst yet... built) the older IMAI or ARII kits of the 80's?! They were awful in every aspect, they were all pudgy and gawky in proportions and had next to nill poseablilty. The only good thing about them are my childhood memories and the boxart (IMHO). Hasegawa makes models, models by nature are miniature detailed replicas of something - mostly ment for display. If you want poseability or transformation, then get a toy, that's what they are for - of course toys sacrifice some proportions or details in favour of durability. Sorry I can't agree with anyone that says the Yamato toys are better proportioned than the Hasegawas - the Yamatos (which I love and own quite a few) are at best a compromise in every mode. Remember this was a hand drawn animation, even the originals are massively deformed from mode to mode - the artist just chose to make each mode asthetically more pleasing (at the expense of actual transformation). Additionally, lest we forget that even among the "canon" line art from Studio Nue - the panel line details and specs to the mech changes from drawing to drawing. As far as I am concerned the Hasegawas represent the best in modelling technology - and the best proportions in fighter and battroid modes without sacrificing for transformation practicalities. Any movement and poseability is just an added bonus - but I have to admit, once I get it in a pose I like, my models are almost never moved from that pose. I have the Yamato toys to play with. But Hasegawas are eye candy - and as far as that is concerned, the additional "ad-libbed" panel lines and revit details just adds to that "wow-factor". Call it re-interpretation 20yrs after - at least all the inventions make sense from a realistic aircraft construction point of view. There could of been a lot of other arbritrary details that weren't appropriate that could of been added. When you have a flight line of Hasegawas starting from the VF-0, VF-1 to the YF-19 & YF-21 you see a steady progression of larger and larger panel segments and fewer and fewer revit details, which seems entirely appropriate for the different eras of aircraft construction. Similar to seeing the 60s Phantom, next to the 70s Tomcat, then 80s YF-22. Believe me, from someone who has built a few models in my time - I find the Hasegawas the best on the Market, and the fact that they chose to start concentrating on an entirely fictious subject (which is a departure for the company) that was over 20yrs old still seems like a dream to me! (hop off my soap box now...) If it weren't for the Hasegawa Macross kits, I doubt I would of gotten back into modelling after high-school.
-
Man I love this series - just saw episode 10 "Hand of God" and its great sci-fi! Anyone have an answer to the playstation question? Those Joyride figures look pretty good - anyone actually see one of them? What's the quality like? Is this "Lowdown" an episode or a special features extra?
-
Wow, thanks Graham, I didn't know about these trading figures, I'd definitely get them. By they way, to all those who have played the PS2 game, is there a mode where you are inside the cockpit, so that you don't see your own viper? Thanks, Wm
-
Did you see my reply to the post: http://www.macrossworld.com/mwf/index.php?showtopic=11807 check about half way down. I've got the True Details seats with the Verlinden Cockpit update set - and I've got some True Details canopy masks - I'd love to find some aftermarket tail cones, as the included kit ones aren't that great - maybe a photo-etched kit, but I haven't found anything yet. Also, resin one piece/seamless intake section would be nice - but haven't sourced it out yet.