wm cheng
-
Posts
4338 -
Joined
-
Last visited
Content Type
Profiles
Forums
Events
Gallery
Everything posted by wm cheng
-
I drew this circle so I can place putty to eliminate the main lateral seam at where the Macross Kite symbol will be. I put tape at the two ends, and filled it with Tamiya putty, we'll see if this holds onto the resin - if not, I'll resort back to crazy glue again.

-
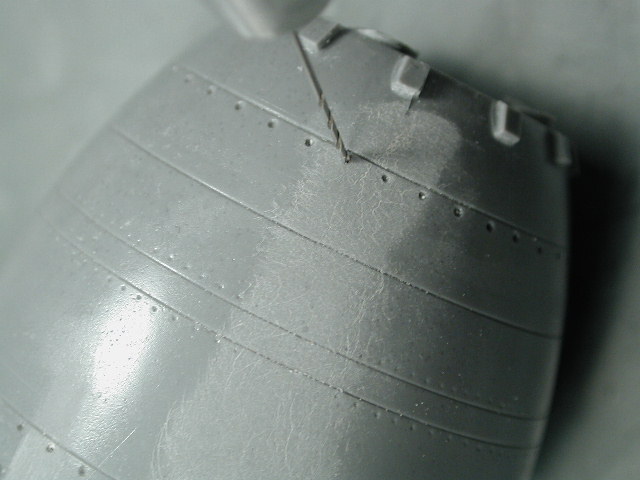
I added a few strips of styrene to represent some of the lines on the lineart of the boosters. I also gave the overall booster a bit of final sanding. I drew in pencil the size of the Macross Kite (from a 1/48 decal set that Anasazi made for the Yamato Fast packs - which I think is pretty perfect in terms of size) which came out to 15/16" (0.9375") or 23.812mm to get an approx. idea

-
I crazy glued the halves together. You need to file down a bit of the mating surfaces to get a nice flush fit. The main lateral seem worked out well as a detail line. I just couldn't resist piecing it all together.


-
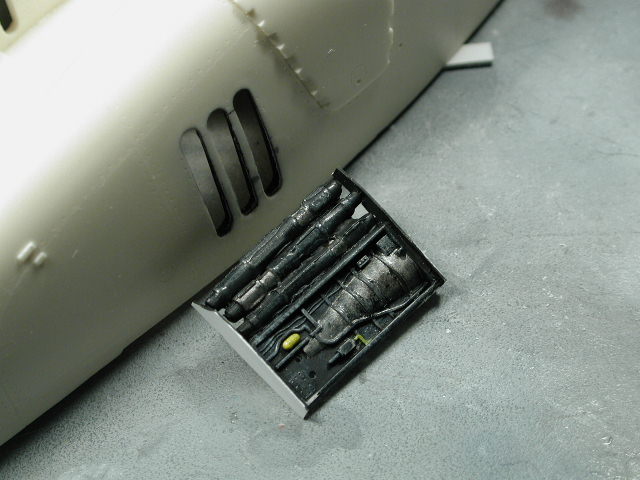
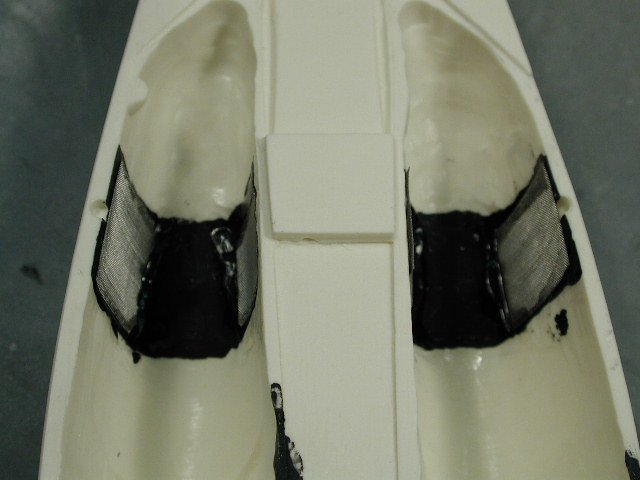
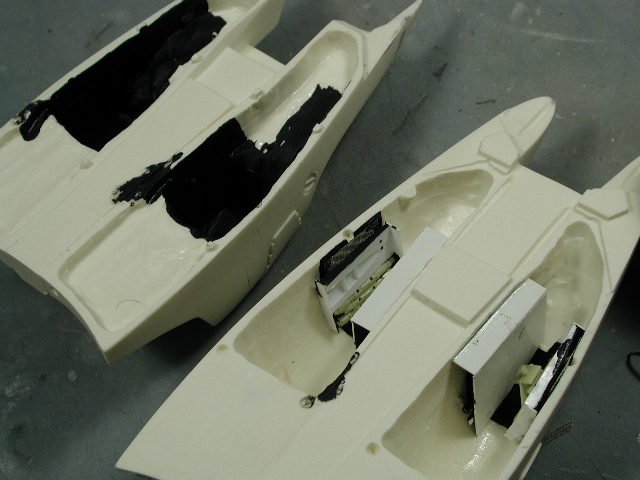
I'm gluing in the fine metal mesh from the inside, be very careful that the crazy glue you use is fairly thick, otherwise, the thin stuff tends to run into the fine mesh and clogs up the holes. Once the mesh is in, I also crazy glued the completed bulkheads with the engine detail - I must admit, I went a little overboard here with the details, you see the details (more so in person than these photos show) but not as much as the effort I put into them ) Oh, well - maybe a more transparent mesh, but then the scale might be too big, if the openings are larger. I also painted the interior of the bottom portion of the booster, just so that when you look into the feet holes, it appears black and dark, and just incase you see through the mesh, I don't want any resin peeking through.
-
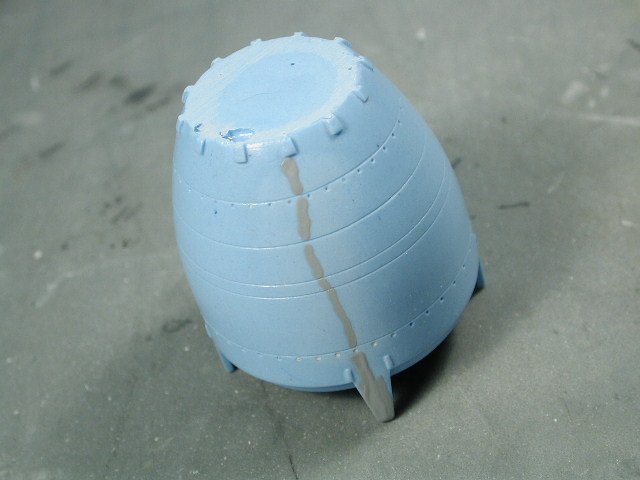
Thanks to the Captn' so much - I just recieved his replacement for my "squishy" engine bell!! Yay! Boy, this one is fantastic, there's only one seam!! and its really minor, the resin is easy to sand, and all of the little four fins are intact and flawless!! Wow, as you can see, it only took a little sanding, and its done! I'd painted a stripe of Mr. Surfacer 1000 to be sanded away just to be sure. I will prime this along with the boosters this afternoon.
-
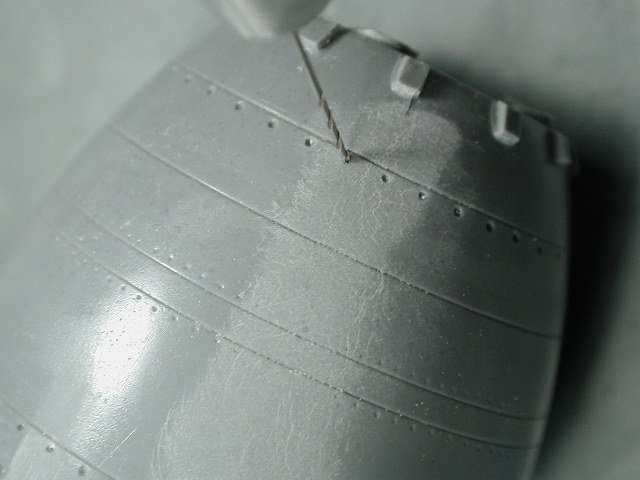
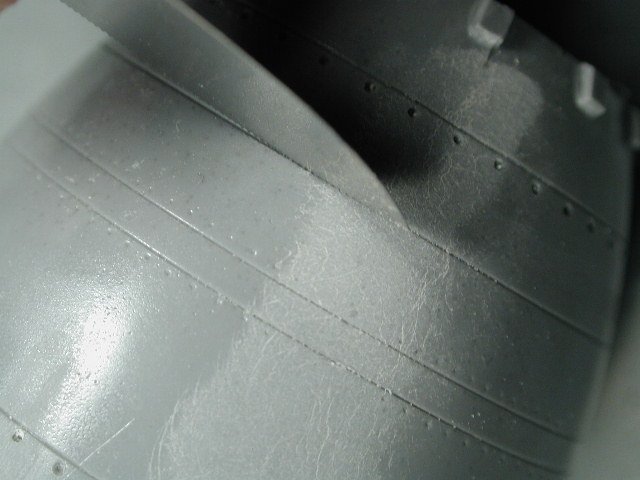
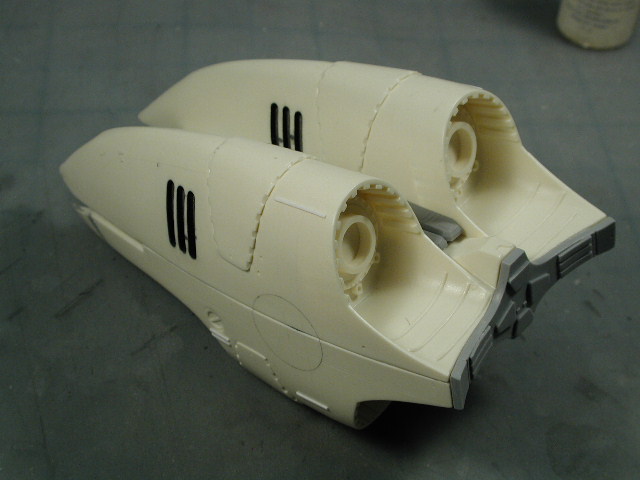
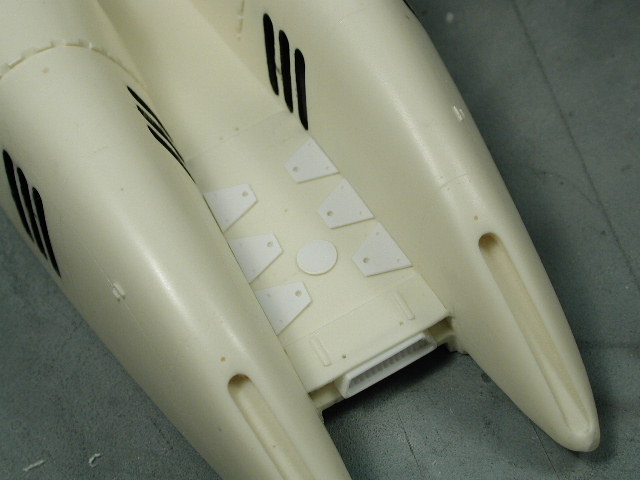
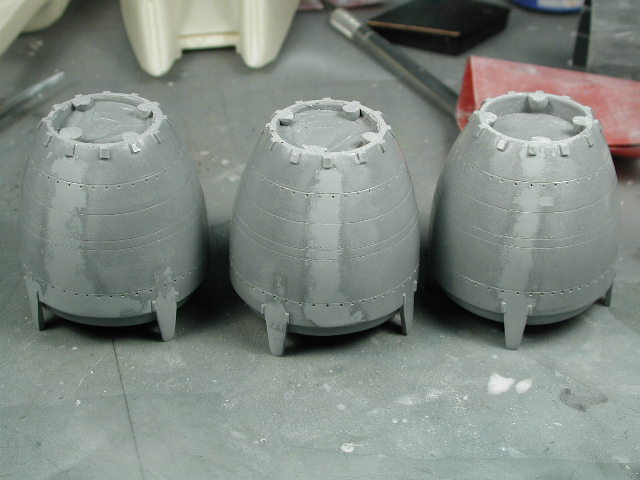
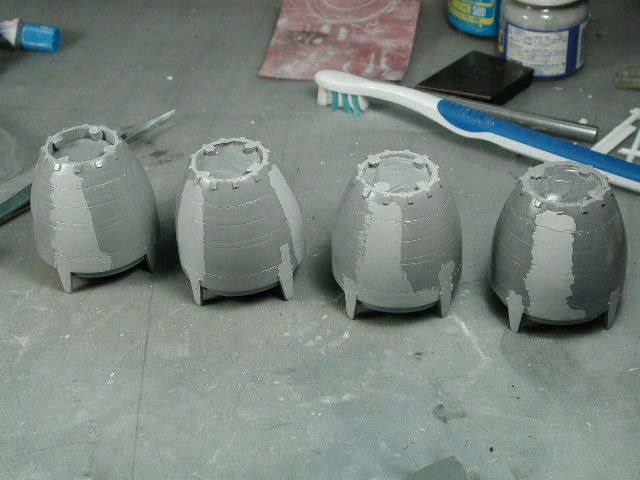
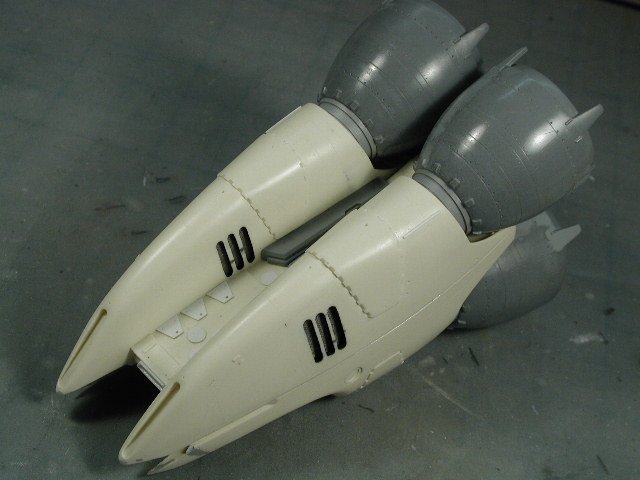
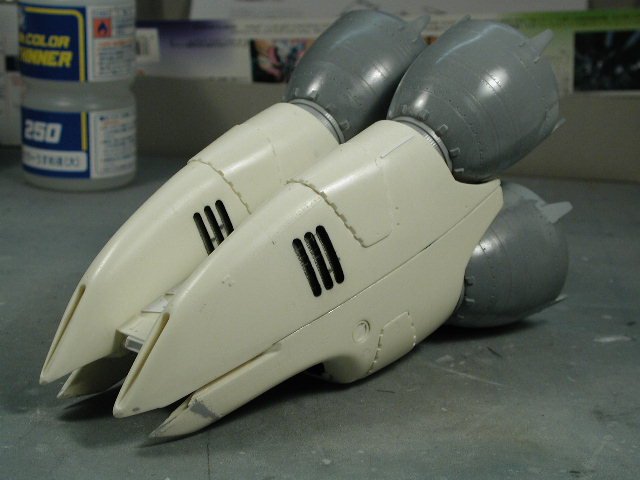
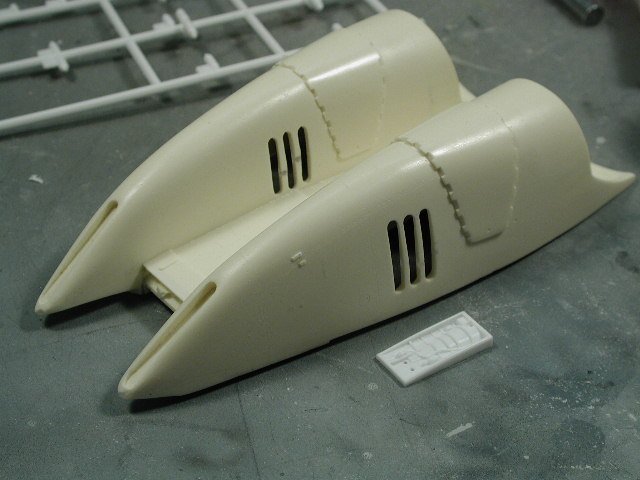
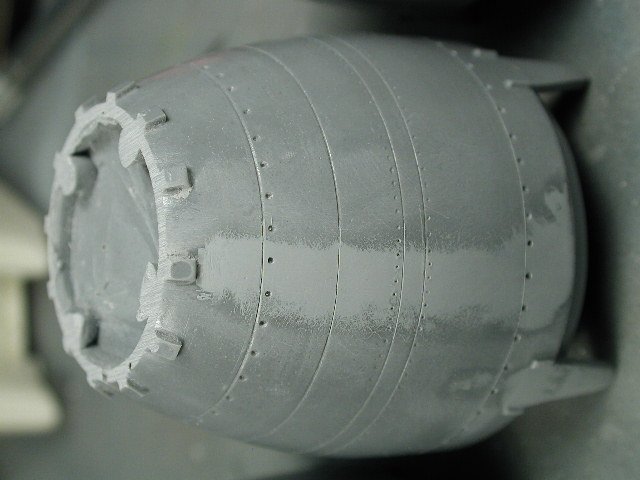
I then went over the boosters with Mr. Surfacer 1000 looking for any small imperfections, bubbles or details I didn't want. To the Captn's credit, he included some fine details on the boosters that will match nicely to the Hasegawa kit, but there were two details that I am choosing to omit, the "refueling hatches" on one underside of the booster and some diagonal ladder designs which did not cast well. I also decided to make something of that main lateral line separating the two halves, instead of trying to sand it smooth to mate both the top and bottom halves, I thought I give these edges a bit of a chamfer (sanded the edges at a 45 degree in) so when they mate, it will form a V-groove - hiding the slight mis-match of the top and bottom curvatures and creating an additional detail line latterally across (which will form the top part of the black line on the lineart).

-
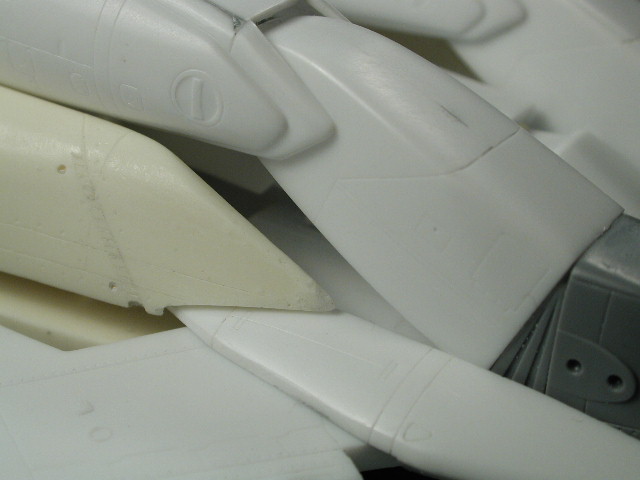
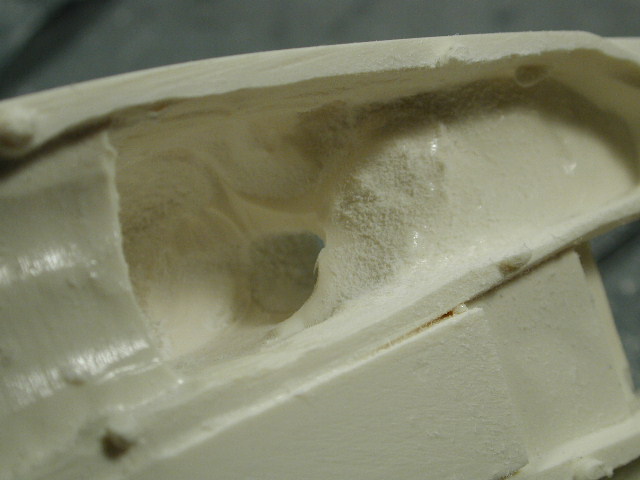
There's this gap here thats been bothering me, its supposed to be there, but it just seems a bit big with nothing inside. I'm not sure yet, but either I'd fill it with machinery gak or close it up, or maybe I'll just leave it alone. I want to get to the painting stage first... When the Valk is removeable, I think I can always come back to address this portion later on. Plus with the entire thing finished it might not be so bad. You can see the clear tip at the end of the resin piece where it meets the Valkyrie - I started hunting for all these little broken bits or bits with bubbles in it and started filling them in to sand them prepping the boosters for priming today.
-
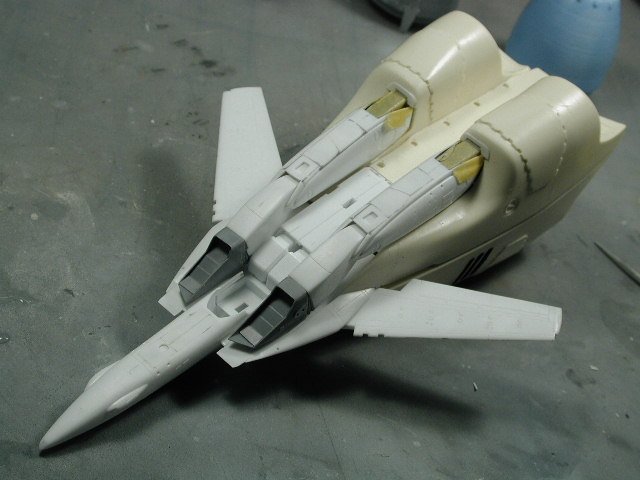
Just couldn't resist fitting everything together to zoom it around the room for a bit!
-
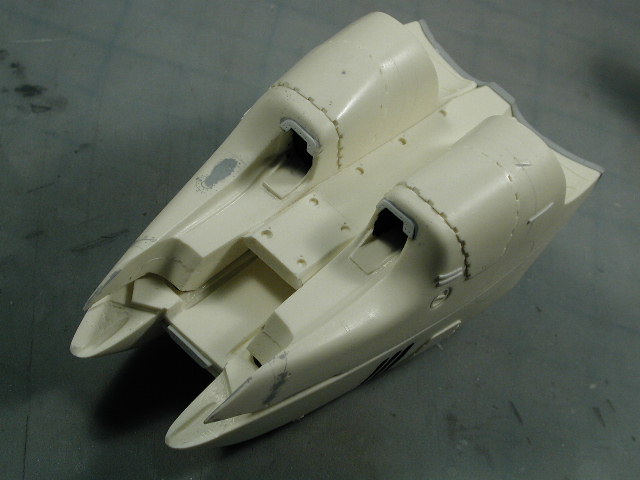
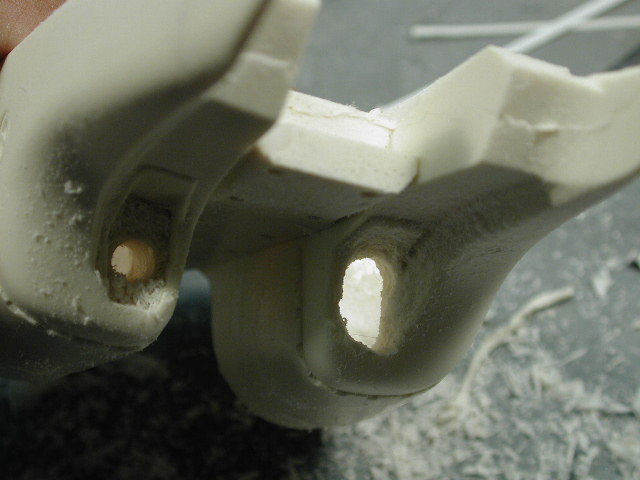
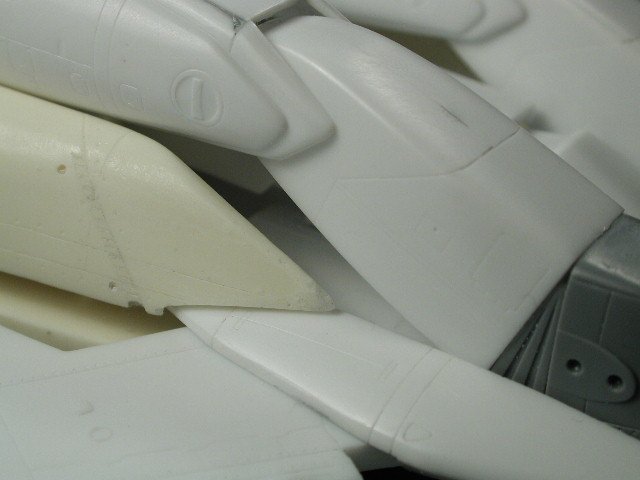
I added some styrene to reinforce this area so that I can re-sculpt some of the opening profile that I lost when my dremel slipped I was going to file it down smooth, but I think I'll leave it raised like an attached panel for some interest, maybe add a few revit details to the ends. Another shot below shows a test fit with the Valkyrie legs.

-
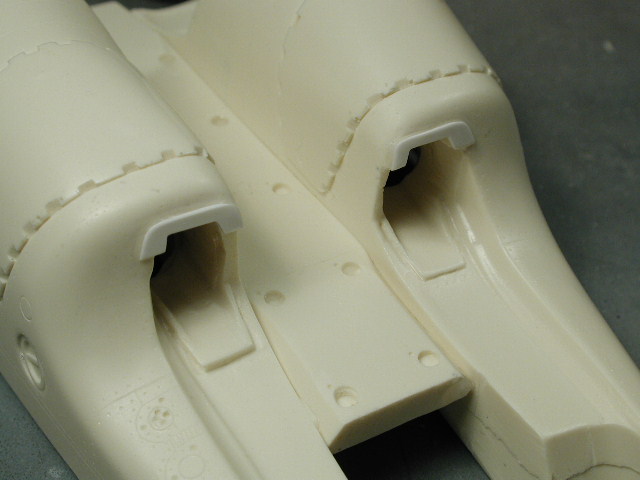
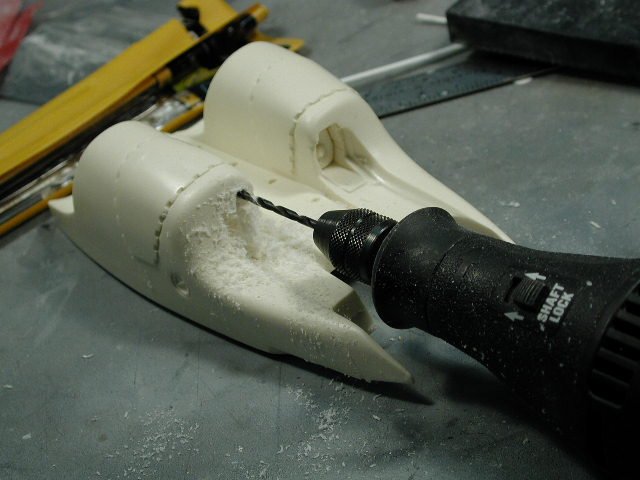
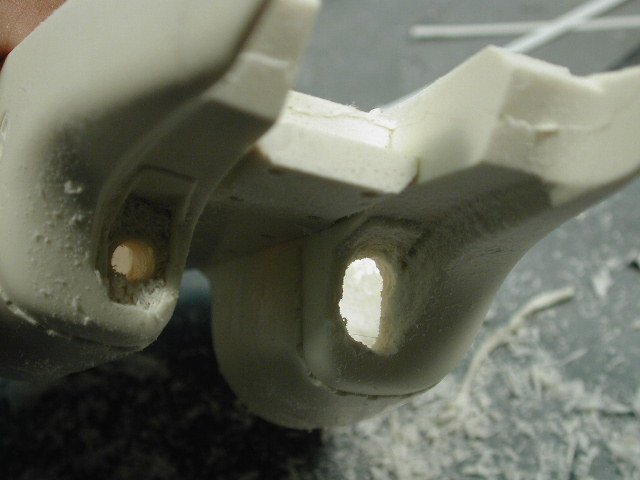
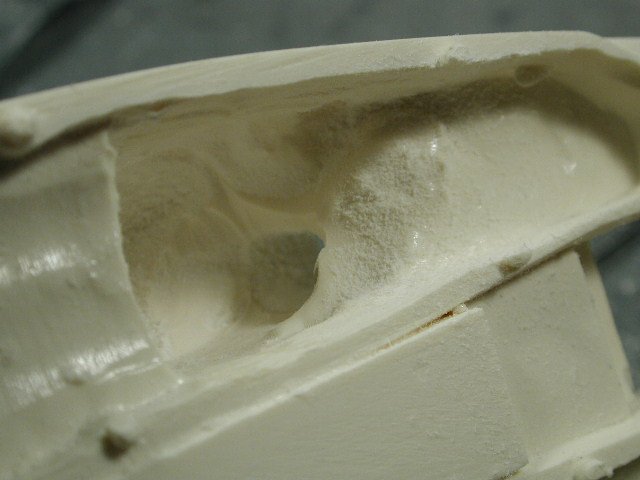
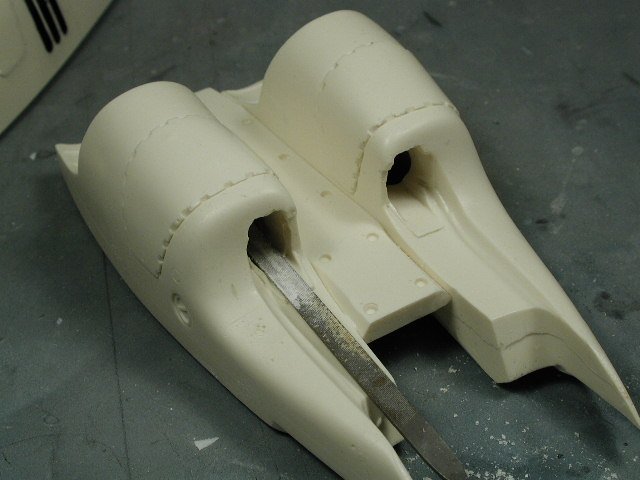
Oh, gawd! what have I done!! I really opened a whole can of worms now... Under the catagory; "WTF was I thinking..." I decided to drill out the holes for the Valk's feet on the lower portion of the resin boosters I guess I wasn't paying attention to the instructions of the resin booster kit, but I built the entire feet assembly, all three pieces and painted them. I was thinking that I wanted to have the Valk pretty intact so I may be able to detach them later on... hmm I'm now not so sure it was such a great idea. According to the instructions, you only really need the "shin" of the lower portion of the feet, and I assume everything else is hidden - then you don't need to hollow out the feet holes. Well, I tried to hollow out the feet holes, I didn't realize that there is actually a fair amout of resin that has settled into this area, and I am tring to route out 2-3" thick of resin! I started by drilling smaller pilot holes with a dremel at the four corners. Then I took a larger drill bit and drilled out the centre. Did I say its a lot of resin... to dig out?! I was almost choking with all the dust in the air - then I remembered my mask... hmm, I'm sure fine resin particles isn't great for the lungs either I felt like a dentist, switching to more of a grinding stone bit to try and hollow out the hole - I slipped a few times, so I need to re-build out the opening. But this was much more work than I thought it was going to be (I'd do it as per instructions and leave the resin in and just modify the feet construction to not include the last two pieces next time...) but I'm in for the job now, since I've damaged the opening and I've started and opened this can of worms. I found it easier later on to also work from the inside hollowing out material - just becareful you don't do too far and create a hole into the body of the lower boosters. The really long and tedious process of finishing the holes with a flat file is what I have to look forward too tonight. The resin is still pretty tough, and my files are pretty fine - so it may take a while, but hopefully when I'm done, the Valkyrie will be removeable .
-
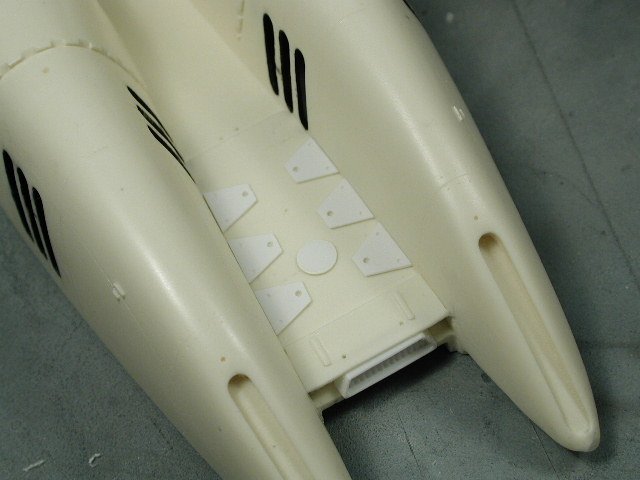
I wanted to bulk up the rear valley between the two top boosters a little - I thought it might look better a little beefier when we got closer to those massive engine bells. For those of you who have the VE-1 Elintseeker Hasegawa kits - you're in for a treat of spare parts after you've finished the kit. These arm armour parts are extras from that kit - since it has a modified piece for that drop down sensor/antenna array. I thought that these pieces were nicely molded, and had a slightly sloped profile that might fit nicely to the boosters with minimal alterations. I wanted as much surface detail on these boosters to tie them togther with the Hasegawa fast packs, since I wanted them to look part of the same language. I intend to decal them and paint them like the fast packs later on. It seems more consistent in the Macross universe than the white boosters shown in the episode


-
I thought I'd add a little extra detail to this top portion - it looked a little bare... I just cut some thin styrene sheets into these shapes and glued them down. I then took my pinvise and drilled some small holes in it for detail.
-
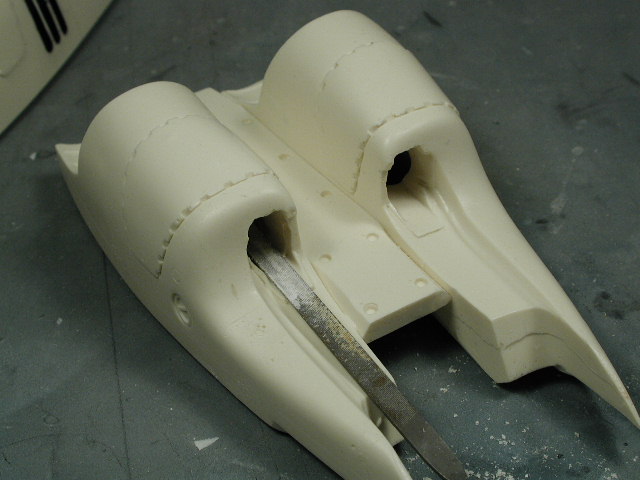
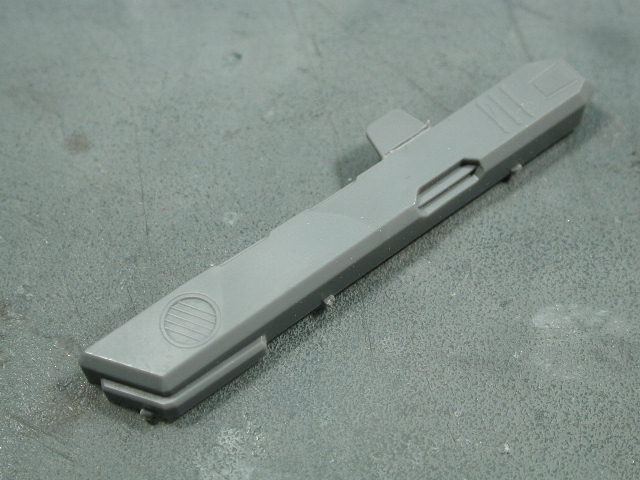
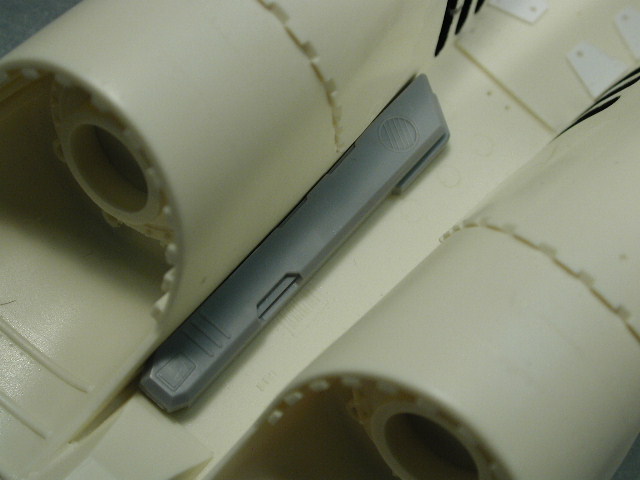
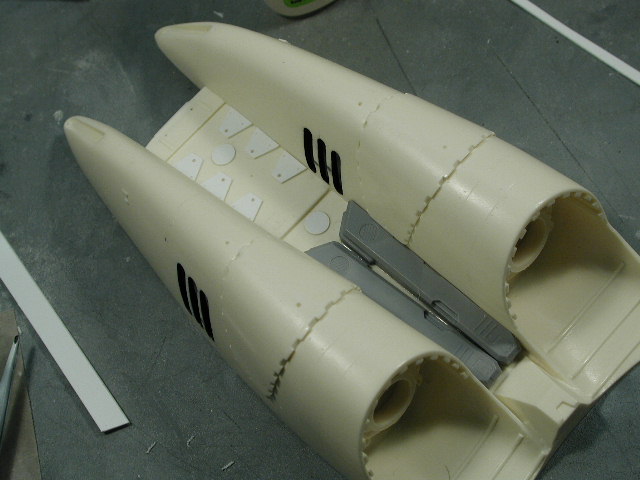
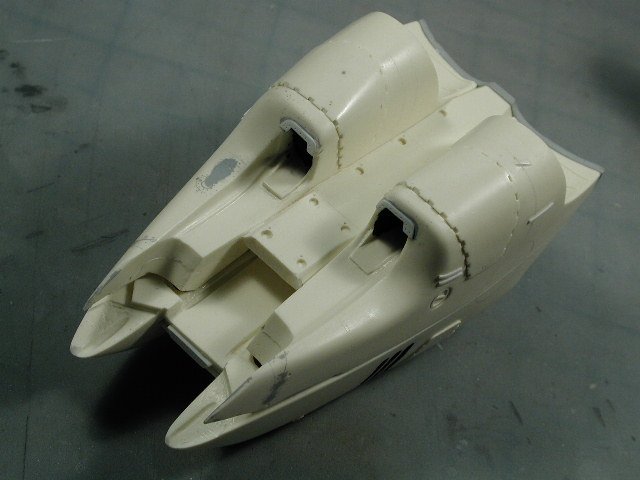
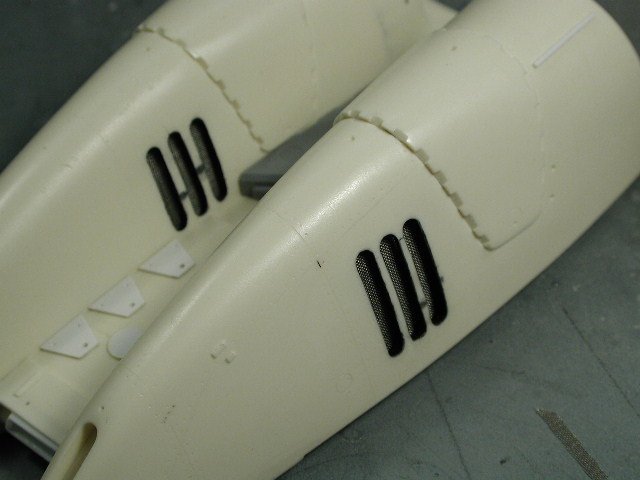
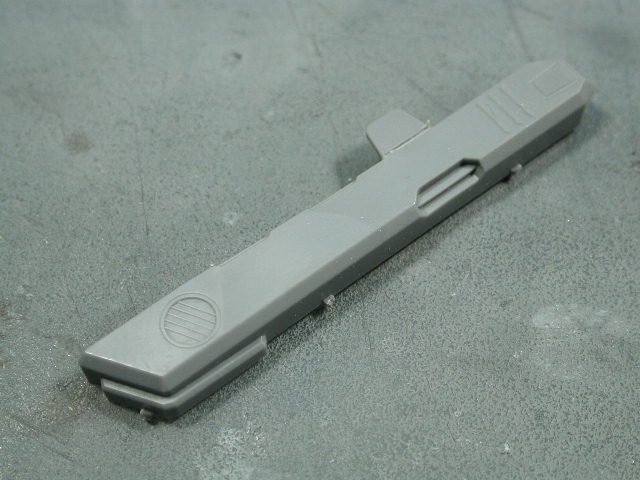
Ok, back at work on the boosters... Try as I may, I couldn't get the forward intake beween the boosters to look smooth - its a really tough area to sand down, especially the back surface. So I thought I might find something to hide this area. I didn't use that trapizoidial vent for the rear tail section of the Valkyrie, so I thought I'd put it in this slot to cover up the mess. It kind of fits, since its like the rest of the super Valks, when the tail section flips up and around to rest on top of the Valks chest piece. I had to sand down a bit of the resin booster slot and the styrene plastic part to fit. I also fitted some extra corrugated styrene strips that I cut to fit into the two sides and the centre of the trapizoidal vent (too lazy to sand out the two injector pin marks inside this vent, I also glued a strip of the corrugated styrene inside it as well)


-
Nice shots Brett!! I like the corrugated sheet behind the slots. I couldn't find the extra rear leg landing gear bulkheads to my other "in-flight" Valkyries, (ideally you'd need four of these pieces - 2 for the outside and 2 for the inside vents) so I thought I'd keep the good ones for the outside, and fabricate some simplier bulkheads for the inside vent slots. Since you don't catch much other than some silver highlights through the metal mesh, I took the lazy way out and just stuck some stuff onto a styrene sheet. Which I'll paint black, and silver brush some highlights onto.
-
Looks fantastic so far... Great build up! Yep, painting & decaling is the best part to come
-
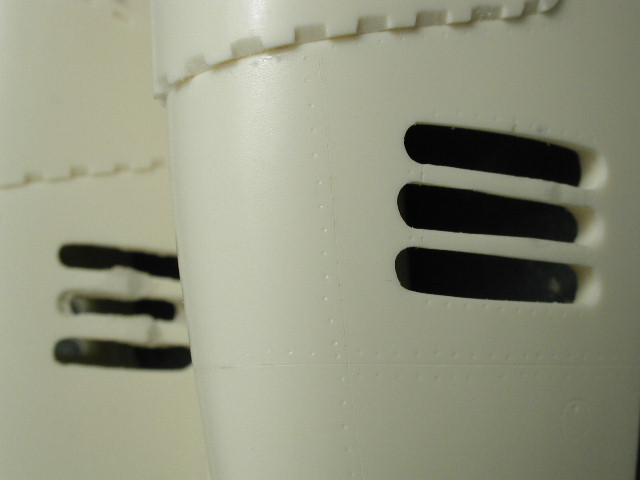
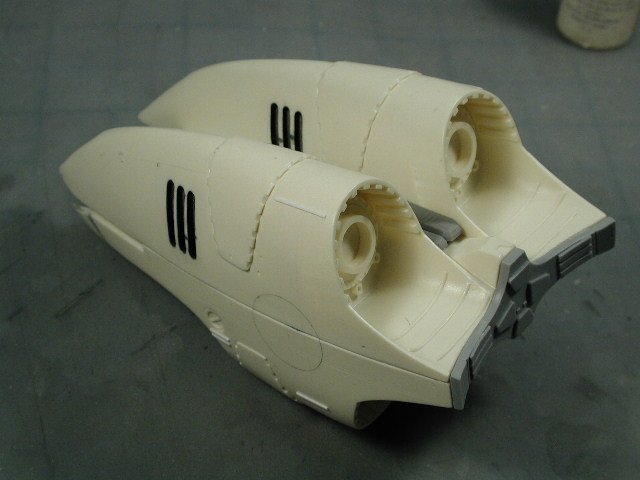
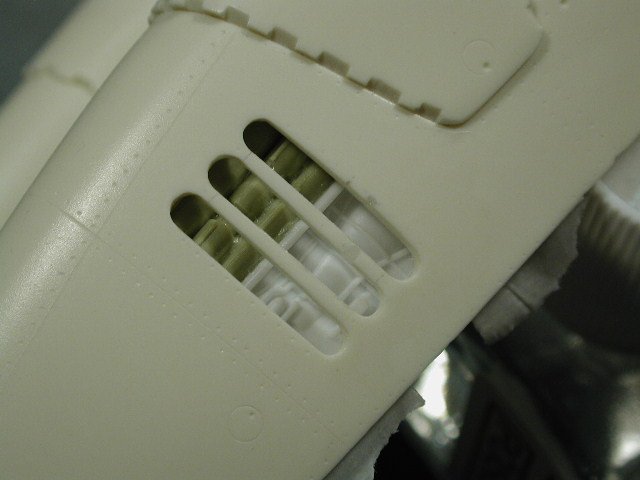
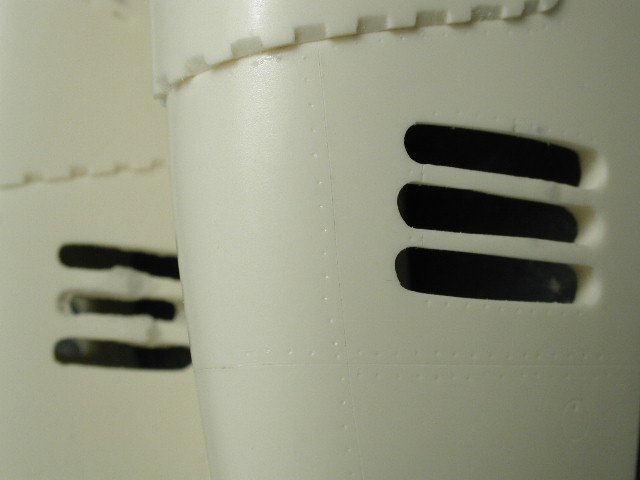
Its pretty dark in there - but you see it better in person, its really hard to photograph what you see. I've had to artificially over expose the shots to get some of the detail to show up - but they show up much more strongly in person (too strongly for my taste - but this is before I put the mesh in front of it). I didn't dry-fit the mesh yet since the bulkhead engine details are still wet - I'll let it dry first. I don't want to get any paint on the real metal mesh - I think the real metal finish of the mesh makes the model look more realistic. Now I have to start worrying about whether to paint the booster first, and install the engine gak and mesh after all the painting is done or carefully mask off the 3-slot vents? I think I'll like the edges of the 3-slots to be black and only have the exterior grey colour on the outer most surface - not sure yet which is the best way to do it.
-
I also noticed that if I were to put the bulkhead right up against the mesh - I don't see a whole lot, but if I set it back away from the mesh, I start seeing more of it - so I added some bulkhead ends to stand it off from the booster shell so it sits a 1-2mm away from the mesh. The second shot shows some preliminary painting. I painted the entire thing flat black as my basecoat - as well as painting the interior around the 3-slots flat black. Then I mostly dried brushed some metallic grey, medium grey and a spot of white to bring out the highlights. Then I added two spots of yellow just for interest. I'm not sure how far to take it, I still want it to look dark and grungy, but I need to exaggerate the drybrushing so that something will show through the mesh.
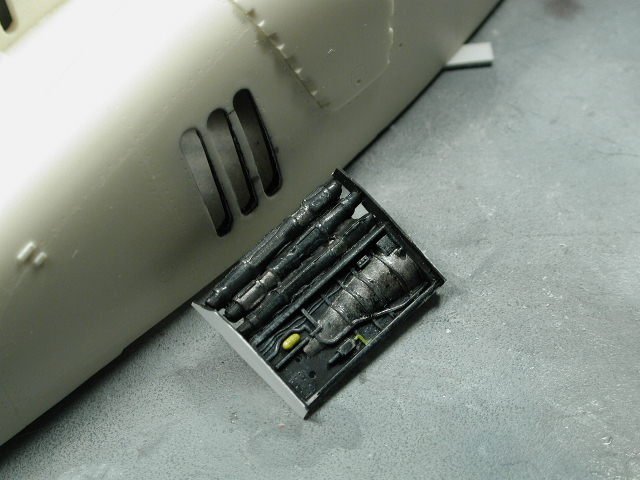
-
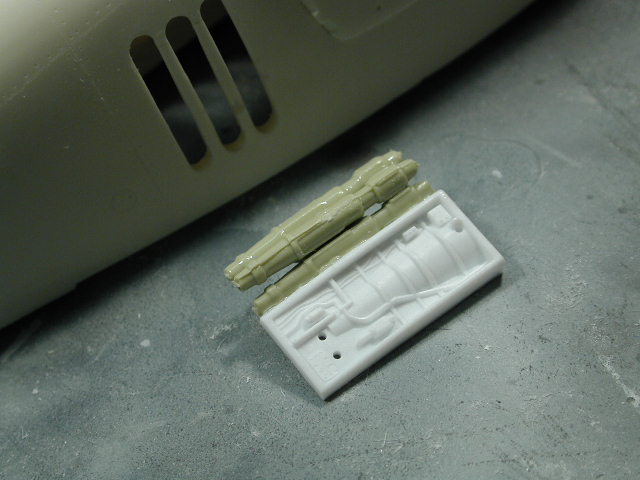
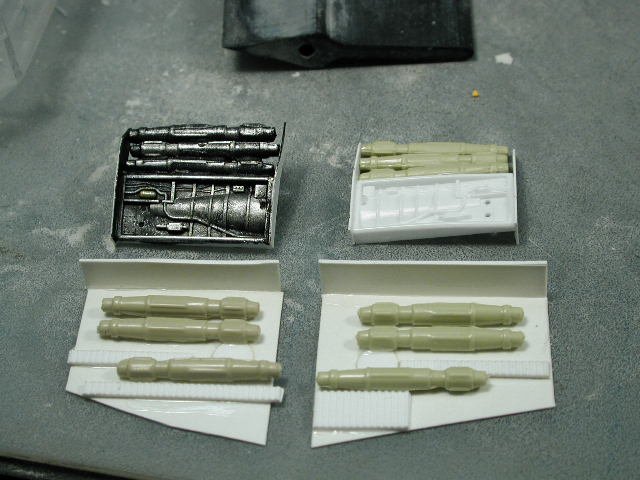
I found some extra missles lying around from an old 1/100 AMAI kit - but they could really be anything (preferably round and cylindrical) and started gluing them up. I was going to go to town detailing these areas up, but I noticed that the mesh isn't all that transparent (which is good) so with some proper painting, maybe this will be all I need. I am going to make one up to see how it works before I start on the rest of the 3 bulkheads. Here's a shot with the bulkhead taped behind the 3-slots. Yeah Brett, this proved to be a lot more clean-up work than I expected - I am much farther behind than I thought I would be by now. Hey Armetage, check with the Captn' or Samura Monkey - they may have something to help you out - but I was led to believe they were sold out.


-
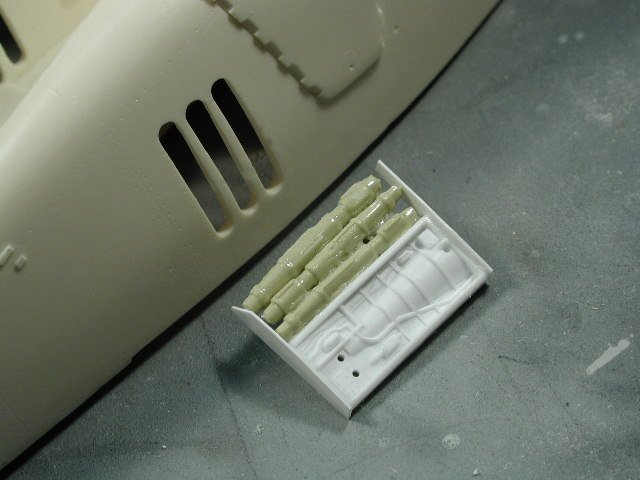
Now for the engine gak... I had a brain-wave! Why not use the un-used rear landing gear bays - its already got molded details with wiring. We have two from this kit which I made the Valkyrie with the landing gears up, and I'm sure I can dig out another two from another Valk that I've made with the landing gears up too. Thats 4 bulkheads, but I want to lay them horizontally - so I might make up the rest with some extra parts like missles glued side by side and extra landing gear struts. Thats for tomorrow...
-
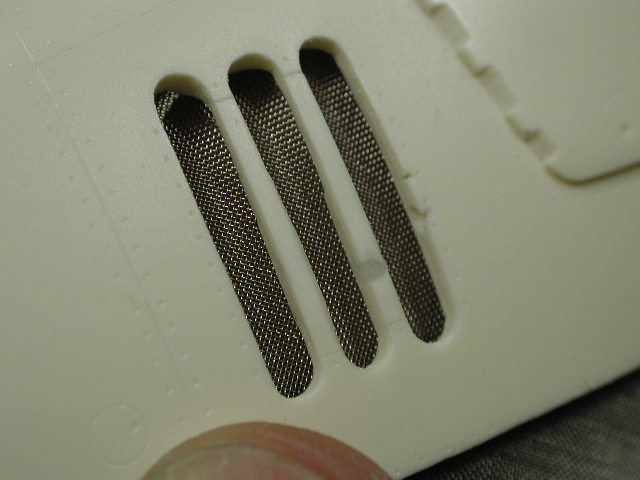
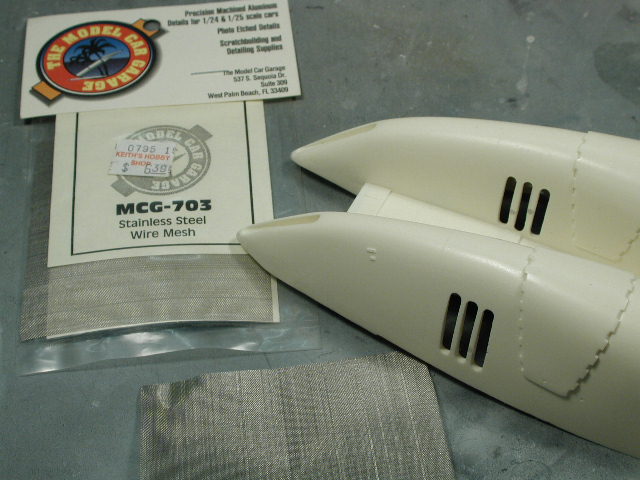
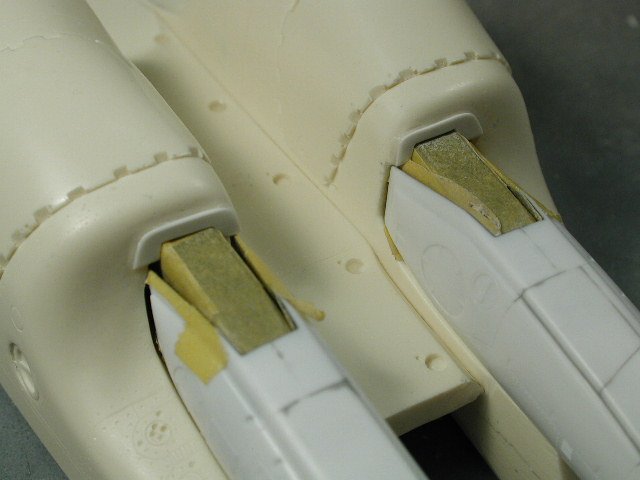
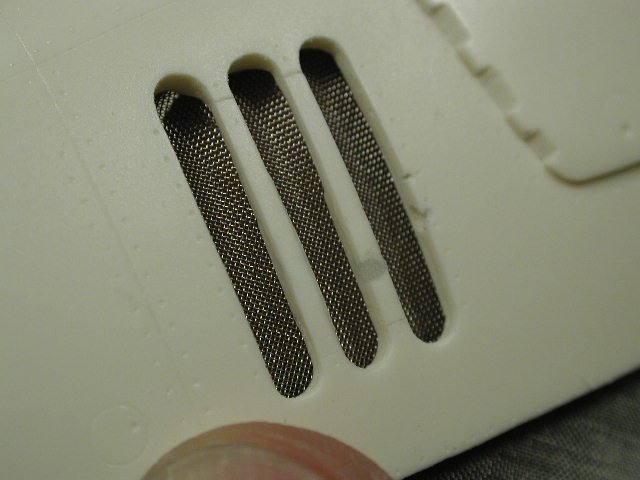
I found these metal meshes lying around (I must of picked them up a few years ago at a hobby store - I think I was going to drill out the vents on the super-fast packs gun rear section and replace them with these). You can find them at most local hobby stores - these are for model cars engine parts. I thought I might back the vents with this mesh.

-
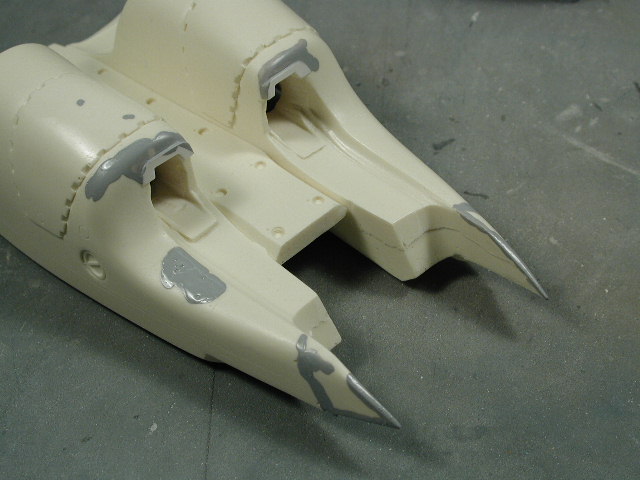
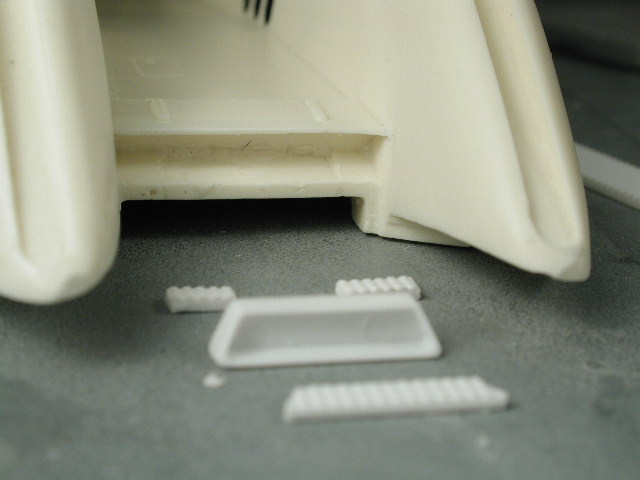
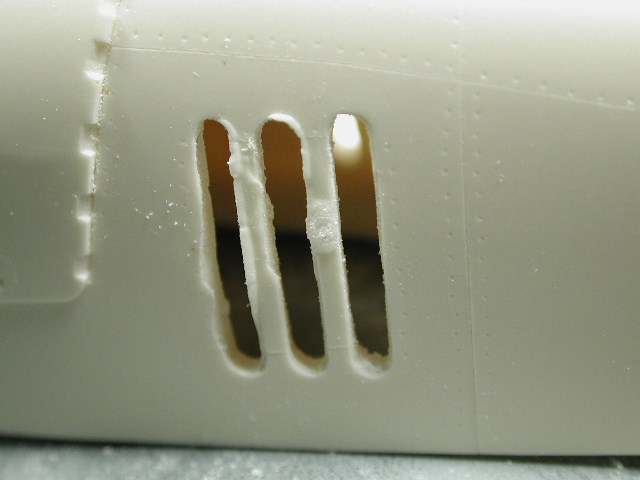
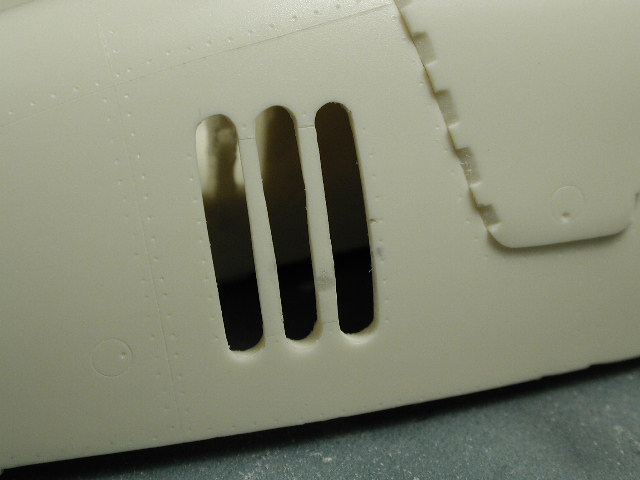
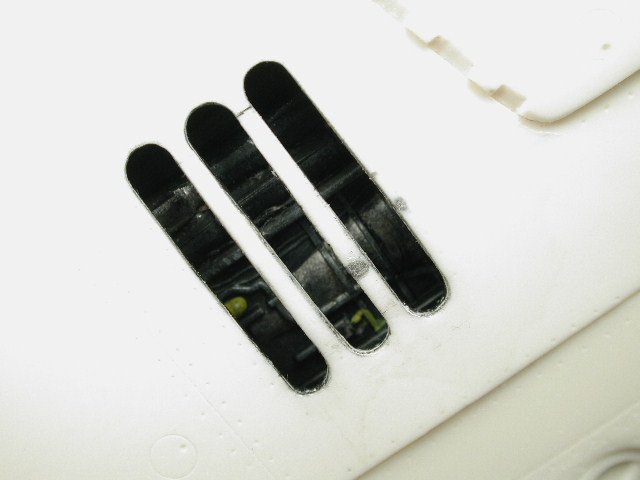
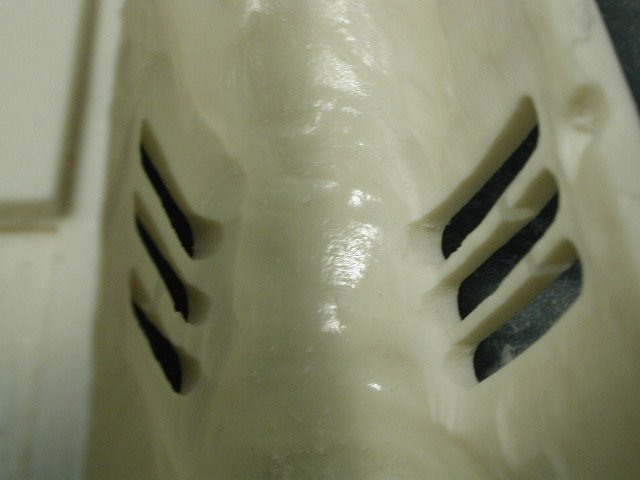
Here's some before and during shots of finishing out the 3-slot vents. Luckily since I wasn't going to use the opaque vents that the Captn' thoughtfully provided - I didn't have to worry too much about making the vent slots larger through the sanding process. In fact, I wouldn't mind making them a bit larger to show off the gak inside. They are a bit of a mess to start off with, but with sanding (argh!) they started to shape up. I also used a dremel and routed out the inside of the vents to make them thinner and made the thickness more consistent (be very careful if you intend to use a dremel like I did, it will sand away at the resin like butter, a very light touch is needed here, or you'll eat through all the vent struts)

-
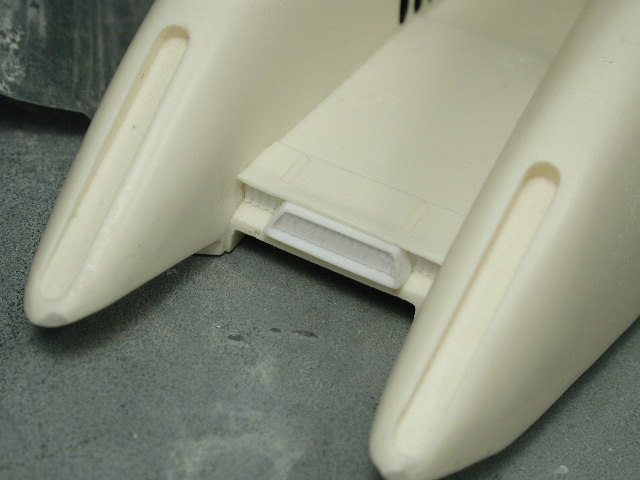
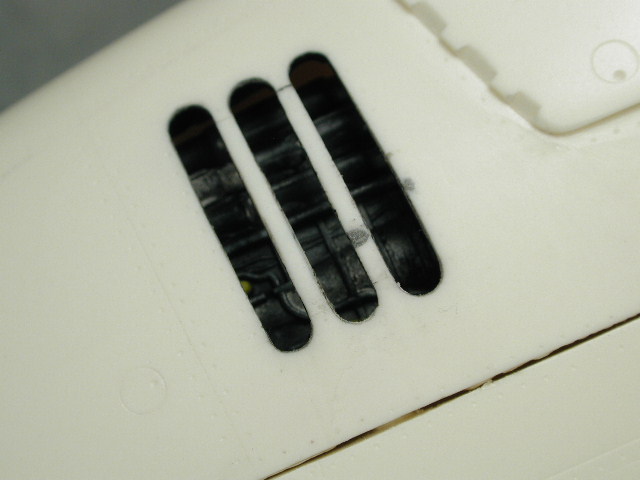
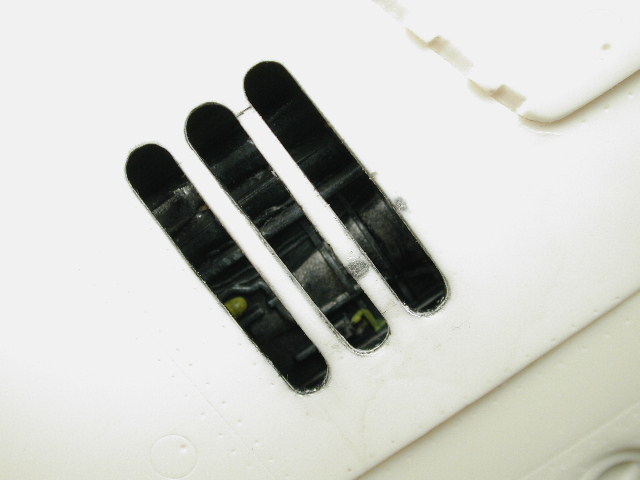
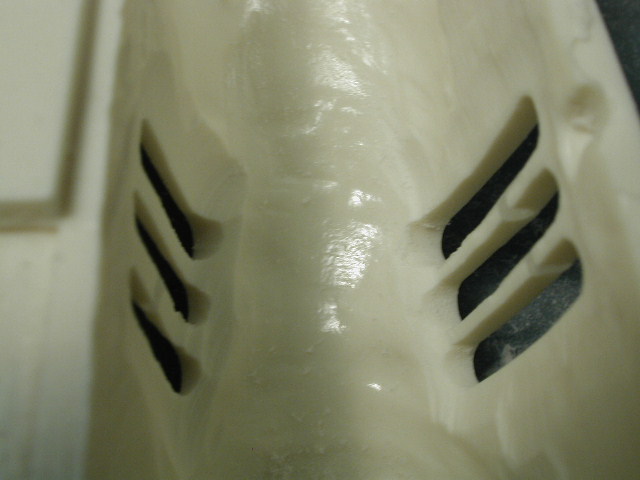
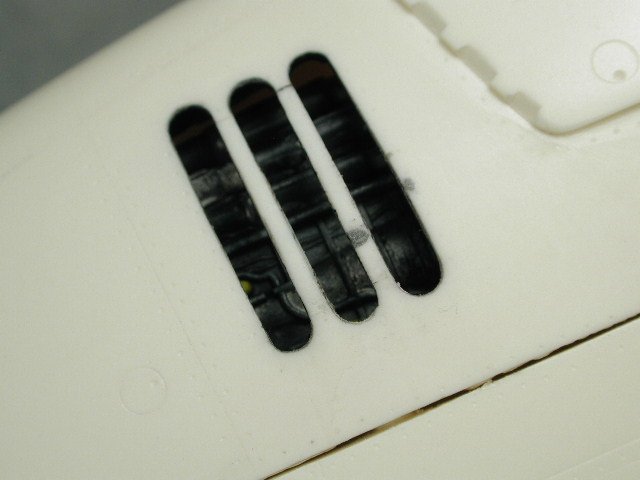
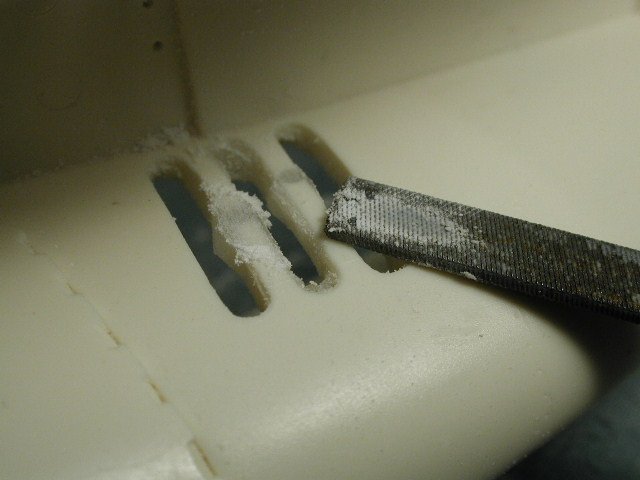
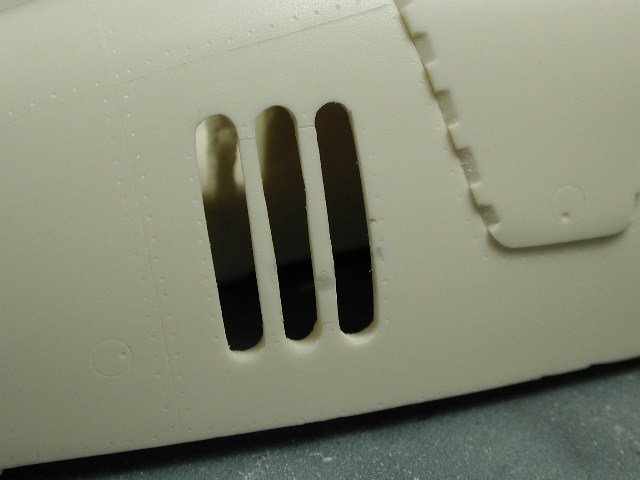
I started filing down the 3-slot openings. Naturally I started with the one in the best condition first - it turned out pretty well. I used a flat edged file for the straight bits and a cylindrical file for the ends of the losenge shaped openings. The only thing now is that the resin is a bit un-even and thick around the openings, I might carefully dremel out some resin behind the openings to thin them up a bit since I'm planning on putting "engine-gak" back there. You can see in the left photo in the background one of the 3-slot openings mess before I filed them out.
-
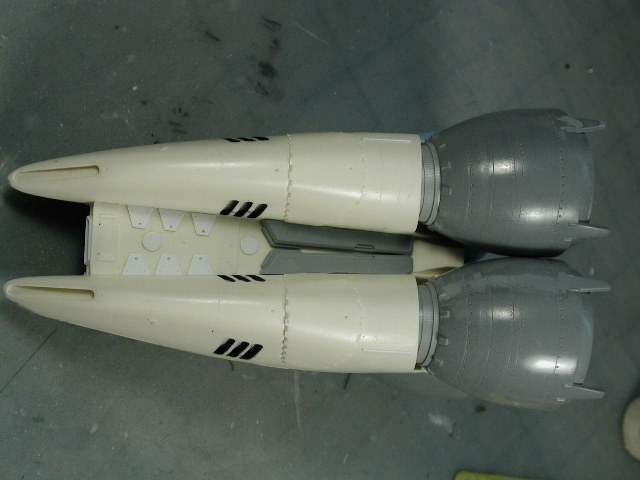
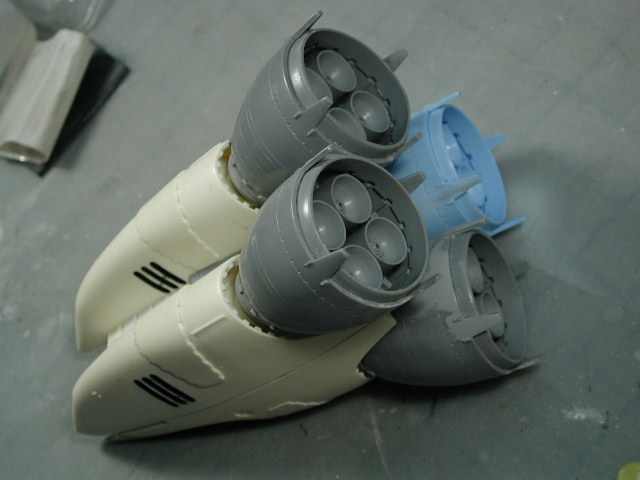
Thanks so much Captn'!! With that great news... I concentrated on the three remaining engine bells, sanding the Mr. Surfacer 1000 smooth - careful to feather it back into the rest of the bells and continue the Captn' great surface details across the seams which have been coated.

-
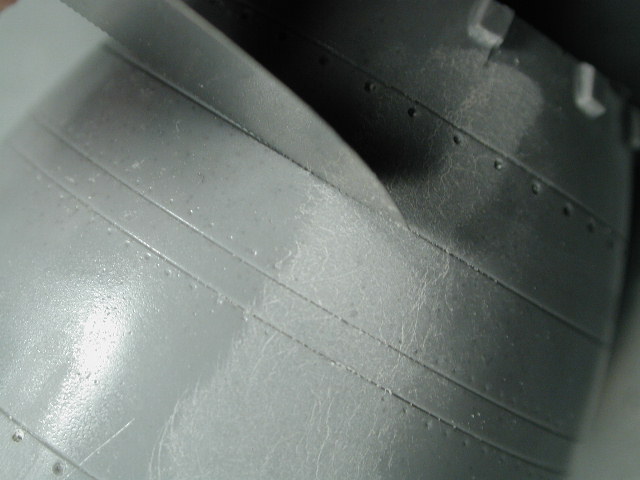
There was a wierd crazing of the surface after I sanded it, it was like there were lots of tiny cracks - you can see it as white lines in the above photos. I've never seen anything like it, and was sure if they were indents or raised areas. Just to be doubly sure, I hand painted two coats of Mr. Surfacer 1000 over the all the sanded areas. Additionally, you'll notice that all the little fins at the end of the engine bells are also painted too because they all have some divit and hole in the middle of them aswell Not exactly smooth sailing, but after a days work, its done! I hope to sand down smooth the painted Mr. Surfacer (hoping that it should fill in any sanding or hairline cracks which I have missed) and they should be ready for a full coat of primer. You can see the bell on the right is by far darker than the rest - this is the soft one. In fact each bell seems to be of different hardness (varying by its grey colour, the lightest on the left is the hardest, with the darkest on the right being the softest) Not as far as I hoped to get today - the engine bells proved that there was still a lot more clean-up than originally thought. Thats it for tonight. I hope to finish up and prime the bells tomorrow and start clean-up on the actual booster parts themselves, with the 3-slots detail taking priority. I think I might cover them in a metal mesh, and build some kind of engine detail that can be seen though them.

-
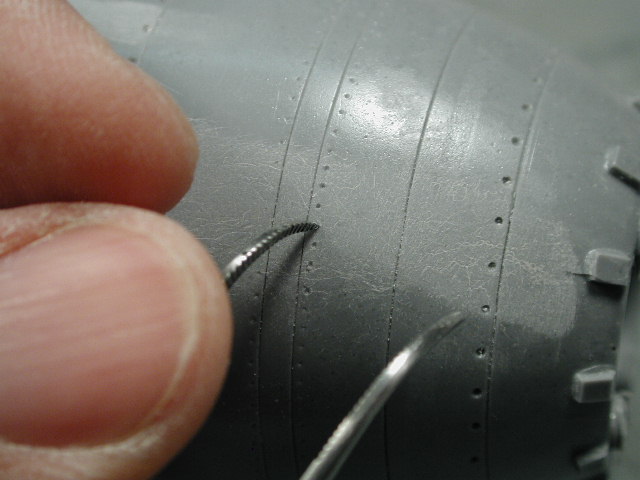
I need to re-scribe all that great detail the captn' originally put in - that was lost due to the sanding. Some of the seams were so deep that when you sanded them smooth, the bell no longer had a round shape - so I had to feather the sanding on either side of the seam (which was a lot more difficult than it sounded with this wierd grey elasto-resin). I used a pin-vise to re-drill some of the larger bolt holes. The hasegawa P.E. razor saw to re-etch the circumferential lines, and a sharp tweezer point to re-press in the tiny rivet details.