wm cheng
-
Posts
4340 -
Joined
-
Last visited
Content Type
Profiles
Forums
Events
Gallery
Everything posted by wm cheng
-
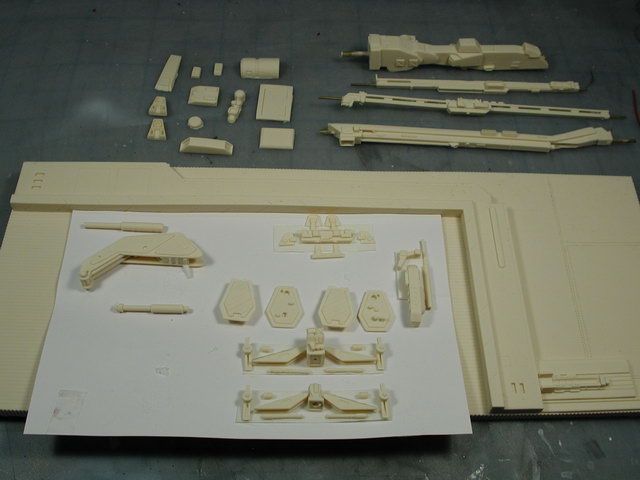
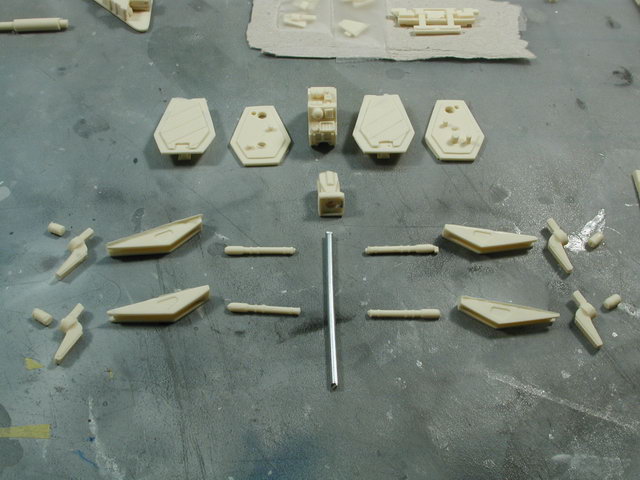
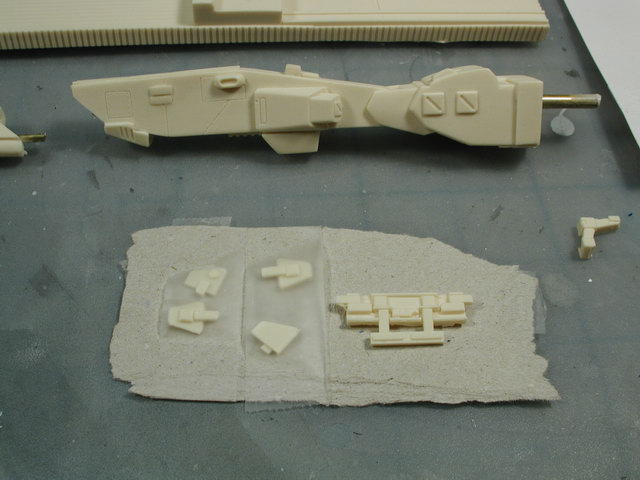
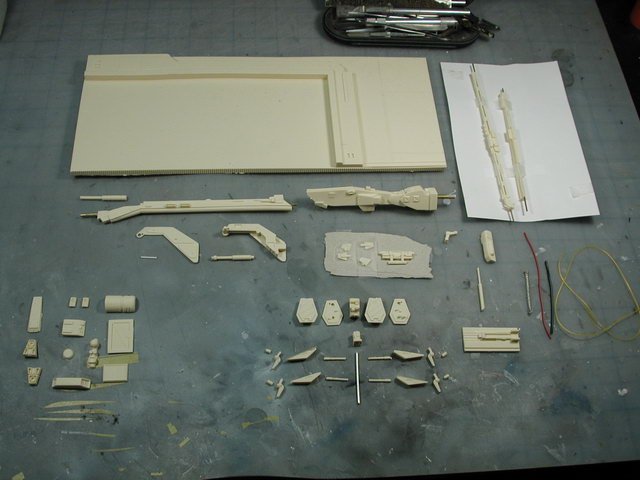
OK, I laid everything back out according to assembly and the photo of the list of parts again. This time I took some masking tape and double side taped the parts to the card that came in the box which protected the longer pieces - this way, if I sneezed or something, the little pieces are still arranged roughly according to instructions. I also put away those extra/optional pieces that Gundamhead provided (I recognize some of these Gundam parts ) this can be used to spruce up the large base in the end - but I just didn't want to confuse them with any of the essential parts of the arm itself for now.

-
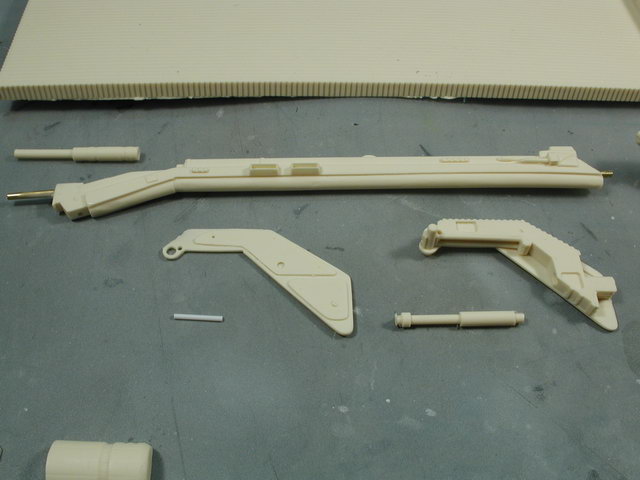
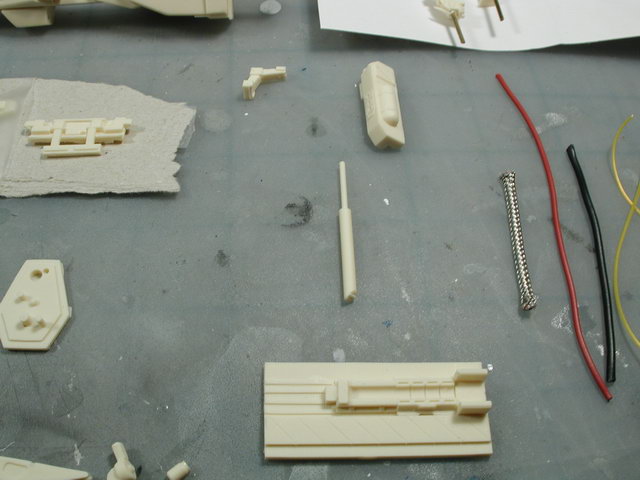
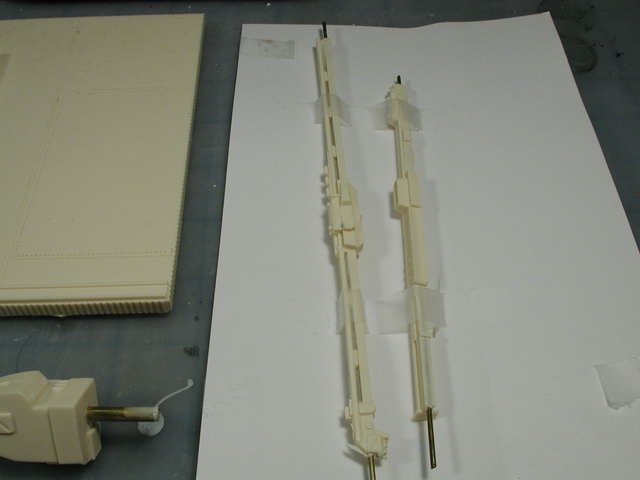
WHOA! Isn't that a bit overkill - its like killing a flea with a hammer! Firstly, lets look at where the brass rod is exposed. Its fairly linear and parallel with the lenghways of the signal stand. Additionally, if you look at the signal stand or any of the arm pieces, there are plenty of "tube-like" umblical details that also run lengthwise. Lastly, there are no "canon" line art that truely discribes each and every pipe and umblical that run along the arms - so we are allowed to interpret (as long as its within reason). I would suggest cleaning any remaining resin attached hap-hazardly onto the exposed brass rod - making it exposed properly. Use the brass rod as part of the details running up and down the signal stand. Additionally add a few pipe or wires along side of it - especially where it will connect to the next piece. I guarantee you that by the time its painted - you can't tell which one was the brass rod and which ones are the surface detail umblicals that run up and down the arm. Remember there are always alternatives to making any mistakes better it just depends on the time you have and whether its worth it to you or not.
-
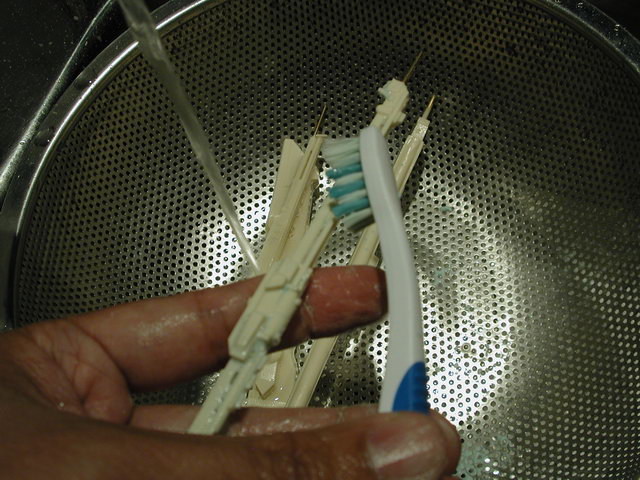
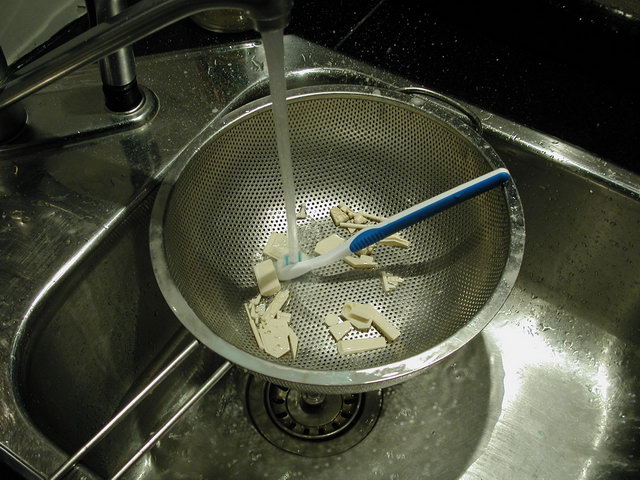
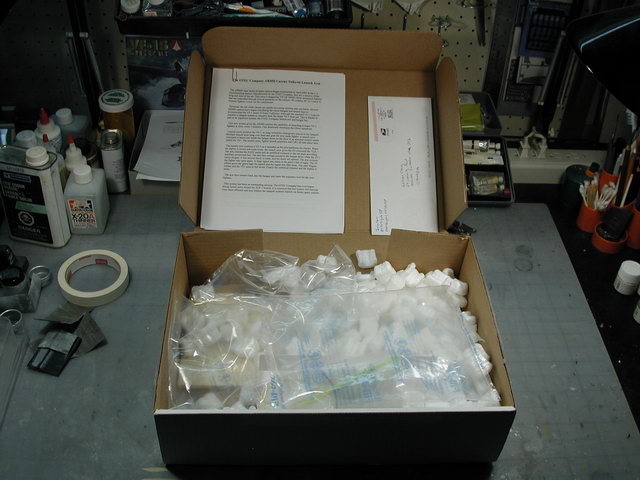
Hey Mano, sorry to see the casting flaws on your kit - with such a limited small run kit, its pretty hard to get a flawless cast (I'm always prepared to fix casting flaws - its just an unfortunate reality with resin kits ) I haven't quite inspected the quality of each components yet. However I do have a bit of pitting on the large base as well, but I don't think its a huge deal, and actually, I don't think I intend to correct them with sanding, its okay to have pitting on the large ship exterior, it could be battle damage . It's great that the resin arm pieces have brass rods embedded into it for strength, but it must of been a bitch to align in the mold as they poured the resin! The good of it, is that it probably easy to hide by adding some extra pipes or wires on either side of the exposed brass rod to hide where the resin ends and the brass rod becomes exposed - just more pipe gak! Yes, I have some seams that run through some nice detail too, I'll just have to sand them and rebuild the detail - there's nothing you can do about resin kits in this regard - its not a styrene injection kit where each mold is almost perfect. Well the next step after opening and sorting your pieces is to wash them thoroughly with comet. I scrub them with a toothbrush and comet bleach powder to get rid of the release agents used in the molding process. There were so many tiny detail pieces in the kit that I decided to wash them over a strainer just in case I drop a piece, I don't want it to go down the drain! I spent a few hours scrubbing! I'm a bit paranoid, since I had a few incidents where I was too lazy to do a thorough job and went on to building, then when the time came for painting, I'd get a patch where the paint bubbled up like water on wax paper! Its much harder to wash at that stage. I've tried a few other solutions such as dish detergent, which is good too, but you have to becareful that it doesn't contain any moisturisers for your hands (that leaves a greasy film behind). I've also tried this Polly-S mold release detergent that you're supposed to let the parts sit in overnight and it dessolves the mold release. Well, it doesn't work at all - in the end only elbow grease and scrubbing works. This step applies to all resin models.


-
Wow! fantastic photos!! - very clean...
-
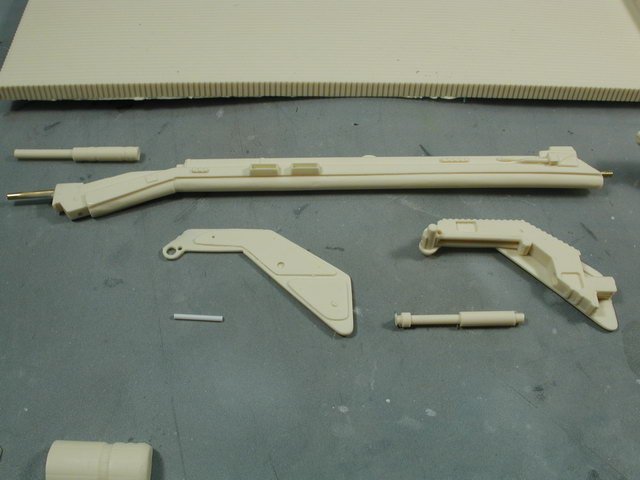
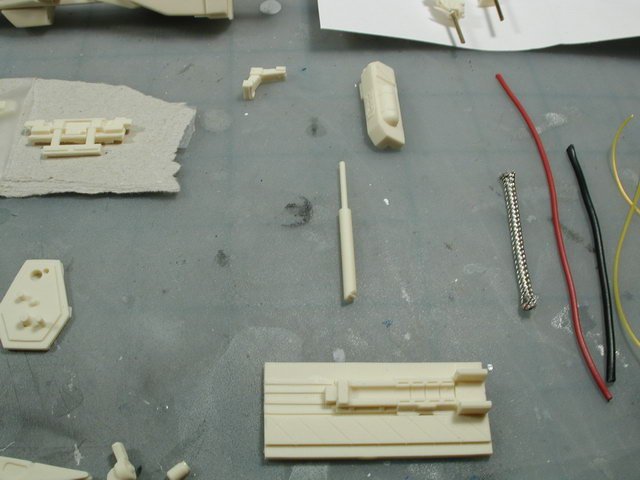
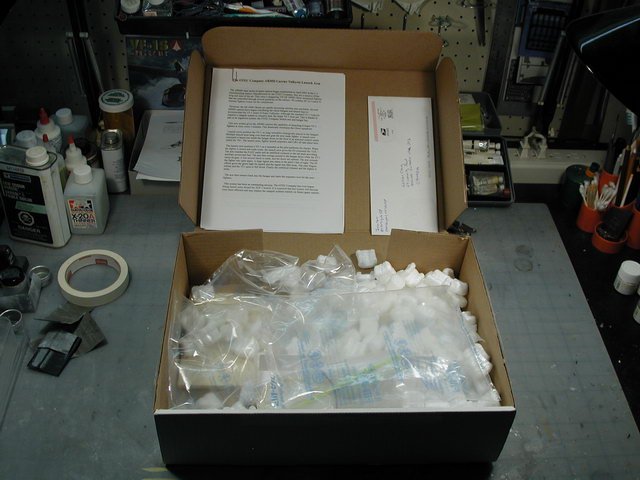
Upon ripping open the box - the first thing I did was lay out all the pieces. I used the colour copy of the parts list as a guide. This was a good way to double check you had all the pieces (and get familiar with what they look like - remember unlike a styrene kit with sprues and identification on the sprue of the kit part - you need to recognize its shape). Plus there's lots of great little detail bits to add (and possibly loose ) The following are other close ups of the many pieces that go into this kit - I tried to keep their layout and orientation similar to the instructions in the beginning, this helps me become more familiar with them. (gotta help the wife prep for the kiddies - more to follow after the young gouls go to sleep...)


-
Woohoo!! Just got my Launch Arm! I am starting a thread over at the How to Build section as I start this puppy! Come join me (and build yours too at the same time!) over at; http://www.macrossworld.com/mwf/index.php?...t=0#entry341193 (more to come tonight after the kiddies have had their fun...)
-
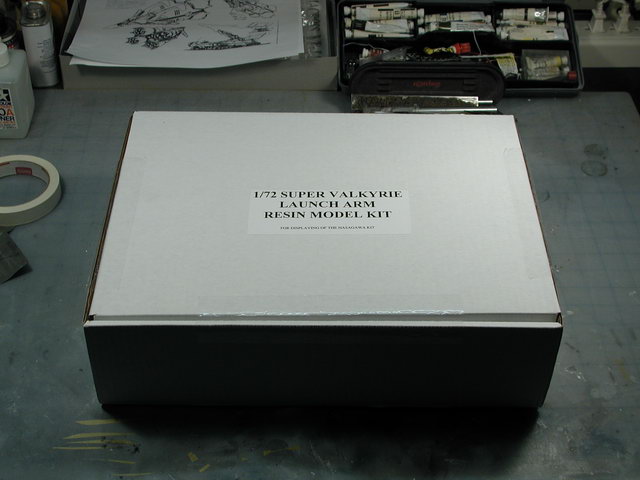
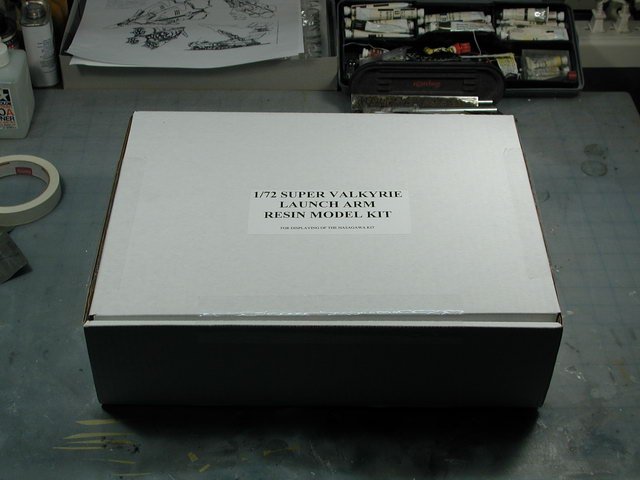
I'm so pyched! I just recieved a huge box at my doorstep this morning!! I got Jesse's signal arm bits and pieces last week (all non-first run kits will have all the pieces in one box) but the sheer size of the parcel took me by surprise. I would like to thank them for all their efforts on producing this amazing kit - for those of you who haven't ordered one - GO AND PAYPAL THEM NOW! I've wanted a launch arm for my Hasegawa Super Valkyrie ever since Hasegawa put out the kit - and then I saw this crappy photo on these boards at some Wonderfest a few years back showing a launch arm - boy was I dissapointed. Then I found out it was limited run and really expensive - so it was salt on the wound. Anyways needless to say, its one of my most sought after mechs to be produced. And what a job they did! from that very simplistic arm Gundamhead has added so much more details (all of which was really appropriate - and I'm pretty picky when it comes to non-canon improvisation) and they really produced a kit in itself. http://www.macrossworld.com/mwf/index.php?showtopic=14475 http://www.macrossworld.com/mwf/index.php?showtopic=16293 I promised them I'd drop whatever I was doing, and start on this immediately. Well, I was thinking, how hard or complicated could a launch arm be? its essentially a stick with a base at one end and a claw at the other. Well, now after studying the kit for a bit, its quite a deal. With all the extra bits and pieces that GH&Jesse put into it - it really becomes its own entity, and not a mere Hasegawa kit add-on! So it may take me more than a few days to power through this - I need to give it the time their efforts deserve. The first thing you'll notice is the size of the box (did I say it was large?! ). Its basically big to fit the base (presumeably a section of the surface of the ARMD-1 or maybe a section of the SDF-1 itself) - and its a fair hunk of resin. Also included is a few pages of written instructions (with a cool history pre-amble on the Launch Arm mech) and a colour copy of some photographs of the basic parts lists and a few select assemblies.
-
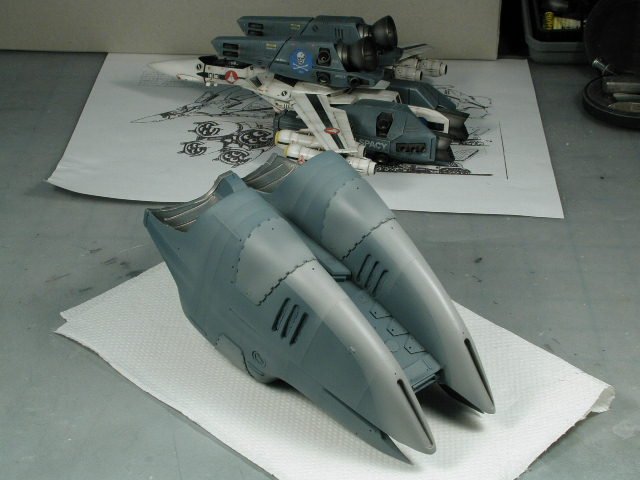
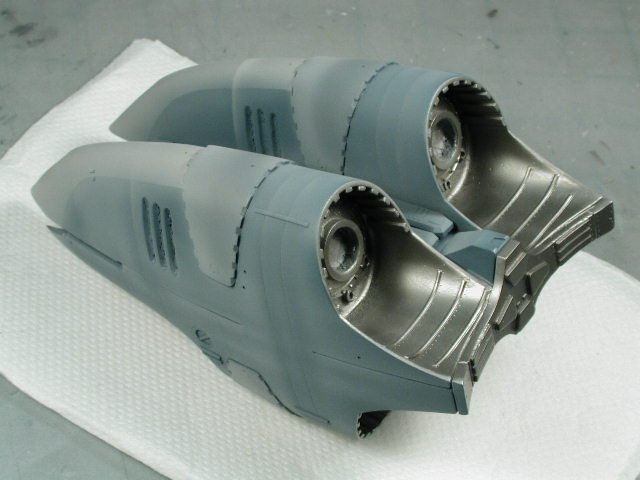
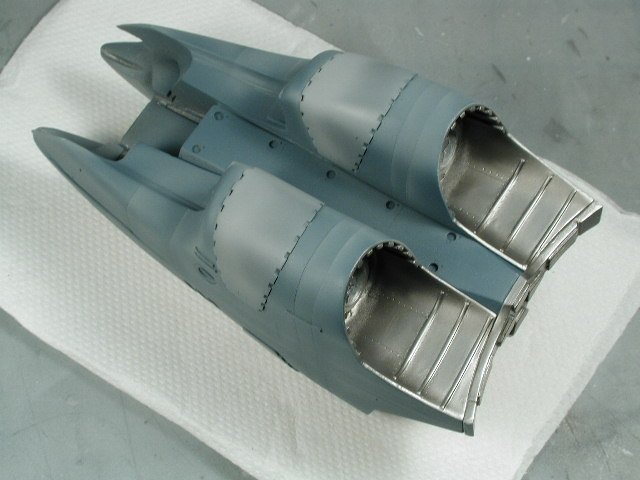
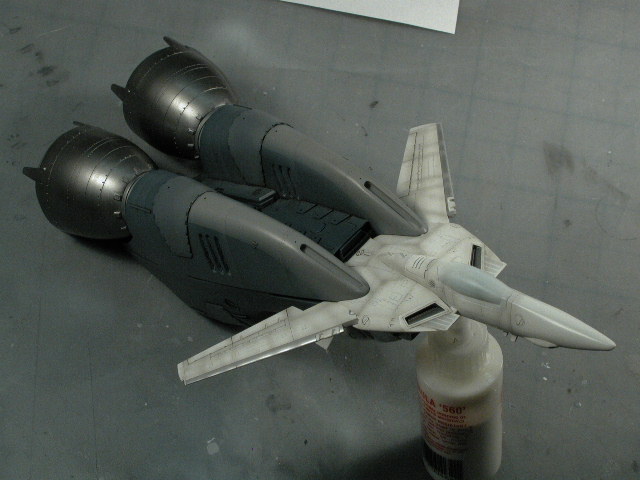
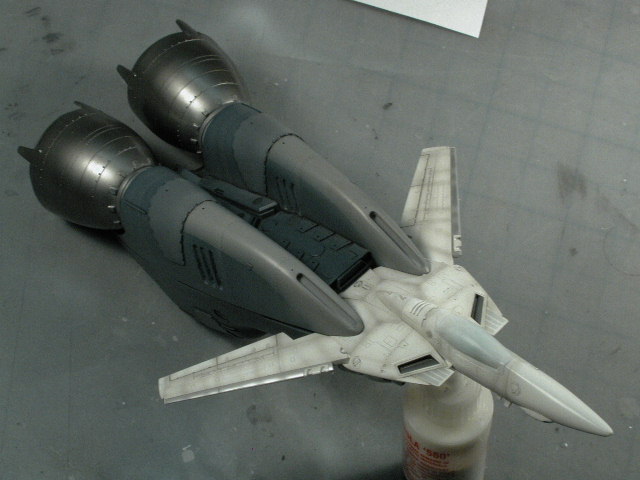
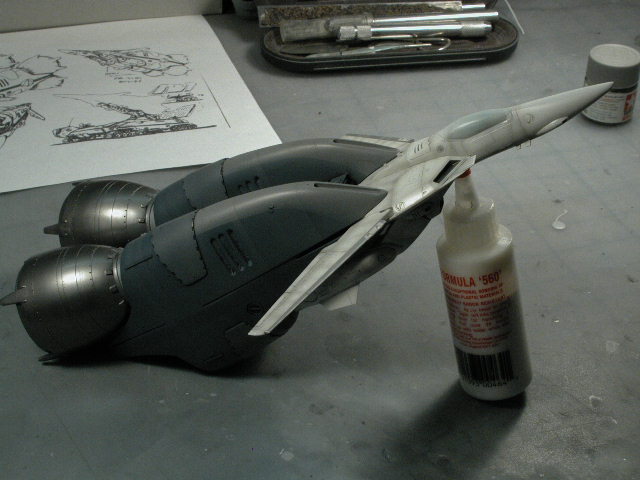
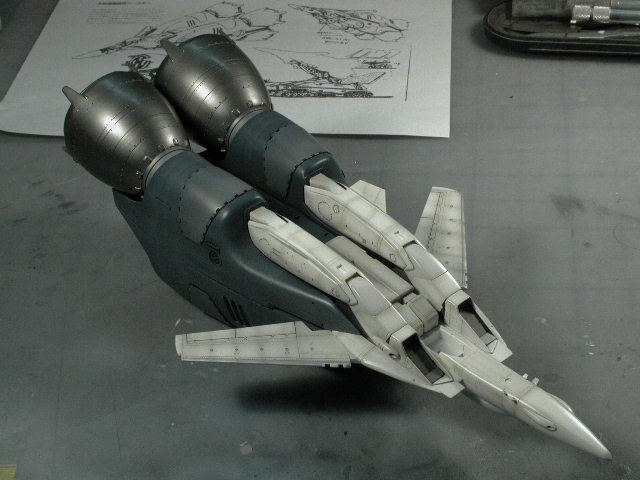
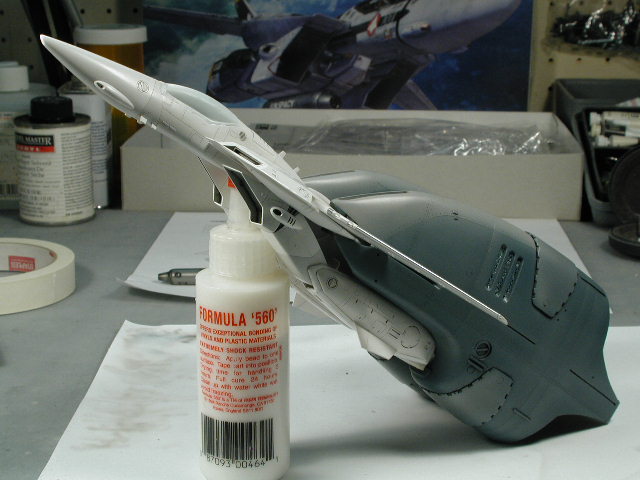
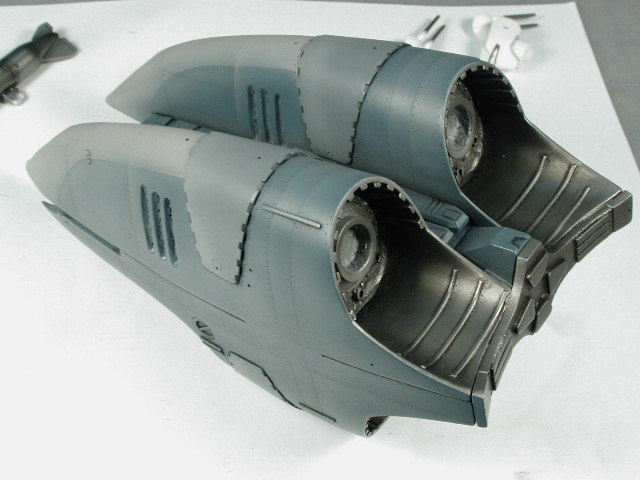
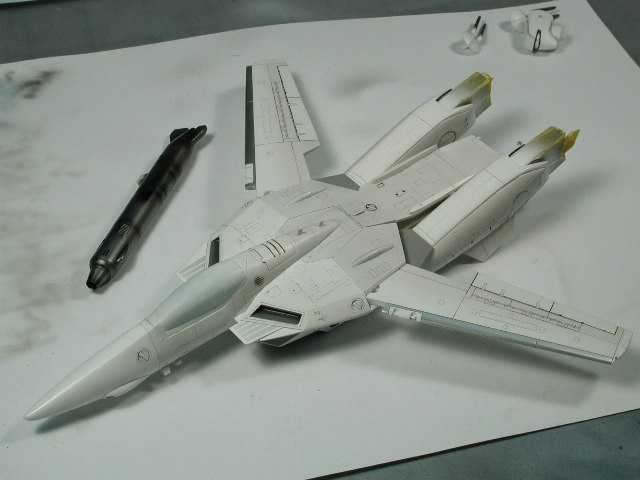
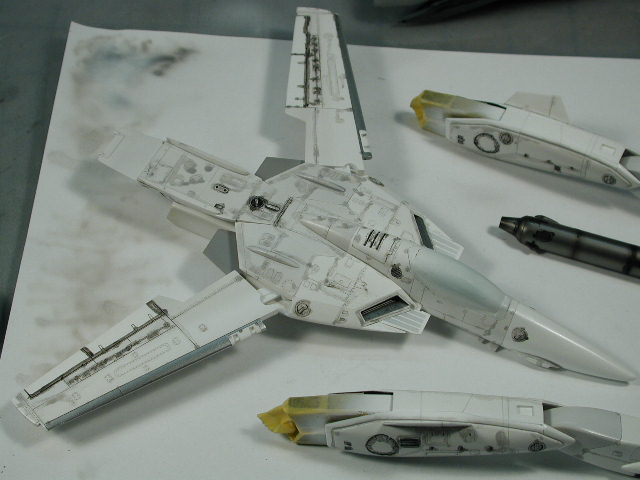
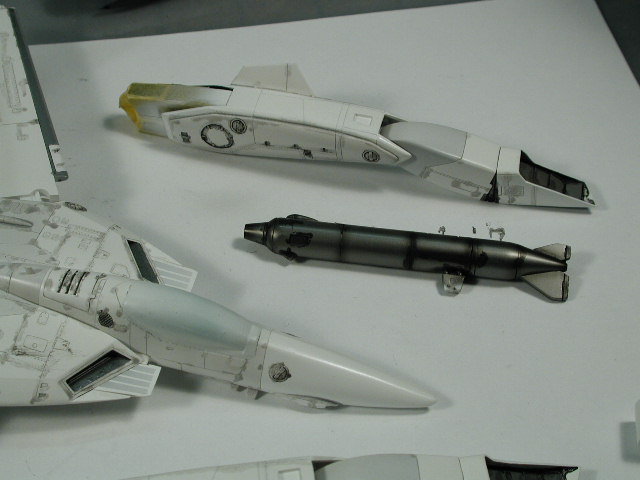
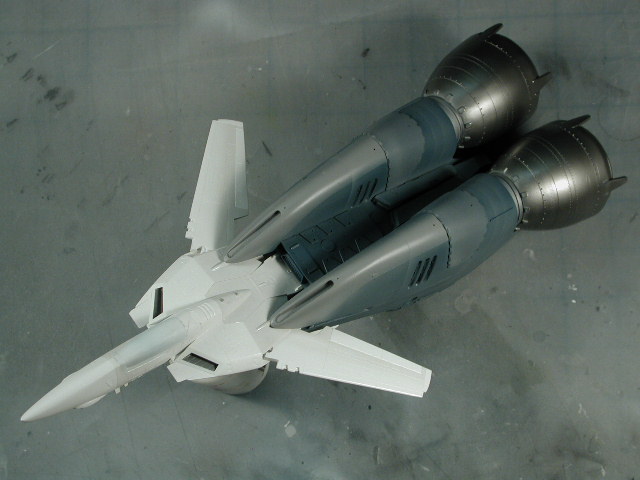
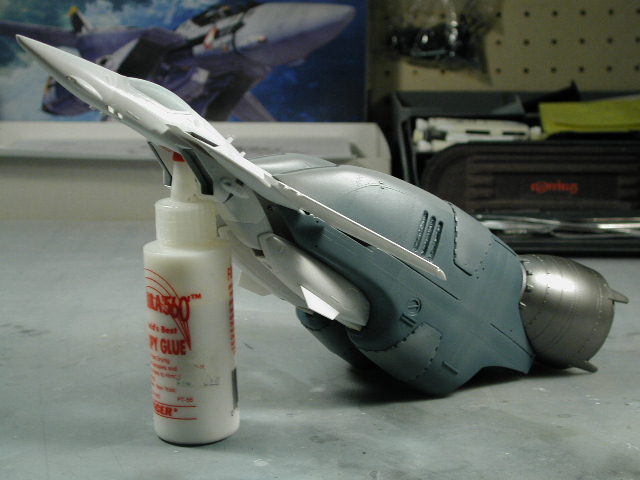
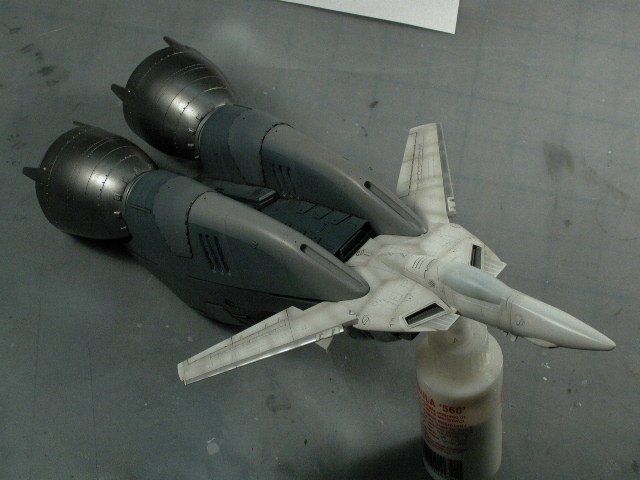
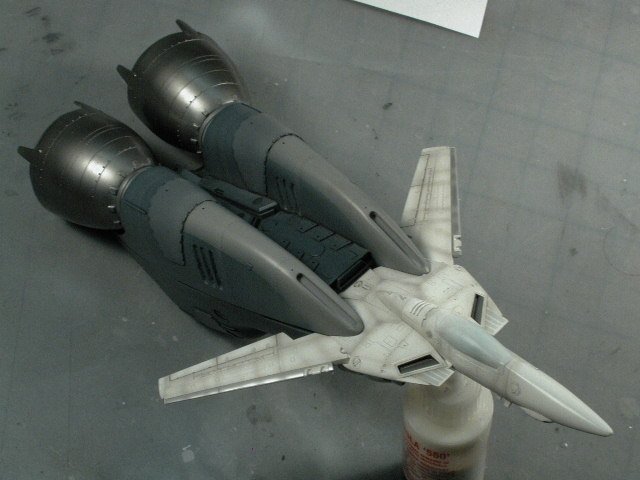
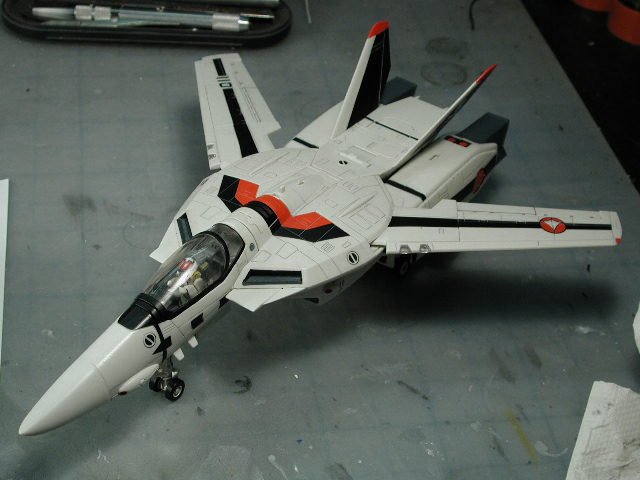
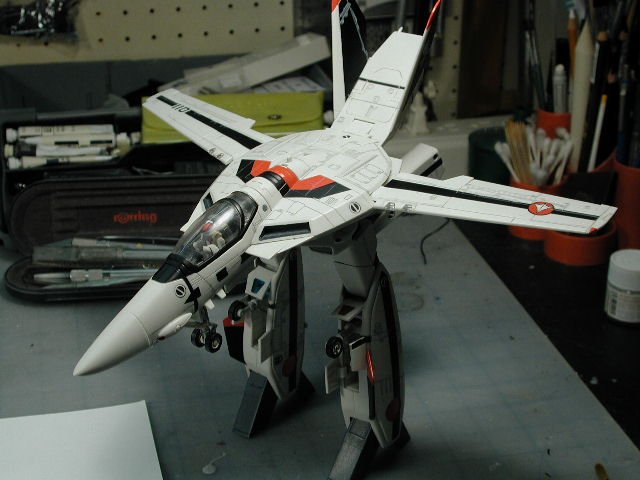
OK, everybody - I'm so excited, I just got the resin launch arm kit that Gundamhead and Jesse produced! and promised them that I'd drop this to start on their wonderful kit. It shouldn't take too long - and I will resume the Booster when I finsh their kit (I already have a Max VF-1A Super ready for it). So here are a few parting shots of the stage at where I am for now. The Valk is ready for decals and the Boosters are ready for the black stripe to be painted on and decals as well. I plan on doing the engine bell metallic shading with all those shades of burnt metal at the end - that will take the longest. Join me over at the Launch Arm thread!!


-
Spatula - I don't have any scans of the book, but if you can get it for $40cdn - then you definitely should! Its a steal at that price - I paid more than that, it was going for something like $70-80cdn at a bookstore here in Toronto. I highly recommend it - its an excellent book - all the pages are gorgeous colour! (Of course I'm a huge book collector - I think I have every thing in print from Macross - at least one copy if not more!!) Also, $40 for the Models are a really good price up here in Canada - the Supers or Elintseekers were more like $60 up here - and if you order them from HLJ, after shipping customs, duty and brokerage, you might save $5-10 a kit! So I managed to do the post shading yesterday... Man I need a new airbrush, I think my 20 year old airbrush should be retired soon. It has no problems do the large flat areas, but the really tight fine control stuff seems to splatter ever so slightly now (although I checked the needle doesn't seem bent and the nozzle seems ok, it might be the mixture - but I'll chalk it up to age). Plus I've been dying to try a double action airbrush - I think I've finally outgrown my single action Badger 200! Basically I traced over most of the panel lines in a very thinned down sky grey on the finest setting - I usually spray like 1/2" to 1" from the model trying to make a pencil line with the airbrush. Its a little heavier than I usually would weather the Valkyrie, but I wanted it a little darker than normal to fit in with the Boosters and from experience, once the high-viz black stripes of the decals go on, you need a lot more than subtlety to fight with the graphics of the heavy black lines! Of course when I made a mistake (which happens occassionally) I wipe if off with a paper towel with a little windex on it - and since the layer below it is protected by the last clear-coat, I only "undo" this post shading layer. Then when I'm satisfied with the look - I seal this in with another layer of ModelMaster Acryl semi-gloss clear coat.
-
Time to go to sleep... Some parting shots as I leave it to dry without my impatient hands putting fingerprints all over it! The next step would be to do a light post shading over the panel lines and seal it in with a semi-gloss clear-coat. Ready for the weathering and decals!


-
The Yamato 1/48 VF-1A toy turned out pretty well too!
-
The booster came out great - the dark wash added a much needed depth. (its too bad the photos don't seem to do this justice )

-
I waited half and hour or an hour - just so there's no shine/wetness to the applied oil wash. Here's a shot of them Valk after I wiped it down. Don't worry if you wait too long - you can also damp the paper towel with a little low odour varsol and it will take off any excess that may have dried. However if you don't wait enough, then when you wipe, you will remove all of the wash including the stuff in the panels. These shots show the different washes - I find that by varying the greys it gives a bit more life to the panels - instead of just a monotone wash over all the panels. YOu can see the flaps and spoilers get the darkest treatment - because they move. Where as some of the detail on top of the plane never gets opened - they are there just for the intial construction of the plane - so they are much fainter.

-
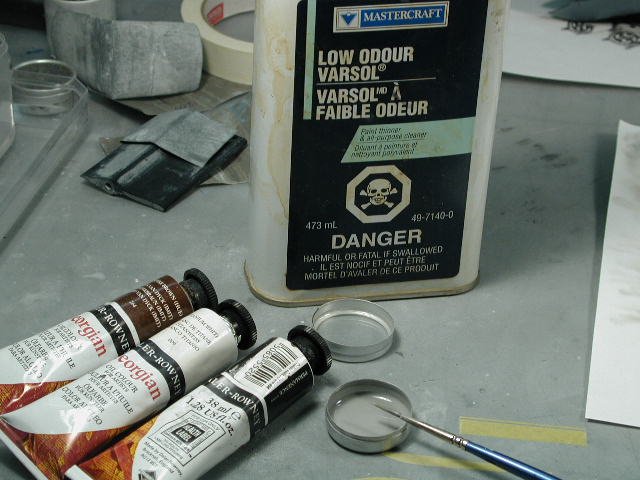
Hey Spatula, yep its late here - but I'm not working at the moment (in between assignments ) I usually only model when I can get a real chunk of time - once I start I get quite obsessive about it. Don't use model paint - I use artist oil paints. They can be bought from an art store in a tube. The main thing with the wash is that it must be of a solution that is different from your basecoat of paint on the model - so that the thinners and solvents from the wash does not eat or interact with the paints you applied to your model. I use an alternating sandwich of paints as I layer up my model so that each layer does not interact with the previous layer underneath it. I start with a laquer primer on the styrene, then a Tamiya Acrylic paint surface, sealed with a ModelMaster Acryl (actually a laquer) clear-coat, then the oil paint wash - to be sealed with another layer of clear-coat. Be very careful that whatever your wash is will not take off the paint underneath. That will be disaster if the wash interacts with the paint below. That's why you can wipe the excess away afterwards without affecting your paint. I use a dark grey to pick out the panel lines on top of a light coloured decal and a very light grey/white on top of a dark decal.
-
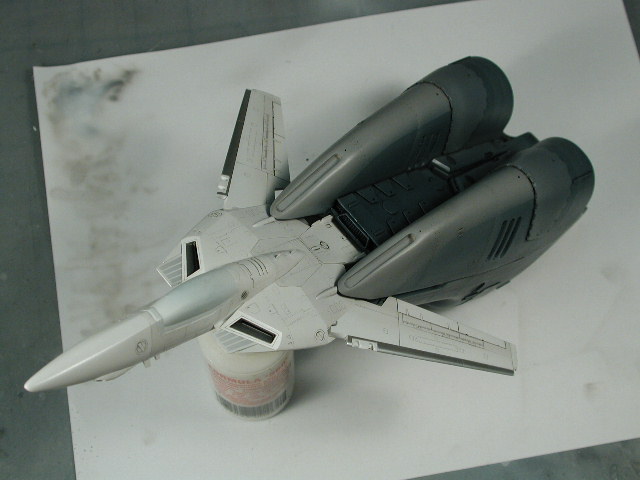
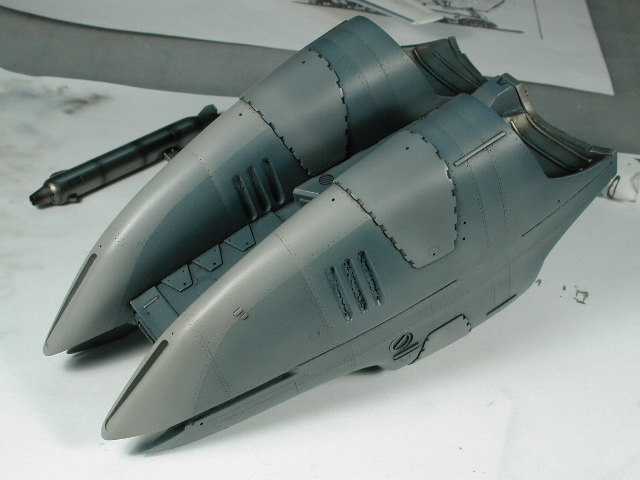
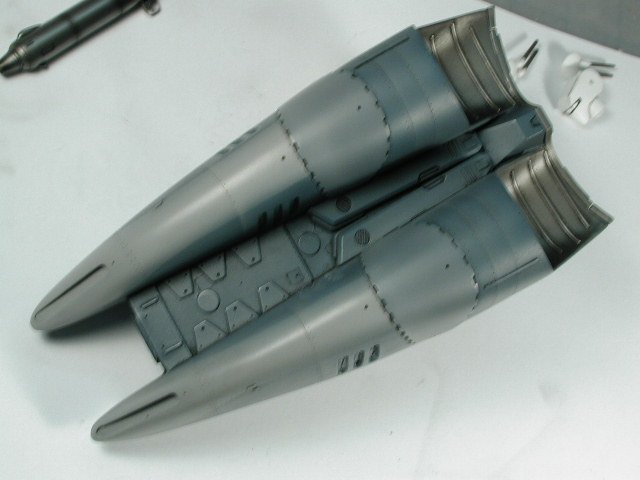
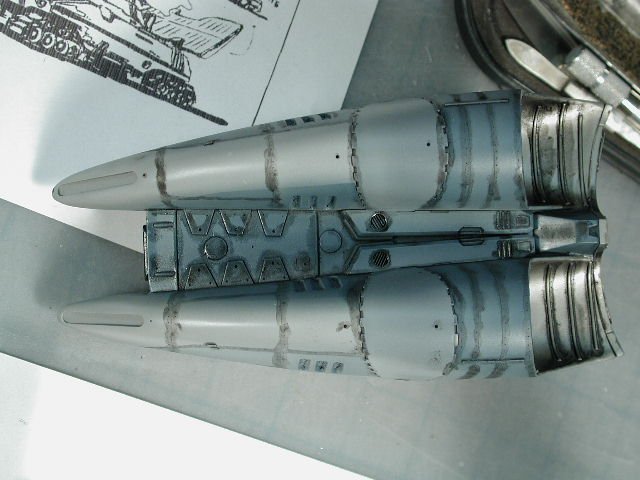
I also apply the wash to the Boosters - but I start at a much darker shade so it shows up against the darker basecoat. Now all the nice revits the Captn' put in will be shown.

-
On to one of my favourite parts! The panel oil wash. As most of you already knows, this is a solution of thinned down artist oil paints with low odour varsol applied with a thin brush to all the cracks, crevices, revits and panel lines of the model. I only use 3 colours, white, black and brown - I can mix all the shades I need with these. This thin solution seeps into all the engraved details - and after a little while, I wipe the excess off with a paper towel. I always start off light, mixing a mixture of white and black to get a very light grey - this will highlight all the rivits and non-moveable panel lines thoughout. I thought I might as well panel wash another Yamato 1/48 Valkyrie I recieved reciently. (Some of you may know that it was my best friend's collection of Macross stuff all the way from when we were in high-school together - we had such a competition collecting this stuff... now I have doubles of everything... since he died - I hope he approves ) As you can see - it gets pretty messy - there are dab marks all over the place, but don't worry, it all wipes away easily (especially since I sealed all the previous work behind a layer of semi-gloss clear-coat) Now I start adding other layers of oil wash - mixing each layer darker. The dark washes are in areas I think are moveable such as access hatches, or flaps and control surfaces. Lastly, I mix up a batch of pure black for the vents. I also mix up a batch of brown for areas I think hydraulic fluid may leak from.

-
Not to worry Spatula... I like them because they provide all the black markings and a lot of stencilling - essentially, you can just paint the whole thing white, and with the decals, get a really good looking model. There are a lot of other companies out there that gives very little in terms of markings on the decals. In terms of thickness, Hasegawa is slightly on the thick side IMHO, but its more forgiving to the beginner modeller, but hides some of the fine engraving due to its thickness. While the decals are wet (you can re-wet them) I usually blot them dry with a paper towel while trying to press them into the panel and rivit details. I also use MicroSOL (a decal solvent) and MicroSET (a decal softener) when I'm applying the decals (they are tricky to use and can melt your decals into a goo-mess - so I'm not recommending them to a beginner) and these solutions will helpo the decal melt into the plastic/paint surface to look painted on. I will get to the decal part of my Valkyrie in a few days or so (if you can wait) In the meantime, you can get a decal softener solution, and dab it onto the already dried decals you have on (as long as you are careful not to touch or move the decal while the solution is on top of it) and let air dry. It will soften the decal and allow it to conform to all the nice little rivit details. Careful not to stretch the decal when you're putting it on. Good luck. I also go back over the decals with a very light controlled oil wash to pick out the rivits and panel lines. On the black portions, I go over them in a white/grey wash - so it shows up.
-
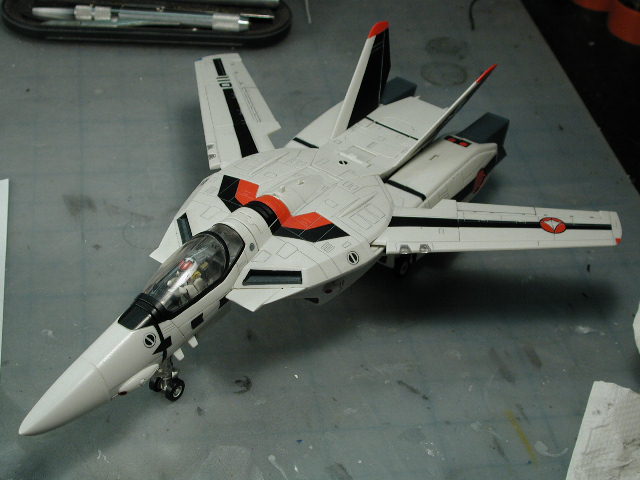
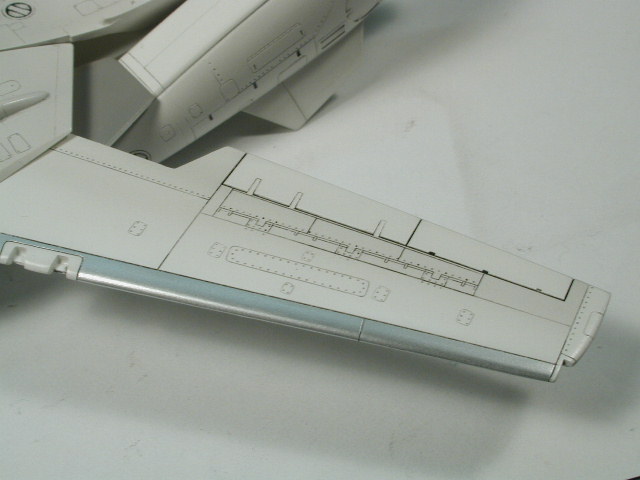
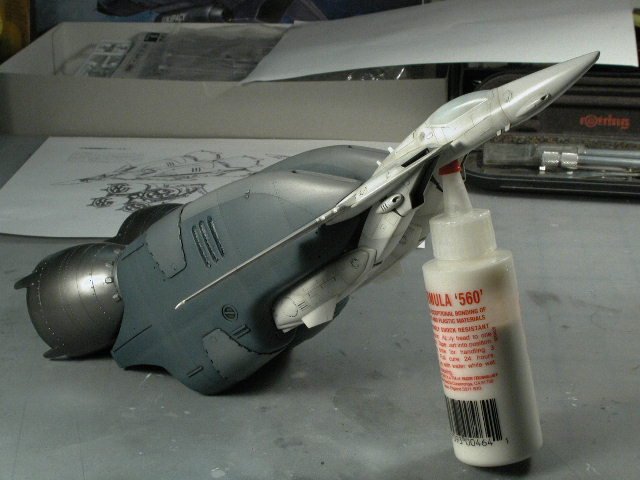
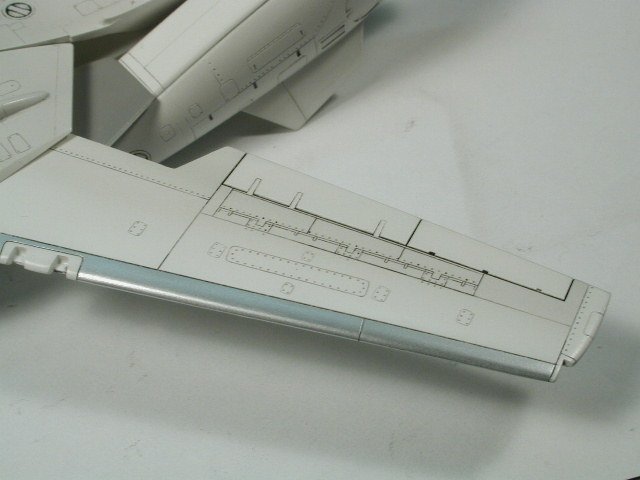
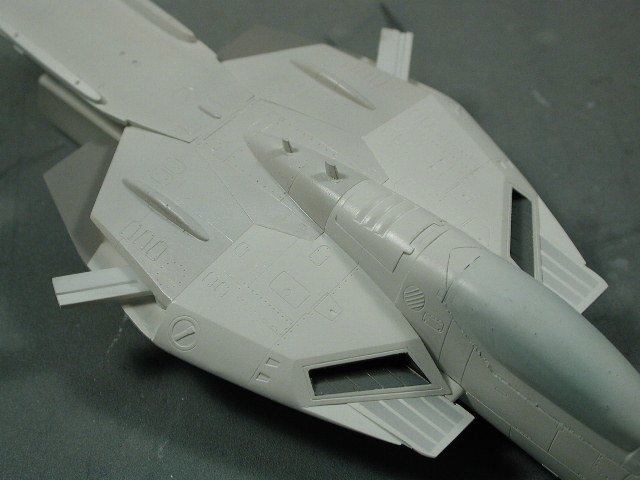
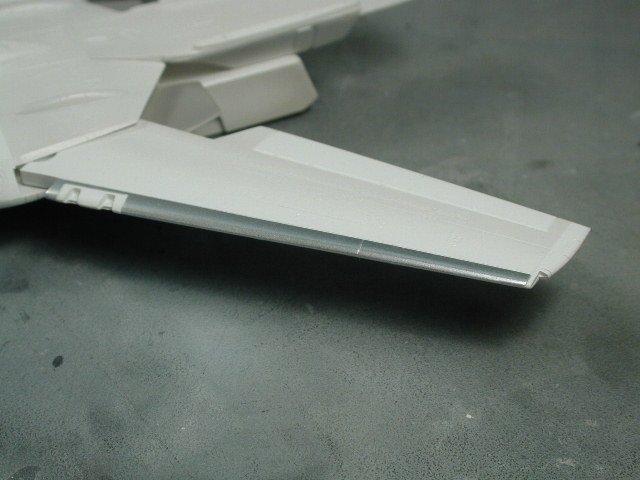
A shot of the grey patches with the masking removed... Ah, since I'm slightly departing from the canon - I thought I'd make the leading edge of the main wings silver (like the F-14s) - plus I've seen some paintings of the Valkyries with this leading edge slats in silver. Man! I love this Alclad Metalizer stuff! - I sprayed it with Polished Aluminum. I masked around the lights - I wasn't sure what to do here, but I thought it adds a bit of interest. Lastly, I thought I'd paint the interior of the side bulges on the intakes silver, they seem to always be silver on the Hasegawa box art. And of course, I coated the entire Valkyrie in another coat of semmi-gloss clear-coat to protect everything. I'm ready for my panel wash now...


-
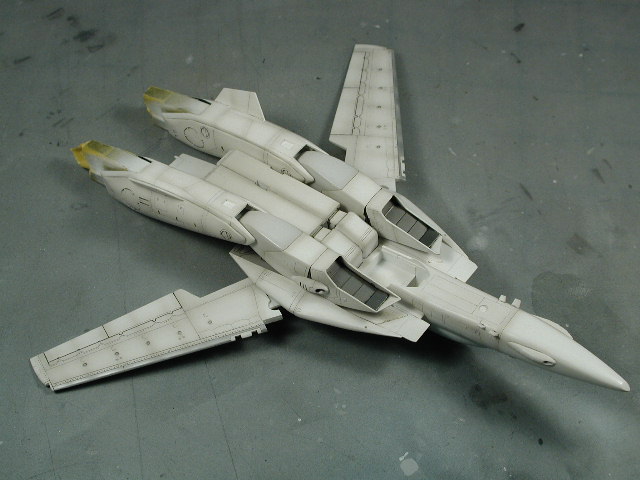
Just looking over that amazing Tenjin Valkyrie book for more ideas to darken the Valkyrie up (more patches of grey) So more masking again, for areas that will get a coat of sky grey such as the area behind the swing wings, underneath the fuselage where the legs swing down, since they are exposed now (without the leg fast packs) and I found some neat light grey markings that Tenjin puts on in front of the forward intakes.

-
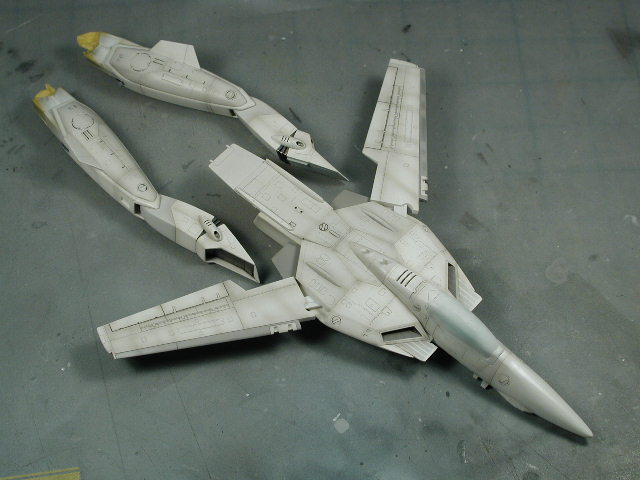
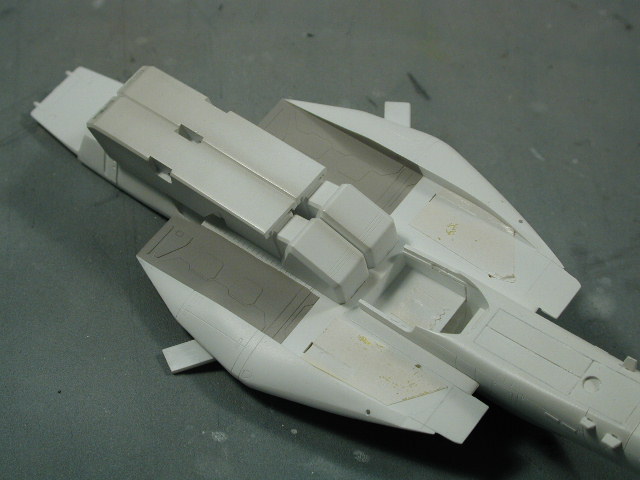
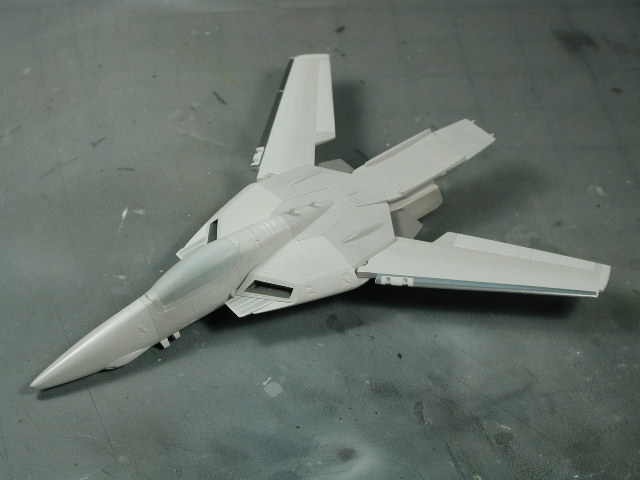
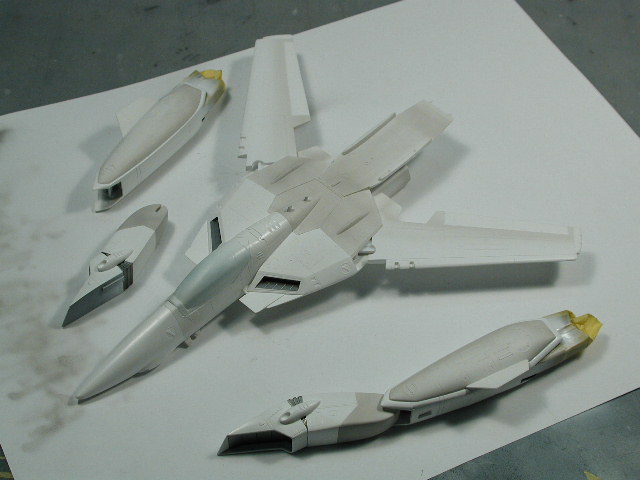
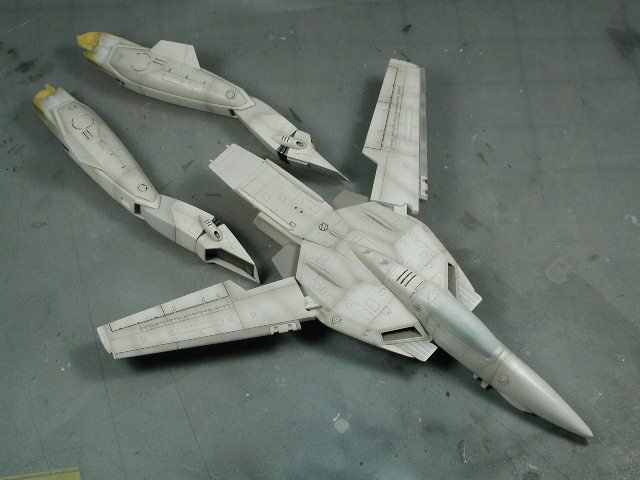
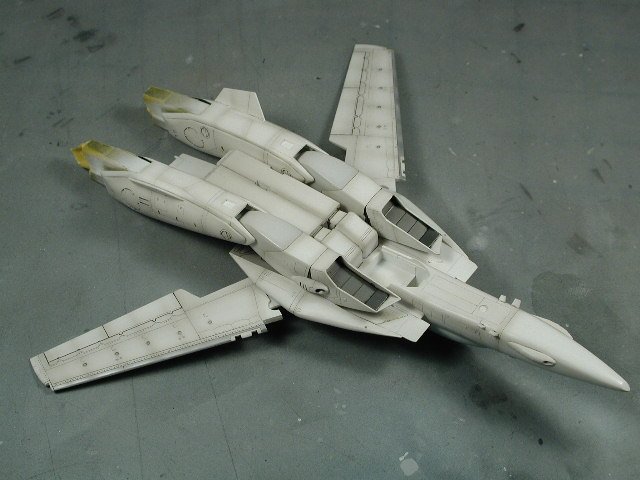
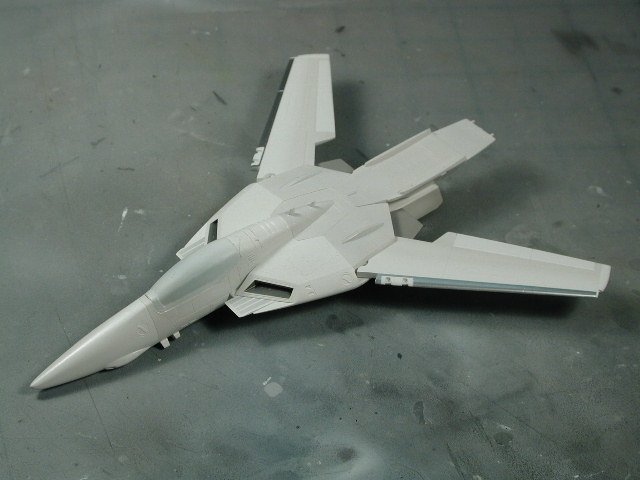
Just piecing everying together for a looksee...


-
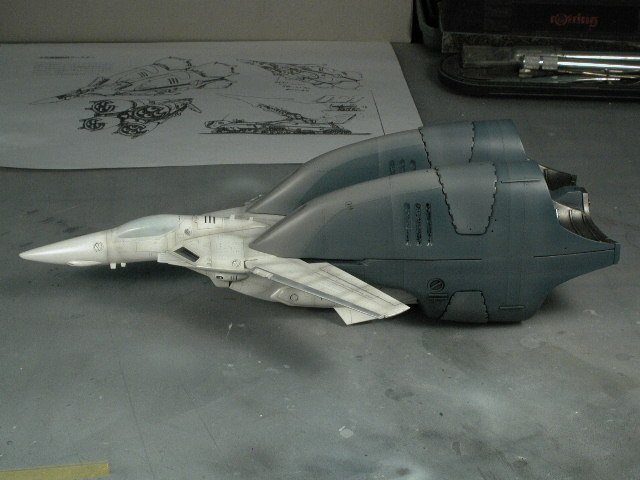
Now I am masking the white portions off to do a dual tone light grey on the Valkyrie. I want to darken up the Valkyrie so it doesn't appear to stark white against the Boosters, but I don't want a grey plane, I still want it to appear essentially white. You can have quite a bit of latitude since eventually, the black lines of the decals are so stark - it hides a lot of tones of grey. I essentially want to subtly shade the Valkyrie from light to dark towards the tail at areas that are in direct contact with the Boosters (if I'm successful in the end - one shouldn't notice the shading too much - the Valk and Booster should look like they belong ) My first past was really too strong - I went over some areas too many times. The contrast was just too much here; I should take my own advice; build up in layers! Well, not to worry, I just went over the entire thing with white again - this lightens the grey and evens the shading a bit more to my satisfaction. That abrupt change from white to grey at the chestplate area will be just fine when I apply the yellow & black stripes - you'd hardly notice the difference - that area won't be stark white hitting the front of the Boosters. Wow! its late - I've just put on another coat of semi-gloss clearcoat to seal in the shading and provide a protective layer for my post shading tomorrow (in case I don't like the post shading, I can strip it back (undo) to this point). And I'll let it dry overnight without my meddlesome impatient fingers getting all over it!


-
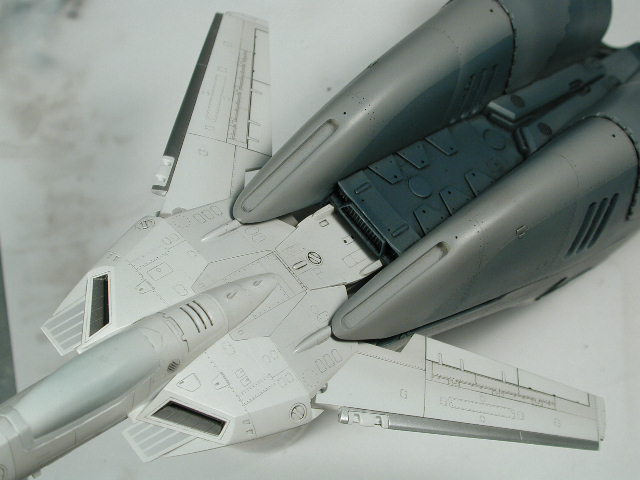
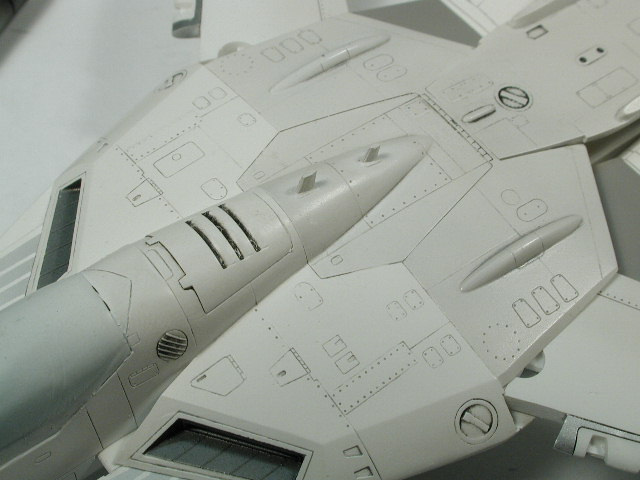
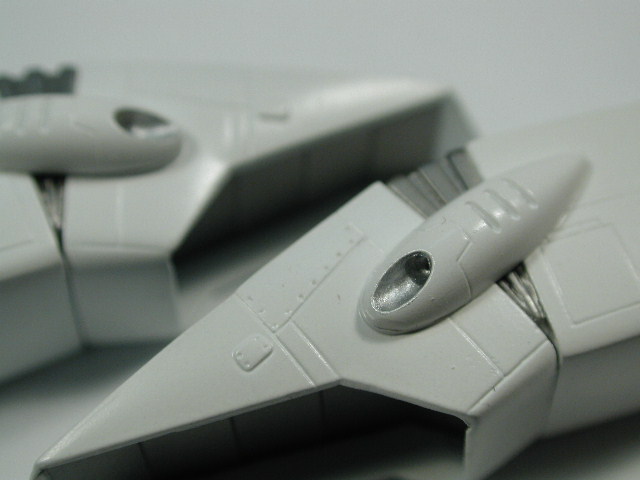
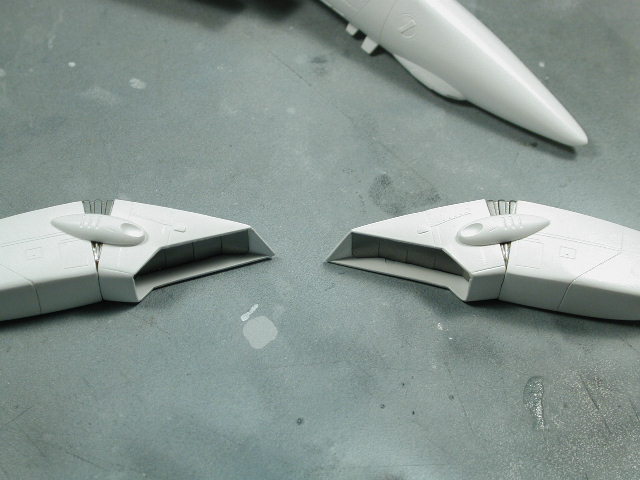
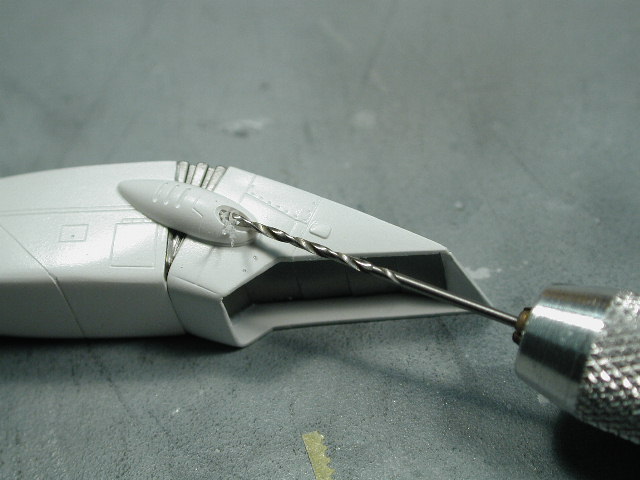
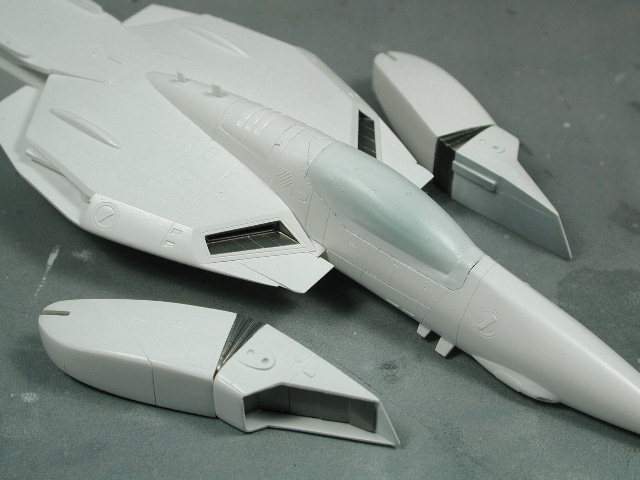
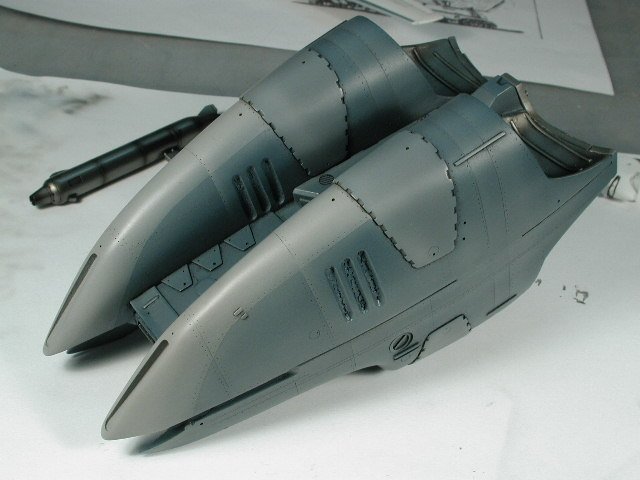
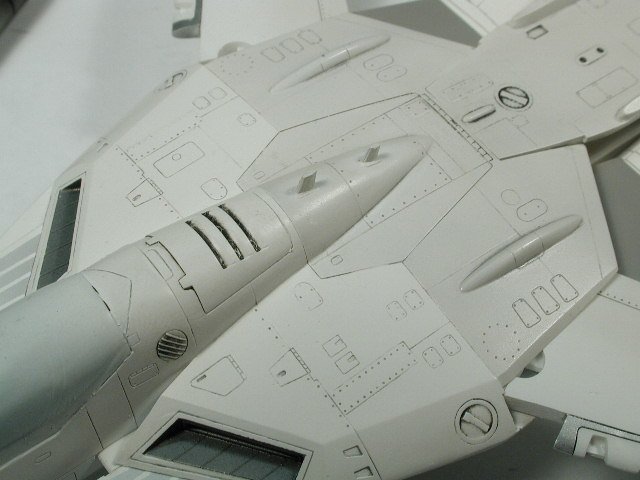
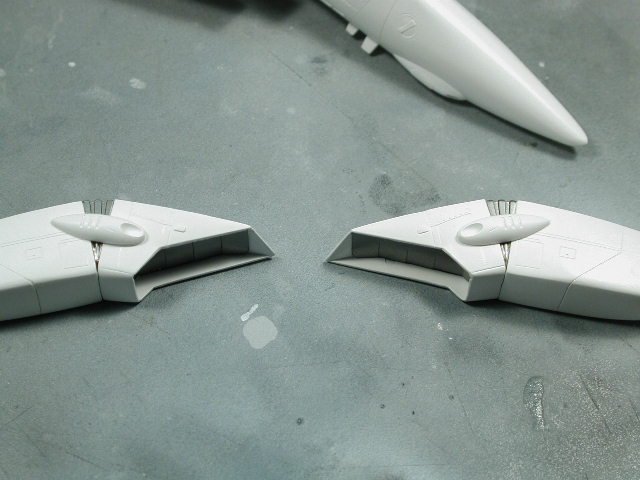
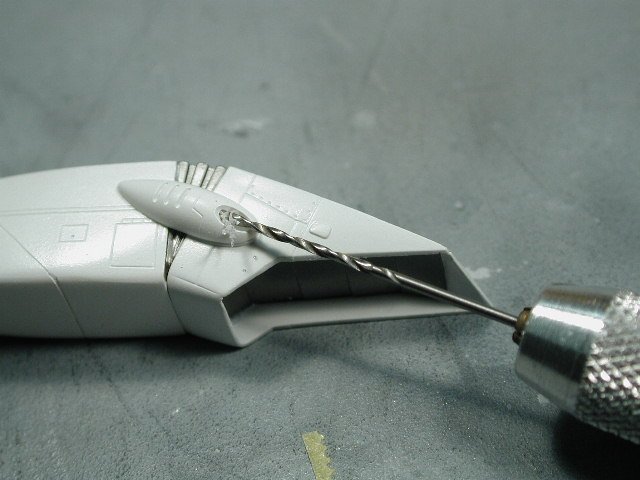
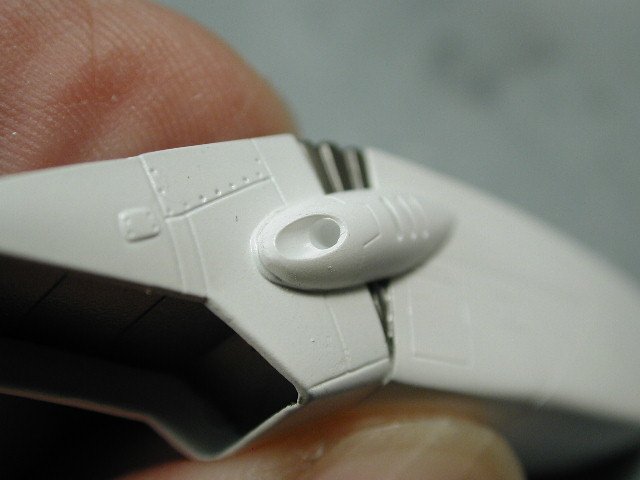
I can finally add those little bumps on the side of the intakes - I keep worrying that I'd loose them. I crazied glued them in - since its styrene being attached to resin (actually with a layer of paint on top - but I didn't think it matter too much since these bumps don't take much stress) Now, I thought while I still had the intakes as separate pieces, I'd drill out the bumps. It looks better as an intake or vernier thruster, so the hole adds some detailing especially when we come to the dark wash. Again, I start with a smaller pin-vise bit to locate the hole then work up to the bit of the intend hole size. Here's a shot of the competed hole, you don't have to drill too deep.
-
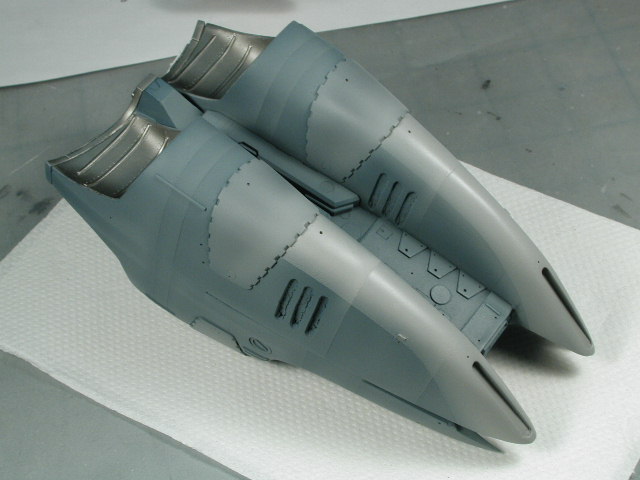
Here's a shot of it done - with the masking removed. Its really not that dark - but because its highly reflective, it seem darker than it is.

-
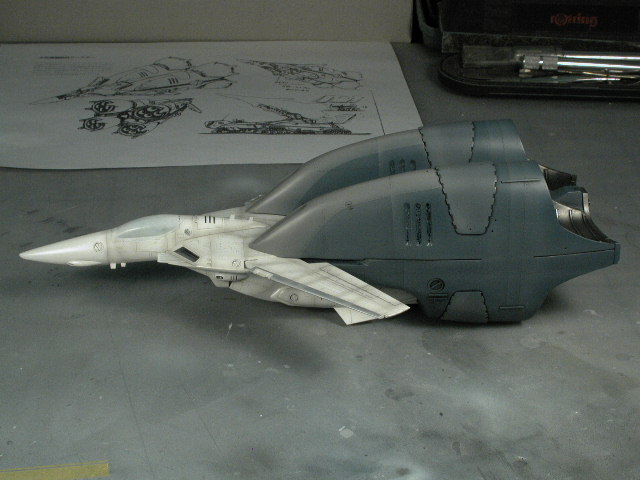
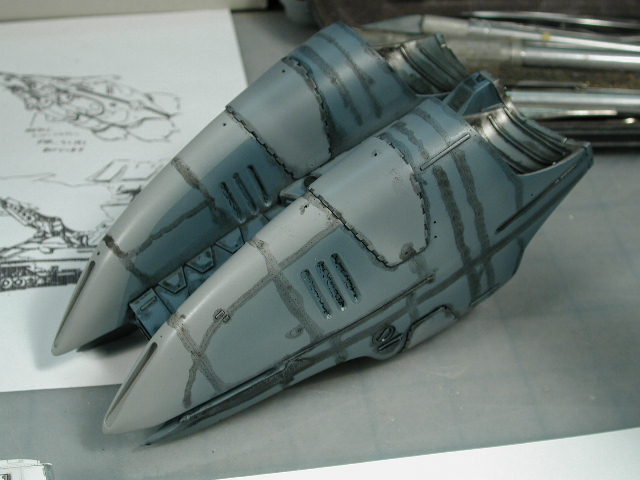
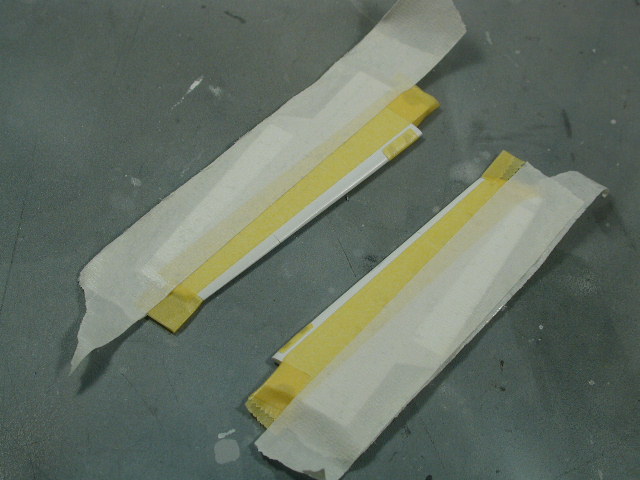
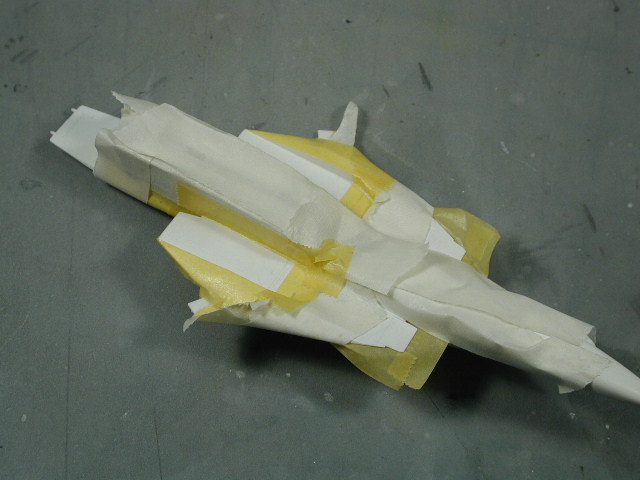
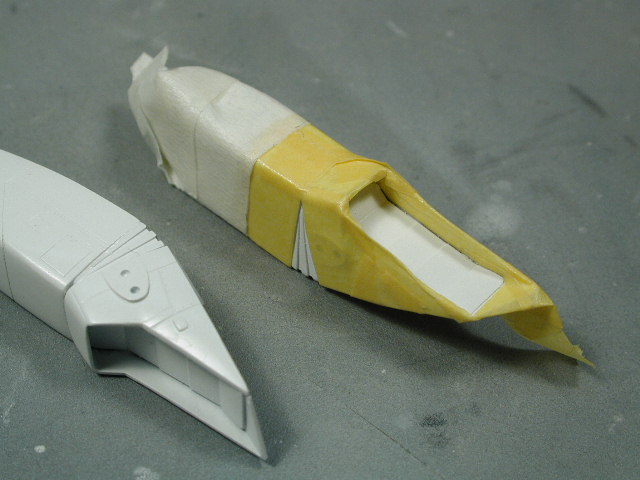
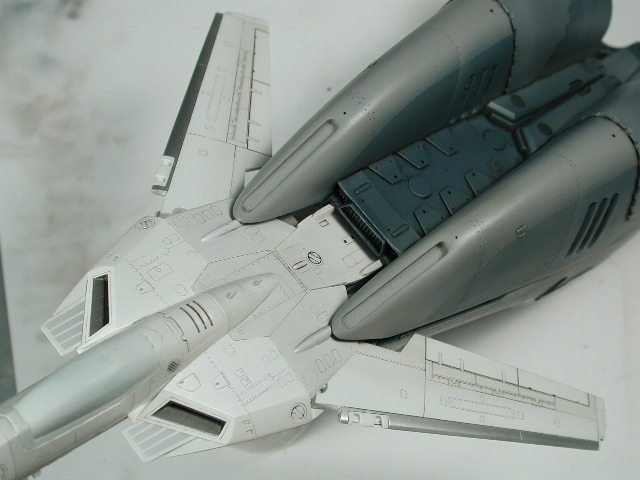
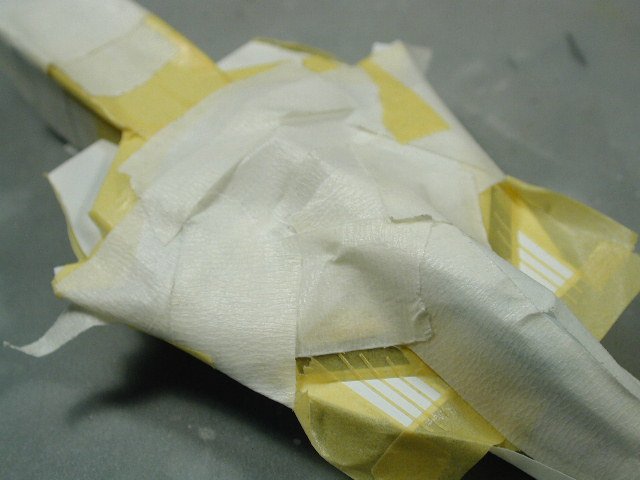
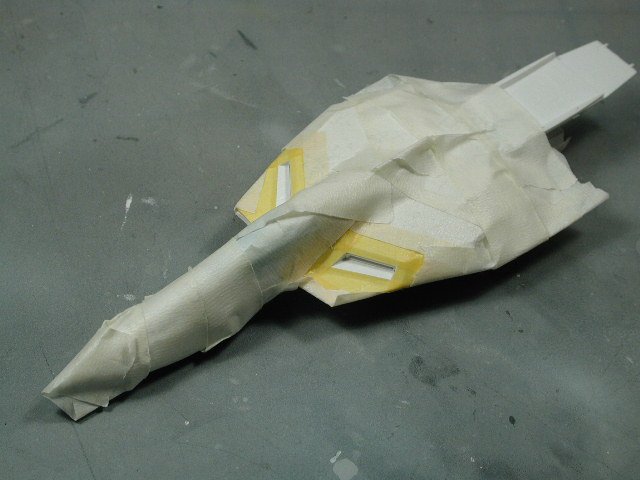
Thanks for the kudos! although, Ido, I'm beginning to know what you mean about the blue/grey colour scheme (i'm not that confident about it - partly because its departing from canon - and seeing Bertt's sure looked nice ) But I'll reserve judgement until I get a little further along and get them both together (its all an experiment ). I'll just hold off the decalling of the booster till I'm sure. Glad the decal worked for ya though. OK, I'm on to masking for the metalizer steel portions that couldn't be painted separately. It was great that the Captn' provided the resin cast of the modified intakes - however, since it was molded in once piece (which saves construction and sanding) the intake covers couldn't be painted separately. Additionally, I didn't use the Photoetched parts for this kit (which would of made painting them separately a breeze). So I have to mask out all the white around it leaving only the leafs of the intake cover exposed to the metalizer. Now with hindsight, it would of been easier to paint the portion metallic steel or grey, then mask it off and paint everything else white - but hindsight is 20:20! oh well... I've gone a little overboard here wrapping up my Valkyrie like a mummy, but I hate overspray especially on white! Again the yellow is the good stuff - the Tamiya masking tape, and the rest is the cheapo regular masking tape after I stuck it to my jeans first to get some of the stickiness off.

-
Spatula, don't be discouraged, the wing tabs and sprockets become misaligned all the time, exactly what Grayson said and you have them back in order! When you attach the wings, it will never do that again. Try to leave them operable - you'll be happy you did in the end. Which lights dropped? The wing tip or the two wing root lights? You can always file a new light from the clear plastic sprue that the lights were attached too. If you're sanding is good, you can glob on some gel-type crazy glue where the light is supposed to be and file back down to get the proper profile (careful that the crazy glue is harder than the styrene). I usually use white glue to glue the clear pieces on. Ok, I just sanded any little imperfections left and re-coated the Valkyrie with its final coat of white. Then I sealed it in with the ModelMaster Acryl semi-gloss clear coat. No pictures of that - just a boring white Valkyrie for now. Probably will start some patches of grey on certain panels with some post shading tomorrow. I concentrated mostly on the booster for tonight. After I got the base coat of colours down, I started to weather it, with a reverse post-shading technique, mainly where ever I would normally shade dark, I used a lighter Sky Grey to pick out the leading edges of certain panel lines. I also sprayed a very light gradated overall coat of Sky Grey from the front to the rear - blending in the various shades of grey (the idea is that the front gets worn a bit and is lighter) also to lessen the contrast between the booster and the Valkyrie. I want to add interest to the greys so that there are no solid patches of colour - always some type of variation. I got out my old VF-1A super as a guide to the weathering and colour range for the booster. Lastly I sealed this very delicate light misting of Sky Grey in with ModelMaster Acryl semi-gloss clear coat again. I plan on a dark oil wash tomorrow to pick out some of the details.