wm cheng
-
Posts
4346 -
Joined
-
Last visited
Content Type
Profiles
Forums
Events
Gallery
Everything posted by wm cheng
-
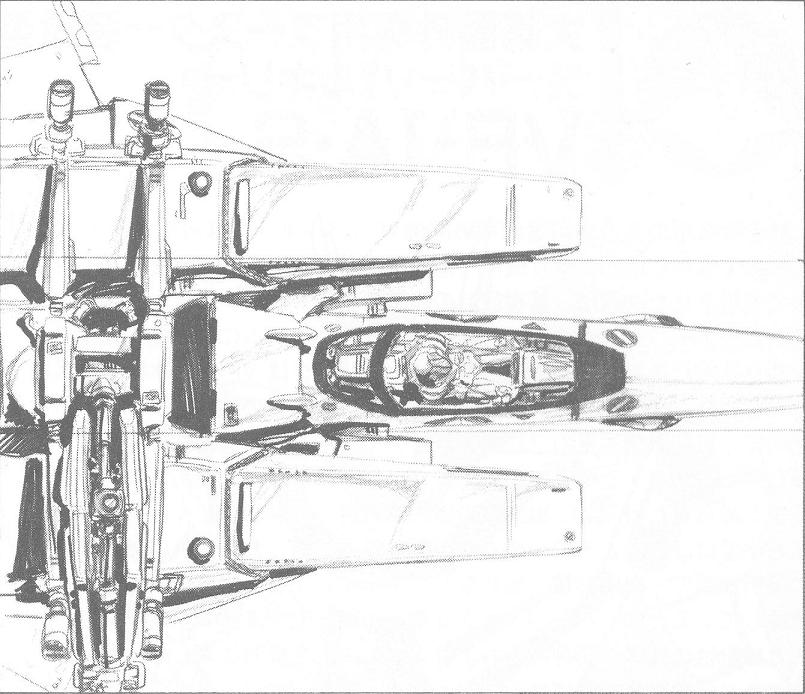
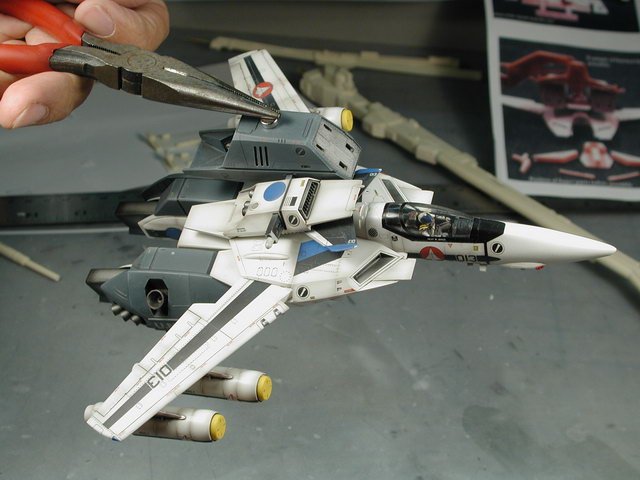
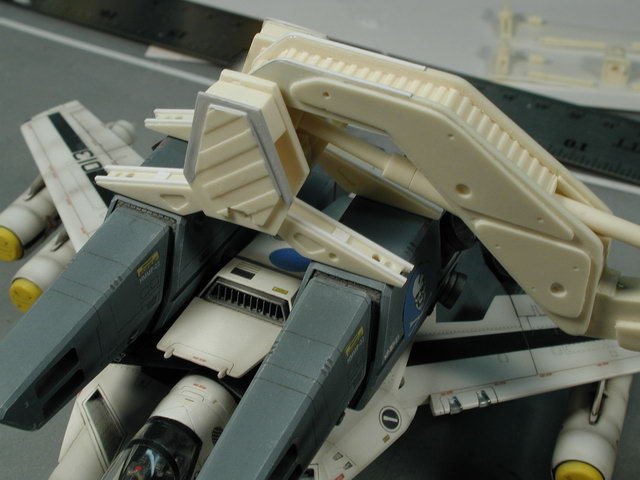
I'd also make sure to carefully align up the claw fingers, they are not supposed to be at the same heights or angles if you want the Valkyrie to be attached horizontally when the arm is perpendicular to the direction of the Valkyrie. Carefully line up the Valkyrie and make sure the arm is straight and in the proper orientation to get an idea of where the claw fingers land.

-
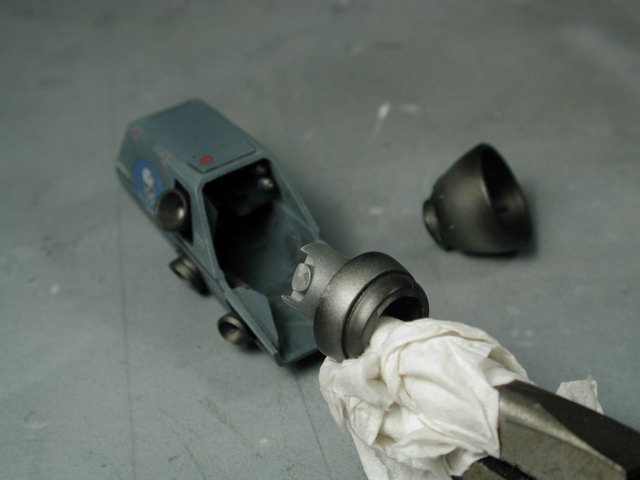
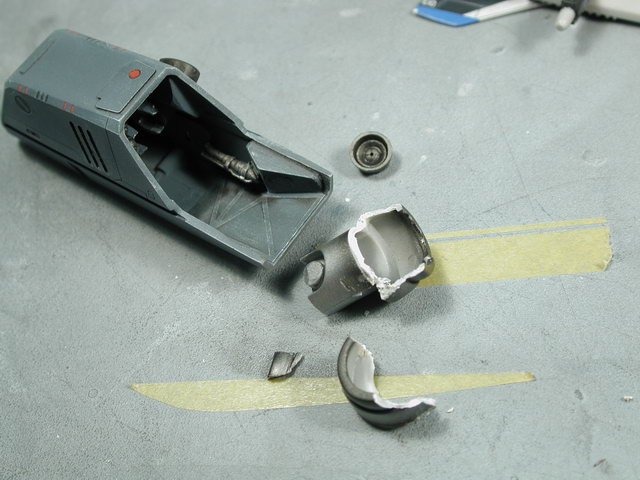
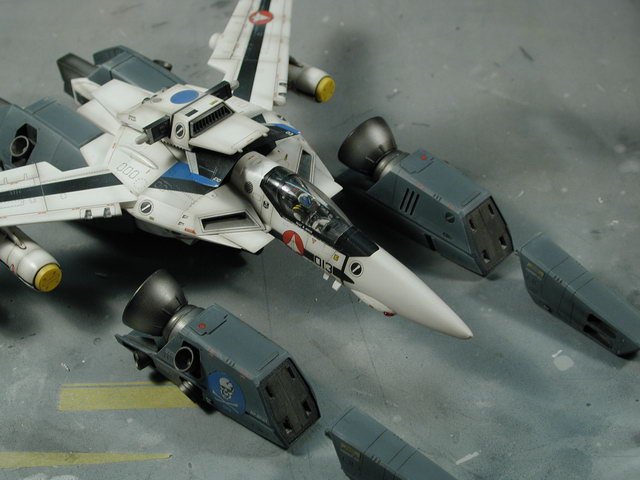
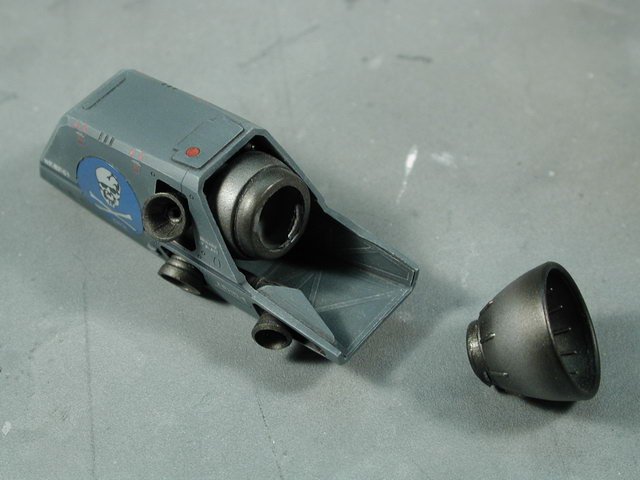
Damn! pulling out the engine bell on the other side was not quite as uneventful or sucessful I think I'll be able to piece it together and sand it all down and refinish it in the end. It will be easier than cracking the fast pack halves. No decals on the engine bells! at least.

-
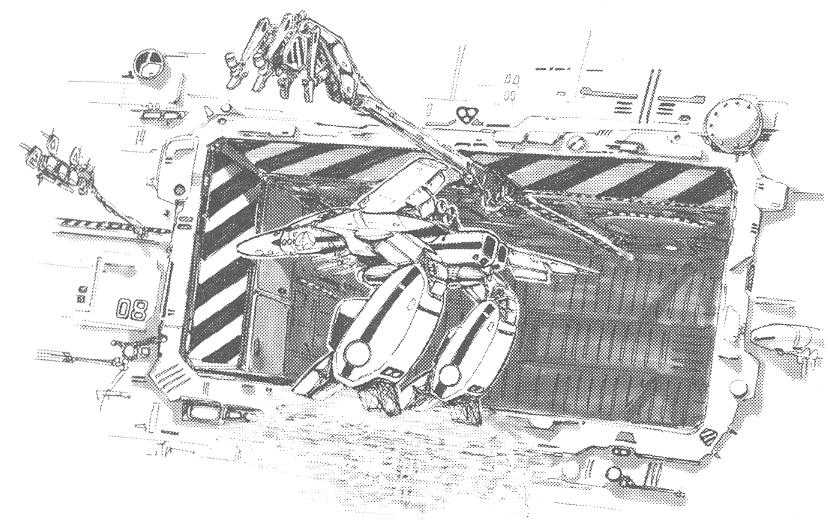
The magnet set were so strong that only one set was able to pick up the entire Valkyrie quite sucessfully. Also, I found that if I had four sets, they would be too close to each other and tended to either stick together (which would cause the forward claw finger to bend backwards to tough the rear claw fingers) or repel each other. So having the other pack with another set of magnets would be more than enough. I tried using a washer under the fastpacks to reduce the attraction - but then it was too weak - so I decide to have it a little over strong than under. I just have to be very careful when trying to separate the Valkyrie (its strong enough to rip the claw fingers out or the fast pack apart).
-
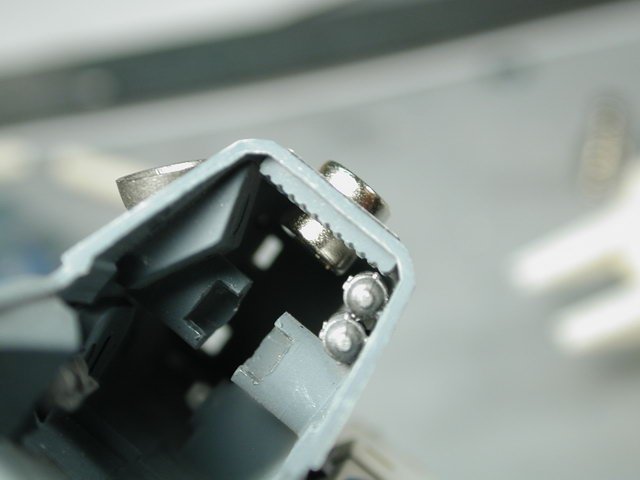
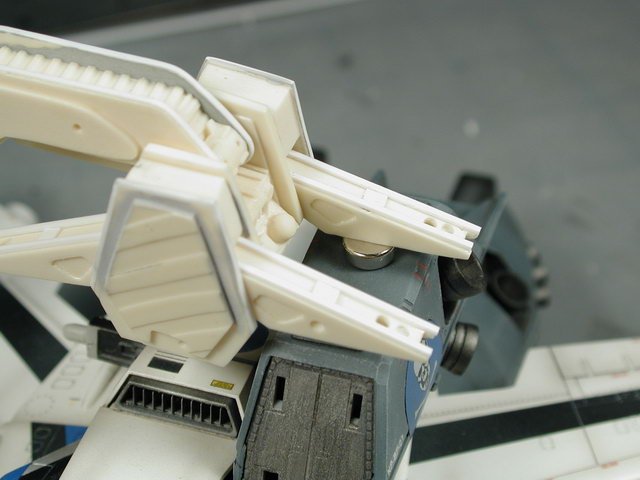
I threw in some magnets to see how they'd hold here. They were so strong that I don't think I'd use four of them (one per claw finger). I think I will only use 2 sets of them for the rear claw finger (one on the claw finger and one inside the fast packs) - otherwise I don't think I'd be able to pry them apart again without either damaging the claw fingers or the fast packs. As fernaris said, be mindful of the polarities - I marked the outside of each the magnets with a dot, so I know the side without the dots face each other when it comes to gluing them.
-
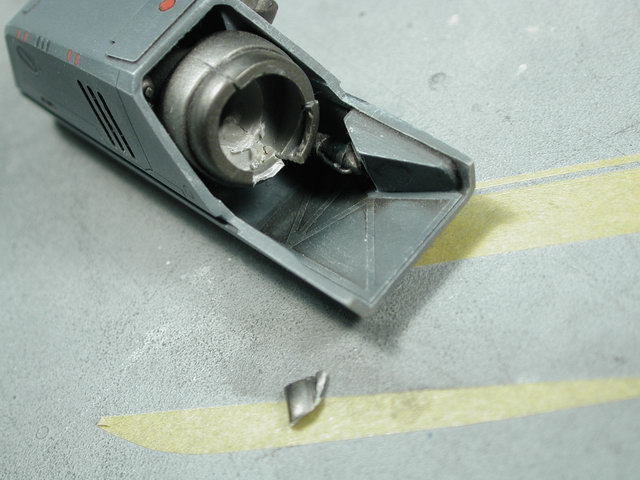
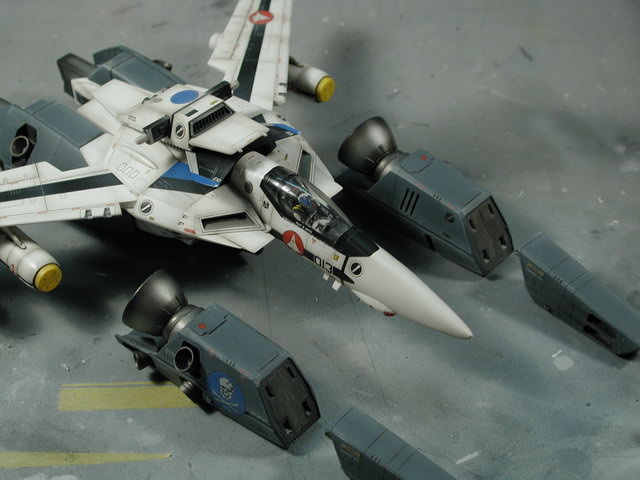
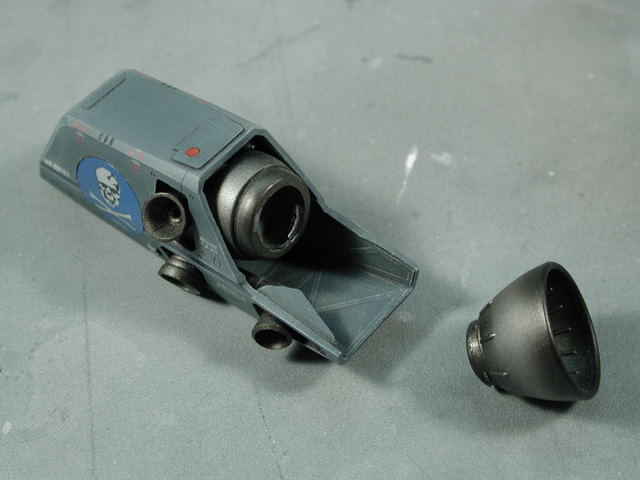
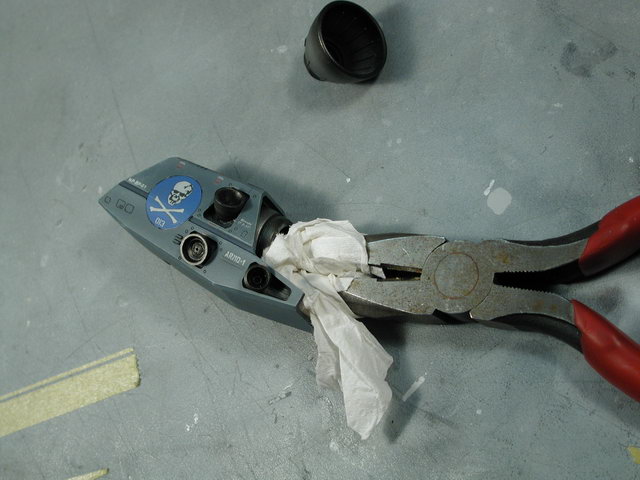
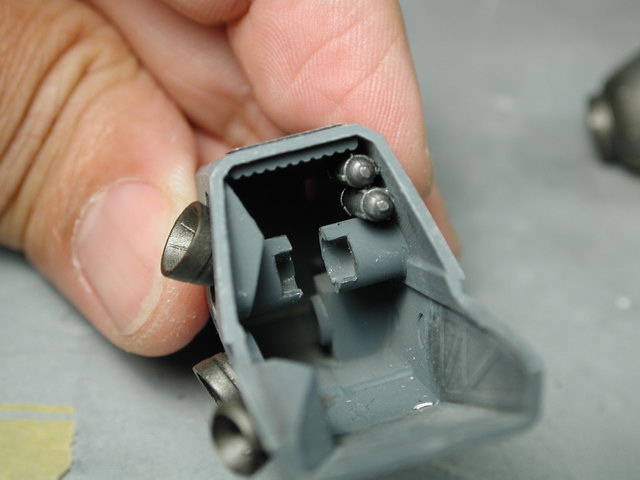
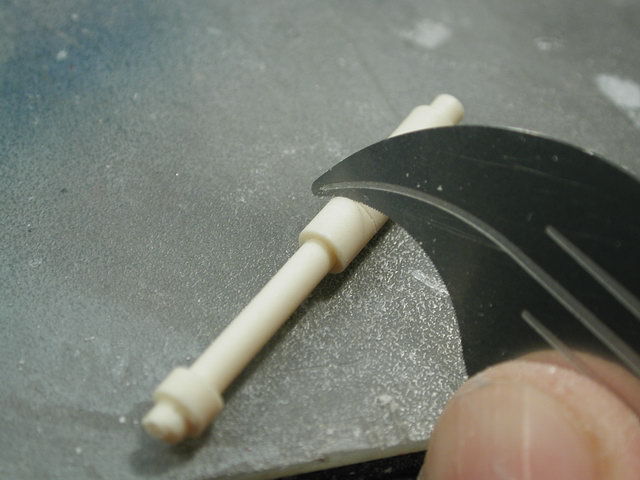
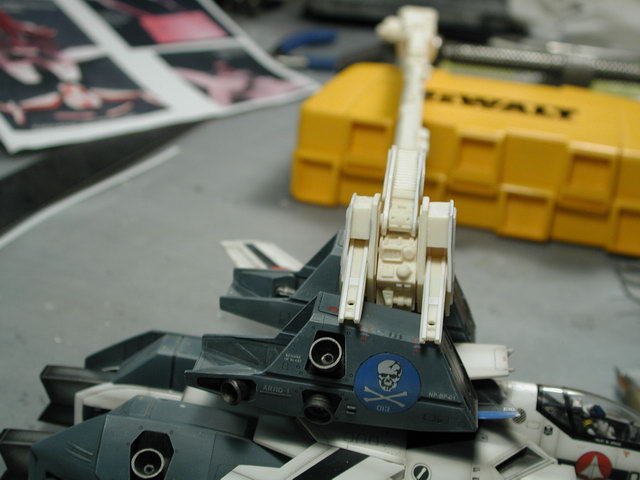
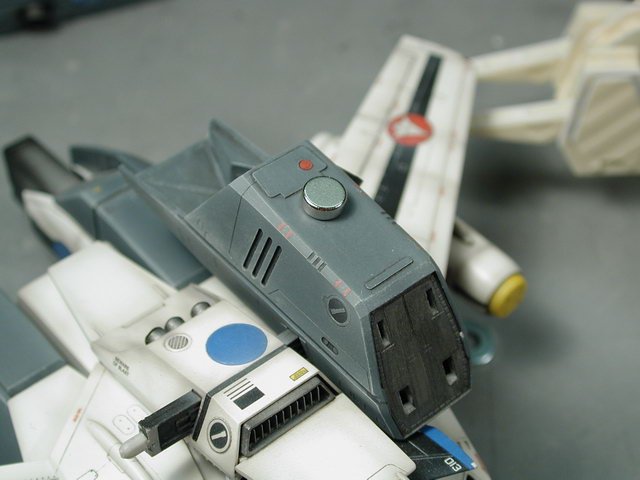
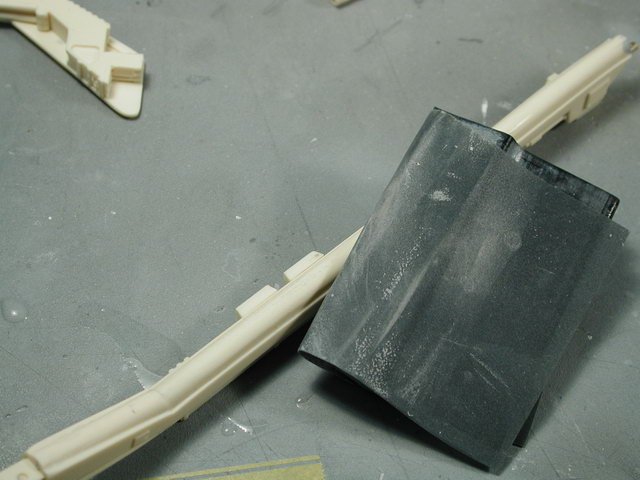
Well - the dreaded time has come to take apart my built Valkyrie. For those of you that have yet to build your Valkyrie for this arm - don't worry about these following steps, sit back, relax and laugh (thank god that you don't have to go through this!) I've wanted to use this Valkyrie for the arm for a while - in fact I was hoping for an arm kit like this to come along when I built this Valk a few years ago (worst case I was going to make my own arm - but thanks to Jesse & Gundamhead, we don't have to do that! ) So I made a few provisions to make as much of the fast packs removeable. I always like to have options. I don't know if you remember, for those of you that did follow along with my original step-by-step build up for this Valkyrie (on the old boards... I wish someday that they could be retrieved ) the rear large engine bells were one of the last things to be placed. I modified the interior mounts by cutting away a section of plastic so that I could mount the engine bells at the end which eased the painting process. Well that provision will/should allow me to extract the engine bell assembly without cracking the fast packs in half. Well, just pulling them out by hand didn't work too well - I ended up separating the engine bell from the pivoted engine itself. Probably better this way anyways, so I don't damage the very visible bell. I thought I'd wrap up a pair or needle nosed pliers and pull on the engine... There, not too much damage - the engine did split a little due to the force of the pliers, but it was only the bottom area and could easily be mended. Here you can see the cuts I made to those horizontal cylindrical pieces that grab onto and pivot the engines.


-
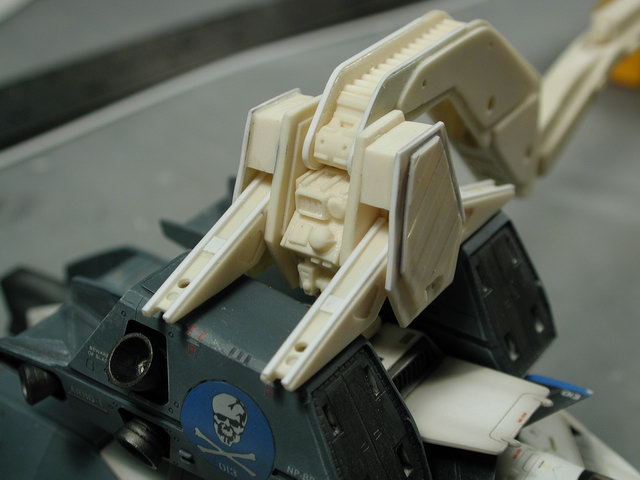
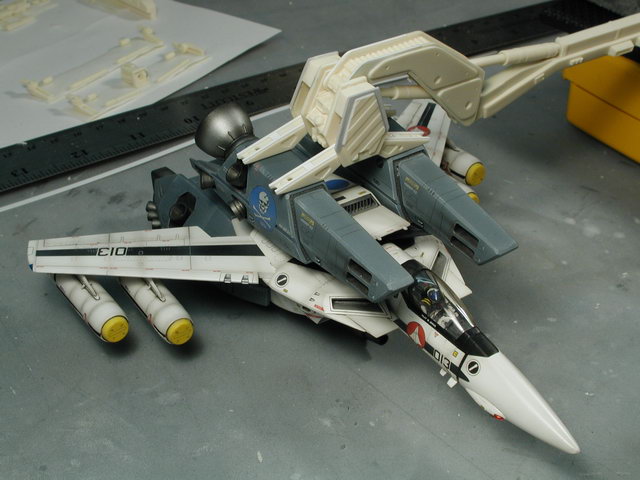
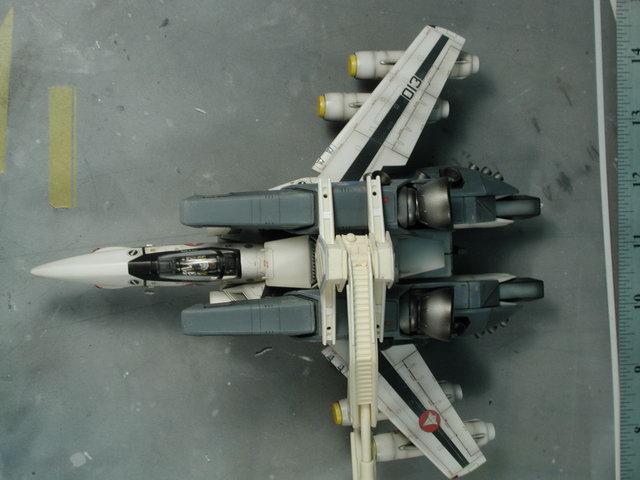
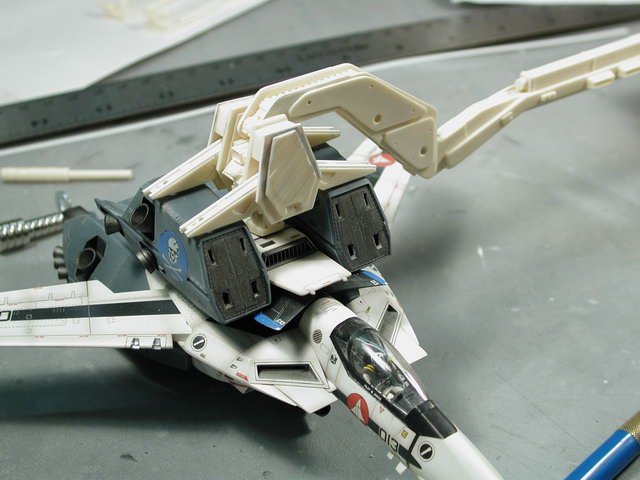
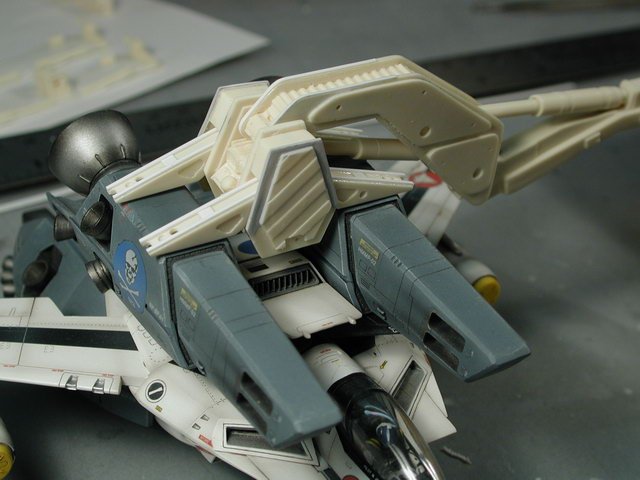
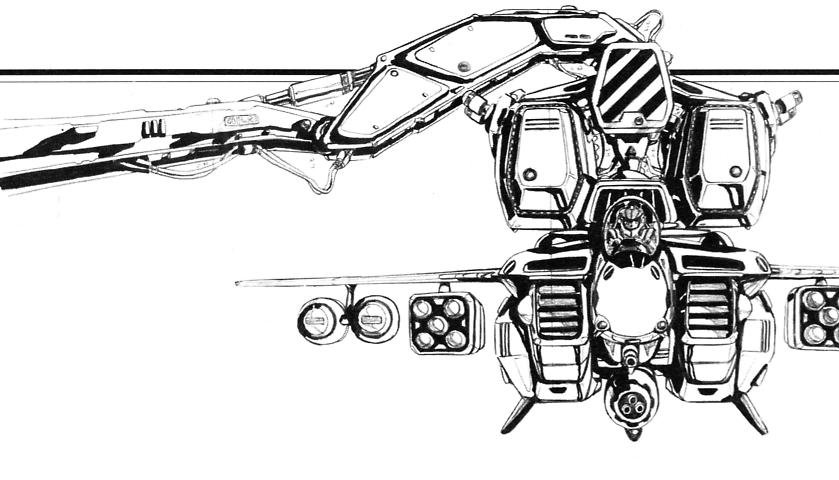
Thanks fernaris - good tip about the polarities. The boosters to Valk - I will probably end up glueing this area - I only left the friction fit because I knew I was going to need to get at these boosters individually in the near future. Gundamhead & MechTech, I realize this is a small area with only three contact points, but with epoxy on the 3 points, I think it will be enough - the Hasegawa model is really light - and I'll keep it away from small kids or high traffic areas (I don't think there would be any solutions to small kids! ) I'll see when I get it all together then - but I'm leaning away from lancing the entire thing together, however I do agree that it would be the safest way of mounting the Valkyrie. This shot below shows a better view of the placements of the claw fingers in relation to the claw assembly - I had them incorrectly placed at the bottom of the claw in the earlier pictures.
-
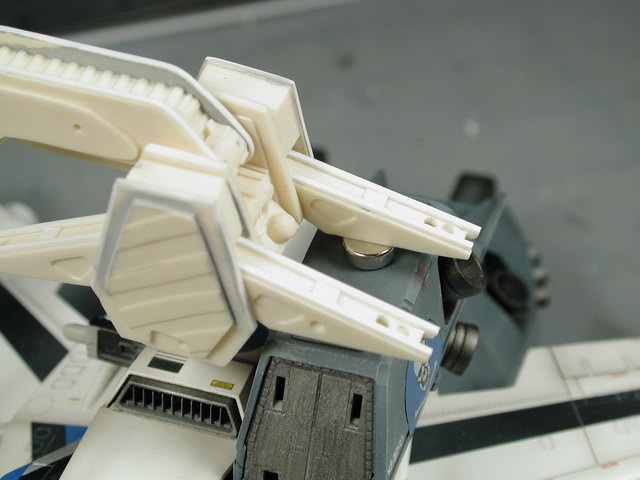
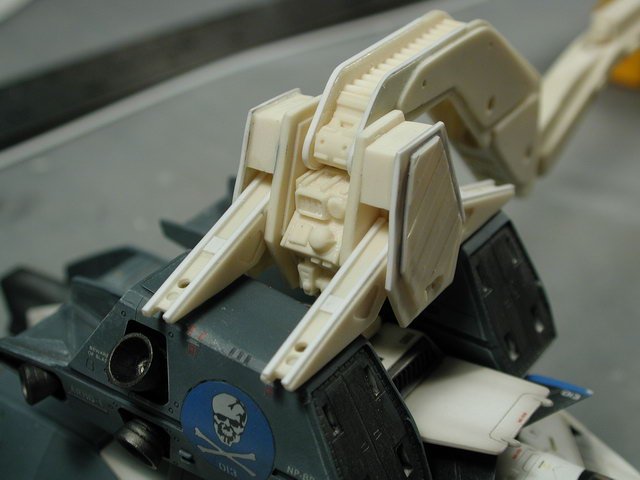
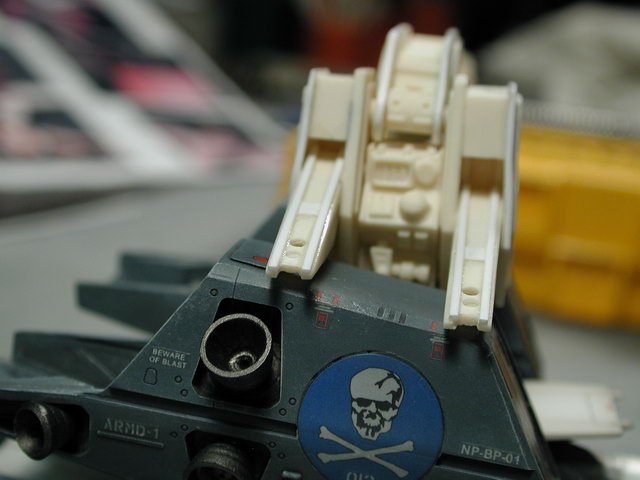
Yep - that's exactly where I want to put them. A set permanently mounted inside the top portion of the fastpacks (I built it so the fast packs do come off the Valkyrie - Hasegawa's fit is so perfect that its just friction fitted all these years to the Valkyrie) Now I just have to back out the large rear engine bells without distroying them to get access inside (wish me luck ) And another set mounted to the bottom of the claw finger section as shown in red in your sketch. My hope is that the two magnets is strong enough to attact each other through that layer of styrene plastic about 1mm thick - but not strong enough that I can't ever use the arm for anything else!
-
Well, that's it for tonight (its Alias night!) and the wife is home! I thought I'd do a dry fit to see how all the parts come together. I thought I'd put the magnets on the underside of the fingers and underneath inside the fast packs - well, thats the plan anyways, we'll see if it will hold.


-
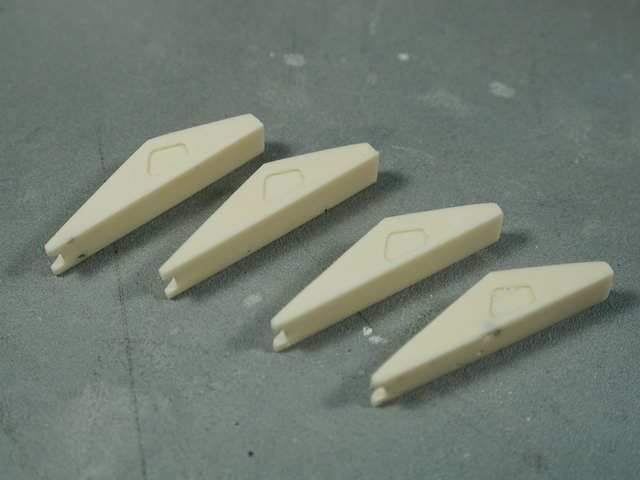
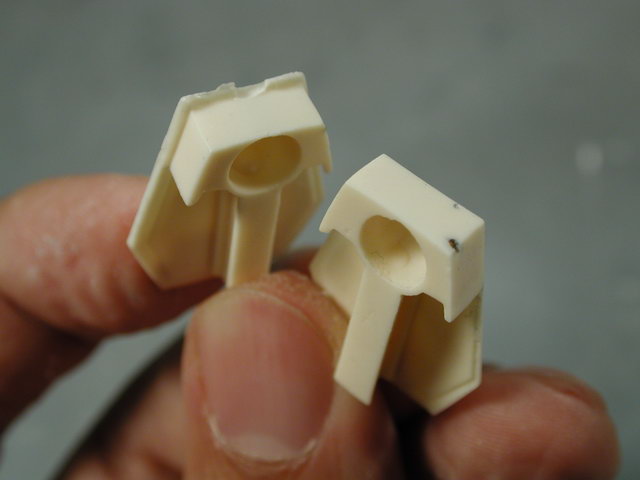
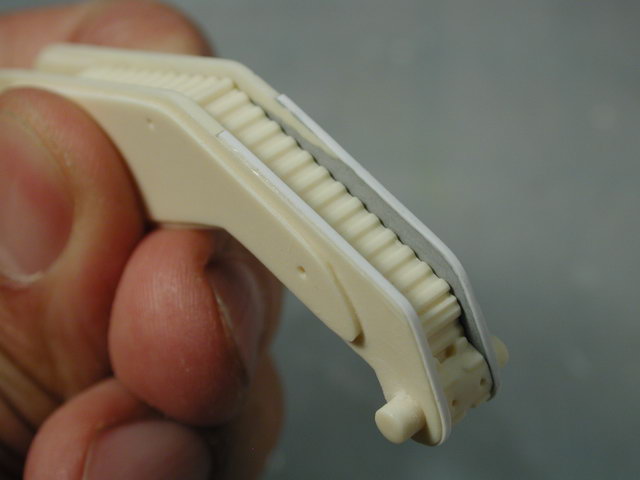
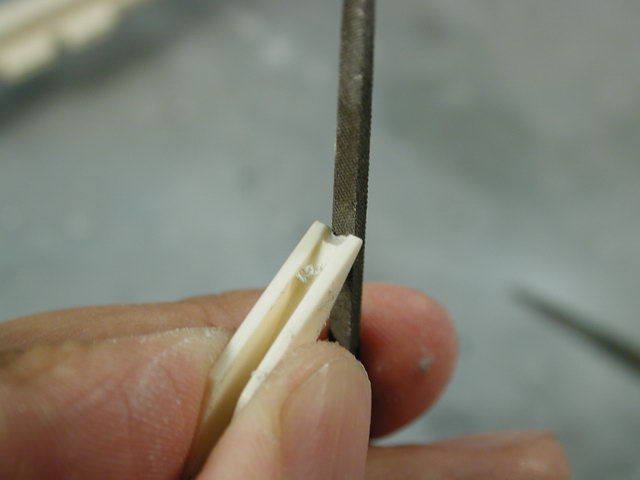
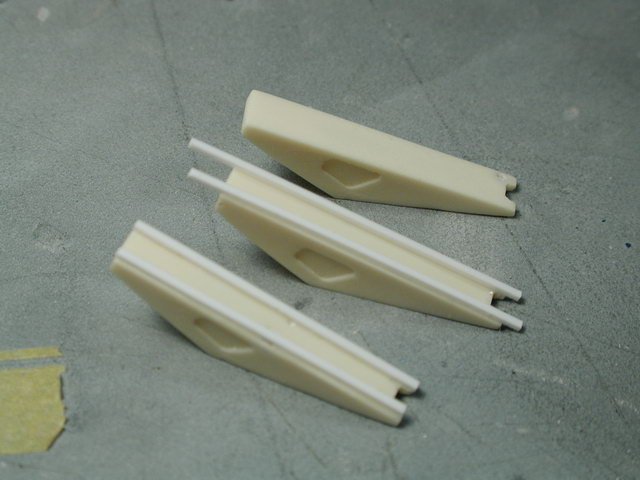
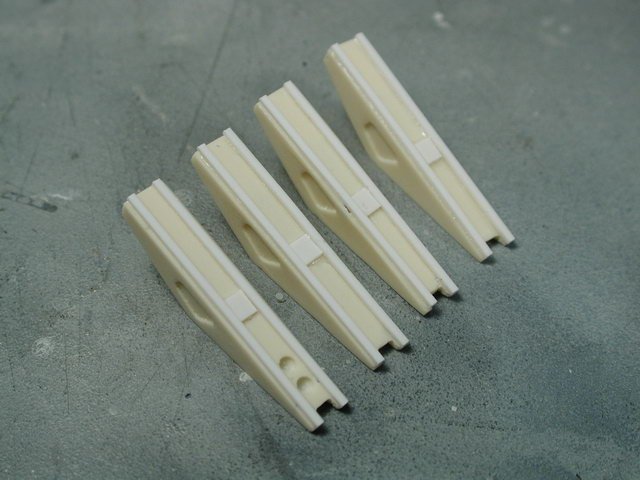
Next, I moved onto the four claw fingers - I thought I'd skip ahead in the instructions and concentrate on the making the necessary modifications to attach the Valkyrie onto the claw with rare-earth magnets. The four claw fingers have excess resin on the top side which is easy enough to sand away along with some flash on the top edge/corners. The end tip is supposed to have a squared notch in it to accept the finger tips that "hold" the fast packs - and requires a little cleaning out with a square profiled file. Upon sanding away some of the excess resin, some bubbles appeared that were below the surface. I thought it might be neat to add some detail to the top instead of just filling them and sanding them flat. So I added some strips of thin styrene again (my good friend on this kit!) and ended up adding a square plate of styrene on one of the fingers that hid a bubble beneath - so I had to make all the other 3 the same as well. Oh, I thought I'd add some shallow circular impressions at the ends done with a pin-vise - but not drilling all the way through the resin (I've done it to all four (not shown - only one was shown at the time I took the photo).

-
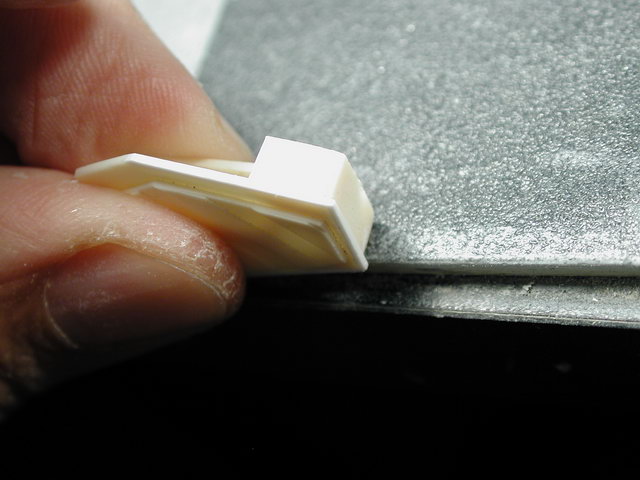
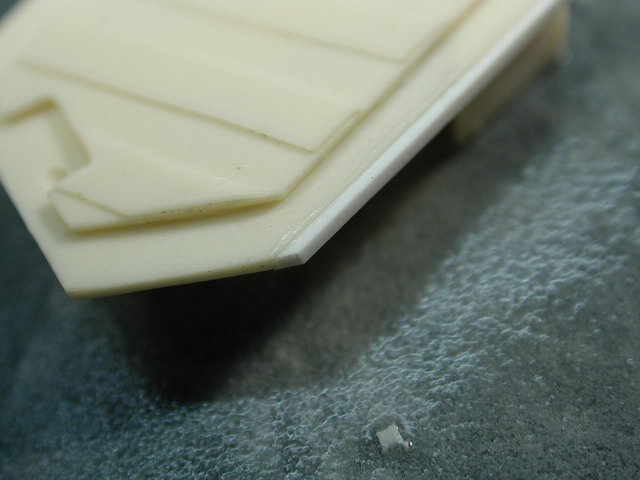
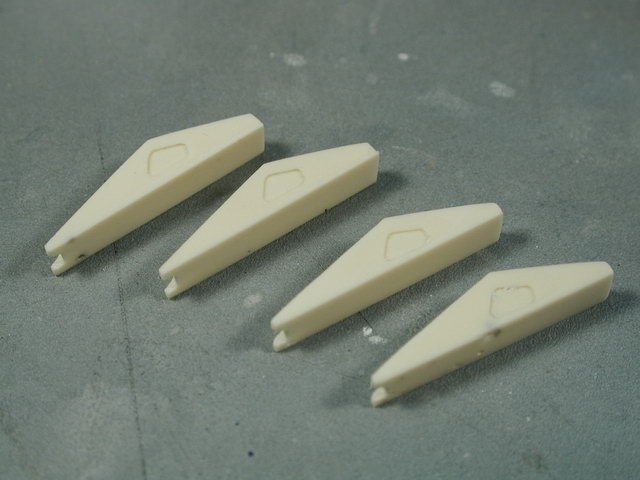
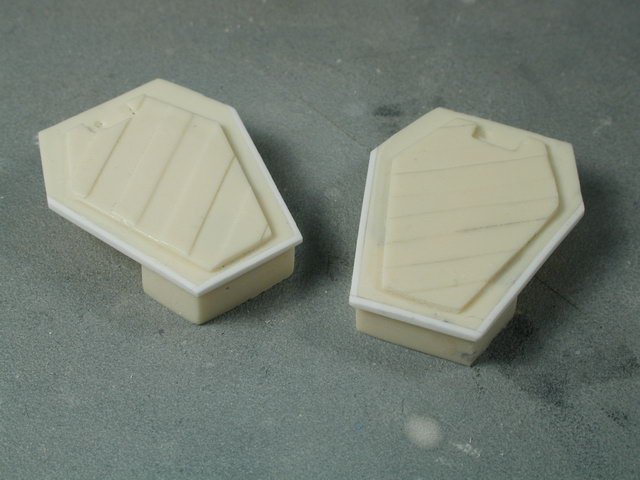
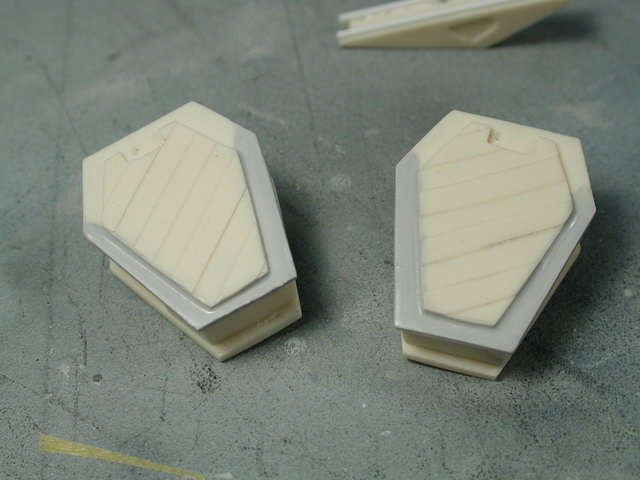
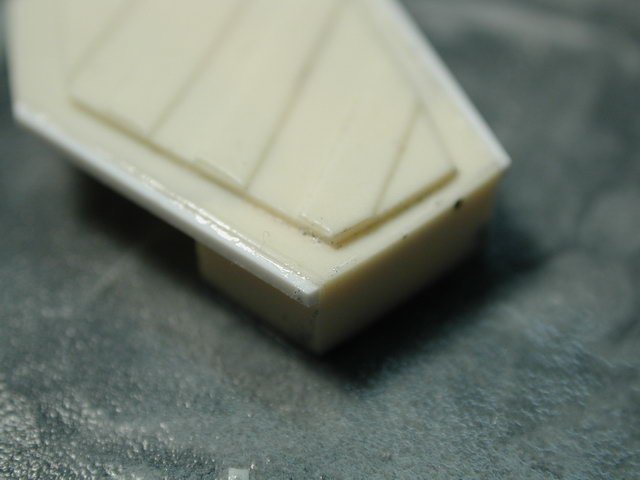
Here are the pieces finished - not too bad eh? A pretty quick fix... it only took like 20mins from start to this end point. I also sanded the front edge to make sure that the resin ended in line with the styrene strips However, if you dry fit these plates to the other half of the plates, you'd see that the solid portion of the bulkhead (near the top) actually extends beyond the inner finger plates (assuming you keep the bottom edge parallel and in line with each other). This is unfortunate - but I tried sanding the bulkhead at an angle in towards the other plate so that there will be a slight lip when attached. Its not ideal, but its the easiest fix and as long as both sides are identical, then who is to say that these bulkheads don't taper in?! I thought I'd apply a thick coat of Mr. Surfacer 500 on the front edge just to be safe and I'll sand that down tomorrow when dry. Of course, I did a test fit of the entire assembly - very cool that it all stays together on its own - snap tight! The pistons are just placed in there to get the right angles (not glued in yet).


-
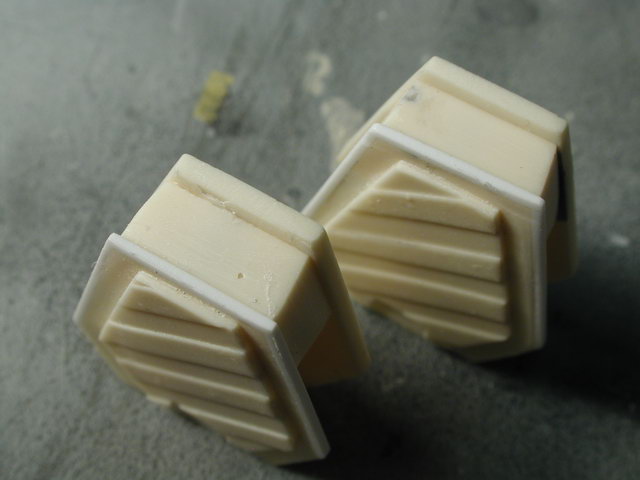
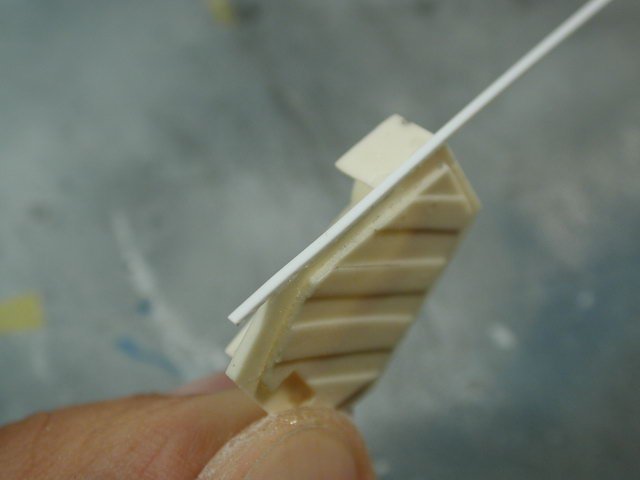
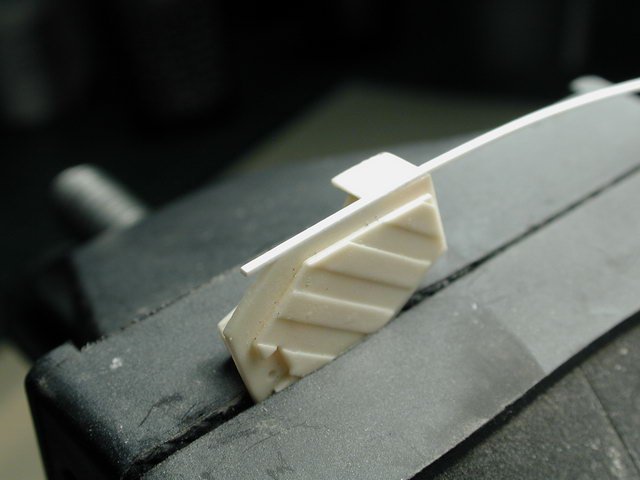
I thought I'd tackle the problem of the claw finger plate edge. I decided to sand down the top and two diagonal sides right down to the bulkhead. Then I'd use the same thin styrene strips and crazy glue them to the edges. I started with the two diagonal sides first, leaving them long so I can have something to hold onto. Trimming them down afterwards. I then sanded the edge with the sanding film flat on the table surface. I works easier to always sand in the direction of the glued piece - so you're not prying it away from the glued surface. I sanded the top flat so that I could glue a continuous top piece. I found it easier to have a vise hold the piece, then you could have both hands holding either end of the strip of styrene.


-
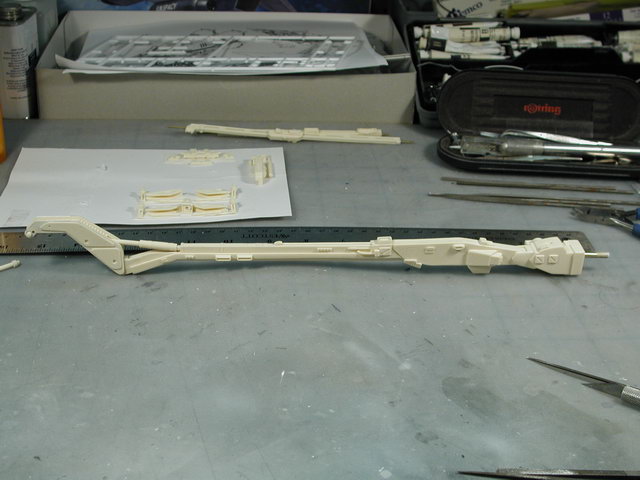
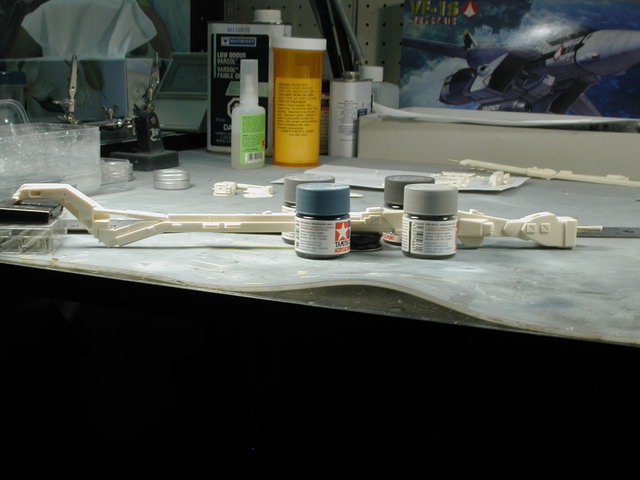
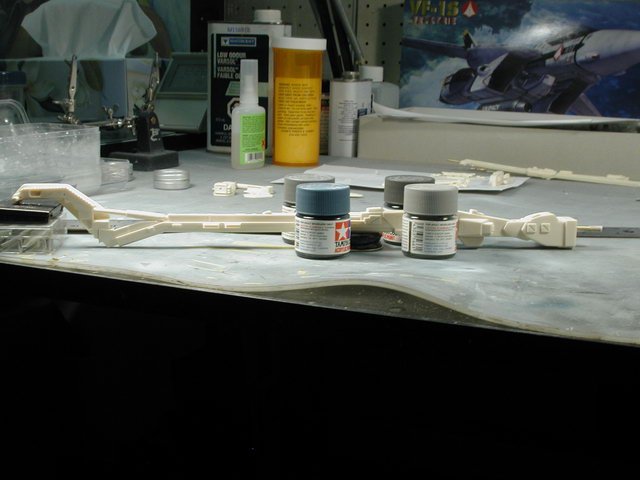
A shot of the arm after the 5min epoxy has set...

-
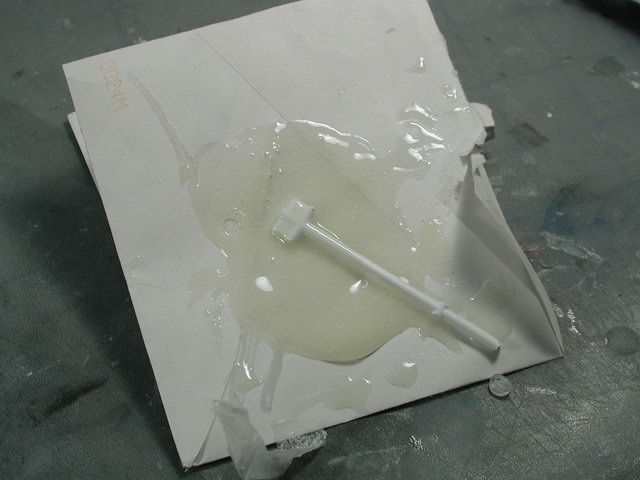
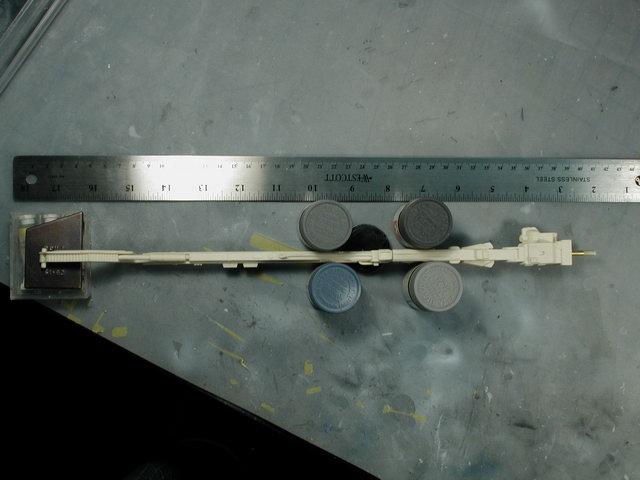
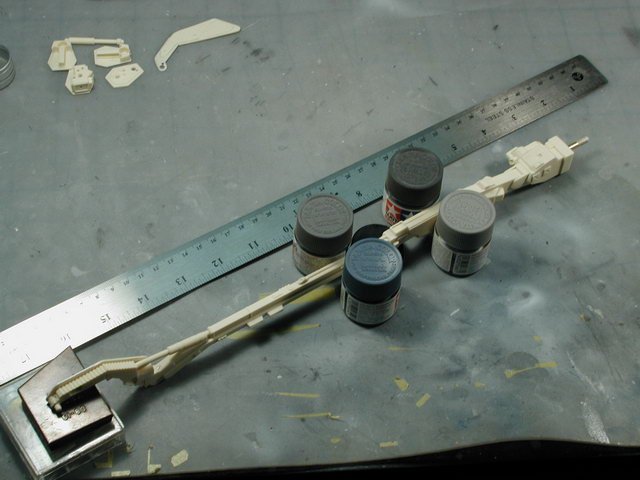
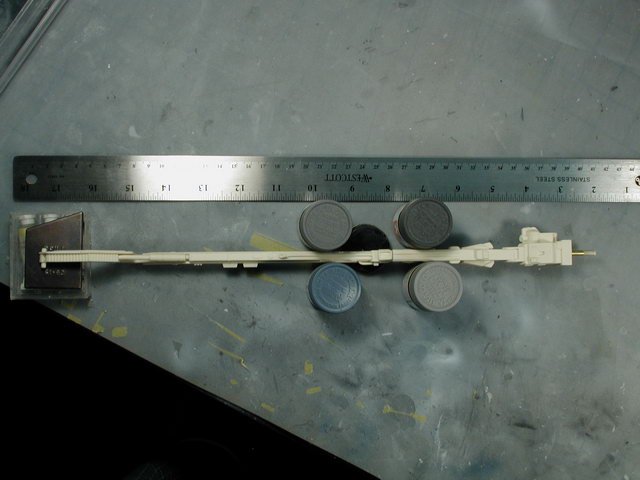
Here's the 5min epoxy - I assume most of you know how this works; you mix up equal parts resin and binder/hardner and mix for 1 min. I usually mix on a scrap of cardboard - and I cut a piece sprue out of the Hasegawa kit (using the numbering tabs as a spatula). Once you mix for 1 min, you have about 4-5 mins to play with applying it and setting up arm in the correct position. I think its quite important to get it straight in plan (top looking down on it) - but in elevation (side view) it can deviate a bit since there are angles throughout the length of the arm when viewed from the side. I first found a way of supporting the arm still with piling up various stuff from around the table. The steel straight-edge ruler is a visual guide to make sure the arm is straight when viewed from above, the four paint bottles makes sure the arm doesn't twist around the joint. The black bottle cap below supports the joint so that its attached at the right horizontal angle. Lastly, I fitted the arm piston in place (not glued) to get the right angle to the wrist piece when attached to the arm.


-
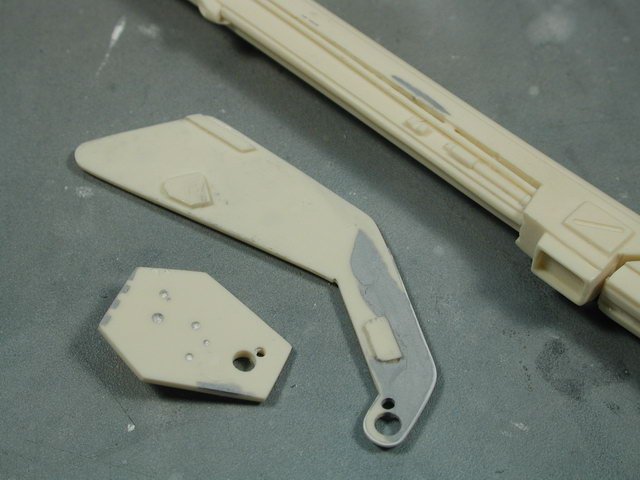
Thanks for all the comments - please keep em coming! What about posting some of your own pictures here too! Well, I found out my 5min epoxy dried out - so I had to go out and get a new set. Even in the capped syringes they still dried out - hmm, and I never used very much to begin with. Oh, well, at least its not that expensive. Below are some of the sanded pieces with the Tamiya putty (this stuff sands beautifully - like butta!) As you can see, the middle piece - you only really have to concentrate on the leading edge, and feathering it back to the resin - because once its attached in place, you really don't see much of the puttied area (reduce sanding wherever possible is my motto! )

-
Because I haven't bought the resin versions of the VF-11 and VF-4 yet!! No, seriously (the last time I finally scanned and searched out the really amazing YF-19 & 21 1/72 resin kits - Hasegawa announced their superior versions a week later! argh!) I would love to have these fighter types done by Hasegawa - I'm still holding out... You never know, Macross has been such a cash cow for them - and eventually they'll start running out of aircraft to do - I'm hoping that they just might get around to these beautiful birds!
-
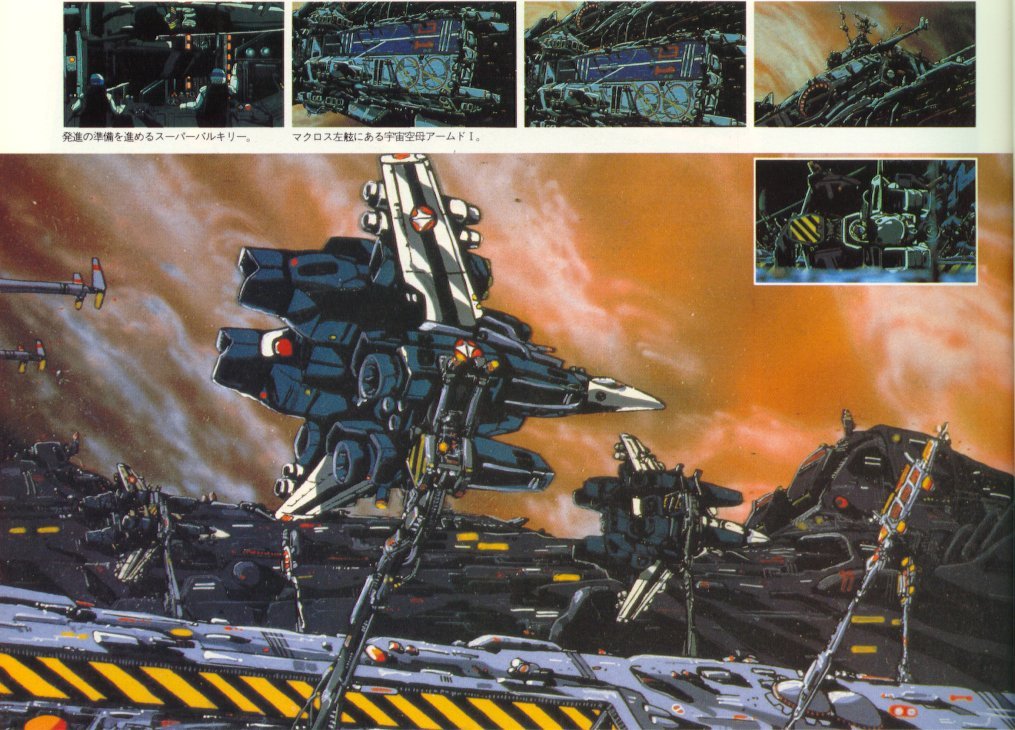
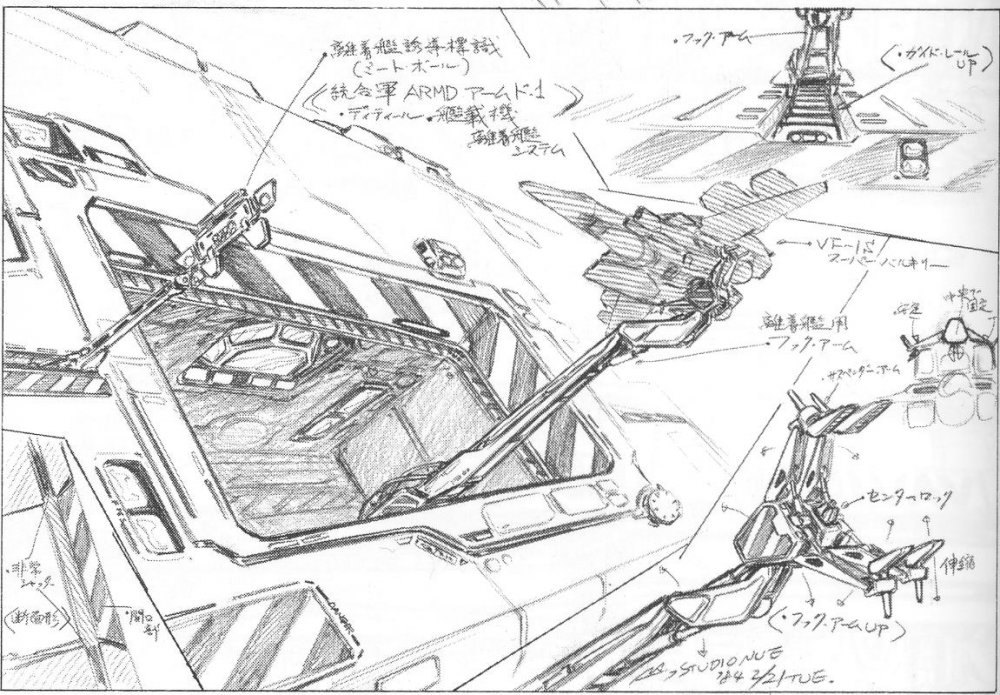
I'll put my references here (anyone with any others especially colour ones please feel free to post them here too - for my benefit! ) (P.S. Anasazi - if you're listening, I'd love it if you came up with some decals like the wierd stylized numbers or "Fire" lettering for the tiny signal arm?! - that will be a bitch to paint)


-
Remember to re-scribe any panel lines that you may of sanded away or made shallow. (I've got to let the putty dry - I just tried to sand the puttied piece only to hit fresh soft putty below the dried skin argh, I hate being impatient - now I have to re-putty and let dry properly) In the meantime, I'd welcome anyone else building theirs at the same time to post here too - I'd like to see where you're at and what you're solutions are too. Additionally if Gundamhead or Jesse has any comments or suggestions to how I'm "bastardizing" their kit I'd love to hear them here too.


-
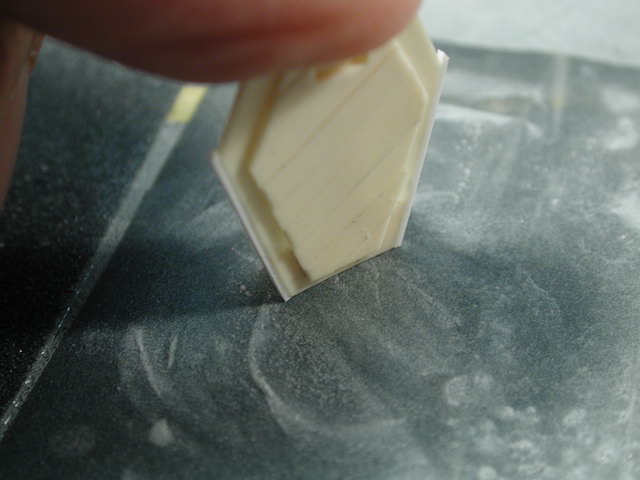
This is another problematic area - the outside finger plates are molded with an inconsistent thickness again. Its especially worst at the top of the plate. I'm not sure what to do at this point, I may re-build them out like the wrist with the styrene edged strips - but it may interfer with the claw arms later on. I wait till I get more of the arm together first in a dry fit before I determine what is the easiest way to correct this edge.

-
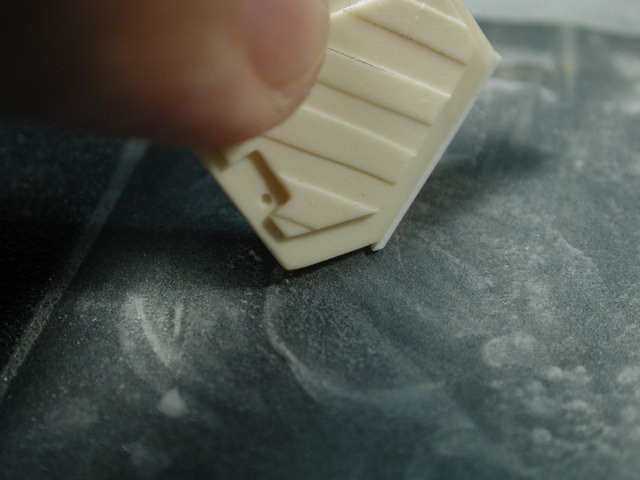
The inside finger plates can also use some sanding to bring their edges down a bit so they are more uniform with each other. On my copy, I have some chipped edges to one of my plates, so I covered them with Tamiya putty to be sanded down and re-shaped to get a sharp edge again.
-
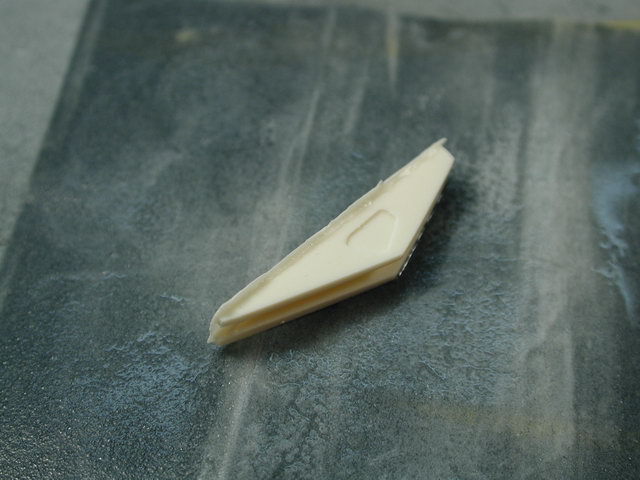
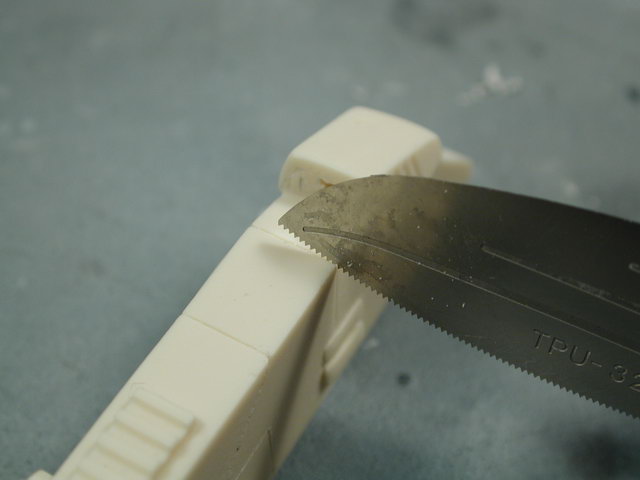
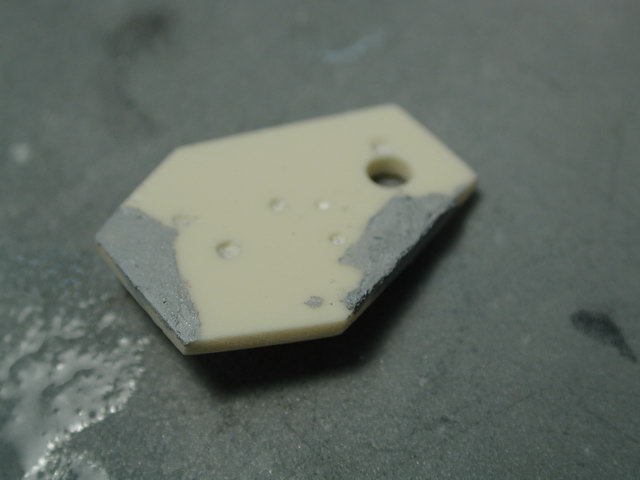
There's a bit of excess to this part on one side, so I flats sand the excessive side. I don't mind that there is more resin - as long as there isn't less! Some bubbles might appear as you sand the side down - but don't worry, since these sides will never be seen - they attach to the inside finger plates.
-
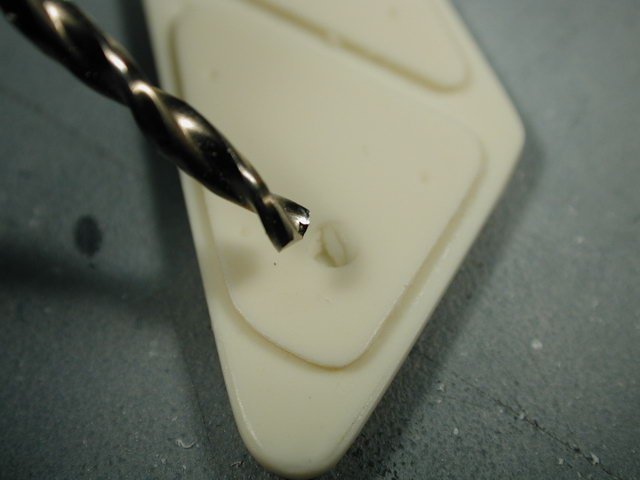
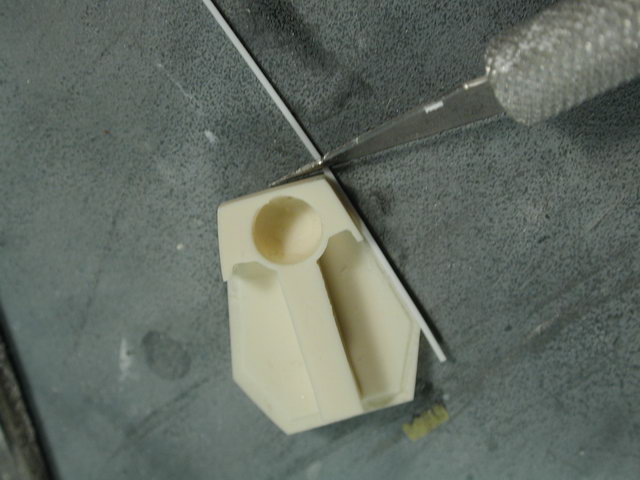
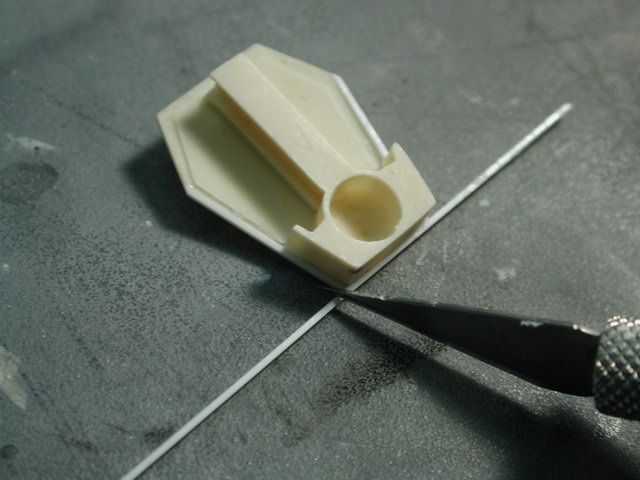
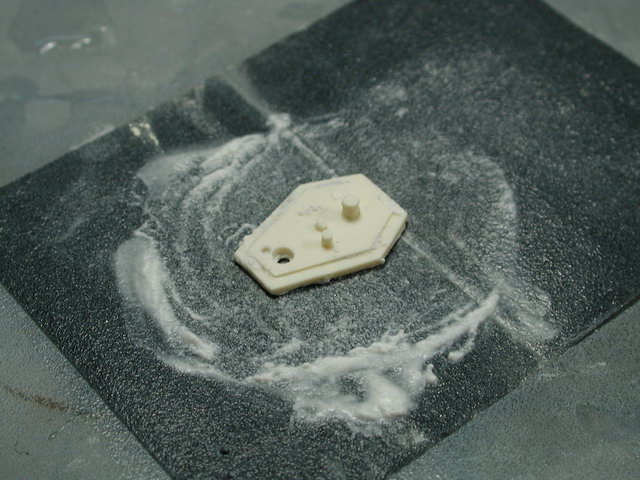
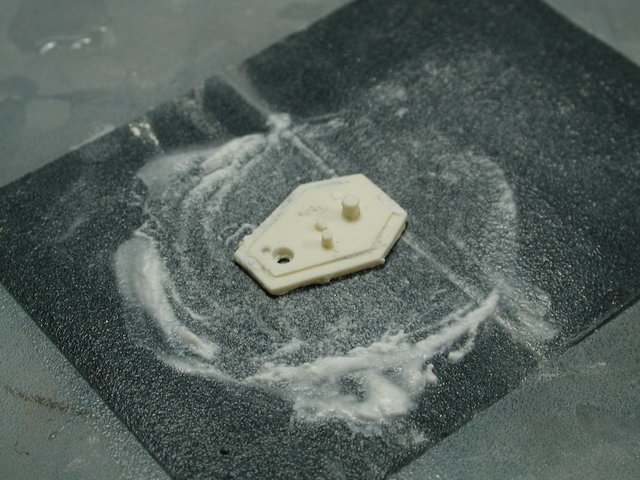
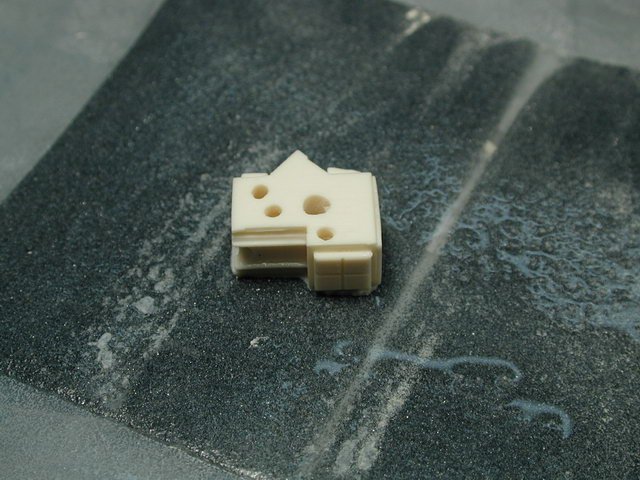
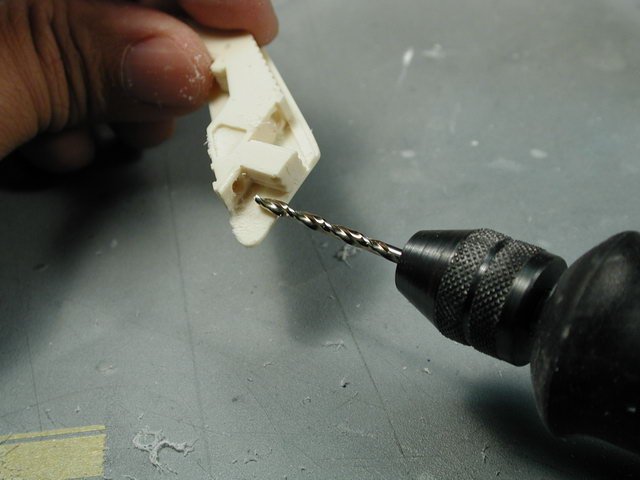
I skip all the sections that tell us to attach any of the hydraulic pistons. Its important to dry fit them to get a sense of orientation and angle, but I usually leave them off till the end because its easier to paint the actuator part in chrome silver without have to mask it. So I skip to the 4th item in the instructions, the claw sensor part. I drill out the holes as instructed to locate the other side. The 3 small ones use a 1/16" bit and the large hole uses a 3/32" bit.

-
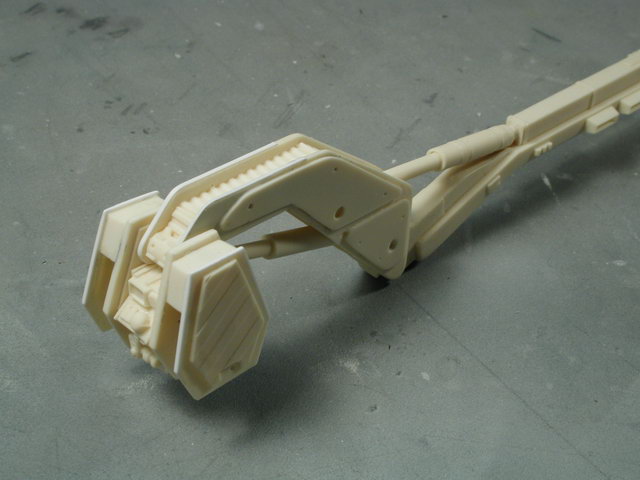
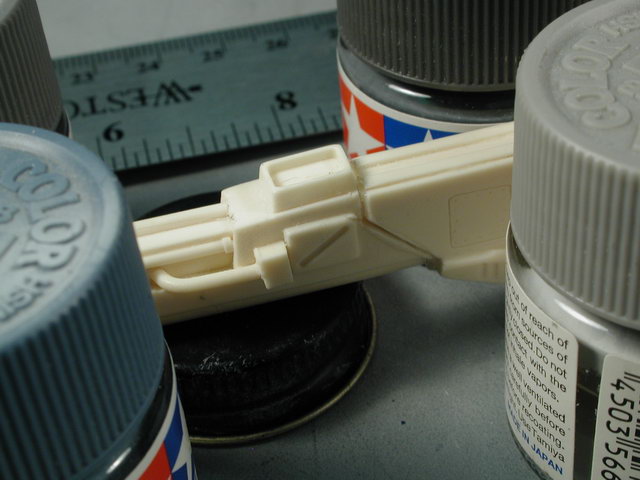
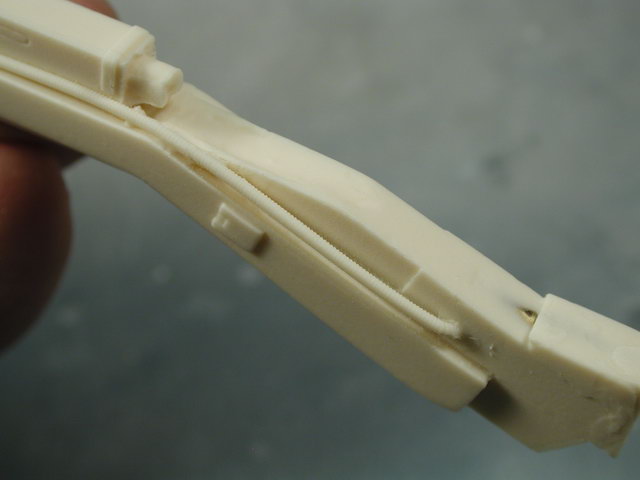
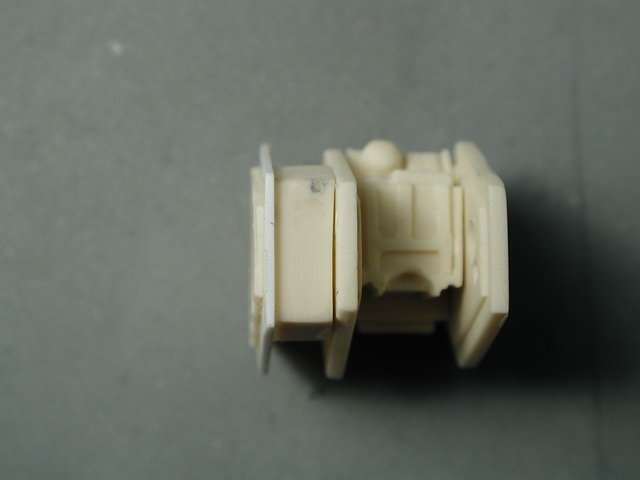
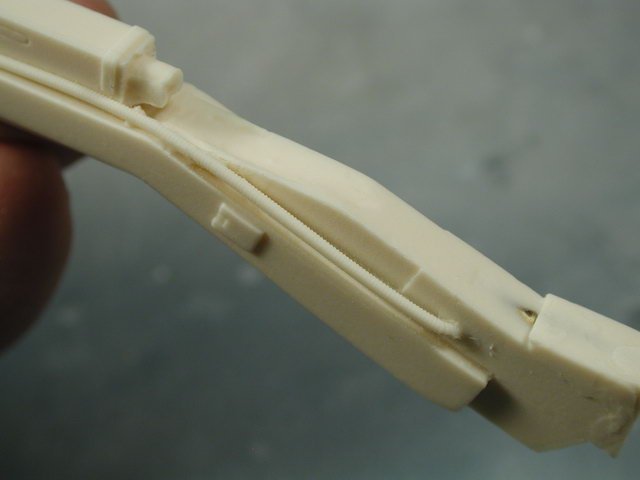
I've got to show this amazing cast! Whoever (Gundamhead or Jesse) cast this portion - its amazing!! there is a fine coruggated hose on the surface of the upper arm that is casted so that its actually free of the arm! WOW! way to go! I just had to mention it since I realize how hard this must of been. The rest of these shots just show boring old sanding. Like any other kit, I just started to sand any seams I can see. Plus there was an area with some small divits that will be filled in with some Tamiya putty.


-
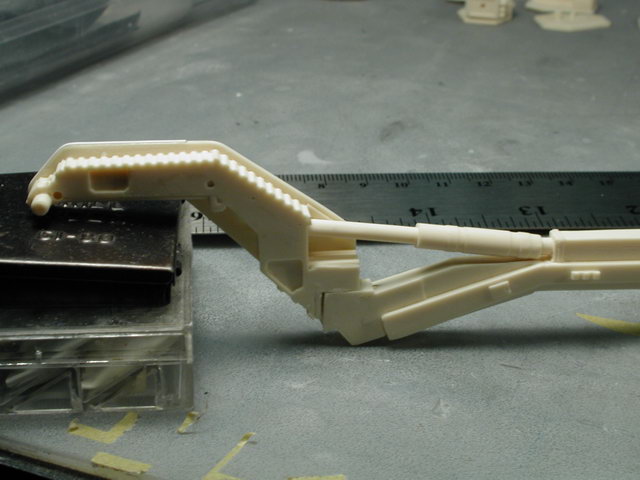
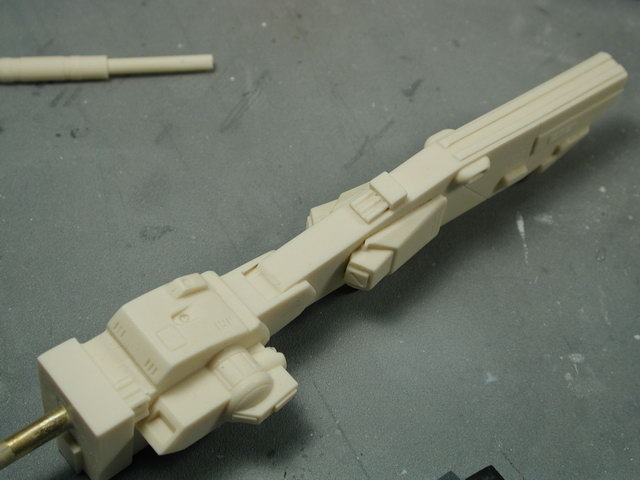
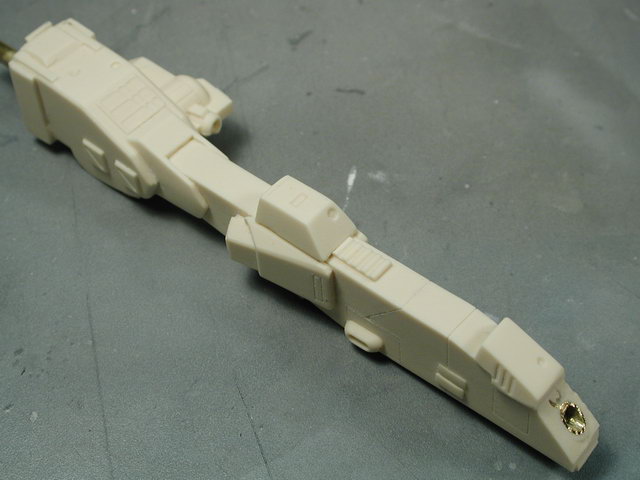
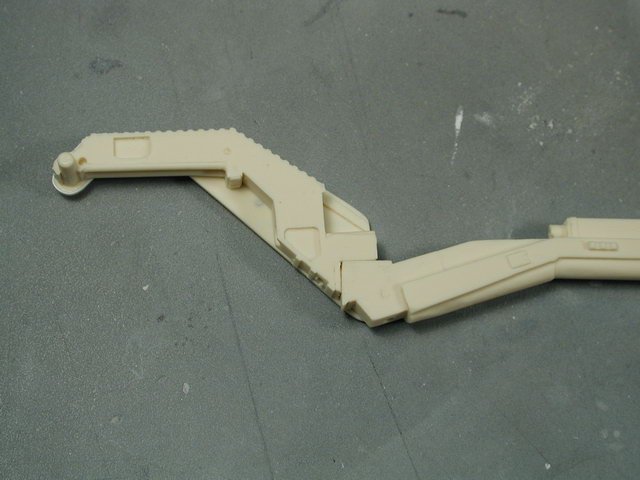
Here's a shot of the parts properly aligned.
-
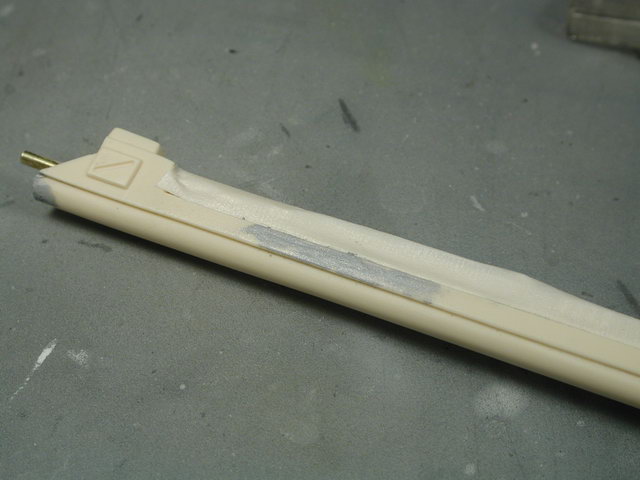
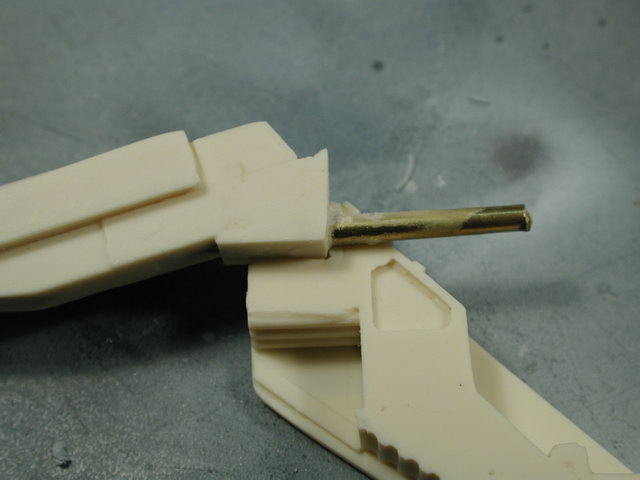
I thought I'd look at the wrist joint again. I carefully lined up the hole by pressing the end of the brass rod into the resin to make an indentation - then I used a dremel to drill the hole. Of course I drilled too far and it went out the other end - but not to worry, I'll plug it with some piece of gak later. Its wise to not use any power tools on this kit, and just use your hands, but I didn't have a pin-vise that accepted any bits as large as a 3/32" bit.

-
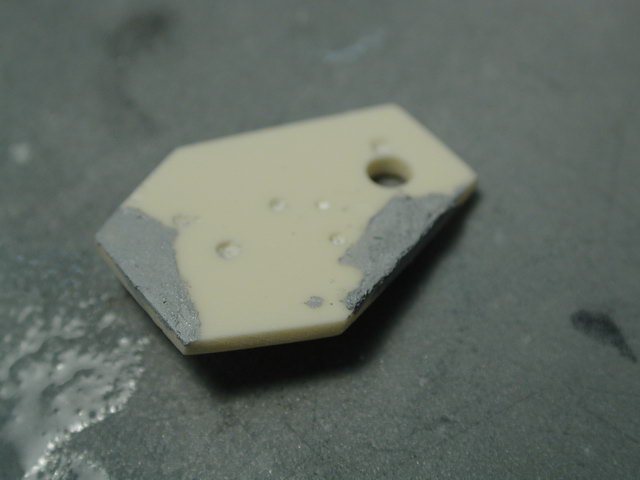
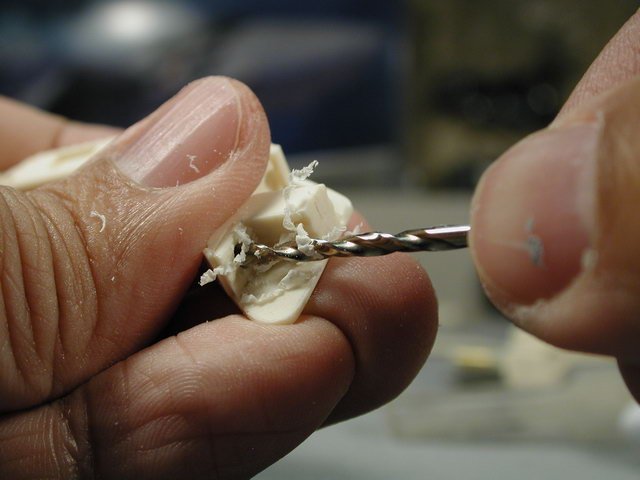
I used a 3/32" drill bit to "ream" out the circular indentations - don't attach it to the drill, just hold it in your hands and use the bit like a pin-vise.