wm cheng
-
Posts
4346 -
Joined
-
Last visited
Content Type
Profiles
Forums
Events
Gallery
Everything posted by wm cheng
-
HEY?!!
-
Thanks for all the kudos everyone, I am going to take a little break from this (mostly just photos left) since the Christmas stuff is really piling up and I got a short 4wk production (YAY!) Hopefully to post and finish up on the Booster in the new year. Thanks for tuning in!
-
Wow Dobber, fanastic work! Keep posting... I love seeing this work - I can't wait for the F-14. I need my model fix (since I can't build right now, Christmas & got a short 4wk production) I can't believe you hand brush - I can't hand brush to save my life!! I didn't know the Ghost was removeable - how does it attach on? I must get one of these kits now! Great work on the scheme, it looks great - keep up the fanastic work!
-
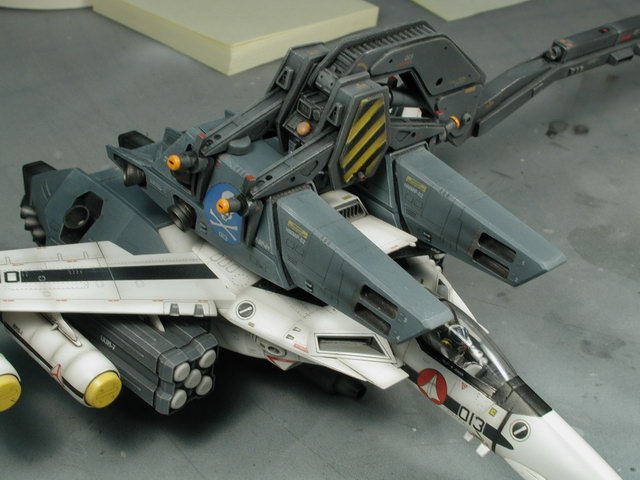
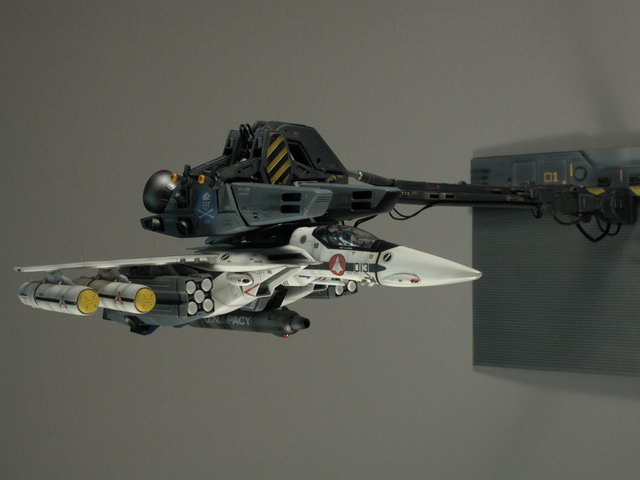
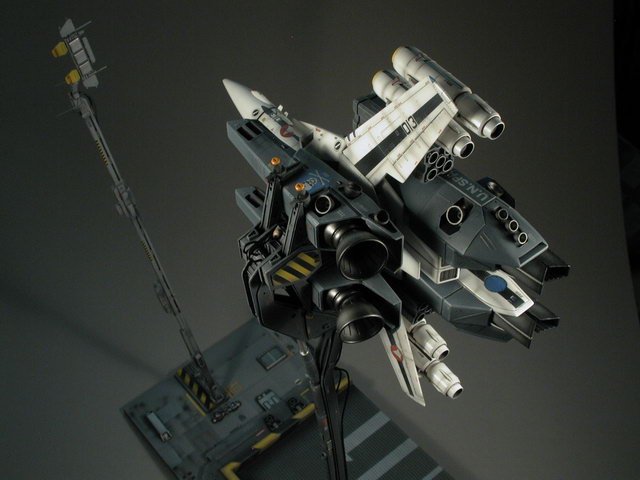
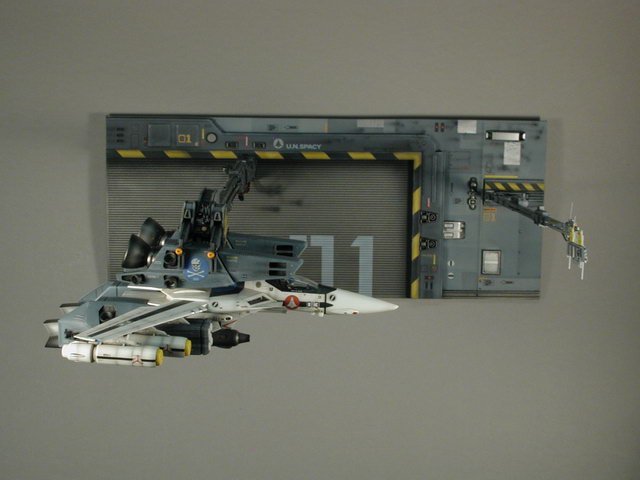
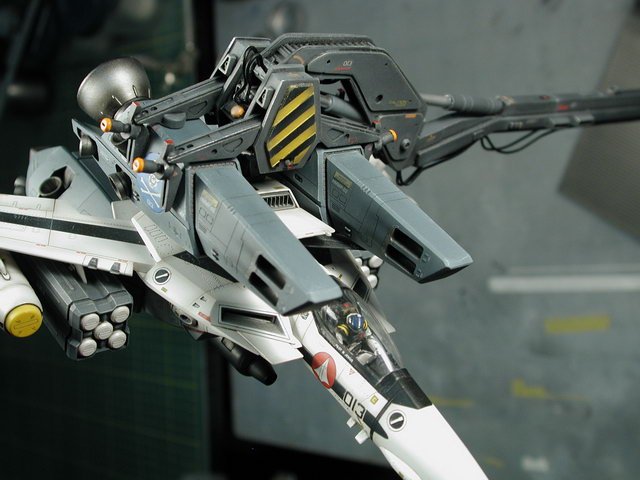
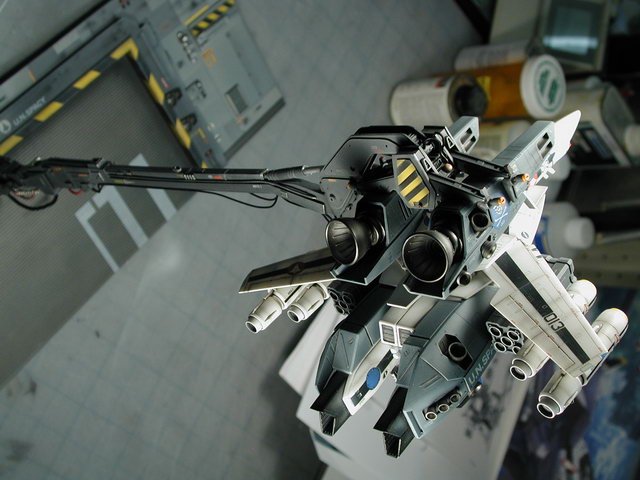
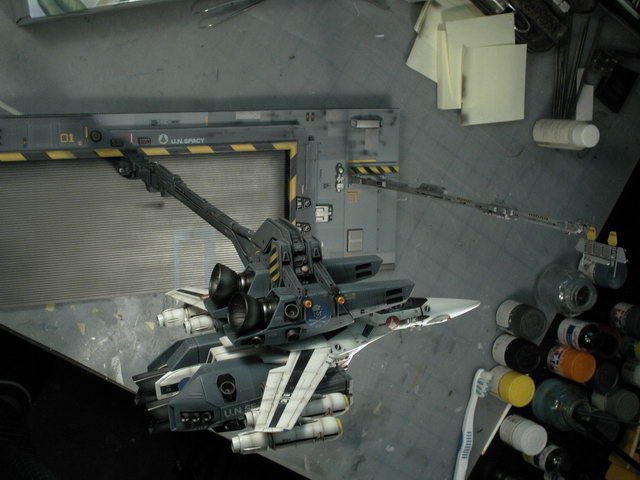
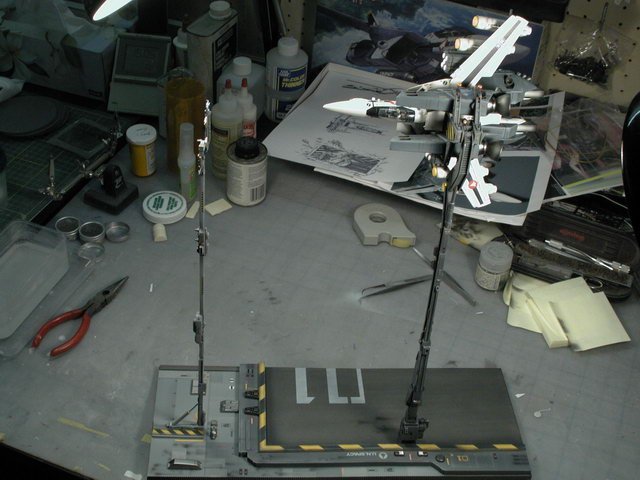
I get some dark grey or black mat board or paper next week to try again. Oh, I forgot one thing, the red and white lettering on the signal arms. I might try to do my own artwork to get my inkjet printer to create something. Here's a few shots with the Valkyrie attached. If I get around to a better photo shoot next week with a proper background - I'll post larger sized photos on the Models forum like I used too and link it to this build up.


-
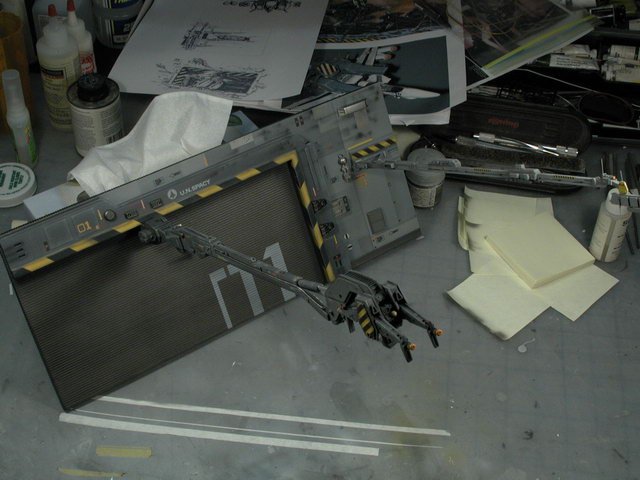
Well, here's a tease of some pictures I took... I'm not very happy with them; firstly, I don't have any solid background big enough (its a tough shape to photograph), secondly all the photos are somewhat blurry (or at least not as sharp as they could be) because its been so dim lately, and the model has such odd dimensions that I need to stop down to try and maintain any sort of depth of field to keep as much of it in focus - however by doing so, I don't really have enough light to keep the shutter speed as high as possible to avoid camera shake at these low lighting conditions. Lastly I can't go outside - its too cold now to photograph in natural daylight. I'll see if I have anytime next week to try again (or I can get back to work on the Boosters! )


-
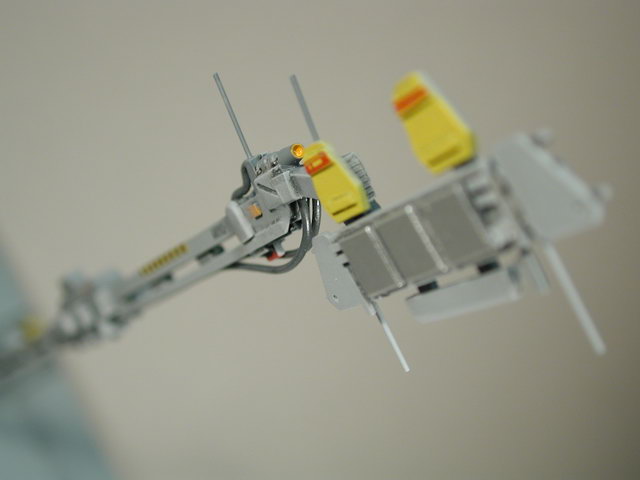
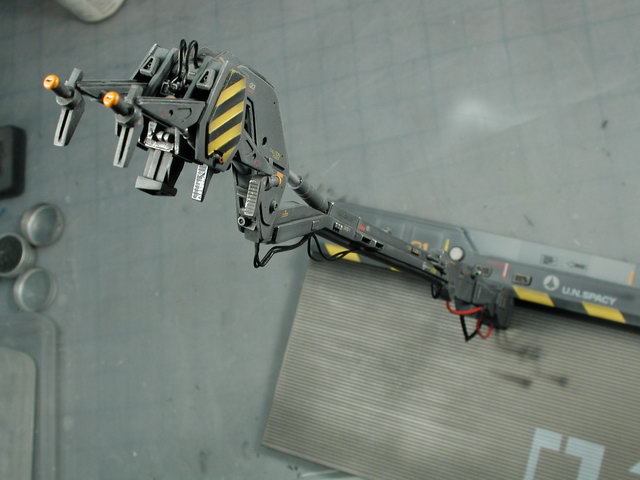
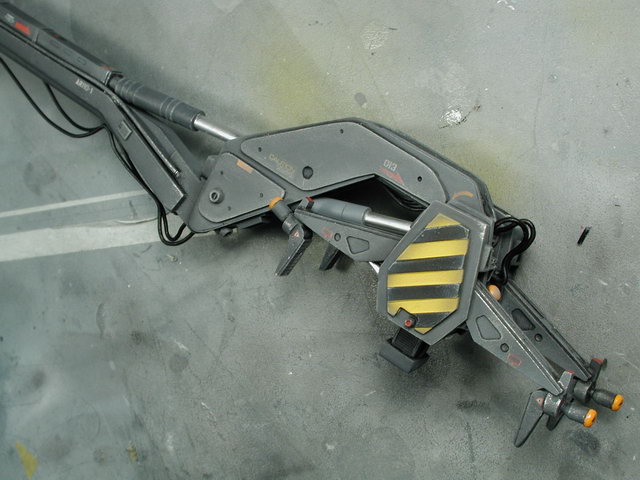
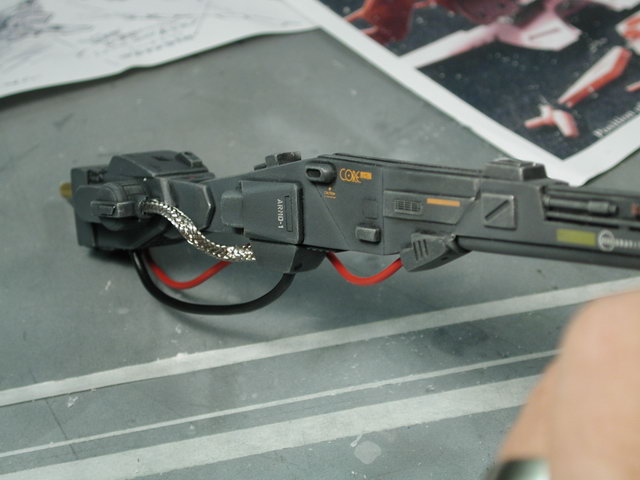
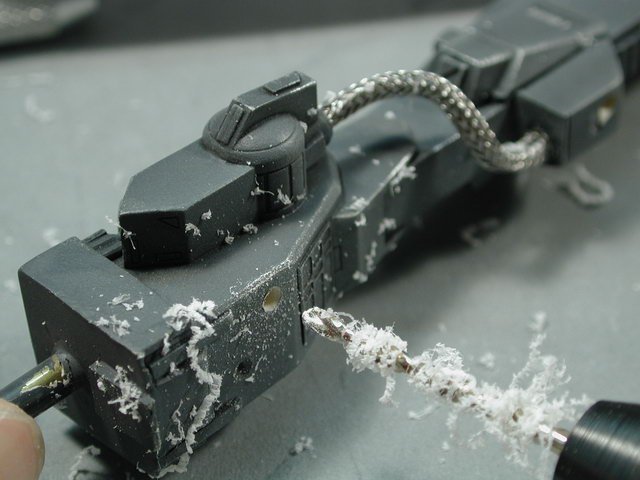
I added some small wireing/hoses to the signal arm today as per the lineart. I had to paint the wires dark grey before I glued them down with crazy glue. Again, I drilled little holes so that the wires had something to seat itself into. I also darkened and weathered the red hose - thanks for the reference pictures and suggestions, I agree, the red hose is nice in there - and now that its weathered and darkened, it doesn't stand out so much. I also did an dark oil wash over the newly added surface optional parts to pick out their recessed details. I also added a brown wash to the hydraulic cylinders - a word of caution here, the thinned down oil/varsol mixture actually attacks the Tamiya silver marker. I forgot about this (I actually learned it doing one of the intake fans on an earlier model - some of you might of remembered the ?!@#$@ incident) of course I forgot and watched it attack the silver on the cylinders. Its not too bad, luckily I didn't add too much. Remember what I said about the fact that there are never any perfect models?!

-
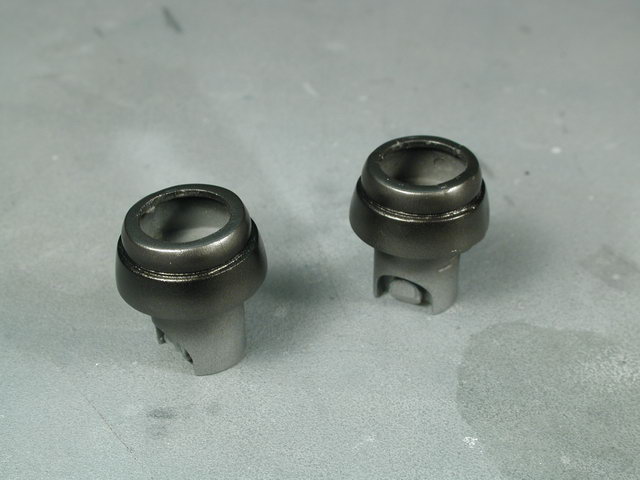
Fantastic - clean and simple - I love Hasegawa... now how much? Since the last top pieces seems like its could be ball-jointed, I think they might work as flight display stands for the Valkyries with the gears up!!
-
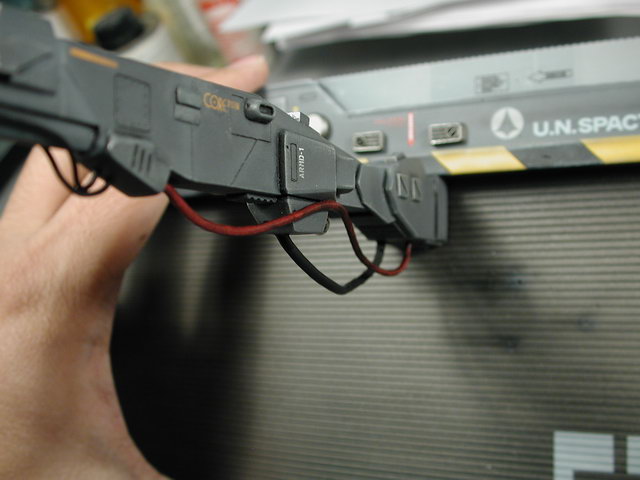
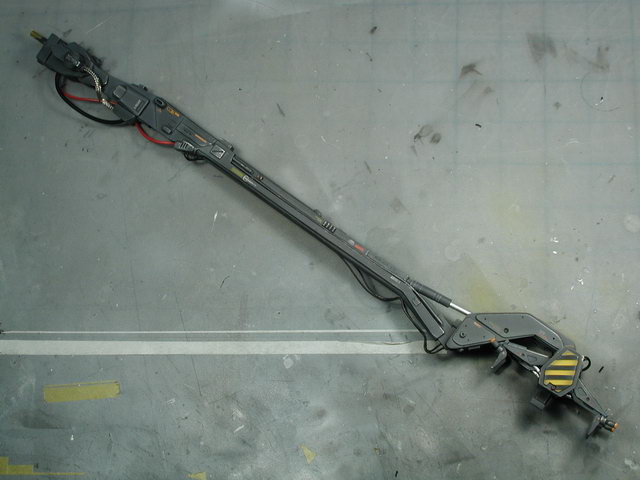
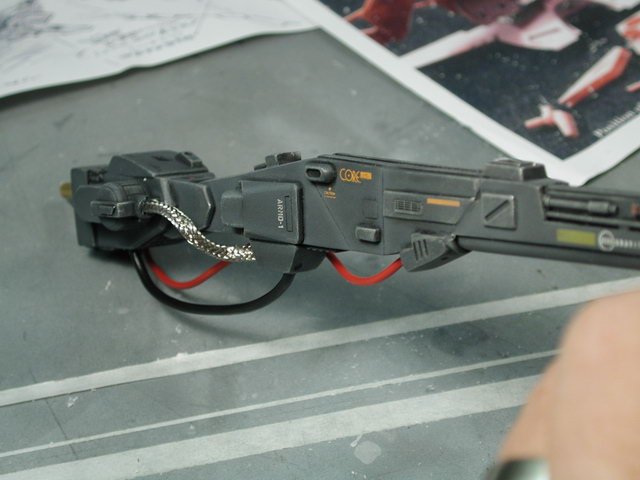
I think I'm about 98% done... just a bit of a oil wash on the newly added optional surface detail pieces and some hydraulic oil leakage on the actuators and some clips to look like they are holding the newly added hoses in place. What do you guys think about that red wire/hose near the base? Does it stand out too much? Does it look too much like a red wire? I can't decide whether I should paint it out dark grey to match everything. Then it will be off to a decent photo shoot against a dark background...

-
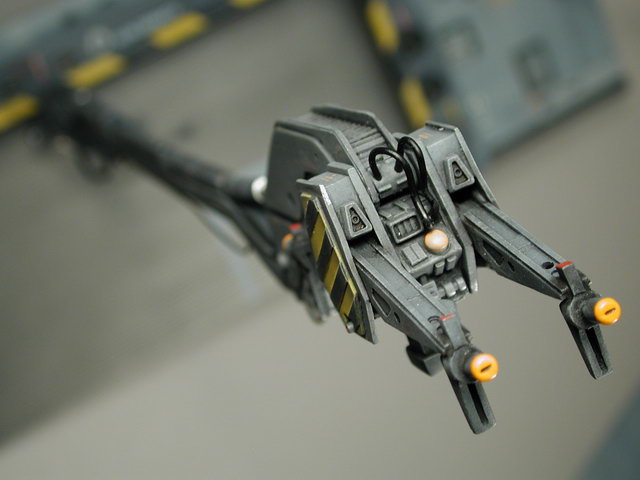
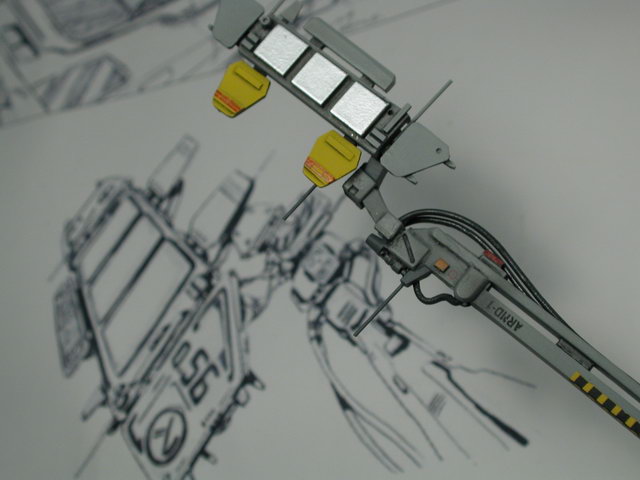
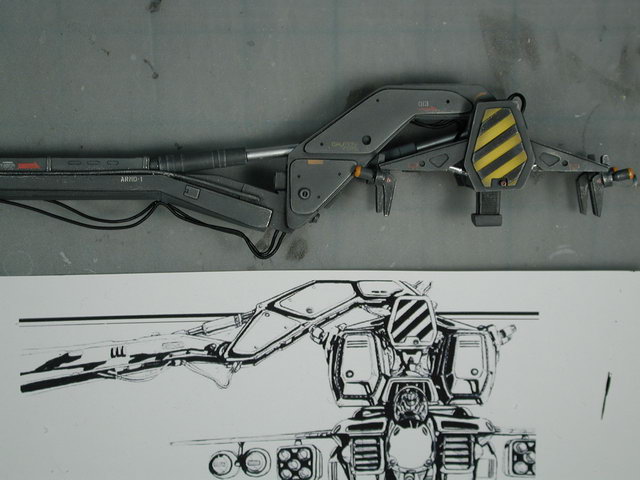
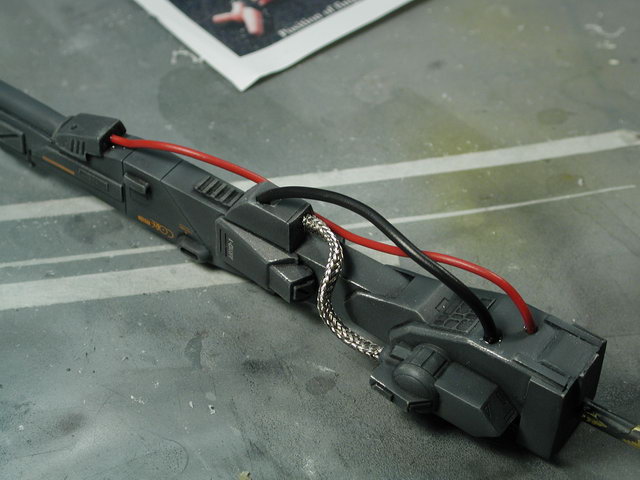
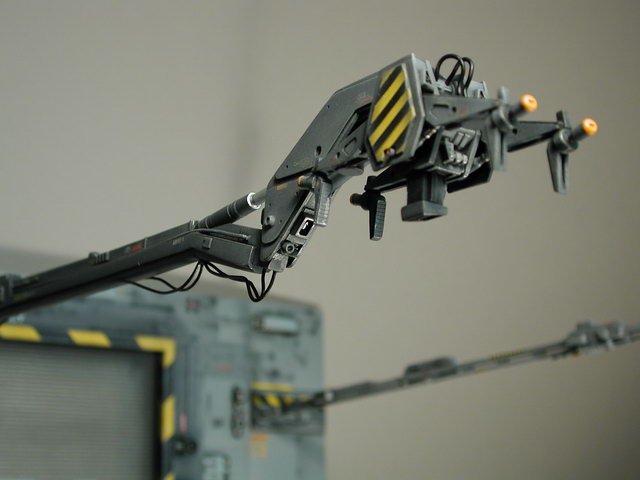
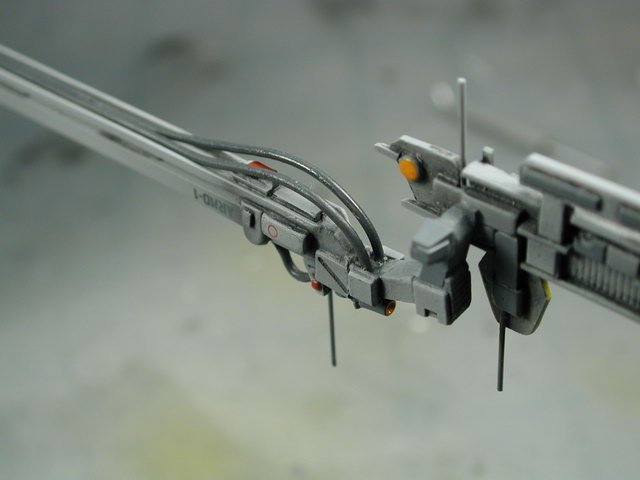
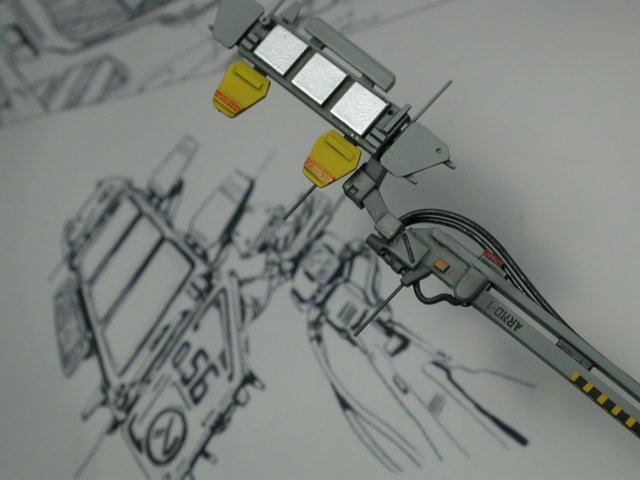
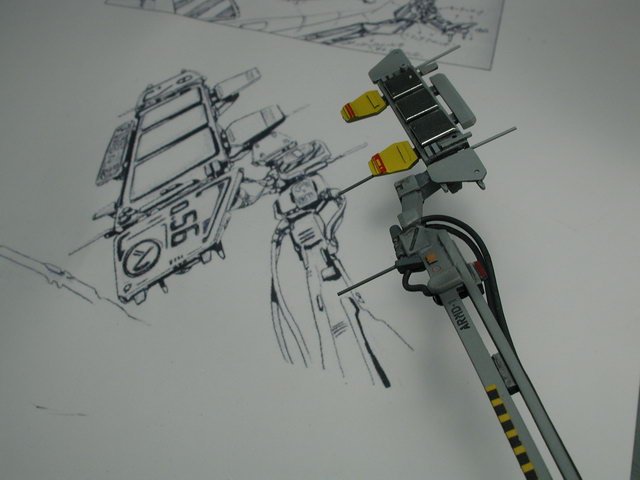
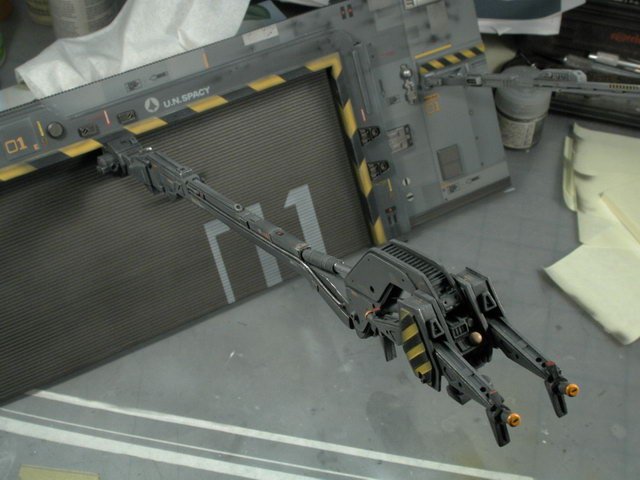
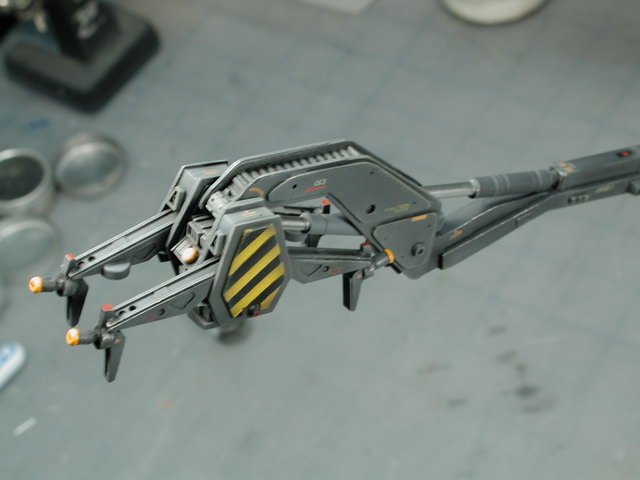
I then added some smaller scale hoses up forward on the arm. Instead of using the supplied yellow wire for this (I found that the supplied yellow was too flexible and did not hold its shape) I used some wire I had lying around that has a stiffer wire core that allowed me to shape it the way I liked and it held that shape. The photo below showed one of the lineart drawings I was using as a guide. Of course I had to paint the wires black first, before I glued them in place with crazy glue. I also had to touch up some of the wires and mounting holes with a brush with ModelMaster Acryl flat clear coat to disguise some of the excess crazy glue that showed around the edges. The crazy glue dries glossy and shiny, and the flat clear-coat helps blend it into the rest of the flat finished arm.


-
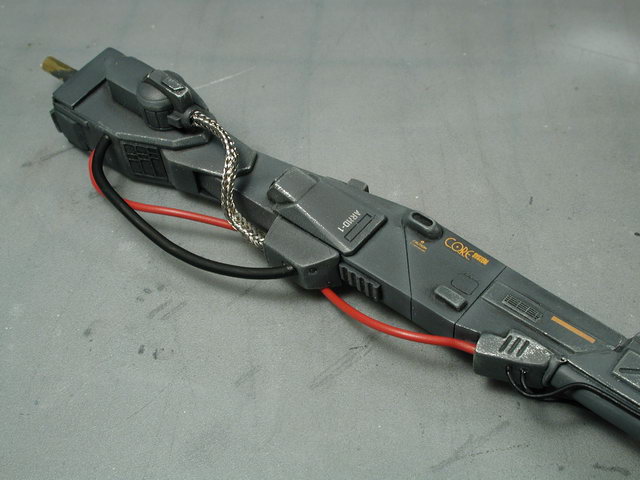
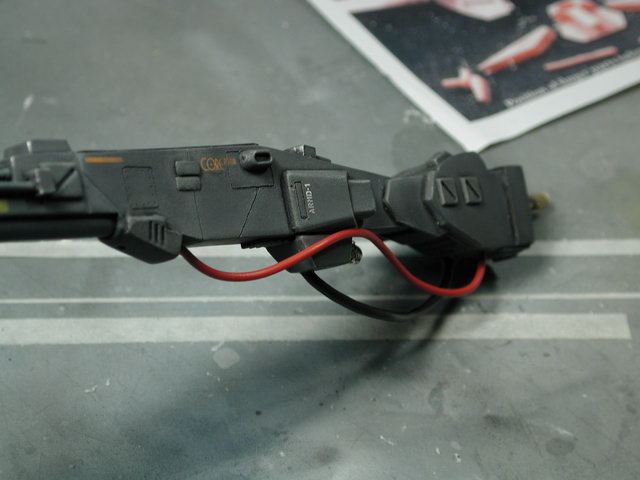
Thanks all! Hey, hasn't anyone started building their yet? I couldn't wait to tear into it! How about Gundamhead or Jessie? I'd love to see any of your works if you started on the arm. As I mentioned earlier, I started attaching the extra hoses that were supplied. I first drilled out the circular depressions that Gundamhead provided so that I had something to seat the wires into (it allows for a better glued connection) There is a photo in the instructions which show where the supplied wires go into on the arm. It also makes sense that you'd need connections across a major "joint" in the arm which slack in the hose for potential movement. The kit supplies the hoses with a bit extra on the ends which I trimed off and I bent the hoses/wires into shapes that approximated the lineart drawings before gluing them into the holes I drilled in the resin arm. I did change the forward mounting position of the thick black wire so that it tucked in at an angle - the original location forward of the bulkhead seamed to be in the wrong direction.


-
Argh!! So sorry to hear about your tragedy Spatula... I've just had about everything happen to me. I've completely finished a Enterprise-E with all the intricate panelling all airbrushed - and after a month, I started noticing that the lower portion of the main saucer had a little divit in it, and when I pressed it, it was soft to the touch. Over the next few days, it grew and grew to cover 1/5 of the entire underside of the main saucer section - it was like a soft warped ripple. Apparently, I used too much testor's orange tube cement (which I still use all the time now) and it was still acting on the styrene months after I finished the model. It has now re-hardened, but the melted ripple is now permanently on the underside - and I can't see putting all that effort in re-building it (so its sits really low on my shelf ). It will eventually re-harden, but not without deforming the plastic - possibly months later. I've sworn off squadron putty years ago - I didn't have your problem of melting, but I find that stuff really hard to work with, just more aggravation than its worth. I almost exclusively use Tamiya regular putty now, its amazing and sands beautifully, but occassionally, if you let it sit in the tube too long, you will see a whitish liquid separate out of the grey putty, this is the solvent that allows the putty to attach to the styrene (and could melt the styrene) all I do is wipe the excess whitish liquid away with a paper towel and continue to use the putty. Sometimes if I want a slightly more liquid putty, I apply some Tamiya liquid cement to the putty and it turns much more viscous. But basically all solvent type cements will eat away at plastic if used improperly - just be careful. I still use the testors orange tube all the time - I love it for high strength joints - nothing beats melting the plastic to fuse two parts together! I may try experimenting with other types of chemical glues like Tenax-7. But in the meantime I still stick with my trusted and true Testors orange tube cement and Tamiya liquid cement. Occassionally I would use crazy glue to attach photo-etched metal parts or resin material. And I will use 5 minute epoxy glue on resin or metal materials that need high-strength. I will only use white glue on canopy parts or any part that will never be stressed. I DO NOT RECOMMEND BUILDING ANY MODEL WITH WHITE GLUE - it is water soluable and non-perminant. Its a bummer... but you now learned a valuable lesson about solvent type chemicals such as putties and glues and the fact that if you use too much, the solvent will still work long after you do. It doesn't mean you should stop using them - its just experience that you have gained now. Modelling like any other craft or skill, anyone can get better with practice and experience. Don't get too discouraged.
-
Lastly for tonight... I thought the base was kinda cool just for other aircraft - it really has an aircraft carrier quality to it - especially the outboard elevators. Hmm... maybe Gundamhead & Jessie can sell it with just the base aswell... So I need to weather and oil wash the newly added optional details. And lastly, (which I'm looking forward too) I get to add all the wiring and hoses to connect up the arm, wrists and claw portions in the next few days.

-
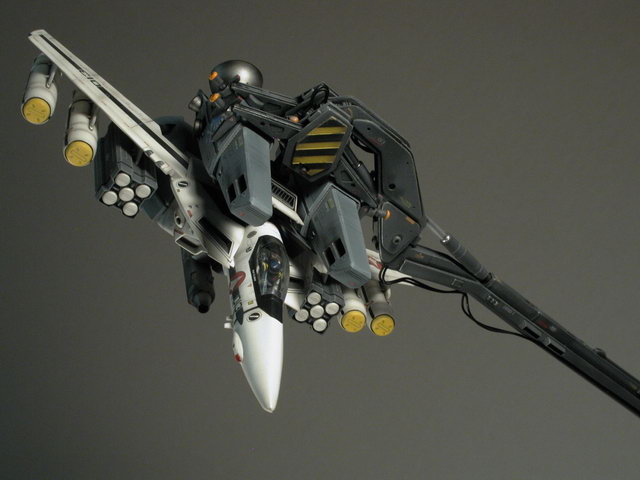
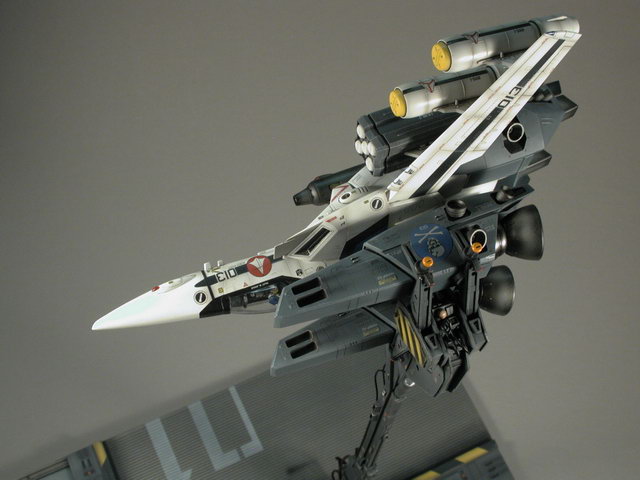
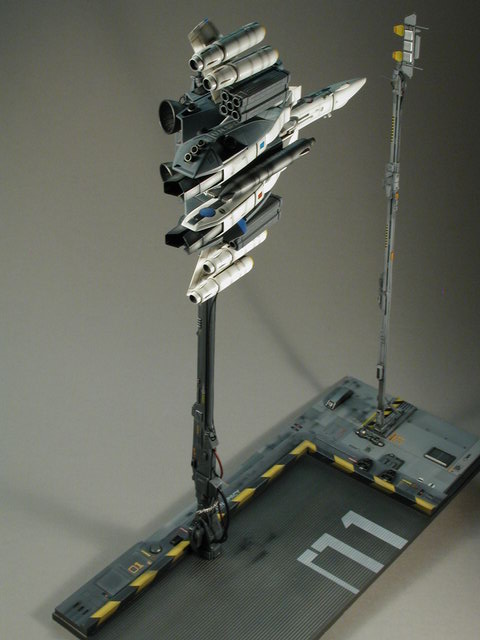
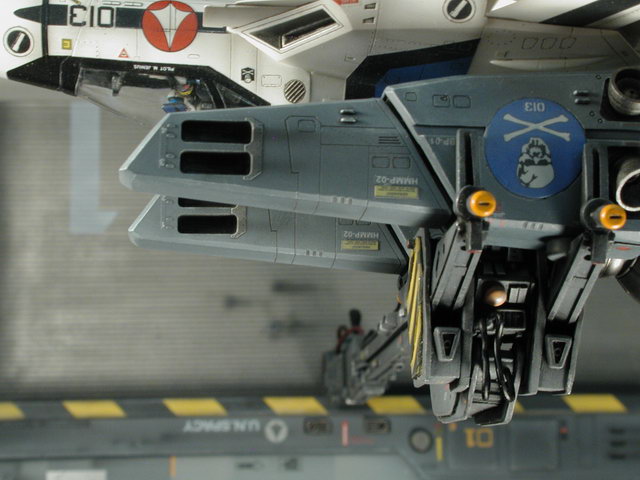
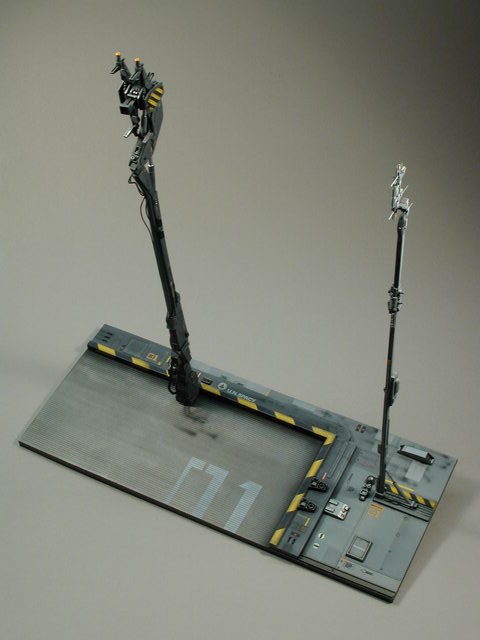
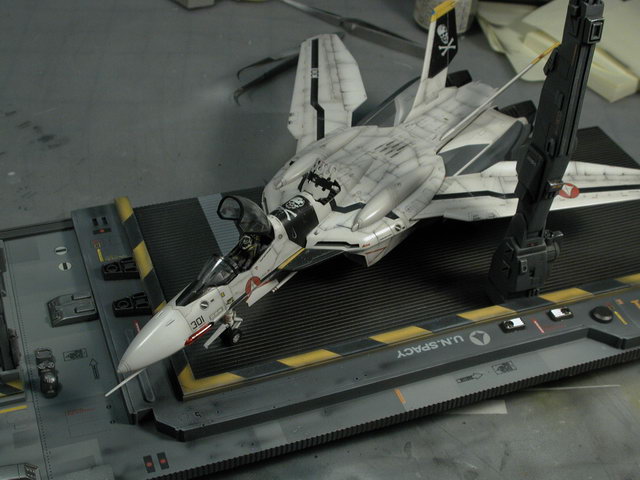
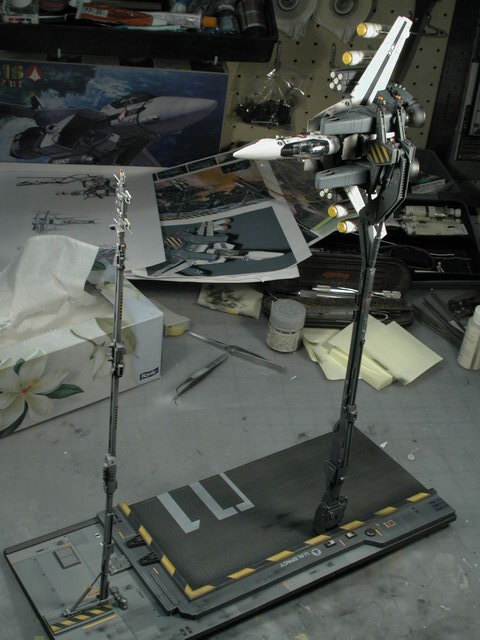
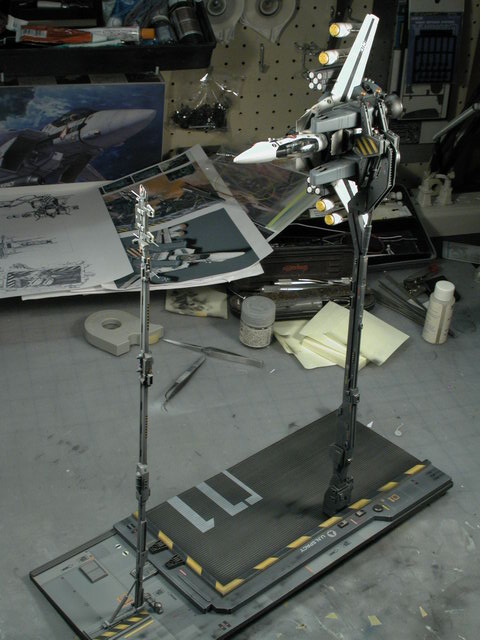
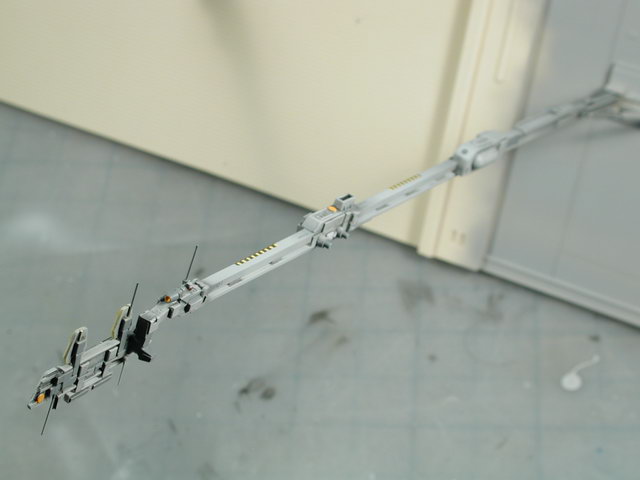
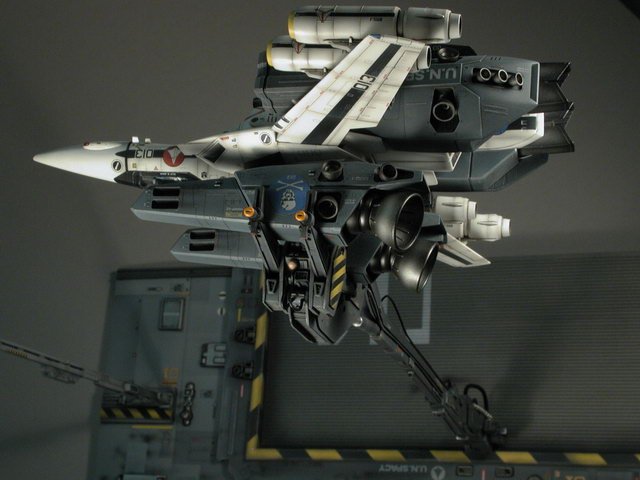
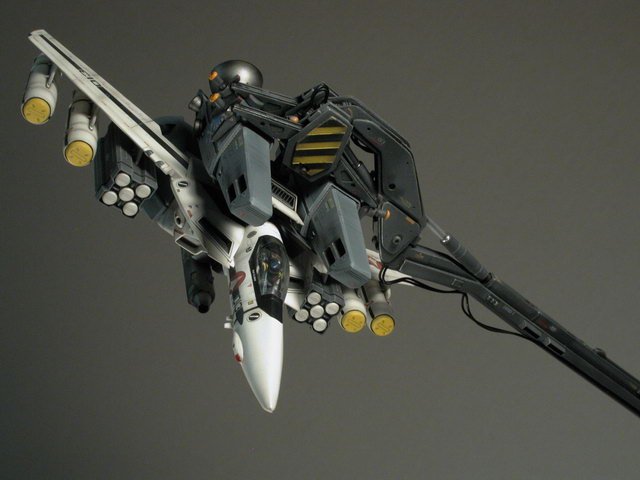
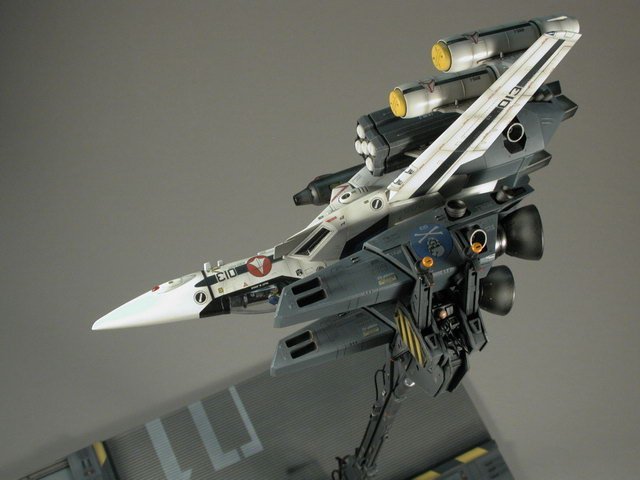
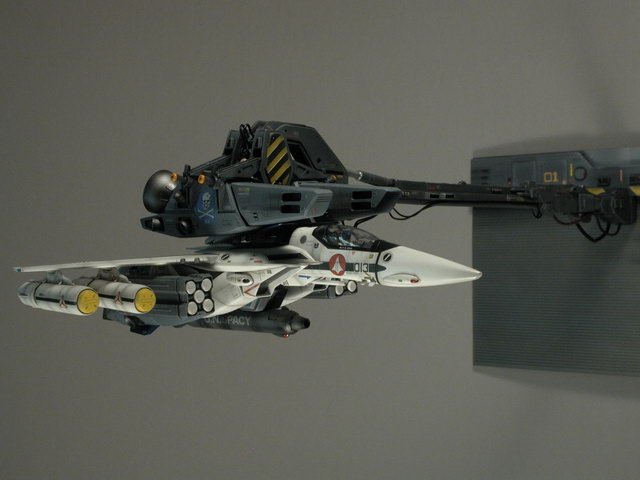
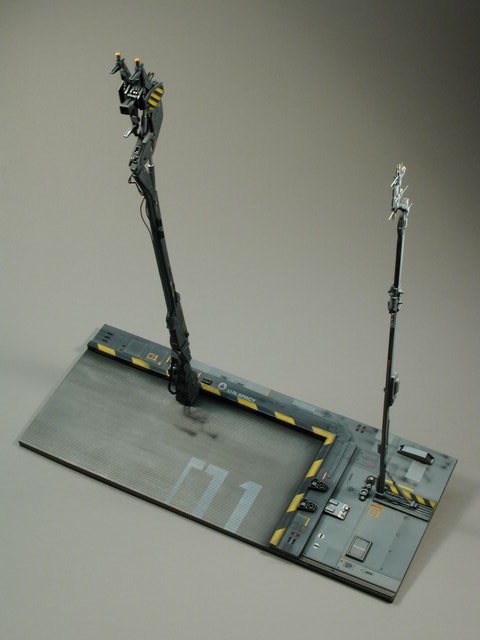
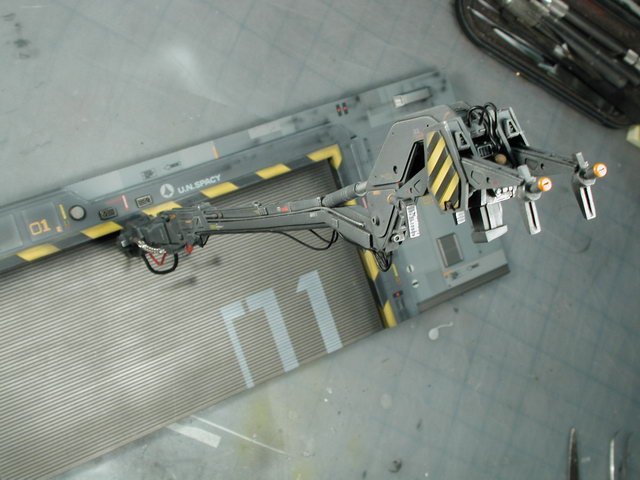
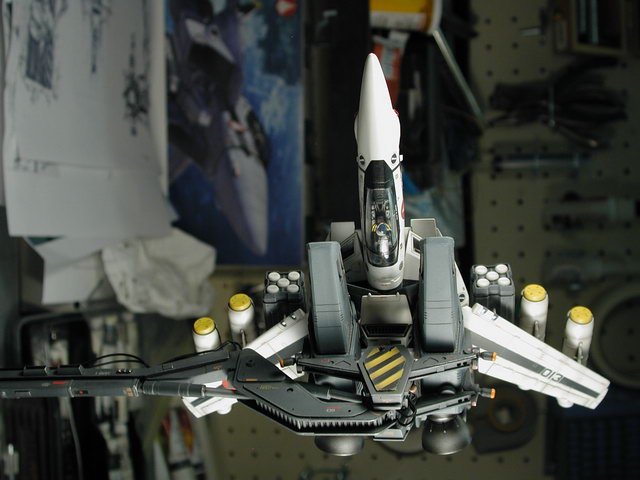
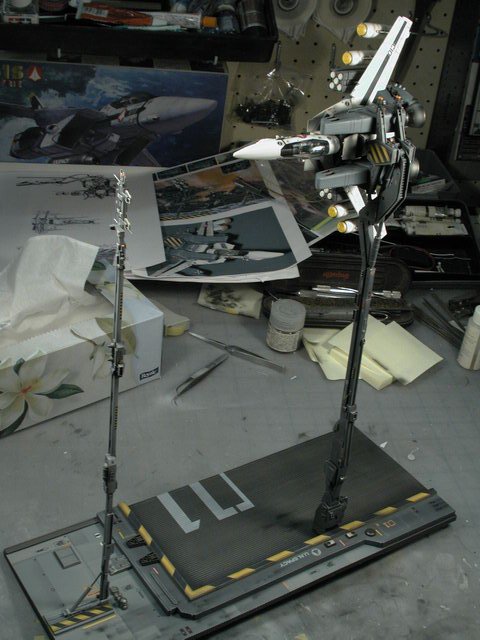
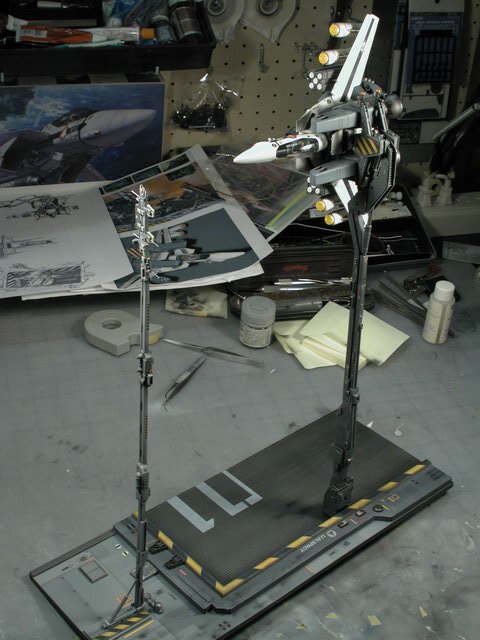
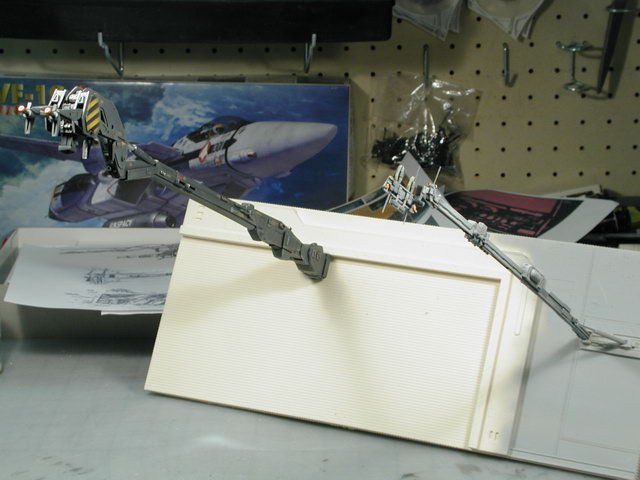
I just had to fit it all together for the weekend - and I'm happy to announce that its been supporting my Valkyrie up like this for the last 72 hours without a hint of sag - now I did goop on the extra 5min epoxy at the claw fingers - and I highly recommend doing that especially if you intend to display the base flat instead of hanging it against a wall. The inner fingers are what really supports the Valkyrie, but then again, the Hasegawa model isn't that heavy to begin with (also I did re-glue the three connection points on the backpack - the two hinges and that flat finlike area with 5min epoxy too - but that was all it needed, I think screwing it would be a little over kill).

-
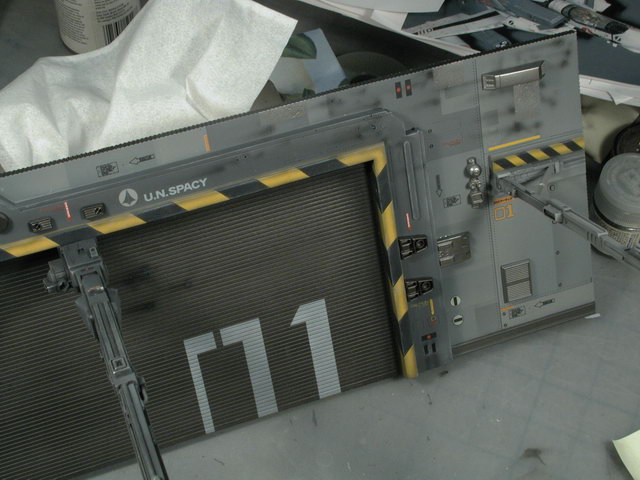
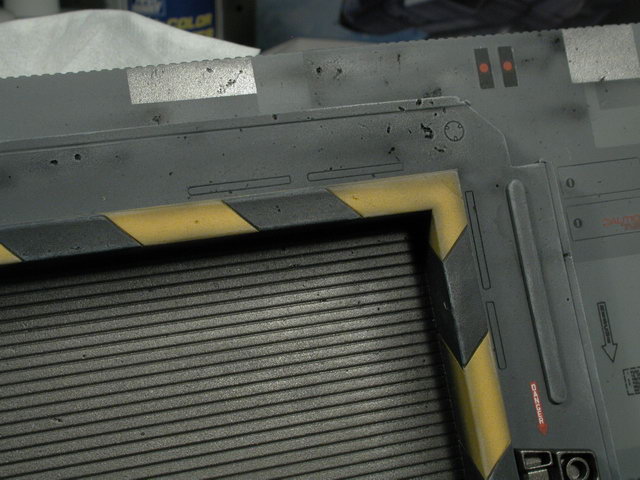
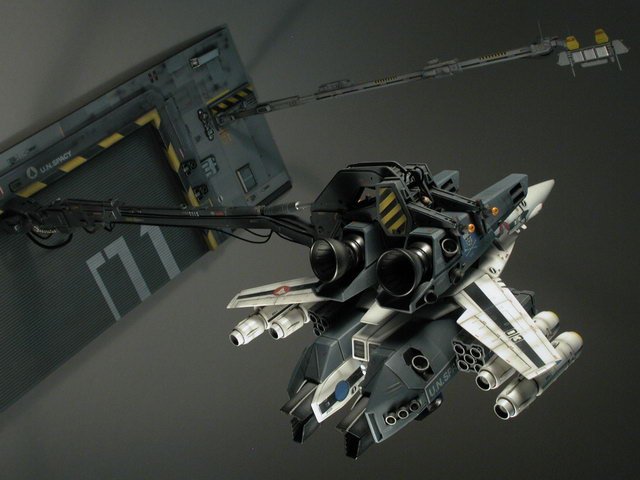
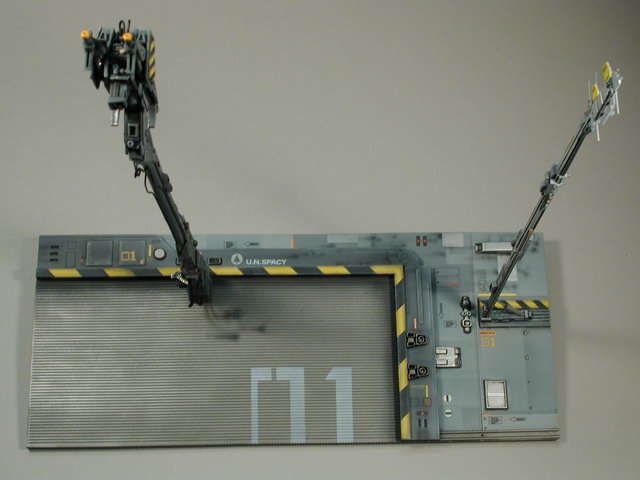
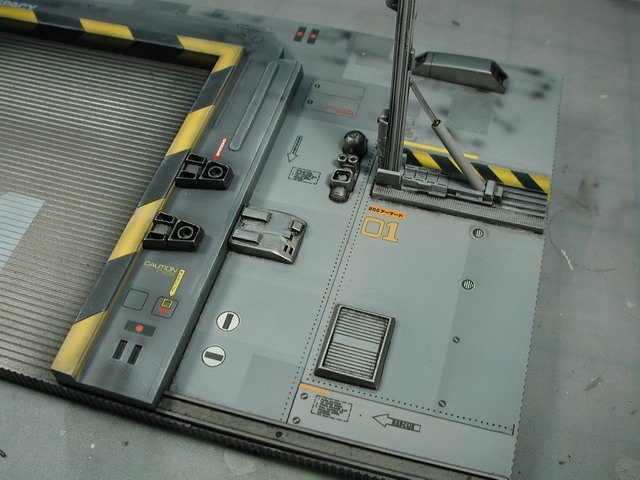
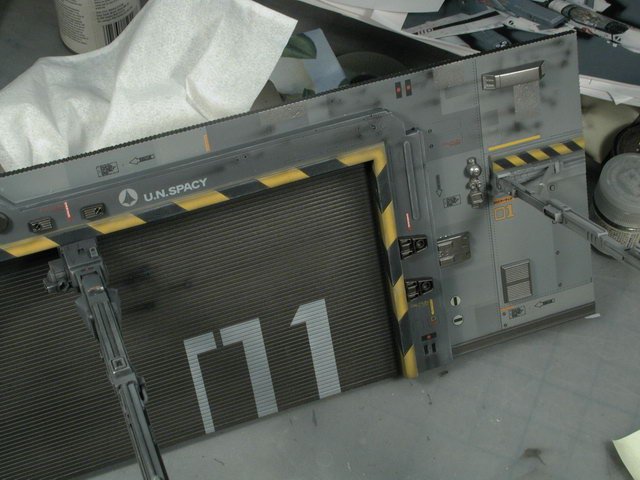
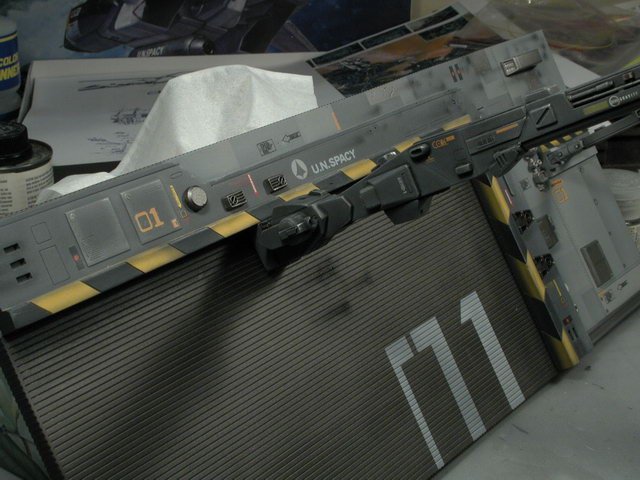
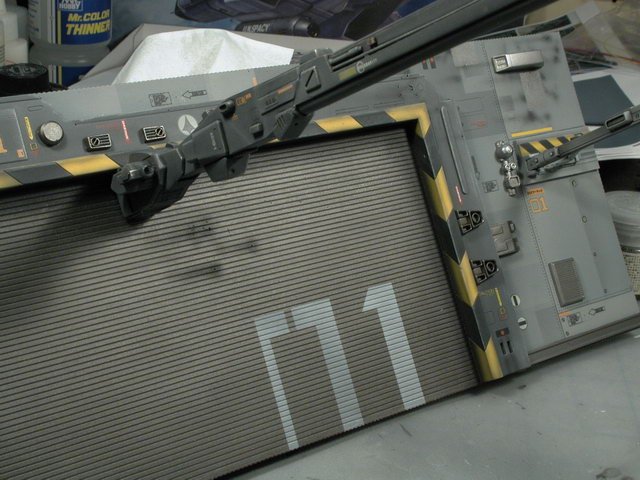
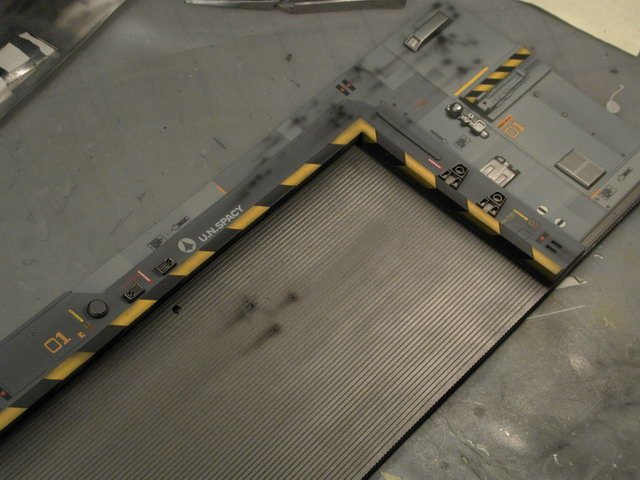
You might of noticed that I found some cool orange decals "01" from an old Crusher Joe kit - so this became Hanger 01. I thought the main hanger doors were a little barren, so I decided to mask a partial "01" on the large doors themselves to add a little interest. I lightly airbrushed a very light coat of flat white on the masked area. I also took this opportunity before I glued down the optional details to dry brush some white and a little silver onto the raised details of the hanger surround. This ties it into the launch arm a little more and evens out the weathering while tones down the decal colours. Additionally, I added a few panels of Alclad "Dark Aluminum" on the surface of the base - I thought the blast marks were a little overdone, so I'd tone them down by "performing a few repairs" as though someone had come by and welded a few new silver panels to cover the blasted areas but hadn't painted them the hull colours yet (ala Star Wars rebel fleet) The newly applied optional details were airbrushed with Alclad's Dark Aluminum for the pieces to be applied to the lighter grey backgrounds and Alclad's Steel for the ones that were applied to the dark grey hanger surround. They kind of stand out right now, but will recieve a dark oil wash to pick out their vents, and a lighter grey dry brushing to tone them down a little bit (not too much since I wanted a little bit of a metallic gleam for the base surface). Lastly, I wanted to show a close up of the "battle damage". I quite liked the molding "mistakes" - I guess there was something in the mold when the resin was poured - but they sure don't look like bubbles. With a little creative airbrushing for some charring and streaking, and a little silver dry brushing to pick out a metal edge - I think they look like "blast" marks quite convincingly. And it was easier than filling them with putty and sanding! anything to reduce sanding!!

-
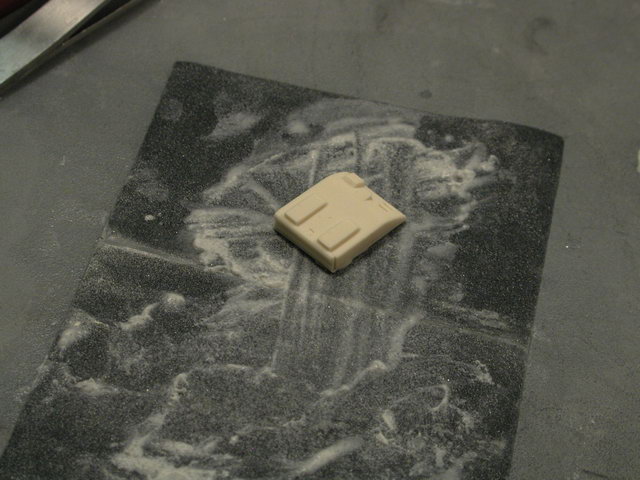
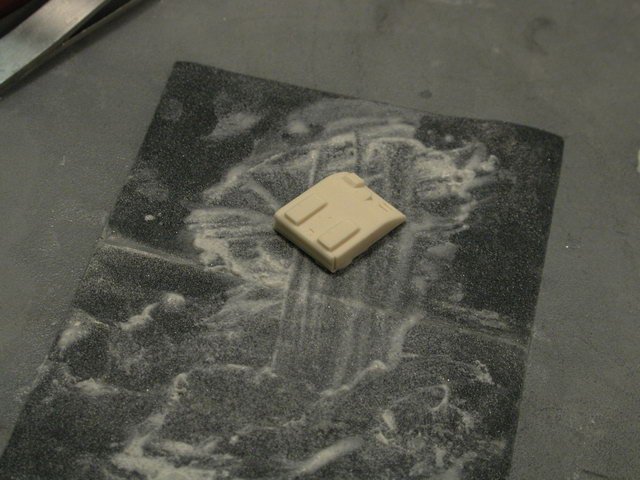
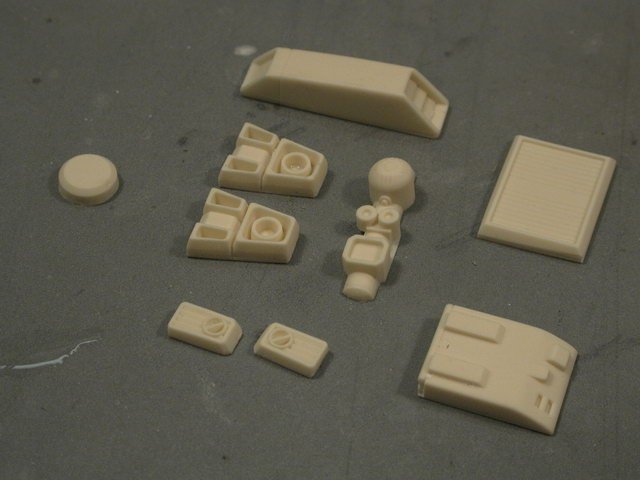
I started working on the few extra pieces that Gundamhead had provided as optional add-on detail for the base. I first sanded off some of the extra resin on the back of the pieces by rubbing it against a rough sandpaper (its actually good to rough up the back side - save time in using a coarse paper, gives the surface some tooth for the glue to bite, plus we never see the backside) place flat against the table surface.
-
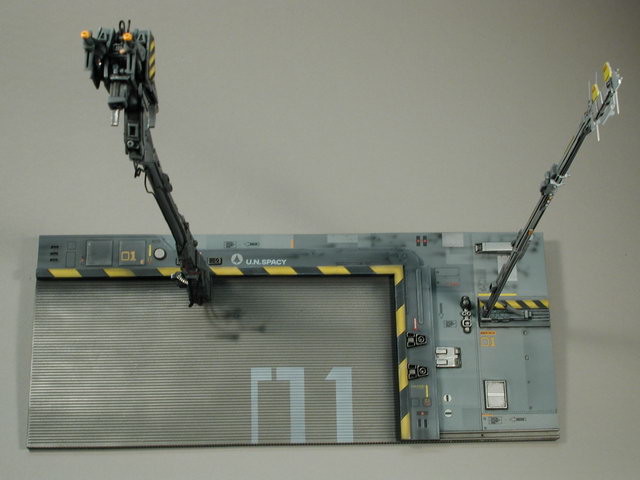
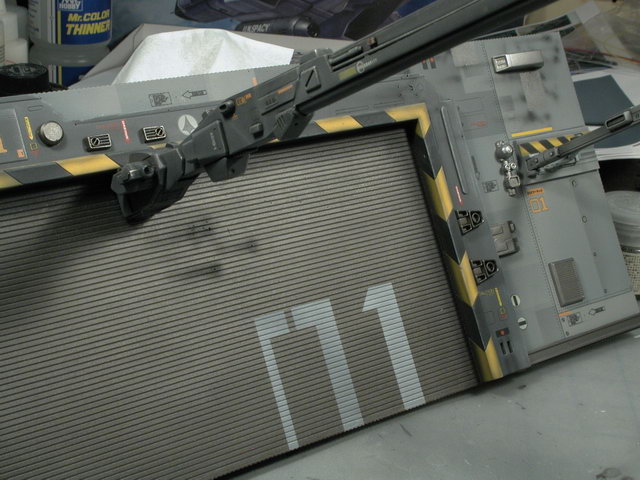
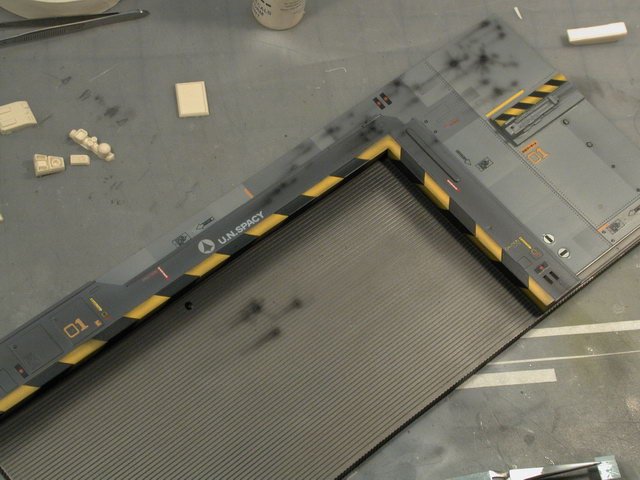
I will definitely take some proper pictures when I'm finished - but I'm not done yet. Although it shaping up to be a big one, so it will be hard to find proper lighting and a neutral background large enough to shot this baby when I'm done. Ah! I've long given up on "the" perfect model - I now know with my emmense expertise that it does not exist - and I should strive for it... but not kill myself when I don't achieve it. Its kinda zen now... I just have to learn of more creative ways to turn mistakes into opportunities. Well... I was kinda worried when I couldn't log into MW for the last few days?! I got a few more things done. I started to decal the base as well. I was trying to take clues from aircraft carriers and hangers - but I didn't want to over do it and take too much attention away from the arm and Valkyrie, since that is the actual model piece. The base, to me should remain in the background to the main model. However, I wanted to add the "dots" of colour that we see in the animation cell - so I mainly chose yellow, red and orange decals. (excuse the next few shots - I forgot to turn the tungsten while balance setting back on my digital camera - hence the orange cast on the photos)
-
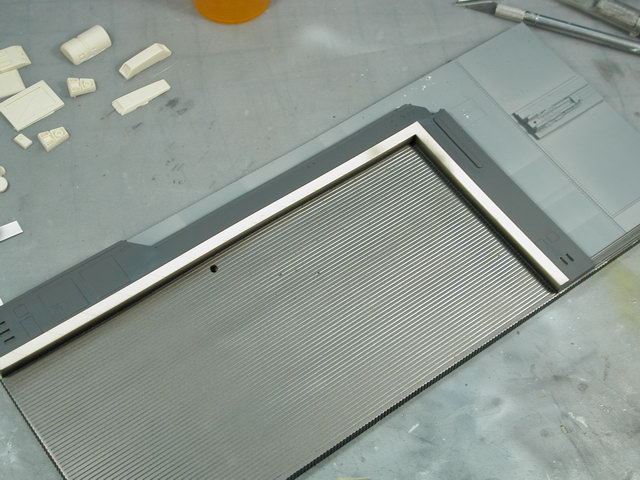
Unfortunately... I cheaped out on the tape! The base was so large, I started using the regular masking tape - and boy was that a mistake. I forgot how fragile the Tamiya flat paints were, especially on resin. I've been sealing each coat under a clear coat of some kind on my styrene models - which works well at protecting the paint from being pulled up with the masking tape. But I didn't seal each colour in with the base - I just started painting and masking... well, the cheap ass regular masking tape pulled a lot of paint off - the Tamiya stuff worked wonders - I guess you get what you paid for You can see all the white specks as the resin showing through from beneath. I just painted patches/panels of a different colour of grey to hide some of these spots. Also, I had a few imperfections on the surface of the mold - I was going to just fill them in and sand it smooth, but I thought I'd do some battle damage on them to add a bit of interest. I airbrushed some burnt black on the affected areas and trailed them off as though the ship was moving when it got hit - an effect I did on my X-Wing fighter I stole from ILM modelshops Its a little heavy now, but in the end after I clear-coated and decaled everything - I will spray a dark aluminum metalizer panels over some of the blasted damaged areas as though some of them were repaired with a new panel. I then sprayed some Neutral Grey to lighten the edges of the dark grey surround and darken some panels of the lighter grey surfaces - to tie the surfaces closer together in terms of tonal range. I also faked in a darker shadow line at the top and side edge of the hanger door to give it some depth. I may spray a partial white number on the hanger door. I have sprayed a semi-gloss clear coat to seal in this paint and prep the surface for decals & oil wash. Just a bunch of misc. warnings and stenciling with some bits of orange, yellow and red colour to match the cell a bit more. Then a final flat clear coat over top of it after the decals & again some dry brushing to pick up the highlights. Somewhere in there I will add the extra optional details.


-
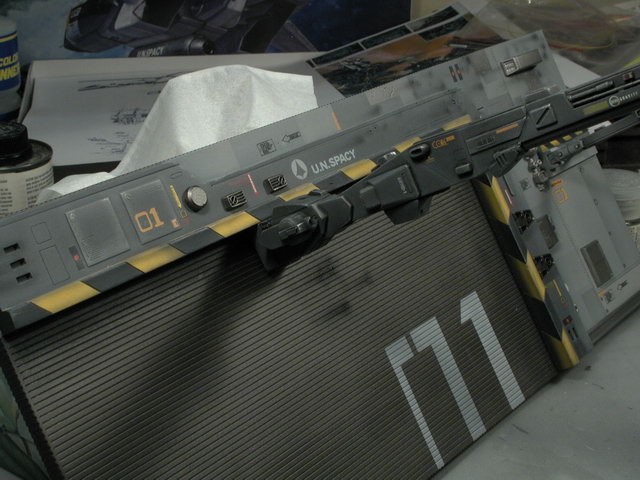
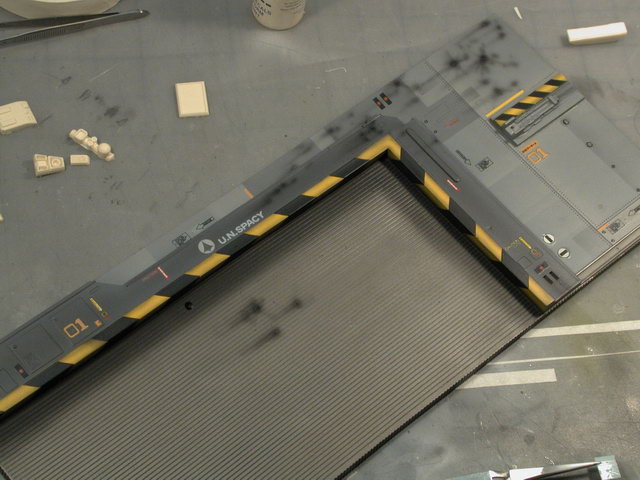
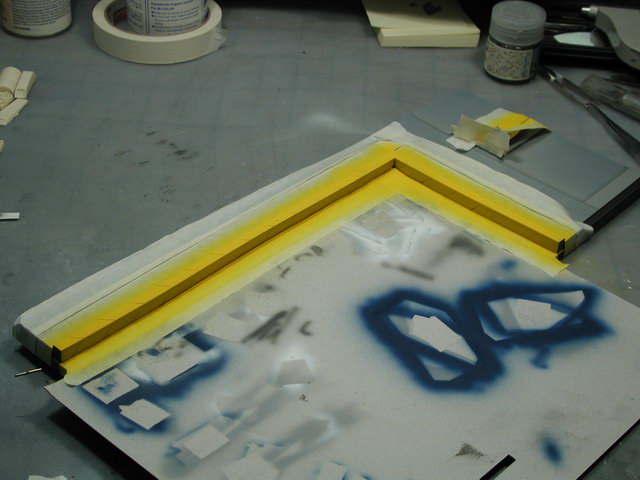
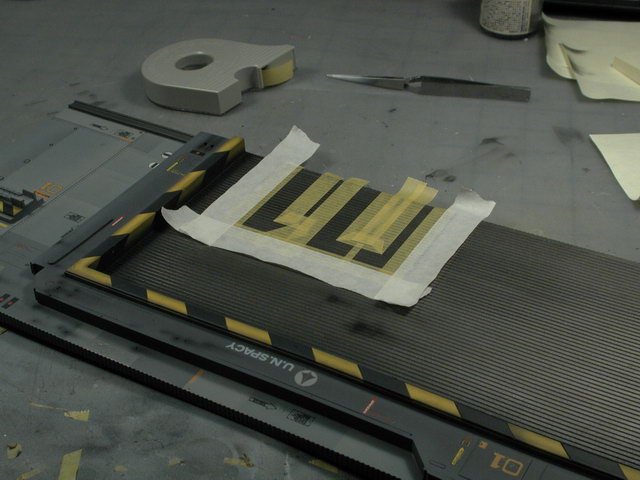
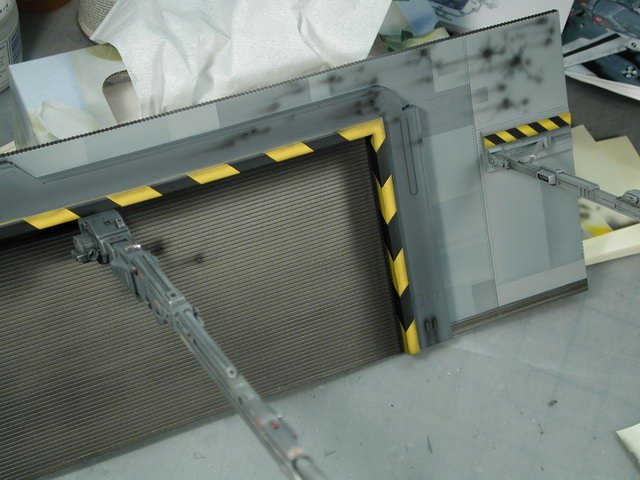
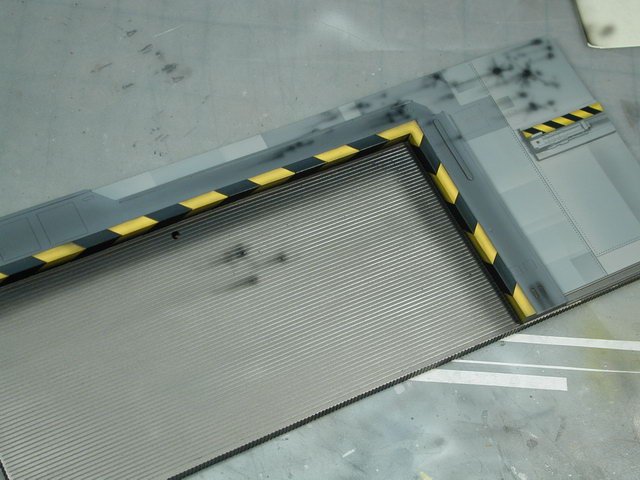
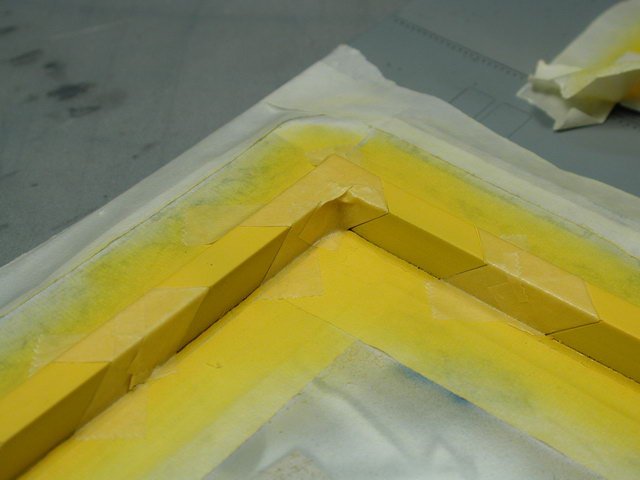
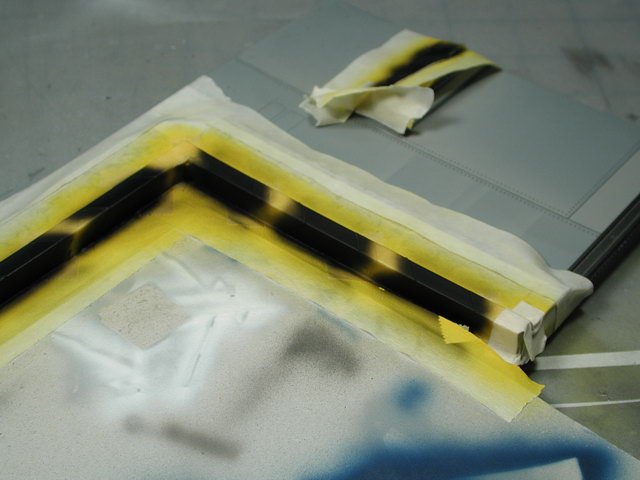
Well... here's some shots of the masking involved with the yellow and black warning stripes. Nice of Gundamhead to etch in the diagonal lines to follow.

-
Haha spoken like a married man! so true... Man, fernarias - I wish I knew about this site beforehand... they have some really great shapes for this project. Well, I got mine at Lee Valley Tools up here in Canada - they sell great esoteric hardware in Toronto, highly recommend those who live here to pay them a visit, they have a great catalog too. Unfortunately, Lee Valley doesn't have all these shapes - I will try them next time I need something. Nothing much to show, just masking for the yellow warning area and letting the yellow paint dry before doing the black stripes. Hopefully there will be something to show later on tonight.
-
I should add the yellow and black warning stripes next.
-
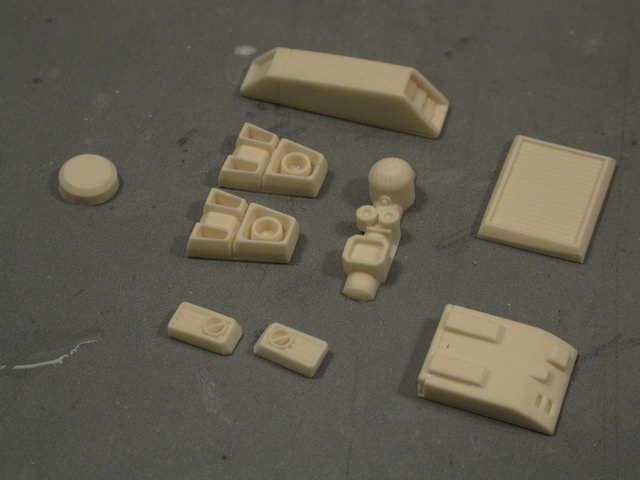
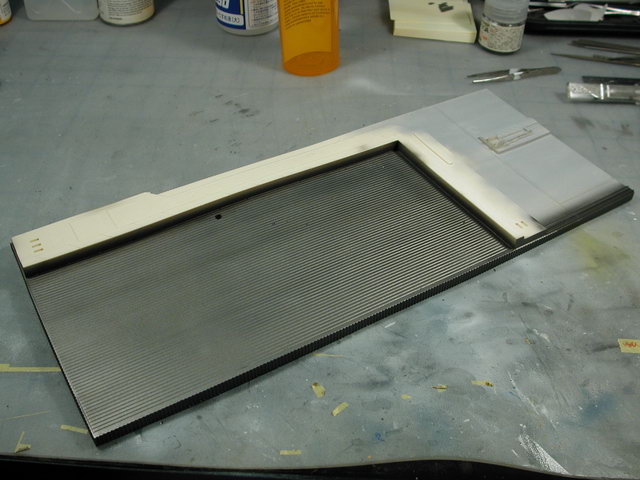
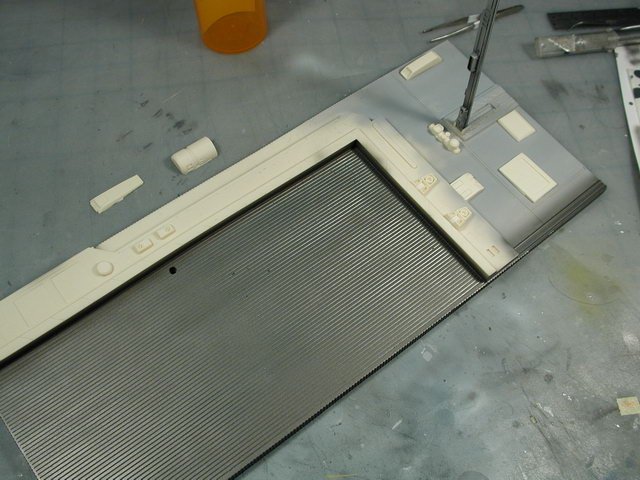
I started to work on the resin base as well. I gave the main hanger doors a coat of Alclad metalizer Steel while the exterior of the ARMD was given a coat of 1:3 Medium Blue mixed with Skey Grey. I notice that in the animation cells, there was a distinctive blue hue to the the exterior. I then also started playing around with the extra pieces that Gundamhead provided to detail up the exterior of the ARMD. I decided that I would probably want to paint these pieces differently, so I would keep them separate and attach them in the end when I'm weathering. Here's a shot of the base as it stands now. I used the cheap regular masking tape for the darker grey areas - and a combination of either not waiting long enough, or cheap tape and the lighter grey dusting of highlights - when I peeled the tape back, it removed a few chunks of the blue/grey surface Argh. I'll probably mask that area off and spray another shade of grey on it to hide it.


-
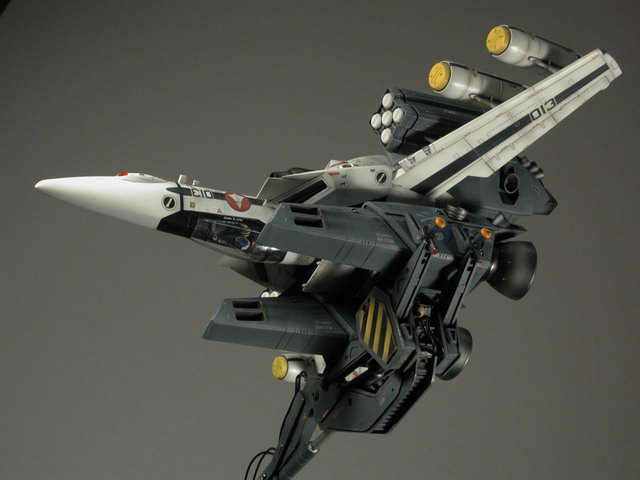
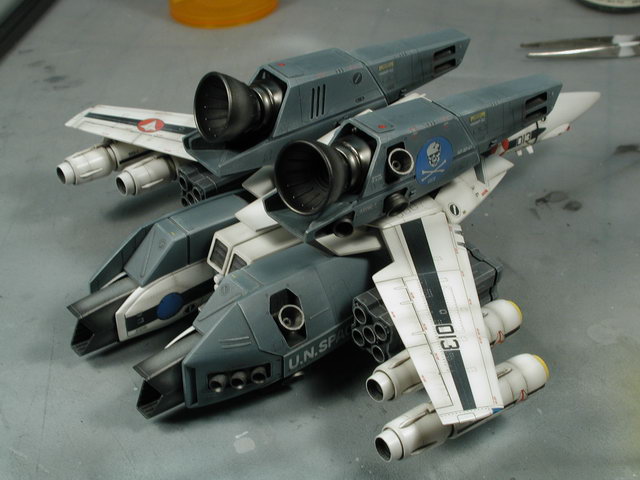
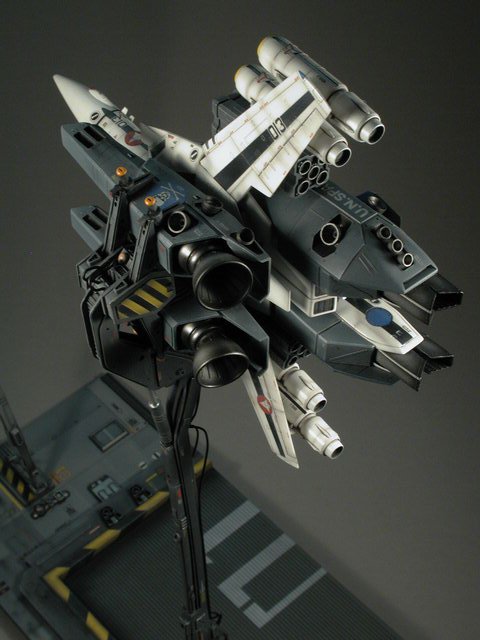
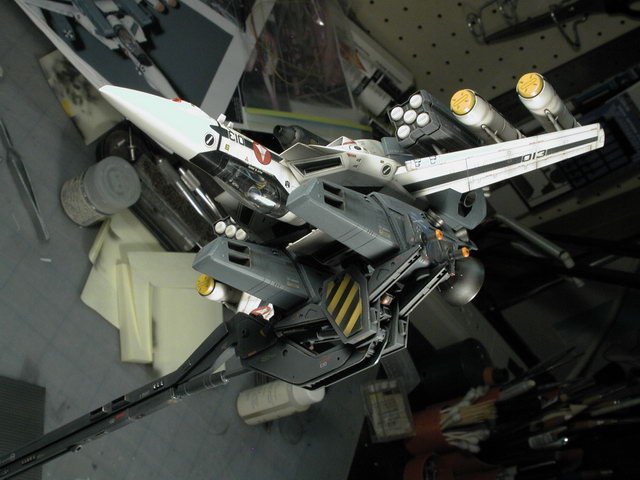
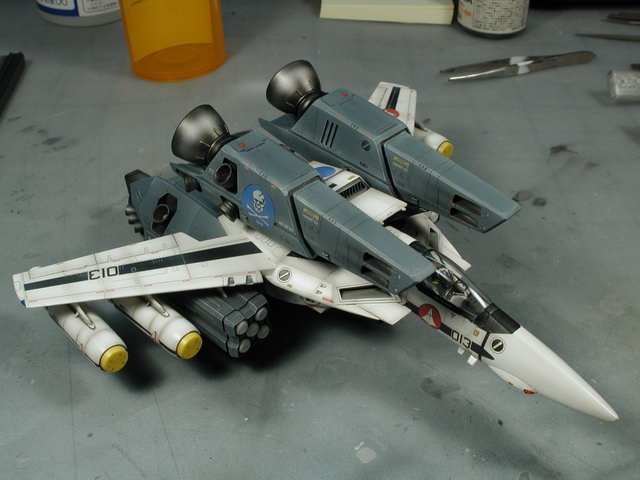
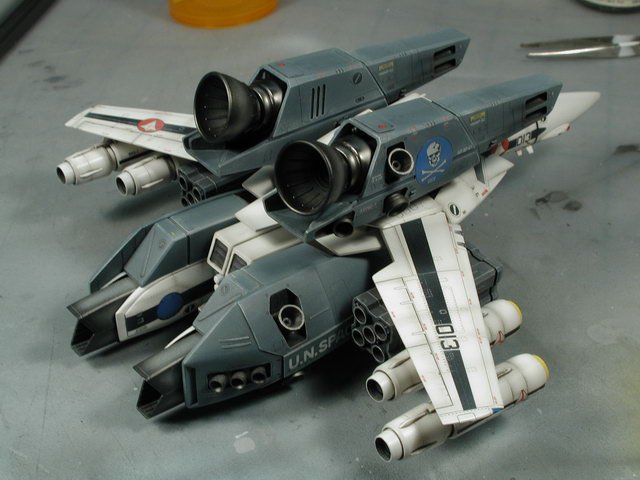
Thanks everybody! Donations gladly accepted even a subscription to Fine Scale Modeller (they're quite expensive up in Canada). I might think about turning this thread into a article... we'll see if I get work shortly after or decide to finish up the Booster! I don't believe my VF-2SS build-up is around anymore - it was on the old boards and it went away with them . It was really one of my first forays back into modelling - so you didn't miss much, it was way over post-shaded and wasn't really well detailed. Plus I didn't really post too much step-by-step back then, mostly some progress shots and final model shots when I discovered this site. Well, I spent most of the time repairing the damage I did to the Valkyrie fast packs trying to remove the engines to get inside the top of the fast packs to mount the rare earth magnets. I managed to glue all the pieces back together and used a lot of Tamiya putty to restore the round shapes to the engine housing (luckily the engine bells just popped off and was spared the destruction). Here are some shots after I re-attached the engines back onto the fast packs. I updated the engines a little with some Alclad metalizer steel and jet exhaust highlights. I hadn't discovered Alclad metalizer paints when I first built this Valkyrie, so the engines were originally painted in Tamiya Metallic Grey with black burnt weathering. (I think they look better now - must resist going back to my old models and trying to improve them... too many un-built ones to go...)
-
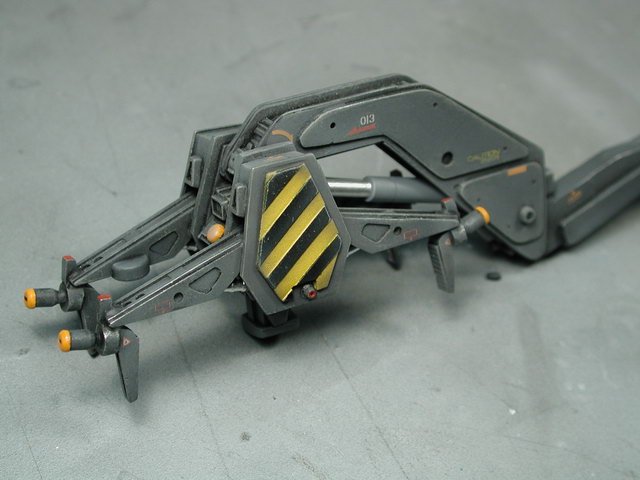
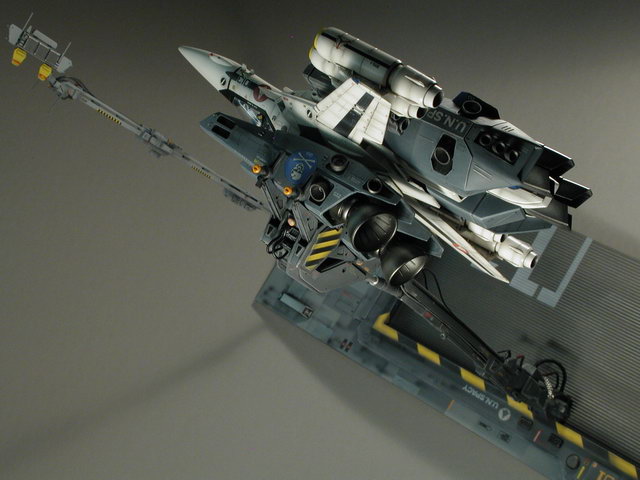
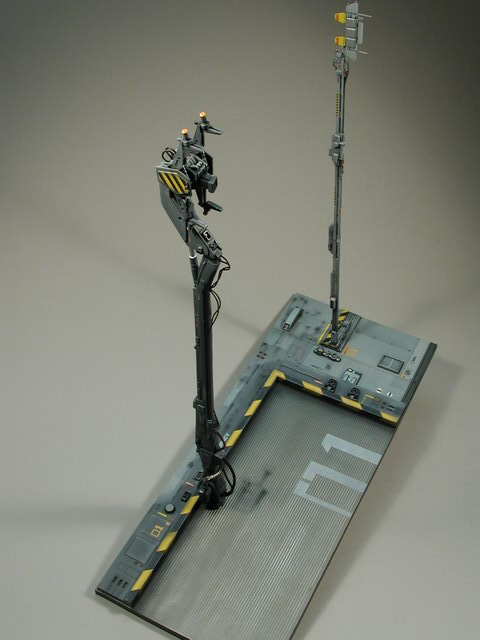
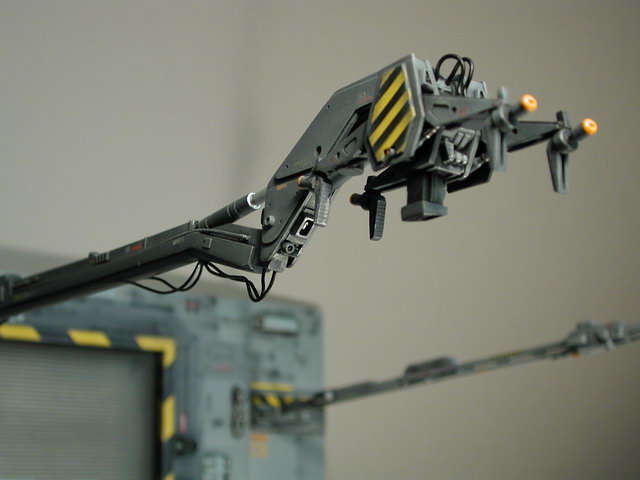
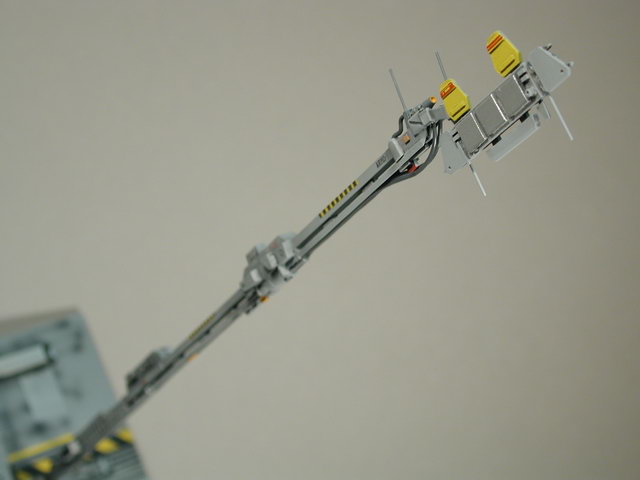
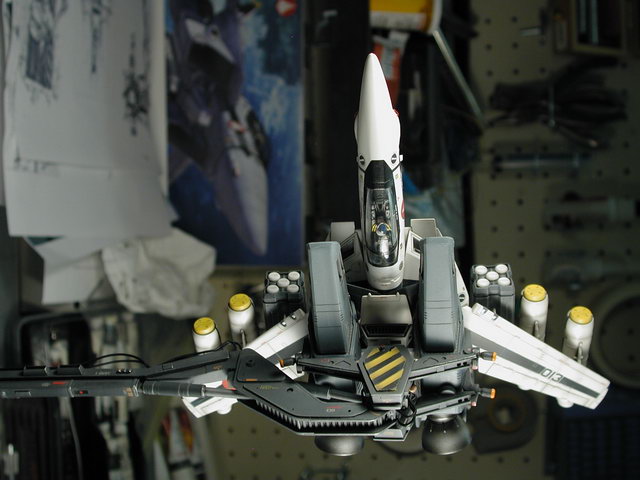
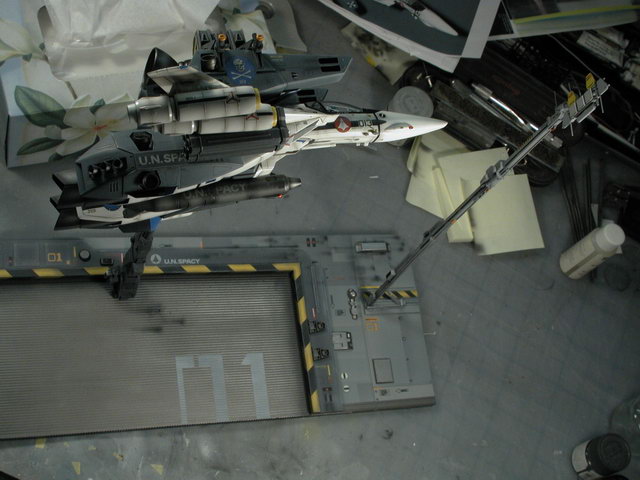
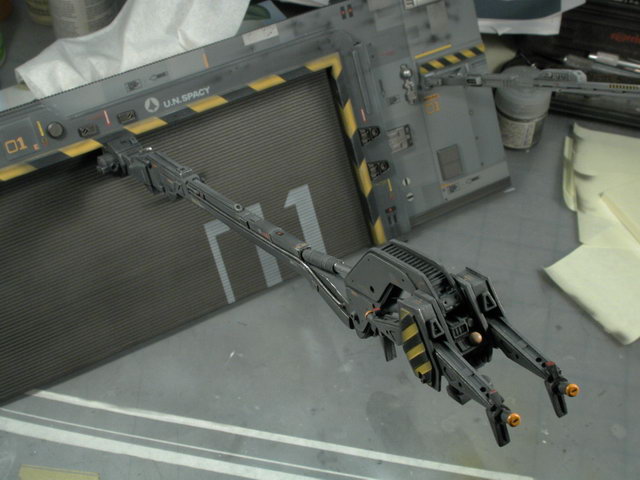
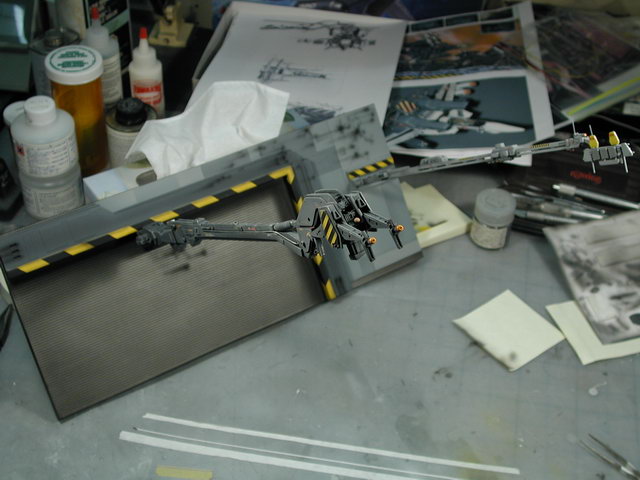
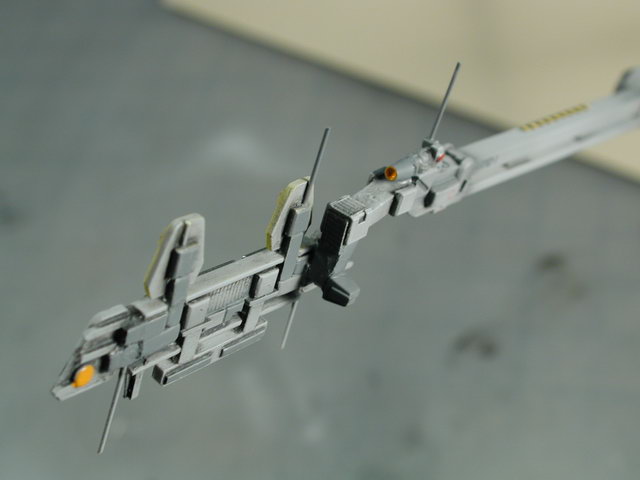
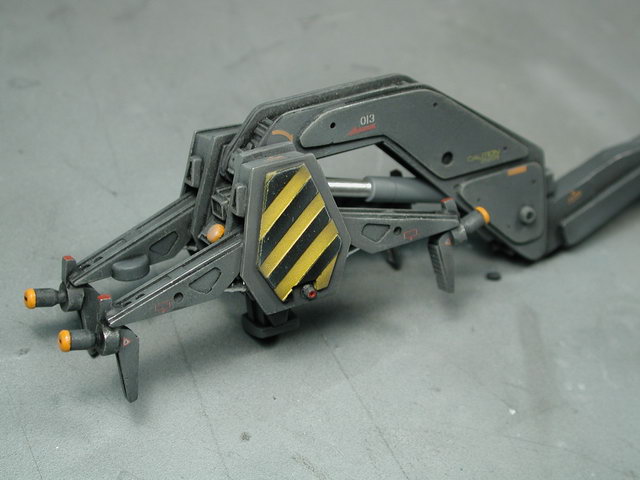
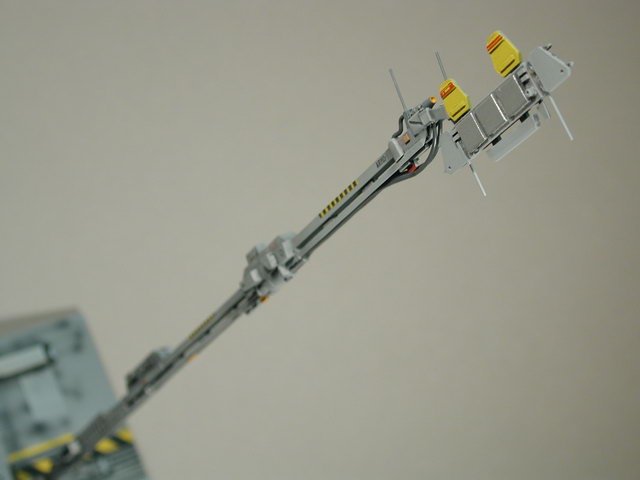
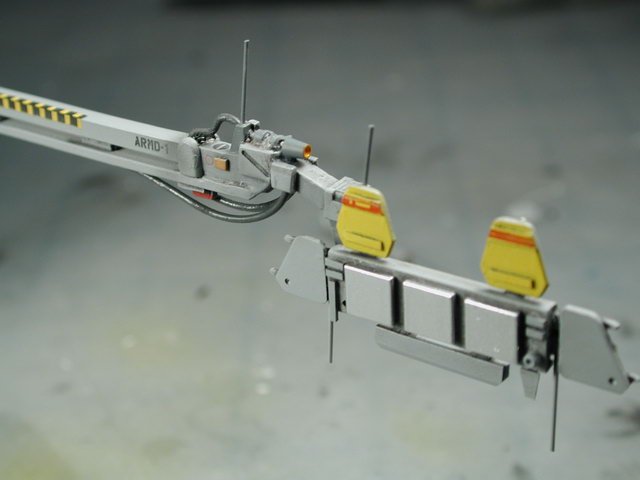
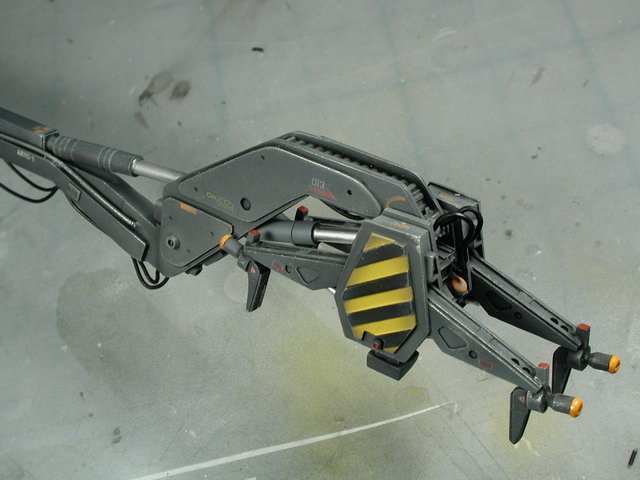
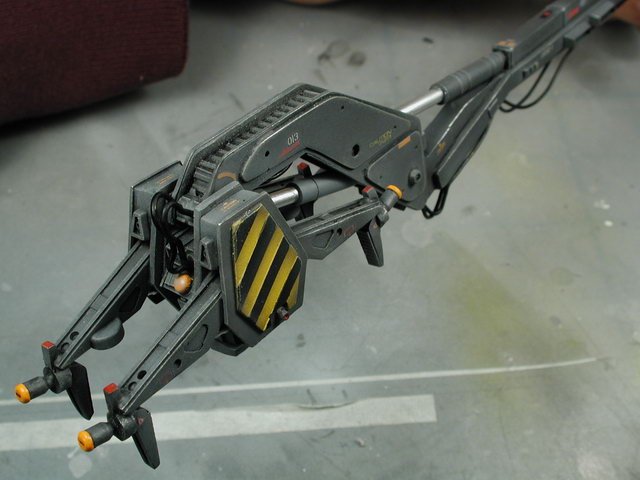
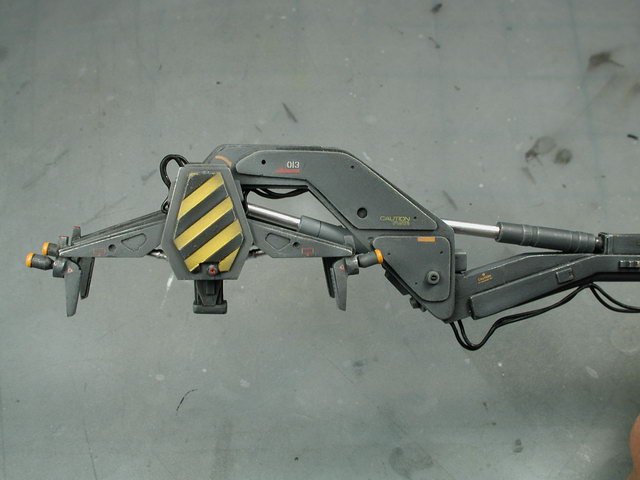
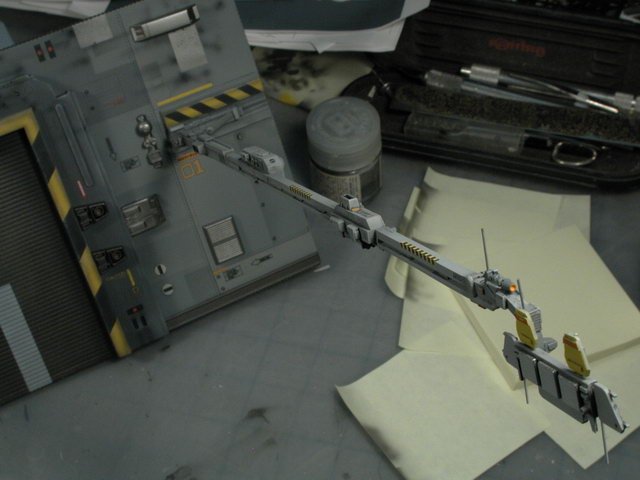
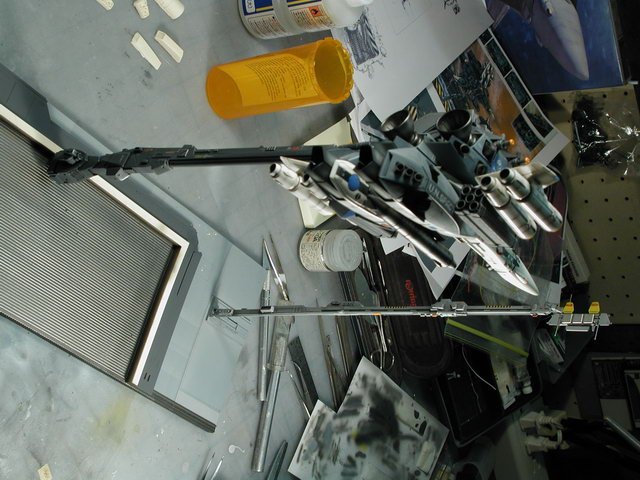
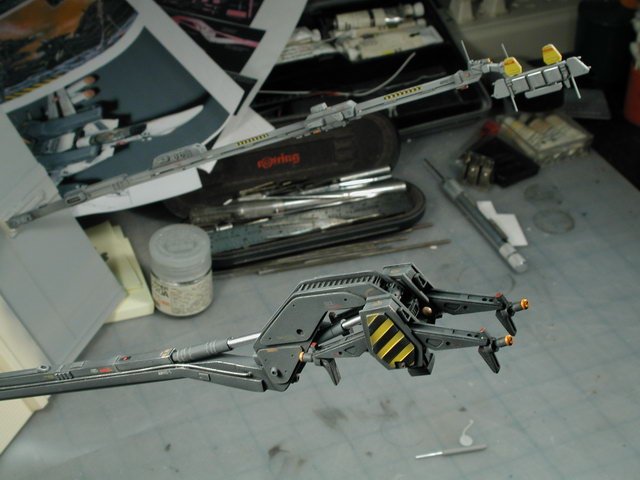
Viceland - Its really hard to discribe the brush motion (a video would be so much easier) but its something that is best achieved through practice. Its best done on dark surfaces (shows up better) that have a flat finish to them. You "work"/rub and scrape what little paint there is on the brush into the raised details. Keep in mind to wipe almost all the paint off the brush so that its dry (hence the term Dry Brushing) so the brush is merely "stained" with paint. Because you are "working" the paint in which involves some perpendicular dabing and rubbing, you will ruin the shape of the bristles - so don't use an expensive sable hair brush. I just ruined one brush and keep using it for dry brushing from then on - I prefer a flat edged brush as shown in the photo. Good luck... its something that is best experienced than discribing - its actually quite easy once you get the hang of it. Hope it helps a little... Grayson72 - Yep, thanks for the heads up, I am going to do a dirty brown wash to simulate some hydraulic oil staining later on - one step at a time... Thanks, if only FSM would pay me or if I could make a real living from doing this - BUT also get to keep my creations! Didn't get much time today, just put it together with the baseplate and finally got to assemble the wrist/arm main hydraulic actuator in place. Here are a few shots with the arms in place. The red stripes on the yellow signal paddles were just done with a ruler and a red fine tipped sharpie laundry marker. I need to repair and paint the Valkyrie engine housing that got damaged while being removed to gain access to place the magnets in the fast packs. Then I need to concentrate on the base plate itself - mostly a paint job with a few extra optional parts to add on. Then lastly, add the extra wiring and hoses to both the arms. Please... Gundamhead, Jesse or Anasazi - consider making some small decals for the signal arm - white lettering and graphics to fill those triangular paddles and the top and bottom of the signal...


-
If you scrub with a old used toothbrush and comet, you will get into all the nooks and crannies.
-
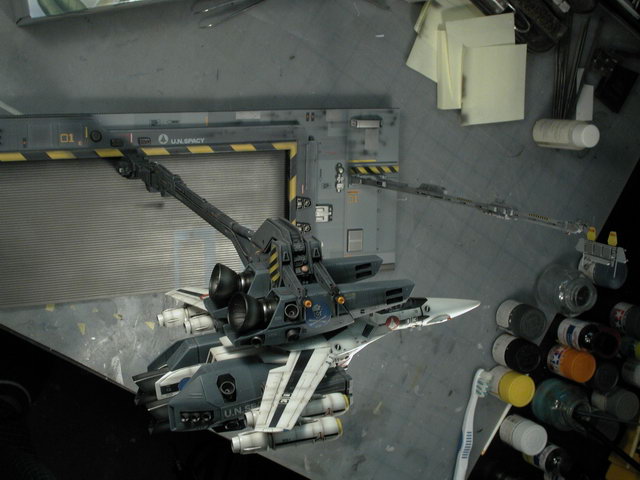
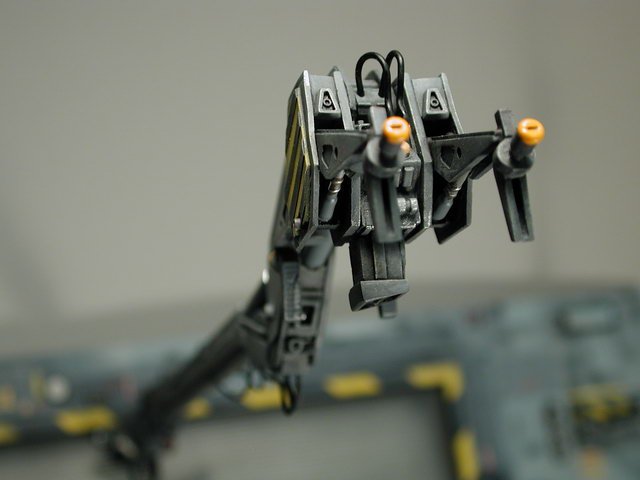
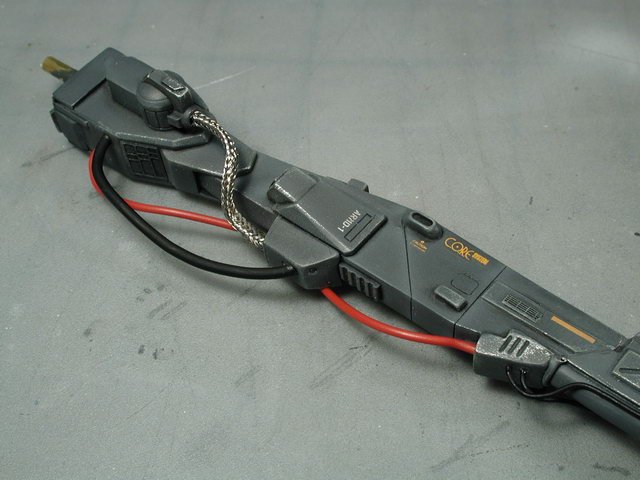
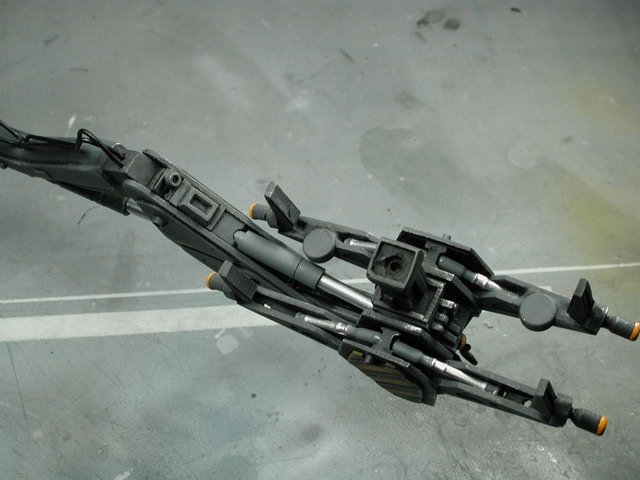
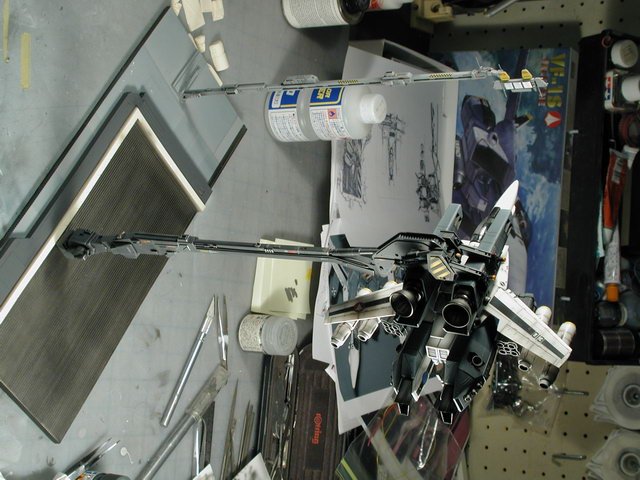
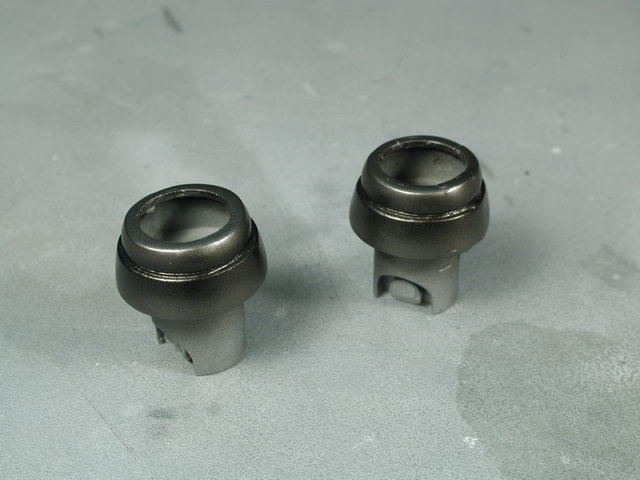
Final shot of the night for now... I added the hydraulic actuator/cylinder between the wrist and claw portion - again I used the Tamiya marker for the actuator and Neutra Grey for the cylinder. I crazy glued it in. I left the main large hydraulic actuator/cylinder between the wrist and arm off for now - I need to let the Silver Tamiya marker dry first. Its pretty close to finishing, I just need to add all those hoses and wires to connect up the arm and the signal piece as well. Lastly, I'll finish the base, but that will be in the end. Enjoy...