-
Posts
4334 -
Joined
-
Last visited
Content Type
Profiles
Forums
Events
Gallery
Everything posted by wm cheng
-

Handheld Ipod/pda Dvd Ripping/viewing
wm cheng replied to Agent ONE's topic in Anime or Science Fiction
Hey with what about Leah Thompson?! Now, there was a cute hottie! (oops I guess I'm revealing my age ) from Red Dawn. -
COME ON VF-11 & VF-4!! More planes! its Hasegawa's expertise.
-
This is on the back/slow burner for a while - got a job that actually pays Hope to get some time on the weekend.
-

Tamiya Paints: Some Kind Of Cruel Joke On Modelors
wm cheng replied to promethuem5's topic in The Workshop!
Sorry - hit reply by accident... instead of edit. -

Tamiya Paints: Some Kind Of Cruel Joke On Modelors
wm cheng replied to promethuem5's topic in The Workshop!
Wow! so sorry to hear about the probs P5... After using just about every kind of modelling paint on the market (I don't know about this Citidel - is it a figure RPG paint?) - I really do believe Tamiya acrylics are the best I've ever used. I almost exclusively use them for everything now - with the exception of metallics (Alclad) and clear coats (ModelMaster). There are a few things; 1. Don't thin Tamiya with water! Firstly, if they are new paints, their consistency is proper for brush painting - only thin when you need to airbrush them. If you need to thin, splurge for the real Tamiya thinner - its not that much more expensive (especially considering the amount of time you put into the model!). Saving a few cents on rubbing/iso alcohol is not worth it! Plus there are flow agents in the Tamiya thinner. When its too thin or thinned with water, Acylics tend to bead up on plastics and you will not get a proper adhesion to the styrene. 2. Think about each stage you do first - work out what you want to do in your mind before you do it. Think about Tamiya smoke, its the same stuff as the acrylic paint - so its solvent base will be the same. If you apply smoke on top of another layer of acrylic and use it to weather, when you rub, you will rub away some of the paint beneath because the solvents are the same and will react to the layer undereath. That's why most people "seal" in each layer with something that has a different solvent base so it protects whats underneath ie; ModelMaster clear-coat semi-gloss or future floor polish. 3. Glossy paints take more time to dry. Are you painting with glossy paints? It also sounds as though you are painting much too thickly with the brush (or its too thin). Paint should never pool - if it does, then you are using too much in one coat. Additionally, paint doesn't dry properly when its too thick, the top layer develops a skin that traps the moisture underneath. Paint should be applied in thin layers (plus you don't want to obscure the detail underneath). Additionally, the glossy finish is more fragile - I've found that even after its dried, it sometimes takes on fingerprints (due to the oils in your hands). I almost always paint with flat paints (better coverage) then apply a clear gloss coat if I want the final finish to be glossy (which is rare) I find that a semi-gloss to be more realistic for scale models (unless we are talking automobiles here). 4. For God sakes , don't apply the decals if you're not absolutely happy with the paint finish! Its one of the last things to do - you can always strip it down to redo the paint if you're not satisfied. I've done that a lot of times myself, and I consider painting one of my strong points. Your initial post was a little extreme - if you're like that when your modelling, then I'd respectfully say calm down a little. Take it a bit more slowly next time, its not something you want to race through. Enjoy the model Zen... hmmm... If something is not working out, then take a break - think about it. Get some sleep, you don't know how many times when I think I'm screwed beyond salvage that after a good nights sleep, I come back to it the next day re-freshed and the solution seems so obvious. Don't push a bad situation, find a different way to tackle the problem. Post here with questions, there are so many talented modellers here - that's what I do. Slough through some of my build-up threads below (ignore the first few - start from the bottom of the list) to get an idea of the painting process (I know I airbrush most things) but the basic principles are the same. Good luck, don't get discouraged, and post some pictures! they're worth a thousand words! -
Wow! I'm so flattered (flattened hehe) by this thread... Thanks so much... its always nice to know that your threads are being read and especially appreciated! I am very humbled by all your praises. I too wish there was a repository for some of my threads (especially for some of the older ones I contributed to the old boards - I hope there will be some way to rescue those someday, I still have the pictures, but the text is gone ). I still get PMs to those threads from time to time - and I also forget what I did on a few of those models that would of helped me out (especially when I had to build a plain-jane VF-1S for that Booster - its been a few years since I did a normal Valkyrie ). I can't even get my "Links to my older build-ups" (see below in sig) pinned - I've asked so many times - but kept getting ignored?! I don't think the MOD likes me. I can't count how many times I've been asked for links to some build I did a while ago. Oh, well so I don't have high hopes. If we do get a model section on the home page - as I have mentioned before, I'd be glad to provide any of my photos to my models - just don't ask me to type out all that text again . Yes, there are so many other great modellers here in these boards - I WOULD LOVE TO SEE ALL THEIR WORKS IN ONE PLACE too. Yeah, my links to their works are getting quite unwieldy
-
Speaking RahXephon fighters has anyone brought those out yet? 366790[/snapback] What do they look like?
-
Yes, my bottom plate that covers the nosecone section of the valk under the waist is extremely loose too! a little annoying, may slip a bit of paper in there to tighten it up a bit.
-
Hey those are amazing!! did you scratch build those? or are there some kits I'm missing
-

Handheld Ipod/pda Dvd Ripping/viewing
wm cheng replied to Agent ONE's topic in Anime or Science Fiction
Yeah I love it! I can watch stuff in bed while the wife sleeps - and up close with such a high resolution screen, its like watching a 60" 10 feet away! I've already got Macross DYRL ripped to the iPod and its clear enough to read all the subtitles (but I'm lazy, its the subbed version on). Plus with the widescreen option - I ripped mine at full resolution when viewing in the 1:33 mode so there's full sharpness. Plus its always nice to hear Wrath of Khan in the car stereo when you're on a long trip! -
Same here - two extra smalls and two extra large. Wow! what a toy! Can't wait to do an oil wash and dry brush treatment on this baby... but need Anasazi's decals!
-
I WISH!! Actually got a real job now that actually pays money, so the boosters might be on the slow burner now...
-
You lucky man!! I'd love to see some pictures of it when you finish. Man, I'd need to work and save up for this puppy. By the way, great work honneamise - looks absolutely fantastic.
-
Cool! maybe a bit too many wings though...
-
Hey David, whats the XFA-27? Is it from Ace Combat oir real? Any pictures?
-
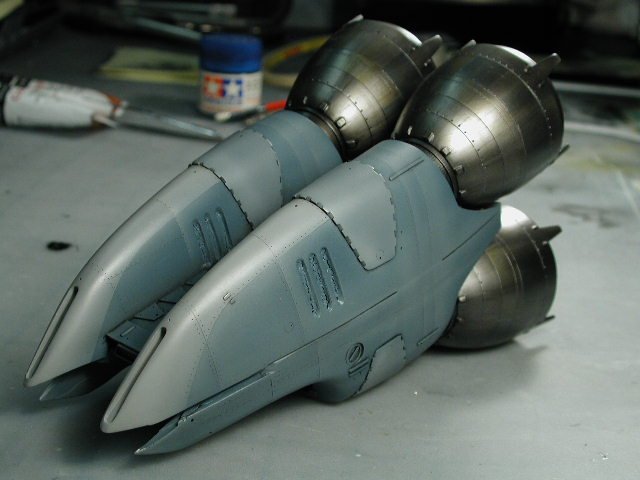
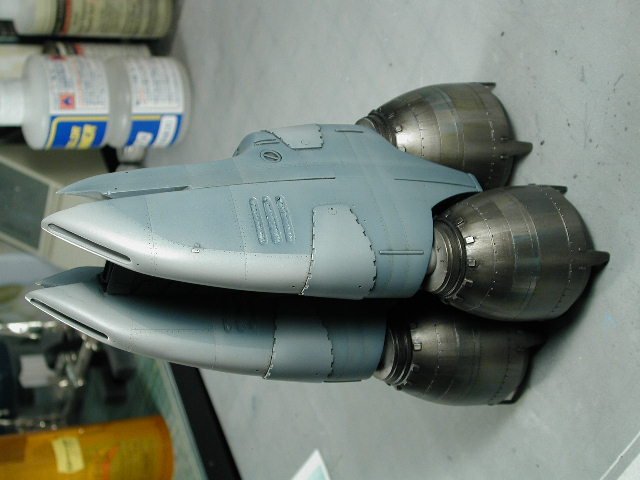
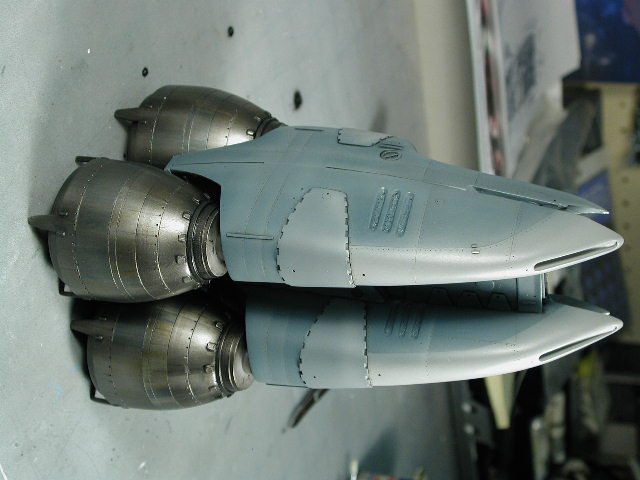
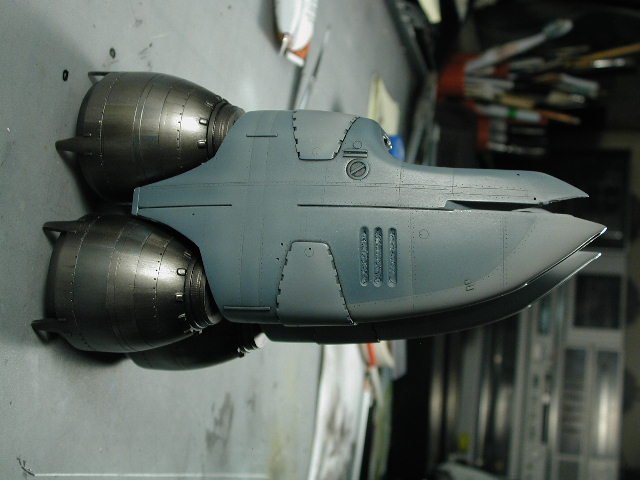
Yay! finally decals... I think I'll start with the Valkyrie first, then moved my way to the boosters. There's still a final weathering over the decals to tie them all together and a final clear-coat over the decals to protect them, the Boosters will get a final coat of clear flat and some drybrushing before I actually glue the nozzles on. While the Valkyrie will get a semi-gloss final clearcoat and some light grey oil wash over the darker decaled sections. Its important to keep piecing together the various components so that you get a sense of how all the colours and weathering goes together. The blue in the engine bells picks up on the blue in the grey boosters. Can't wait to peel that masking away from the three meshed grilled portions! Its like peeling the canopy masks (the best last steps)
-
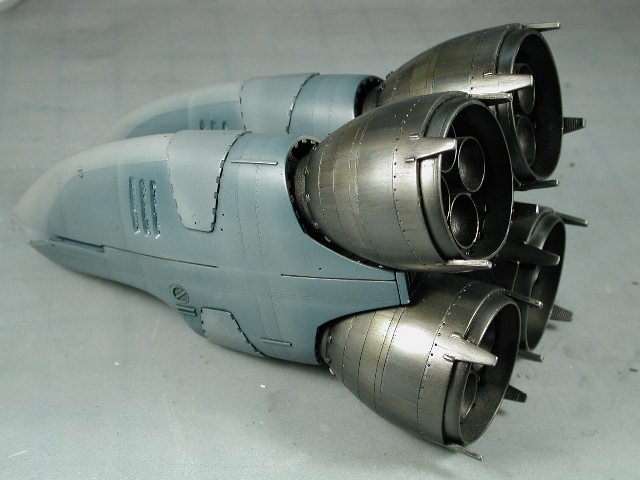
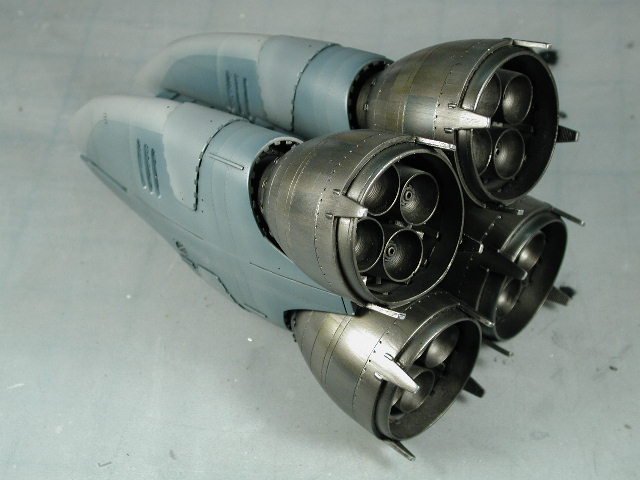
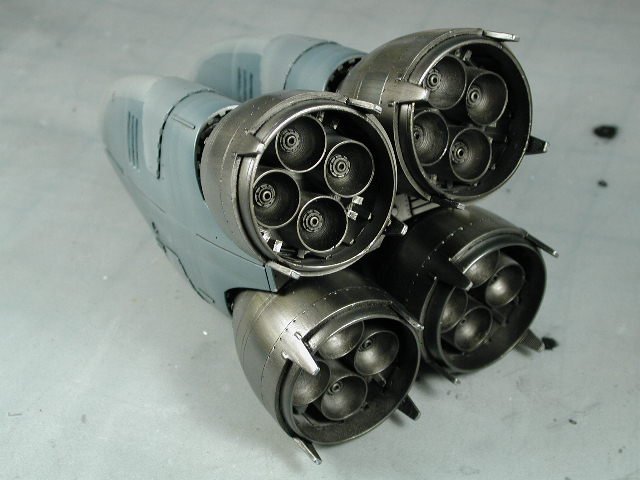
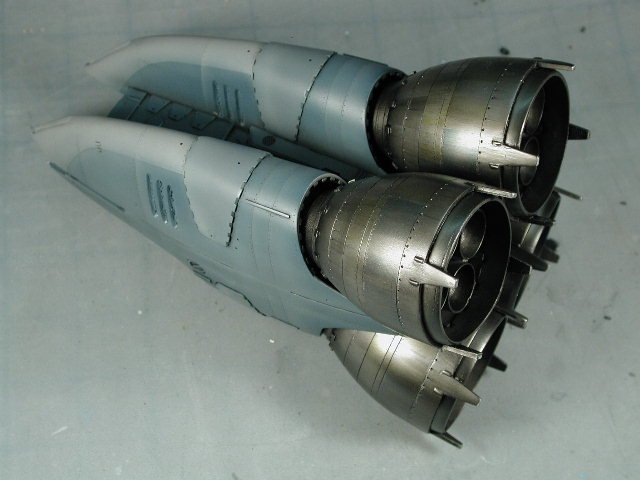
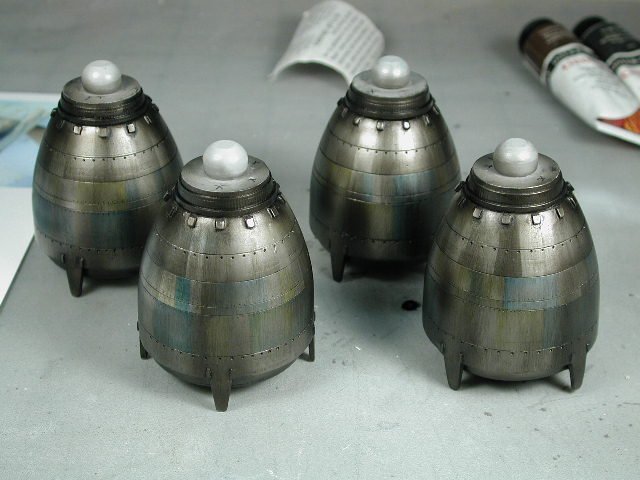
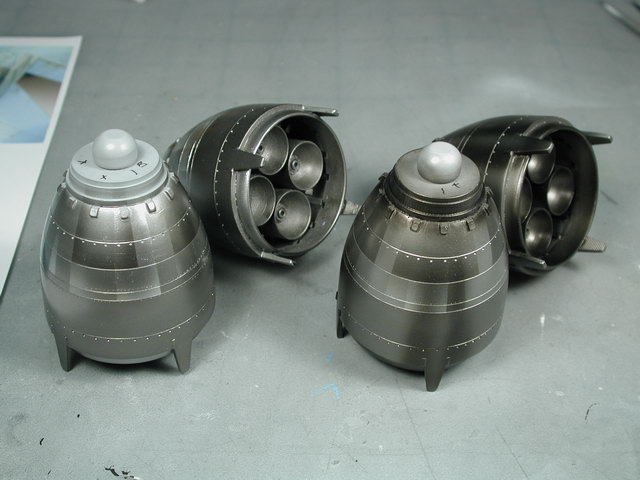
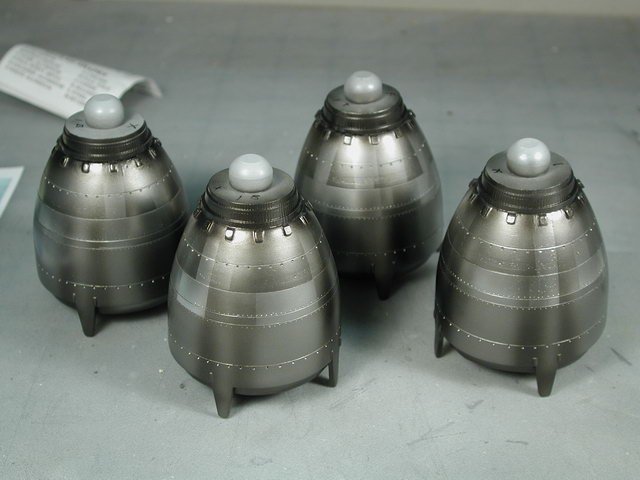
Hey great to hear you've rescued the melting putty model - how did it dry out? Did you have to fill and resand it or did you just leave it alone and it dried on its own? Good to finally see it, looking good - you should post more photos of it when you get your stand completed. Good idea about the magnet thing for the stand, will it be strong enough? Let me know when you try it, I'd be interested in ripping it off if its sucessful Ok, I added some pencil crayon silver to the edges of the scribbed lines - its pretty subtle though, the pencil was a little too hard to really bite, so it just really cleaned off some of the oil wash at those areas. It wasn't too bad, but it didn't work the way I thought it should. I sealed in the oil wash and pencil crayon and brown/black conte streaks from the boltheads in with another coat of ModelMaster semi-gloss clear. Overall its not too bad, it was a little too heavily weathered (great for rebel starships though...) but when I placed it next to the blue/grey boosters it seemed too heavily used. So I gave the nozzles another dusting of Alclad Steel to brighten it up a bit, tie in all the bluish panels together and hide some of the darker weathering. I like the fact that you can just make out that the nozzles might be made from several different types of metals, instead of one big sheet of some non-descript metal - but it doesn't look patched together from junk.
-
Oh! MAN! I so want that!! That's great news, it will be to scale with my Yukikaze Bandai stuff, the molding detail is so crisp on those planes. When is it out? Any plans for an X-02? I just finished Ace Combat a few days ago, now I want to get back to earn enough money and obtain the pieces to buy a Falken. I love the aircraft designs!
-
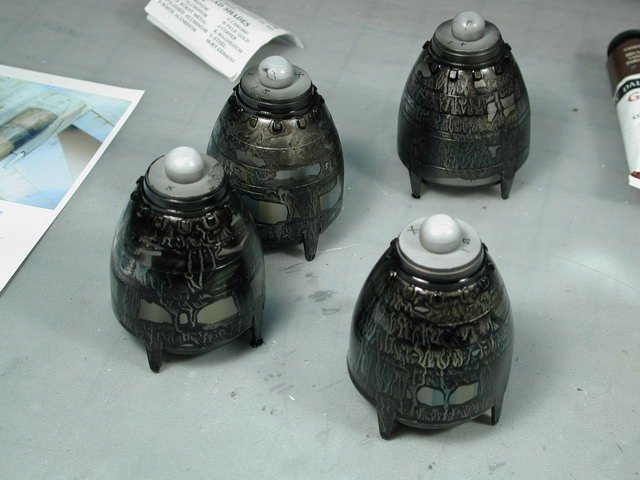
Thanks, I tried to wipe some more excess oil wash away today - but even after 24hrs, its still too wet (I guess I laid it on a little too thick) it just smears... a little too evenly. I wanted sections to wipe off while leaving other sections intact - when its too wet, it just evenly smears - so I just wiped in the airflow direction so that the smear lines are in a single direction and I will have to wait till tomorrow. Hoping that it will dry more thoroughly - and I can remove some of it in patches.
-
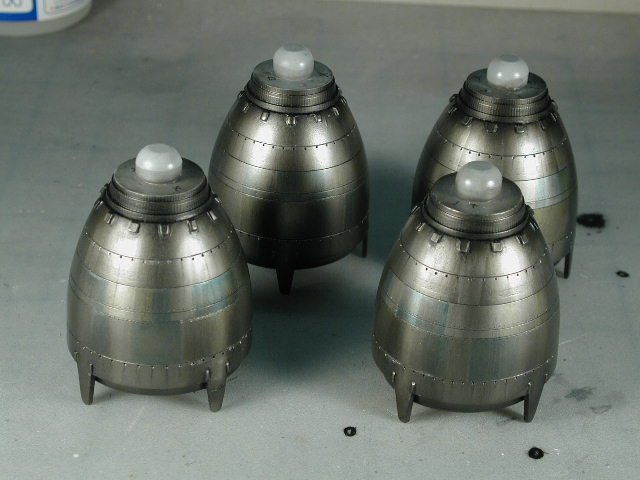
Now I've applied a thick black oil wash over most of the bell nozzles. It will seep into all the rivet and scribed details as well as provide a darker base for me to wipe away to reveal the metal panels below. I made the wash much thicker than I usually do, because I want some of it to stay behind (not just in the crevices). Now I'll let it dry over night (so it doesn't all get wiped away so easily).
-
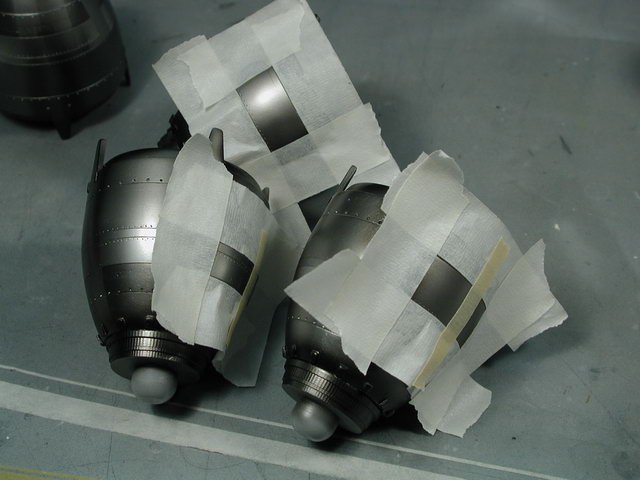
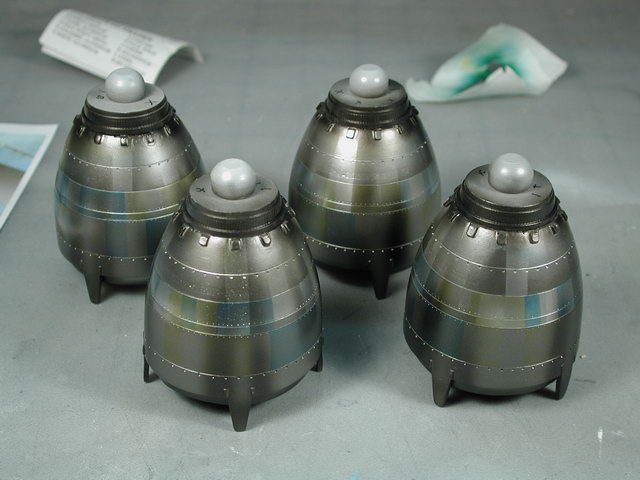
Now to add the clear blue and yellow to various panels to denote different materials and various stages of burnt staining. I masked off a few panels, and I reused these masks in various places to get all the "random" panels. Then I thinned down Tamiya Blue Clear and Yellow Clear and lightly sprayed in the panels. I think I might of over done it with the blue, but the yellow looks convincing. Although the panels might seem a little too random. However, I'll reserve judgement till after I weather it, I may need them to be a little overly contrasty or strong for it to show through after the weathering.
-
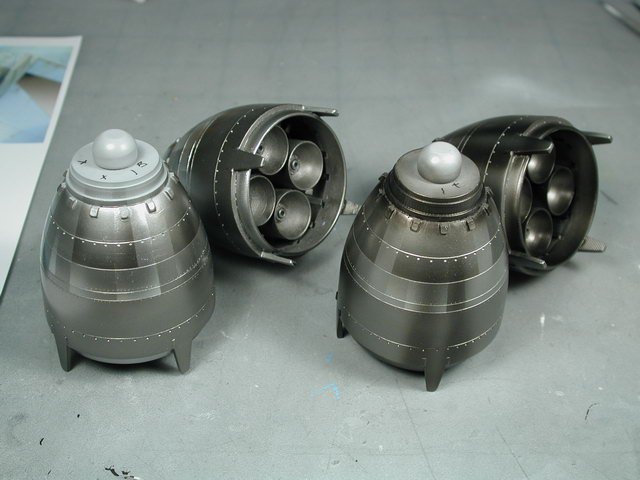
For the real anal freaks out there - I guess I should of applied a thin coat of Mr. Surfacer to seal in some of the resin surface imperfections, but I didn't mind it, it will give it a worn patina when I'm done with the weathering. I've been asking myself whether I should weather or not, since the Booster is probably not a re-usable piece of equipment, so the engine bells should look new. But hey, I've been dying to try out the SU-27 techniques, its more fun to weather, and it gives it a sense of scale. Now I took the last colour; Jet Exhaust and started to airbrush burnt markings and streaks and darkening the tips of the bell nozzles with this colour.
-
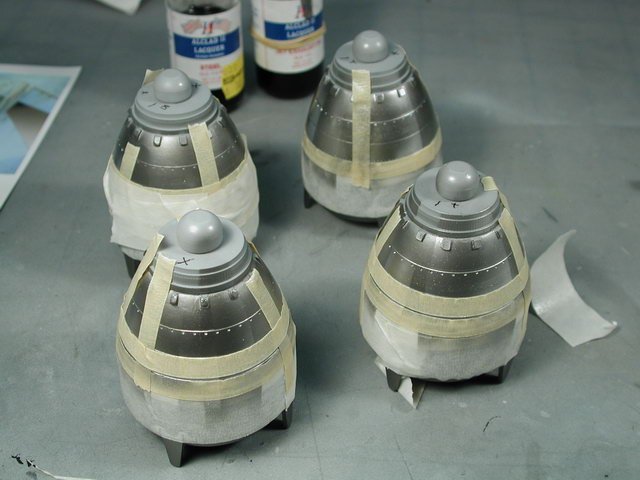
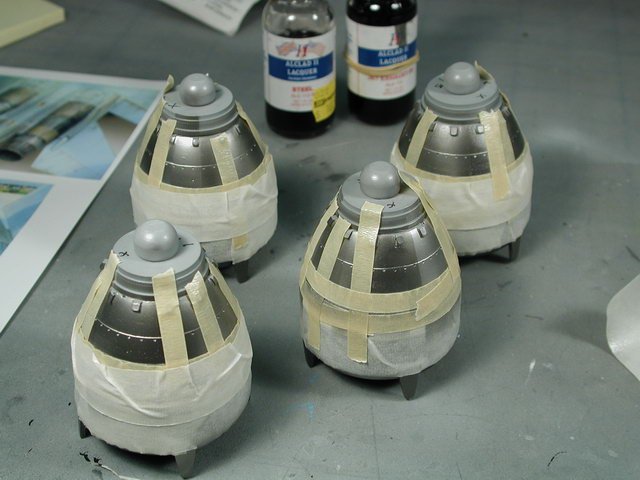
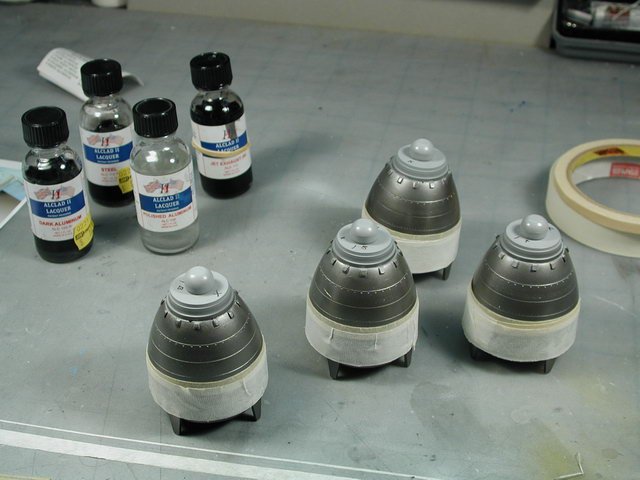
Using the Captn's scribed rings as a guide, I sprayed varying patterns as I moved forward - I masked the next section, trying to make a random plated pattern.
-
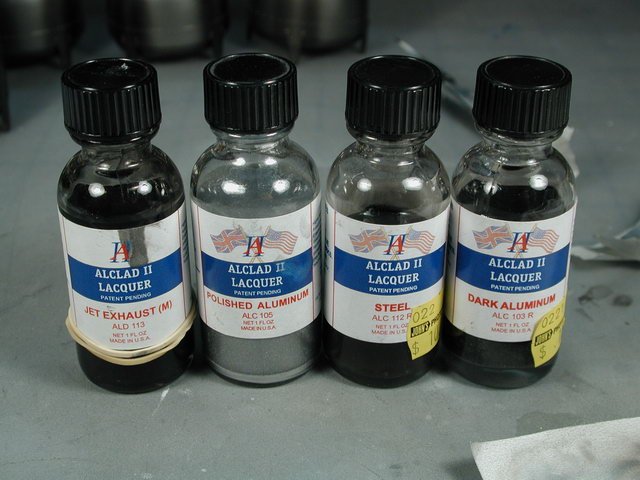
That looks great Brett! Well, got a little time to get back to work on these Boosters. I wanted to experiment - learn to age/weather the booster nozzles like the SU-27 references I got from the tips section of ARC (Aircraft Resource Center). So I started to layer up the multiple shades of metallics I had lying around. First I masked off the nozzles starting with the bottom working my way up towards the front. I only had on hand four Alclad colours.
-
Yay!! May I be the first guinea pig!

