wm cheng
-
Posts
4304 -
Joined
-
Last visited
Content Type
Profiles
Forums
Events
Gallery
Everything posted by wm cheng
-
I would not use the Gundam Marker, its just too thick and dark - unless you are going for the anime style... Pencil is a good idea - the grey will look good and its easy to erase. If you want something a little more permanent, I use thinned down oil paints, it has a slow drying time, so you can have lots of time to wipe off the excess. It mixes well, so you can have white (or light grey) lines in the black areas and different shades in the white areas. You can wipe away the excess with just a paper towel - or if you leave it too long, you can dip it with varsol (low odour is less strong) and wipe - it didn't harm the paint.

-

Need to know how to blend in decals with kit ...
wm cheng replied to Spatula's topic in The Workshop!
Everything you ever wanted to know about Future! http://www.swannysmodels.com/TheCompleteFuture.html -
Need to know how to blend in decals with kit ...
wm cheng replied to Spatula's topic in The Workshop!
The best (proper) way is to spray on a heavy coat of future to seal in the decals (the future blends in the edge of the decal to the paint surface) - then spray on your final finish (I use a acryl semi-gloss by ModelMaster) over the whole thing. That being said, the decals should of been applied over a glossy (future clear coat) surface in the first place. Never apply decals over a flat/matte based surface - thats a sure way to get the silvering that can occur in the carrier film. Also it may look fine at first, but if you apply a flat clear coat over a decal that was applied over a flat/matte surface, the silvering will appear or become worst. I said "proper" because I often skip the future spray (unless the decals are quite thick). The Hasegawa decals are fine, not too thick, but if you trimed really close to the carrier film, and you applied decal softener, then you should be fine in just spraying your final finish clear coat over the entire model. I often dust the plane down in a very light thinned sky grey in the direction of airflow to darken up some of the white surfaces and lighten up some of the darker decals to help blend them into the overall paint scheme so they do not catch the eye as being too constrasty or jarring. Then protect this light mist with a clear coat of the desired finish (again I usually choose a semi-gloss for the fuselage and a flat clear for the fast packs) Good luck! -
Yep, pin friction alone holds them in - but always have two (or more) pins to hold something in, its the "inaccuracies" in trying to get both pins to line up exactly that creates the friction for the piece to stay on (if you can get my poor discription of the process). The farther the pins are apart, the better the hold. Yes, I try to locate the pin holes so that they appear as detail instead of being too distracting. When you get your kit, you can compare and locate where my pin holes are. I had my friend vac-form the canopy for me (he used to own a plastics shop) but no longer has that ability. Try some local hobby shops or contact your local chapter of IMPS - they will know who can do this for ya. Good luck.
-
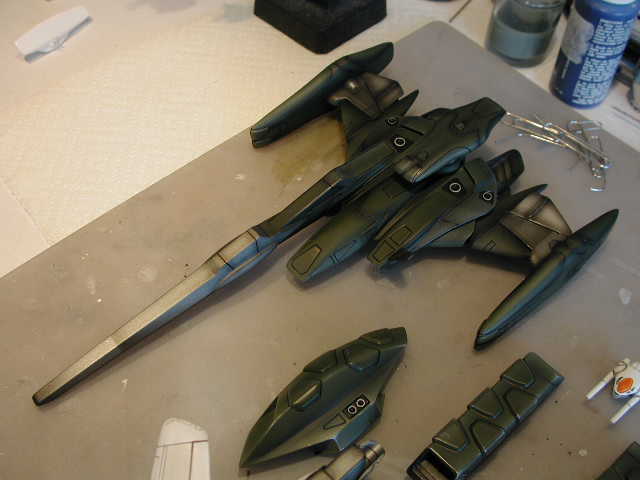
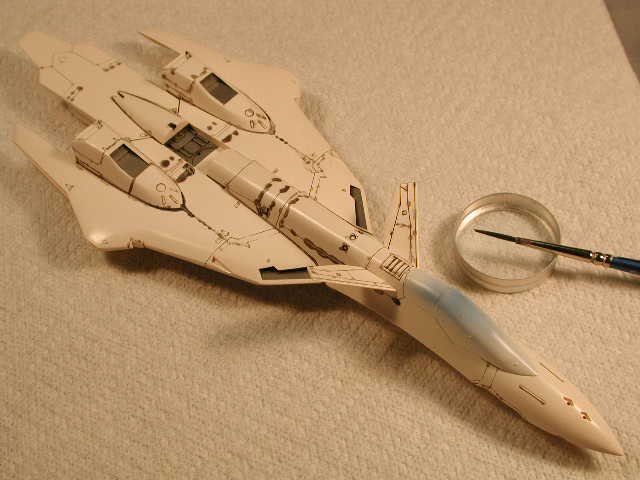
Unfortunately I no longer have the write-up (it was lost with the old boards) but I do have a few of the in-progress pictures... Unfortunately none of the beginning stages of the build. Pretty boring though, just a lot of sanding, priming, epoxing pins (paperclips) to re-inforce some of the smaller contact points. I basically used a pin vise to drill a small hole for the paperclip pins, then applied some market to the ends and touched them to the other half to be joined - then the mark created I drilled out for the pin to seat into. I epoxy one end to the part and leave the other end a hole.


-
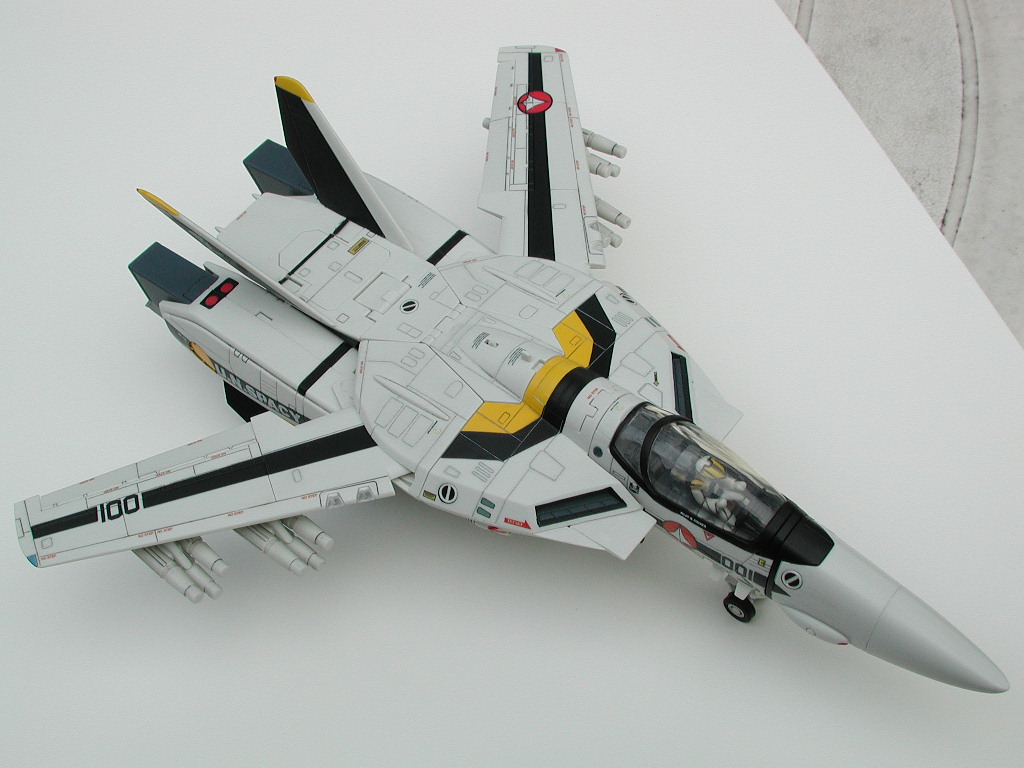
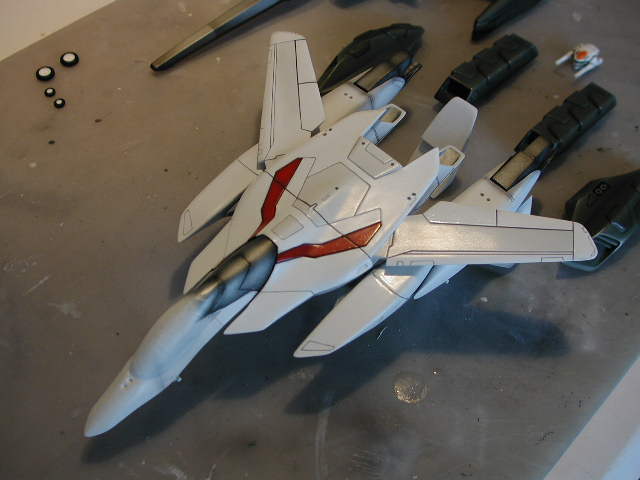
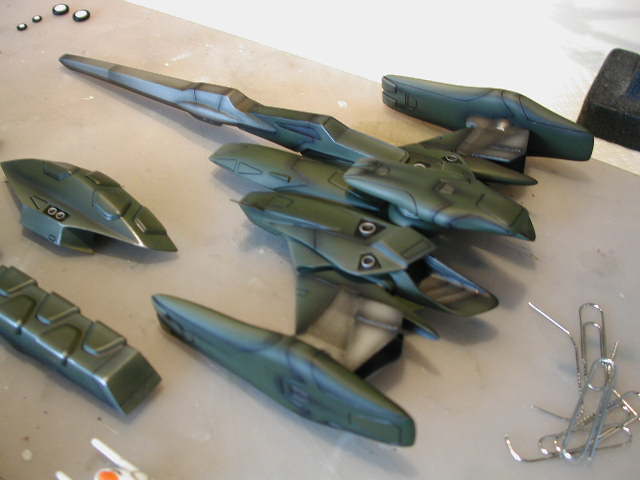
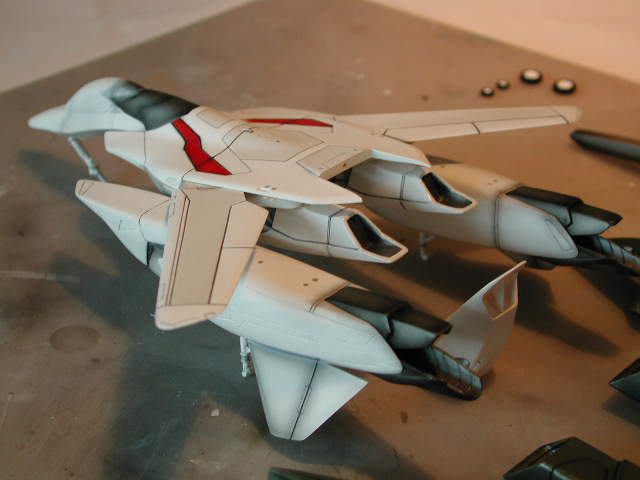
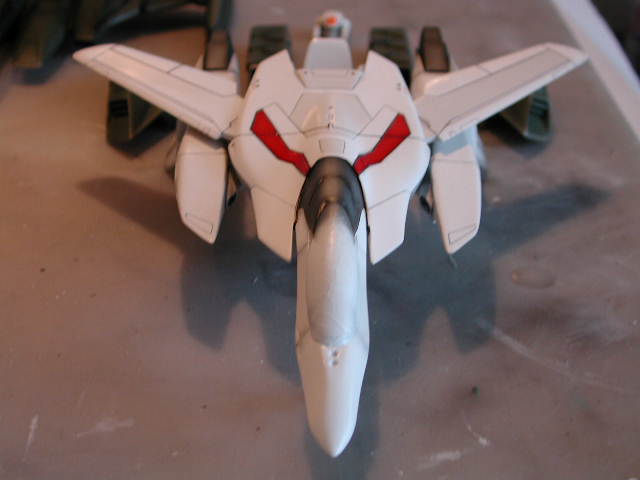
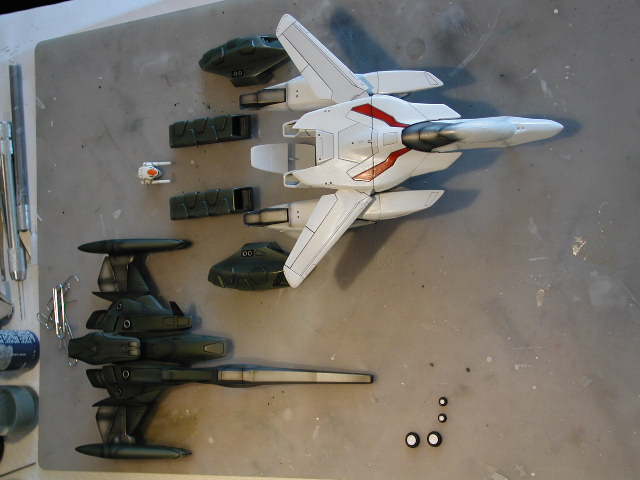
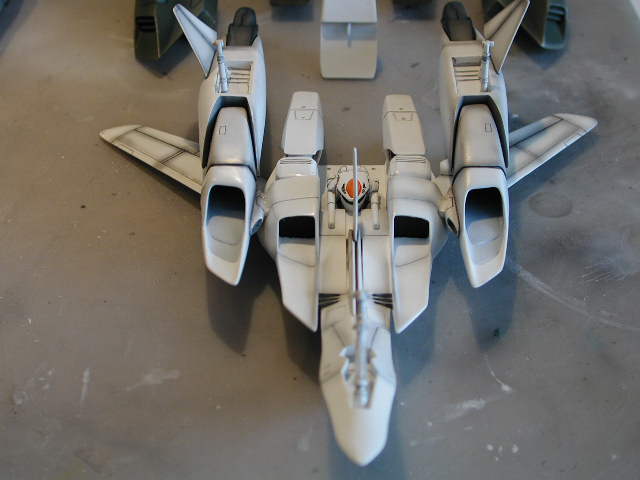
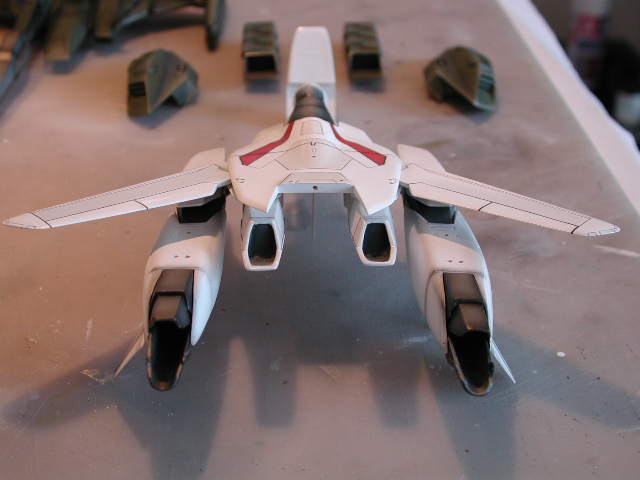
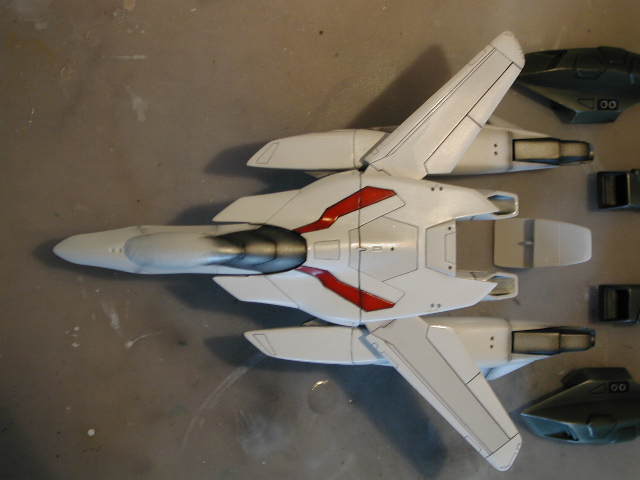
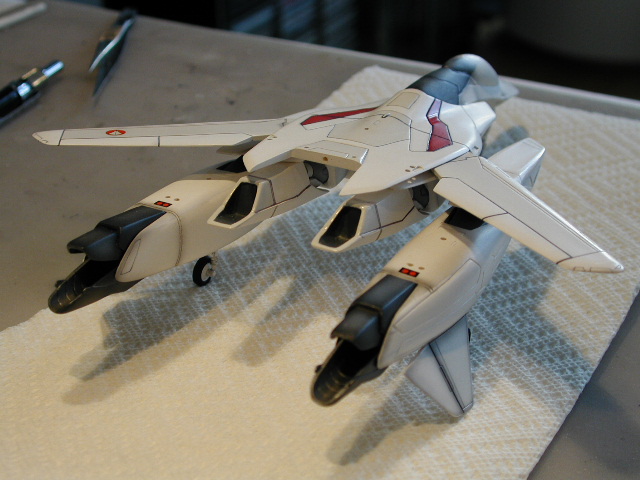
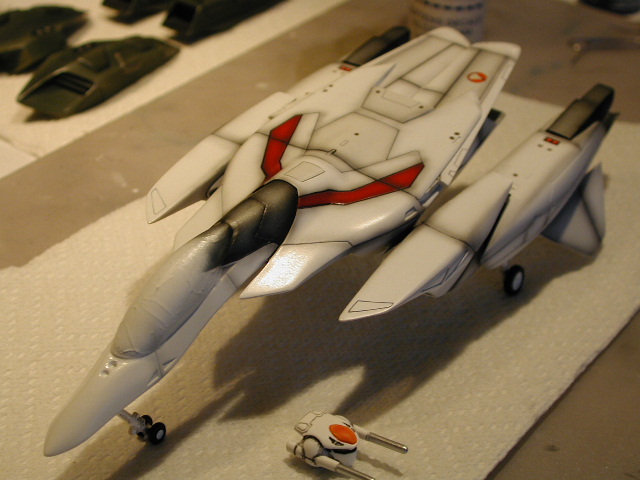
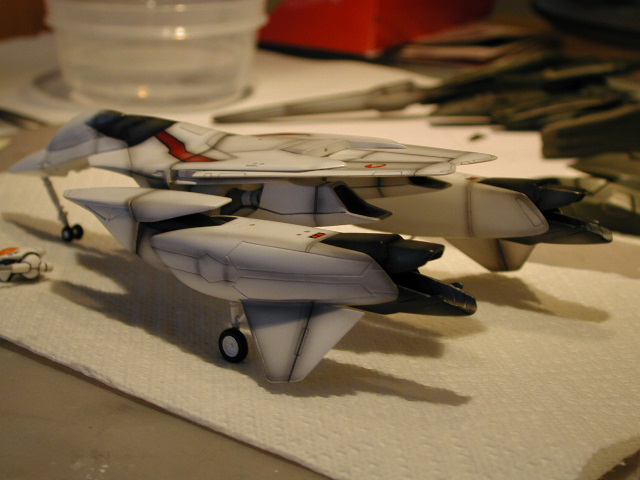
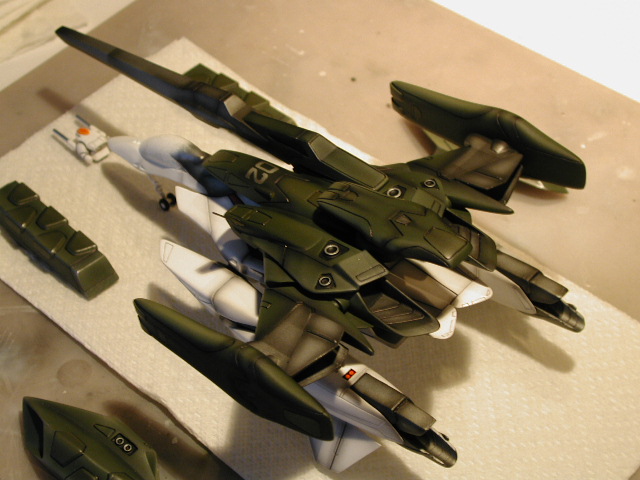
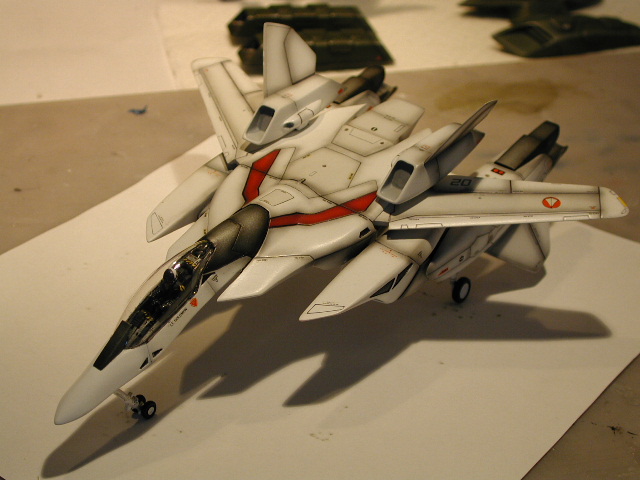
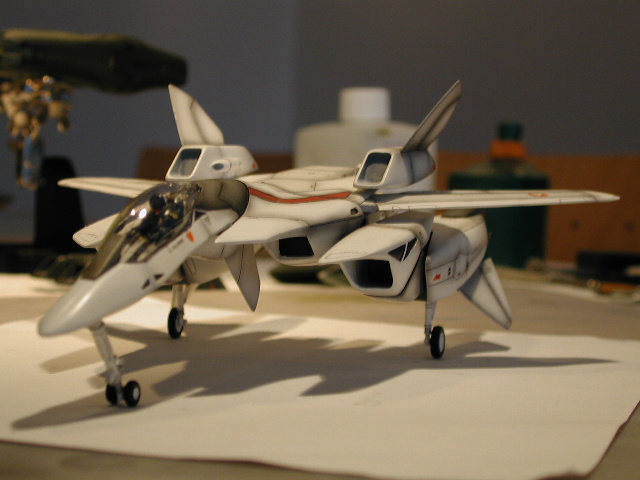
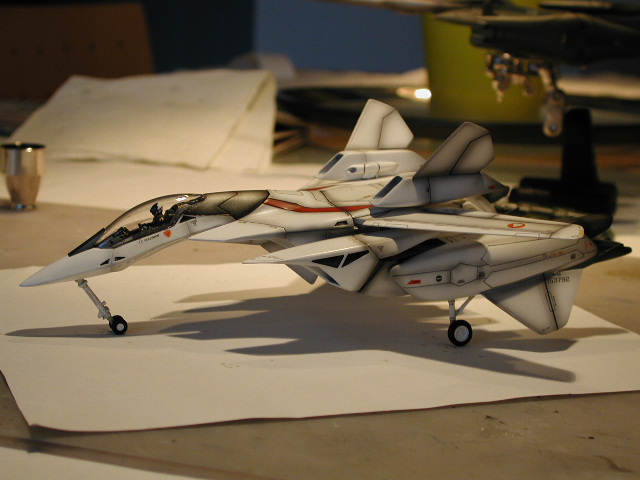
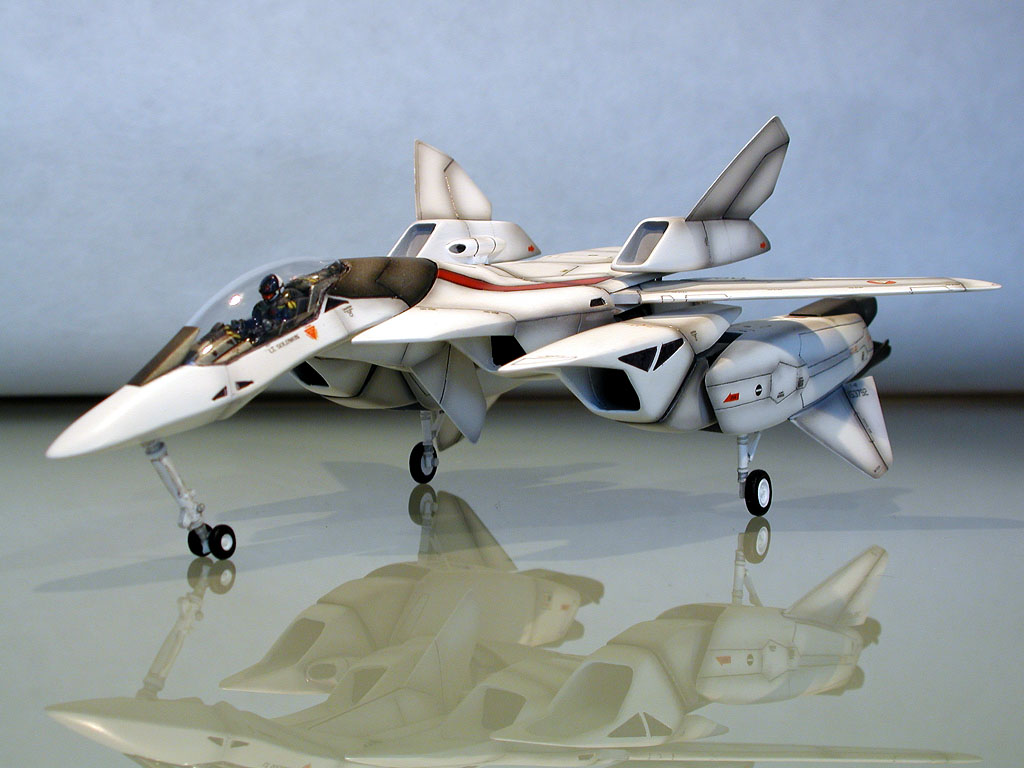
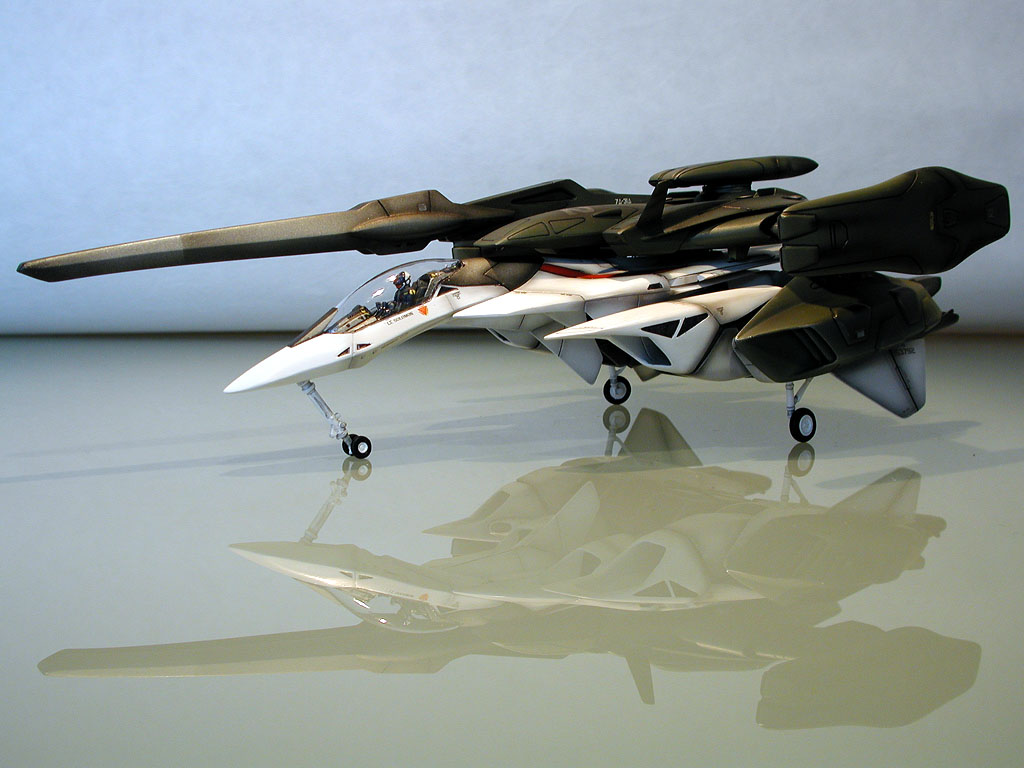
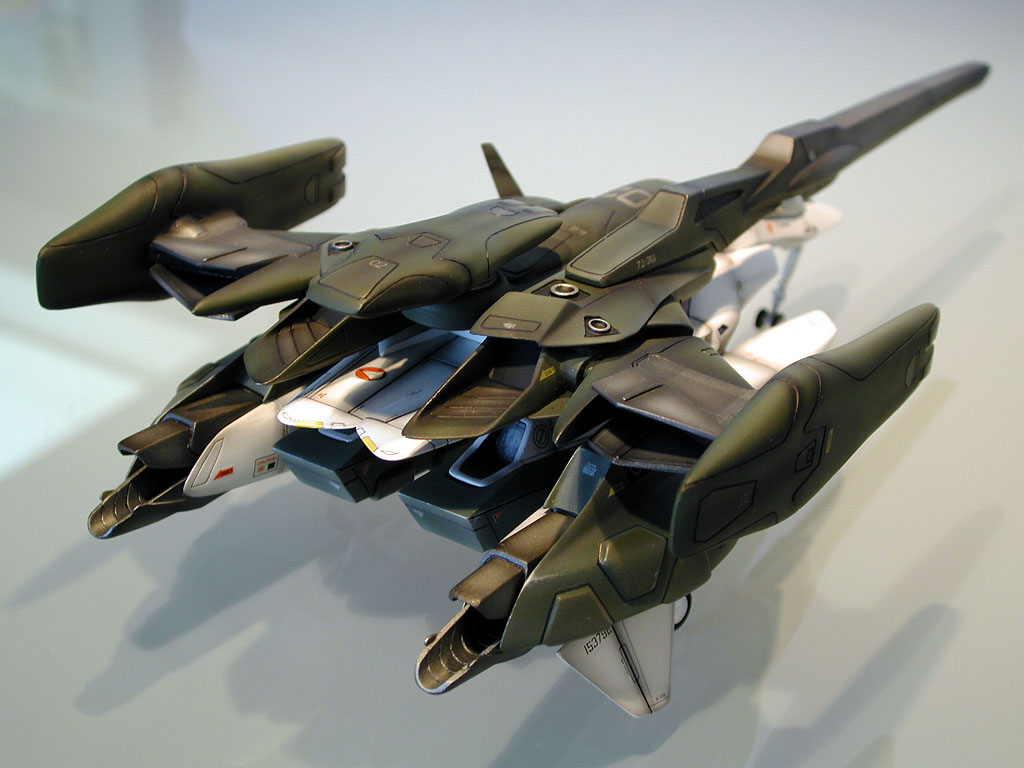
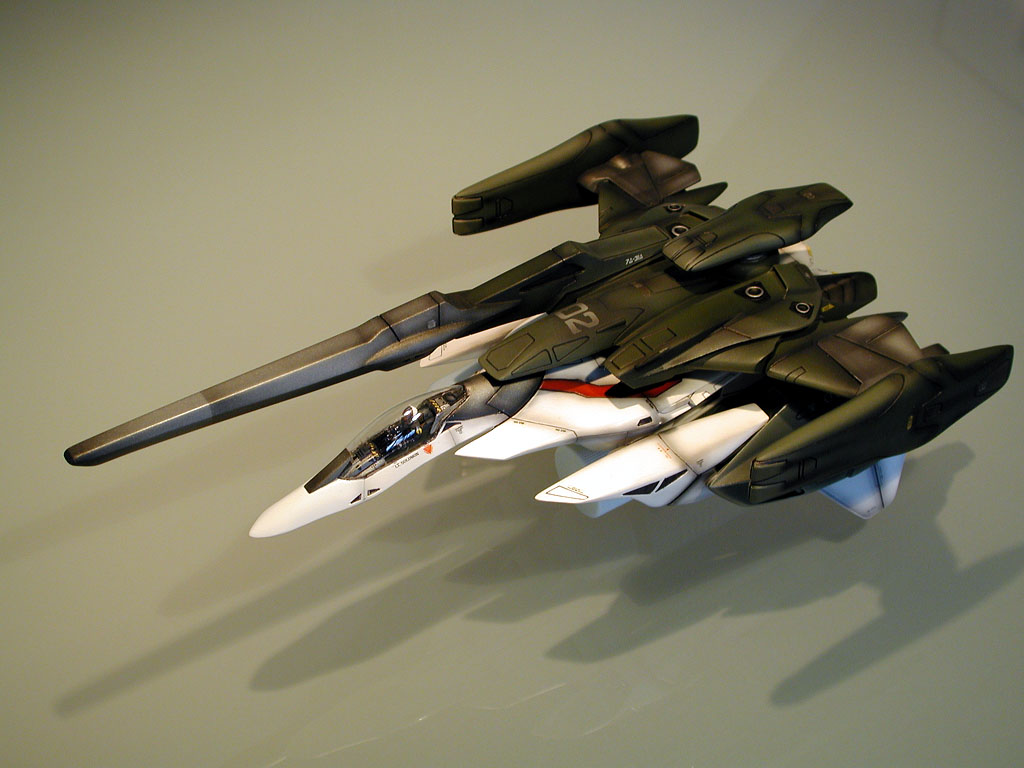
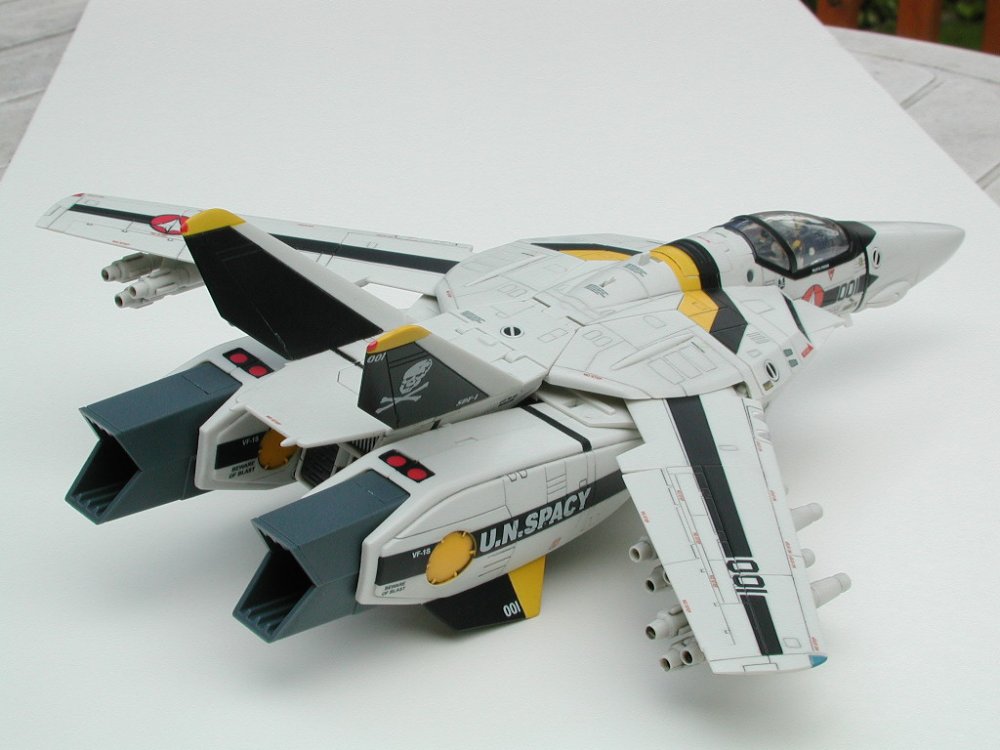
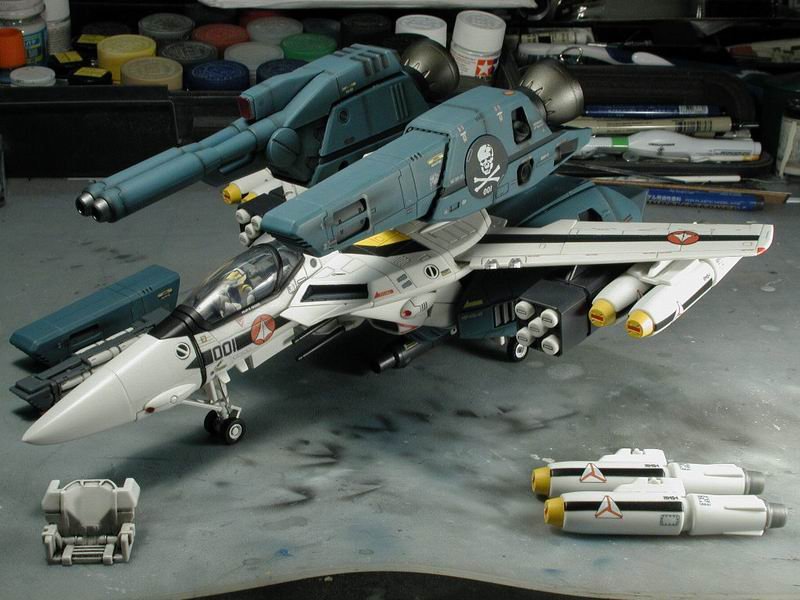
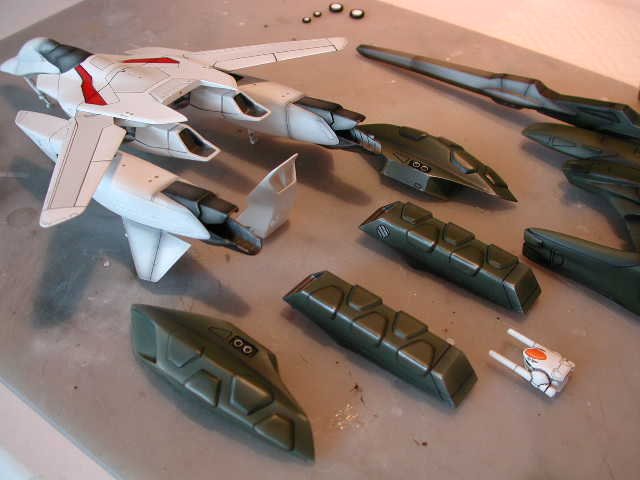
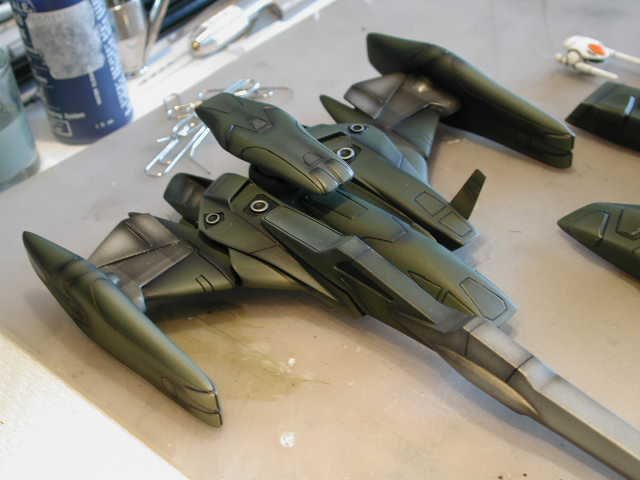
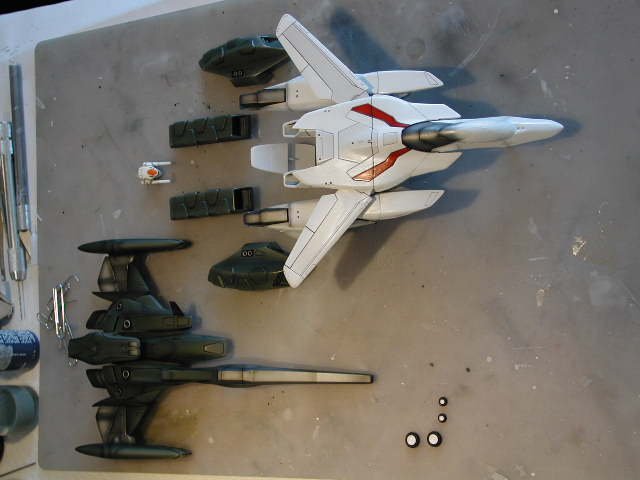
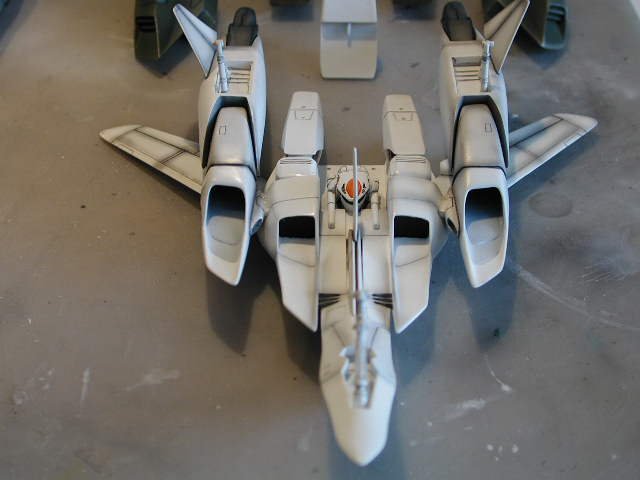
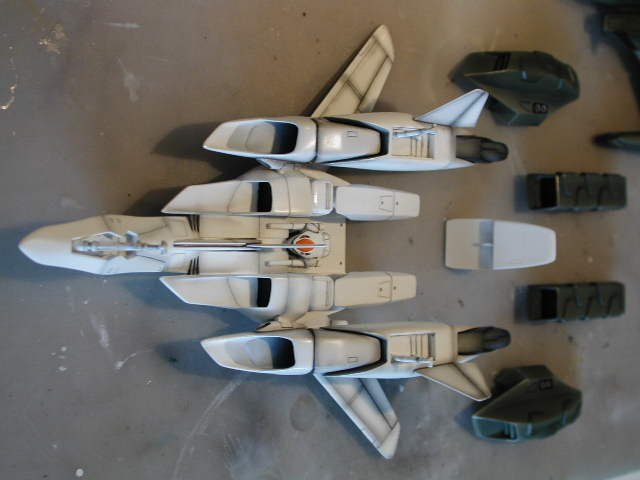
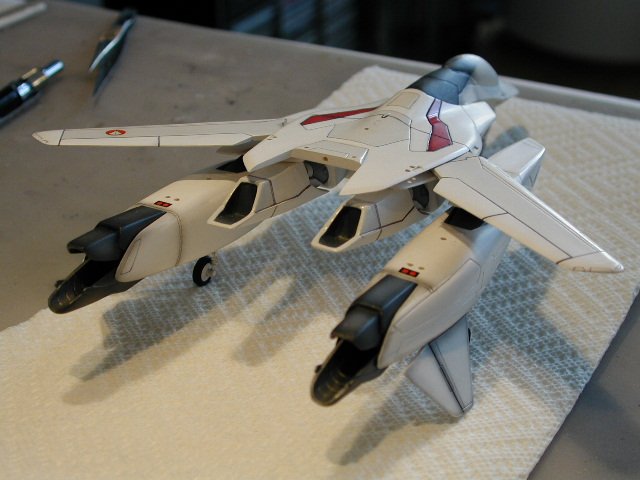
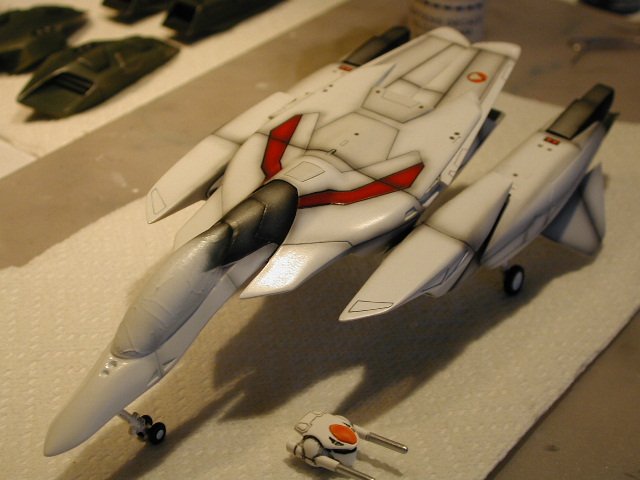
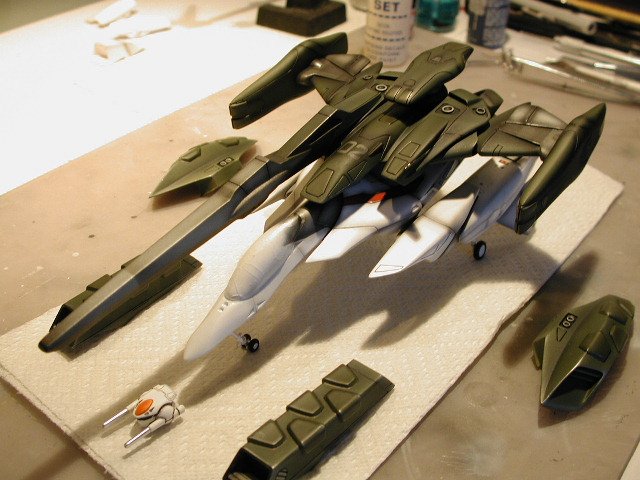
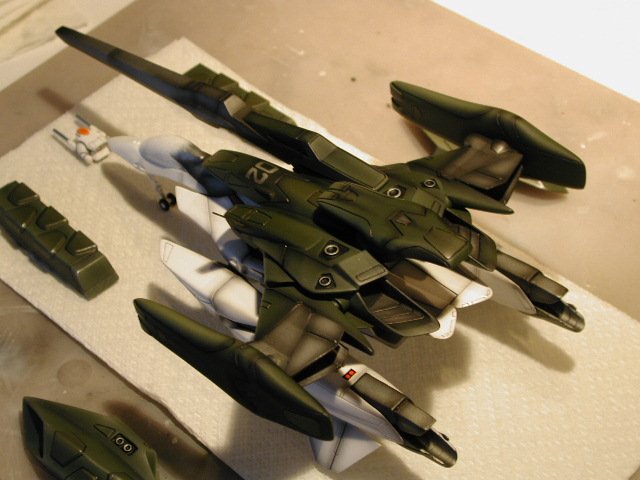
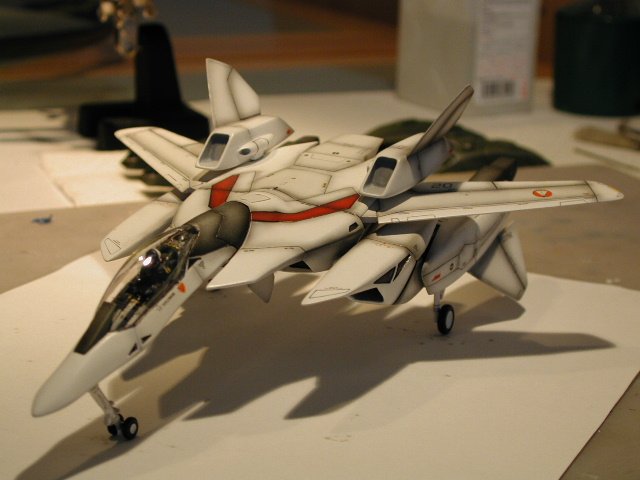
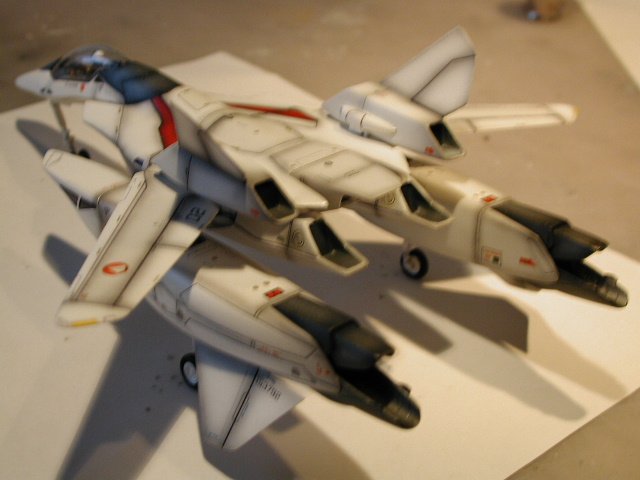
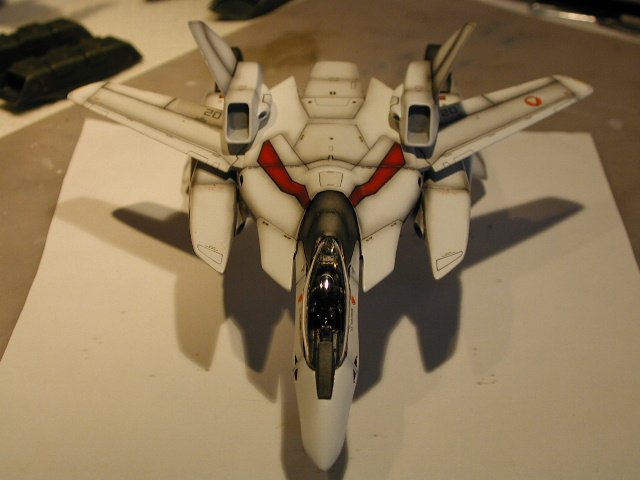
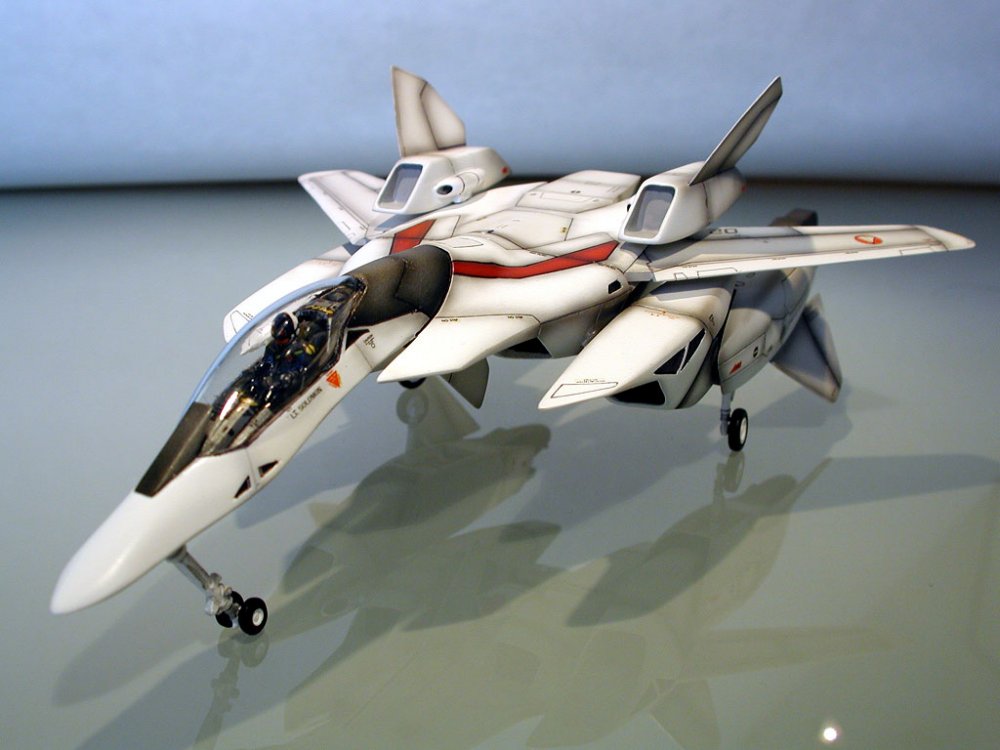
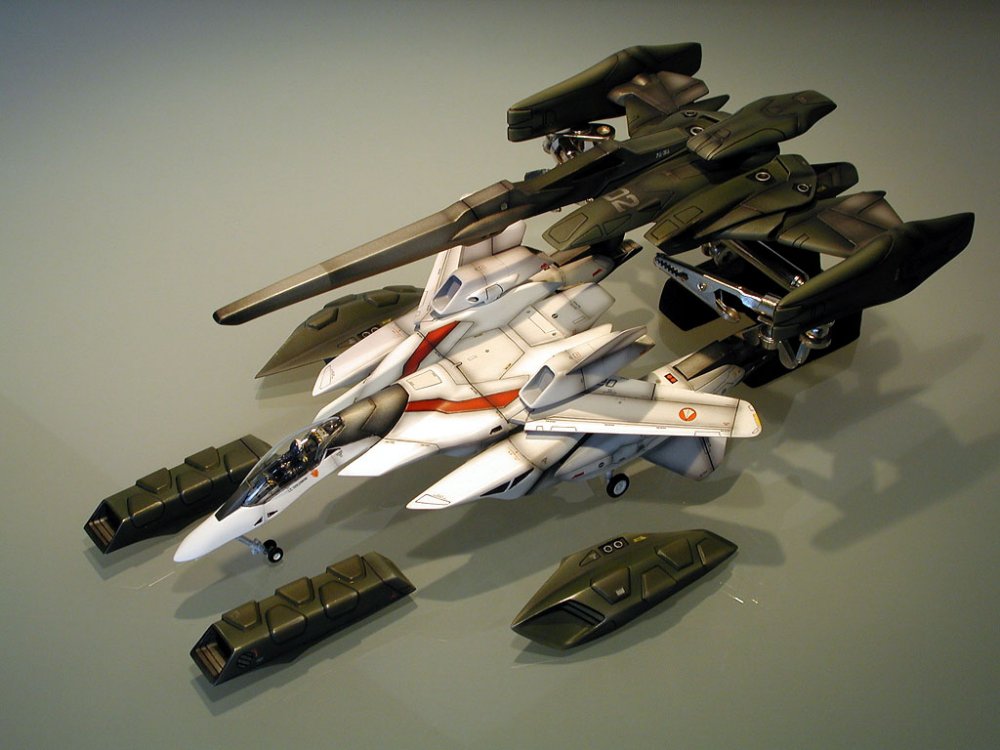
What an awesome wife!! Yep, mine was from Hobbyfan way back when and I got a useless foggy translucent canopy which I had vacformed. The kit is excellent though, very crisp line and great shape. It takes a little work to get the fast packs removeable - but its definitely worth the effort (I just used paperclip pins) Here are some shots of mine built 5 or 6 years ago - please excuse the way too heavy panel lining and post shading - but this is the model that got me back into Macross building!!


-
1/72 Reactive Armored VF-0S Macross Zero
wm cheng replied to Less than Super Ostrich's topic in Model kits
Willdo! John is a great guy - that's where I got my FMMF from. -
1/72 Reactive Armored VF-0S Macross Zero
wm cheng replied to Less than Super Ostrich's topic in Model kits
I can't wait for this puppy!! But it may be a while before I can sink my teeth into it... -
Nice build up so far Spatula... A few suggestions, great idea about the gun vents, a faster way maybe to drill out the vents with a pinvise which is much smaller than the rectangular opening. Then, use a fine needle flat file to work the sides flat and sharpen the inside corners of the vents. You can pick up a set of fine needle flat files at a hobby store or hardware store for cheap (especially the made in china stuff) - you don't need the expensive ones since its only soft plastic that is being filed. Secondly, you could paint the wheel well in a few different shades of grey or metals, picking out some details of the pipes or tubes in a different colour. You don't have to be really neat to stay within the lines, since the dark oil wash will fill in the transitions between all the colours. Finally, do a white colour dry brush on it to lighten it back up and pick out all the raised details - this is a great part for it, lots of raised details to catch the dry brushing. Good luck.
-
Yay! another build up for me to live vicariously through! Great work... one little comment though (not sure if you want to hear this ) but I got caught up in detailing too and made the same mistake as you. The VF-1D was a TV series Valk, and in the canon lineart, all the TV series valks don't have controls on the side panels, they have these green rectangular pillowy cushions for the arms (an armrest!). Oh well, I still think it looks better (more realistic) with side consoles. Keep up the great work.
-
Thanks for all the warm wishes and creative comments (my wife really loves those!) Congratulations to you too Brian! p.s. I've already been caught with overspray a few times - and I don't mean with an airbrush! ;-)
-
Hi all! I am very happy to announce my greatest creation - a 1:1 scale fully variable (although the neck joint is a little floppy ) future Macross fanantic! Our "kit" was delivered on July 11 at 1:56am weighing in at 7lb 6oz (customs and duty didn't like the big box she came in ) Mom is doing very well and actually approves of this "purchase". This new project may take some time away from other Macross endeavours for the immediate future (until she starts building her own kits). Just wanted to share the good news with my online family - I didn't know where to post this appropriately, but thought the most people that knew me would be in this thread. Thanks, with step-by-step updates to follow. Wm


-
Yep, it looks really thick - the idea is to thin it down so much that the capillary action of the liquid draws itself into the recess lines. There should only be little dabs where your brush touched the line to clean up afterwards (the rest of the line shouldn't need clean up). Just becareful you're not wiping too much - it may eat into the protection layer beneath. I specifically use oils for their slow drying time, it gives me more time to weather and wipe away the excess. You don't want to let it dry completely before you wipe away the excess (especially seeing how heavy you laid it on). Use as little of the mineral spirits as required. Below is a shot of my oil wash process (and this one is really messy compared to what I usually do) - however the YF-19's lines are rather shallow.
-
Hey sounds great!! I'm going through a model withdrawal right now... I'M IN! There hasn't been much activity in the model section lately - lets stir it up a bit!
-
Come on guys!! lets see some step-by-step build ups of your modifications. What no pictures?! that's not fair - you're just a tease then... I can't build now, but I still need the fix...
-
Hey GH! Fantastic job! Lets get some closeups of the arm itself, nice Valk! Love the extra viewing platform! How about some folded up blast doors on the top of the large vertical windows You're so right, its such a hard subject to photograph.
-
For Those Of You Who Have Been Here For The Years.
wm cheng replied to VortexVFX's topic in Anime or Science Fiction
Since 2001... actually it was this site that got me back into Macross... and got my first resin kit, the recast VF-2SS - haven't looked back since!! -
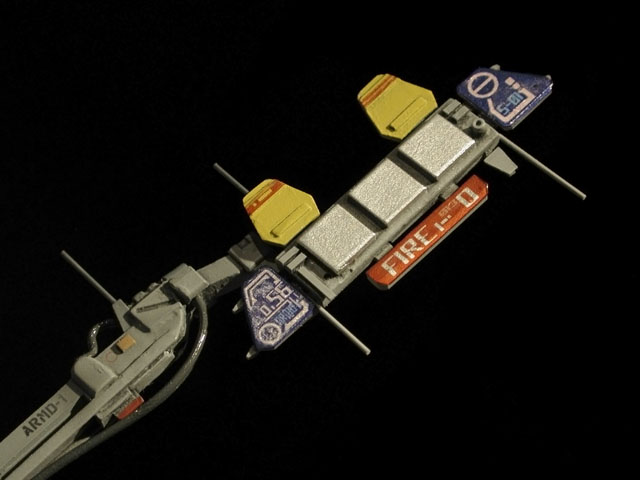
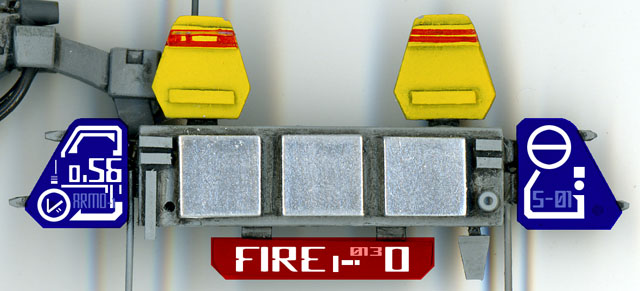
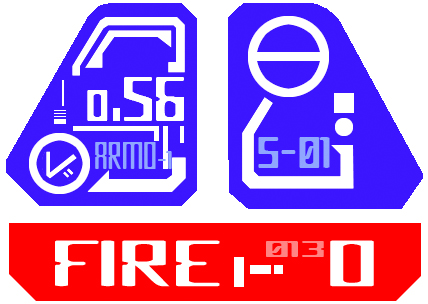
Finally finished the graphics for the signal arm paddles. I have posted them for download in my build-up thread! http://www.macrossworld.com/mwf/index.php?...ic=16726&st=200 Good luck... now I want to see everybody else's launch arm models.

-
Yay! Finally finished... I had a few minutes tonight and decalled the signal arm. Luckily the graphics worked perfectly. I first painted the paddles with a Tamiya silver paint marker to get a highly reflective silver. Then I decalled over them with the graphics I created in photoshop (by first scanning the part in and drawing it out) and inkjet printed onto "inkjet" decal paper by Bare Metal Foil http://www.bare-metal.com/gateways/decal_supplies.html onto clear decal paper. The "white" is just areas where there were no inkjet ink, so the silver underneath showed through. I took the photo immediately, so some of the silvering on the blue areas of the paddles is just the decal setting solution catching the light (its still wet as I type this). But its drying perfectly - I am really happy with it now (its that finishing touch which was missing). So as promised, below is the graphic I used - its sized perfectly, so print your own and give it a try! Photoshop work on top of the scanned part. Photo of the decalled part. Raster graphics file at 100% at 600dpi (Good luck!)


-
The Yamatos are quite well engineered (I have one of everyone myself) but they are still a long way from being able to be compared to as models. They are miles ahead of the chunky monkeys of the 80s (IMHO) but the depth of the panel lines and such still relegate it to toy status for me (even if we attempt a decent paint). They do rival the old ARII/IMAI models of the 80s though. The closest toys I've seen to being models are the Gundam FIX Figuration - their paint and markings are incredible. However, it is sad that I find model making a dying art. Just looking at the bricks & mortar shops around here - so many have gone out of business! I find that I can no longer get all my supplies locally and must rely more and more on the internet. A bad sign of things to come. I think the newer generation lacks the patients that is required to build a model - its the "instant gratification" generation! What's easier than paint something that's already been made! (sorry, no offense to the amazing customizers on this site) - its more a stab at the lazier younger generation.
-
It works better when you push the crack together and hold while the tube stuff sets - I find even if you sit there and hold it in your hands (pushing it together) for 60sec or so, it really helps with the strength of the bond (versus just letting sit on its own) That old testors orange stuff is what I've been using since I was 7! I should try some of the newer glues out there - old habits are hard to break. I do use crazy glue, and liquid cement from time to time.
-
Fantastic! Can't wait to follow your build up! You need to make a mini-mave about to land on that thing! (in scale! ) Thanks for posting - man, I love the mech designs in Yuk!
-
I'm not sure about the durability without clear-coating, but I clear coat mine with ModelMaster semi-gloss which gives a finish exactly like the plastic (it was too hard to tell where I sprayed and where I missed ) You're right, Future is too shiny, but would make a good under coat to apply the decals onto. I don't think there is any realistic way to return the Valk to its original state. There will be signs - I am guessing, but the plastic will probably age differently around the areas that have stickers or decals applied, and if they are taken off, they may leave ghosts in the plastic (at least this has happened to some of my older toys in the past - but not necessarily the Yamato Valkyrie per se). You should just enjoy your Valk! If you want to invest, keep one MIB! Its pretty hard to pass off something that's been modified and played around with as MIB. Plus you'll always be handling it gingerly. The homemade decal kits only work when you are decalling onto light or white surfaces - it cannot print white. You've got a problem with the U.N. Spacy lettering on the legs if you use those decals. I use Anasazi's decals, and they are great (keep in mind that it comes from an Alps printer - so the colours other than CMYK are screened to make up the composite colour).
-
Waterslide decals all the way!! Especially if you're going to clear coat the Valks afterwards anyways - that will protect the decals. Additionally, with the waterslides, the edges are so thin that they appear painted on (more realistic) and the edges don't get caught and lift up as some stickers sometimes do. You may be able to PM anasazi directly here on MW...
-
Fantastic work Berttt!! Yay! someone actually finally finished one of these babies (and it ain't me! ) Thanks for sharing - it really looks great. Are you going to weather your base a little more? I love seeing your work - please if anyone else has finished their boosters, I WANT TO SEE THEM. It gives me my fix when I don't have the time to build. Yes, my booster is on the back burner - I'm working now (thankfully!) and I've been sick with a flu. As soon as I have a moments time, I want to finish up the launch arm signal paddles (I've got the decals printed from my inkjet printer) and I'll post the photos along with the graphics if all goes well. That's first, then this booster (but probably detail up and decal the Yamato 1/48 GBP first - oops a toy! that might be a sin around here ) Then I just got my FineMolds Millenium Falcon too - that might throw me out of Macross for a few months if I ever get around to it!