wm cheng
-
Posts
4301 -
Joined
-
Last visited
Content Type
Profiles
Forums
Events
Gallery
Everything posted by wm cheng
-

VF-1S Strike Battroid Valkyrie step-by-step
wm cheng replied to DrunkenMaster2's topic in The Workshop!
Yay! a step-by-step... I'll be watching to get my fix Since I don't have time to do it myself, I can live through you guys... that's great, I haven't built a Battroid before. Thanks so much!! -
No I didn't! What issue of Model Graphix is it? Anyone know where I could get scans of it online? (or is willing to scan some pages for me?) I would love to see it! Thanks for the heads up. Yep, the computer is there, but not working yet. Its leftover components from my desktop upgrade upstairs - the theory is so I can have my iTunes and references close at hand. But I have yet had the time to hook it up, it has a TV card in it so I can watch TV too - great place to use a old spare monitor and tower.
-
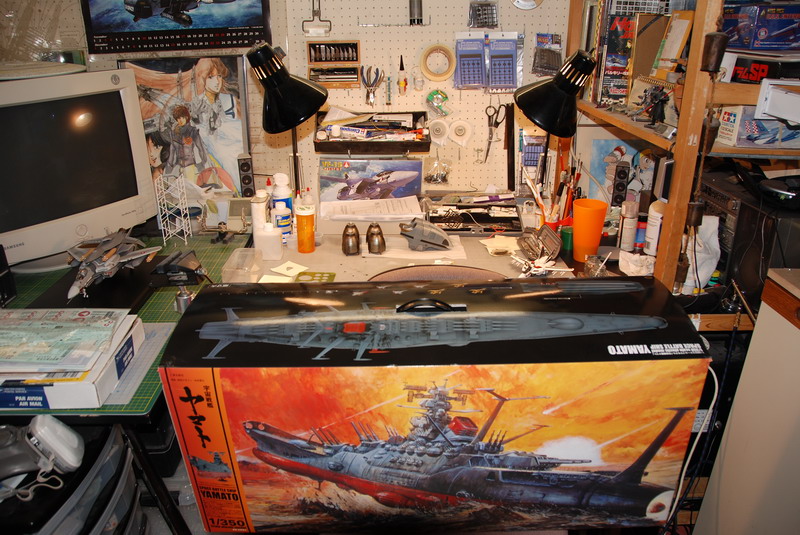
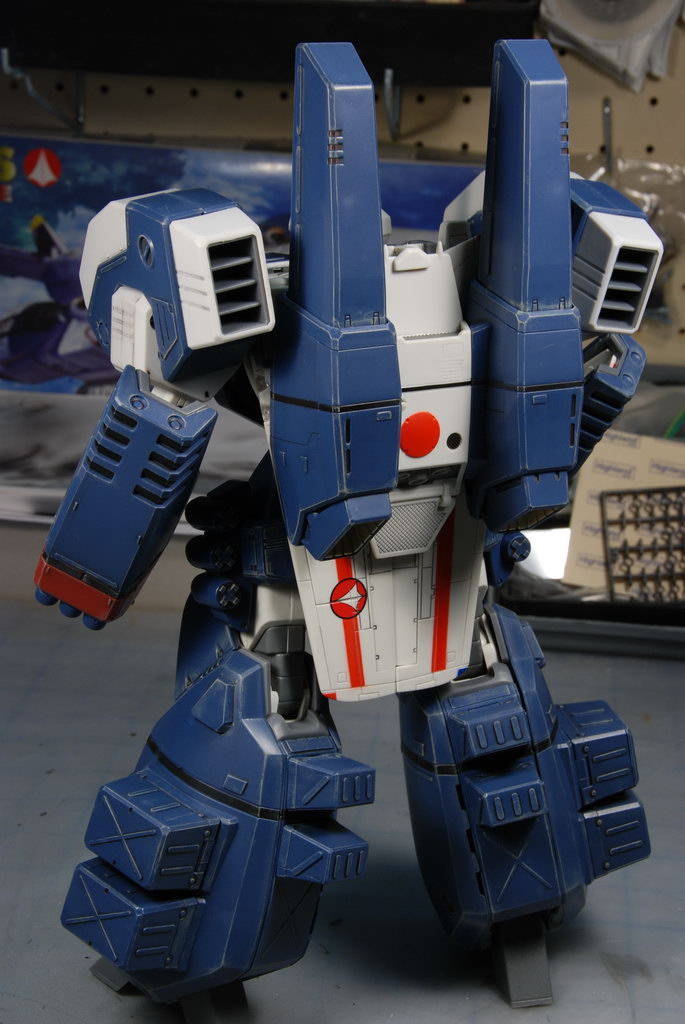
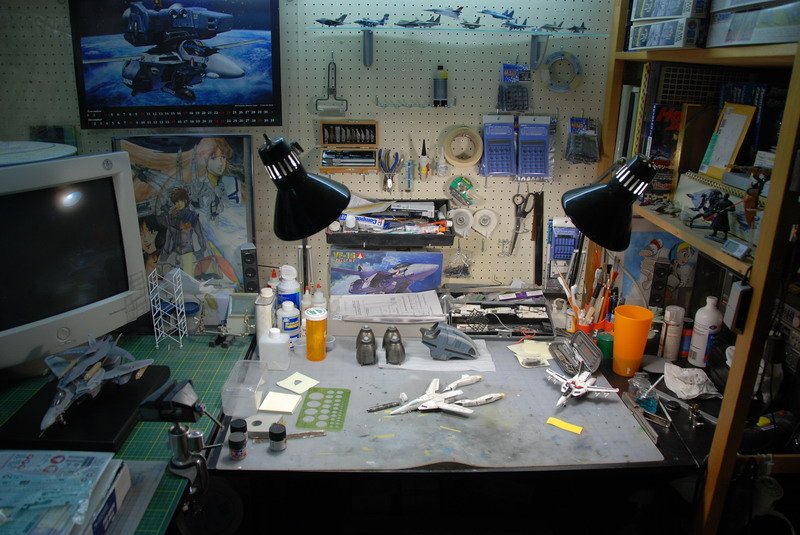
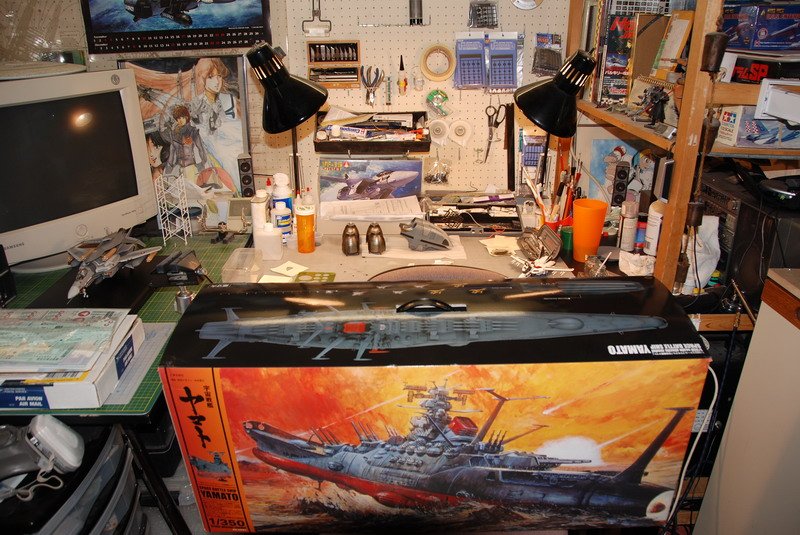
Happy Father's Day to all!! My "best-est" present was 7hrs of uninterrupted modelling! The first time I've sat down here since Alex was born. I had to literally clean off cobwebs and vacuum the entire workspace since so much dust had accumulated, my airbrush compressor oil had settled too! You can see I got the Bandai Yamato - this will be my next treat as soon as I get a real opportunity. For now, I'd be happy to finally finish my long overdue Atmospheric Booster. Unfortnately I did not get it done, but did get a good start on finishing it. I had to spend a bit of time trying to orient myself again to remember where I left off last. I'll post some works in progress to the step-by-step thread later. After this booster, I think I'll take a bit of a break from Macross, with the Bandai Yamato and the Fine Molds Millennium Falcon battling it out for who gets my next attention (if Alex allows me some more time in the summer).
-
Thanks Recon, You wouldn't happen to have a photo with arrows or areas circled would ya? Good to know that it isn't just me that the fighter mode is slightly more flimsy than the older VF-1s. p.s. is anyone else's rear gears hard to take out and deploy? - I guess I need to grow my fingernails out (eew!)
-
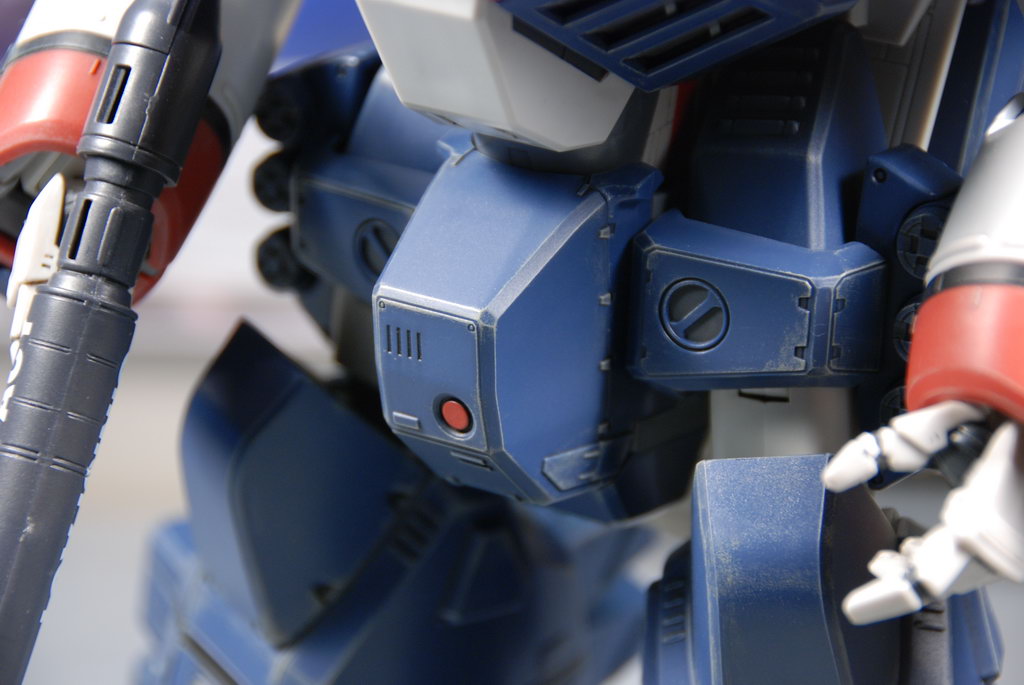
Well, I just got this puppy yesterday - and I must admit, the sculpt is amazing! However, this is my first VF-0, so I'm not too familiar with it, but did notice straight out of the box that it was looser or flimsier than the VF-1. My older VF-1 all lock up so tightly in fighter mode, but this is a bit loose. Same here that my left leg doesn't hold very well in fighter mode and the intake shield falls out rather easily. Upon a semi-transformation, I noticed that the "thigh" or intake part of the leg was split down the seam, I can only hope the screw is loose and just needs to be tightened and the threads aren't stripped. I'll let you know later. Wierd kinda flimsy or loose in some areas (nose portion of the fuselage, left leg against the backpacks, tail fins, two face shield pieces under the fuselage by the head keeps floppy out) and really tight in some (I still can't get the rear gears deployed without a screwdriver on both the VF-0 and Ghost nor the secondary hinge - smaller one in the backpack). A newby transformation question - what happens to the front nose probe during transformation (I looked at the instructions and it just disappears from one step to another? Hey is there a transformation video or guide somewhere or can someone help me though this. I'm pretty good at the VF-1, but the combination of loose and really tight joints have me scratching my head. In step 07 of the instructions, I can't seem to separate the forward nose from the blast shield - there is a gap between the blast shield and the chest piece, but the seam between the forward nose and blast shield is tight - where do I press?
-
I got mine too today!! - yay! first Macross thing since our baby!!! - this thread forced me to get one... I couldn't help it. Its also the first Yamato toy I've bought that I don't have Anasazi's amazing decals for yet - I hope that sorts itself out soon - cause I can't wait to do this baby up!! Amazingly fast service, got the shipping notice June 7th, and it arrived at my door today June 13th (4-5 working days from Japan to Canada?!). Customs did ding me $40cdn for taxes and handling fee, and I was charged $60cdn from HLJ shipping - so it all cost $100 in just shipping & handling?! (Ok, I got a few other small books) Kinda steep.
-
Wow! fantastic work on all the models... So is the VF-2 a modification of the Bandai kit? That green canopy seems to say so , but it looks too good to be the plastic kit. Fantastic!
-
Thanks, I do like the Cariburn (or whatever) nice lines - I hope they make kits of it. I wouldn't mind a Ace Combat for PS2 with more futuristic fighters too - but they'd probably be concentrating on the PS3 by now (too bad). I love sleek lines!
-
WOW! Electric Indigo... what's Ace Combat X? I love the aircraft designs!! Any models of those exists? What are they? I have Ace Combat 5 and I've never seen anything like those! Must have Hasegawa make those designs!
-
Anasazi Decals now available through Robographics
wm cheng replied to Anasazi37's topic in The Workshop!
Hi everyone, I just wanted to add my comments (sorry been out of the loop for the past few months - but I love my baby girl, she's 10 months now!) I am so sorry to hear about this Night Stalker - some people can be so rude and don't realize that this is a community based on the generosity of others. For all those people out there that were less than kind to NS, all I can say is "Grow UP!" - its only $10-20 dollars, thats nothing to get rude over, even $100 or more, whats the price for our civility? I mean don't get me wrong, there are definite scammers out there in the wild internet, but with our MW community here - they may get away with it once or twice initially, but then are usually shut out. I feel I must also express my appreciation to Anasazi's hard work for creating these graphics and initially providing the service (all my Yamato Valks bear his work!). To this day I will not even buy a Yamato Valk if I didn't have his decals for them ready. Actually thats one of the reasons I'm holding off on the VF-0 with Ghost. So selfishly... - I am hoping that he would create the graphics for the new VF-0 with Ghost and that NS will eventually provide the services to print these graphics and continue to contribute to this fine community. It really would be a shame to have all this end due to a few loudmouths. Its all a Karmic chain, no more decals, no more Yamato Valks for me, and eventually no more postings from me either. Maybe the decal service should be a bit more selective to who it sells too, if NS deems you to be rude, then maybe bite the bullet, refund their few bucks, call it a loss and refuse to service them. Or check out how long they have been members here (membership should have its privileges ;-)) -
Sorry been out of it for a while, but a question. Is there two types of Ghost offered, the stand-alone Ghost with the Grey/Blue camo pattern and the Ghost packaged with the VF-0A that is Light Grey/Grey scheme? I must say I like the Light Grey on Grey scheme much better on the VF-0A! But I see pictures of the Grey/Blue camo pattern also on the VF-0A - which is which?
-
Sorry guys... took a little vacation down south to the Caribbean with our daughter - then it was back to work... I got another job (much sooner than I anticipated). Its pretty crazy starting up again... so the booster is on the back burner, but its NEXT! Its pretty much assembled, only decalling and paint touchups. Come on all, lets see your Boosters! Inspire ME! ;-)
-
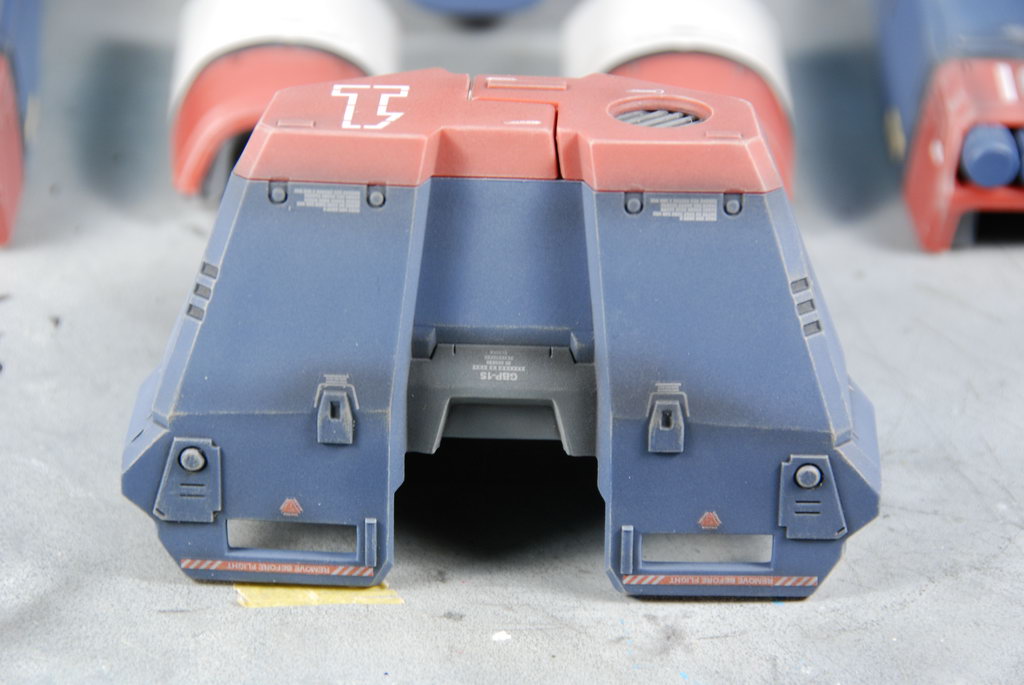
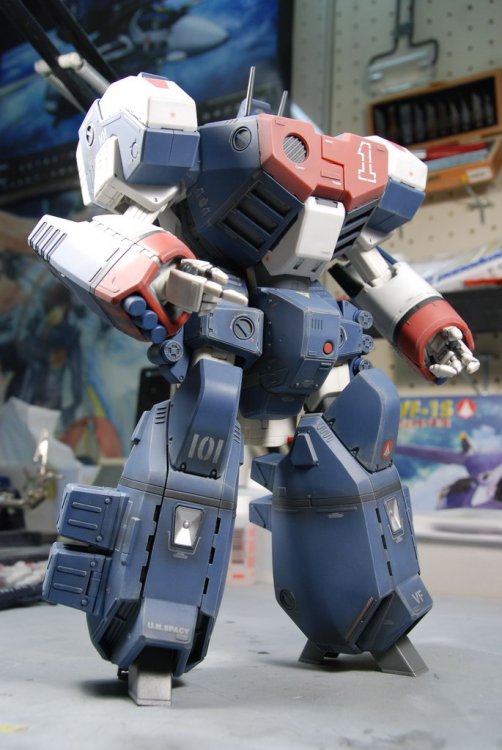
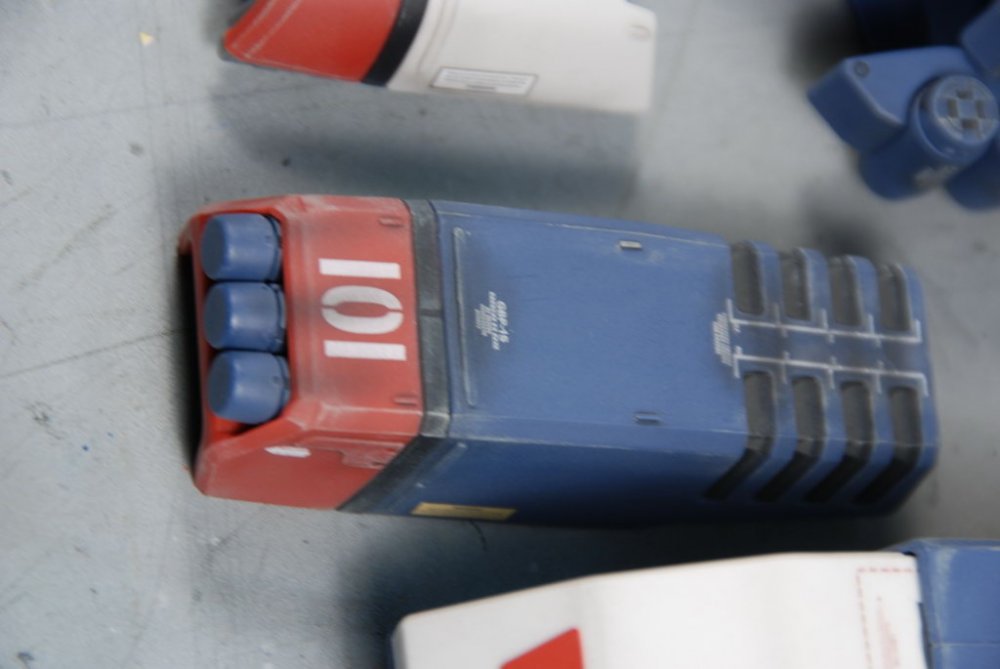
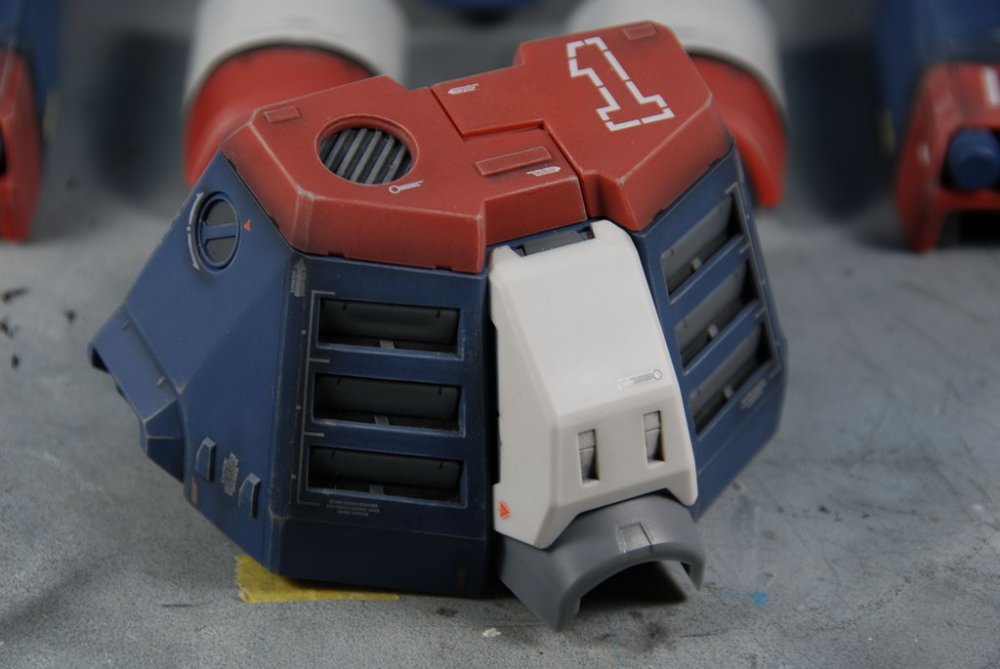
1/48 Yamato GPB-01 decalling and minor touch ups!
wm cheng replied to wm cheng's topic in The Workshop!
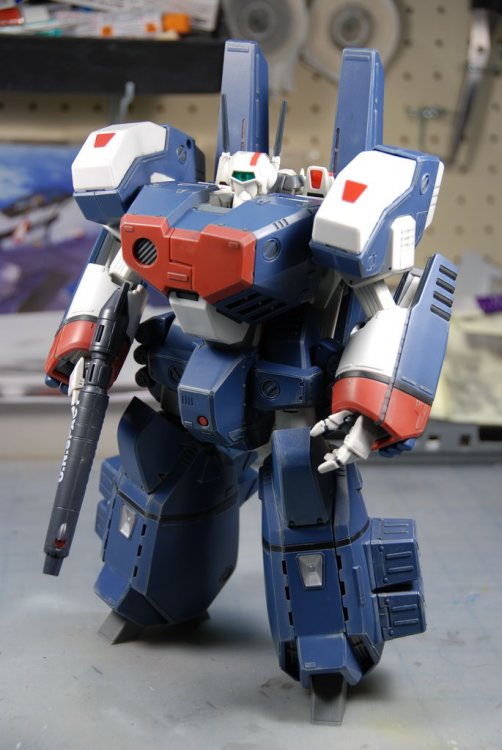
I pretty close to being finished. I may add a light dusting of light grey - kind of like post shading to tie it together a little more, plus do a small amount of silver dry-brushing to simulate some chipped paint. Lastly, I need to do a dark oil wash on all the missles - its a very labour intensive task, so I am leaving this till after the vacation (I'm leaving for a 1wk family vacation this Friday!) As you can see, the VF-1J beneath is completely naked (that will be another time!) - but I'm happy for now.


-
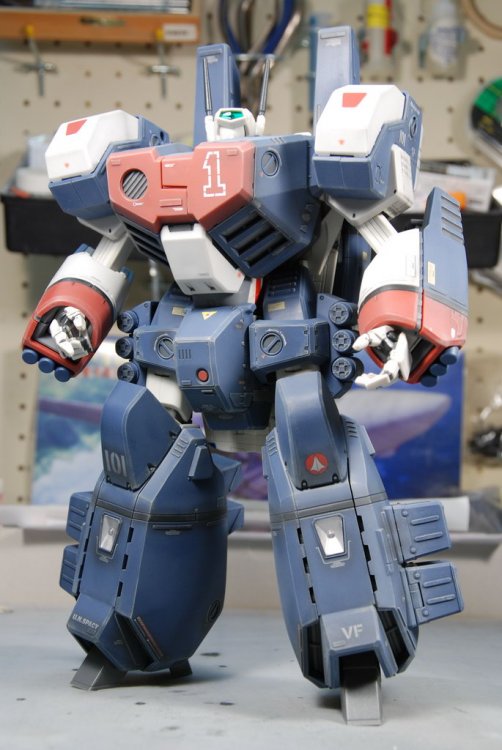
1/48 Yamato GPB-01 decalling and minor touch ups!
wm cheng replied to wm cheng's topic in The Workshop!
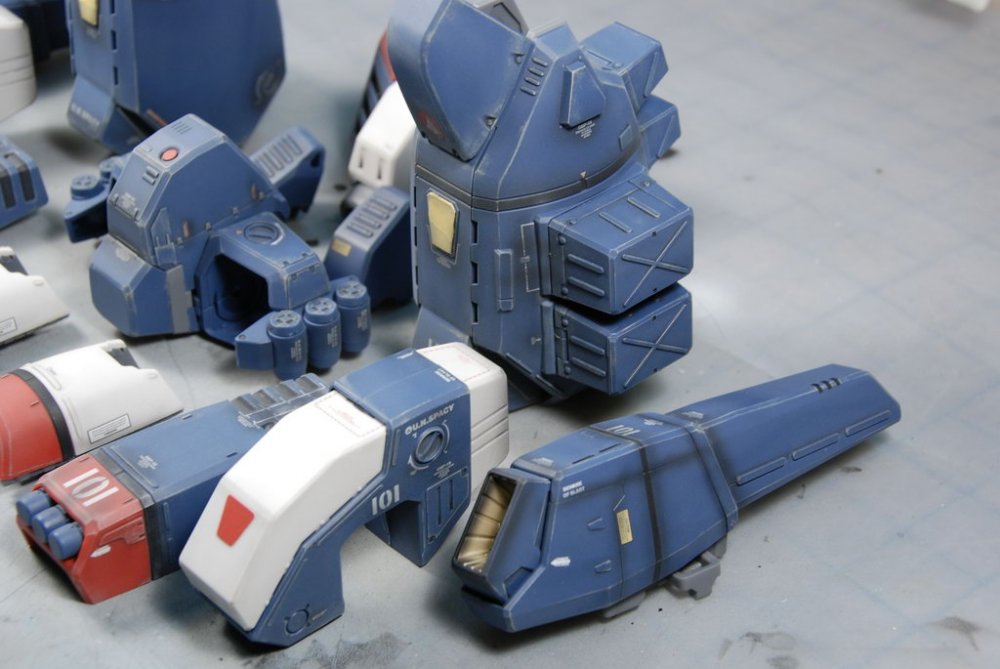
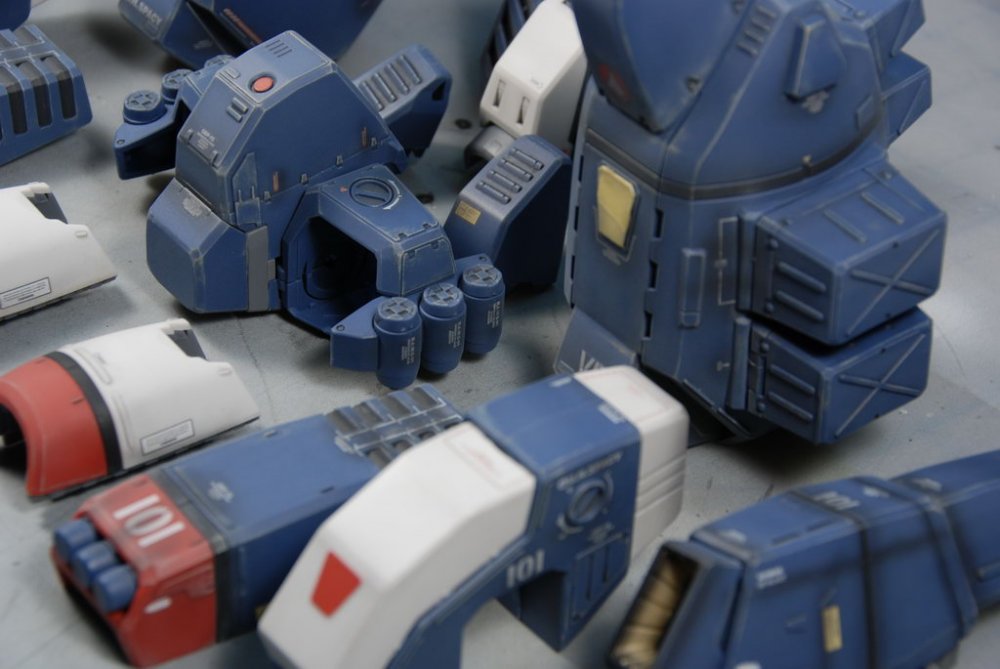
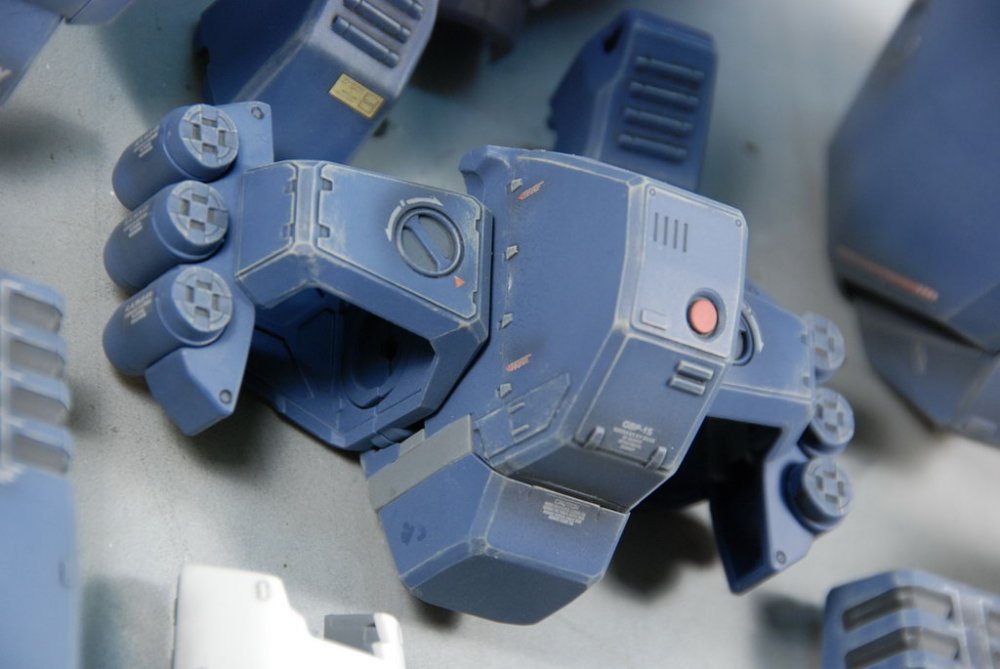
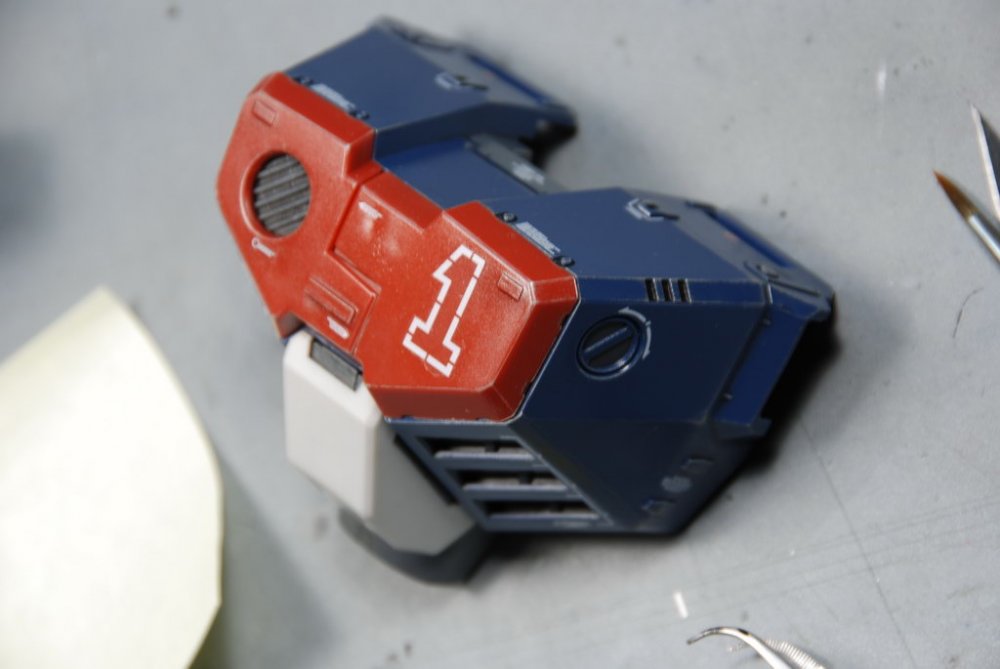
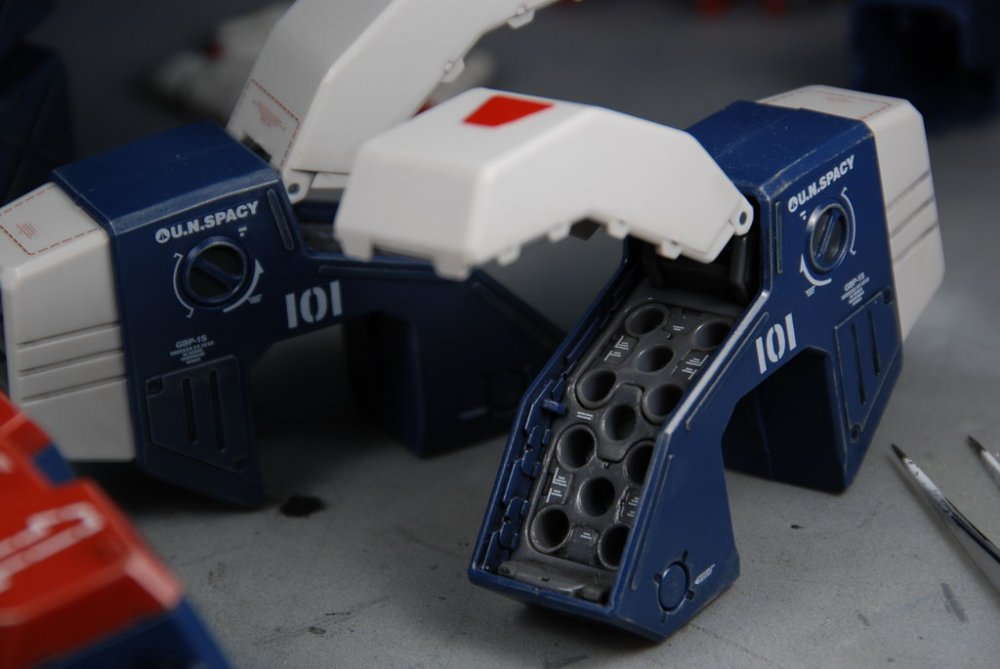
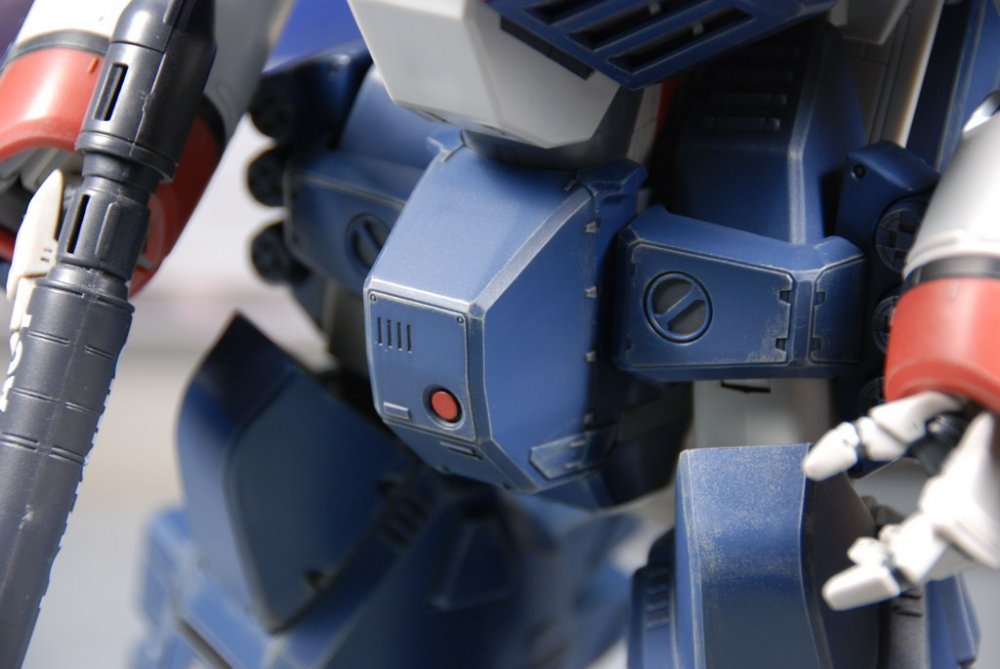
I next thinned some black down, and did a very light misting over some of the white stencils, to tone them down a bit to a grey. I also used this opportunity to do some blast charring from the missles, the rear thrusters and do a general panel post shading to tie it all together. The toughest part was trying to guage darkness on the glossy finish (as the glossy finish is always dark and will lighten considerably when you apply the matte finish over the whole thing). Once I thought I've toned down the screaming white stencils, I shot the entire thing with ModelMaster Acryl Matte/Flat Clear Coat to get my desired final finish. I liked doing the Fast Packs and any Valkyrie add-ons in flat finish, it gives a more scale sense and makes it look less toyish. Additionally, it makes it look more like armour and brings out the original lighter dry-brushing All the previous work with the future was to create a glossy under-surface for the decals to lay flat upon, so the carrier film between the various white lines become invisible. One must alway take care when doing a flat finish with a dark background, these two factors really tend to bring out any silvering that may occur with the decal carrier films (no matter what type of water-slide decal or how thin they are). NOTE: Becareful when applying a flat clear coat over the glossy future - I got a crackling / splitting texture in some areas, kind of like desert clay crackling - I suspect I may have sprayed too heavy/wet a coat of flat/matte clear coat over the glossy surface. Its fine in thinner even coats, and the crackling disappears after a few more coats over it - however if it was worst, I suspect I would have to strip it down to start over.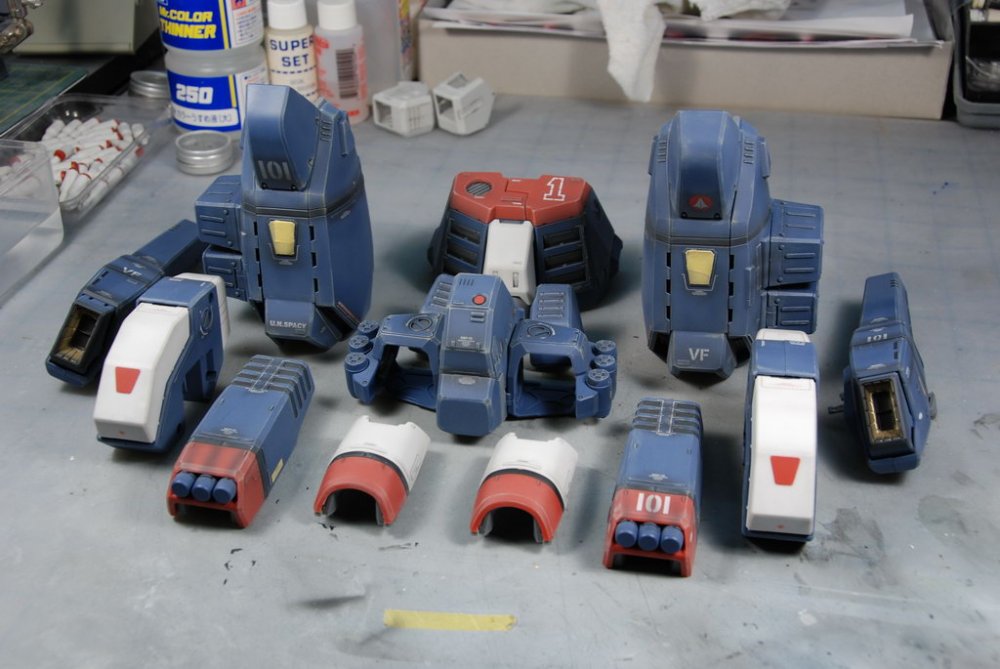

-
1/48 Yamato GPB-01 decalling and minor touch ups!
wm cheng replied to wm cheng's topic in The Workshop!
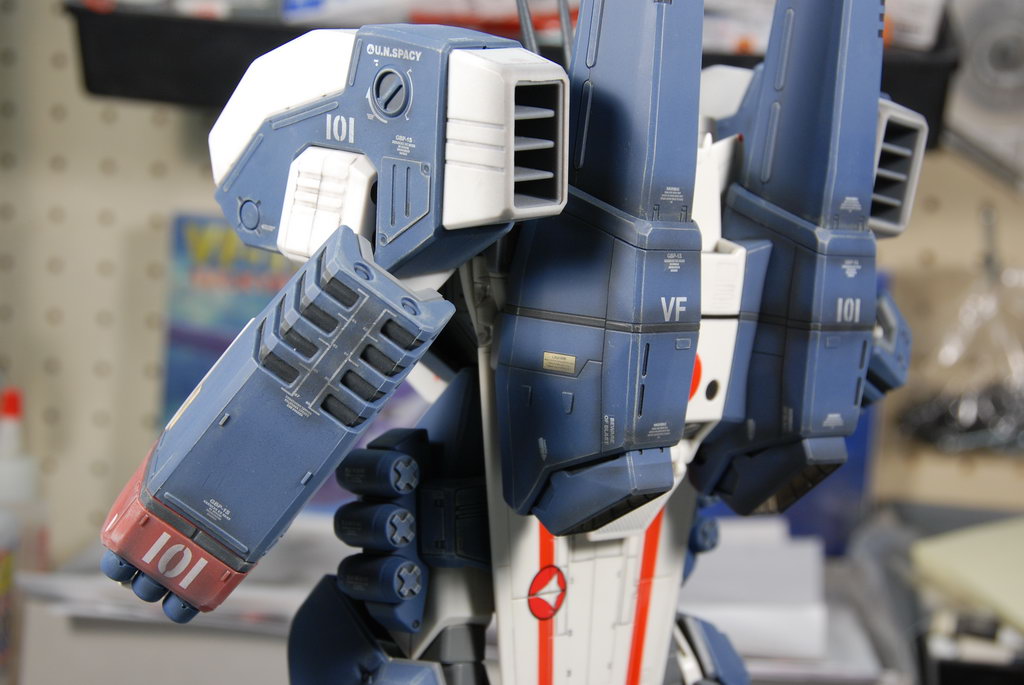
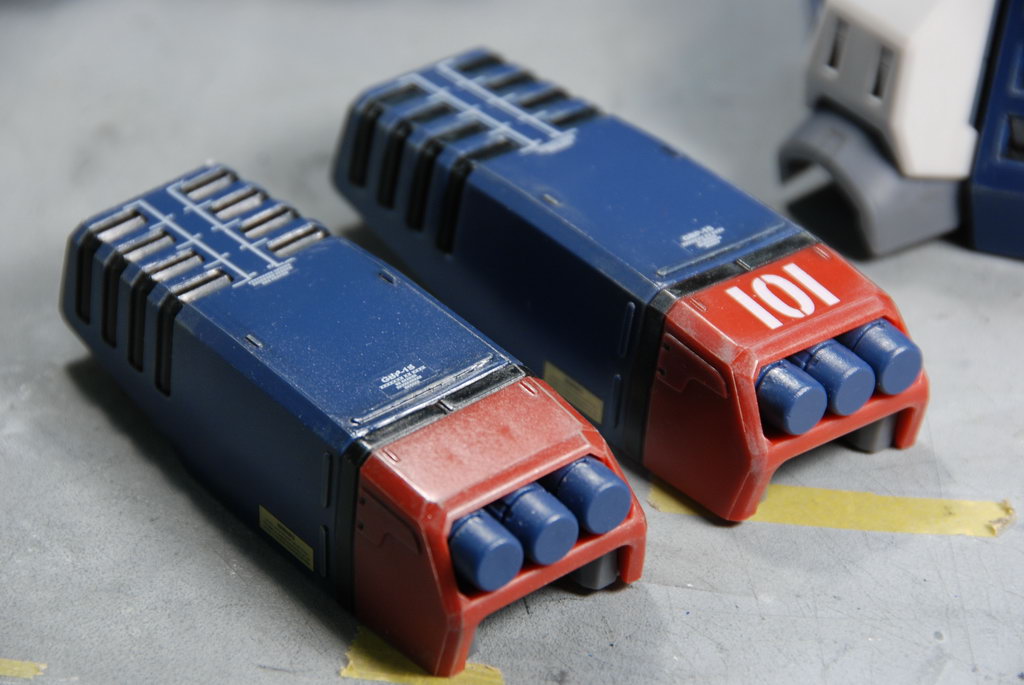
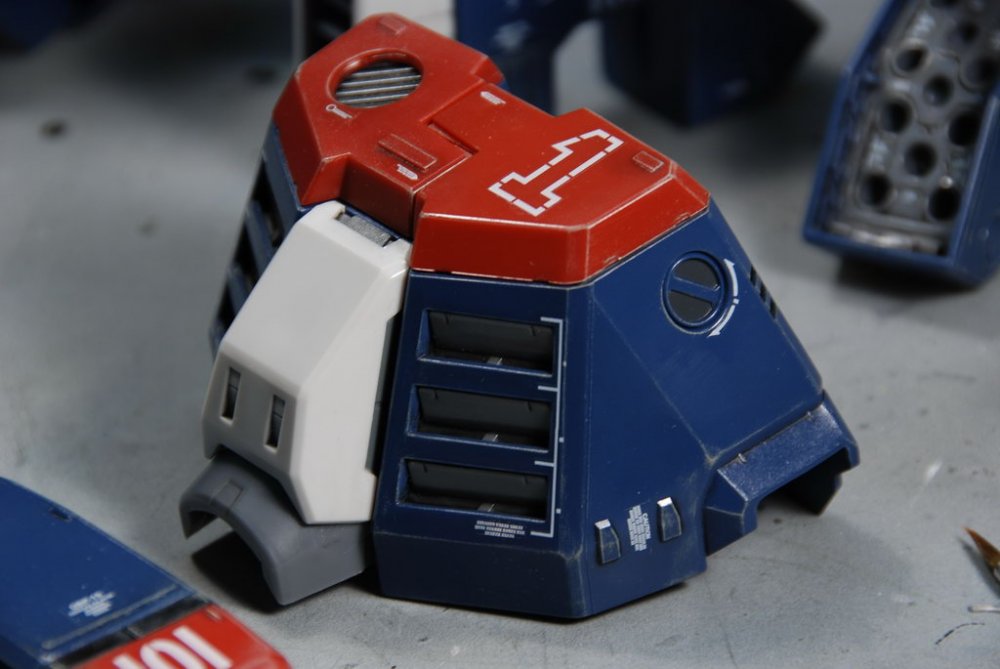
Ah... so good to hear these great decals are available again!! YAY! Thanks David, yeah, I know what the remove before flight tags are, but on the GBP sticker sheet, they seem to be warning stencils, with red & white hazard striping on either side. Its probably the Japanese, not know what "remove before flight" really means, and just stuck some "Engrish" in there. Anyways, once all the Yamato instructions were followed, there are so many more decals that are not specifically located - I then just kind of chose the ones I liked and tucked them here and there - I error on the side of not enough rather than too much - but I think it really adds a lot more to the toy! Here is a shot of the completed decalled parts. I added another thick coat of future over the decals to seal them in and smooth out the carrier film edges.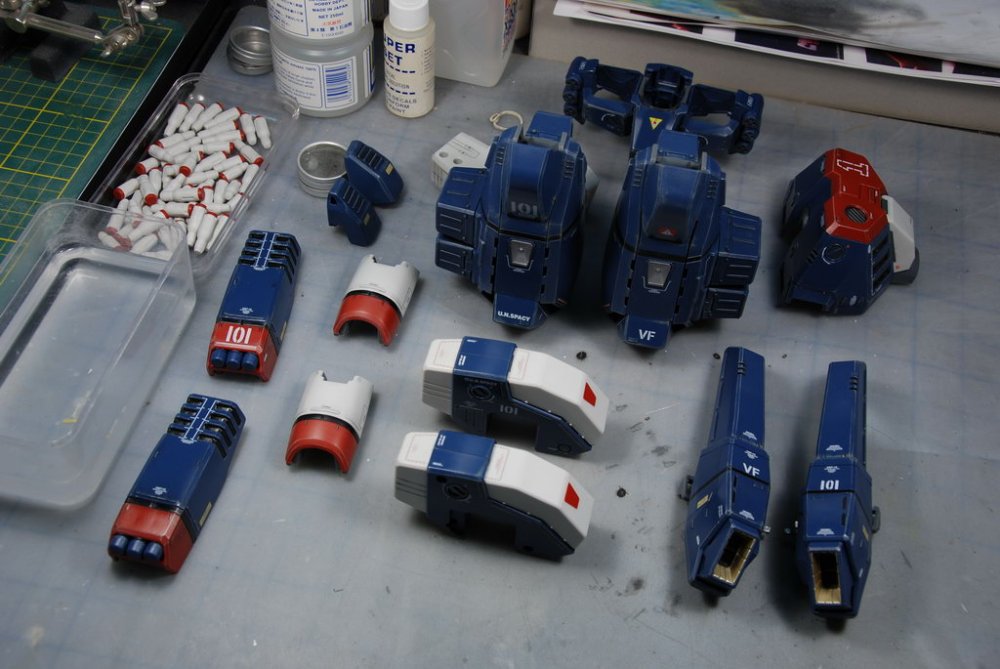
-
1/48 Yamato GPB-01 decalling and minor touch ups!
wm cheng replied to wm cheng's topic in The Workshop!
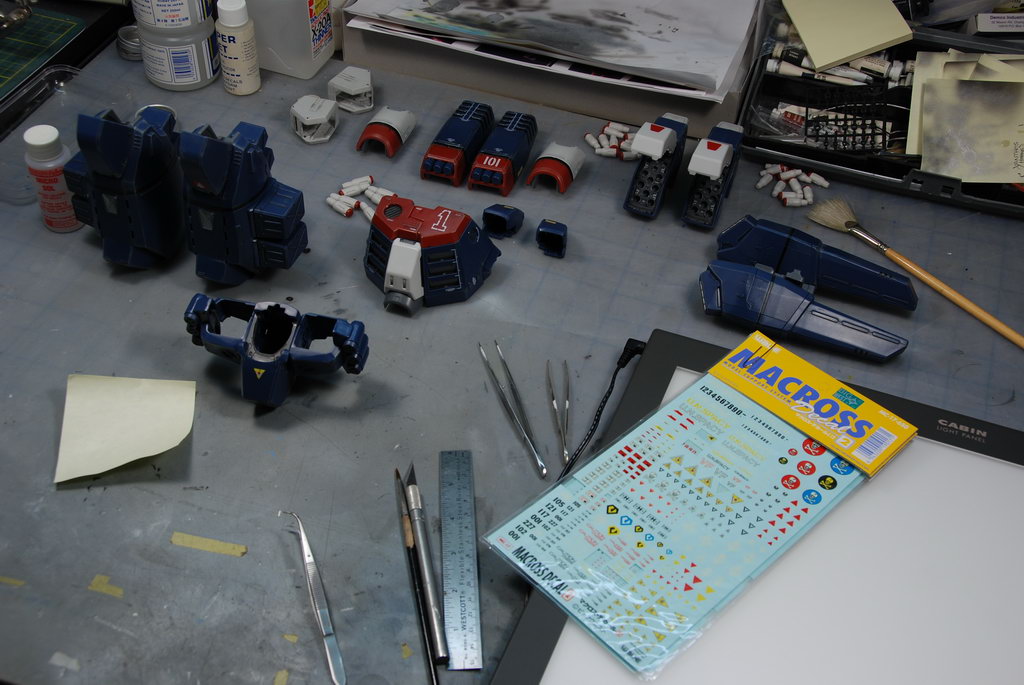
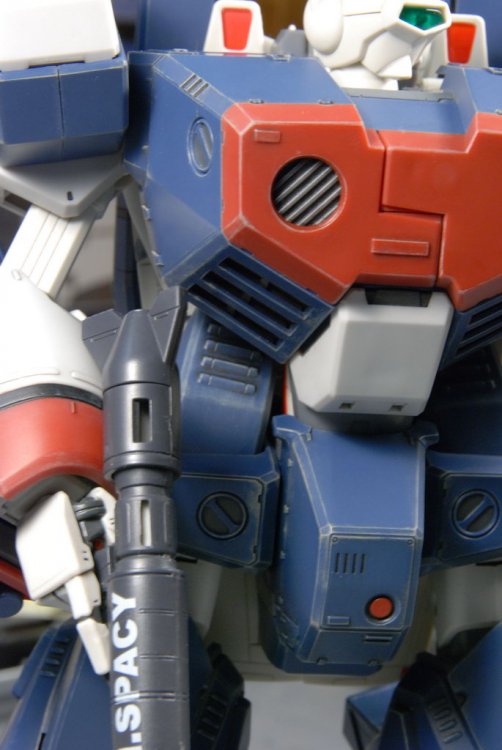
Yep, I'll have to decal up the VF-1J too, but that will be after I finish the Atmospheric Booster, this decalling project is being done now to get me back into the swing of things. There are a lot of decals (but I love all the stencilling!) but the toughest part is probably trying to cut all the carrier film off around the white markings as close to the marking as possible without cutting through the paper and damaging my light table. I have also decided to substitute some of the markings with ones from a smaller scale from and old WAVE option decal sheet, it seems to be sized for 1/72 destroids, but I thought the yellow triangular marking looked too toyish when it was so big. Now I need some help, there seems to be a bunch of other decals (both on the original Yamato sheet, and faithfully reproduced by Anasazi) that I can't seem to find where they go. Although I seem to have remembered seeing some of them applied somewhere. Specifically, they are numbers; 93, 95, 96, 85 - 93. I also remember seeing someone apply the red "remove before flight" stencil no.93 onto the armor somewhere - if anyone has any good pictures of any other completed GBP-01 Armor - please post them in this thread as well, I can really use the reference! p.s. the glossyness from the Future really makes it toyish and hard to photograph - can't wait to dull it all down again!!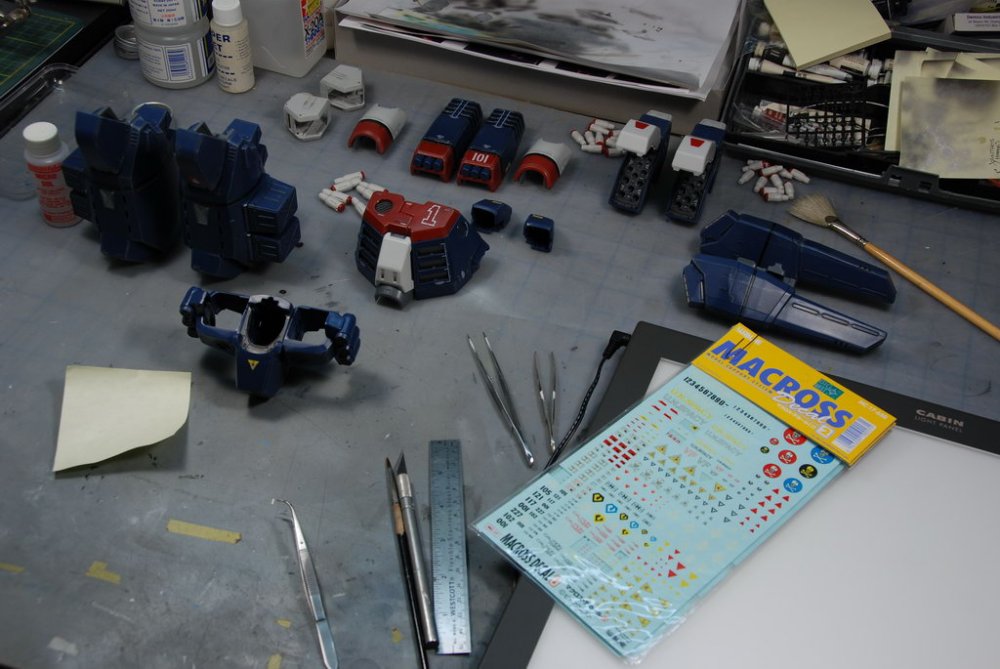

-
1/48 Yamato GPB-01 decalling and minor touch ups!
wm cheng replied to wm cheng's topic in The Workshop!
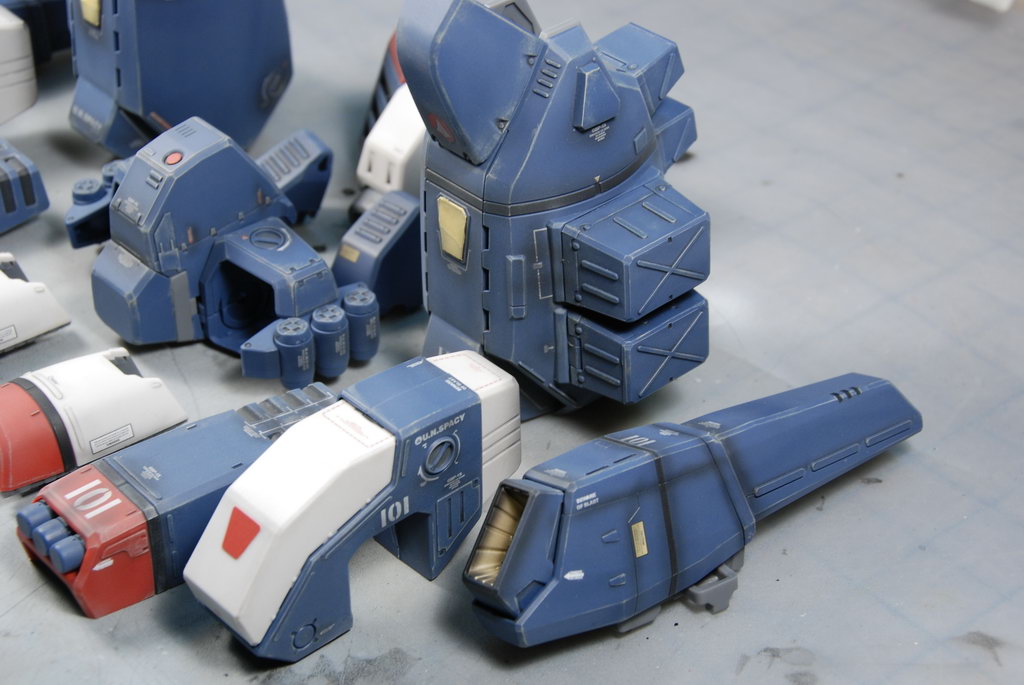
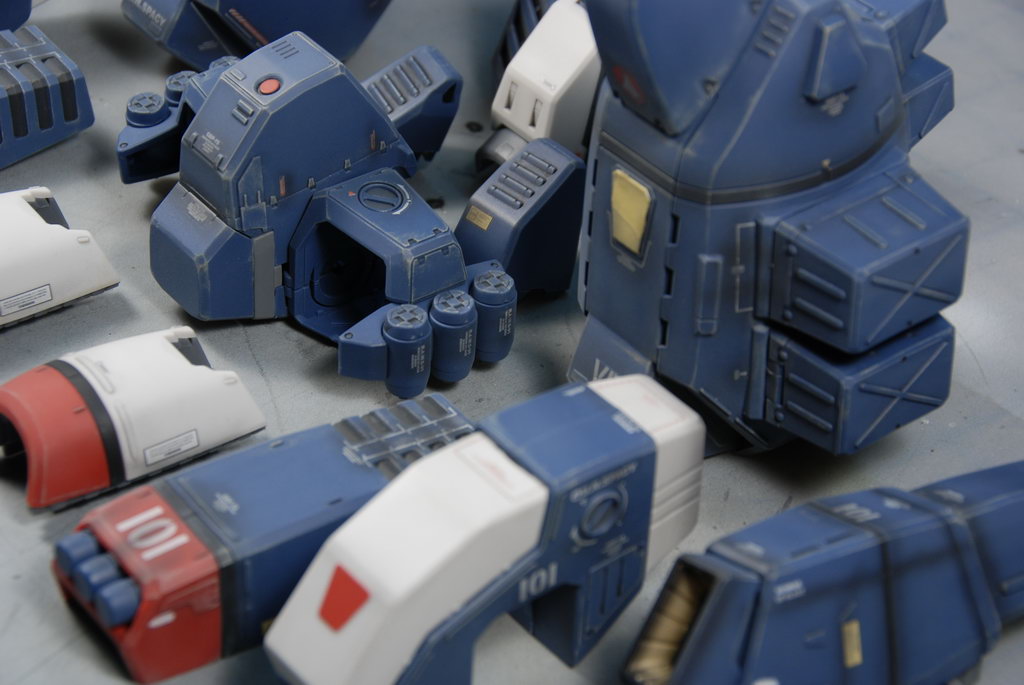
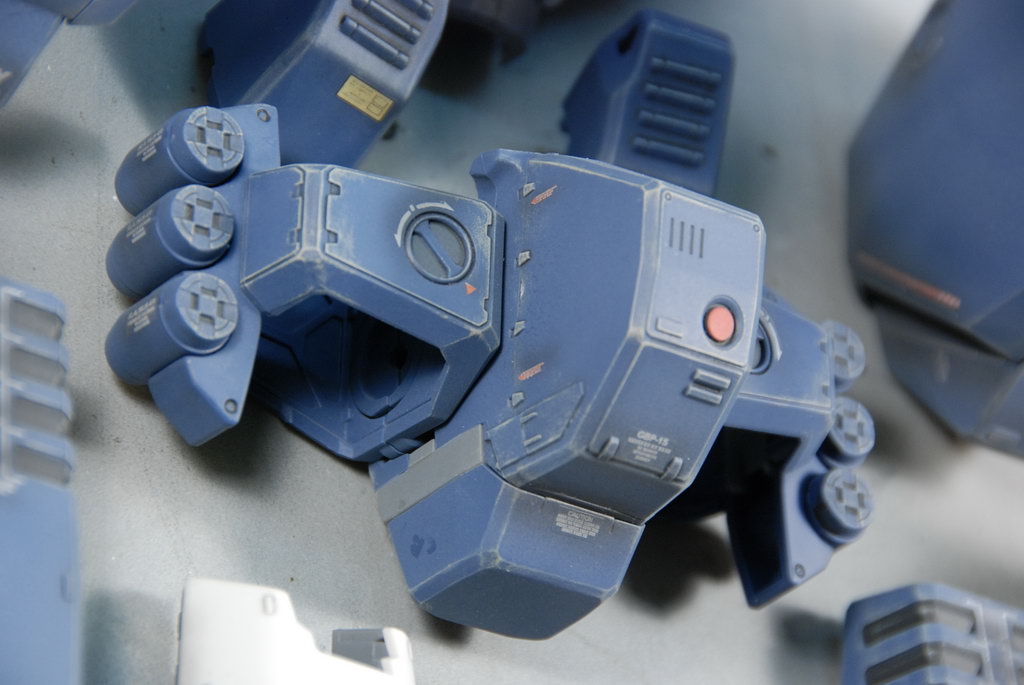
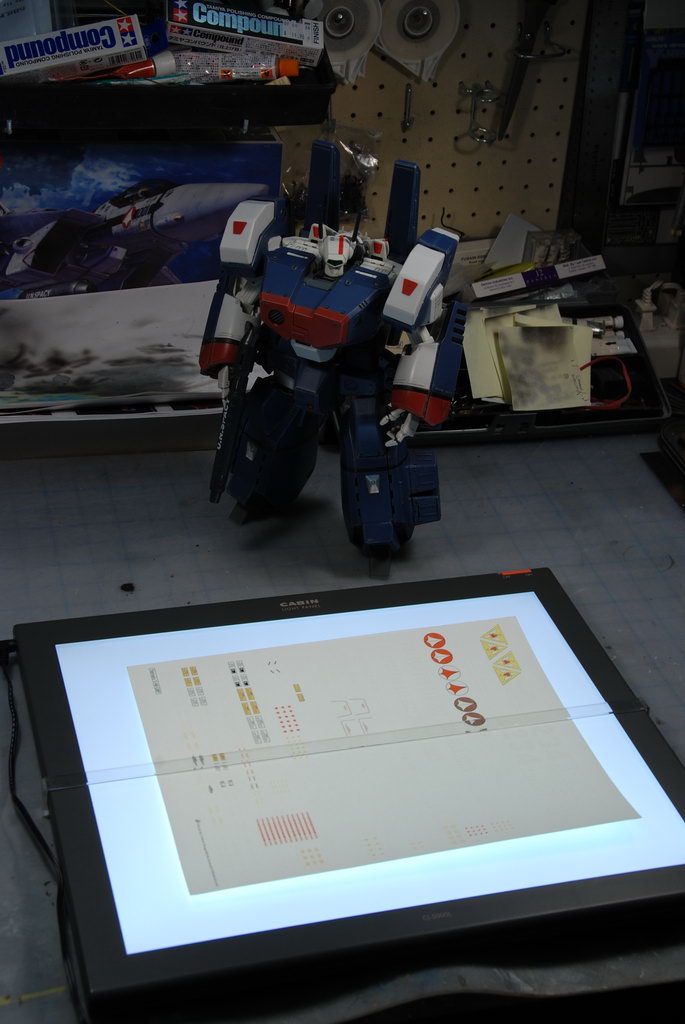
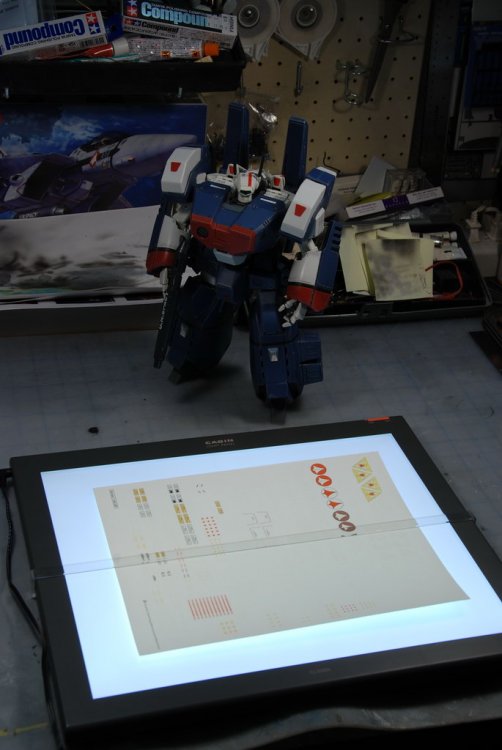
I took all the amoured parts off the VF-1J and sprayed them with future - am I letting that dry for a bit. For those of you lucky enough to have gotten a set of Anasazi's GPB decals - you may have noticed that its pretty hard to see the white printing against the white paper background. Photographed below is a light table (this is a smaller portable one used for viewing photographic slides or tracing) once you put the decal over the light, you will see the white printed graphics more easily which will allow you to trim as closely as possible to the carrier film. You can also just tape the decal up to a window and let the daylight do the same thing (its just a more awkward cutting position.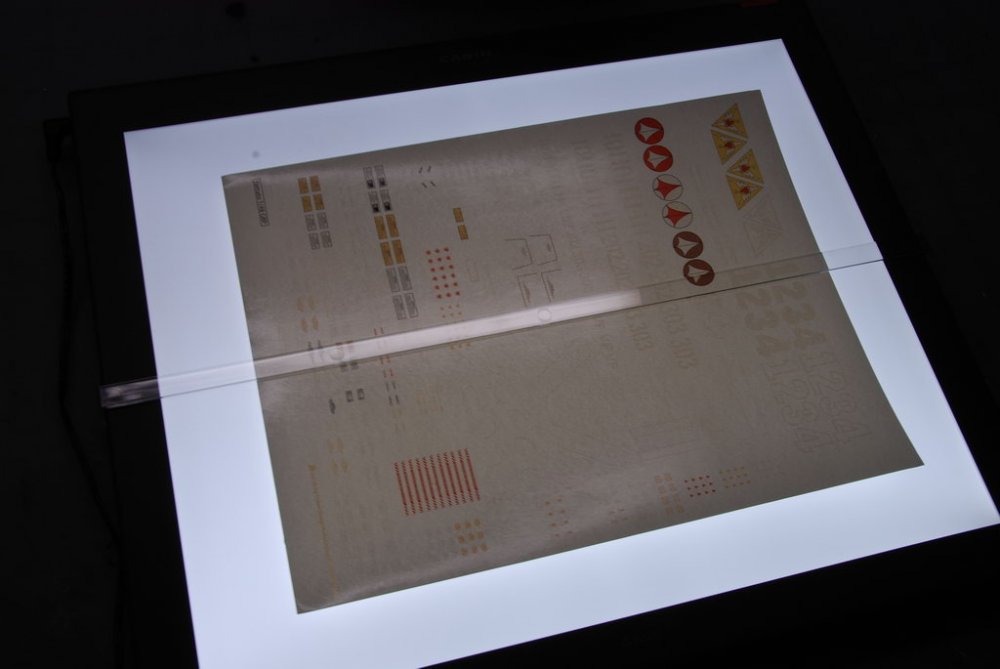
-
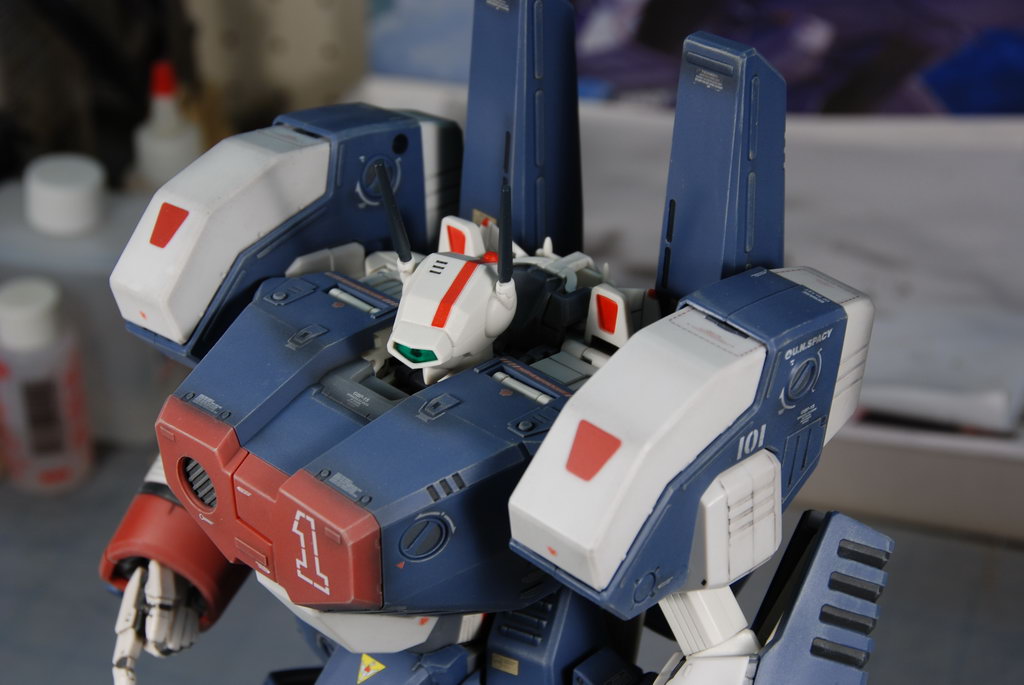
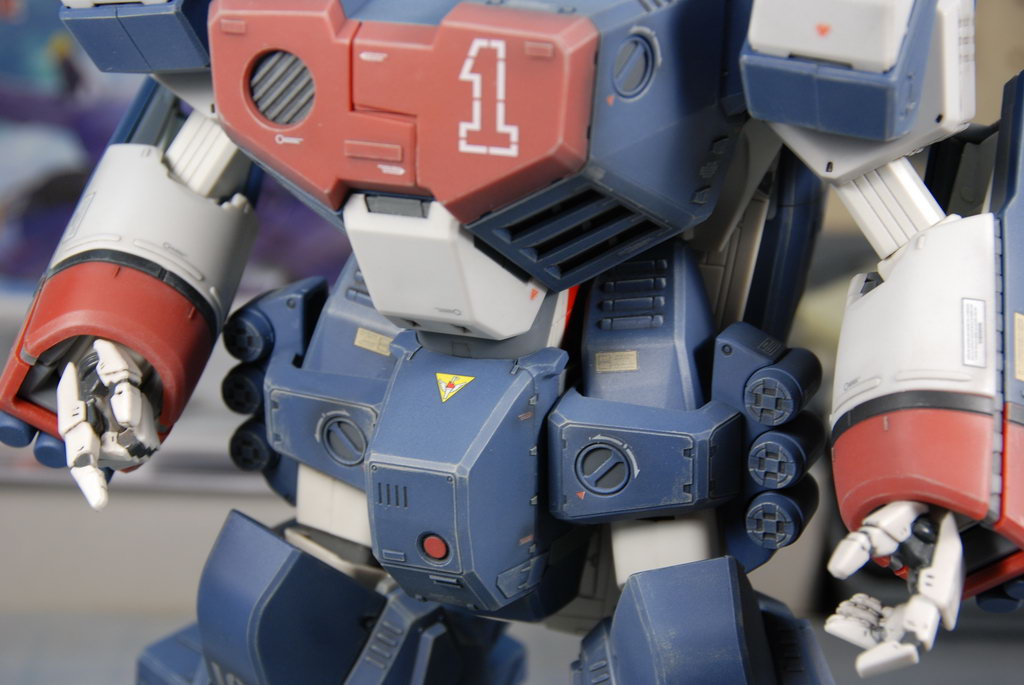
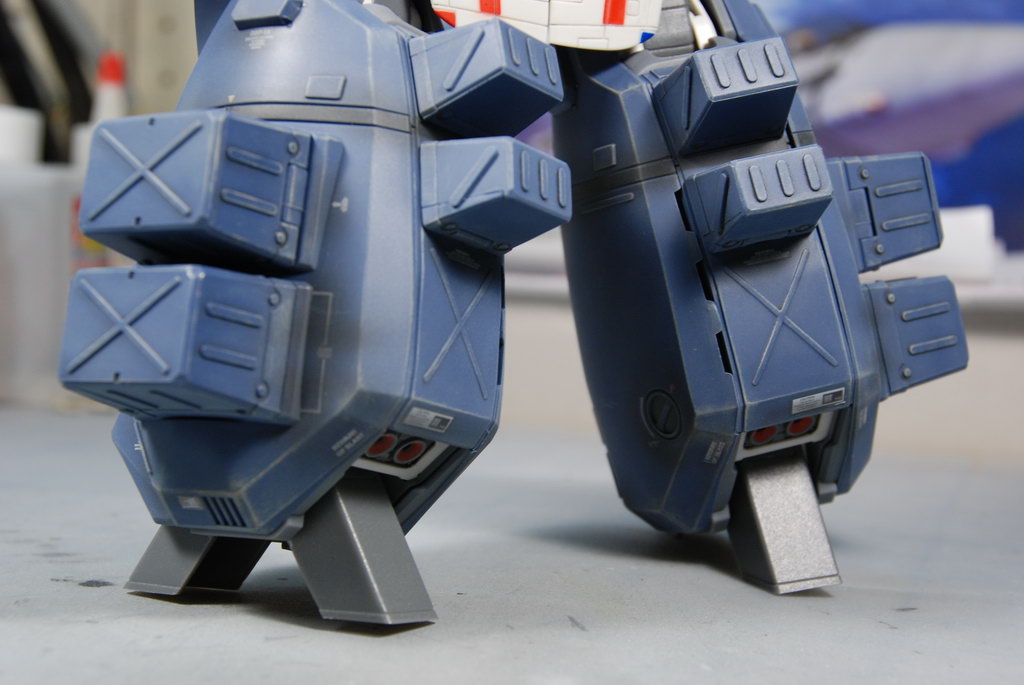
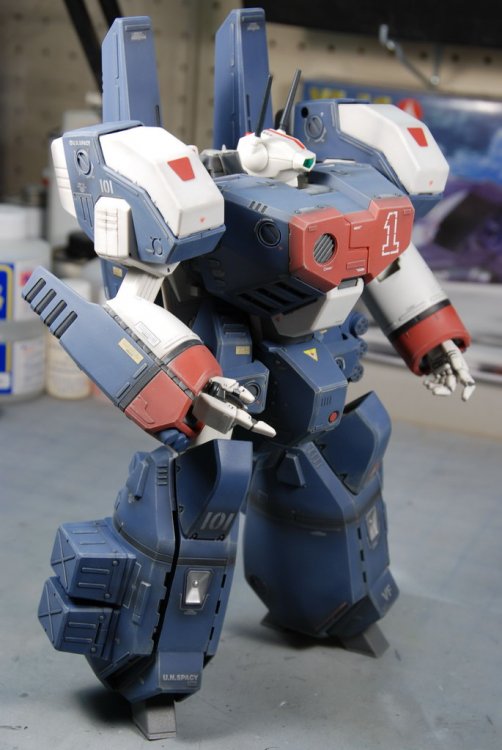
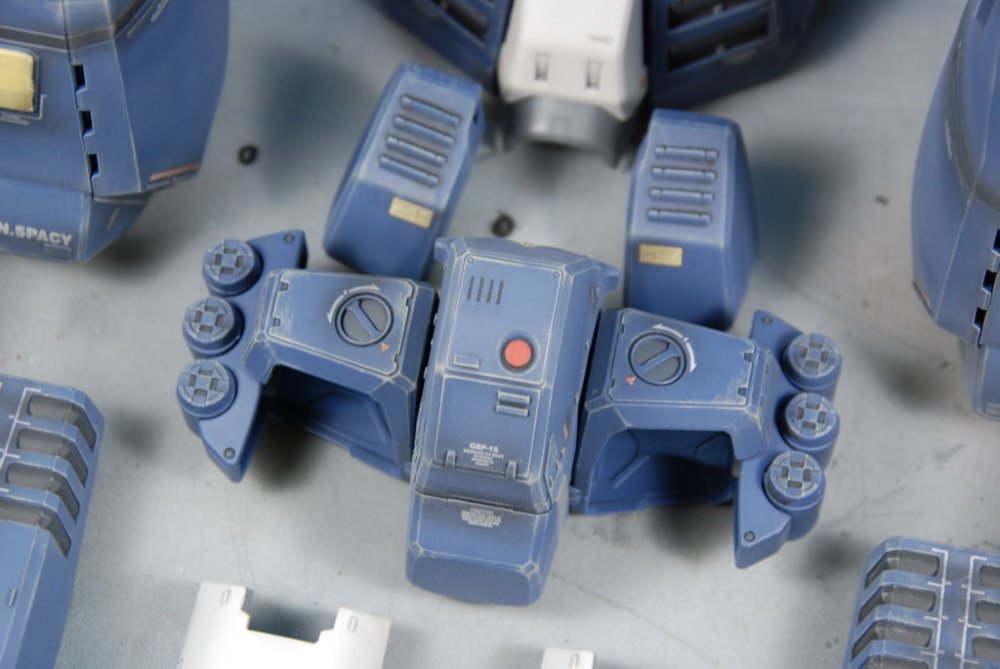
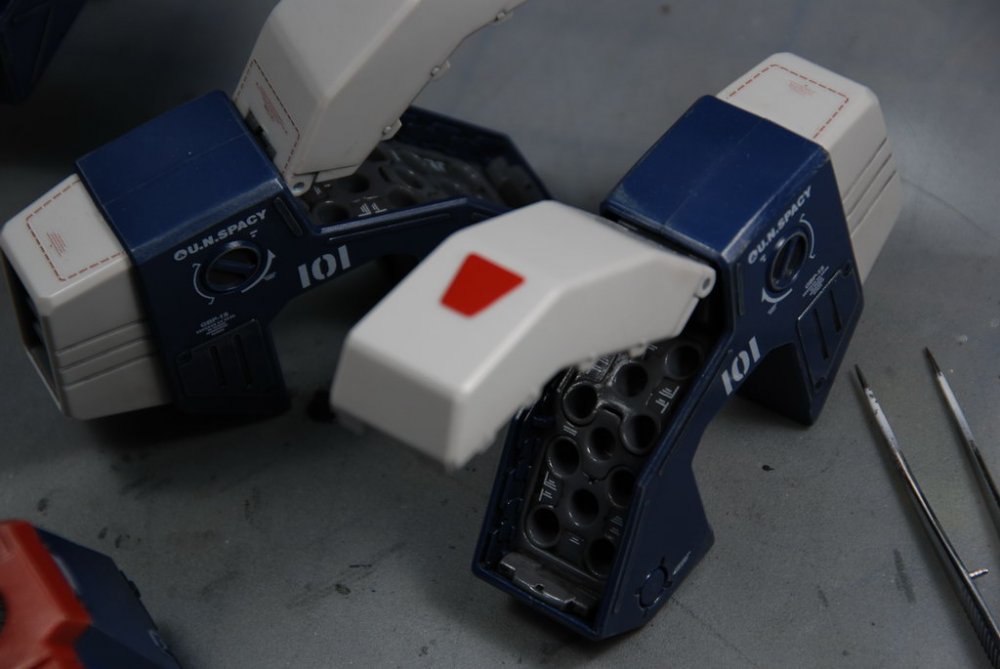
Hi all, As most of you may know, my wife and I had our wonderful Alex last July, and I have dropped off the map... with working and all. Well, Alex has finally reached that magical age of 6 months when the baby world has agreed to let the parents who passed a little breather... before they start crawling and getting into stuff. The stars have aligned, and ACTRA has chose to strike in Canada, so the film business has just tanked! So I have a week (before we head off down to the Caribbean for 1 wk) to get back into the groove again... My first priority is to finish up that Atmospheric Booster resin kit - but being rusty and lacking confidence, I decided to fix up my Yamato GPB-01 Amour first using Anasazi's amazing set of decals. Its a real lost to the Macross community that he no longer provides his invaluable service (in fact, I have given much more thought and consideration to the upcomming Yamato Macross toy offerings since I can not longer obtain his beautiful works for my toys) Luckily, I got one of his very first batch of GPB-01 decals! As with all my Yamato toys, they are for playing with (as opposed to my models) so I usually just panel line them, decal them and seal them in with an appropriate finish (semi-gloss or matte). I don't usually go to the bother of repainting them or eliminating the seam lines. Similarly to my earlier Fast Packs, I wanted to finish the GPB in a matte flat finish similar to tanks and artillery. However, after learning from the Fast Packs I realized that there is a slight pebbly finish to the Yamato toys which if you decalled directly over it, and sprayed a flat finish over that, it tends to silver the decal carrier film slightly. So to try to smooth out the plastic undersurface for the decals, I am going to spray future floor polish to give the plastic a smoother glossy surface for the decals to lay on. I hope this works. Below are some photos of what I am starting with. Over last few months, I had 5 or 10mins here and there where I did a black oil wash over the toy and wiped the excess off to pick out the recesses of the molding. After that was dried, I did a light sky grey dry brush to hit the highlights of the molding. The combination of the dark wash and light dry brush brings out more of the details. I will continue this process after the decals as well, but I just wanted to get an idea of the undercoat before I started to decal. (hint, its easier to dry brush on a matte/flat surface). p.s. I got a new DSLR for X-Mas, so these photos are hopefully better than my last, they are from a Nikon D80 under Tungsten WhiteBalance - then reduced before attaching.


-
I hope to be finishing up this model soon!! The baby is finally just over 6 months old (and she is fantastic!) - and the parents can now catch a breath!! I hope to be returning to this soon. I thought I'd get practiced with a Yamato 1/48 GBP-01 toy first, then move back onto this later in the week.
-
Thanks so much for all your contributions Devin! Congrats on the marriage... having a new little around the house really eats into my time - I too think my hobby days are going to be on hold for a few years - so I totally understand your lack of time. Beware its only a matter of time when you come to know what having no time really is!! I would just like to thank you for all your hard work over the years, I personally couldn't of done so much of my toys and models without your help and your wonderful decals. I hope to finish off the Atmospheric Booster and the Yamato GBP-01 with your decals this winter and post it as a homage to your work and dedication. I hope we stay in touch, and maybe... someday... we can return to the fray... Best of luck. Wm
-
A big congrats! on such a beautiful girl. Hope the Mom is doing well to. My best wishes!
-
Hey David, Just get the cheapest oils from a local art supply store - you're not doing a painting. I only got white, black and brown, and I mix everything in between. It shouldn't cost you more than $5 a tube - and that lasts me a while (in fact I'm still on my first tubes ever).
-
I would not use the Gundam Marker, its just too thick and dark - unless you are going for the anime style... Pencil is a good idea - the grey will look good and its easy to erase. If you want something a little more permanent, I use thinned down oil paints, it has a slow drying time, so you can have lots of time to wipe off the excess. It mixes well, so you can have white (or light grey) lines in the black areas and different shades in the white areas. You can wipe away the excess with just a paper towel - or if you leave it too long, you can dip it with varsol (low odour is less strong) and wipe - it didn't harm the paint.

-
Need to know how to blend in decals with kit ...
wm cheng replied to Spatula's topic in The Workshop!
Everything you ever wanted to know about Future! http://www.swannysmodels.com/TheCompleteFuture.html -
Need to know how to blend in decals with kit ...
wm cheng replied to Spatula's topic in The Workshop!
The best (proper) way is to spray on a heavy coat of future to seal in the decals (the future blends in the edge of the decal to the paint surface) - then spray on your final finish (I use a acryl semi-gloss by ModelMaster) over the whole thing. That being said, the decals should of been applied over a glossy (future clear coat) surface in the first place. Never apply decals over a flat/matte based surface - thats a sure way to get the silvering that can occur in the carrier film. Also it may look fine at first, but if you apply a flat clear coat over a decal that was applied over a flat/matte surface, the silvering will appear or become worst. I said "proper" because I often skip the future spray (unless the decals are quite thick). The Hasegawa decals are fine, not too thick, but if you trimed really close to the carrier film, and you applied decal softener, then you should be fine in just spraying your final finish clear coat over the entire model. I often dust the plane down in a very light thinned sky grey in the direction of airflow to darken up some of the white surfaces and lighten up some of the darker decals to help blend them into the overall paint scheme so they do not catch the eye as being too constrasty or jarring. Then protect this light mist with a clear coat of the desired finish (again I usually choose a semi-gloss for the fuselage and a flat clear for the fast packs) Good luck!