wm cheng
-
Posts
4337 -
Joined
-
Last visited
Content Type
Profiles
Forums
Events
Gallery
Everything posted by wm cheng
-
Wow! Where can I order this? HLJ?
-
Can anyone clear this up? I heard that Microsoft entered into a exclusive agreement with Ace Combat so they had AC6 only for the X-Box for a set number of months till the contract expires. Then I also heard that Microsoft bought up the Bandai Namco department that developed AC6 with the intention of developing more games like it, but due to the recession, it had to close down a bunch of its assests including their Flight Simulator arm (this is where it gets even more sketchy and "rumoury") Now I heard that includes closing down the development team of AC effectively stopping any future development of the franchise. Please tell me this isn't so and that its just a stupid rumour? Does anyone have any "REAL" news that AC7 is coming for the PS3?
-
WoW! Fantastic... I'm subscribed... hooked line and sinker... You scratch builders always amaze me with what you can do from absolutely nothing... cheers to you!
-

1/72 Hasegawa SV-51 Gamma w/ twin boosters (DD Ivanov type)
wm cheng replied to nickster's topic in The Workshop!
I don't think so, I think the marker was just to indicate where the panel detail was (to re-scribe afterwards) and show up if there's still any seam left in the glued pieces that require further sanding. Kind of like using primer to see how you dealt with the seams (but easier). -
Hey start a build-up thread... I'd love to see more of the work! What about doing the missile bay open - opportunity for scratch building! Will the canopy still fit after making all the cockpit gak taller? It looks kinda squished already.
-
YES! YES! - I second that! any news on that? Is there the possibility or is it just a pipe dream?
-
YEAH! definite plus 1 Maybe Hasegawa will go the removeable panel route? to show some internals...


-
1/72 Hasegawa SV-51 Gamma w/ twin boosters (DD Ivanov type)
wm cheng replied to nickster's topic in The Workshop!
I triple that! you are fast!! That's great. Never knew about the marker technique... must try that soon. I HATE SEAMS! and need all the help I can get too. Can you elaborate a bit on this technique - especially the last part after sanding, you run the marker again over the "supposed" smooth seam - what does that do? Do you sand again? If there were still a seam, how does it show up? I thought the market nib and ink would be too thick and big to run into any fine hairline seam that might remain? Thanks, looking good! p.s. I never found any mold release agents on Hasegawa kits (maybe I'm just lazy to wash) but what did it look/react like? -
Bandai 1/72 Scale Macross Frontier Model Kit Thread Ver.3
wm cheng replied to azrael's topic in Hall Of The Super Topics
Hey David, I don't know why you're fiddling with Future when there are "real" clear coats made for models. I've always found out the hard way when trying to scrimp and save for finishing materials that its just not worth it especially when it can damage your models or ruin your hard work sometimes even months down the line after your finish. Really, how much is your hard labour worth? Just use the real stuff, I've never had a problem with ModelMaster Acryl Clear-Coats and I'm sure a lot of these other ones suggested here like Mr.Color are just as good (which I want to try someday). Don't mess with making Future flat, you're fighting an uphill battle. Use future to clean up canopies or make a glass-like smooth surface to decal on - and that's about it! Actually I've thought about using a rattle-can topcoat to protect the next VF-25 I make, they are usually "hotter" lacquers - lacquers have a tendency to "bite" into the plastic and are usually much more durable than acrylics (probably why it says not to use it over decals). Plus you don't have to constantly clean the airbrush and I believe rattle-cans provide a much heavier/thicker coat than airbrush (I just don't have the patience to layer 5 or 10 coats!). Yes, if you want to paint it and do it properly, it WILL take forever, its just not a friendly kit for that, the assembly process requires you to paint the same colours in many different steps and have outrageous masking - argh! Not enjoyable, believe you me, but the end results are probably worth the effort though. -
I hope your right Noyhauser! I only wished I shared your optimism. While the internet is great to get rare and hard to find stuff, I still find this stuff to be getting rarer and harder to find all the time. I just joined the local IPMS chapter here in the city and its populated by a lot of seniors, I'm by far the youngest, but I'm almost 40! (in 12 days!! - argh!!!). I haven't seen anyone younger in the stores except to accompany their grandparents hobby in a long time. I really like 1/72 scale - mostly due to my lack of space to display them, so I always look around for 1/72 scale aftermarket stuff - believe you me, its really hard to find stuff (unlike 1/48 scale) and getting harder all the time! ;-( There is a definite greying of the hobby, but I don't see the next generation picking it up. I find a really hard time to carve our any time for my hobby being a parent now (and I really, really love it!). There's just no time in today's busy hectic schedule for the casual hobbist (no more 9-5 jobs with mom staying at home anymore). I am afraid, we are the tiny aging minority here. As Excillon said; "...bitter that you're a practitioner of a dying art" is what I feel like sometimes, however I wouldn't go so far as not evolving and sitting there whining about it. We're not bashing Bandai - don't get me wrong, I'm building their VF-25 right now (maybe not enjoying it!) but still building the best I could. But its really designed for the snip and snap crowd, it does look great for the amount of effort you put into it (better than any Hasegawa kit could un-painted) but I'm after a little more (and it fights you if you want that extra bit of effort). It could be a generational gap here too. Tranditional model making just doesn't have the immediate gratification that newer paintless snap together Bandai kits offer. In fact, model making lacks that immediate gratification that our society as a whole now demands, patience is a dying quality, just look at the current economic crisis which can be summed up by people going into incredible debts for instant gratification. No I digress (or ramble on as my "age" suggest ;-) hehe... I'd be curious about a poll that correlated Bandai supporters versus Hasegawa supporters and their relative ages. Back to the 1/48 Hasegawa YF-19, I'd love to see it first, I just don't have the room to display them properly, but its just too tempting (especially once we get pictures - however I am surprised they chose this subject as the first one in the series, I personally think their 1/72 scale version is one of the weakest in their series). As I get older, I only have a limited space in the house to display the models, as they are displayed like art with appropriate space around them - to jumble them together makes them like toys and cheapens the respect they deserve.
-
1/72 Bandai VF-25F Messiah build-up step-by-step (sort of)
wm cheng replied to wm cheng's topic in The Workshop!
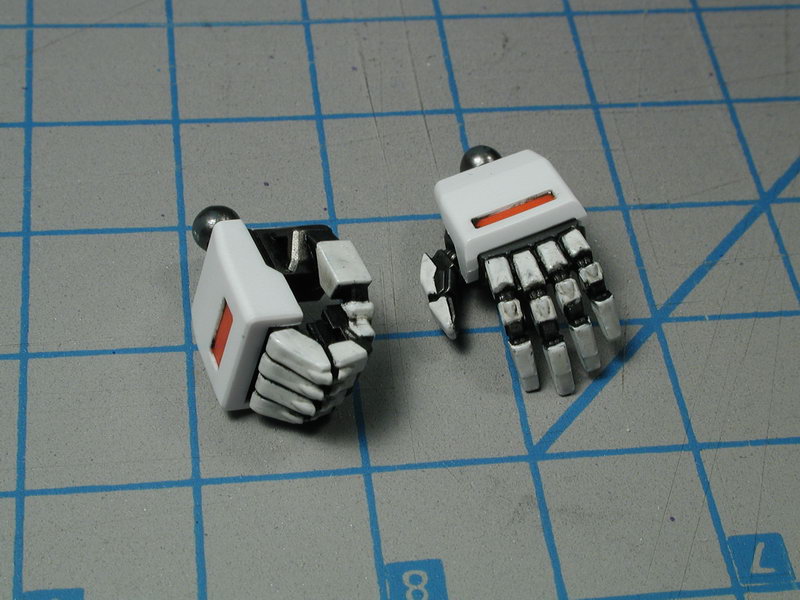
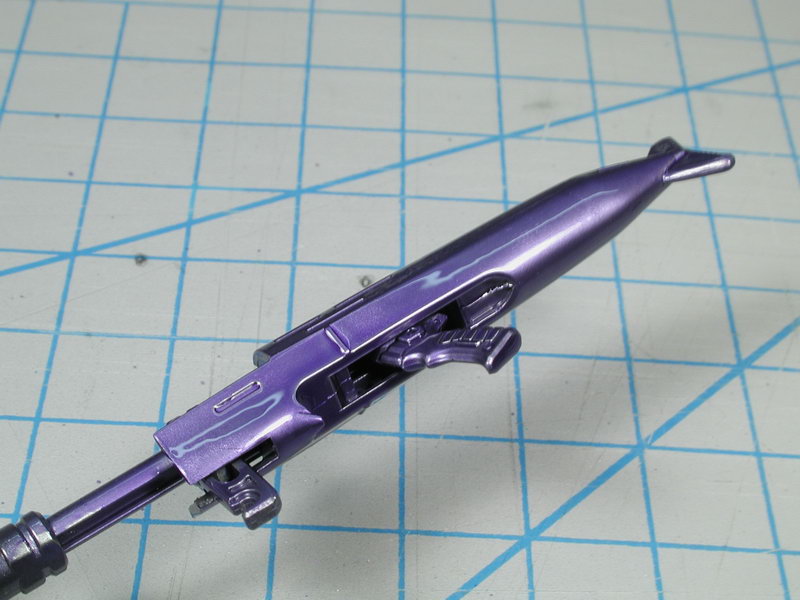
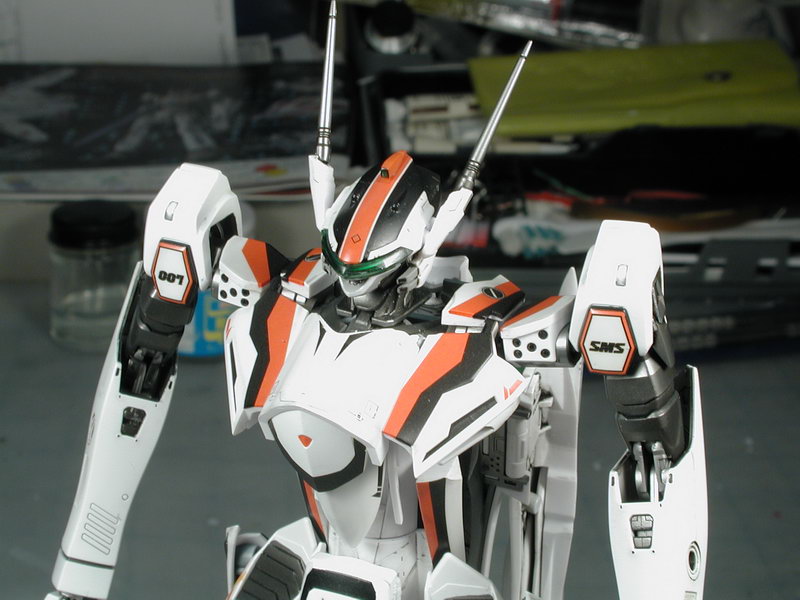
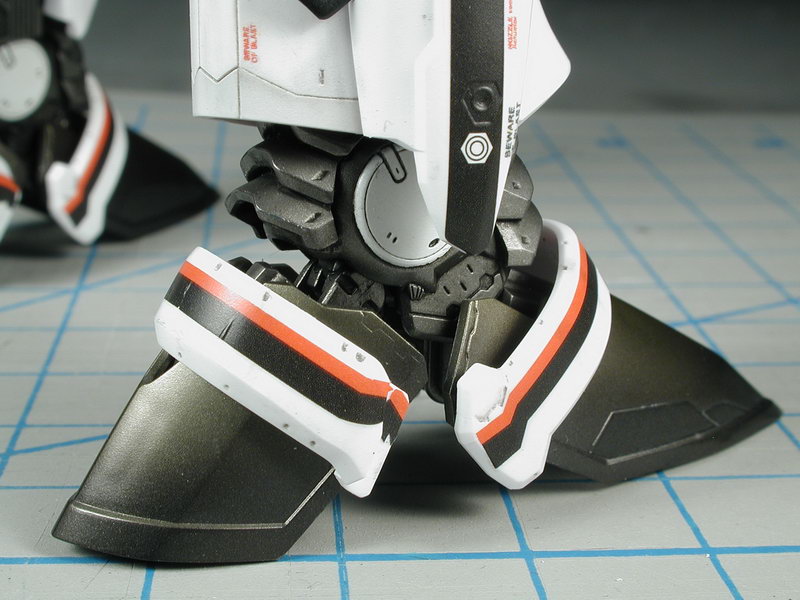
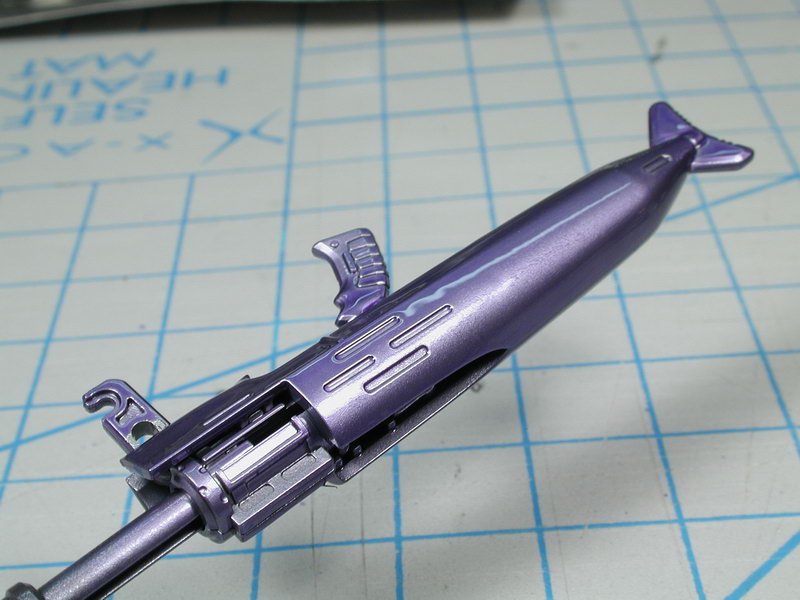
I did a oil wash on the hands too, to separate the fingers and details more from the white fingertip caps. I think painting the hands was a really important part that makes the overall Battroid mode much better, its one of those small effort things that make a big contribution in the end (I love those items, little work... big bang! - lazy me coming out ) The metallic Alclad gives a nice glint in between the joints (more robot/machine like) and the dark/black oil wash defines the features and gives definition to the joints. Luckily the semi-gloss clear-coat did wonders to tone down the "toyish" quality of the purple gunpod - it lightened the overall tone and soften the sheen. Its still a little too purple, a little more blue and grey will be in the books for the others (but I like it enough to not fiddle with it further - that's the hardest call that comes from experience I find in model making, knowing when to make the call to STOP fiddling... at some point it just makes it worst, without having to totally re-strip and re-paint - since there are flaws in everything I do, if I didn't know when to quit, I'd never finish any models!!) Anyways, I'm pretty happy with it, its just got the silver basecoat under the red & green lenses left and it's done! I do love the sheen and depth I get from doing the metallic undercoat, its got an almost iridescent quality that's hard to capture on film (I wish my car had that!). Woohoo. It almost wants me to do Luca's blue like this (but I'm not that crazy, if it wasn't transformable I might consider it, but the rubbing and scraping would be prohibitive). I hope I get the Ozma Armoured soon - I'm iching to get started on that as my next build (mostly left in Battroid mode, but I will still build it transformable, maybe without the magnet modifications to speed things up). Those new HJ scans are inspirational! I just wished they weathered it a bit. It doesn't seem that the Japanese like the metallic joints, they grey all those parts out - I personally feel that you can't really do a real metallic or chrome in anime, so they chose grey, but the metallic parts really add that glint I love from machinery (I guess its just me). Hey how about a joint/group build on MacrossWorld, we can all post our progress together?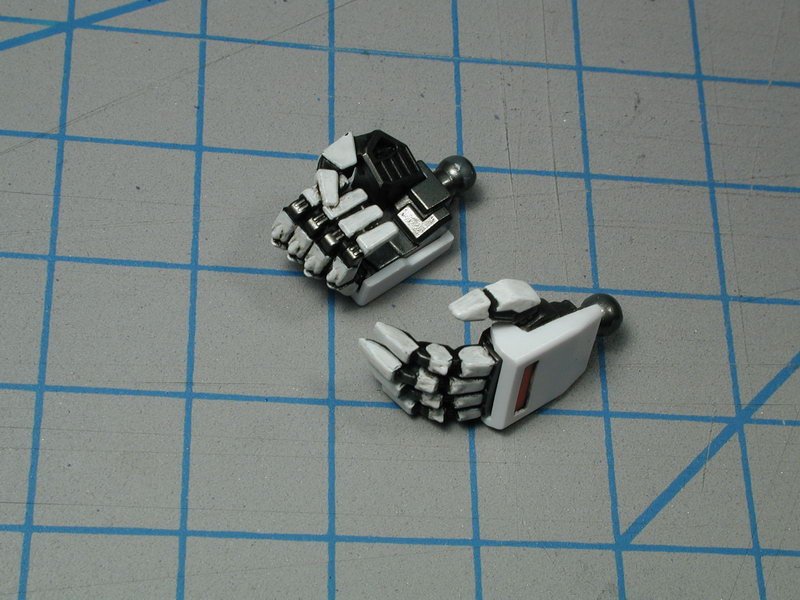

-
Bandai 1/72 Scale Macross Frontier Model Kit Thread Ver.3
wm cheng replied to azrael's topic in Hall Of The Super Topics
Argh!! now thanks to you... I DO TOO!!! -
1/72 Bandai VF-25F Messiah build-up step-by-step (sort of)
wm cheng replied to wm cheng's topic in The Workshop!
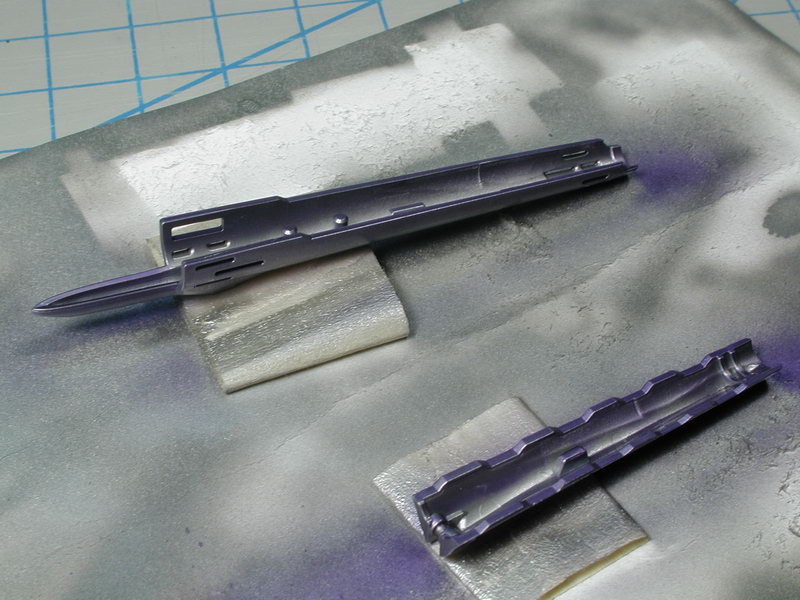
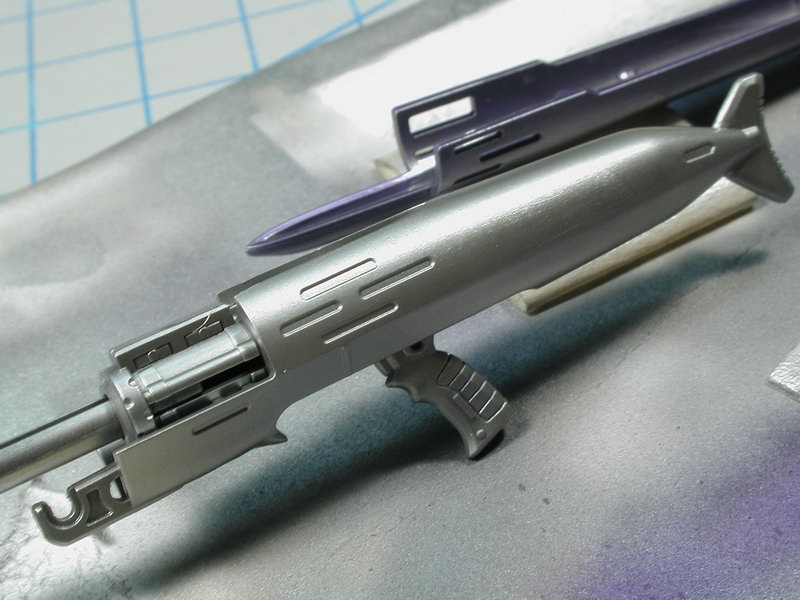
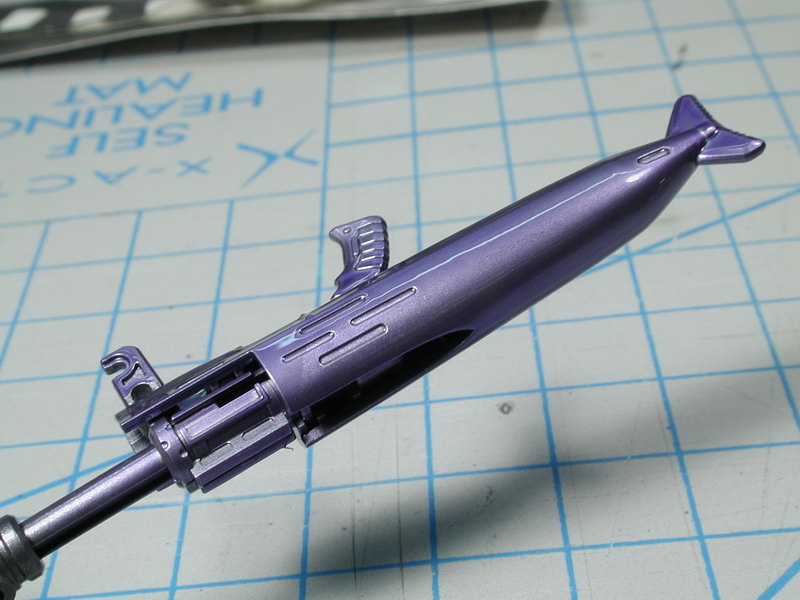
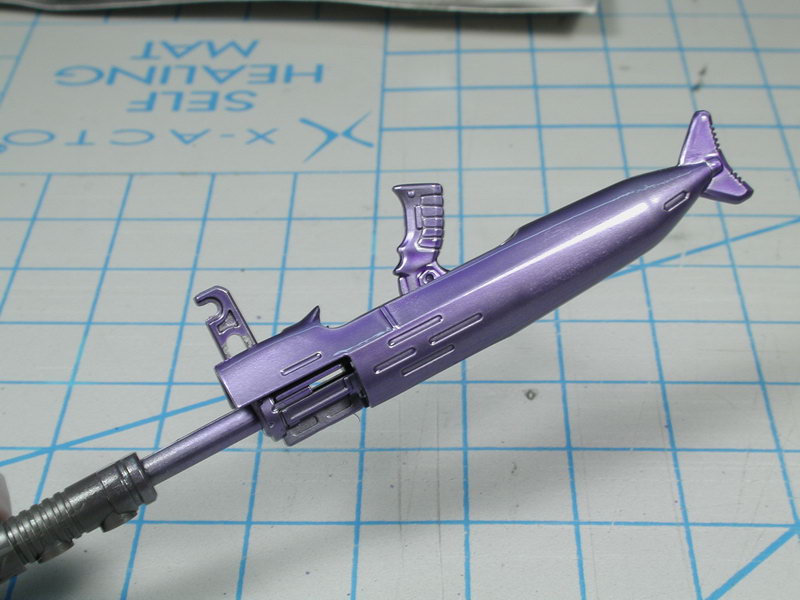
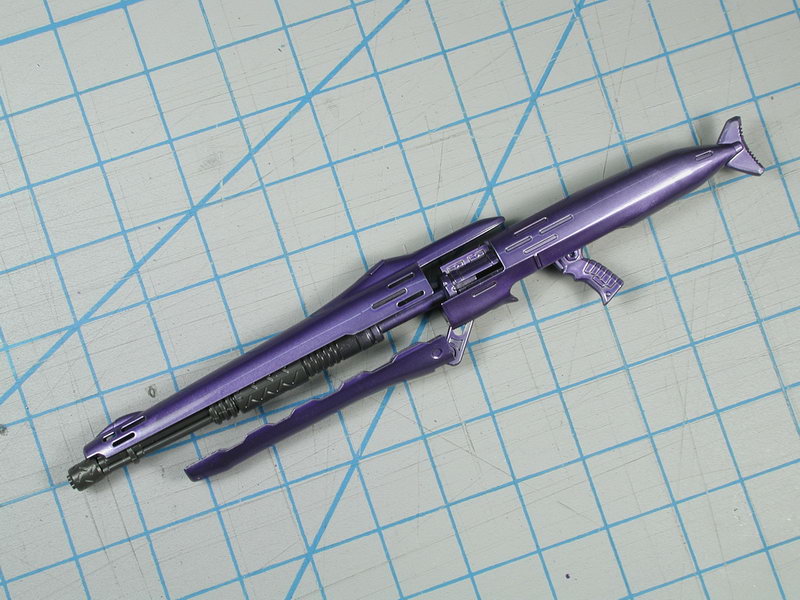
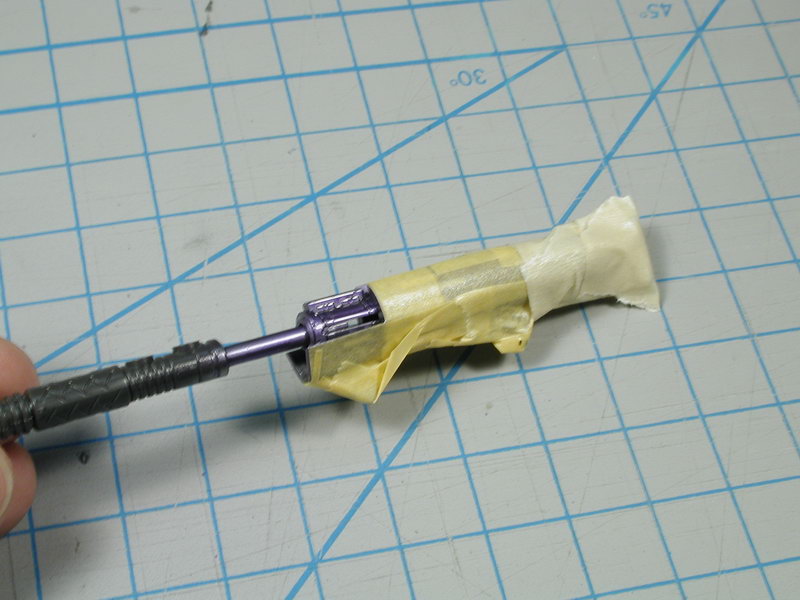
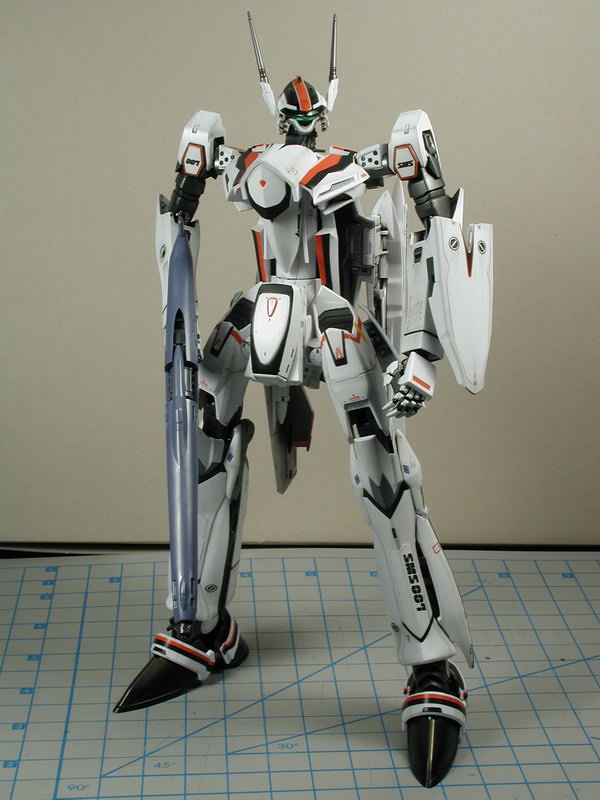
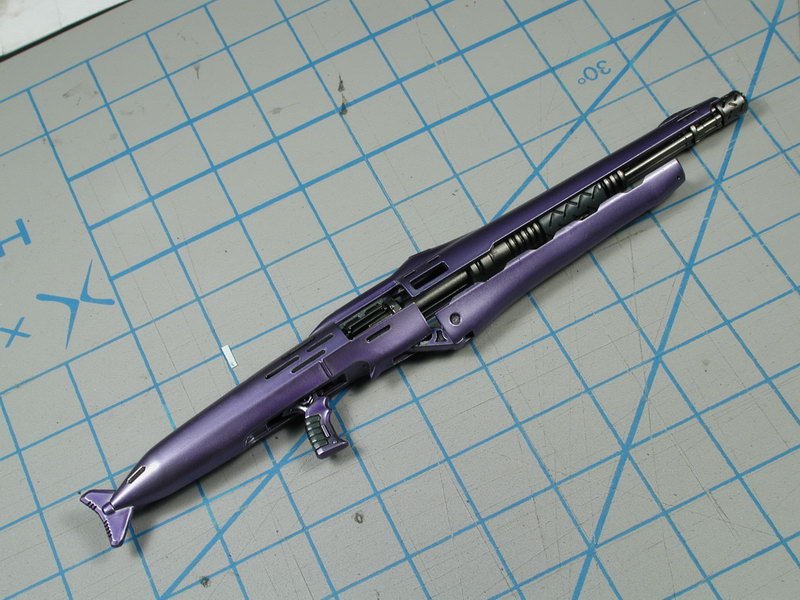
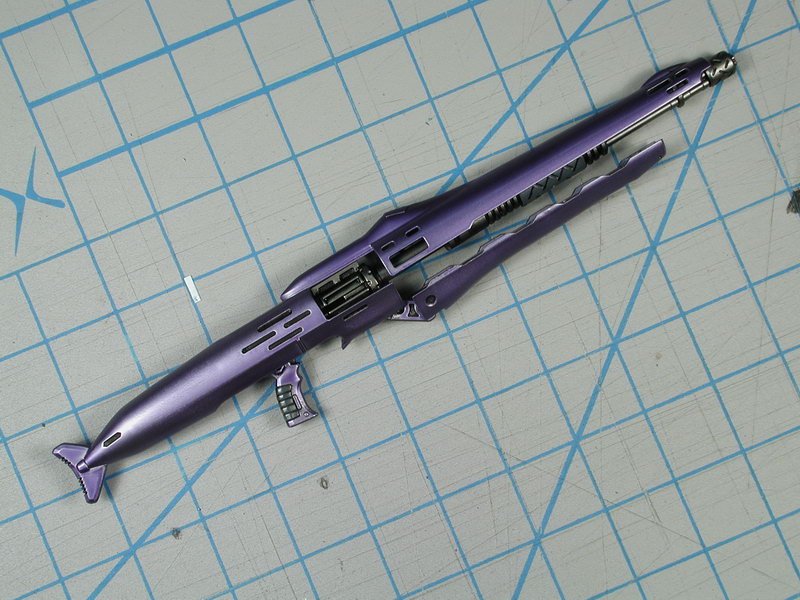
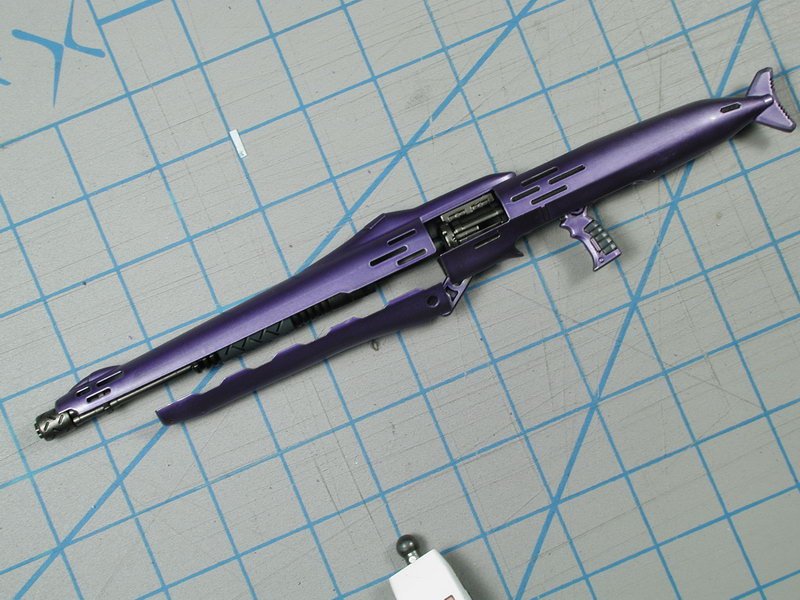
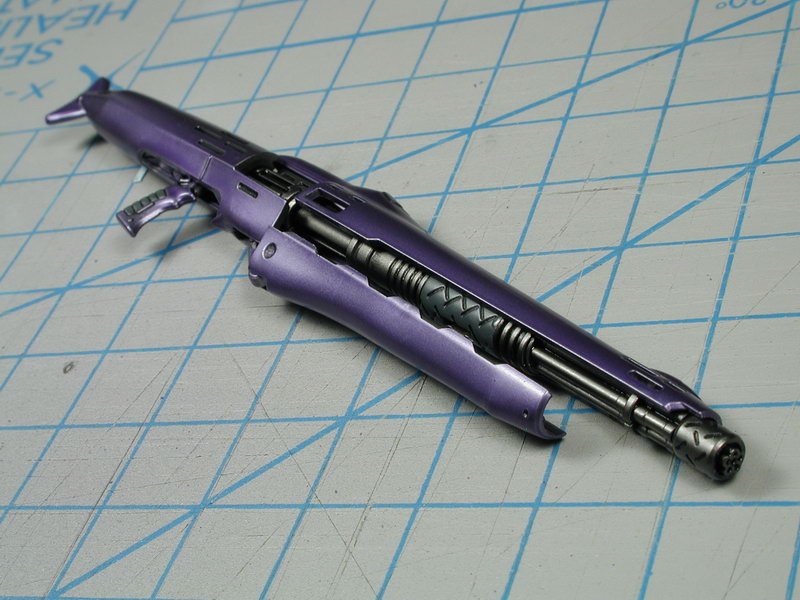
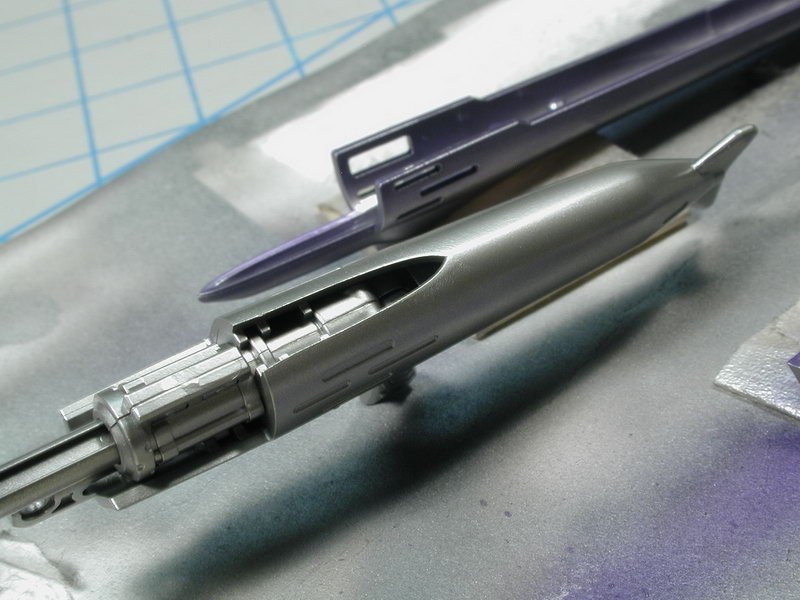
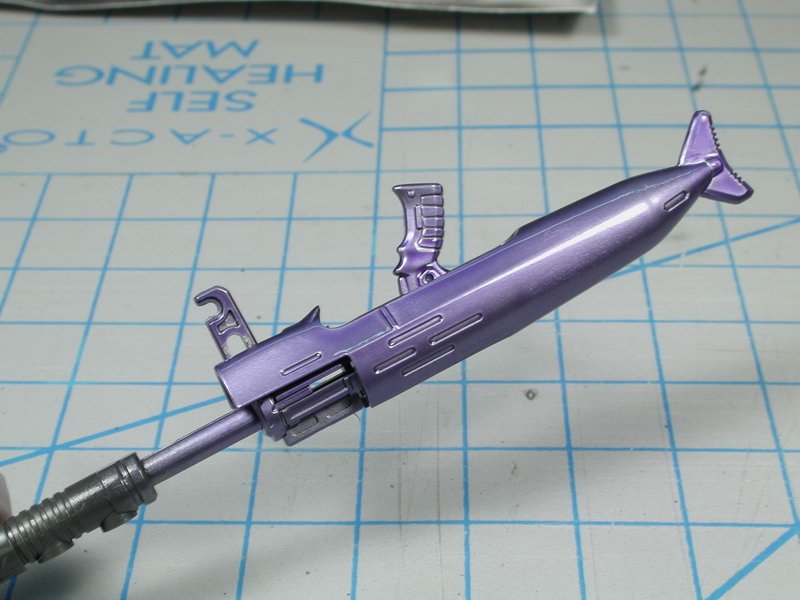
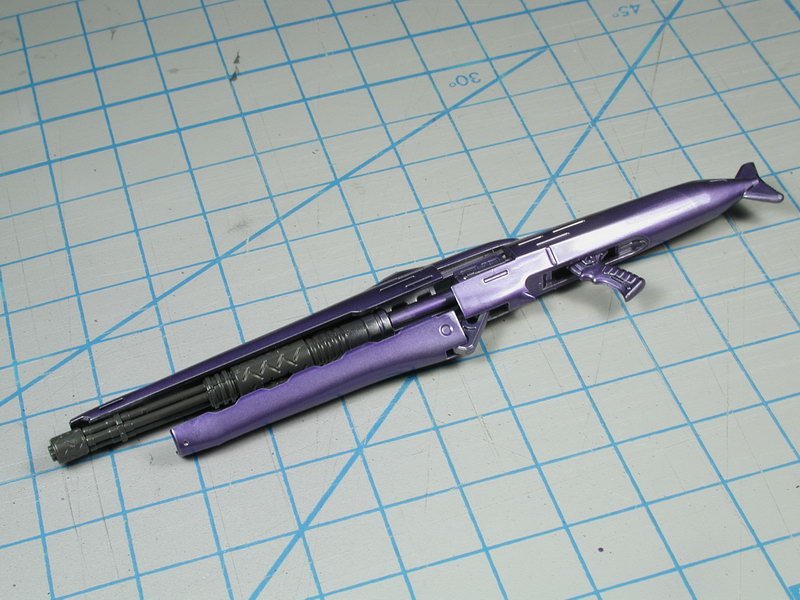
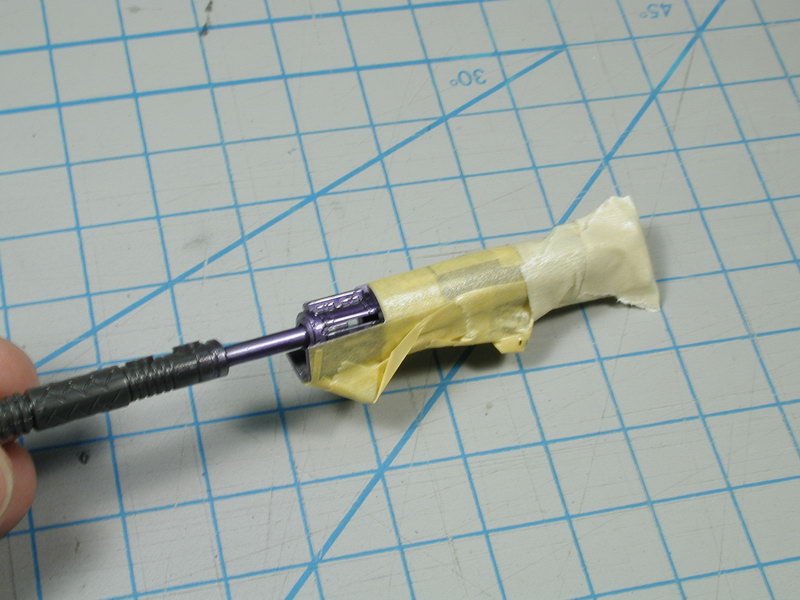
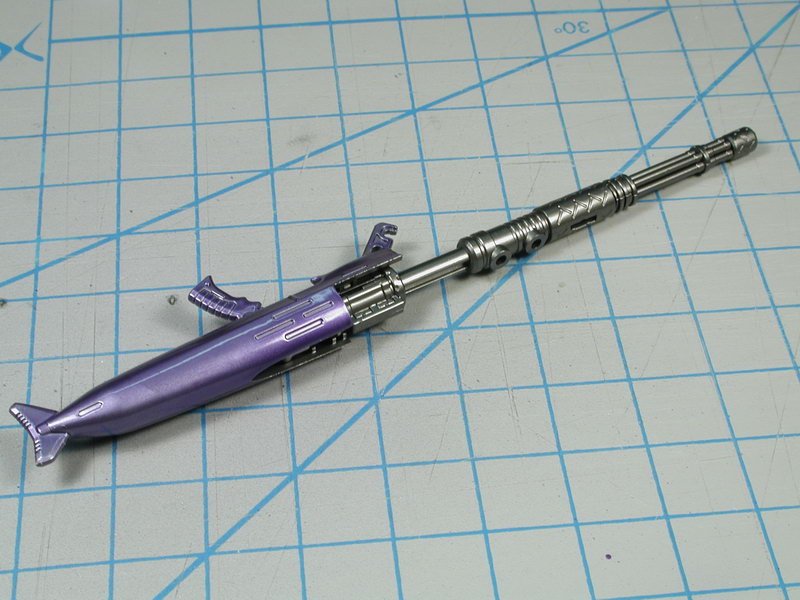
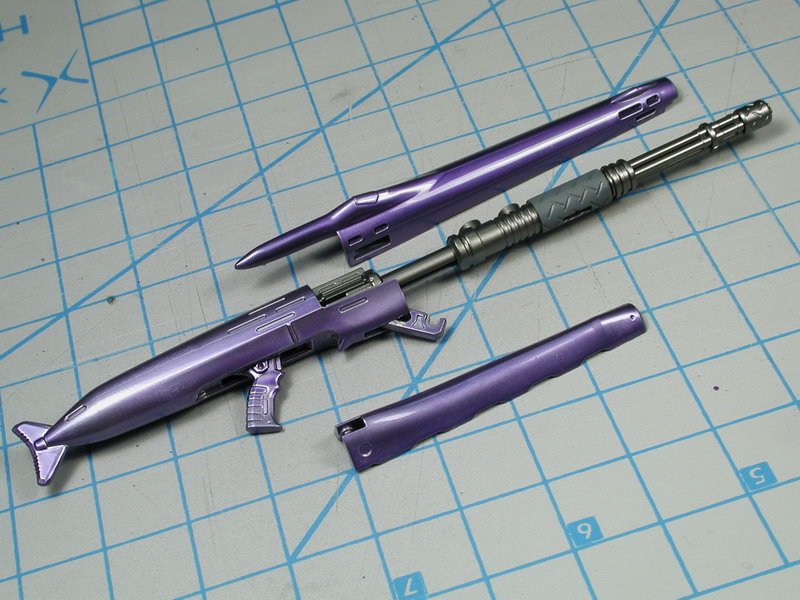
Thanks! I can't wait to see yours. Ok, a little bit more... the gunpod. Again, Bandai bones us again with a stupid assembly staging that isn't friendly to painting. You have to glue the two rear halves together to fill and sand the separation seam, however you have to insert the gun barrel part, handle and bottom hinge when you glue the two haves together. Argh, they should have allowed the gun barrel portion to slip in afterwards, then you could paint all the purple parts in one shot, and all the metallic parts like the barrel in another shot without un-necessary masking. But Bandai wasn't thinking of modellers... actually, I find that in general, Bandai doesn't think about the actually process of assembly and finishing. Oh well, I should have gotten used to it by now with this kit! So I wanted to do a metallic purple sheen to the gunpod. I saved the purple ink mixed with future that I used to tint the canopy and used that as a clear-coat over the metallic Alcad paints. I did the base reflective coat in AlcladII Dark Aluminum. Unfortunately, the Bandai plastic isn't that smooth and that there are swirls in the plastic which I thought would dissappear once I painted - I was wrong, the slight swirls telegraph through a bit. With all Alclad metallizers the key is surface prep, it needs to be absolutely smooth, the smoother the more metallic it appears. On hindsight, I will prime these parts next time and go over them with some micromesh cloth for my next few VF-25s. My main reason to paint these models is to get rid of the slight swirls present in just bare plastic, even if you clear-coat the bare plastic you still see the imperfections in the plastic. Anyways, I let the future/clear-coat purple dry for a few days on top of the dark aluminum. To make sure the future is hardened and won't take fingerprints. You can see the high-gloss sheen left behind by the future. I will tone this down with a coat of semi-gloss clear-coat afterwards, its shouldn't look like a showroom car! Now on to masking the purple for the darker Alclad Steel colour to be applied to the gun barrel. Once sprayed, I let dry and hand painted a dark grey section just to break up the long steel barrel to add a bit of interest to the internal mechanism. I will let it dry and spray a clear-coat of ModelMaster semi-gloss before I do a black oil wash to pick out the dark recesses, details and vents. Then I plan on another clear coat to protect the oil wash and lastly to hand paint some silver to the lights and sight and paint Tamiya clear red and green over the top of the silver. Such a lengthy process for just the gunpod, I wished there were clear parts supplied for those. Then I might be able to finally finish! My only complaint is that the purple is just too "purply" to strong... I would have preferred a little more blue and maybe a lighter coat so that it wasn't as strong, it looks a little too "candy" and anime like, I'd like it more realistic with just a hint of purple. Oh well, learn with this one, I'll try to do better on the next one.


-
Bandai 1/72 Scale Macross Frontier Model Kit Thread Ver.3
wm cheng replied to azrael's topic in Hall Of The Super Topics
Yeah! Great scans... thanks so much for pointing us in the right direction. Love the paint job on the first Ozma Armoured! I'd love to find out what they are saying on those tips pages... can anyone translate them, it would be tremendously helpful. I too wonder what they are using to wipe off the excess canopy frame paint. I wished I thought about cutting up the decals - it was a b$@##! to apply those ones. Definite battroid mode winner! -
WoW! that does look bad... for such an expensive kit to have that flaw, its pretty much inexcusable. I expect better from Platz.
-
Thanks! so how much does it weigh? Too bad I can't read Japanese with the Amazon.jp site (I'd prefer a bigger store).
-
Whats Lying on your Workbench MKIII
wm cheng replied to HWR MKII's topic in Hall Of The Super Topics
Good job, its quite a build. Unfortunately, nope, you did nothing wrong, its just a really poor fit and Bandai didn't bother with any good pins or attachment mechanisms. Once you transform it a few times and the joints loosen up, you get the knack of tweaking the legs and upper thighs underneath a bit to get a better fit. You can play with it a bit to get all the shoulder plates to lie a bit more flat, and the gaps will even out a bit, but that IS the problematic area which we all have. I think their solution is the super packs that has an entirely new piece that covers it. -
Fantastic!! finally something on the mech designs... What's the shipping from Hobby Search to Toronto Canada? Haven't ordered from them before, is it up on HLJ yet?
-
1/72 Bandai VF-25F Messiah build-up step-by-step (sort of)
wm cheng replied to wm cheng's topic in The Workshop!
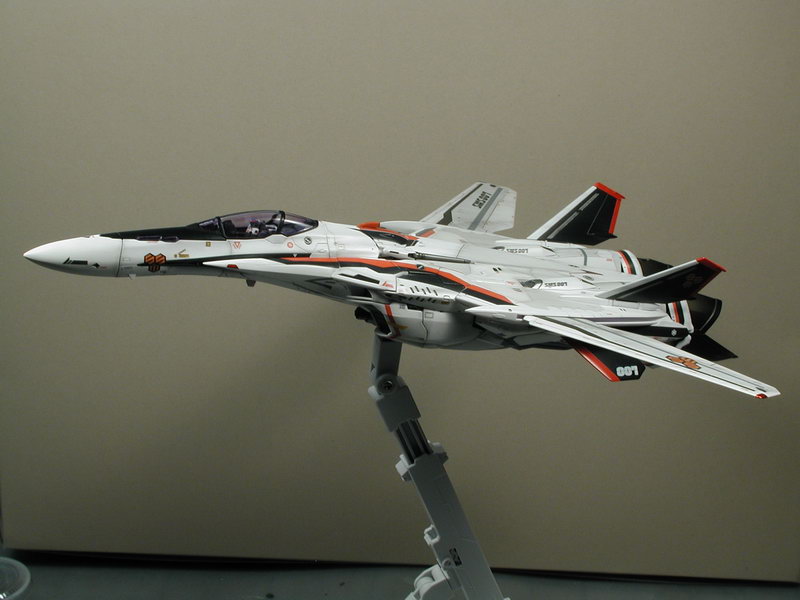
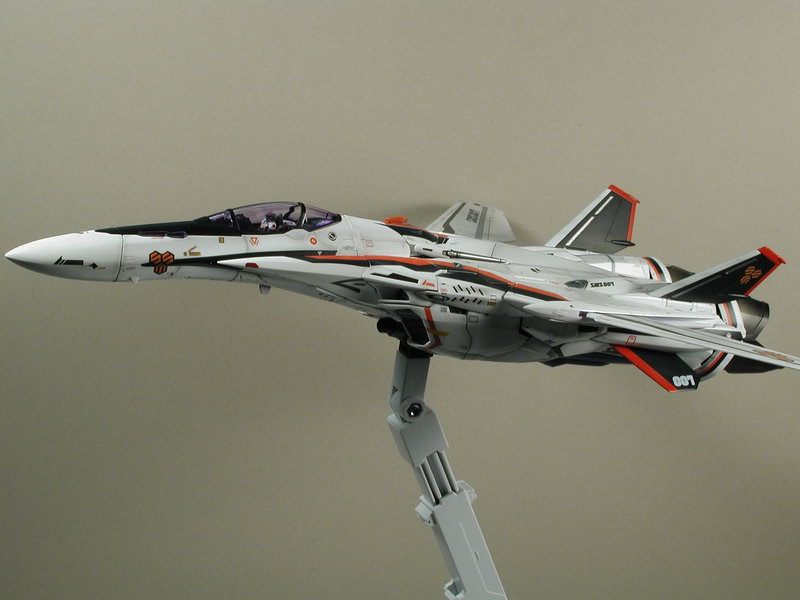
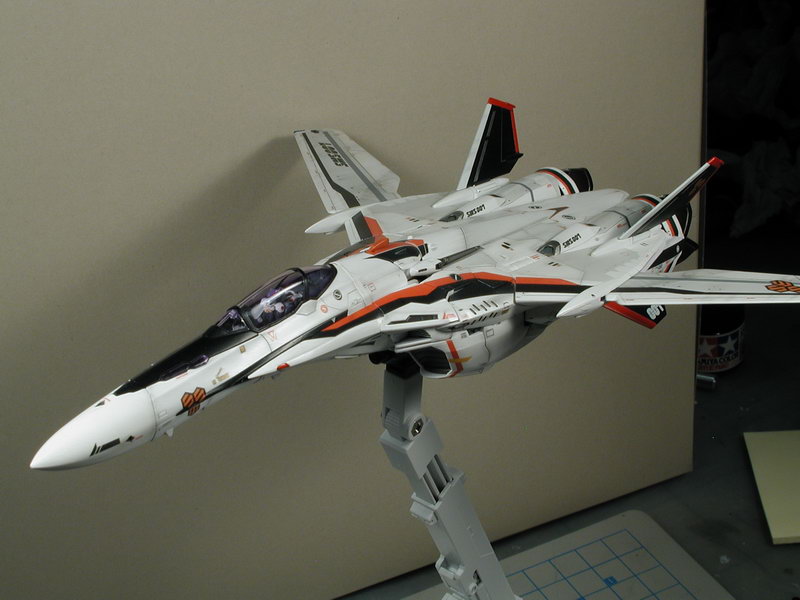
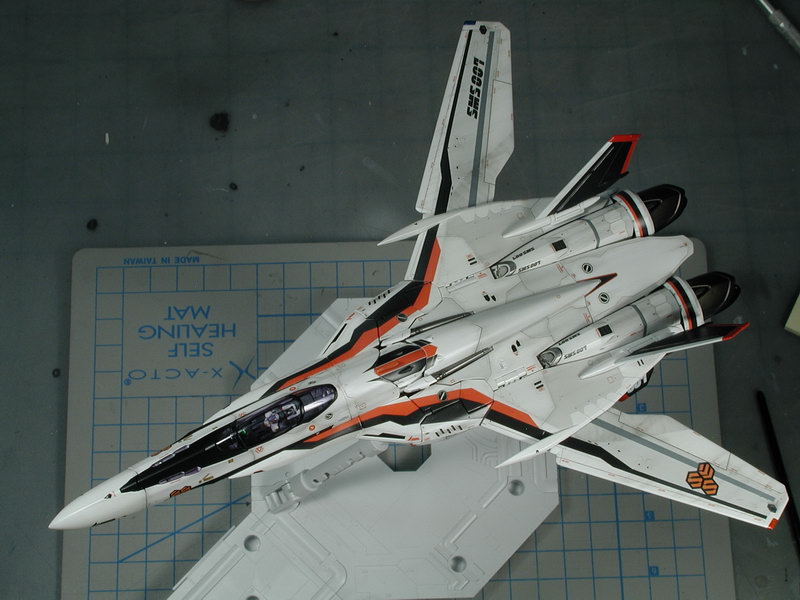
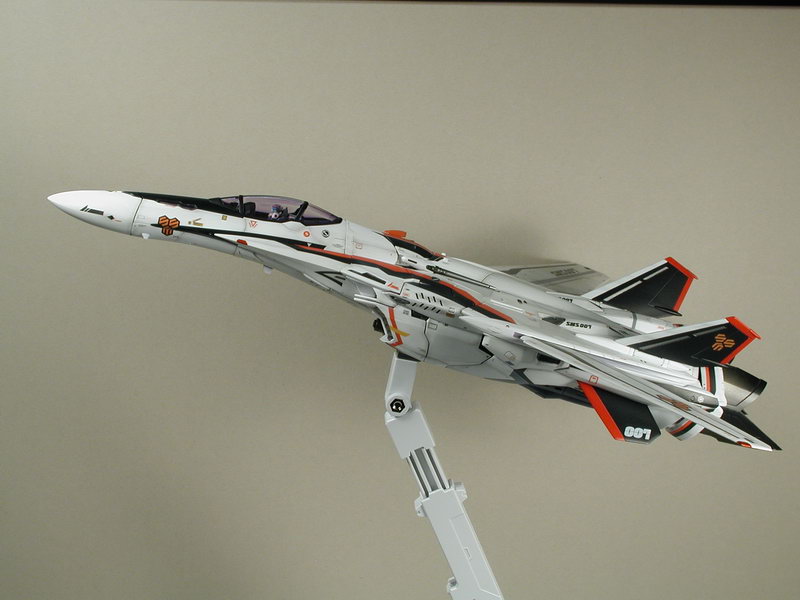
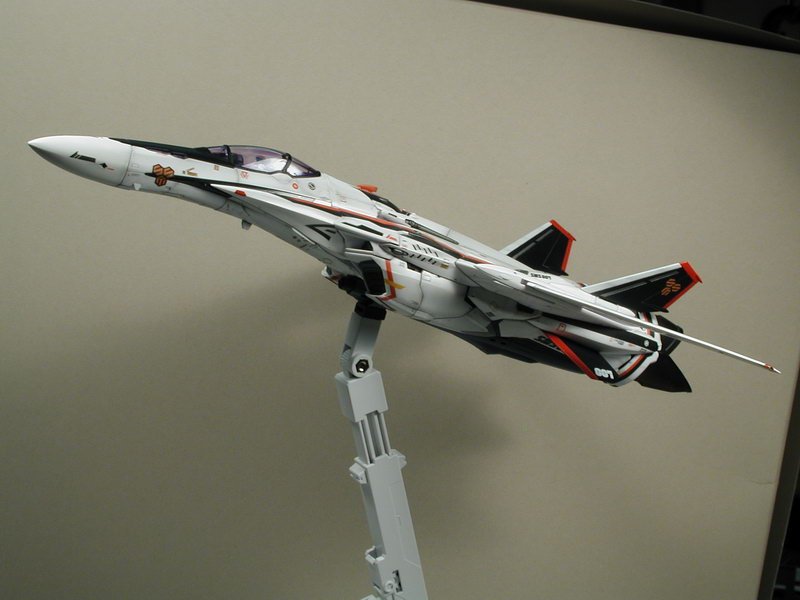
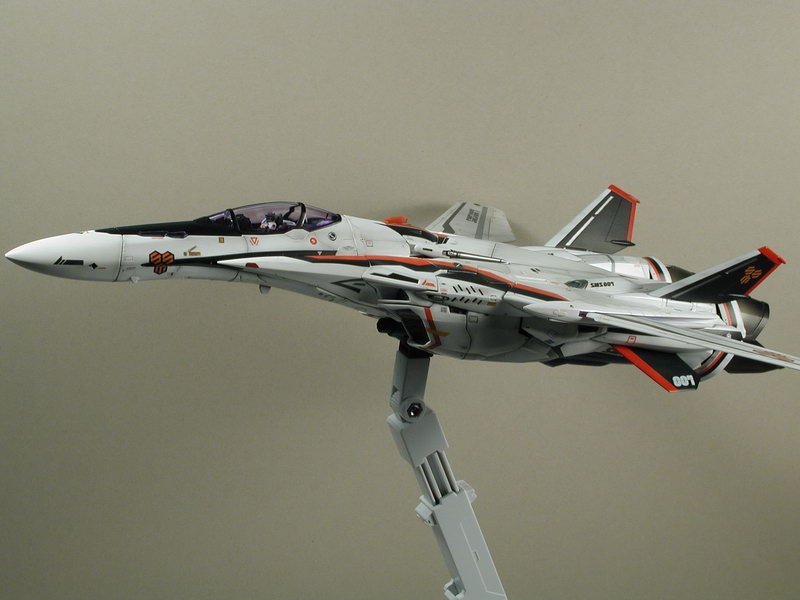
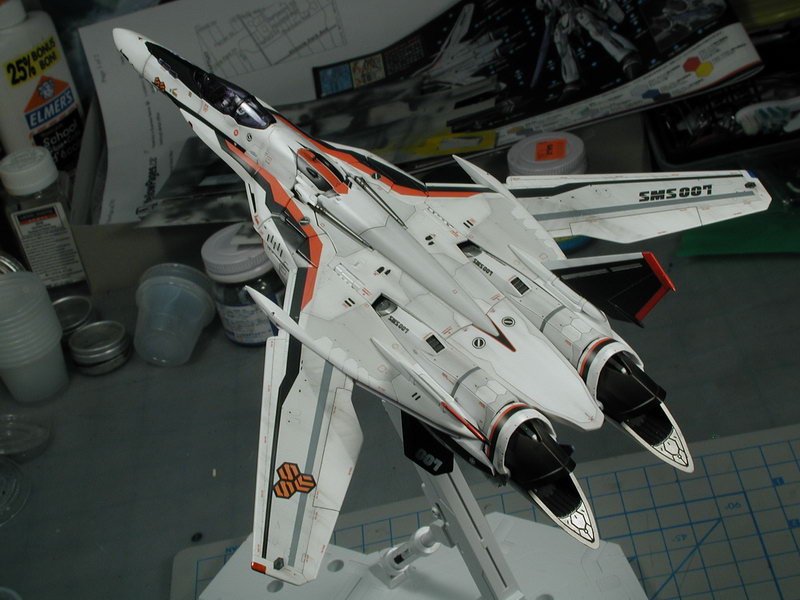
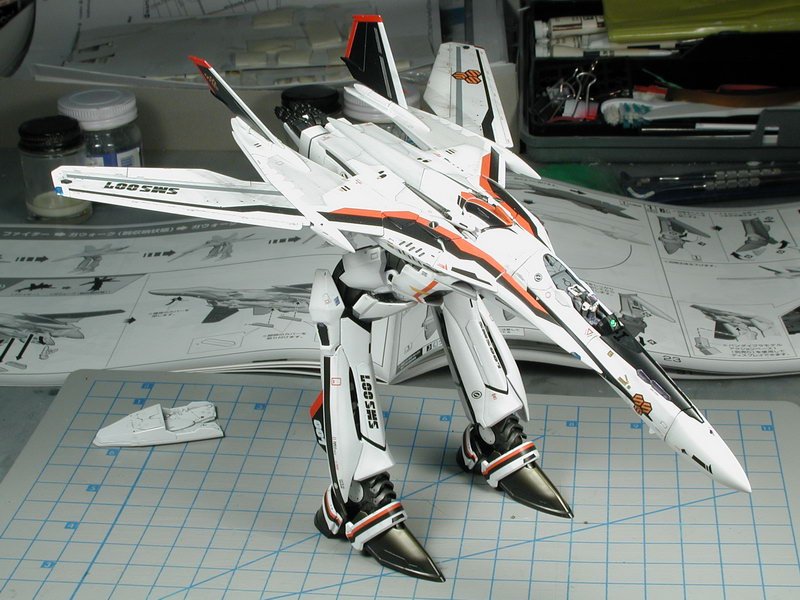
I was just going to call the plane finished when I realized that I forgot those yellow/orange sensor thingys on the wing roots (again!) - oh well, I see if I can try to hand paint those later when I work on the gunpod. Ok, so the canopy is finally on!! YAY! Here's some shots after the white shading and subsequent clear coats. Its 90% there! Argh, this has been a long haul.


-
Whats Lying on your Workbench MKIII
wm cheng replied to HWR MKII's topic in Hall Of The Super Topics
WoW! That looks amazing!! King of the Micron machines... -
Bandai 1/72 Scale Macross Frontier Model Kit Thread Ver.3
wm cheng replied to azrael's topic in Hall Of The Super Topics
WoW! your workbench is neat!! I wished I didn't work in such a pig pen... Congrats on your new arrival, can't wait to see a build up thread... -
1/72 Bandai VF-25F Messiah build-up step-by-step (sort of)
wm cheng replied to wm cheng's topic in The Workshop!
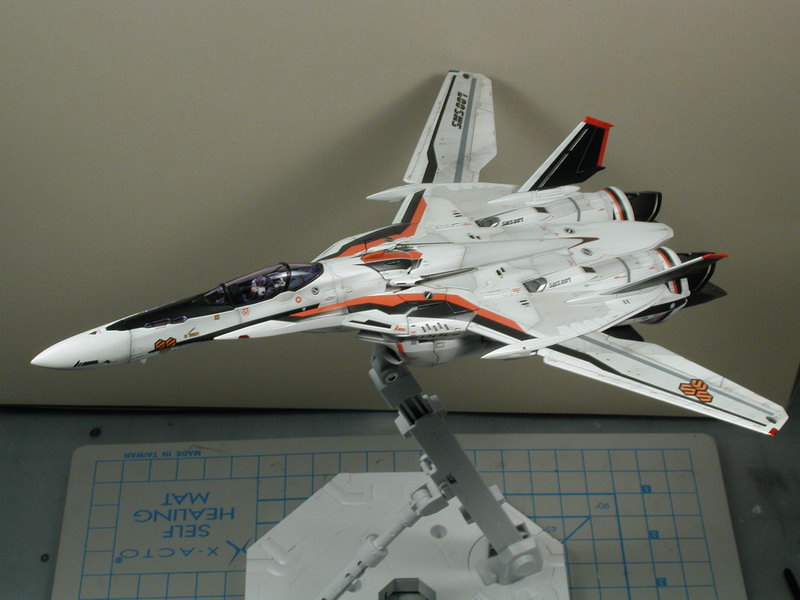
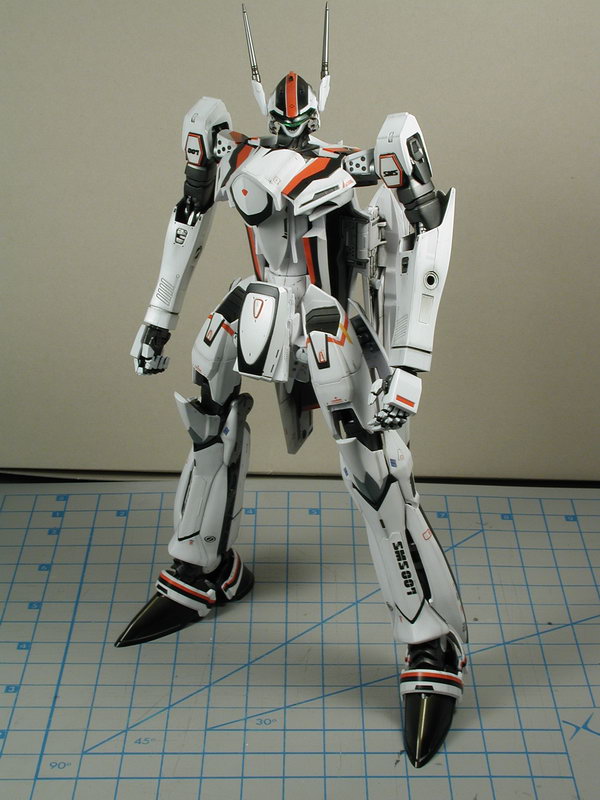
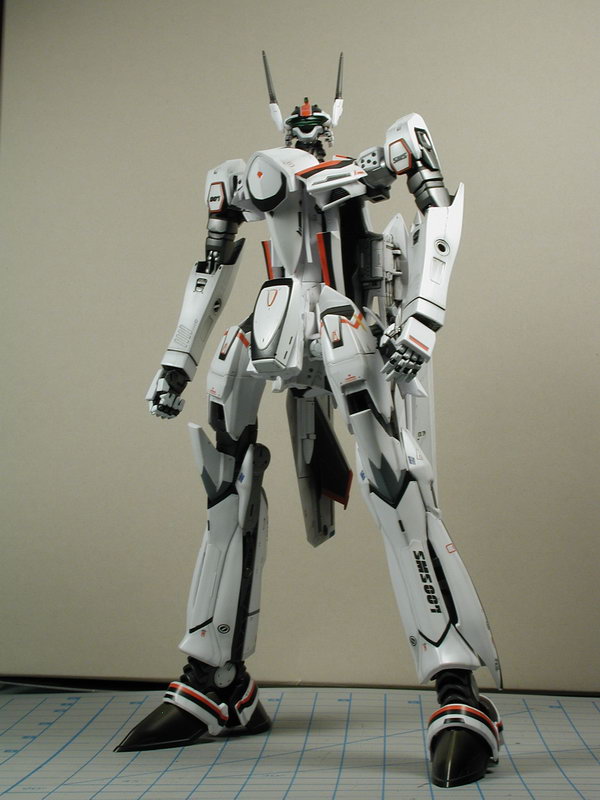
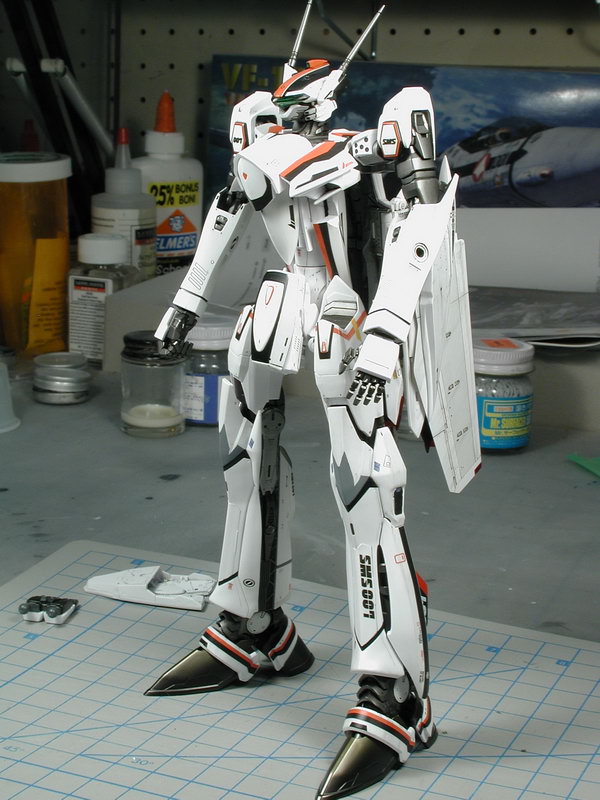
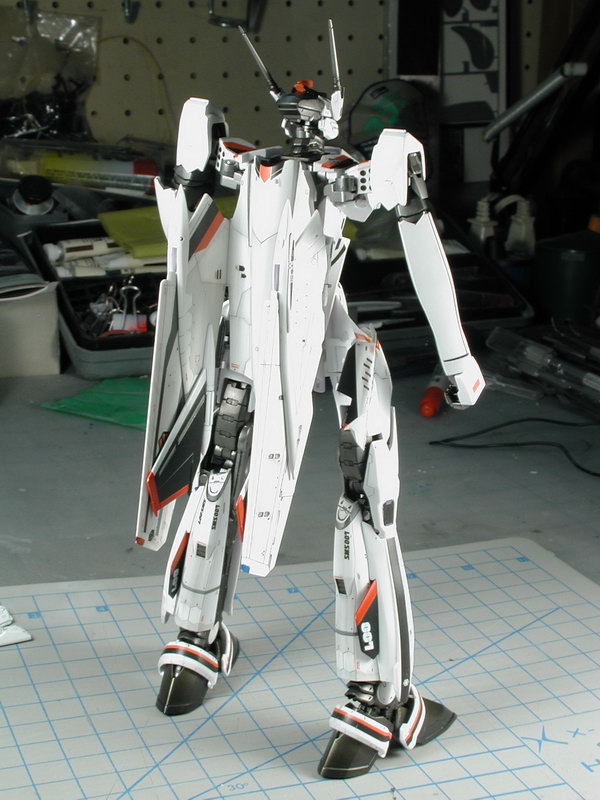
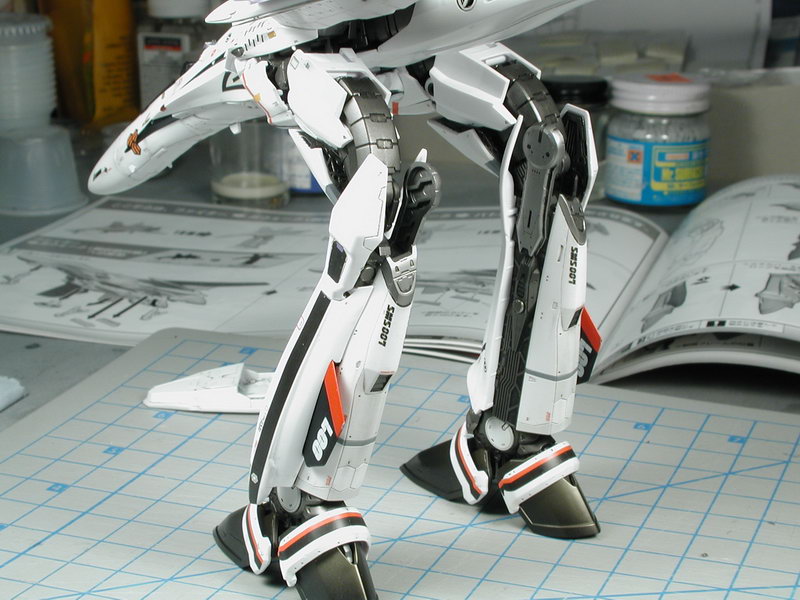
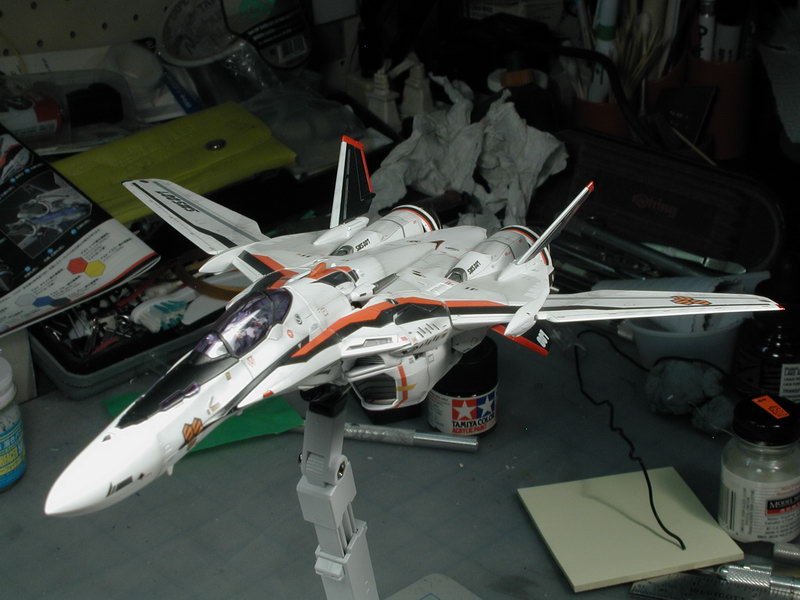
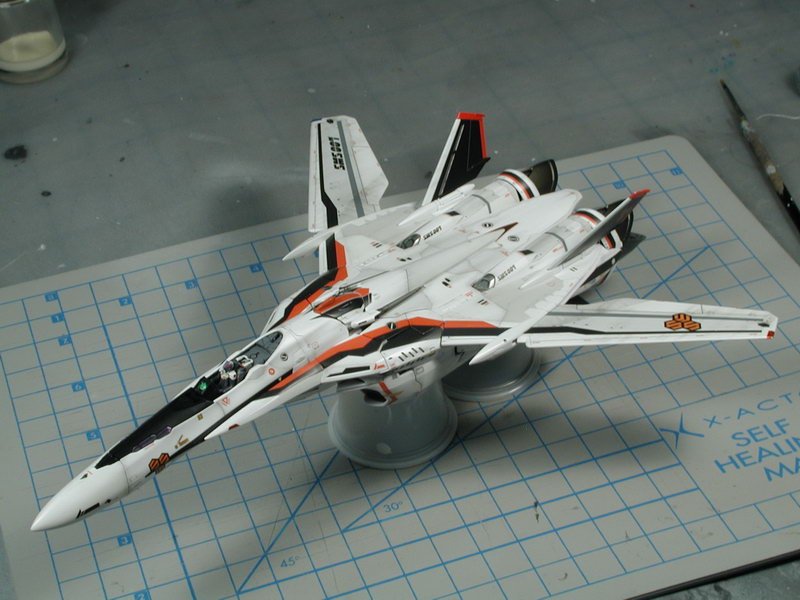
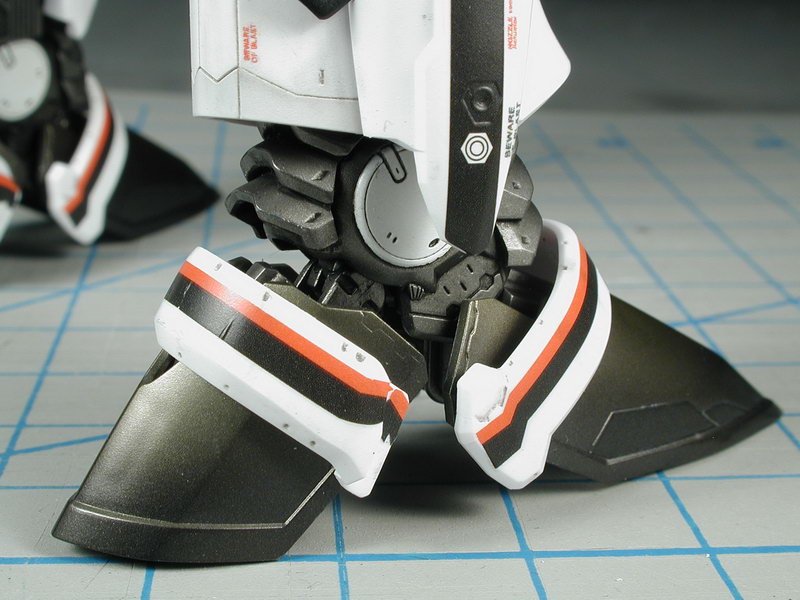
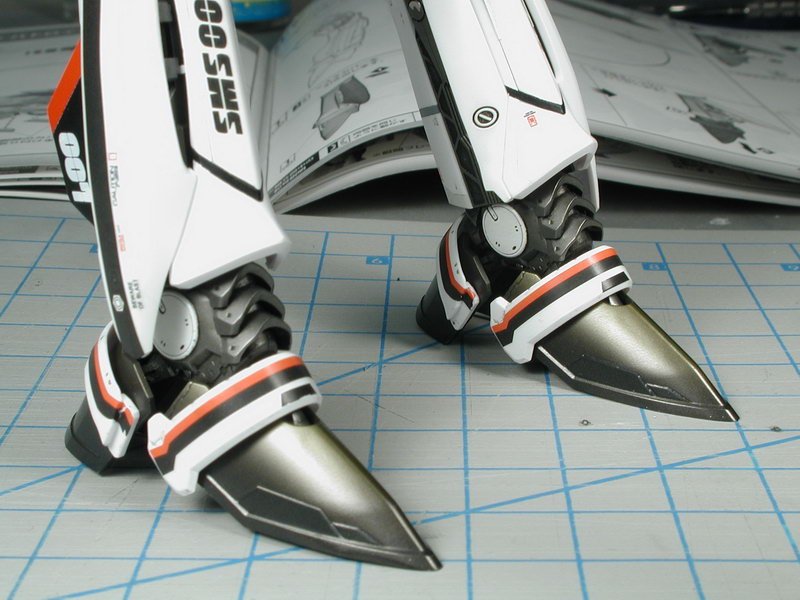
I've lost count! AND it still scratches too, I guess the airbrush coats are too thin, but nothing can really withstand the scraping abuse. I've hand brushed the clear coat (much thicker application) where I think are the most problematic areas. I've learnt a lot from this build though and I would try to streamline my other builds (for one thing, I'd paint more parts before assembly and I would only do a final assembly instead of constantly assembling and disassembling all the time to see where the parts go and where they rub!). Finally finished the light weathering, I weathered it very lightly since it mostly looks new in the anime. I mostly did the weathering on the legs and forearms (to cover up parts where there was tiny damage from the rubbing of the arms folded together, but after the weathering, it just kind of blends in together. I think I'll leave this in the aircraft mode for the majority of the time, it looks too skinny without the fast packs. Hand painted the white covers to the fingers in the hands - I think it makes a huge difference to the hands. I wished continued the black stripe on the underside of the lerx (?) forward wing roots. I missed it before and now its too much disassembling and masking to do it. Unfortunately the forearm pieces started to crack along the seam after all this handling. The parts were too thin and didn't have enough surface area for the glue to hold, plus the parts flex a lot during tweaking to get the aircraft mode all fitted together properly. I'm not sure what to do differently next time, but I am not going to repair it now since it would mean completely stripping the arm down and re-gluing, puttying and re-sanding and then all the subsequent coats of paint and weathering. Yes, I'd love to do the Ozma Armoured one next! that deserves to be in the Battroid mode most of the time. I'm thinking it shoud be easier without all the subtle panel shading since its almost all hidden under the armour! I love the designs and the look of the finished models, but building is pretty laborious. I can't say that I "enjoy" these Bandai kits. The plan is to have the Michael's with the super pack in Battroid, Ozma with the Armour in Battroid, Luca naked in aircraft mode and Alto naked in aircraft mode. I still have the shoulder lights (which I save till the end, a dab of Tamiya silver marker, then Tamiya clear red over top, it gives more depth and reflection than the decals). I have the gunpod, which I will spray with Alclad metalizers first, then clear-coat with purple future to get the outer casing a metallic purple sheen. I am not even going to attempt the landing gears (this is what happens when a fantasy robot company tries to interpret wheels! ) - they are a lost cause! If I was going to do one of these VFs with the landing gears down, I'd have to deepen all the gear wells (they are a shallow joke at the moment) and completely scratch build the gears probably from the Hasegawa VF-0s as a base, but they would not be removeable and it would be a huge undertaking in itself. I still need to mask and spray those yellow/orangy thingys on the side of the wingroots - now that really should of been a decal! I don't know if I might try to hand-paint them. Lastly its back in the plane mode again awaiting final light shading/wash spray of thinned white to tone down the panel shadings, off-grey panels and tie in the contrasty black and red markings to generally tone down the markings to look more "painted" on. It survived the transformation rather well with only 2 or 3 chips or scrapes (even with the clear coating). Warning, the black top area to the forward nose cone seemed to be rubbed the most in the Battroid mode - unfortunately its a prominent part when in the aircraft mode - I handbrushed more clear coat, but you should all watch out for this area.


-
1/72 Bandai VF-25F Messiah build-up step-by-step (sort of)
wm cheng replied to wm cheng's topic in The Workshop!
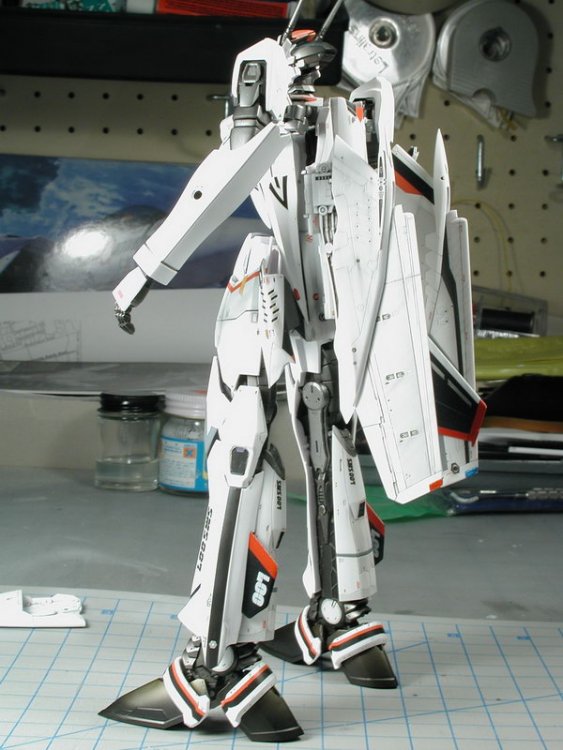
So far so good... I can see areas that were in pressure while in the aircraft mode now. Mostly the top of the shoulders, inside of the arms (forearms) as slight rubbing on the clear coat. There's nothing that can be done, I just hand-brushed another coat (much thicker than airbrush) over these problematic areas. That too will eventually damage, but the idea is to not transform it that often. Now I'll selectively add a few more data/stencil decals that are exposed while in the Battroid mode so that it doesn't look too bare. The main purpose is to weather it to look in place with the top of the aircraft weathering job done previously.


-
1/72 Bandai VF-25F Messiah build-up step-by-step (sort of)
wm cheng replied to wm cheng's topic in The Workshop!
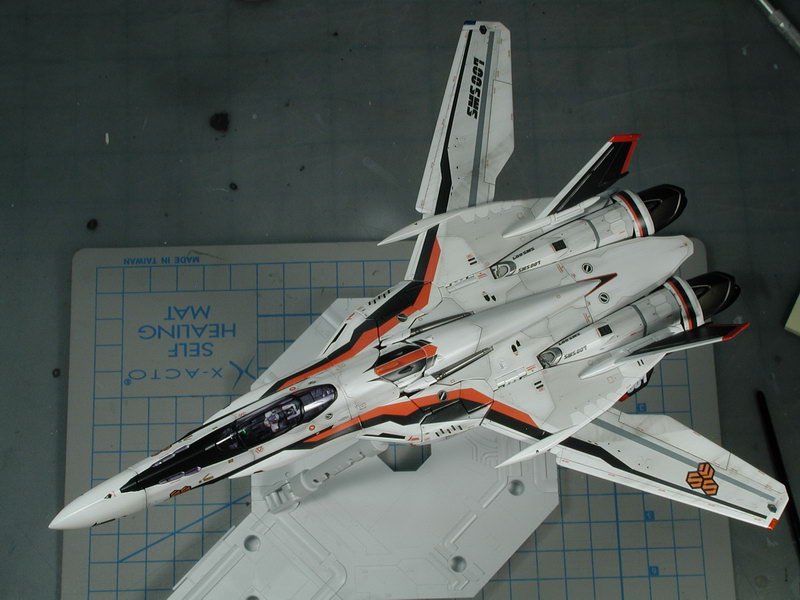
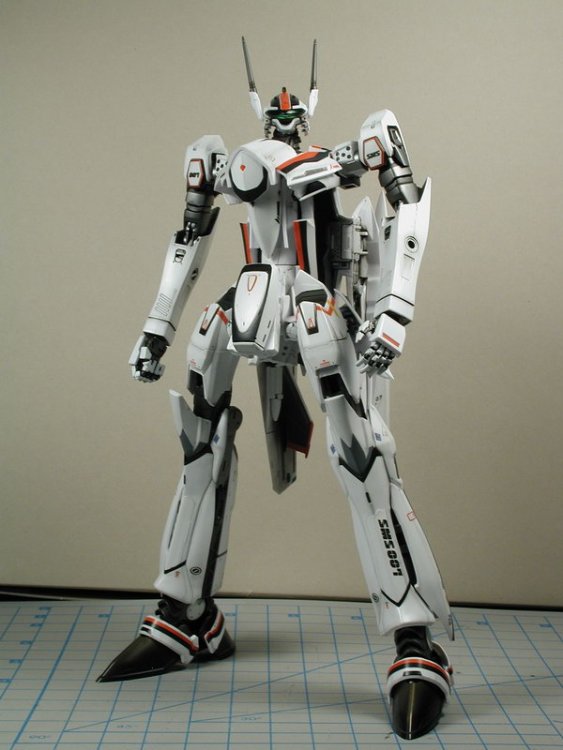
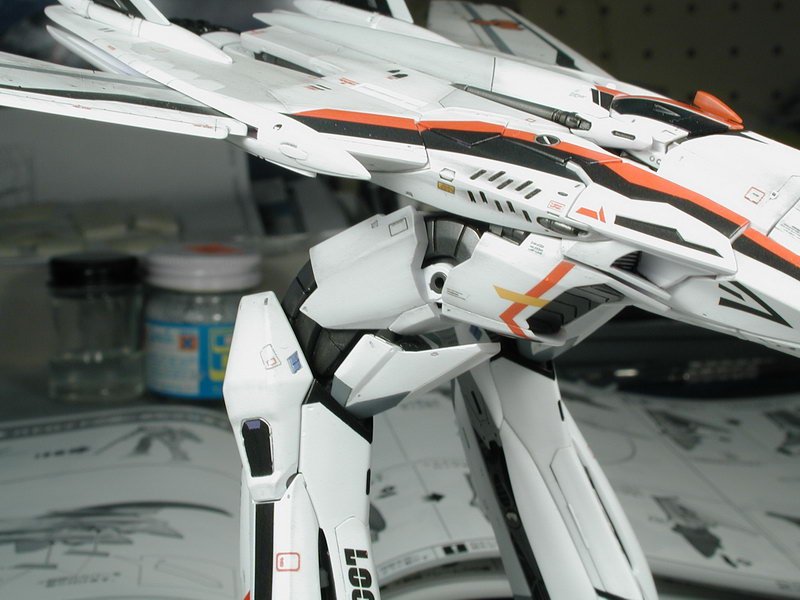
Ok, another few hours and several clear coats later... I've lost count of the number of coats now. My first time to transform this puppy, I need to get it into the Battroid mode to see if there are any unpainted or un-clear coated gaps and weather all the bits that I couldn't access while in fighter mode. Believe me, I don't want to do it more often than I need too! The initial transformation seemed to have gone well. I love seeing the metal bits poke out through the skin like a motorcycle.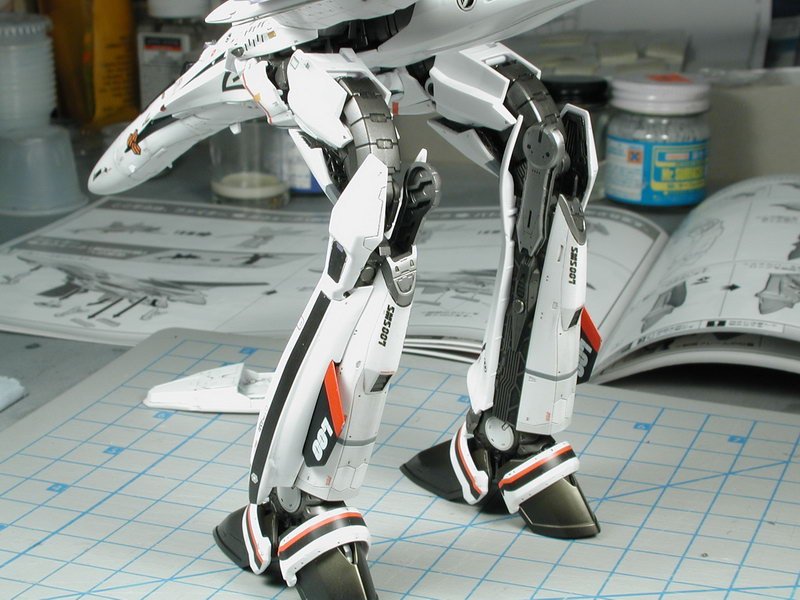
-
Bandai 1/72 Scale Macross Frontier Model Kit Thread Ver.3
wm cheng replied to azrael's topic in Hall Of The Super Topics
WoW! Congrats Jarrod... it looks great and with such speed you got it together... Thanks for putting up the pictures so quickly. Now I want one too! The regular Battroid mode just looks anorexic - this is so much more fun! (and probably a pain in the ass to build and paint properly!) some day...