wm cheng
-
Posts
4343 -
Joined
-
Last visited
Content Type
Profiles
Forums
Events
Gallery
Everything posted by wm cheng
-
YOU GUYS!! Just pure amazing awesomeness!! Care to cast them and sell them? I feel like such an old man these days as my eyesight sure ain't what it used to be, I have to move things farther away just to focus on them, I remember when I could focus right up to tiny things - argh, I hate getting old... Fantastic work! Now I can live vicariously through you guys.
-
Hey KyeKye, that looks amazing!! You guys are fantastic - now you've pushed me from just a oil-wash of a toy to a bigger and bigger deal I'm trying to not turn this into a model (as I don't have time for a full build) - but you've convinced me that this toy deserves it. I love your ideas. Still gotta find a few hours to sneak in. What do you use to cut your brass wires? I hate doing it because it makes me think I'm mangling my sprue cutters and ruining the cutting edge. That Valkyrie is insanely small. I'd love to see what you use to build it up - let alone paint it. Great work so far. When you put it together again, are you going to putty and fill up the seams?
-
You my friend are crazier than me!
-
Ah! What a great idea!! - I guess I should read through your thread from the beginning ;-)
-
Great job so far! I'll be watching for ideas!!
-
I didn't know - great work so far! Definitely subscribed!! Too bad you didn't do it earlier before I "ripped" off my bridge! ;-)
-
Hey Keykey - why don't you post pictures for us of your disassembly process? Feel free to add to my thread if you want.
-
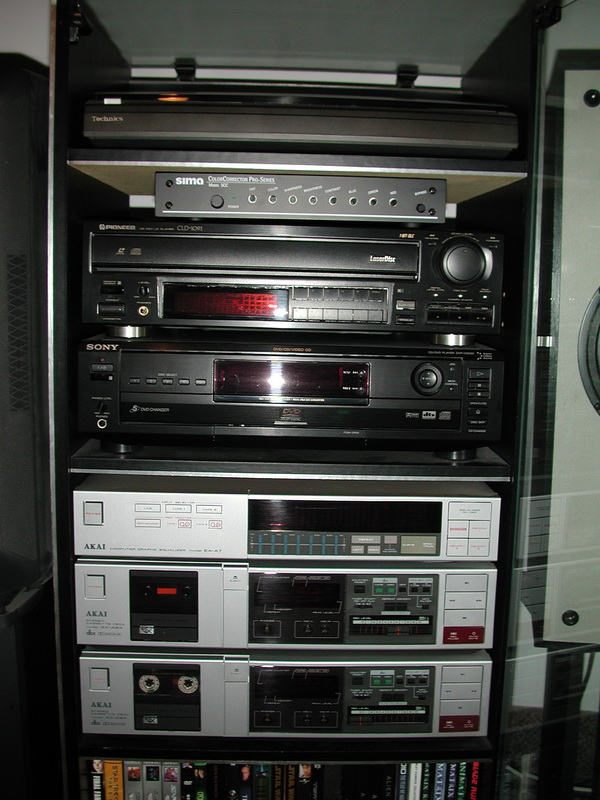
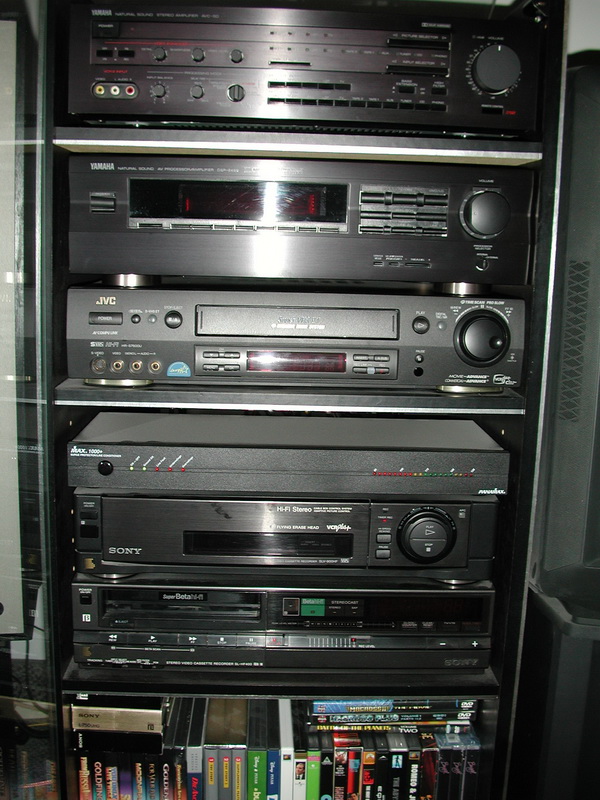
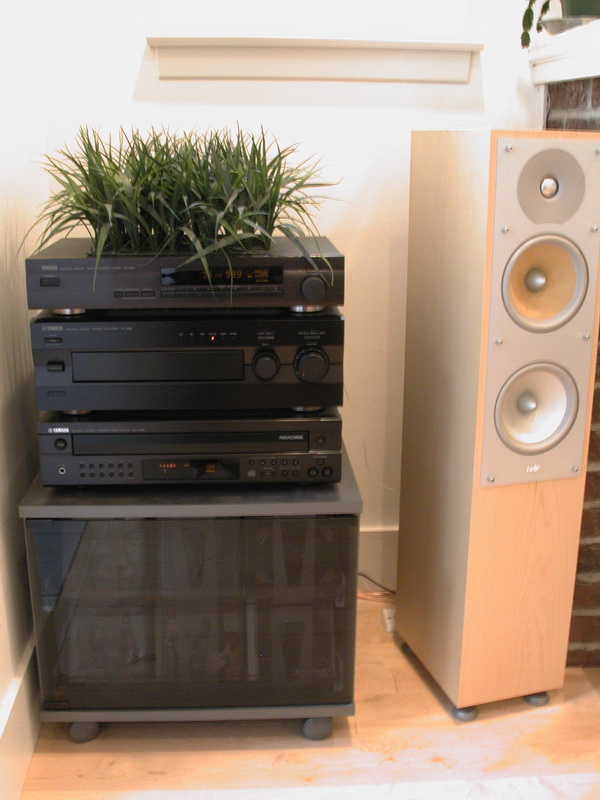
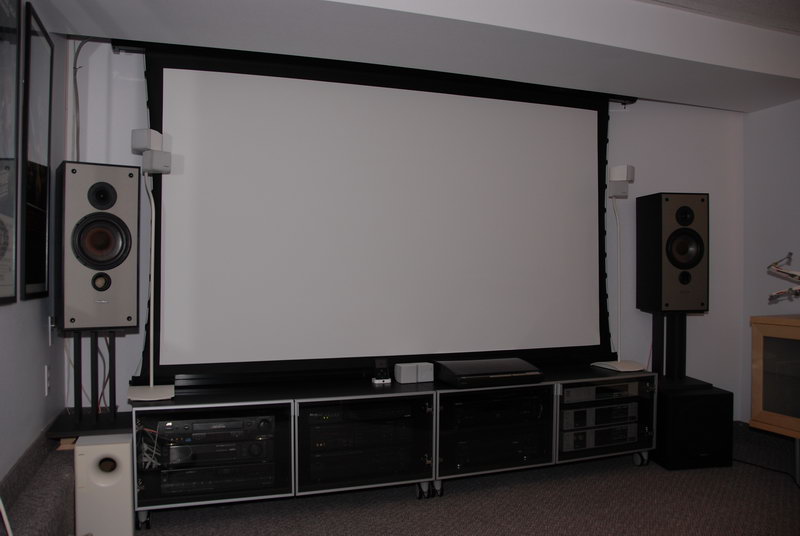
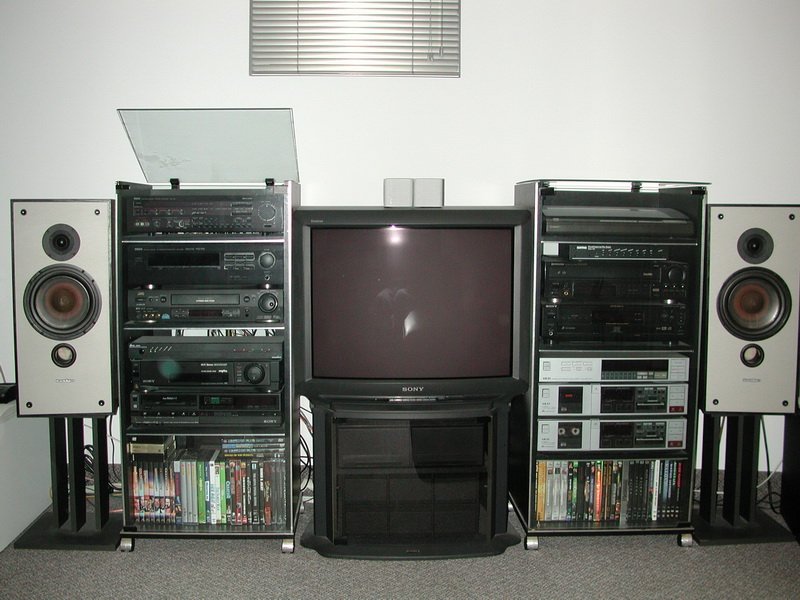
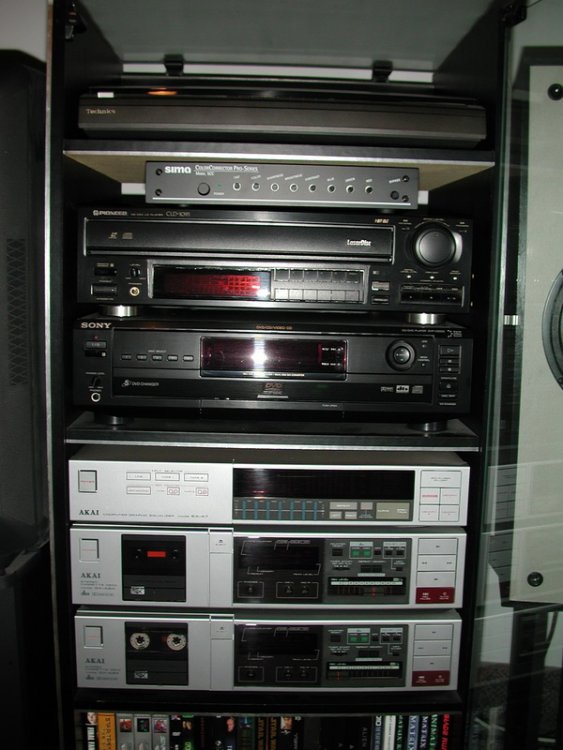
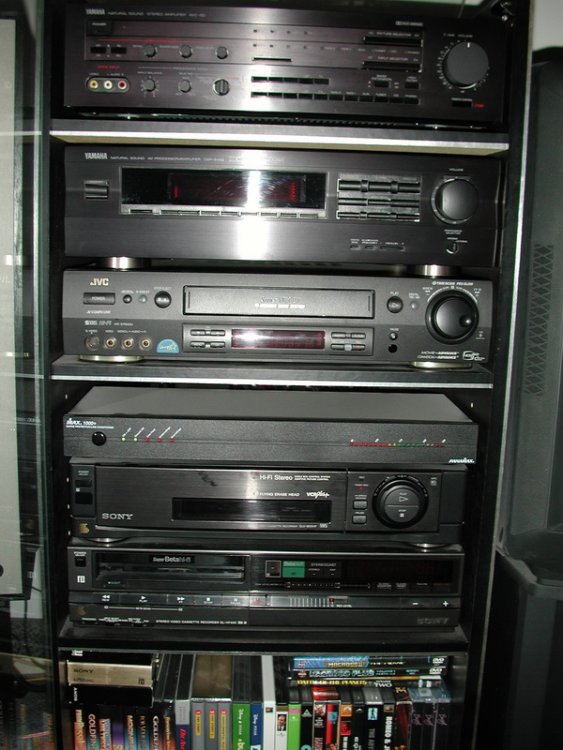
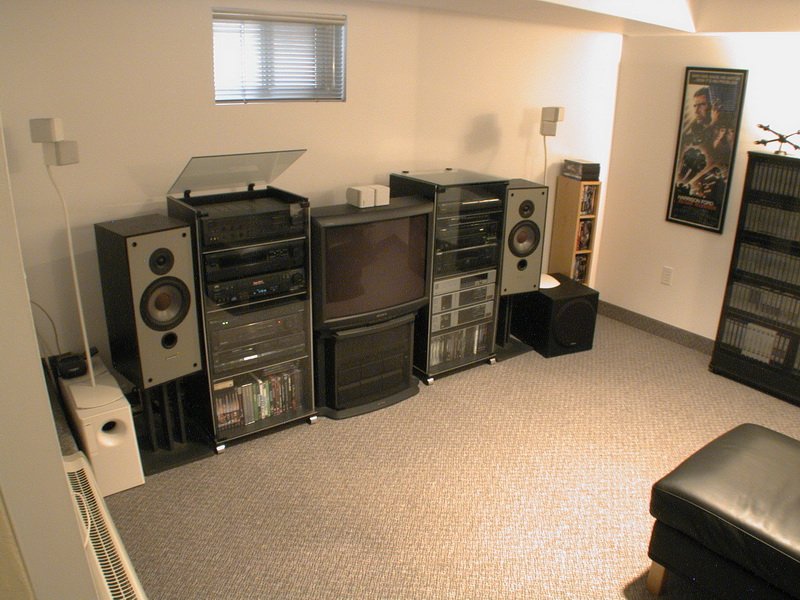
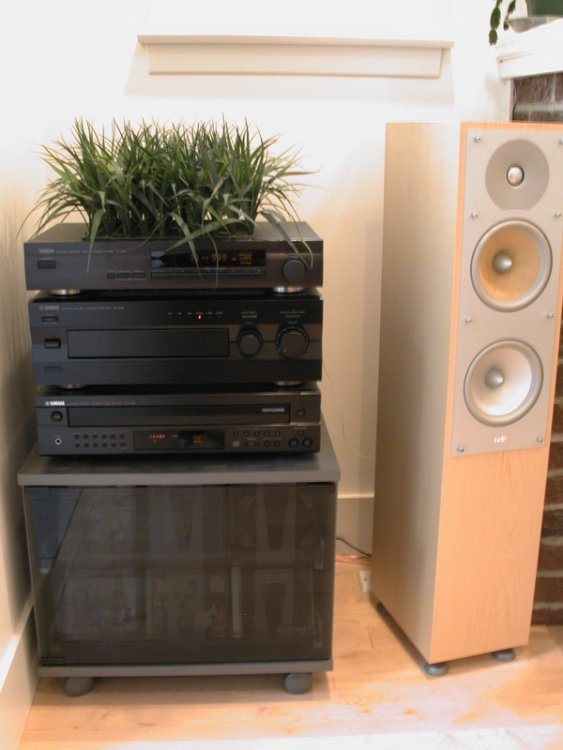
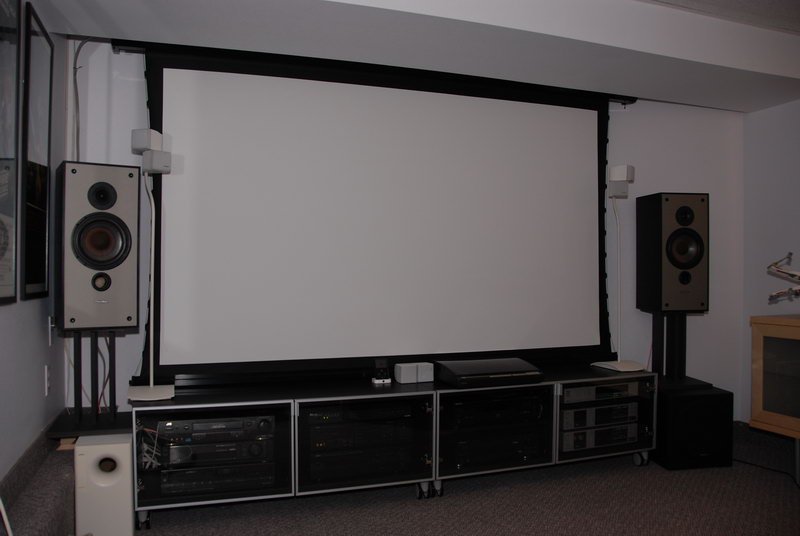
Ah Shaorin... your setup and thread brings back memories. It was the 80s and I was in highschool when we got into this anime stuff. I remember getting my first copy of a copy of a copy of Macross on Beta and watching that over and over again. My friend and I were totally into this hifi stuff and nothing like the real "Made in Japan" components of that era. We were totally loyal to Yamaha at the time and funny enough, I still am today. I remember the tape Dolby-S and glass heads, flying erase heads, 4-6 head VHS-HiFi and linear tracking turntables! My love of Macross goes hand in hand with my introduction and love of these components. We started out in the 80s with; Yamaha AVC-50 Yamaha DSP-E492 JVC HR-S7600U (SVHS) Panamax 1000+ (Power conditioner) Sony SLV-900HF (VHS) Sony SL-HF400 (Beta) Sony KV-27V15 Technics SL-L3 Sima ColorCorrector Model SCC Pioneer CLD-1091 (LD) Sony DVP-C650D (DVD) Akai EA-A7 Akai GX-A5X Akai GX-A5X Bose Acoustimass AM-10 Paradigm Model 7SE Polk Audio PSW350 Then later on in the 00s we finally got a decent stereo only system with good speakers (to this day they are the best purchase I've made, they sound awesome and I highly recommend them) B&W CM4s; Yamaha TX-480 Yamaha AX-596 Yamaha CDC-685 B&W CM 4 Finally in 07 we finally got into the home theatre properly with a 1080p HD front projector, 100" screen and the Yamaha RX-V3900 amp with full Dolby-HD DTS-MA and HDMI; Yamaha RX-V3900 Panasonic PT-AE2000U Elite Cinetension2 100" Sony PS3 (40Gb) (BR) All that old equipment still works great, but just can't keep up with the 7.1 surround, HDMI inputs and HD video. Its too bad, because I baby my equipment and I still have the boxes, bags, styro inserts, instructions, receipts and they are totally scratch free and looked the same as the day they were bought. Unfortunately they are worthless now. But they sure have great memories as we took the laserdiscs and dubbed them onto S-VHS and watched our favourite anime over and over again - we even re-mixed and re-edited the Bubblegum Crisis songs into our own music videos with scenes from our favourite anime - back in the day before YouTube and PC editing! They knew how to make quality components where there was a real steel chassis, 10-20lbs per component with cast aluminum knobs, non of this plastic crap. Decent remotes where every function had its own switch/button and remember the jog/shuttle dials! Ah, I'm getting misty just thinking about it now. I just got a new 50" Panasonic Plasma for the bedroom as just a TV and the materials and workmanship really has gone downhill. However the picture quality is miles ahead of this ancient stuff. The last time I watched my Blade Runner LD on my 100" screen was almost un-watcheable compared to the Blade Runner BluRay - amazing how much difference 4x the resolution makes!
-
So am I hearing this right? If I choose SAL, there's no customs charge? OMG! It was close to $60 in customs/duty/brokerage itself!! Argh.
-

Any other "Thing" fans out there?
wm cheng replied to HappyPenguins's topic in Anime or Science Fiction
You're very welcome. You can probably guess at my name from my user name and IMDB it (its the second one and the only one in the Art Department). Please don't credit me with anything I replied - even though I haven't given anything away, I just don't want to raise any flags with Universal Legal. Now go out and tell everyone to go out to the theaters to watch it, not just download it (or else I don't get paid! and can't support my Macross addiction). -
Any other "Thing" fans out there?
wm cheng replied to HappyPenguins's topic in Anime or Science Fiction
Hey Happy, 1. So how did you get involved in the project? They called me. Its a pretty small community of film designers in Toronto, so whenever anything slightly sci-fi comes along, they call - thats the nice part of working yourself into a niche (the bad is no one calls you for anything else!). 2. Who did you work with directly, and what was it like? Worked mostly for the Production Designer - Sean Haworth (amazing guy, just came off of art directing Tron and Avatar). He loves toys and knows about Macross. He oversees the entire visual language for the film and works closely with the director to ensure we have both of their visions translated onto film. 3. You said that you had a lot of zentraedi influence for the interior of the ship design, were there any other influences and if so what were they? Tons, hard to pick out any single influences, but of course Alien/Gieger was thrown around. We just started to look at everything! If you could pick out the individual references then it would be plagiarism and we'd run into problems with copyright and legal. Sean had a few of L.A.'s best illustrators working beforehand to conceptualize a lot of the Alien environments too before I came on, then when I started to design and translate some of those ideas into built form, we had a constant dialog of back and forth, when I came up with an idea, we'd send the 3D models to LA for a rendering/illustration to be made and then we present the idea to get studio and director approval. 4. Based on what you saw, do you think fans of JC's film will be satisfied with the prequel? It's pretty hard to judge working on it and being so close to it, I naturally think its amazing. However reading the script from the beginning so many times, I don't have any of the sense of suspense or surprise that is required with such a film. We watched and still captured the original JC film so many times (it was really done on the cheap) - but we were definitely faithful to it when the situations required it. With such a fan base already, its hard to appease the die hards, because nothing can live up to your minds expectations. Also todays film production climate, with all the different parties, individuals, studios, egos involved, its more like movies by committee - so one has to take into account the sheer up-hill battle to get any project even green-lit. That being said, I would like to think that the art department's efforts to stay true to the original "look" of the film will definitely please the fans. Everyone who is a fan that has walked through the hallways have always mentioned the chills they get. 5. Are there any designs that stand out, kind of like Rob Bottin's Norris spider head? I just saw the effects shops creations from time to time, but wasn't involved in that department. They were certainly cool from what I saw, I was mostly concerned with the built sets. 6. As I have done my research on this film for months now, I have come to realize that there seemed to be a lot of passion and real dedication to it, do you think there was based on what you saw? Definitely YES! 7. Do you have any advice for those who would also like to work on a movie some day? Find out what department of the film you'd like to work on. I work in the Art Department. Then find out which union is responsible for that department and apprentice or apply as a trainee to that union and look for work on film in those entry positions. This is rather location dependent as I only work on shows that come up to Toronto to film. Depending on your home town, you may need to move to one of the production centers in North America to get consistent work. I personally went to University and graduated with an Architecture Degree. I found out a lot of my childhood heros such as Star Wars illustrators and concept artists had architectural backgrounds like Syd Mead (the futurist concept artist for Blade Runner). So I followed that direction, after working as a design architect for a few years in a design firm, I side-stepped into film by joining the union (Director's Guild of Canada) up here and started blind calling their members lists and lucked into a few jobs until you're name starts to get out there and people begin to know you and what you do. Good luck! -
Any other "Thing" fans out there?
wm cheng replied to HappyPenguins's topic in Anime or Science Fiction
Yep! It was so much fun. Also to see all the real physical effects and monster creatures in latext foam. Actually they are back in town to do "re-shoots" although I'm not involved on that. It's been pushed back. Got some amazing photos, but can't release anything ;-( Just tell everyone to go out and see it when it premiers! -
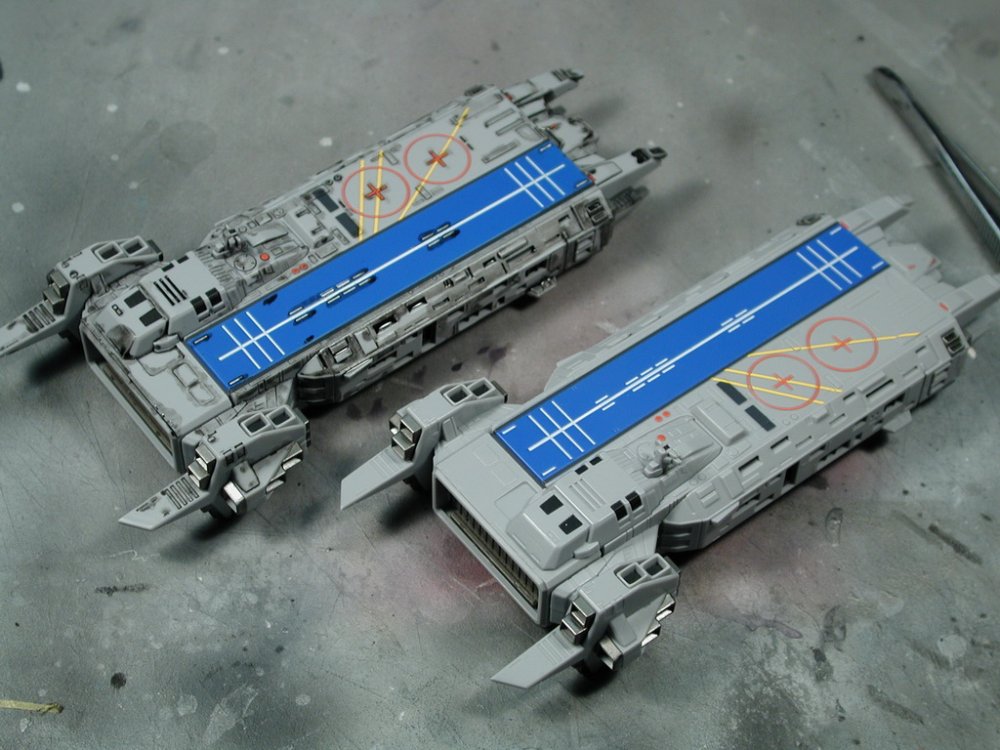
But the DYRL SDF-1 doesn't have all these stripes...
-
Thank you, Thank you, Thank you!!
-
What decals/markings would you be thinking of?
-
Any other "Thing" fans out there?
wm cheng replied to HappyPenguins's topic in Anime or Science Fiction
You guys have to go out to see it to support a fellow MacrossWorlder! I worked on it here in Toronto. They brought me in to design the alien spaceship. Look for Zentradi influences in the set! It was great and creepy to walk through those hallways dressed as it was back in the 80s when I saw it as a kid and it freaked me out. There was so much physical effects that I think it will make the difference. -
I just used plain old white glue. A lot of the pieces fit in really well with a lot of friction holding them in. A lot of the pieces I also want to be somewhat removable if I ever need to disassemble the toy for any reason (they cover the screws). Also they are gluing dissimilar materials, some ABS, some POM, some styrene - so model glue only works on styrene and its permanent.
-
Yamato 1/3000 SDF-1 modification and paint up...
wm cheng replied to wm cheng's topic in The Workshop!
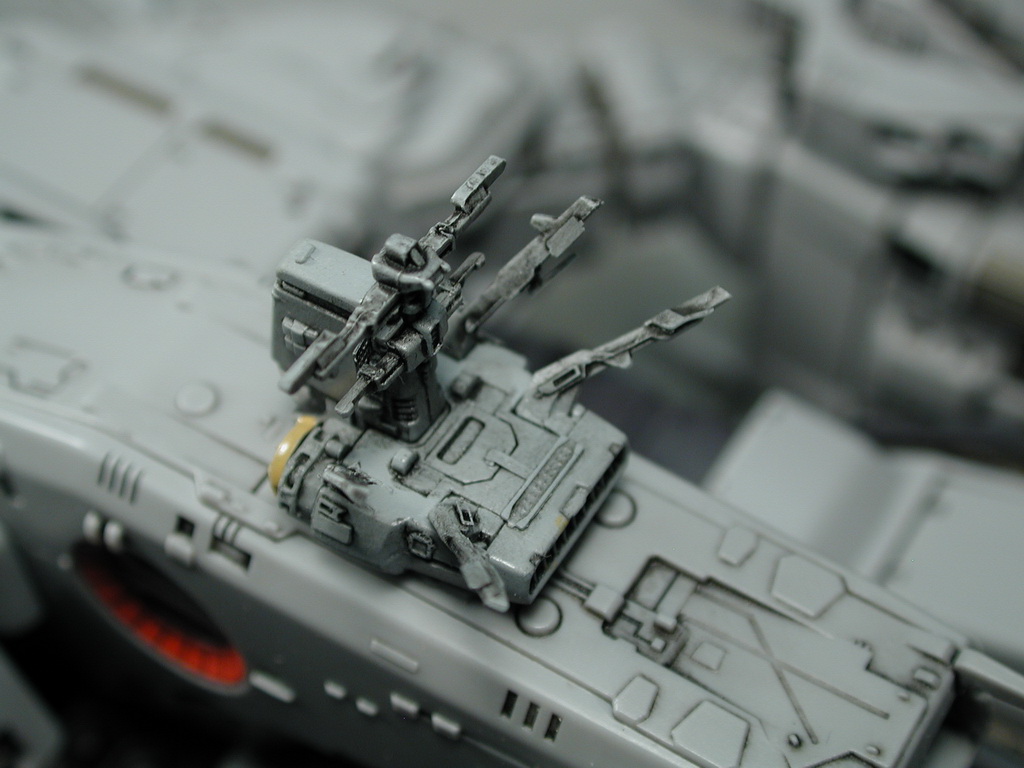
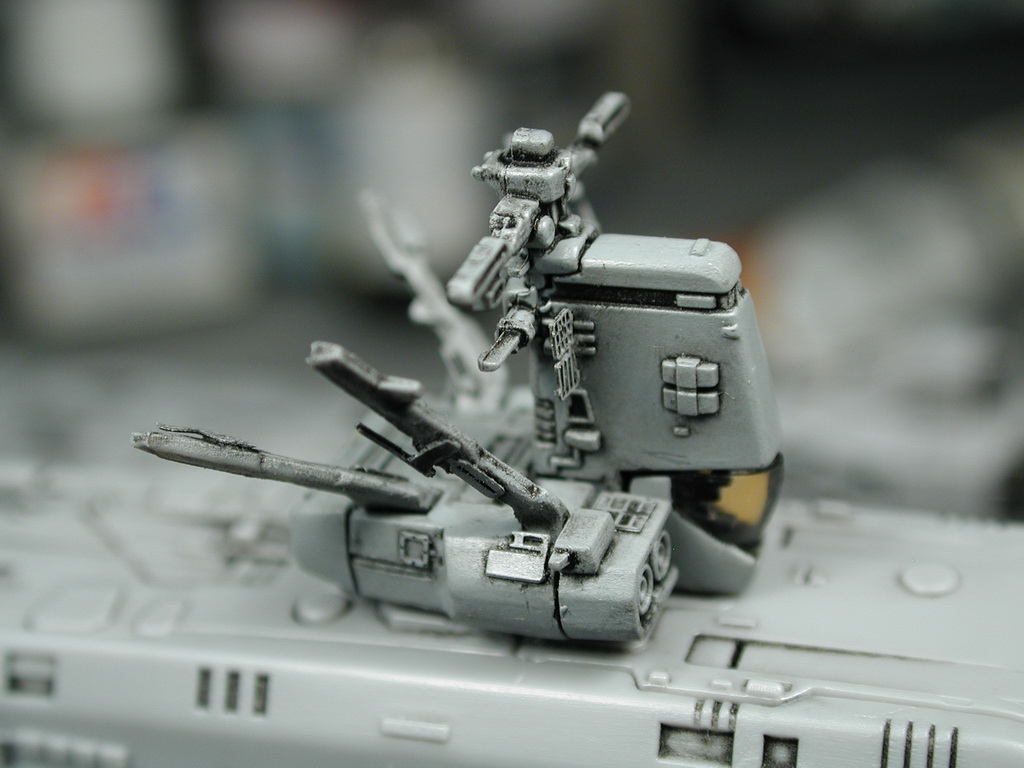
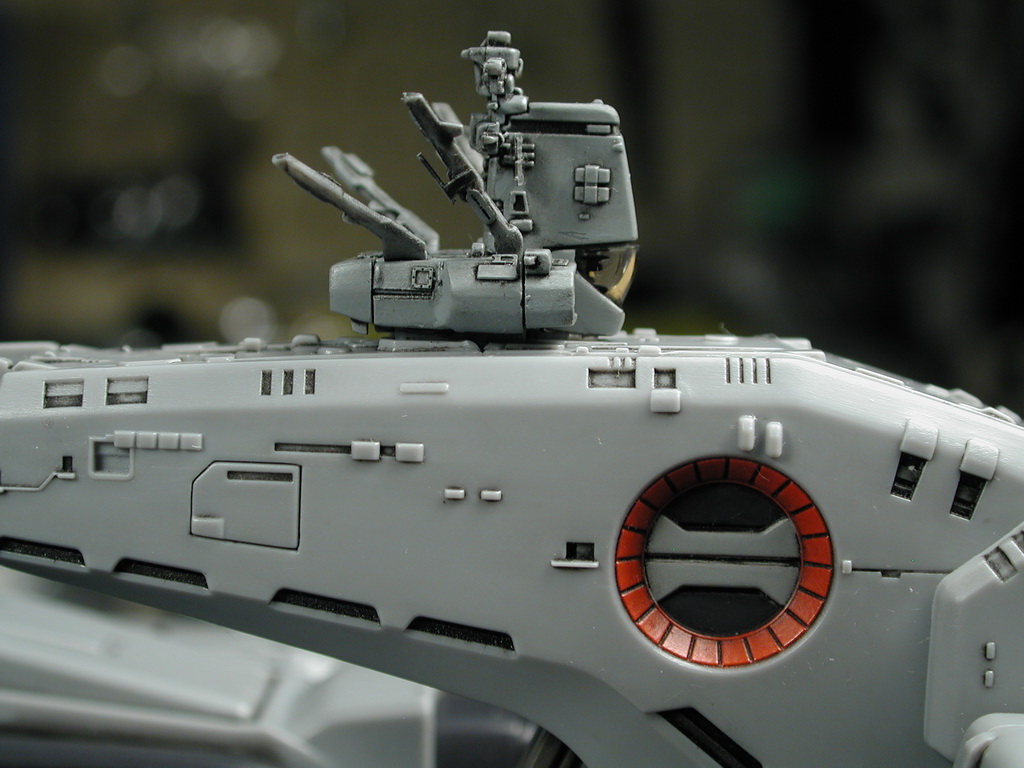
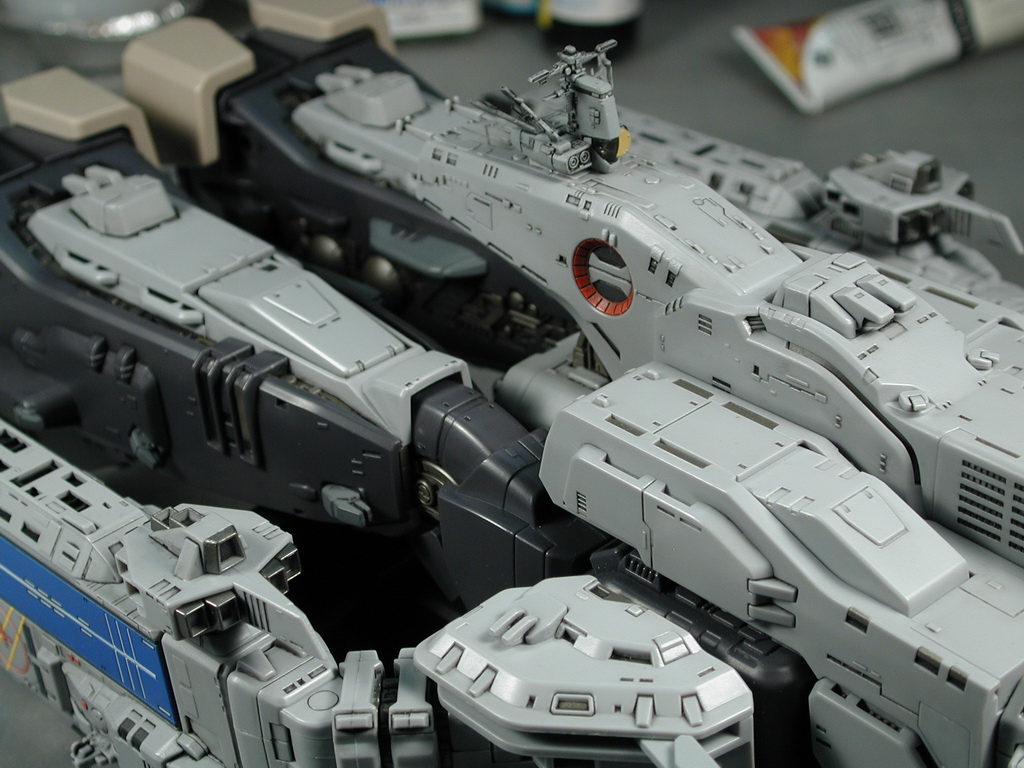
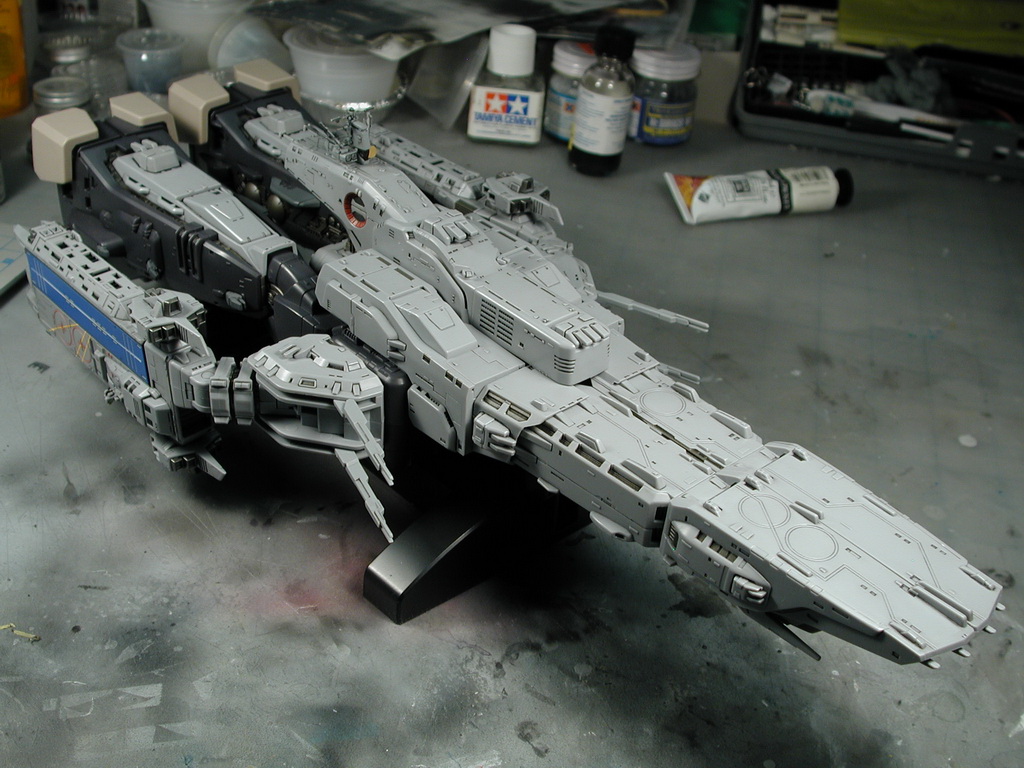
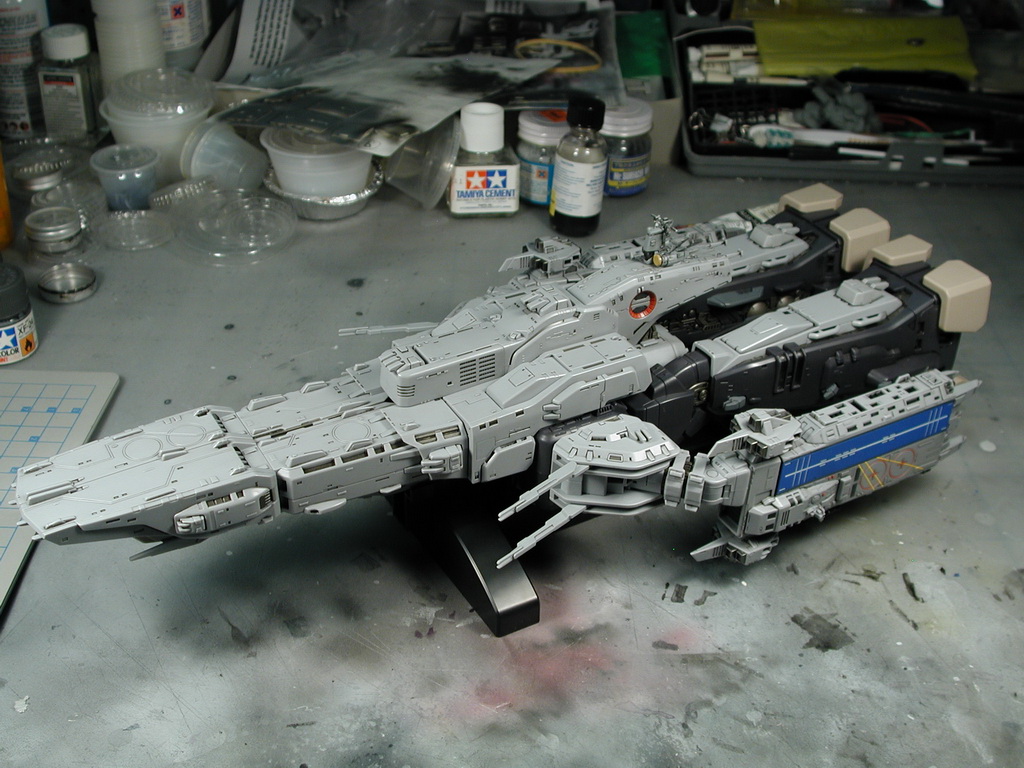
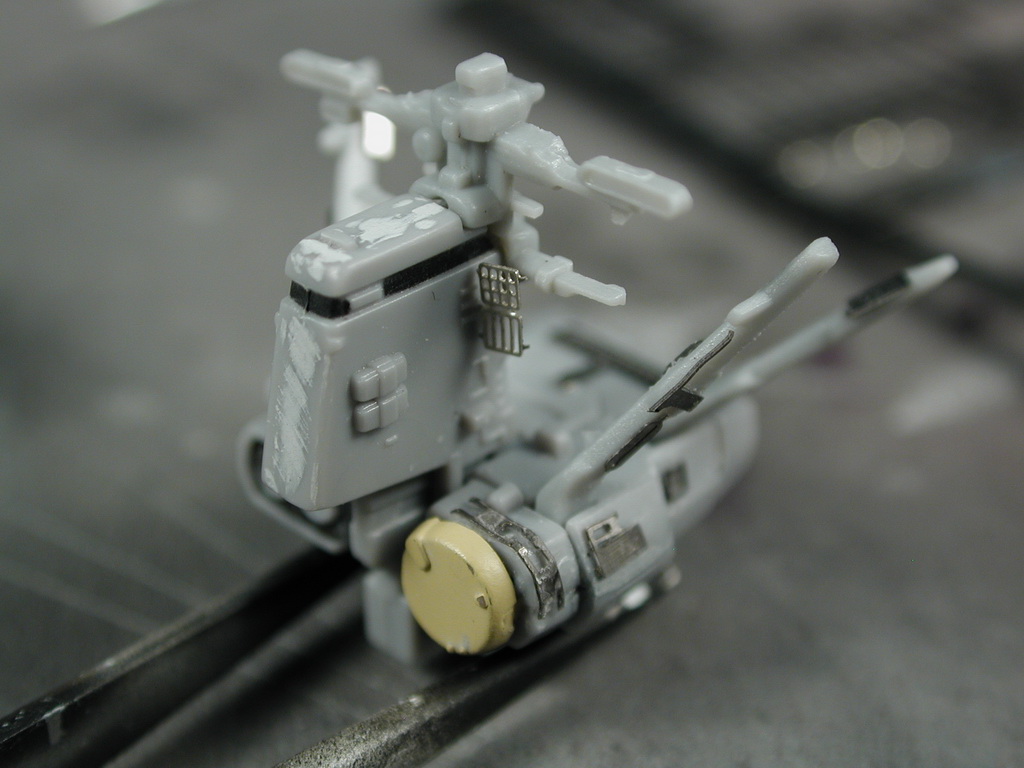
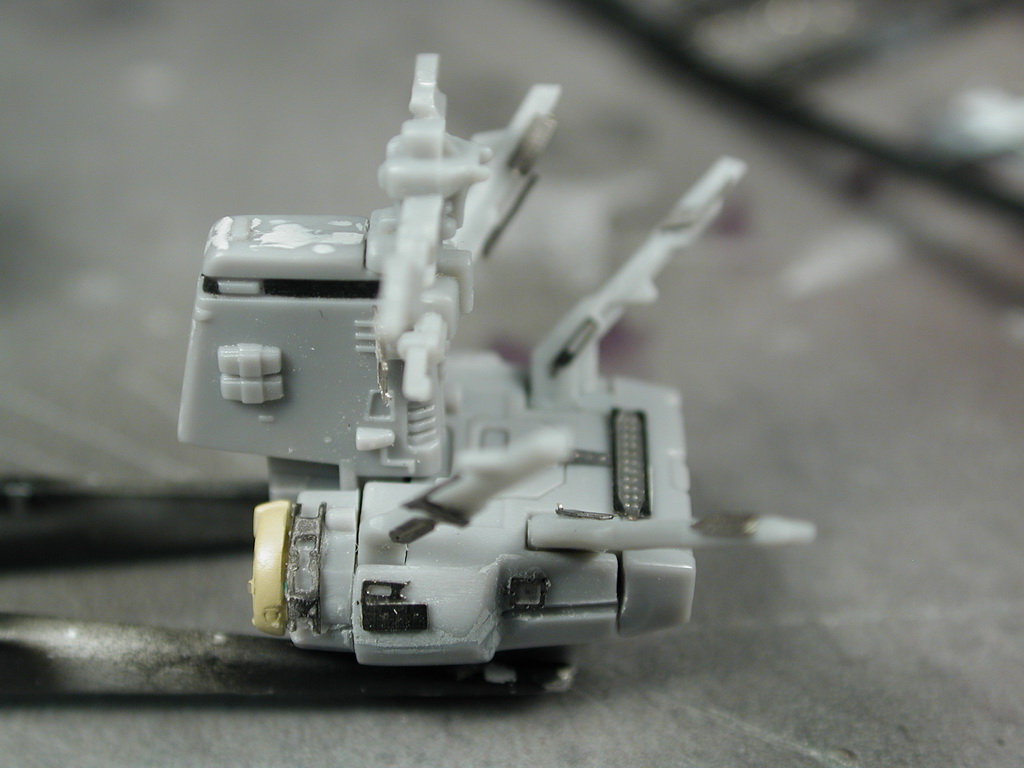
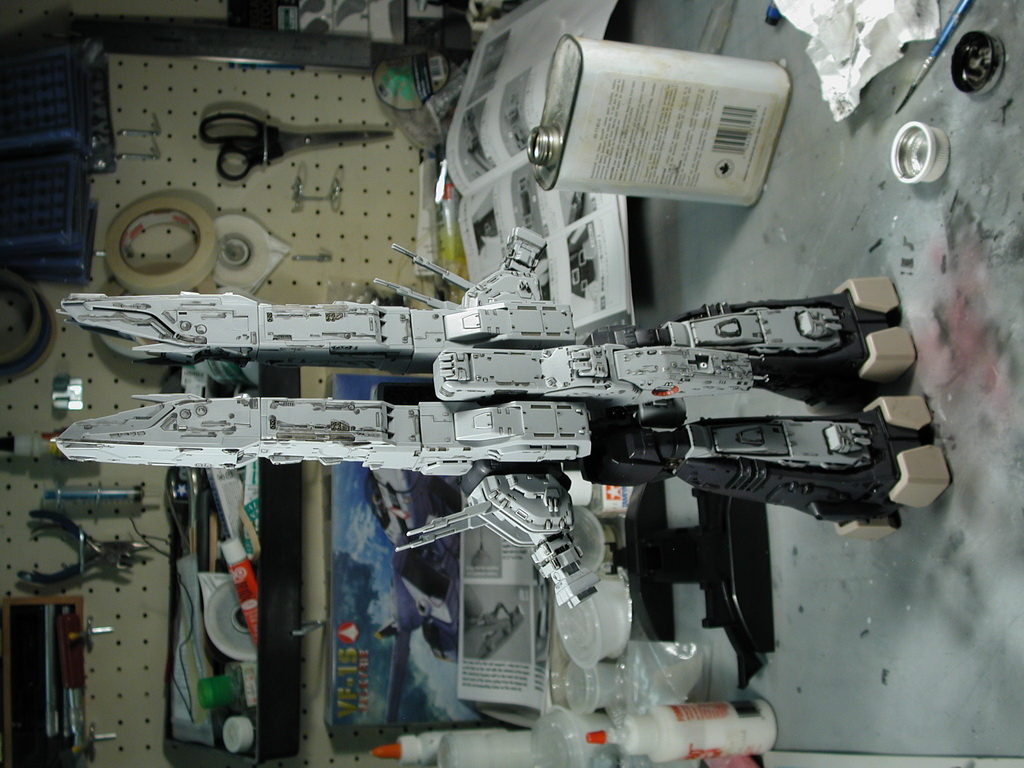
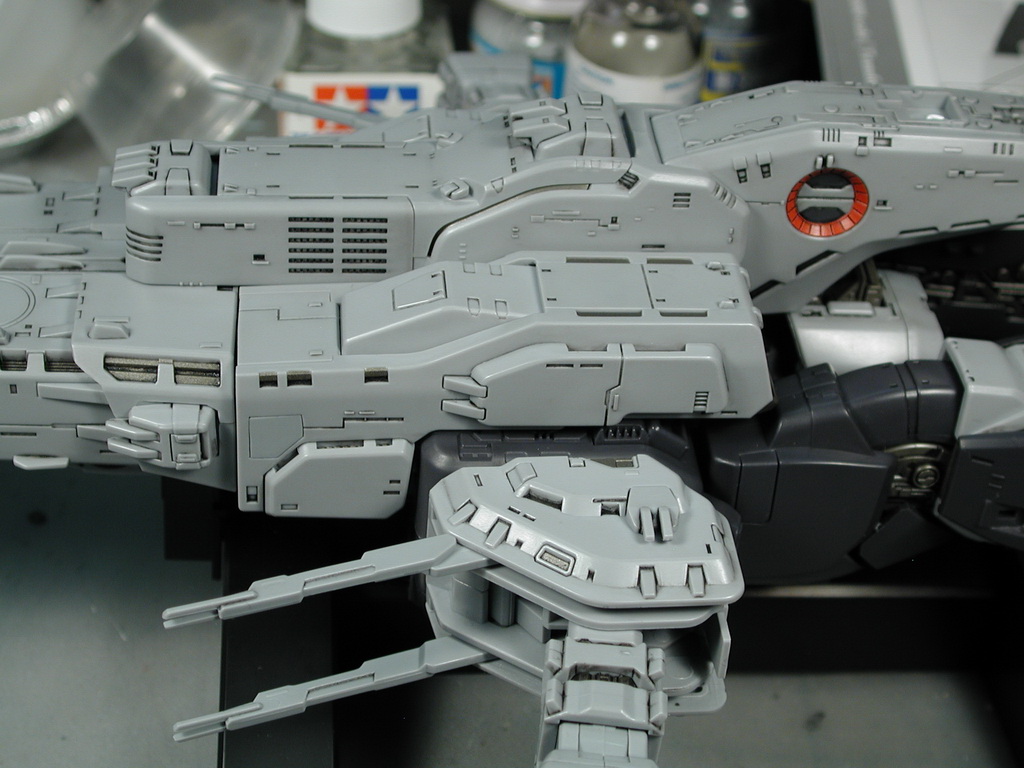
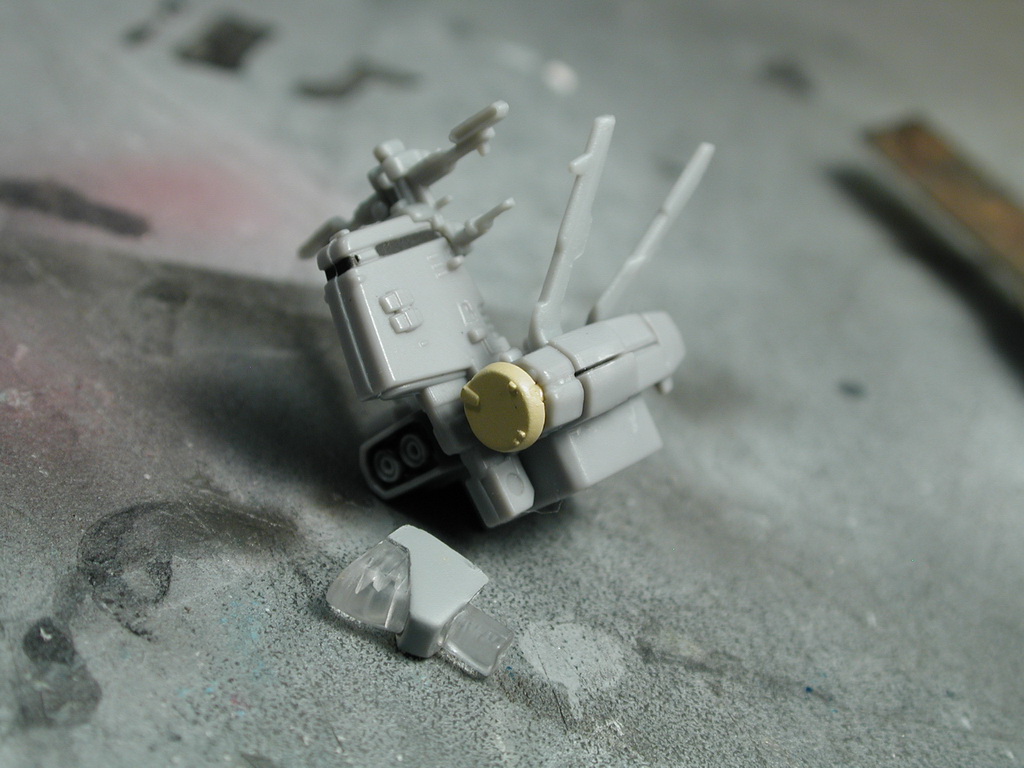
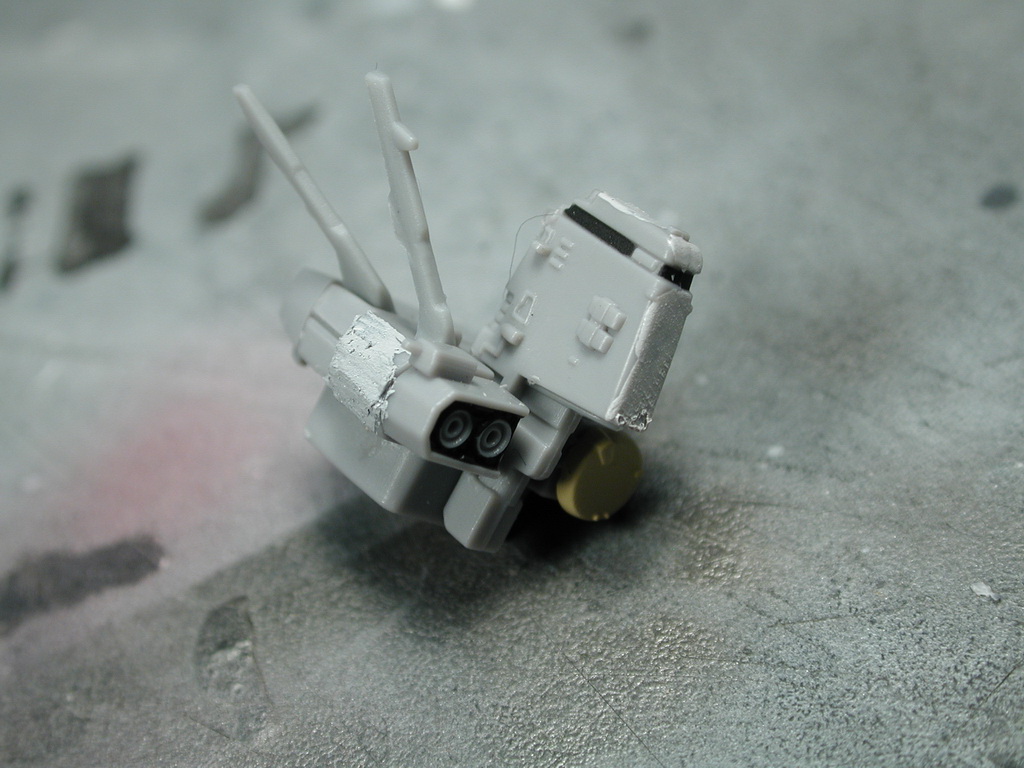
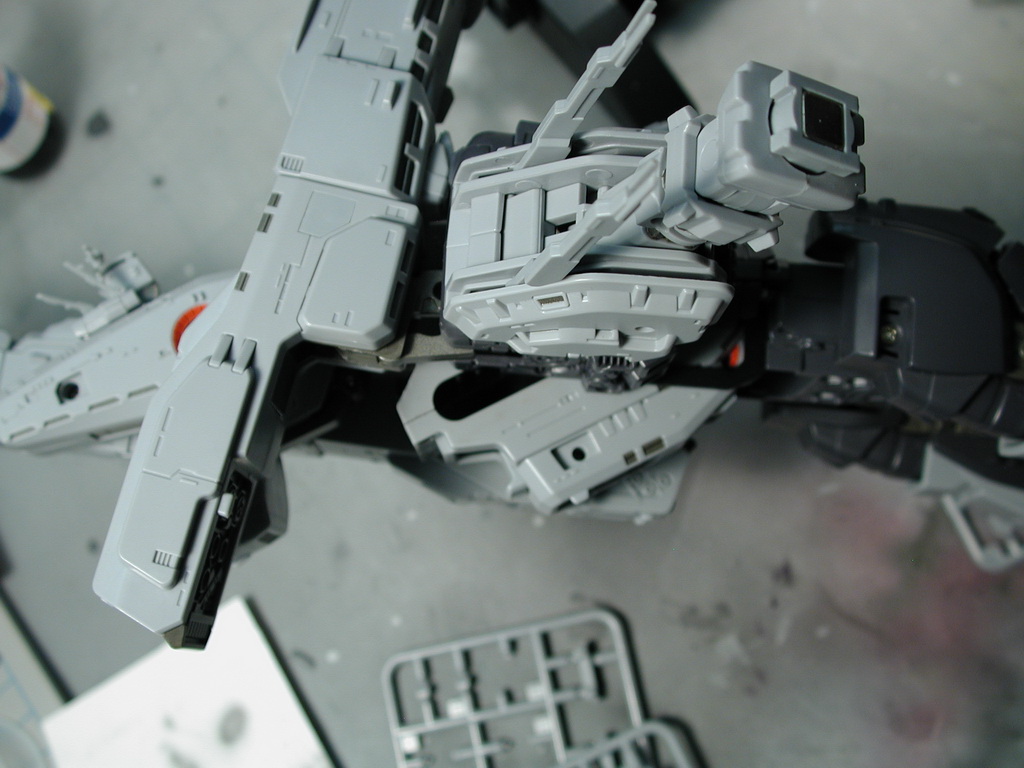
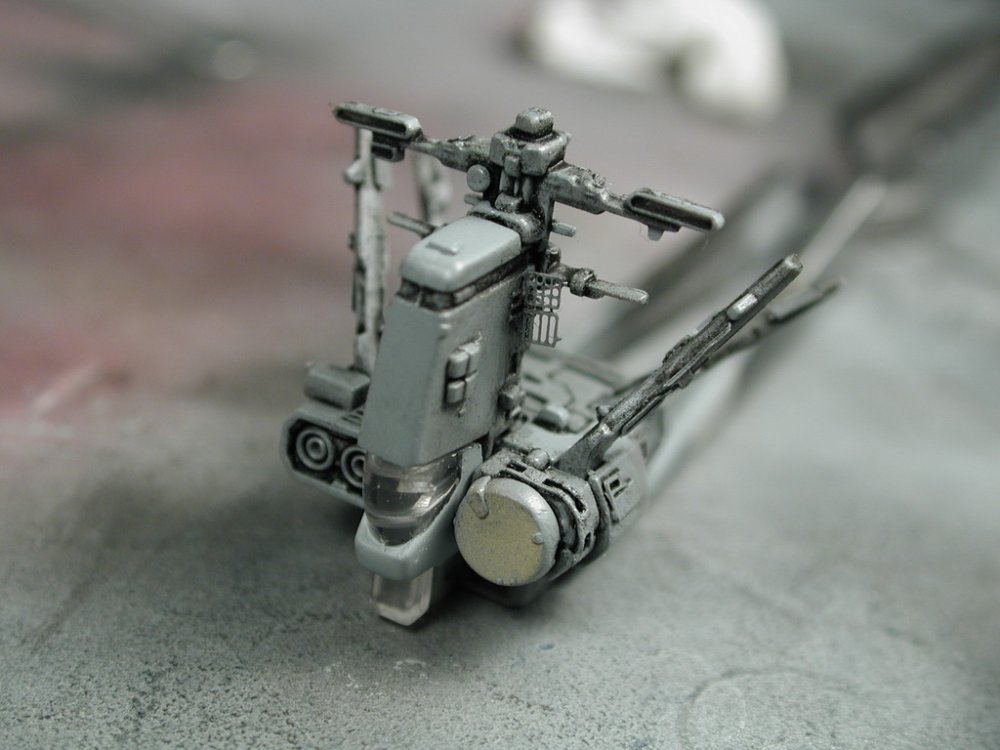
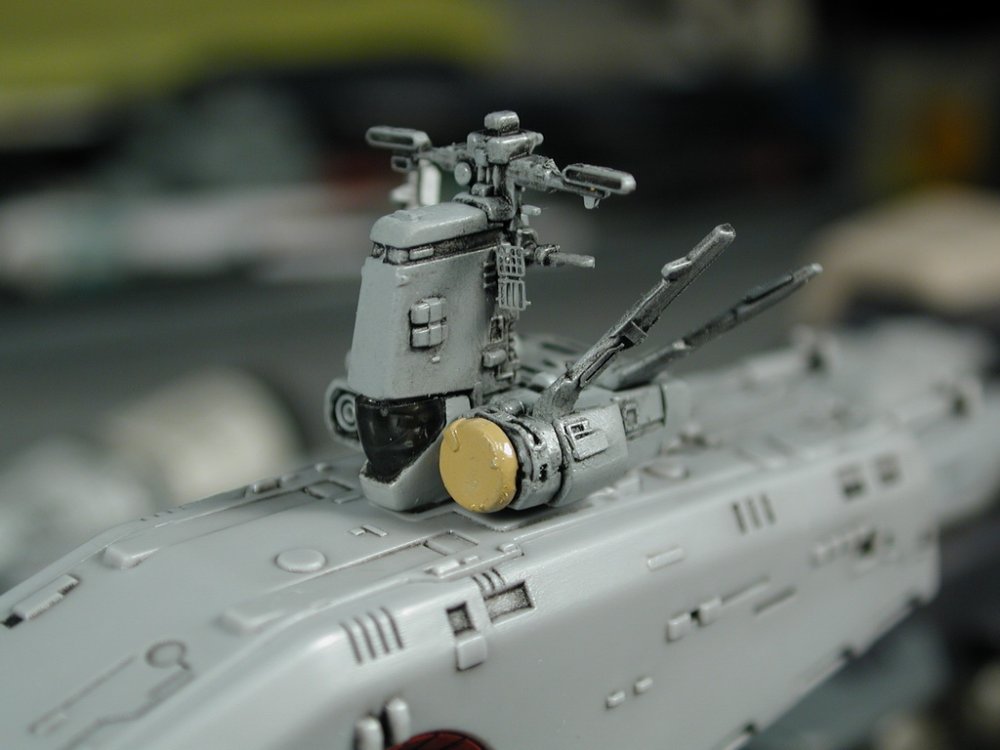
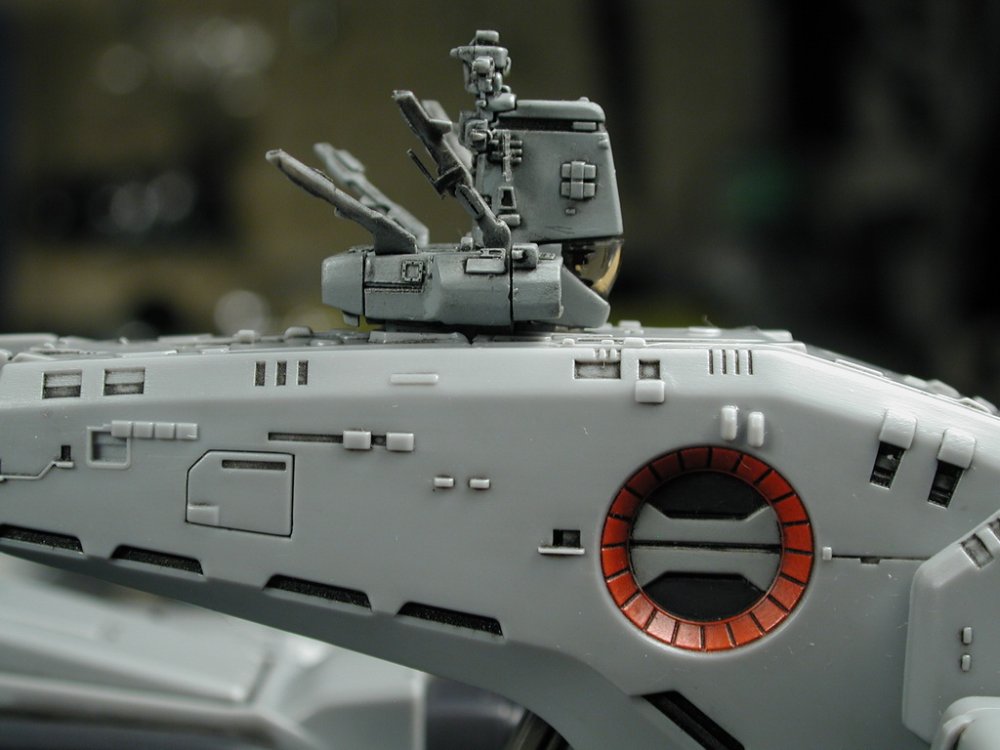
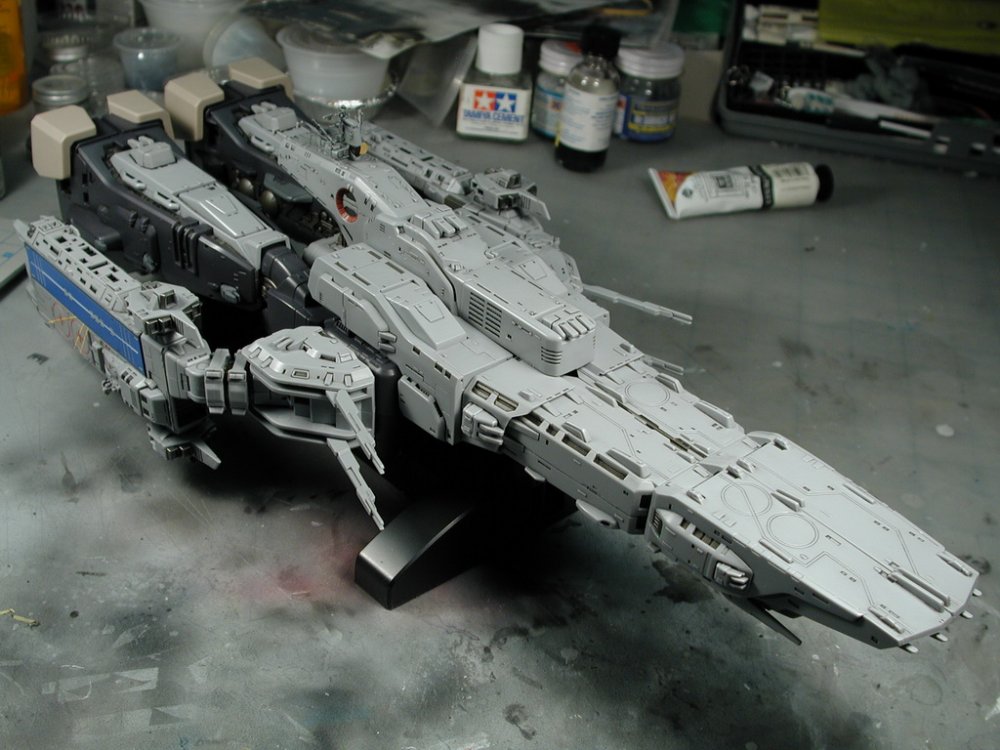
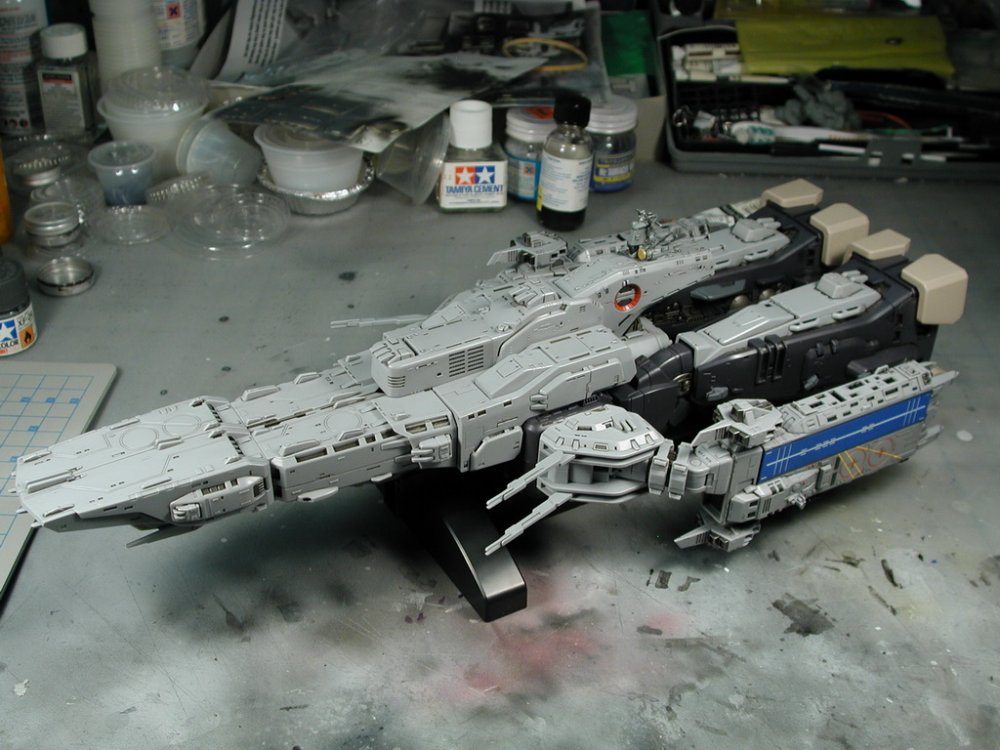
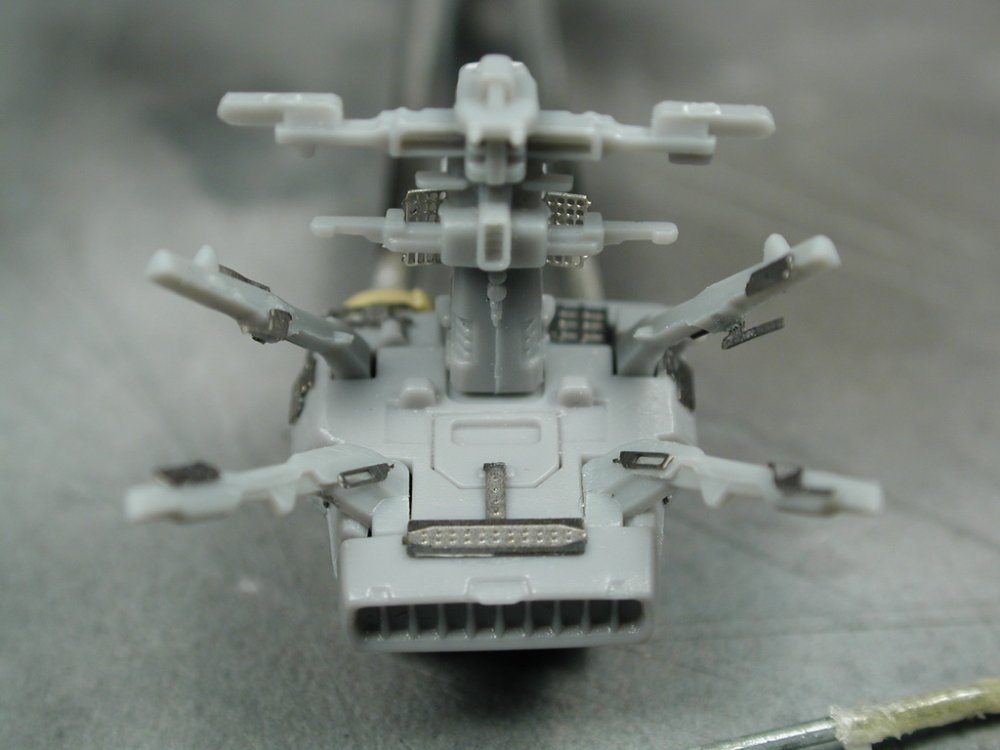
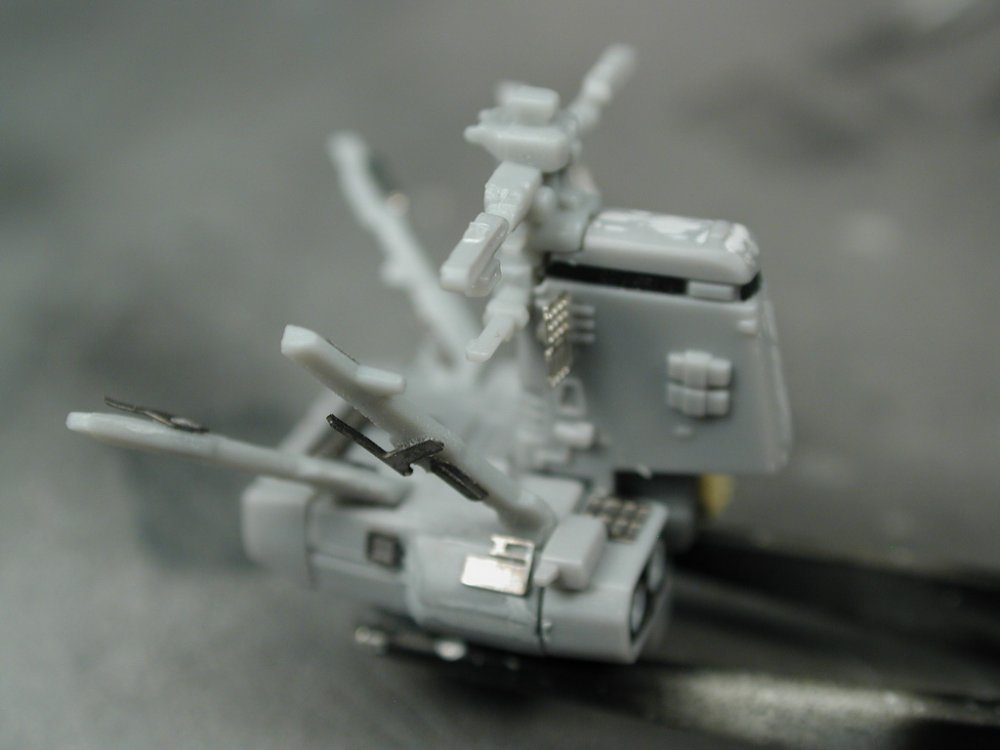
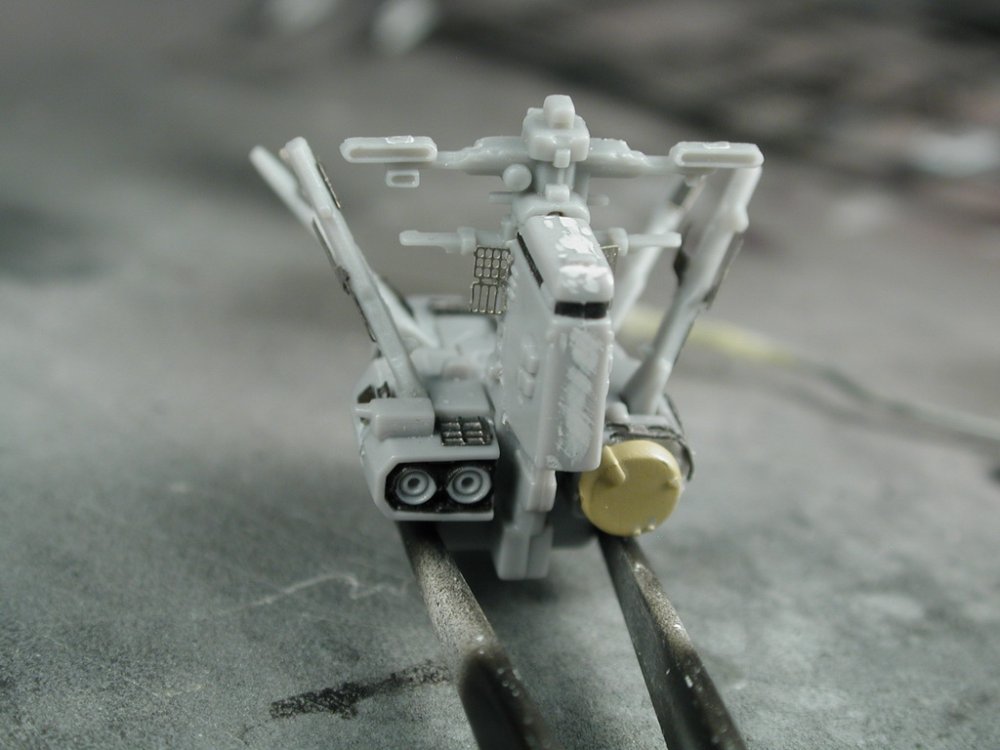
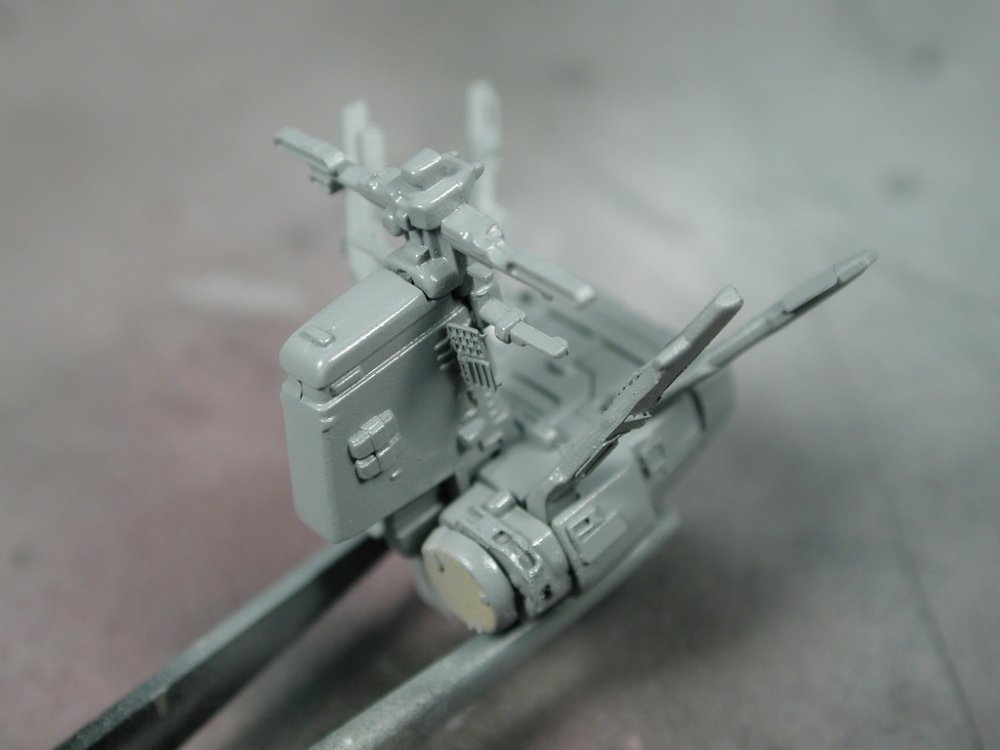
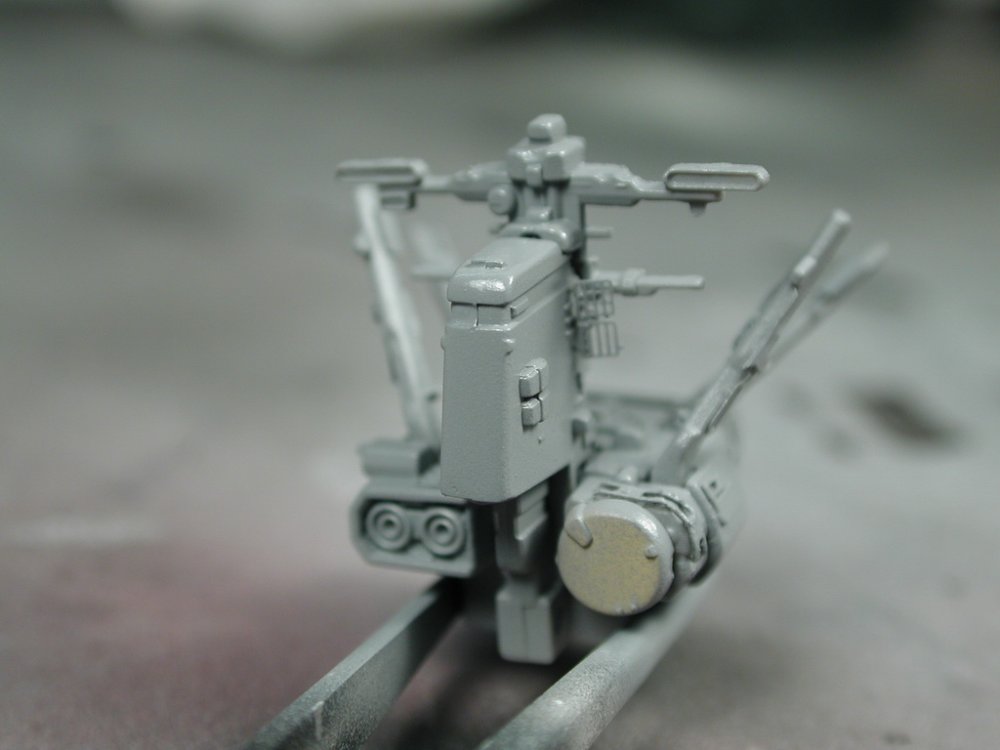
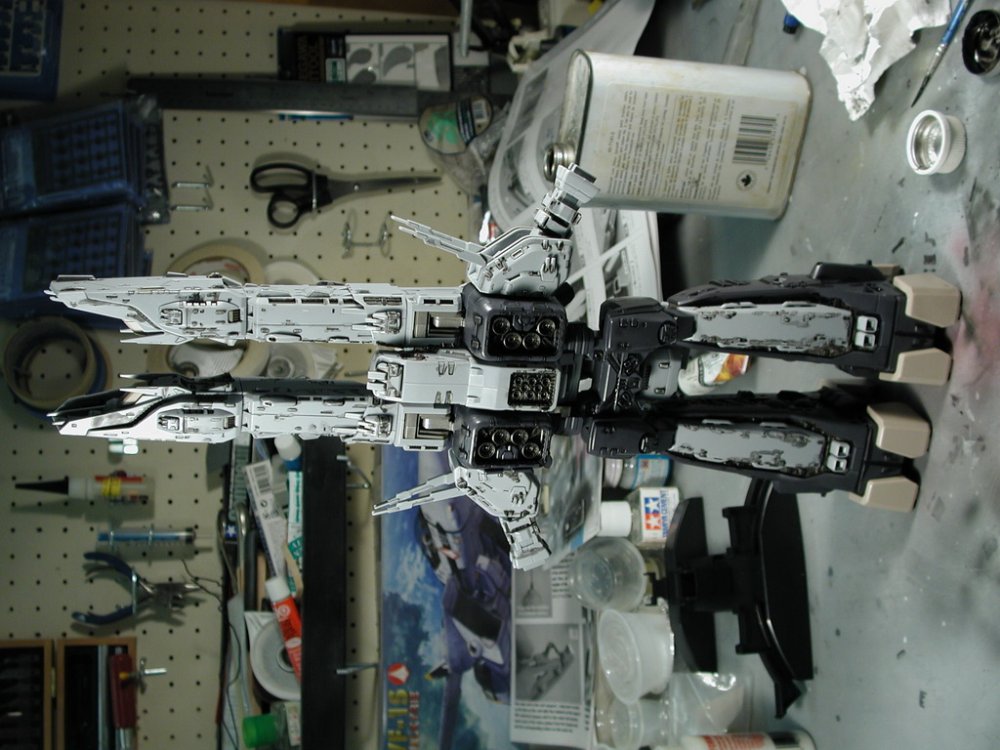
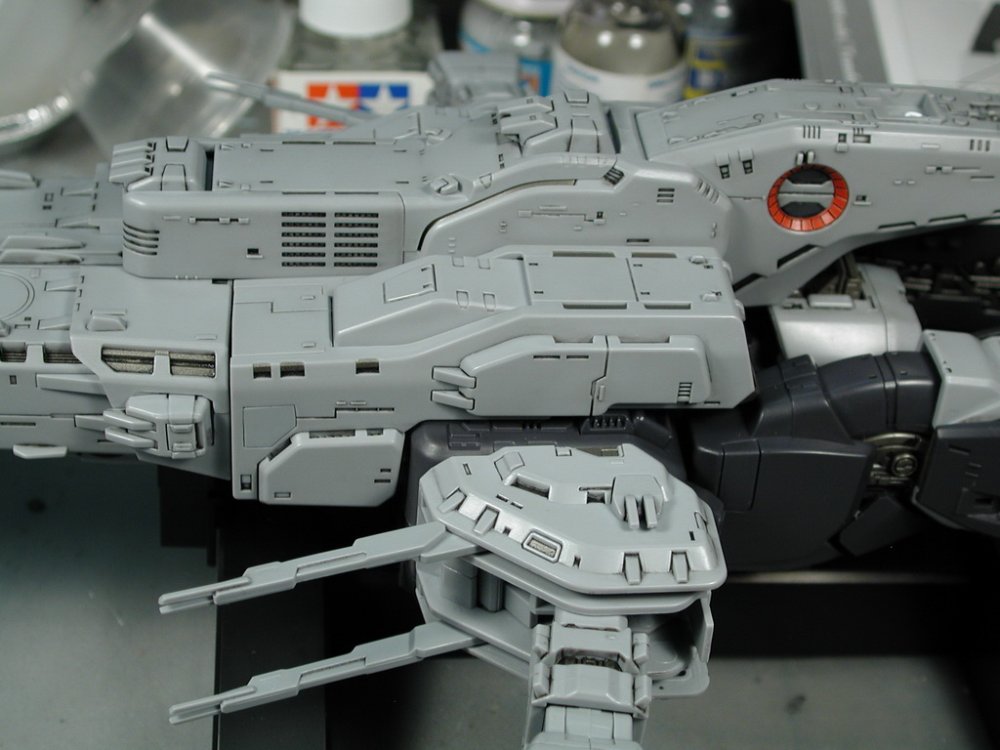
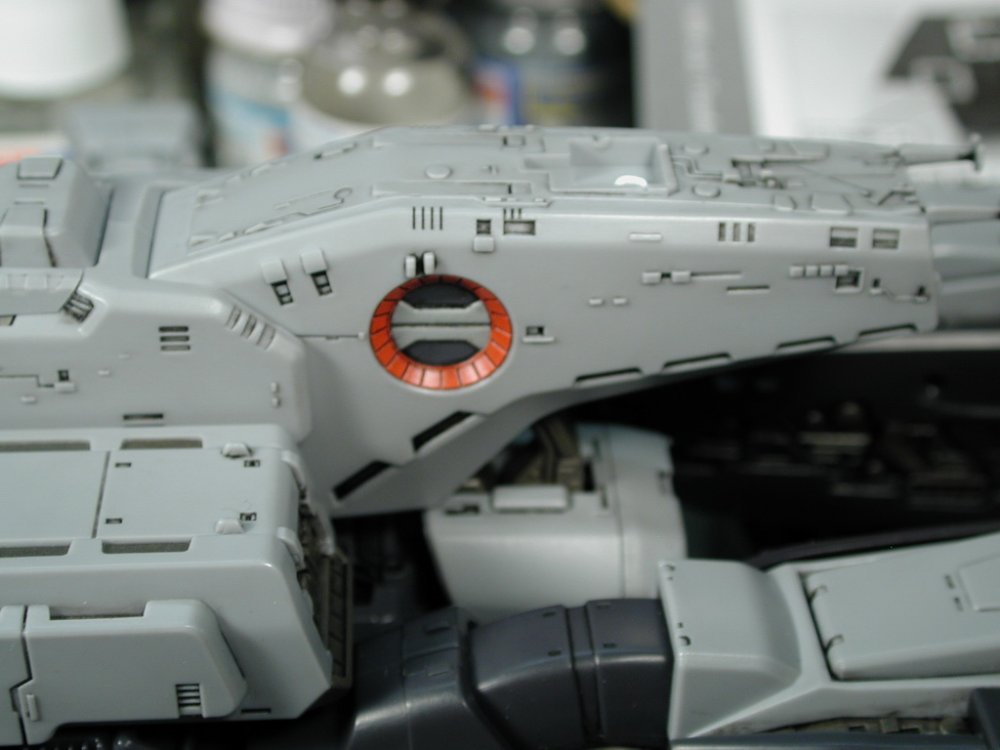
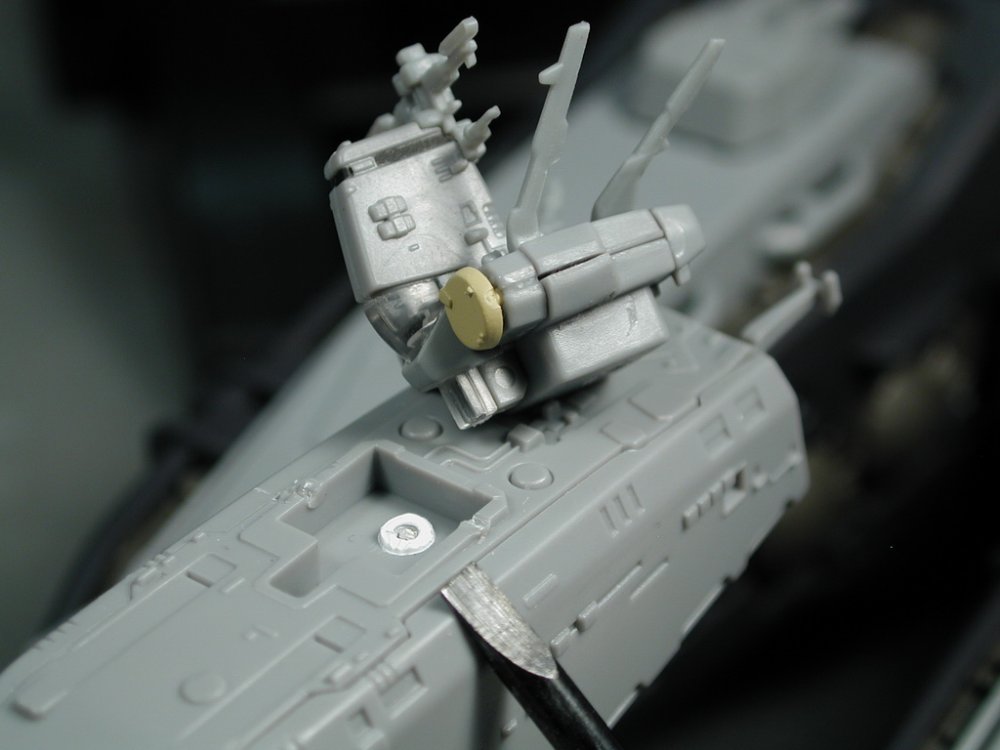
A little black oil wash later... Ok, so now I remember about the clear visor part gap - argh! I did my best to sand the back vertical edge down a bit and shave off some plastic off the tab in the bridge side that fits into the clear part so that I can get it to seat itself higher and more snugly into the bridge to minimize the gap. I also added a few drops of thinned black paint inside the clear visor piece to pick out the molding for the bridge levels (its amazing they even thought of that!) Then I had to re-paint the big radar dish tan color. and fitted it onto the rest of the ship to see how it would fit in. I will add some tiny darker grey, silver and dark sivler paint highlights as well as some hits of red and white here and there to bring it some life like the DRYL references, but at least its at a stage that I can leave it for a few days. At the end, I want to add a few strands of stretched sprue to span vertically across the main antenna masts to simulate the vertical antenna cables. I also noticed playing around that there are magnets inside the main guns that help keep them together in the cruiser mode. The last 3 shots is how it will sit on my desk till I can get enough time to work on the next stage. Possibly start the other shades of greys and applying small patches of greys randomly all over to form the base for the pencil work, I'd like to darken up the lighter grey and lighten the darker grey so they are a little less contrasty and blend a bit more (the post-shading at the end will tone down the paneling, pencil work and match the greys a bit more). Of course there's the matter of taking the leg apart to get at the city, that will be a paint deal in itself. Wish me free time soon!

-
Yamato 1/3000 SDF-1 modification and paint up...
wm cheng replied to wm cheng's topic in The Workshop!
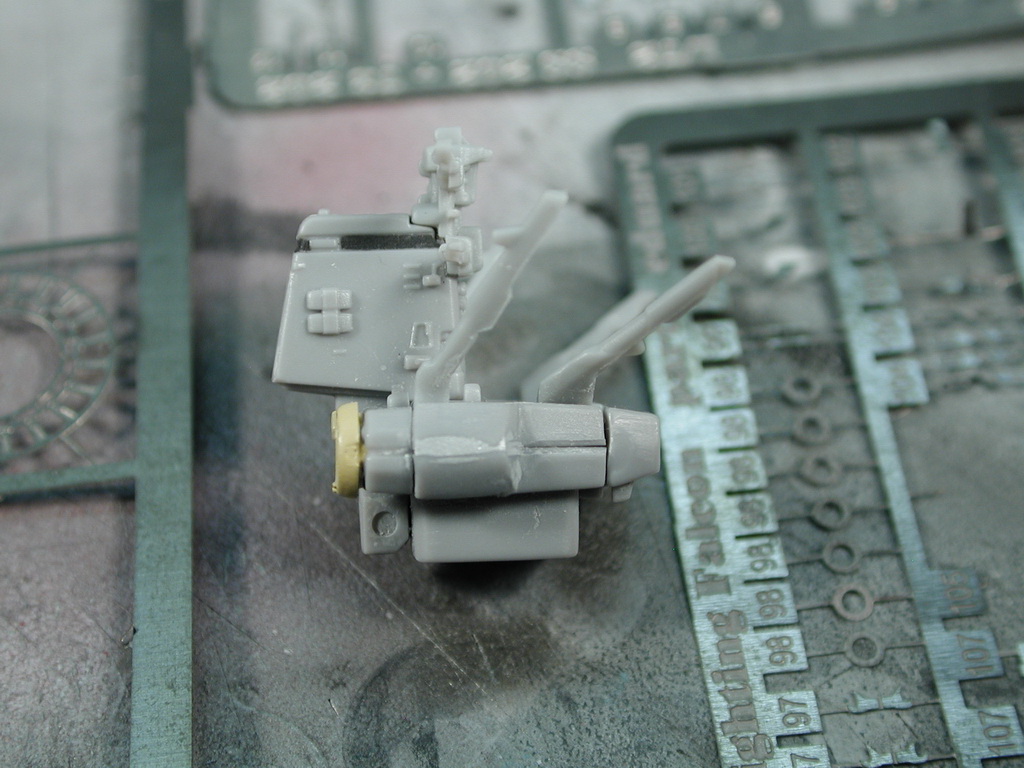
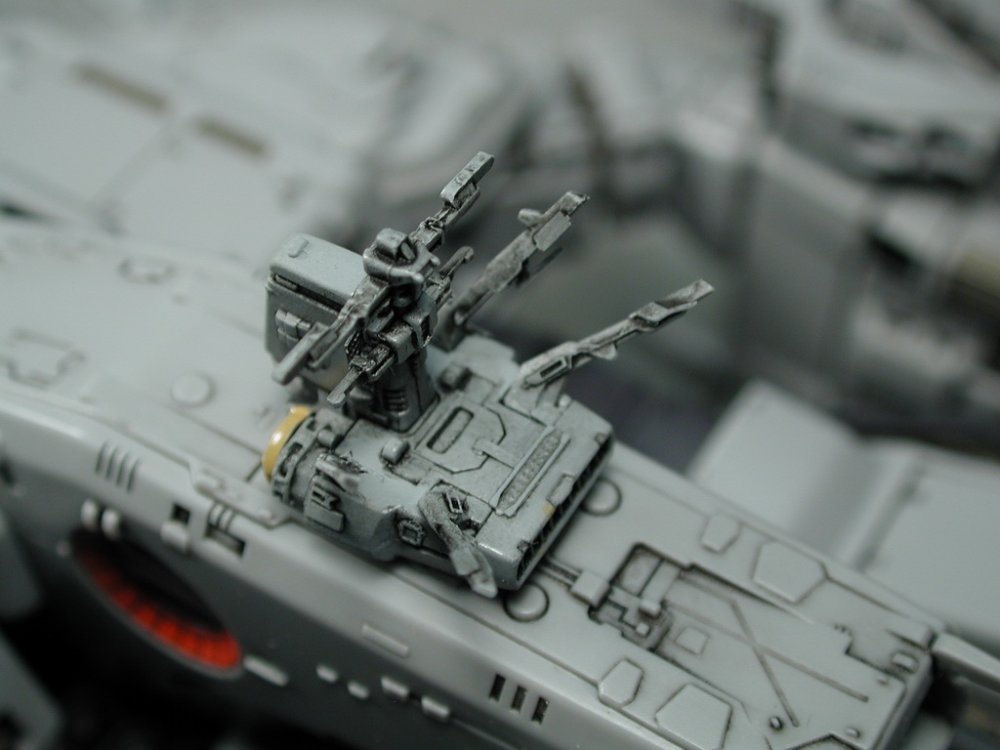
I always try to plan ahead a few steps so I can work in paint drying times so by the time I finish a certain task, I can get back to whatever has been left drying and work on that, kind of leap-frogging steps. Here's some shots of the Photo-etched parts glued on with crazy glue onto the bridge. Note here, I forgot that I needed to modify the internal tab a bit (make it smaller) to allow the clear piece of the bridge to fit a little snugger in towards the bridge superstructure (to minimize the gap on the top) - I went ahead and started gluing the PE parts (if I were to do it again, I would cut down that internal tab and test fit the clear piece first before gluing all the PE parts. Anyways, curious to see how it all goes together, I mixed a bit of Tamiya sky grey, neutral grey and bit of medum blue (15:5:1 ratio rough estimate)to get close to the main body colour - again, I don't think it has to match exactly as I will end up with a lot of shades of greys, but they are all on the blue side of the spectrum.

-
Yamato 1/3000 SDF-1 modification and paint up...
wm cheng replied to wm cheng's topic in The Workshop!
So I took a little break knowing that I want to leave time for the airbrush paint to dry, I decided to paint all the dark grey sprue attachment pieces a Tamiya dark grey, knowing full well the greys won't match, I thought it would be nice to add yet another grey into the mix.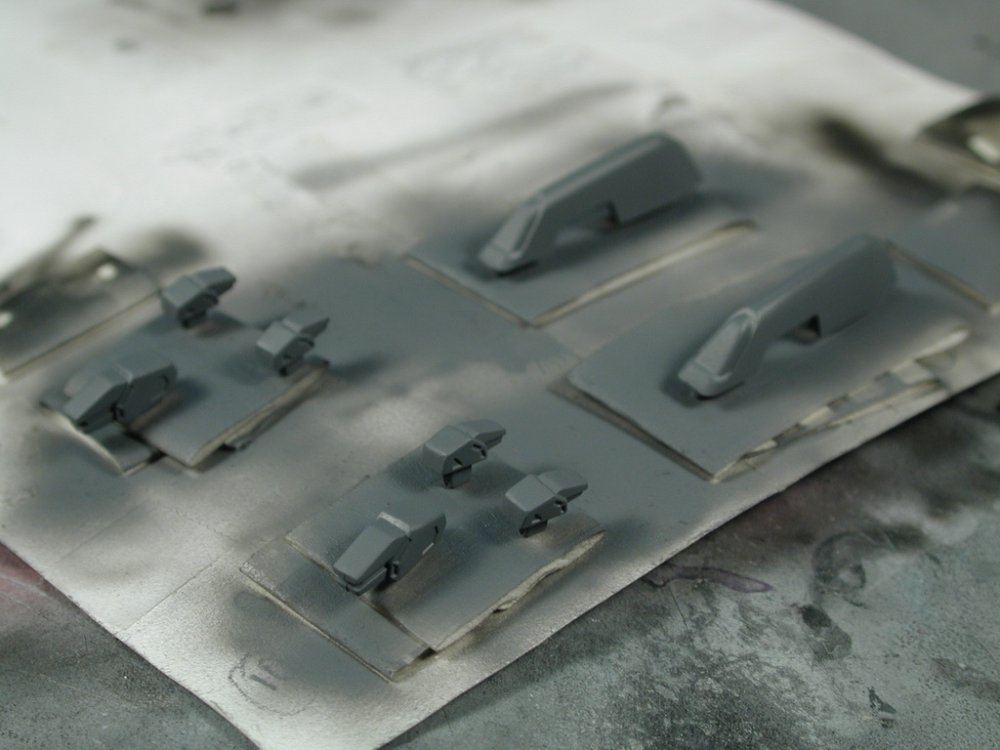
-
Yamato 1/3000 SDF-1 modification and paint up...
wm cheng replied to wm cheng's topic in The Workshop!
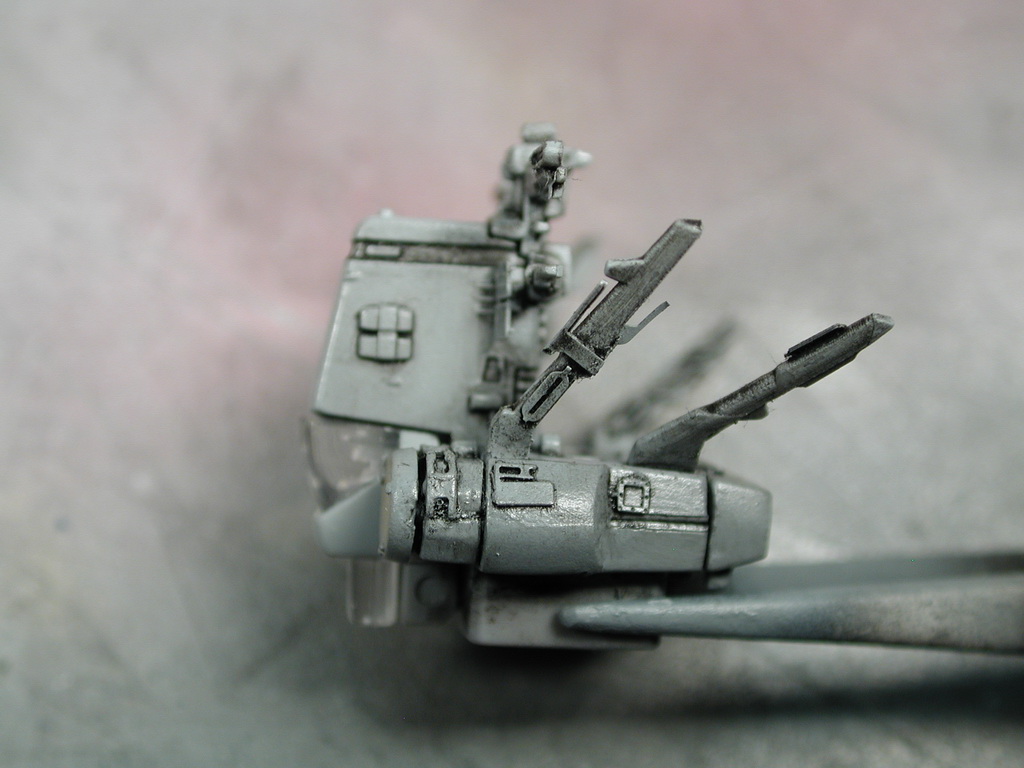
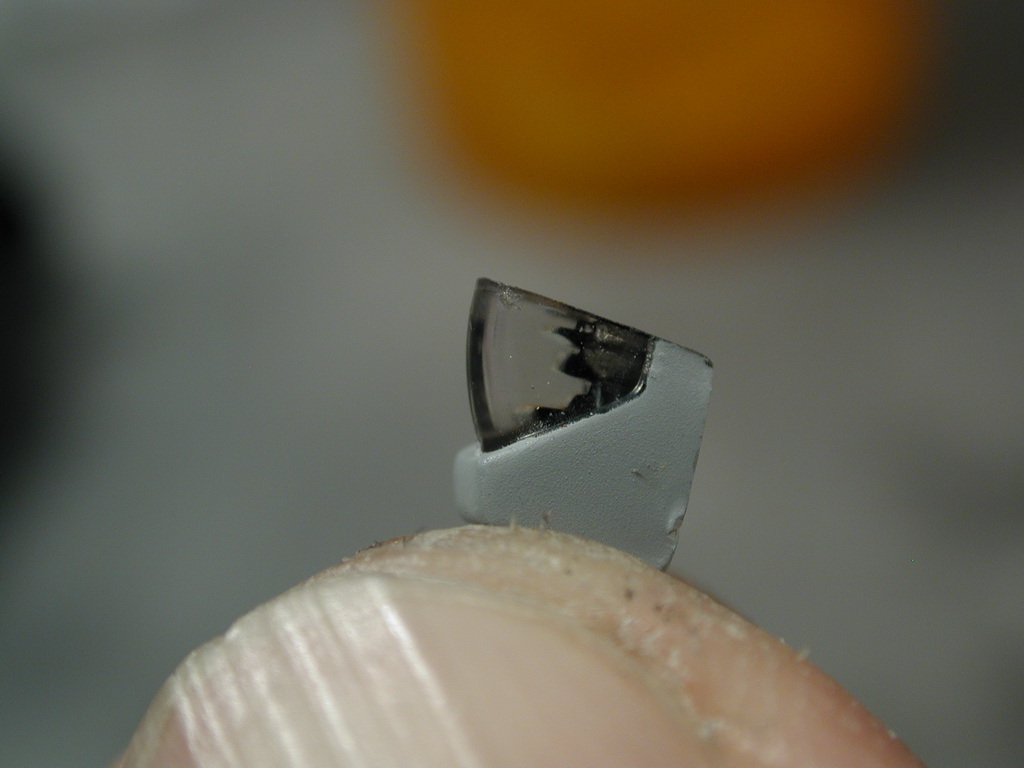
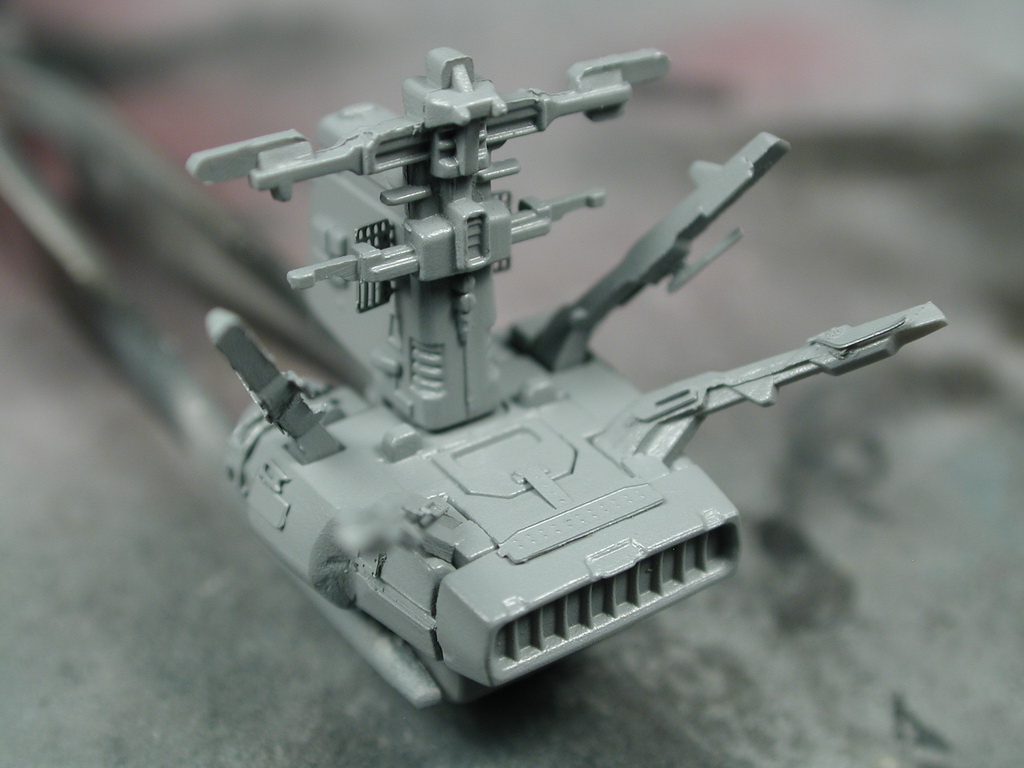
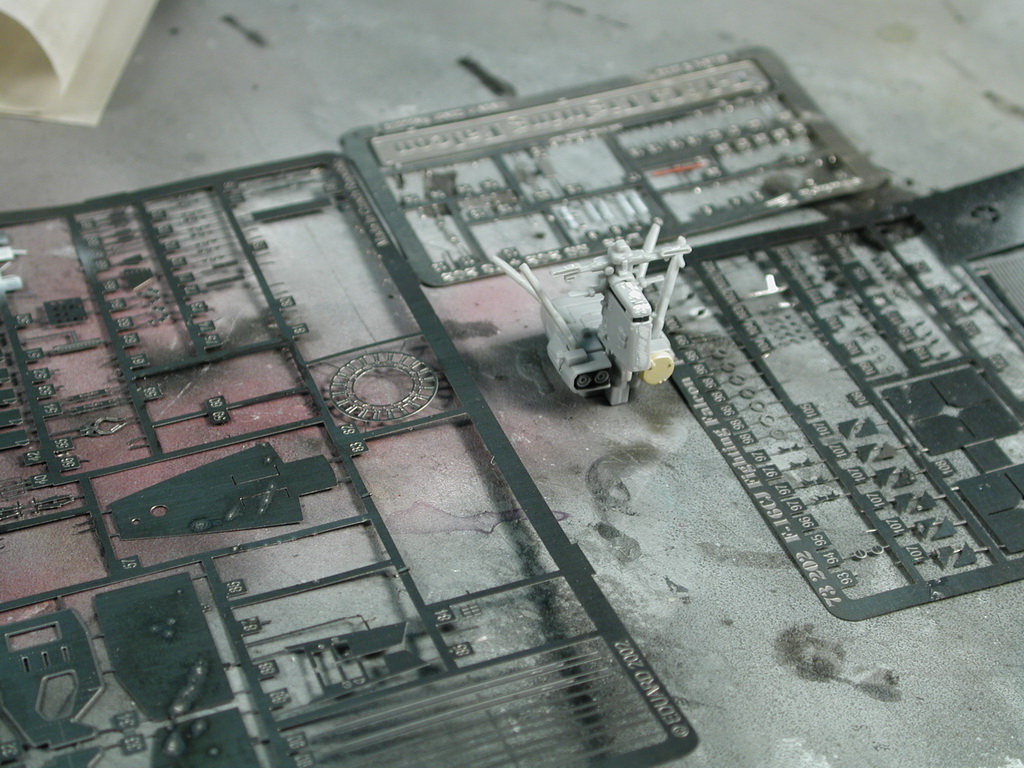
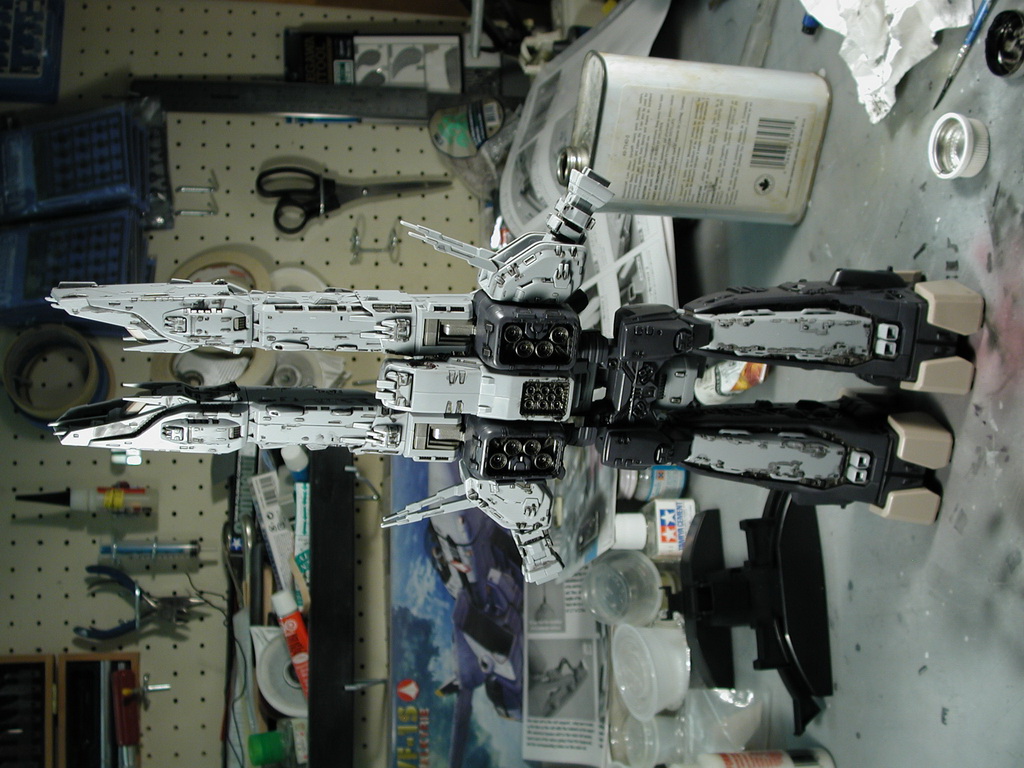
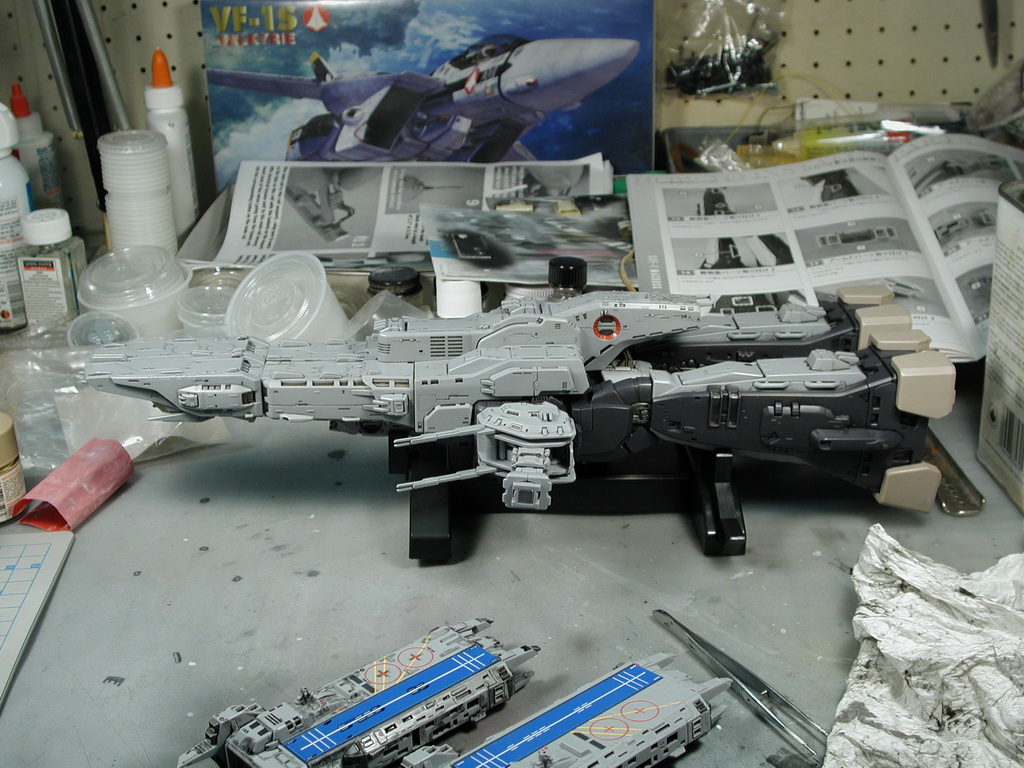
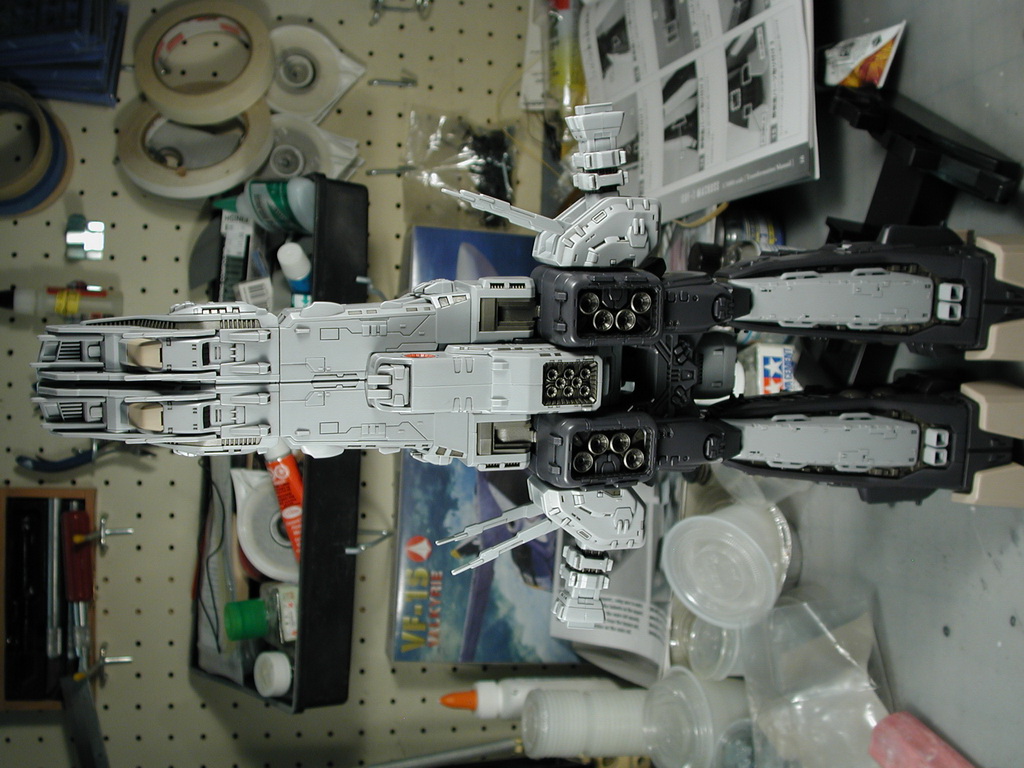
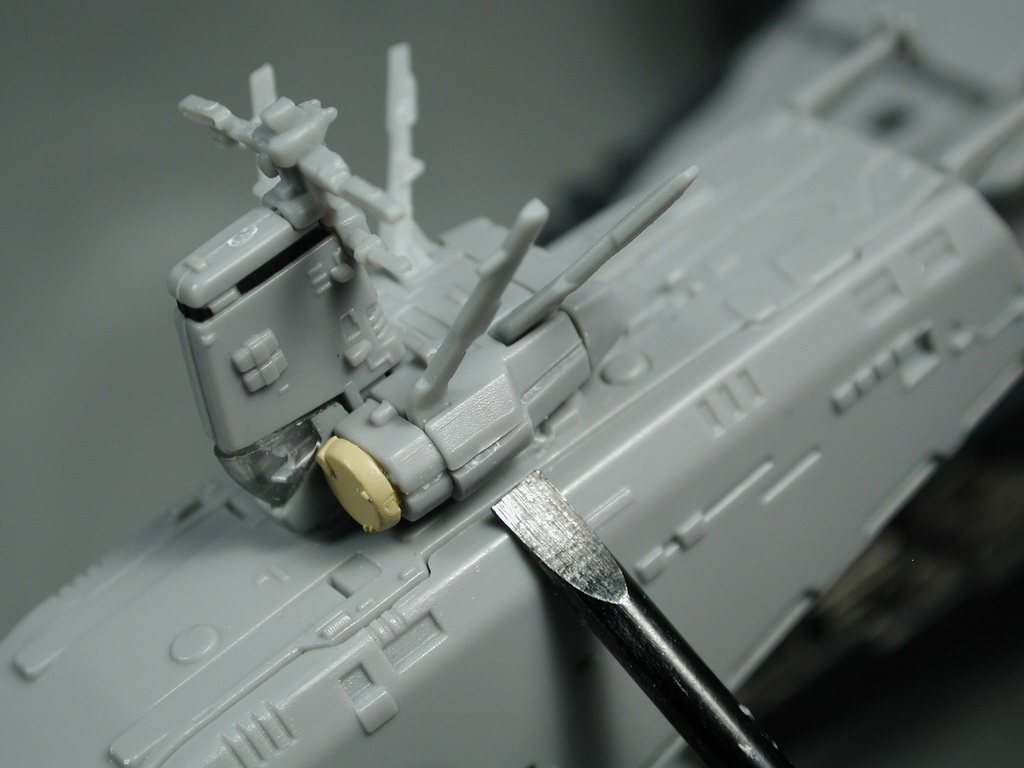
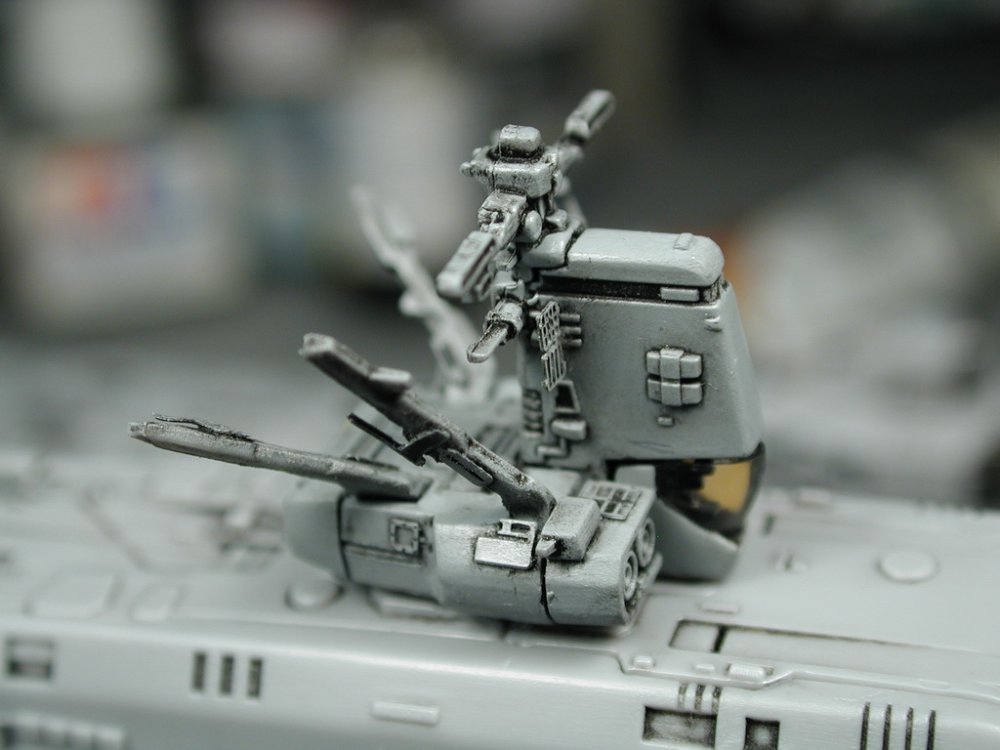
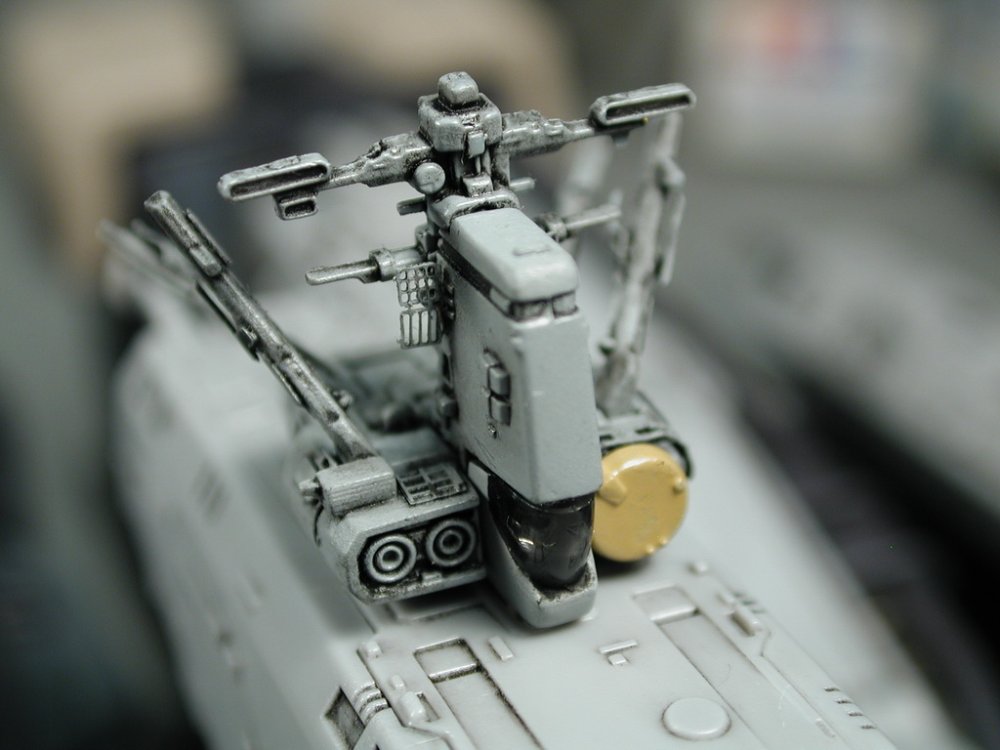
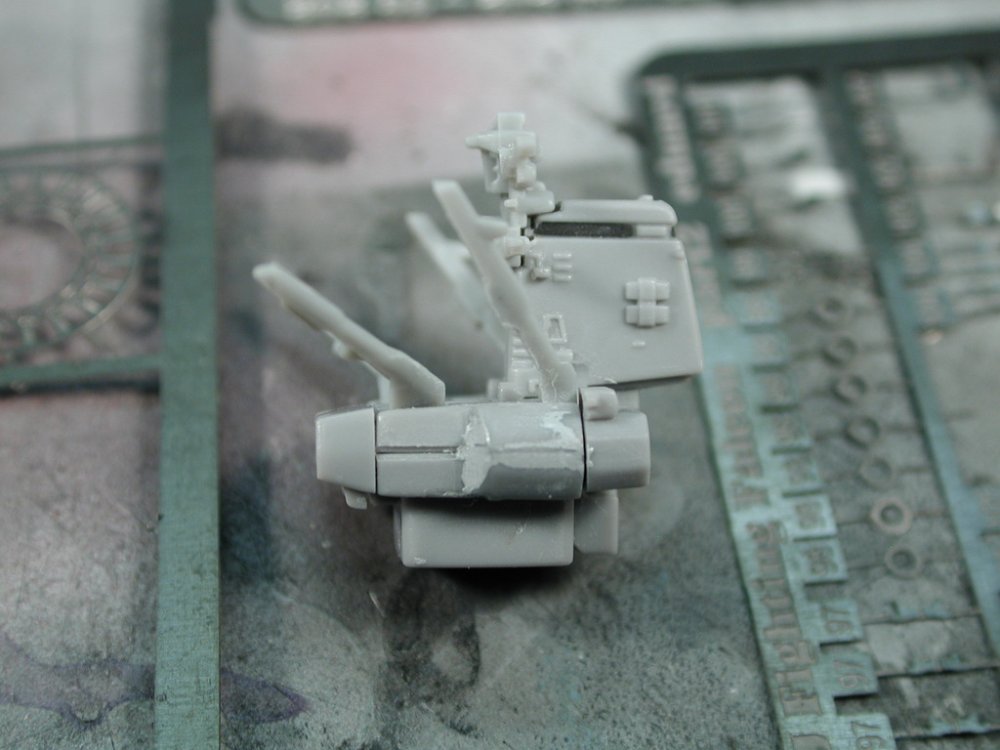
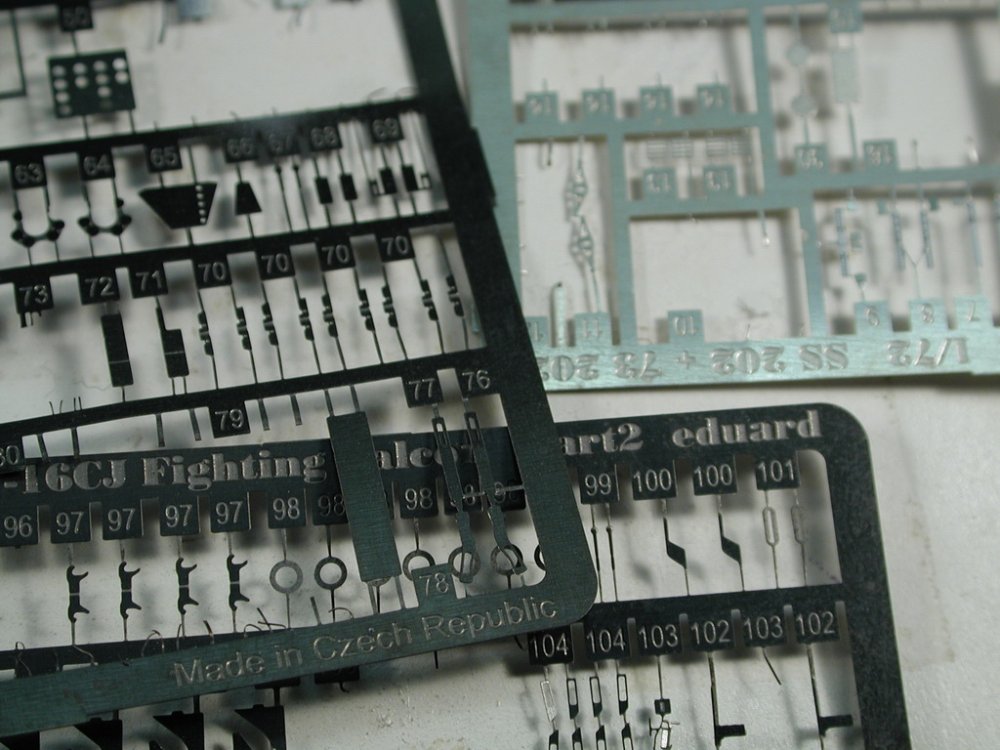
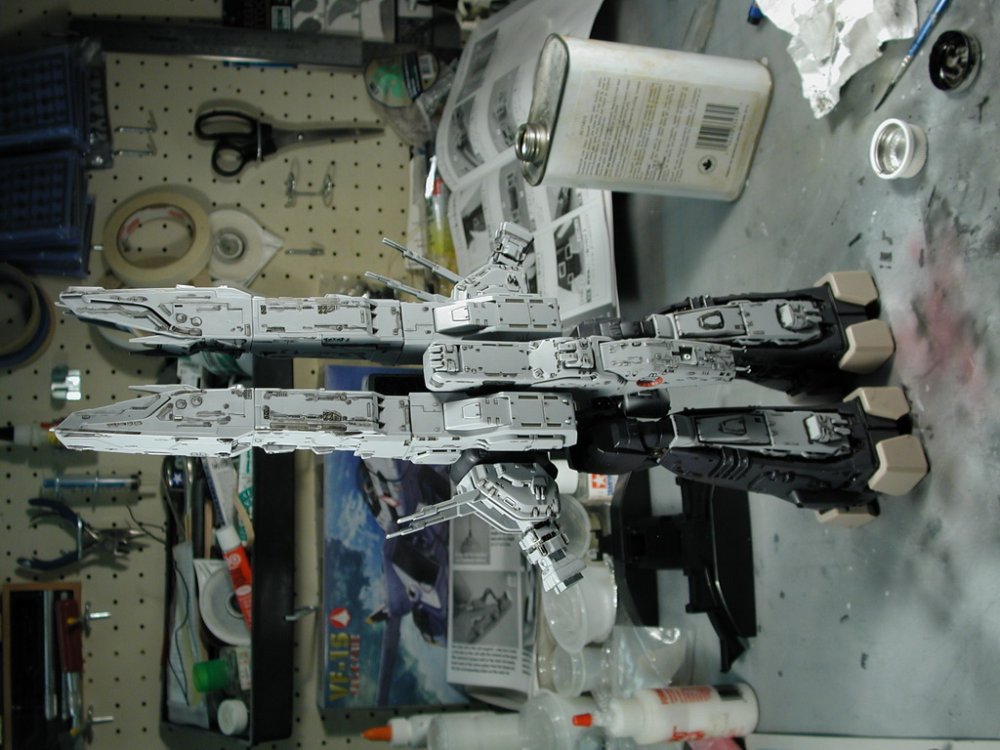
Sorry for the delay... I'm back at work - boo!! (gotta pay for this beast though) So my 2 days are over and I didn't get very far, I did spend a few hours cleaning up my workspace since there was a layer of dust over every surface and tool (tip... airbrush and dust don't like each other ;-) and a few years of neglect (and being a Dad). However, I love this toy so much that I can't keep my hands off of it! I'll try to get some more done in small drips and drabs over the next few weeks, but it will be a very slow build from here on in. Please feel free if anyone else is starting on their own 1/3000 SDF-1 to hijack/contribute this thread as I would love to learn a thing or two and mooch ideas off of too (the reason I post is that it should be a collaborative effort!). A special thanks needs to go out to vf_1s as I've downloaded all his photos and reference scans of his amazing 1/2000 custom and I am using it as reference for my own paint-up. mslz22 - please post pictures of your SDF-1. I'd love to see how it turned out with the pencil lines! danbickell - ah, gone down that dark path before... I did a resin Enterprise in 1/1400 scale way back in the day (almost 15yrs ago) before aztek masks or decals, and CAD drafted out and painstakingly hand-cutout that pattern and it just about killed me (and I was young then!). At 1/3000 scale I can't imagine how much smaller the panels will have to be! It's just too much work for me to cover the entire ship in that kind of pattern times several, since you need at least 3 or more shades to make it really work. The pencil lines will still have an undercoat of a few larger rectangles and irregular shapes rotated and reused in a few different orientations that I will spray on that will serve as the background. But if anyone here is will to try that approach, I'd love to see the results! OK, down to business! I was thinking since I was nearing the end my "window of opportunity", what could I get down so I can still have a decent toy sitting on my desk for all the days I can't work on it, I can't just leave it laying in pieces on my workbench. So I decided to tackle the bridge. I sanded down all the excess putty and Mr. Surfacer and decided that this was a good opportunity to add a little more detail to the bridge. It's a hard call between a toy and model, I wanted to completely re-build the antenna arrays, but after playing around with it, and transforming it a few times, I found I really liked the robust transformation and playability of this toy so I opted for the safer approach and used the existing toy antennas and just augmented them as I feel they are studier and more flexible than anything I would build. Next was to find something thin enough to not over power the tiny scale of the bridge. All my styrene stock was just too thick. I ended up finding a bunch of unused photo-etched parts I had laying around (the advantages of being a pack rat, I never throw anything out!) and started playing around with the tinest of parts to see where they could fit.
-
Hey everybody! I just started my thread on modifying/painting up this beauty! I just got 2 unexpected days off - so lets see what I can do in the two days!! http://www.macrossworld.com/mwf/index.php?showtopic=34450&st=0&gopid=889724entry889724
-
Yamato 1/3000 SDF-1 modification and paint up...
wm cheng replied to wm cheng's topic in The Workshop!
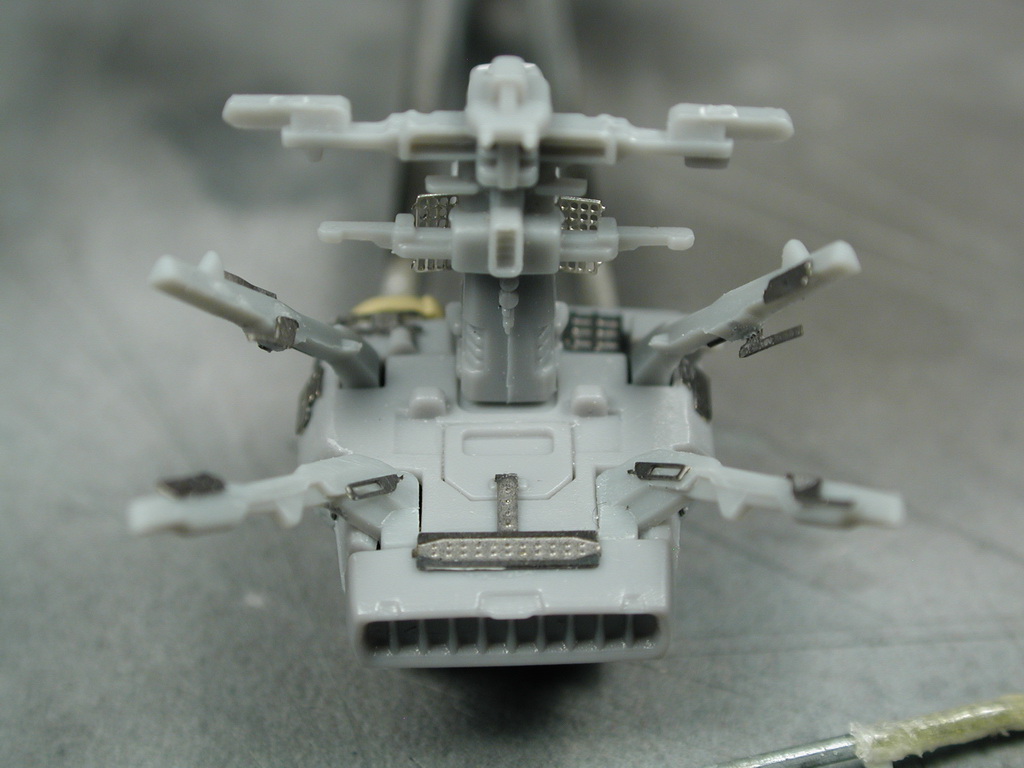
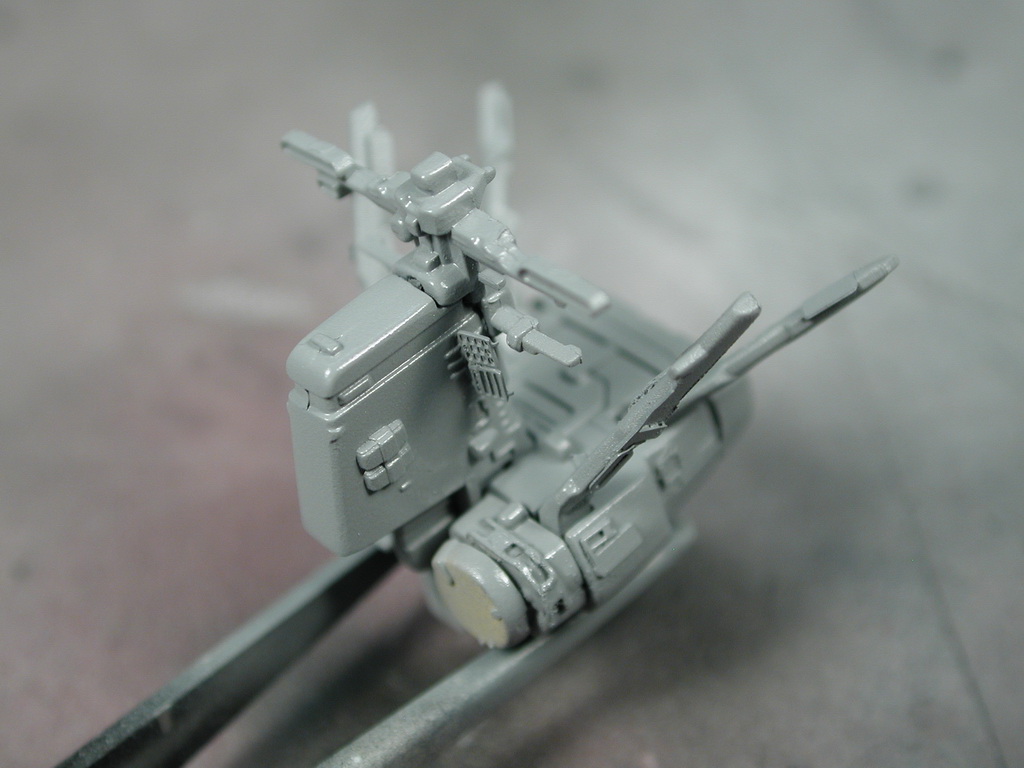
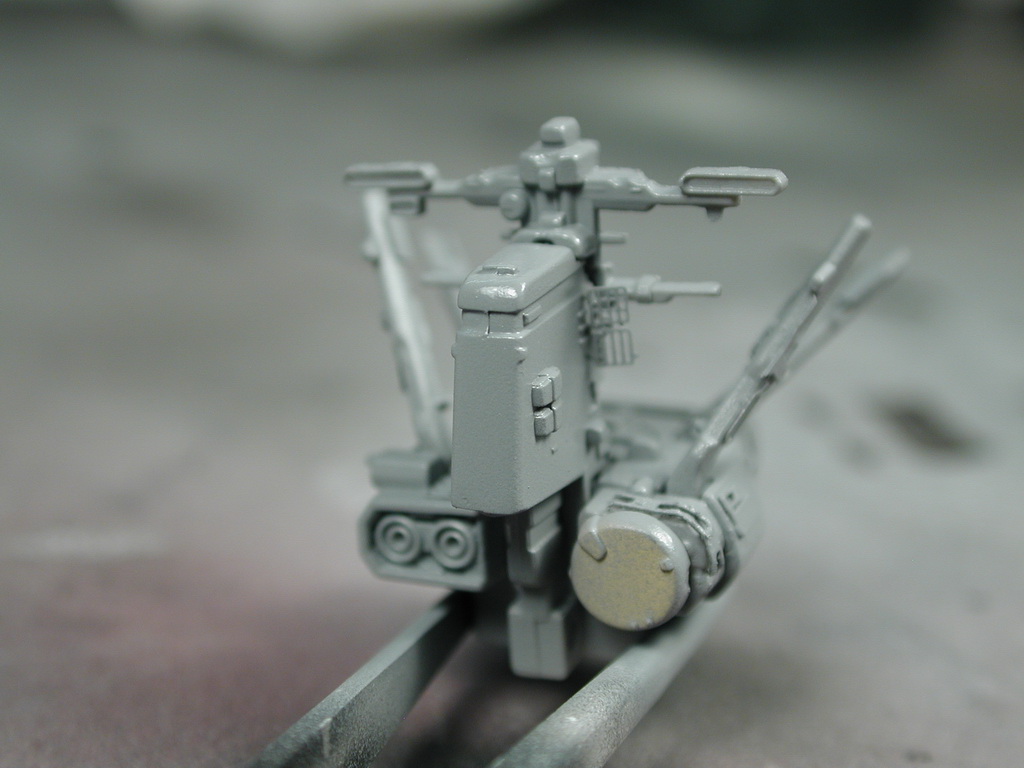
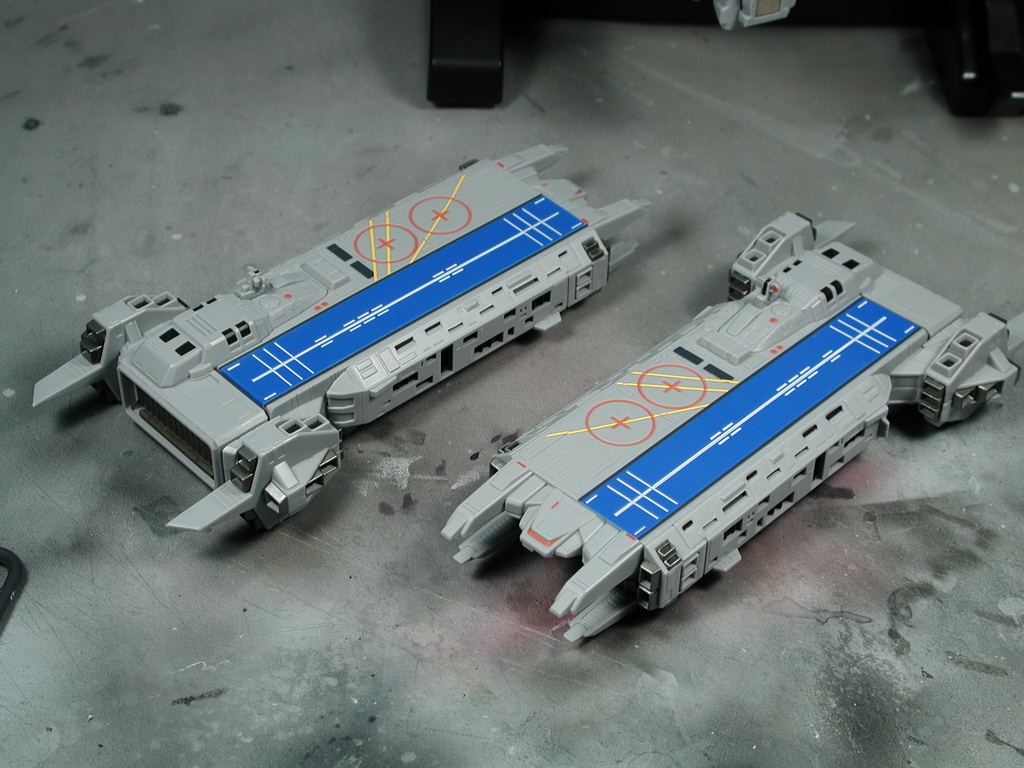
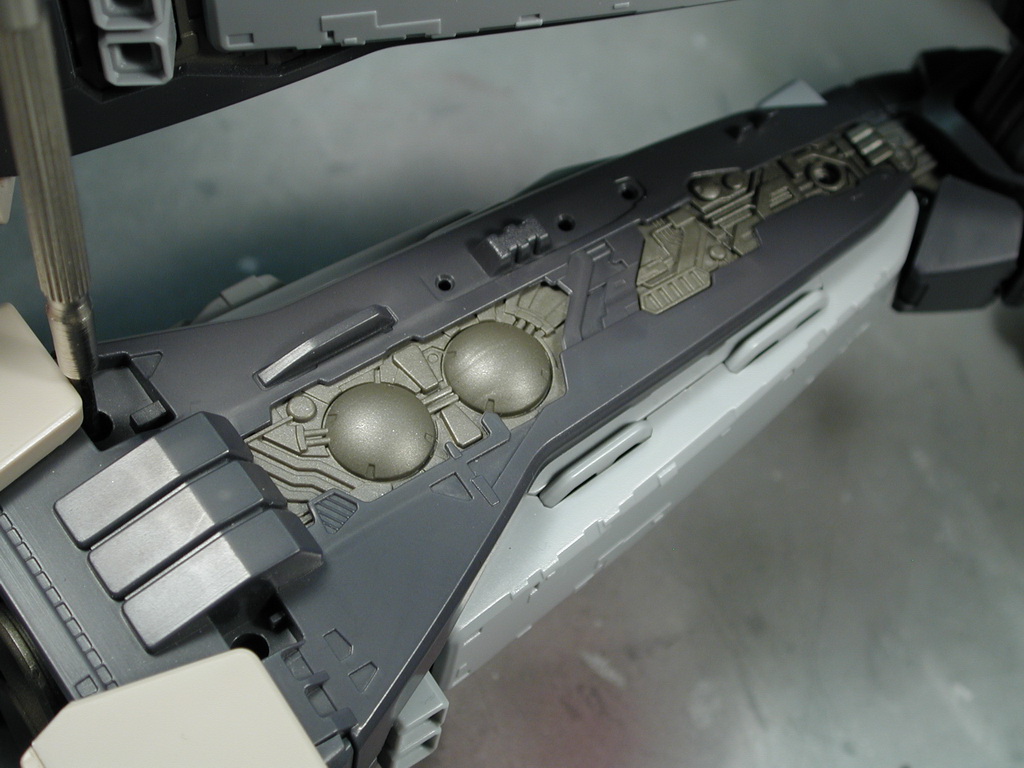
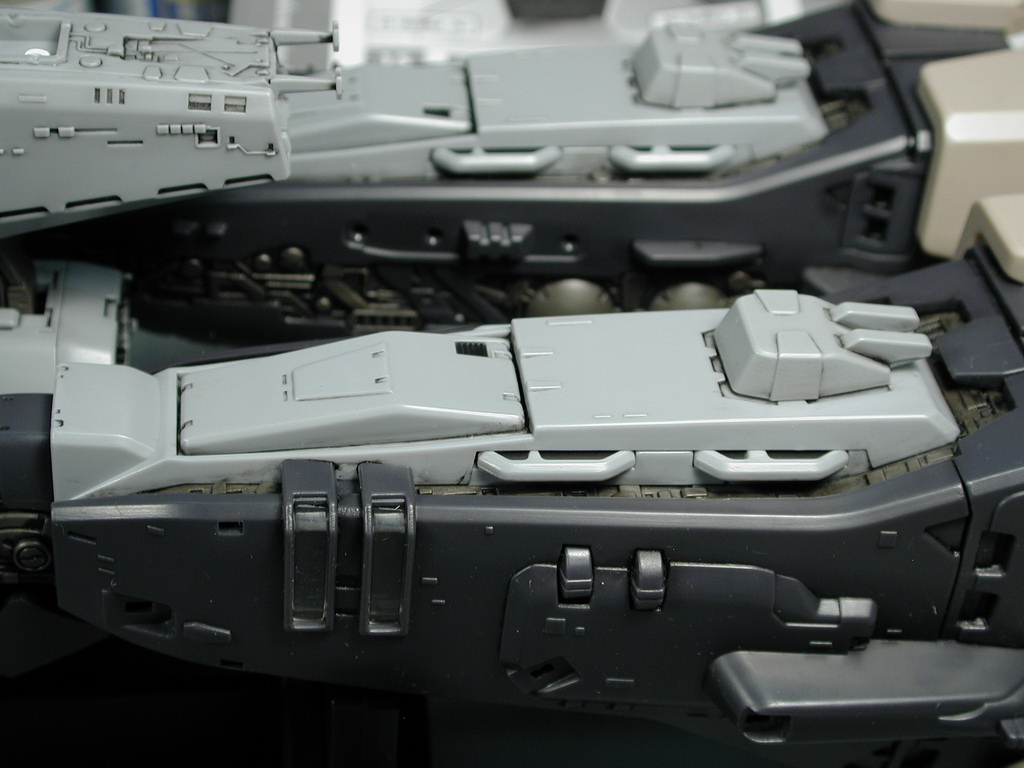
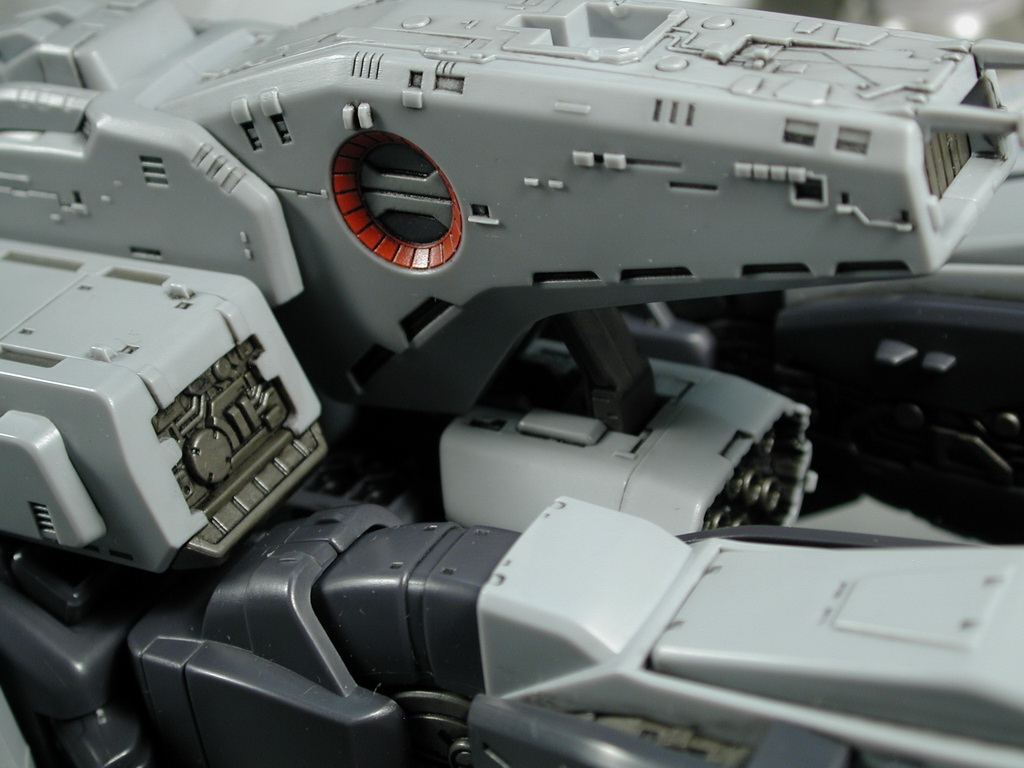
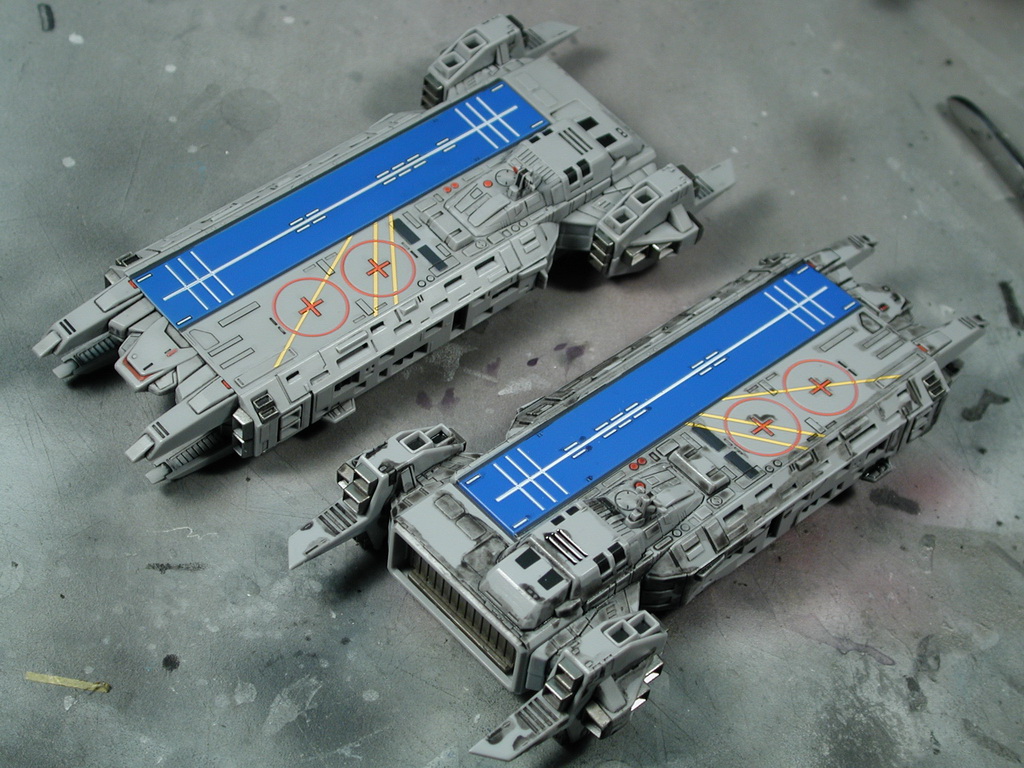
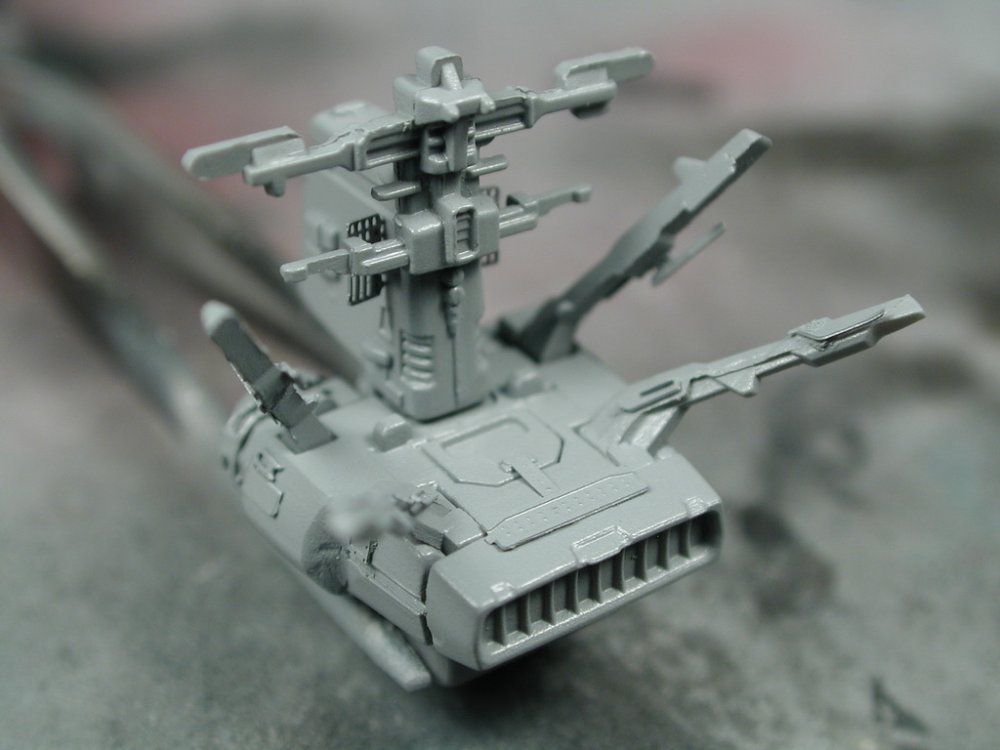
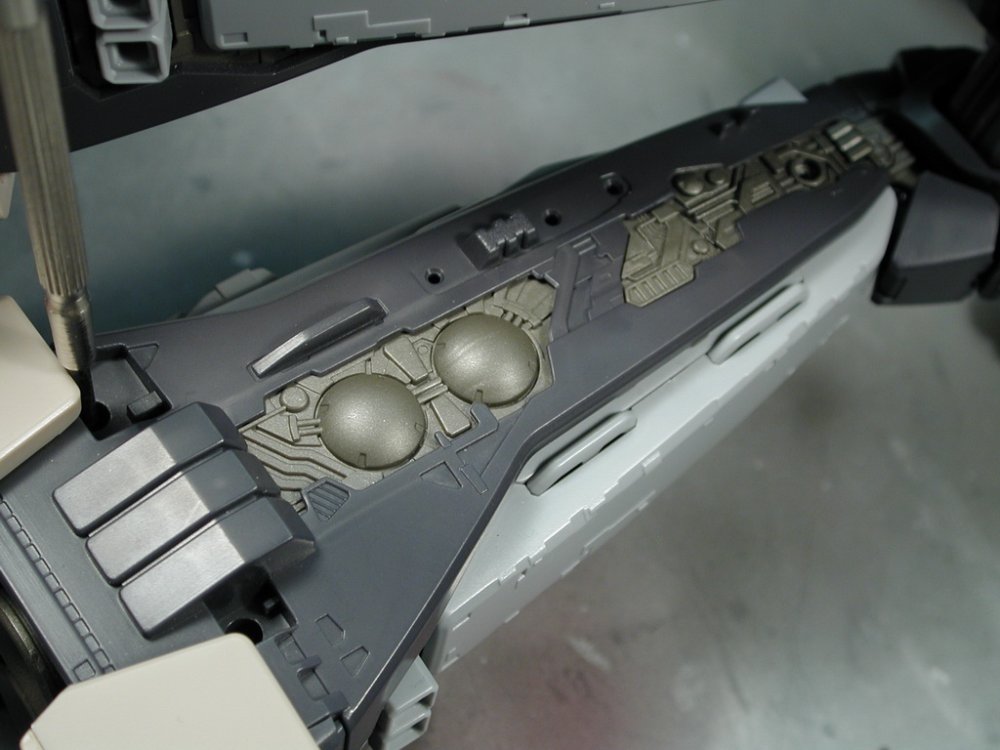
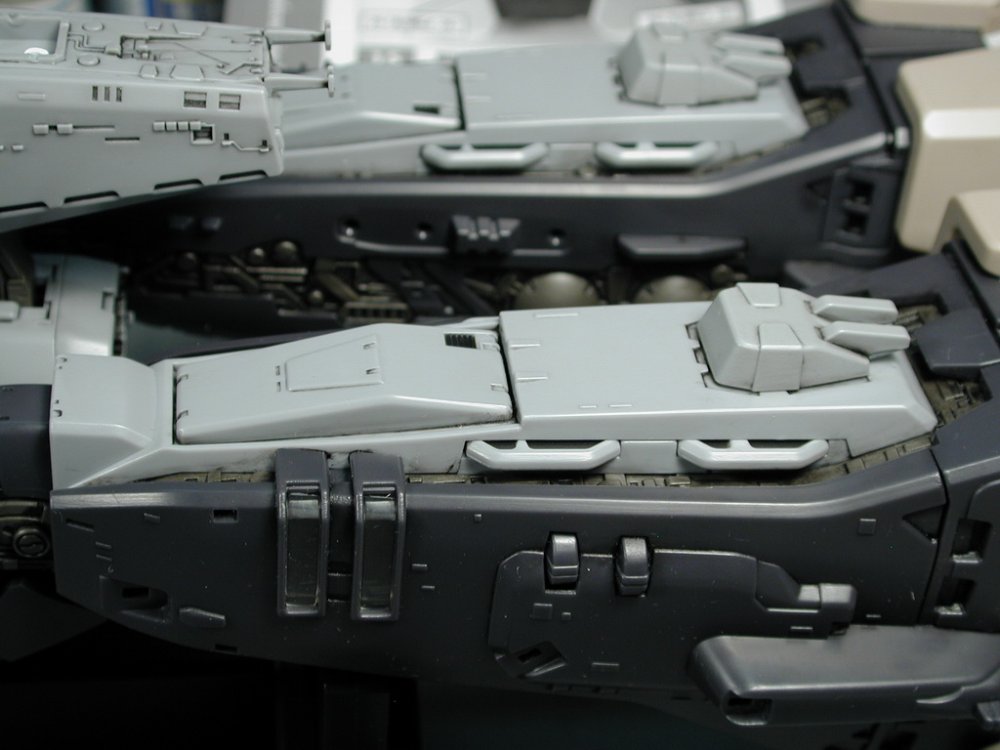
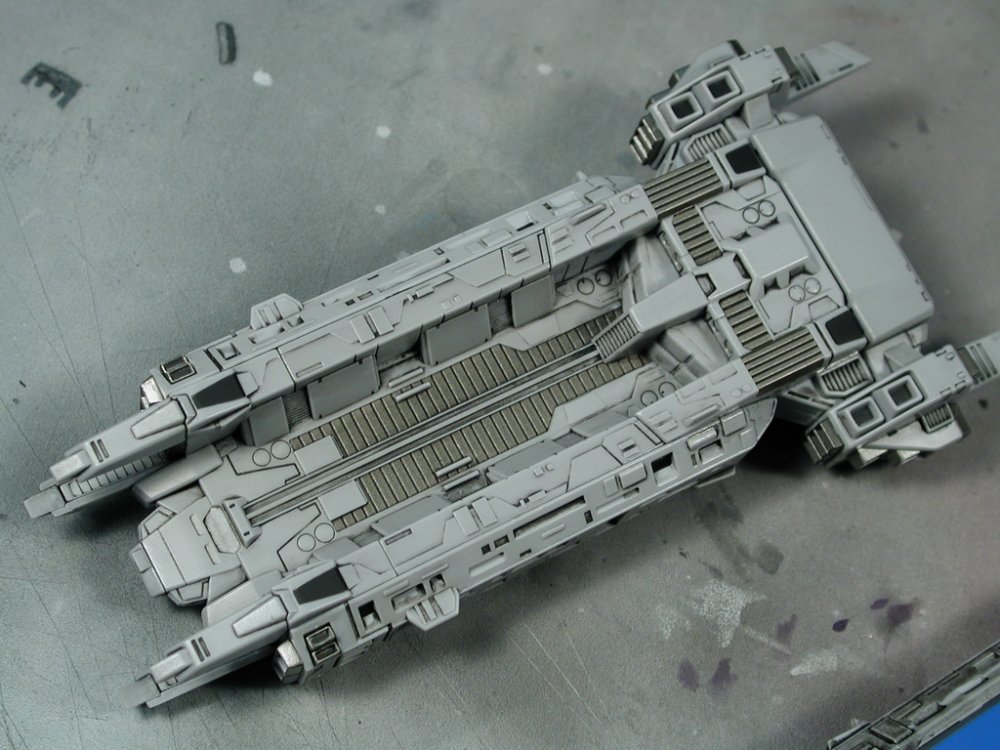
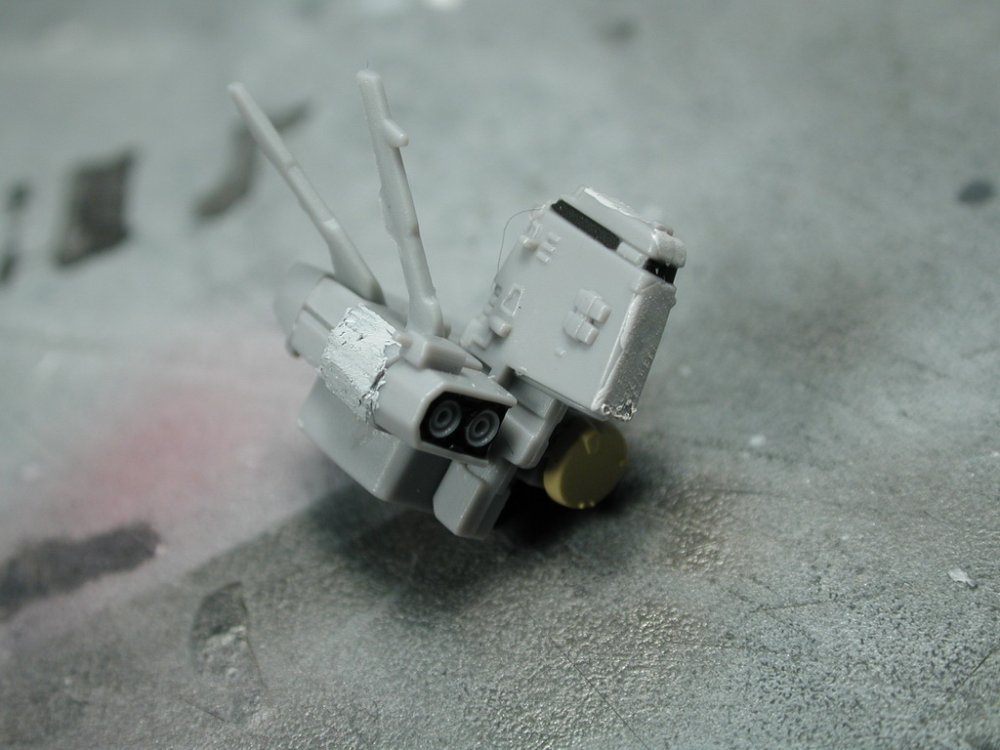
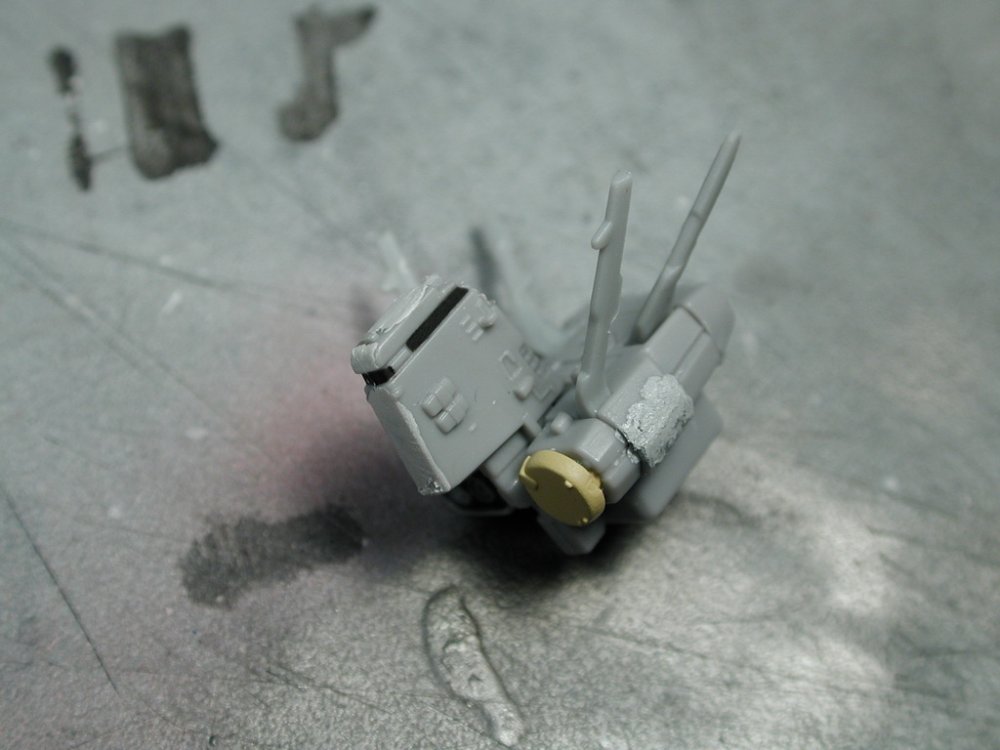
Here's a shot of the ARMDs with the painted metallic thruster nozzles in place - I think it adds a bit of colour relief from the monotone grey. I think anything to add more shades of grey will be a good thing for this scheme. Ok, I tried to take apart the leg to see if I can access the City. I noticed 3 obvious screws (ones that I didn't cover up with the provided panels yet) and thought I'd take them apart thinking that if I can separate the two halves vertically, it should expose the city attached to the bottom piece with the top piece removed. Well, I took apart the 3 screws and the front section (near the knee) separated, but the back section seems locked in by the tan coloured engine blocks, I couldn't free it the two halves. After breaking the bridge screw piece, I thought I'd better not try to force this one (in case I screw up the knee joint or break something) - so I chickened out. If anyone here wants to take a crack at getting the City out to paint, please let me know how you did it! For know I'll concentrate on the outside. I just couldn't wait any longer, I had to do an oil wash on this toy to pick out the details! I usually would do it after painting some differnt greys and panels, but I wanted to see all the amazing surface details first, then decide what extra panels I would airbrush/spray on afterwards but before the pencilwork. As I did the oil wash, I couldn't believe how much detail I had to put the paint on! There was detail on every surface, hidden everywhere! It took quite a few hours to apply all the paint and a few more hours to wipe it down! Why is it lumping each reply into a single reply? I just did three separate entries and the text and attachment appears in the same reply - hmm, it might be a bit confusing as I want to separate them by attached images. Oh well, I almost forgot about the ARMDs - they are loaded with details, models in themselves! You really start to see all the molding effort Yamato put in once you do an oil wash. I just used black oil paint with varying thinness or dilution of low odour varsol, really thin for the panel lines and contours and really thick and black for the vents and thrusters and mechanicals. Here it is after hours of wiping down the excess oil paint! Pretty good and I haven't even gotten to the paint or dry brush yet. Argh, it lumped the last post back into the previous reply - why? It didn't do it when I started off this thread! Lastly these pictures show the ARMDs with the oil wash applied, it really shows that there is literally details on every surface of the ships, they are amazing little gems in themselves! Well that's it for today! Must get some sleep for the second day of fun!


-
Yamato 1/3000 SDF-1 modification and paint up...
wm cheng replied to wm cheng's topic in The Workshop!
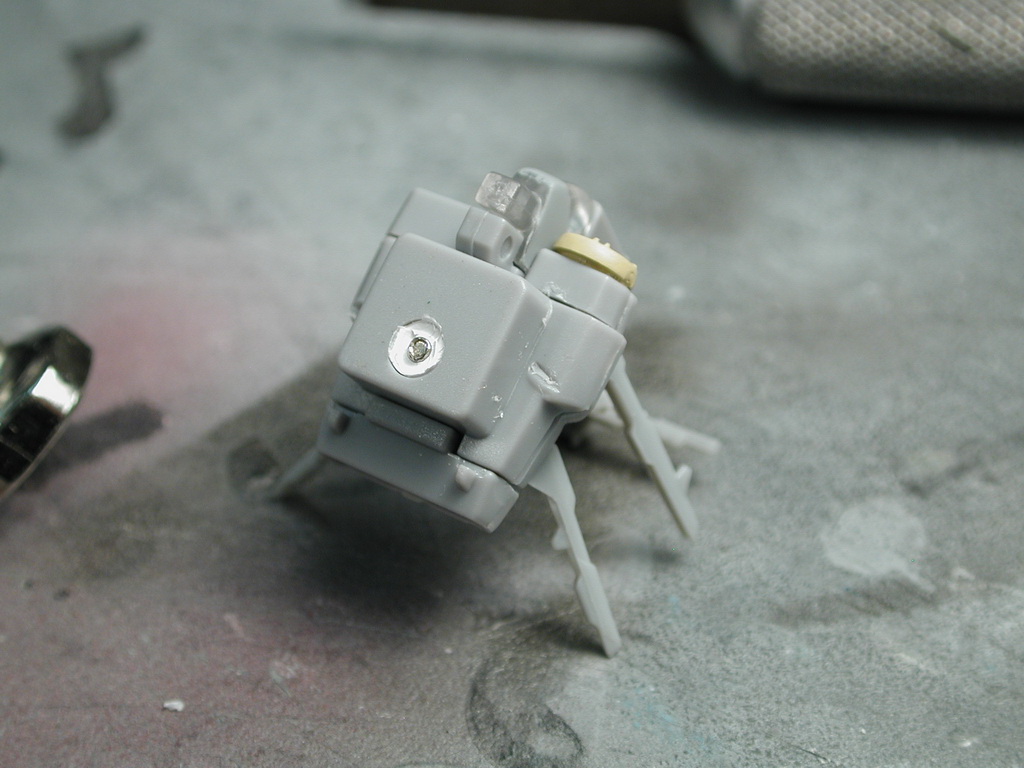
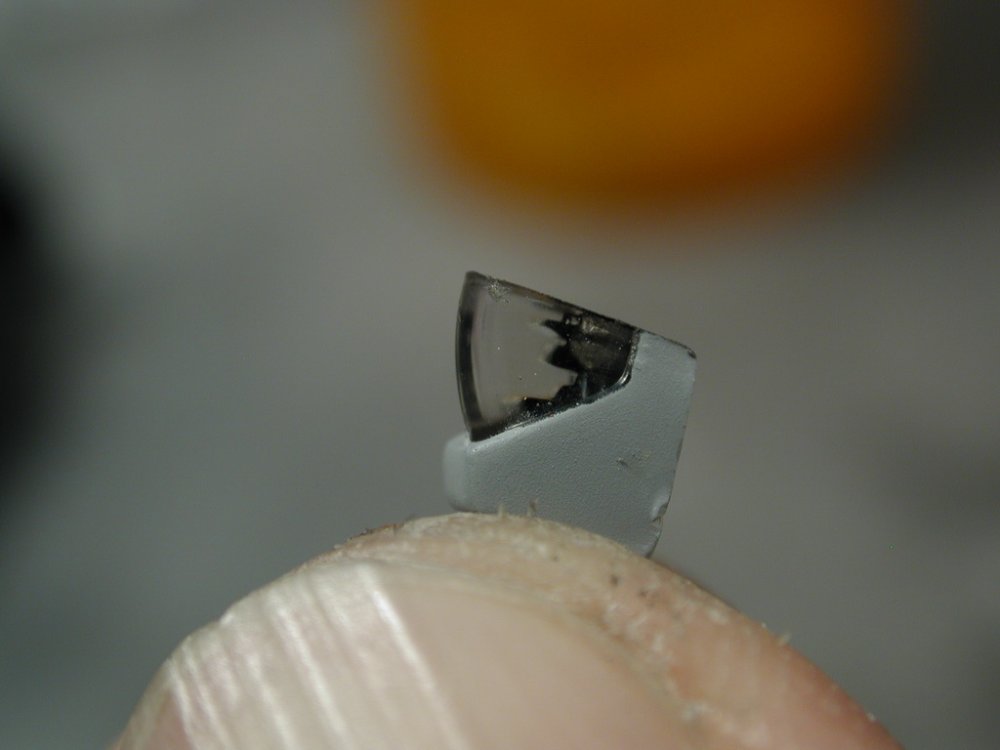
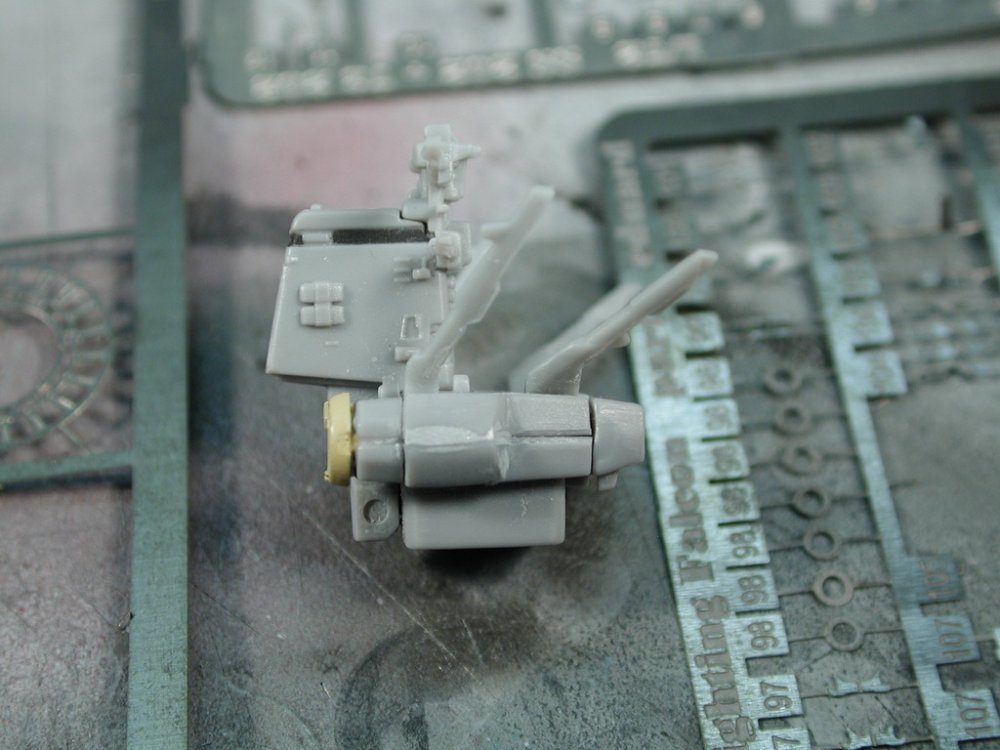
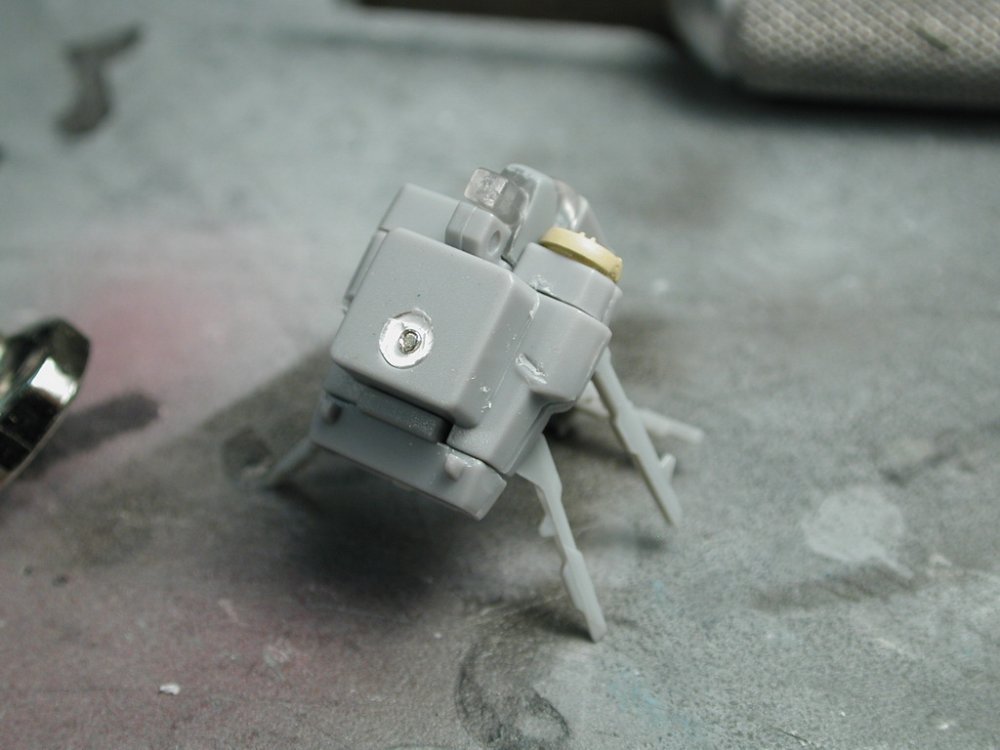
The seam on the bridge really bugs me. So I thought I'd "pop" off the bridge to work on it separately, also I thought it was a good idea since its fragile and I'd be handling the SDF-1 a lot in subsequent phases that anything small, fragile and breakable should be removed (or it will accidentally break off and get lost!). Well, it looked like it would just pop off, it was much harder than I though. I took a jeweller's screwdriver to wedge myself under the bridge and twist, but it would come off. After a little more twisting, it finally came off. It wasn't just glue that was holding it down, there seems to be some plastic tube with a metal screw holding it down screwed in from the top of the bridge to the top plate of the SFD-1. As you can see, I pried so hard that I snapped the tube with the metal screw in it clean off. Luckily this will be hidden when I re-glue it back on, its nice that its a mechanical connection (stronger) but I can't see how I can access the screw without damaging the fine details on top of the bridge. Now in hindsight I see the scew access panel on the top, but I still don't think I can pry it off without damaging the delicate surface detail. At leas the twist marks that damaged the plastic are under the bridge and can't be seen once the bridge is back in place. The clear bridge pieces just pops off now, its actually all clear with the lower chin painted. Yes, I have a bit of a seam on the top part of the clear piece too as most people have complained. I think I will load a little ink into the clear piece inside portion which they hollowed out the different levels as bridge detail and sand the top part a little down for a tighter fit when I re-assemble. The rear antenna mask was just crazy glued onto the main bridge and broke off while handling it - which was just as well as it would get in the way of sanding it. I added putty to the two sides and Mr. Surfacer 500 to the front and top of the bridge themselves. Upon closer examination of the reference material. there is actually a horizontal seam detail/reveal that runs for and aft of the main circular dish - so I left those seam intact.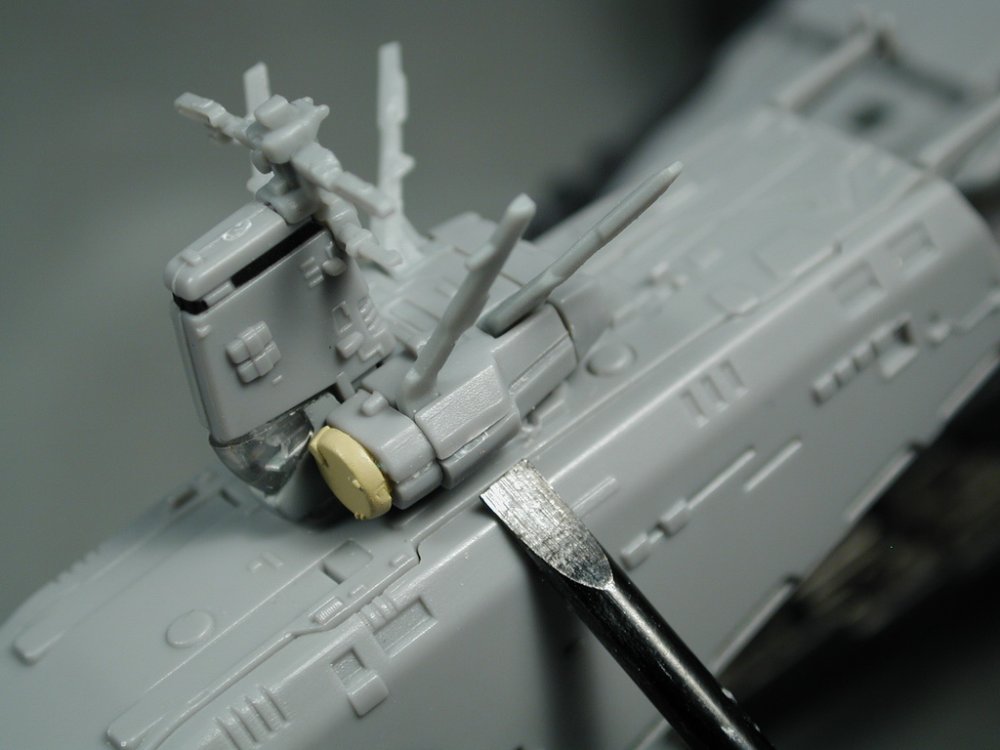

-
Yamato 1/3000 SDF-1 modification and paint up...
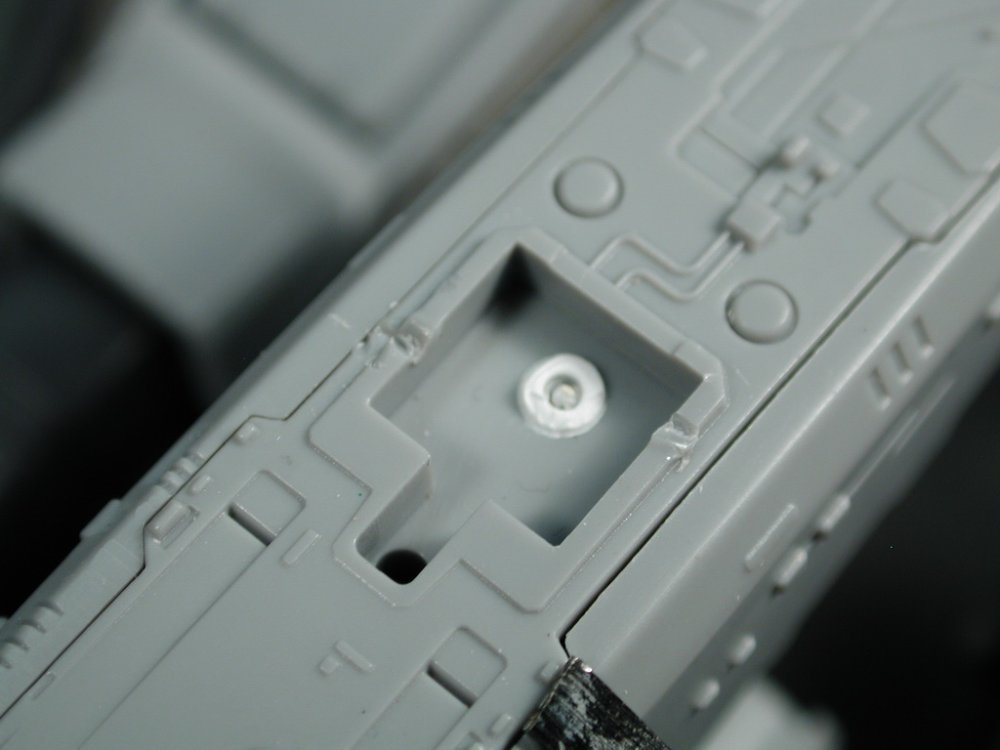
wm cheng replied to wm cheng's topic in The Workshop!
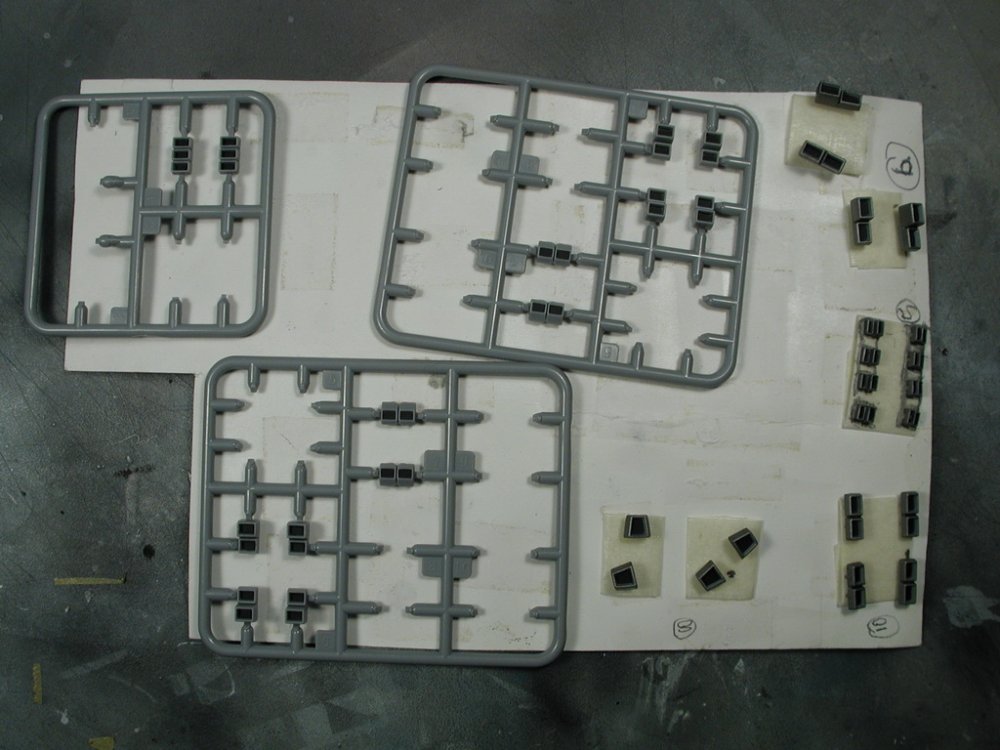
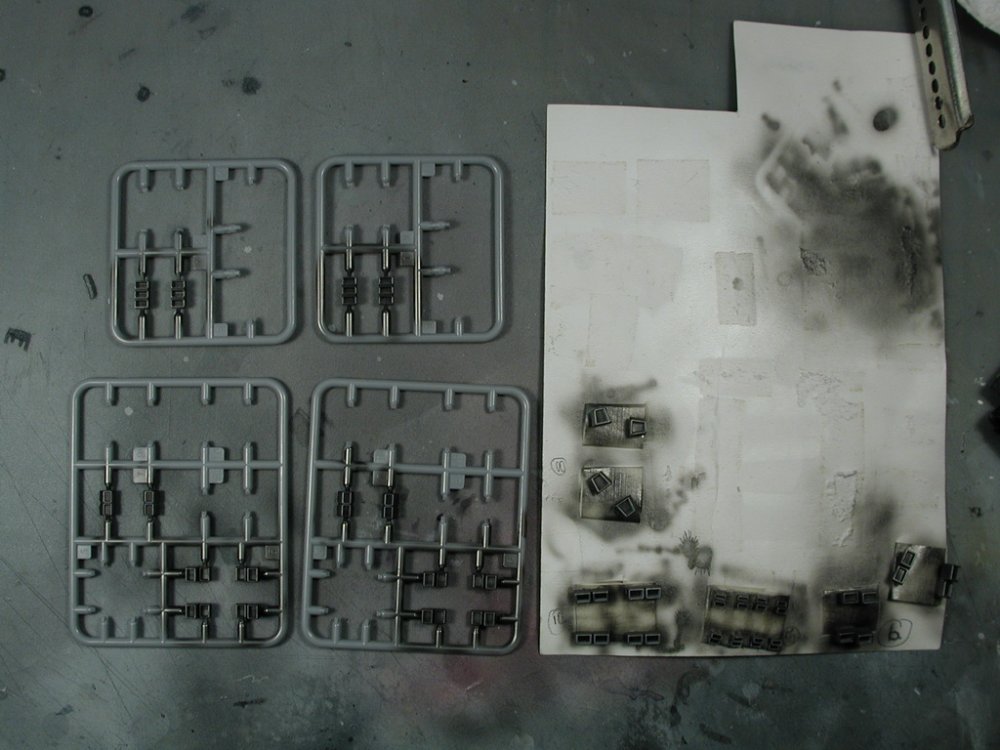
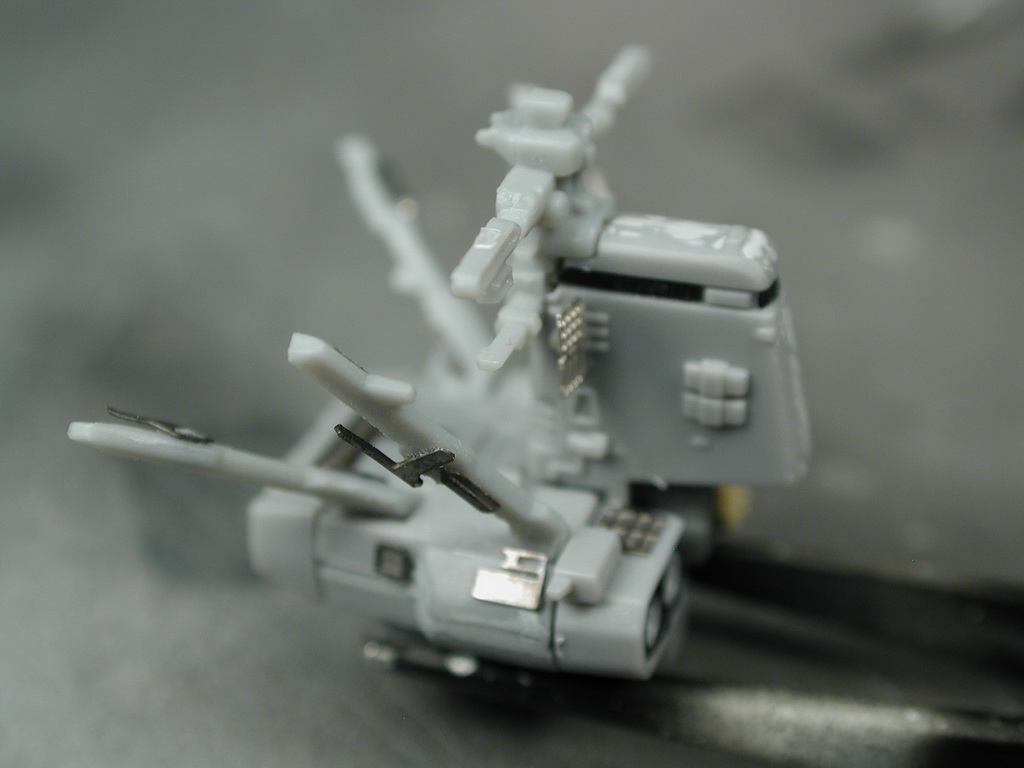
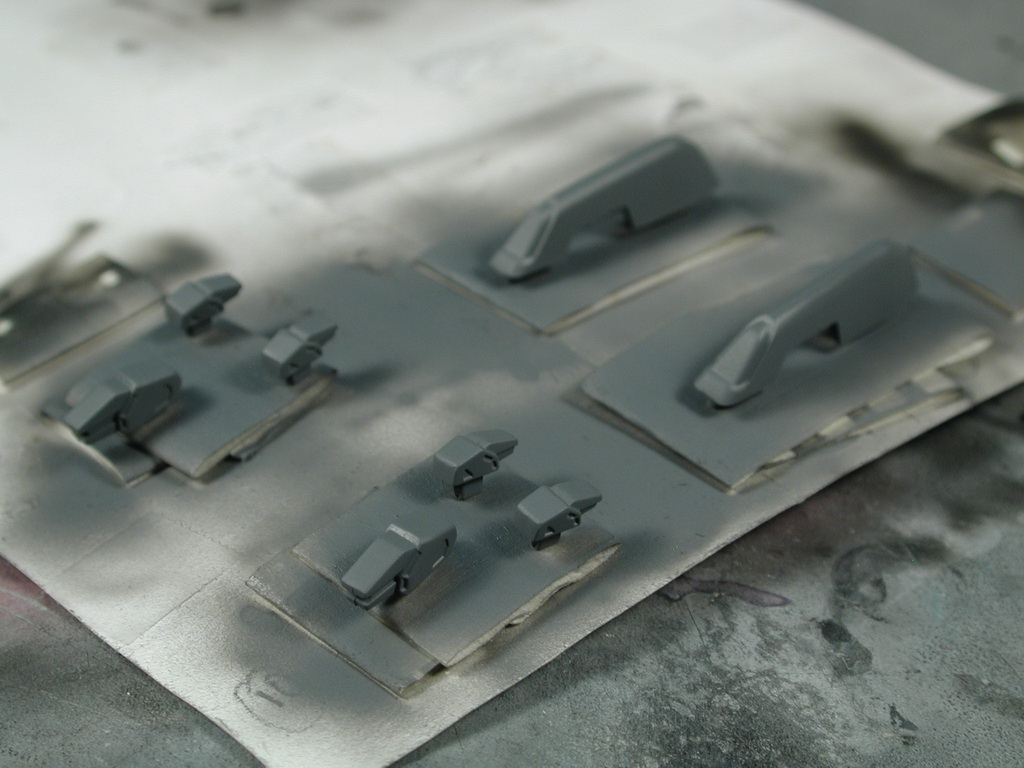
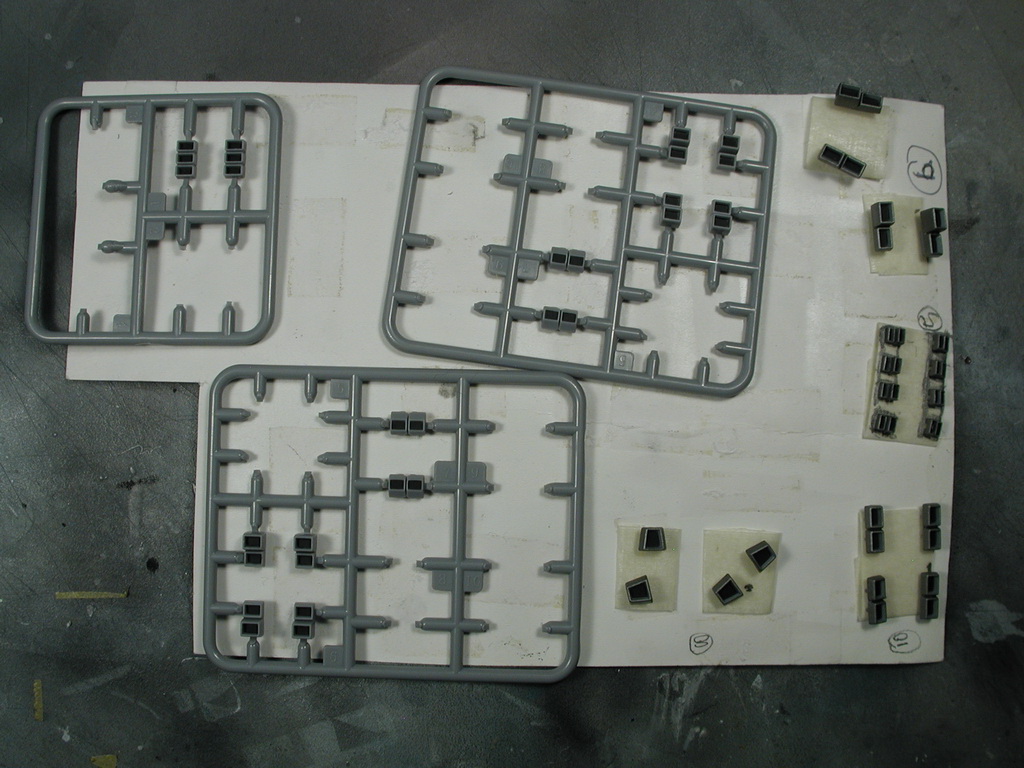
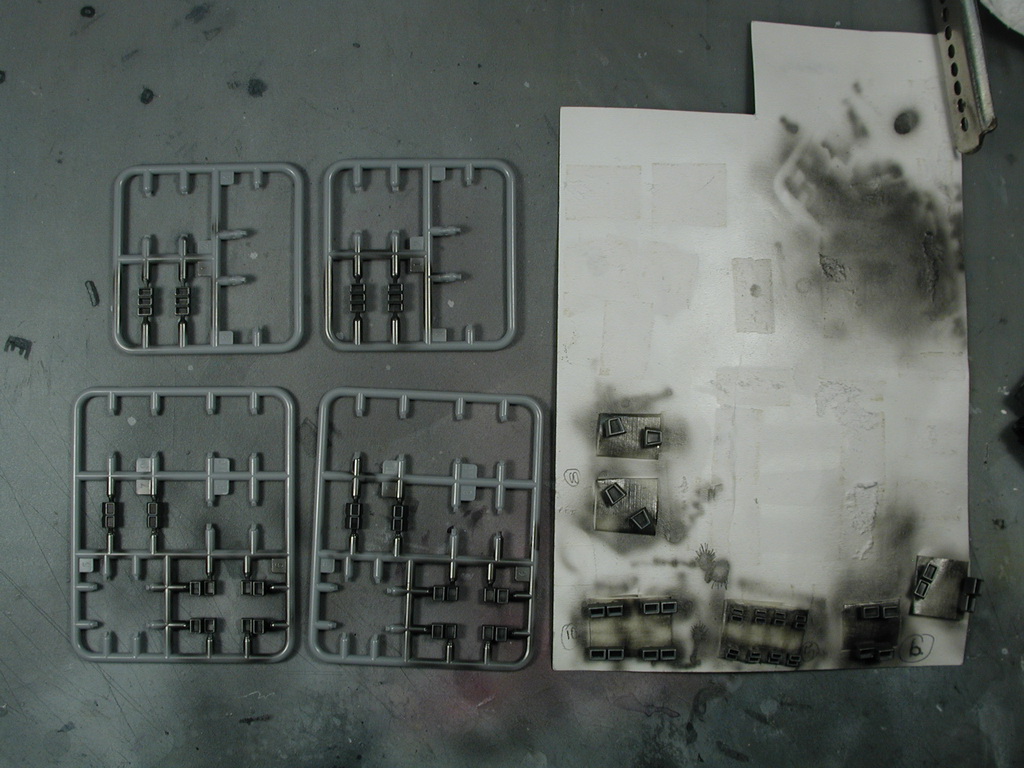
I started to look at all the thrusters for the ARMDs first. I thought that since most of them were separate, I'd take the opportunity to paint them metallic without having to mask the toy - it would further add another shade of grey to the scheme. First I looked carefully and identified the thrusters that has sprue attachement points that will be exposed on the final toy, I separated those out with a sharp x-acto knife and sanded the sprue nub off and laid them out on the cardboard. The remaining pieces will have their sprue connection hidden in the toy after attachment - so I left them attached to the sprue trees so that they can be more easily handled for airbrushing. I decided to airbrush them with Alclad metallizer Steel as its a middle tone metallic. I set the airbrush on the finest spray line and tried to color the edges without spraying too much into the black centers = I was lazy, I should mask the black insides, but if you're careful, a steady hand on the finest pencil line should do. In the end, I touched up some overspray of the inside with a black gundam marker. I started to attach all the screw hole covers. I used a dab of white glue to make sure they held in place, but is not permanent in case I ever had to take it apart to fix a joint or something. The panels are really well designed IMHO, they really work with the surface detail and are in pretty ideal locations. I really had to hunt and partially transform the toy to find this access panel which can only be seen during partial transformation.