

wm cheng
-
Posts
4346 -
Joined
-
Last visited
Content Type
Profiles
Forums
Events
Gallery
Everything posted by wm cheng
-

New coming! 2nd wave of PE update parts for 1/72 Valkries
wm cheng replied to newca's topic in Model kits
Fantastic Newca! Thanks so much, just bought 2 sets of the bundle and another VF-25 & VF-19 - so glad you haven't forgotten about us 1/72 scalers! How about a flaps/spoiler set for the VF-1? Also what about 1/3000 scale Valkyries and launch arms for us early adopters of the SDF-1?! -
You are the master now! My daughter now has taken up all my free time. Been able to satisfy my modelling bug lately on a few SciFi movies (Resident Evil, The Thing, Total Recall & Pacific Rim) by building 1:1 scale models for sets - but that takes up all my time now. Look for Macross design cues in the sets of those films! In fact, they just interviewed me on my latest set on Total Recall where they asked for my inspirations and I mentioned Shoji Kawamori and Macross. If you want to see me, I think its called "Hollywood Builders: constructing Total Recall" - 1 hr special probably sometime next year on DIY Network and Discovery Channel (my guess is close to when Total Recall comes out to theatre). It will probably be on the Total Recall DVD/BR special features. I hope after Pacific Rim I might get back to finish up painting that SDF-1 toy and it probably will be a few years before I get back into modelling again - for the time being, I'm just a model kit/box collector! Or whenever you get around to that 1/72 Hikaru and Mimay in the VT-1 with her helmut off - my VT-1 kit is waiting for your pilots! ;-) In the meantime, keep up the amazing work, I can live vicariously through you!
-
Thought you might be interested in this article: http://news.cnet.com/8301-13645_3-20082026-47/how-can-30-year-old-receivers-sound-better-than-new-ones/?tag=nl.e702
-
Awesome! Simply fantasic work Petar. Really realistic scheme - love the light weathering, just enough to give it some weight.
-
Any other "Thing" fans out there?
wm cheng replied to HappyPenguins's topic in Anime or Science Fiction
The trailer is finally up! http://movies.msn.com/movies/movie-trailers/#/video/f749b83d-e1d0-4983-a918-a9c3914b03c0/ I think it looks pretty damn good... (if I may say so myself;-) -
Fantastic! How long till they go on sale?
-
Fantastic, How about one last tiny addition/suggestion? What about the fold out step ladder from the forward fuselage to climb into the cockpit? Great work, can't wait till its on sale! Thanks for not forgetting about us 1/72 scalers!!
-
Any other "Thing" fans out there?
wm cheng replied to HappyPenguins's topic in Anime or Science Fiction
Unfortunately, Hollywood is now under the control of accountants! They are multiplying everywhere and has become the decision makers in the industry. In fact, every production that I've been on now, the accountants are the first to be in the office, before any art department, locations, ADs before anyone is even on the production, the accountants are there first and they are there last, even past when the production wraps up and everyone has left, they do forensic accounting to close up shop. Actually, they have grown from 4-5 accountants per show when I first started to the single largest department in the production! It's just wrong, there's no art to films anymore, it's just pure business and merchandizing. Movies are decided upon not based on content but pie charts and committees. In fact, demographics and target audiences are decided upon first, then a movie is crafted to satisfy those criterias now. Just look at Transformers 3 - 12 year old boys would love it! they will need their dads to take them to the theatres and probably drag them there again and again. According to the accountants, Transformers is a total success. Sad but true. Any good films out there today, would be a unlikely happenstance by-product of a financially successful venture. (gets off soapbox rant...) -
Variable Fighter Master File VF-25 Messiah
wm cheng replied to Shin Densetsu Kai 7.0's topic in Movies and TV Series
Ah, thanks for clearing up. I just had a little heart attack that I missed one. Love these books! -
Variable Fighter Master File VF-25 Messiah
wm cheng replied to Shin Densetsu Kai 7.0's topic in Movies and TV Series
Was there a VF-11 Master File book out that I missed? I thought I got all of them?! Is it still available? When did it come out? -
Live Action Space Battleship Yamato
wm cheng replied to capt.actionjackson's topic in Anime or Science Fiction
Is there any site with a plot/film synopsis for those of us who don't speak Japanese and is trying to remain calm waiting for a subtitle file to come out? -
Live Action Space Battleship Yamato
wm cheng replied to capt.actionjackson's topic in Anime or Science Fiction
Anything better than a 720mkv rip in 2ch stereo only? Perhaps a 1080p AC3 5.1? I guess there's no english subtitles on the BR-DVD though eh? $70cdn for a Japanese only BR is just too much at this time. -
No, No, No... definitely not. Most decals are spot colour printed - meaning that they have solid colours representing the true colours that the design intends to be. Well, most reputable companies like Hasegawa, Tamiya or Cartograph. Screen printing whereby using a limited pallet of colours in dots/screening to simulate other colours is just a cheap way to give you the likeness of other colours without the true expense of paying for those inks to be printed. It's the difference between a photographic coffee table book and a colour photo in a newspaper! It just underscores to me that Bandai doesn't really pay that much attention to Macross models - if you look that closely, a whole world of problems open up! Just my humble opinion ;-) Did I mention how much I hate their MF decals?!
-
Live Action Space Battleship Yamato
wm cheng replied to capt.actionjackson's topic in Anime or Science Fiction
So did anyone get the released BR-DVD? Did it have english subtitles? That's the main thing holding me back from ordering it. -
ME TOO! Woohoo!! Now just to find the time to work on it... ;-(
-
You'd think they'd give some credit eh? At the very least, offer up some of these add-on items to early adopters!
-
Well, if anyone doesn't want or intend to use the PE parts (they might be too small and bad for your eyes!) ;-) - you've got someone (ME!) more than happy to take it off your hands! Keep me in mind.
-
Any further news about whether any of these upgrade parts/decals will be available separately to previous owners of the assembled toy?
-
Variable Fighter Master File VF-25 Messiah
wm cheng replied to Shin Densetsu Kai 7.0's topic in Movies and TV Series
Anybody in Toronto interested in buying a second copy of the book from me? I had pre-ordered it from HLJ, then for some reason my pre-order didn't go through, then I added it again to another order I had coming - now it's been added twice to my order. They'll refund it if I ship it back, but not the shipping charges - argh! The order is shipping, so it'll take a few weeks I assume, its SAL. So if there's anyone locally in Toronto, I'd like to sell it for what I paid. Let me know. -
Hmm, better, but still too bubbly and not sleek enough. I was kind of hoping for some VF-1 revits. Although that didn't stop me from pre-ordering two though ;-) I just love the old style grey with white moveable surfaces scheme.
-
A question, I just got Killzone 3 - not being familiar with it's setup, when I start it, it just hangs at the Select Language screen (I can't select any language and press X to go on - although the PS3 hasn't hung as I can quit out of the game properly). Is it trying to access the PSN waiting for some authorization or something? Naturally I can't sign onto PSN at the moment (due to the service outage). Or is this unrelated to the PSN outage and is indicative of something wrong with my PS3?
-
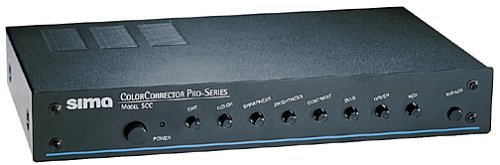
Ahhh... that brings back memories! Shaorin, you must the around the same age as I (too old!). I have a box of that stuff too, loved the gold labels - I remember I taped DYRL onto that and I "letraset"ed the label information onto it and even added a clear coat to protect the letraset from rubbing off!! Man I had time when I was in high-school. ;-) What you need for the Macrovision is a Sima Color Corrector - its an analogue video enhancement device that's side-effect (after the recombination of the color channels) is that it strips off all Macrovision protection schemes. I had the "super" JVC VHS too - but it was slightly later model with the jog shuttle dail - I think its still packed away in my basement somewhere. Man, they sure don't make components like they used to. I still have a bunch of these amazing Sony Super Beta tapes - can't remember... HX-Pro ESX Gold or HiFi something, that had these great cases. All the crap we used to spend money on eh?! I'd always double my anime onto the best VHS tape and SuperBeta tape possible!
-
YES PLEASE!
-
Any indications that any of this extra stuff (glow stickers, decals or PE parts) will be offered separately to those of us who were early adopters?
-
At the rate I'm going now, I need a new basement to store all of these kits, or a second retirement to get enough time...
