HWR MKII
-
Posts
2644 -
Joined
-
Last visited
Content Type
Profiles
Forums
Events
Gallery
Everything posted by HWR MKII
-
No the nozzles are NOT meant to be taken apart. Thats why they have that stupid cleaning statio thing that is pretty useless. Your supposed to spray a FULL bottle of thinner through it. When the nozzle finally does clog or get faulty you are supposed to throw it out and replace it. Read the instructions for it. From the one my parents got me when i was learning airbrushing i dont remember seeing anything about removing the needle. Technically you have broken every nozzle by pulling the needle out. They are actually locked in. It ist hard to pull it out but they are not supposed to come out. For me the badger is cheaper to maintain and more reliable to use. . No O rigns, Needles run about 2 bucks and my tips are in excellet shape. a package of those nozzle things for an aztec is about 10 bucks a pop maybe more now. Give a real metal airbrush a try and im sure you will be amazed at the difference in it and the quality of work you can produce with it.
-
Pics have been shown and they look anorexic in the torso.
-
If anything Johns kit could be modified to be sold as a "correction" kit for the wave one.
-
you clea them by flushing them. The nozzles are interchangeable for different lines and effects. Bad system if you ask me. Even flushing doesnt remove all the paint. Some people do disassemble the nozzle for cleaning but you arent supposed to. Eventually something will happen to make the nozzle unuseable. The nozzles are also more expensive than a new needle for a normal airbrush. Id rather replace a bent needle or over worn one than work with those nozzle things.
-
If he was he definitely isnt now. Though i believe Johns sculpt to be superior to anything produced before or now. it just looks "right".
-
just use real hinds and other similar helicopters for inspiration. base your details on similar parts taken from real pictures online.
-

Whats Lying on your Workbench MKIII
HWR MKII replied to HWR MKII's topic in Hall Of The Super Topics
Thats because the Hunter Killer tank isnt done yet. Still making a display base for it. Not good to weather and dirty something with no set ground color. Also they really didnt get that dirty in the movie. James Cameron wanted them gleaming almost all the time. -
Whats Lying on your Workbench MKIII
HWR MKII replied to HWR MKII's topic in Hall Of The Super Topics
Did you tell them so it could get corrected. -
Whats Lying on your Workbench MKIII
HWR MKII replied to HWR MKII's topic in Hall Of The Super Topics
How did the vaccuum chroming on it hold up since 1990/91? I know the lower parts have some scorching from on set pyro effects. I wonder if it is the one bob burns has in his basement. -
Windex. It has removed tamiya that has been on my table and other models for years. Give it a shot.
-
Whats Lying on your Workbench MKIII
HWR MKII replied to HWR MKII's topic in Hall Of The Super Topics
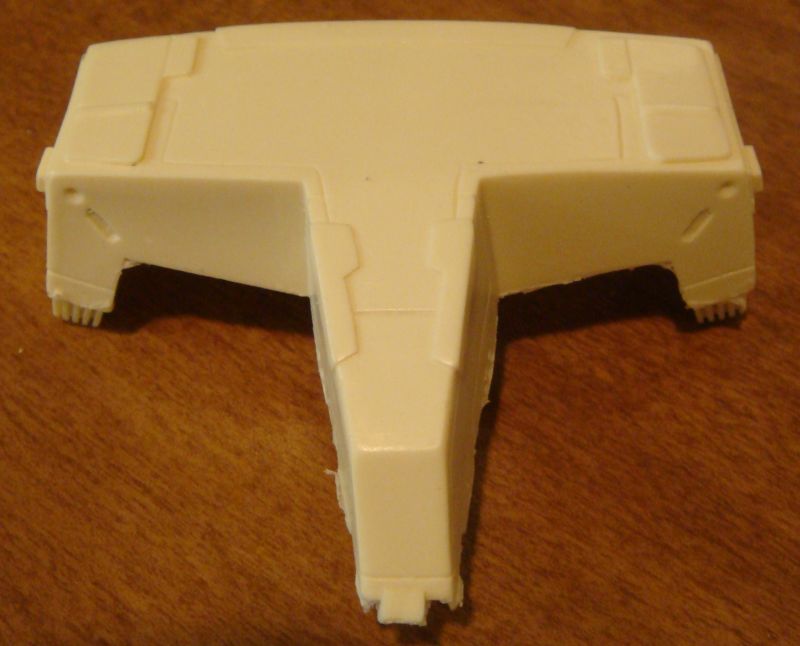
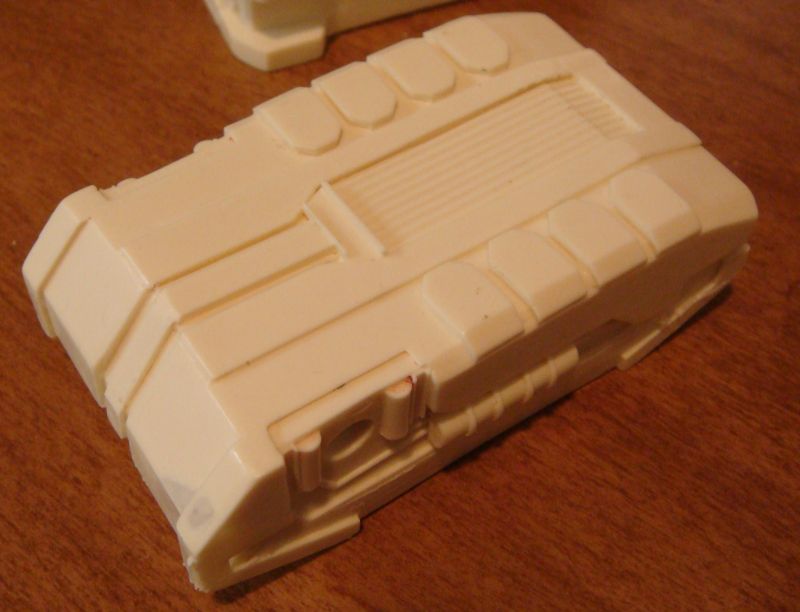
Im working on this shiny bad boy http://i306.photobucket.com/albums/nn268/H...er/100_4221.jpg http://i306.photobucket.com/albums/nn268/H...er/100_4222.jpg http://i306.photobucket.com/albums/nn268/H...er/100_4223.jpg http://i306.photobucket.com/albums/nn268/H...er/100_4224.jpg http://i306.photobucket.com/albums/nn268/H...er/100_4225.jpg http://i306.photobucket.com/albums/nn268/H...er/100_4226.jpg http://i306.photobucket.com/albums/nn268/H...er/100_4227.jpg -
I use a badger 150 double action internal mix. WITH JARS! I have never had an issue with them clogging. As for cleaning the pipe i just run a pipe cleaner with windex or other cleaner on it through the pipe. Comes up sparkling every time. This airbrush has literally been to war too. Took it to the mid east with me to paint some murals for the squadron while i was there. For as touted and celebrated the iwatas are i have yet to see any evidence that it is a better TOOL than a badger. Alot of airbrushing is up to the user and their style. AS for cleaning the jars and such. Use tamiya paints. Windex or other ammonia based window cleaners will actually remove old dried tamiya paint with little effort. It works ok for thinning Polly S and other acrylics too. Alot of the problems people have with clogging and such come from the paint types they are using and how they are thinned more than the actual airbrush they use. If your paint is prepped properly and sprayed at the right pressure and distance your airbrush will cause you no problems. It just takes time and patience to learn.
-
Whats Lying on your Workbench MKIII
HWR MKII replied to HWR MKII's topic in Hall Of The Super Topics
Yeah should get the first test pops in a couple weeks. Then i get to draw instrucions and make box art -
Whats Lying on your Workbench MKIII
HWR MKII replied to HWR MKII's topic in Hall Of The Super Topics
Coming soon. For further info see here http://www.starshipmodeler.net/talk/viewto...p=944889#944889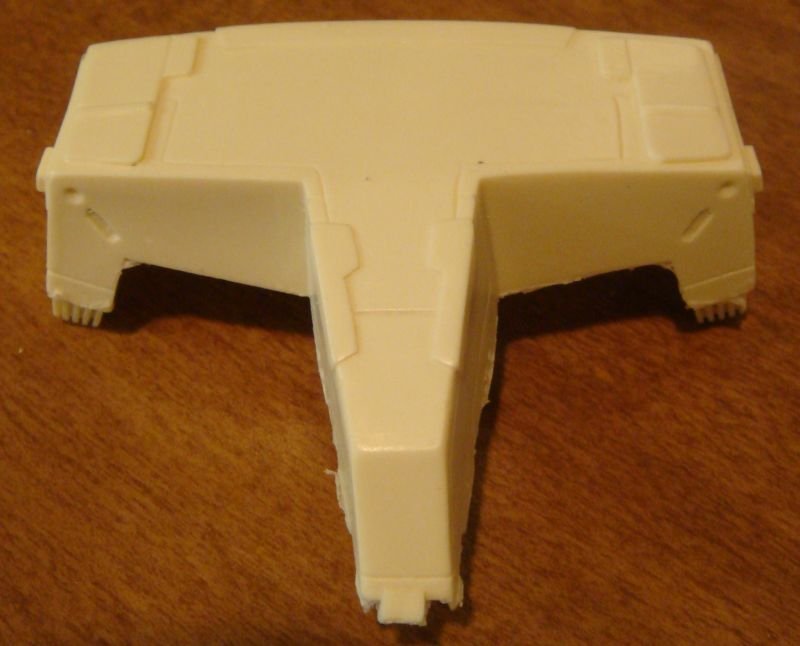

-
Small destroids? Strange Never seen these resin kits!
HWR MKII replied to Ranger565's topic in Model kits
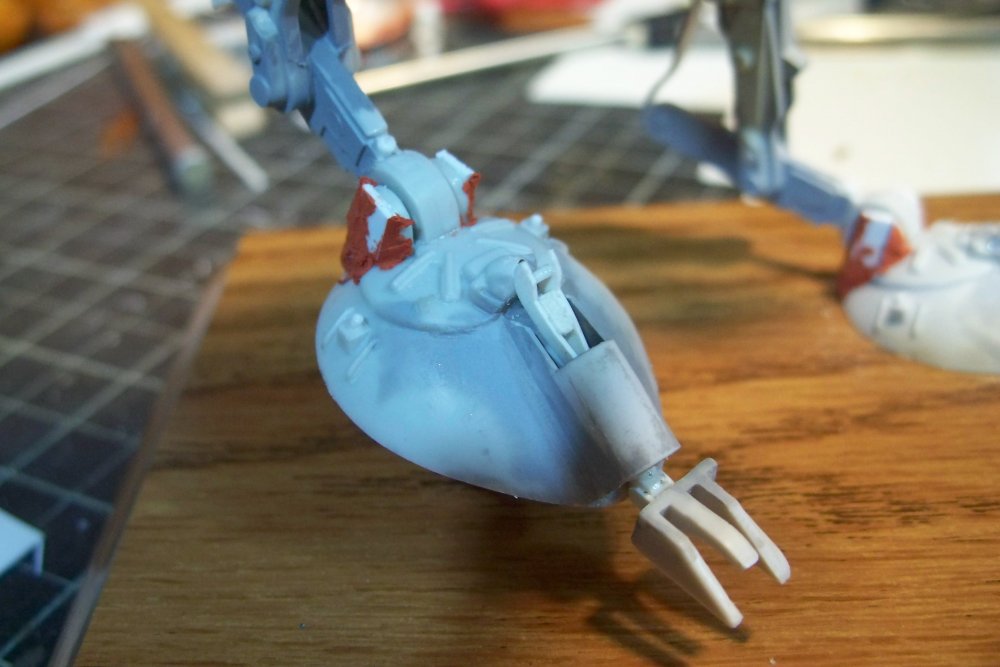
If you look in my spartan thread i have closeups of the hands. It shouldnt be tough to scratchbuild them. -
Whats Lying on your Workbench MKIII
HWR MKII replied to HWR MKII's topic in Hall Of The Super Topics
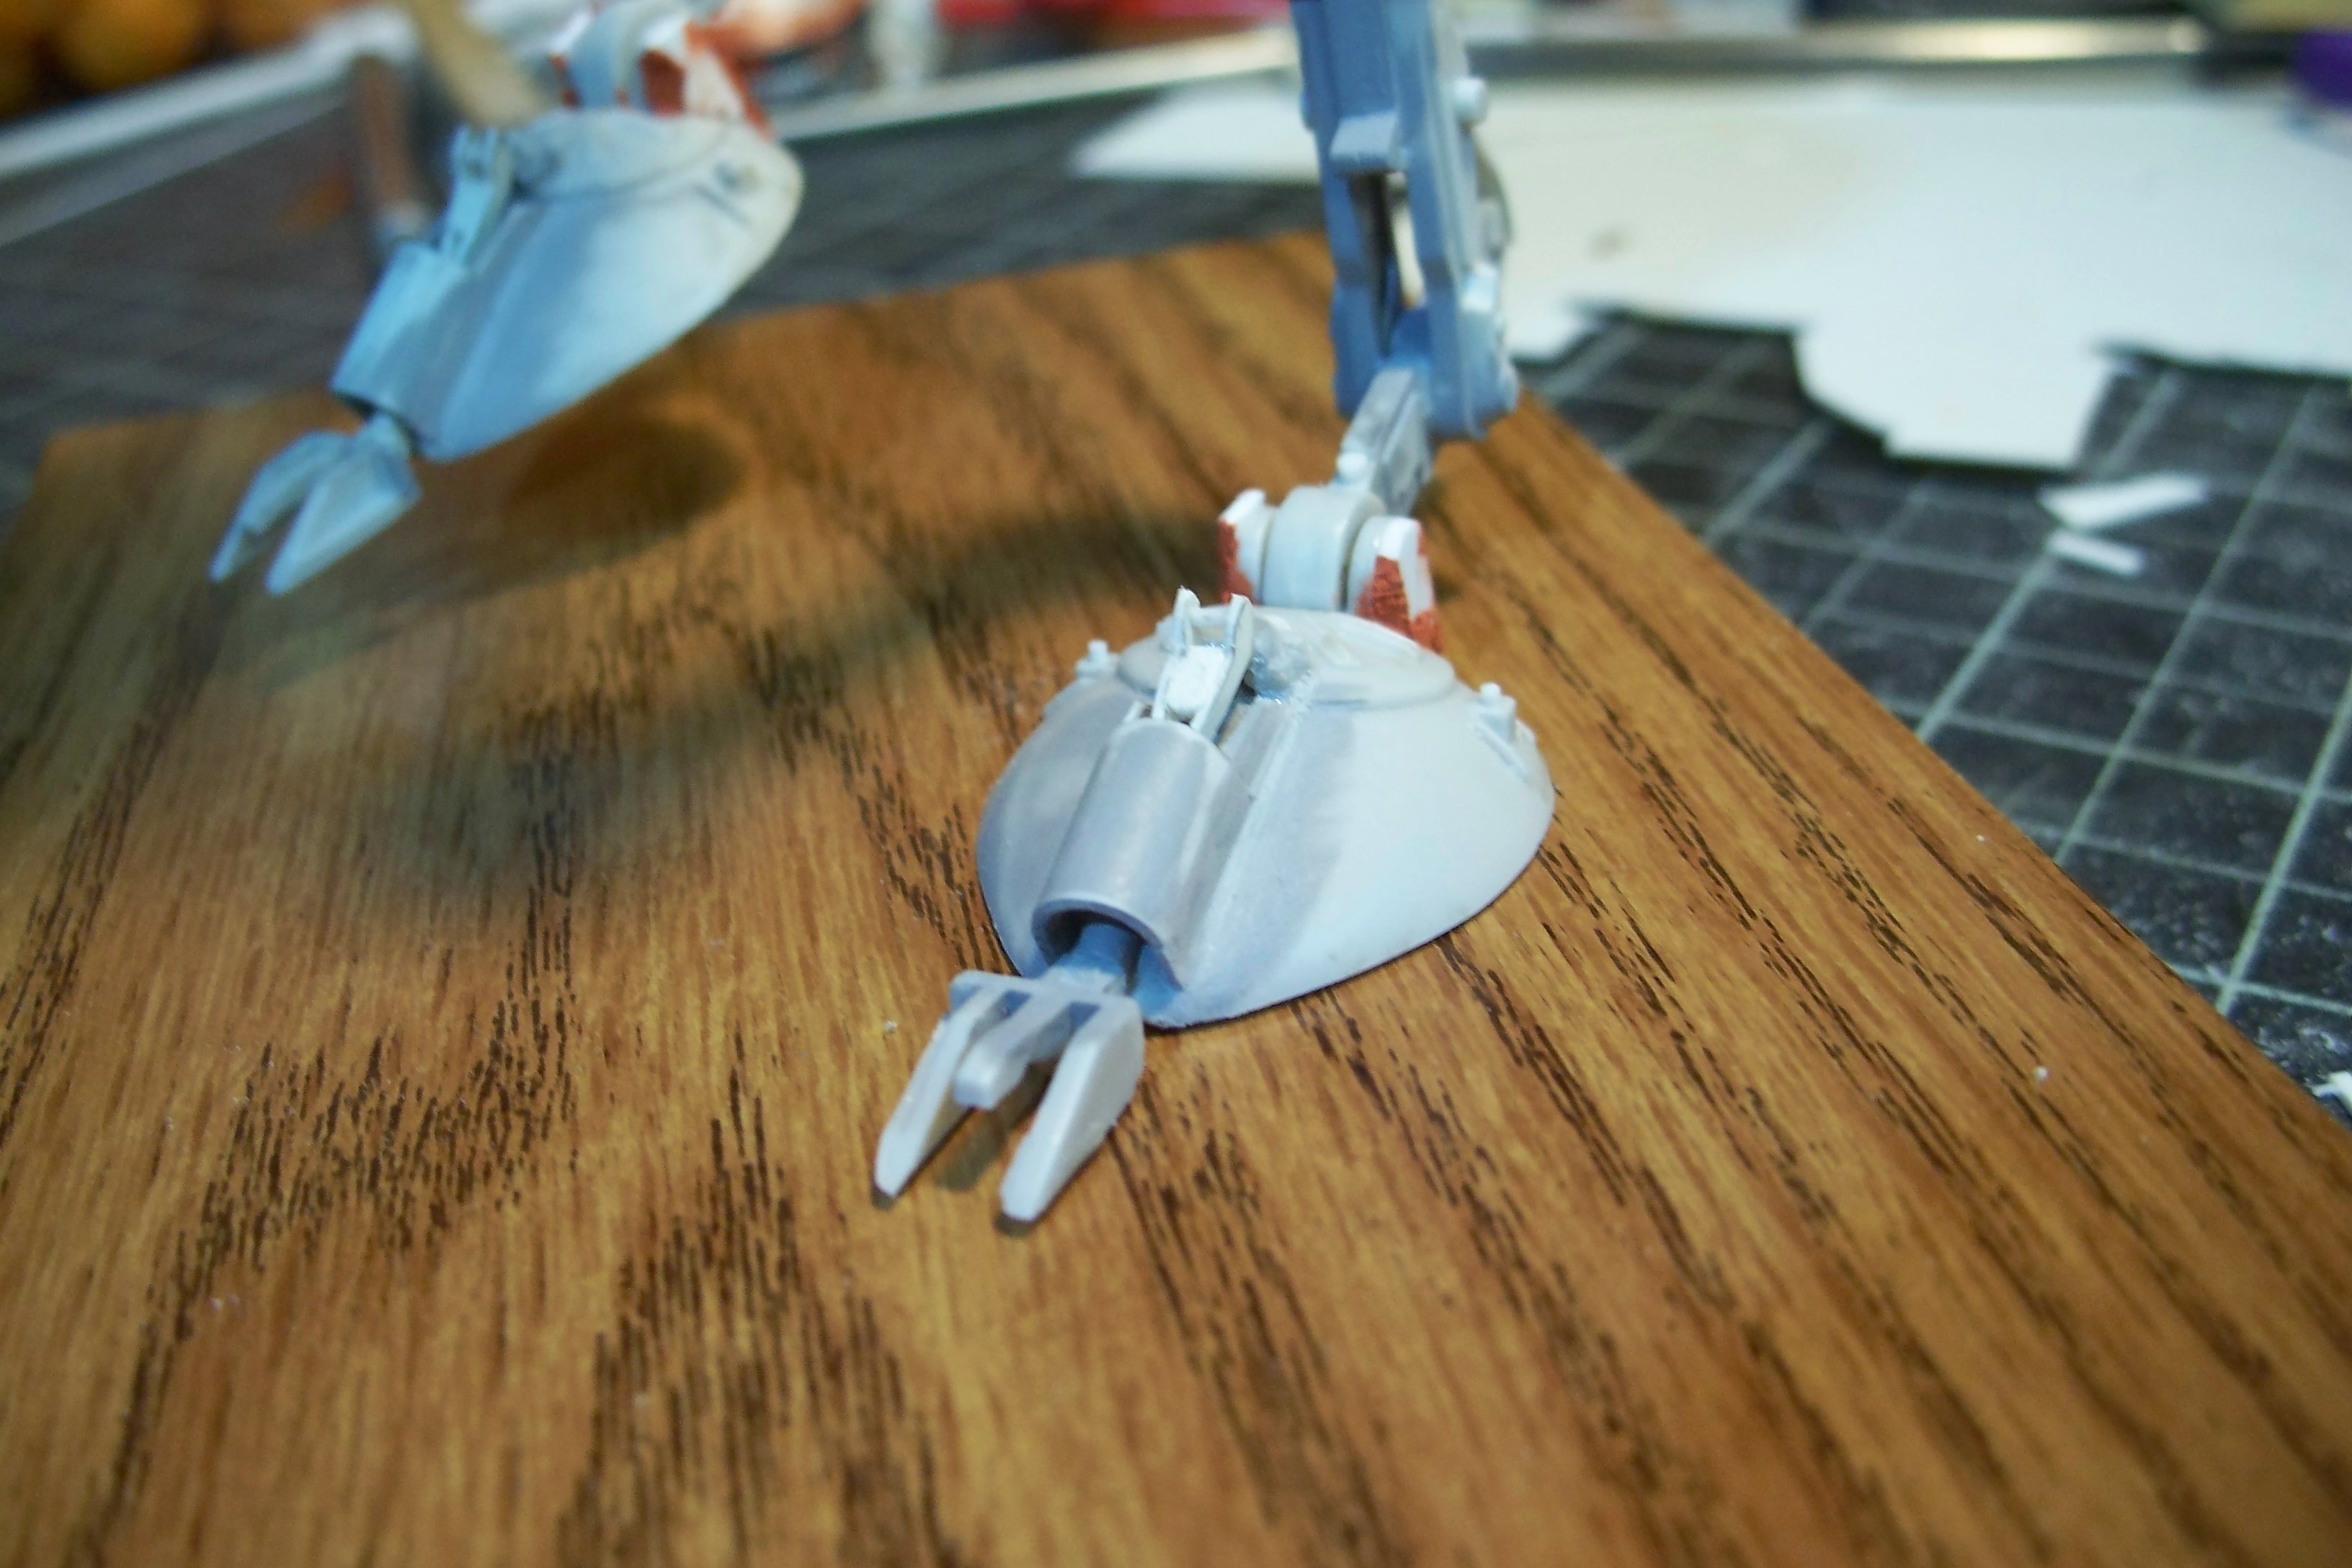
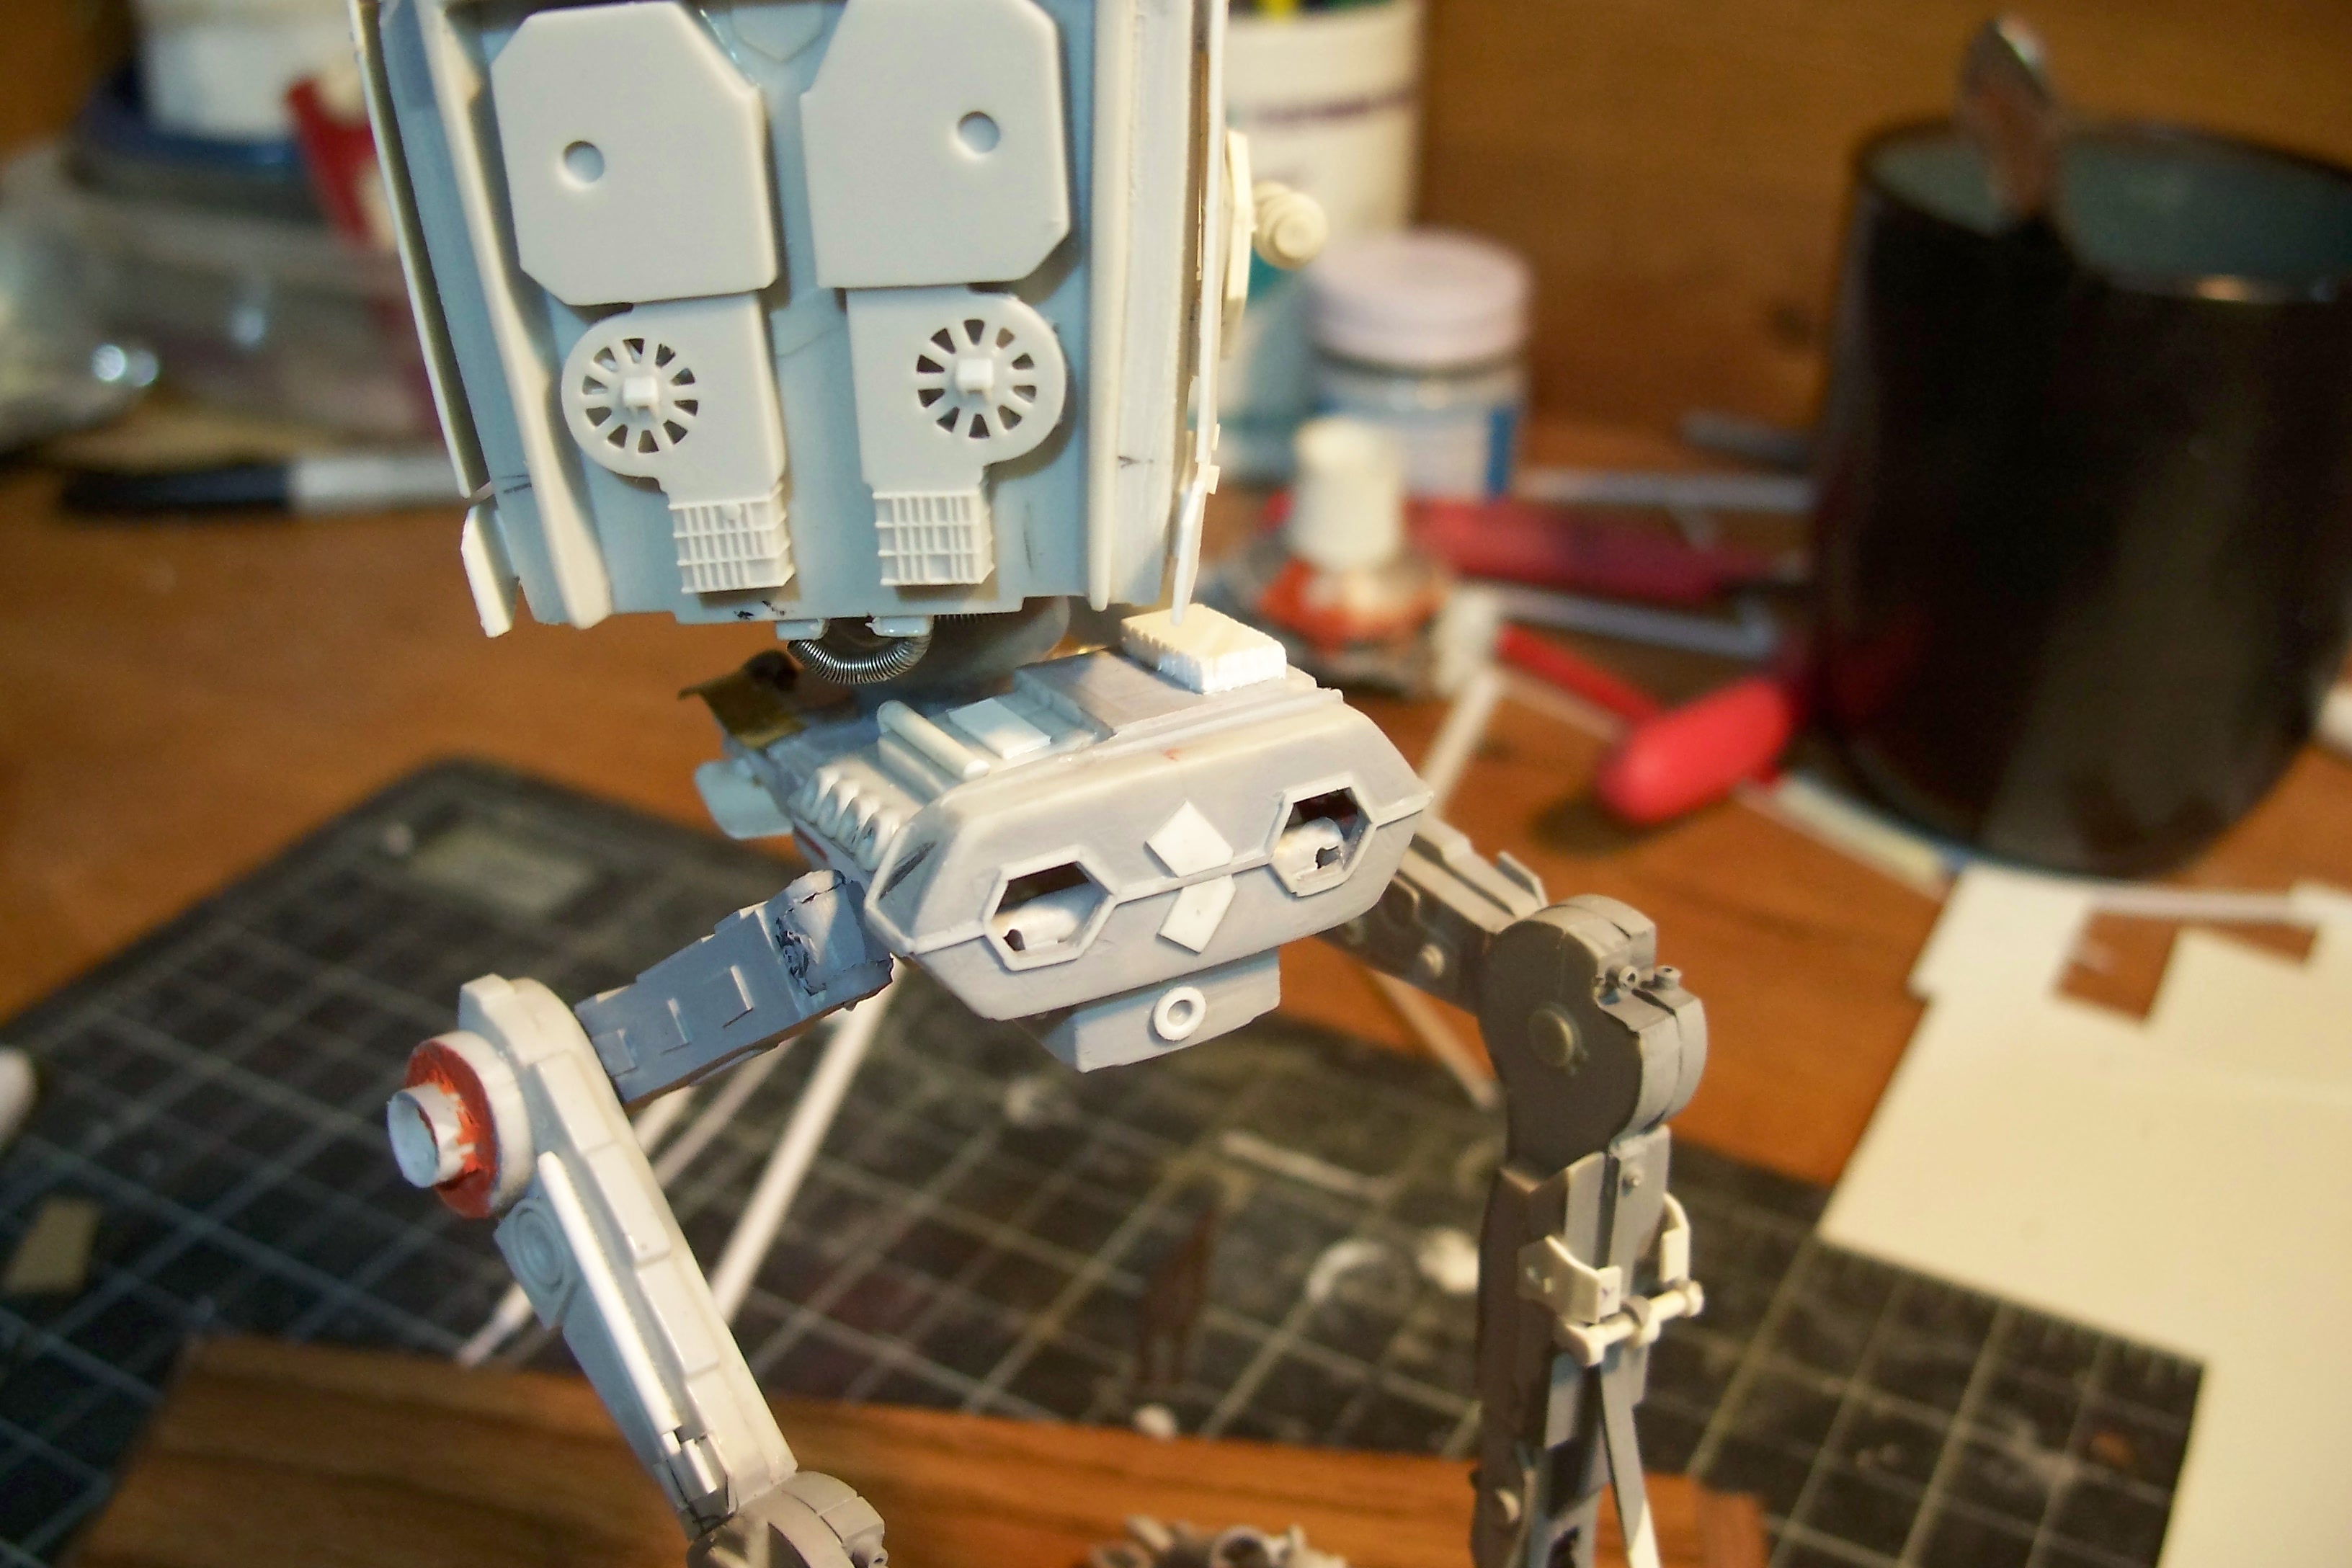
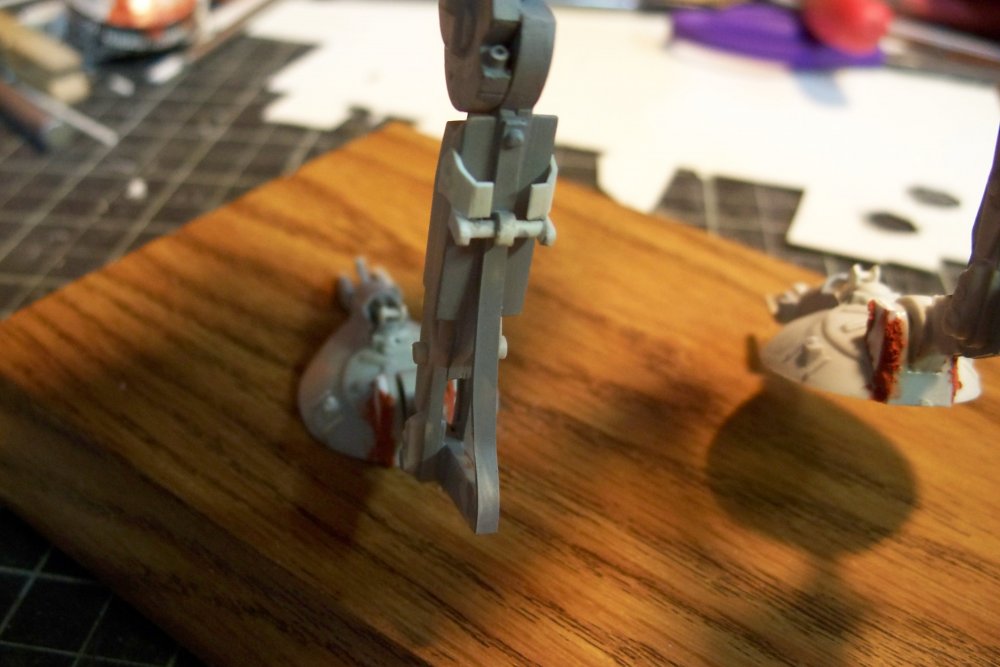
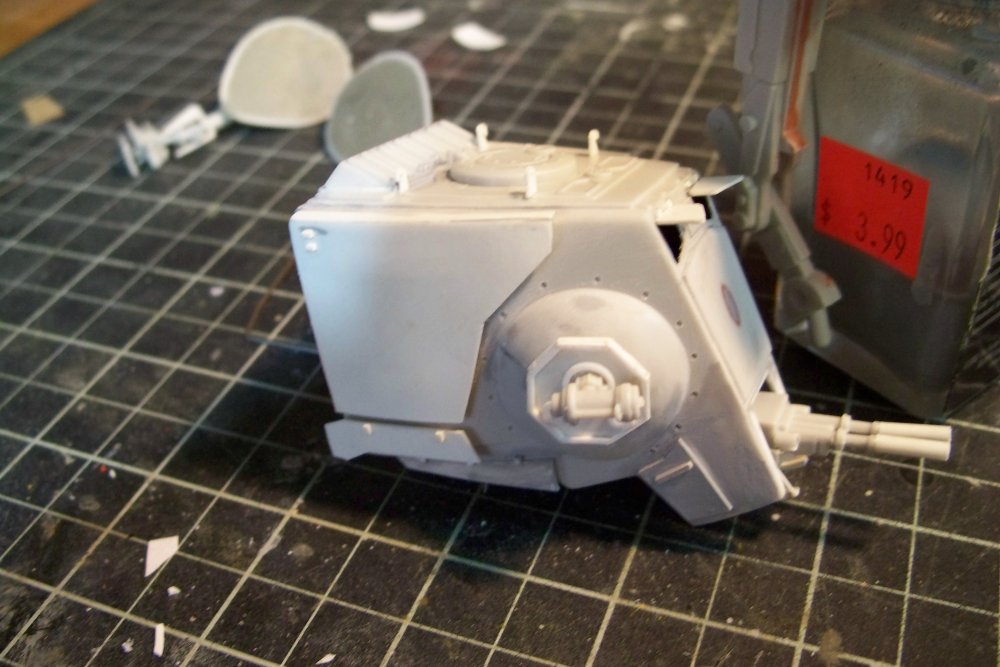
Here it is temp assembled. As it is i wil probably finish sometime early tomorrow afternoon


-
Small destroids? Strange Never seen these resin kits!
HWR MKII replied to Ranger565's topic in Model kits
If i had that in my hands i could whip up some replacement bits in an afternoon. its smallllllll. unfortunately i dont have the cash to buy it at the moment -
Small destroids? Strange Never seen these resin kits!
HWR MKII replied to Ranger565's topic in Model kits
The parts your missing sound like they would be easy to scratch build in that scale. The leg frames of the monster arent that difficult. Nothing some styrene sheet and rod couldnt fix. same with teh missing detail parts. -
Small destroids? Strange Never seen these resin kits!
HWR MKII replied to Ranger565's topic in Model kits
what parts is the monster missing? -
Whats Lying on your Workbench MKIII
HWR MKII replied to HWR MKII's topic in Hall Of The Super Topics
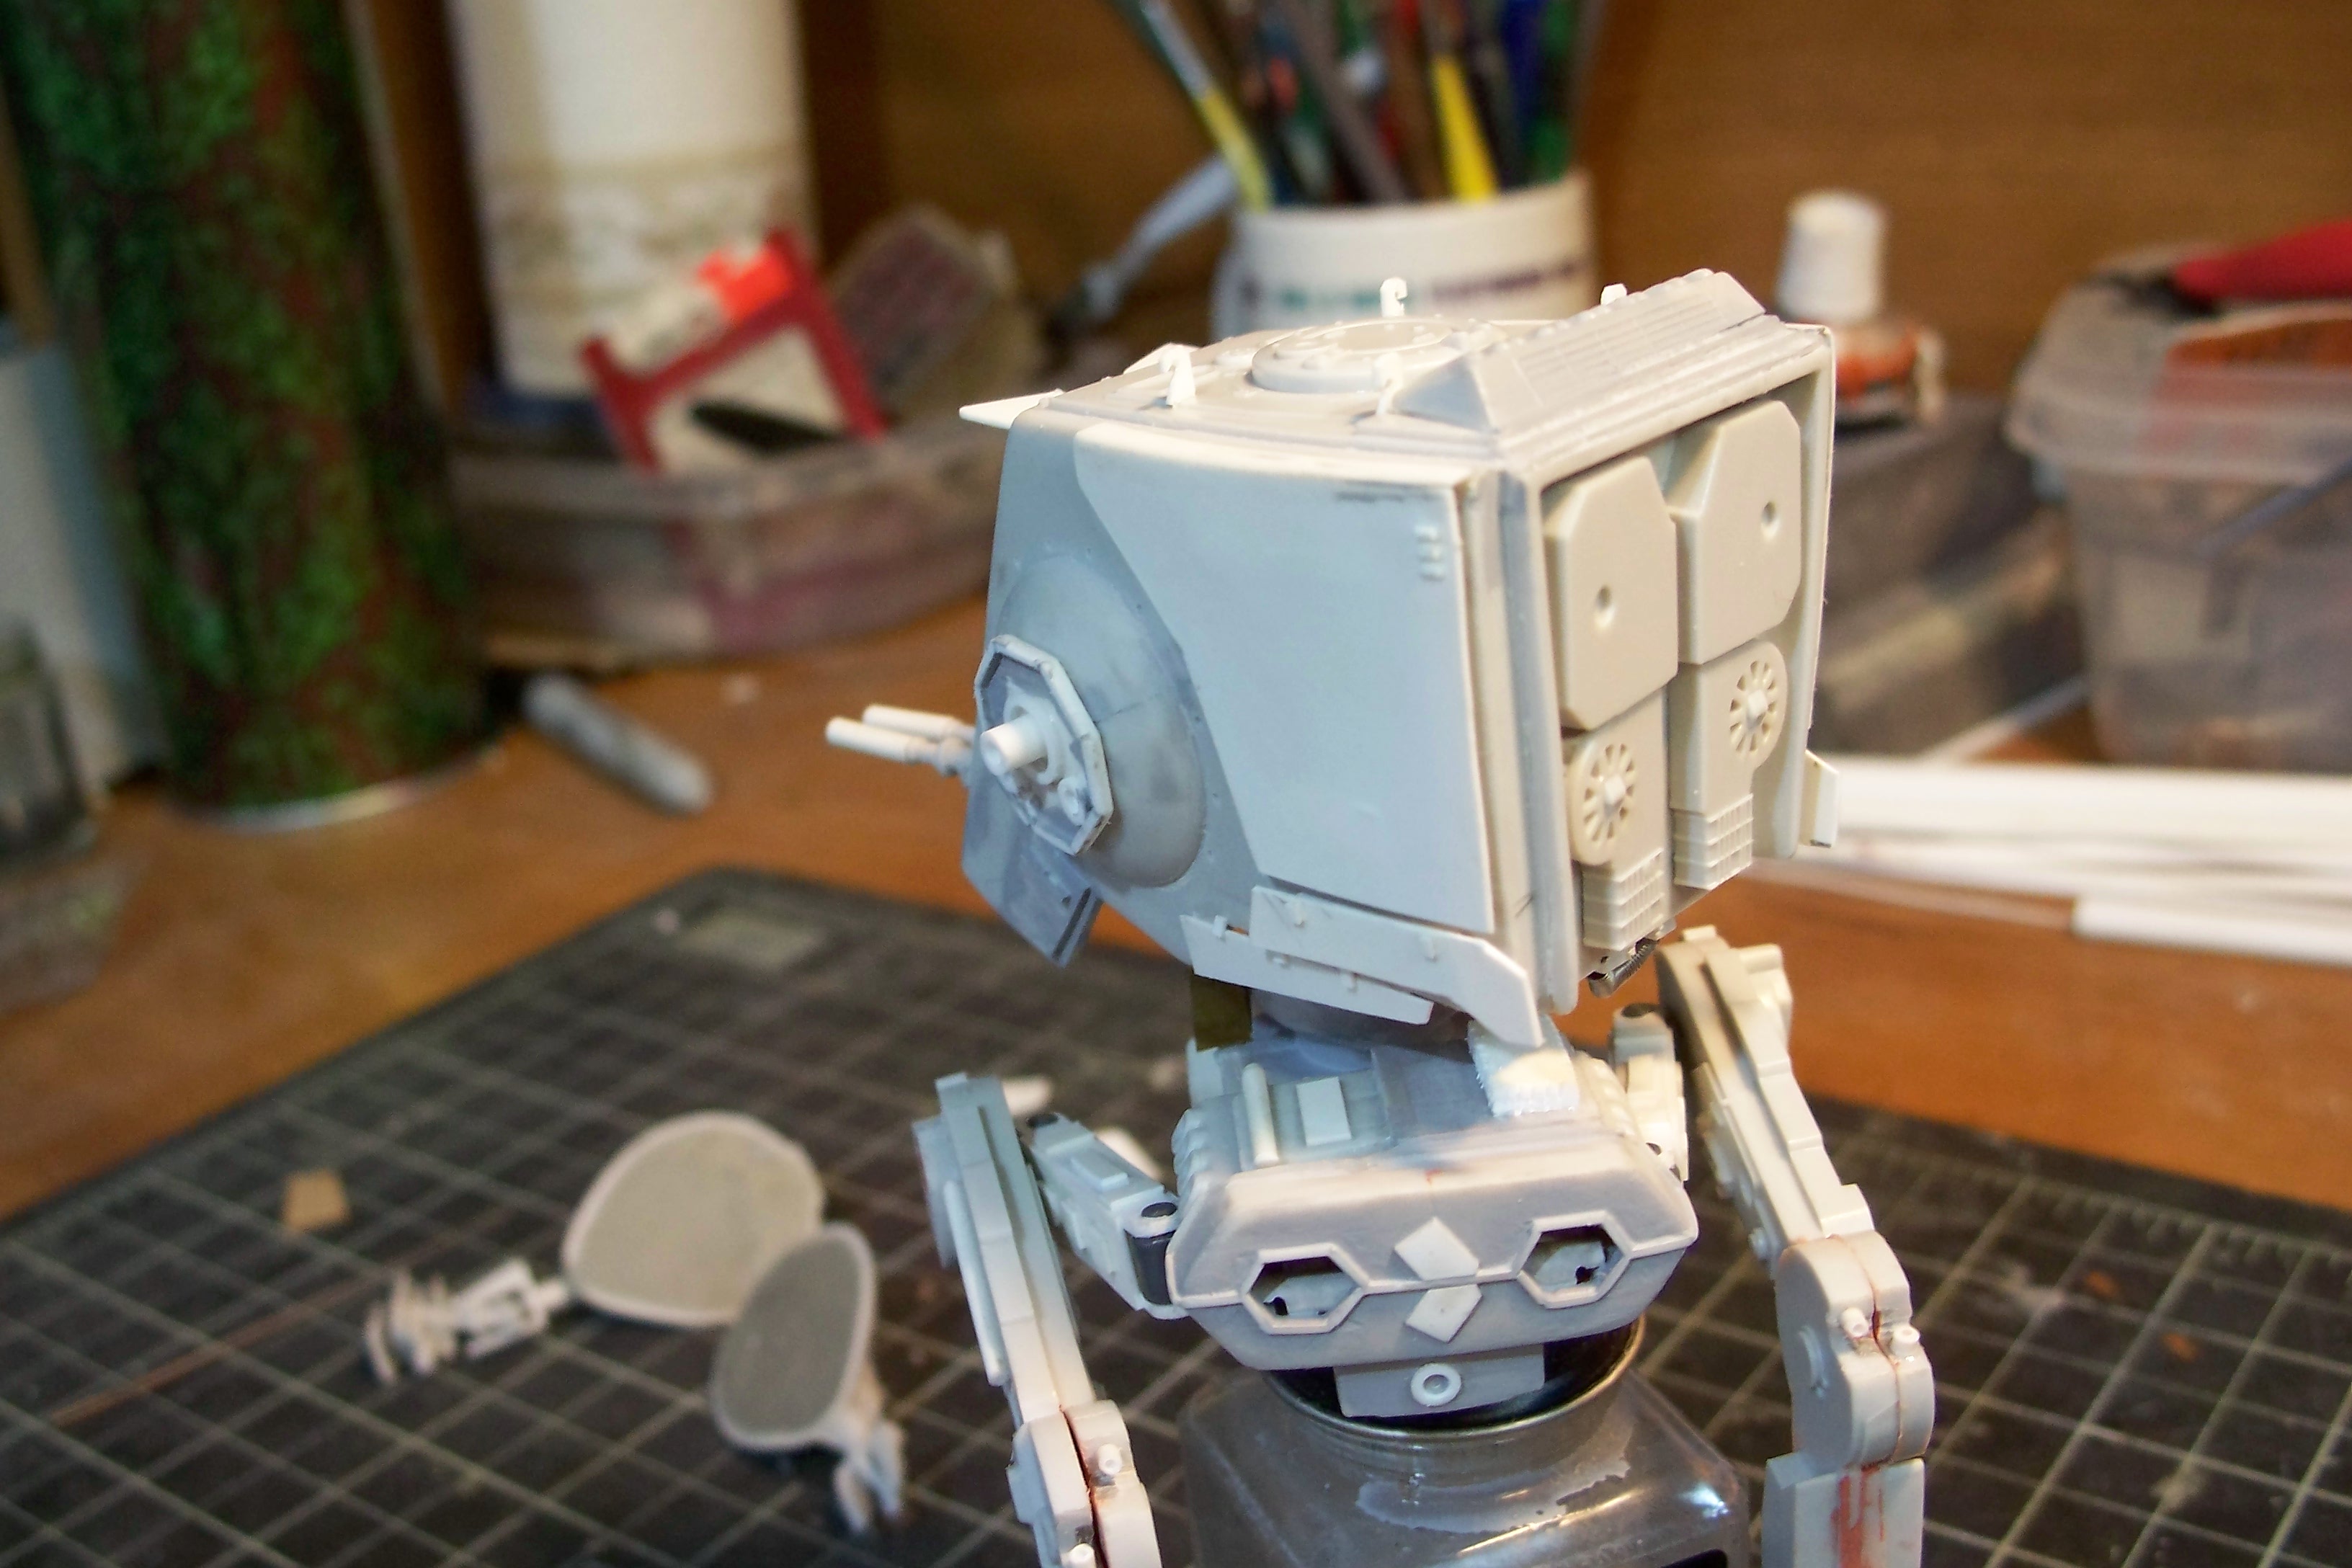
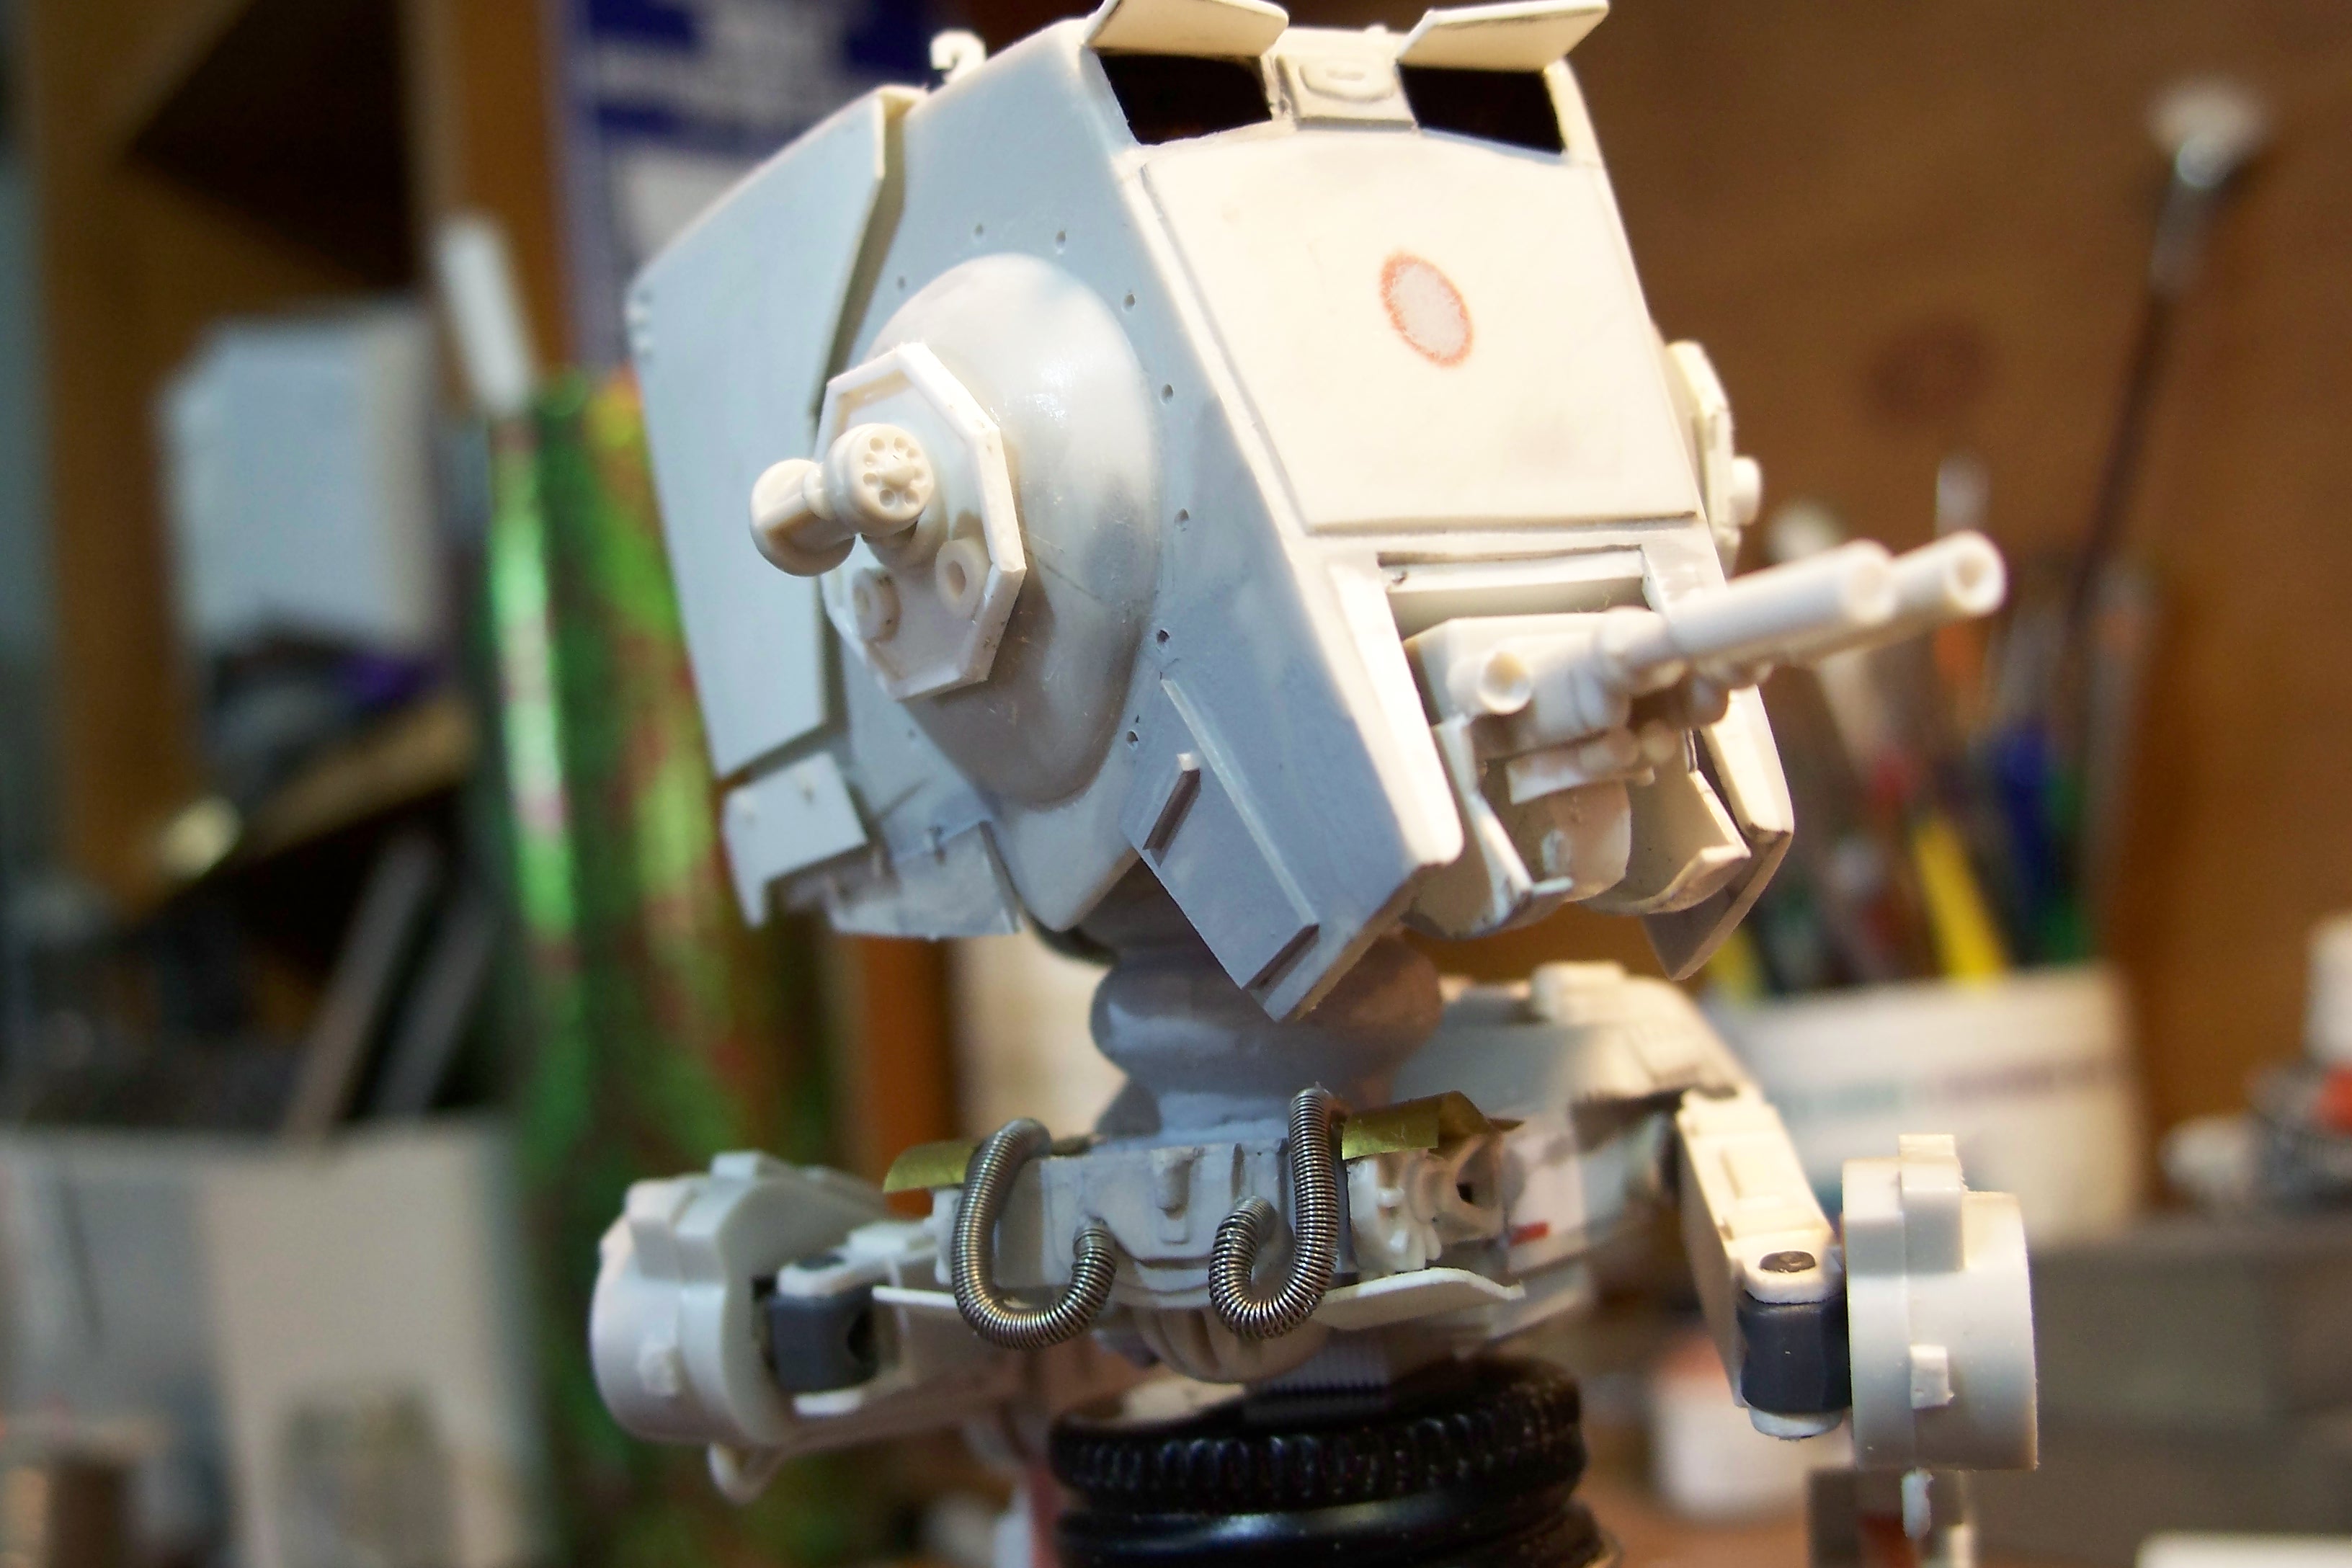
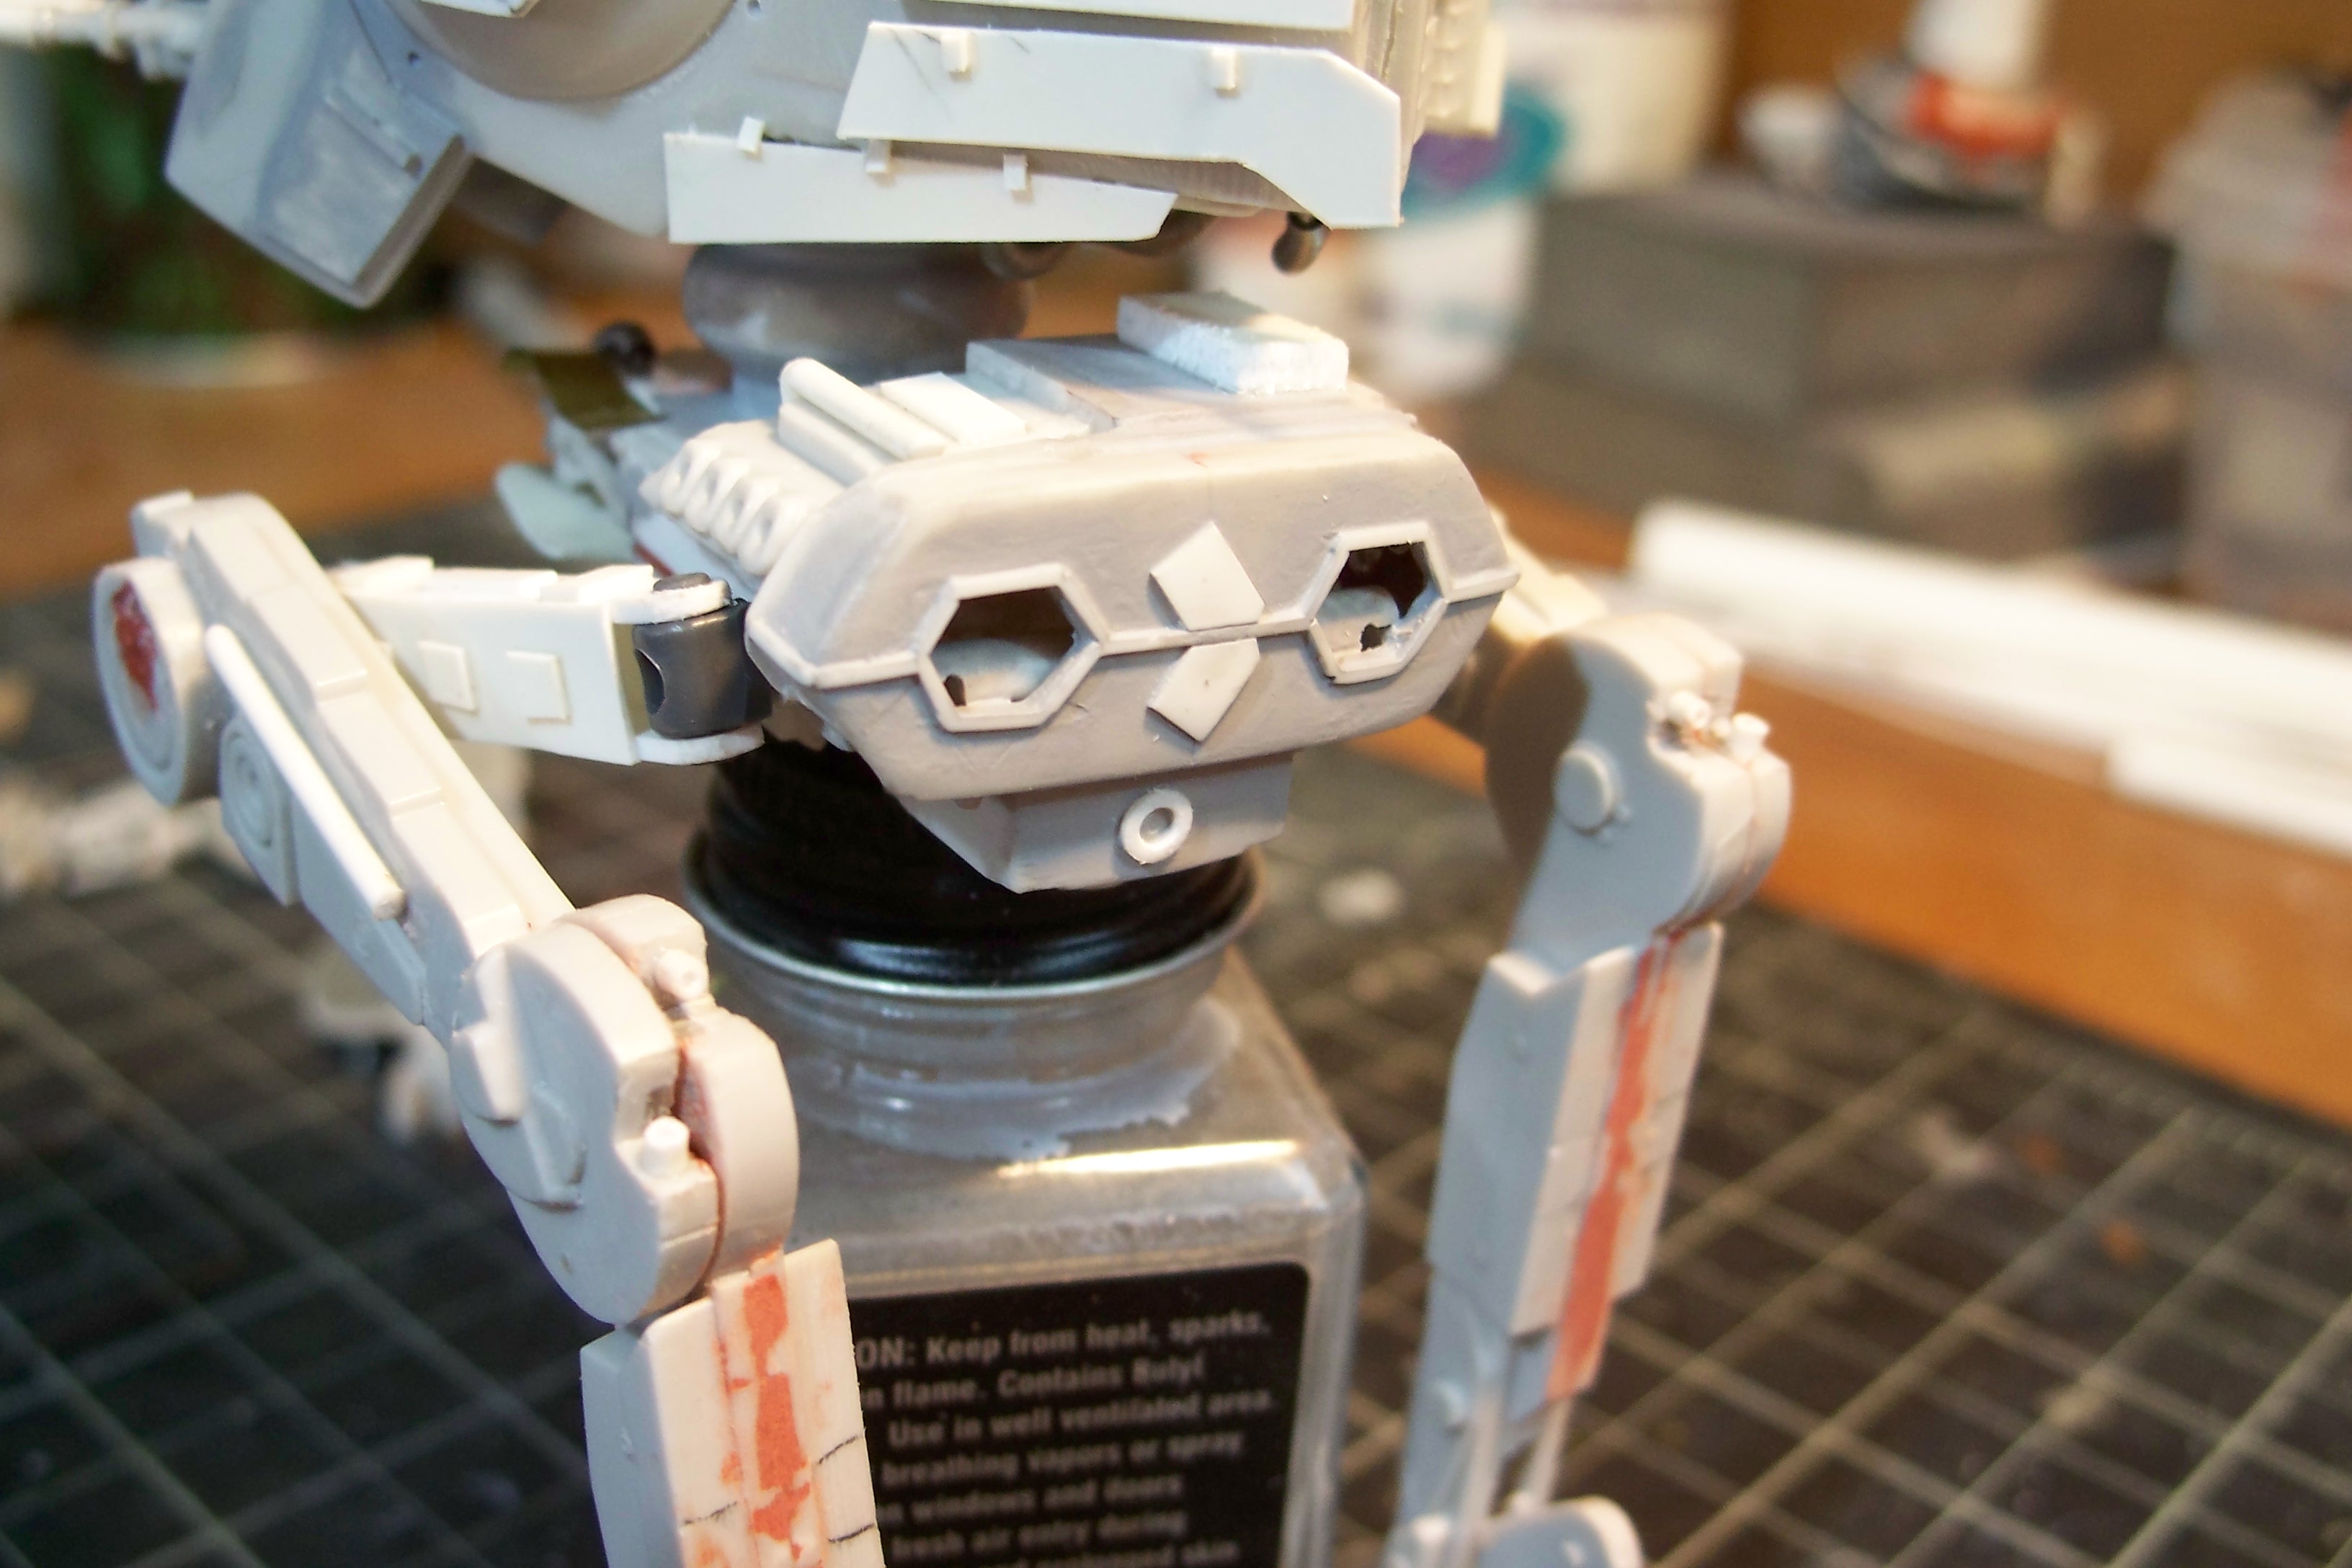
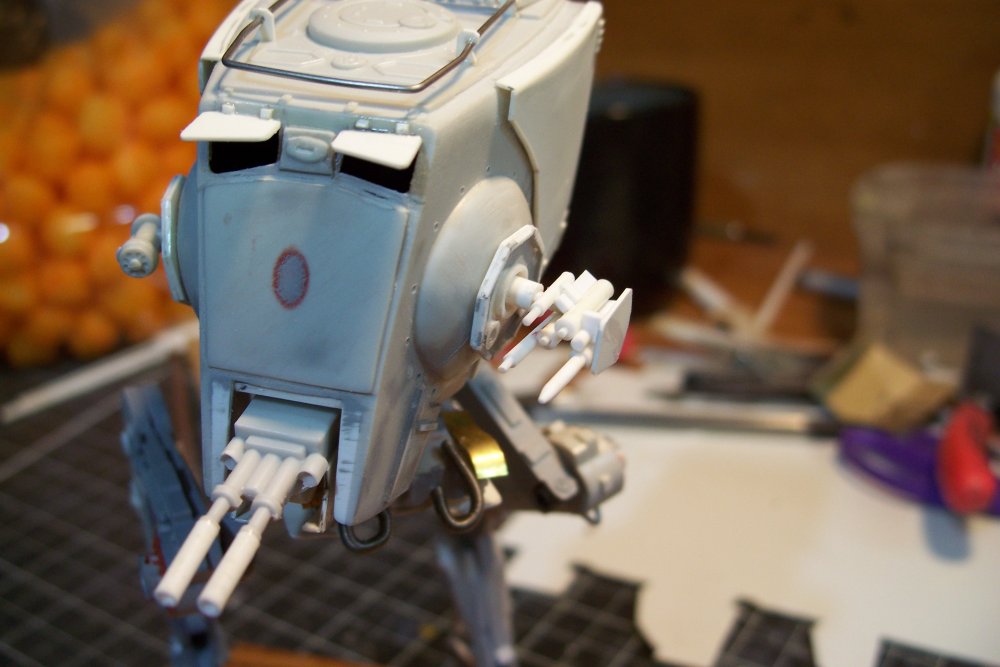
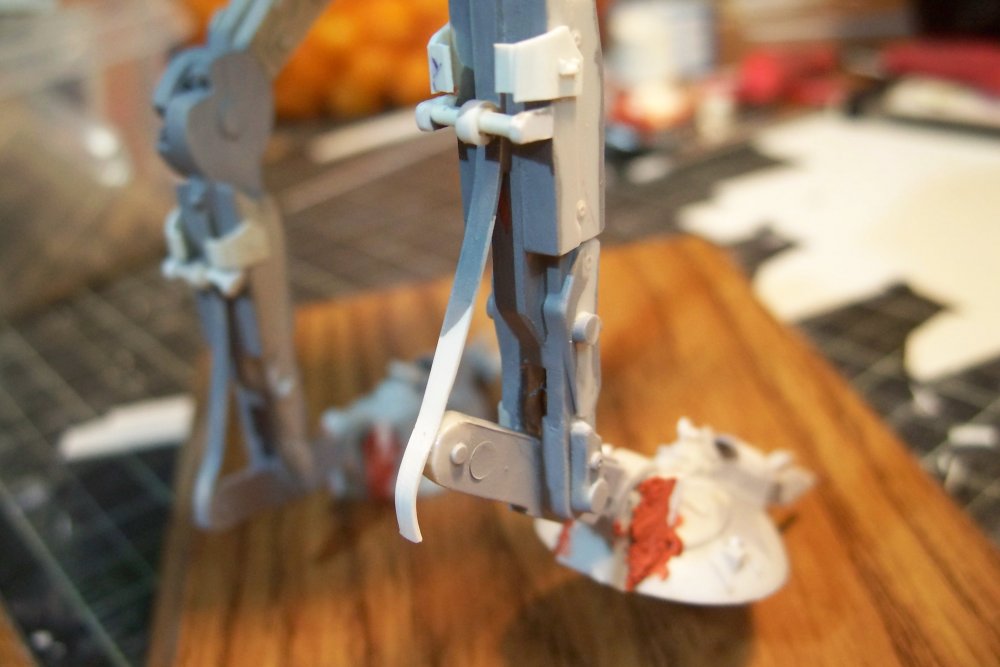
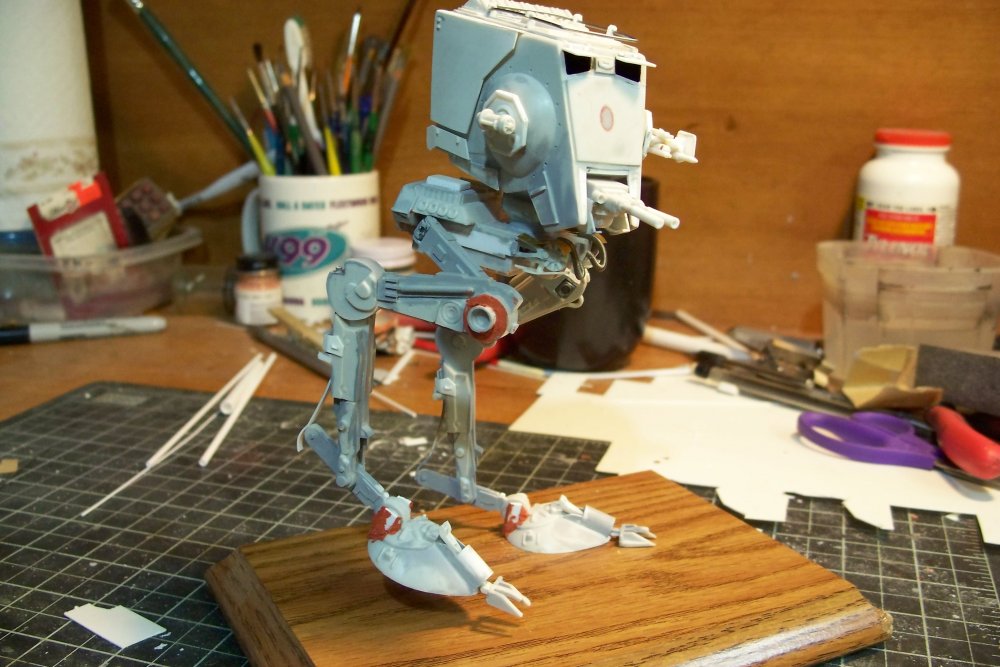
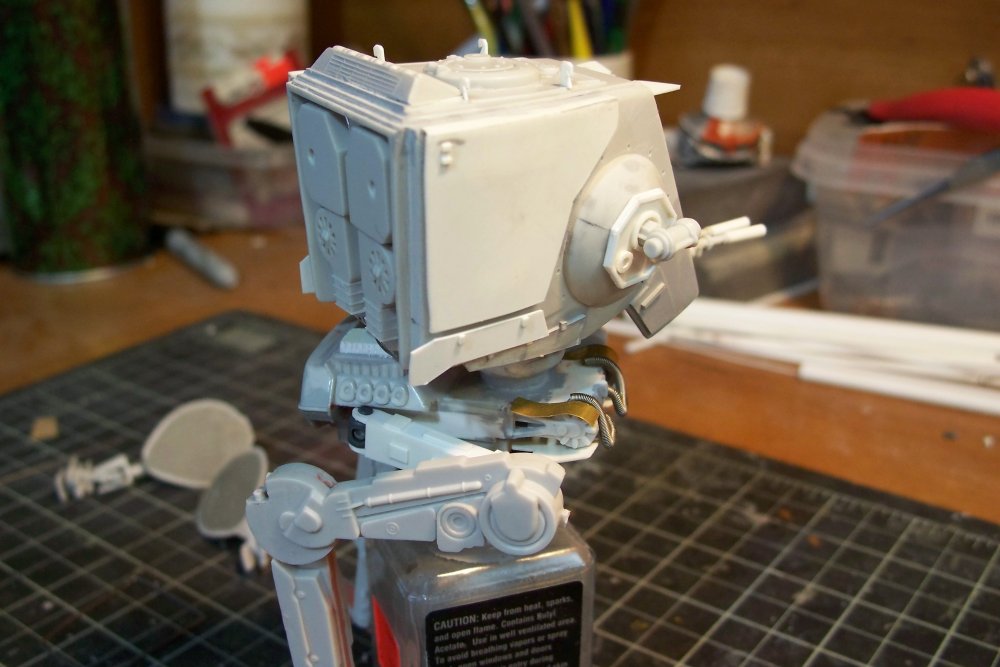
Also i havent seen those antennas on any active USAF aircraft only export versions. Then again there could be a few in wolfpack that have them. I have only gone stateside and USAFE. Hill is the main depot though and i have yet to see any US bird come through with them on it. Only foreign nations. Personally im in a turd polishing mood so im rennovating the AMT ATST.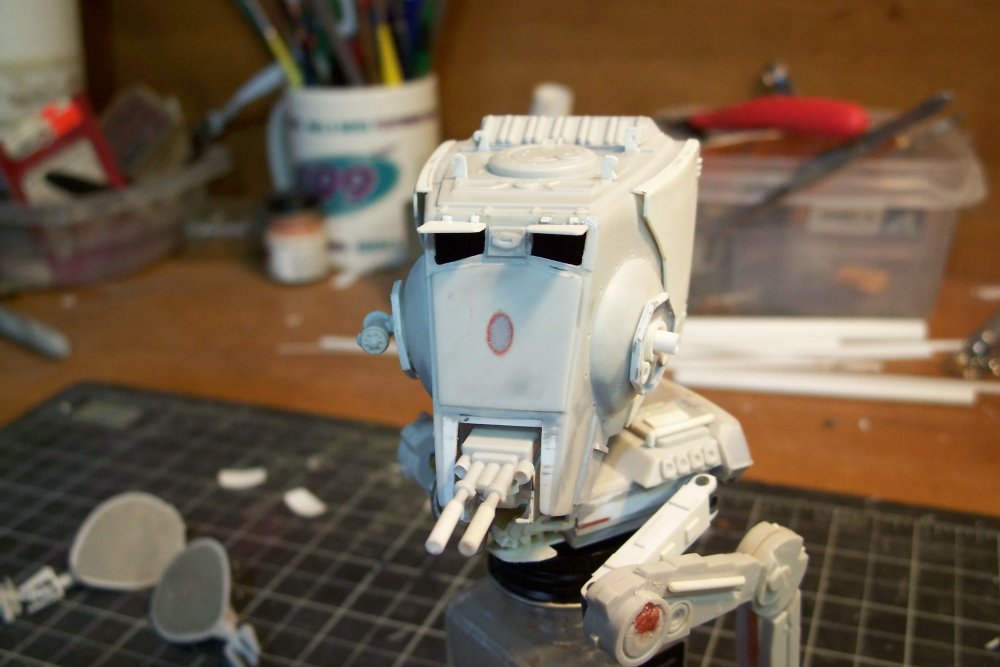


-
No prob John. If it werent for you 4 of these destroids wouldnt exist. Have you given any though to doing up a Cheynne 2 now that it is a mainstay mech in Macross Frontier?
-
Whats Lying on your Workbench MKIII
HWR MKII replied to HWR MKII's topic in Hall Of The Super Topics
If your making a Block 50 F-16 out of it youll want to remove the reenforcement panels on the spine. If its any other block aircraft your fine. It was part of the falcon up program which added stiffeners, new ALE-47 chaff/flare system and other avionics changes. Sorry to hear about your troubles with the kit. Sometimes even i have one of those kits that just doesnt want to get finished. I wind up throwing it in a box for a couple years and coming back at it with a fresh outlook. Try a battroid. Something your familiar with but not an aircraft. -
Just a bump. Its been a while and i know theres renewed interest in mikes monster kit. Theres some pics of it here for those who want to see it.
-
Bandai 1/72 Scale Macross Frontier Plastic Models
HWR MKII replied to Graham's topic in Hall Of The Super Topics
I "may" get this kit. I want to see some things from people who have got it and built it first though. -
I have said it before and ill say it again. You DO NOT need to thin future. Its already thin as it is. It dries even thinner. You can paint over it using other acrylics but if you do paint over it allow 3-4 days for it to fully harden. Future will stay "gummy" and stretch if given a matt overcoat or paint overcoat causing cracks in the finish. For canopies just do your usual polishing to remove any seam lines ad then DUNK it. Set the canopy on a paper towel to wick away any excess and cover it with a tupperware bowl to keep dust from setteling on it. Once cured your canopy will be sharp and clear.