nightmareB4macross
-
Posts
5944 -
Joined
-
Last visited
Content Type
Profiles
Forums
Events
Gallery
Everything posted by nightmareB4macross
-
 It’s so super subtle in fighter mode that I can’t see where the Kai and Optimus forms meet. Wow. 🫠
- 142 replies
-
- 1
-

-
- macross 7
- collaboration
- (and 1 more)
-
I really admire work like this and truly appreciate the labor of love that goes into it. Very talented builder. Just hate when a small detail is missed or incorrectly done after all is said and done.

-
Unofficial Plastic Model Kits (Knockoff/Bootlegs)
nightmareB4macross replied to Shawn's topic in Model kits
Congratulations @xstoys! I noticed the canopy is colored differently from the built up toy version releases. Very cool.
-
Probably for the best. I don’t think any animator or cell coloring artist would remember to keep highlighting these areas over and over just to keep that detail.

-
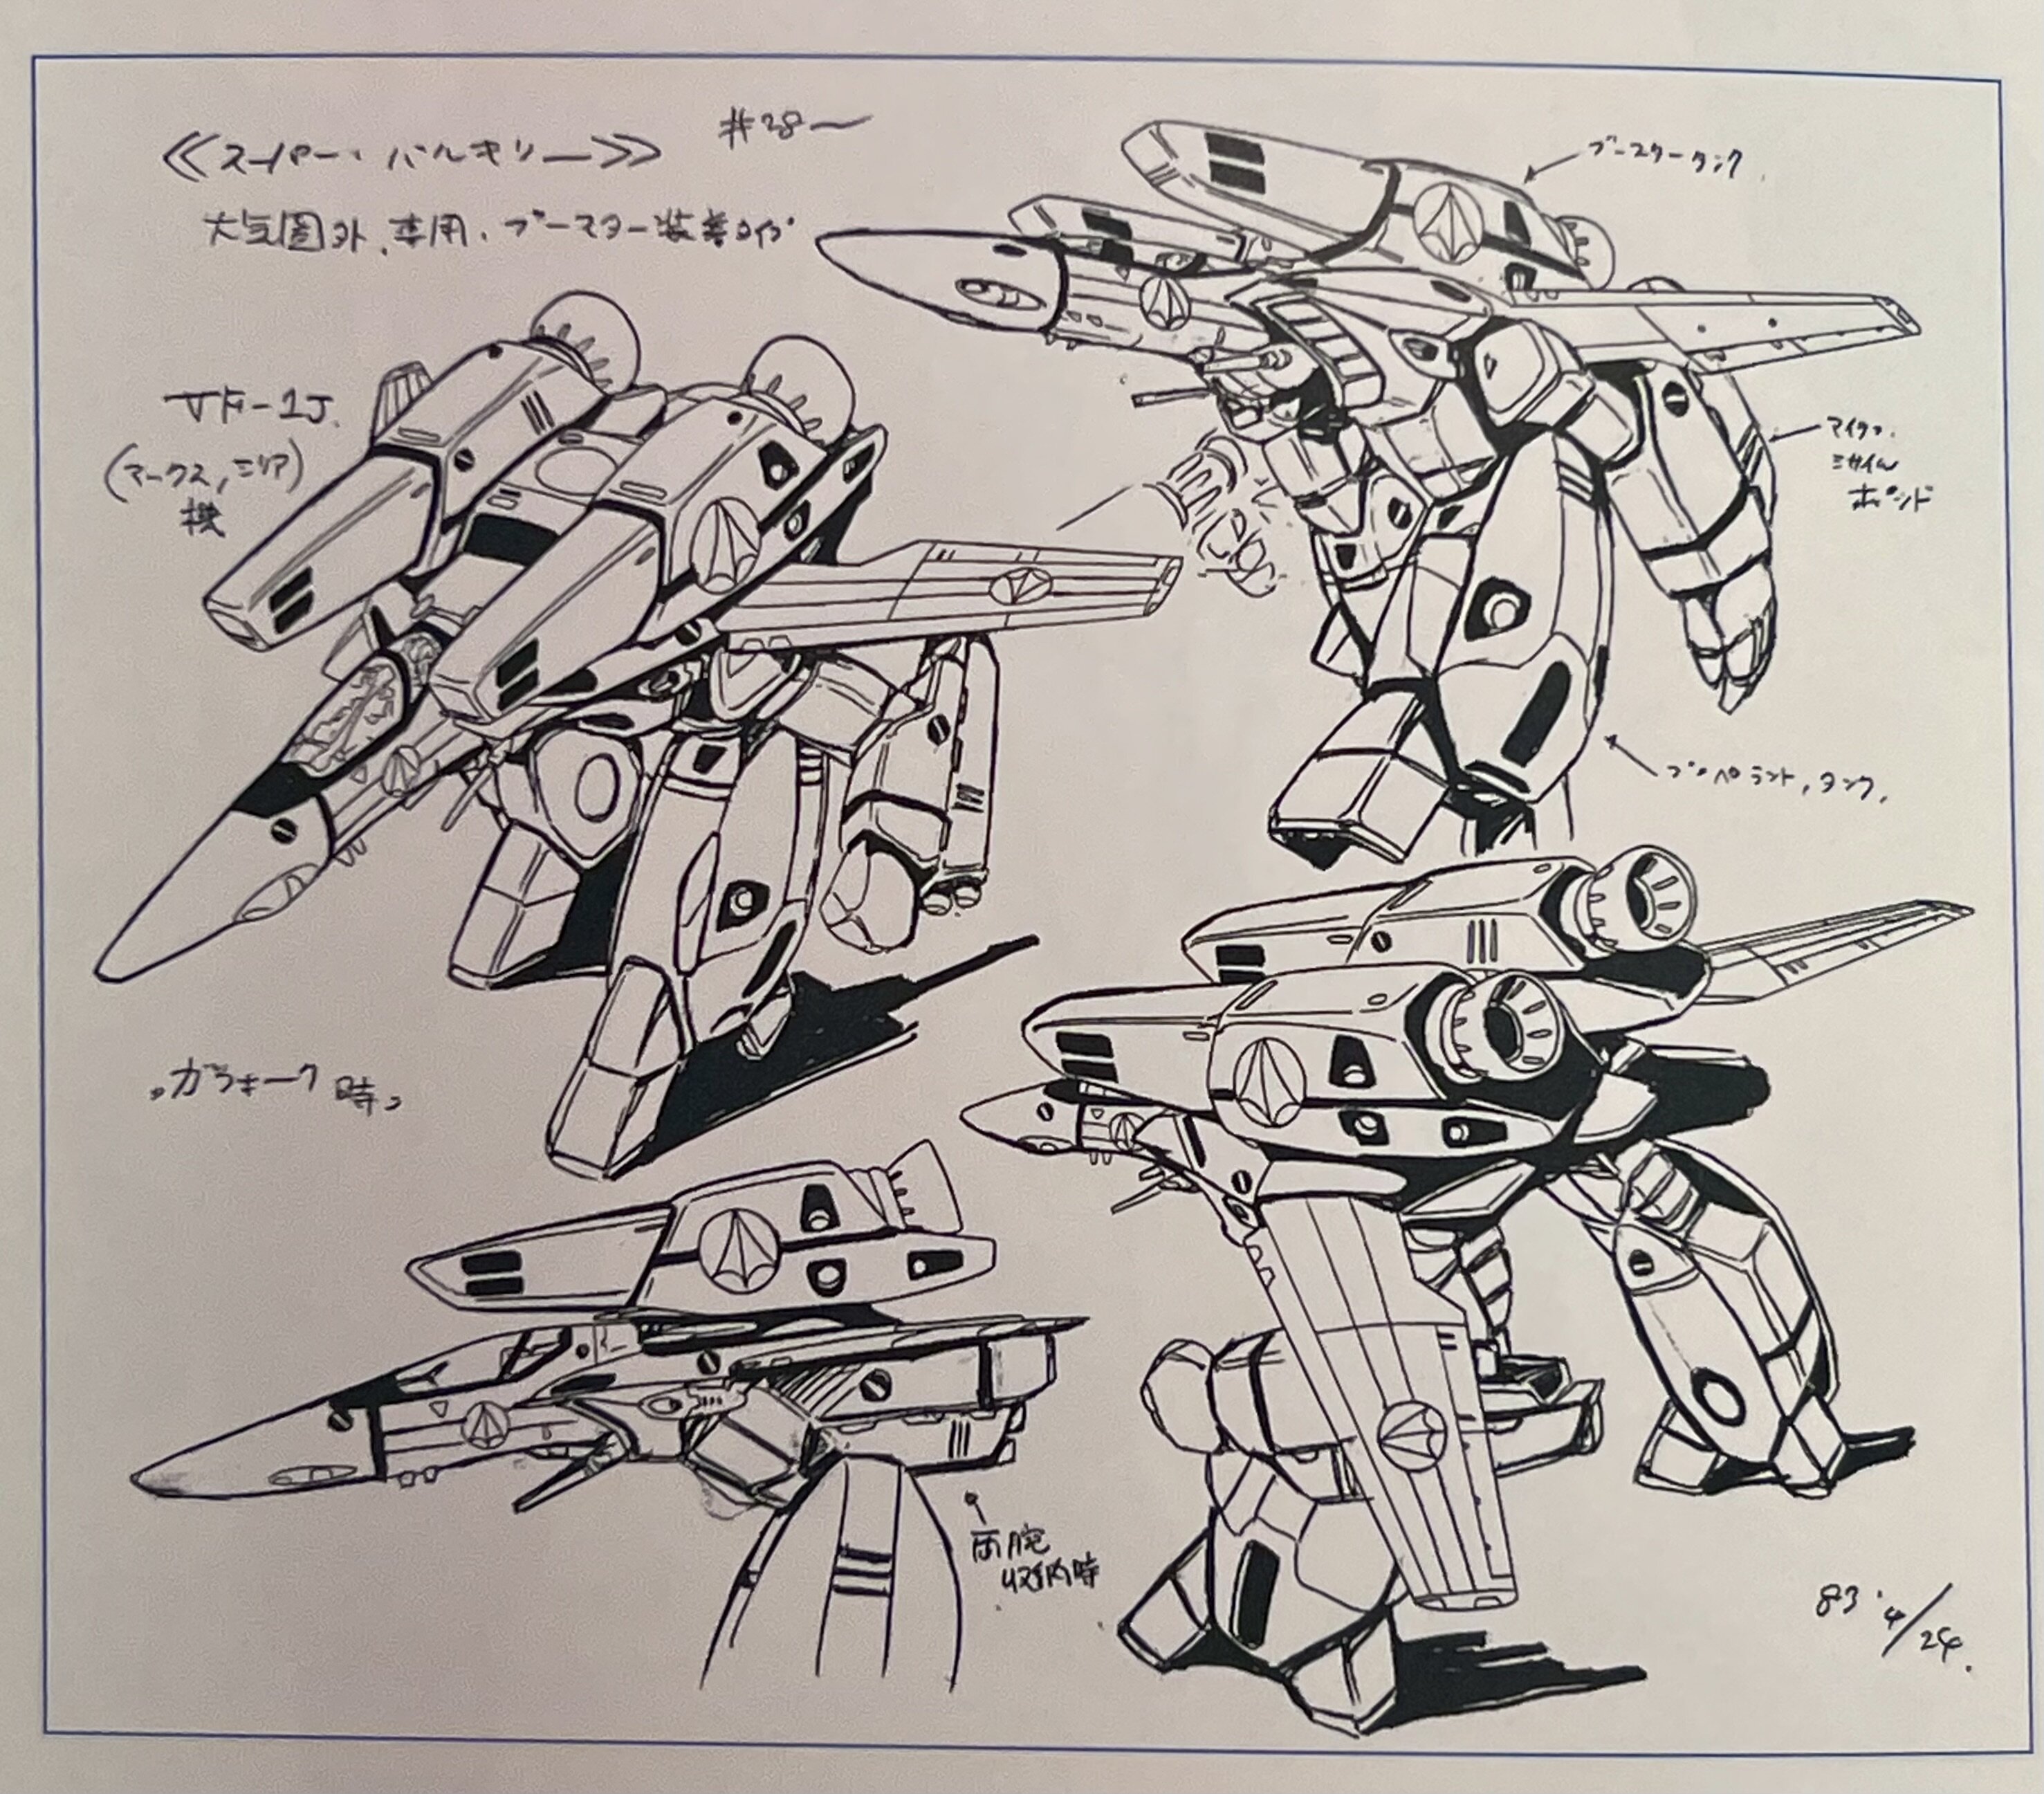
Yep. The backpack SDFM line-art detail is this version here. Which was never really used. Most animation detail and the majority of SDFM line-art has it blacked out. For DYRL the panel looks like vertical slats. And for the TT/Bandai toys it was small round circular thrusters.


-
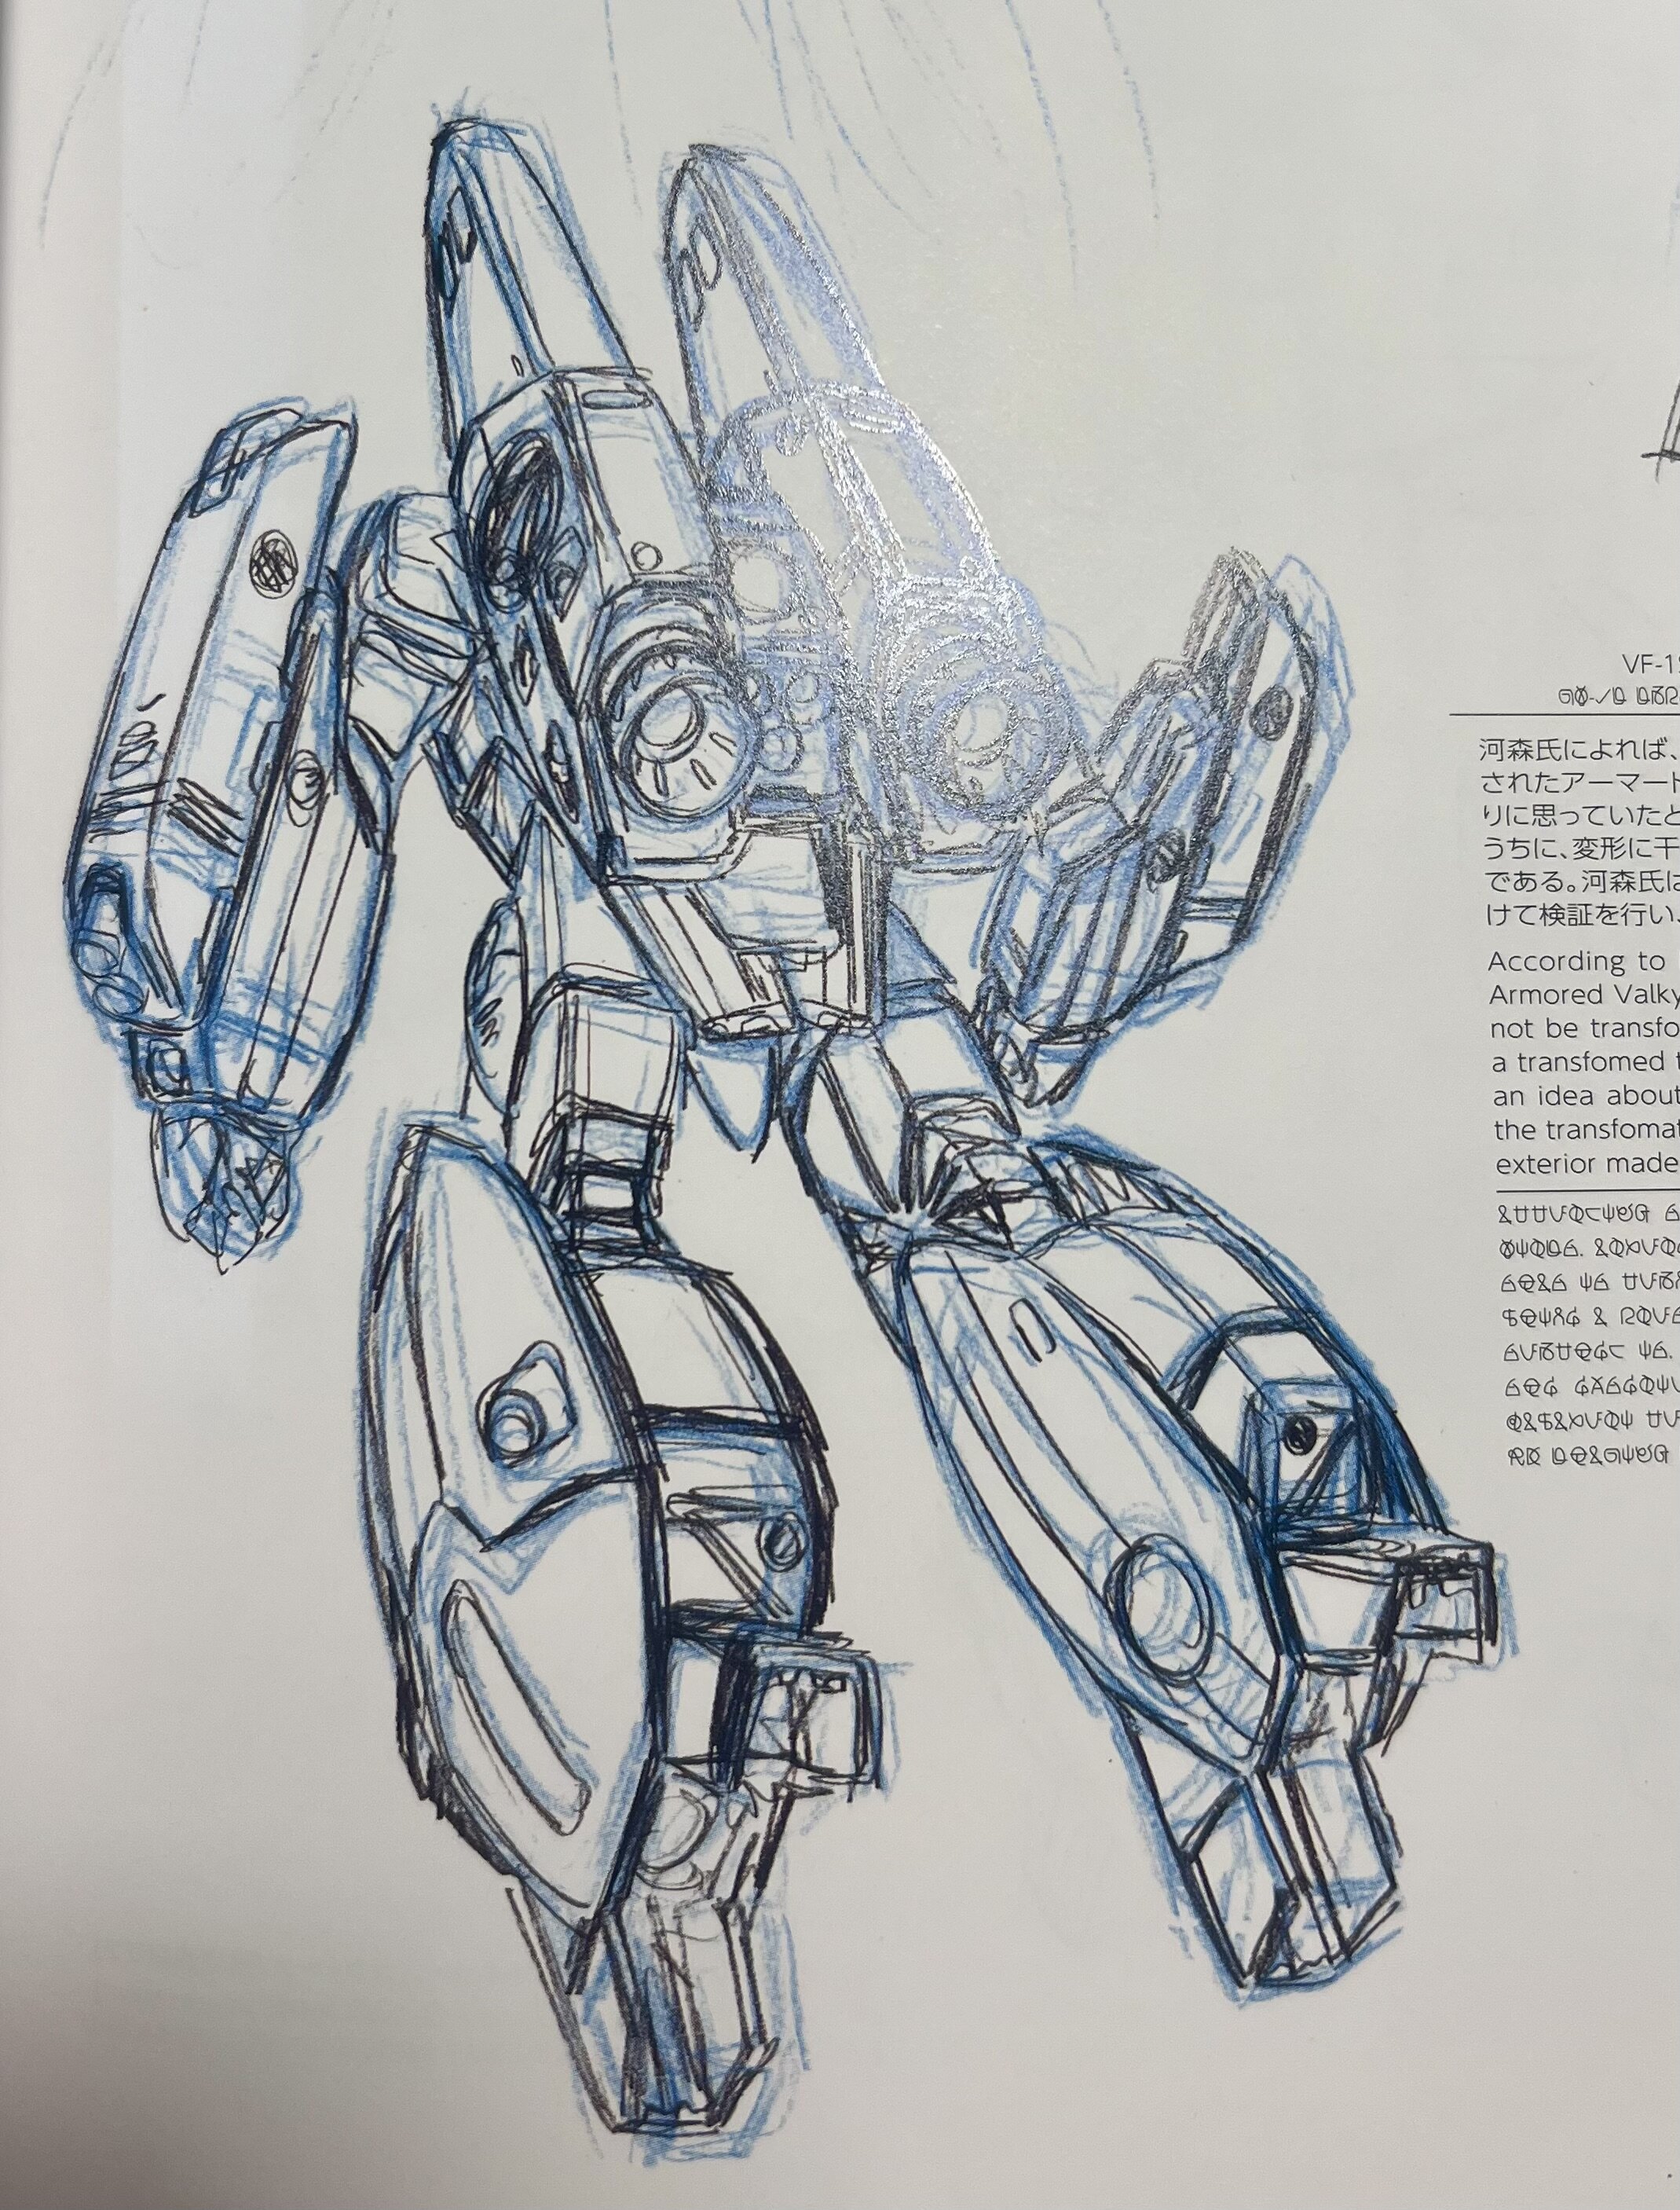
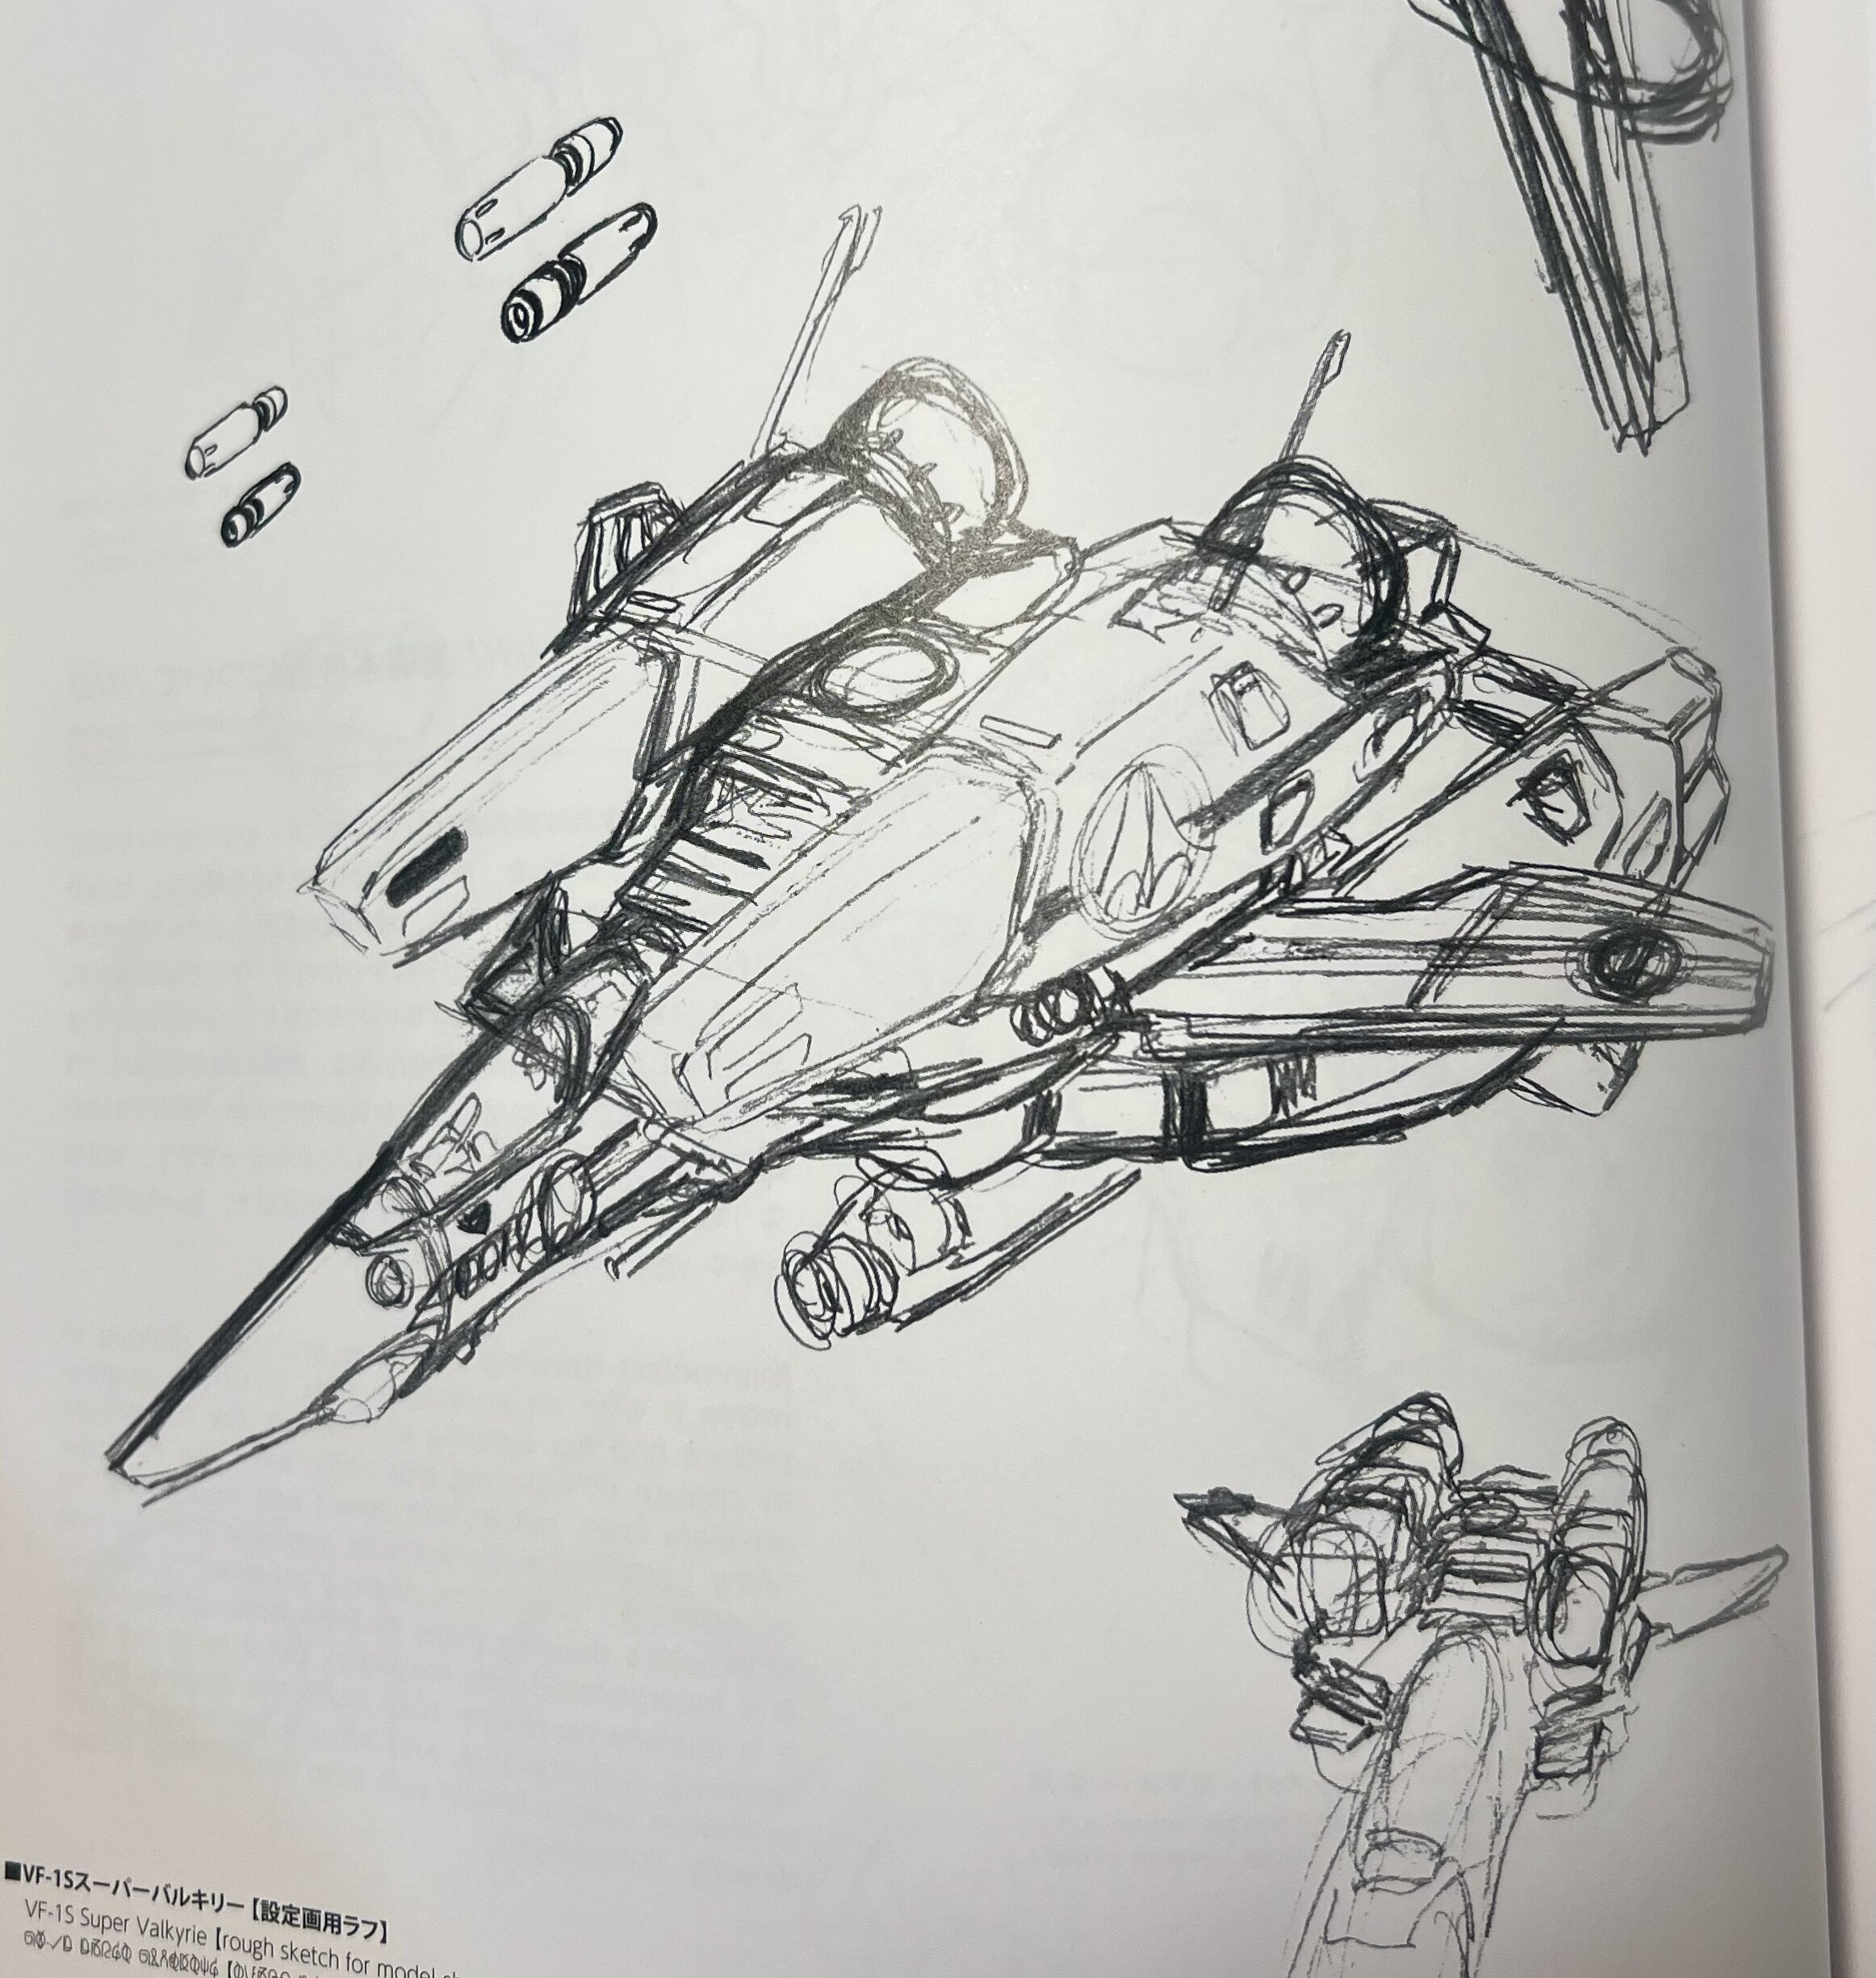
I would say leave it the color and of the leg armor and not as a blacked out panel. And to finally put this to rest, I looked into the Designer’s Notes. These are all the rough sketches from SK. Nowhere is there any visible thought of any kind of thrusters within that space. Wild.


-
My bad I should have caught my error. I pulled the image from the Macross Mecha Manual. I’m slipping. There is always a new gem of detail to be found. Nice. This should be the proper reference image. But while I was looking for my reference books I found something odd in the Package Art Collection book. Somewhere along the lines a reference to a single thruster is made. Not sure where the reference came from but now I have to do more digging. The same reference appears on the back of Perfect Memory. Even the stickers on TT Super Valkyries have the three thruster on the legs. I’m going to have to go back to the anime and look for screen grabs to find if these thrusters ever showed up in the anime. And even more so, somewhere in the art books. Macross is the hobby that keeps on giving.


-
I see your point, but if you’re considering this as correct based on anime laziness, then the whole mold is incorrect due to the over embellished details on the PlaMax mode. If the modelers said this is the route they actually chose then the anime version would be more akin to styles like this. Line art is always the standard to follow.

-
Totally missed the mark.


-
-
That spring loaded tab is there specifically to keep the front and back halves together in Battroid mode. When pressing it down to disengage from Battroid to fighter it is always best to hold the back plate so you don’t force the metal shoulder hinges to warp and eventually break the plastic clips that keep them in place. Plus it keeps the Battroid tighter. If you often mis-operate these parts the front and back halves will get very loose and sloppy over time. And when you pose an arm with the GU-11 pointing forward the two halves will often split and the arm droops down. And as an FYI, a similar clip system is used in the 1/100 Takatoku figures, but the clip is attached to the nosecone underside and has no spring tension. Hope this helps.
-
Wave 1/72 and 1/100 Destroid Kits
nightmareB4macross replied to nightmareB4macross's topic in Model kits
Looks like we got a new update.
-
The 'Hey look at this really cool model build I saw' post
nightmareB4macross replied to Shawn's topic in Model kits
All else is cool, but the city…😘 -
https://ebay.us/m/zyJlca It appears someone is trying to sell ultra crappy recasted soldiers and claiming these were official to some capacity. Just putting this out there.


-
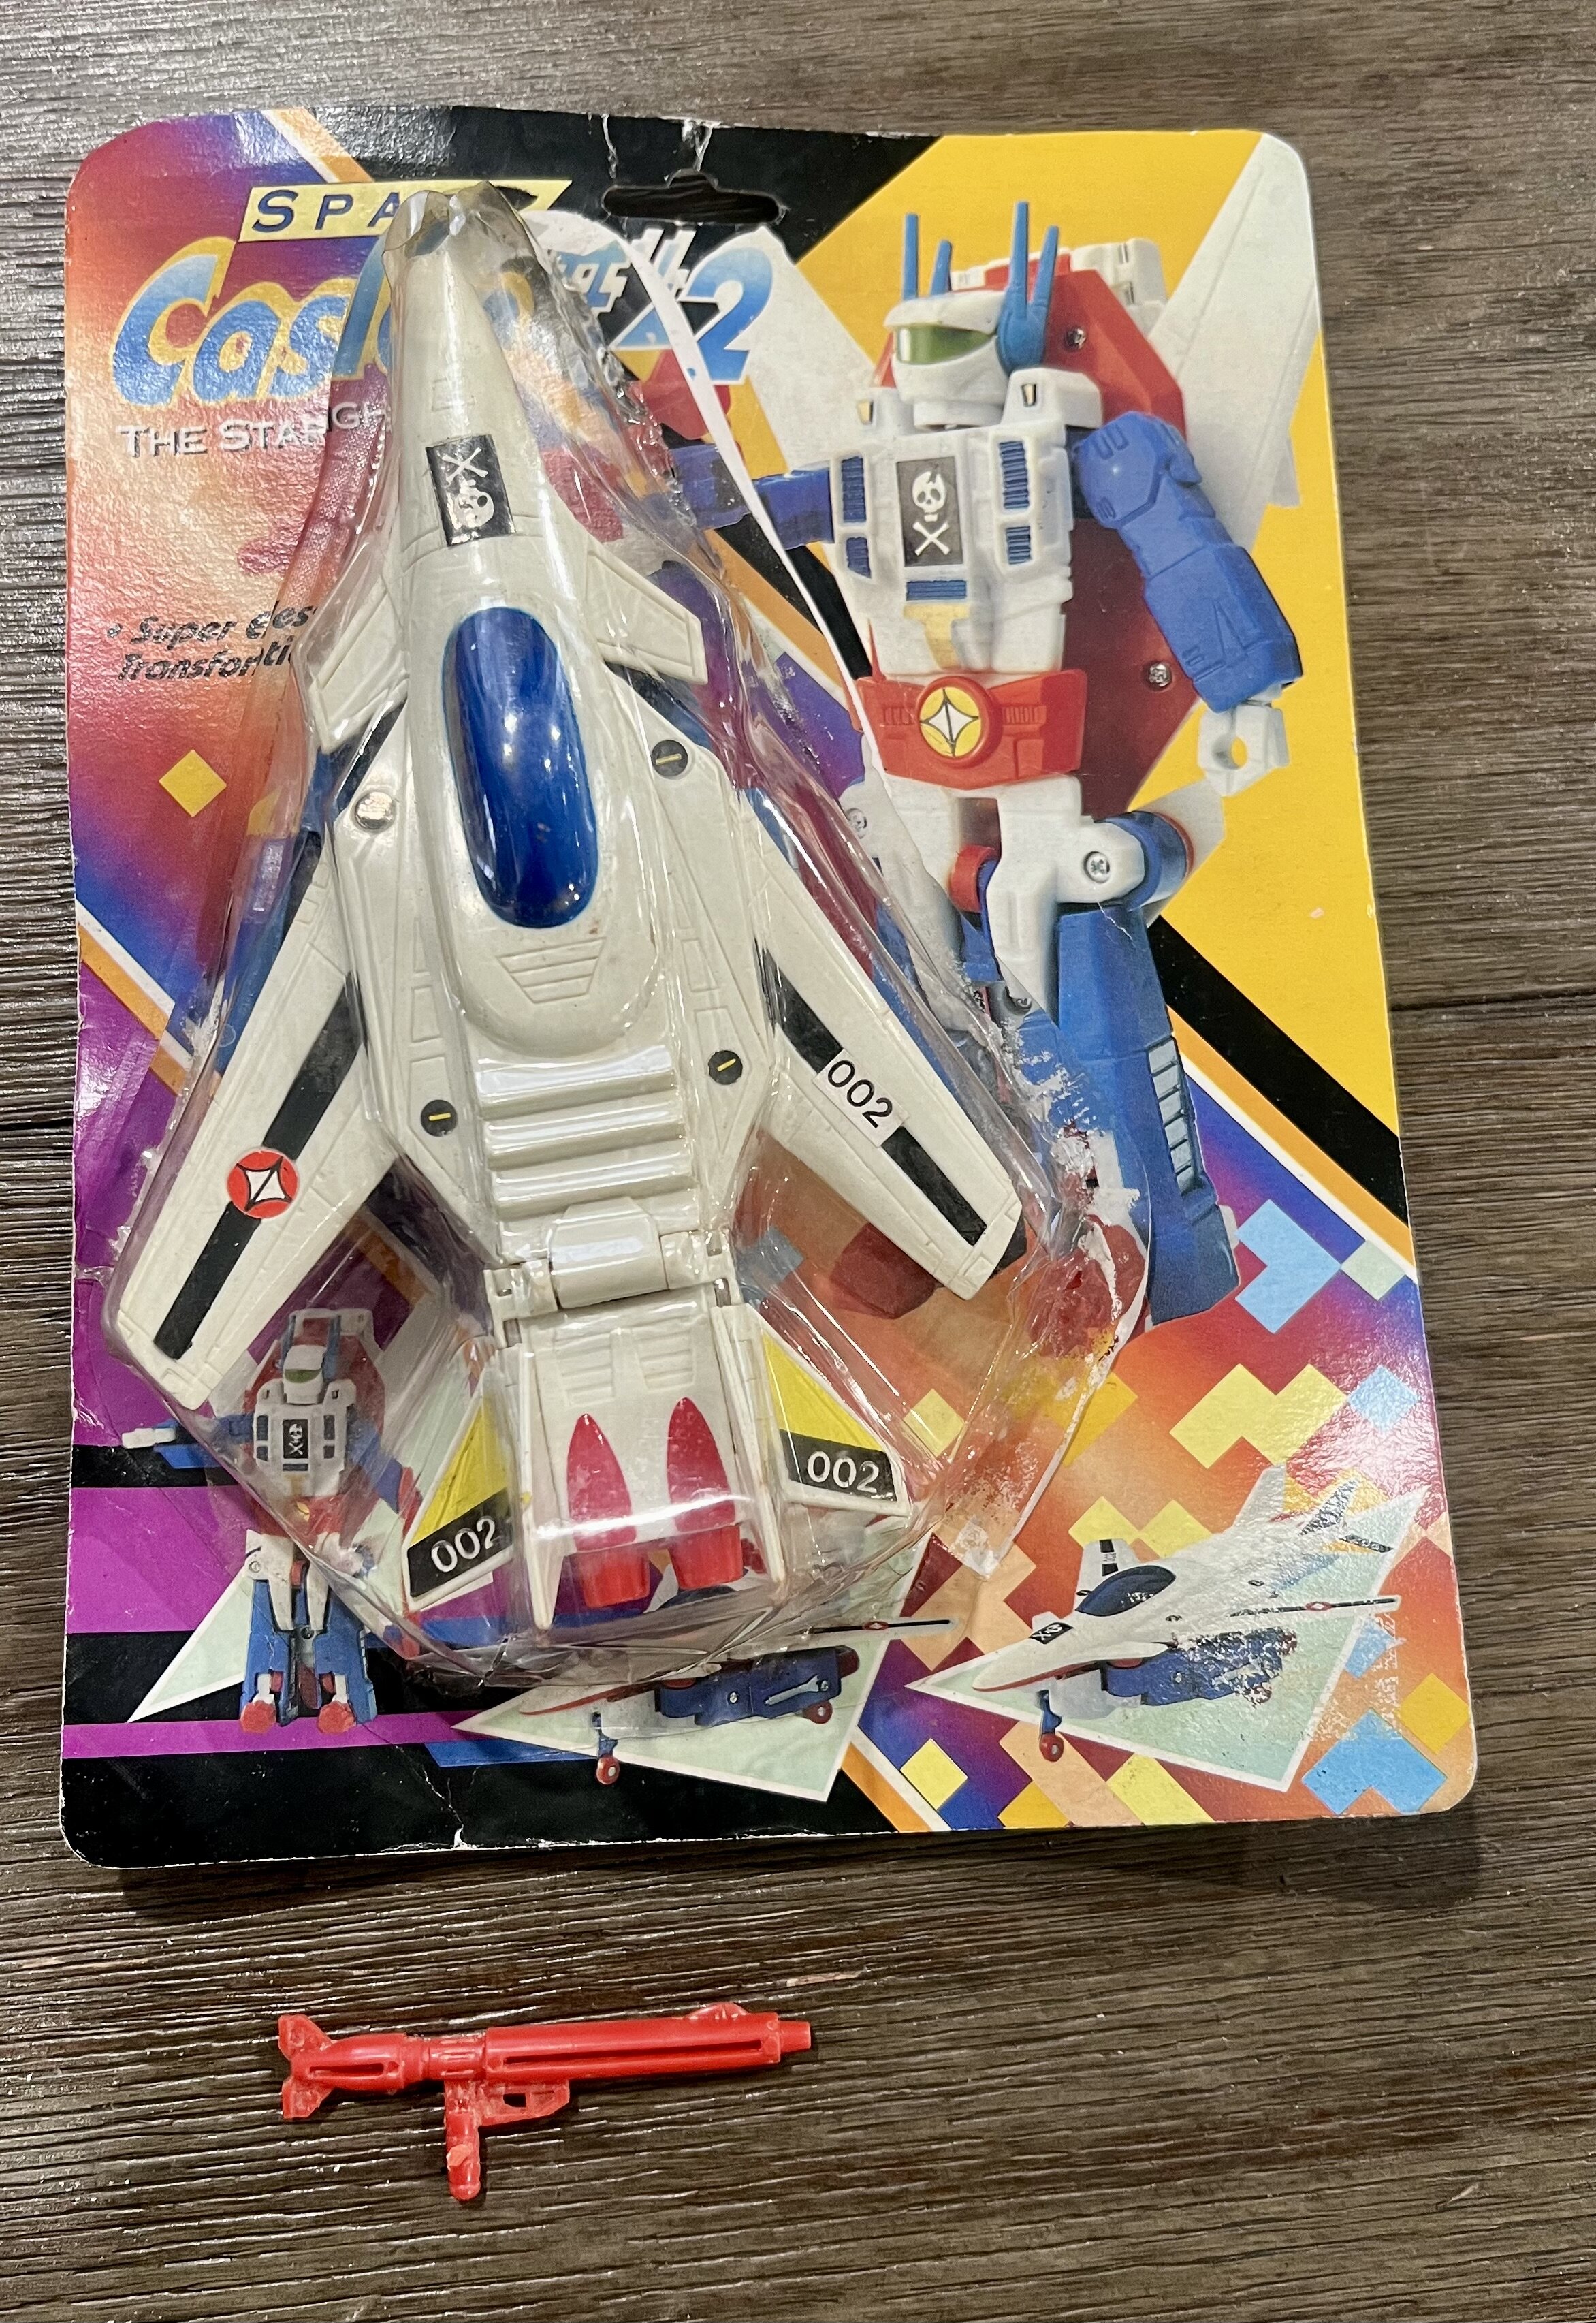
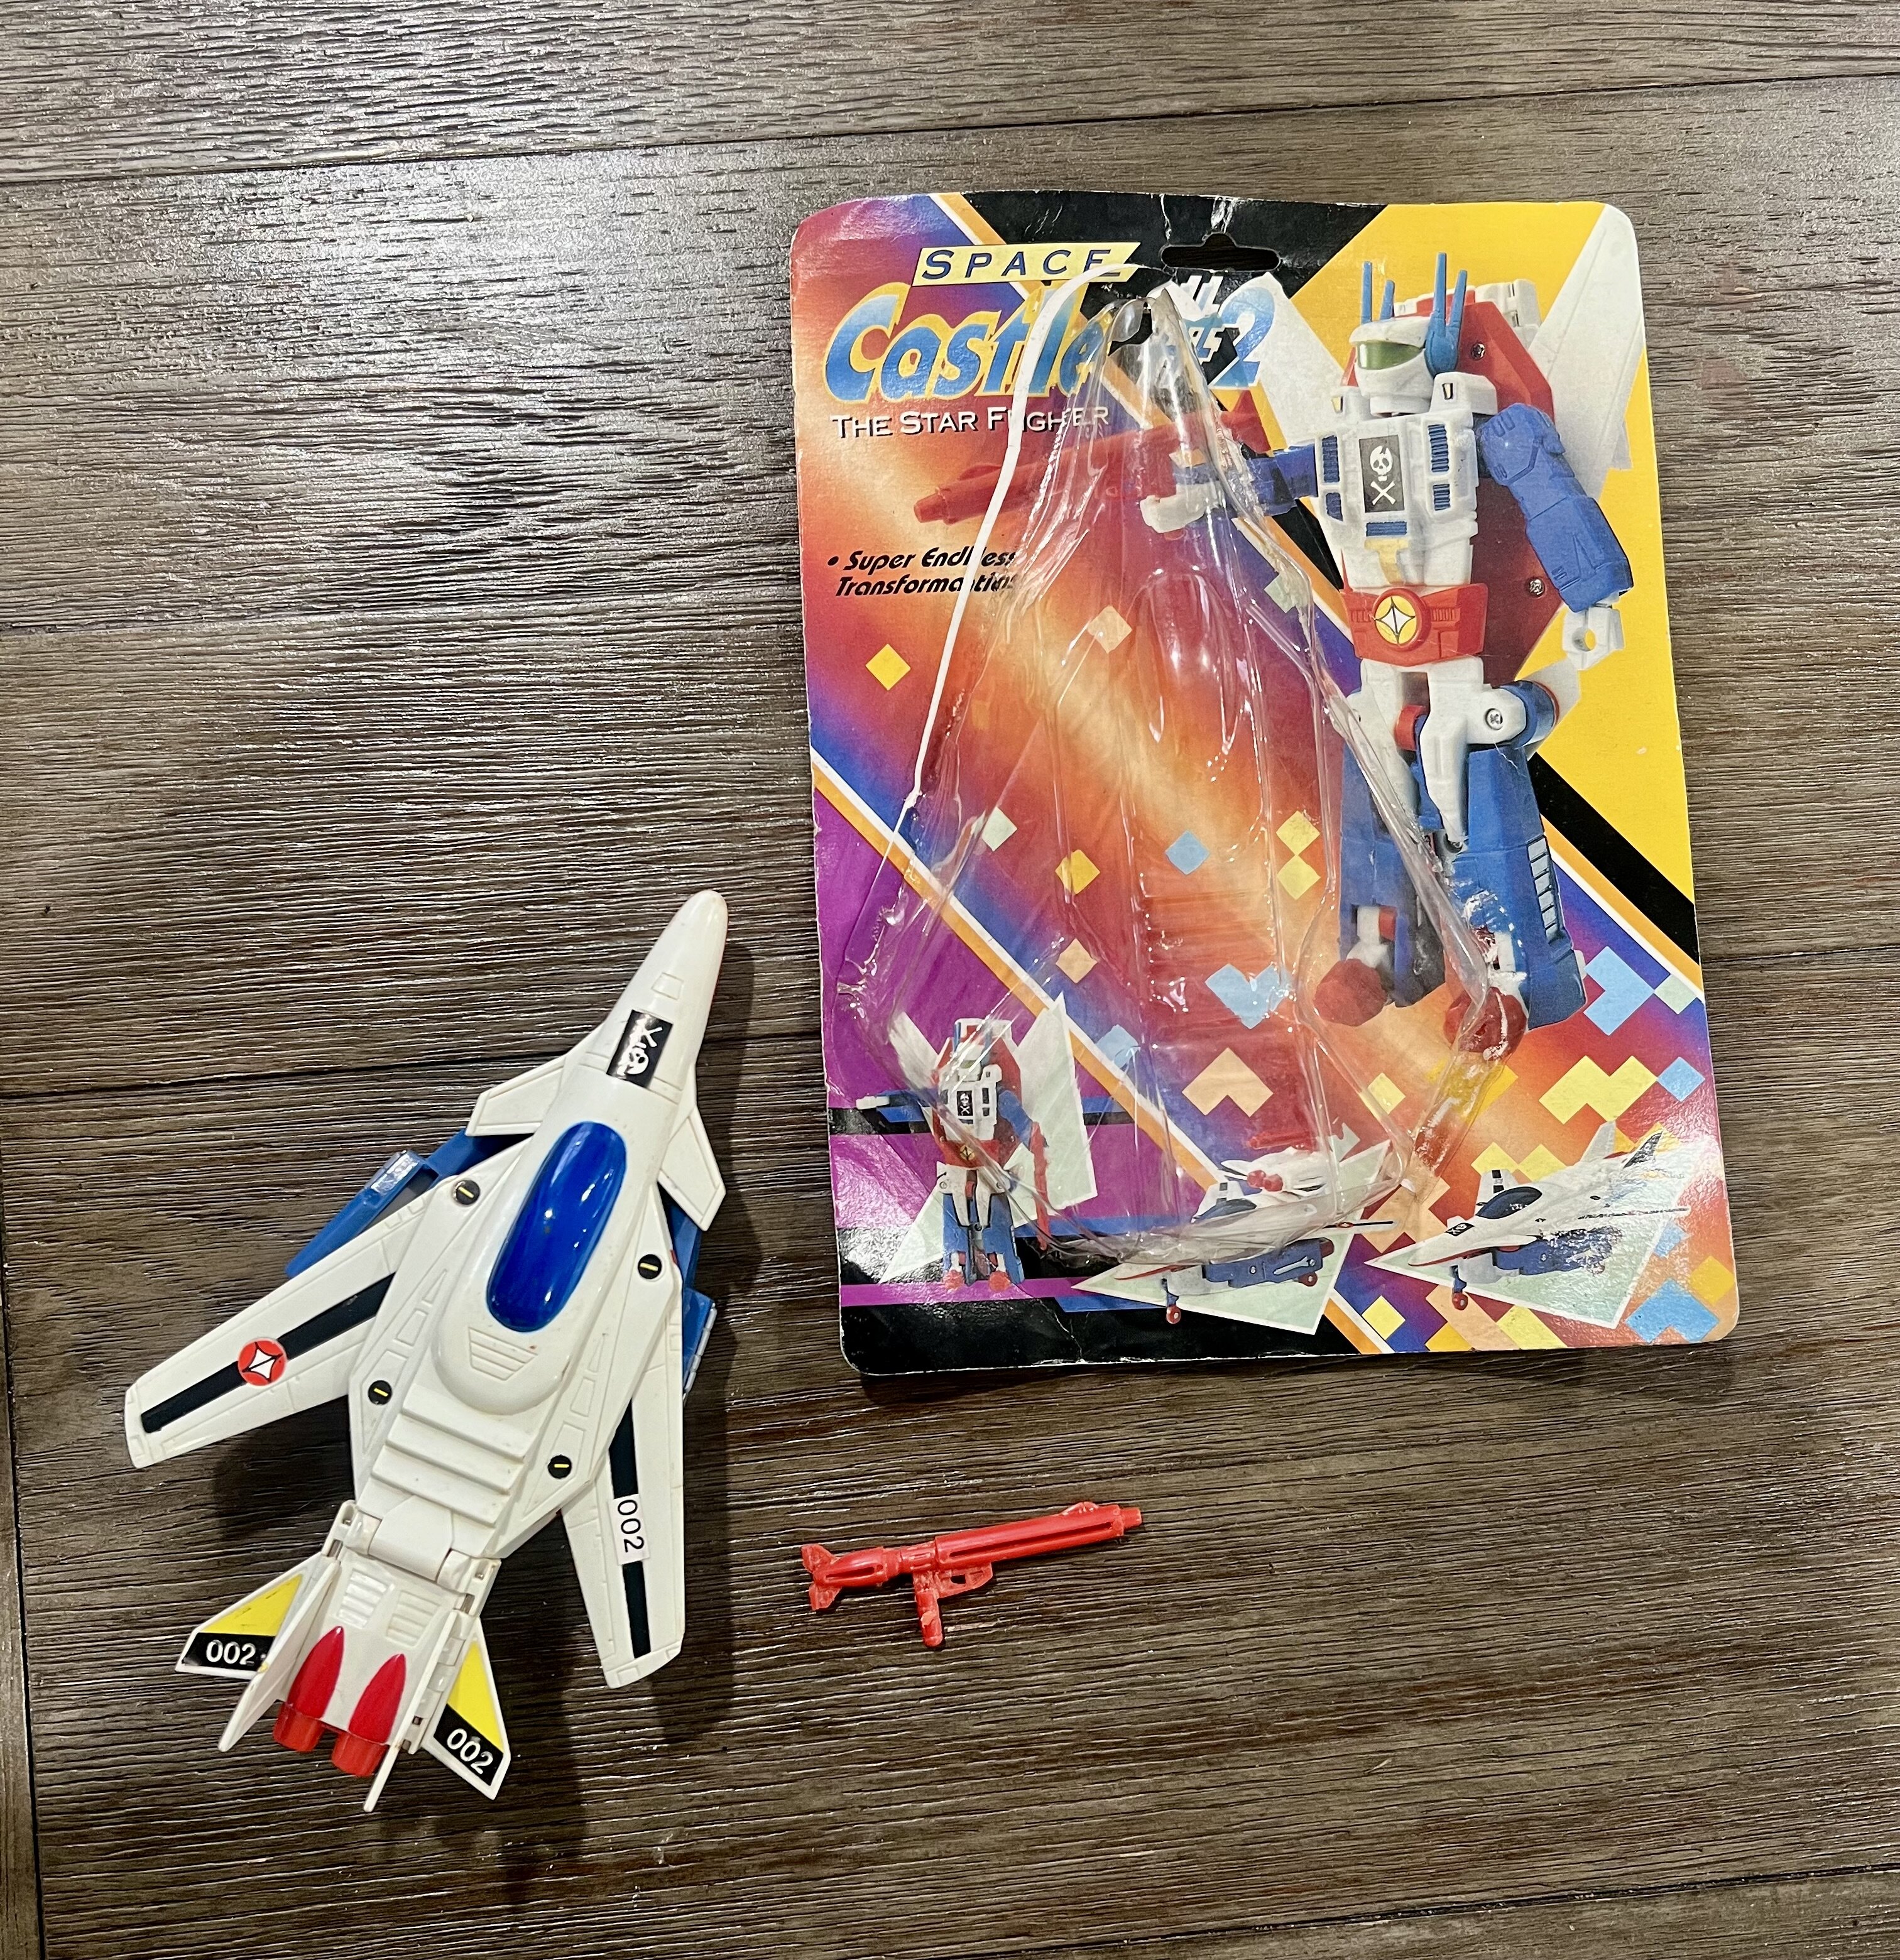
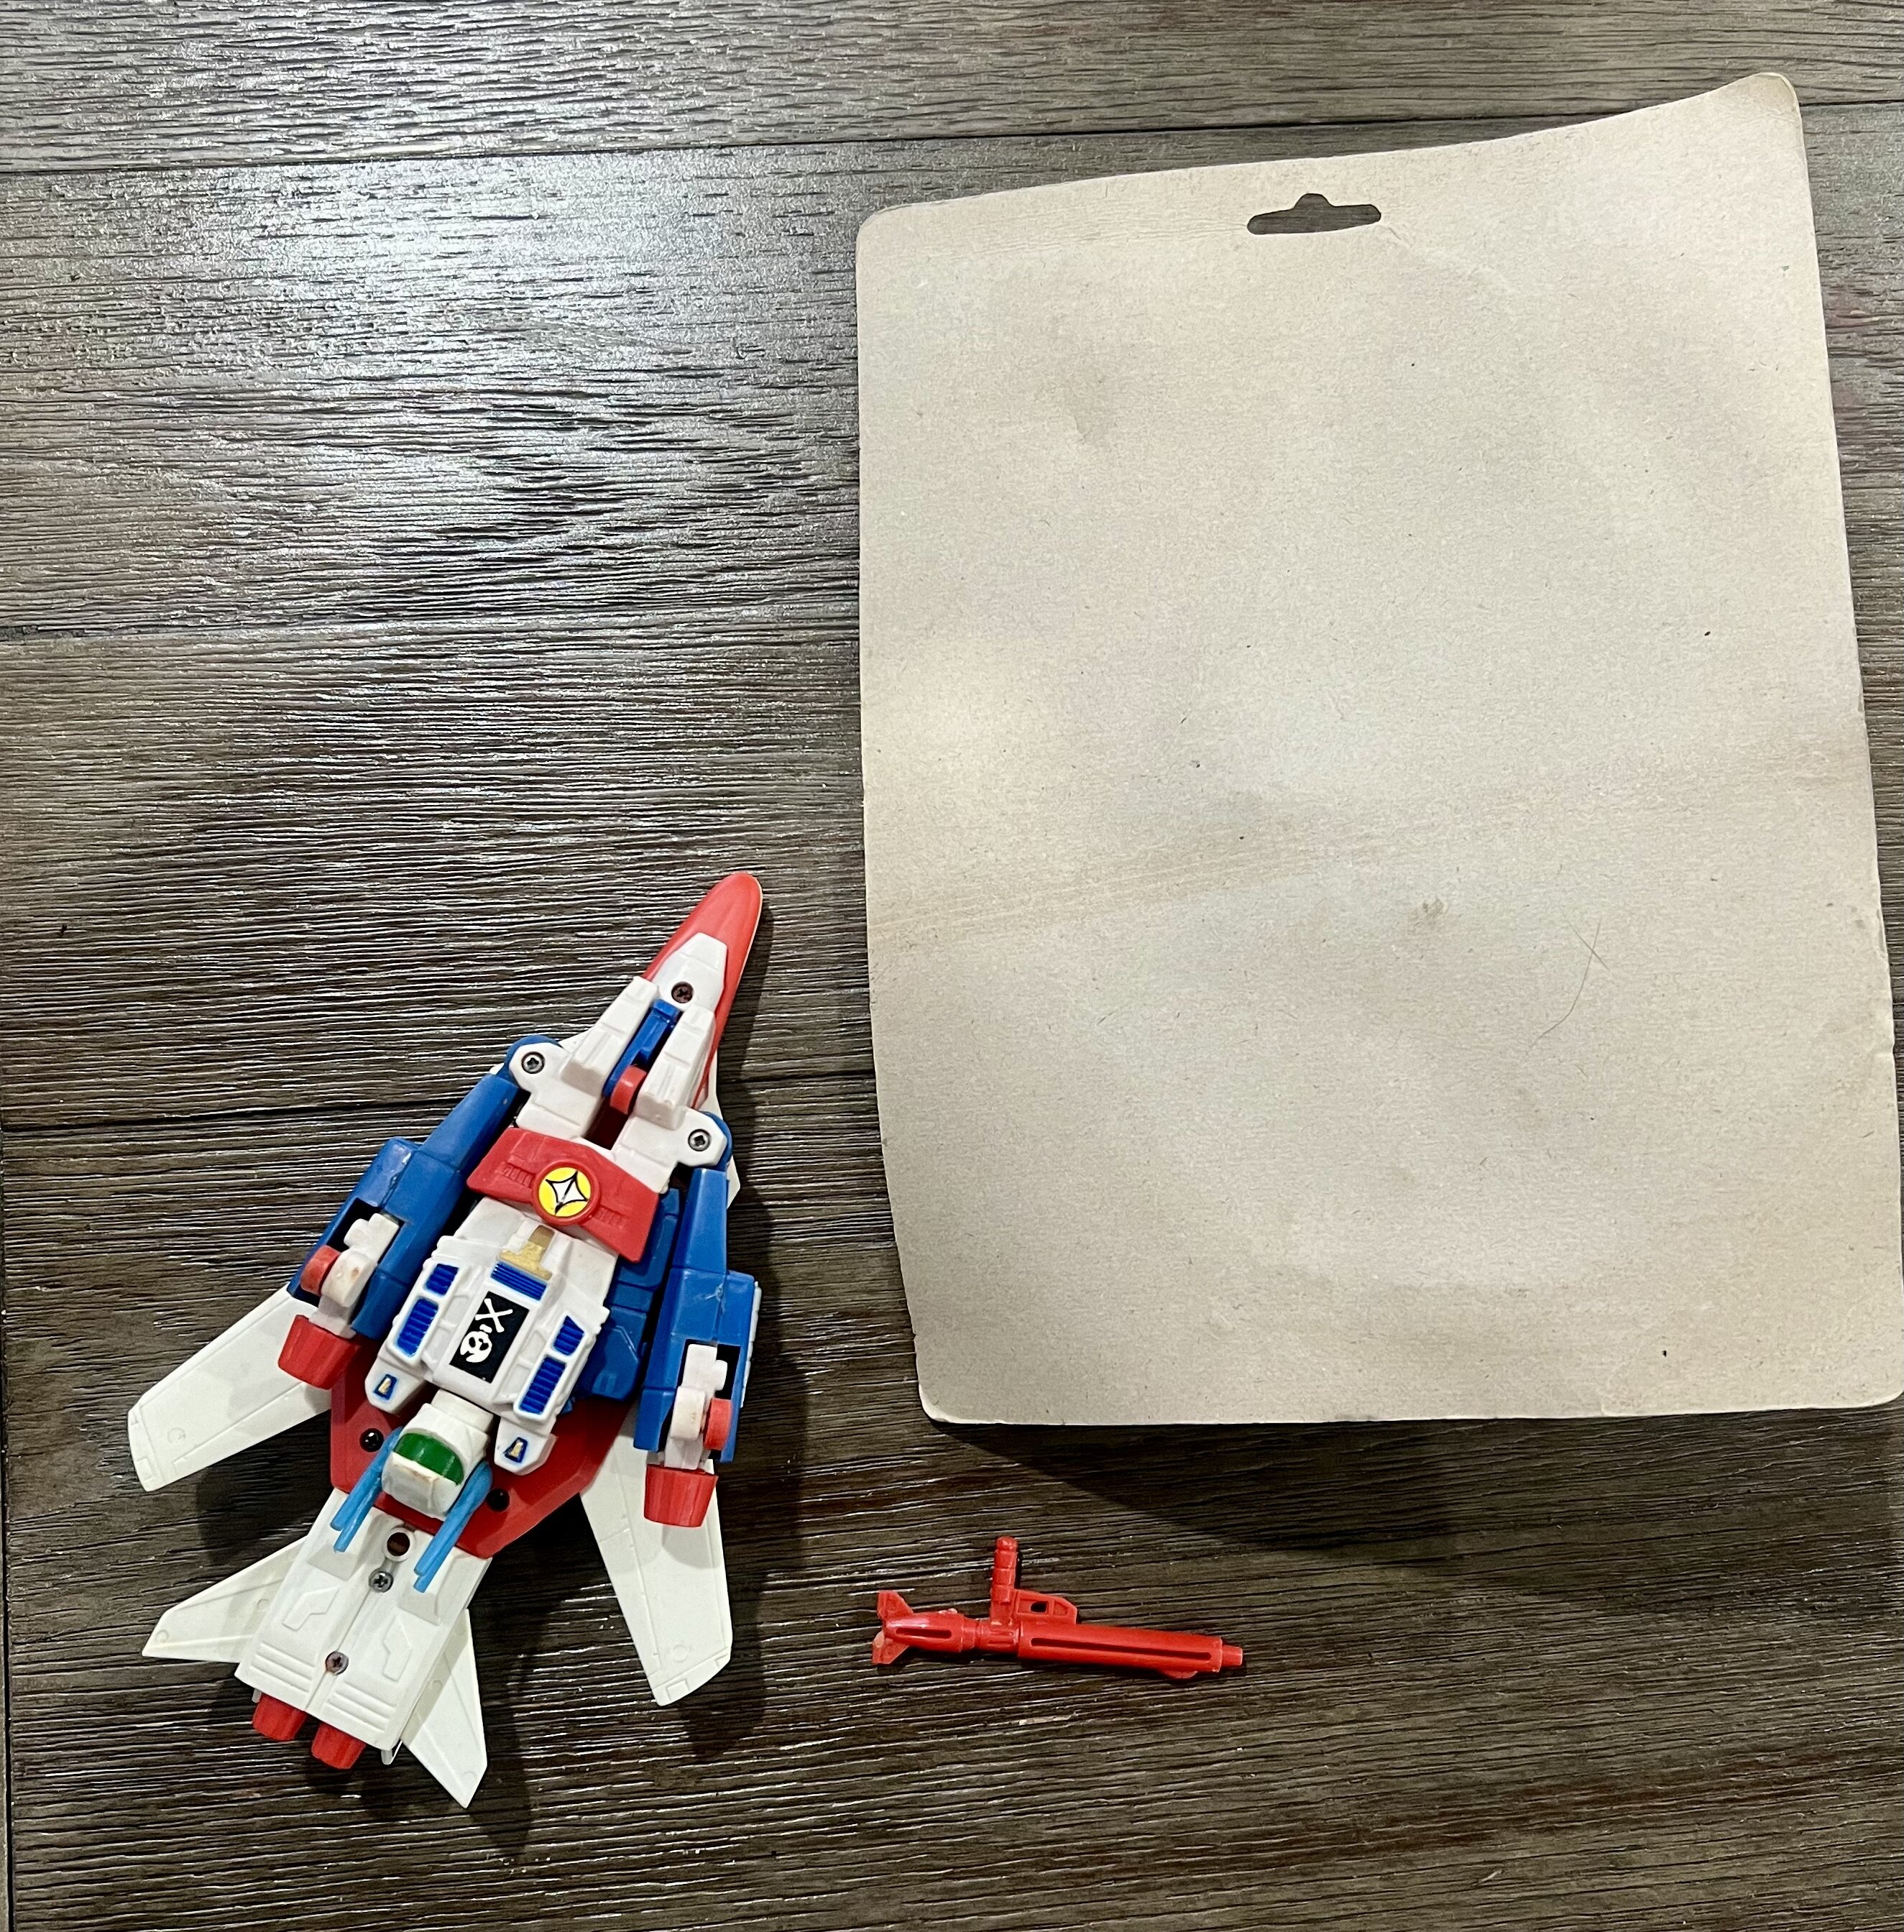
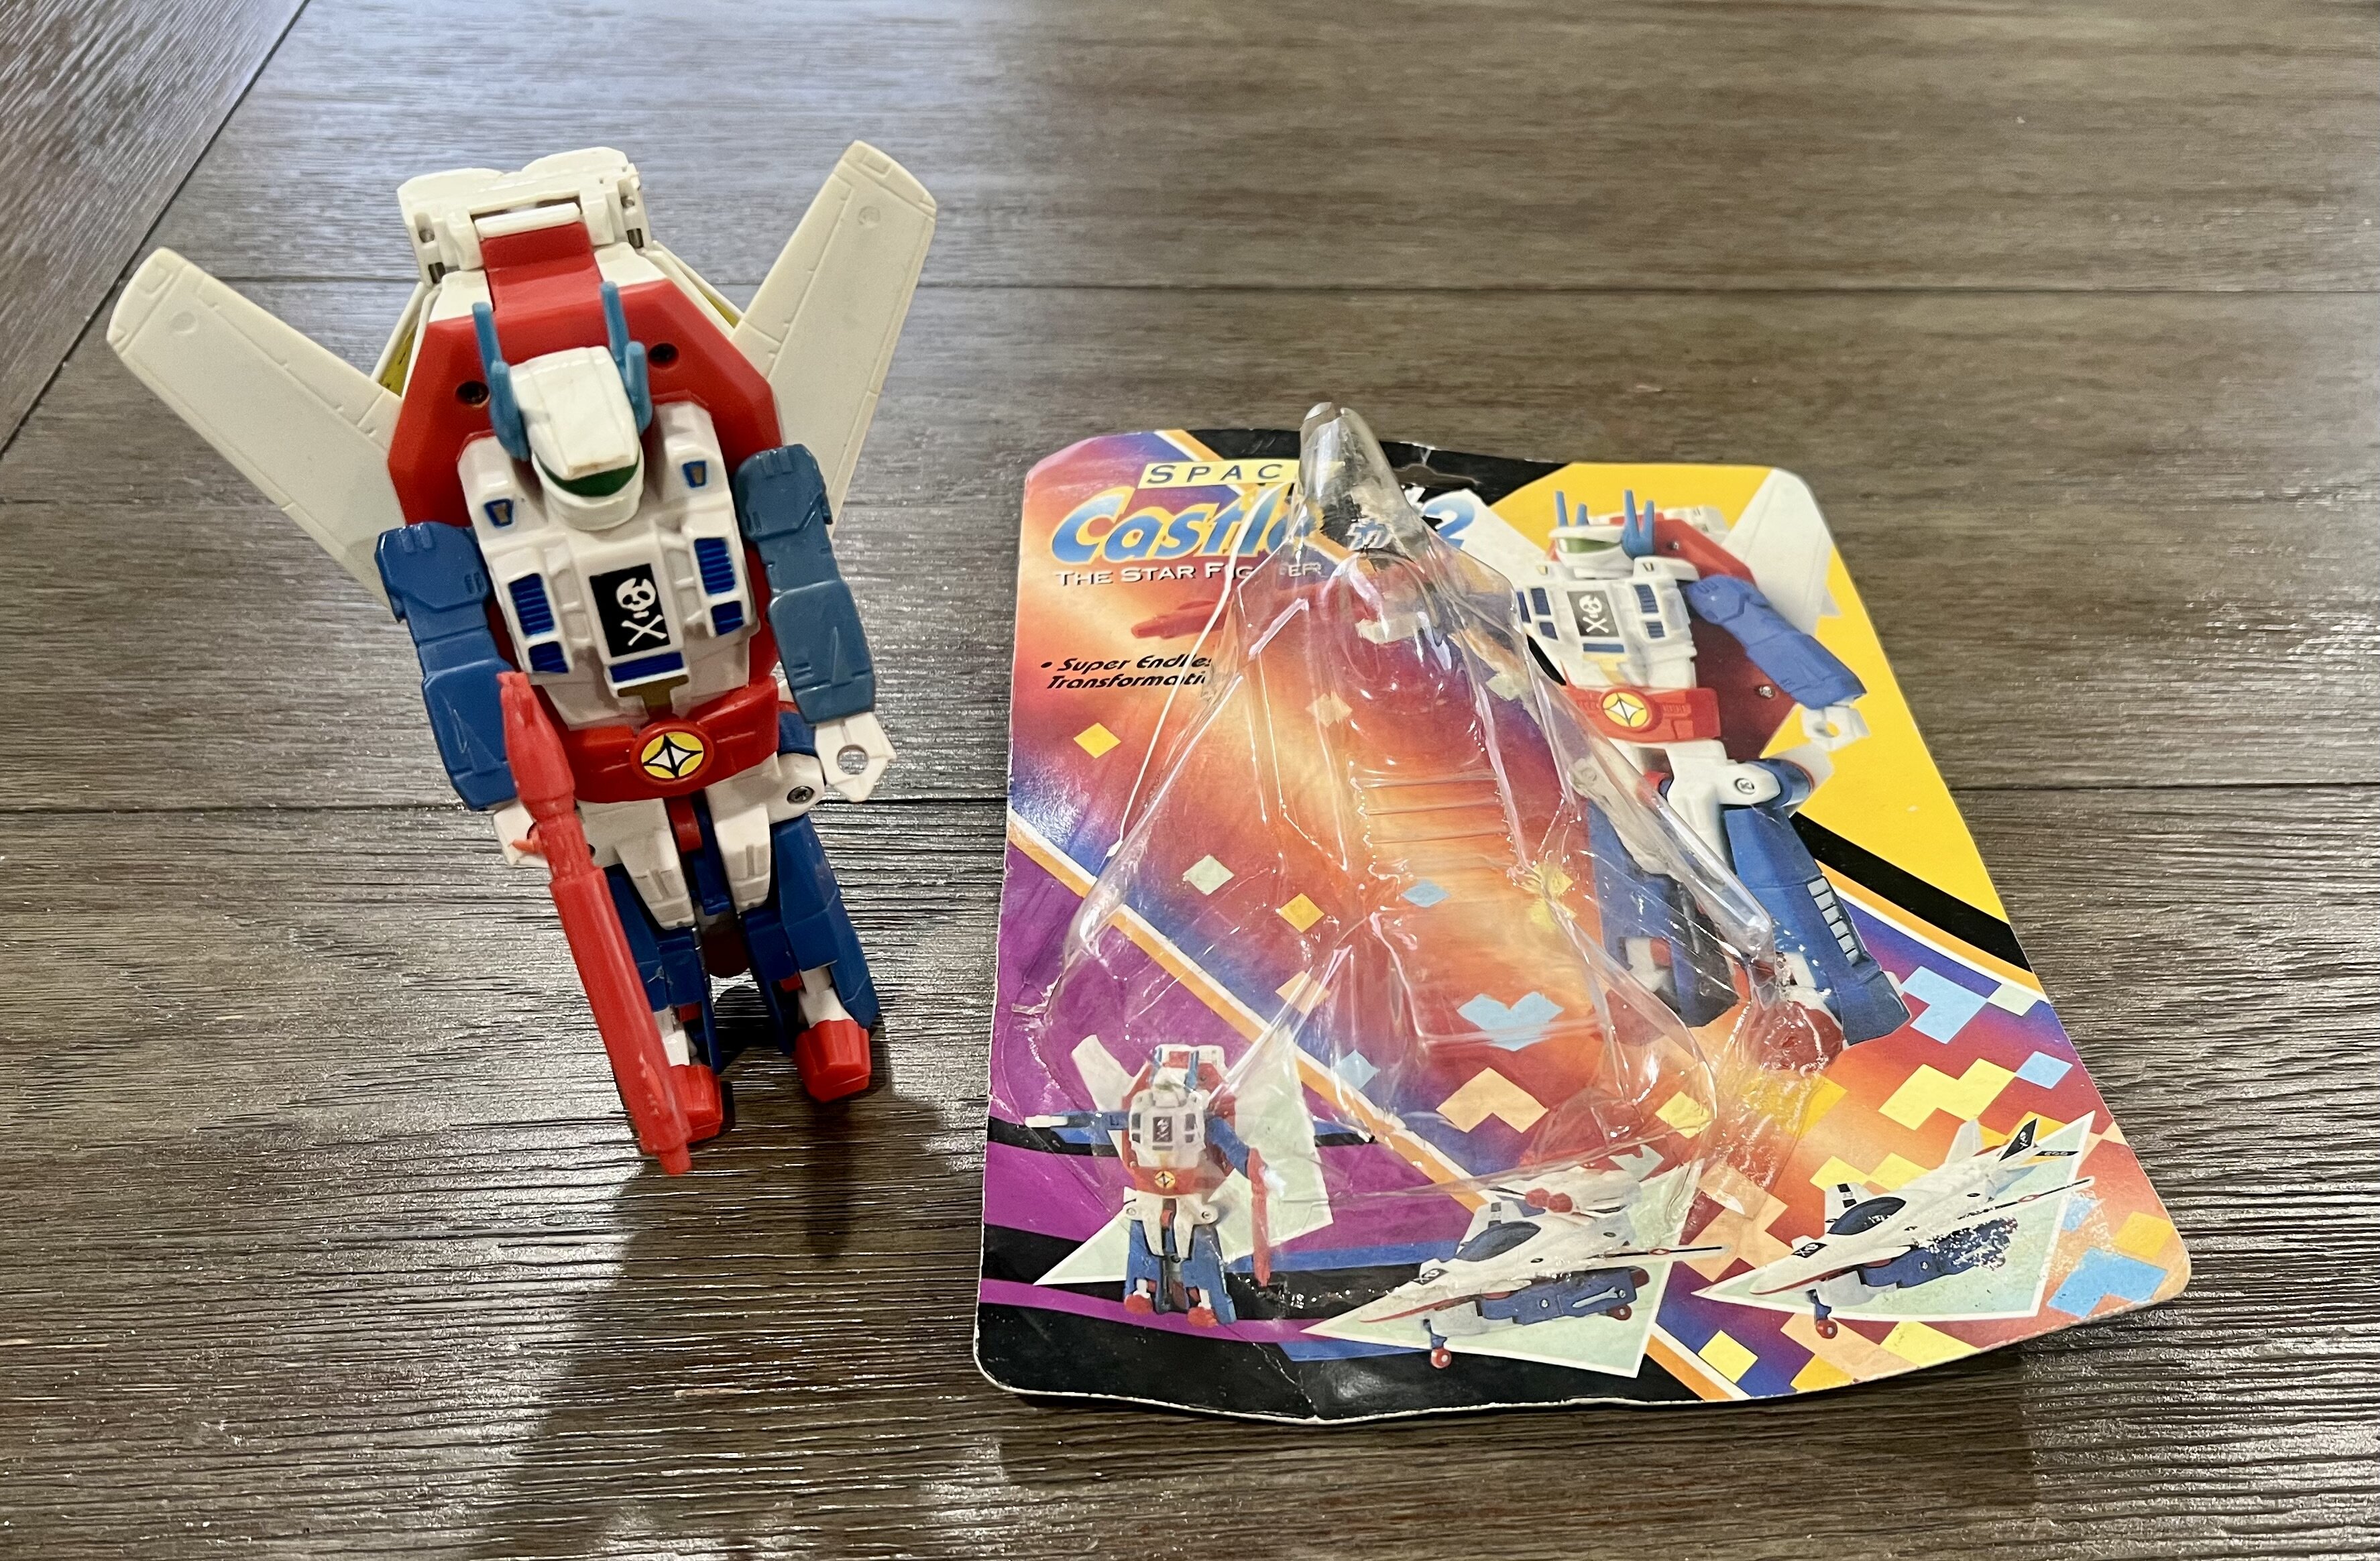
There are four versions of this mold. The other two are a MekaNek and Voltron head. But there are two other color variants of the #2 as well. when it comes to Castle series, the first is not like the second.

-
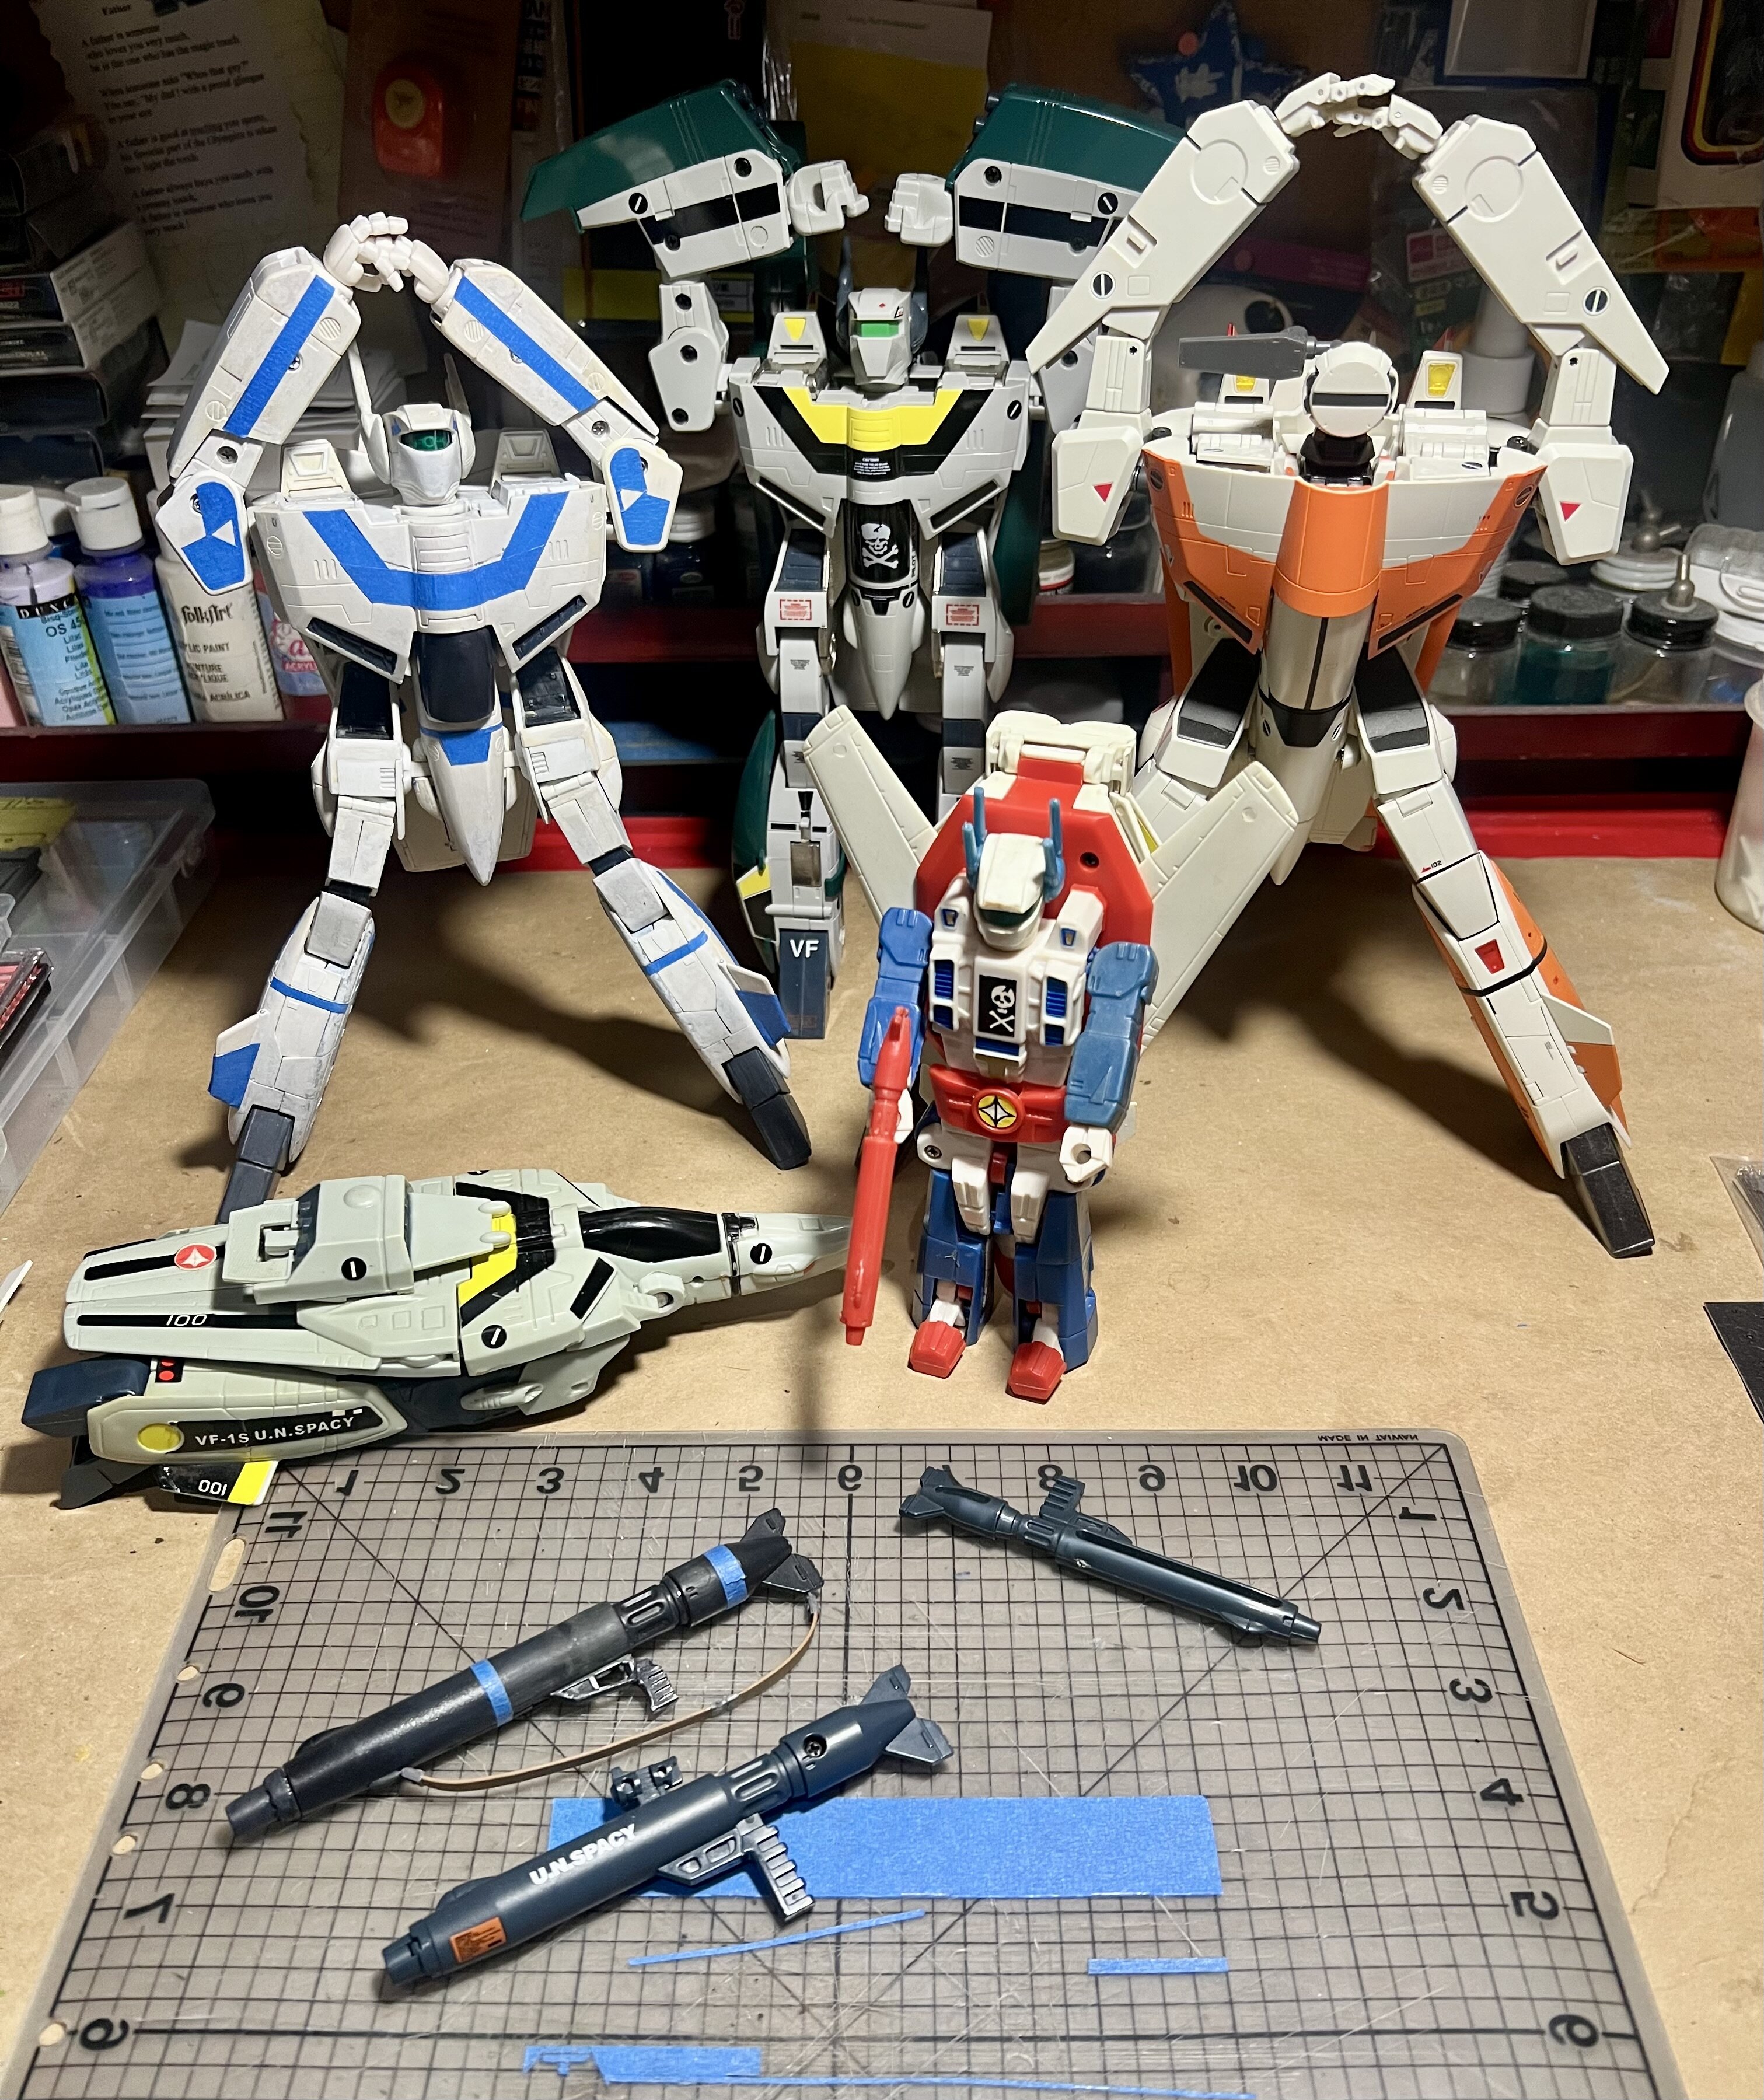
Whats Lying on your Workbench MK IV
nightmareB4macross replied to Urashiman's topic in The Workshop!
@Papa Rat is there a display shelf where you are housing all these finished builds? Would love to see pictures of the completed kits altogether. -
So many possibilities have been lost to vaporwaresville.
-
In related news to the 1/55 1990 VF-1S, I present this…whatever it is.🫠 Enjoy.


-
So sad that these figures will never be released.

-
Tell us about your avatar, name, etc.
nightmareB4macross replied to Pontus's topic in MW Site News & Member Feedback
Cool backstory. What does your handle mean? -
Why can we not see who has liked a post?
nightmareB4macross replied to Chas's topic in MW Site News & Member Feedback
I think it has a very useful function here. In certain circumstances there is no need to comment about a collection picture or pose shared. A like will suffice. Commenting in those pictures gives us that monotony of people quoting and reinstating the same picture over and over to no unforeseen end. A like just keeps the image in place. Let’s provider know someone has acknowledged it and lets the forum move on with new content. It works well with certain comments. If you agree with a persons perspective and just want to give nod, like works just fine. To me a like is similar to giving a person a wink or nod of approval. Plus it’s a lot easier to use than having to type “:” & “)” to get an approval emoji. Or having to hunt it down on the forum menu. It’s a simple and effective way to communicate. 👍 -
? Beaty for your booty but which one? is she Classy, or not?
-
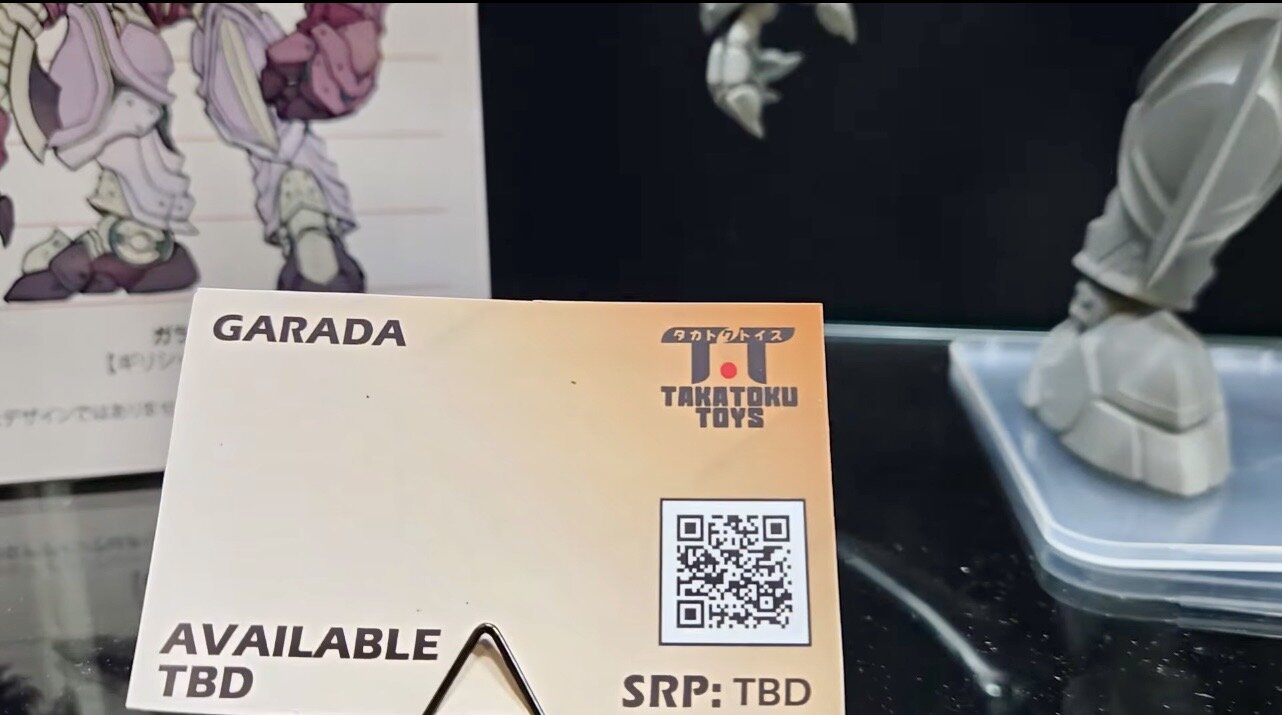
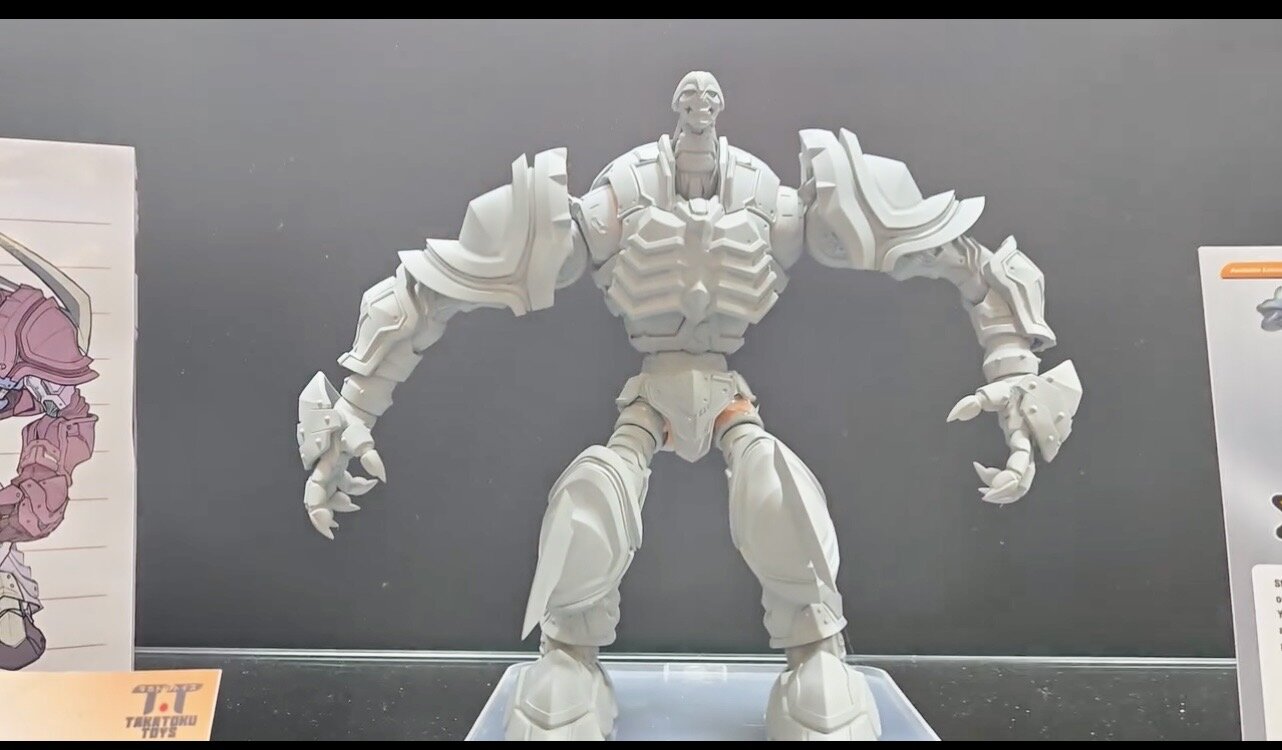
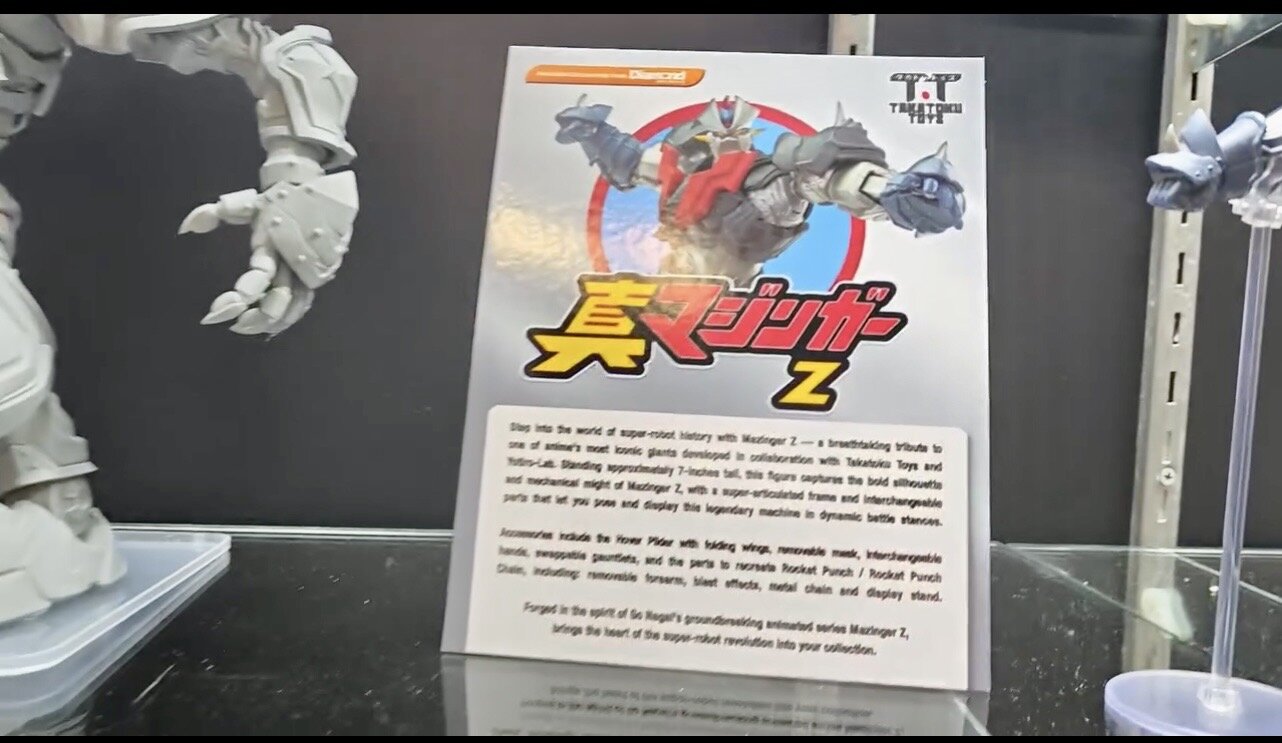
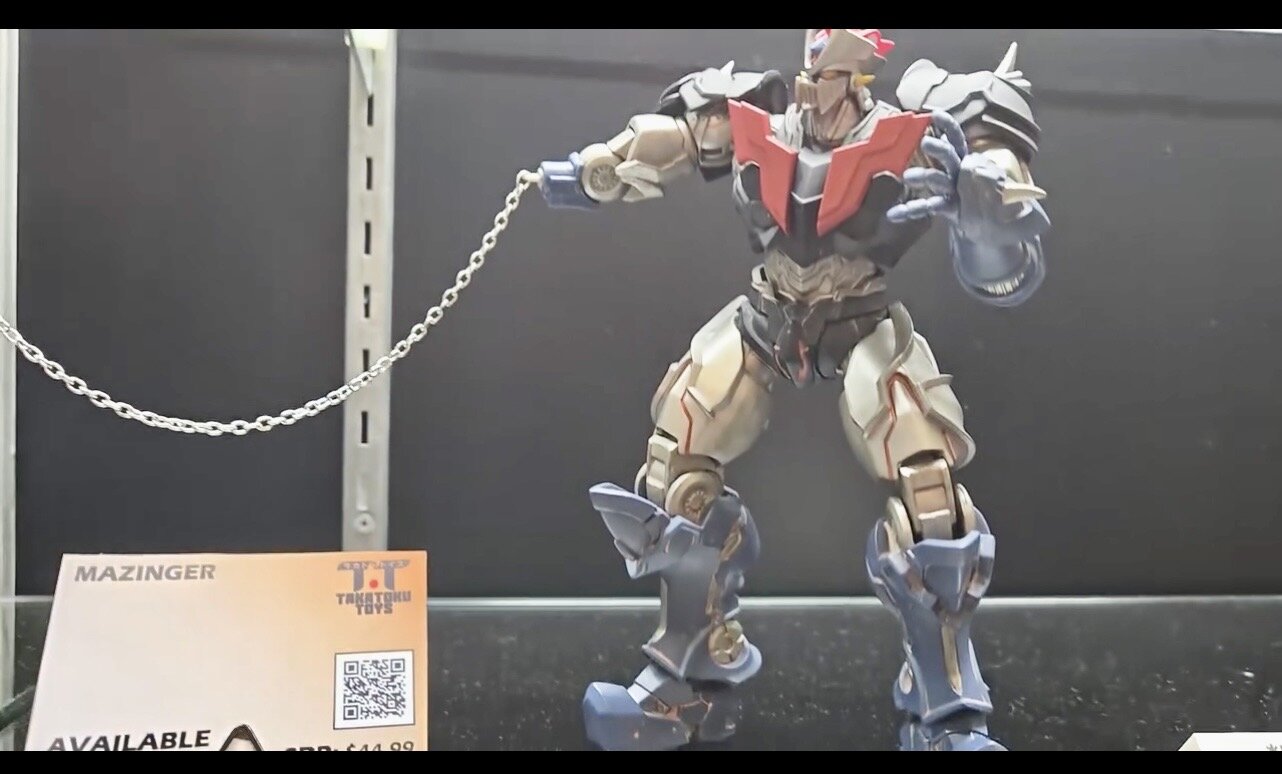
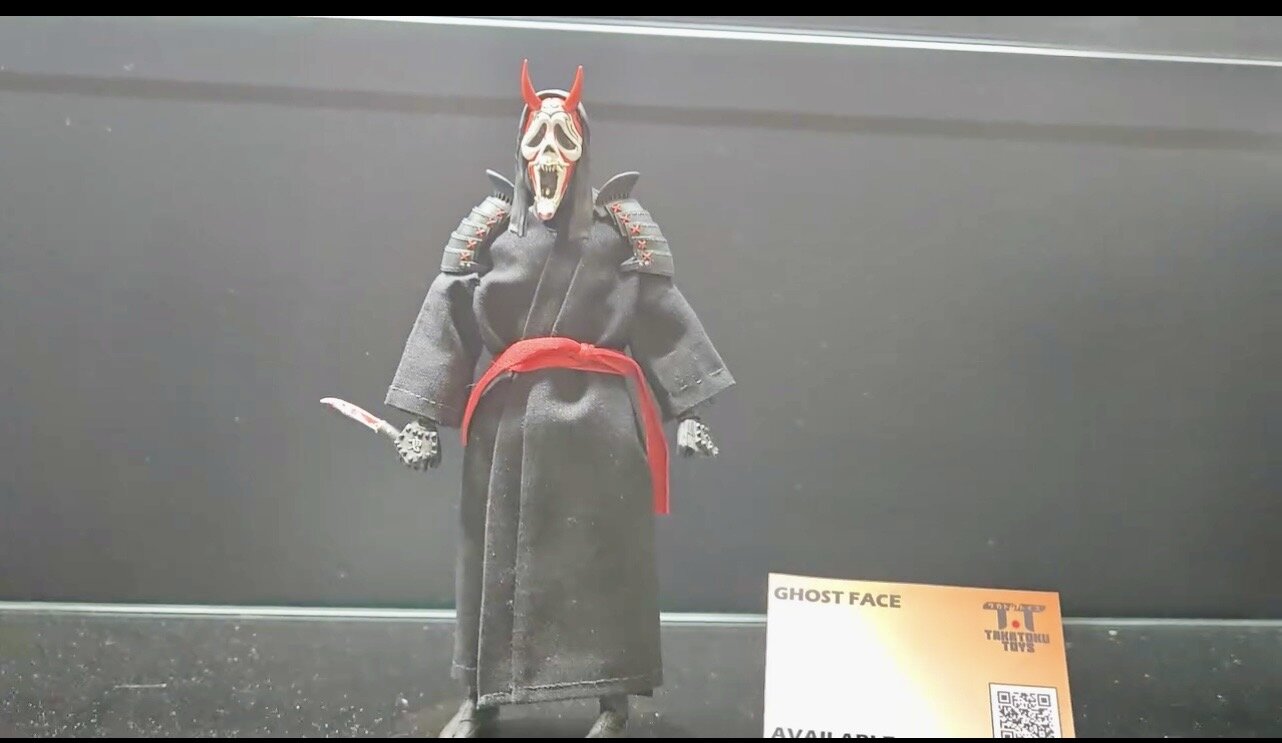
Takatoku Toys is Back?!?
nightmareB4macross replied to nightmareB4macross's topic in Anime or Science Fiction
Not really sure at this point. But as we all know strangest of occurrences happen when we least expect them. -
Takatoku Toys is Back?!?
nightmareB4macross replied to nightmareB4macross's topic in Anime or Science Fiction
Added a link with more content and pics in the first post. My previous blurry pics, while still here, were from a YT video. Apologies. -
Takatoku Toys is Back?!?
nightmareB4macross replied to nightmareB4macross's topic in Anime or Science Fiction