nightmareB4macross
-
Posts
5873 -
Joined
-
Last visited


nightmareB4macross's Achievements
")
Galactic Diva (12/15)
1.5k
Reputation
-

Whats Lying on your Workbench MK IV
nightmareB4macross replied to Urashiman's topic in The Workshop!
We always need a beautiful bird such as the SR-71 for Thanksgiving. All I get is crabs. 😜 Happy Thanksgiving everyone!!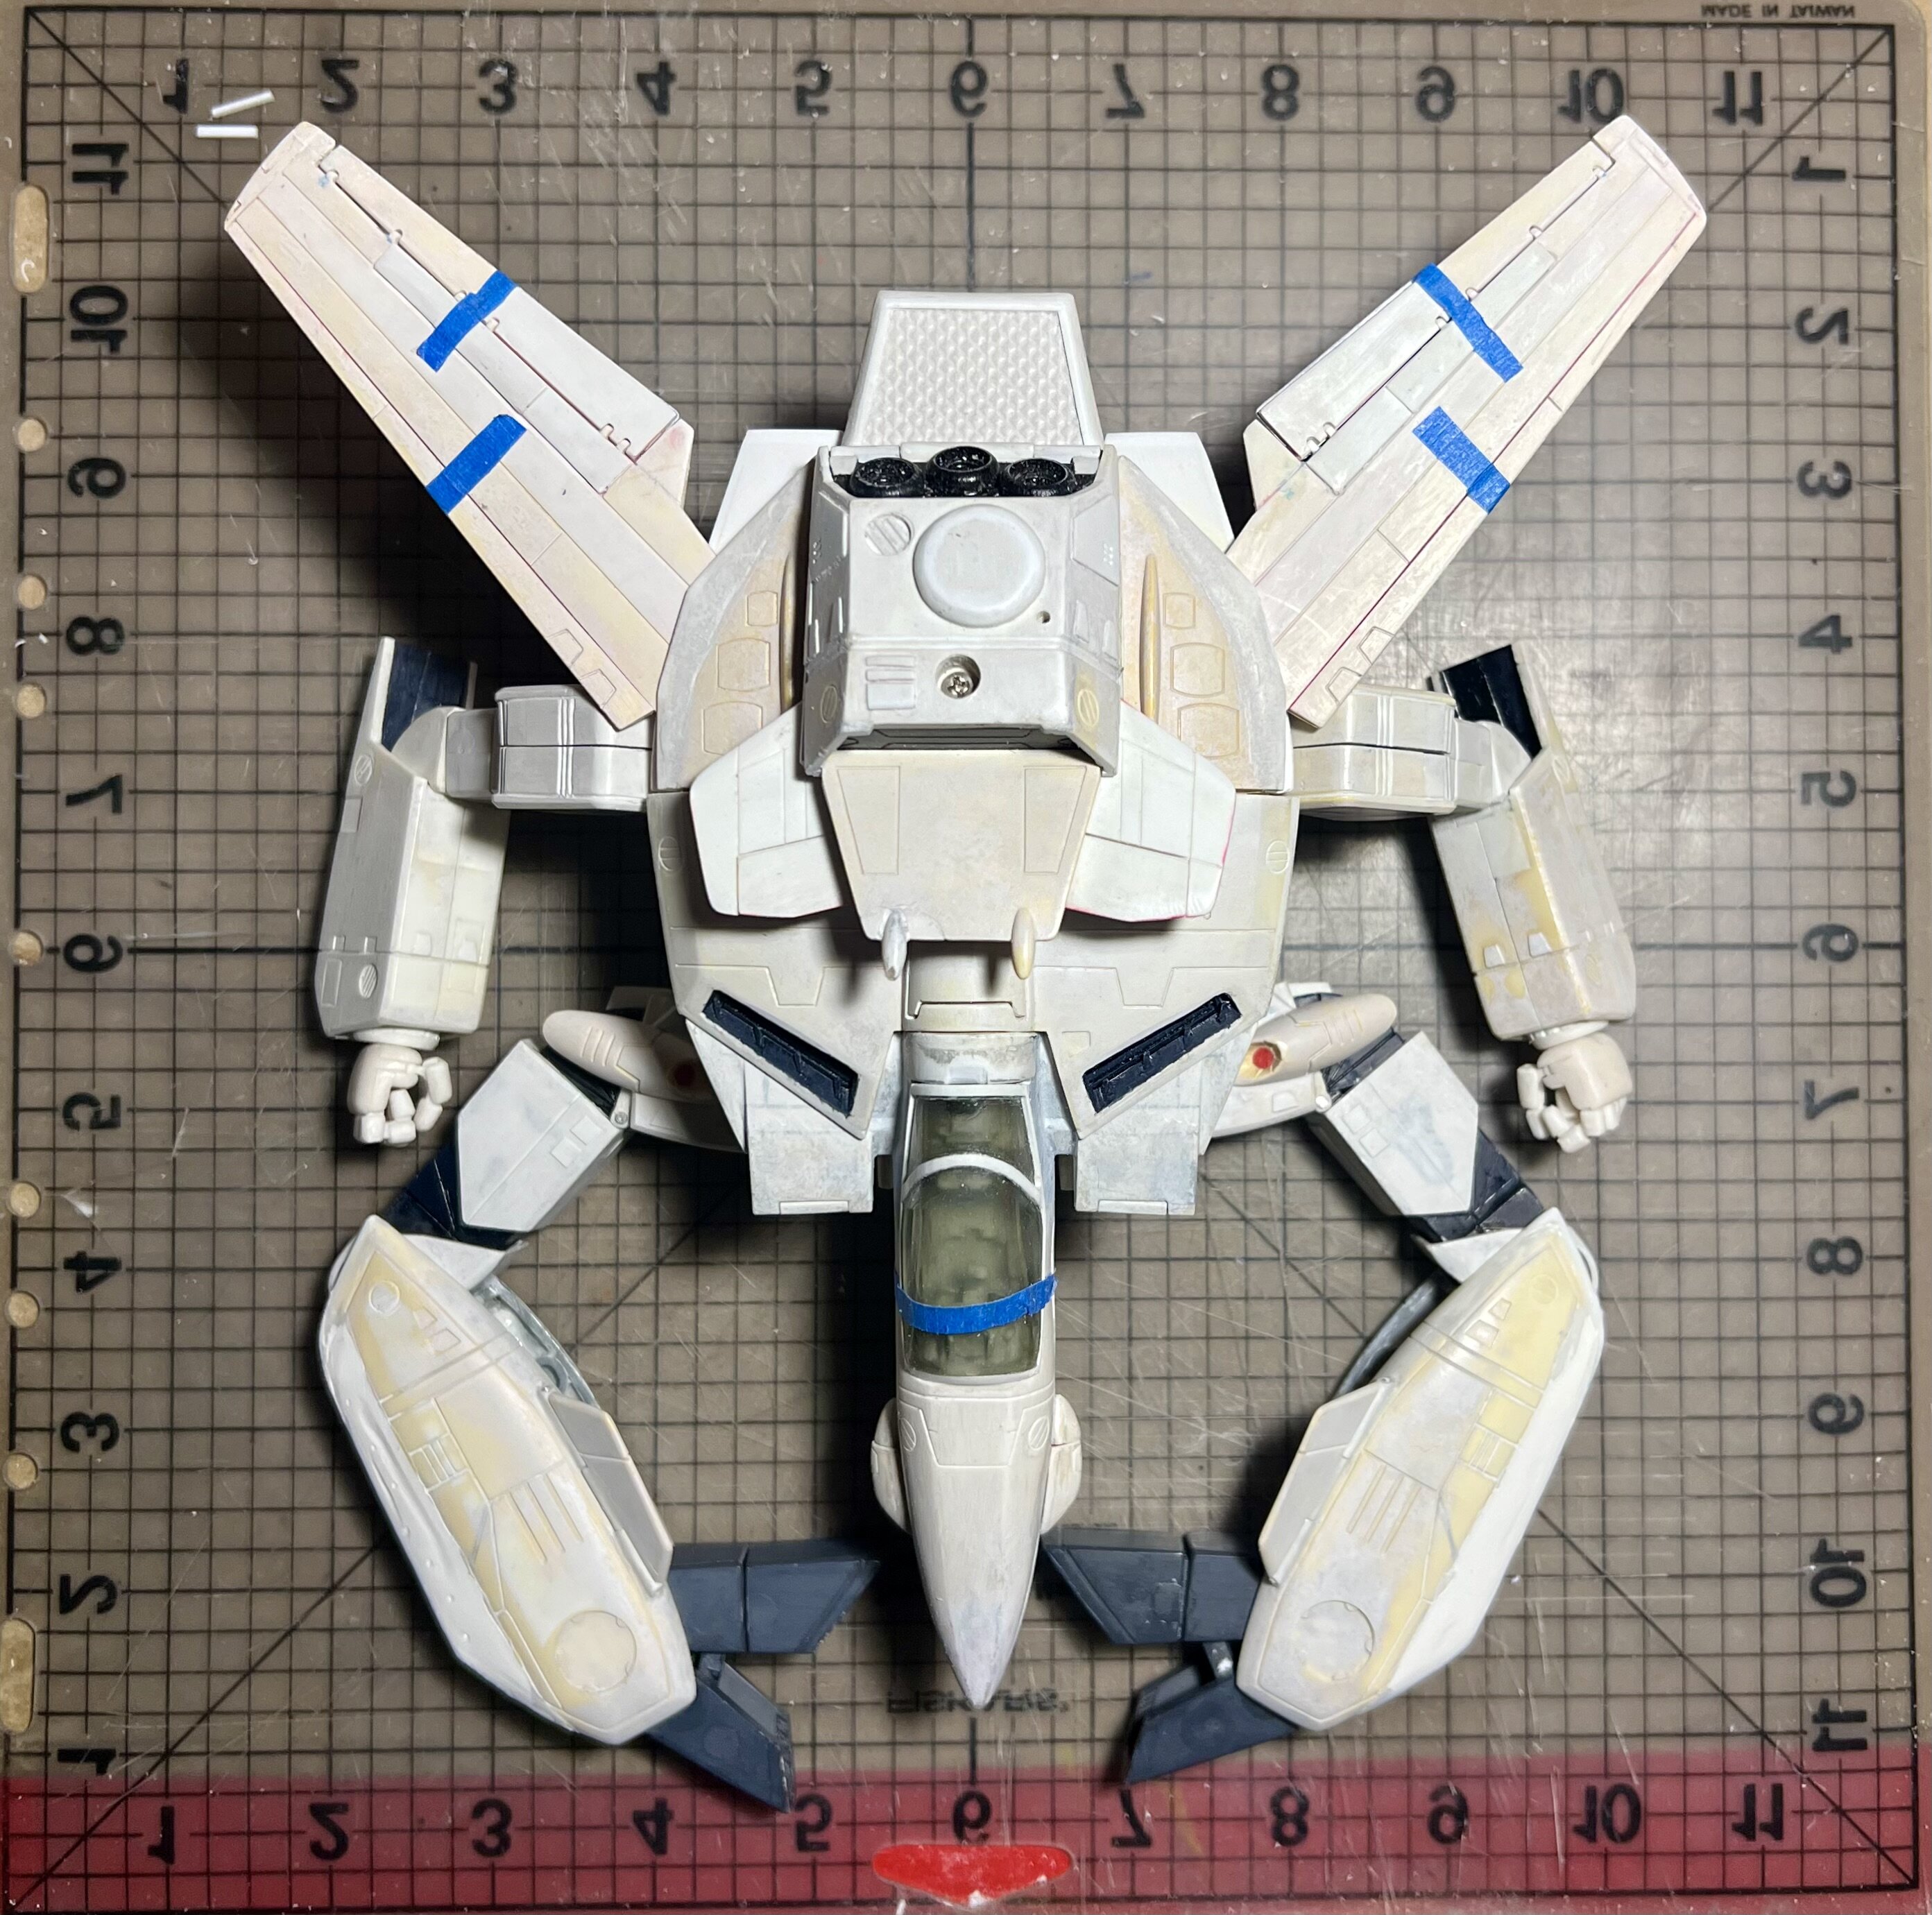
-
Whats Lying on your Workbench MK IV
nightmareB4macross replied to Urashiman's topic in The Workshop!
Look at all that beautiful detail. The pearlescent white makes the building appear ethereal. Wow. -
Whats Lying on your Workbench MK IV
nightmareB4macross replied to Urashiman's topic in The Workshop!
New leg profile is really looking good. IMHO.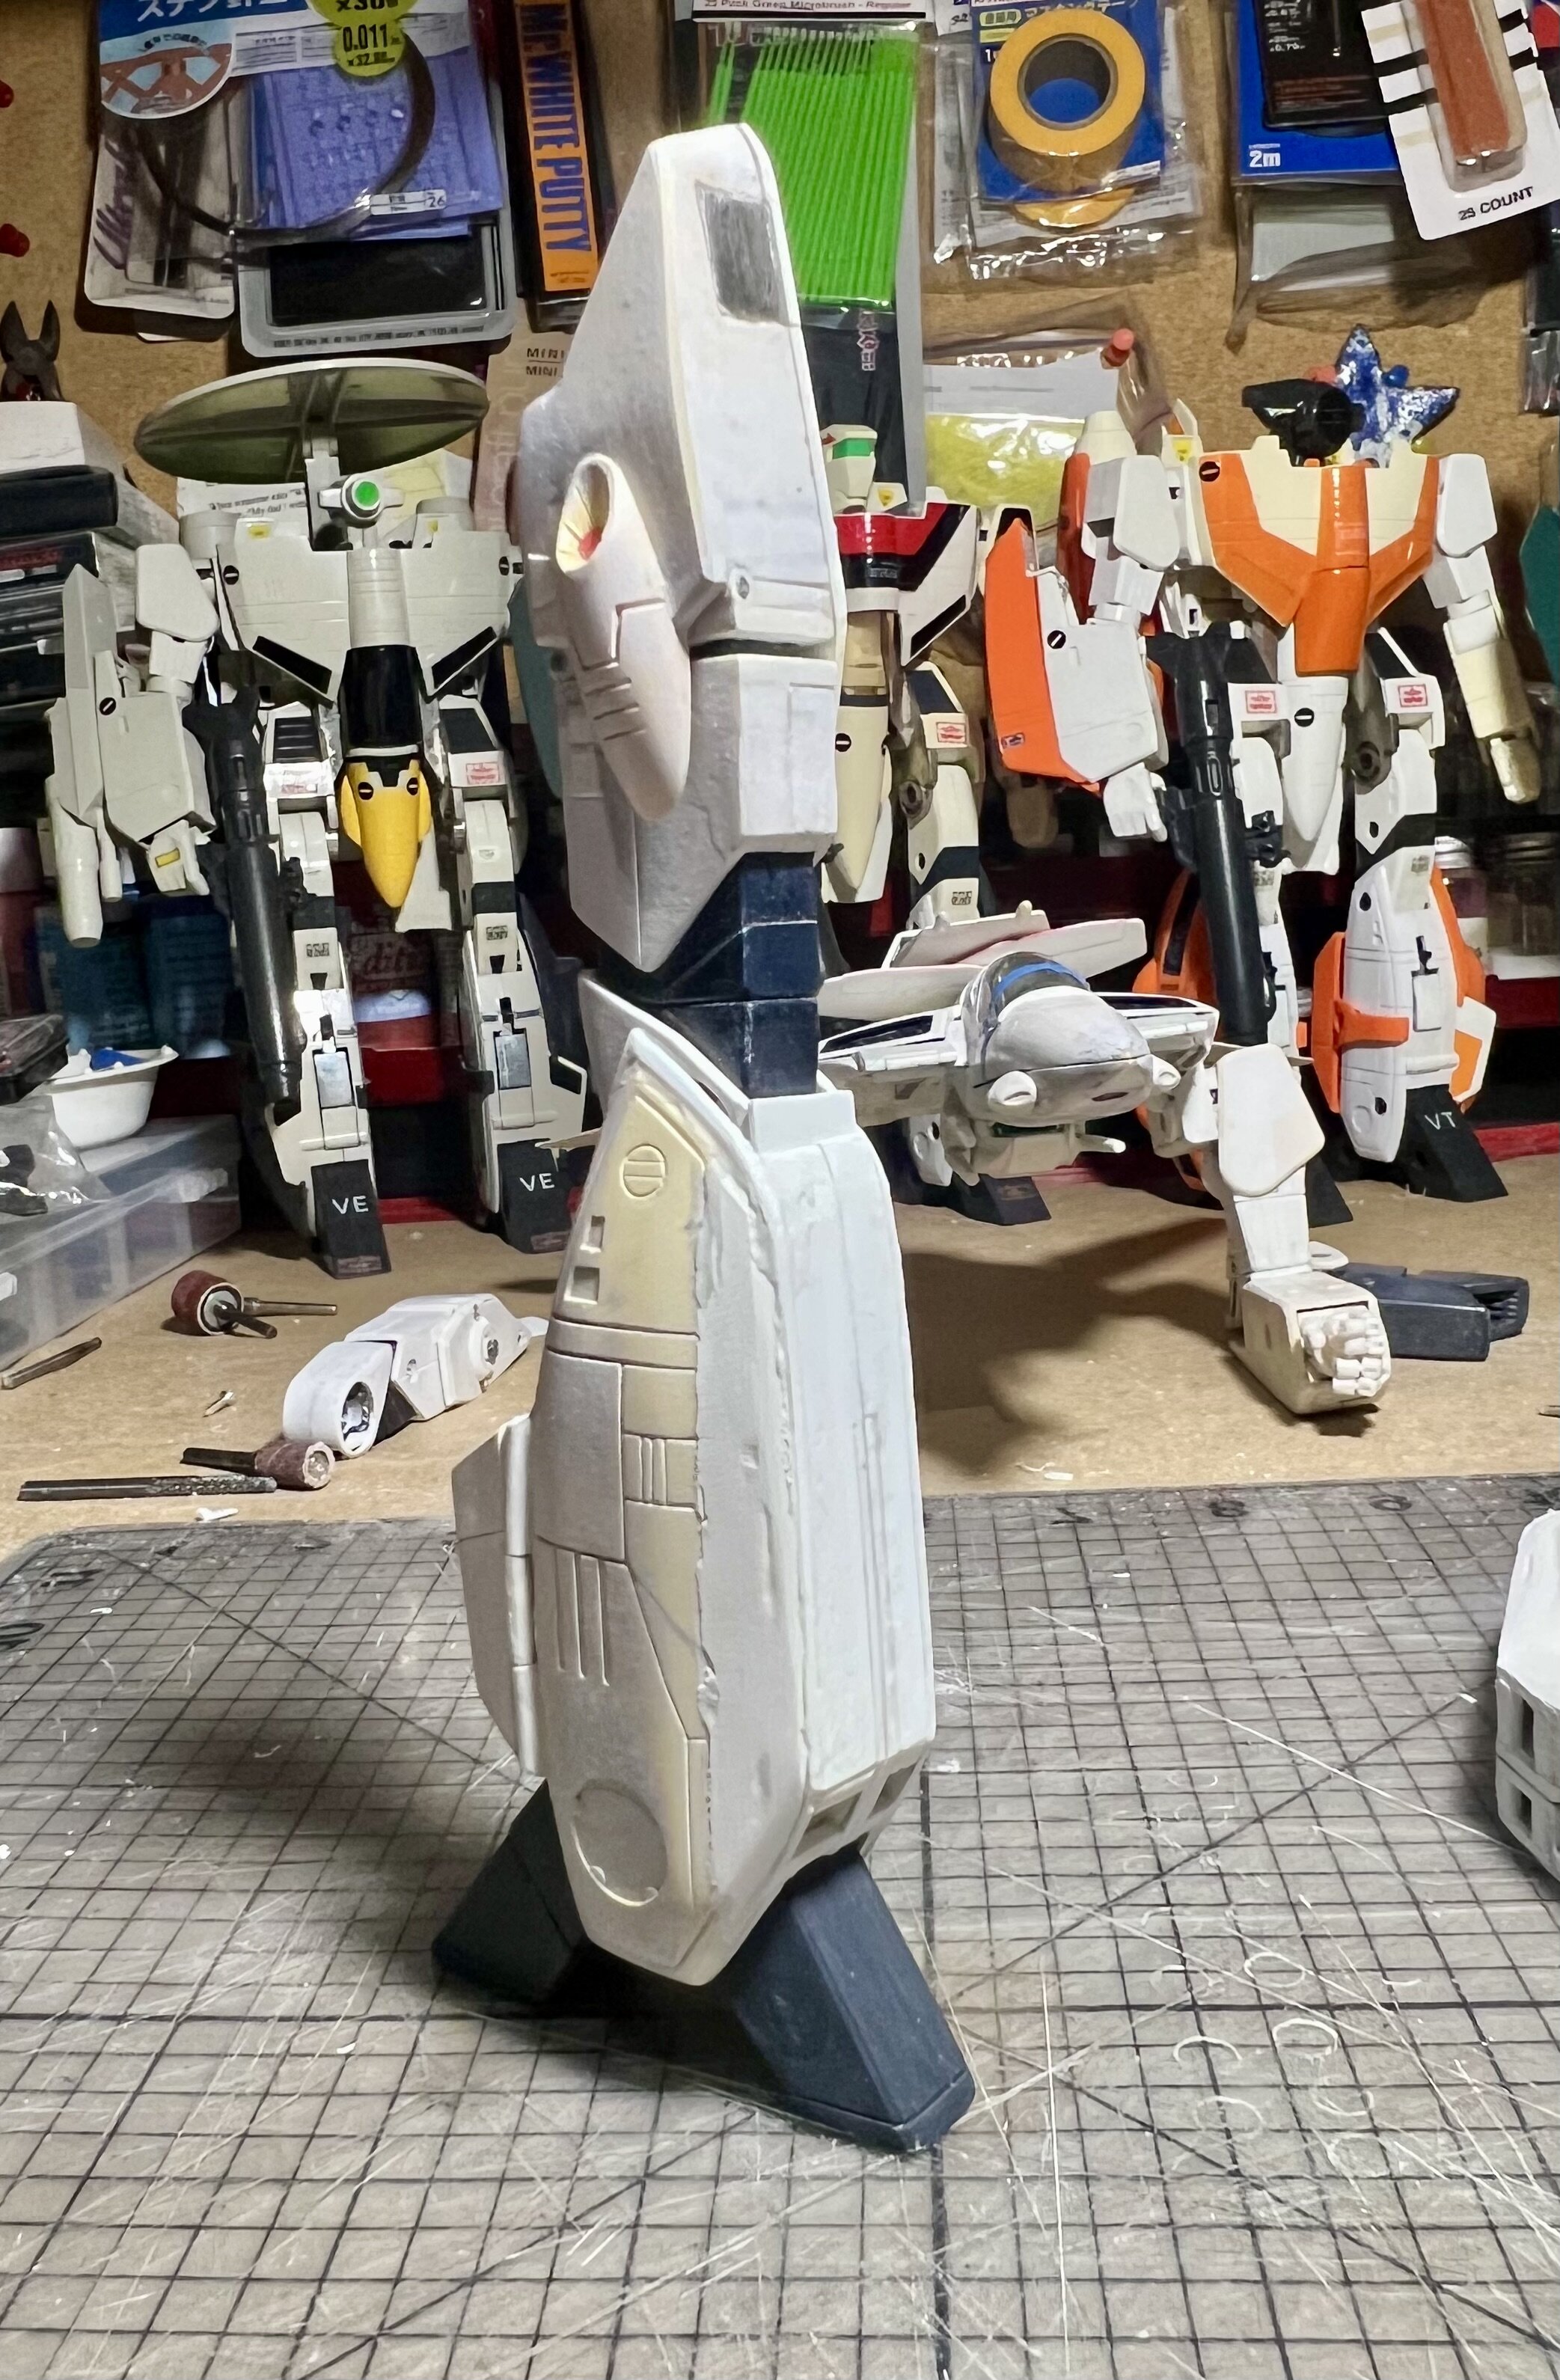
-
Whats Lying on your Workbench MK IV
nightmareB4macross replied to Urashiman's topic in The Workshop!
Yes siree they would! -
Would really like to see that happen. Are you considering a transformable or static Battroid version?
-
Whats Lying on your Workbench MK IV
nightmareB4macross replied to Urashiman's topic in The Workshop!
It’s leg day.
-
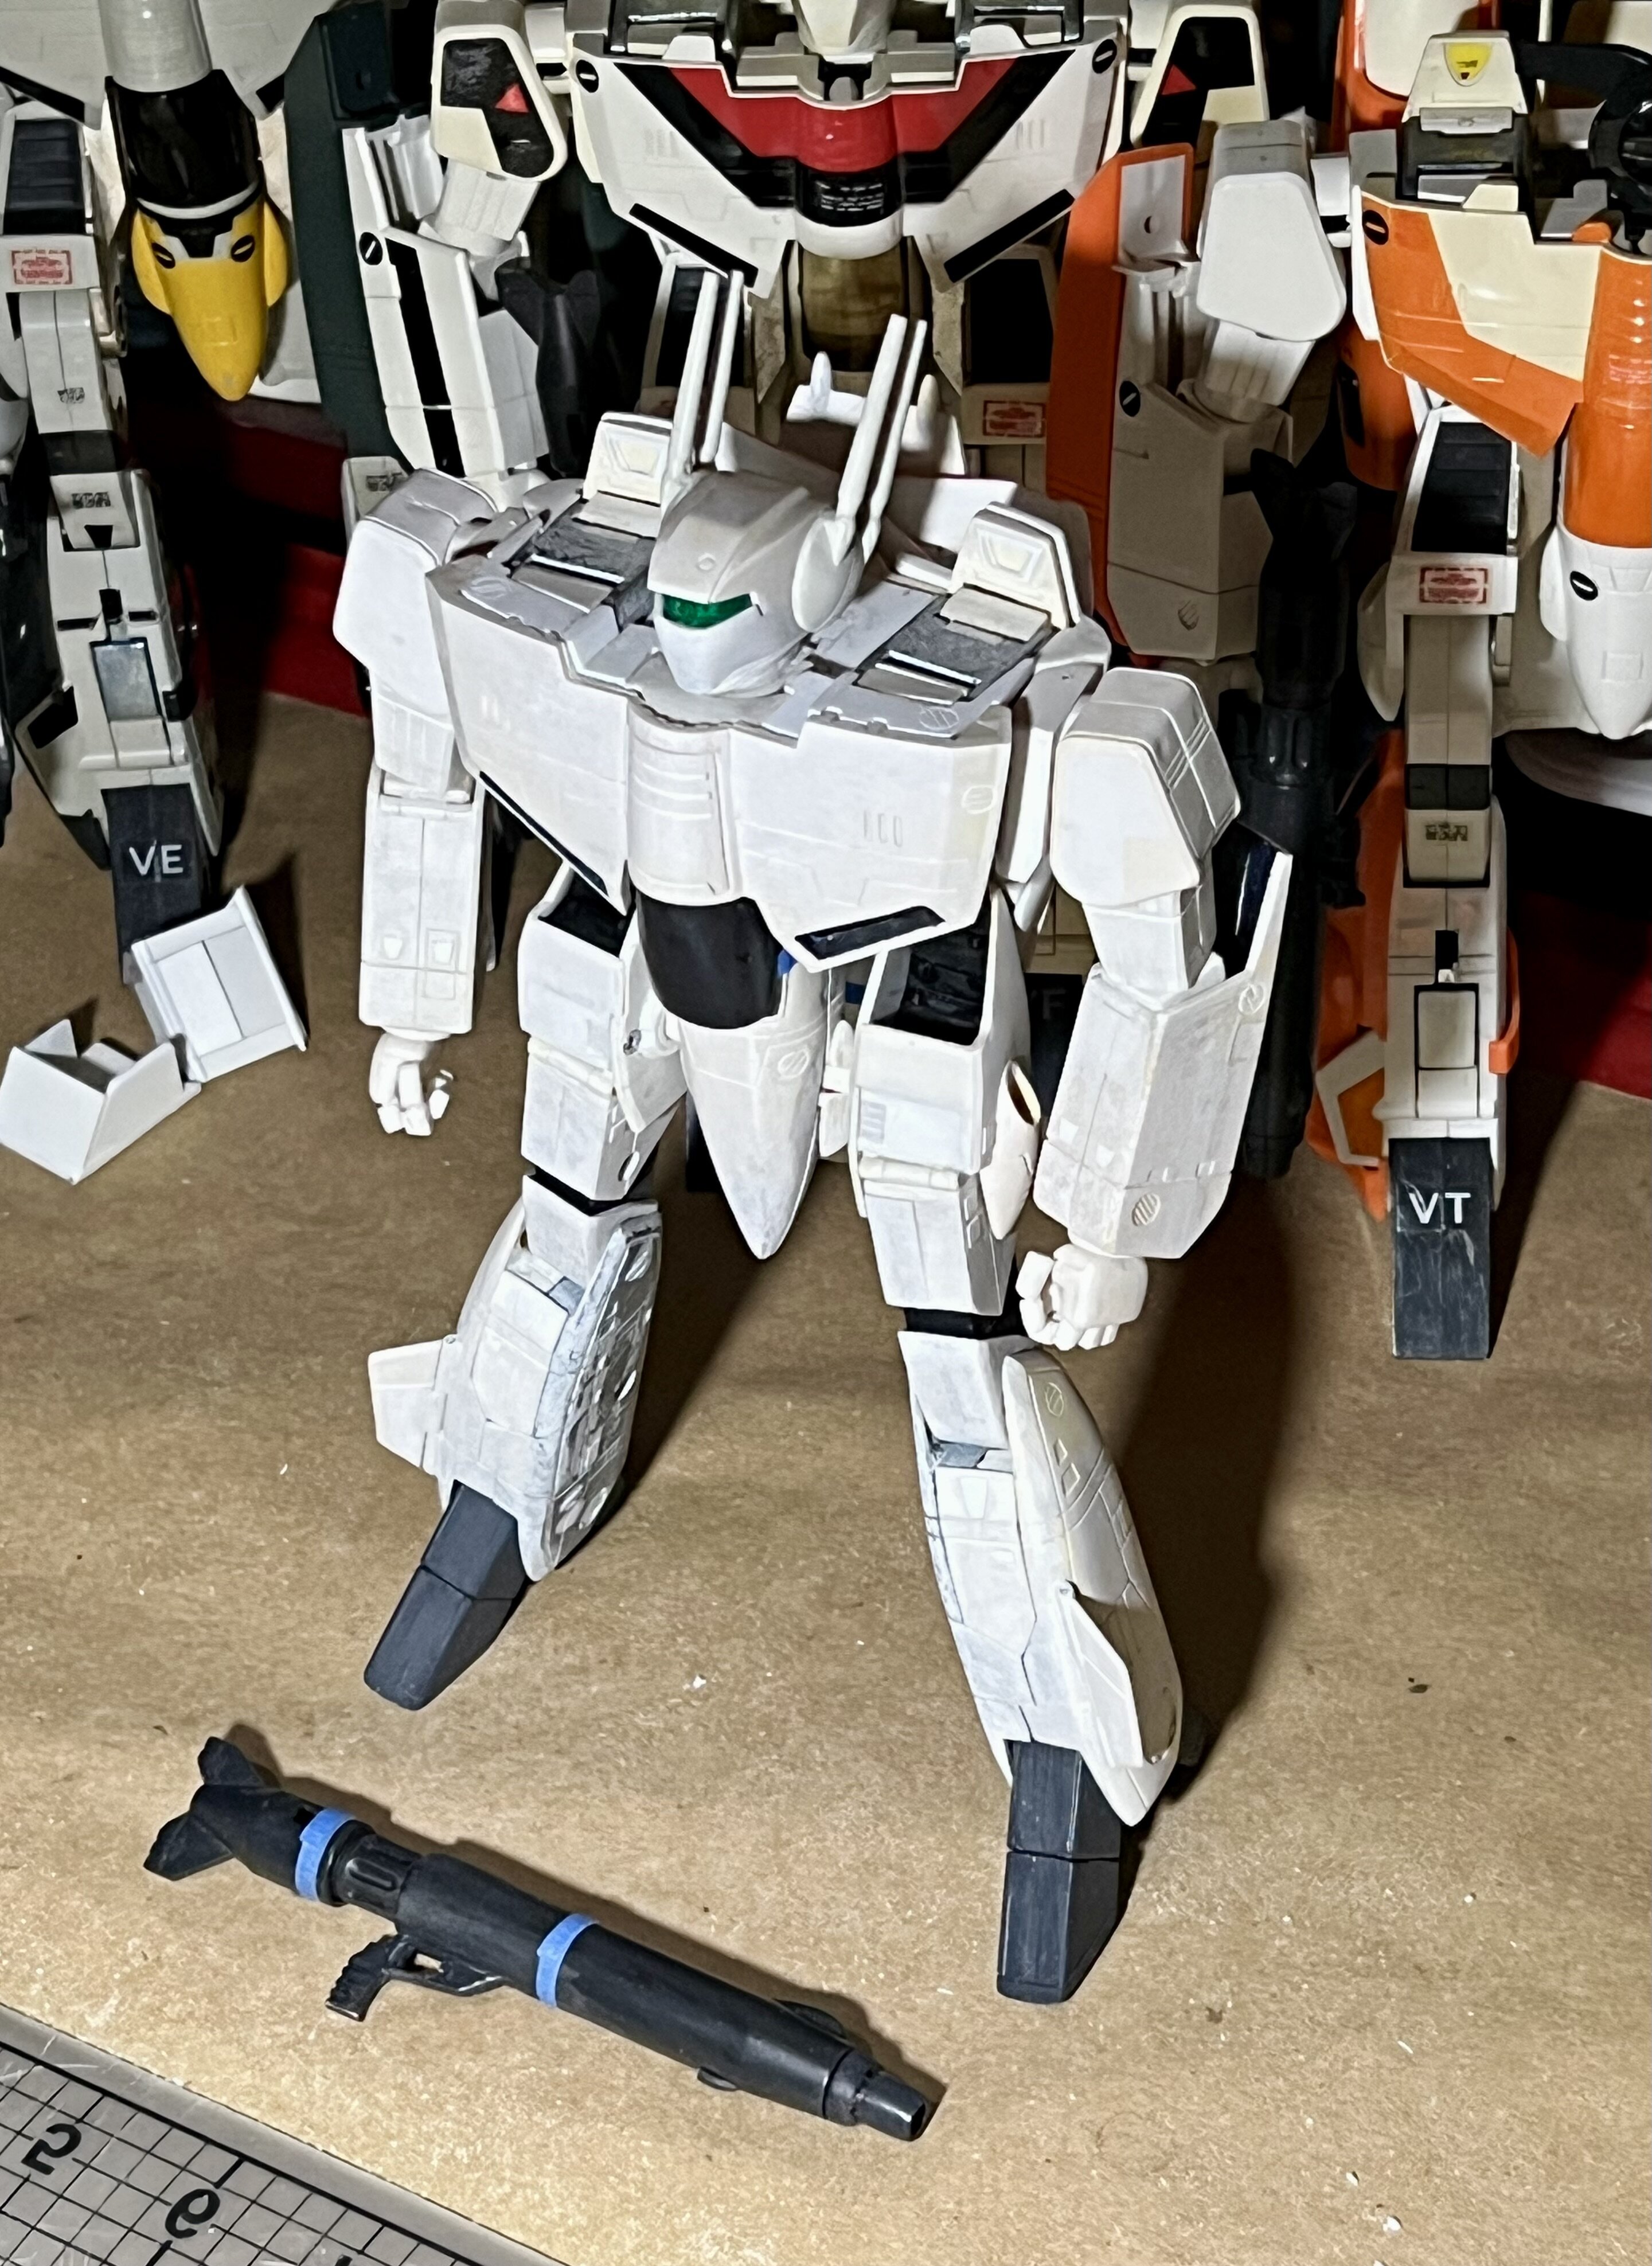
Battroid Valkyrie Details - Rear Detail
nightmareB4macross replied to nightmareB4macross's topic in The Workshop!
Thank you for inquiring. Found what I was looking for.
-
Hi All, I am positive there is lineart of this picture with much more detail. Anyone out there have it? I would greatly appreciate it.

-
Fantastic catch! Congratulations.
-
AstroMagnumblogspot delivers another great catalog from Savie Toys. This time there is a Hikaru VF-1S (no Strike arts). I don’t think we ever found out who made the 1990 Bootleg VF-1S (Grey or White) Super Valkyrie that was recovered as a Strike but had Blue Super Parts, nor the CeppiRatti versions. This might be a clue. Note the stickers on are now on the inside of the vertical stabilizers.

-
Whats Lying on your Workbench MK IV
nightmareB4macross replied to Urashiman's topic in The Workshop!
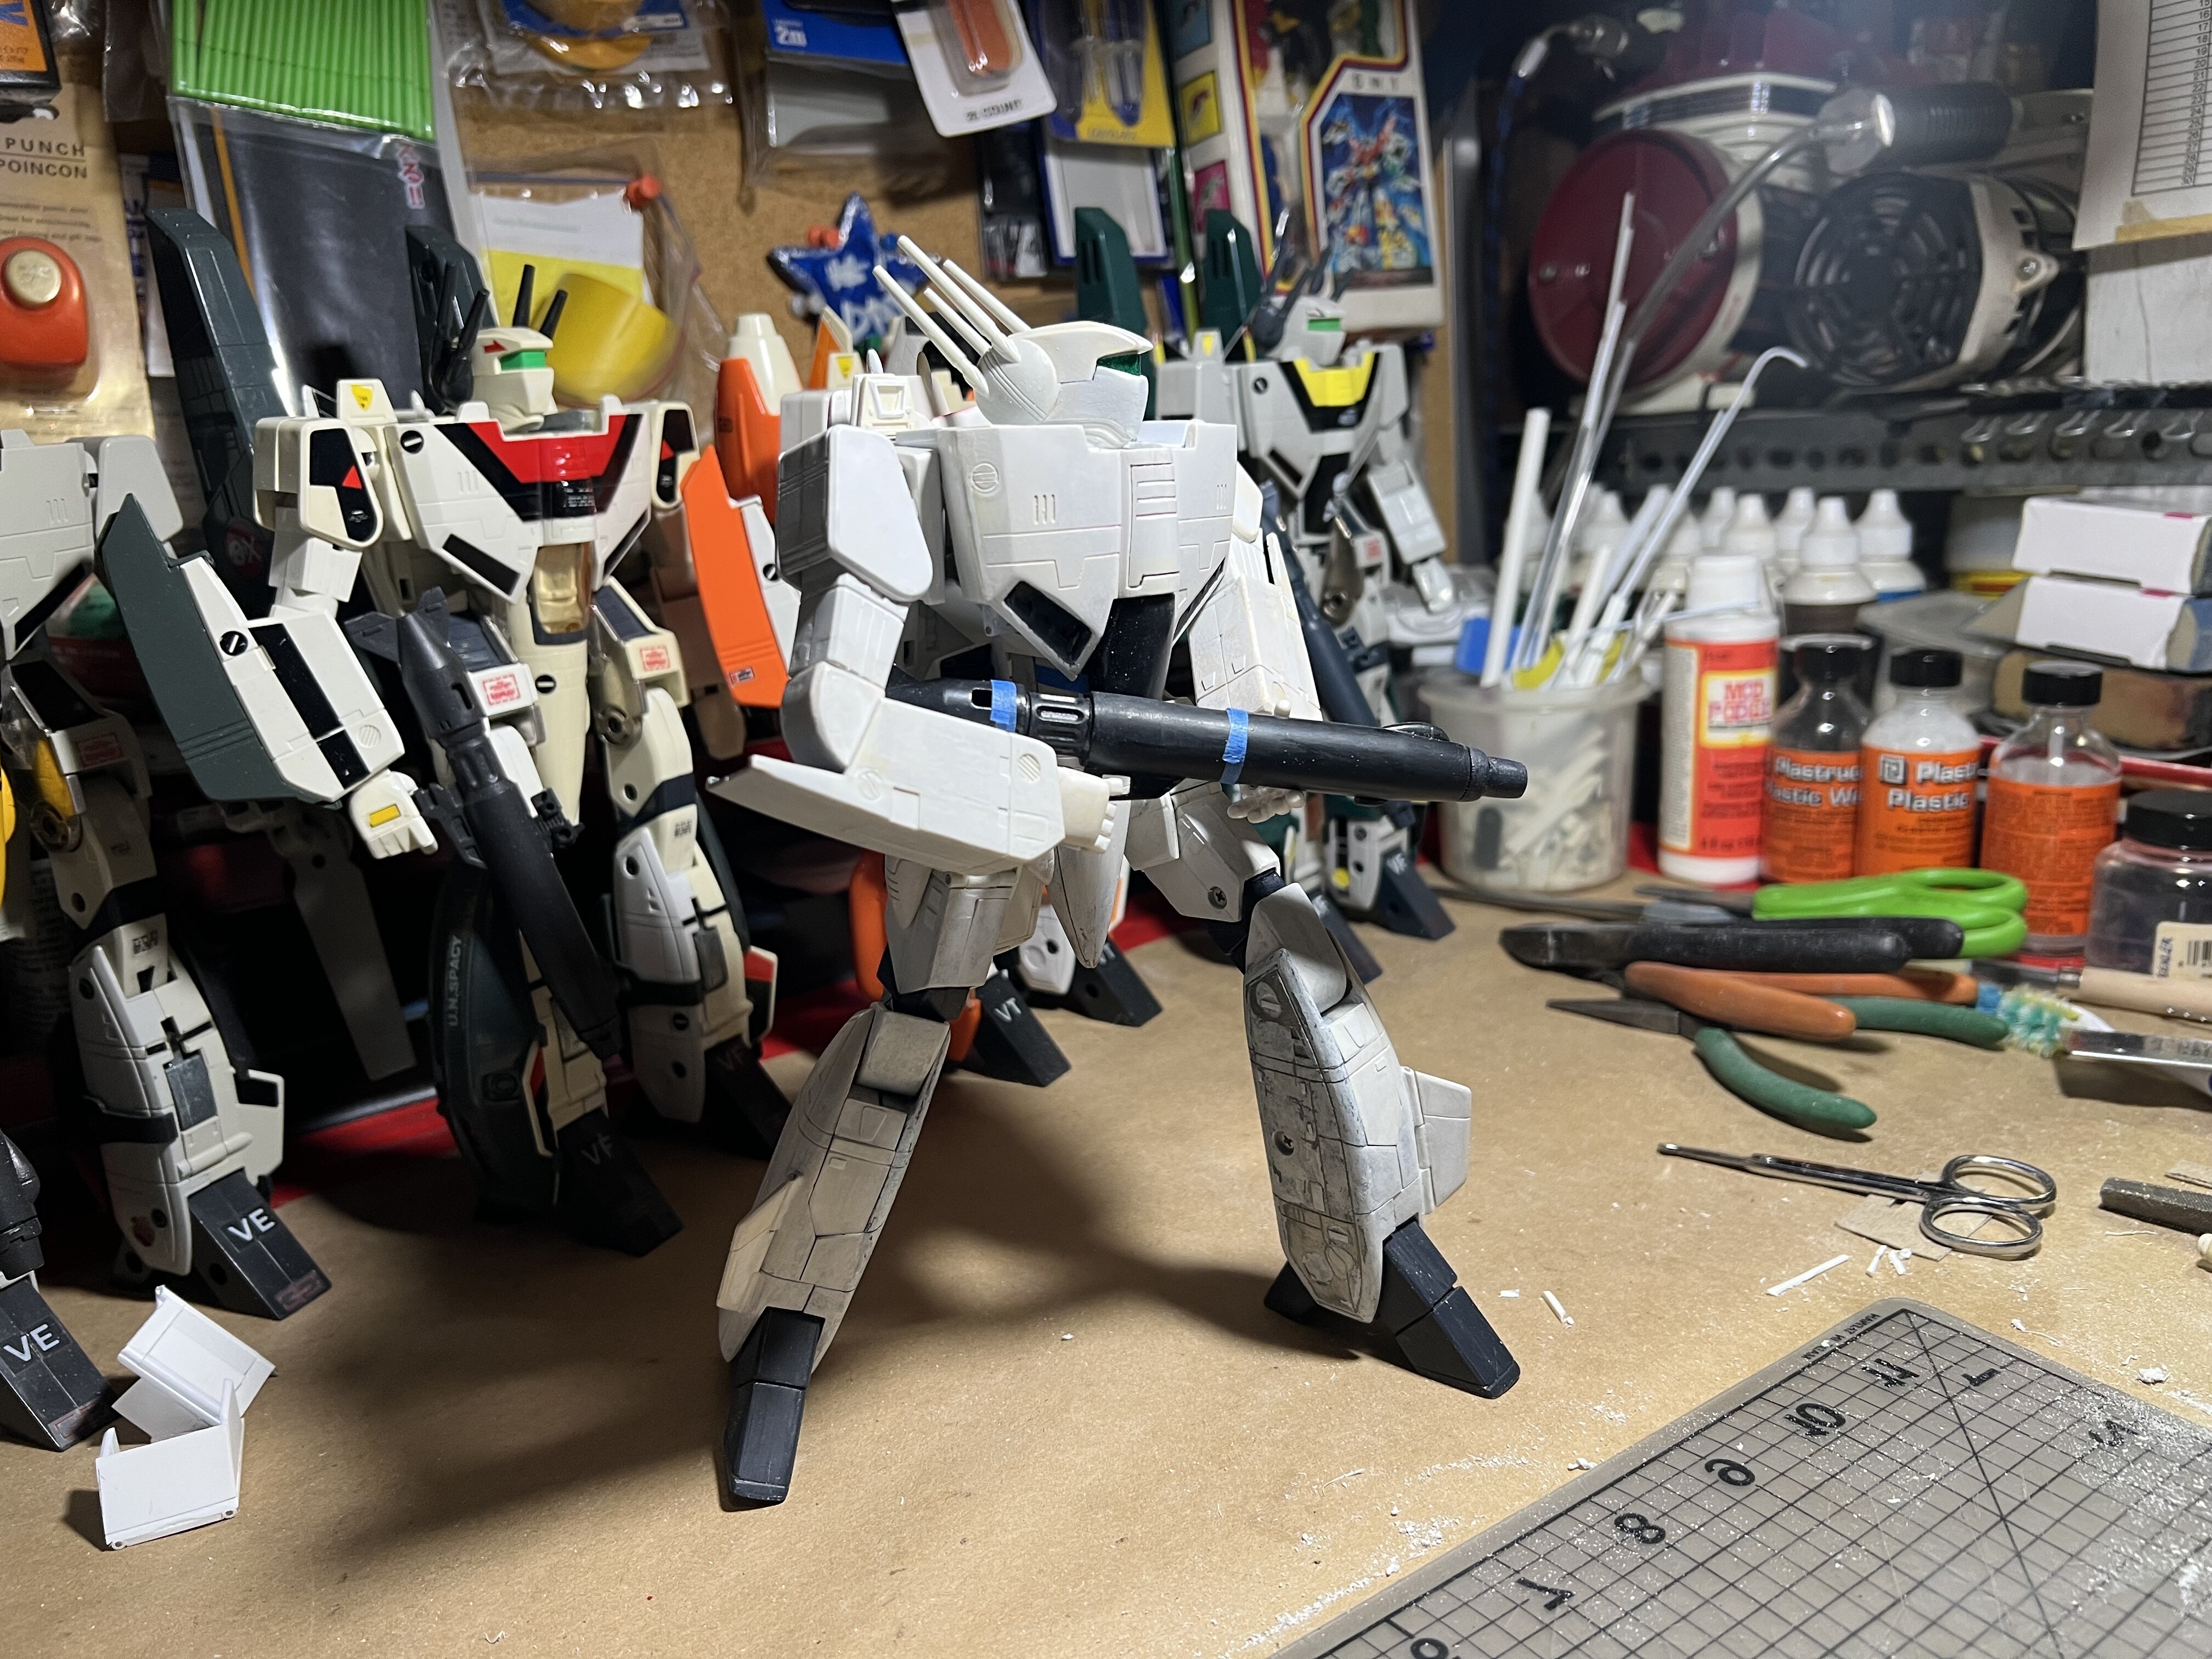
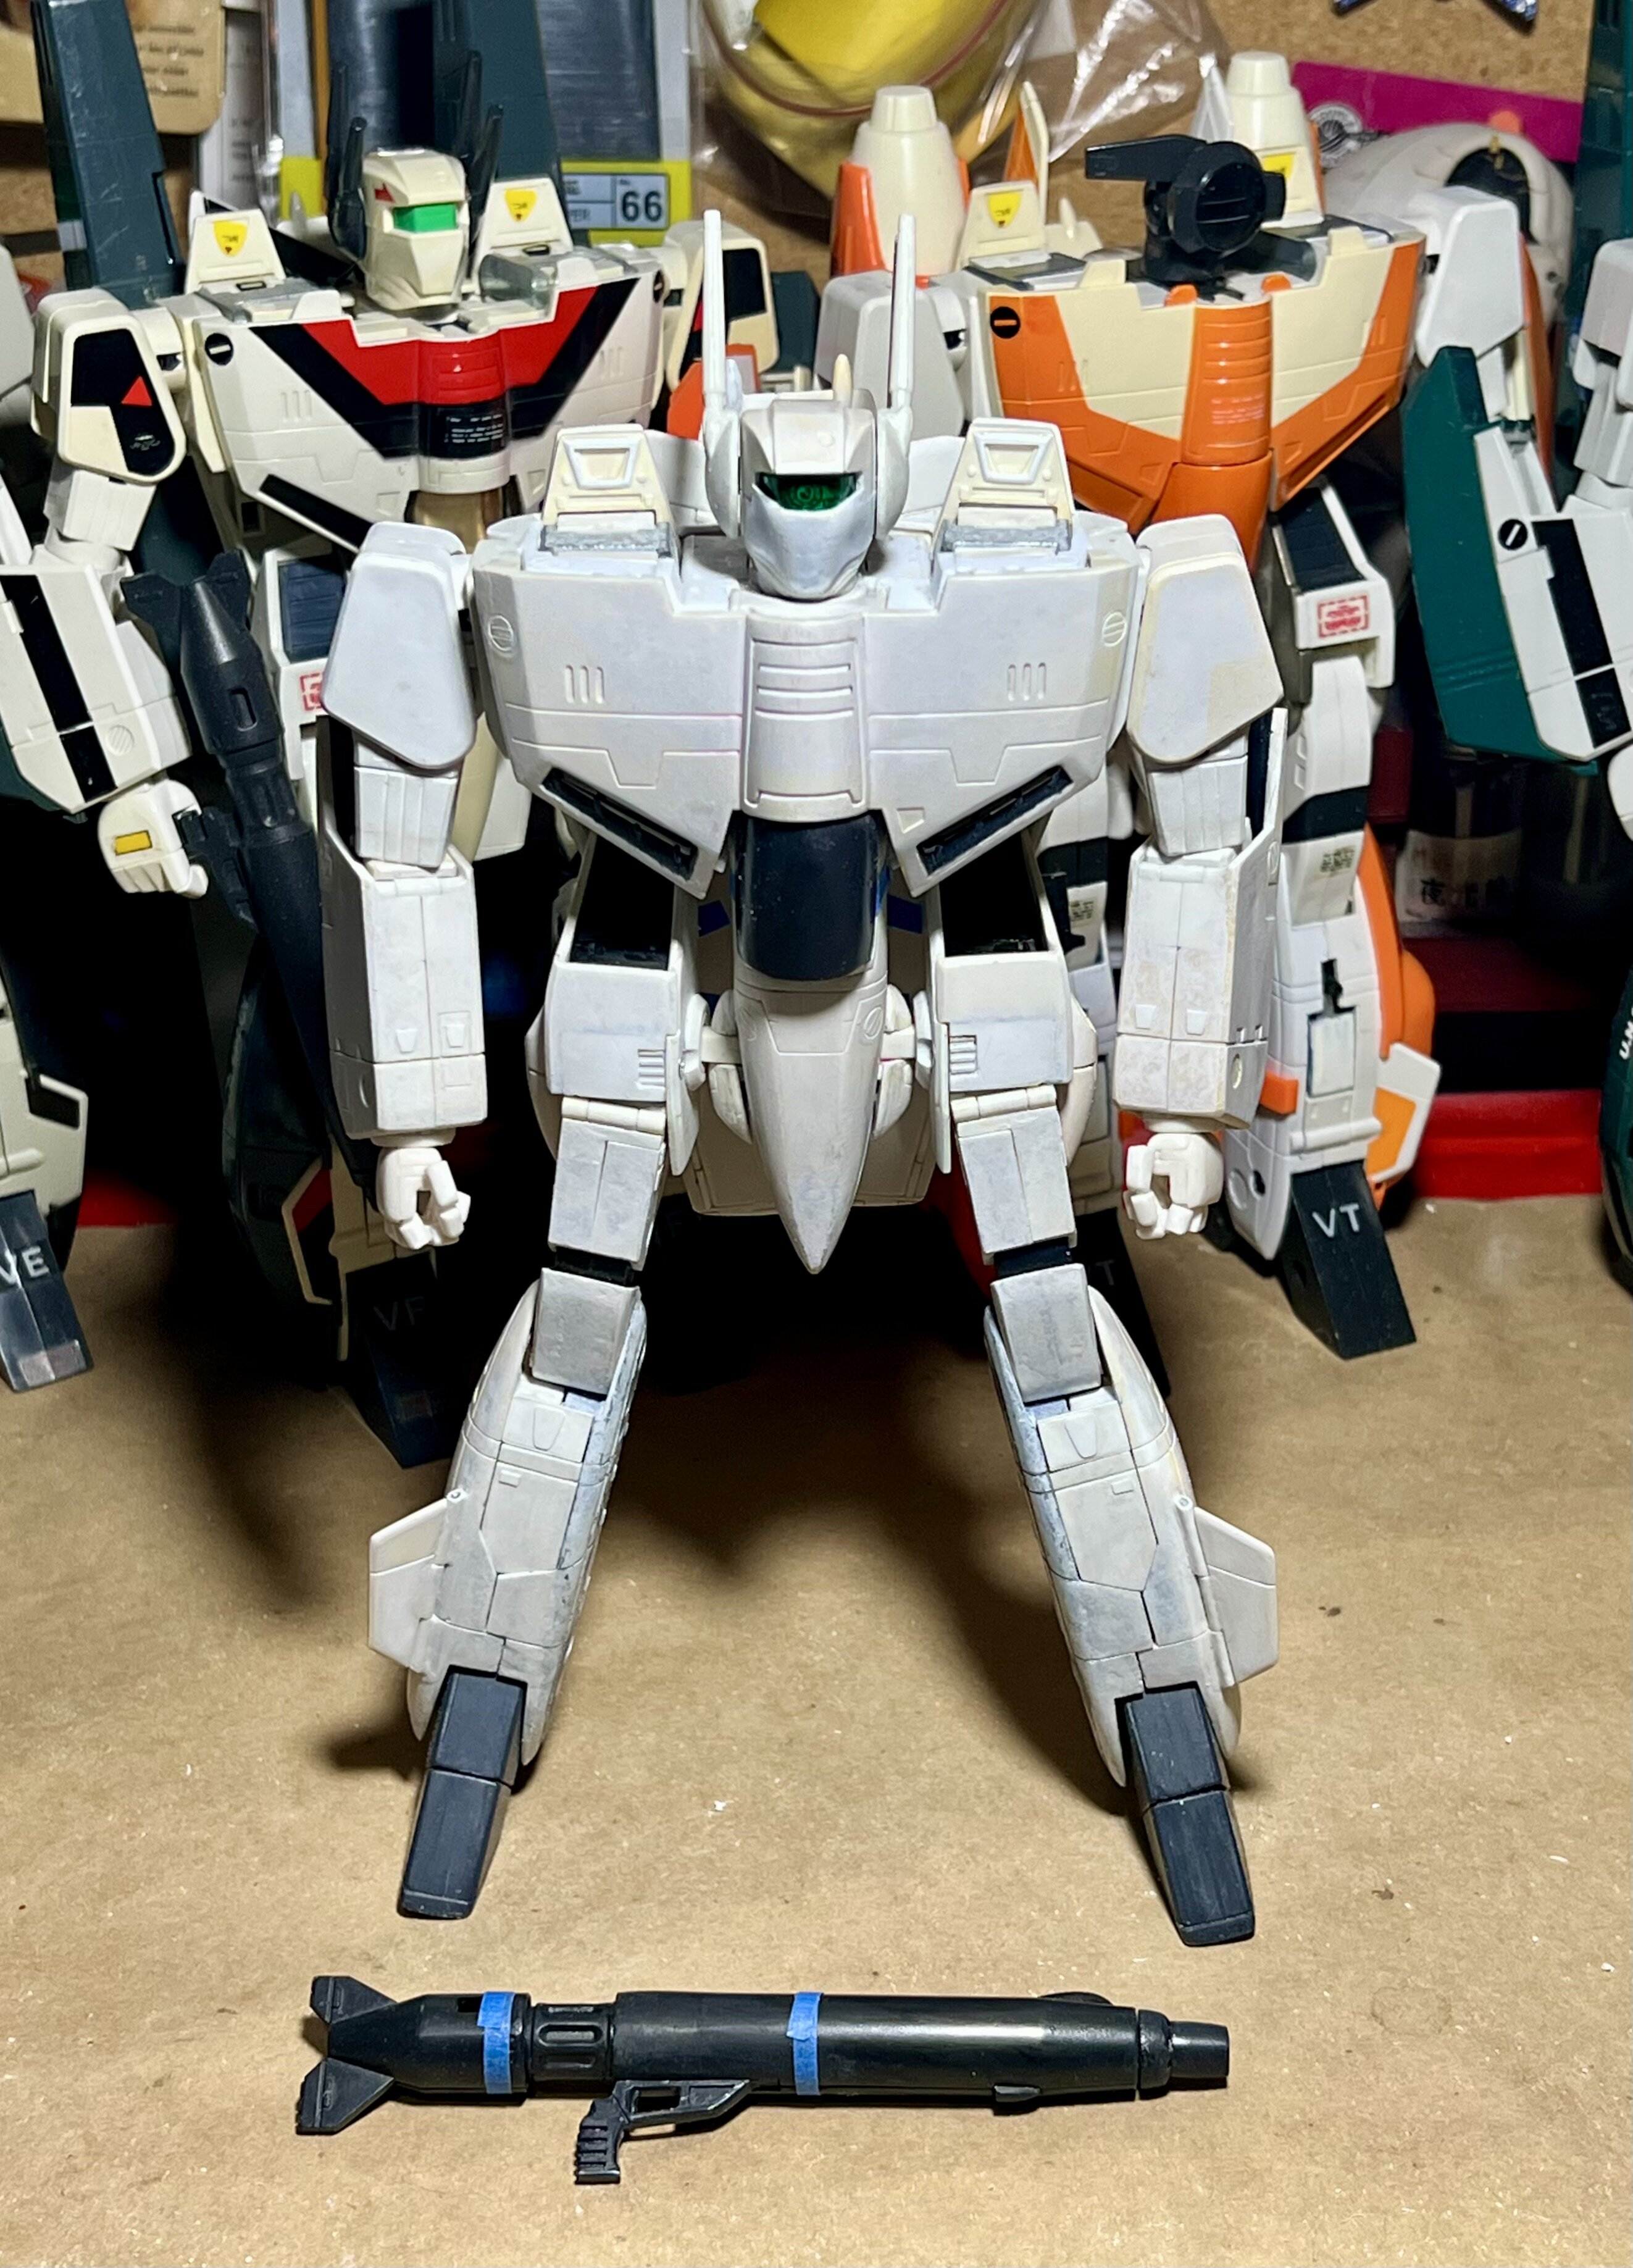
Well, I had to revert back to a more basic style of side covers. The version with the armpit thrusters were not going to look good in operation as half of a door would be missing on each. Oh well. But I was capable of making a much better side cover piece that wraps around the cockpit and sets secure on the body. Still need to add the panel lines and then sides cover is done. Feeling good.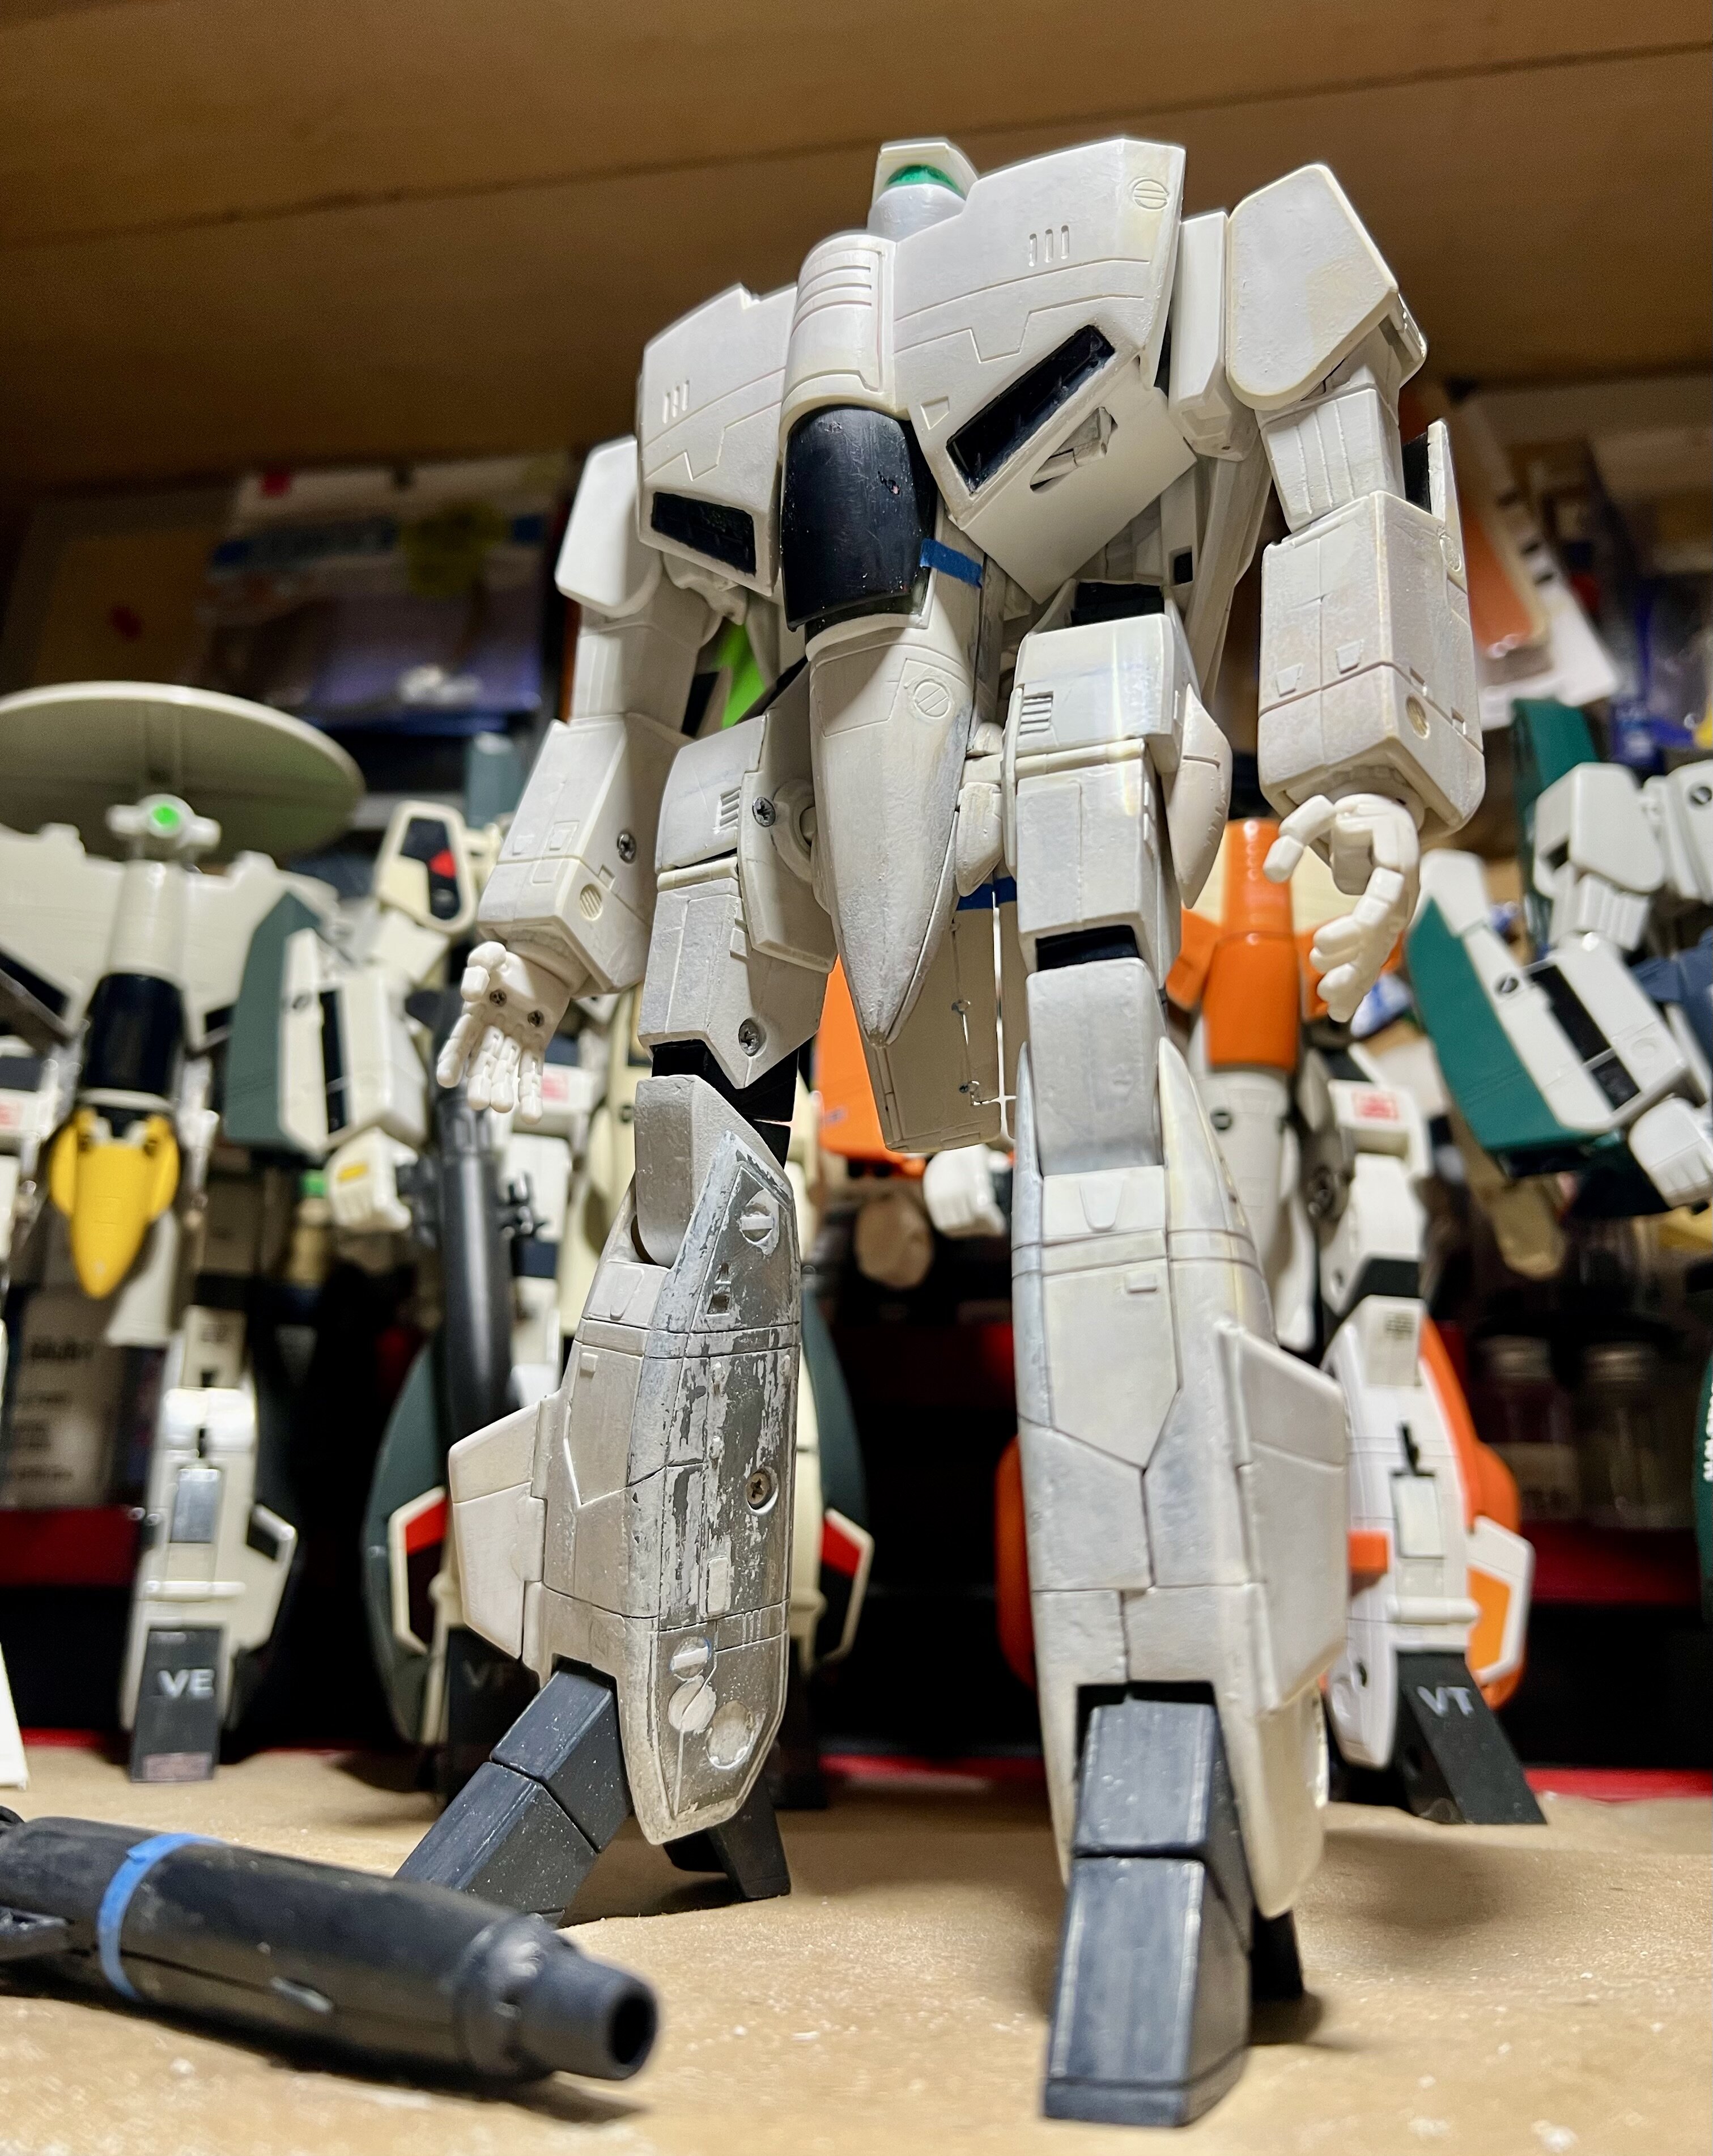
-
Whats Lying on your Workbench MK IV
nightmareB4macross replied to Urashiman's topic in The Workshop!
You probably can, but then the jerky would taste like paint and your build will forever be known as “the beef.” 😅 -
Whats Lying on your Workbench MK IV
nightmareB4macross replied to Urashiman's topic in The Workshop!
Side covers. not quite done as there is a bit more modifying and securing them in place that needs to be done.


-
Best review ever. Got all the minor and large details. 😜