Sam
-
Posts
752 -
Joined
-
Last visited
Content Type
Profiles
Forums
Events
Gallery
Everything posted by Sam
-
Sure. here they are. I get to start late today at work for late night shopping so I can actually take photos using natural light! its a lot nicer I think than flash Yeh, the seam has pretty much dissappeared*thankfully*, unless you are really looking for it Thanks
-
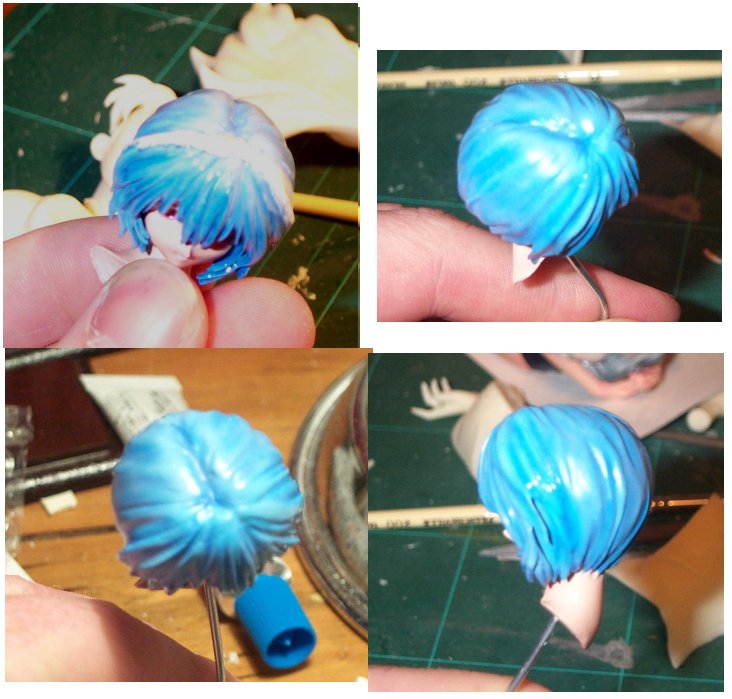
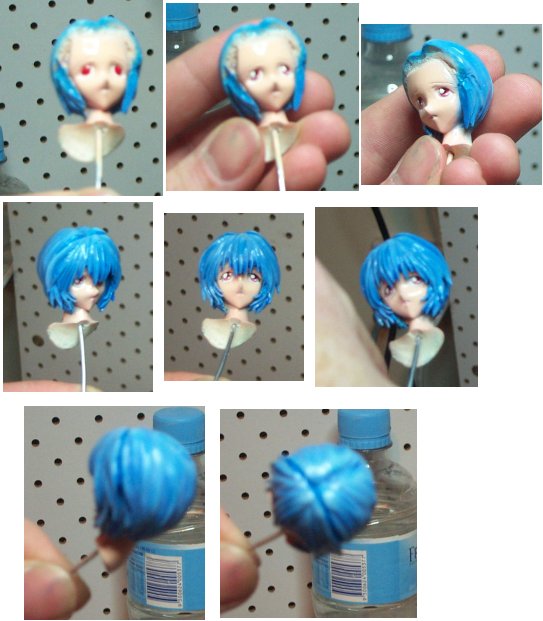
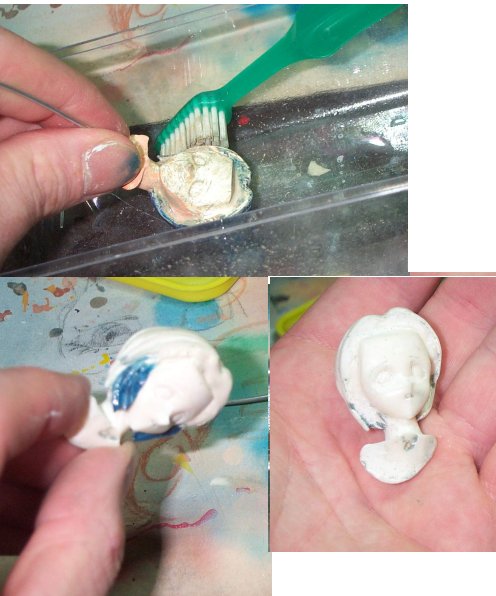
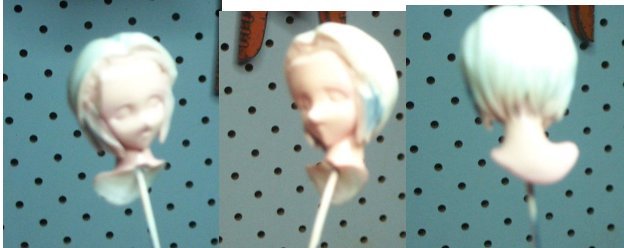
Thanks very much for the nice feedback on her Now, as you can probably see in the previous pics that nasty seam on her head? Well, its very annoying, especially seeing as because of her pose, its the first thing that hits u, so I have just fixed it tonight... Last night I put some testors contour putty on, let it set overnight * does anyone know a good putty that is decent for filling gaps after being put together? something that doesn't eat paint? maybe in a tube or something? * anyway, got it shaped tonight using a knife to main shape, then some careful sandpapering, then airbrushed on the hair colours again after figureing out that handbrushing just wouldnt' cut it Thankfully I had some purple and blue mix in my jars left, So anyways, shes all good now, all filled up, still a little visible but wont be noticeable unless really looking for it I think, so NOBODY look for it please THanks again. BTW, the top left is just the putty, the rest are after painting..

-
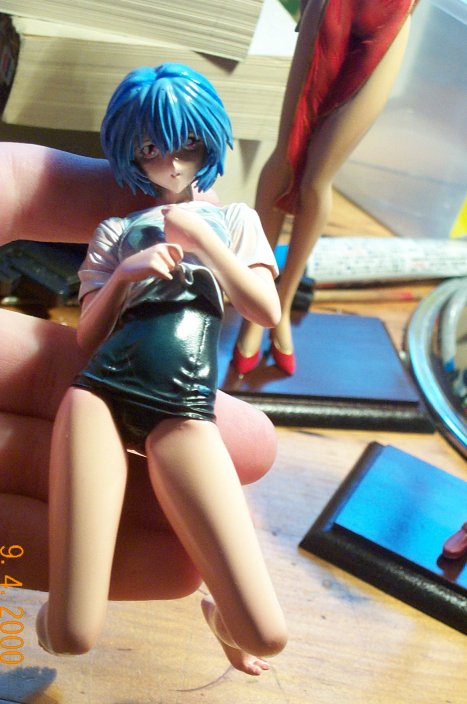
full frontal

-
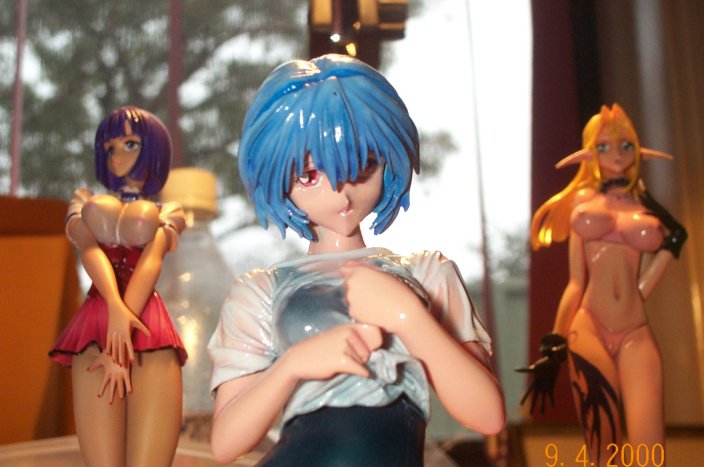
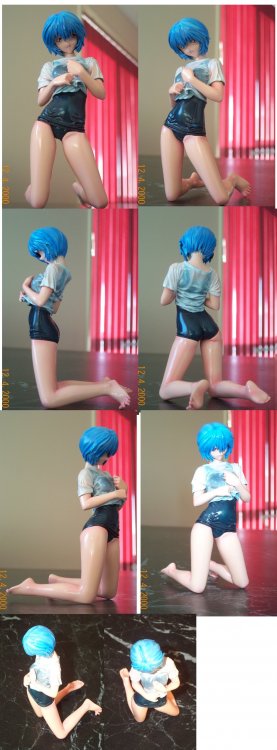
Still need to matte finish, but that will come later.. more shots ... this should hopefully show shes not really that sad..

-
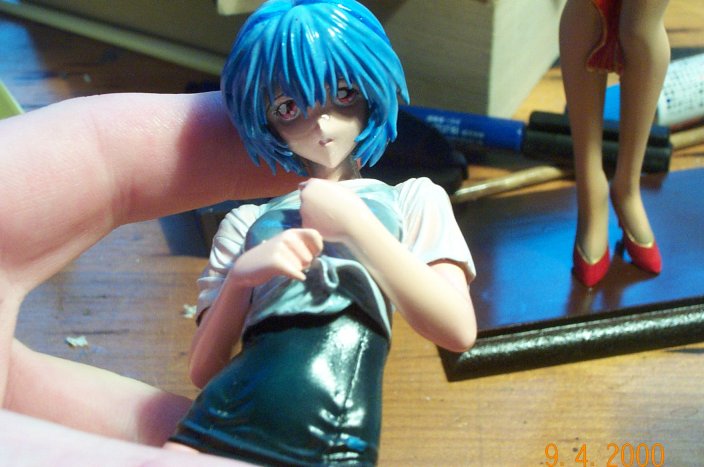
poor ol Rei, shes never really happy though is she? The kit has pre formed eye sockets, so its still within those, so maybe its the angle? Looks ok in real life, well, to me Tried that idea with the kleenex, I *think* it sorta helped, but I still suck at it but heres a put together shot. Couldn't wait to do the hair seamline..

-
see what kind of day it is from my backyard, lifeless grey sky!! its damn cold too, and lotsa wind....

-
Thought i would tag this shot on, its of the feet, which casting wise was a little.. uh.. crappy, but its sorta ok now. Even though Rei wouldnt' wear nail polish I dont reckon, I stil put pink on where they would be, cuz fingers tend to have a colouration there anyway, and its a bit more feminine too, so it couldn't hurt Thats bout it for now, gotta let it dry more. Might take a group shot of all the figure models I have done recently, cuz they were all a lead up to this fig and Misato who is yet to come

-
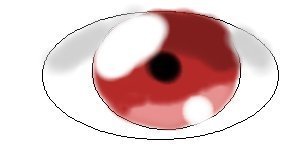
Well, have done the eyes today, its such a lovely day outside*not at all actually, its windy and overcaste, just the way I like it cuz then i dont feel bad staying inside and painting all day hehe * in this attached pix, I tried to show the step by step, but I just couldn't get it to focus very well, so this is the best out of a dozen or so shots ! Basically white out the eyeball, let it dry so the paints dont mix up. Then did the iris in the red, added white to red for the pinkish colour thats a crescent shape for the bottom section of the iris, then did a black with red for the top section of the iris, added a black pupil, then let dry. If u look at the computer pic above you will see the sections im talking bout After a minute I then thin black right down, so it goes on easy, and i outline the top of the eye for her lashes, the also a light outline around her iris, none of this can really be seen i dont think on these pix, cept maybe top right one.. but they are there! I then attached the fringe on with some 5 minute epoxy that takes 10 minutes to dry then the gap i knew that was going to be there I filled up with light blue paint, kinda like a Mr surfacer idea. I did this because Mr surfacer would eat at the paint otherwise, and I dont have any gentle putty fillers, so paint it was Once thats dry I will lightly spray the highlights again, redo the skin on the back of her neck, and see what else looks wrong. Should be able to be completely finished today or tomorrow I reckon!

-
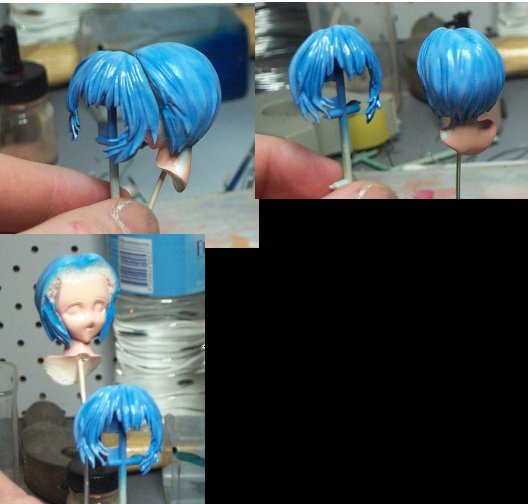
Im only using them in the in between the week that im makign a model, so they tend to be ok =) Now, I couldn't resist doing more, cuz i have to redo the face skintone anyway, so I thought i would do the main part of the hair ! Pretty happy with it actually. First colours i did were way too dark, but now I woke up to myself and did it Rei colour its much better IMO. Got the lavender in there as well, just for u David! Again, it doesn't seem to show up in the pix.. Time to go watch Las Vegas on tele!

-
LOL..ur addicted mate, totally, thoroughly, and completely! But ur right, it will be 'hued' this time As for her eyes, im totally looking forward to it, its like my fav part of the model i think.. ! the way im gonna be doing it like on the attached pic i just quickly roughed up. It will blend better though in paints And wolfx, resins are totall accessable cuz i keep an eye out on ebay, thats all these are, just cheap crappy white resin, brittle as all heck but I got them to practice on. Even this Rei was only a cheapy. Its not the best mold as i said in the beginning of this thread The good kits I haven't touched yet, they will be AFTER i have done my next four or five cheapies.. I have two to do, final battle version of Beat angel escalayer, and another beauty not sure whats shes called... but will show it off when its done... Mind u, the ones on ebay are usually kinda ecchi,or hentai style, or just crap LOL. Get some though, practice on it, then save up for Hobbyfan, its what i did! I wish it was dry so I could go and do the hair, !! *sigh* might go down and check it... might be ok for doing something extra tonight..?
-
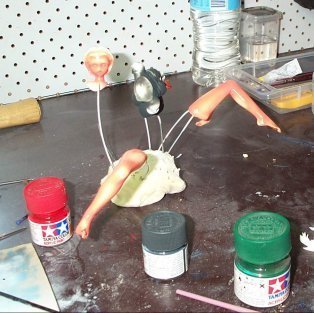
BTW, for anyone playing round with paints a lot, as you know they cost way too much, so i just invested in these little paint jars so i can save all my custom colours! =)

-
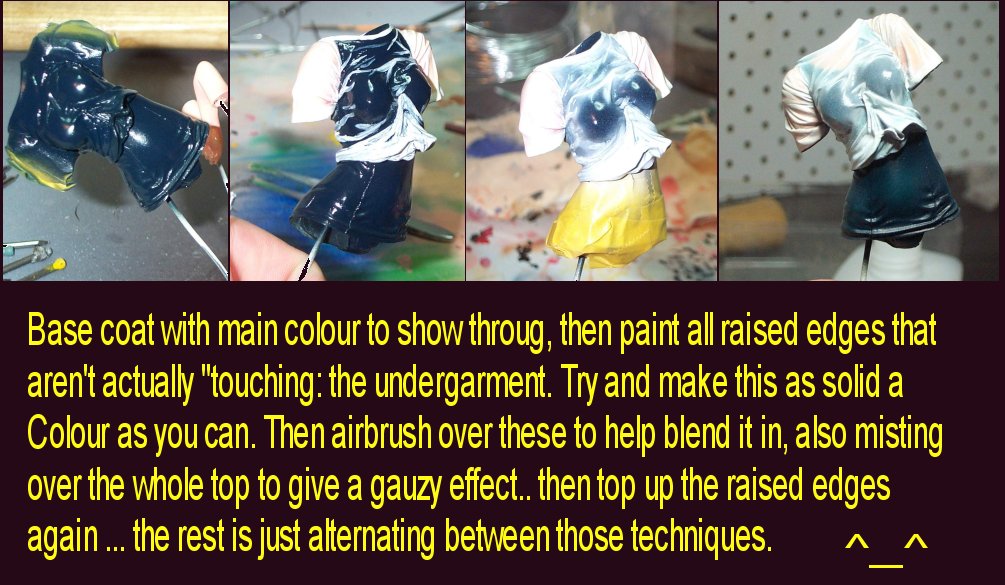
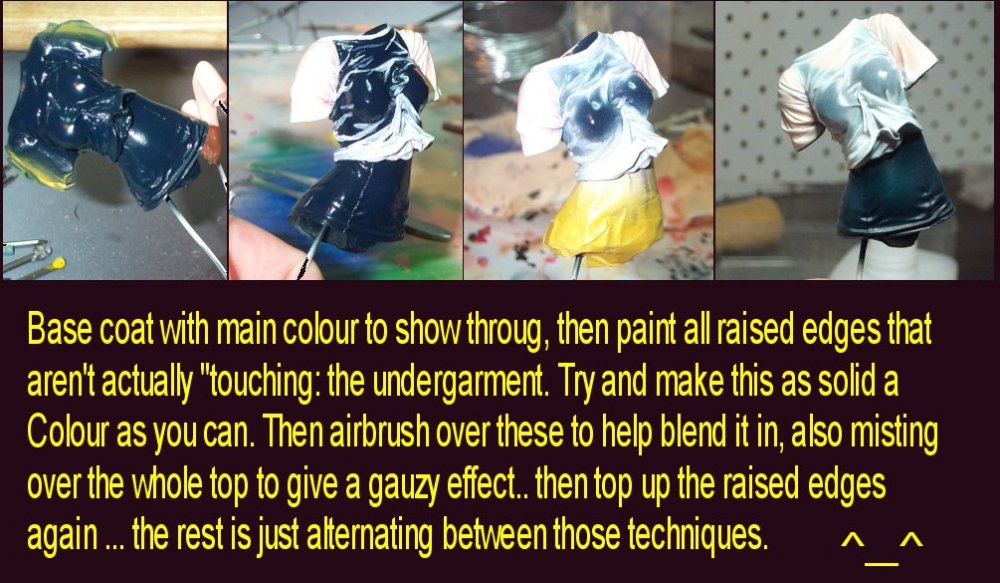
Whoops, forgot to add the 'instructions' picture
-
Thanks for the kind words, I hope this next pic might help point out how I achieved this look. I have seen it done other ways, mine almost seems the hard way in comparison, but it did I wanted it too, so thats the main thing! I have an aztek airbrush, trying to use the finest tip, but its not always consistent in how it dispenses the paint, sometimes I get a blob bust out, and i ruin a paint job I might have been working on for a long time, but now i have en'route an iwata hpc, which should kick arse in the fine line dept! I have heard only good things so far on this brush, so fingers crossed. * only hope my existing hose will fit it, ...* But anyway, tonight i did another skin tone on Reis face, but my pix dont show it up too well, but here is the photo anyway Basically a standard skin tone I mixed up myself, a little bit of yellow added for highlighted skin, a bit more red for her pinkish edging skin. Its a decent effect when viewed in person, but its too subtle to pick up on my 2.1 megapixel camera it seems... Tomorrow i finally have a day off, so after it dries tonight, a quick airbrush of hair so her face doesn't come off again from the tape's tack, and I will be close to finishing up. Definatly not the best example of this, skills wise, its still decent nuff for me to display I reckon LOL
-
In anticipation of Resident Evil: Apocalypse
Sam replied to UN Spacy's topic in Anime or Science Fiction
mmmmmmmm.. nice. Jills hot I liked the first one ok, did get a couple of jumps outta me... cant really call it classic, but more enjoyable than my memories of Street Fighter the movie, another capcom fav Must say, it must be pretty harsh as cosmetics go*see preview*, oil of ulay defineatly looks to have less side effects hehe I'll watch it. -
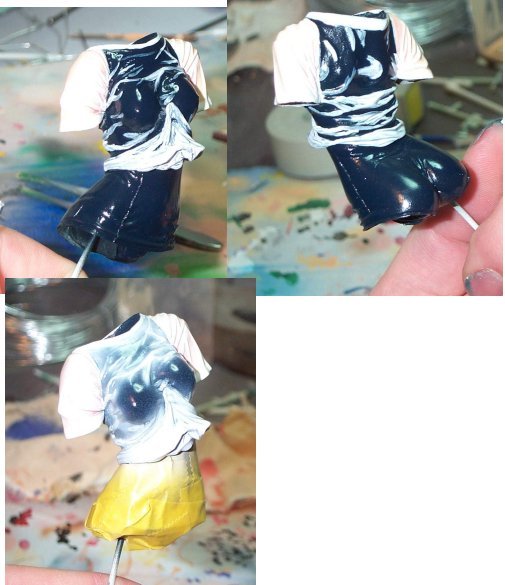
Now the good news for the evening... i now have pretty much finalised how the torso looks... sprayed on some lighter colour for the bottom half of the swimmers, and then coated with nato/clearblue, so now looks bout right to me... also put some more colour of the swimmers showing through on her back, then feathered white over and finelined the ridges with airbrush again. So now Im fairly content thats all I need to do to it, short of adding colour to her little badge but that will come last... Well thts it for now cuz its all drying, so next couple of days will yeild some more pix and progress. For now i have to be patient and DONT TOUCH the drying paint...
-
Well, a couple of hours later, or maybe hour half, I have cleaned up the head as best as I reckon i need to, by spraying heaps of acrylic thinner onto the head, and using a toothbrush, getting rid of most of the paint.. Note to self and others, when spraying lots of thinner, wear face mask sooner than later, as Im sure the room is NOT meant to be moving like it is right now.... So now i have it pretty clean, start from scratch again, but at least it has allowed me to glue the side pieces of hair in place, and put some putty in the places I think I need it.. theres gonna be a god awful seam between the fringe and back of the head it seems..

-
hoooo.. man, talk bout pressure of high standards Ive run into a spot of bother which i found out just before going ot bed last night. Where I had masked for painting the hair and the body, I had left it *the mask* on too long, and its affected the paint very badly, pitting, pulling, making a complete mess. Its a total loss, and Im not sure how to get this semi cured acyrilic off without sanding away features or damaging it... also the bottom half of the body got a similar but not as bad, so a few coats of paint and minor sanding will solve it.. but as for her head...*sigh*... its quite dissappointing.. might have to soak the whole thing and start from scratch, which might not be so bad, im not happy with the hair now, ive gone too dark according to that pic. *sigh again* no pix, im trying to fix it now, I hope it turns out half as good as the pic u got there wolfx, really I do thanks Sam
-
P.S. sorry bout the glare, the flesh on the arms doesn't show up at all cuz of flash i thinks... kinda makes it look really bad, but its only slightly bad.. hehe
-
i think i should have misted first, then added highlights now, in hindsight...*sigh* anyway, thats all I have in me tonight, might do some more tomorrow
-
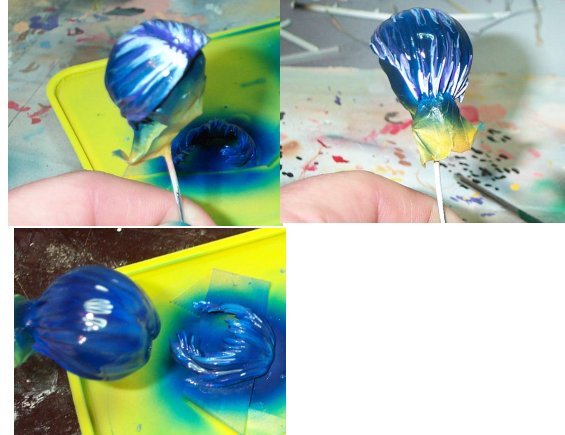
Well, tried to add some wash purple in, didn't show through on the pix, might have to redo it a bit.. actually I redid the whole hair again Basically put the pure white highlights in so I could clearblue and purple over it, but the purple got lost in the clear so might have to do it again Also started up on the wet t shirt , basically painted by hand the raised edges in white, then misting over in the white. ONly did the basic coat tonight, theres a lot thats annoying me about it at the moment so will maybe end up redoing a bit, but gots to let it dry, and its also near midnight and should go to sleep
-
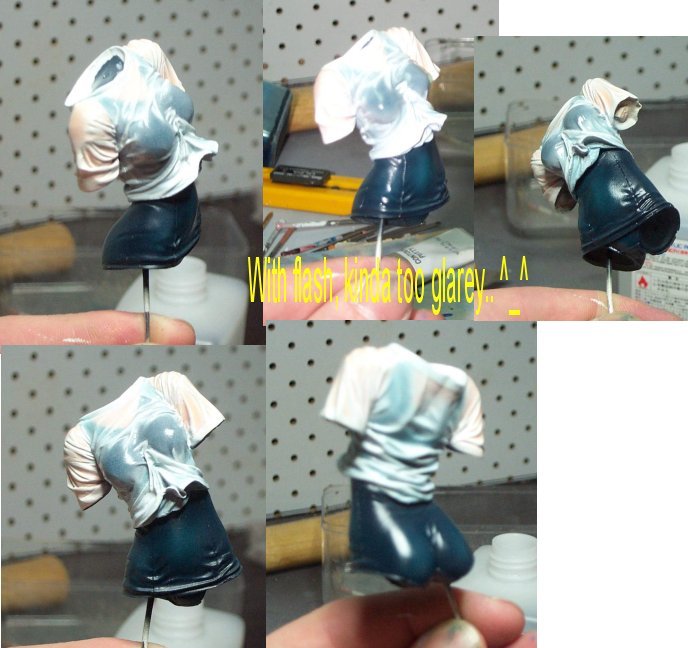
Ah, blue you say? Well, I just did a respray tonight and amended that oversight, thanks for bringing to my attention Tonight was fairly basic, wasted a bit of paint though cuz too tired, made mistakes, etc etc... but anyways, after using tamiya masking tape to block off the face and the arms, I was able to do the hair in a few shades of blue, mixed in a little bit with the nato black for the darker areas, sky blue for the highlights, and clear blue to bring it together. I am *so* going to dark wash the hair cuz it needs detail I think, and it wont hurt to dry brush some highlights too me thinks The pic looks too bright for what it really is on the hair, I guess im still no camera man, but at least its fairly decent idea on how its coming along. Damn this working on weekends bit. Sux Time to eat n sleep methinks. Thanks for feedback by the way, kinda a bit disturbing bout ur thoughs on dismemberment and Gendos wayward ways though...*backs away slowly* Sam
-
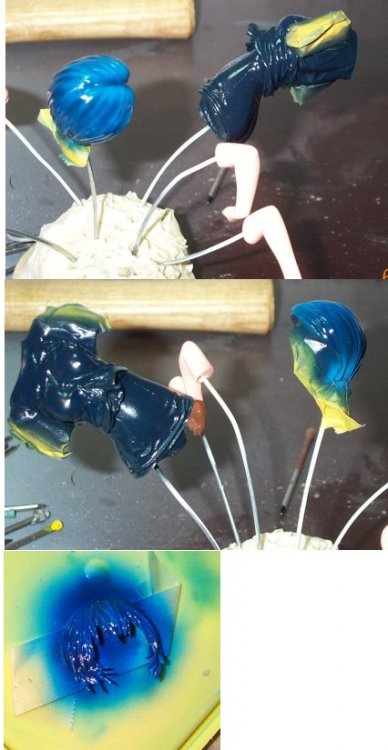
This is the only other shot i have at the moment, can see the nato black a lot better, its the same colour I will be using for Misatos black dress,*did i mention i am so looking forward to making that model? * fleshed out the arms a little bit cuz they will be see through the shirt as well, but there will be a lot of points where I think the shirt wont touch, its all going to be play by ear though, see how it looks as I go. The bottom of the two pix sorta shows my shading up the best, its still had to see in the pix, but was using more yellow in the flesh to stop her being so anemic, which while we know Rei kinda is powder girl, I wanted her to be a bit more normal... who know, might change my mind again, already did her flesh 3 times tonight cuz i wasn't happy Well thats it for tonight, got to work the weekend so may/may not do more in the next couple of days. See how I go. Adios Sam
-
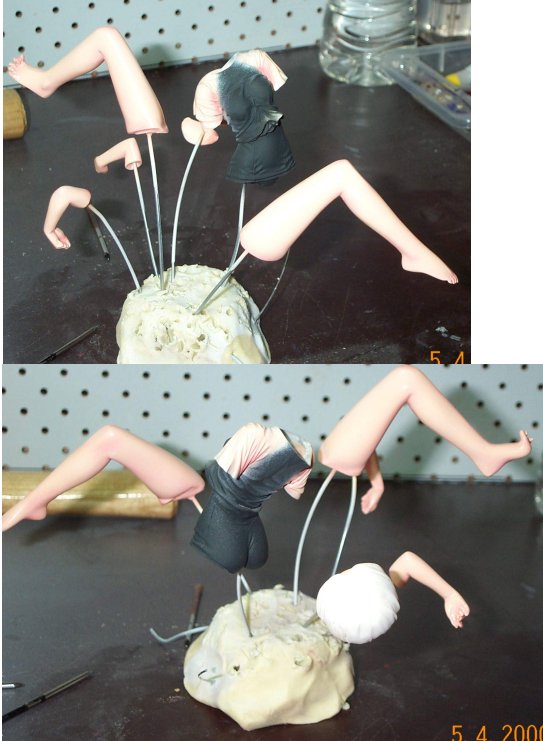
This next one is after i had done an undercoat, did some extra puttying, and now have put a dark shading in. I have a standard flesh coat I had mixed out of my red yellow white already on it, so this is just for the cracks so to speak You can sorta see the torso in the background which i have used nato black on cuz its a flat black, looks like the spandex? rubber? that swimsuits look to be made of, but think I will have to add some 'wet' bits to tie in with the wet t shirt idea.. * this is what all those other see through figures I did were for, practice for my Rei which im confident I will do a half decent job now
-
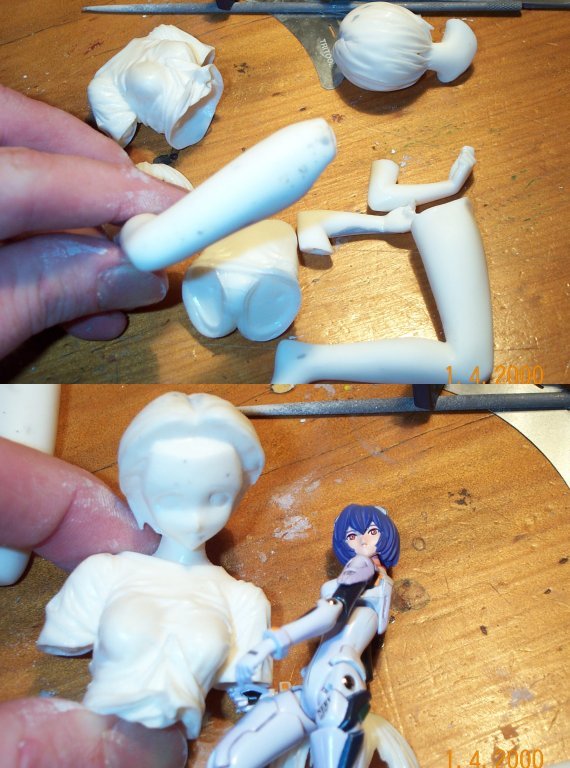
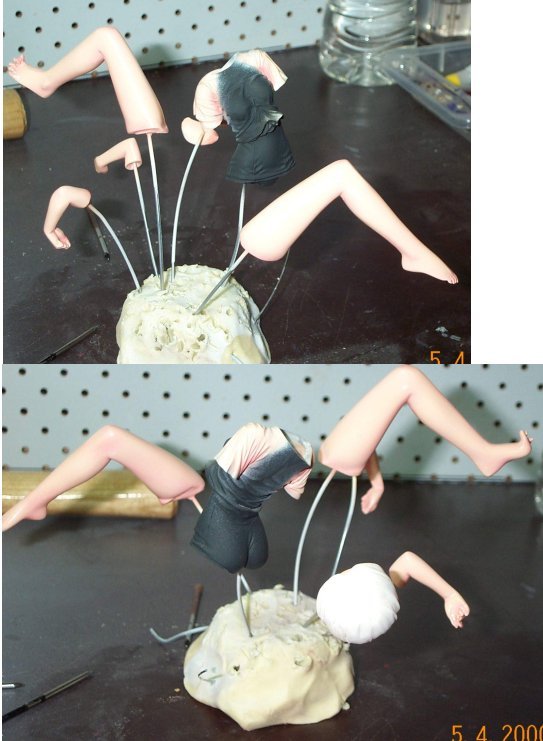
Well ppl, this is the resin figure that I was saying i had that I was going to build up, so heres a few shots showing off the lil gal.. I got it from ebay seller, its the cheap white brittle resin, which i didn't know was meant to be crap, its just that I ordered something from hobby fan, and hobbyfans resin is just beautiful to work with!! it doesn't snap, has good molding, no pits that I can see that are bad, very very nice, so I recommend anyone to go there for kits, unless you dont mind working a bit harder, which i dont, cuz im lazy Anyway, this first shot is just a compare for those who have perfect Rei to get an idea of her size. Also you can see where mr surfacer is on it, there are LOTS of pits.. ugh... not clean at all.. little did I know the first coat of undercoat shows it up a lot worse...!

-
Wow, So you program the 3d model into the computer, and the router carves it? Ive not seen that before, so excuse my ignorance