Grayson72
-
Posts
2563 -
Joined
-
Last visited
Content Type
Profiles
Forums
Events
Gallery
Everything posted by Grayson72
-
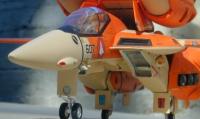
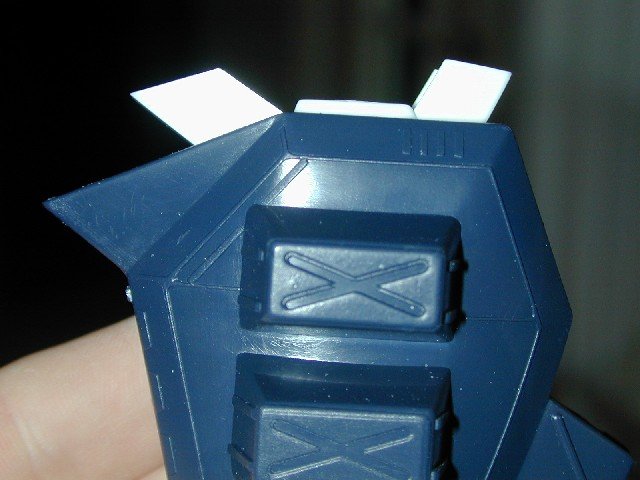
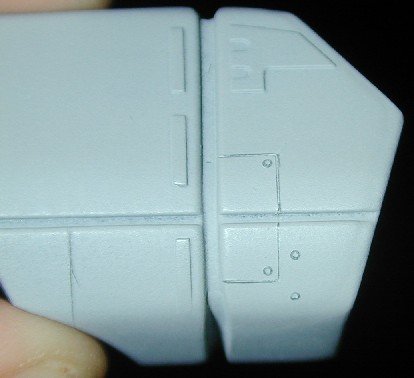
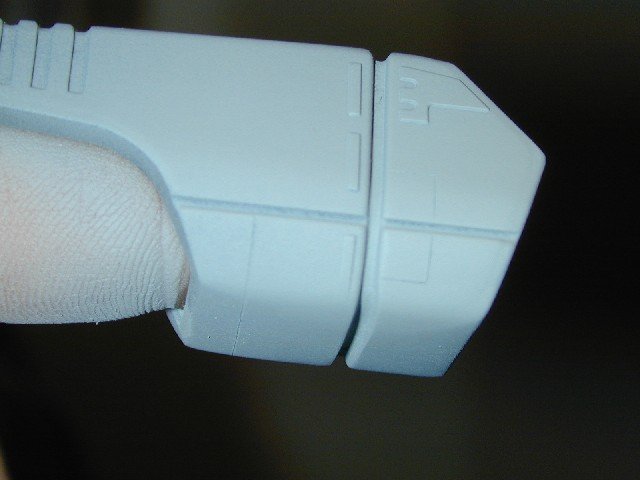
Here's a closeup of the front of the leg armor after primering. The light is snug and you can see some of the panel lines I did, the one near the foot came out the best, the long oval ones on the missile covers...well... not so good, I may just fill them and leave them out.
-
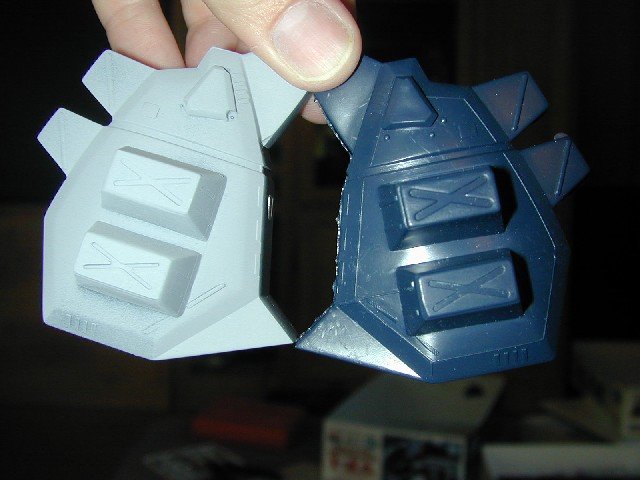
Here's a before and after shot with the other leg that has yet to be modified. I got rid of the raised panel lines and big bumps which I suppose were rivets but I thought they looked kinda silly. I gouged out the corners of a raised detail part and used one of my rivet scribers to make better looking bolts.
-
Well the light was just one small part of the leg modifications I did. I scribed some panel lines along the big missile covers to give them the appearance of where they opened. To do the lines I cut some of the thick label maker tape, makes a nice line and sticks really well and is not easily gouged when scribing.

-
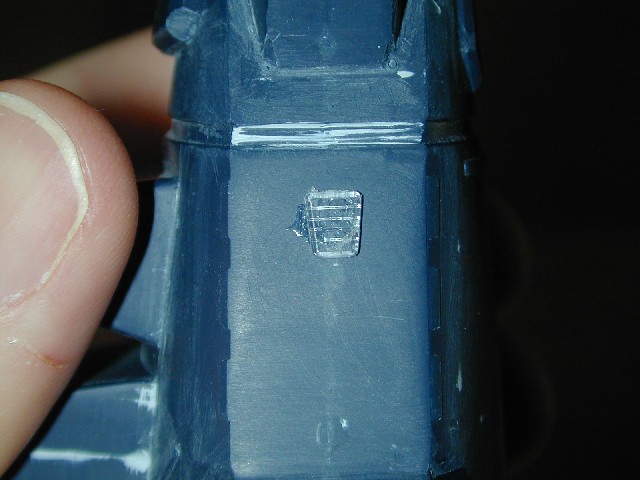
Here it is with the lens in.

-
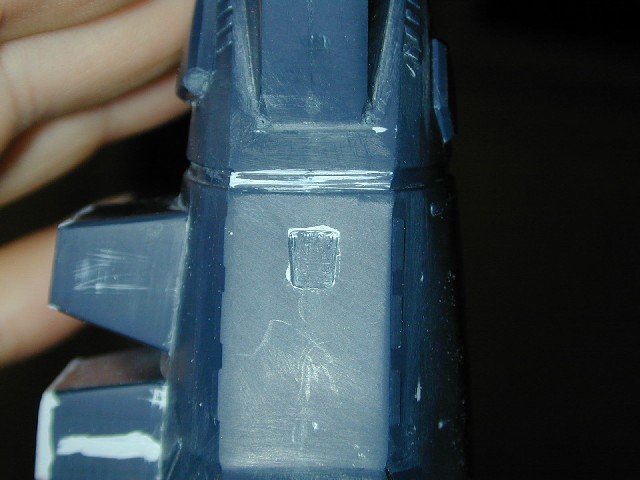
I cleaned up the edges several times with Mr. Surfacer 500 (man I love that stuff). Once I had it pretty clean I just needed to close up the gaps so I used my goosh technique again to get a perfect fit.
-
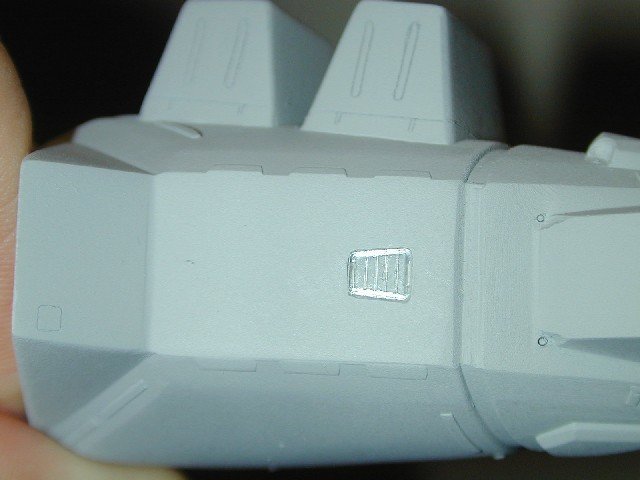
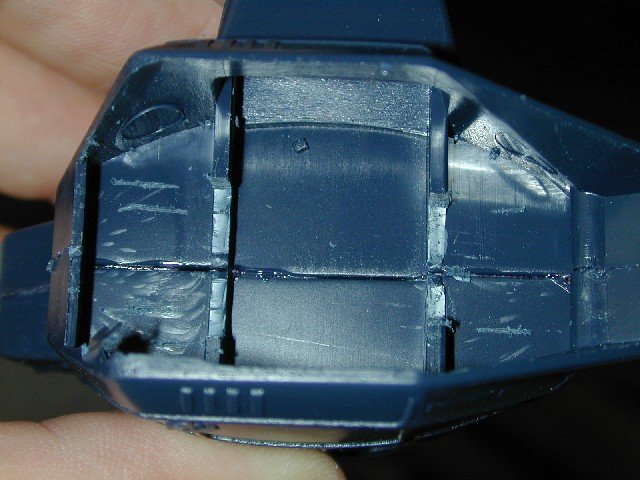
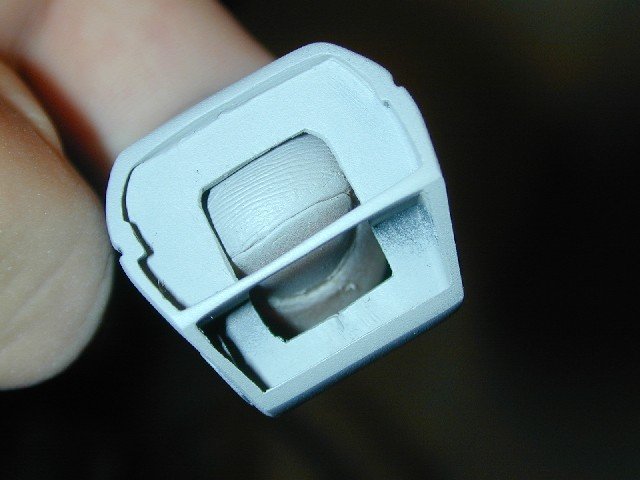
Someone did a battroid conversion in one of the Hobby Japan mags that I have and he counter sunk the leg lights so I figured I'd give it a shot. I stole the leg lights from the Hase battroid kit and white glued it to the leg where I wanted it. Then after it had dried I took my scribing tool and lightly traced around it. I kept going over and over it a little harder each time till I had a nice groove to act as a guide when I went to chisel out the middle part.

-
So after all that here's where I wound up, it's still a little small but looks better then the first option.
-
I then had to cut away some plastic on the underside of the armored leg to make it sit correctly.
-
Unfortunately after I got done cutting the stock foot down I tried it on the model and it looked even fuglier. It was just to spread apart from the front and back. Sooo... I went back to the stock Hase parts. I wasn't about to try and fit the whole leg into the armor (it's not removeable so what's the point?) so I cut off the part I needed.
-
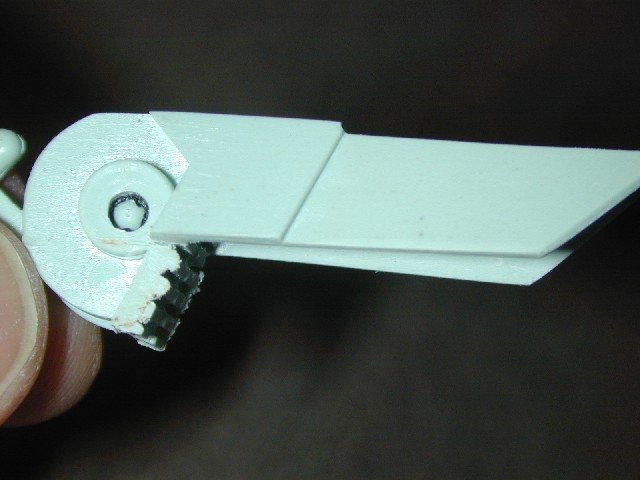
Here's the foot after I was done cutting the foot and my finger.
-
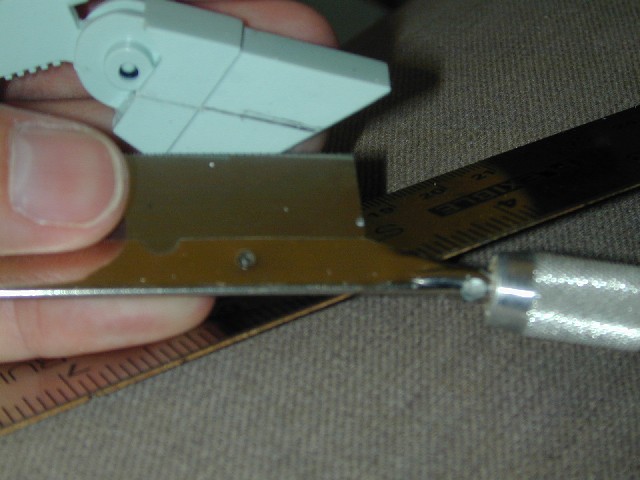
Here's me using the razor saw, these are great for cutting straight lines. Carefull, plastic isn't the only thing they'll cut.

-
Here's what I did for the feet. I thought the feet from the Hasegawa kit would look too small so I decided to use the ones that came from the original Arii kit. Unfortunately the stock feet are way fugly so I sanded off the goofy looking bumps and then I needed to cut down the thickness of them. I used the feet from the Hasegawa kit to mark the right thickness.

-
That's one big gun! Try pinning the joint with a metal rod like with a sewing pin. Hey you need to resize that pic though. Delete and resize it in MS photo editor.
-
I'm sure you have more my friend.
-
Heh secret handshake, you're funny. I chose 1/72 scale for several reasons: There's a lot to collect in this scale (as you stated) I wanted to limit myself and this seemed to be the one with the most to offer, especially if you want to buy diorama stuff to go with it I do stray when there's a few items I want like the 1/48 models, and I collected all the little Zentradi ships cuz like they would'nt fit on my property in 1/72 scale Here's the list: This is just the Macross and Mospeada models, I got tons of other scifi and modern military models too, all in 1/72 scale. All items are 1/72 unless noted otherwise All items are original unless noted otherwise VF-1A Fighter Valkyrie clear w/special decals VF-1A Fighter Valkyrie x4 VF-1J Fighter Valkyrie x2 VF-1S Fighter Valkyrie VF-1A Super Valkyrie VF-1S Strike Valkyrie VF-1 Valkyrie Weapon Set x2 VT-1 Valkyrie "Super Ostrich" VE-1 Valkyrie "Elintseeker" YF-19 Fighter VF-1 Battroid YF-21 Fighter Macross Display Stand VF-1A Super Battroid Valkyrie VF-1S Strike Battroid VF-0S Valkyrie SV-51 VF-1 Super/Strike Valkyrie VF-0B Valkyrie VF-1S Strike Battroid, Minmei Guard VF-22S VF-1D Valkyrie VF-19 Fighter VF-1A Valkyrie Angel Birds VF-1J Valkyrie Max & Millia Two-in-One Set VF-1D Valkyrie "Max/Virgin Road" (Wedding Episode) VF-1A Valkyrie Low Viz VF-1S Super Fighter Valkyrie VF-1J Super Fighter Valkyrie (Max) VF-1A Super Fighter Valkyrie VF-1D Valkyrie (Variable) x5 VF-1A Valkyrie (Variable)x4 VF-1S Valkyrie (Variable) VF-1J Valkyrie (Max) (Variable) VF-1J Valkyrie (Milia) (Variable) Destroid Missile Phalanx Destroid Tomahawk Destroid Defender x5 Zentradi Glaug Destroid Spartan x3 Armored Battroid VF-1J Zentradi Standard Regult x2 Zentradi Quel Quallie Theater-Scout Bug-Eye 1/720 Zentradi Fighter Pod 1/72 Destroid Monster (recast) 1/72 Legios & Tread (recast) Mospeada Gurab Mospeada Gurab (recast) Mospeada Ligaa (recast) Mospeada Ligaa w/Booster (recast) Mospeada Legios AFC-01Z (red) VF-19 Sound Booster Add-on Cat's Eye Recon Fan Liner Fan Racer Fan Racer (recast) VF-4G Lightning III Fighter Zentradi Queadluun-Rau VF-11 (Wonderfest Special) 1/48 VF-1S Ultimate Detail Strike Valk (recast) 1/48 YF-19 (recast) 1/48 YF-21 (recast) VF-2SS Lancer II x2 VF-17 Battroid VF-11C Super Battroid
-
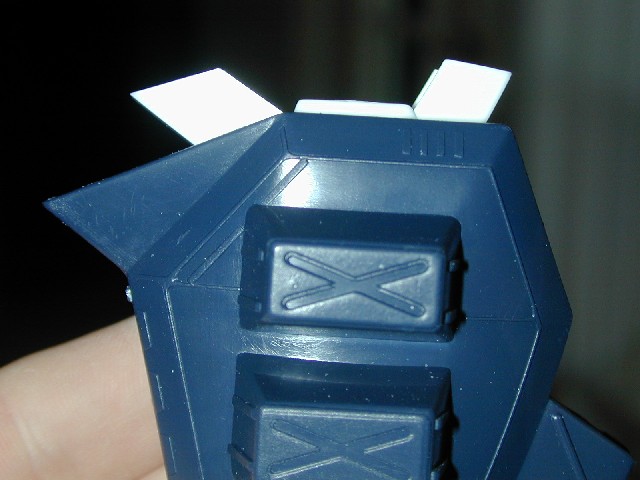
Here is the arm with the rivets or whatever they are.
-
Welcome to my little club
-
Oh boy oh boy oh boy!!!! Oooooh a surprise, hopefully it will contain the words Macross model and 1/72
-
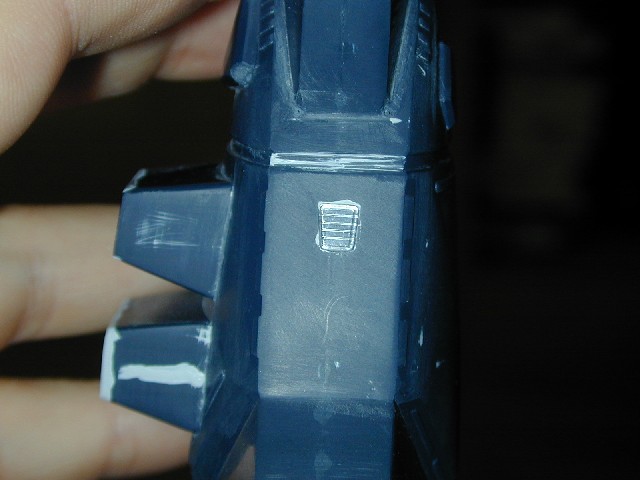
I scribed some panel lines to give it a little more interest, I'm also gonna add a few rivets here and there.
-
Another shot of the arm, I primered it with gray tamiya primer from a spray. Man that stuff dries fast. Anyway it really helps to highlight the defects but I'm almost there with the front. This has been the hardest part because I had to build up the gray part with putty and then sand it flat inside that recess.
-
Great question Chris, personally I wouldn't match the missiles to a specific pilot. I think that's a bit unrealistic myself. I guess if they were going on parade they might do that but in a time of war who'd have the time. "Wait wait Roy you can't launch and defend the SDF1 yet, I haven't finished painting your missiles to match your aircraft. yeah right"
-
Thanks for the pics, in the future you should probably reduce their size by about 50%. This site is privatly funded and we don't won't to impose extra costs by using up their HD space.
-
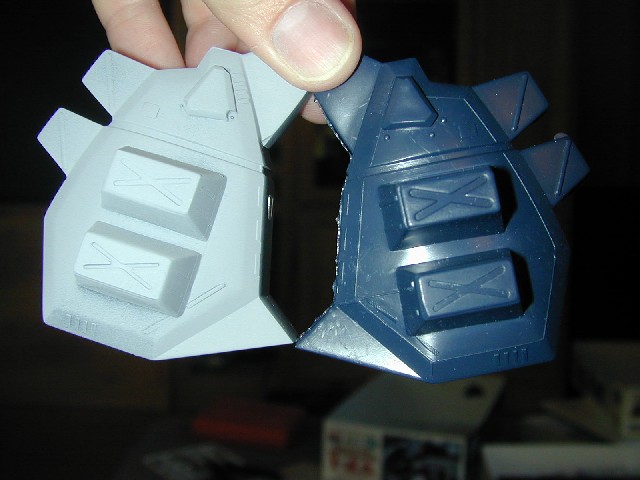
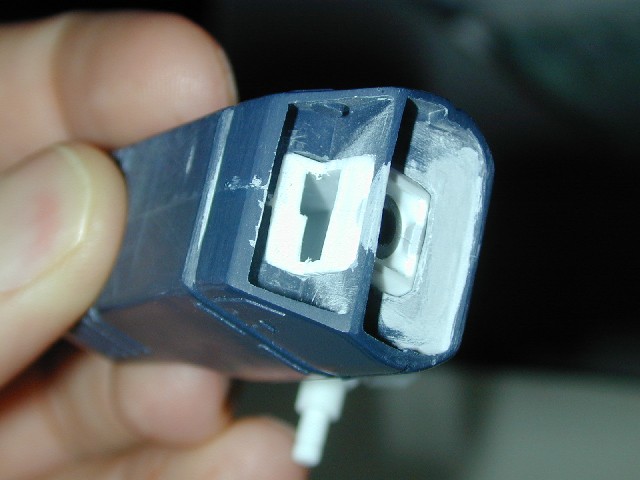
Here's the two together, the fit is pretty good so far, but I'm far from done. I figured out a technique were I fill the voids with Tamiya putty and let it set for awhile, once it's dried up a bit to where it's not sticky but still soft I jam the arm in the armor and it forms around the piece. Then I sand off the parts that goosh out after it's hardened.

-
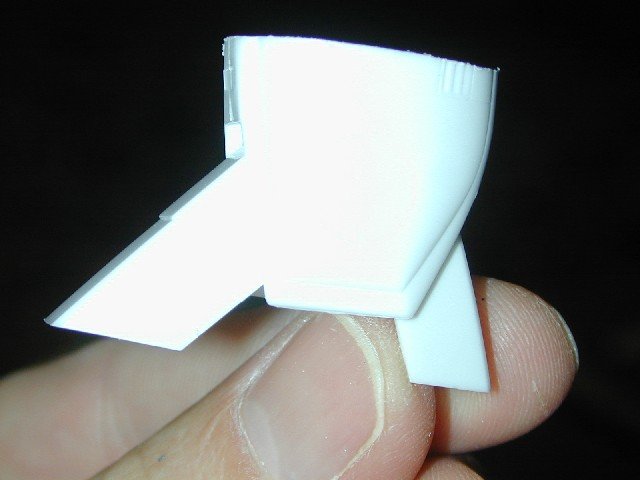
Here's the arm from the Hase Battroid, I had to cut off the top part to make it fit right.

-
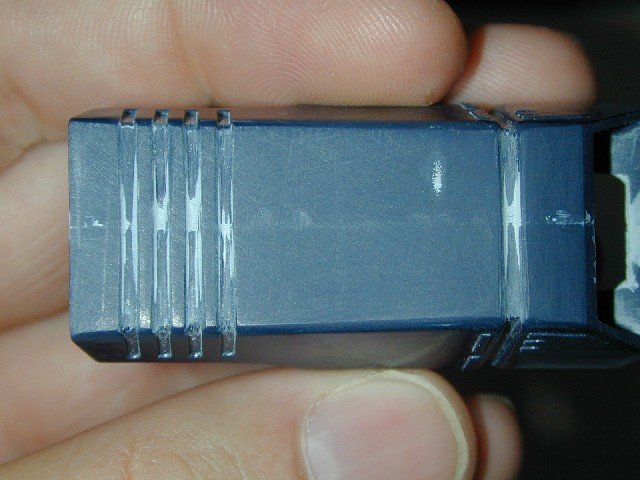
Here's the top part of the arm, I finally figured out a good way to get at the seems in those little ridges. I wrapped an old credit card in a piece of 400 grit sandpaper and used the edge, works like a charm.