Grayson72
-
Posts
2563 -
Joined
-
Last visited
Content Type
Profiles
Forums
Events
Gallery
Everything posted by Grayson72
-
Holy crap that's awesome!
-
Dude your place looks like a star wars museum, WOW!
-
Exactly, what a bunch of apefaces
-
OMG OMG OMG, Thorsten you don't dissapoint my friend. that little thing is perfection. And yes must make the Commanchero someday
-
I used to have a girlfriend with a bod like that, god that was fun...then I got married
-
Huh? that's not an X-9 dude, that's the QF-3000 Ghost you'r lookin' at right there.
-
Oh fricken schweet, Thorsten is back on the job
-

Review And Comparison Of The 1/72 Mk Ii Monster's
Grayson72 replied to Grayson72's topic in Model kits
I think you did send me a scan but I wasn't able to use it. I finally had to go buy a 1/200 scale Monster off ebay and send the decals to Anasazi. -
Review And Comparison Of The 1/72 Mk Ii Monster's
Grayson72 replied to Grayson72's topic in Model kits
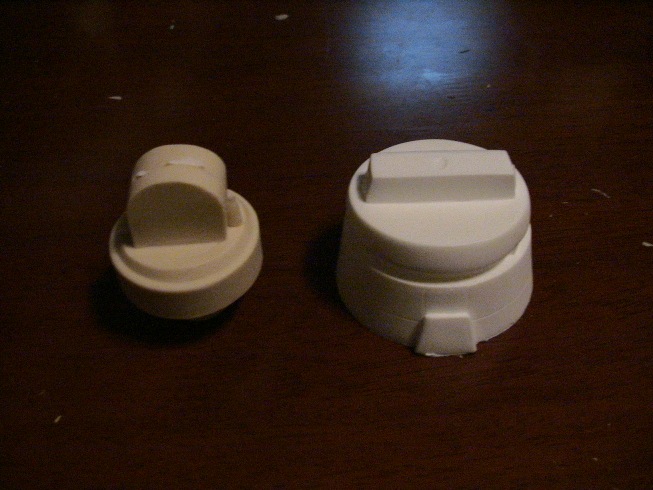
Ok on to those huge arm cannons, oh baby! In the first pic you can see some major design differences (artistic license) with the raised detail, Mike's is a bit more subtle and I like it better. The next pic is a shot of the cannon exhaust ports (or whatever they're called). While the old version has some nice detail, Mike's version is much more subtle and way closer to the line art, so I think Mike's version is the winner again . aaaaaand my camera has run out of batteries so that's it for now, up next is cannon barrels and the legs. Stayed tuned peeps.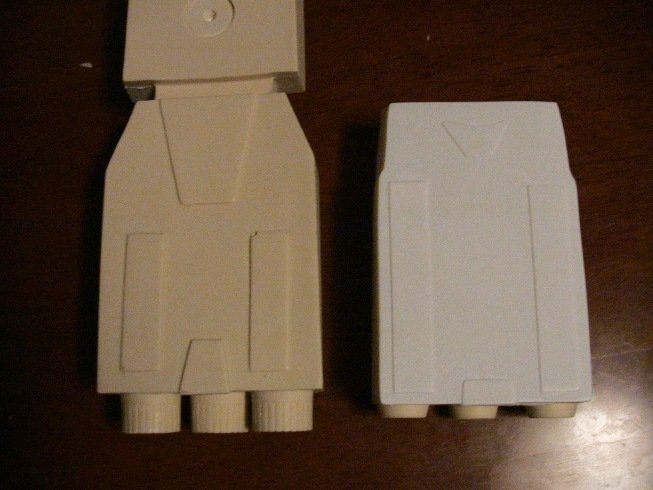

-
Review And Comparison Of The 1/72 Mk Ii Monster's
Grayson72 replied to Grayson72's topic in Model kits
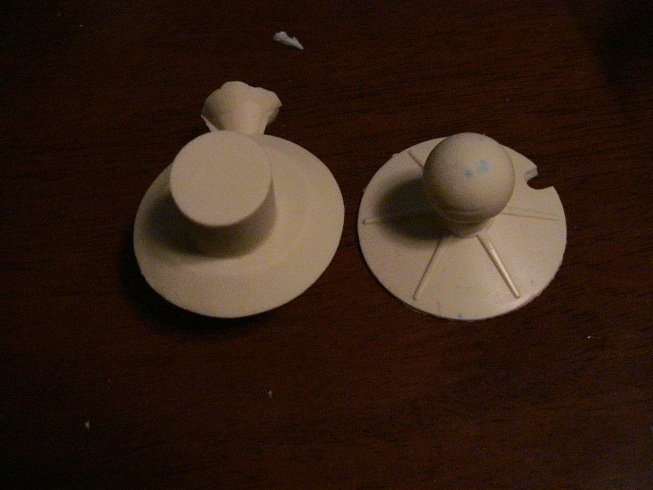
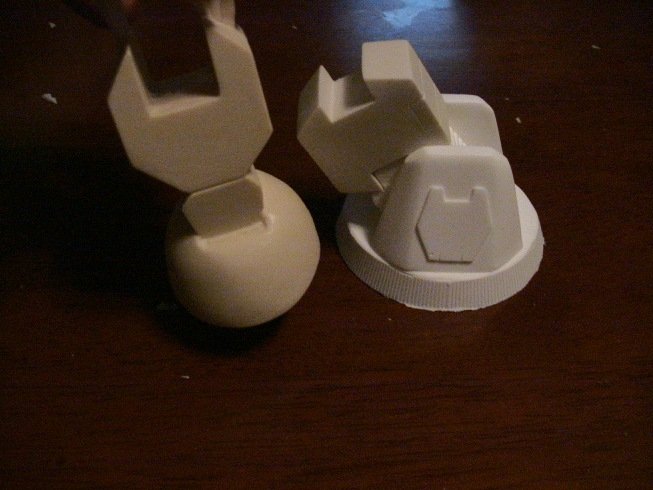
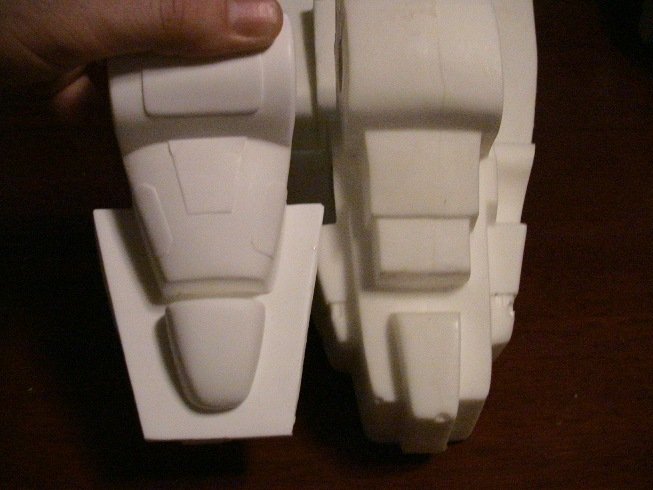
Ok arm joints... there's several of these connecting those gigantic arm cannons to the main body, let's have a look shall we? The peices are so incredibly different that I'm guessing that I'm comparing the correct parts to each other (especially since neither kit came with instructions...ahem). The first pic, well not really sure where they go but again great detail and refinement on Mike's version. The next pic is of the joints that connect the arm joints to the main arm cannons, again no comparison in terms of quality and detial. And the last pic...what happened here? Mike's version has some nice raised detail and cool ridging around the outer edge, the older version...well...who dropped the wrench in the big wad of chewing gum?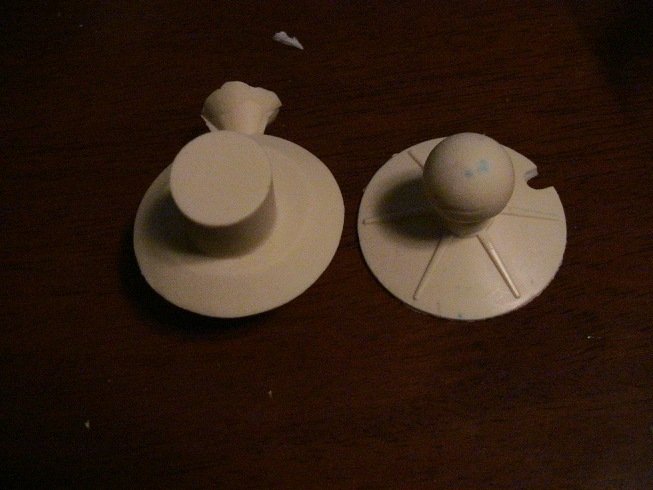

-
Review And Comparison Of The 1/72 Mk Ii Monster's
Grayson72 replied to Grayson72's topic in Model kits
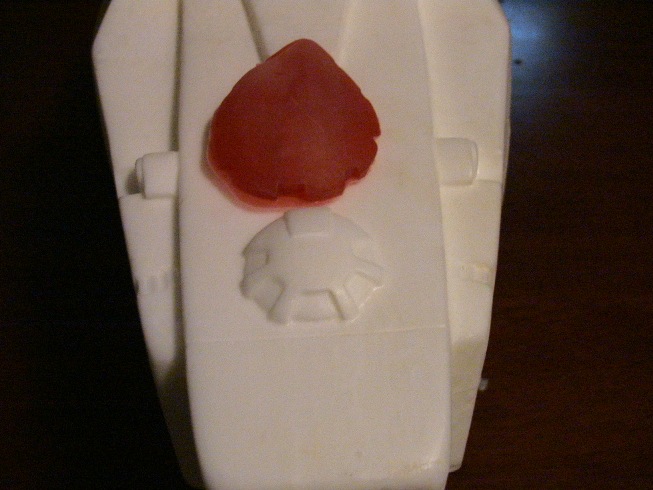
Ok the canopy section is the only part where I think it could have used a tad more detail, I like the raised detail on the old version better, the new version kinda looks like a cherry sucker that got left out in the sun too long (sorry Mike). The cool part is the red canopy and several other parts are cast in red clear resin so the kit can be lighted, I think I can add just a bit more detail to the canopy part using thin strips of styrene so no big deal there.
-
Review And Comparison Of The 1/72 Mk Ii Monster's
Grayson72 replied to Grayson72's topic in Model kits
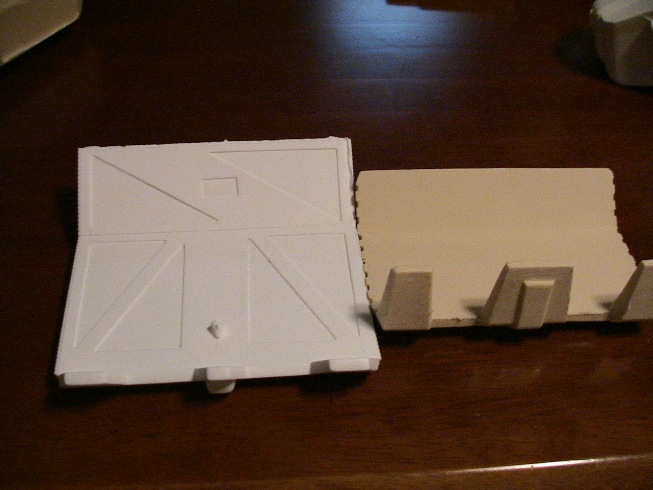
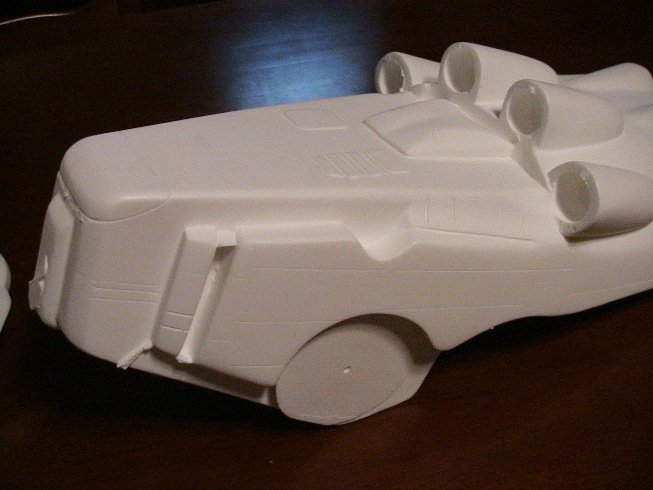
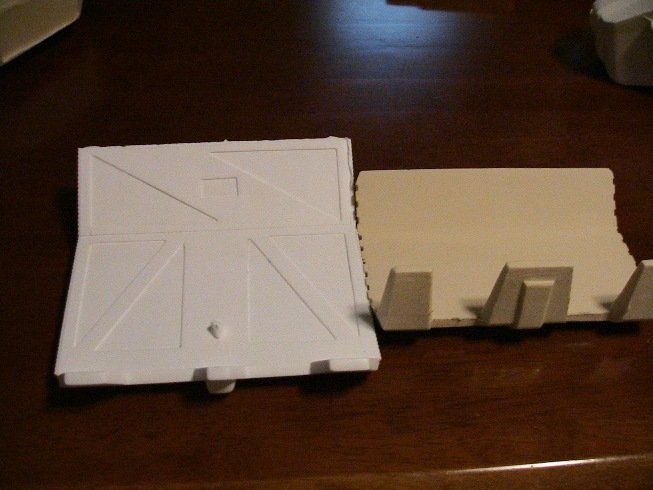
Ah yes the main body of this beast, this really came out nice on Mikes version, lots of scribed panel lines (some are a bit shallow for my taste so I will probly rescribe them). I like how Mike positioned the stubs for where the cannon go, when the cannon barrels are installed they will look much better in their more pronounced staggered positions than the older version. Mike has raised and recessed detail all over this kit which really gives it great dimension.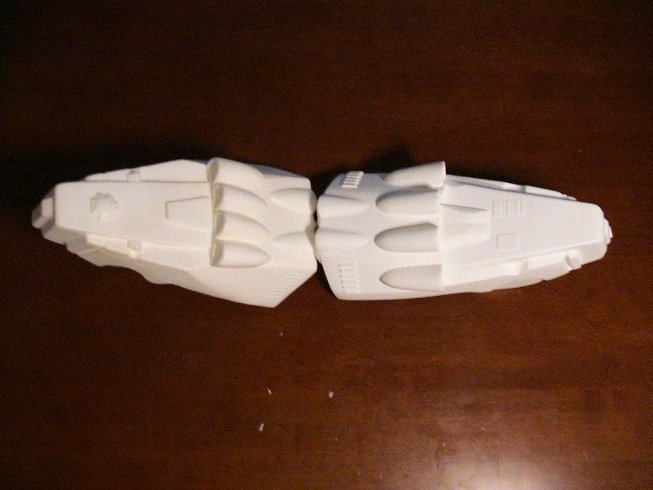


-
Review And Comparison Of The 1/72 Mk Ii Monster's
Grayson72 replied to Grayson72's topic in Model kits
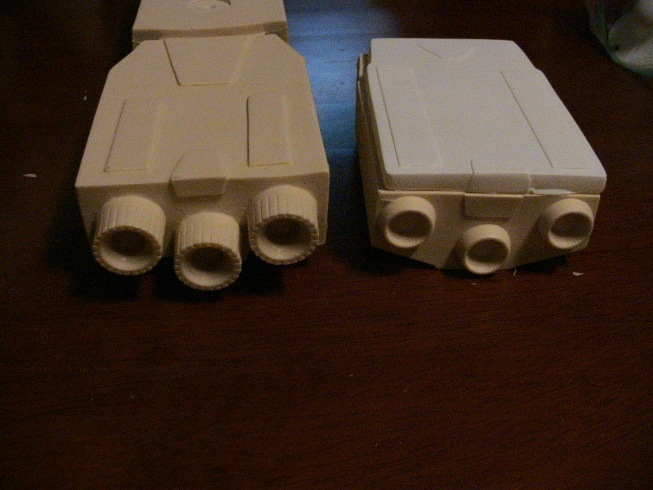
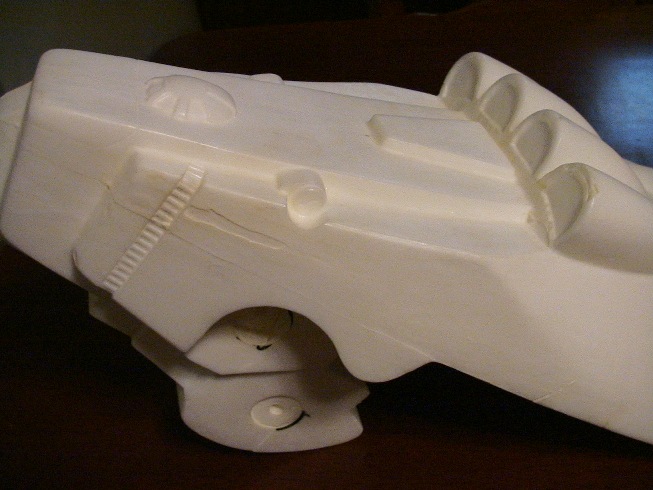
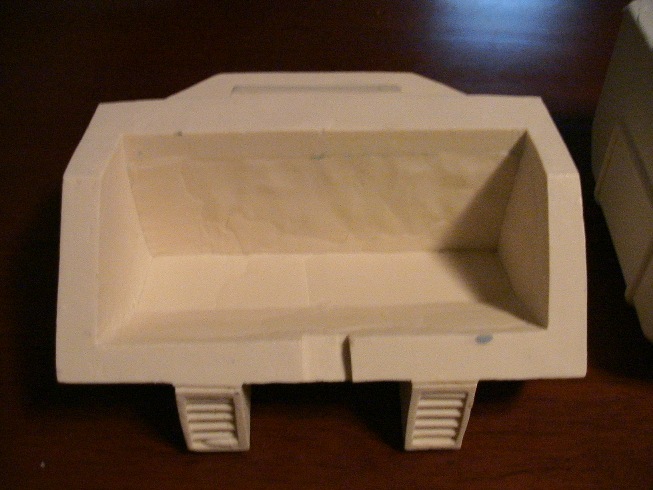
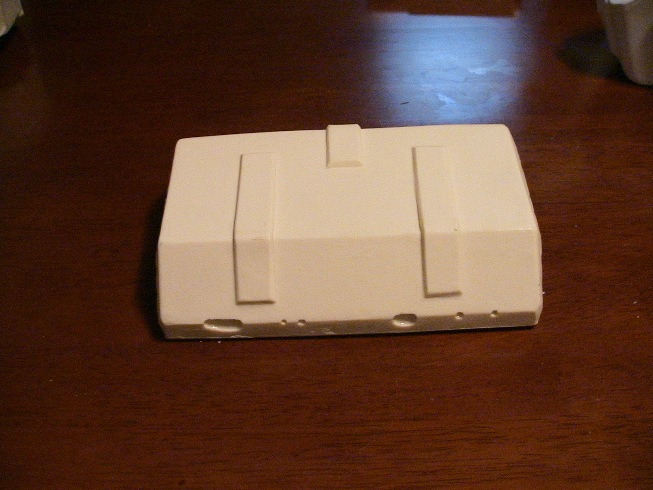
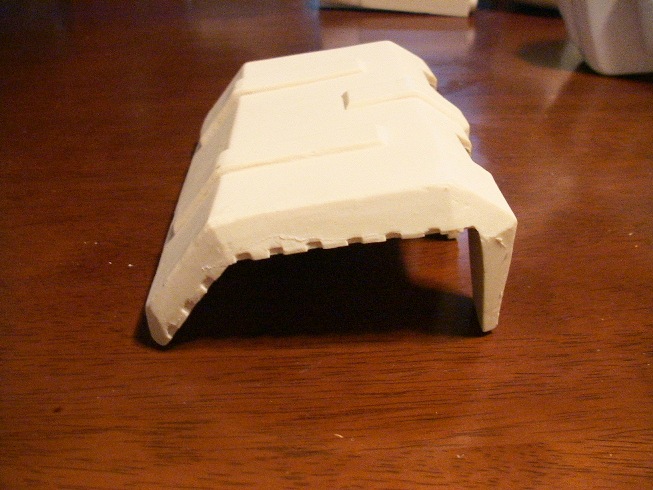
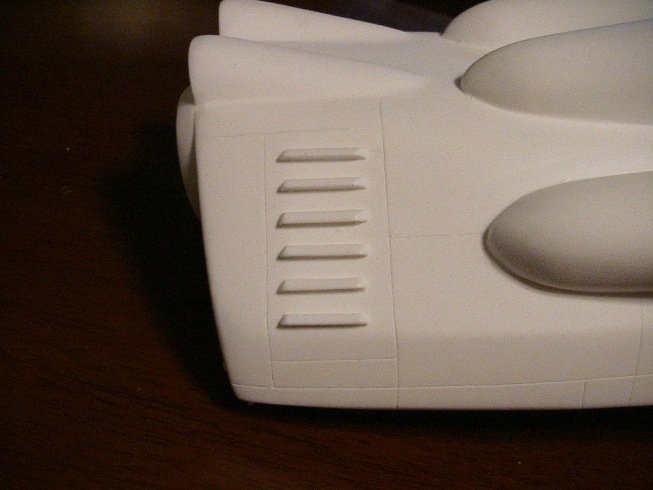
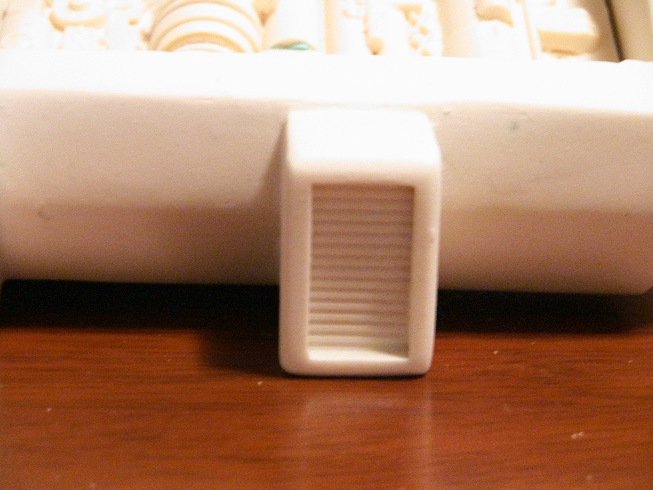
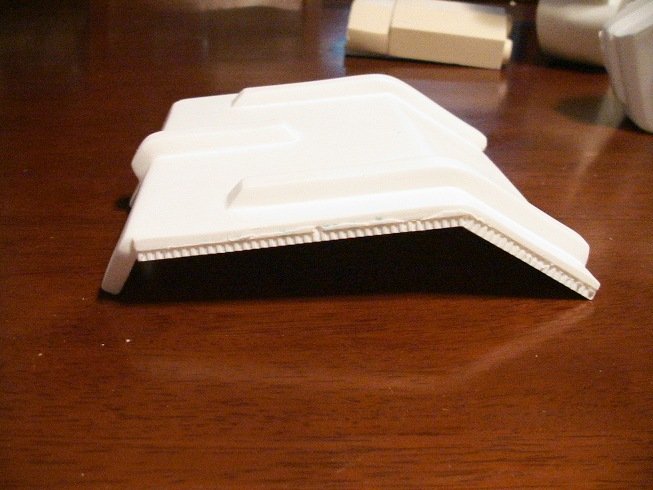
And probably my favorite part of the whole model... the engine detail, mikes looks like something that came out of the model shop at ILM, the old version...well...nothing to see here folks, move along. Even the vents on the outside of the engine compartment are so much nicer on Mike's version, the vents on the old one look like my two year old made it out of play Dough.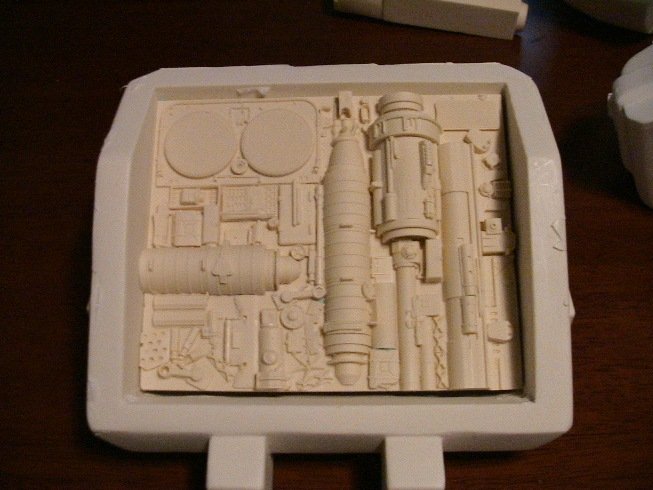

-
Review And Comparison Of The 1/72 Mk Ii Monster's
Grayson72 replied to Grayson72's topic in Model kits
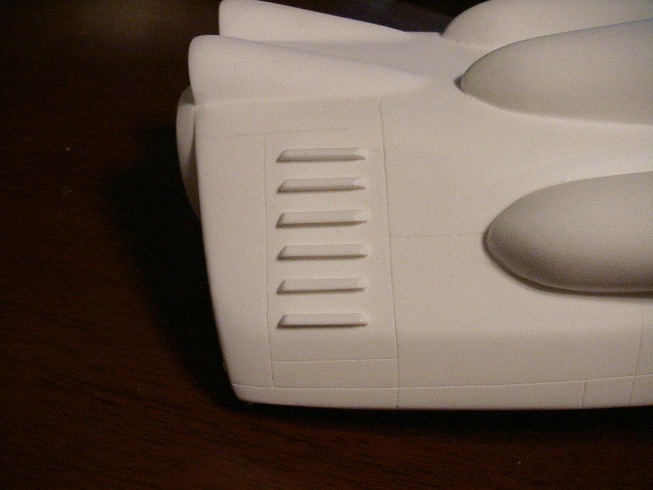
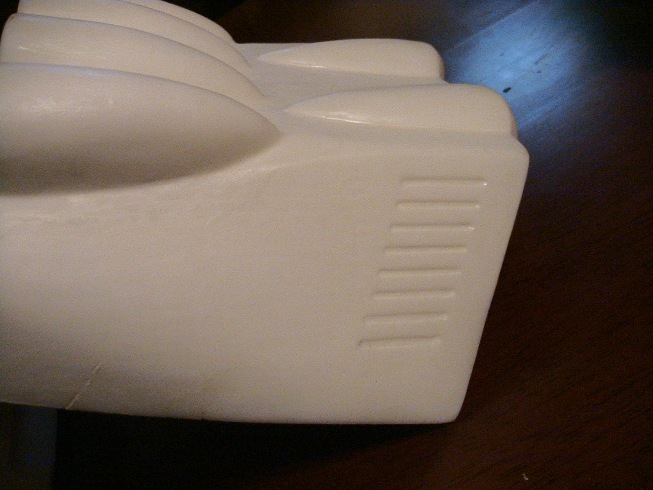
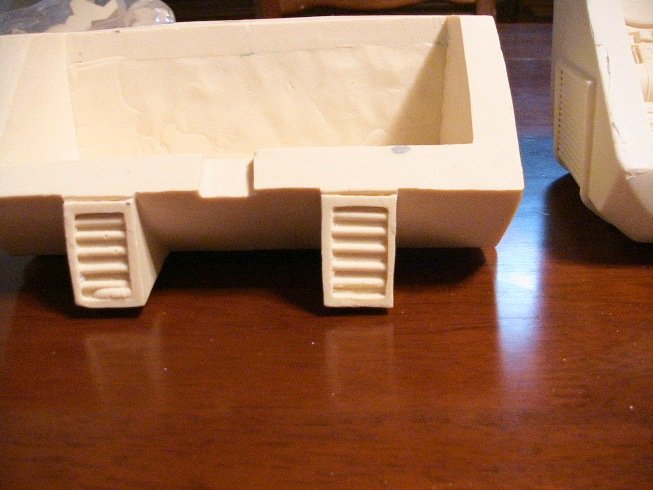
Here's the main engine compartments side by side, the venting on the sides of Mike's version is just night and day better than the old one.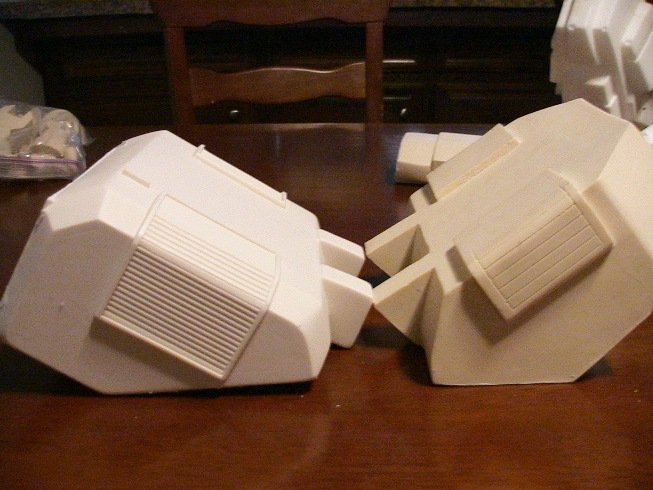
-
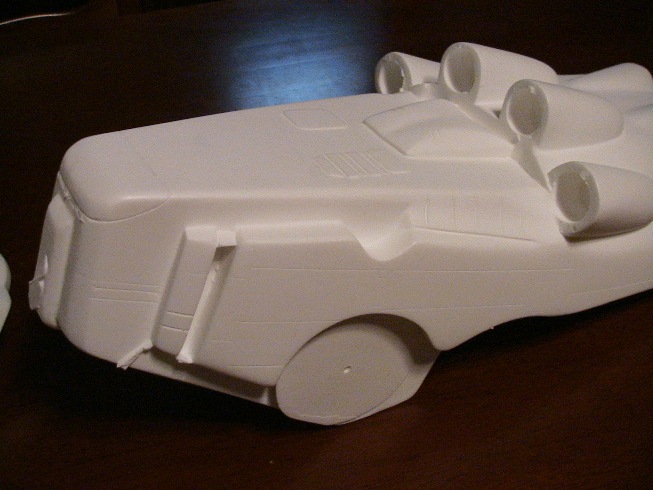
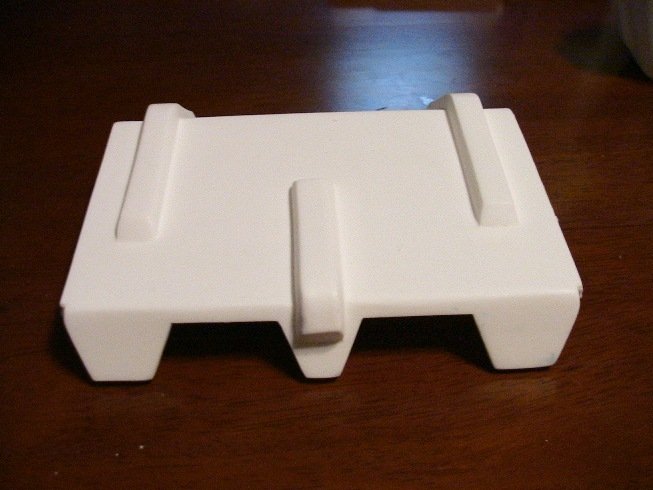
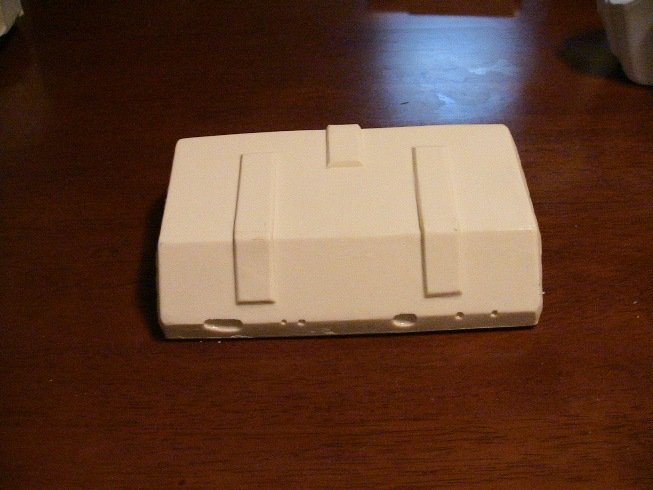
Well we will all soon be receiving Mike's new version of the Mk II Monster in 1/72 scale (hey my favorite scale what do ya know ). I'm one of the people who bought the recast of the original Monster offered at Wonderfest from Samurai Monkey. I decided to do a comparison of the two kits just in case any of you were thinking you might be missing something by not having the original (you're not). The recast was $400 dollars and not much detail, Mikes is around $200 and has more than twice the detail so I think it's a good deal, plus this one comes with good decals (thanks to me wink wink). Anyway, so without further ado lets check out some comparison shots. I'll just start with whatever I happened to shoot first which in this case is the rear engine cover.

-
Got mine yesterday, oh saweet! I'll be posting a review and a comparison of this and the old 1/72 kit tonight! Stay tuned!
-
fichten, is that the "F" word in German?
-
All of the schemes you mention are fan based creations that were featured in Model Graphix magazine, only one of which (the Minmay Guard) was ever produced by Hasegawa as a kit.
-
man that looks awesome! Your shop is so clean and organized, I hate you.
-
the paint jobs look excellent, I'm curious though why you didn't fill in the seam lines.
-
Meh, he might as well start with something, then modify the thing.
-
Nah, no one's got the landing gear stuff, that was the deal we had with that A-hole
-
Keep in mind that the Dragon II was actually sent incomplete by Tanmen, missing the all the gear, wheel well detail, bay doors etc... and underwing stores as well.
-
Thorsten you're my hero!
-
I'll take five of each. Yeah the big one isn't necessary actually, I'd start with the little one you have in the pics. Please please please do these!