
arbit
-
Posts
2630 -
Joined
-
Last visited
Content Type
Profiles
Forums
Events
Gallery
Everything posted by arbit
-
Examples please?
-
Great idea for painting the warning lights and cockpit lights, etc. Only problem is that the good stuff is REALLY expensive. I have some cheap stuff which didnt work for me on plastic.
-
Glad u like it. I'm just trying to figure out what to do with it. Realistic lighting seems out of the question.
-
Fold Boost!
-
Nice work! Is that brush painted? I'm a fan of this style, would like to try it with an airbrush one day...
-
Good idea. Definitely will do that for the small parts, because even with canopy glue, while it dries clear, it does not level very well and you can see its texture through the part. Agreed. The seams cannot be hidden as far as I can tell. The trick is to put minimum glue, so that the glue doesnt run on the reverse side, which shows through the top layer, and to at least get a glossy clear seam (after a canopy style polish).
-

Valkyrie Canopy Masks - 1/48 TV VF-1 and 1/72 VF-1D set available!
arbit replied to Return To Kit Form's topic in Model kits
Congrats. I saw your masks at Hobbysearch. -
I learned some tricks for cutting and polishing clear parts here. But still not sure how to hide seam lines on the nose cone with clear parts. I plan to do some tests on spare parts to see if I can glue the seam with a non-corrosive glue and repolish to a glass finish.
-
Amazing work. I'm in love
-
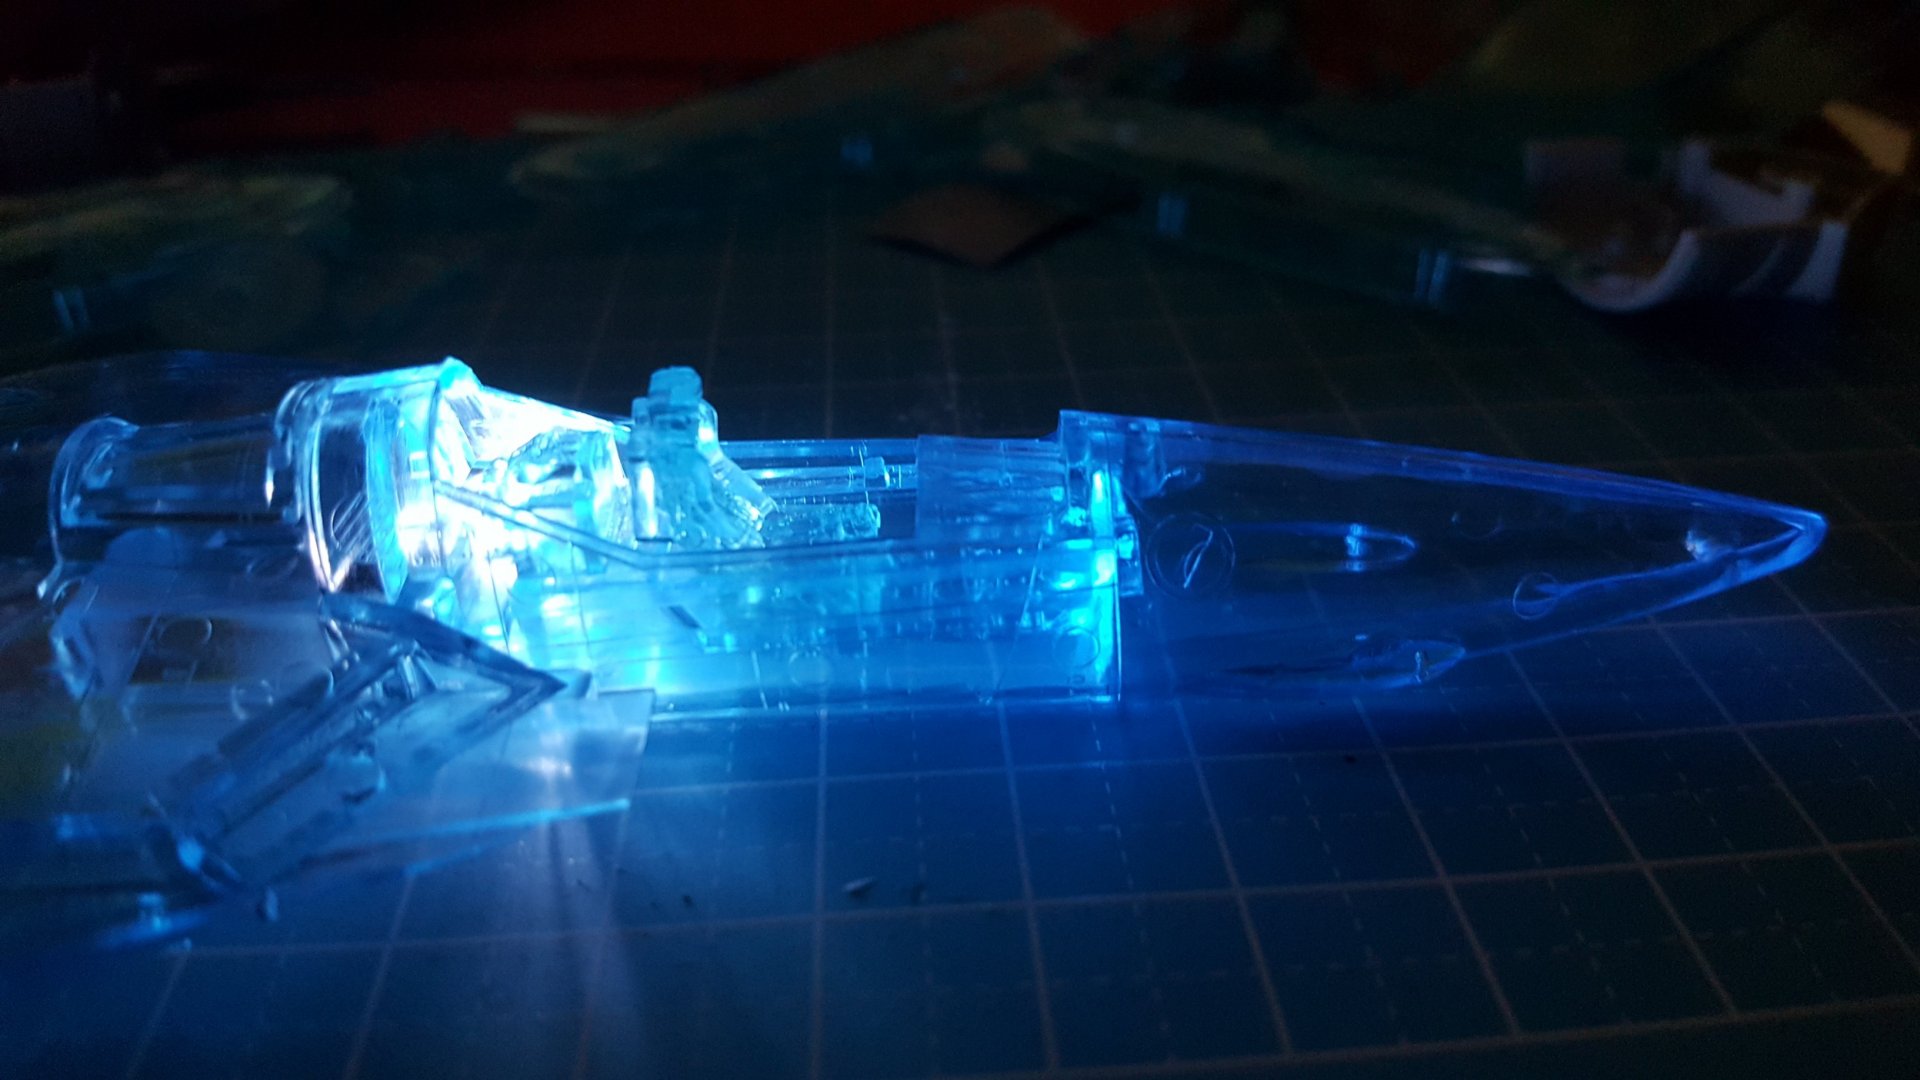
Working on this clear Hase Vf-1J, I ordered by accident. I really don't know what to make of it. It's all brittle like a canopy and difficult to work with. I'm definitely building it clear, so testing white glue and clear canopy glue. I've even tried a bit of normal cement to see how it looks. But what do I do with seam lines, especially the nose cone? Can't hide those. Because I have to build this basically without any sanding so I don't ruin the clear cast. One idea is to treat it all like a canopy... micro sand and dip in clear. But that nose cone isn't going to be pretty. On the positive side, some lighting would make good use of the clear cast, but all those wires will show through... Maybe a good thing? Not sure. Or do I keep lighting to a minimum, under the cockpit and engines, and maybe the wings. And then in the end how will decals look on it. It's a bizarre thing.... but it is a nice challenge to build a clear valk without messing it up.

-
The Arduino sketch for lighting and sound is attached for anyone who wants a look. (The sketch for the reversing motor was attached separately earlier. ) VF-1_Project_Full.ino WS2812_Definitions.h
-
I need a video showing this application if anyone has seen a good one. The videos I've found on youtube are different approaches that havent worked for me.
-
Thanks for all your advice. I have saved the note for next practice session.
-
Agree. I can paint gundams or small pieces okay sometimes, because you spin them on the paint stick and get good glossy coverage. The problem is when airbrushing wide surfaces like hulls and fuselage. I doubly suck when I'm glossing. I airbrush future and Super Clear (and Vallejo Varnish), and it doesnt build up, even if I spray 50 light coats, the enamel wash seeps right in.
-
True. I thin A LOT, so I think I am too far and I live in a hot desert climate. And I've only been painting 2-3 years. It doesnt frustrate me, I've sucked at painting since I was a kid. I just think its funny when I see guys with their first paint job and it's a hundred times better than mine!!
-
I think I have seen those before. But if you highly recommend it, I will go through them again. (I've watched hundreds of painting tutorials... but the best advice, I get from you guys.)
-
Wow, you nailed the classic scheme. What were your ratios for the gray and orange? (I really need someone to teach me how to improve my painting. I get a grainy finish, and my gloss is useless...)
-
CrossAir, That's some superb paint finish. I think you're on a roll. Electric Indigo, Not sure where you're going to end up with that yummy burnt tone, but I can't wait to see, Derex, Don't give up. I'm sure you will find a solution for the canopy. It shouldn't slow you down on the body anyway, while you figure it out with a little help from your friends.
-
Go for it. I will help walk you through it. But you probably don't want to add as many lights as I did at first, because it is really tight for space. I was lucky to pull it off, but I also had a lot of practice from previous projects.
-
Surely its not the longest build in the world. Were you using an Xacto to trip those canopies? Looks bad, but I wouldnt give up on it just for that. I'm sure someone who has the kit can recast it for you, maybe even the Captain himself if you ask him. Check out how well the recast Fan Racer canopy came out by one of the members here. It has its own thread.
-
Back to the wing lighting issue. As you know from this WIP I had a lot of problems with those because I insisted on a red, blue and white leds, wired on only a single pair of wires to save space for the motor. One solution: I have seen others use 3x white leds, which are no problem to parallel on a single pair of wires, and then paint the ports red and blue. Second solution: I am not sure if they will fit in the 1/72 yet (that's for my next project), but definitely okay in the 1/48, we can use smd resistors to parallel red, blue and white leds safely. Third and easiest solution: Use a red and a blue SMD in each wing, and forget the whites.
-
Well, if you want help building a Hasegawa VF, you've come to the right place. There are a lot of experts here who will be glad to help you. While I'm not one of them, I will give you a few tips to get started. - Don't be too afraid to start. Hase valks are challenging because they have some particular flaws in the molds, but not that much that you can't get a handle of it. - Some basic skills you will need to Youtube are puttying and concealing panel lines, and polishing and glossing the Hase canopy. You might want to practice puttying on something else first if your concerned. But if you can do that, then the rest is easy. - The first place to go is WCheng's Links to My Old Step by Step which is pinned here atop the Workshop main thread. Find any VF-1S guide, because all the Hase valks are the same and have the same issues. Anyway, when you are ready to start, you can go slowly and post your work here with questions and I'm sure everyone will be there for you. Go for it dude.
-
Very fine results on the Yamato. And great photography too!
-
Cool! But it deserves some better photos. Give us another look on white background.
-
Looks amazing. I can't afford it and don't have the space ether, so I made my own! Here is the clip in case some of you guys have not been on the model threads.


