arbit
-
Posts
2630 -
Joined
-
Last visited
Content Type
Profiles
Forums
Events
Gallery
Everything posted by arbit
-
Do you disassemble before priming?
-
The video really shows off the transformation quality, strong locks, and the stiffness of the joint positions. Great job!
-
I've seen cheap From Japan.
-
Classy photo!
-
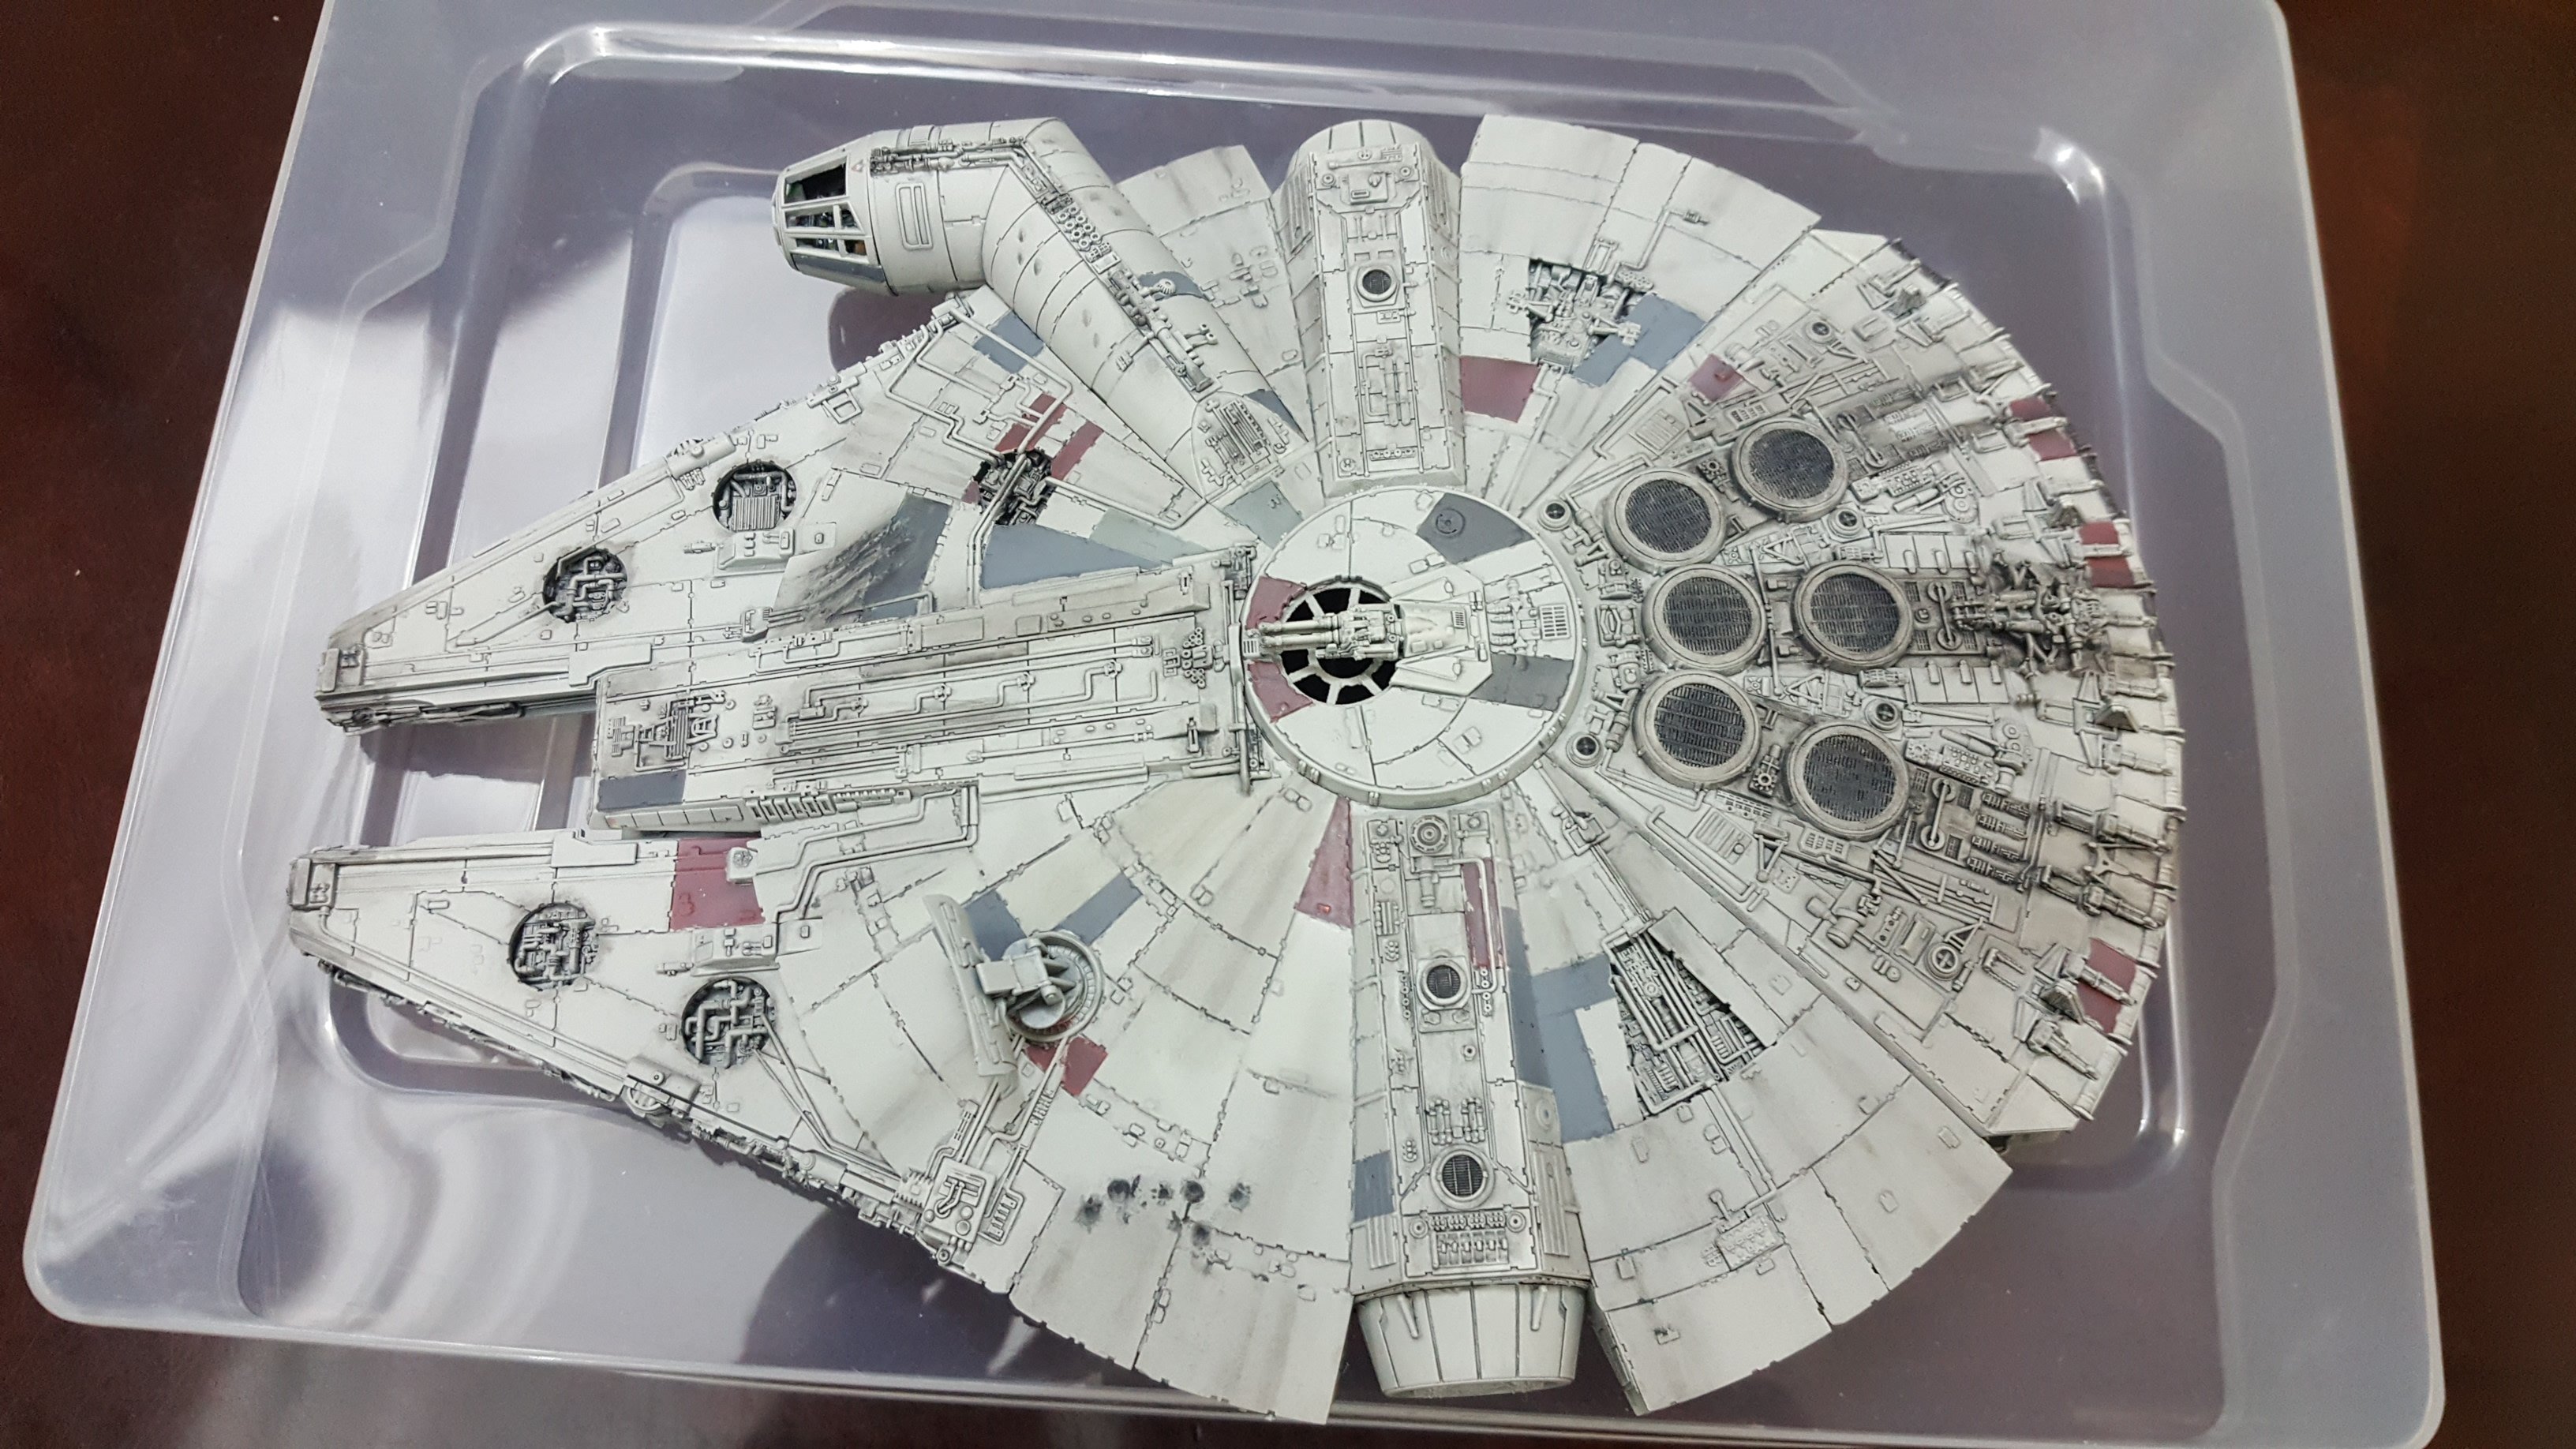
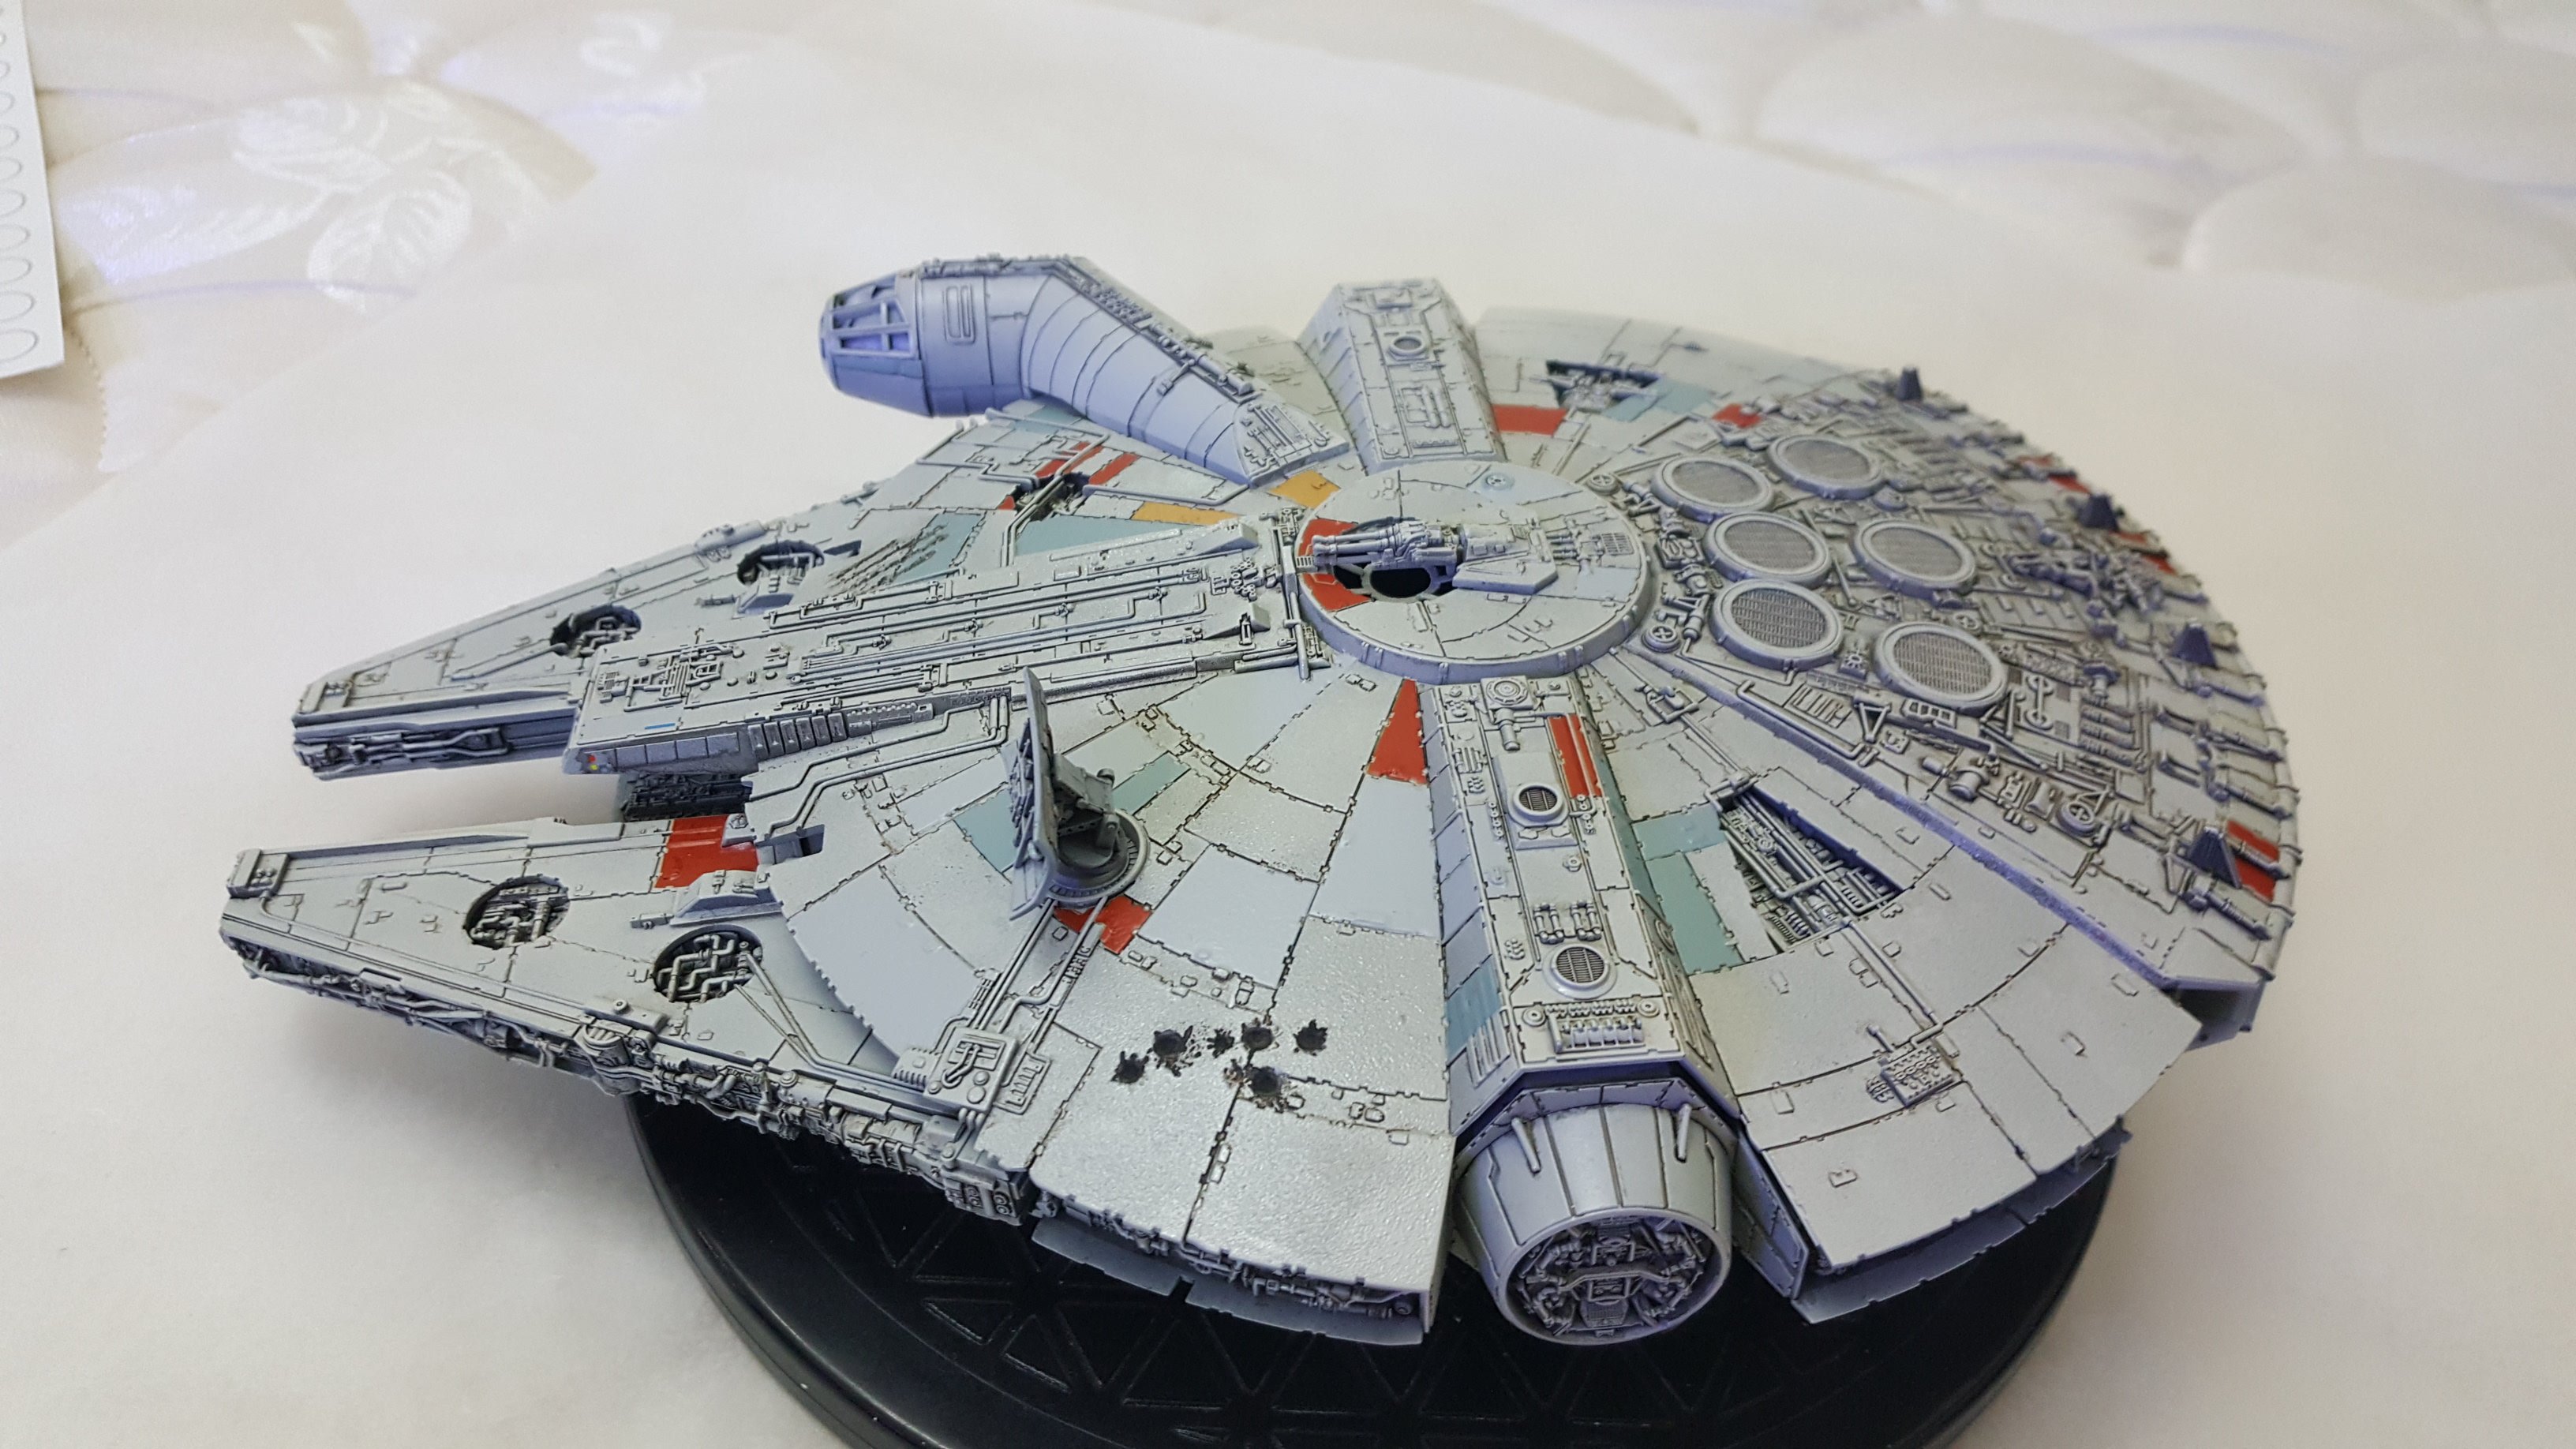
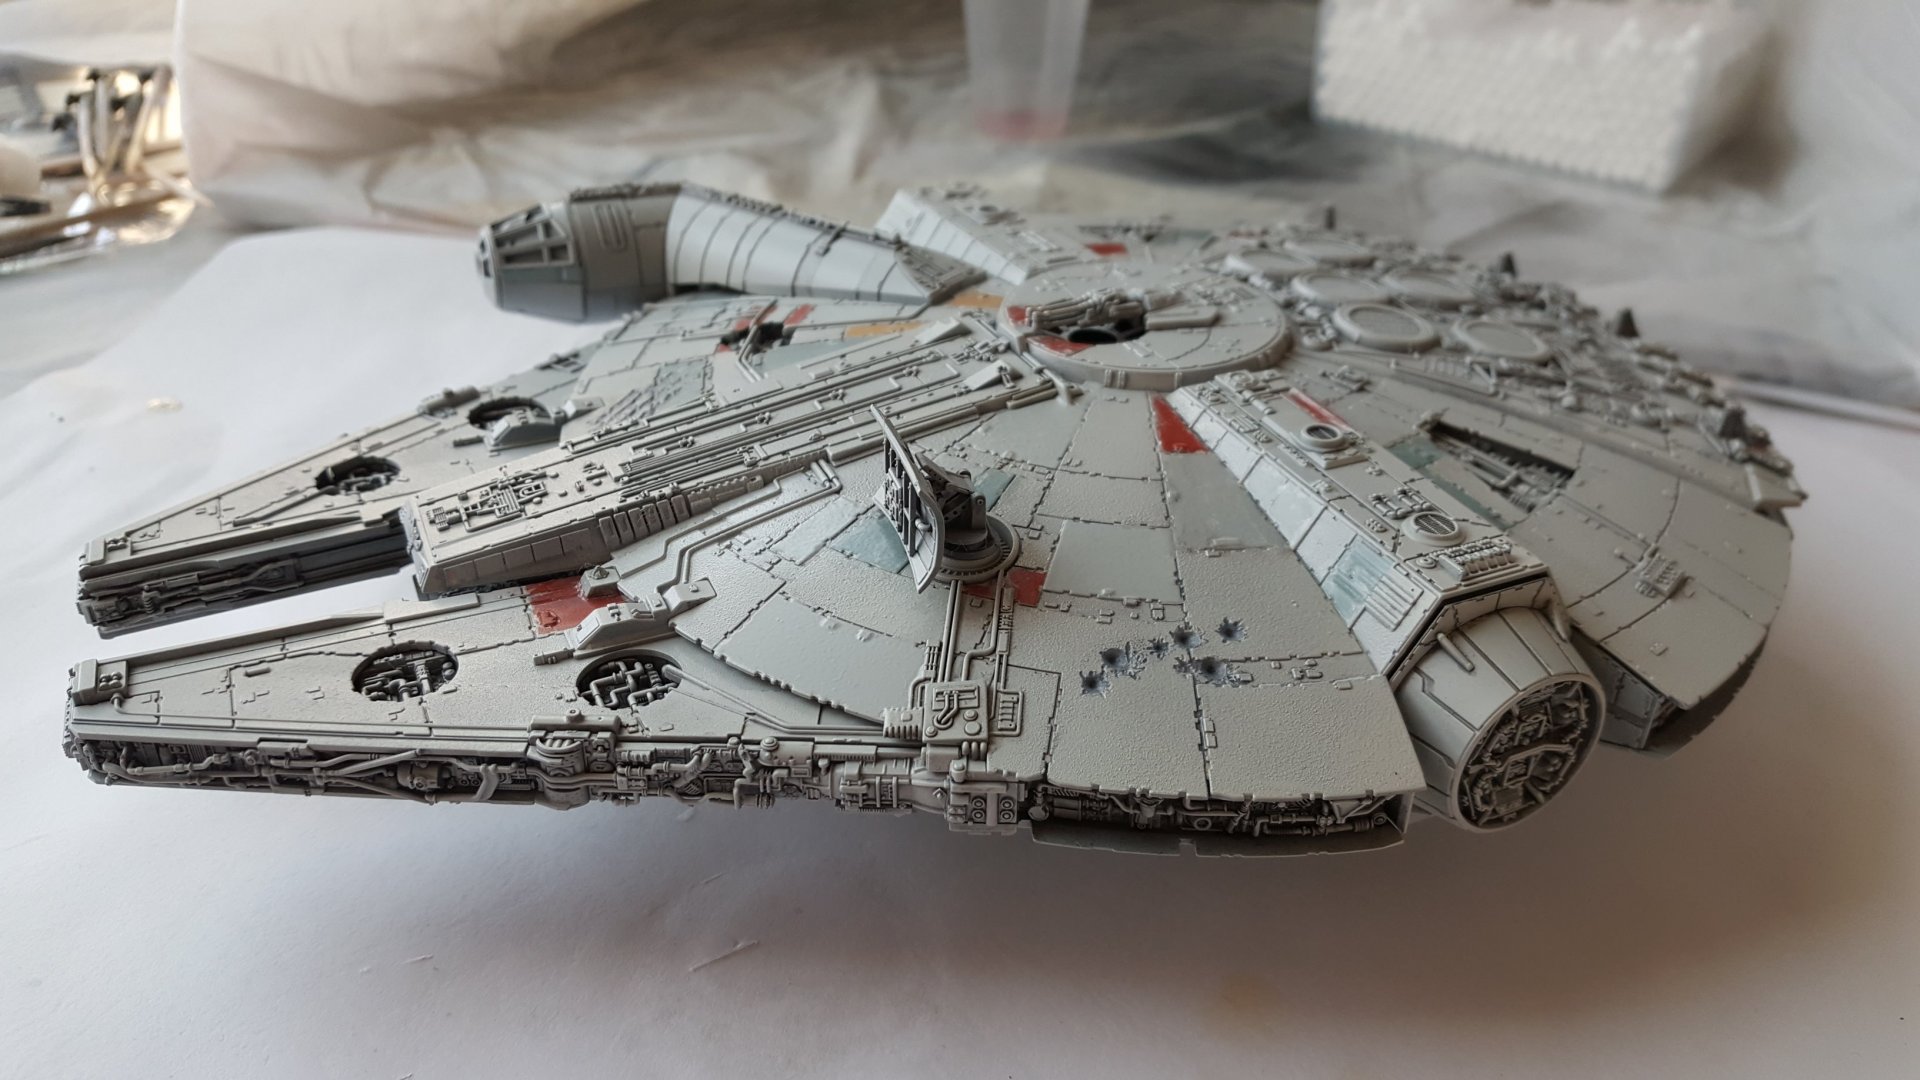
Getting dirty! Now it feels like a Falcon.

-
I've been waiting for this video! It looks like a perfectly engineered toy. Puts the old resin transforming kits to shame. It is definitely worth the money.
-
Thanks. Interesting. But what about eps 4-6? Saucerish or flat? I'm old school.
-
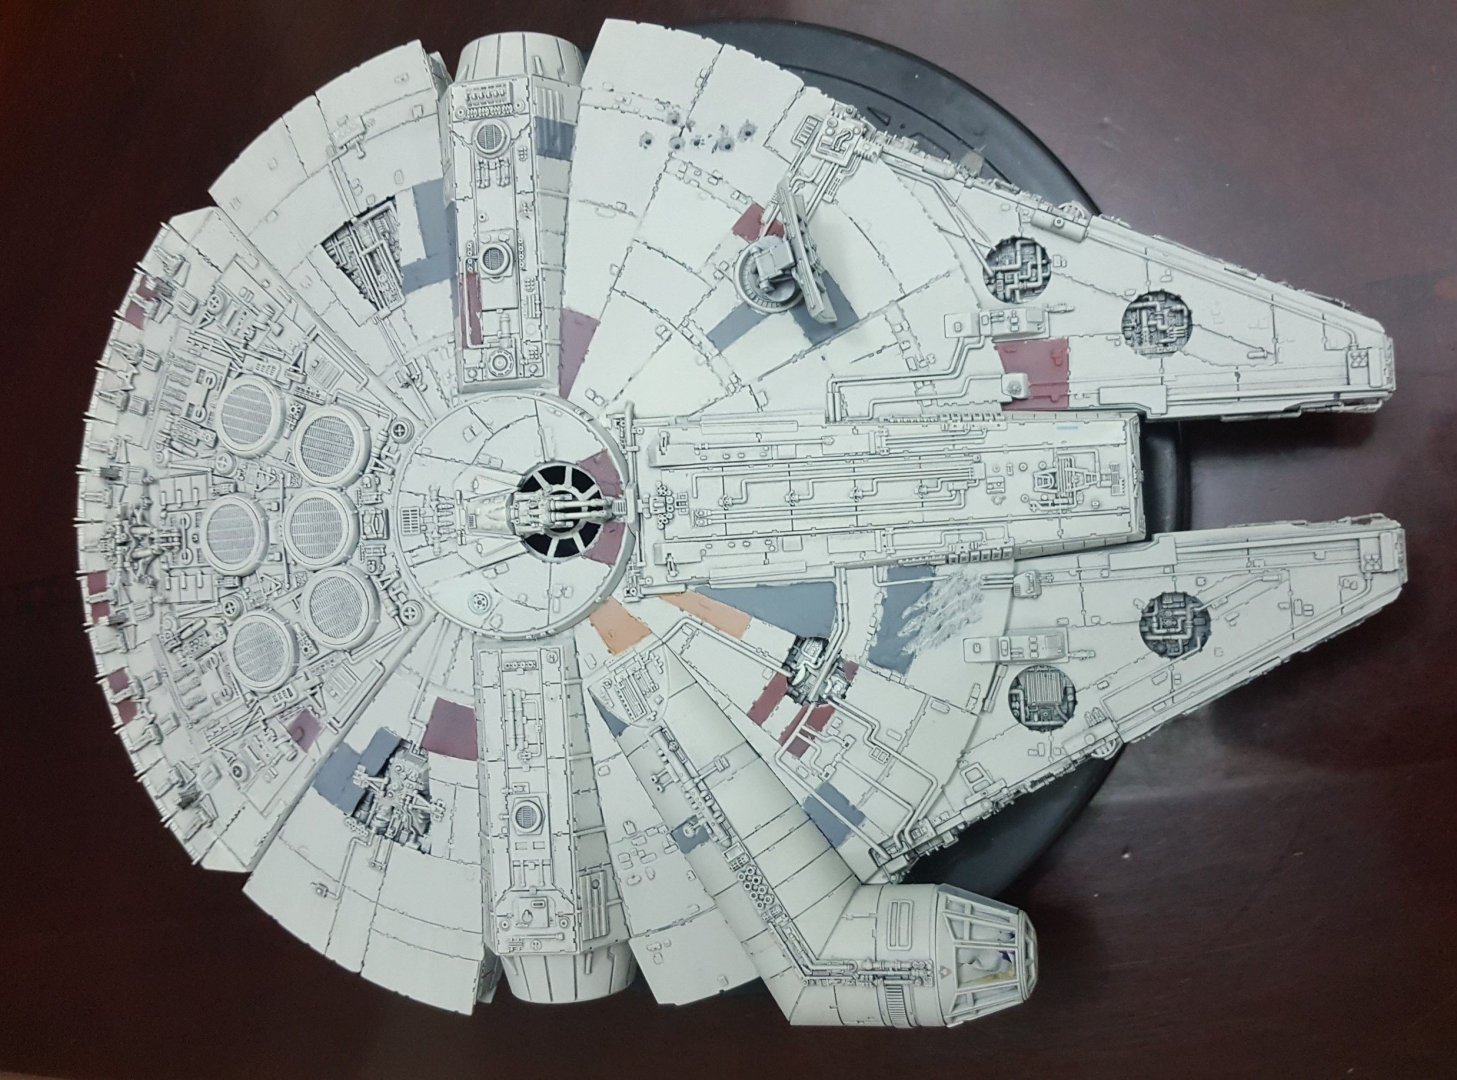
I think we will call it Night Version! Better than Pastel MLP Version anyway... On to the oils finally. Derex, I have a new found respect for Star Wars models. Getting the movie accurate shades right and painting among all those greeblies is a lot more challenging than it looks. Grayson72, you've gone from metal to paper. I look forward to updates on both. Thom, nice to see you're Yamato fleet is growing. The more Yamato the better! Notice how the Bandia version is more saucerish. Look how much more humped the rear and sides are! Despite the great accurate details, I finally figured out why it just doesnt look like a Falcon to me. Needs to be flatter.

-
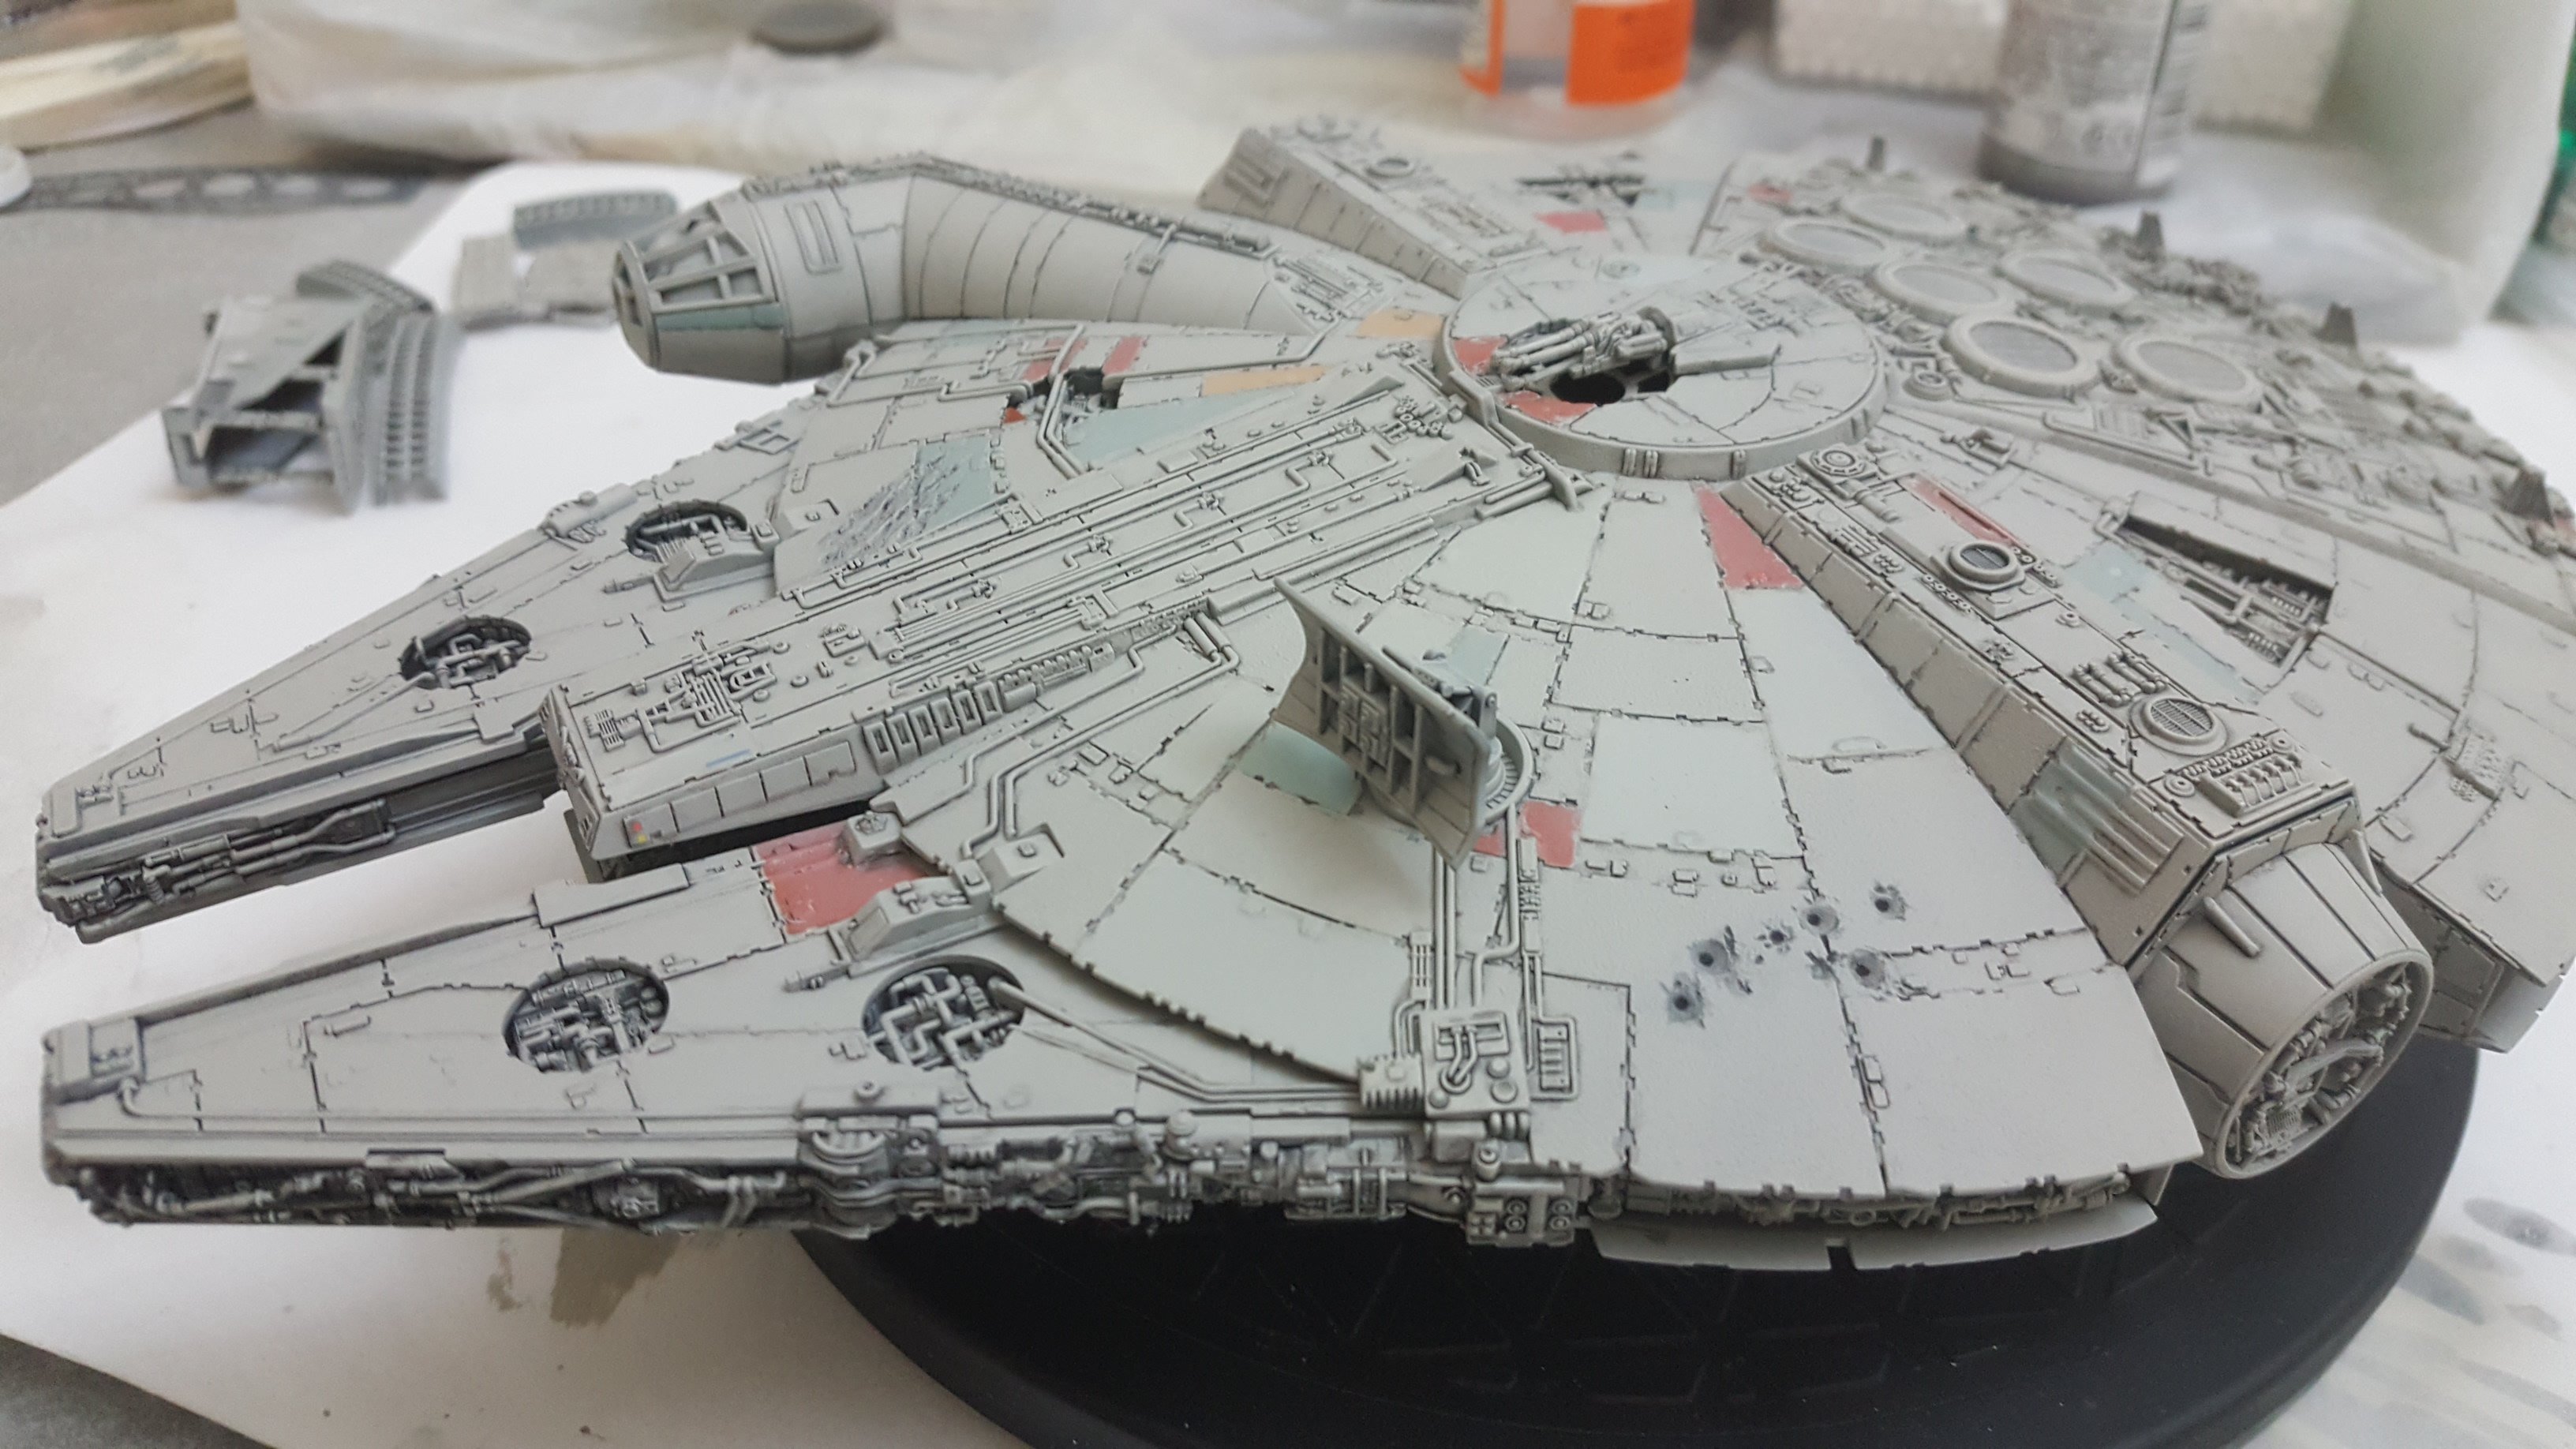
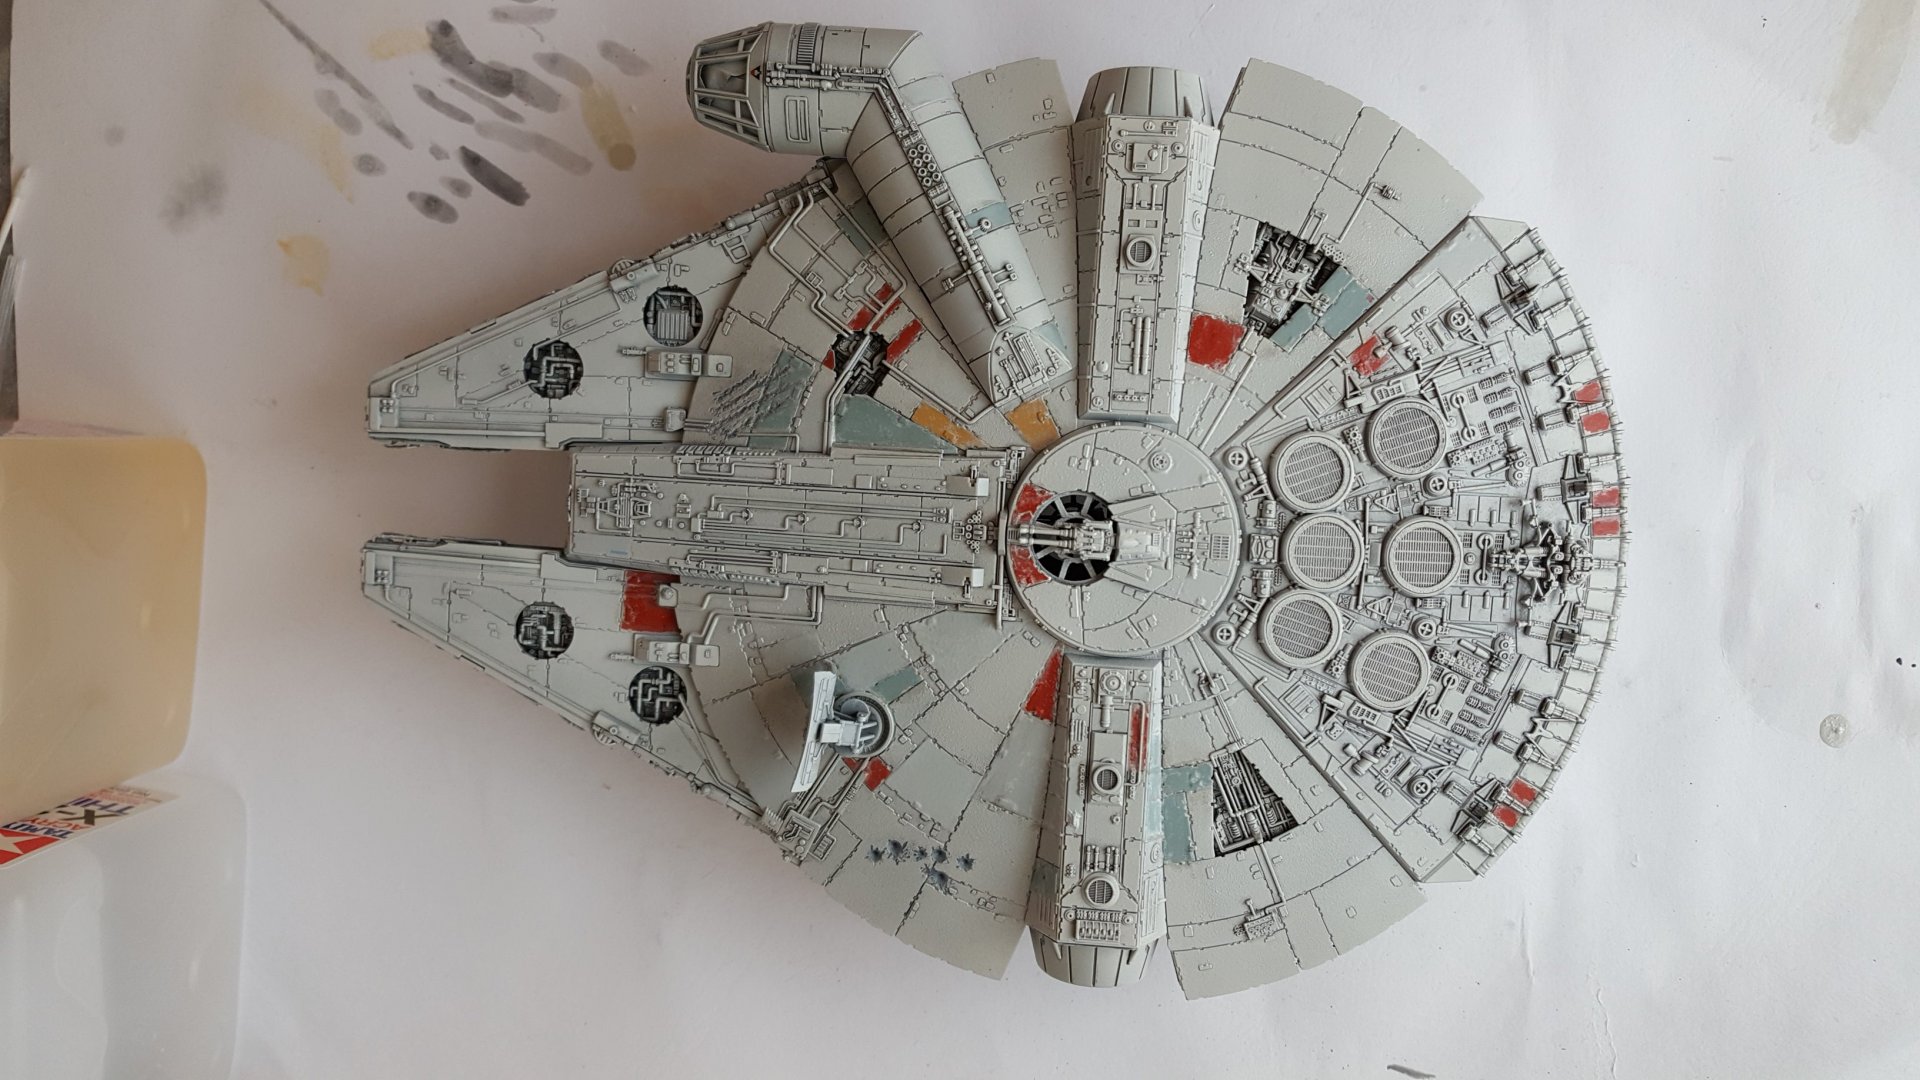
The quality of the decals is good, a bit of softner and they go down well on the panel details. It is the colors that suck. Bandai was realy perfectionist on this 1/144, so I don't understand why they screwed up the decal colors. The sticker decals were the correct colors, but those would not conform well to the panel details. It does need weathering, so I am planning it out with oil paints and brush. I don't want to make a mess of it. I need to mix oil streaks to match my coat. I might end up painting them, but again mixing my own colors to mesh with my base coat requires a lot of artistic skill I don't have. That's what DECALS ARE FOR BANDAI!!!!! Which black stensils? You mean the little decals for warning signs and such? Yes I still have those, planning to add them later. But I forgot about them. Any advice now after I have completed the overspray to get the right tones for the decals? Here's a sneak peak of what I'm up to next

-
And so I have a beautiful pastel falcon. These decals suck. I might try some oil weathering on them to darken the tones.

-
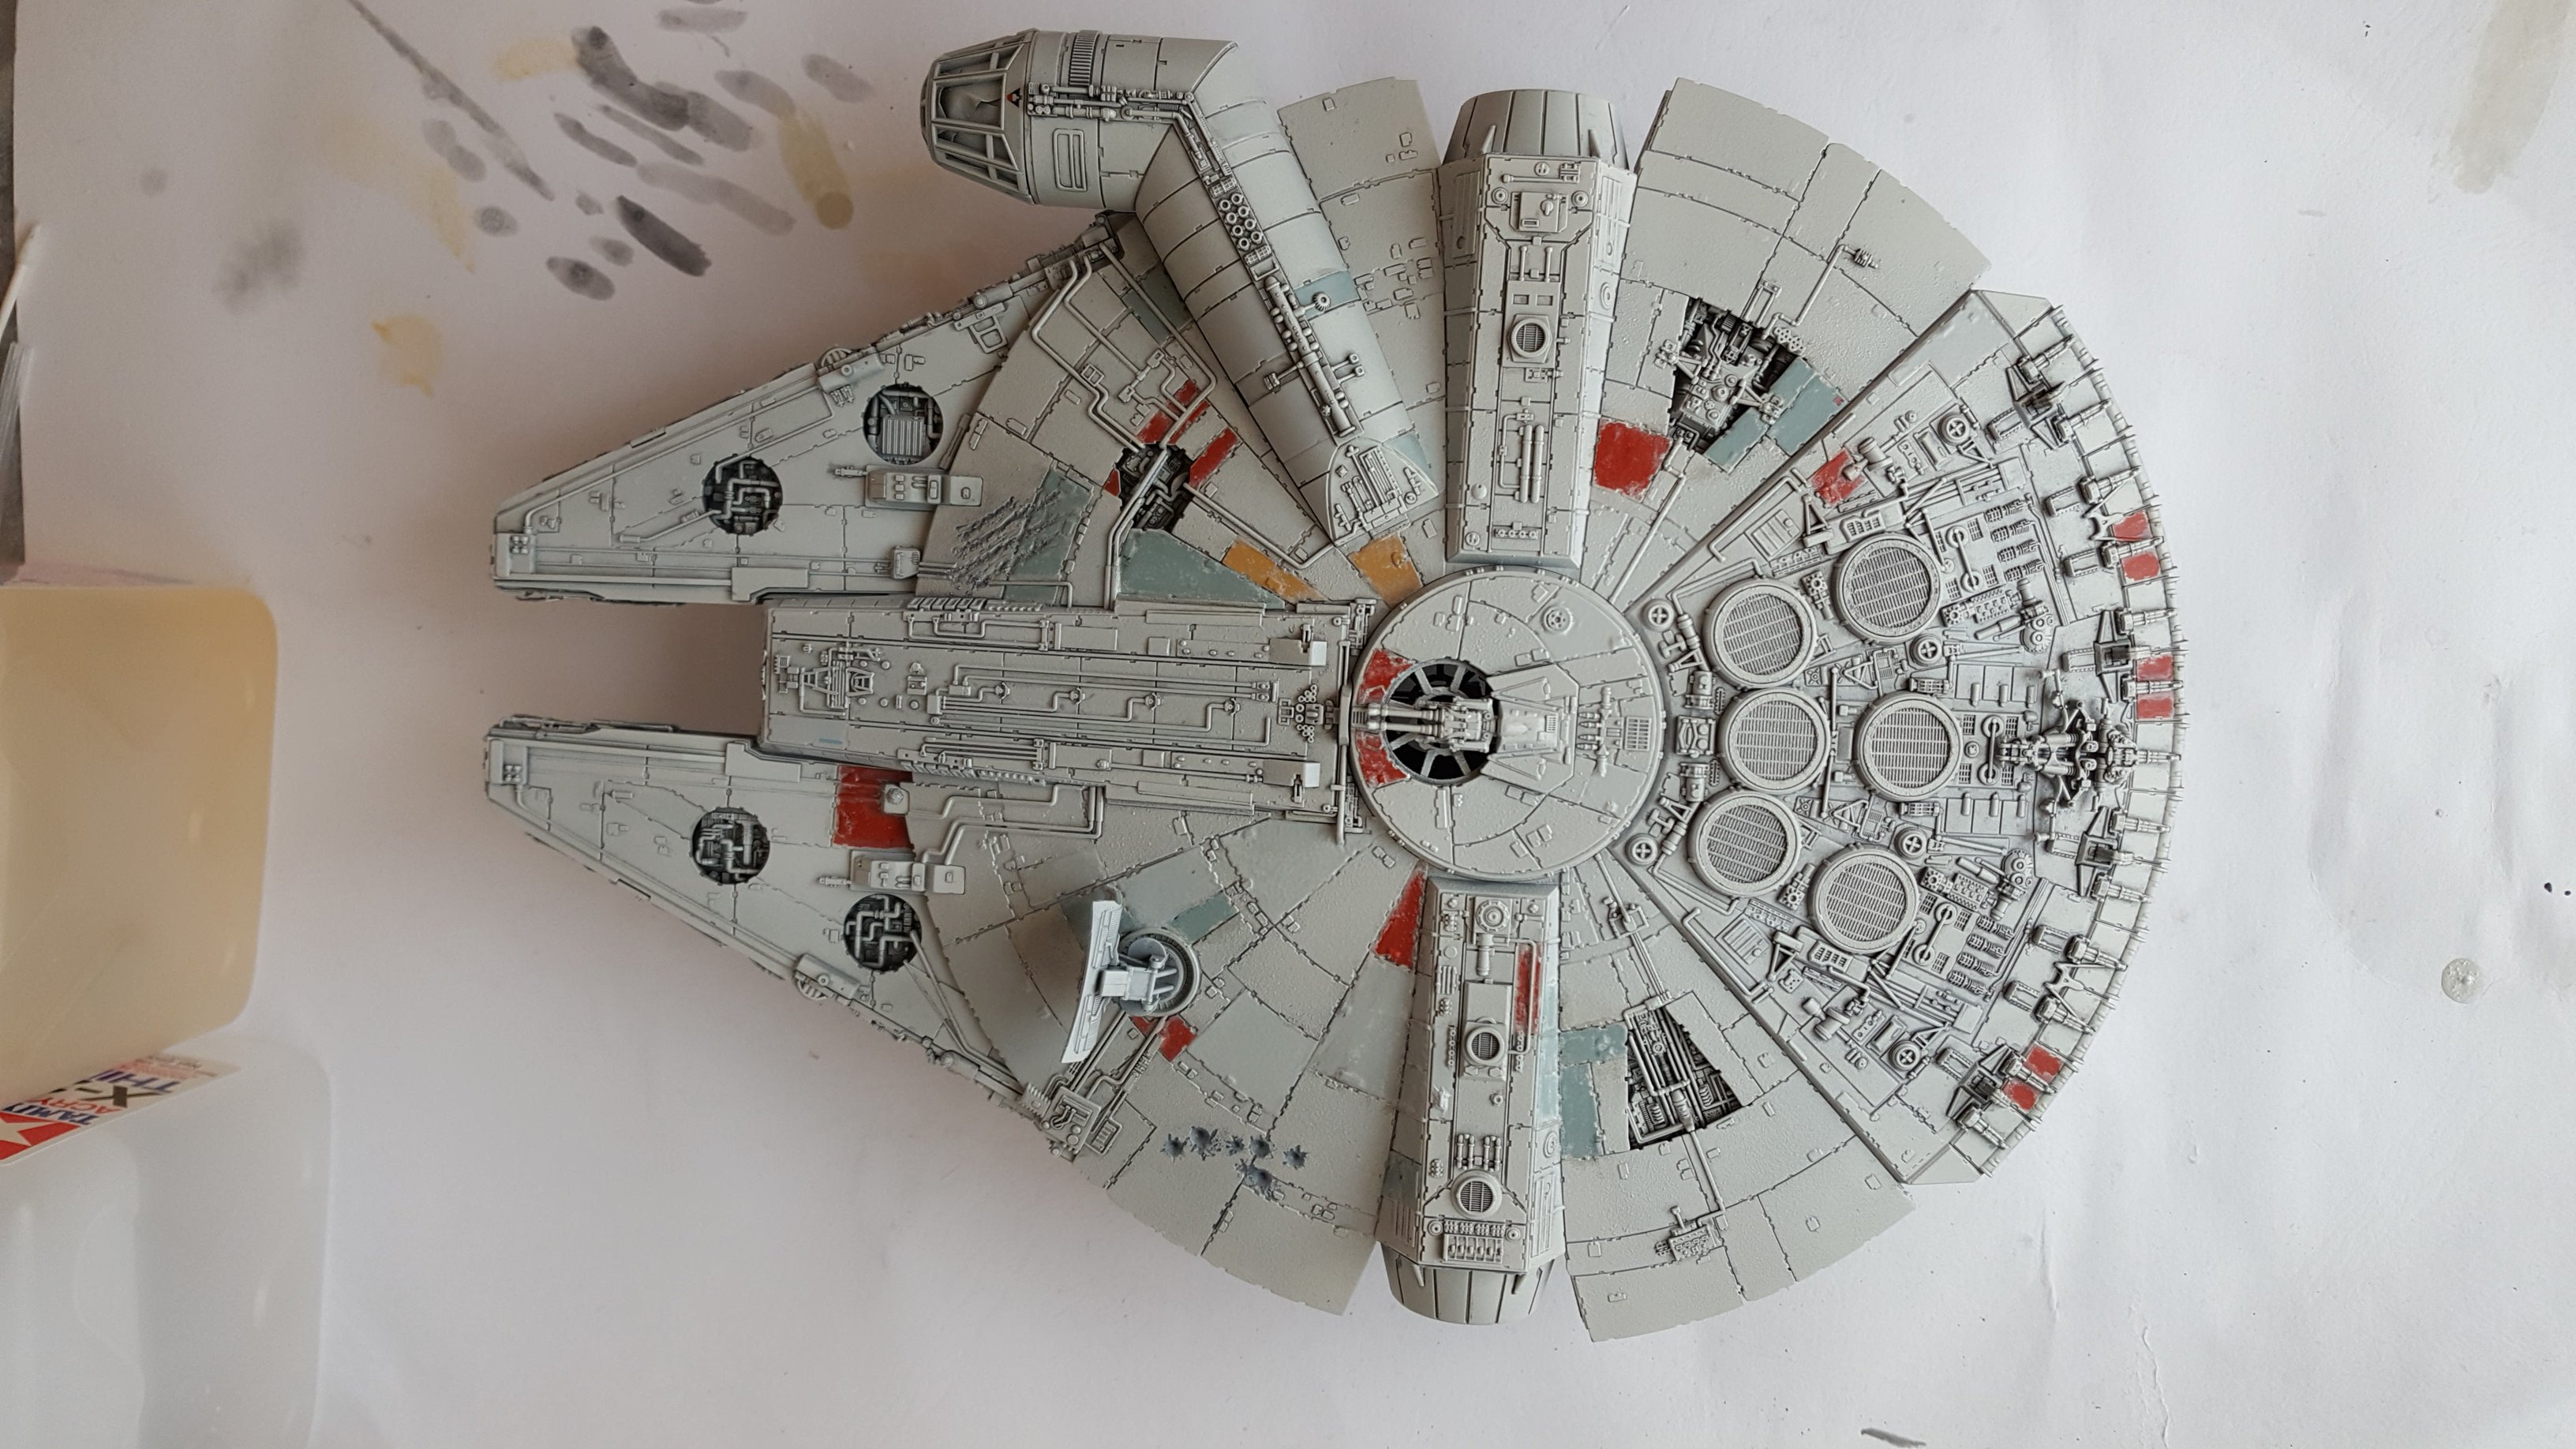
I think I am more in the right direction after lightening things up a bit. Aiming for movie accuracy is a hoepless task for me, I just need it to look something like a Falcon. Now I need to figure out how to darken those decals. Any suggestions?

-
This is where I am. I think the Florys grime came out too dark. I'm planning to airbrush a thin coat of light white grey color on top of everything. Any suggestions for the color mix, to kill the decals and lighten the panel wash?

-
Well you are the Star Wars expert around here. FYI, I grew up in Texas y'all.
-
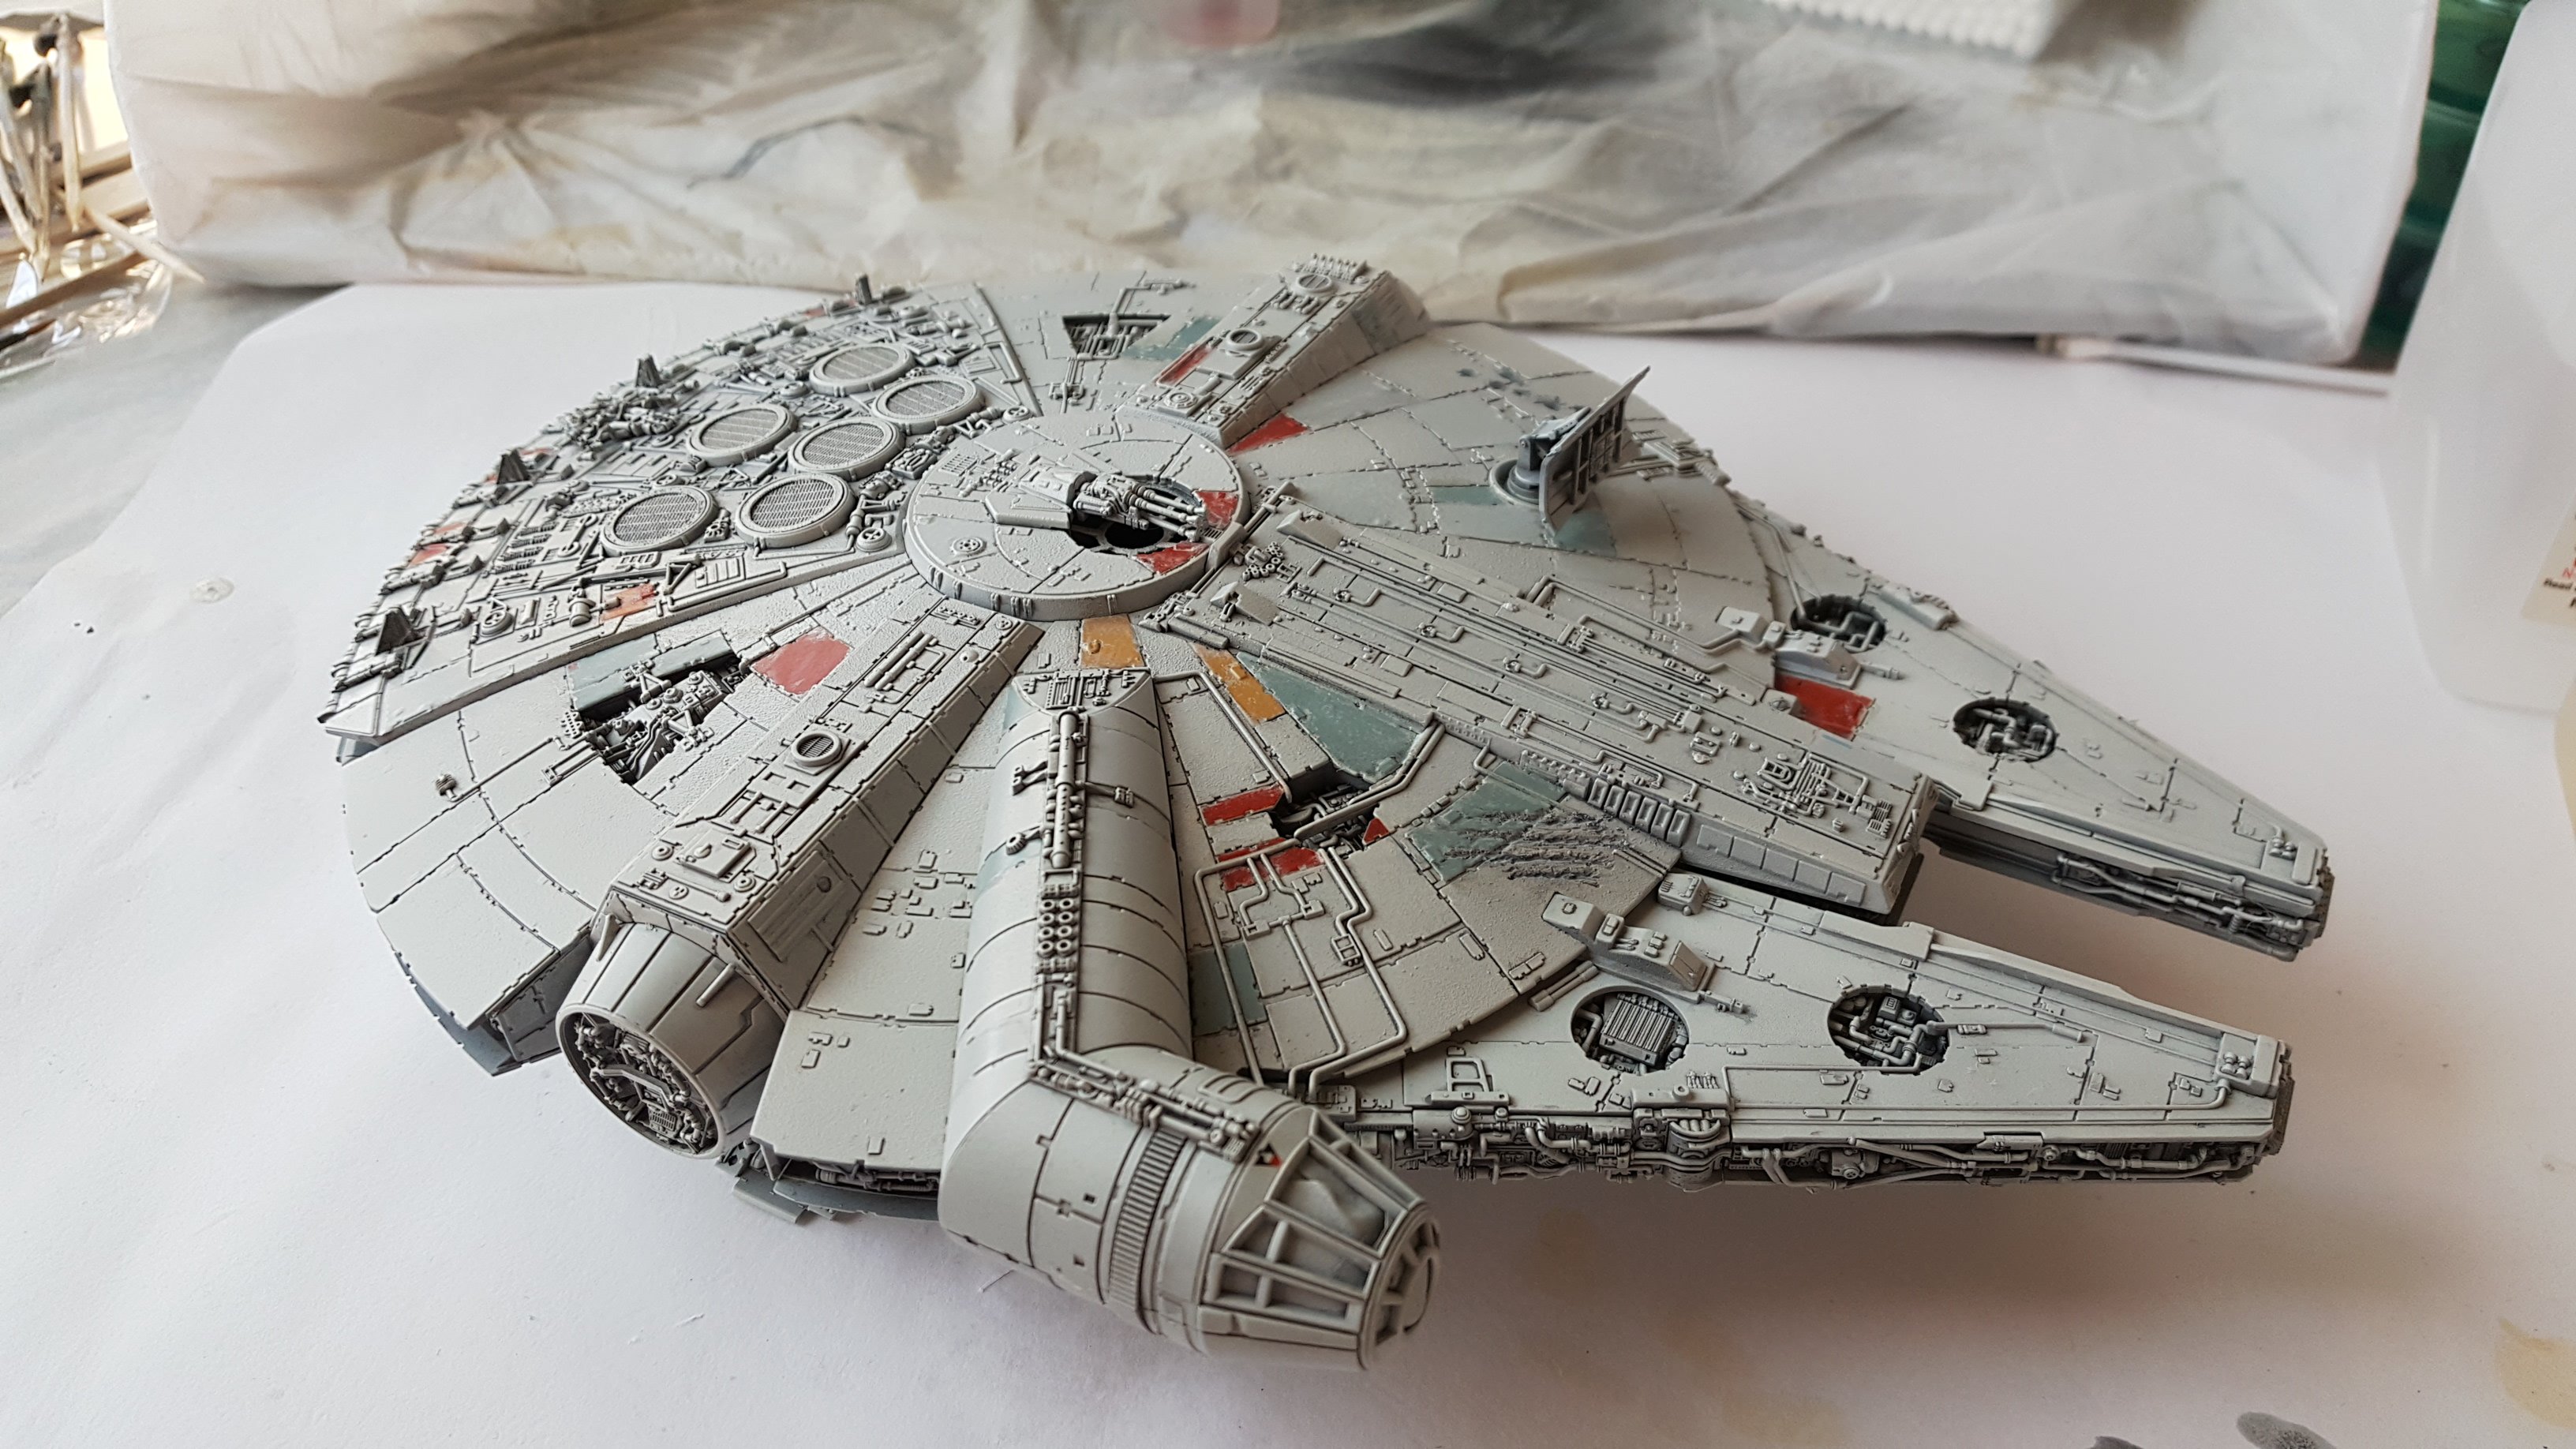
Looks like I'm not the only frustrated modeler around here! The art of painting has me totally discouraged. I'm no better now than when I started. I'm ready to give up on ever being a decent painter... I need you all's feedback on my gloss coat. Good? Bad? Comments? Is it strong enough to withstand an enamel or Flory's wash? Other than that, on the raised glossy surfaces you can see that I have built up an orange peel texture with the base coats. So this makes my gloss coat look terrible with all the little dimples. Still not sure how to avoid this. (I'm using super fine primer and Tamiya paint 50-50 thinned.)

-
Wow, these 1/144 are tougher to paint than I thought. I would hate to have to paint an even larger one. Now I have no idea how I will build up a gloss on this for the washes.

-
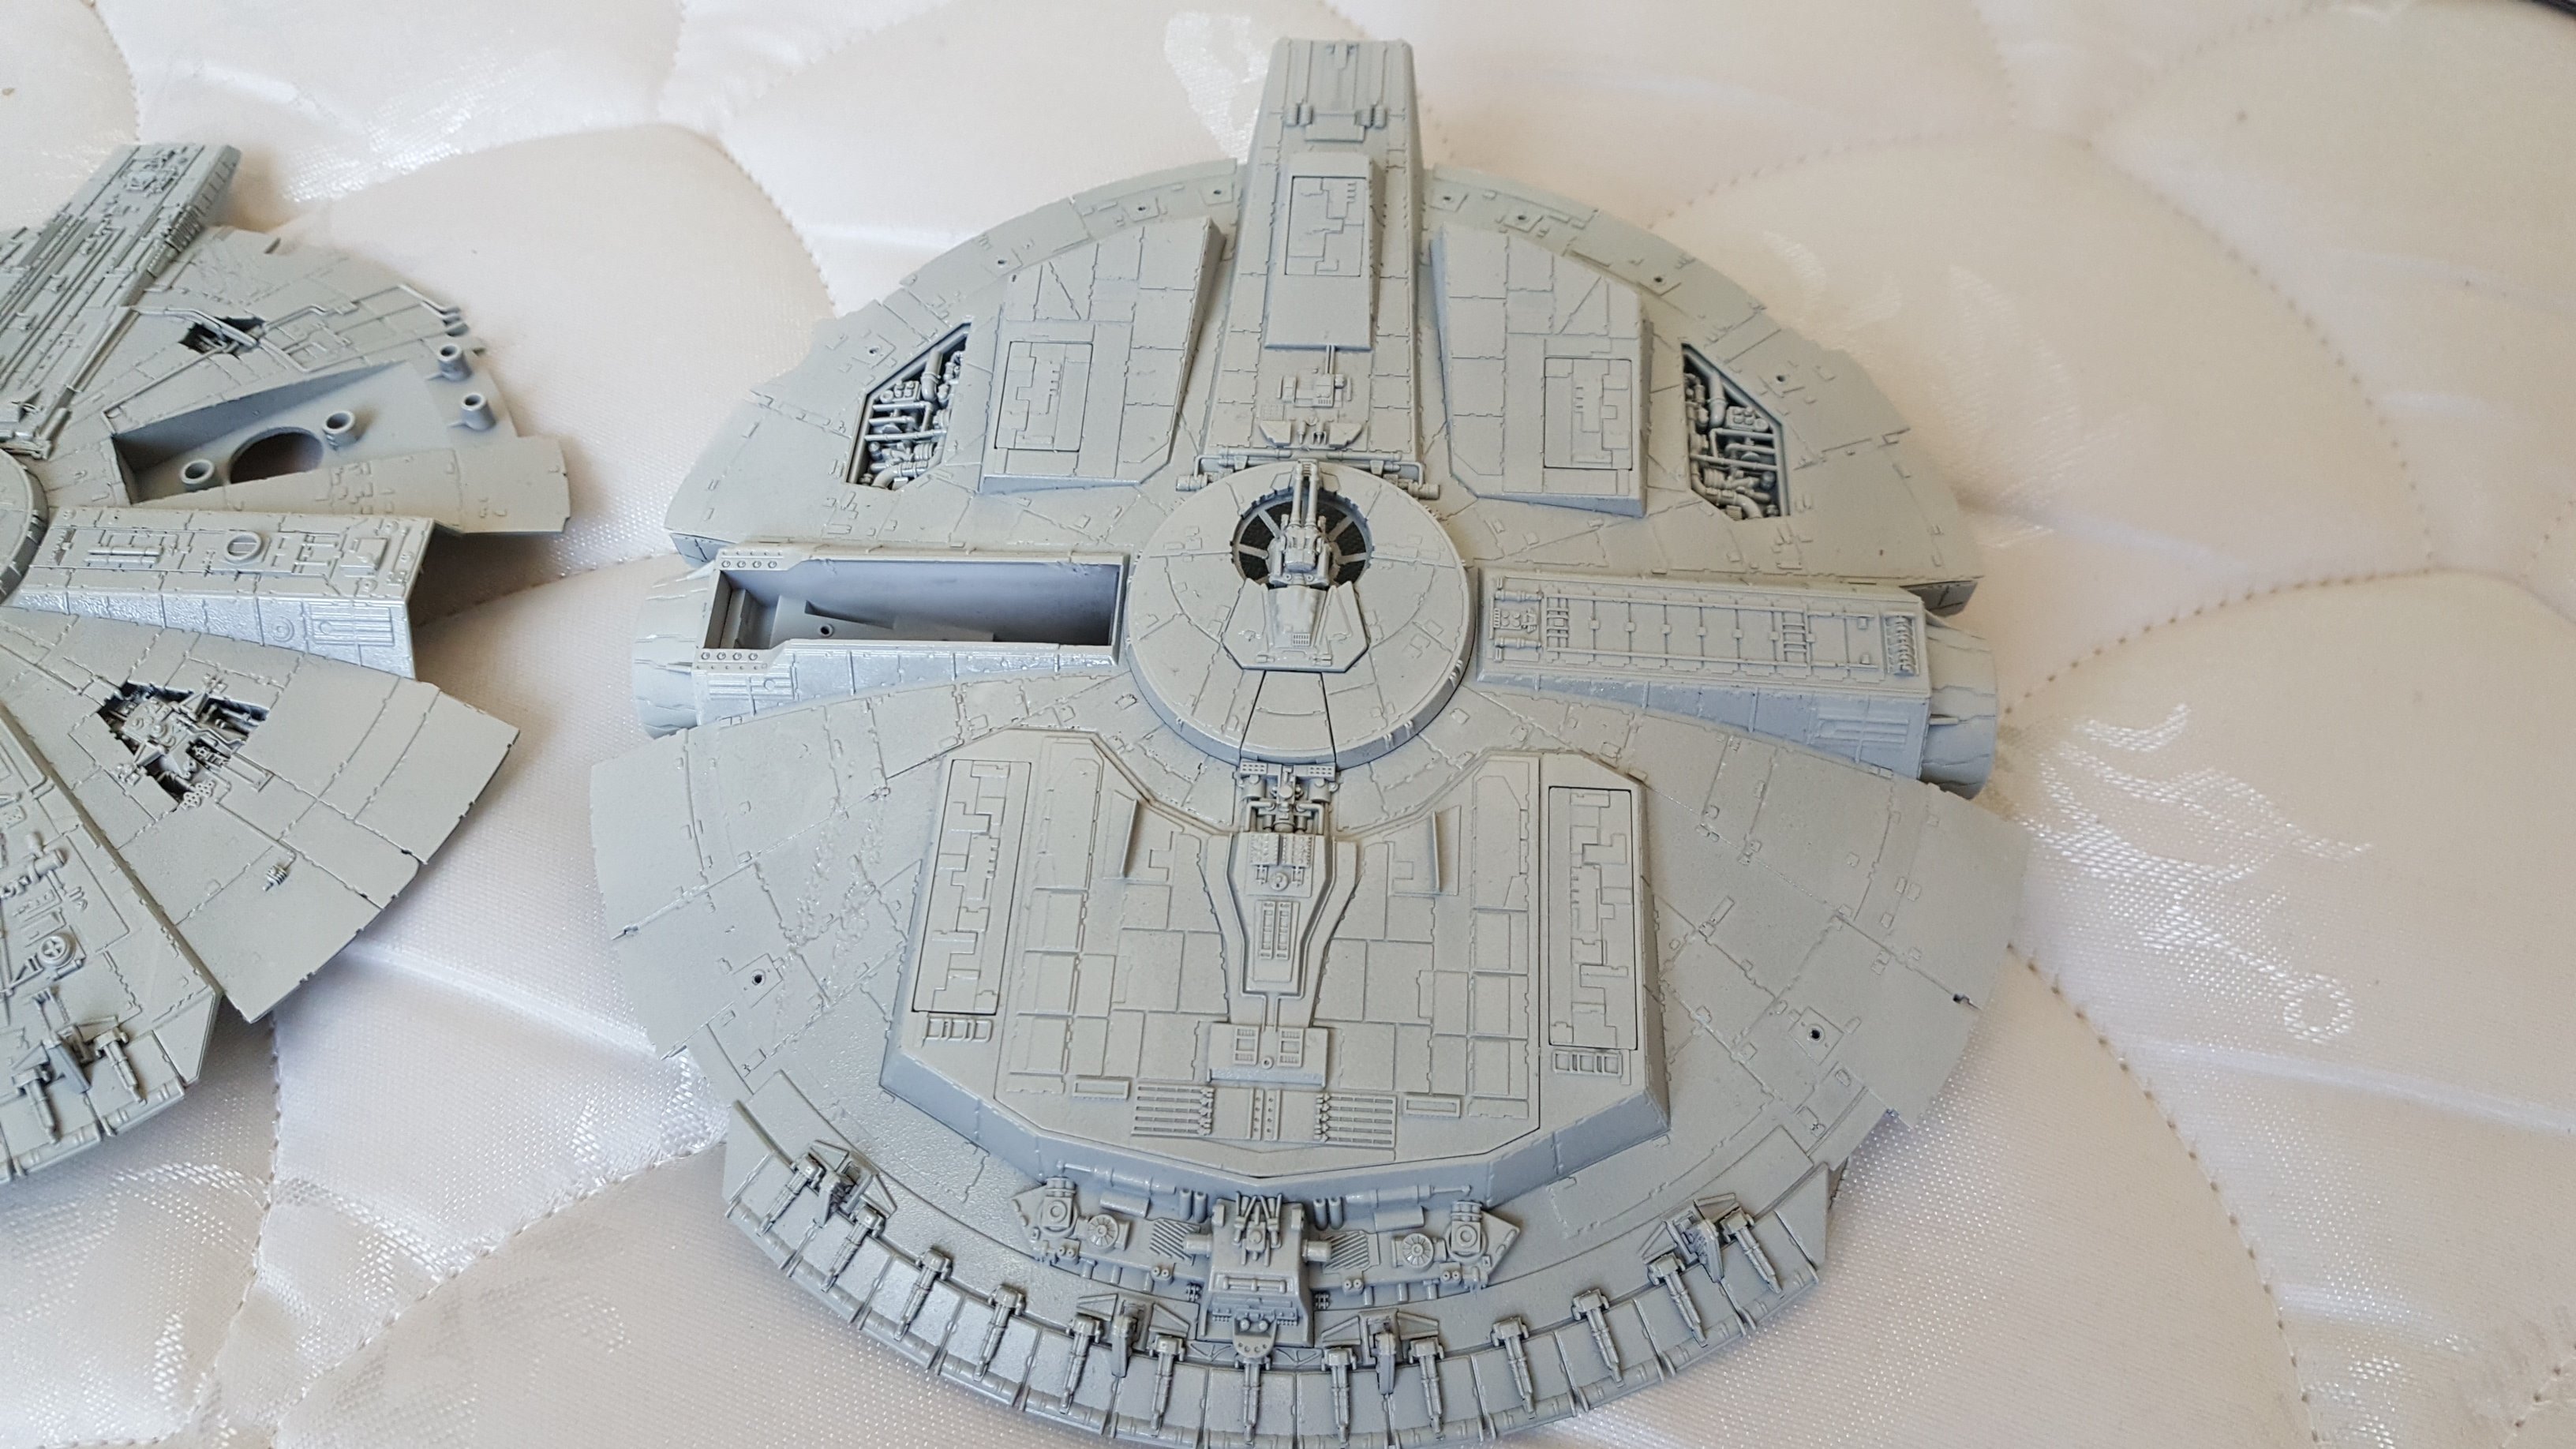
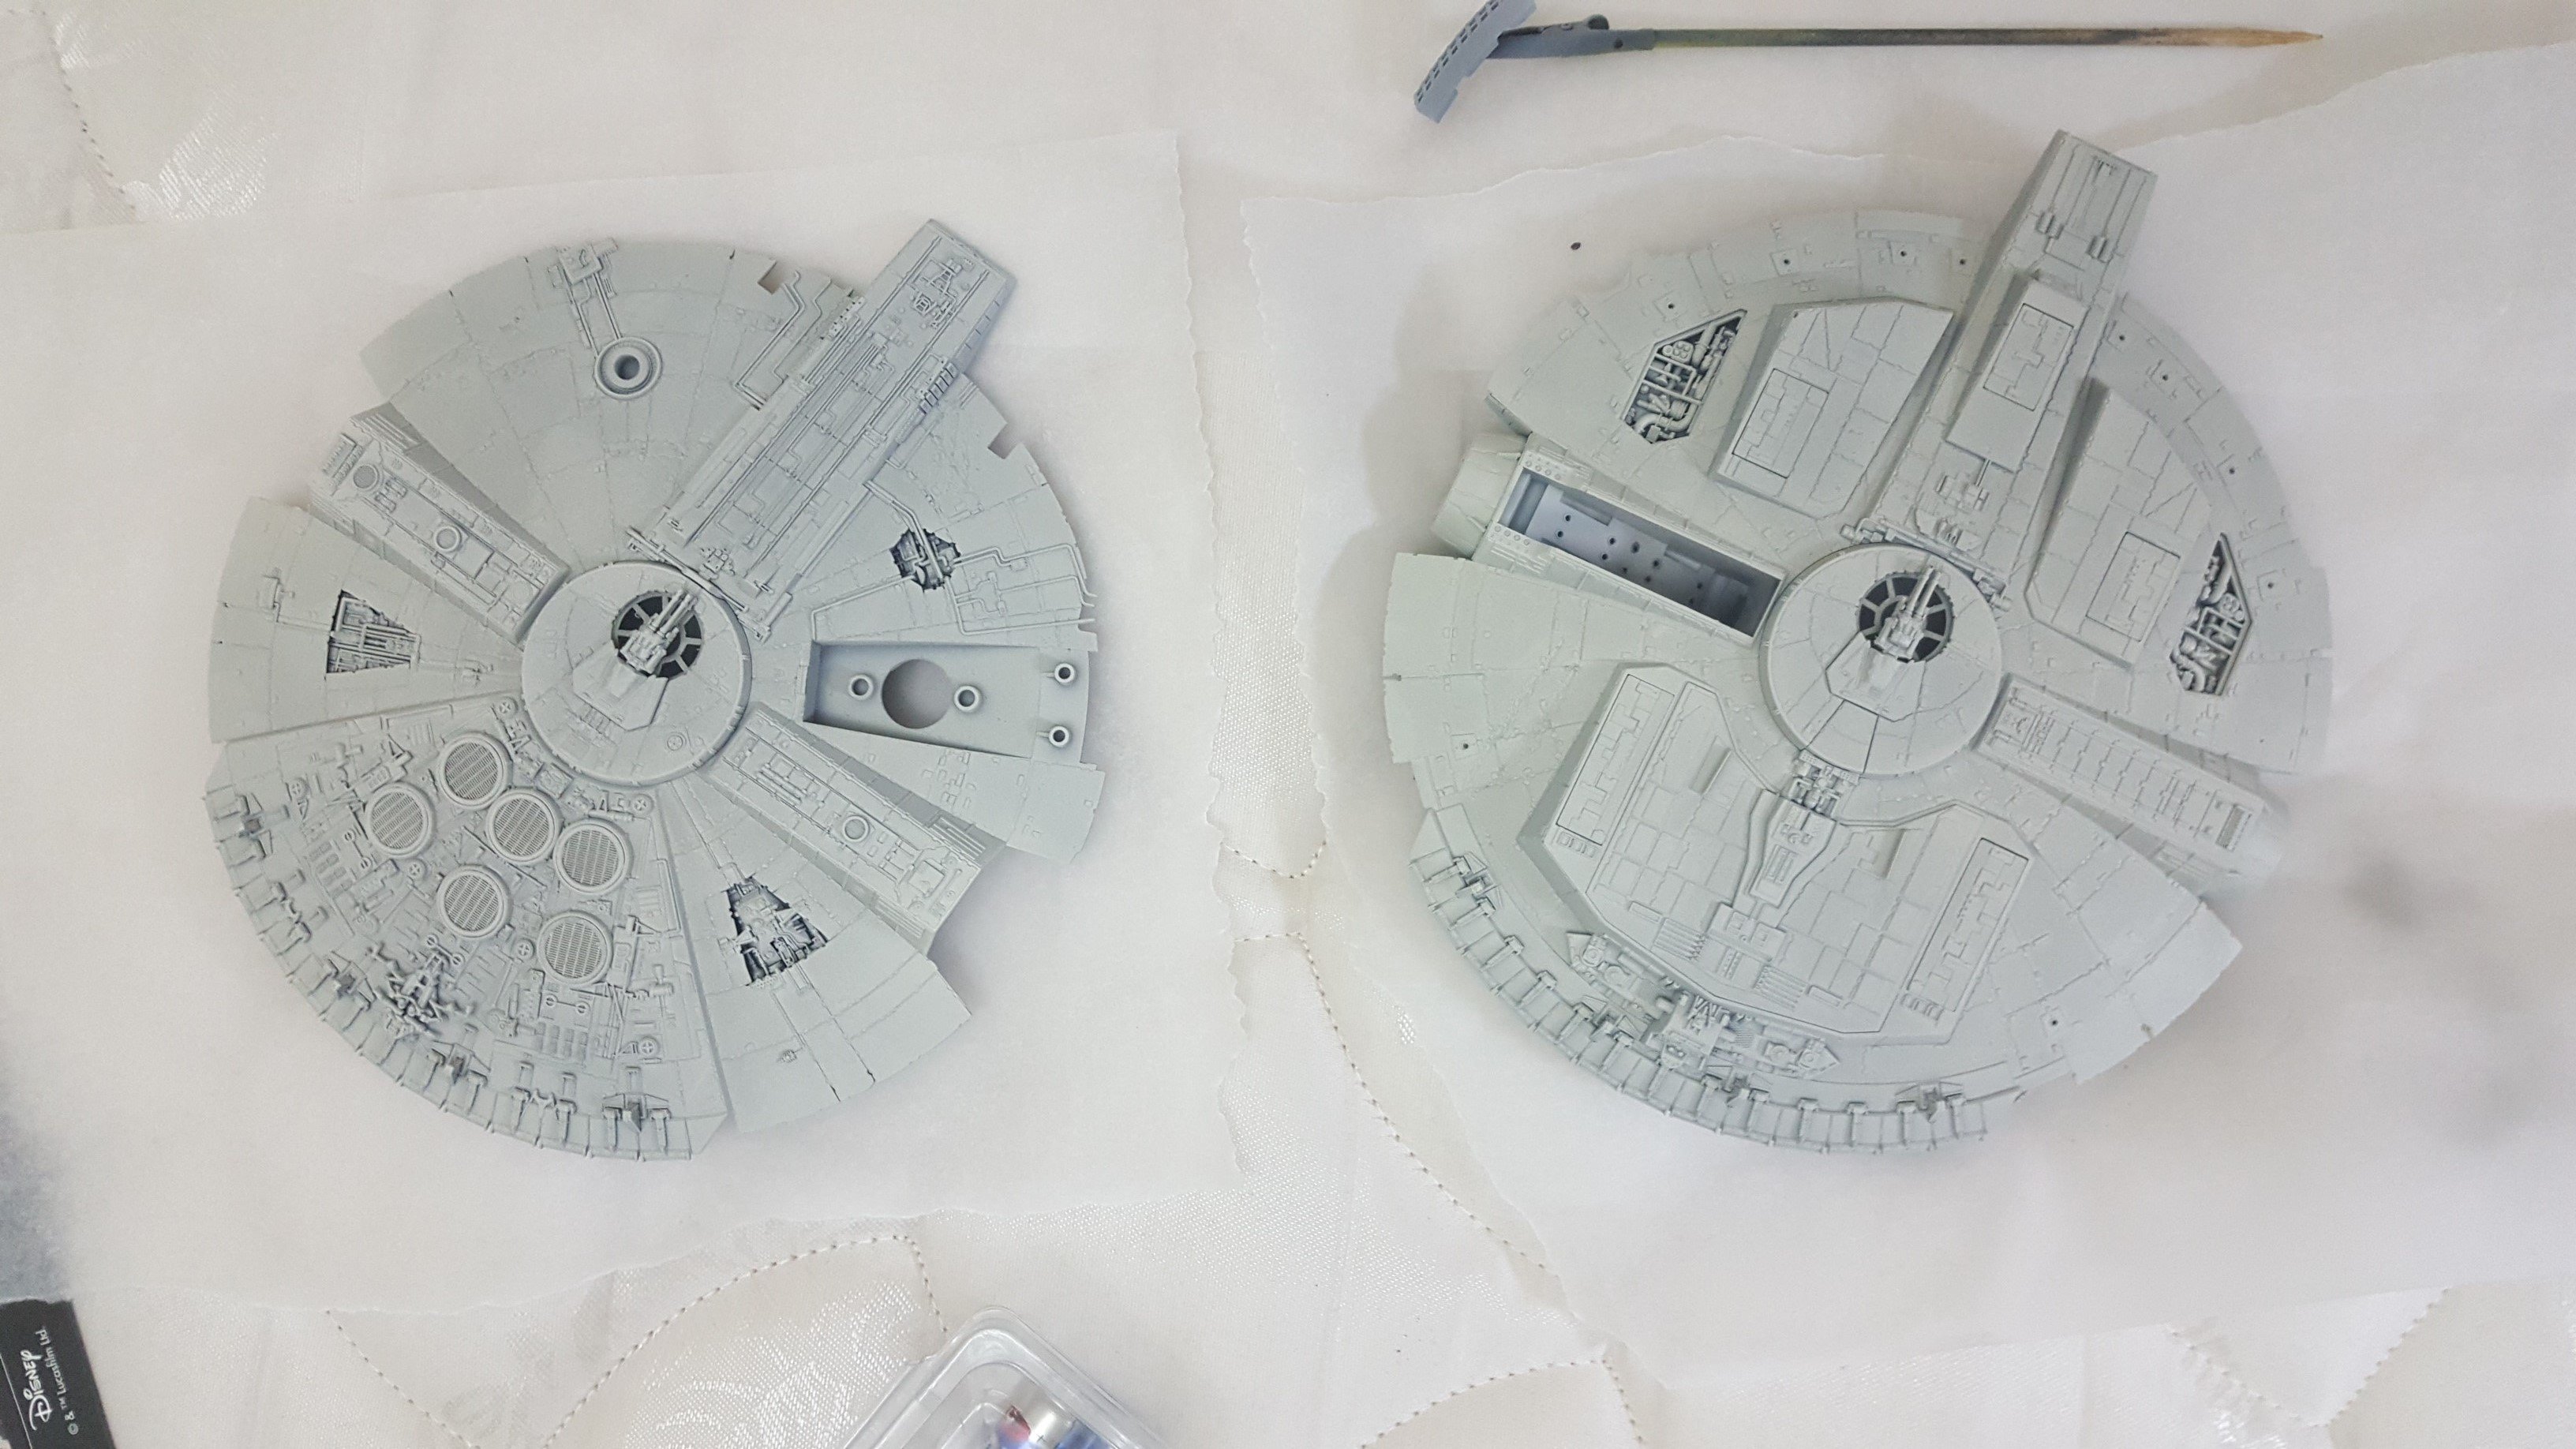
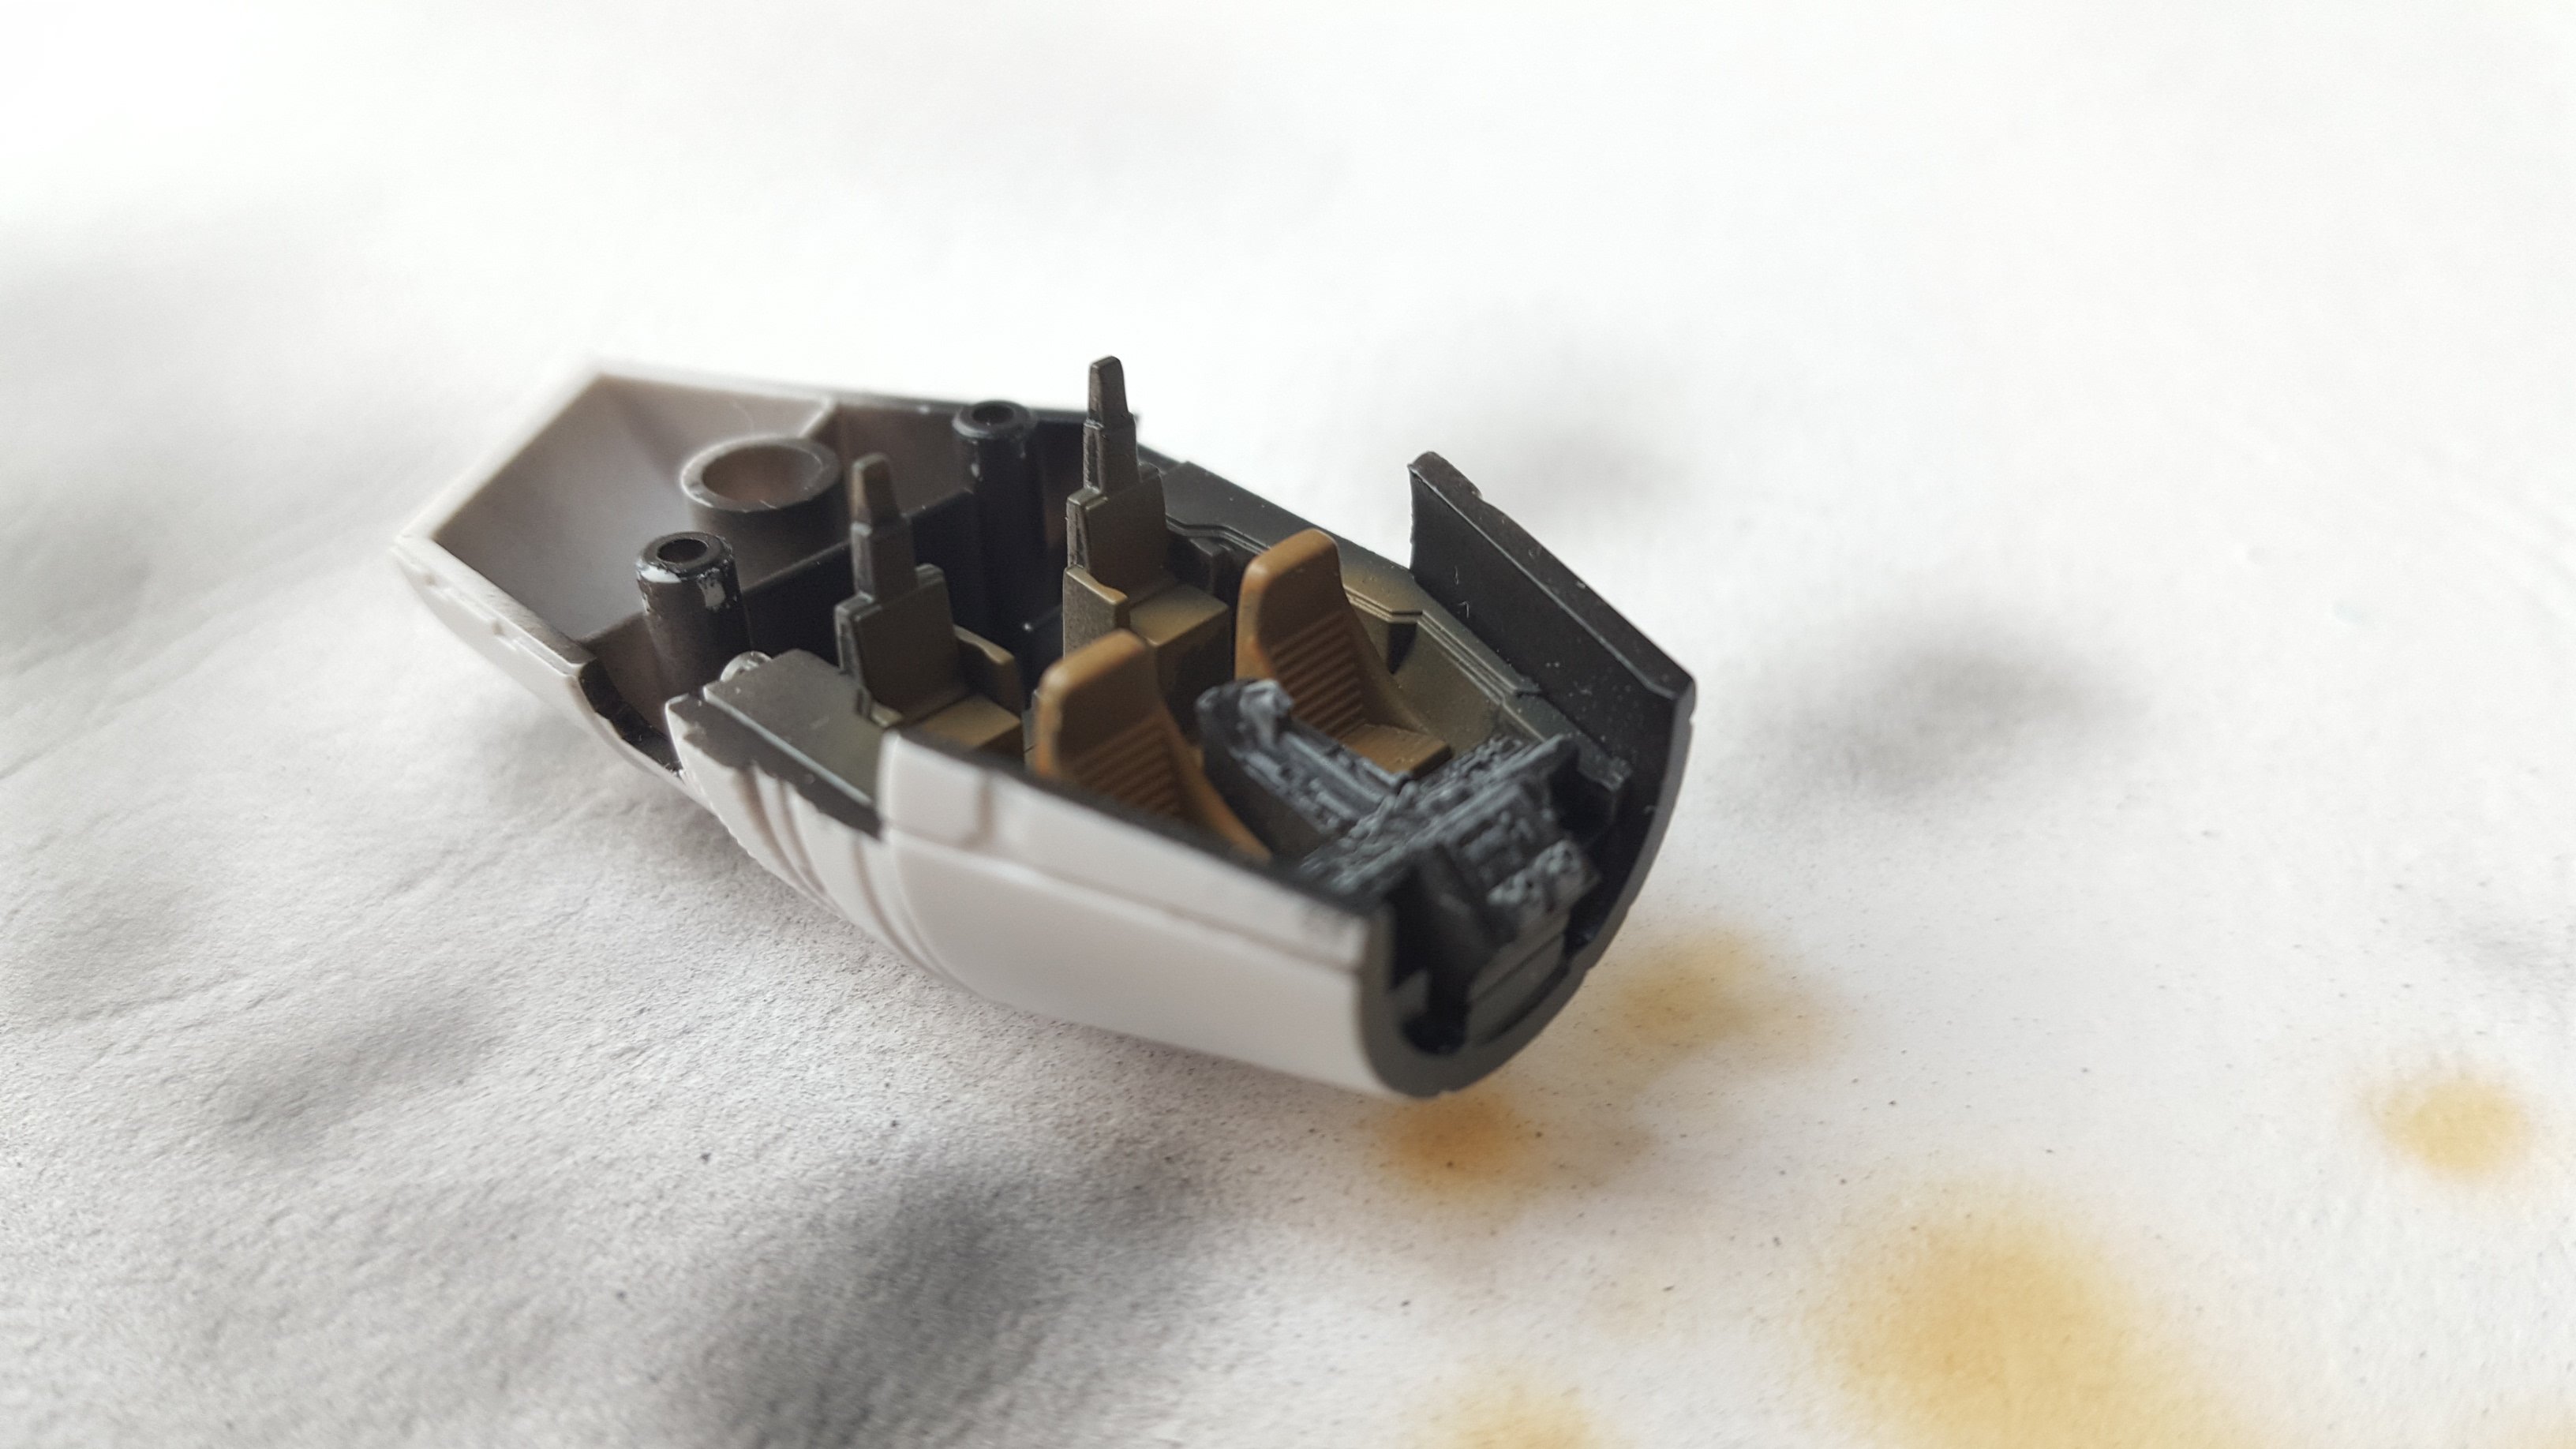
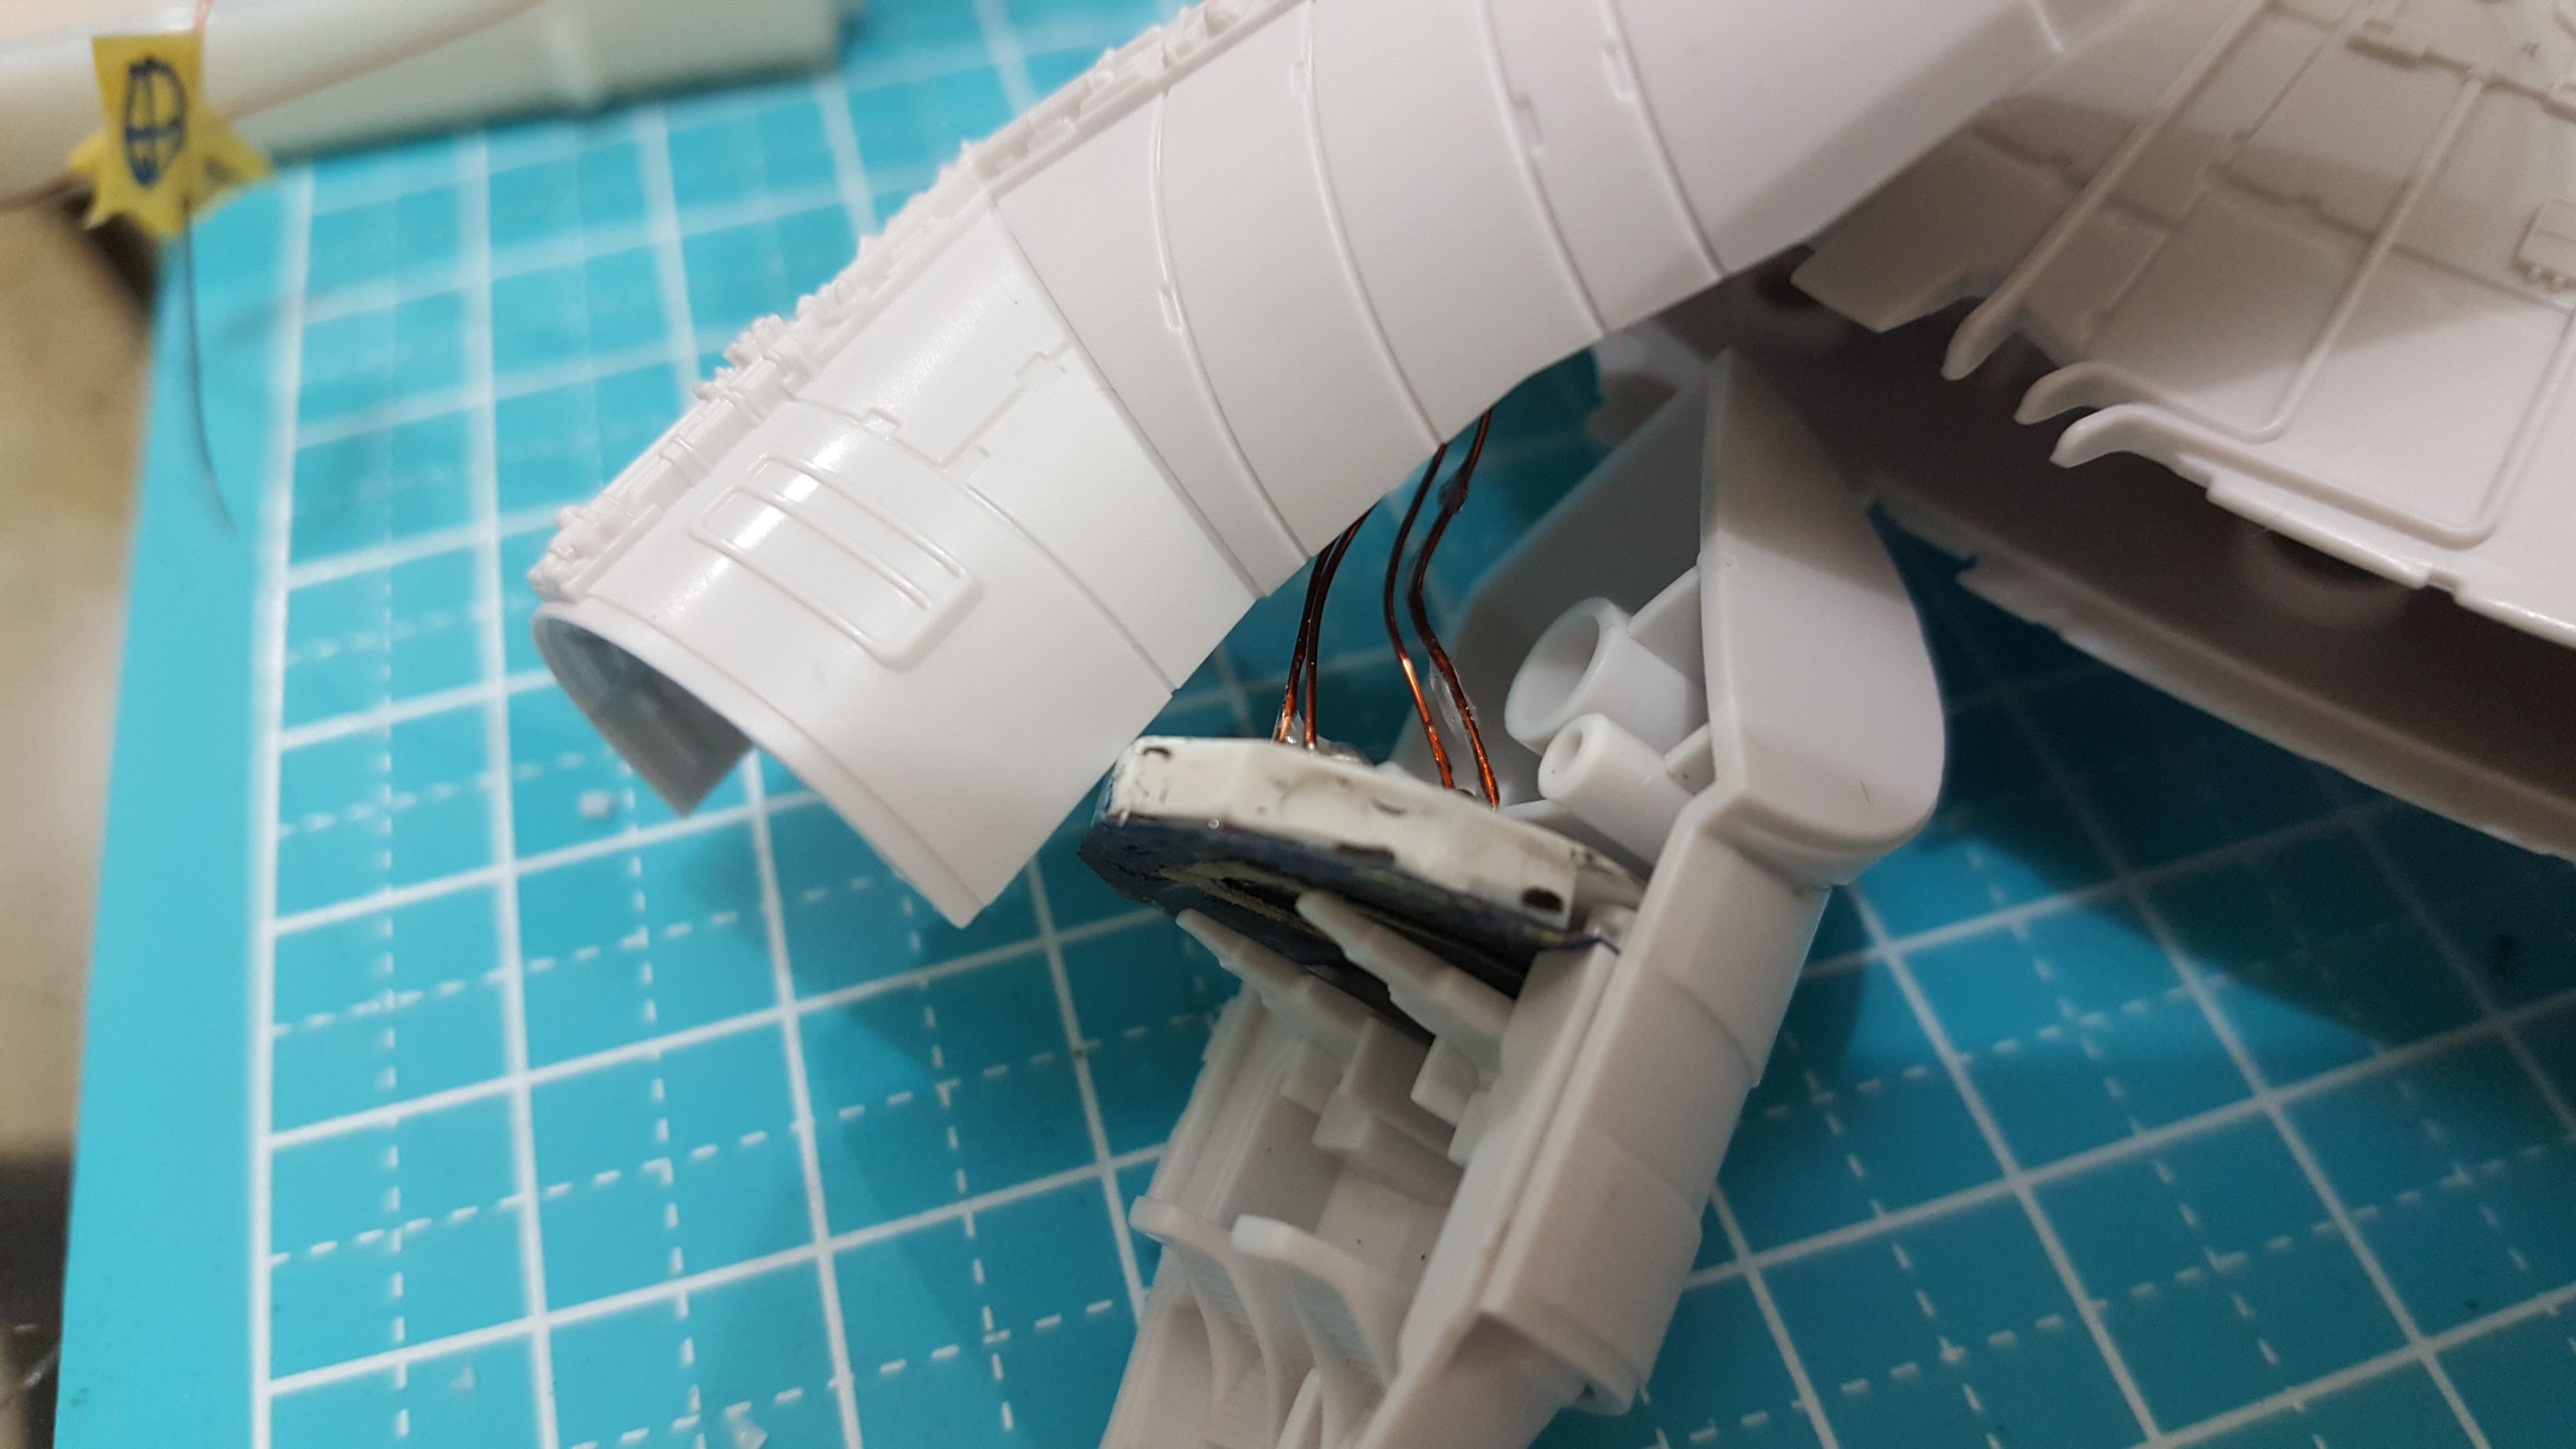
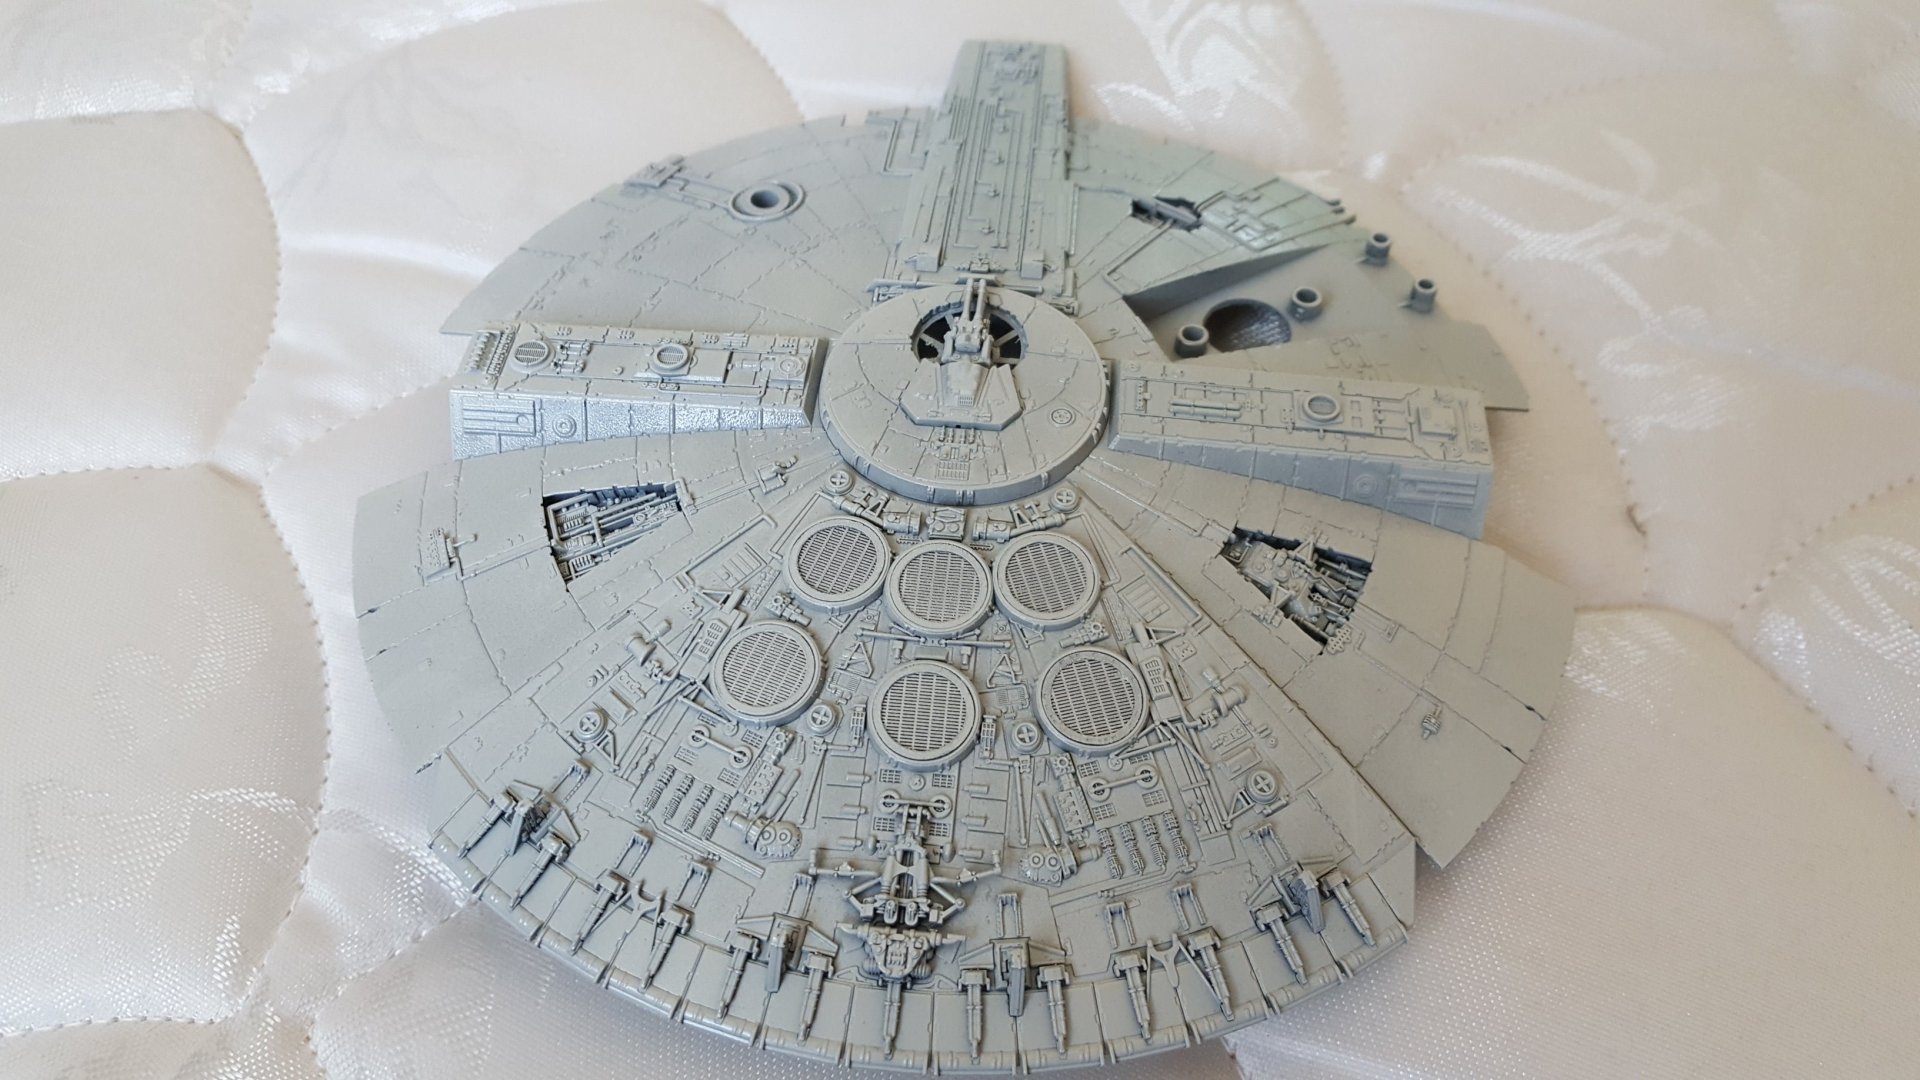
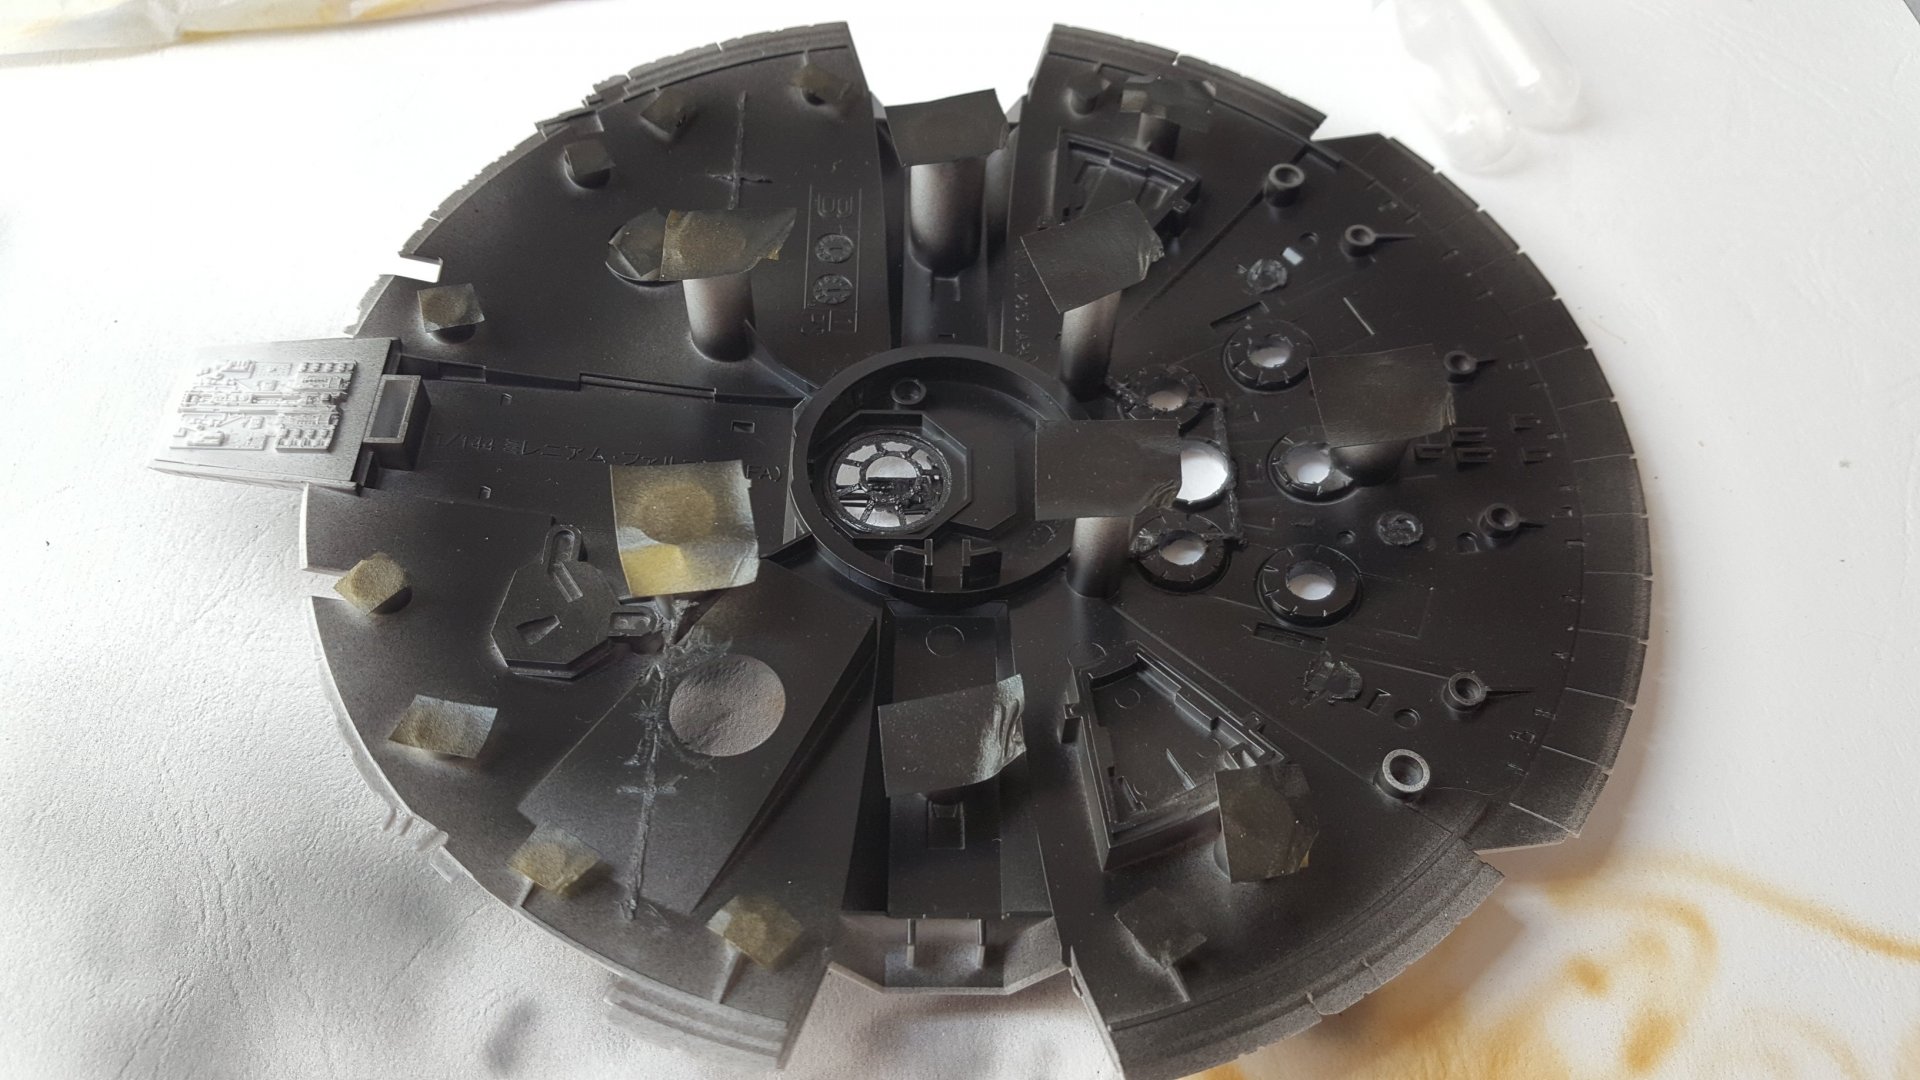
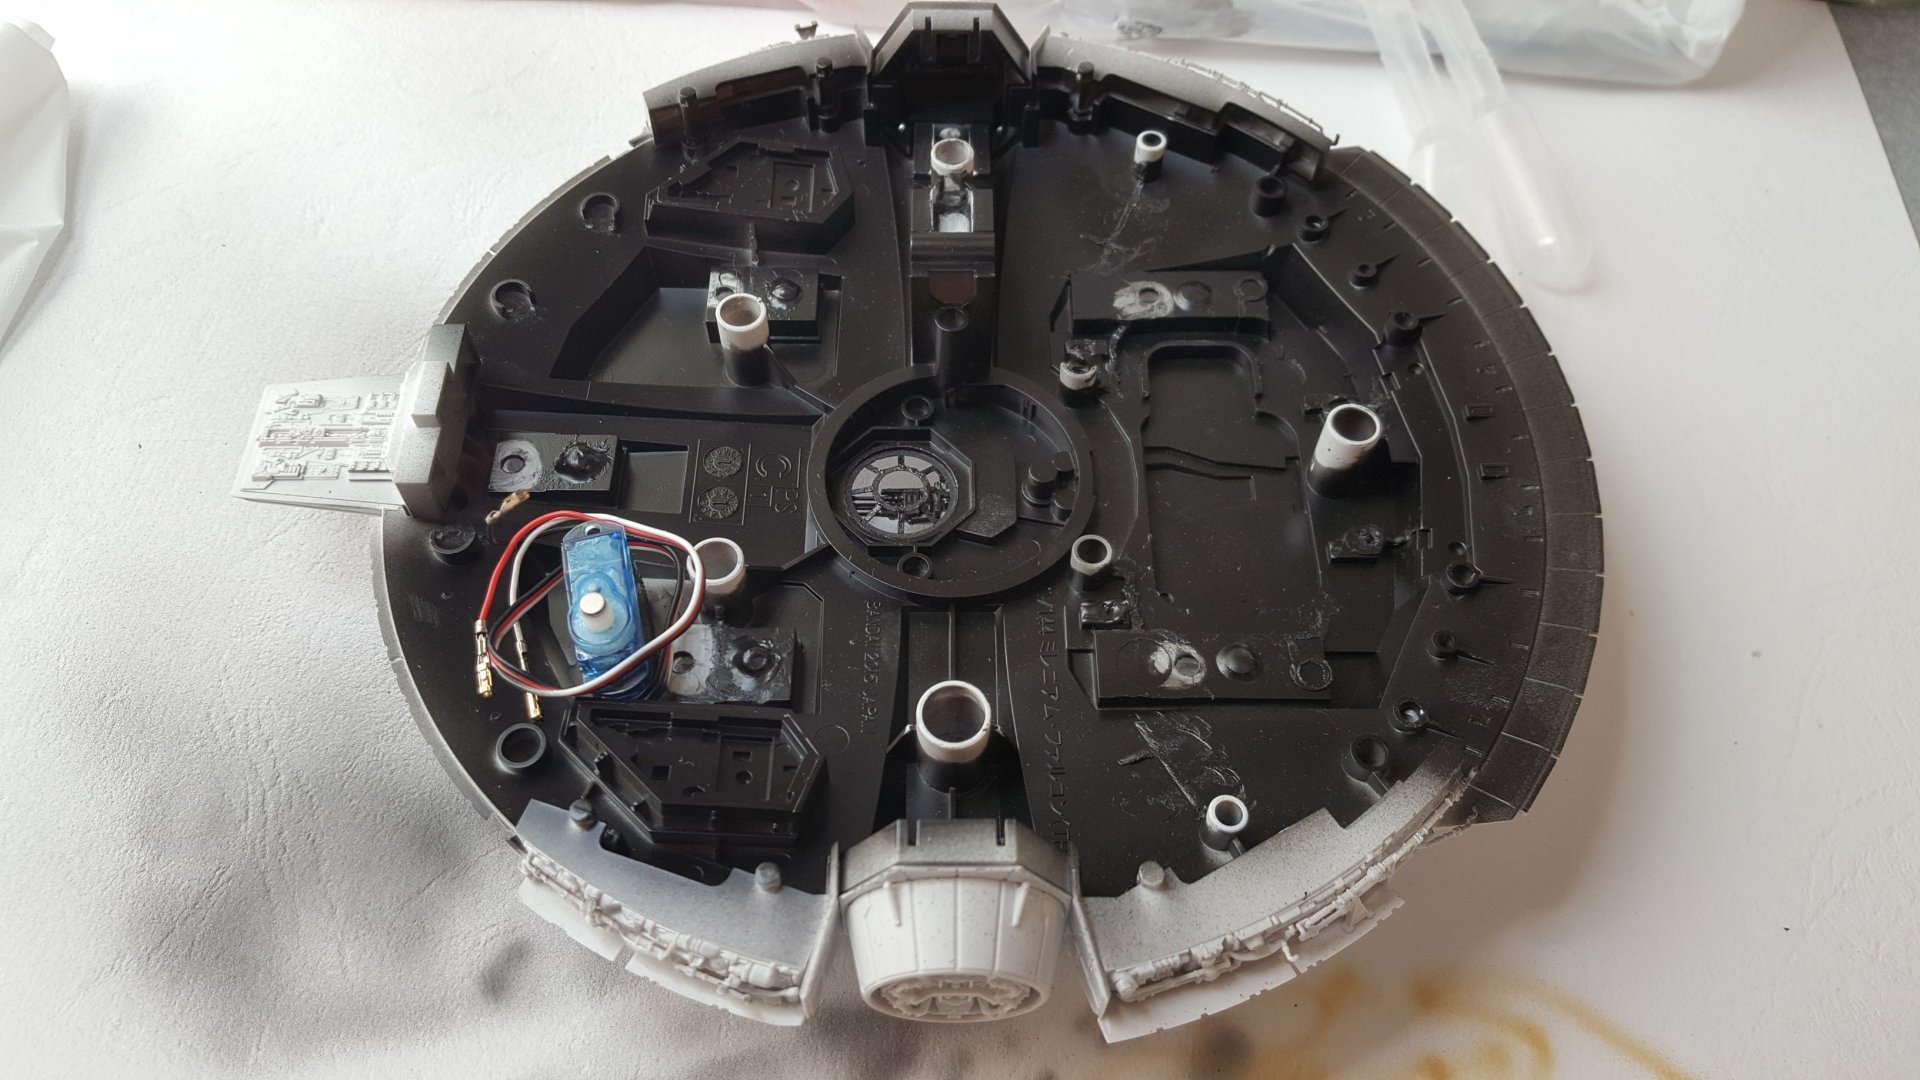
Toys for big boys! I will keep filing the landing gears down after painting the body to ensure they stay fun and clicky! Finished all the prep work for lighting, Then blacked out the interior and dremeled out all the unnecessary pegs to make room for the wiring. I used a drop of epoxy to connect the magnet to the servo radar sweep. Much stronger and safer than super glue. Not sure how much more detail I want to add to the cockpit at this scale. Overkill is probably in order.

-
Actually, looks like you used Green Strawberry PE. I used Paragrafix which are less detailed, but also a lot simpler. For this small scale I didn't care too much about detail, and its less fragile for the kids to play (If they can get off Fortnite).
-
I also got Preparation in Progress for the 31A today after nagging NY somewhat politely last night (For the hundredth time). Order Date Oct 7. I feel they are holding these for mark-ups once people give up.
-
Nice painting dude. You are so talented, it's a priveledge to sit back and see your hard work.
-
I've been watching Making It on TV with my daughter. I think you would win!
-
Nice work! Version 2 looks much tighter than before. You are serious pro level now. Could you post an ebay link to all the screws and pins required to put this together?
-
That's how I started too, lighting a 1/100 Nu Gundam. - Thin wires are very important or you wont be able to close the model. I use 0.25 and 0.30 magnet enamel wire. - I use pre-wired SMDs with soft thin wires (I change their resitsors depending on what I need). The hard brittle type wires need to be epoxied immediately or the LEDs break off. And you want pre wired because soledring these little guys is tough. - As for batteries, let me know what you use. I have never figured out a solution for a good internal power source that will fit in our little models, and power multiple leds with resistors. The really thin car remote batteries run out very quickly.
-
Glad you like it. Now only if I could weather like you... I think a lot of people have trouble lighting these. I took it slowly to figure it out with trial and error, and a lot of youtube videos to learn from others.. You can't just throw an led in and think it will work every time,
-
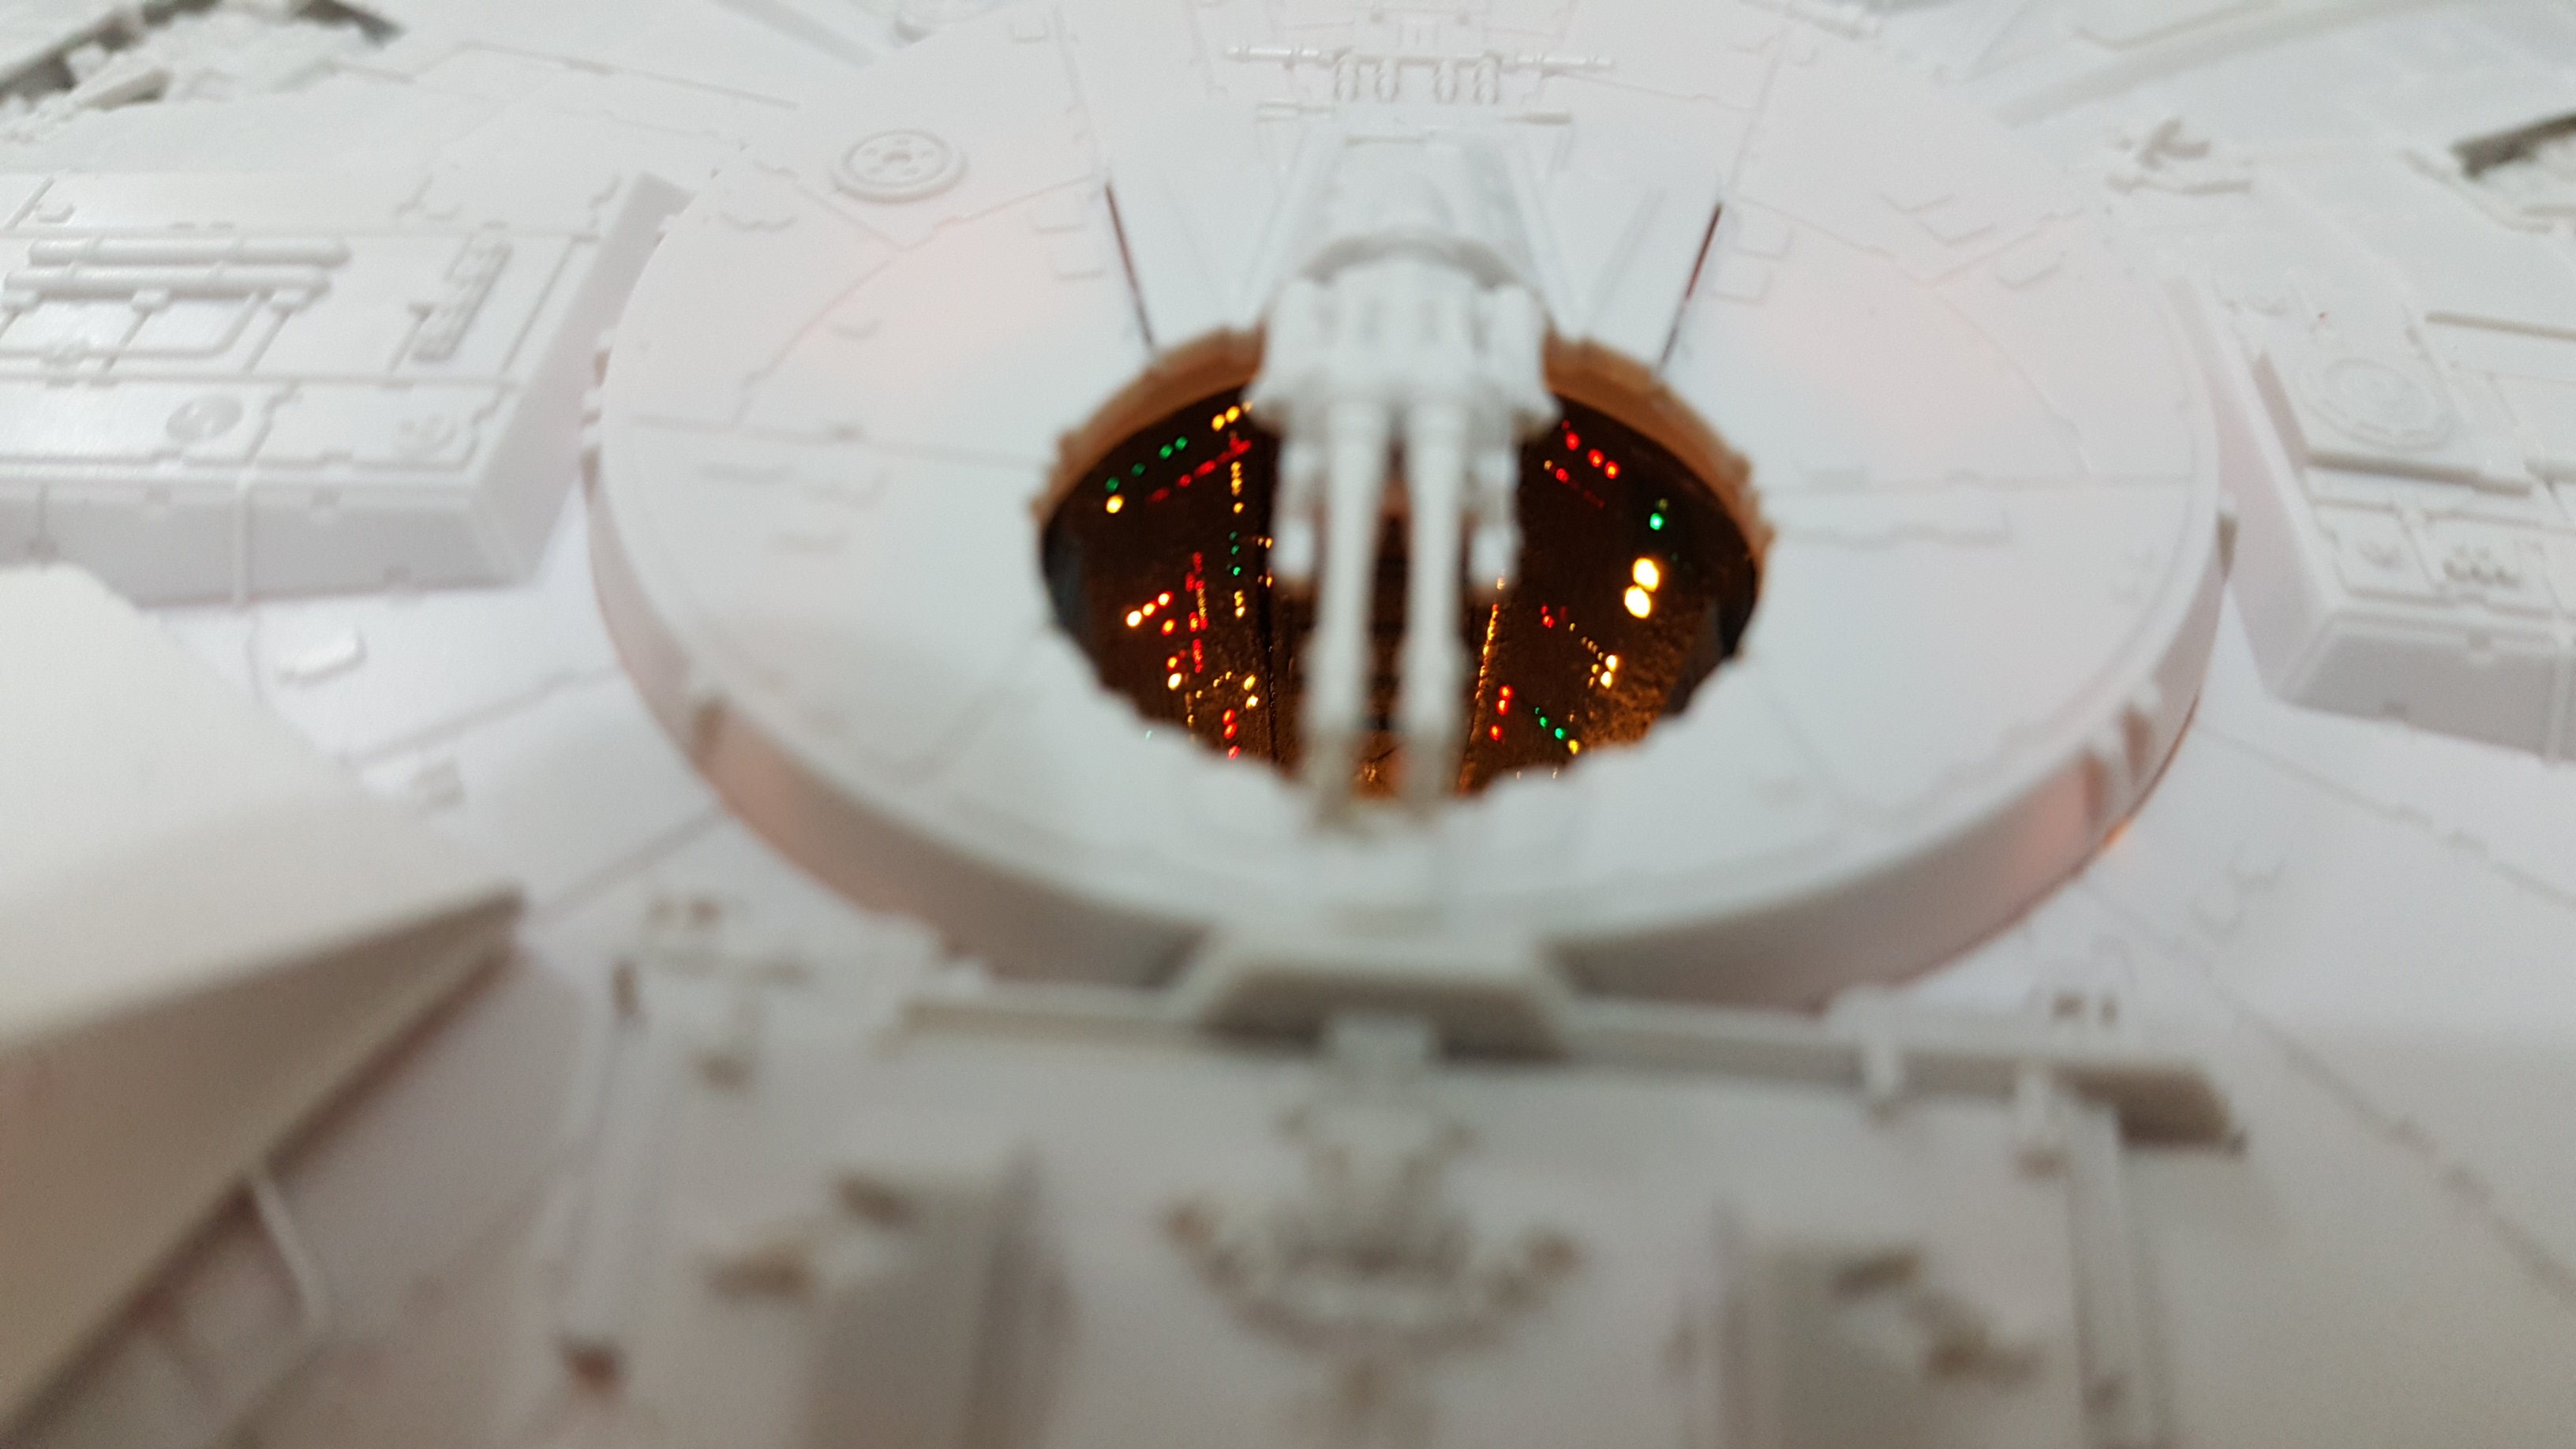
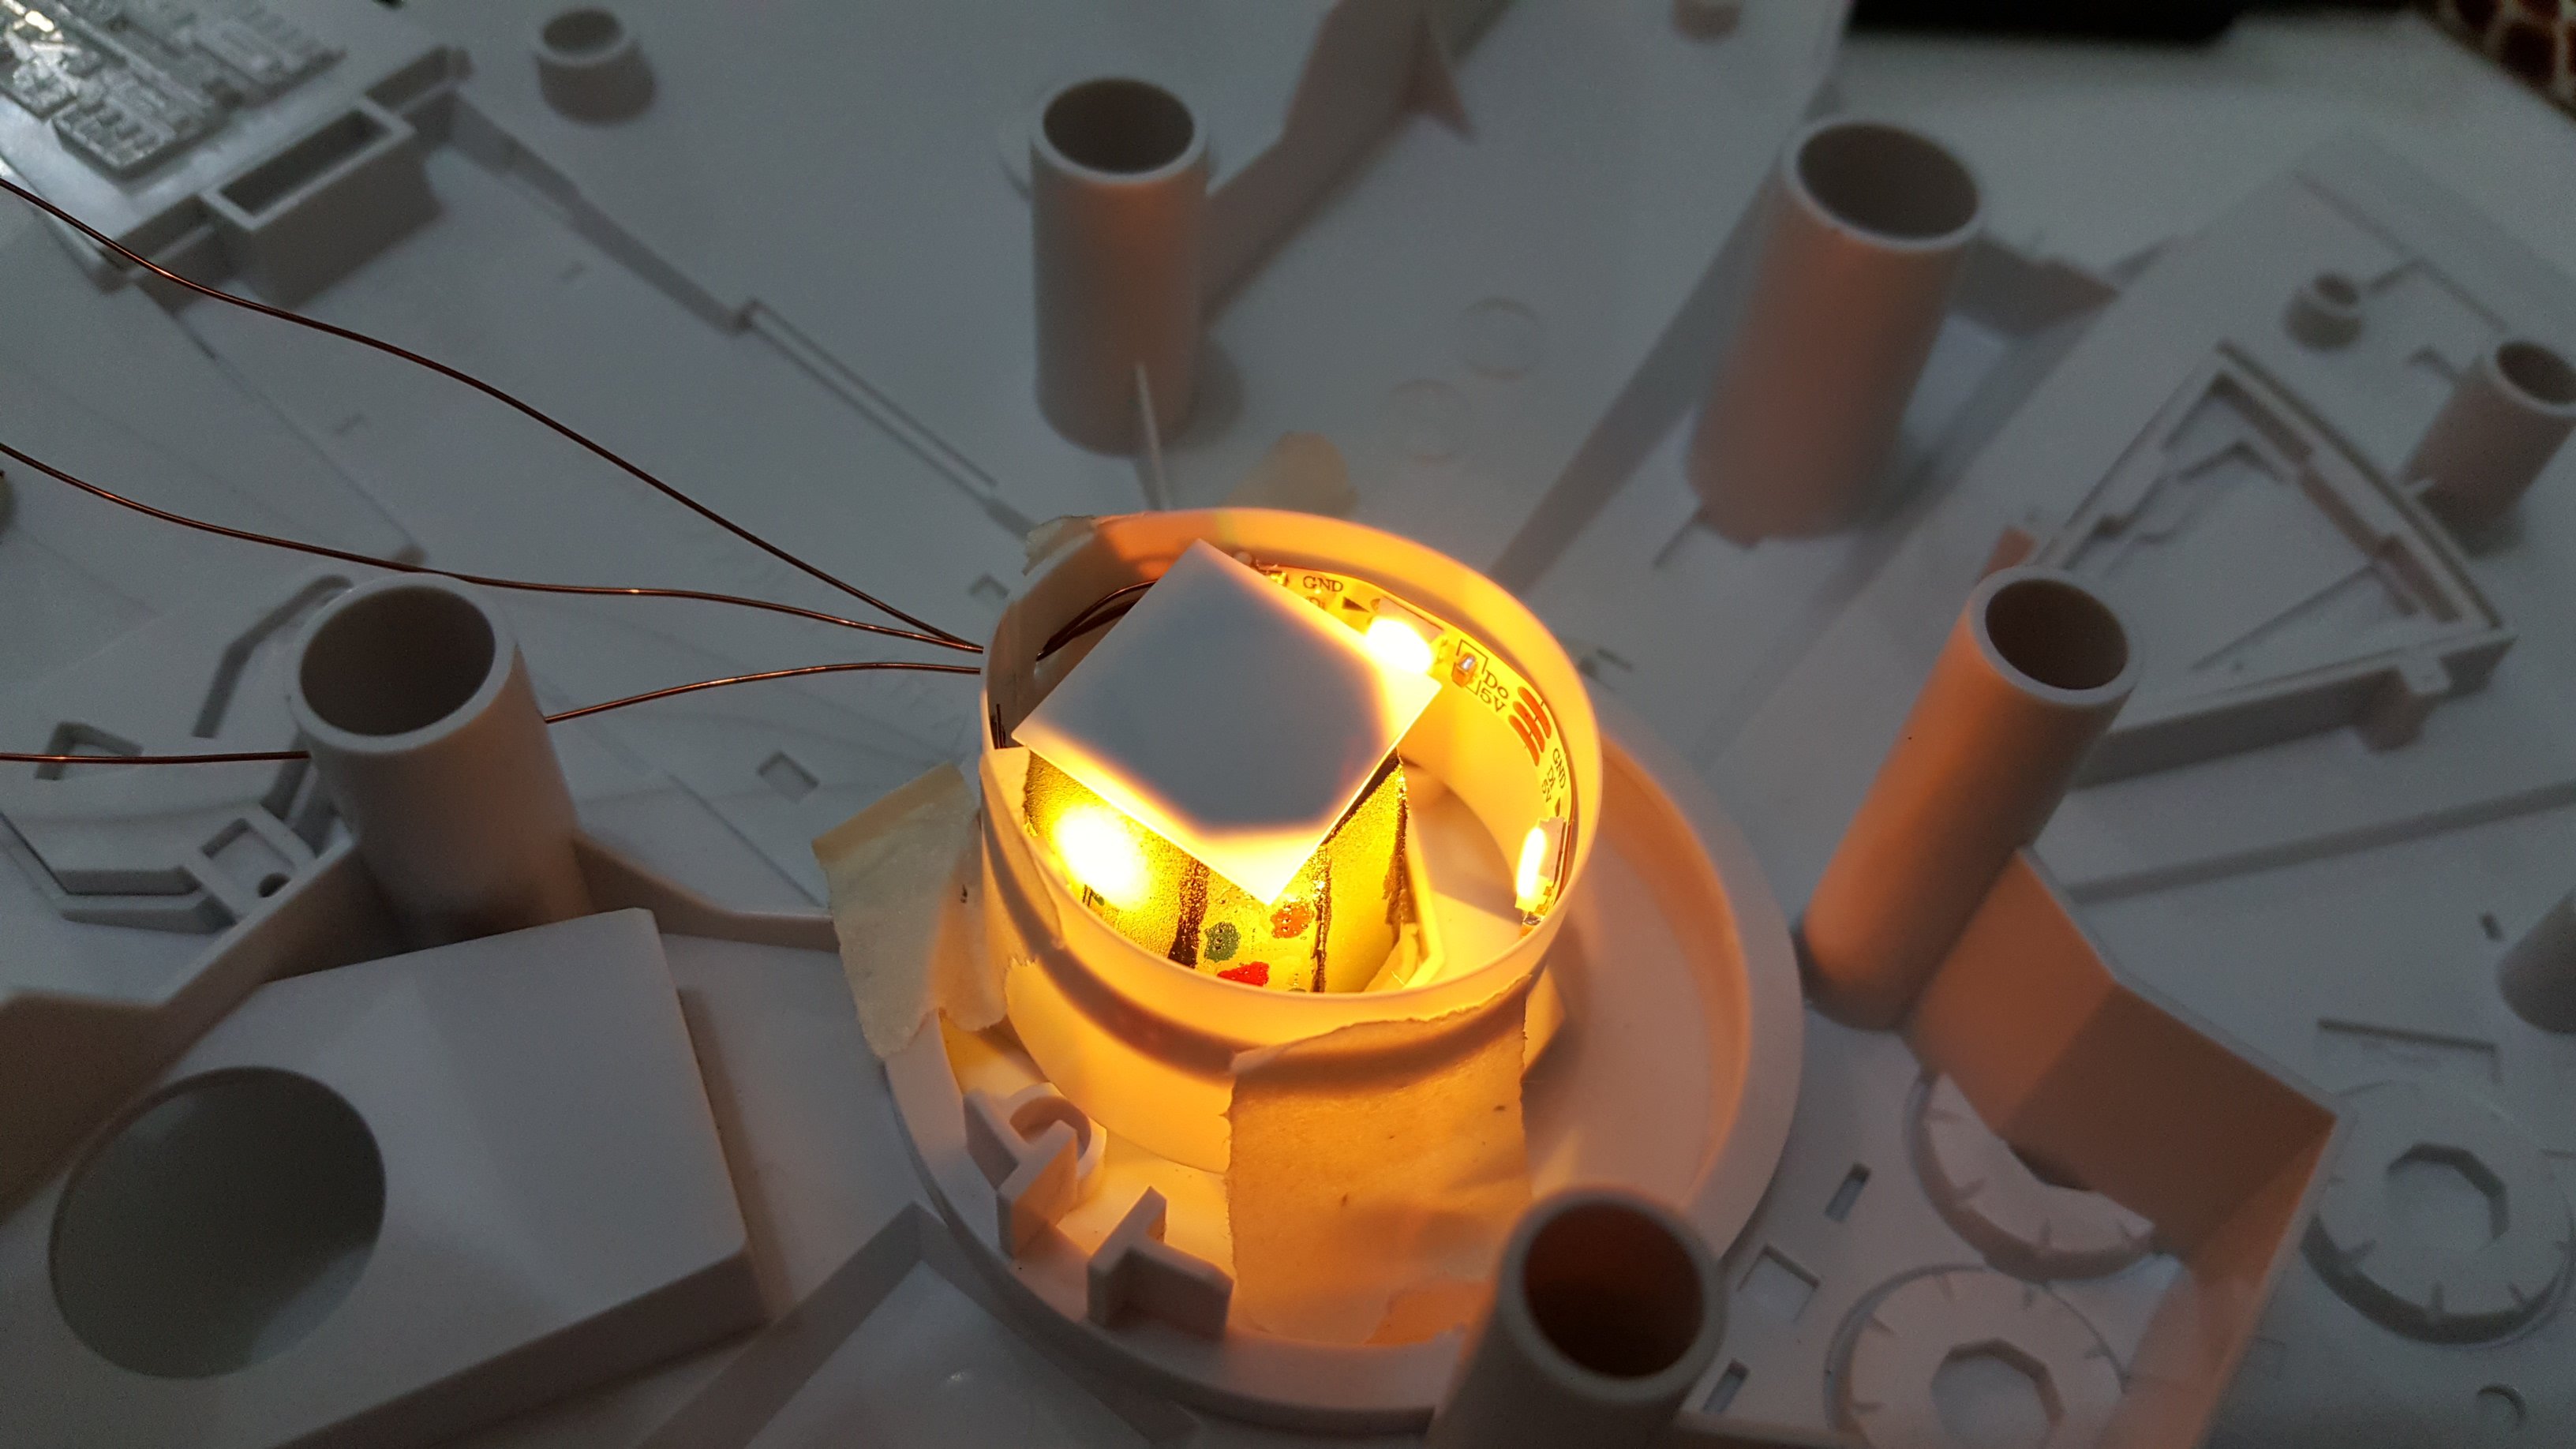
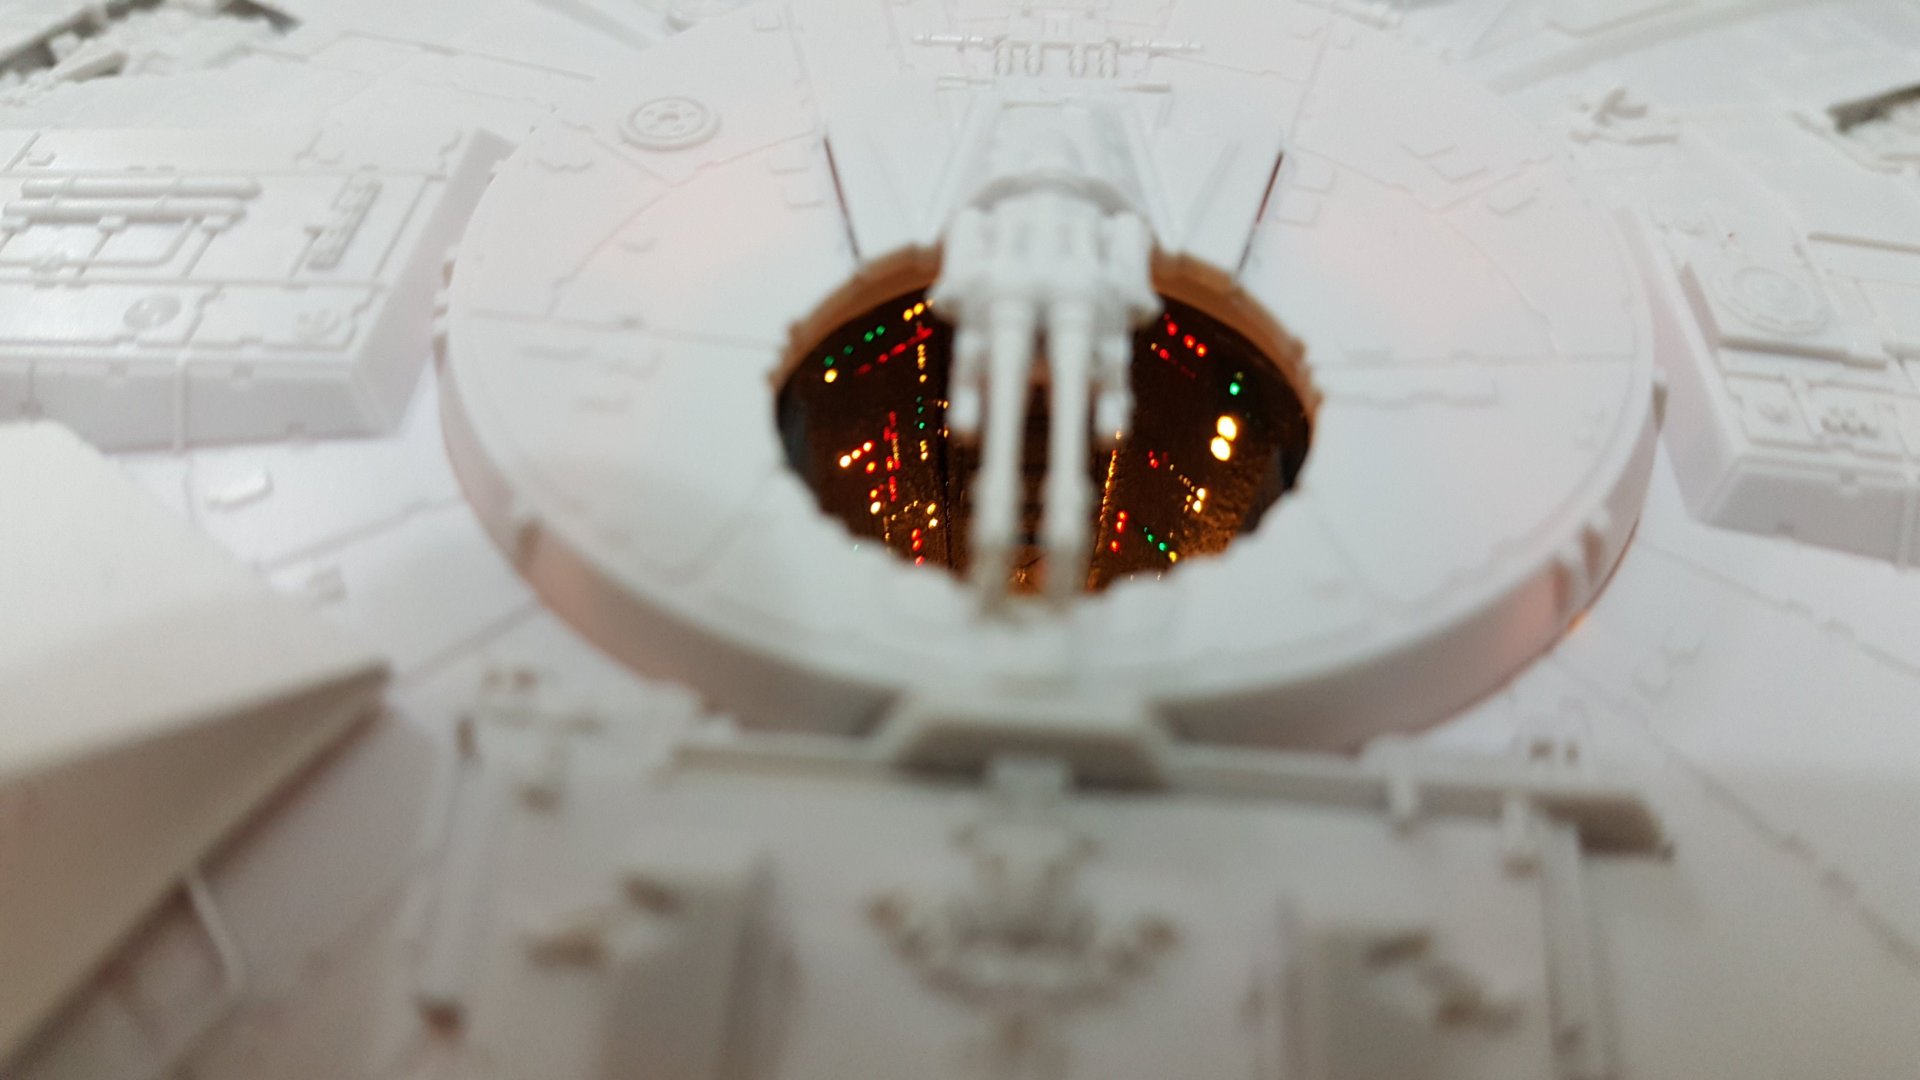
Carefully balancing and blocking off the light to get full effect from the PE. Too much light and you lose the display details. I might need to cover the circular light box further, so that the light doesnt overpower the second Gun Port.

-
I made a little light box for the cockpit PE part. It's necessary, to reflect all the light around for one neopixel smd led to light up all the PE panel light holes. I have some light seepage around the edges, hopefully I can paint the outside of the light box black to reduce that without losing any brilliance; but the inside of the light box needs to be white to spread the led light around to all those panel lights.