arbit
-
Posts
2630 -
Joined
-
Last visited
Content Type
Profiles
Forums
Events
Gallery
Everything posted by arbit
-
Derex, Great idea. I think that will give it a lot of texture.
-
Gotta love those two! Fantastic painting too.
-
Ok that makes sense. The new Metal Color (32 ml) line has better reviews. But I would not recommend for airbrushing most of the Vallejo Air metalics (17 ml).
-
Which Vallejo metallics are you refering to? The old ones i their airbrush line, or the newere ones with bigger bottles? I have not tried the newer ones. I have their Airbrush line of metallics, and they are very inconsistent. The Steel and Silver seem to spray the smoothest, while gold and gun metal have very thick particles that don't thin down at all.
-
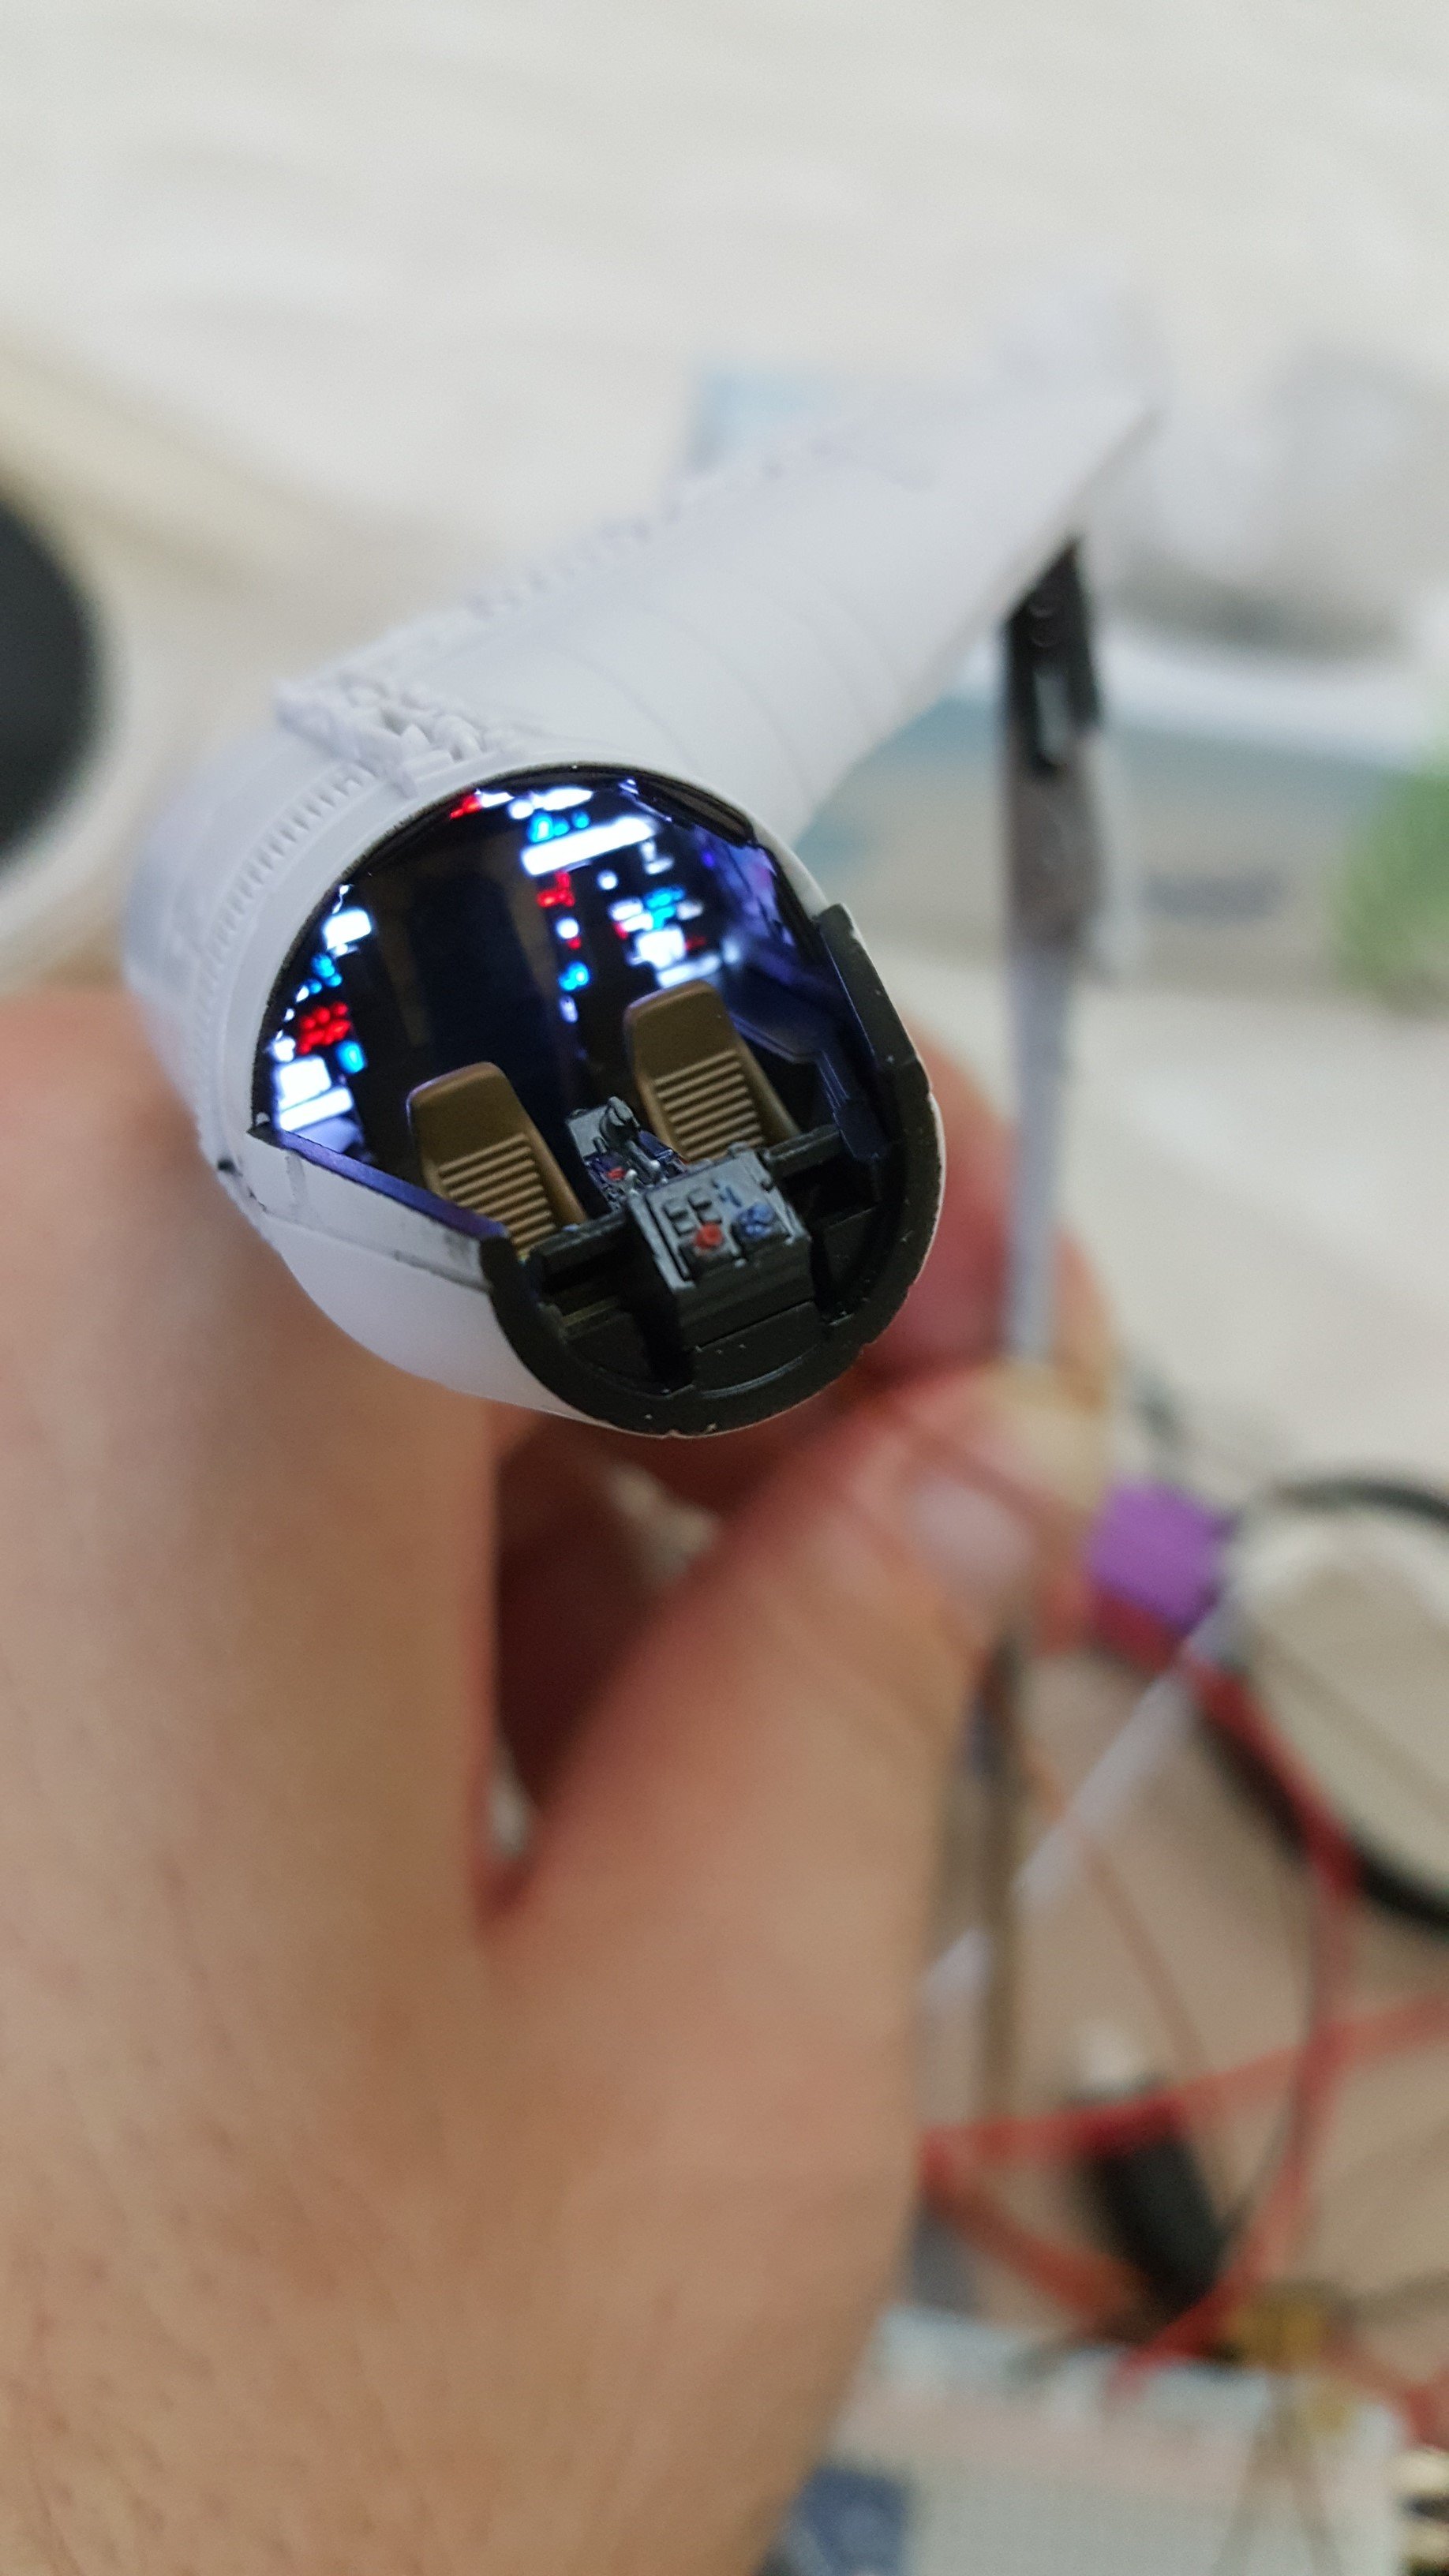
He's actually using Hachette parts to motorize the cockpit and wings. The benefit of being in Japan and buying extras of whatever you want...
-
A beautiful diorama. Actually I would like to see more photos and a build log!
-
I was thinking about that the other day. Of course I agree with you, old school is the best school. But maybe it's not a matter of there not being cool designs these days. I think there is just too much: games, movies, anime, fanworks, facebook, twitter, instagram. We are overwhelmed with thousands and thousands of design images, and nothing sticks anymore. Back in the day, we took what we could get, and loved it.
-
derex, That is looking AWESOME!!!!!! I want one now... So tell us what process you've used so far to deal with lighting this kit. - Did you drill out more pinholes? What sizes? - Did you need to put anything for diffusion between the led strip and the interior pinholes? Was there a clear kit part along the entire line of pinholes?
-
Tiedown heaven.

-
Here's a good example, not mine. There are all kinds of flaps there in repair positions: Leading edge (down), outboard flaps (up), inboard flaps (up), and ailerons (down). So if I wanted to have a wheels up configuration at any point in flight, with as many of those displayed open accurately, what could I do? I;m ignoring other real-world flaps that are not in this model.

-
Cool. they never come down during an ascent? I guess in a valk, the feet thrusters substitute the tail wings. In many dioramas, they have the flaps up and down, which doesn't look right... maybe that's repair position?
-
I'm thinking gears up, but accurate open positions for the flaps.
-
Ah, it's the splinter camouflage that got you! Nice site. Question for you aeronautics guys, if I were to make a vf-1 with open wing flaps, what would be the correct position for ascending (and look cool at the same time)?
-
Awesome! Love seeing new stuff like this. Hope you will share results as you progress with the 1/20.
-
Check out this guy's mods to the 1/20.
- 1065 replies
-
- 4
-

-
- max factory
- dyrl
- (and 1 more)
-
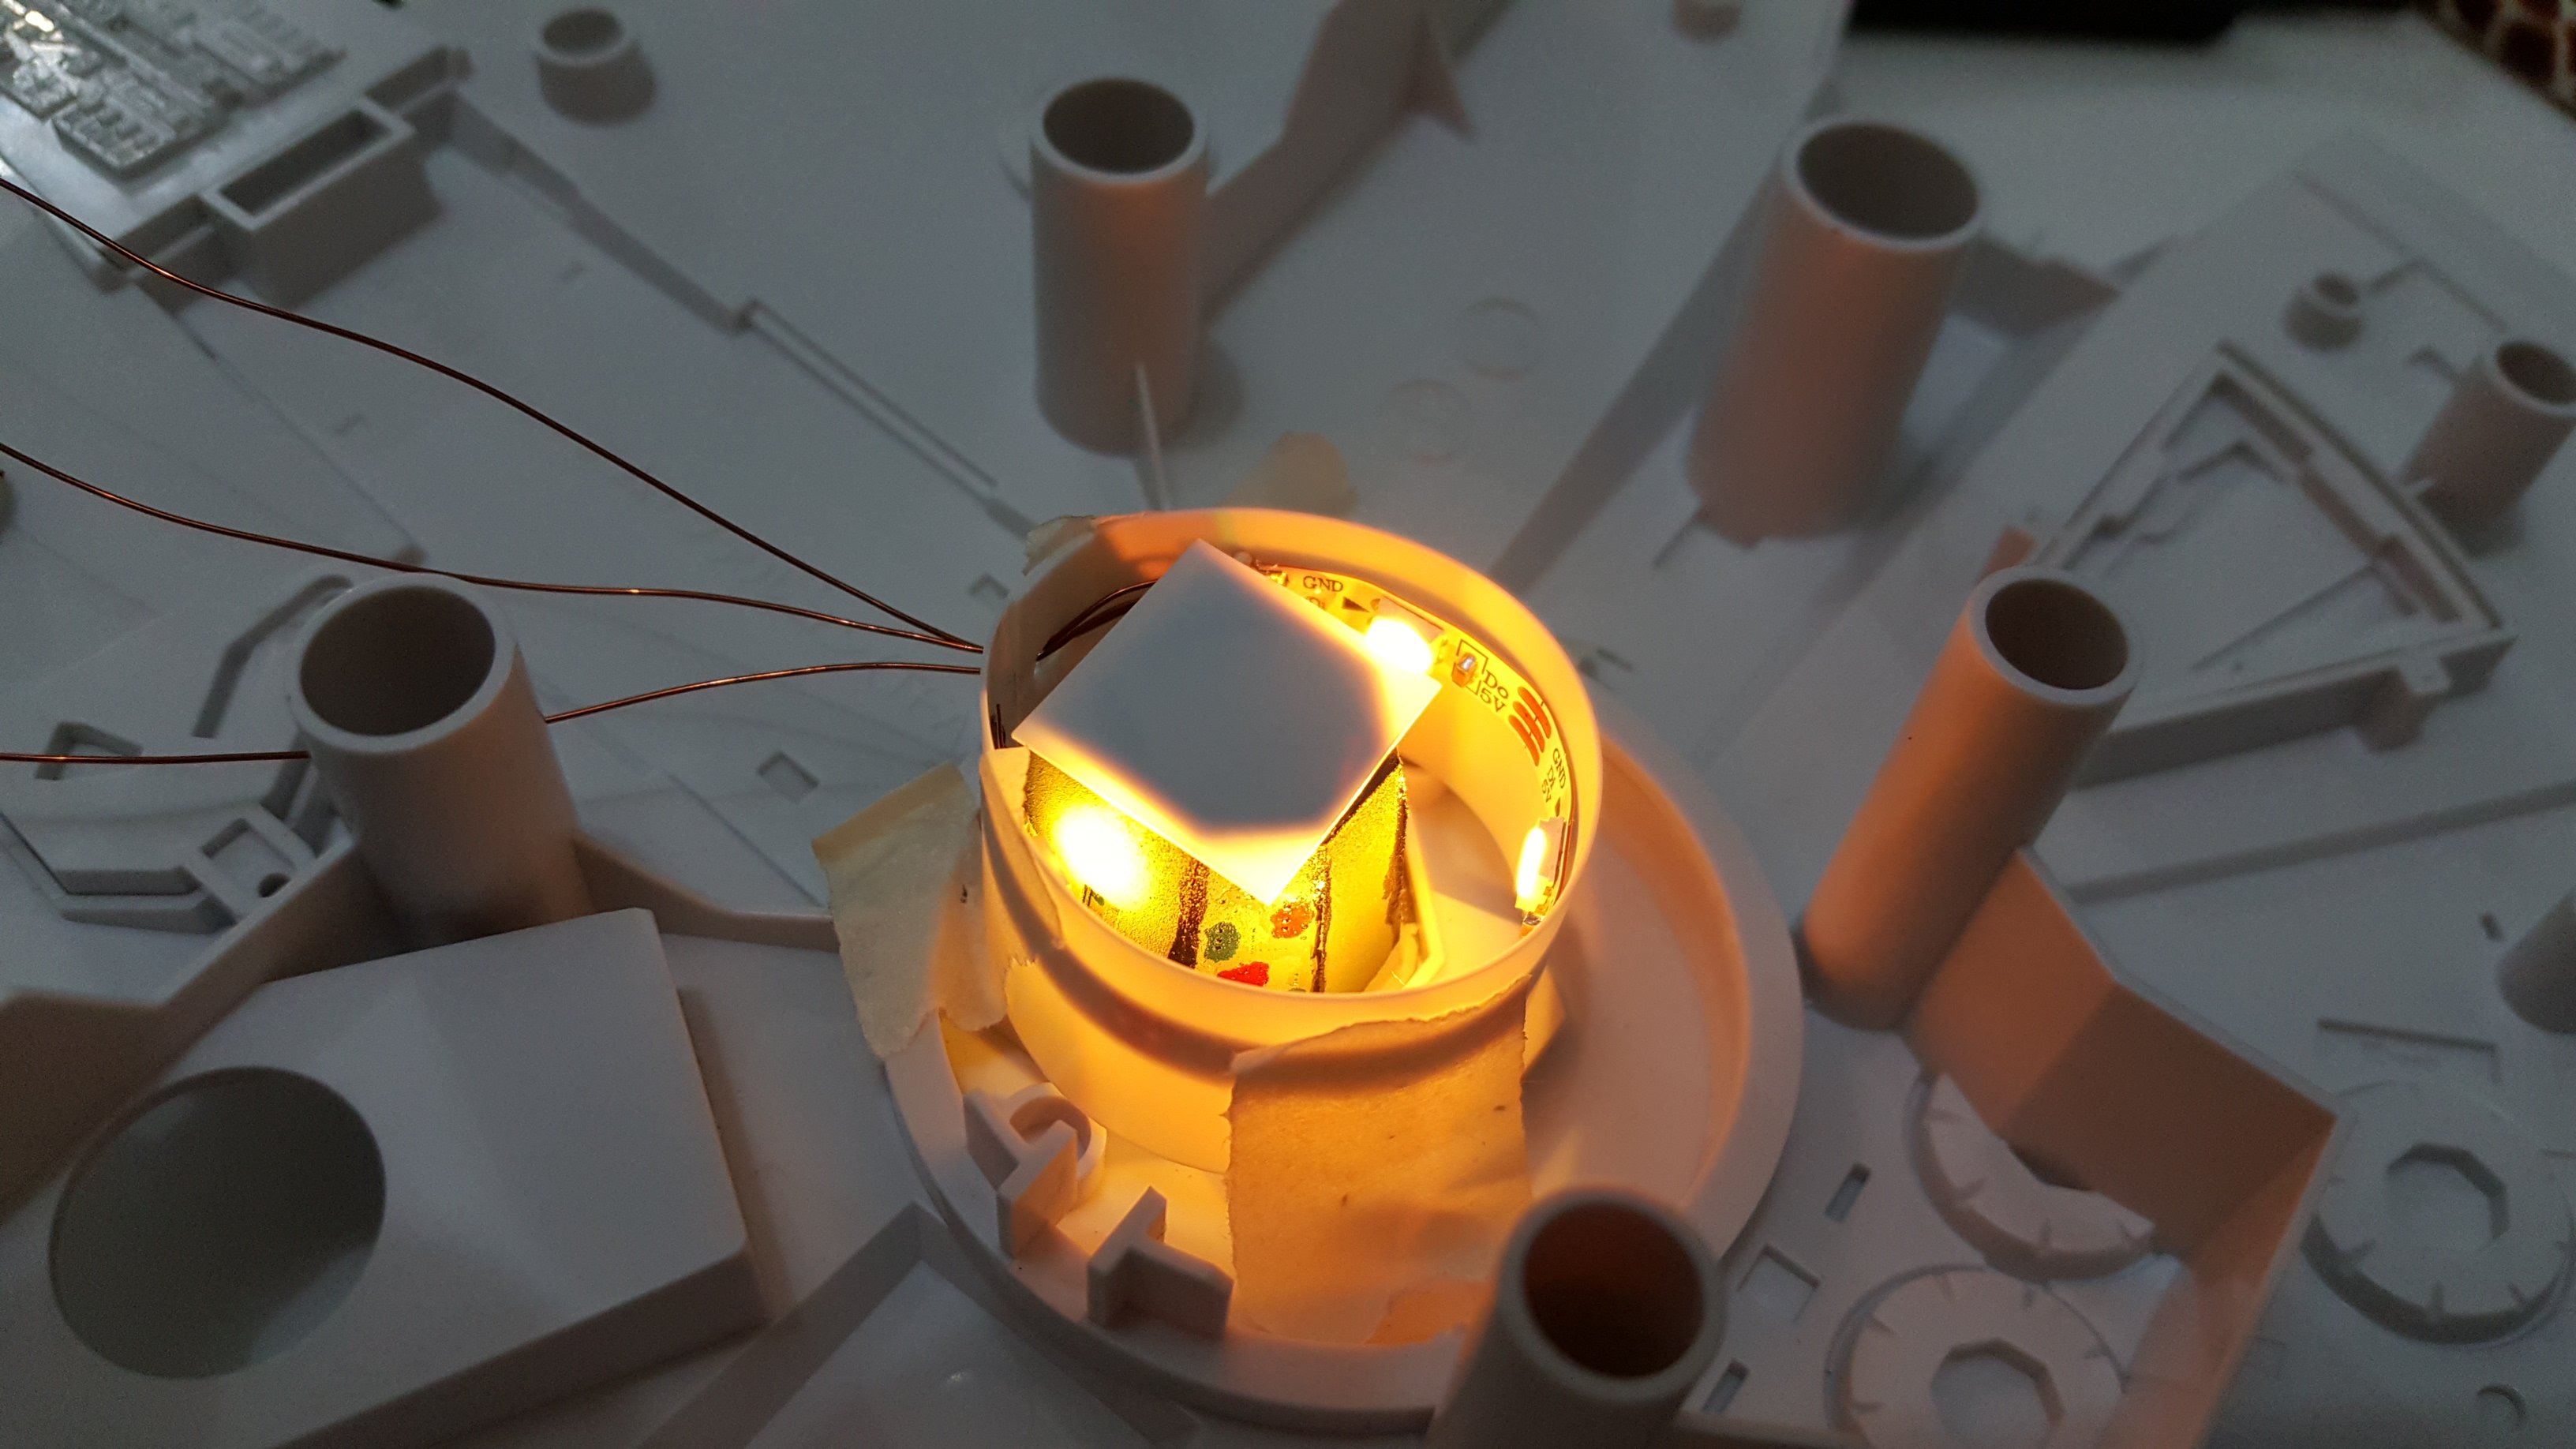
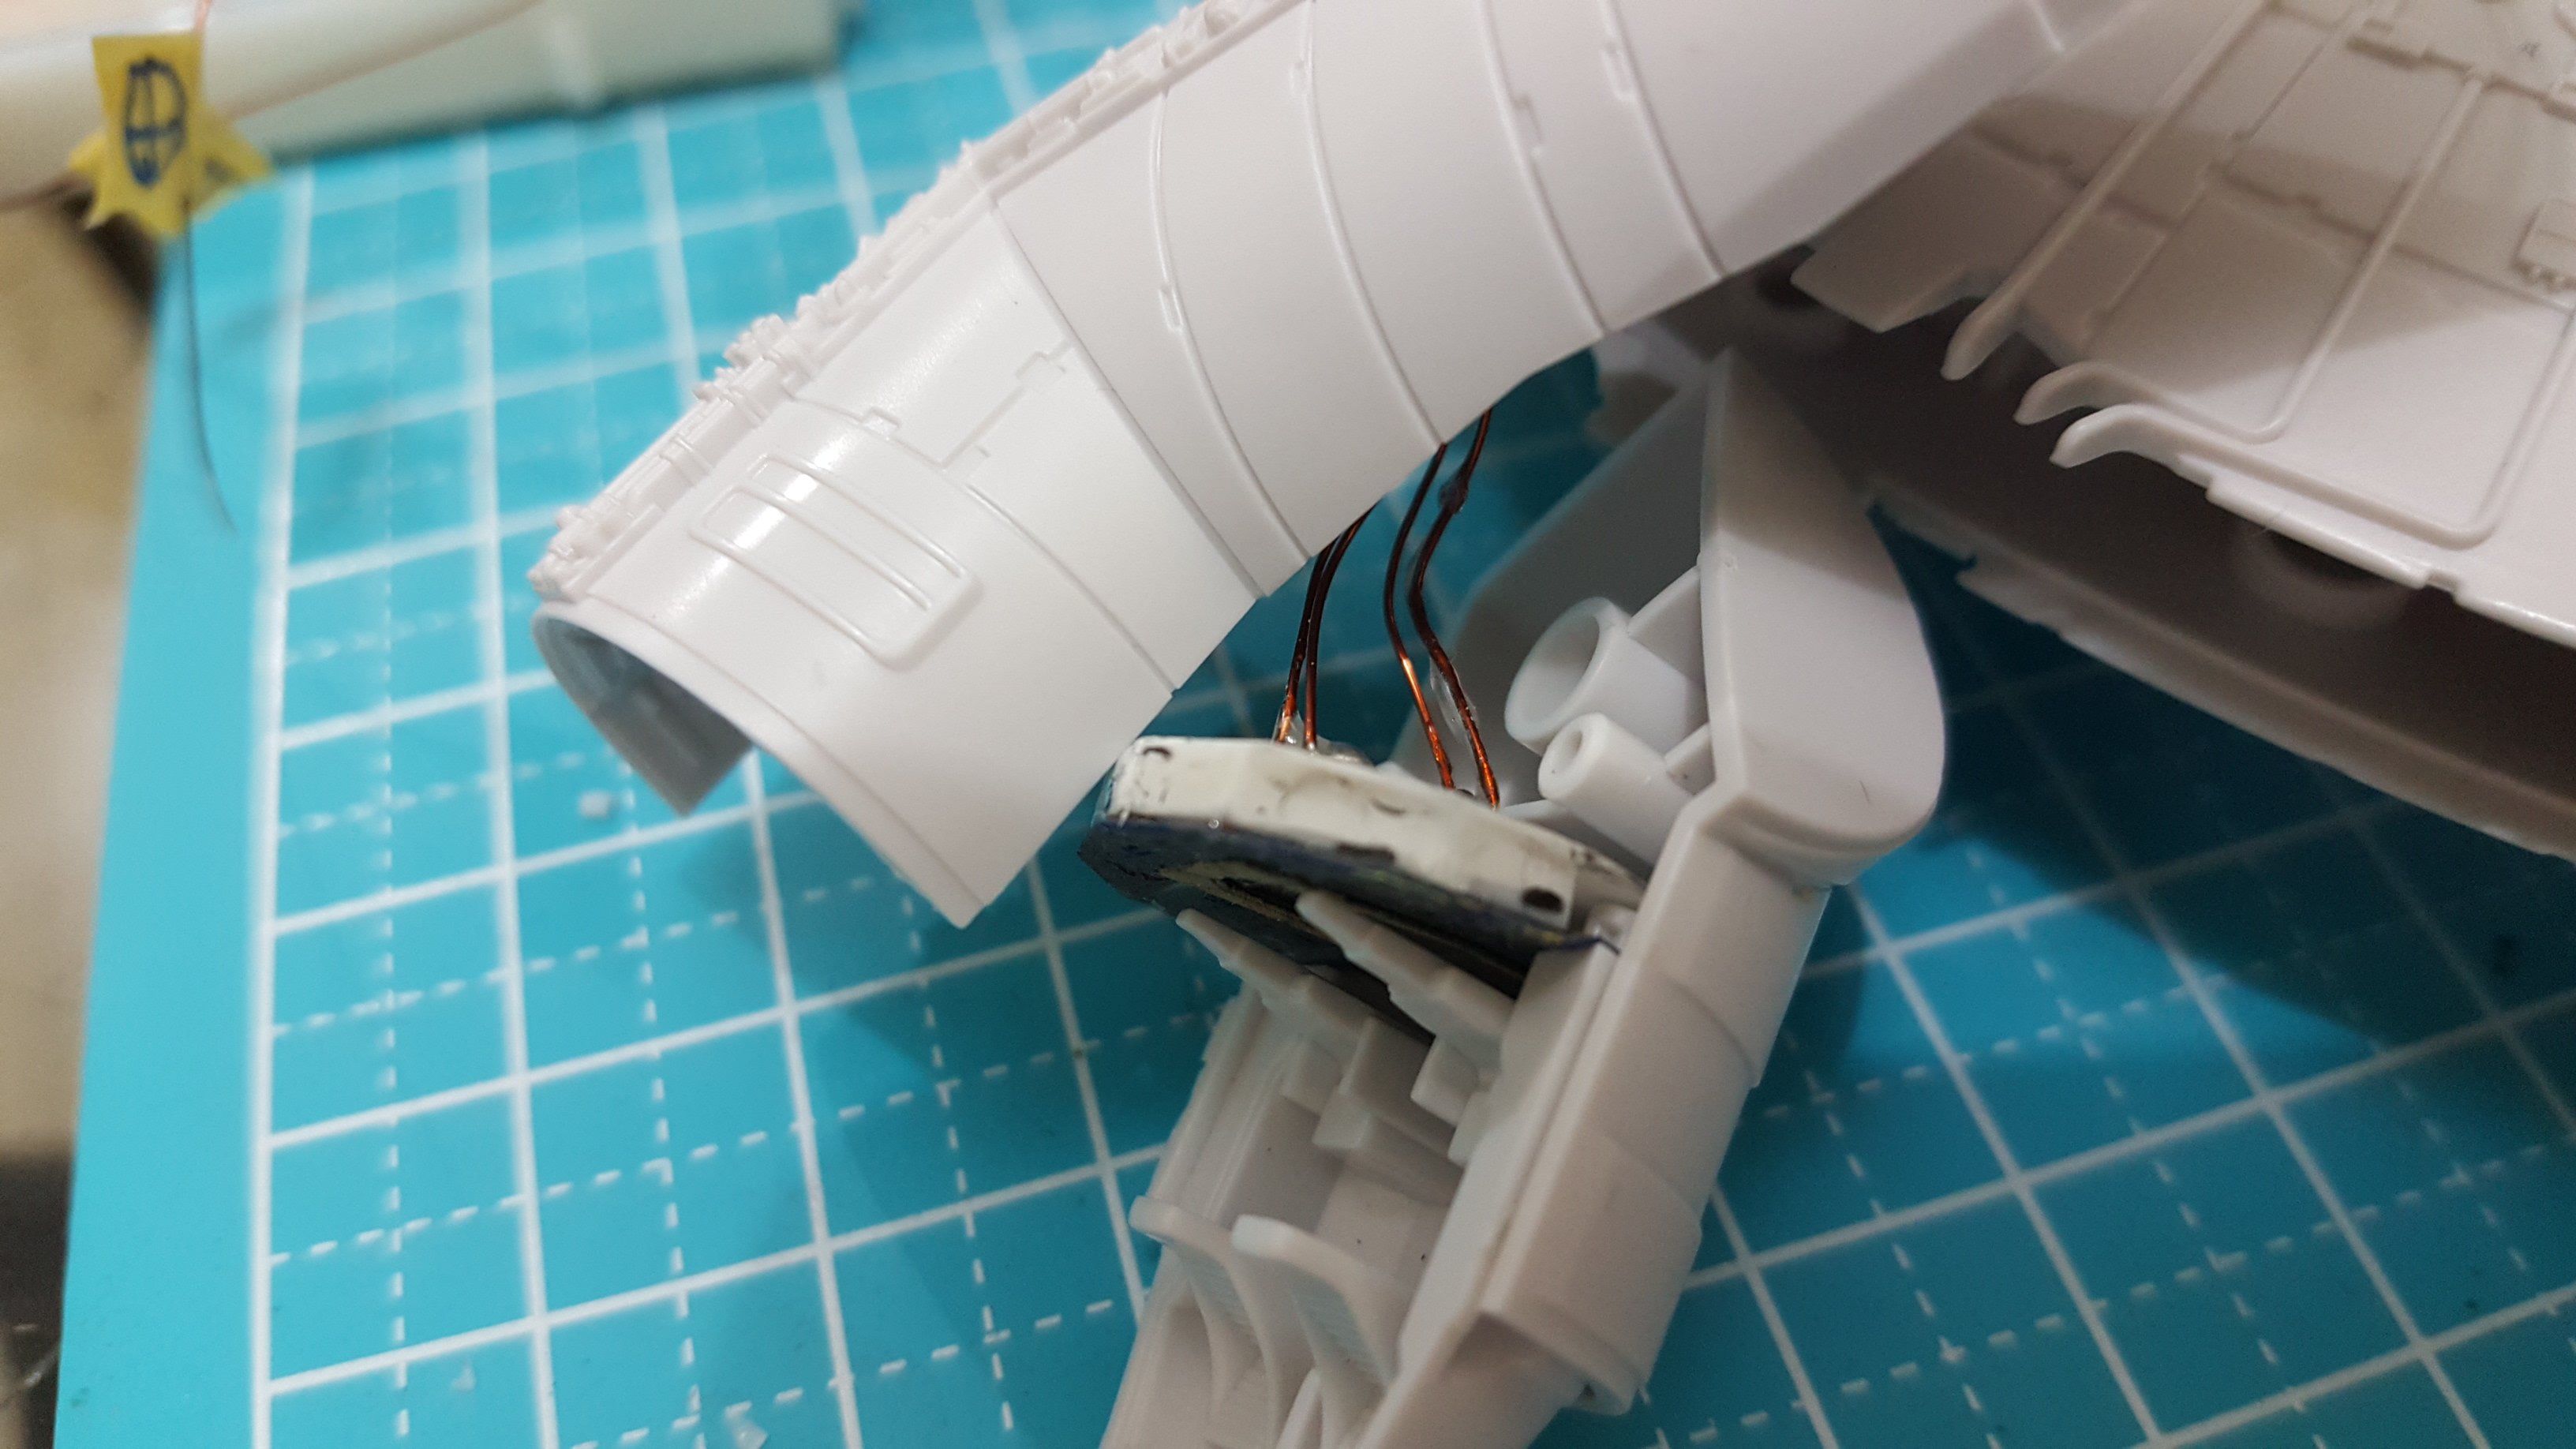
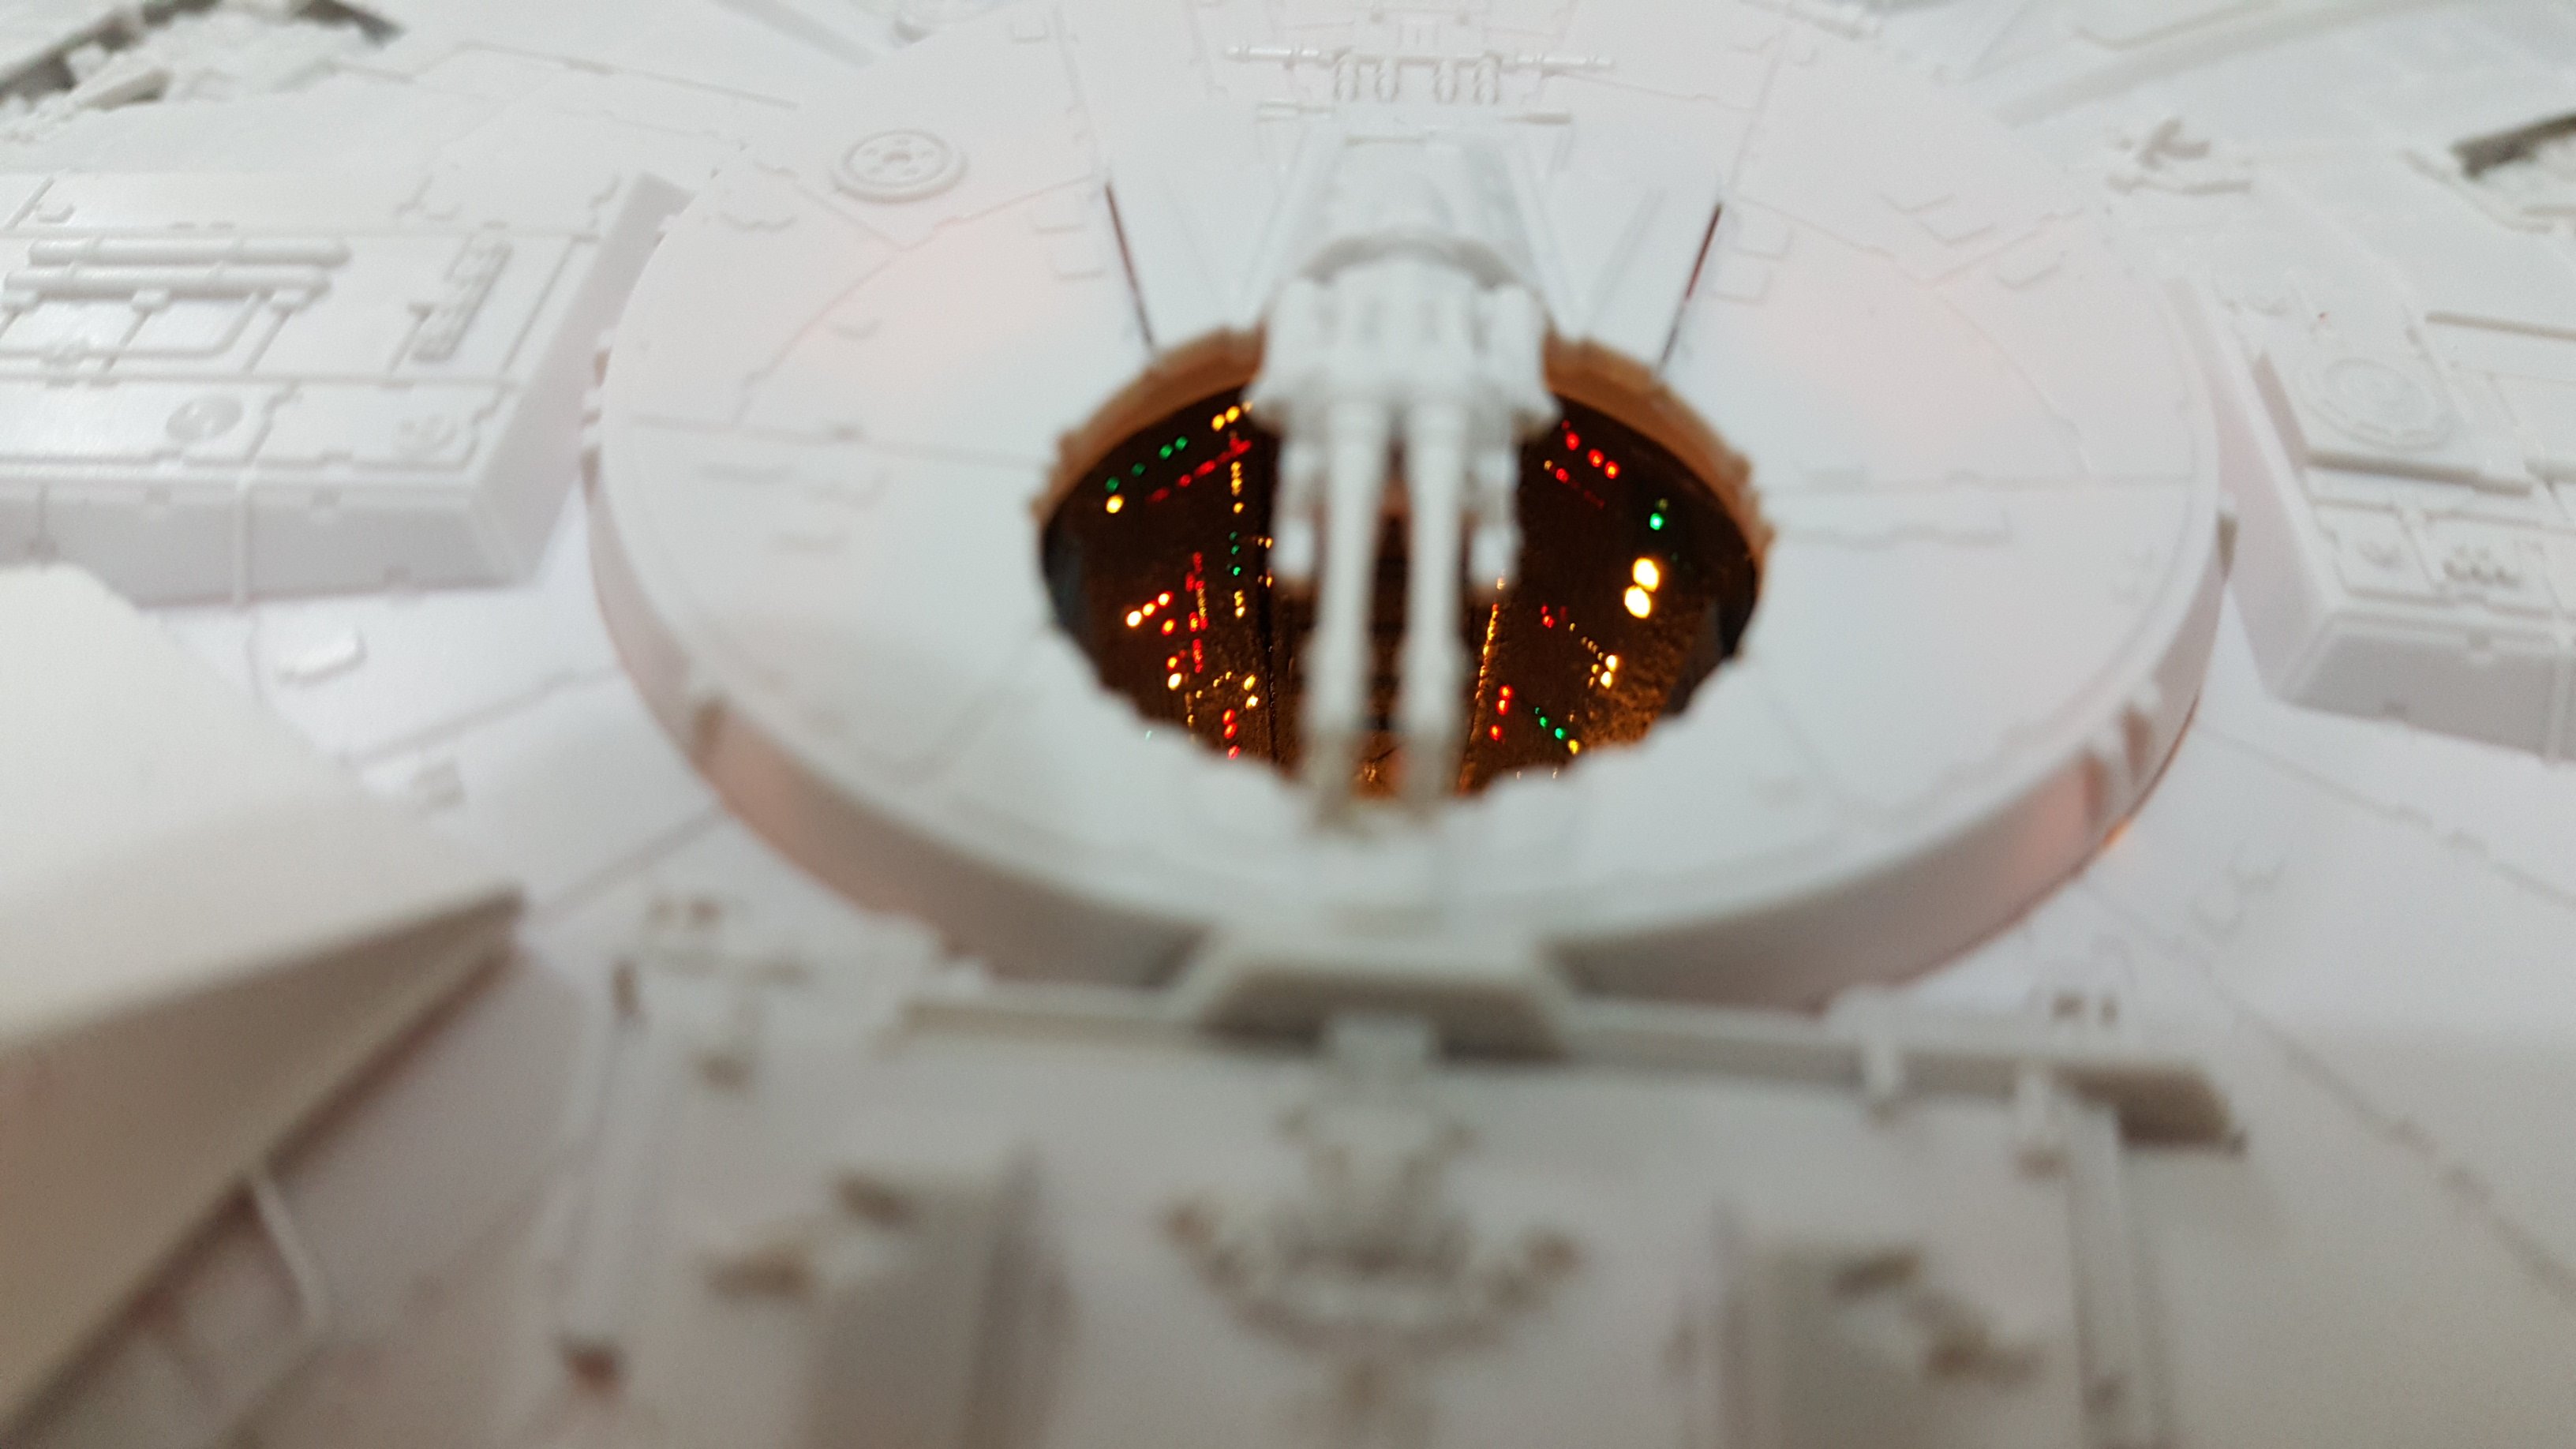
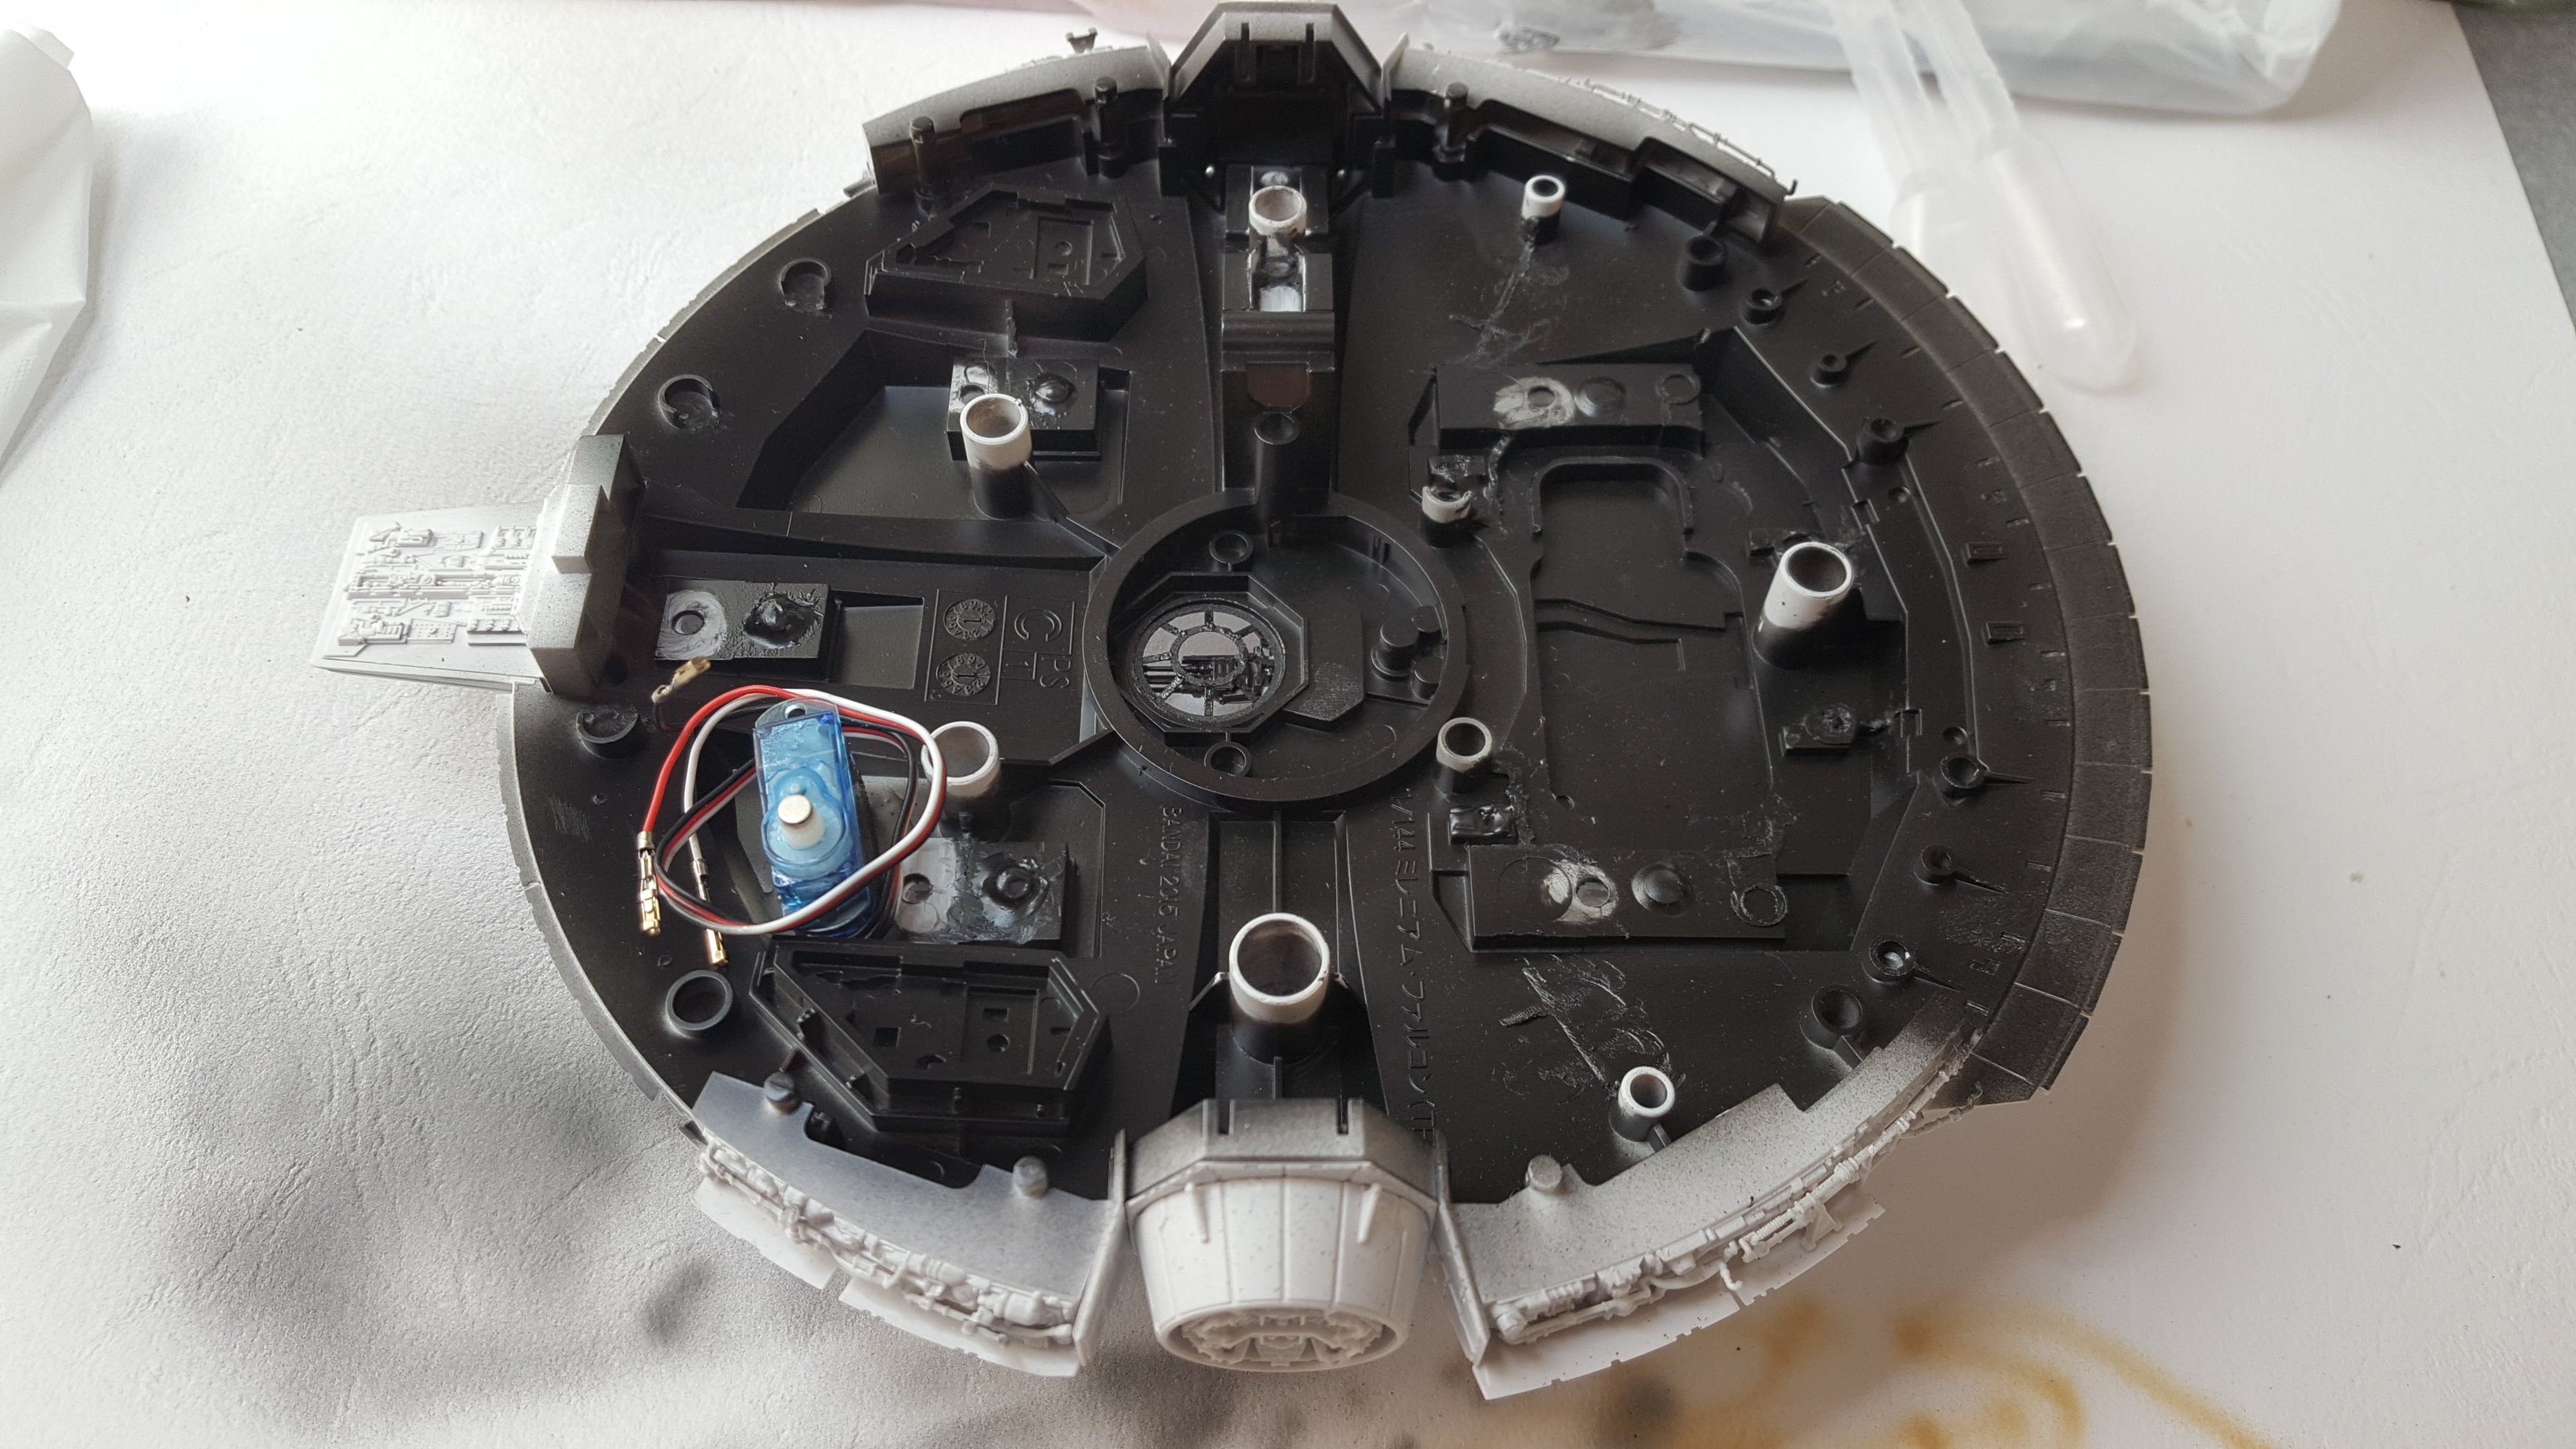
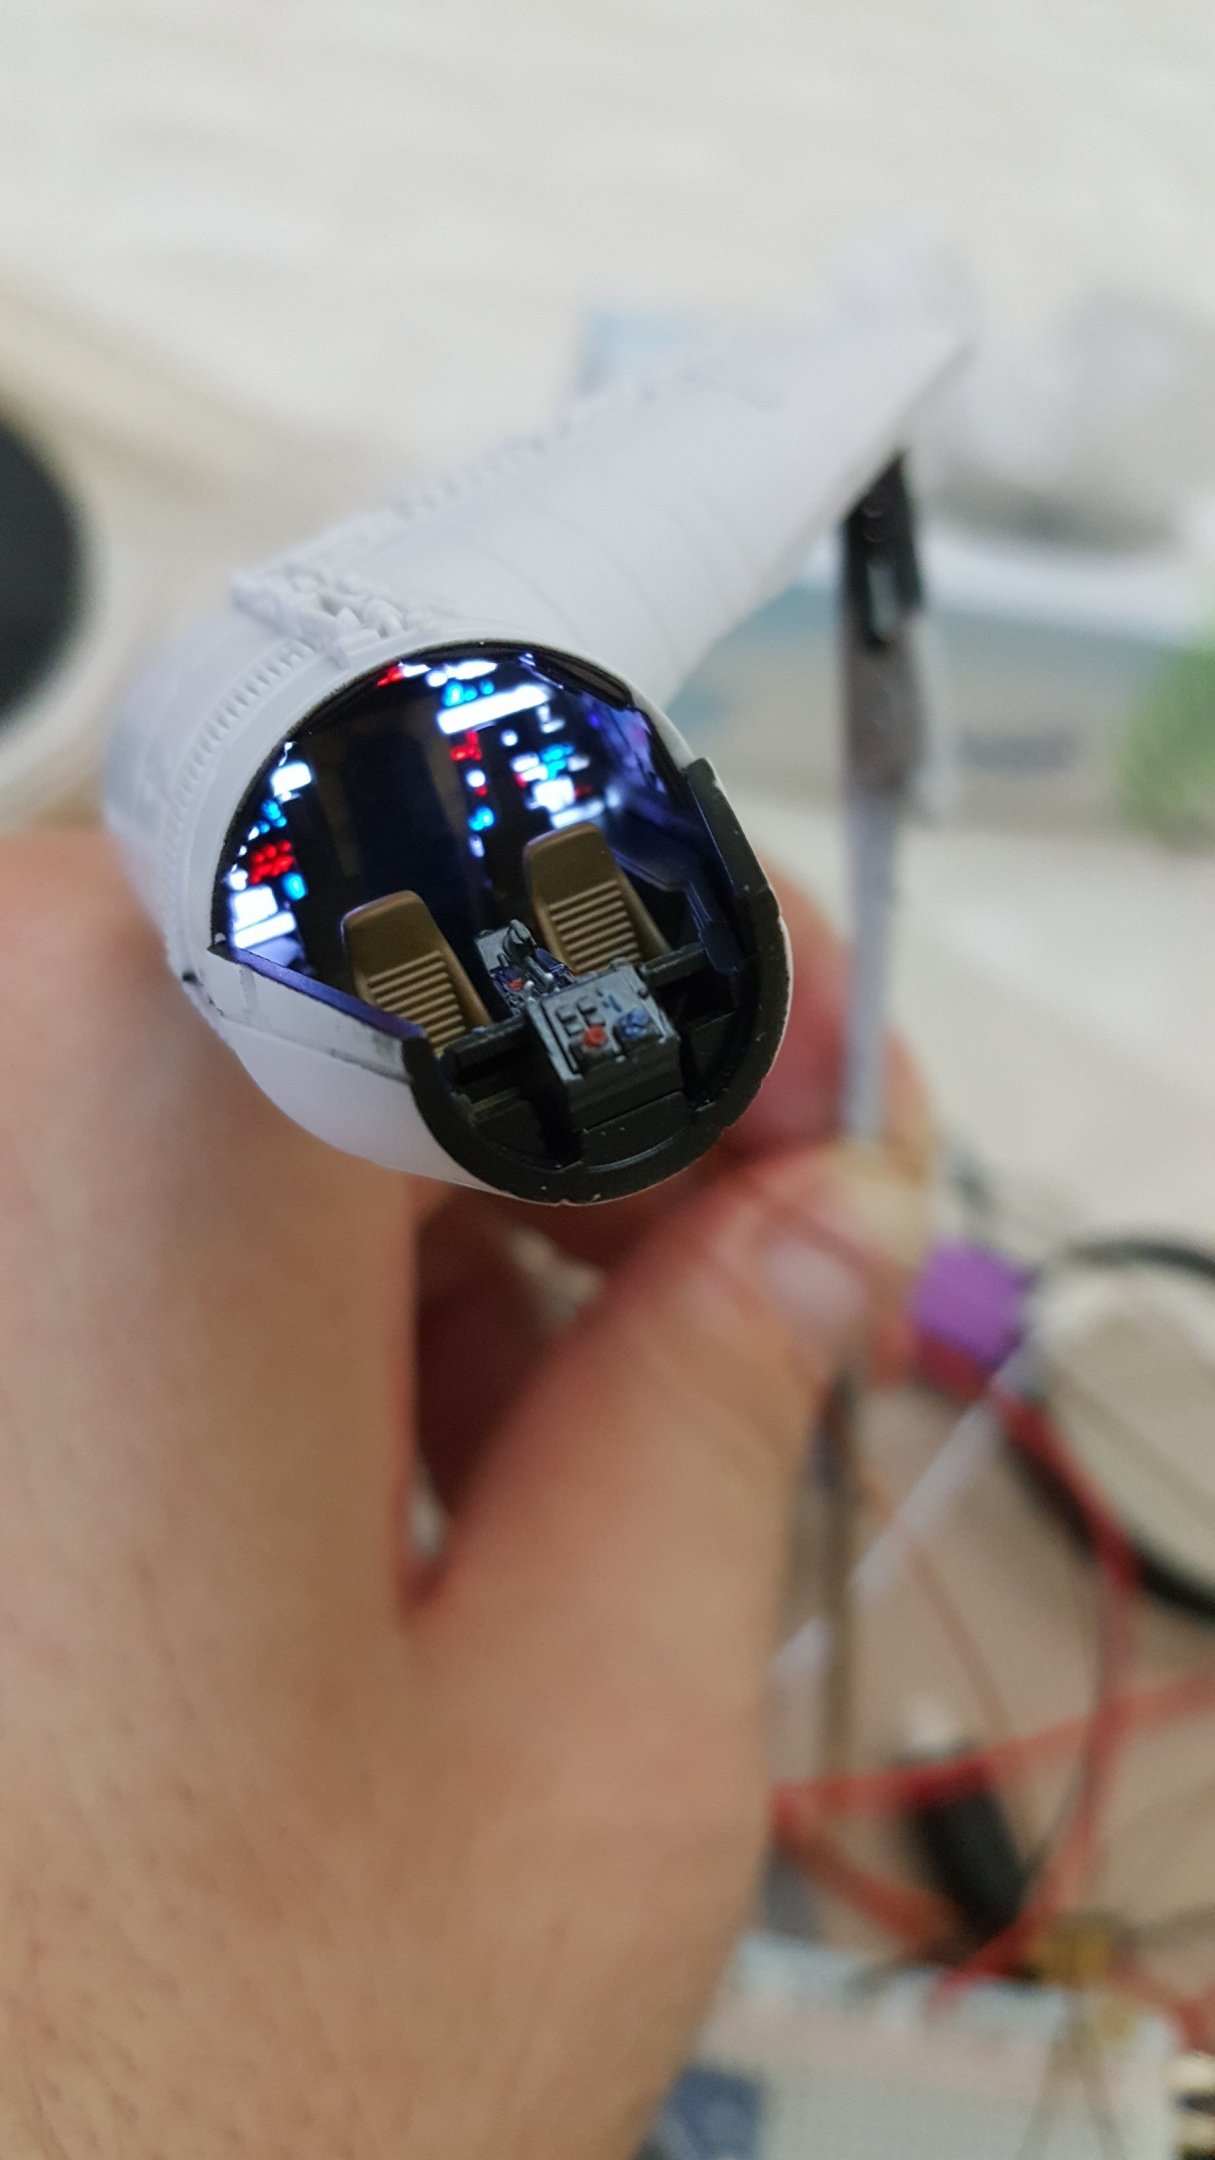
Derex, Some other points to add to the good advice from WM Cheng and NZEOD. I haven't worked on this model, but I don't putty the exterior as you mentioned. For light blocking edges, you can often use black construction paper. I don't use aluminum foil because it conducts electricity. Painting the insides black will also help a great deal. I also paint the backs and sides of the LEDs, and I paint the fiber optic strands as well (except the tips), usually with polyurethane black primer. Basically black paint everything on the inside, and keep blocking until you get the result. A light box is different, in which case you black the outside, and keep the inside white to reflect around the space. This can spread 1x light source to multiple pinholes, such as the cockpit and gunner-room images below. If you intend 1x led to light multiple holes and hide the hot spots, then you definitely need to diffuse the light as you said. Try white paper, tracing paper, and stuff like that. You can also sand down clear parts to diffuse light. I add my own piece of clear stryrene sanded down between the light source if there is no clear part. A blob of Epoxy can also diffuse light for you. As you said, painting the leds will also have an effect, but you need to test different shades and see what you like. You can always wipe it off with alcohol if it is not right. But I always wait till everything is dry before testing the light. And if the lights are too powerful, you might want to bring them way down to a minimum to get desired result. I use 3-5v strips. Here are some examples of light boxes and light blocking form my Falcon.
-
I didnt have any idea about models, but when I saw Starblazers around 1980, I would draw the Yamato over and over again with huge space battles. It was just from memory, I had no other material. I remember my 4th grade teacher asking me, "What are you drawing," and I said, "It's the Armada." I wonder what she thought of the little warrior.
-
Are those stickers or water slide decals? You cant use softner on stickers. If they are very tough water slide decals, you add more softner and press down firmly with a q-tip till they form in place. And keep repeating till it works. But weak water slide decals will risk breaking up. So you test on blank part of the decal to see how much softner it can take. If it is a sticker, I have no idea, but you may google it.
-
The award for cutest modeler goes to....
-
That sucks! Buying a new kit on clearance is probably your best best. I have seen people recast canopies in crystal clear (search for a Fan Racer Yamato recast in the Workshop forum). I have also seen vacu formed canopies. They use Tamiya putty to re-mold the canopy interior. But those methods require a lot of experience, and even then you get a lot of failed attempts.
-
Nice matte finish Crossair.
-
Painting the markings is a great challenge to take on. Don't give up, it won't be perfect, but it will be something to be proud of. I look forward to seeing more progress. If you're gonna paint a valk, Hasegawa is the way to go. Painting the transforming Bandai is pretty much useless, as it will likely never transform again.
-
Nice weathering to beat up the old guy. The scratches and gunk are nicely in scale too. I don't have the patience for that level of detailing. And some of those photos are very well done with the angles and lighting. Do you plan a matt coat or semi-gloss at the end? Or is that how you want it? Nice work. Keep em coming.
-
wm cheng, yeah that Mr softner is powerful stuff. I usually wipe it right off, let it work, then add more and wipe right off again if it needs more, or it will disintegrate Hasegawa decals. And I would say 90% of my time is fixing and repairing
-
Gloss coat is looking clean. What is your method of applying the coat. Please give some details. I always struggle with this step and can't safely apply oils afterwards. Seems no matter how much I spray, the gloss is not thick enough.