-
Posts
2607 -
Joined
-
Last visited
Content Type
Profiles
Forums
Events
Gallery
Everything posted by Xigfrid
-
Now that the pre-order for Arcadia's VF-1J has gone live, Kurosawa please update us for this exciting project!
-
That would give me more time to save for 2015 releases ! Bandai's pre-order madness had fed me up on that one.
-
You are welcome!
-
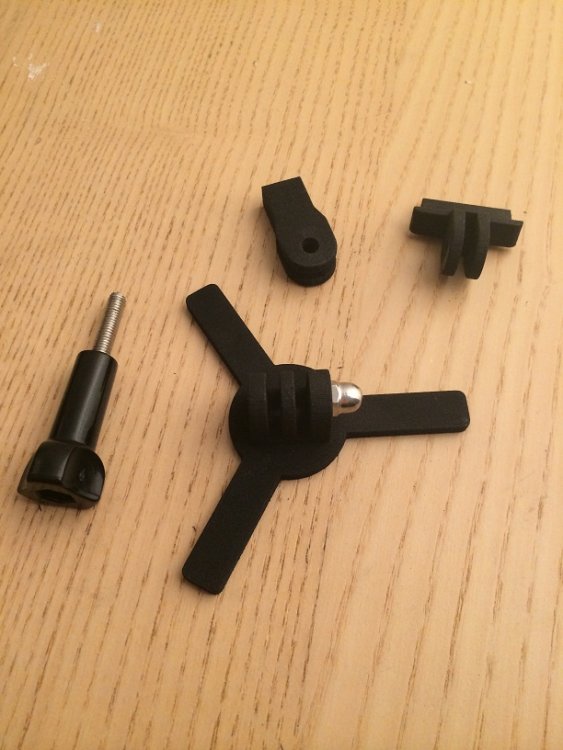
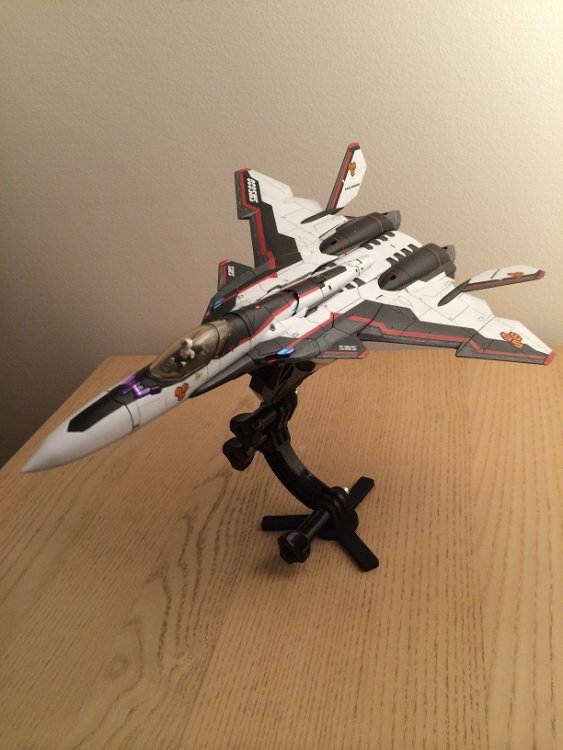
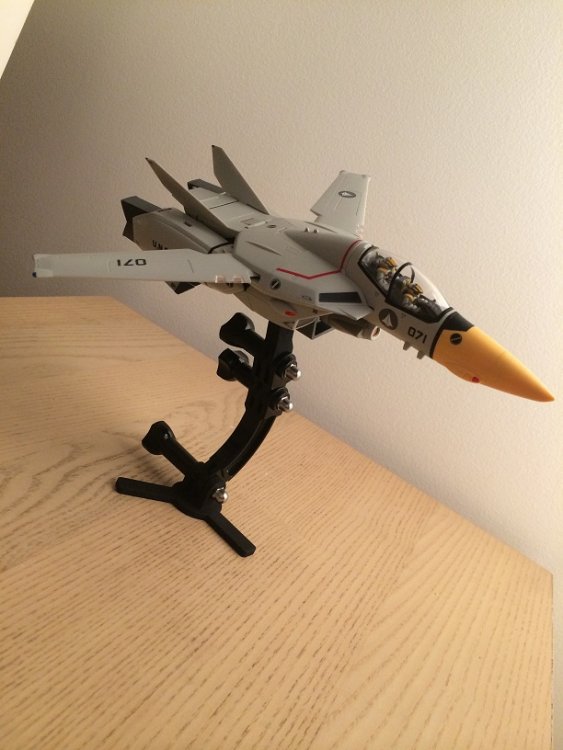
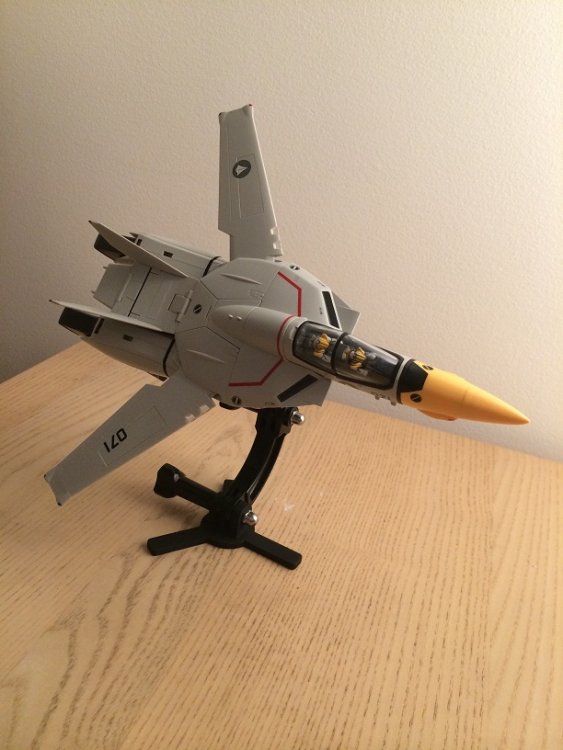
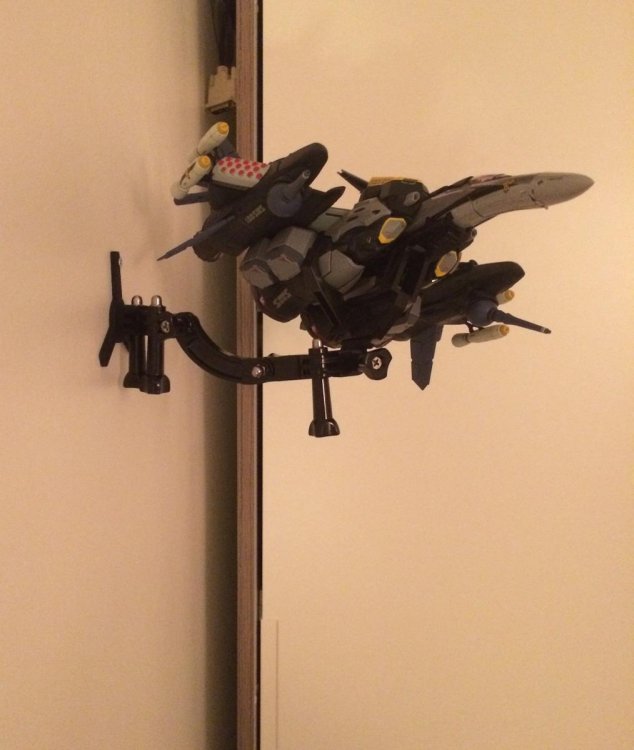
Another display alternative: the GoPro compatible stand (Shapeways)
Xigfrid replied to Xigfrid's topic in The Workshop!
The VF-1 are very stable on the small base. The YF-30 is something much less stable, mostly because the weight is not well distributed on the plane length. I later will try the 25s with its armor parts and 25F with tornados, but not much faith on that last one. 3D printing a larger base would cost much more than a GoPro compatible one on Amazon or EBay I guess! -
Hi there, This is the topic for my GoPro compatible stand available to print on Shapeways here: http://www.shapeways.com/shops/xigfrid3dshop?section=GoPro+and+Macross+stands&s=0 Why the GoPro, would you ask ? The idea behind this stand is to use all the accessories available for the GoPro camera. Because the GoPro is so popular that all the stand accessories are cheap and widely available on Ebay, Amazon. All we need was the adapter to our toys. I made 2 for Bandai's and 2 for Yamato's / Arcadia's. Each adapter has a specific rotation axis, so that you can tilt or swivel your toy. Don't forget that the GoPro stands also feature different angle and rotation options! If you don't have a stand base, grab the one I made. The GoPro cameras can be attached to almost anything, just browse the internet to convince yourself! In case of you want a small and pretty standard feet for your stand, you can grab one of the ones I made. Here is an example: I ordered from Shapeways: 1) stand base (Axis B) 2) adapter for Bandai (Axis B) 3) adapter for Yamato (Axis B) from Amazon: 4) a set of GoPro thumbscrew Later from Amazon 5) a set of extension arm for GoPro (http://www.amazon.com/Goliton%C2%AE-degree-rotary-extension-camera/dp/B00H7QM5LC/ref=sr_1_33?s=electronics&ie=UTF8&qid=1418949255&sr=1-33&keywords=gopro+extension+arm) Bandai Yamato Almost anything is possible now! After some experiments, it turns out it can be used as the first known Yamato/Arcadia/Bandai Macross wall mount! And now with a GorillaPod:
-
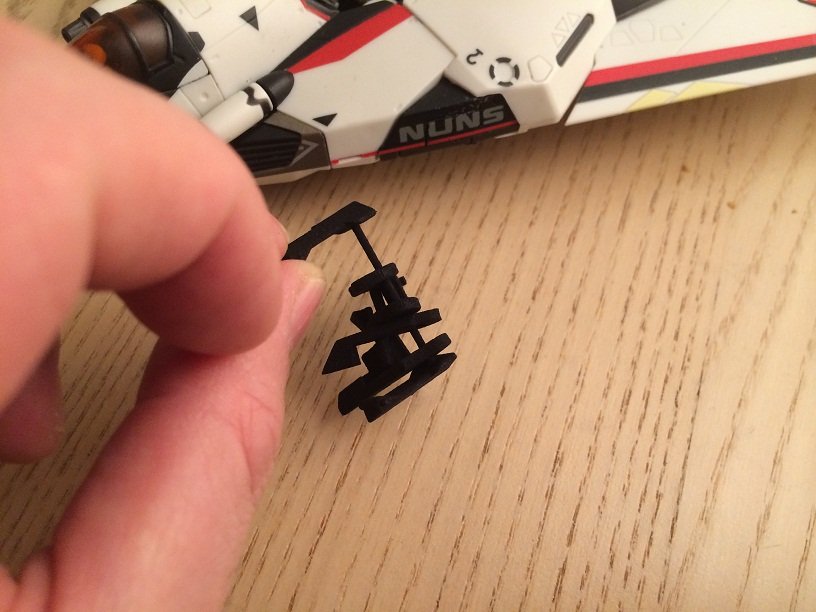
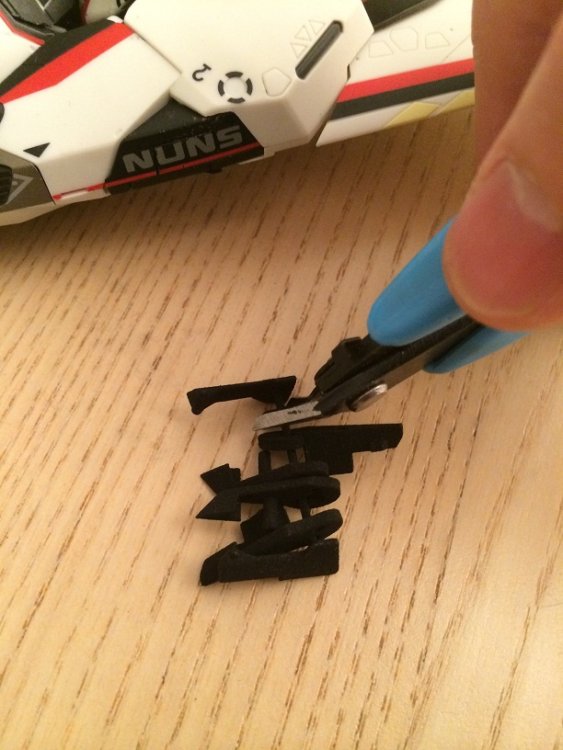
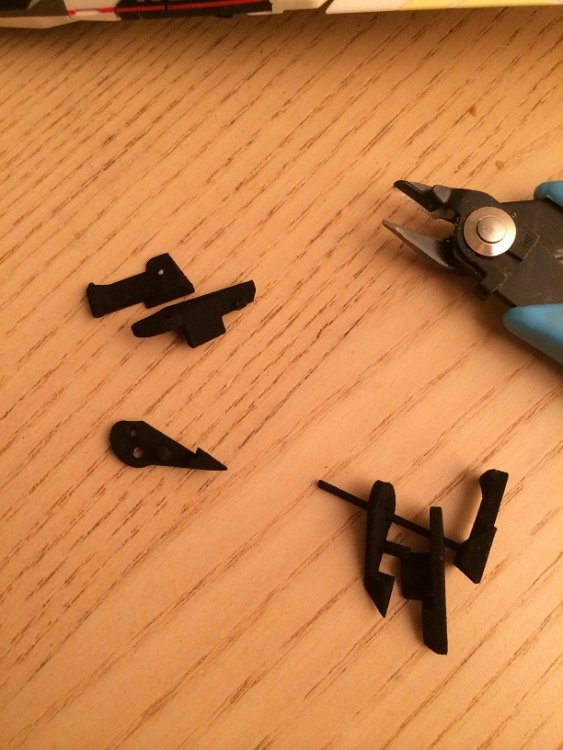
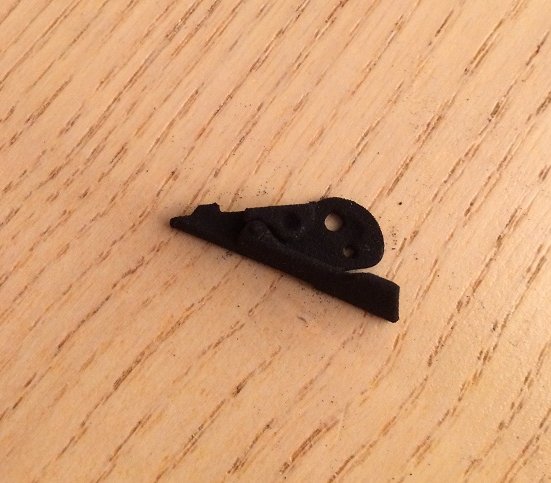
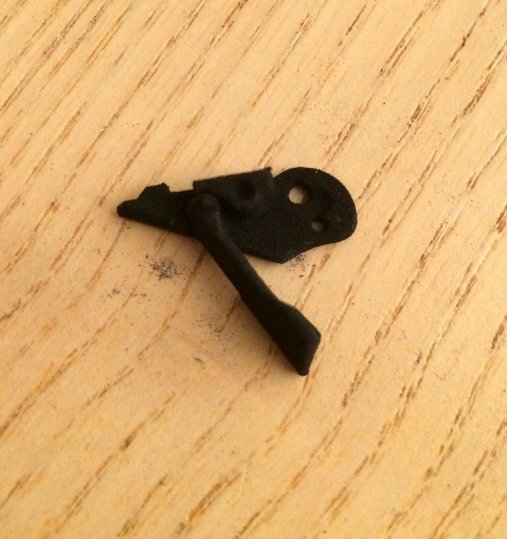
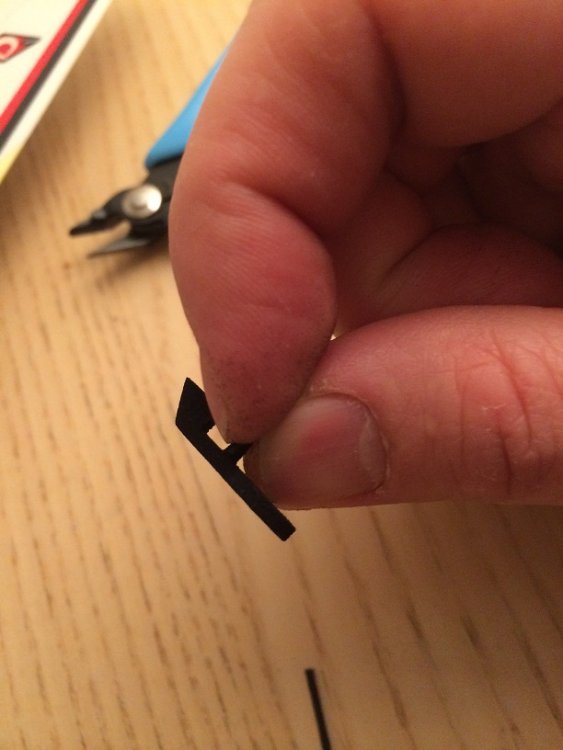
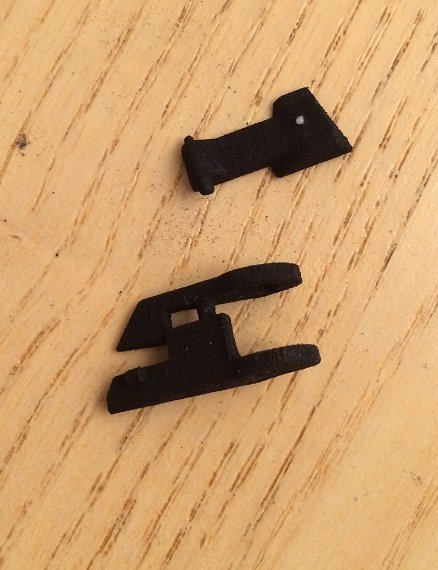
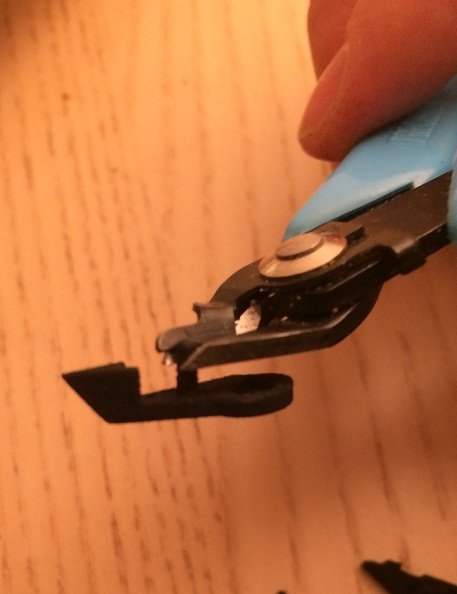
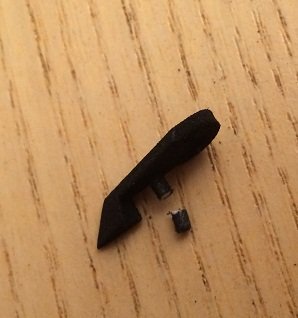
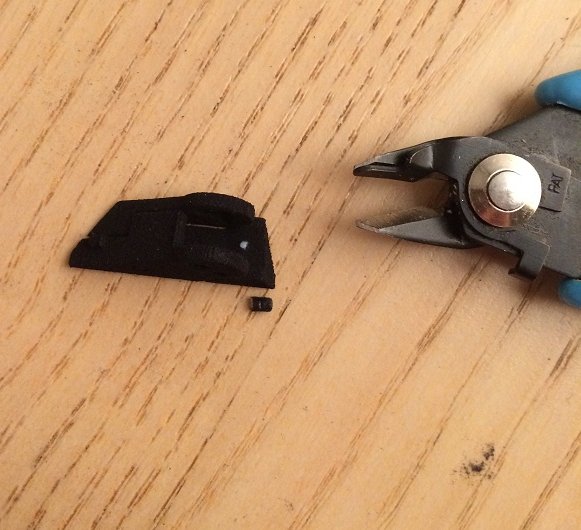
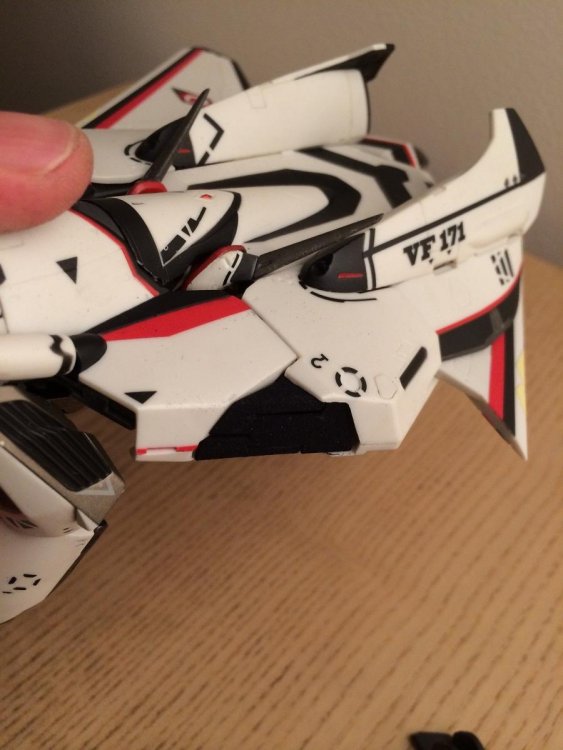
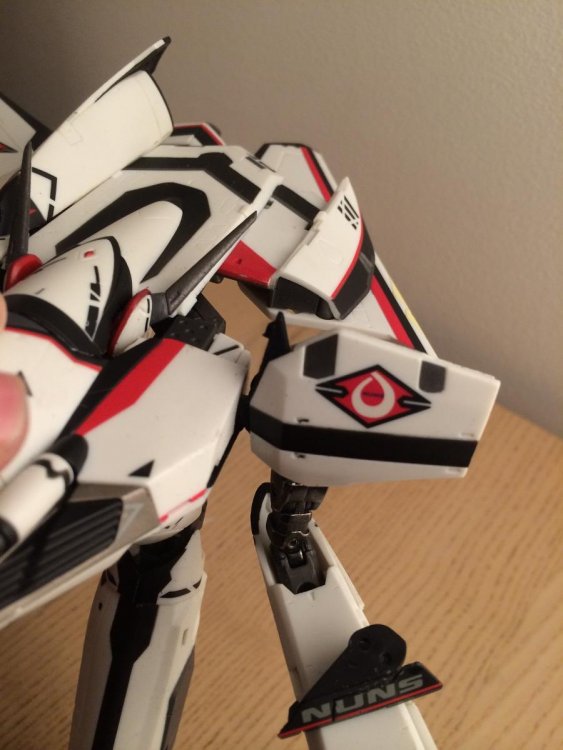
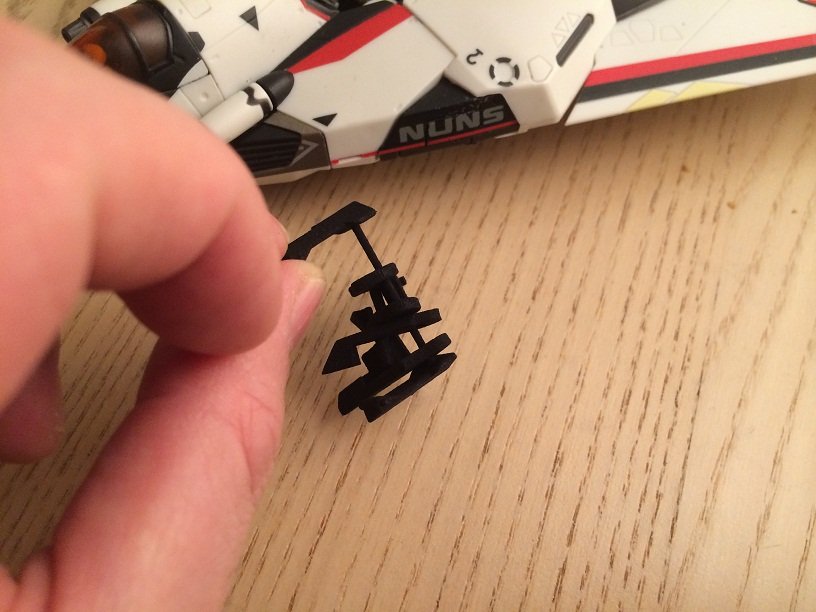
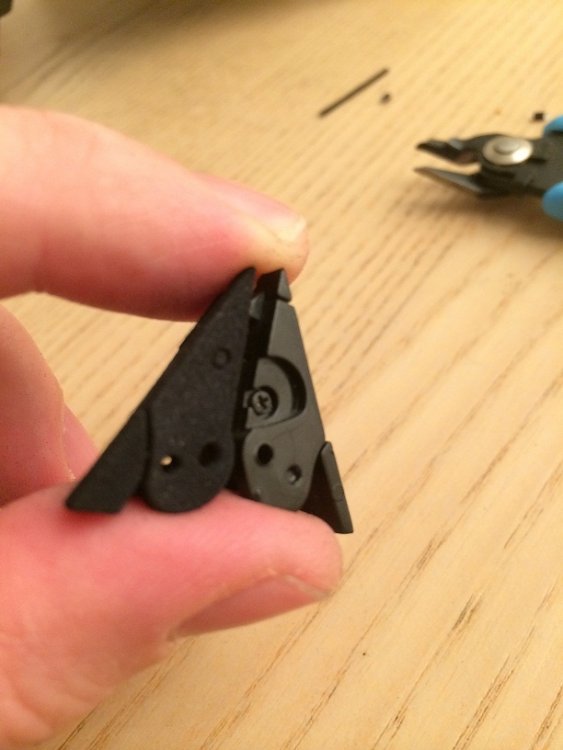
Updated first post with new design and photos Here is how to assemble: step #1 Cut the assembly to free the 6 parts step #2 Test the fit of the lower part and middle part. Rotate the middle part. Do not glue the lower and middle parts ! step #3 Take the upper part. Scratch with your nail the fixing rod to eliminate any remains of printing dust. step #4 Test the fit of the upper and lower parts. In my case, the rod was too long by 2mm, so I cut the rod by this amount, do the same if needed. and Voila Fitting test in fighter mode: Fitting test for Battroid mode:
-
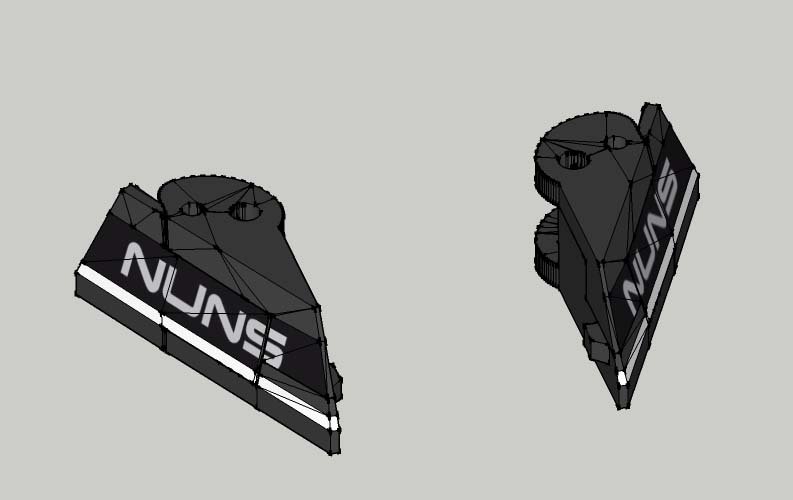
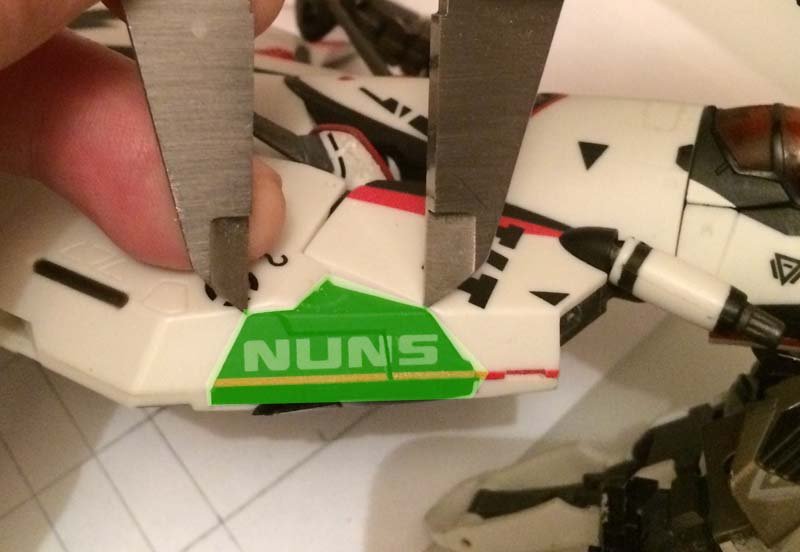
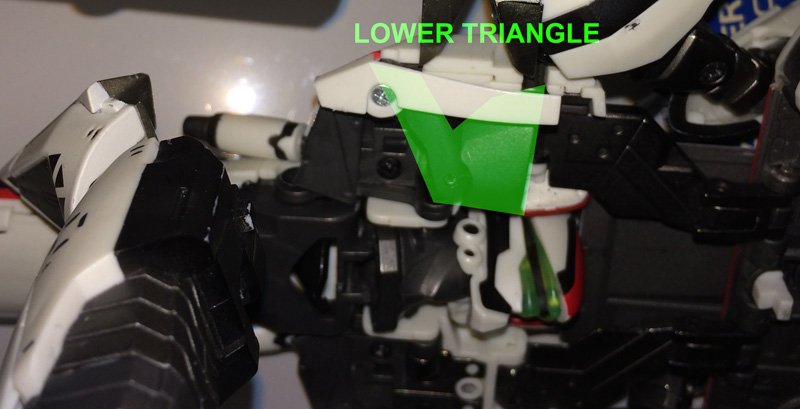
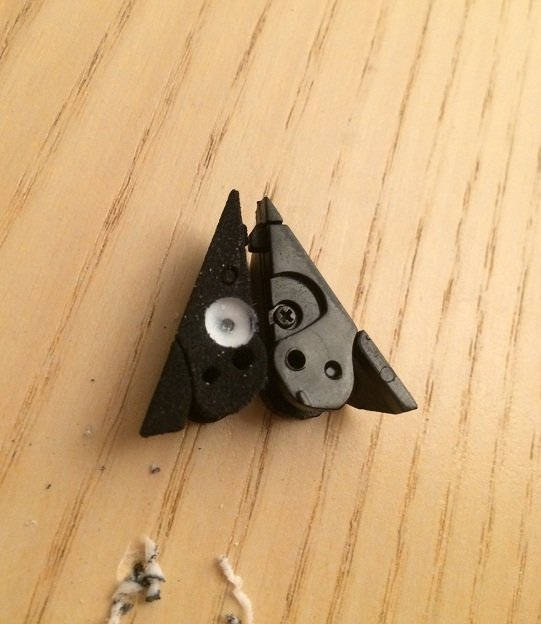
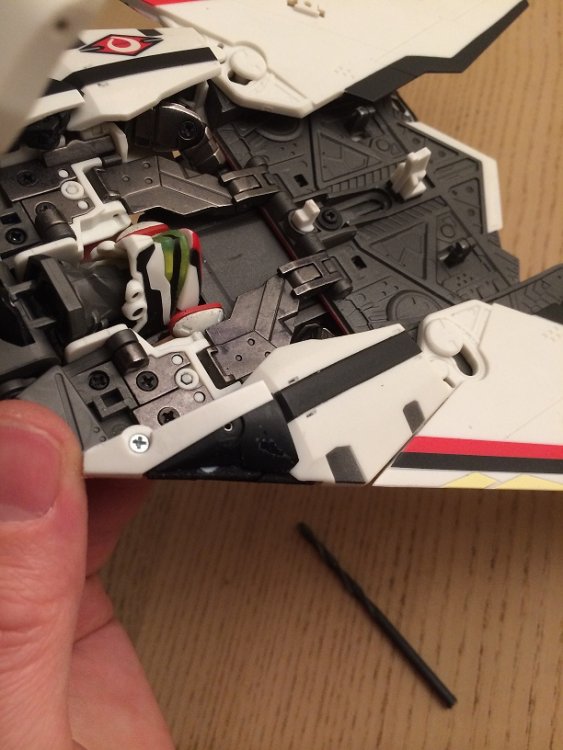
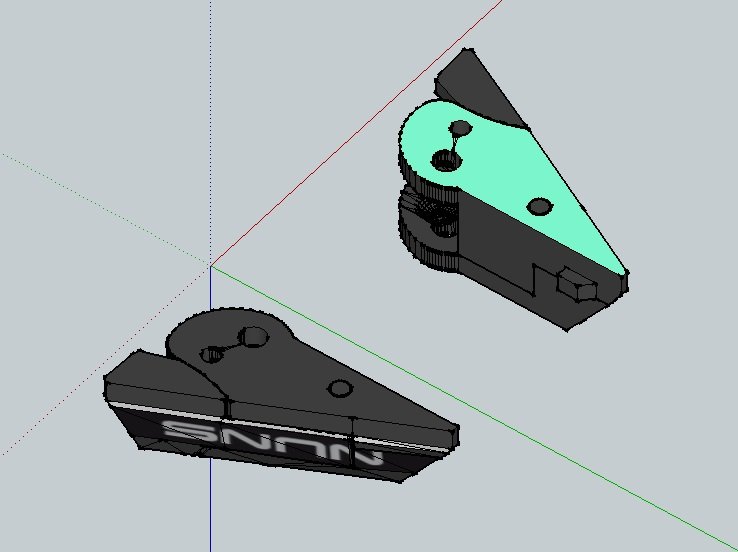
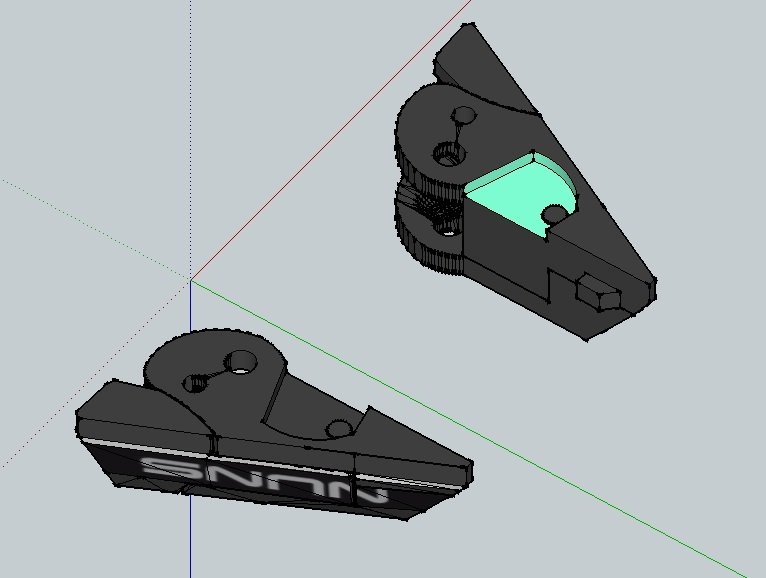
Just received the test triangles from shapeways (among other stuff) ! They fit nicely. The actual version didn't fit the "lower" triangle, so I had to drill the triangle so that the lower triangle could get in. Don't panic, I made a newer version for that so you only have to choose between: TRIANGLE with LOWER TRIANGLE FIT, if your VF-171 has only the upper triangle broken or SIMPLE TRIANGLE, if your vF-171 has both upper and lower triangles broken The main reason I made the SIMPLE TRIANGLE available is because it is a stronger design and it would be sleeker for a VF-171 that has a broken lower triangle.
-
Yeah I lost faith in getting one at MSRP. Hopefully this YF-29 being a standard release and not a web/tamashi exclusive, will be re-released later in 2015...
-
Damn, missed this one!
-
I feel that the white paint will not pop out the details enough, This head deserves the "Max" color scheme from your avatar!
-
Very nice head, I didn't realize how different it could be from Yamato's head and still carry a stronger "A" feel. Congrats for the design !
-
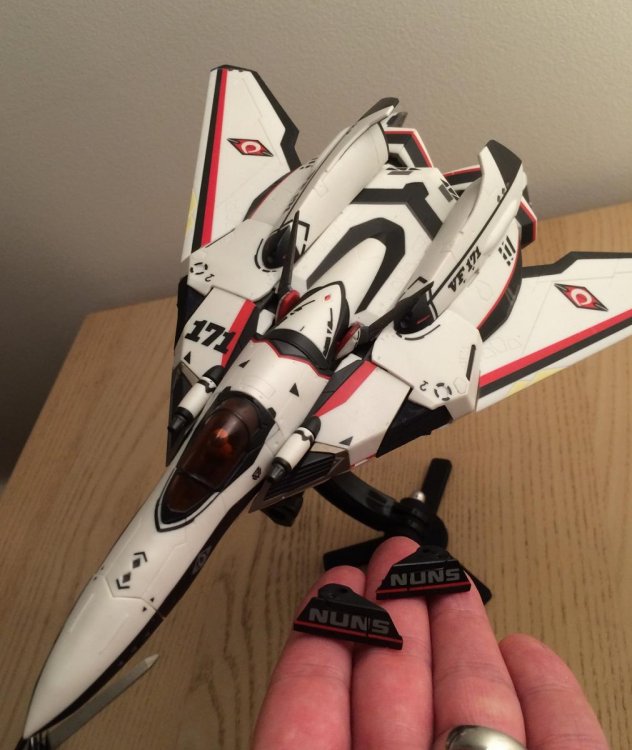
I got three versions available on Shapeways, only the textured version would have the "NUNS" logo marking.
-
I just checked the textured models and tried to order them, the price tag of 15$ was a mistake, it was the price for the standard white plastic. It turned out to be more around 30$ for the complete set in Full Color (excluding shipping costs!) This is mostly due to the minimum of 3$ handling commission per part. I think I will first review the design I ordered and if dims are good, I will try to review the Colored Plastic to reduce price by combining several parts in one.
-
Still waiting, they should arrive by the end of the week or during the next one I guess.
-

My Custom 1/60 Yamato No Paint Build Kit! Work in progress
Xigfrid replied to darthmayhugh's topic in The Workshop!
nice chem indeed. Are you going to panel line it ? -
Mickyg, aaajin is correct. Full Color Plastic is one very exciting material where your 3D prints get out of the machine with all the details and painting described in the 3D file. But it is experimental: it is painfull to make shapeways to accept complex forms with a lot of textures (texture is the coloration on the plastic) and also Shapeways makes it very expensive to produce a model from it with rigourous modelling rules. I made the model because I really hope more designers would be interested in making colored prints and I personnaly hope to find more more 3D prints from others in the near future. I don't really think people would buy it at the current price point at this moment.
-
For those who doesn't know, Shapeways can 3D print in full color using Sandstone material or Full Color Plastic. -The first material (Sandstone) is not solid enough for small piece and moving parts to my knowledge and the description -The second (Full Color Plastic) seems very promising BUT this is only a pilot material for the moment, that means only the designer can order his designs in this material (to his own risks also! link: https://www.shapeways.com/materials/full-color-Plastic) I was excited enough to spend some time in the week and the whole weekend to texture/upload/debug Shapeway's full color 3D printing option. This damn thing is very buggy by now, but finally I made it and the whole design had to be exploded in individual parts due to the material limitations. You can have a look at them here: http://www.shapeways.com/shops/xigfrid3dshop?section=VF-171+NUNS+textured Unfortunately, because each part is printed as an individual part, and also because the material costs about the double as White Strong and Flexible, the cost for the whole textured set is something like 15 USD. Add to that shipping costs from Shapeways to my place (only I can order it), then shipping from me to you. The price is prohibitive… until Full Color Plastic becomes available to the public.
-
Your chance these antennas are white, you probably only need to spray a laquer and you should be done. I tried to custom Ozma's antennas and I don't know which color to begin with
- 1306 replies
-
- DX Chogokin
- Durandal
-
(and 2 more)
Tagged with:
-
That's probably why Kurisama made these https://www.shapeways.com/search?q=yf-29+head+turret I don't have Alto's one, so I can't confirm.
- 1306 replies
-
- DX Chogokin
- Durandal
-
(and 2 more)
Tagged with:
-
That´s nice! Be careful when gluing the top and bottom of the triangle, the middle part must still rotate! As soon as I get mine, I will make a more detailed tutorial
-
Seems the same to me
- 1306 replies
-
- DX Chogokin
- Durandal
-
(and 2 more)
Tagged with:
-
Indeed but they depict a different antenna than in the rest of the game: http://img2.78dm.net/forum/201401/07/225359ljvnlts1s3fvfou1.jpg vs http://i.imgur.com/aA8JgrK.png http://i.imgur.com/eqazF.jpeg EDIT: perhaps it wasn't clear, but the point was to tell that Isamu's 29 can have a "standard" YF-29 head also, depending on the sources.
- 1306 replies
-
- DX Chogokin
- Durandal
-
(and 2 more)
Tagged with:
-
Some cinematic pictures tell the opposite such as: http://img2.78dm.net/forum/201401/07/225359ljvnlts1s3fvfou1.jpg http://img2.78dm.net/forum/201401/07/225334brk03t9ji35235px.jpg I prefer the original head as made for the actual toy and in the game
- 1306 replies
-
- DX Chogokin
- Durandal
-
(and 2 more)
Tagged with:
-
Hello, I made a replacement parts that once assembled (preferably using glue) will replace the original triangles of the VF-171. Additionally, I wanted to make a replacement of the "lower" triangle which is supposed to brake also, but couldn't figure which material could do the job. If you have ideas, let me know. I made on Shapeways a few models: no texture: http://www.shapeways.com/shops/xigfrid3dshop?section=VF-171+NUNS+no+texture&s=0 #1 Optimized for Strong and Flexible materials, this model has a cavity to fit the lower triangle available here: http://www.shapeways.com/model/2965873/vf-171-nuns-triangles-with-lower-triangle-fit.html #2 Optimized for Strong and Flexible materials, this model has no cavity for the lower triangle. This design is stronger than the one with a cavity and is sleeker for any VF-171 that would have both upper and lower triangle broken: http://www.shapeways.com/model/2939051/vf-171-nuns-triangles-wbk-sf-version.html #3 Optimized for Forst Ultra Detail material, without the cavity. You will have more details and smoother surface from this material: http://www.shapeways.com/model/2921408/vf-171-nuns-triangles-fud-version.html I ordered and received the model #2 Detailled ASSEMBLY Instructions here: http://www.macrossworld.com/mwf/index.php?showtopic=42000#entry1171040 NUNS Triangle without Lower triangle fit: I forgot to put a cavity on the model #2 so I had to modify it with a cavity to fit the lower triangle. I have updated Shapeways with a new file with these modifications to fit the lower triangle. NUNS Triangle with Lower triangle fit: Additionnaly, there are fully colored models available here: https://www.shapeways.com/shops/xigfrid3dshop?section=VF-171+NUNS+textured Because the material used for Full Color Plastic is, for the moment, available only to Shapeways designers, you should PM me if you want one of these models now. I have put a few pictures of the Colored triangles with lower fit here: http://www.macrossworld.com/mwf/index.php?showtopic=42000&page=2#entry1180759
-
I vote for B version too!

