
Xigfrid
-
Posts
2607 -
Joined
-
Last visited
Content Type
Profiles
Forums
Events
Gallery
Posts posted by Xigfrid
-
-
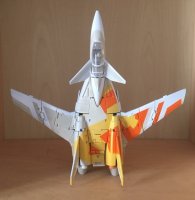
I need to check the parts before selling them, that's the primary reason why I ordered them.
I can file and sand without a second thought, but I don't have an aerograph so painting is not my thing. I would love having this drone professionally painted and glossy finished, I will try but I guess others on this forum would have theirs painted before et better than mine.
-
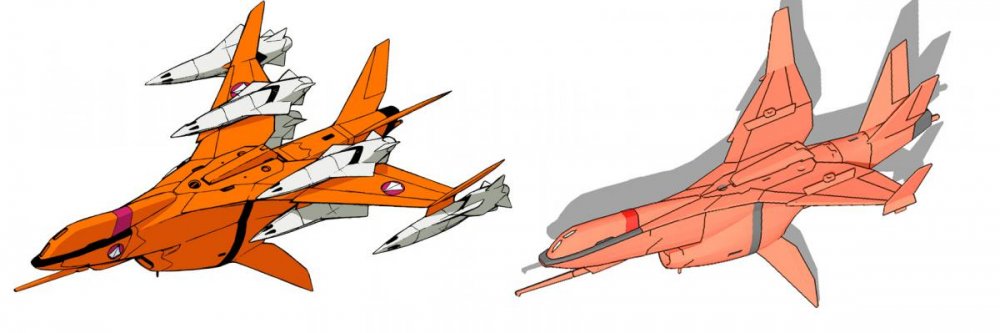
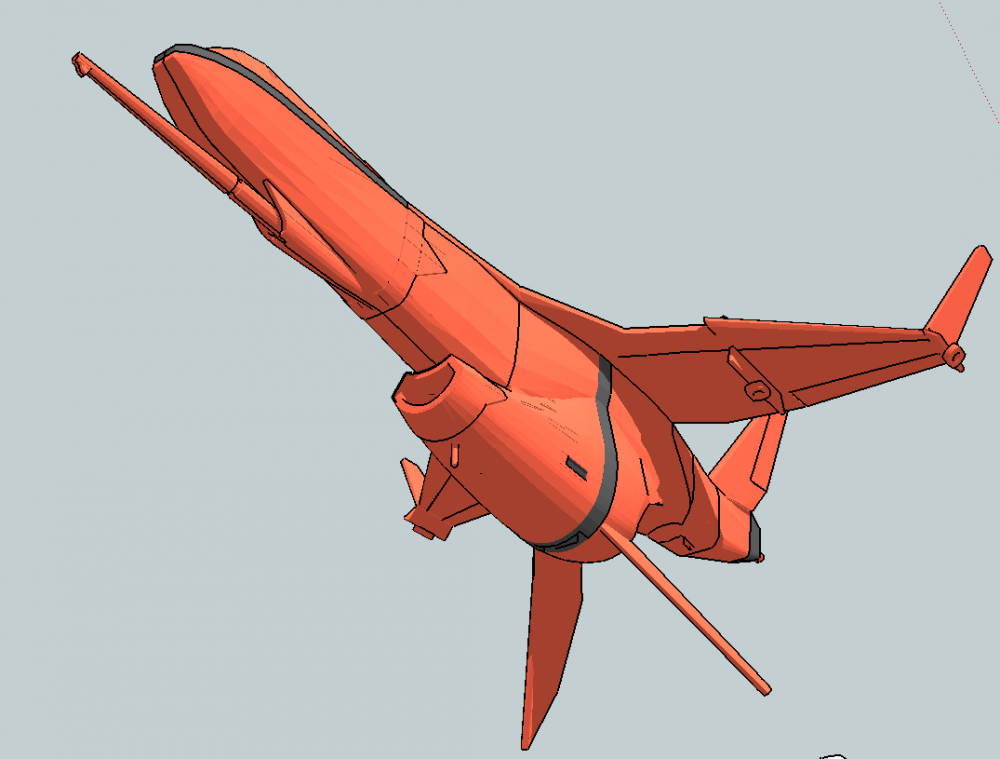
Looks a little sleeker than the lineart. But then again, all the M+ mecha is "husky."
I made it sleeker indeed, to match better with the YF-21 and 19. One week to wait now!
-
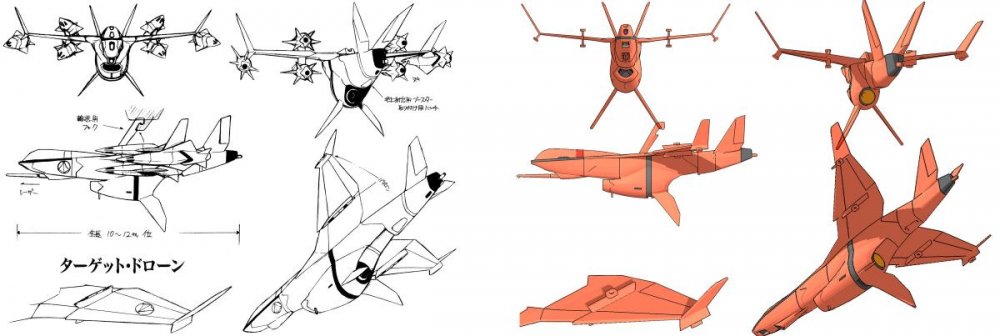
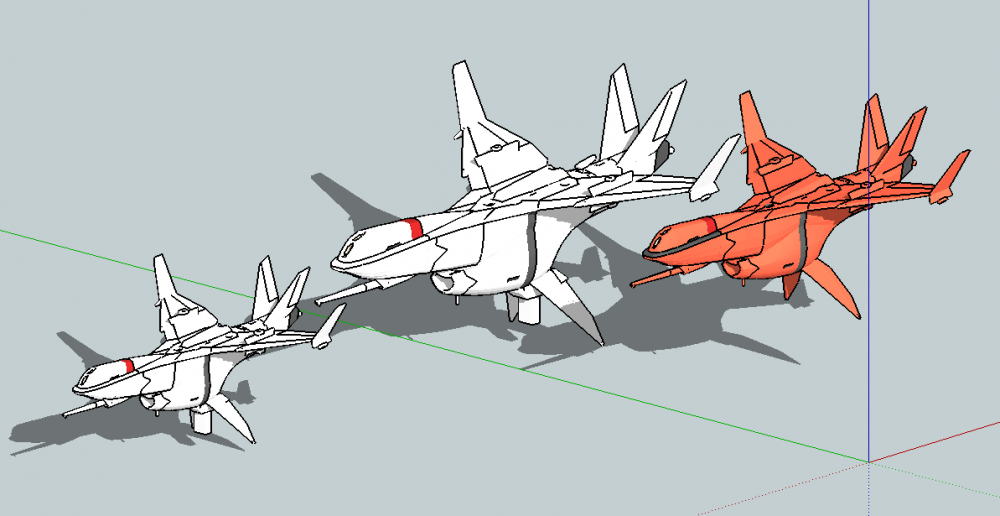
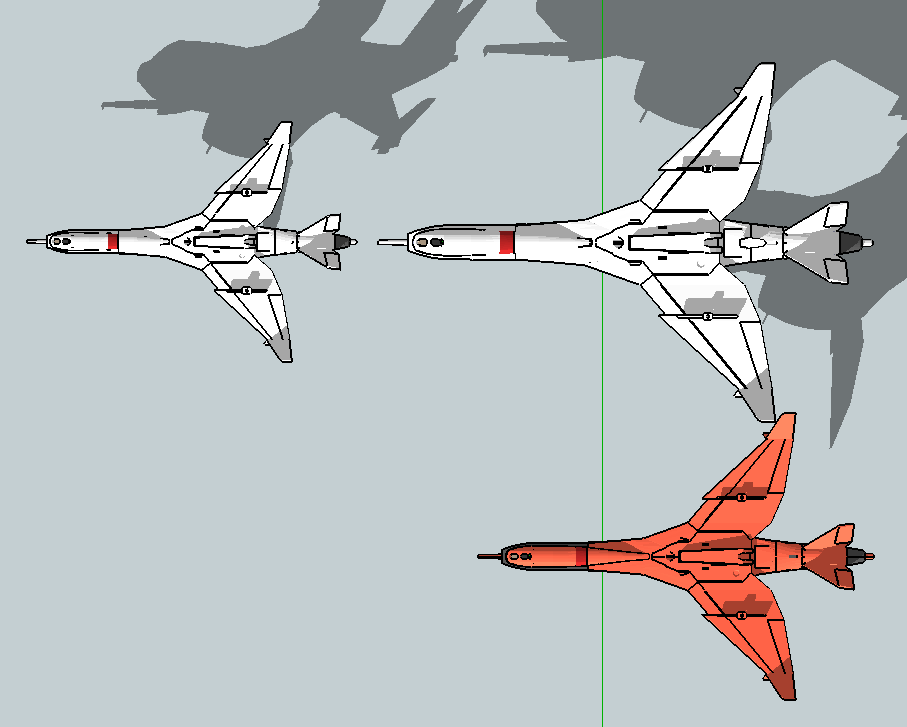
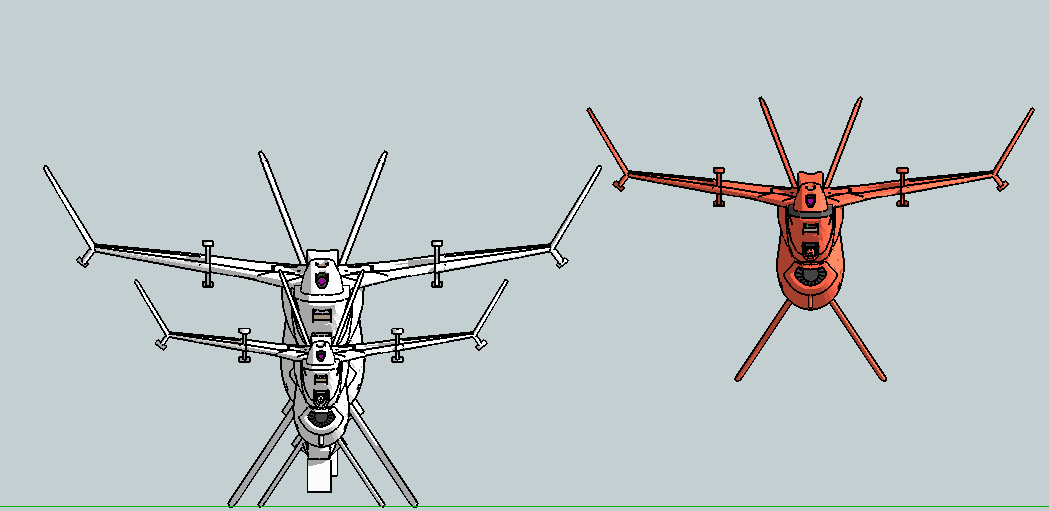
I made comparison shots and made a side by side of the model.
-
in for 1/72, but i guess i'm the only one hoping for 1/144 also.
the Starwing mothership is much more practical in 144
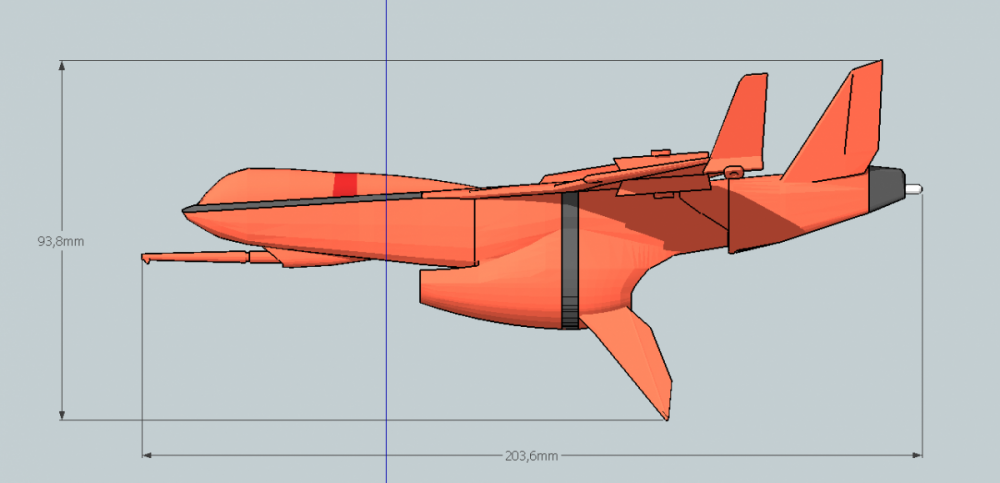
I was considering it lately and that scale would make the drone fighter to be 8cm long. This is very small overall dimension for details such as the laser canon or the flaps that must be at least 1-1.5mm thick.
This can be done, but at that size it would be very difficult to make it very detailed, even more difficult to work on hollow parts, making the drone at this scale pretty expensive for the its size.
I can have a look later, but to me, it doesn't mean just adjusting details, but making a new model from the actual shape.
-
The 1:72 kit would be approx 70 USD
-
Same for 1/72....
Thanks.
No problem I still have the first 1:72 PM alert available

-
So much details !
-
Nice!!! Great design and engineering. I'll probably order mine in WSF, then thin layer it with putty to smooth out the slightly sponge like texture. This is going to be a fun kit to work on.
Thank you for the kind words! I was thinking also to do a layer of resin+microsphere before painting and gloss. I hope not to ruin it with the painting as I am planning to spray it.
Bro, please PM me when your 1/60 version is ready! I will be your first customer!

Haha that's nice to you, I will give you a small head up in PM so you can be the first on this one
Thank you again for the great support !! -
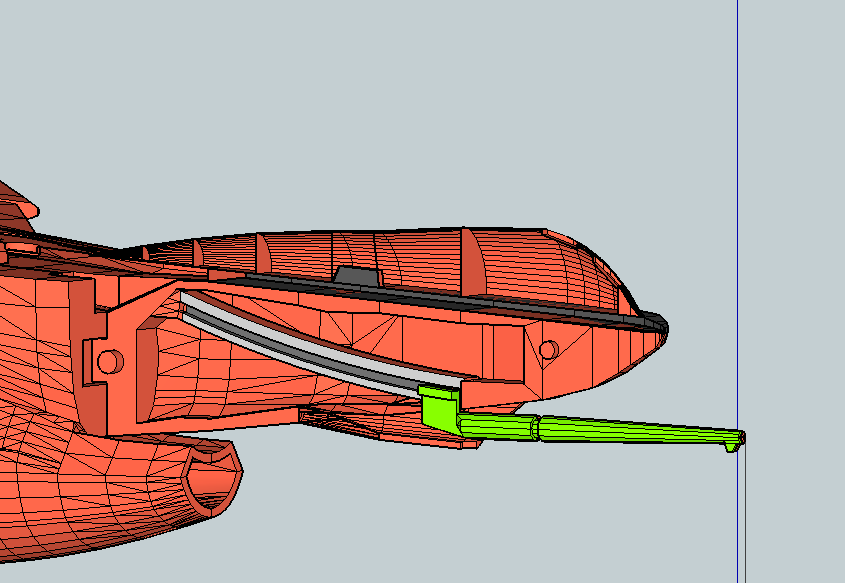
Finished to review the 1:72 version and I got great news; the laser will slide in the same fashion as the 1:60 version and the hanging lever and the lower "inside the head" camera will also be rotating.
The 1:72 version will not have the removable bottom trap it would be only panel lined, I had to review a little the proportions of here and there parts, but globally the differences are very thin to bare eyes.

-
I have ordered the parts already and they should arrive in 3 weeks. I will review the fit and proportions.
The 1:48 parts are ready and are exactly the same but scaled bigger so they would be available pretty much at the same time.
I am having a closer look at the 1:72 parts and in fact there are less issues than I expected by this scale. I already fixed a few issues so normally they should be ready by the same time!
-
Every chance
Nice! Just let me know if you keep the same Yamato/Arcadia attachments or if you scale it down Kurisama.
-
In fact you need 6 HMMs.
An Arcadia YF-19 has 4, so you will need to source 2 more if you don't have 2 copies.
Kurisama has a pack of 6 available on shapeways already. I haven't tested them but they seem really well made
-
I'm just concerned about sanding/painting. My other experiences with Shapeways parts have been that I'm very good at accidentally breaking things when attempting to sand or modify them. I never finished Kurisamas 0D mod because I kept snapping tabs off of things.
As long as you order in any of the "Strong and Flexible" plastic, it should not break easily because it is pretty strong!
At the opposite, Frost Detail and Frost Ultra Detail are very fragile and brittle, this is a nightmare if you need to put stress on this material, but once they are in place and do not get handled, they are very neat and doesn't need sanding.
In between you got the Acrylic plastic, which I belive is not very strong compared to the WSF, but significantly more robust than the Frost detail.
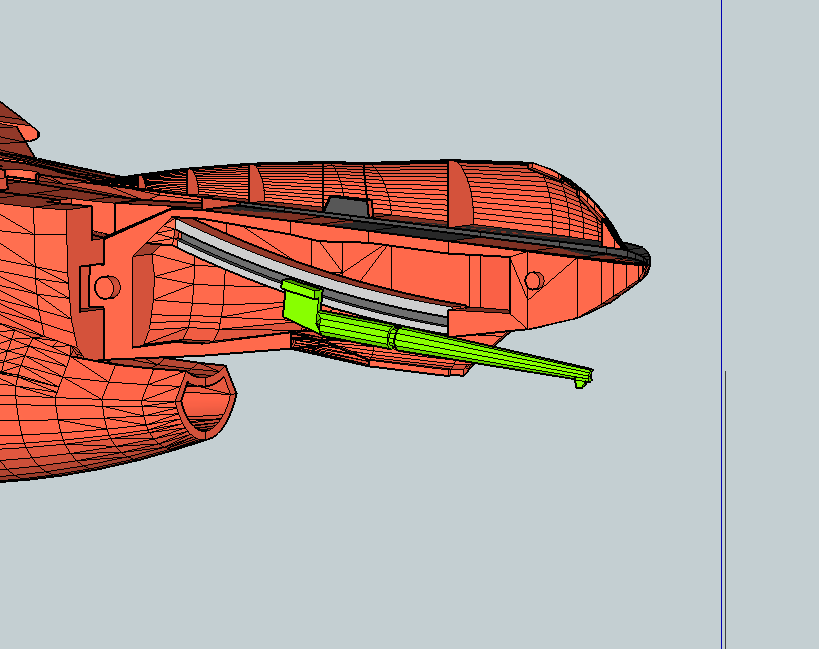
I began to experiment with metals and they are very nice, I made the Laser canon in both plastic and Black Steel, I will see how they get from the printers!
-
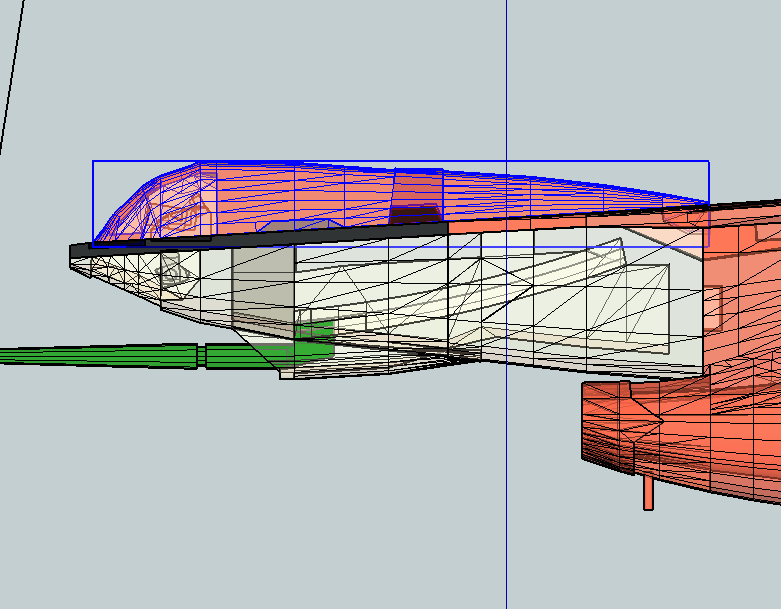
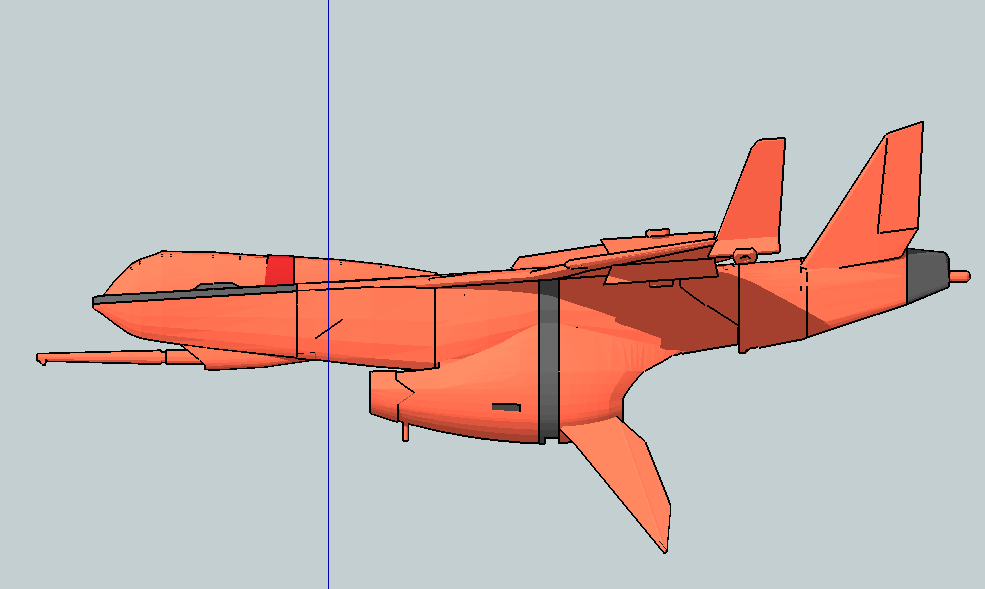
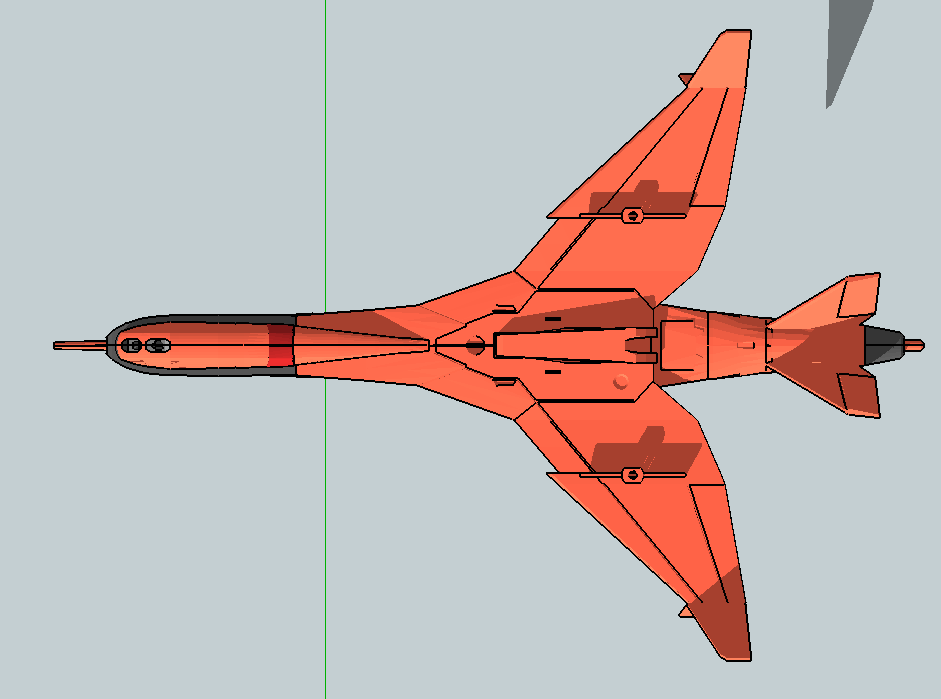
Again judging from the 3/4 view, I think the nose should bulge less at the front when viewed from above. Everything else is pretty much perfect IMO.
I reviewed the model and I liked it more with the line you suggested!
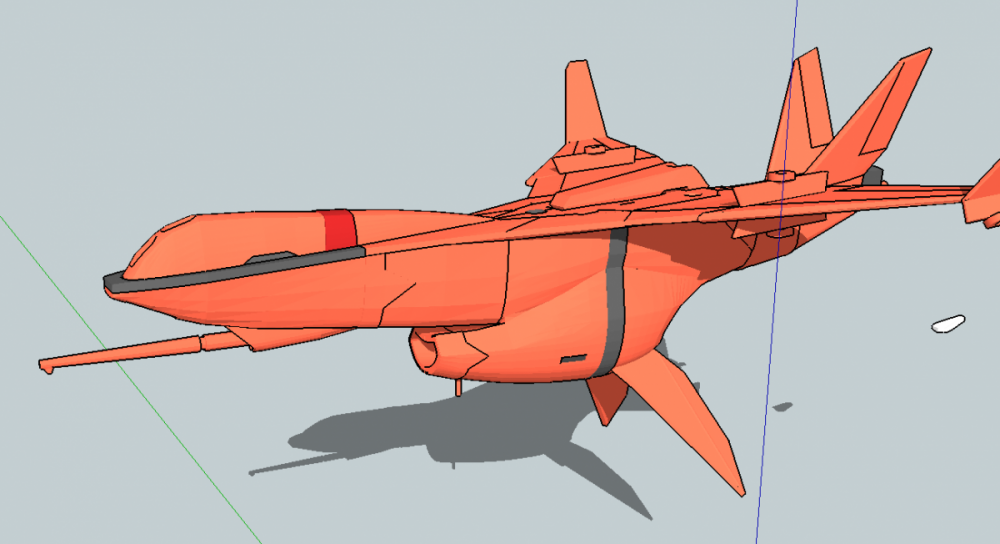
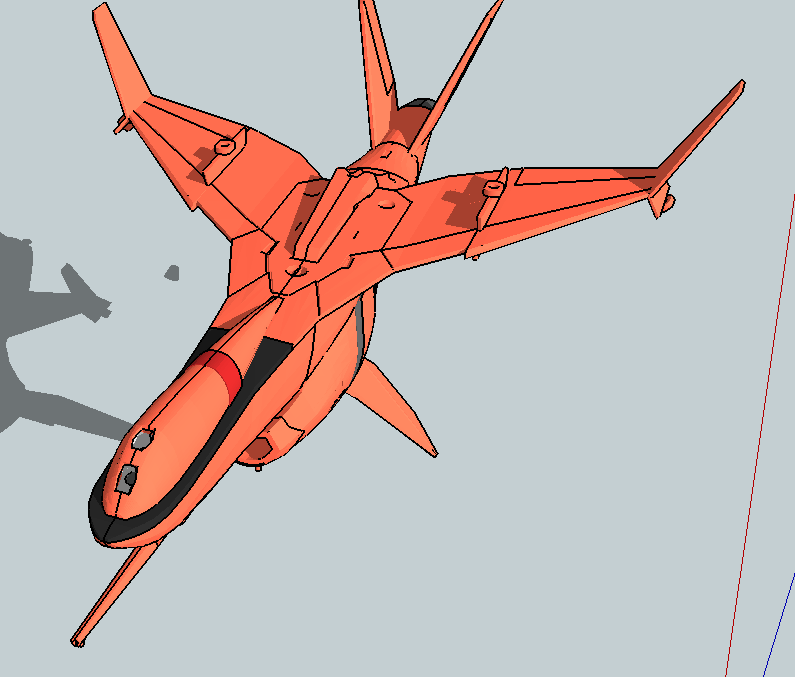
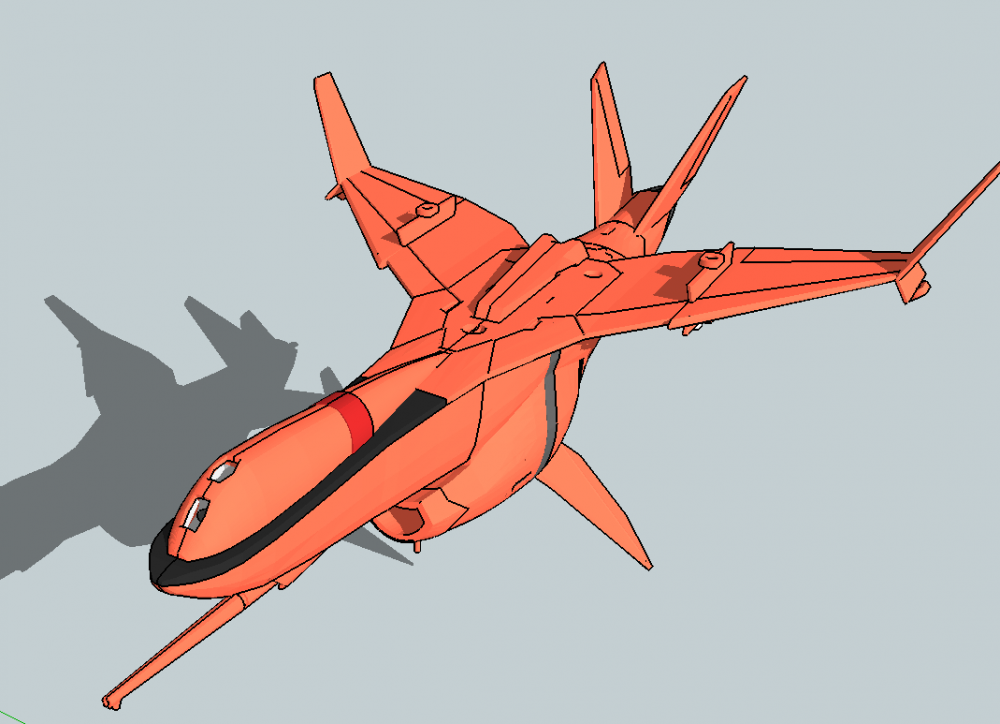
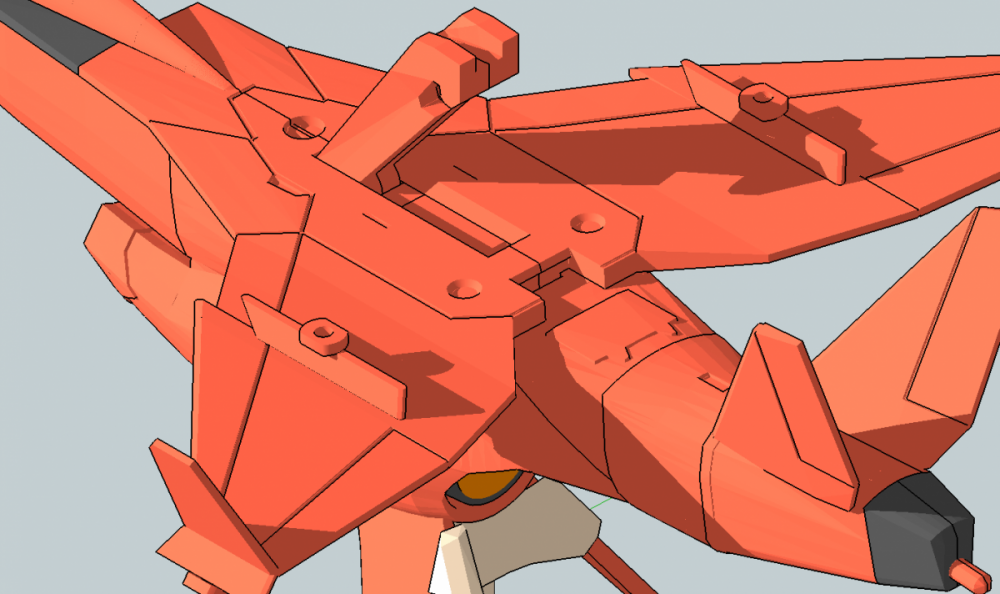
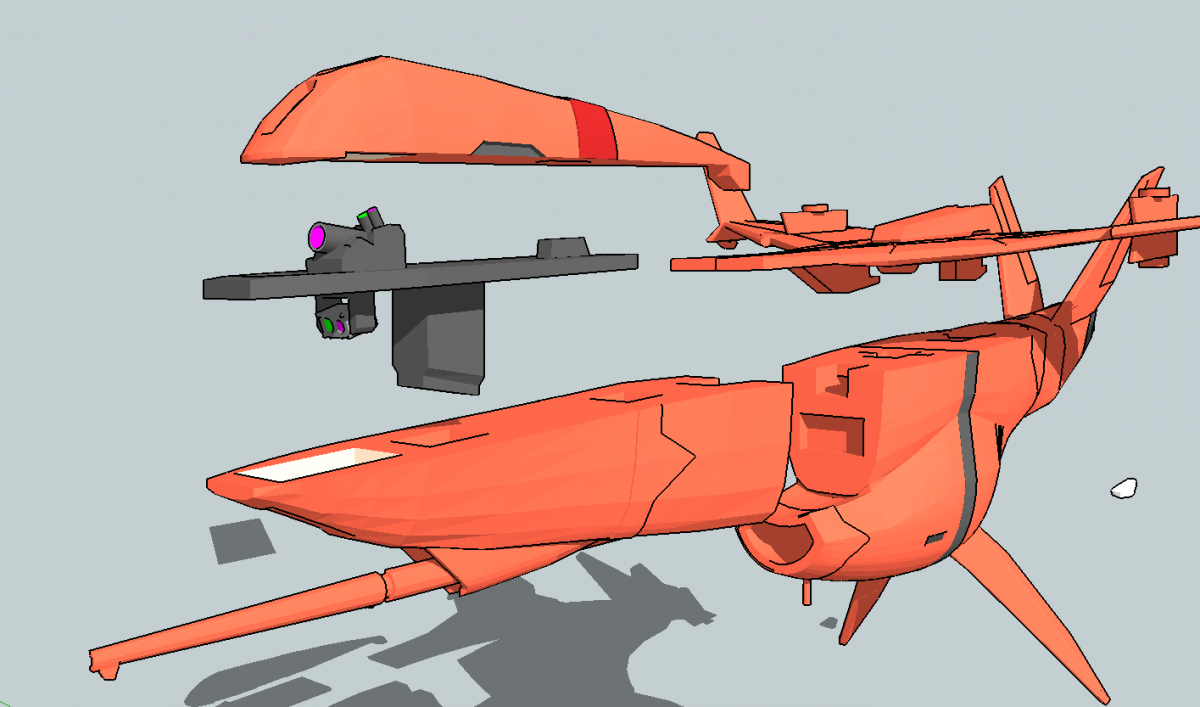
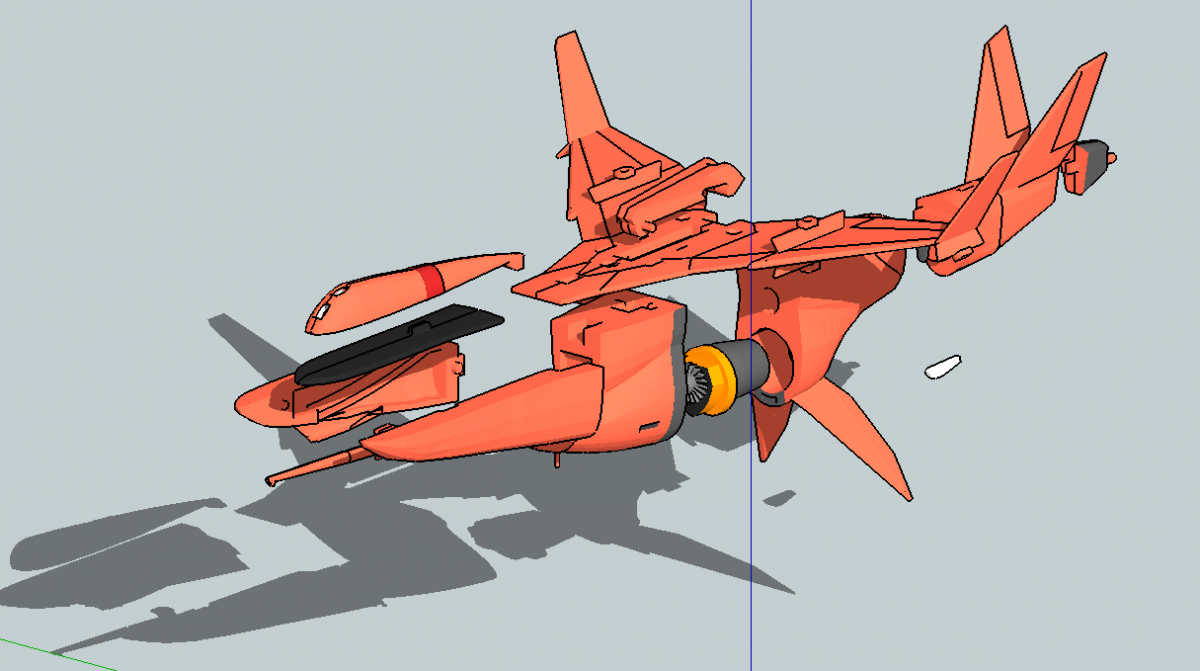
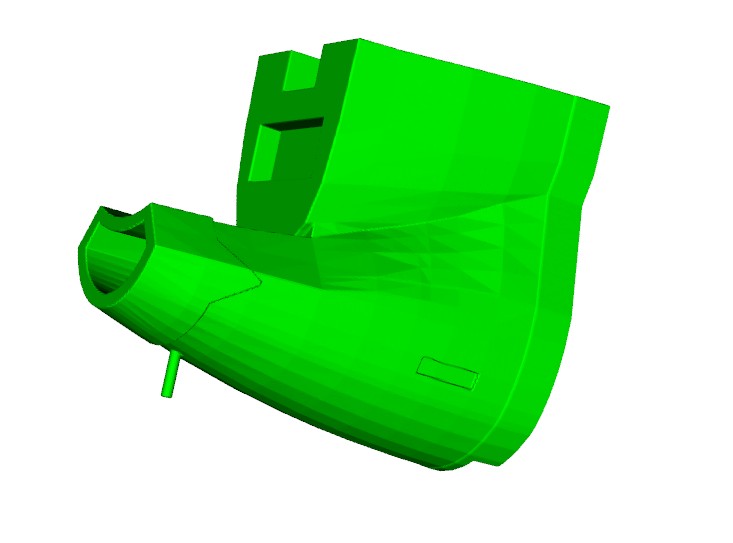
I have finished the 1/60 model, I got to review each part for the tolerance before proceeding to the first 3D print.
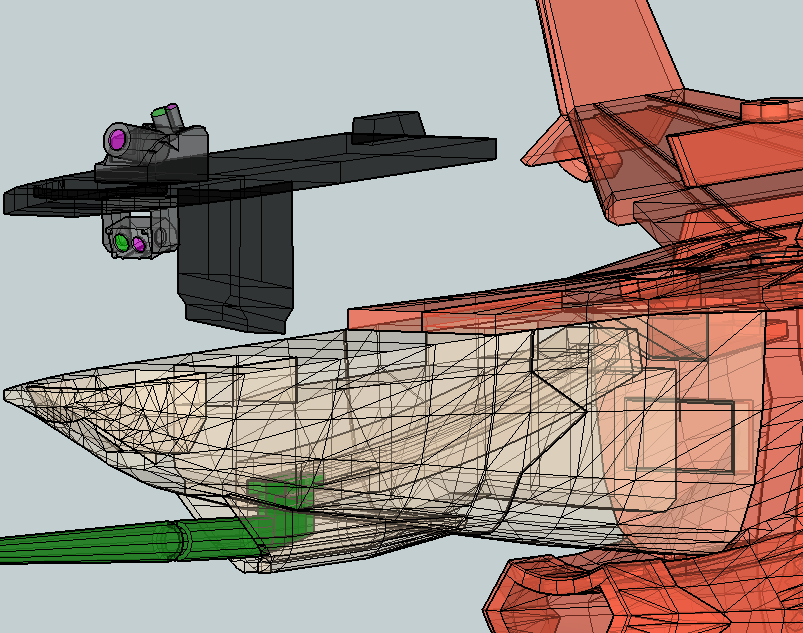
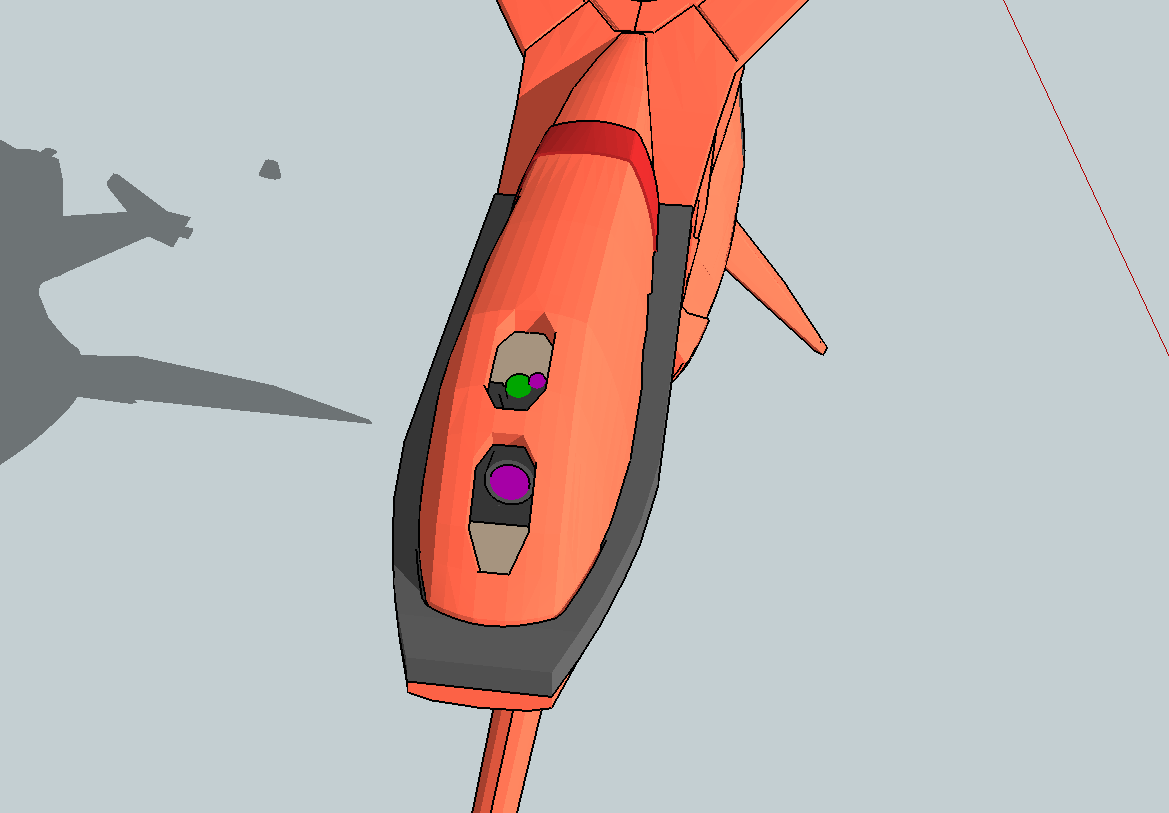
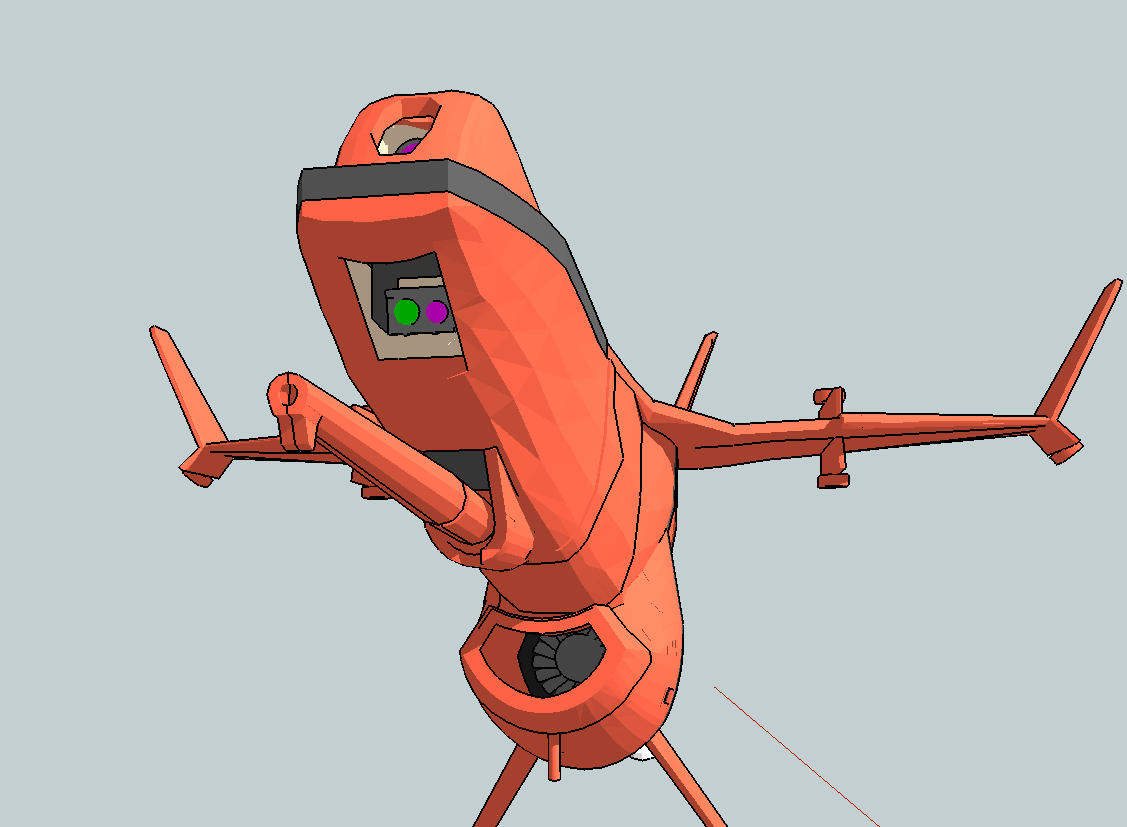
I have added as my personnal touch the internal nose cameras, the bottom one is rotating up and down.
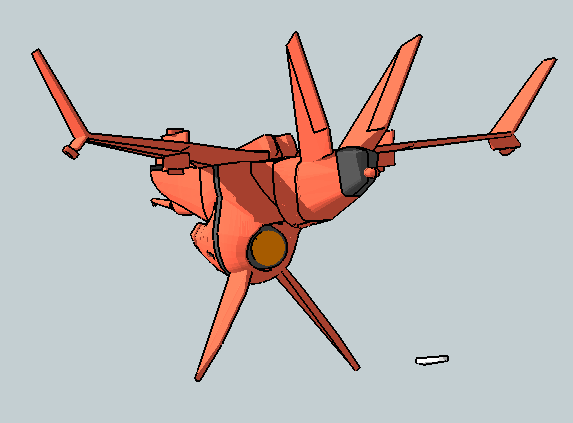
I also exploded to explain how the different nose parts fold one into the other make a locking mechanism to hold the Laser canon once everypart is installed.
Just hold a little for my definitive "GO" before ordering the parts and I hope everyone will enjoy this model as much as I did to built it !


-
1:48 and 1:72 would be available soon after this one
-
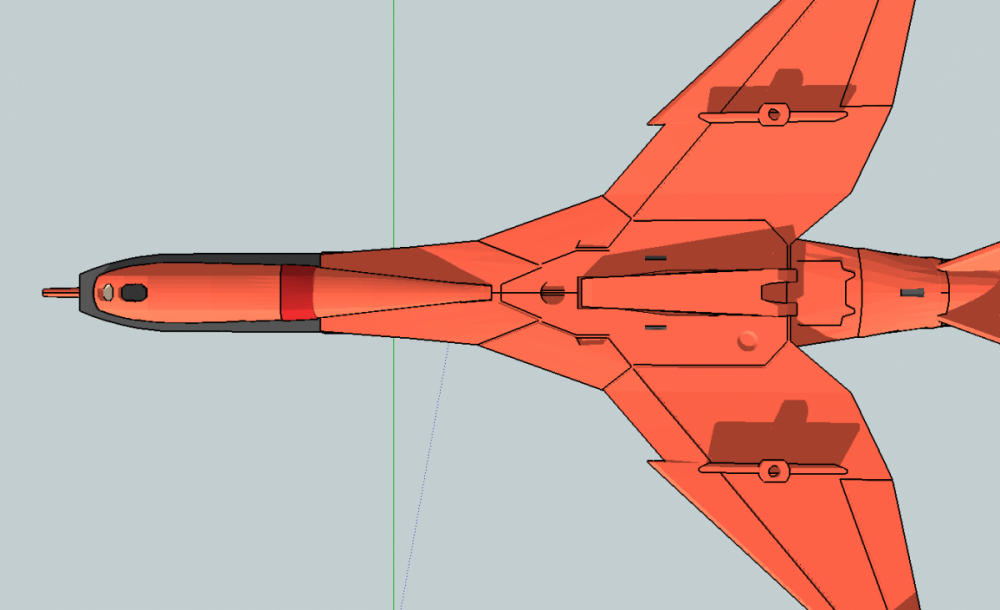
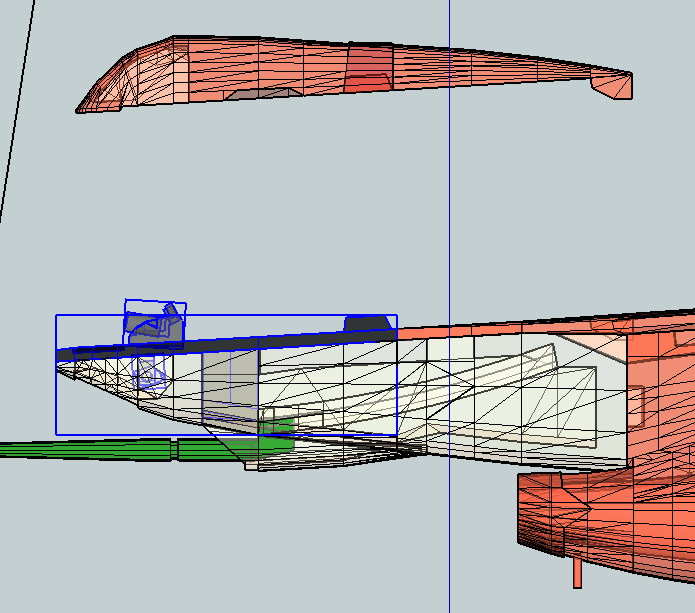
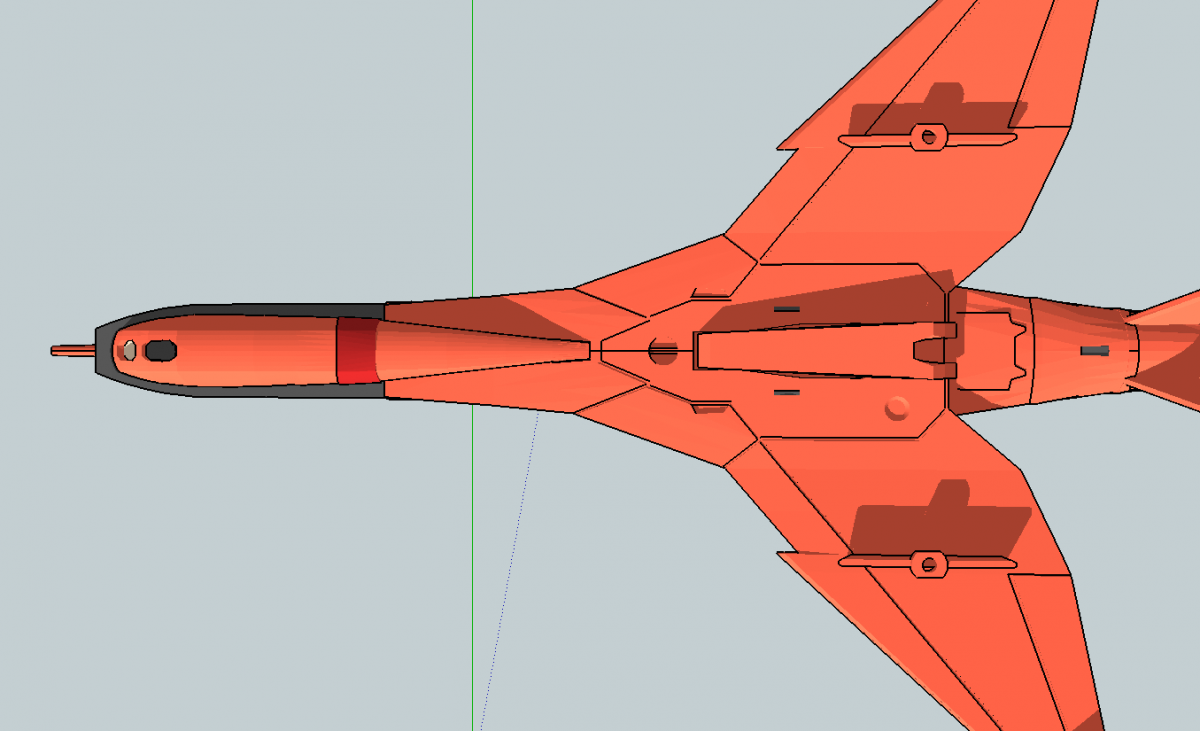
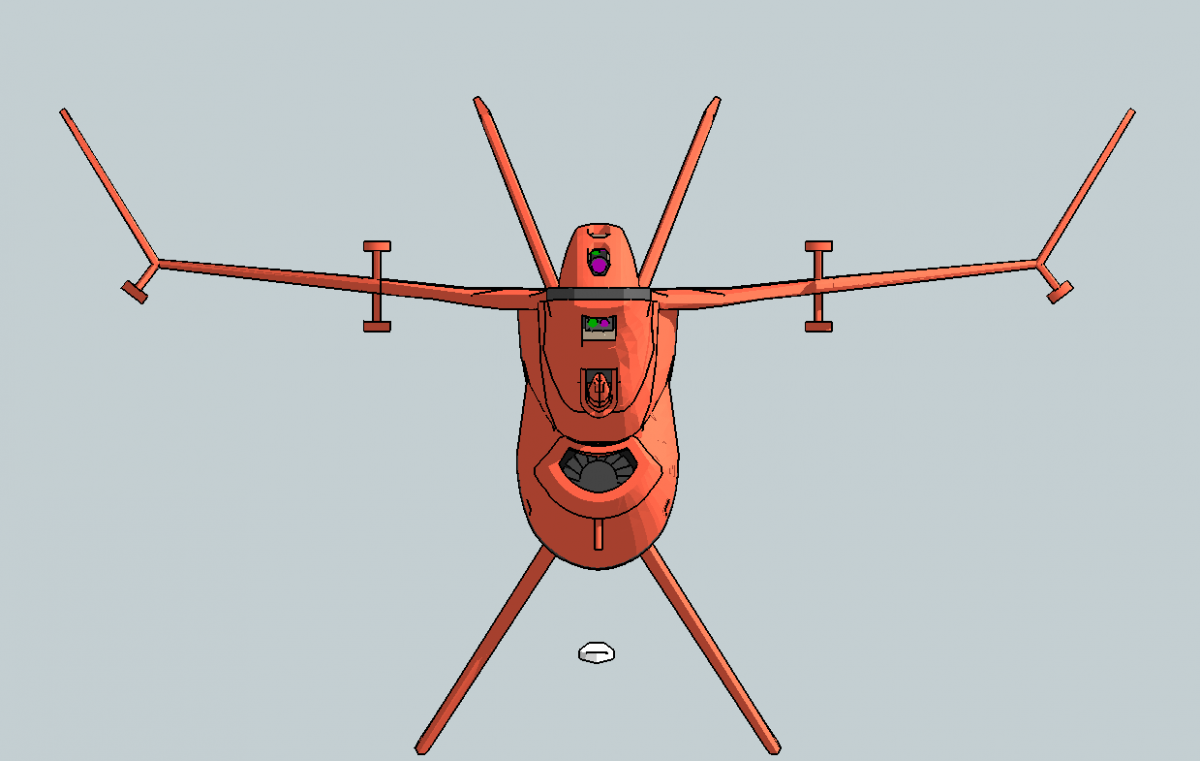
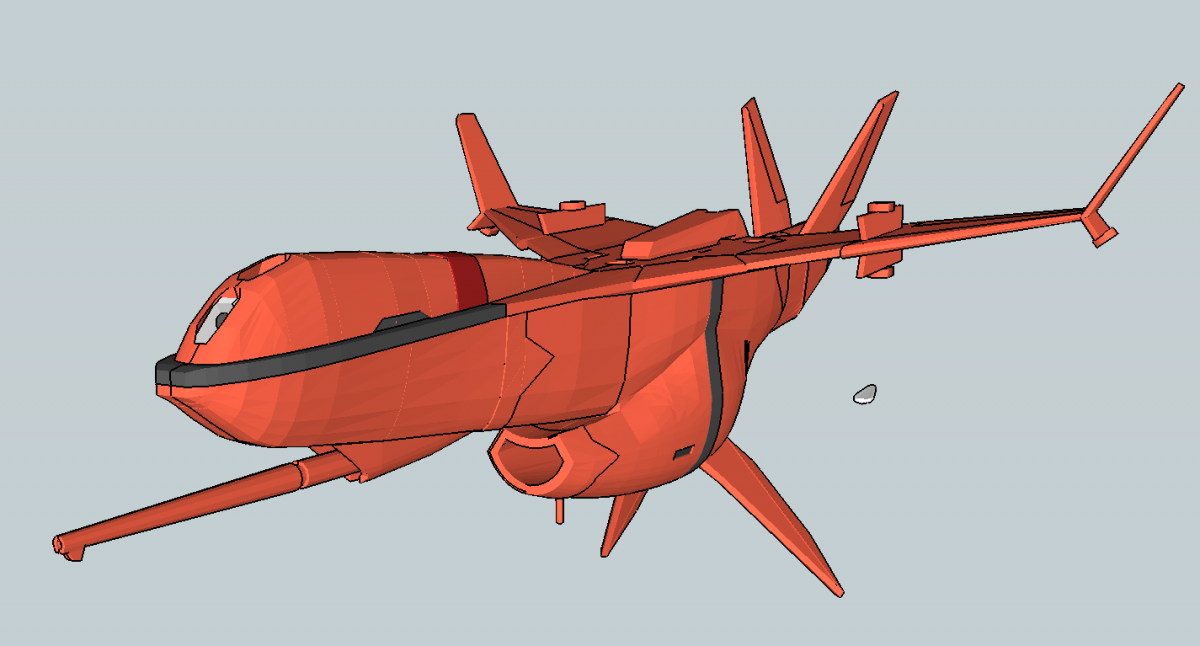
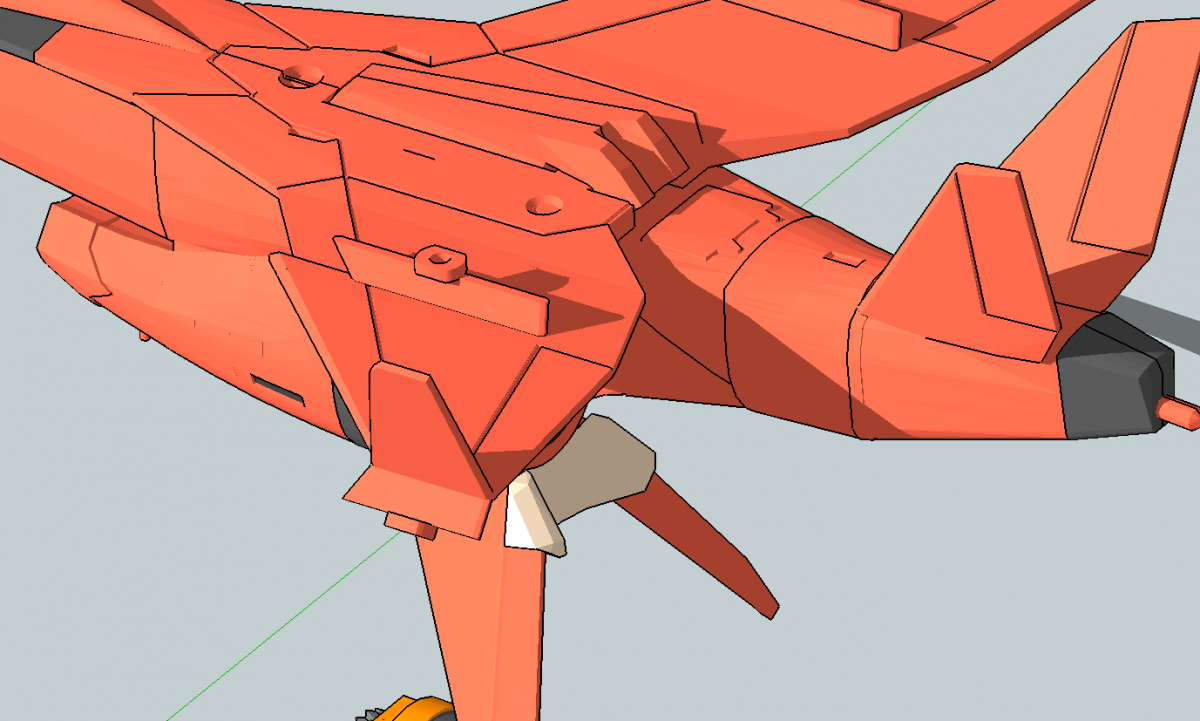
I am pretty happy with the general lines and the detailing.
There are a few internal mechanisms and the bottom window to finish on the nose, but you got the general idea of how the drone would look like.
I still can change things, so don't hesitate if you find design / line art errors!


-
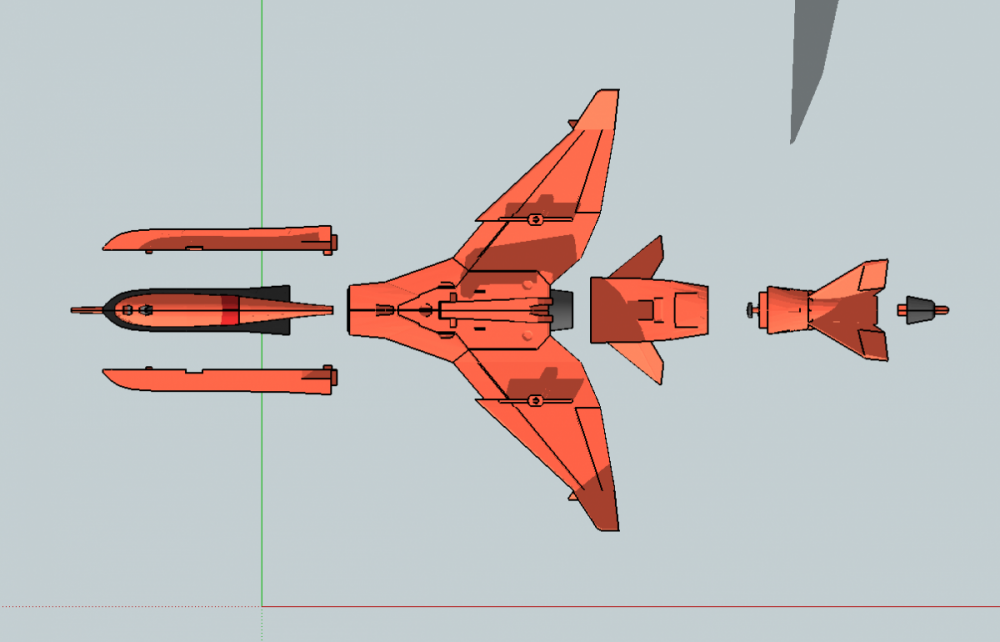
How many parts is this thing total?
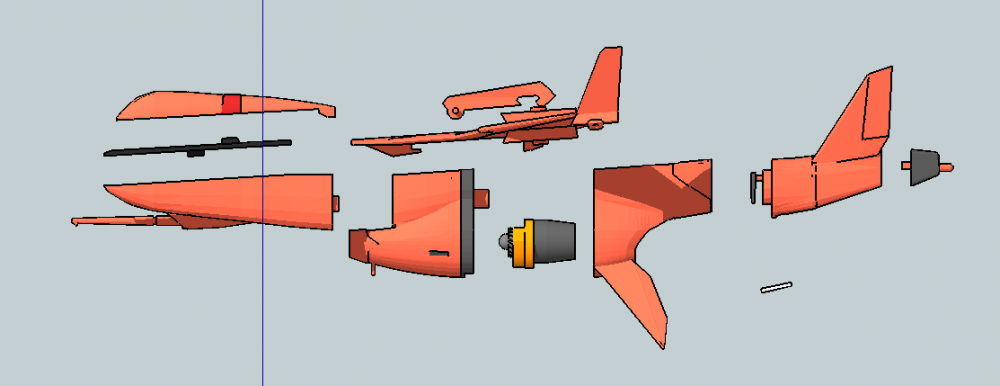
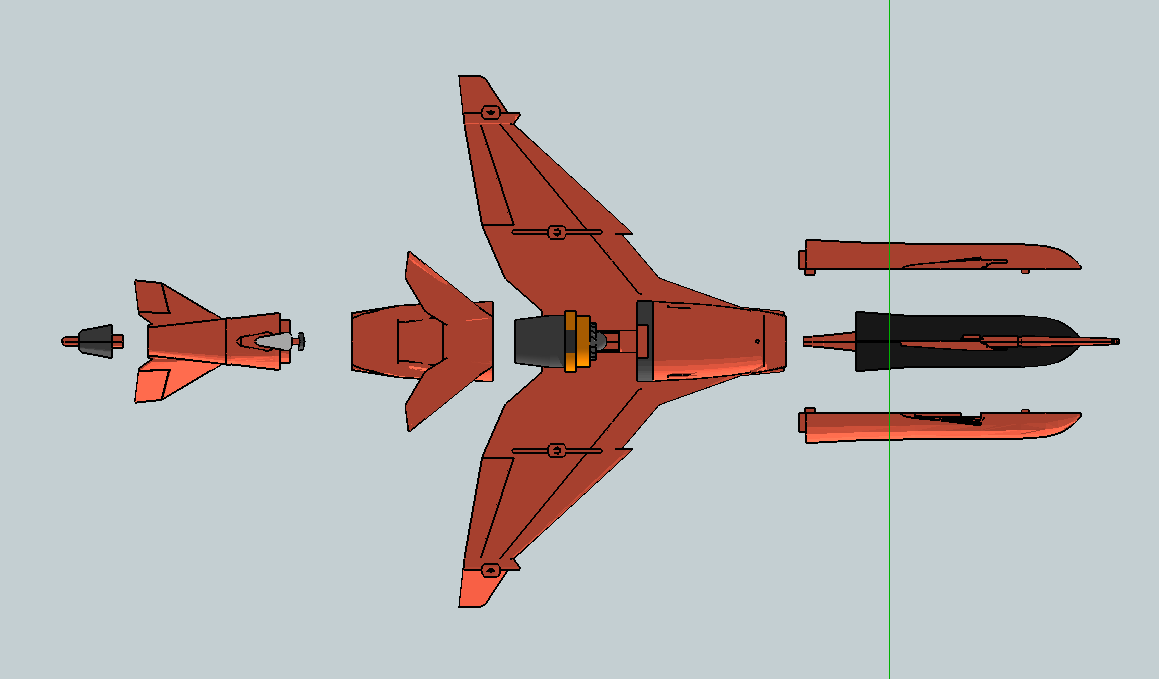
For the moment, it is 12 parts, 13 if counting the small rear trap.
I haven't finished the nose, but there would be at least 2 additional clear parts that would be cut into a recycled 1.5L Coca bottle to make the front windows.
-
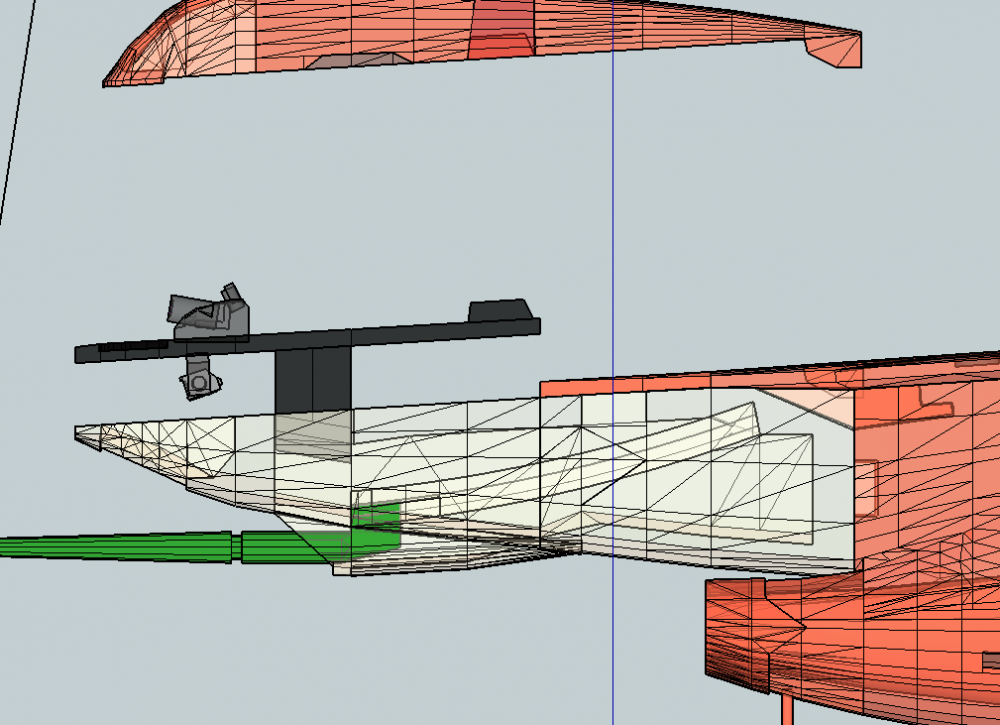
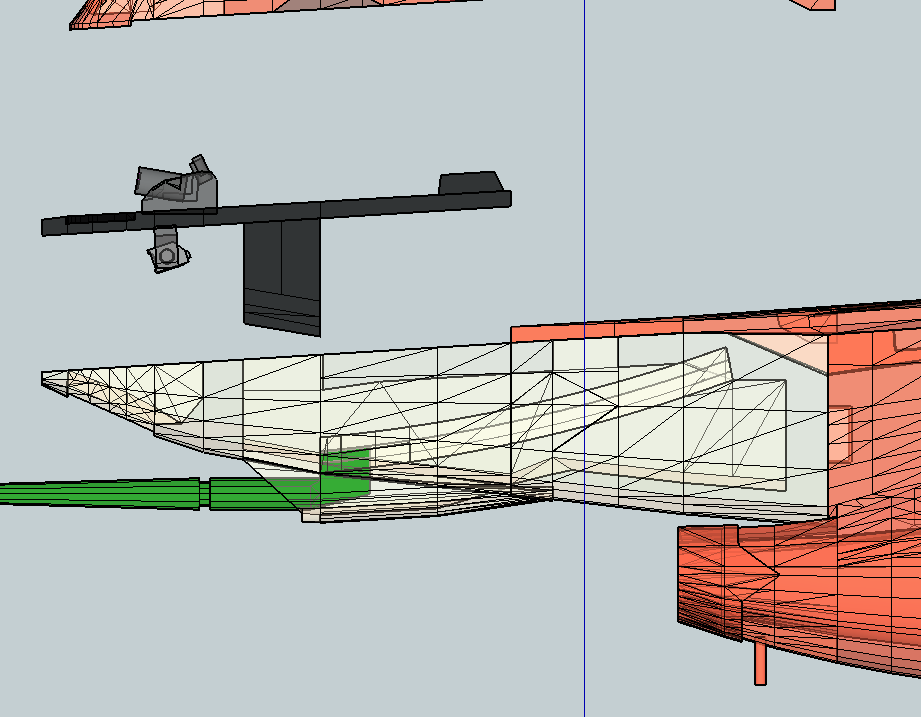
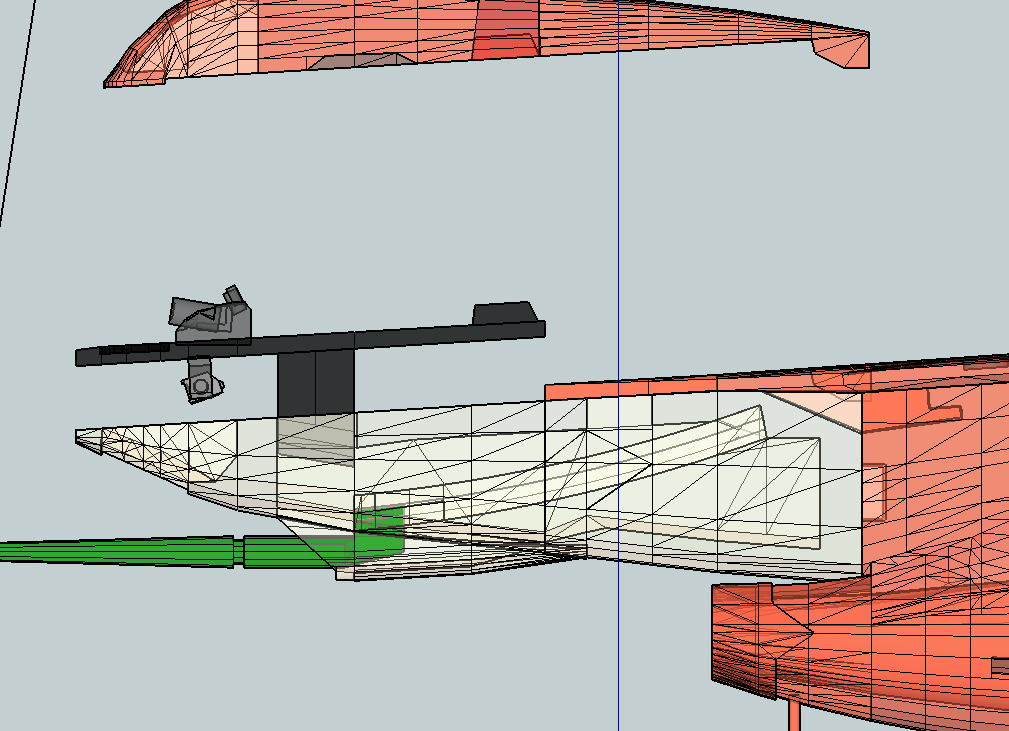
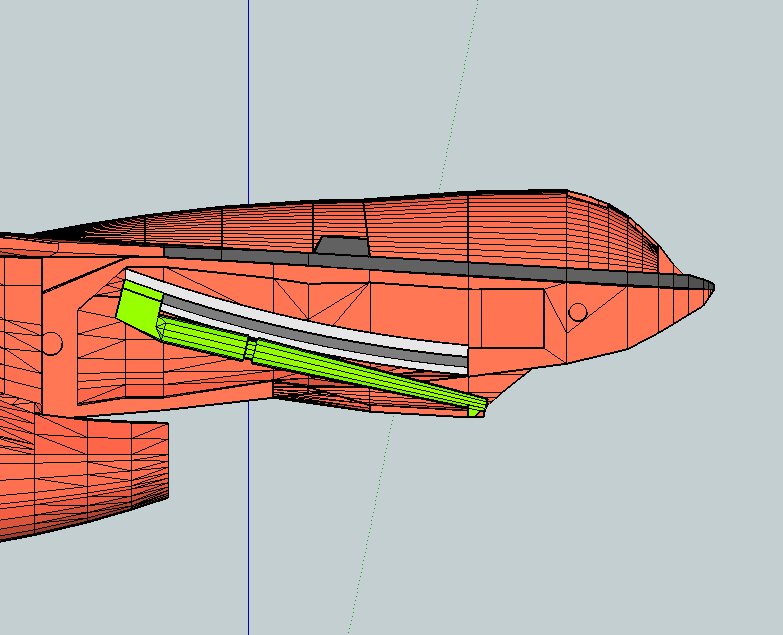
I see what you mean in fact this portion of the nose is already made of two curves but I think that I have rounded it too much after the purple stripe, I will rework it a little in that direction, thank you!
The bottom nose is still not processed, I agree it should be more square than the top portion
-
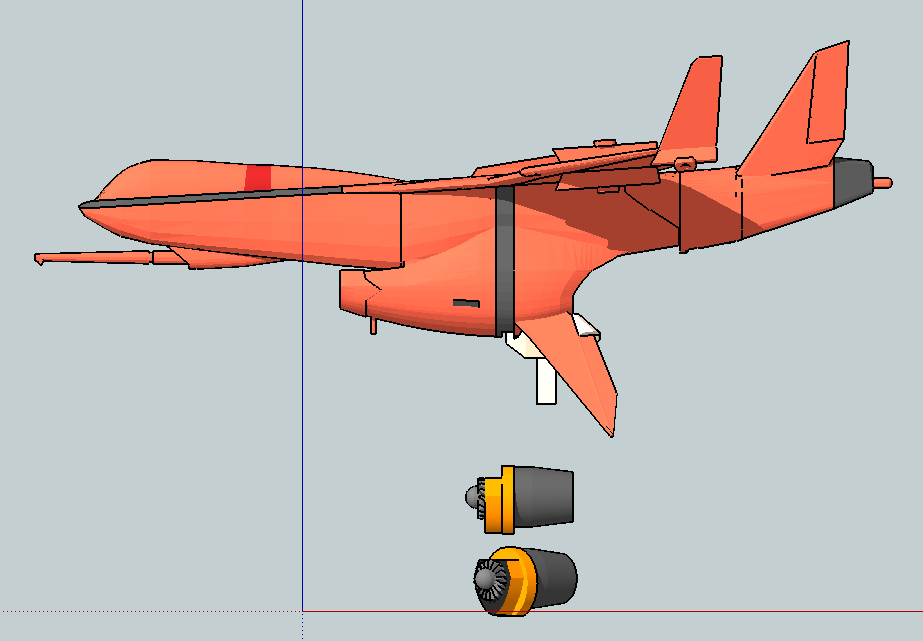
A few exploded views to entertain the long wait


-
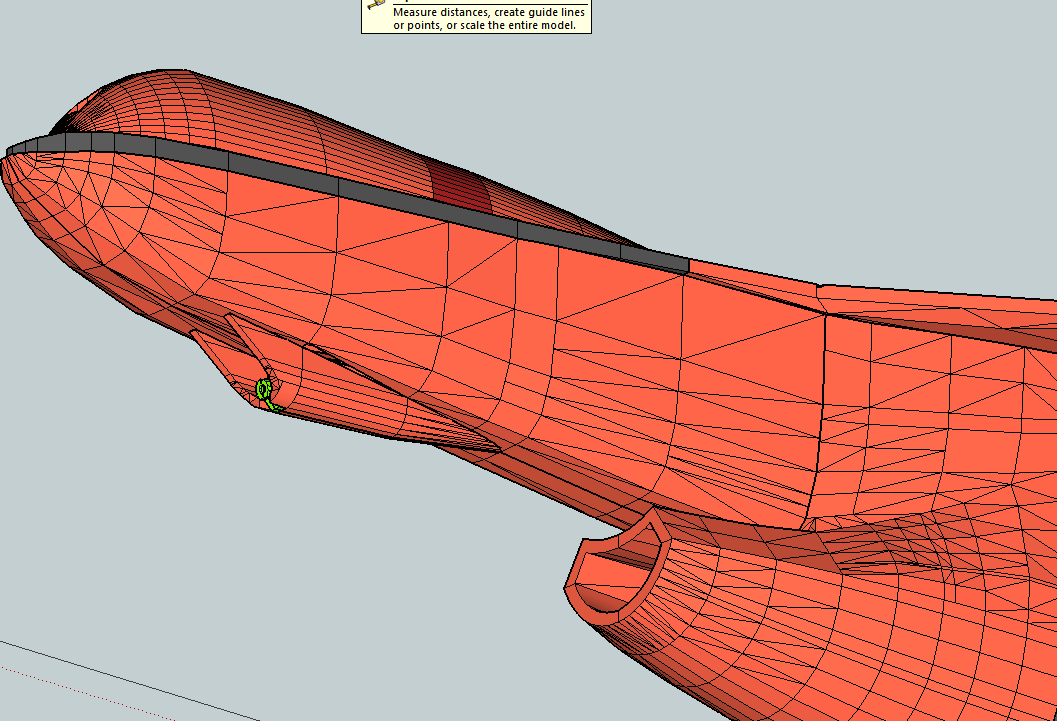
Working on the nose ...
another view

-
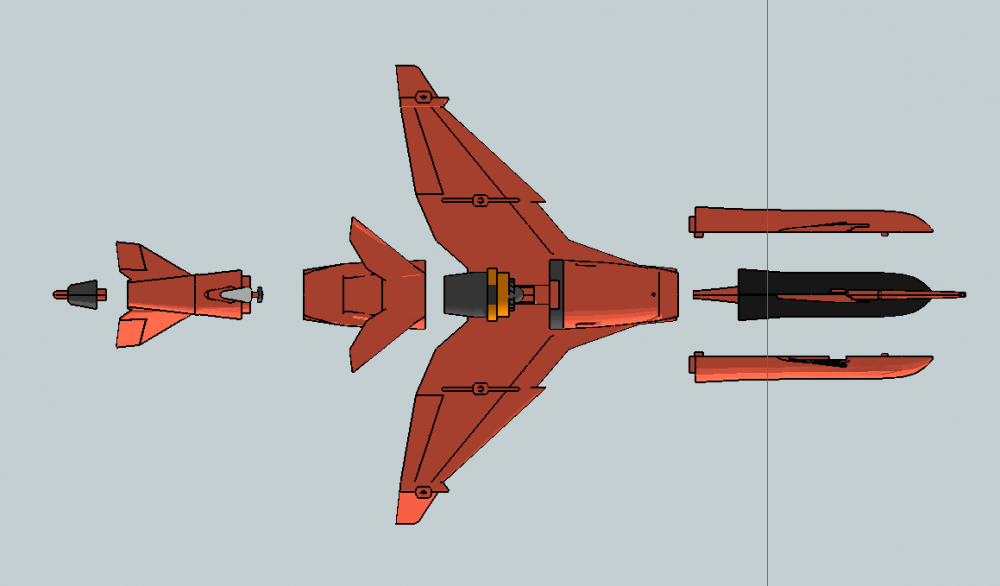
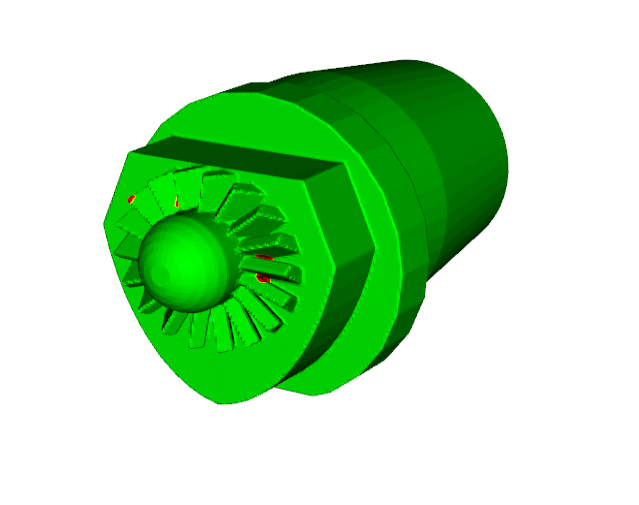
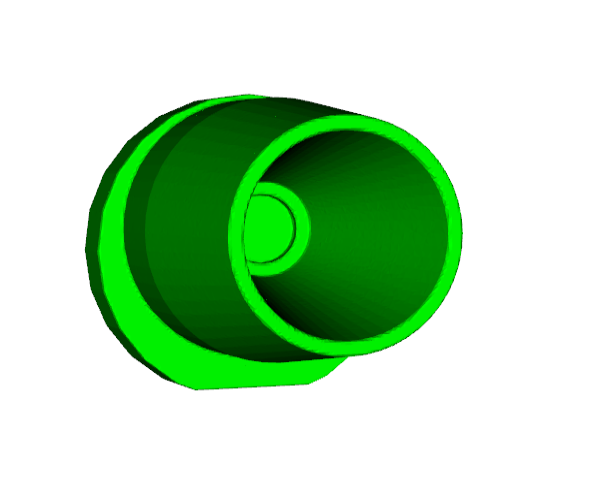
I separated the reactor from the intake to make it easier to paint.
Added details on the reactor intake.
Yamato/Arcadia stand adapter is also complete.
I am trying to make it printable before the end of the week so that I can test fit it. I have put them online as separate parts but I will try to make one single printing batch to reduce costs (Shapeways charges at least of 1.00 USD per seperate print)


-
Really nice, thank you! I am trying to get te picture of the x-9 in the macross chronical, but can't find which one it is.
Anyway I will find it for sure.
-
I already made the 1:60 laser canon retractable. Your idea would certainly be great for the 1:72 version! thank you !


-
Main lines have been refined


Whats Lying on your Workbench MK IV
in The Workshop!
Posted
Amazing work on that 0D Cheng!