
Xigfrid
-
Posts
2605 -
Joined
-
Last visited
Content Type
Profiles
Forums
Events
Gallery
Posts posted by Xigfrid
-
-
Hi Axelay, nice review. I am sorry it doesn't match 100% the original form.
According to you this is the main tab that goes into the armor that is the culprit of the wrong angle? Can you sand it a bit so the front little pylons touch the armor pack again, then making the reaction missiles point forward?
You can also try to heat the part with a air dryer and gently ploy the parts in the correct angle.
-
Where did you found this Ghost ??

From the quote below!
I believe it's this one
http://www.macrossworld.com/mwf/index.php?showtopic=42502&hl=
Is it 1/72 or 1/60?
and if 1/72, are you doing more Xigfrid?
They are 1/60 but unfortunately I have no plan to make resin kits of these in the 1/72 scale. Mainly because there are small parts that won't scale down as is, so the 1/72 ghost needs a fair amount of additional work and thinking that I currently don't have.
It's sad not having enough free time.
-
Great diorama derex!
-
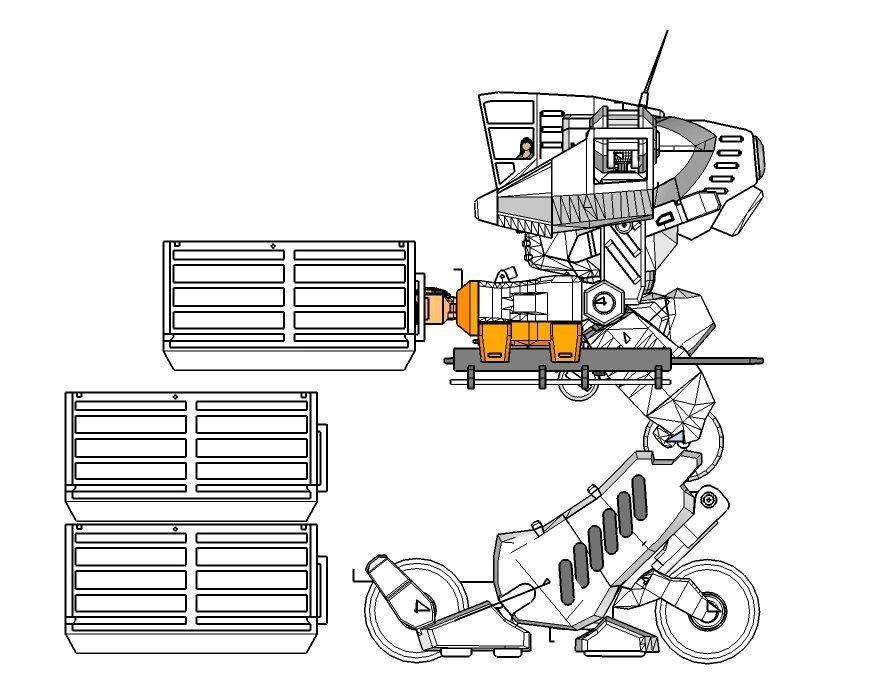
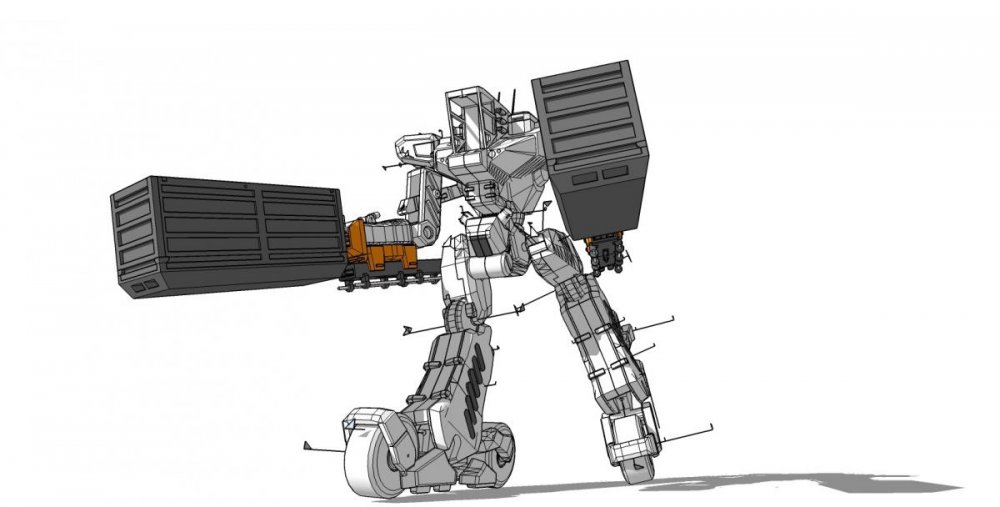
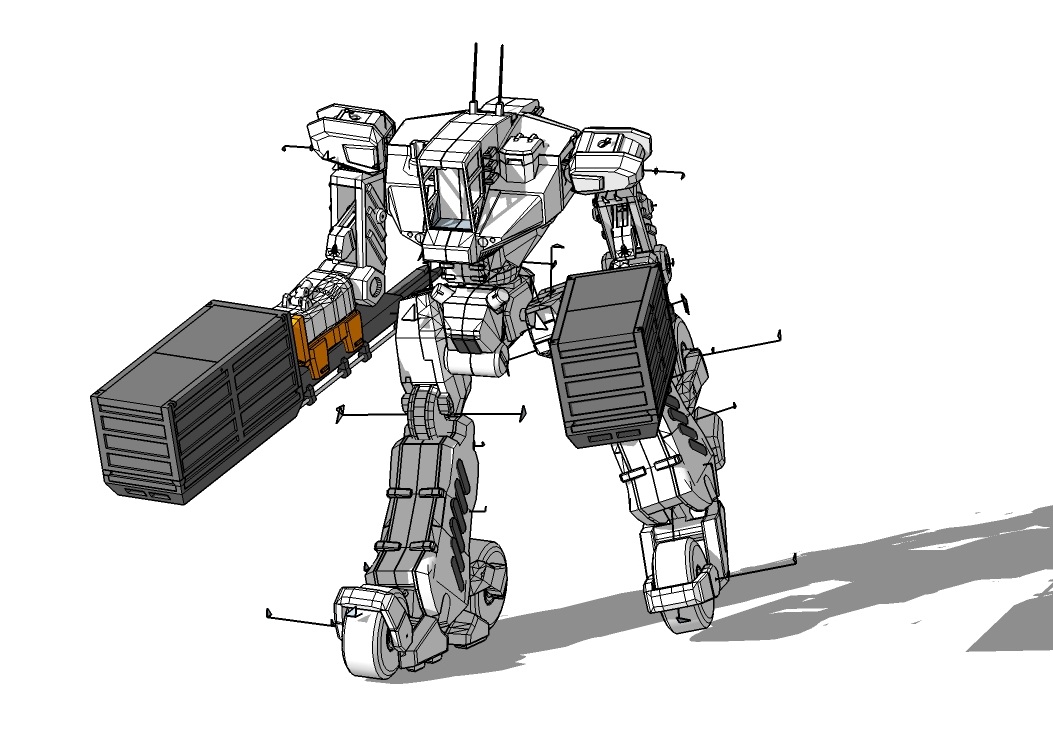
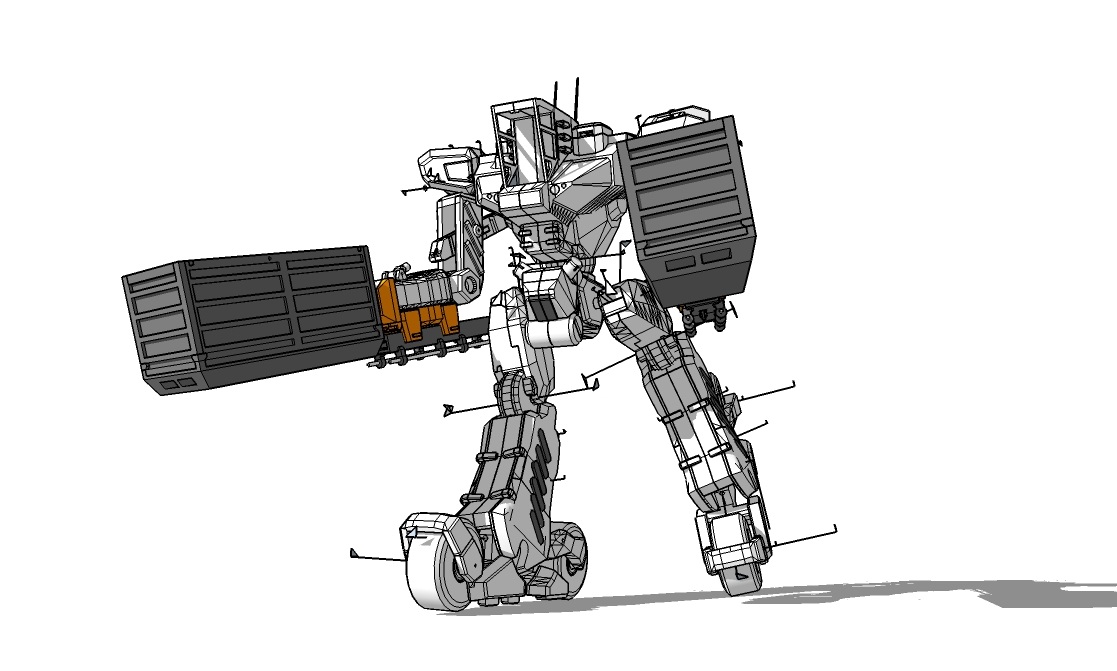
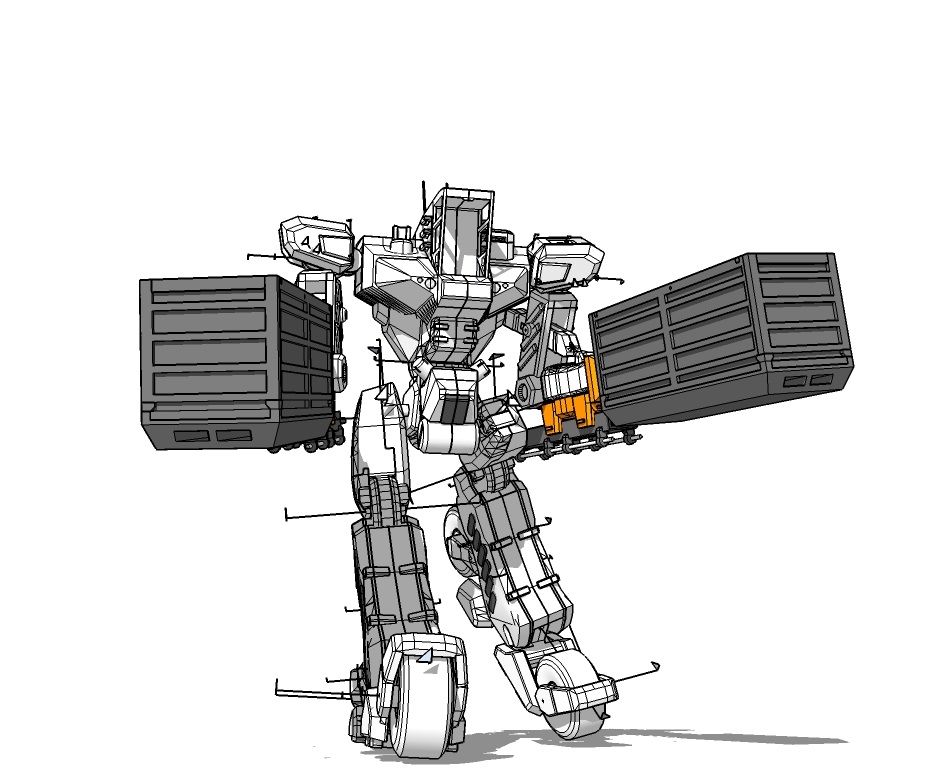
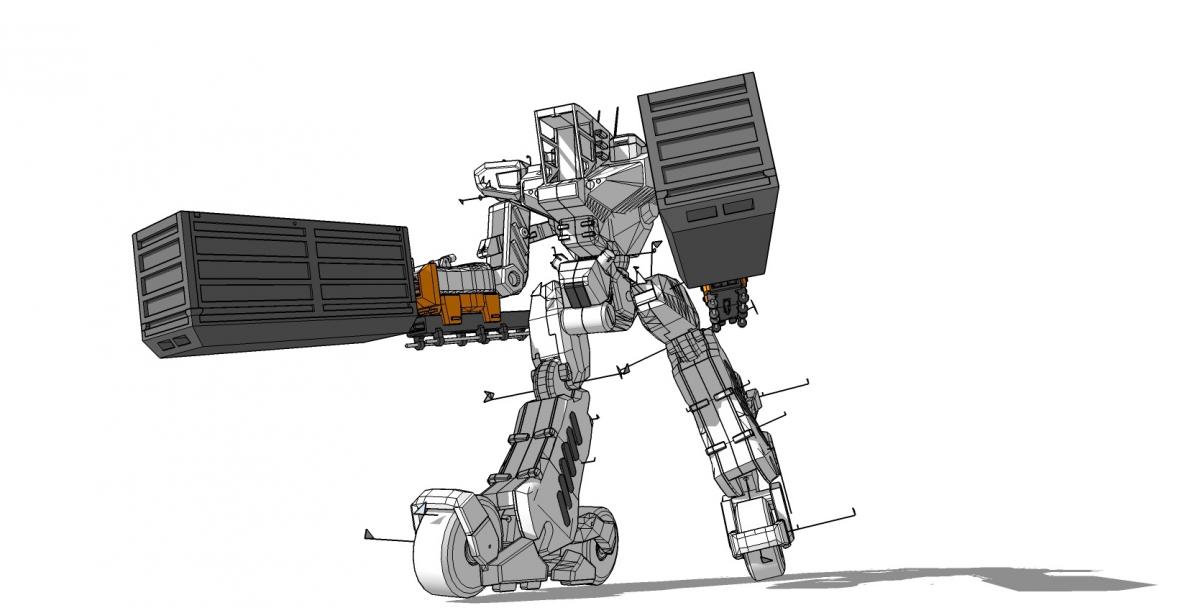
Thanks! Well the Workroid is scaled to fit the VF-1J 1/60 scale in terms width, it is a little smaller in height. The containers are scaled as seen in the anime so the Workroid has to lift itself a little on its feet to carry the third pile of containers.
The actual size of the containers are 3.14 cm x 7.5cm x 3.8 cm (in real size: 1m90 x 4m50 x 2m30)
-
You work really fast with 3d modelling Xigfrid. I'm still dreaming stuff up in my head
I spend way too much time on 3D to my taste, this is probably why you think I am fast with it

-
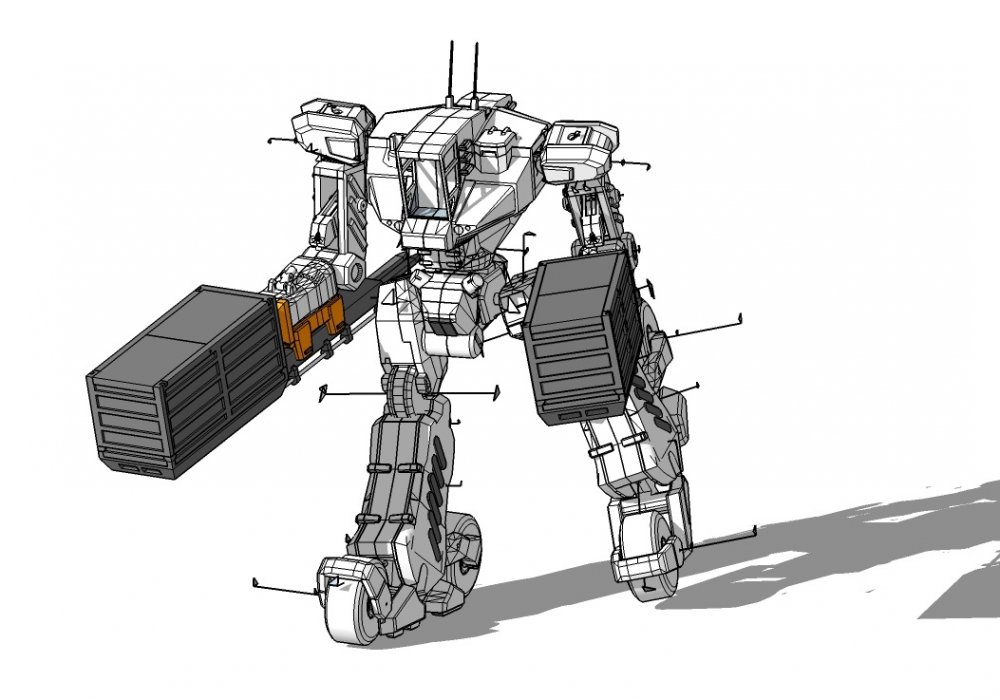
I have stopped counting on the articulations implemented! I like this model a lot, and surprisingly the Workroid has a LOT of common shapes and curves with the Cheyenne III


-
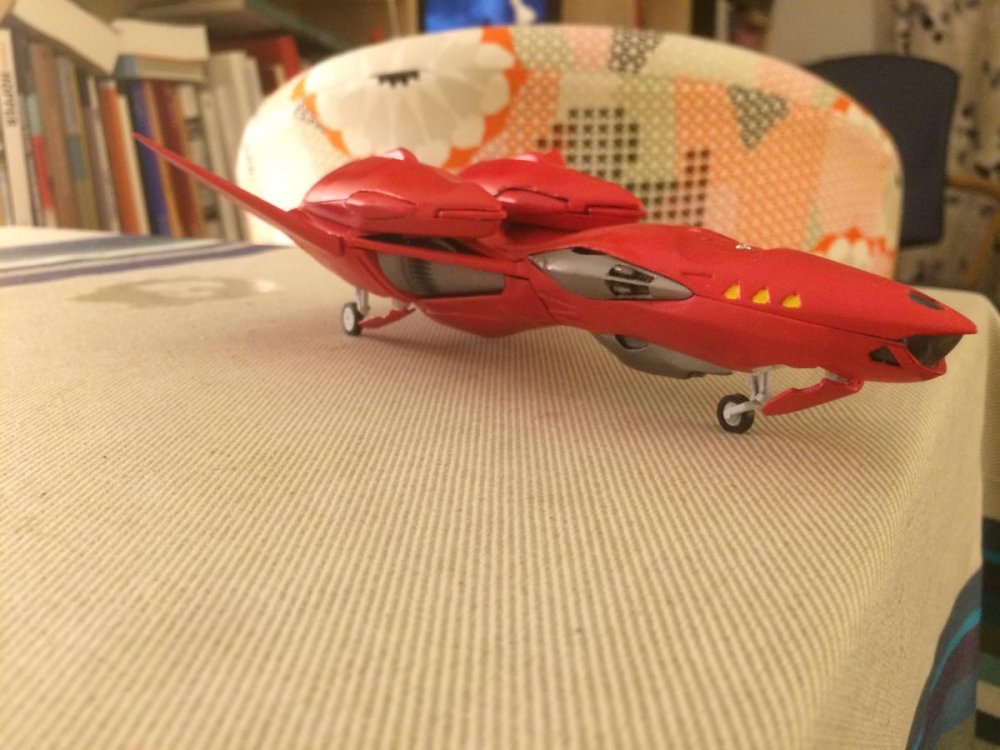
Halfway through my 1/72 one but still need the black nose piece or a pic of it to recreate it. Liking it though. Displaying it with the 1/72 Ghost from the VF-0C and the 1/72 Ghost from the Bandai RVF-25 set.
You can have a look of it here, you can also rotate it in the 3D viewer. Or, if you have an order there, you can grab the part and add it to your current.
https://www.shapeways.com/product/ZKQ8XKCAG/black-nose-scale-1-72?optionId=56828949
-
Not as sexy as Wmkjr's but this is my workbench right now!
-
Hi Duymon, would you mind to ask the 25s buyer if he would sell the front land gear traps as they don't really show in battroid? Thank you!
-
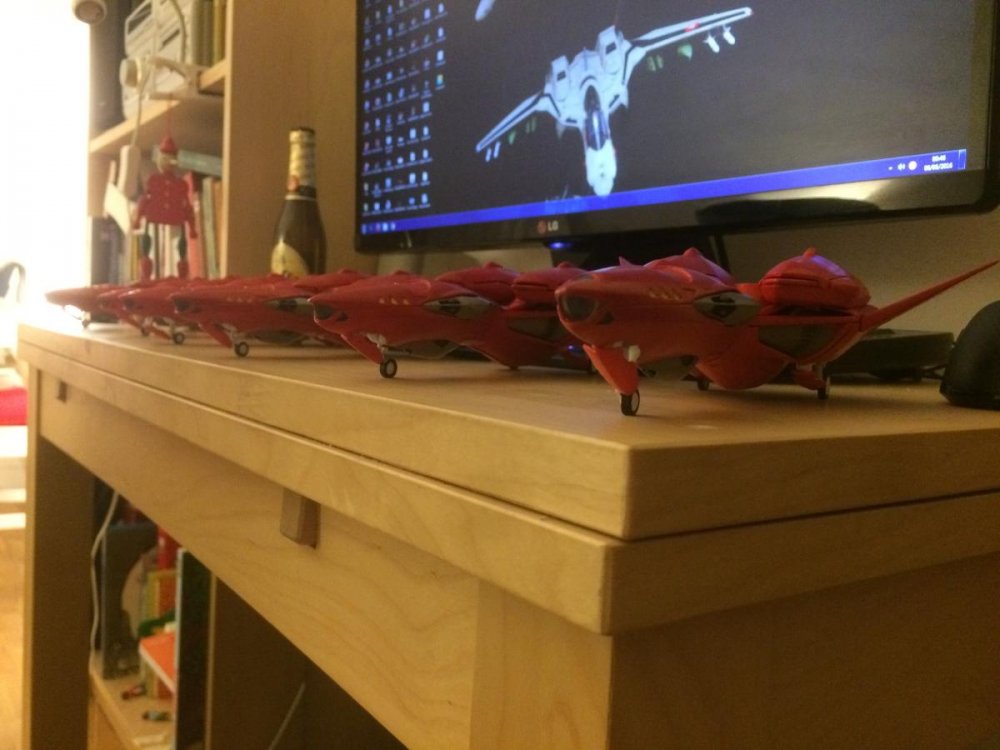
Sorry for the lack of updates, I have been really busy with a peak of orders that I had to prepare the whole weekend!
I am very happy that almost all the painted kits have been sold.
Updated 1st post with :
The production is complete.
1st batch: unpainted versions is completed and shipped
2nd batch: mainly Painted versions is completed and being shipped.
Stock: I have available in stock 1 Painted Ghost and several Unpainted ones. Landing gears are being restocked and will be available for end of June.
I am preparing the 3rd and probably the last batch, if you want to secure a Painted kit, you should order now because I need prepare the batch for the painting.
-
THANK YOU Xigfrid! I have been hoping for this for some time now! Purchased a set just now.
If you want a fast and great result with WSF plastic:
1) wash the part with water and dish washing soap, let it dry or quick hair-dryer.
2) Take a metal wire and wrap it in the middle of the part to attach it then spray some dark grey / black primer all over. Let it dry (for Tamyia spray paint it would be dry enough to be mounted in 1 hour, 24h for complete dry)
3) cut the part in half to separate the 2 pylons and assemble
-
working on a small/medium side project, can you guess what ?
-
Is it a VF-1 left fin (version2) ? If yes, I think you can source them from the unpainted kits, so you can try to post your request in the "Wanted" section, I have seen unpainted parts that have been traded there.
-
That looks awesome. I would never be able to get it as good as that. Wish Arcadia made an official one.
May an Arcadia employer come by and read you! I would love to pass my 3D file or the Master. Making such figures available and even making a few of these painted and assembled is very time consuming.
-
Spanner is right, we all are happy to follow your progress!
-
Dont waist your time with clearance! Sanding it once printed takes 1000x less time
And yes it is better to keep all the groups and component of a part until you are satisfied with its geometry, then explode just before printing
-
Should be good as is. It needed to be a little bulkier than the original, but nothing that a little sanding couldn't fix
http://www.shapeways.com/product/NU2UKP26V/missiles-pylons-for-vf-25-armor-parts
You have a set of 2 pylons, if you want to try them, let me know if they pass the print-ability. They should without issue, but who knows with shapeways...
-
Your X-9 looks fantastic! Great job.
Ps: your lower gun can be further pushed by approx 2mm up (the gun is a continued line of the lower shape)
-
Has anyone ever put a replacement armor parts missile pylon on shapeways?
You can count me as a member of the broken pylon club, so I'm just curious.
I almost broke one also. It plied and hopefully I could put it back without breakage.
Will have a closer look to see how easy it is to replicate in shapeways.
-
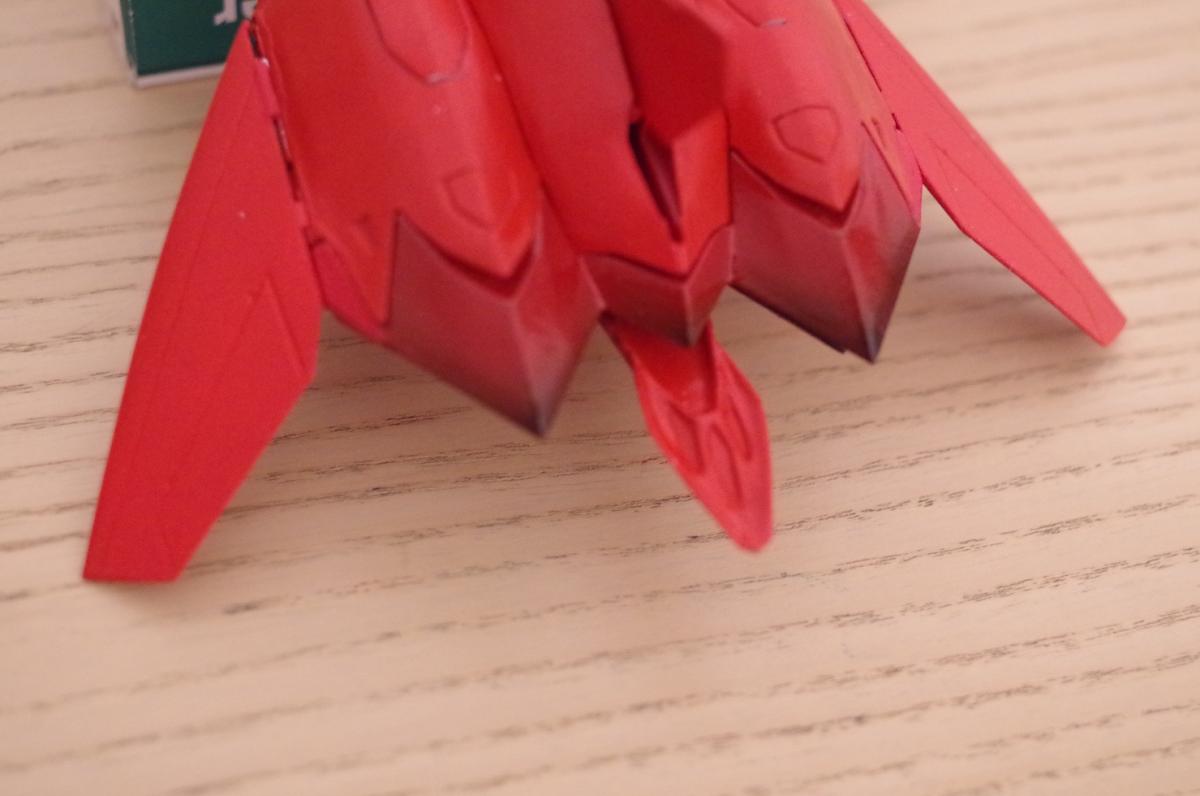
The darker red is obtained by mixing some brown with TS-85. The white kite is obtained from the white primer, masked with the supplied kite logo sticker, then airbrushing the rest of the part with darker red. The sticker is then removed before clear coat.
I highly recommend to clear coat the primer before applying the mask, that would protect the primer from the strong glue of the sticker.
If you want to apply a spray, TS-33 should be just what you are looking for this color
-
Looks great! Now I got something to reference for the exhaust. Is that the TS-85? That red looks nice. Too bad my LHS don't carry it in stock and they take forever to order.
Yes it is. The color looks good, and I also love the feel of TS paints once dry!
impressive work you are amazing
Thank you!
Small update about the painted orders: in the next coming days I will assemble the landing gears and add some coat to harden the paint. That would take a few additional days, sorry for the wait.
-
I will try to take new pictures of the painting in the sun light, these one don't really do justice
-
Hey Wmkjr, your ghost is getting some character with these black accents! Looking really great!
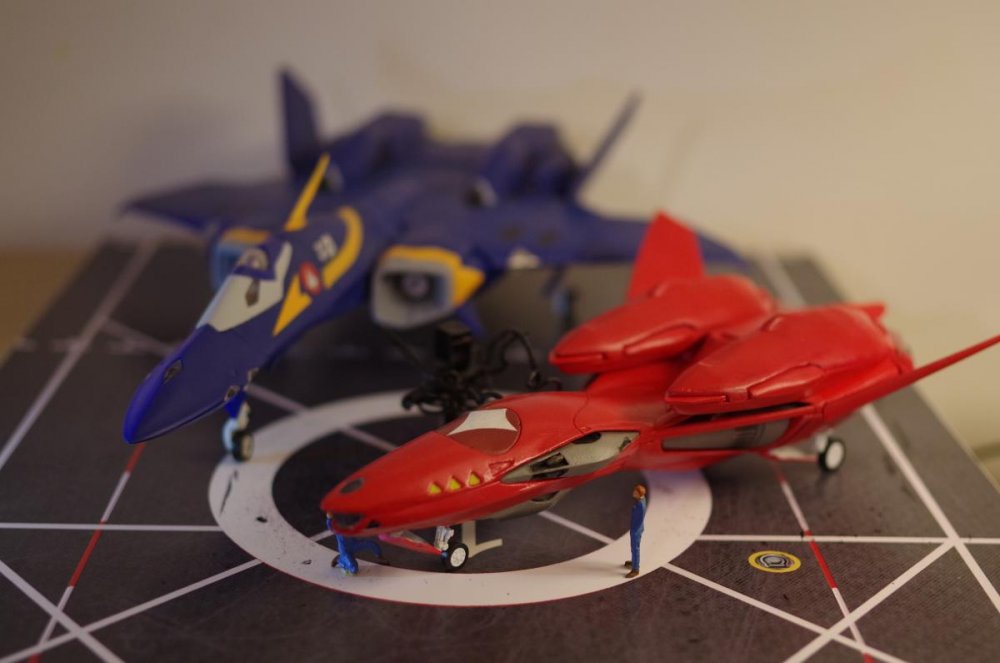
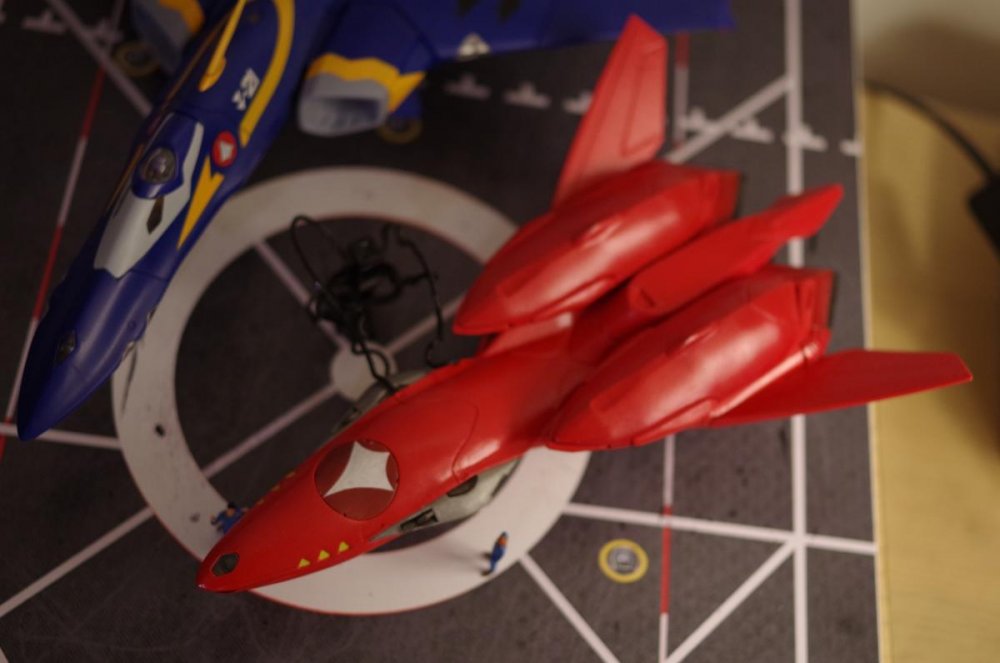
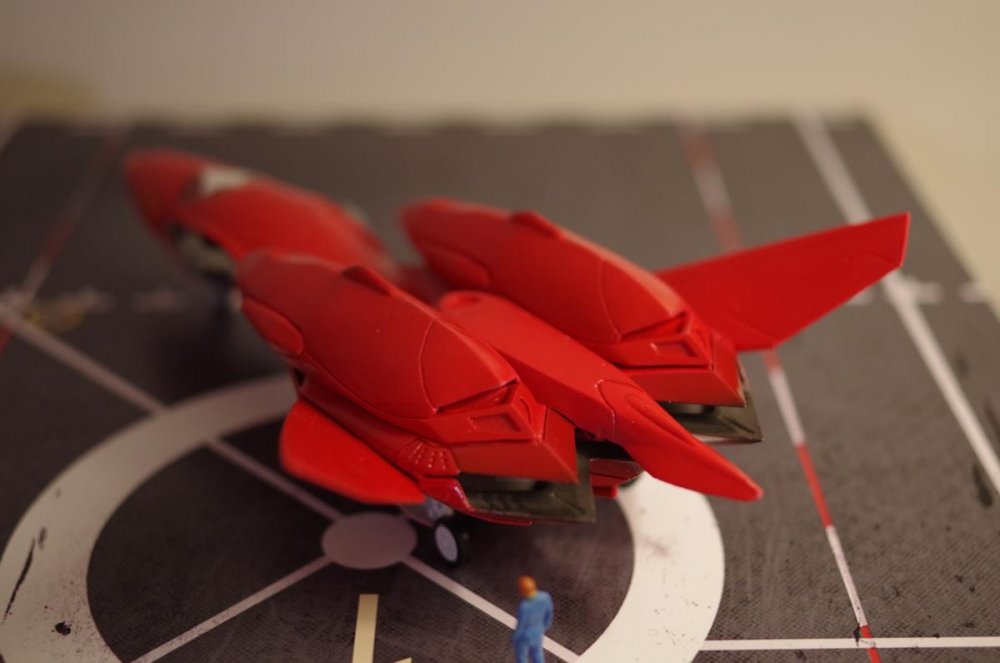
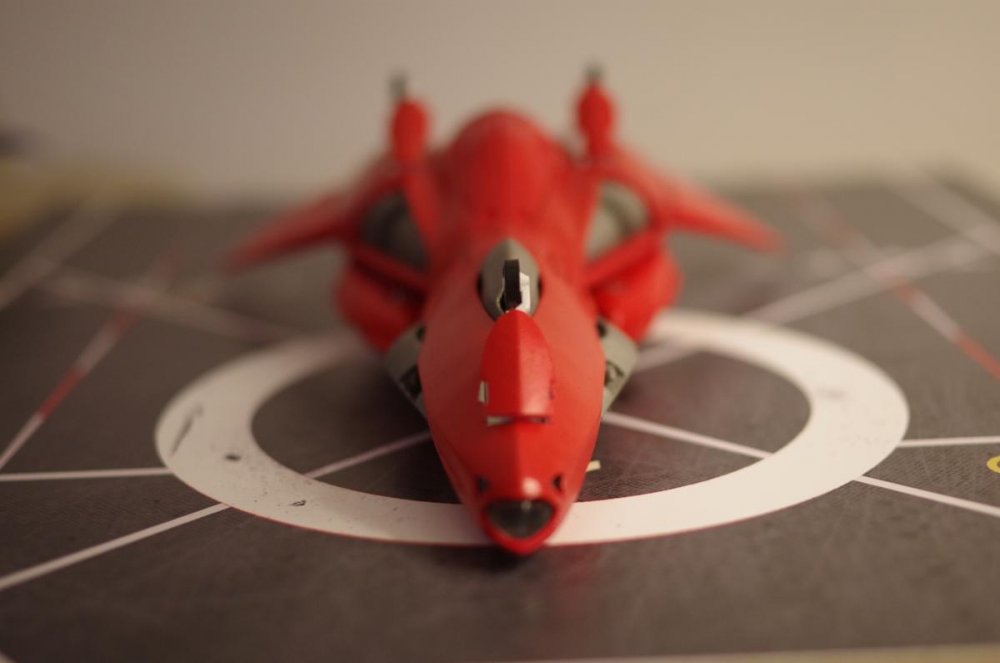
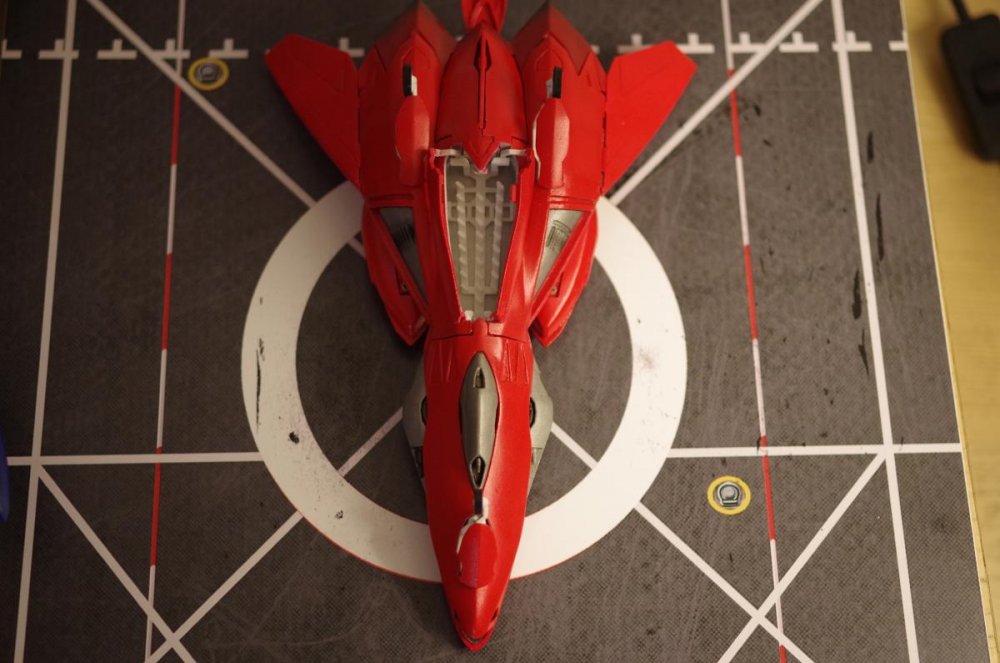
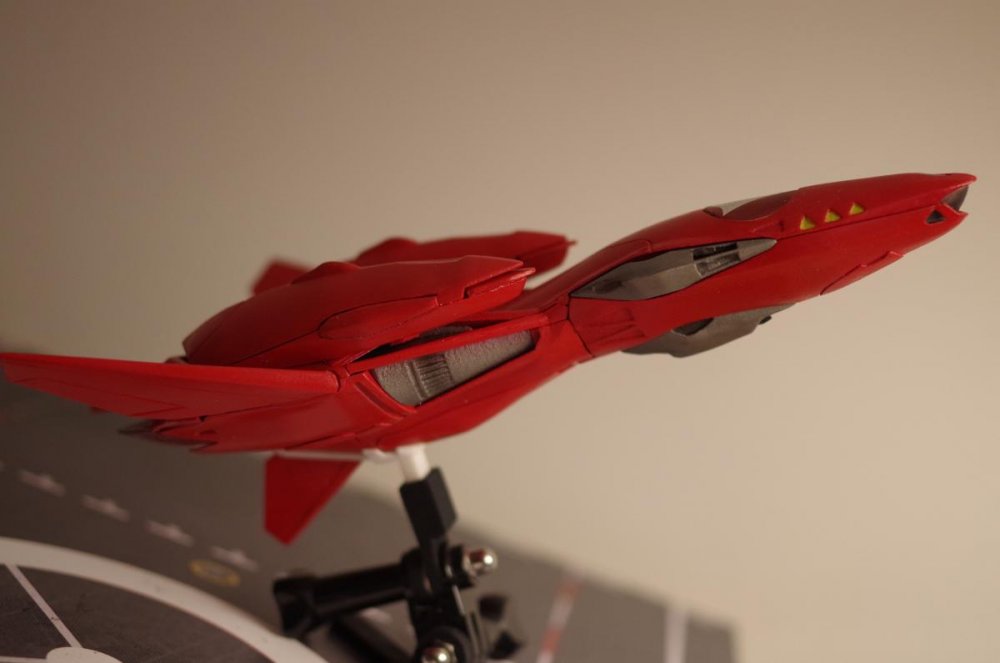
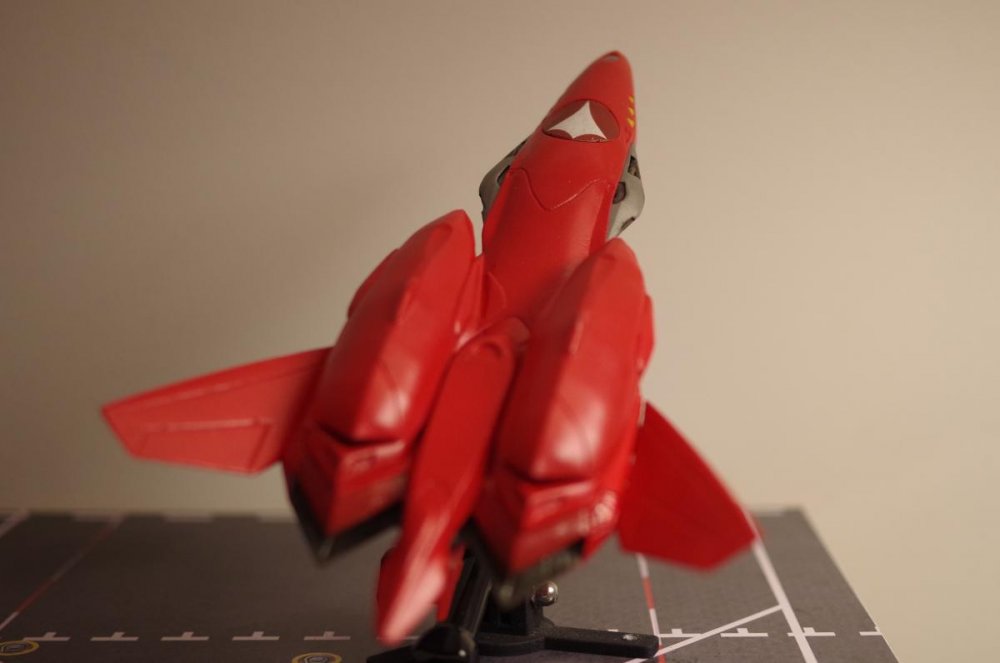
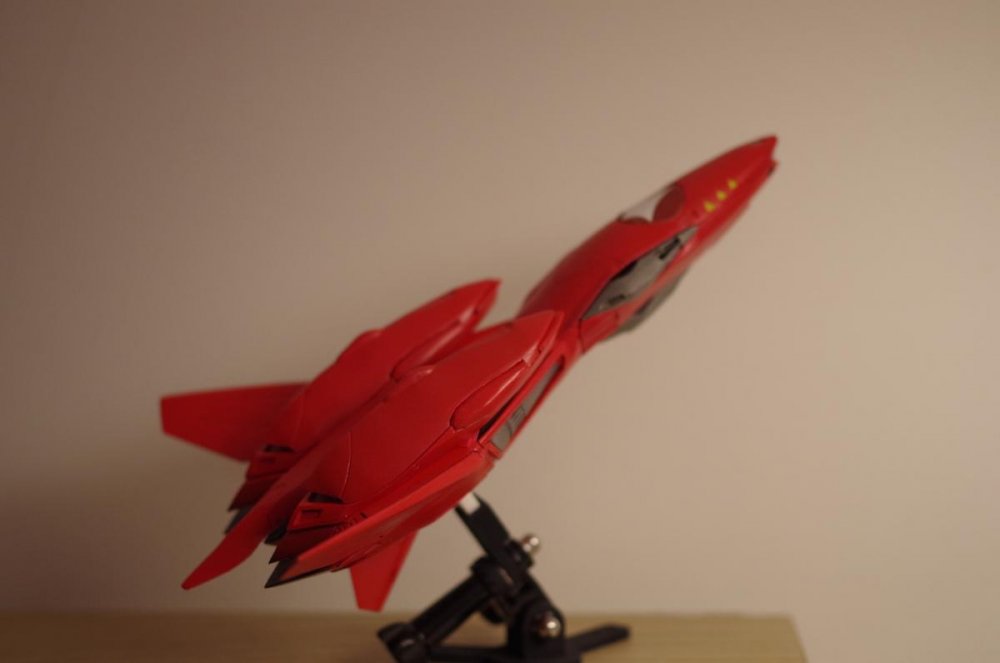
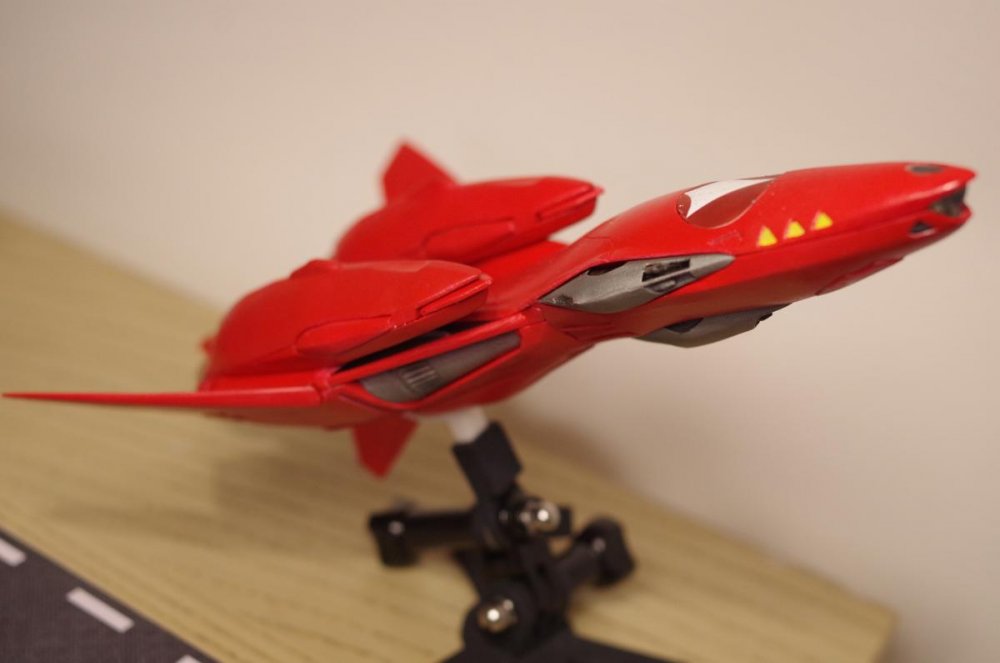
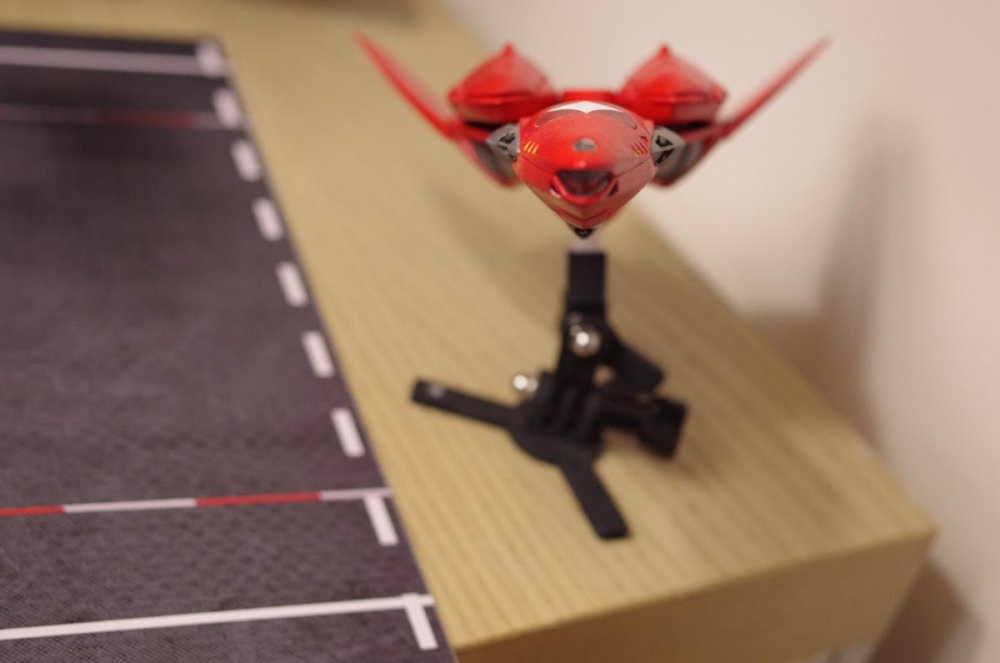
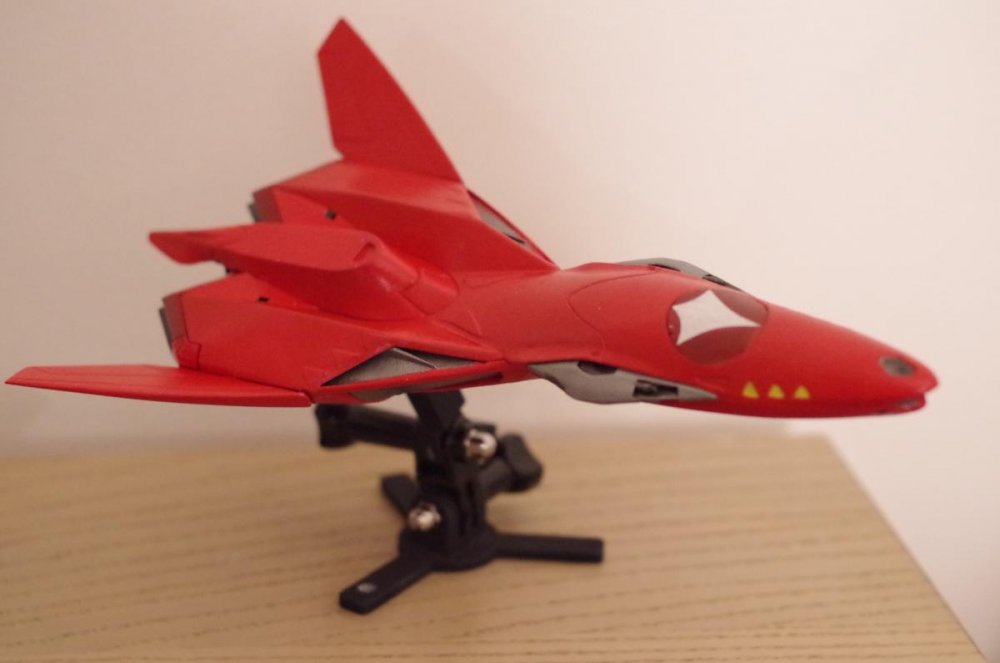
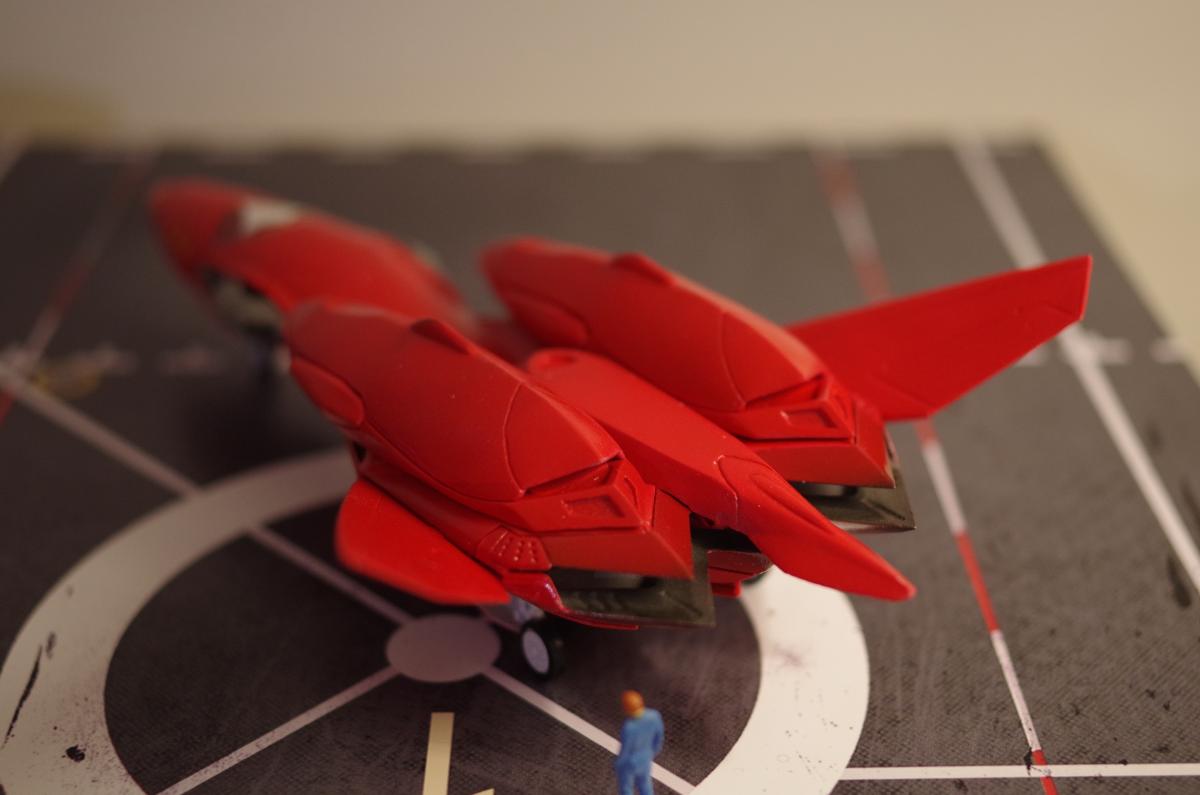
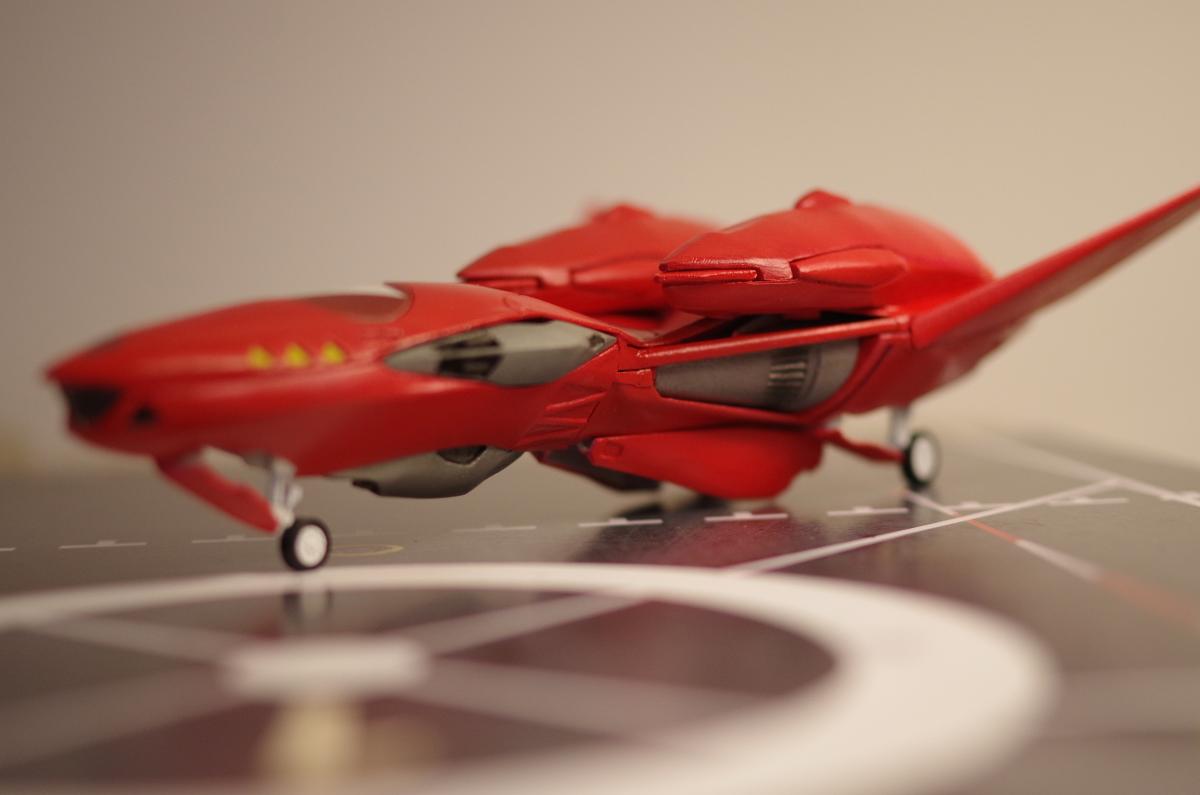
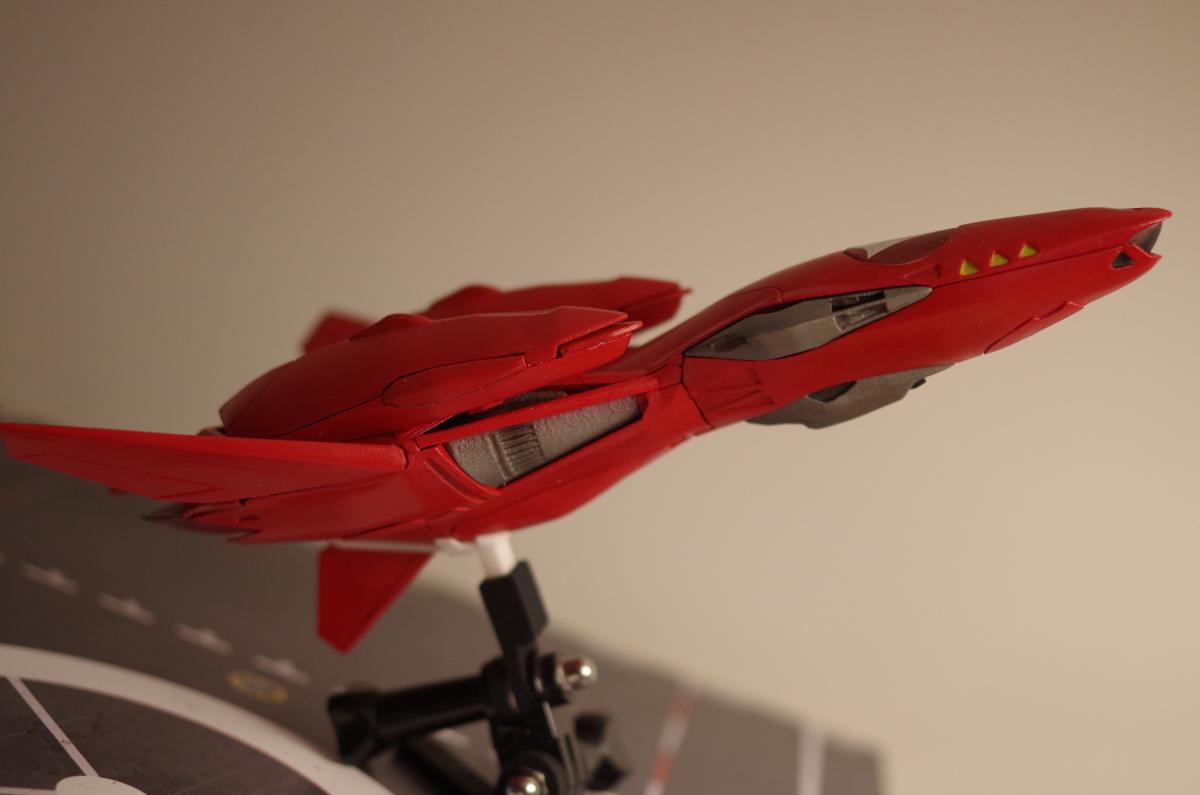
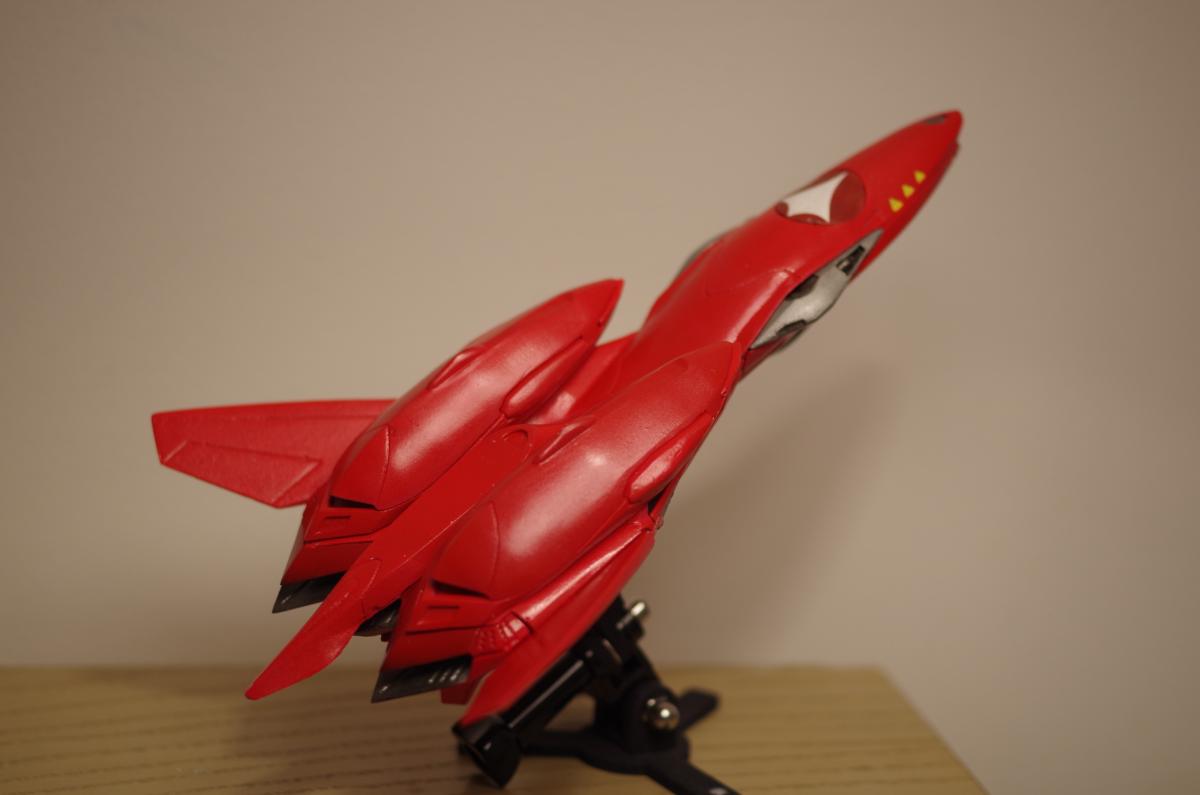
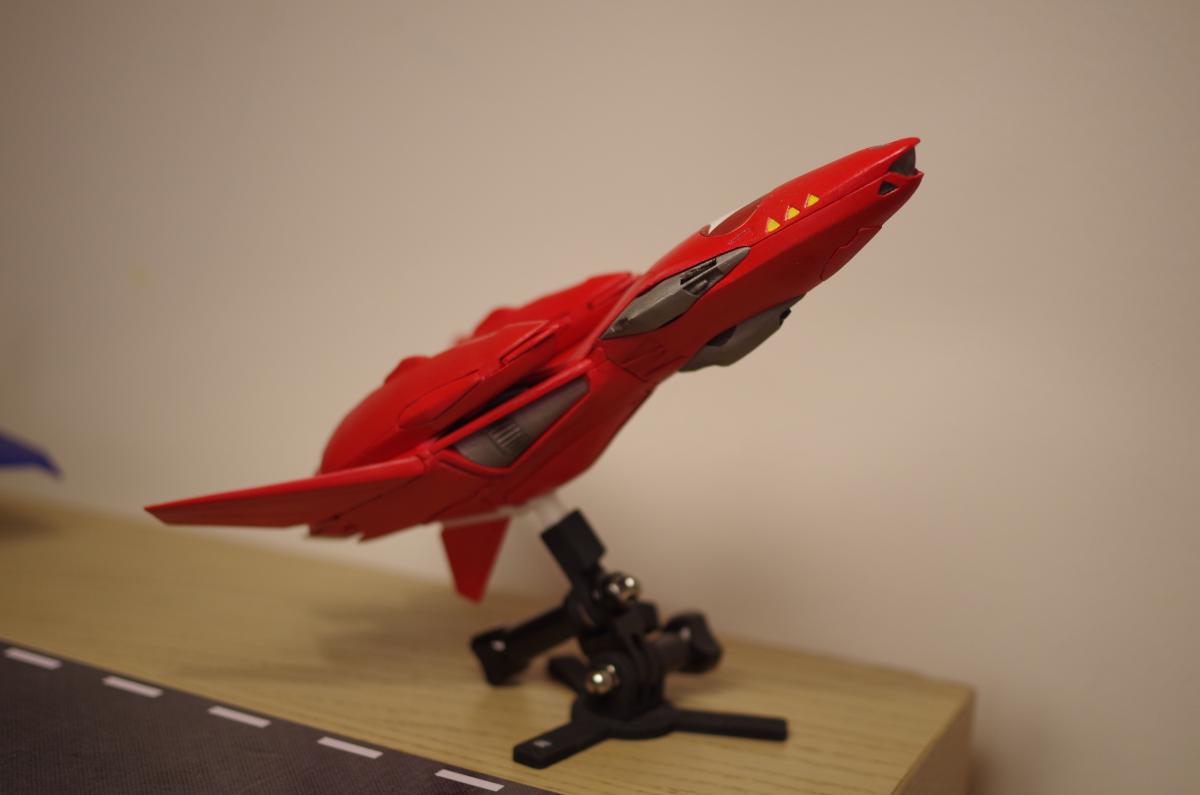
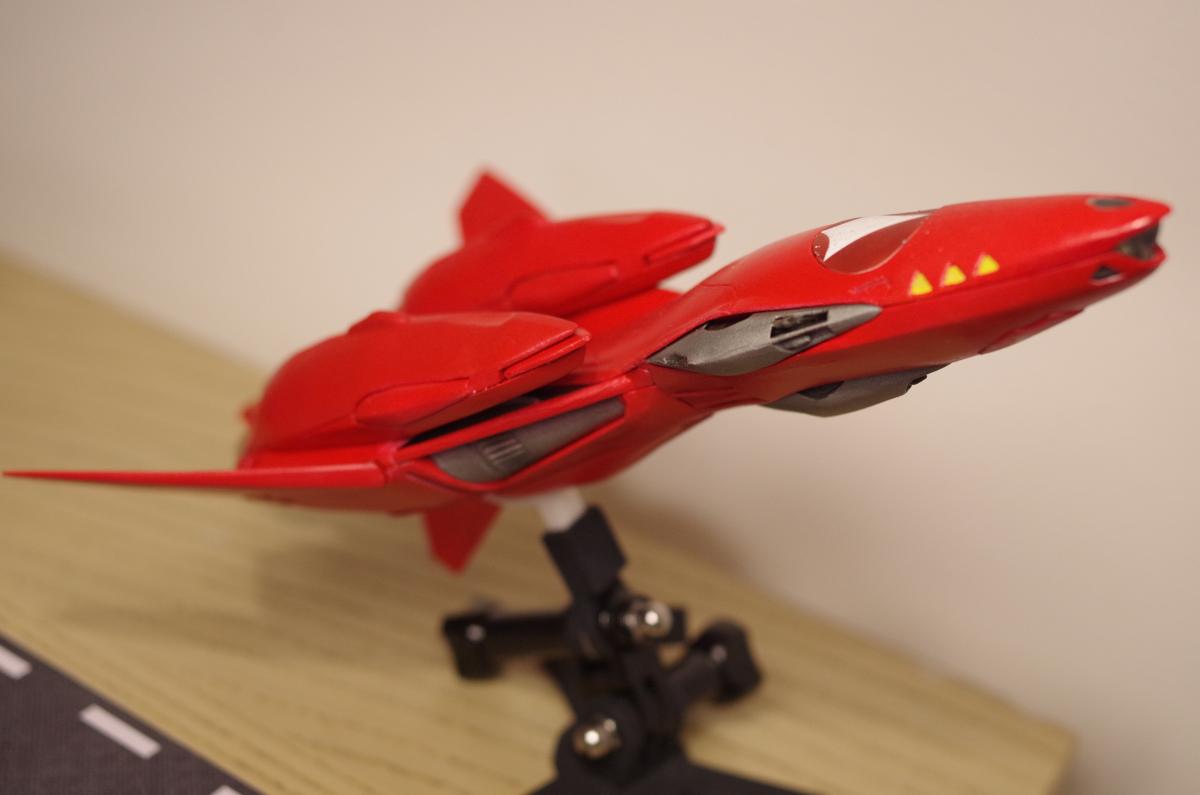
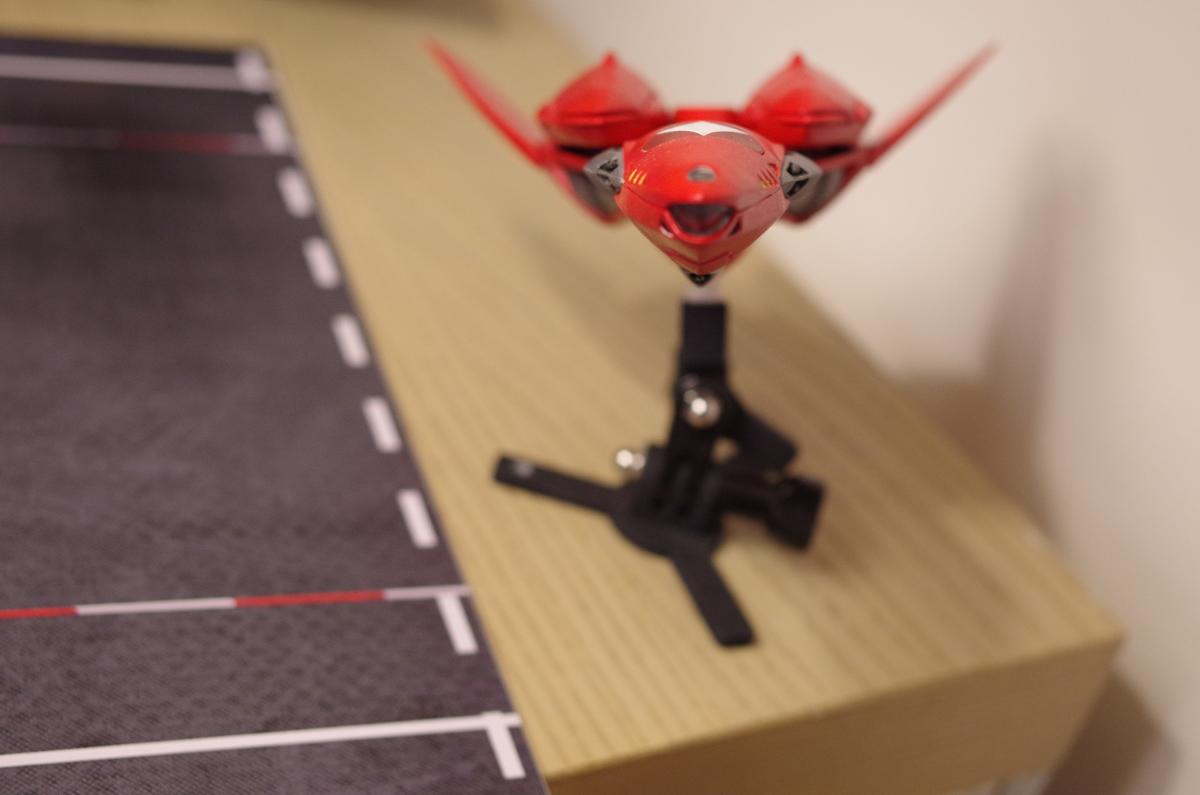
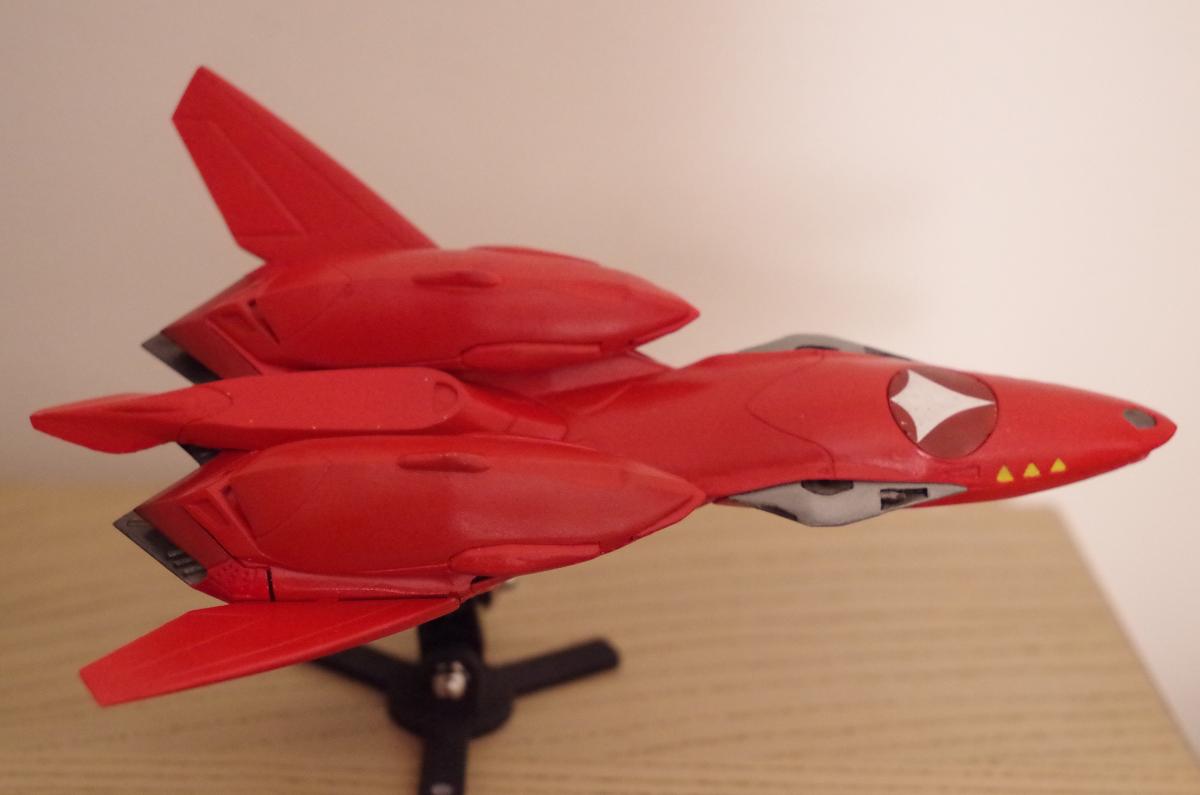
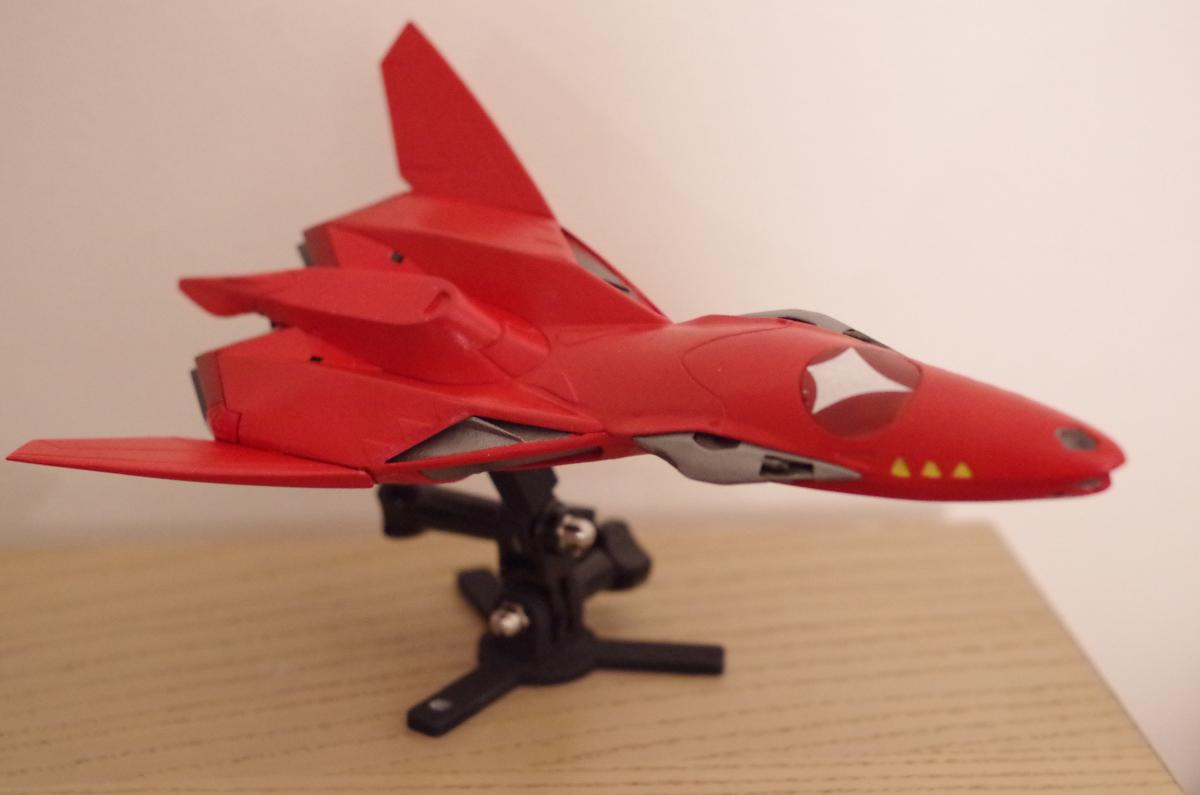
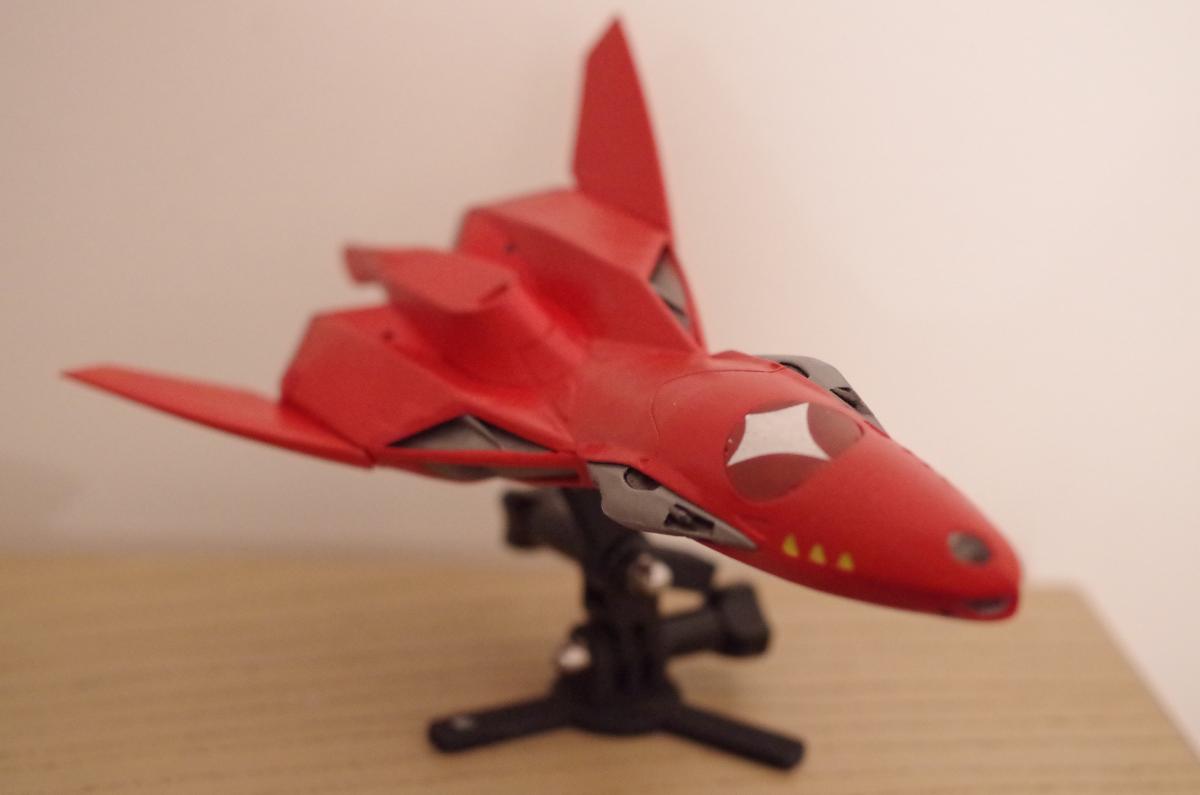
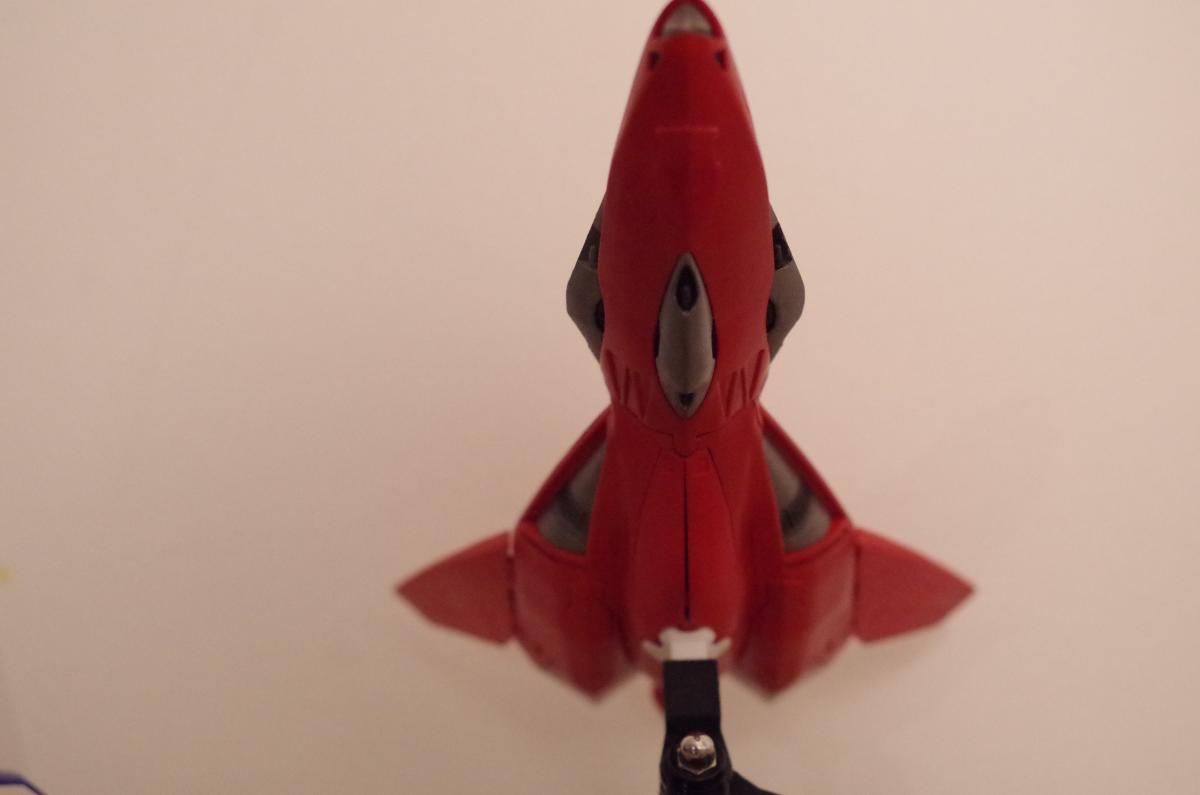
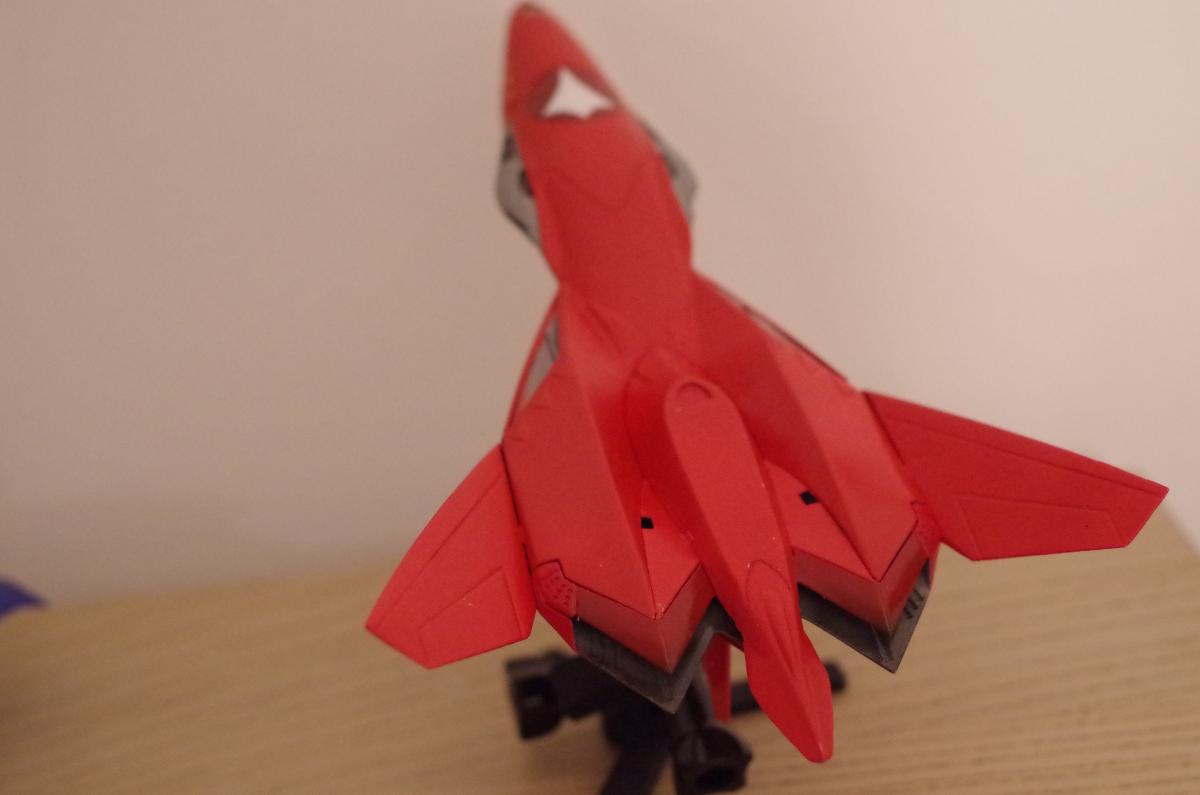
I have received the painted Ghosts today, and assembled one to take a few pictures of it.
1) The plastic parts that hold the landing gear need some sanding and cutting to fit. Be careful with them when working them: Work slowly, step by step when adjusting! In particular the front plastic part that is a lot off the perfect dims. I don't know why, probably because the resin recesses more than 3D printing when curing.
2) the paint is not super high quality, and have some defaults: it cannot be compared to a Bandai DX or Yamato painting jobs. But I am really happy with them and I think they really worth it.
I will let you judge them by yourself:
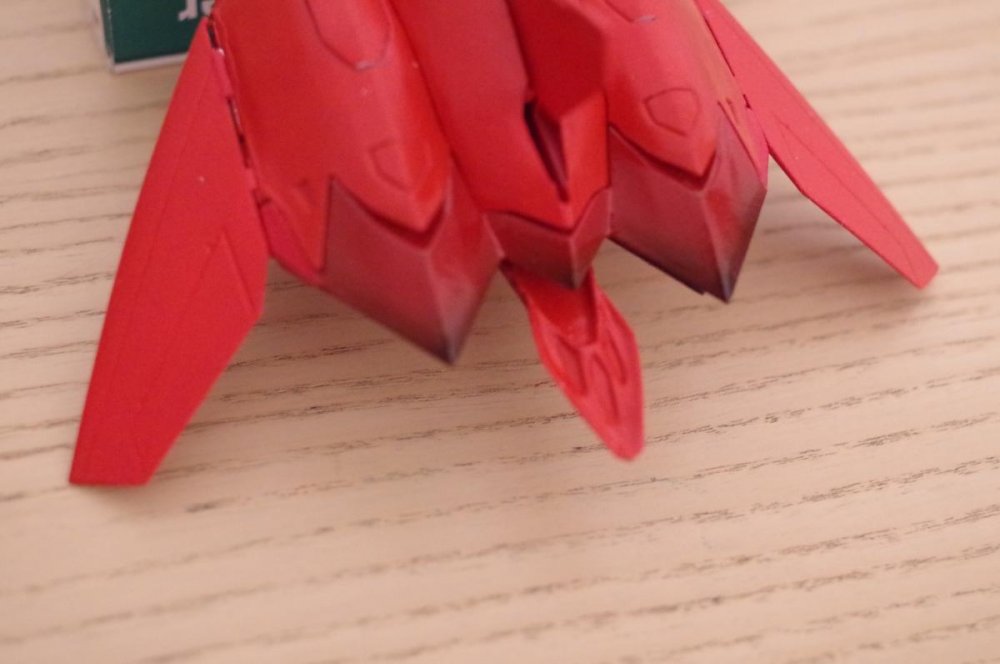
Last picts to show that the rear reactors have been emphasized with a slight darker red than the rest of the body.


-
Well no big swords for the mechas, but in episode 5 you can see Bogue trying to stab Herman Cross with its sword.


M+ ghost X-9
in The Workshop!
Posted
Damn I was confused a few seconds also: he meant Sharon not Sheryl.
And thinking of that, a little Sheryl would be stunning also... I shall give her a try soon!