
Xigfrid
-
Posts
2607 -
Joined
-
Last visited
Content Type
Profiles
Forums
Events
Gallery
Posts posted by Xigfrid
-
-
Hi derex, your ghost is a real beast: the paint matches perfectly the official toys. Did you apply the belly decals ?
-
Yeah, thank you everyone for the patience. If it can helps, I believe this kit is going to be a Macross Plus beauty. In a way, I tend to prefer the Training drone lines over the Ghost-X9...The curves reminds me the Boeing 747 and seems almost pacifist where the Ghost is much aggressive.
-
Are you working with perspective camera? Or is it just for the screenshot? It is so much easier to trace lines with the orthogonal view, you should try it if you dont
-
I will be looking to your build!
-
Glad that you like it! I will soon receive the missing parts, until this moment I will swoosh it around and make some dynamic/ 1-handed poses!
-
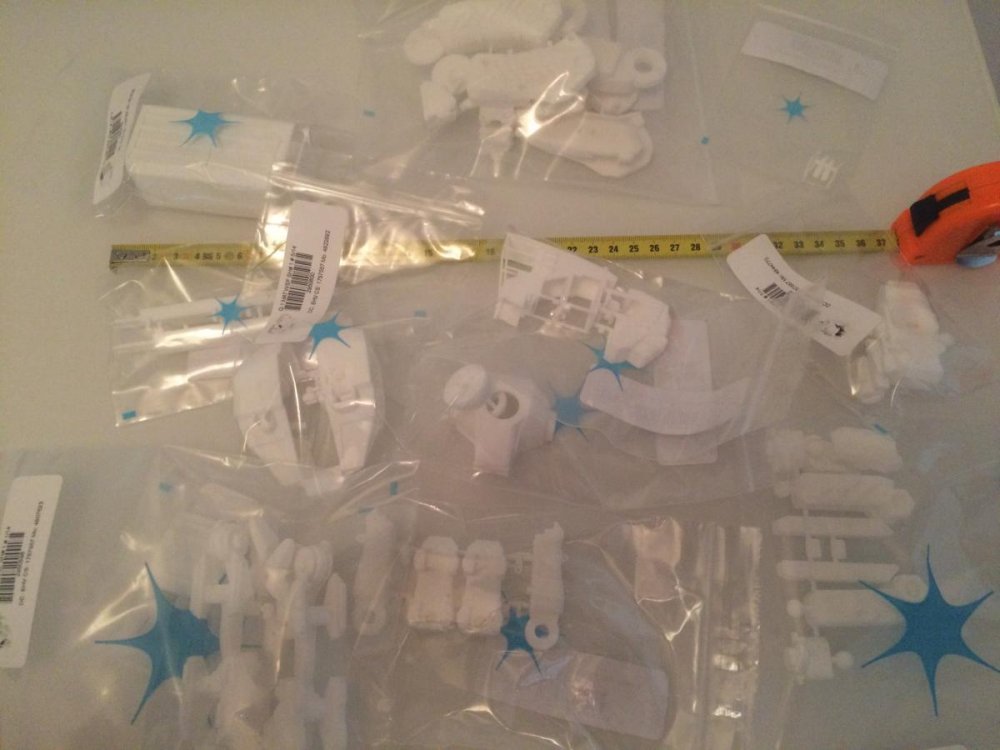
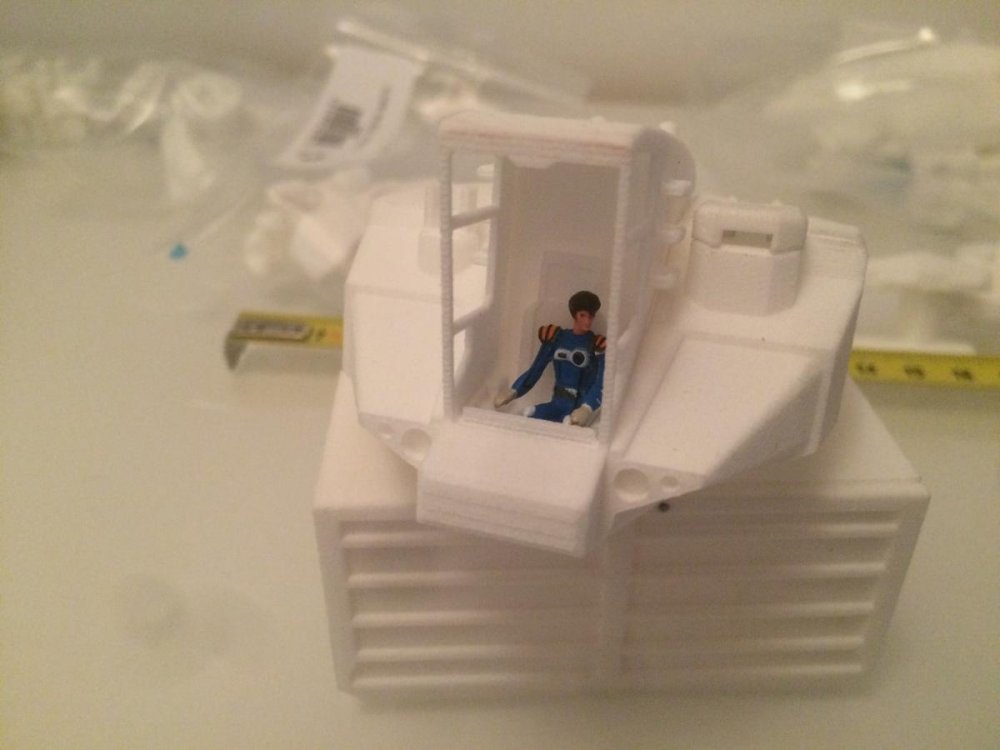
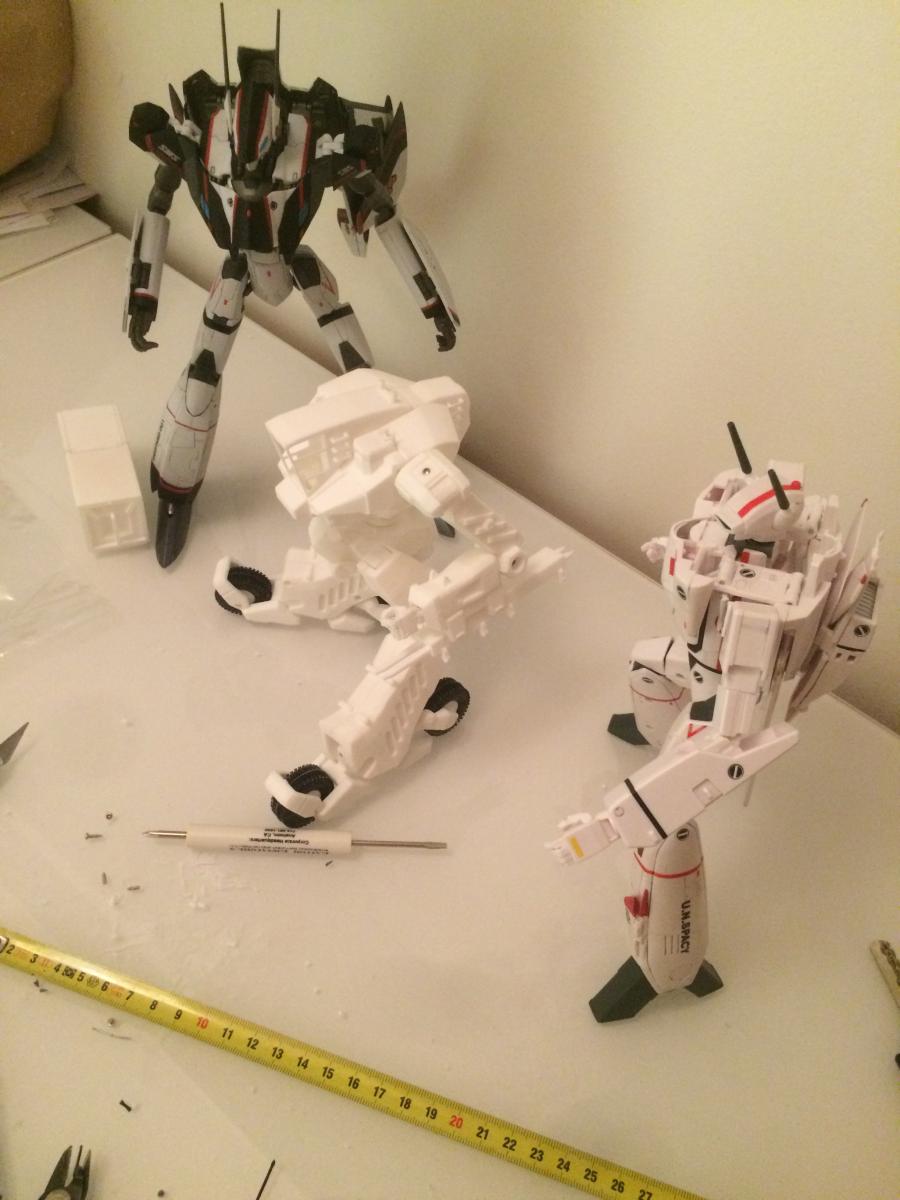
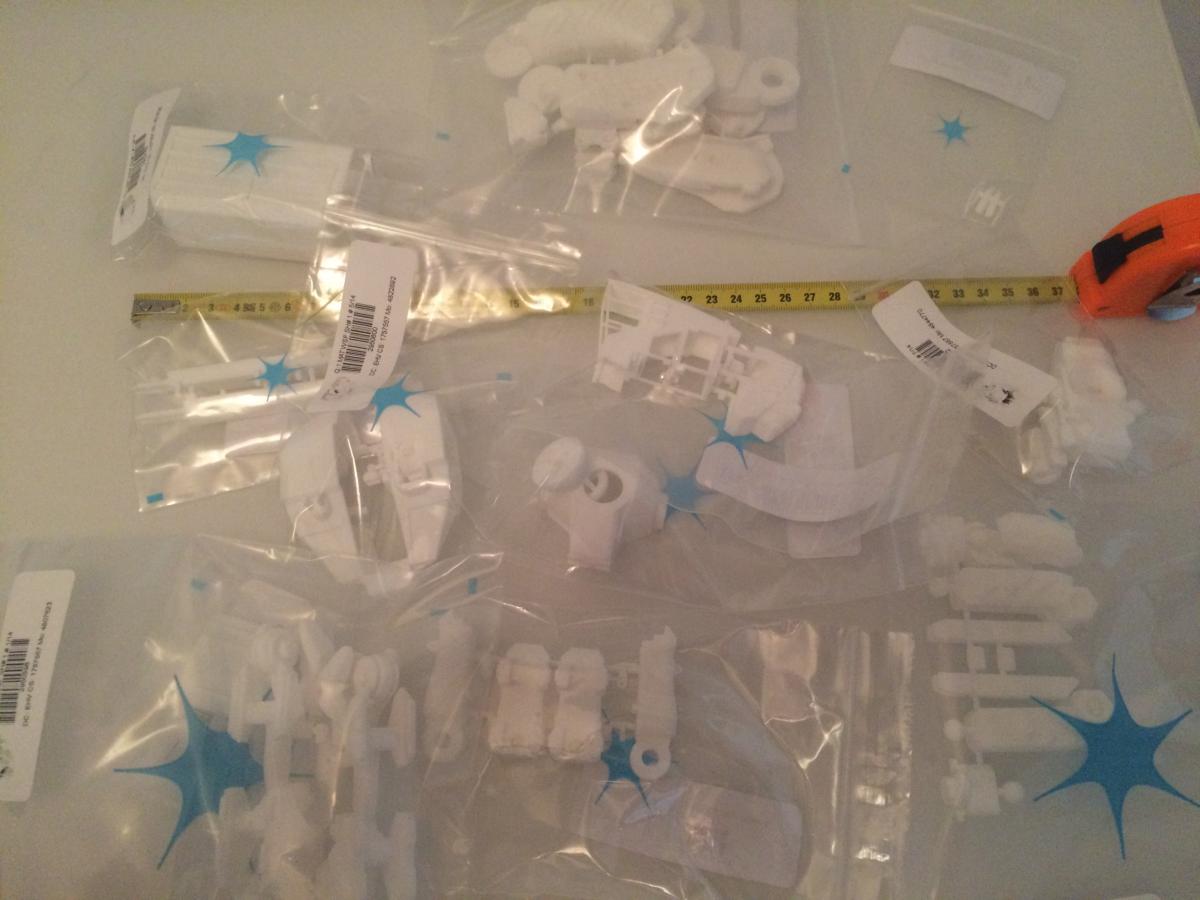
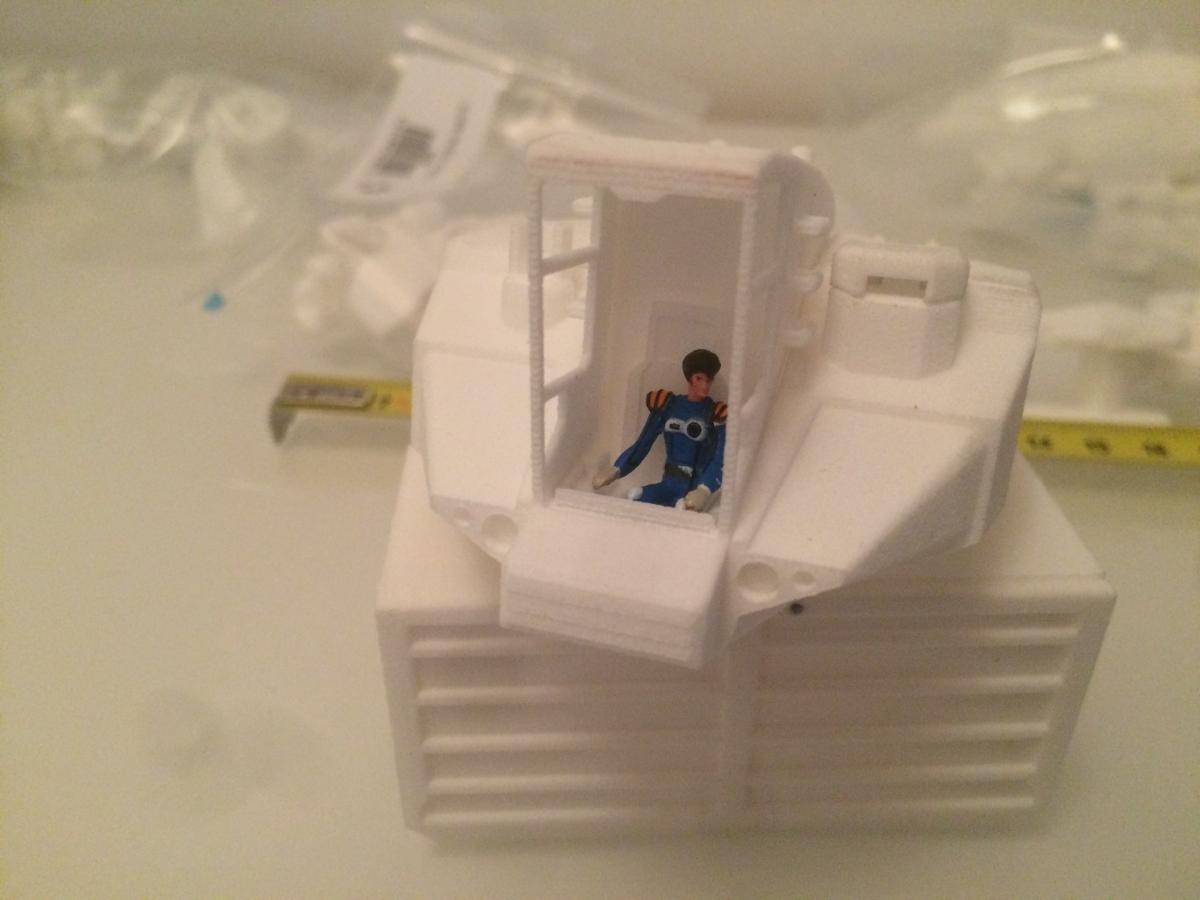
OK, I received the Shapeways parts yesterday. Sorry for the not-so-great quality photos, but I was trying to shoot these with my camera to show some comparisons.
...
This is really quite a good attempt, but the ultimate angle of the reaction missiles when mounted seems off by just enough to not let my OCD let it go. I also might need to try to put some Future floor polish on the connection peg which goes into the armor pack booster, as it is ever so slightly thinner than the port and doesn't hold securely. If I were to jostle the Valkyrie while on its stand, the pylons will fall out. This is so close to being a solution to my problem, but it needs just a *slight* bit of adjustment.After this review, I placed an order just to make sure that your sample was not a default.
I just received it and as you said, it is a too far "OFF" the original dimensions. I have removed it from my shop until I fix the design. 1) The main tab needs to be enlarge and slightly recut= Easy fix.
2) The pylon extremities need to be angled a bit more, and to make it right that would some take time because I don't want others to test a faulty design.
As soon as I fix the design and tested it I will make the model available again in my shop
-
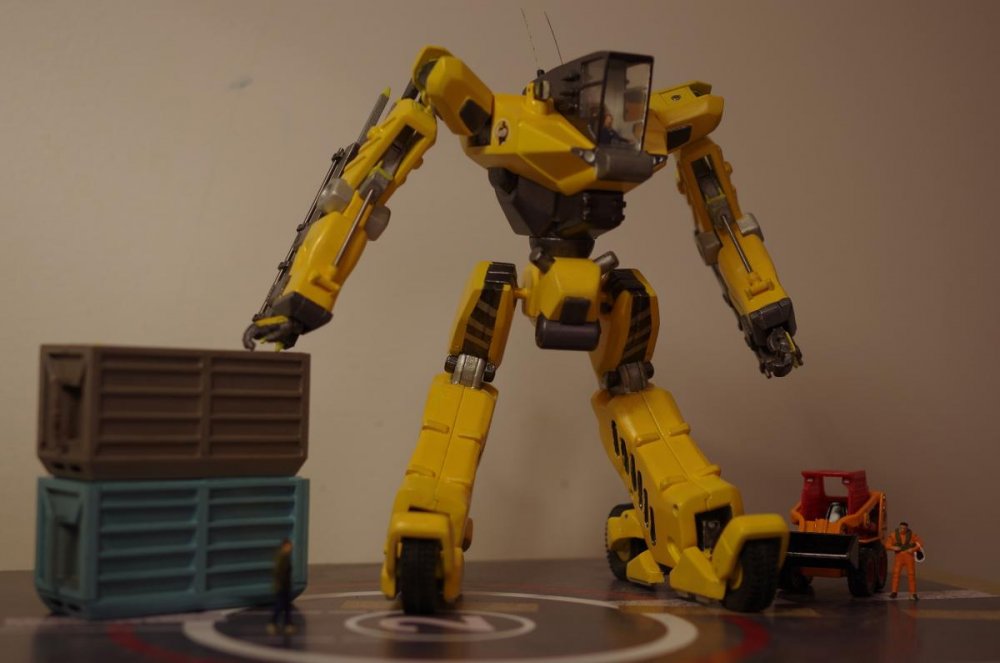
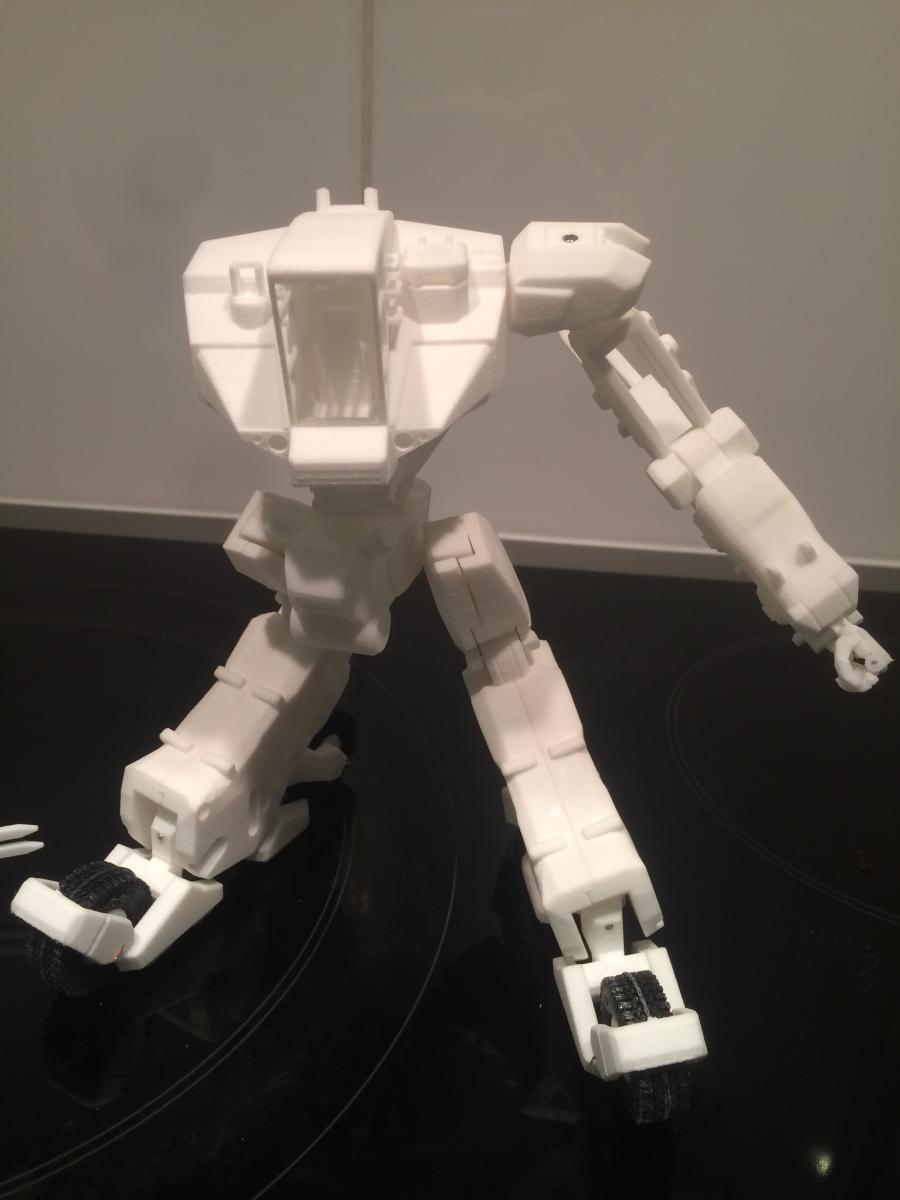
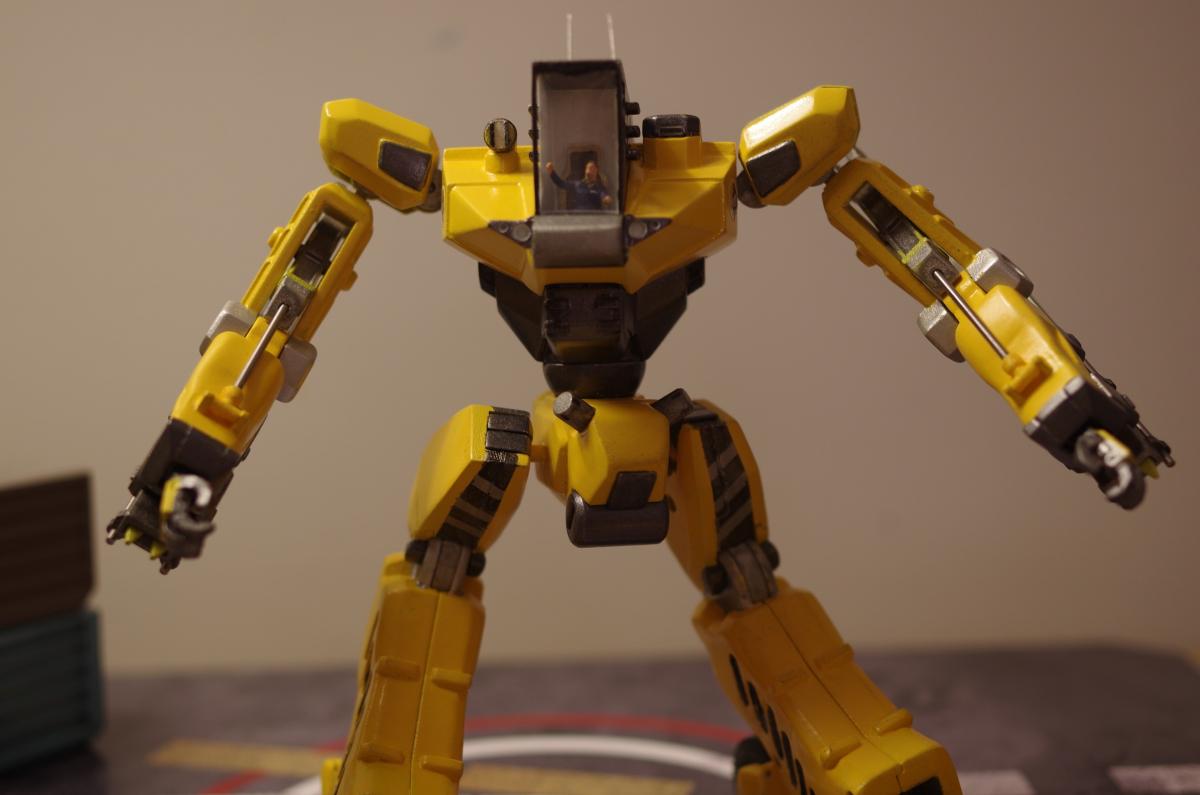
Todays pict!

-
Thank you guys!
Concerning the Cheyenne, this Workroid shares a LOT of common parts with the Cheyenne. I made the design so that it is possible to upgrade the Workroid into a Cheyenne.
-replacement of the current head part + reactor in the back
-arms replacement
-shoulders upgrades
-feet upgrades
But, I am not so into the Cheyenne compared to the Workroid right now (I loved so much the Workroid since its first apparition in Macross Delta ep01!) so I don't have plans to design these parts for the moment.
Perhaps once I got this Workroid painted and buffed, who knows!
-
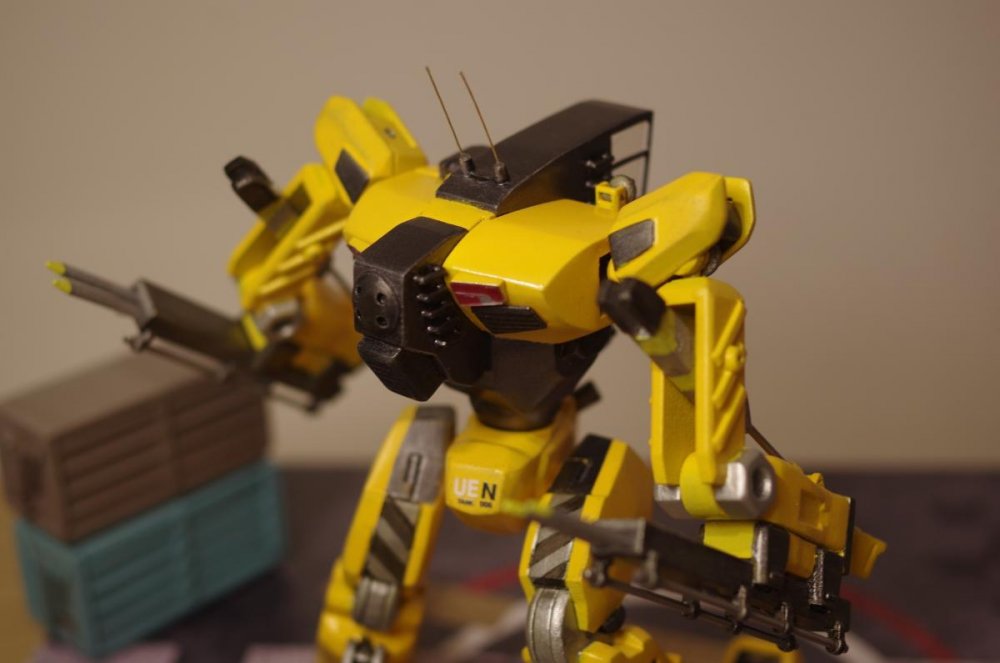
Seeing this part, it reminds me that I use to sand a bit the inner part of the "plastic" part. Please check the "sanding.jpg"

Apart from that, everything look good.
To insert the Supers, I usually begin to insert the front portion, with plastic part first on the angle of the air intake. Then I insert the rear hook into the hole, I use a flat screw to check that the hook get inside the reactors thruster correctly.
illustrated as below:
STEP 1

STEP 2


-
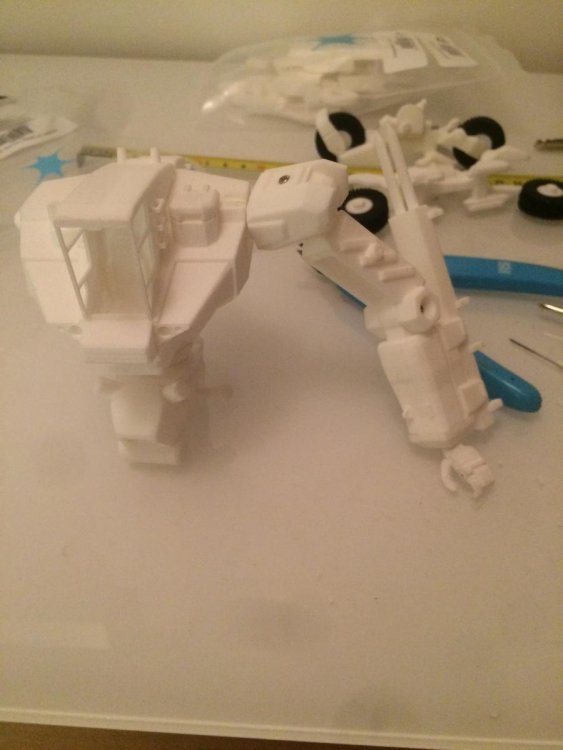
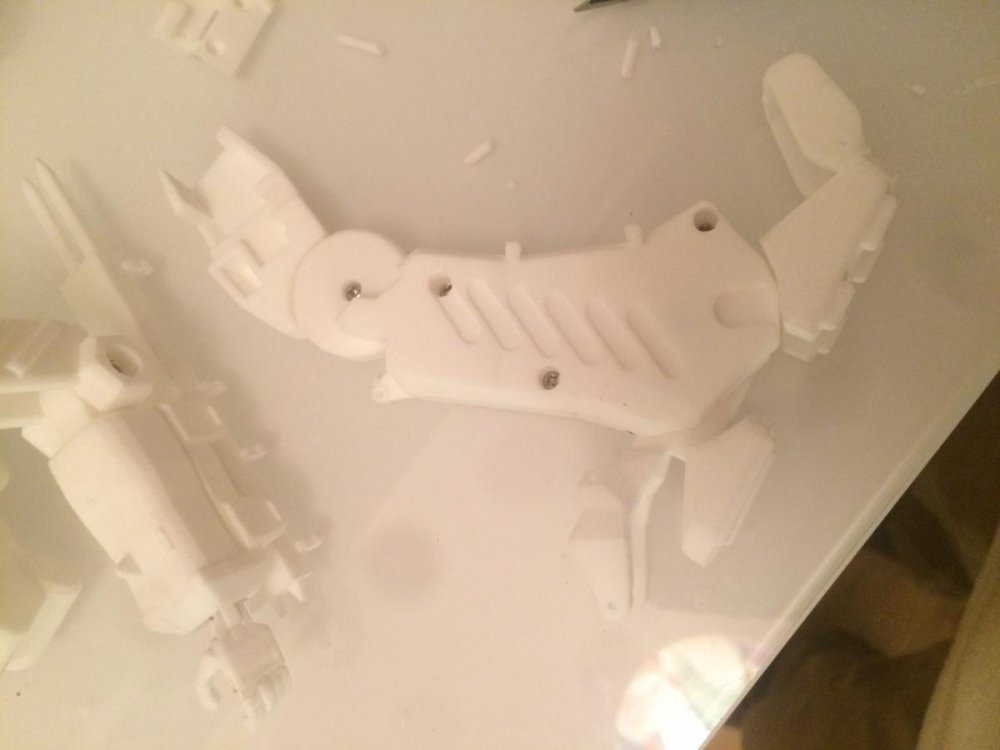
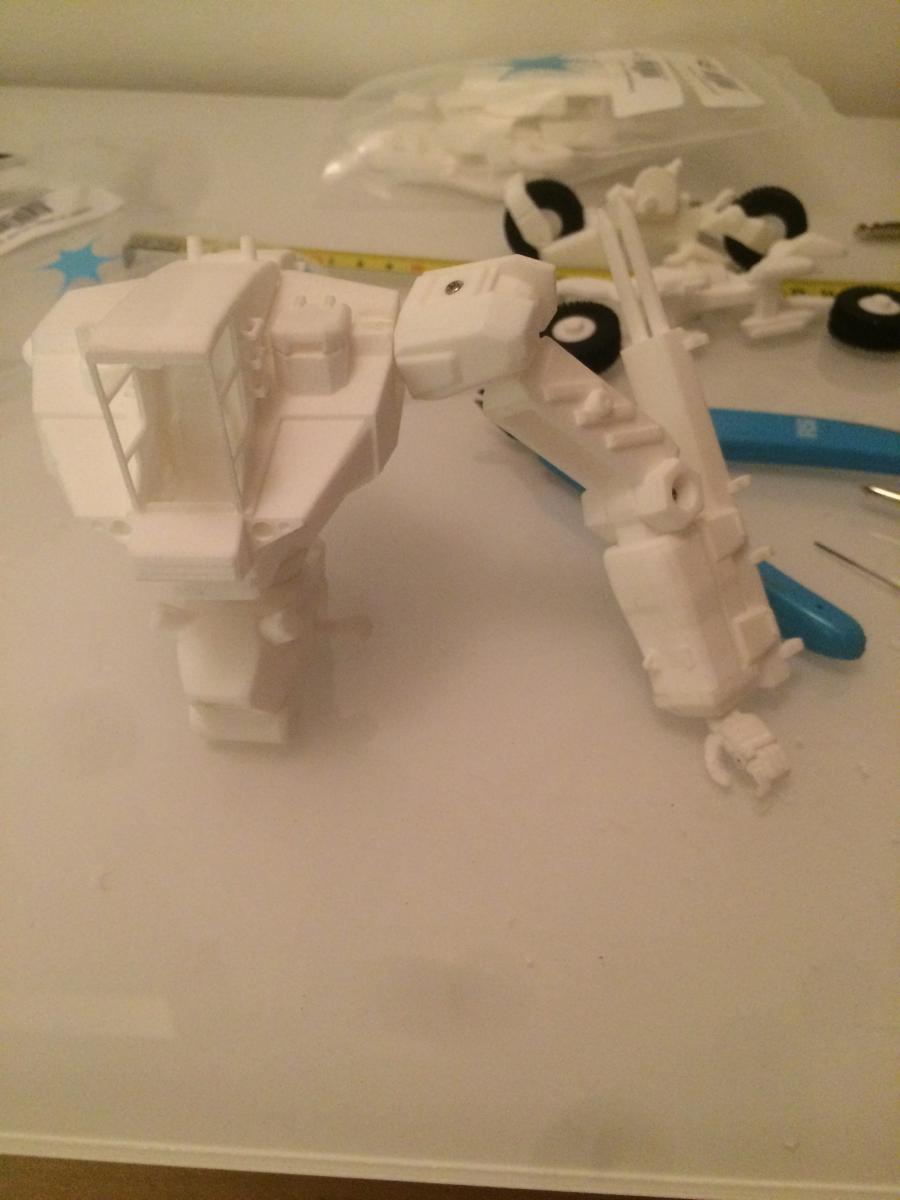
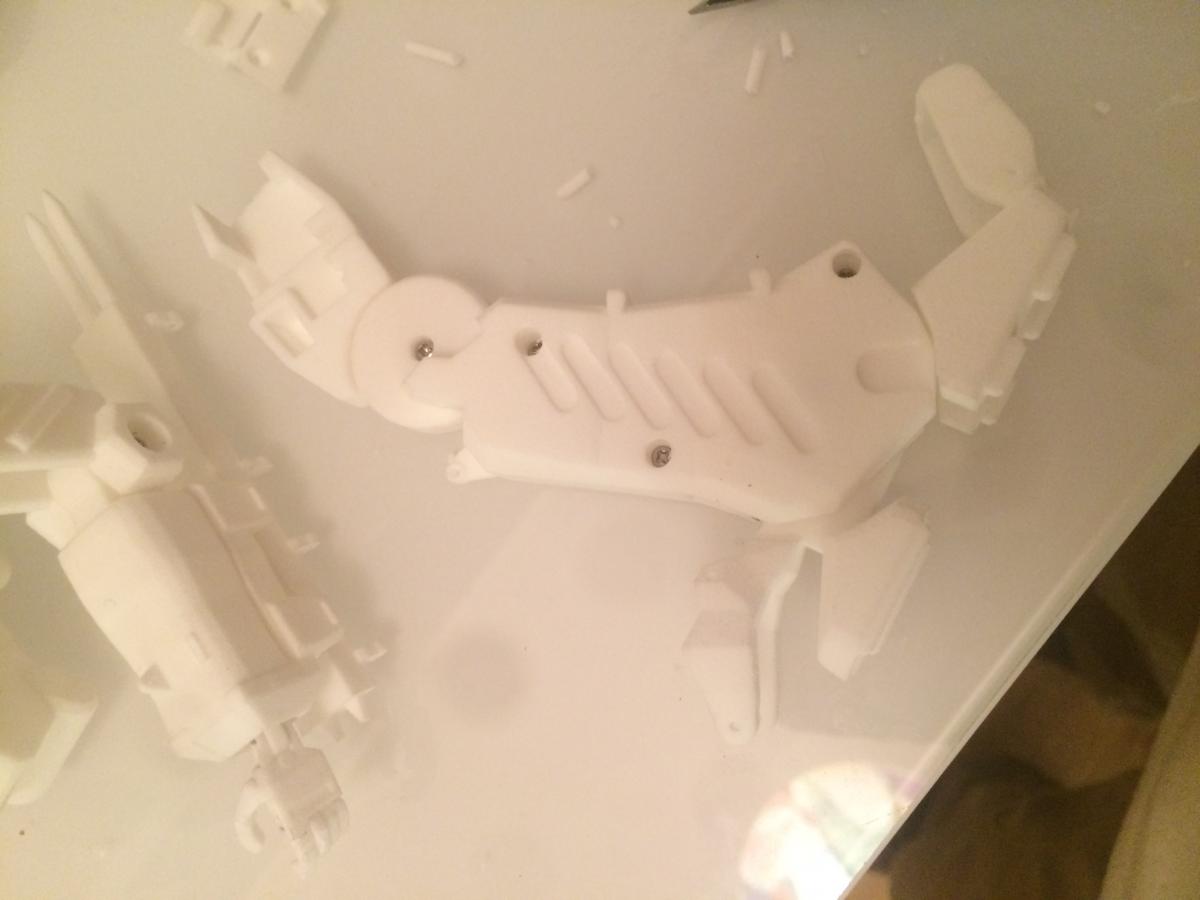
Unfortunately at this point I realized that a shoulder is missing, so it is uncompleted.
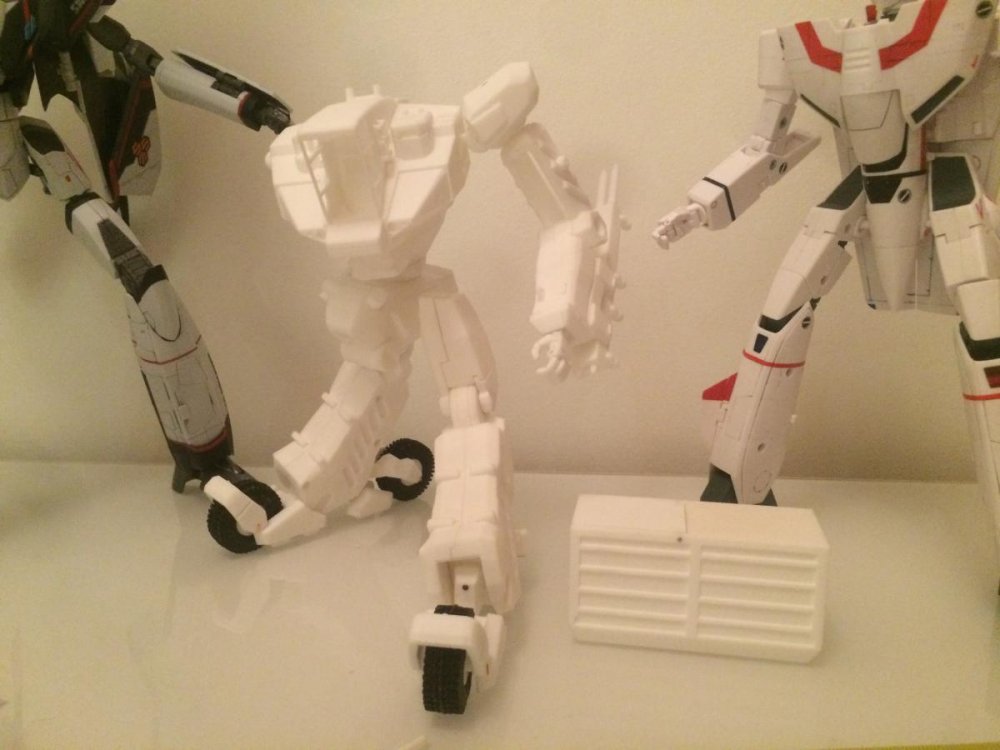

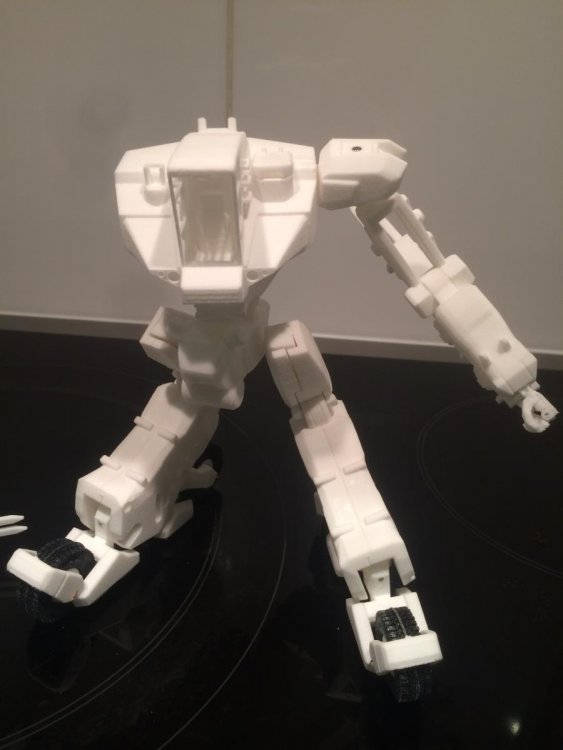
Next steps:
1) I got to get the missing parts asap
2) assemble the hydraulic cylinders that reinforce the hands and feet articulations (2 caps are missing together with the shoulder) so I can't attach them
3) Priming, sanding x3 times before
4) Painting
-
Latest update:
-22th September 2016
- First of all the Shapeways link to the 3D parts that can be bought: https://www.shapeways.com/shops/xigfrid3dshop?section=Workroid+1%3A60&s=0
- Assembly Manual : https://drive.google.com/file/d/1B3OYMny22O9Qw7F6KAJ55-vc2wA2ZXuu/view?usp=sharing
- RUBBER TIRES: I made the wheels in 2 parts, one the center of the wheel in WSF plastic, the tires however were bought from a chinese RC car supplier. You can get all 4 tires for 6 USD here: http://www.banggood.com/Orlandoo-F150-OH35P01-KIT-Parts-Tire-Skin-4PCS-GA1001-p-985256.html
- Another rubber tires model: http://www.banggood.com/Orlandoo-F150-OH35P01-KIT-Parts-Tire-Skin-4PCS-GA1002-p-985260.html
- PAINTING: I have used Tamiya spray paint: TS-47 (Color code "Chrome Yellow") as a color base, Tamiya spray paint TS-38 (Color code "Gun Metal") for the dark/black aeras and Aluminum/Steel Acrylic Spray from Humbrol. I used black enamel paint to wash over the Aluminum and Gun Metal areas to give a great metallic finish.
- METAL PARTS: You will need approx 50cm of steel rod diameter 1.8mm for the arms detailling, the feet axis and the arms&feet cylinders. Also approx. 50cm of steel rod diameter 1mm for all the moving axis.
- SCREWS: I have used only one type of screw: round-head screws M1.7 x 6mm (such as: http://www.ebay.com/itm/M1-2-M1-4-M1-7-M2-M3-M4-M5-M6-304-Stainless-Pan-Head-Phil-Self-tapping-Screws-/171984976102?var=&hash=item6da215437f
-
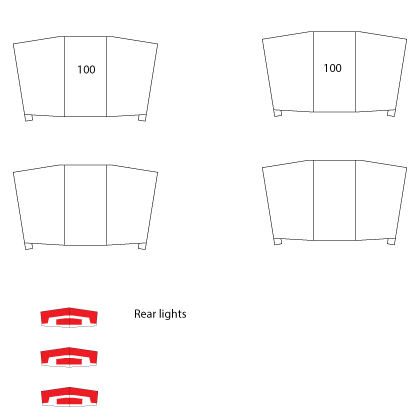
TRANSPARENT PARTS: you will also need this pdf file to cut the canopy and the rear light shapes from a transparent sheet: https://drive.google.com/file/d/0B5ZYBiTIPlbOcmZBX2gwVFVrOXM/view?usp=sharing
-
STICKERS: I have used basic letter/number from water decals for the lettering on the Workroid, but I had to make the "Muscle Man". Here is the pdf file: https://drive.google.com/file/d/0B5ZYBiTIPlbOWmxhU2czV0ZNbU0/view?usp=sharing
Pictures of completed project.
-
Here's my offering... Xigfrid did an absolutely fantastic job design wise on this. It was a fun, fairly quick build. I am thrilled to finally have one in my collection. Ordered the Yetistand adapter today and will definitely be putting up some beauty pics with my 19 and 21 when I get all them on a Yetistand in a couple of weeks. Thanks Xigfrid!!!
Woah! I will now call you "Master of glossy finish"!
-
Edited first post with Wmkjr ghost photo and the following info.
The production is finished.
I have available in stock 2 Painted Ghosts and 6 last Unpainted Ghosts. Landing gears are also in stock.
Feel free to PM me if you want one, even if this post don't get updates, I will be keeping the spare Ghost in a cool, dry place for the future until they got sold out. -
If you pull the canopy, it will go out easily. Try to wash it gently with soap and see what happens.
I don't think there could be such a mistake as manipulating plastic parts with dirty hands in a factory, it is probably some dirt that came during the final assembly step.
I had cloudy canopies to come transparent again with an acrylic gloss spray. Don't try Tamiya's TS 13 (lacquer base), it can melt the paint if applied too thick.
-
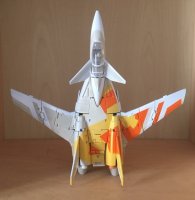
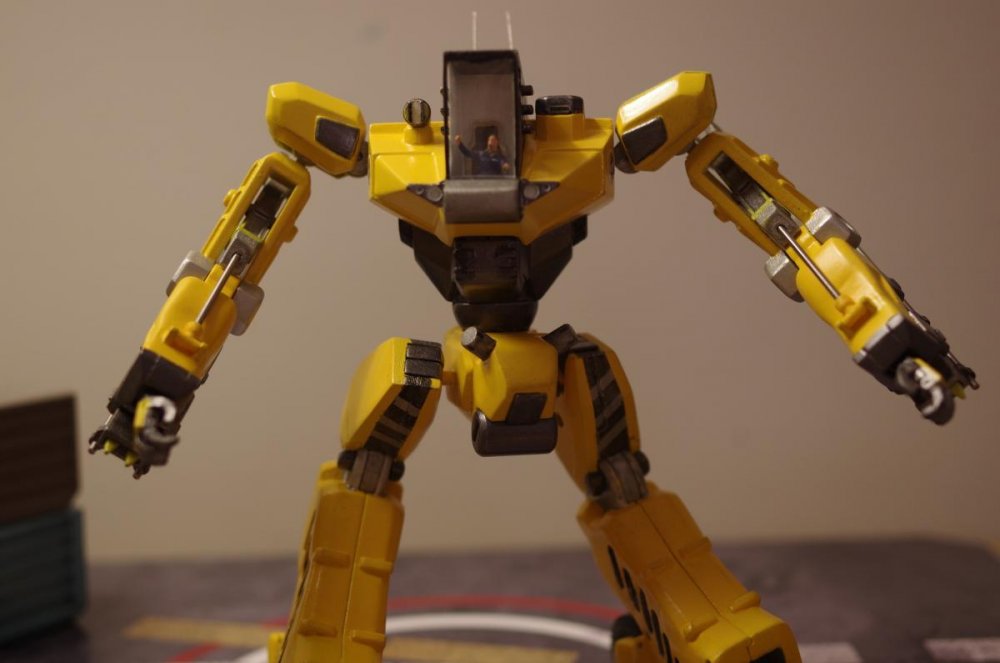
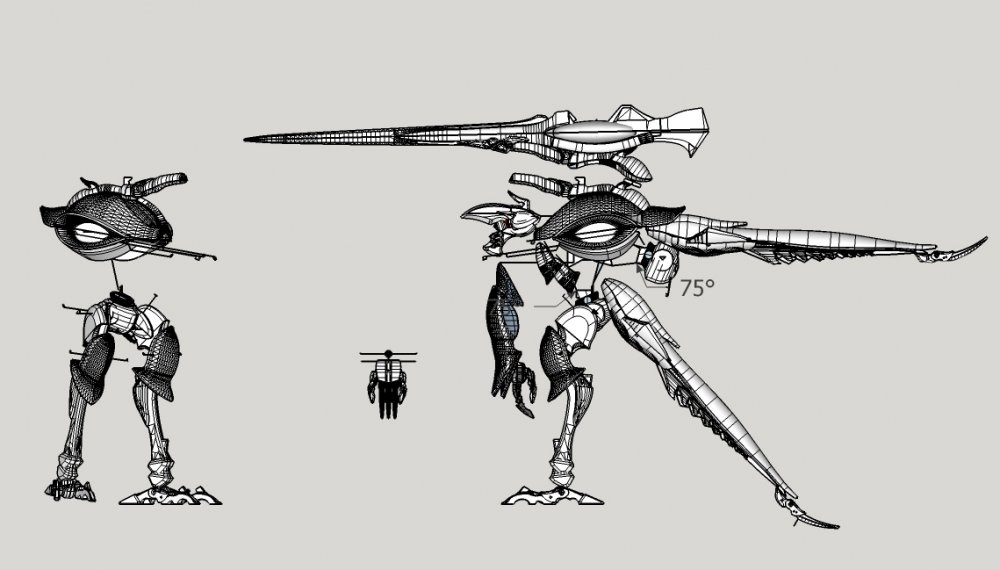
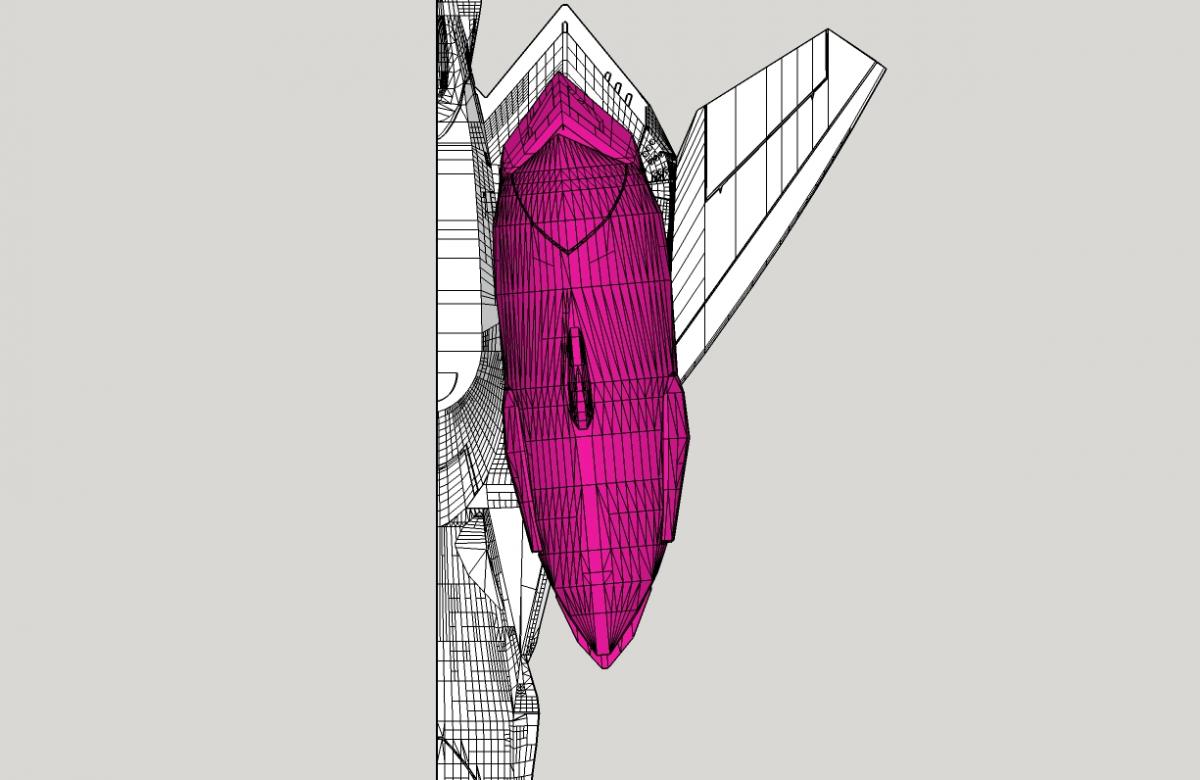
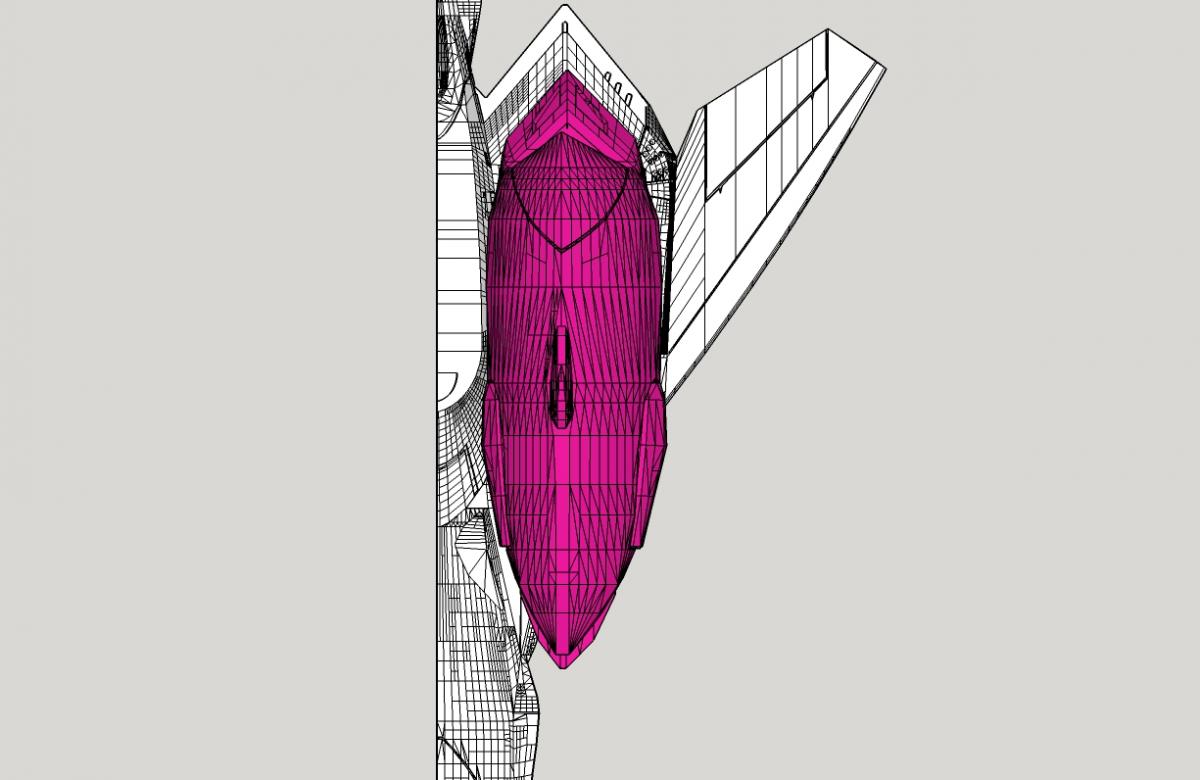
Getting slowly into shape. 340 mm height. The plasma beam canon is 430mm long. It should be something holding it
-
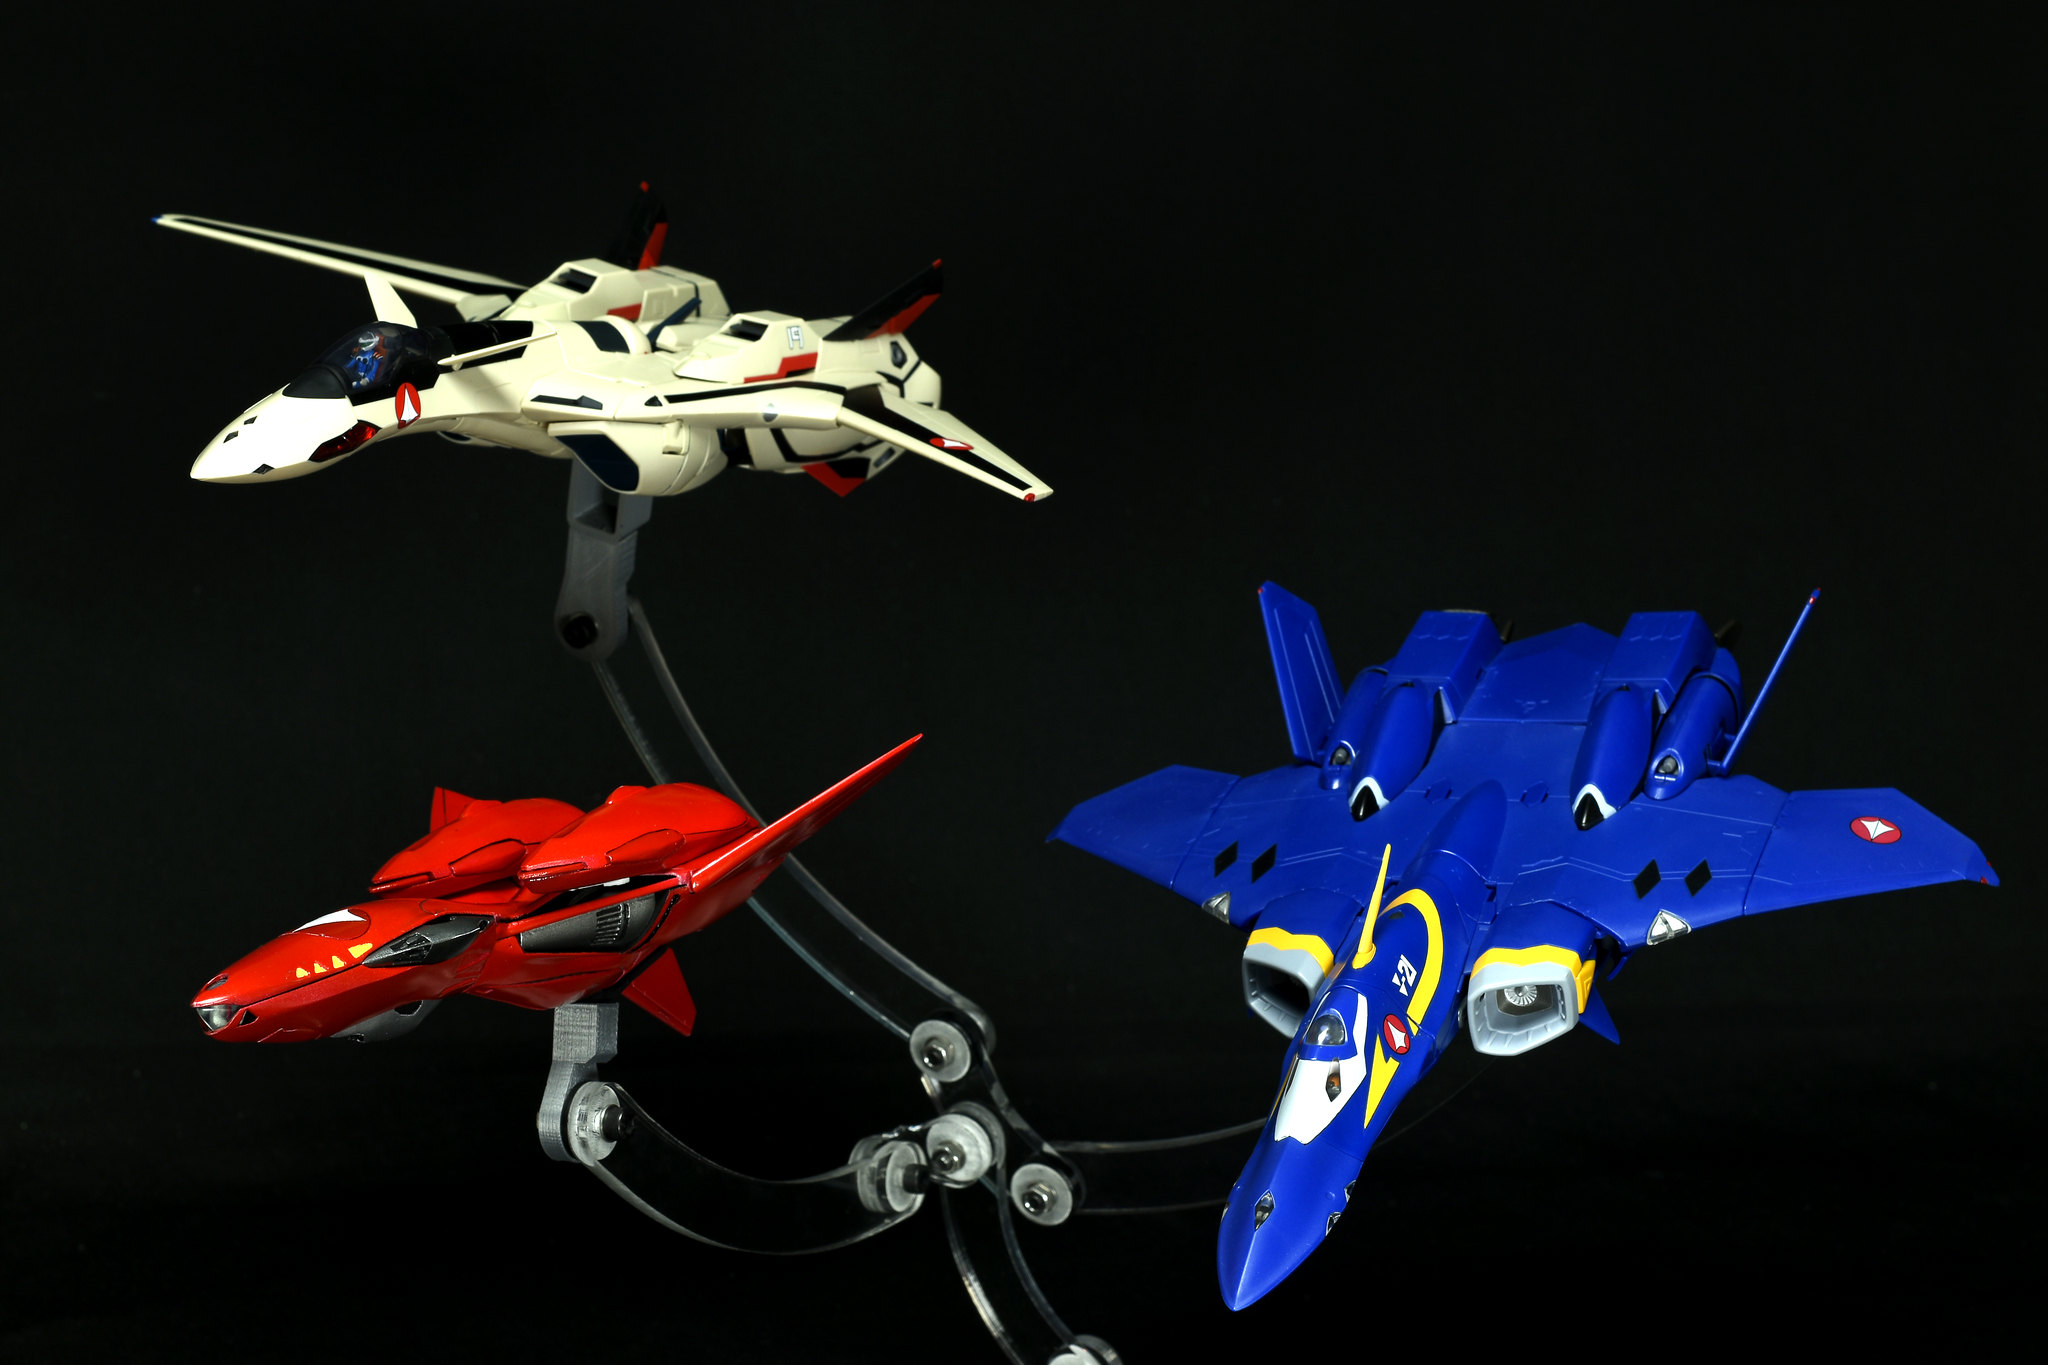
After this 13rd episode, I am now convinced to get a 31F and I would love to get both Hayate and Messer figures in it! But still my 2nd choice: 31A had some show time also, and this grey scheme and delta wings are lovely!
-
@Captain, the Soprod A10 is a great choice, I will be looking at your FB now

@Derex, that Ghost is looking great already, even without the yellow details and shadowing. Can't wait to see it when finished
-
Hey Captain, I kind of like automatic watches but couldn't convince myself to pay more than seikos.
Wanna share more about your model? Is it unique or do you plan to make more?
-
Hi Spanner, thank you for the support! I will ask Kicker in MP about his issue, but if he wants to let one of his to you, that would be great.
-
Yeeeeeeeees!!!! Xigfrid..what do i need to order to get the Ghost attached to a YetiStand???
Make sure that you got either the "Ya Banking" or "Ya Standing" adapter on your YetiStand, then you can buy from my Shapeways shop the "X-9 stand Adapter".
To insert the adapter, you need the bottom/rear fin deployed and open the missile traps, once installed you can close the traps.
beautiful shot Xigfrid!
 That drone looks amazing!

These shots are from Wmkjr's Flickr! All the credits should go to him.
-
I tried looking for screenshots for color references. Maybe grey or black in the exhaust port and black in the 2 little dips in the rear?
I just had a look at your pictures link, and couldn't resist not sharing this one... Such a great display and my favorite angle shot.
 Macross Plus 5 by Wm K, sur Flickr
 -
A shame that Bandai never edited a small VF-25 addon featuring a fold reactor
-
Looking really nice, but is it a satin red? Looks not that glossy.
-
Besides the reactor exhausts that can be greyish, and sometime I saw the top of the supers having yellow accents too, all red seems the official way.
That's also my favorite color way


Adding Electronics to our Models
in The Workshop!
Posted
Really nice from you to open a thread on this matter.
I have a specific setup in mind for some time, perhaps it has already been done.
I would like to make lightings for 3D printed parts, I imagined it could be done very easily by making pre-drilled holes in the models into which you can pass the optical fiber. Making this way allows the system to pass the fibers from a center point to any other position in the model, even through articulations. It needs several color light generators I presume. How small can be the control device, including batteries? How do we solder the fibers etc? Perhaps there is somewhere a tutorial for that specific setup?