
Xigfrid
-
Posts
2607 -
Joined
-
Last visited
Content Type
Profiles
Forums
Events
Gallery
Posts posted by Xigfrid
-
-
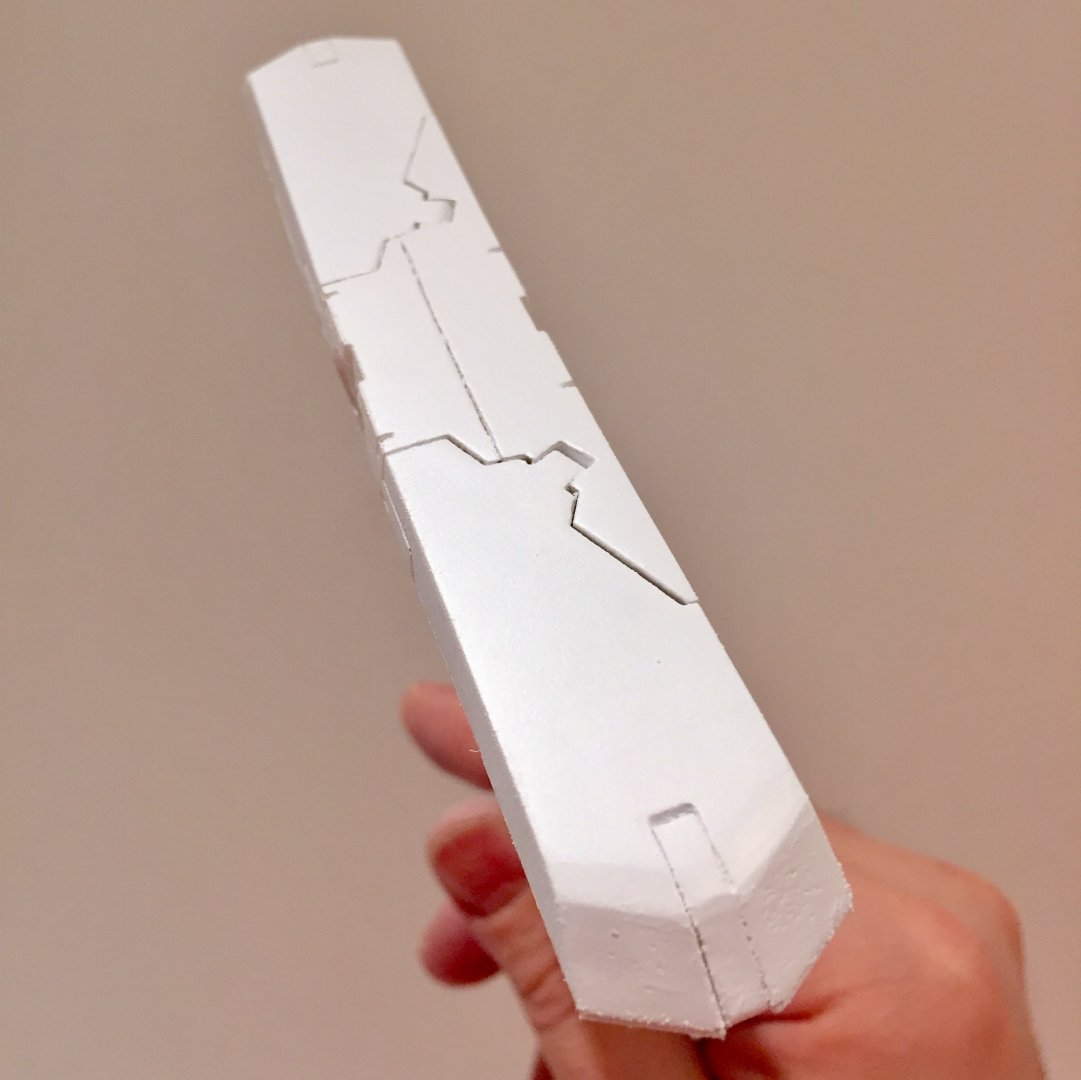
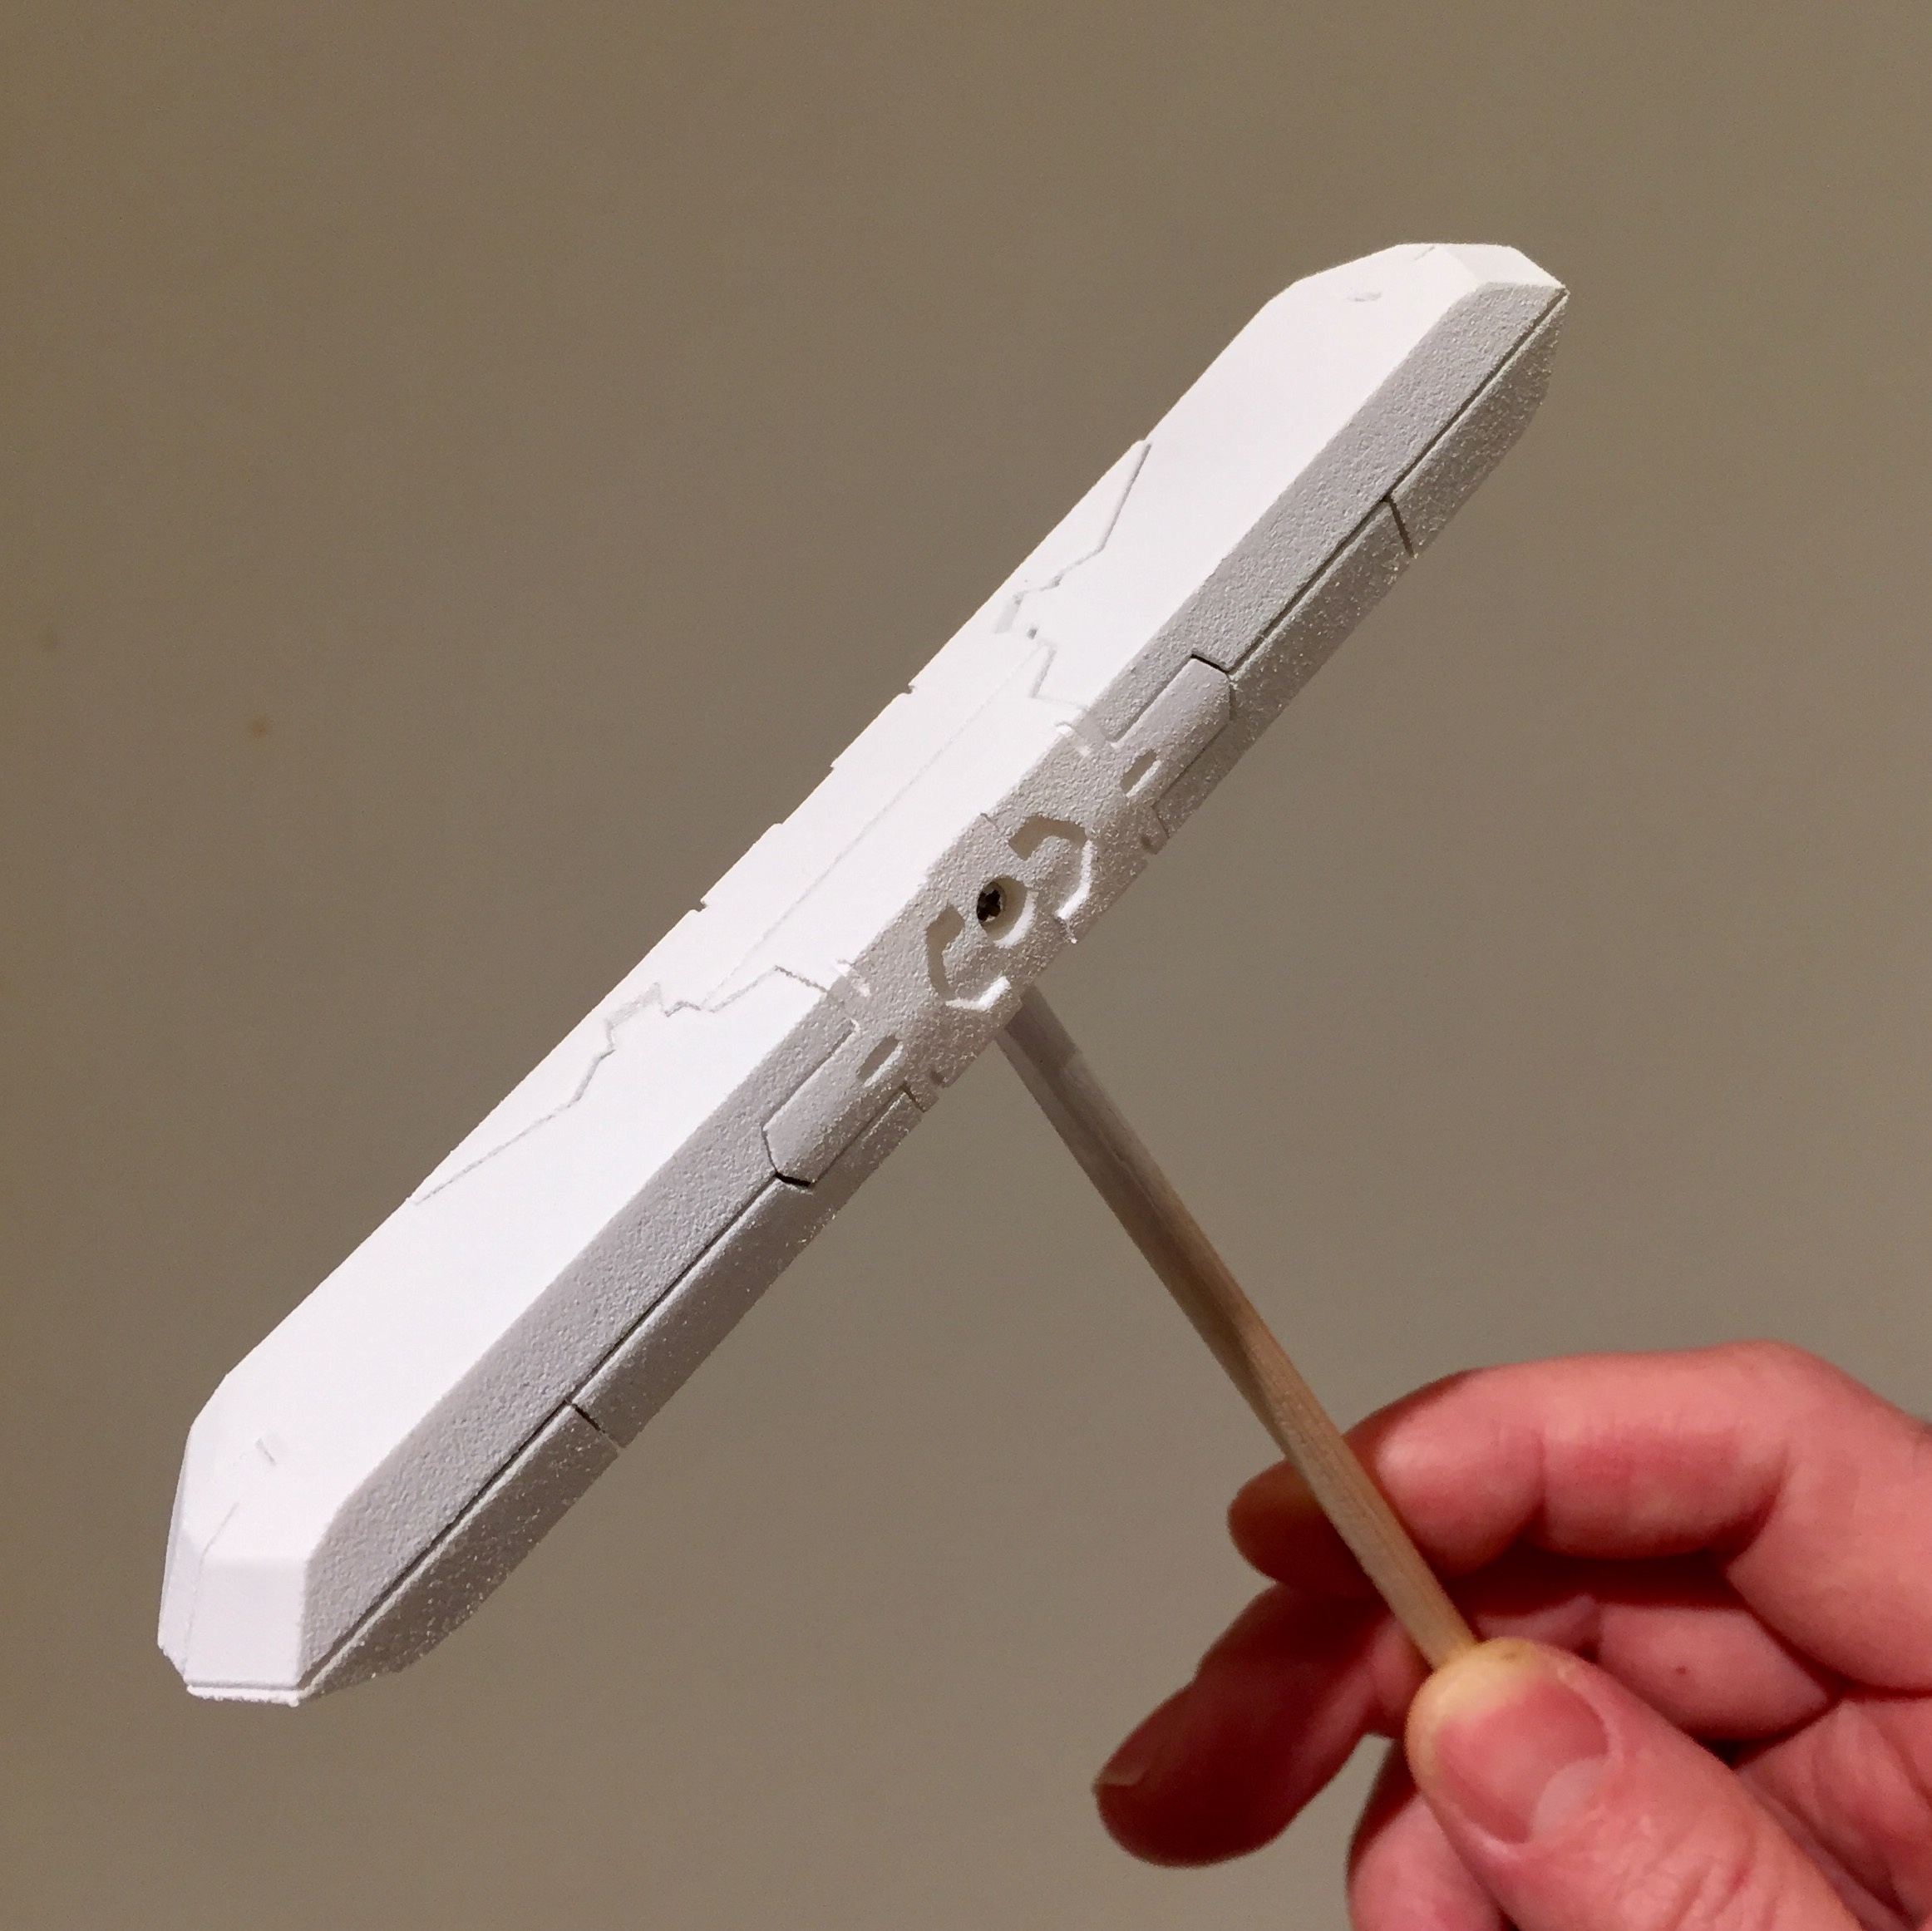
Second sanding session plus another primer layer. The flat faces are almost done, tomorrow that would be the last sanding session I think.
-
After 1 primer layer + sanding, then the pictures when taken after the second primer layer. The surface is quiet rough, thankfully, I don't plan a lot of sanding for the inside since the FUD speakers are great as is

-
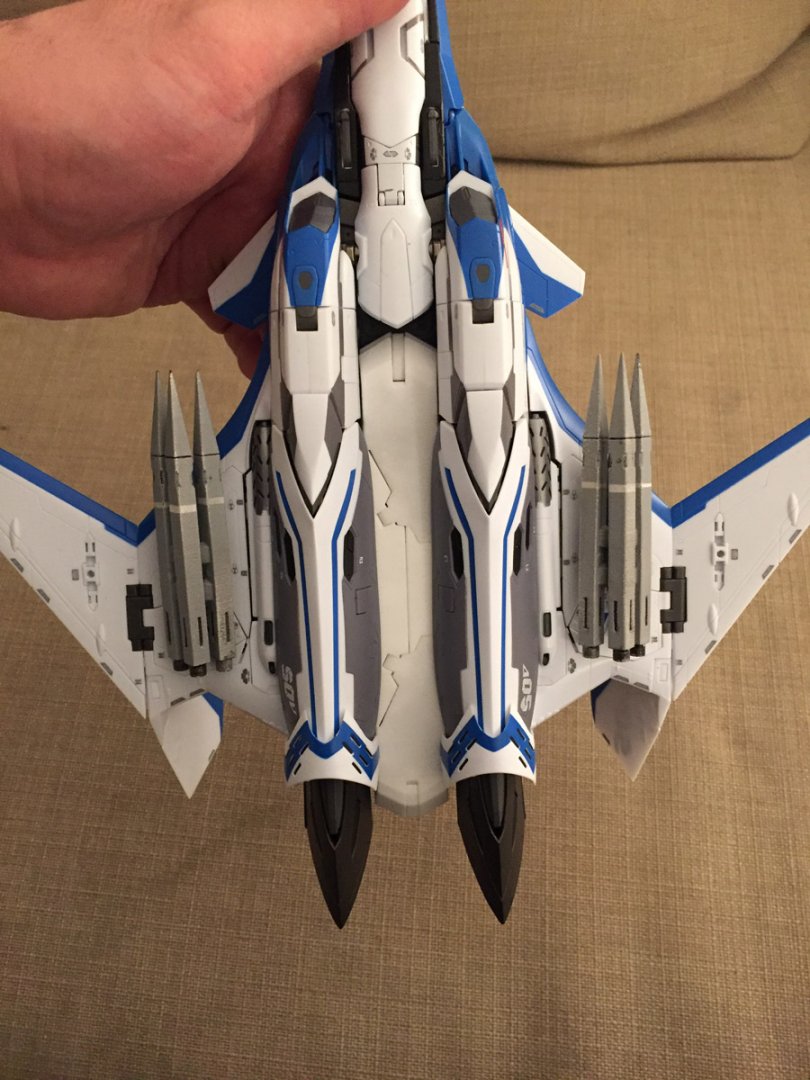
I think this is impossible to have both top and bottom flaps identical because the bottom ones would be longer and be in collision with the wings and the super pack on the wings too
-
Thanks to @wmkjr who point me to a few unpleasant details. I decided to take the 3D file again and moves things around to obtain a better front speaker shape and finally I think that this version is better than the previous one with better closing tabs and good -looking front speakers.
I have already updated the Shapeways file to this new version (that I call version R)
-
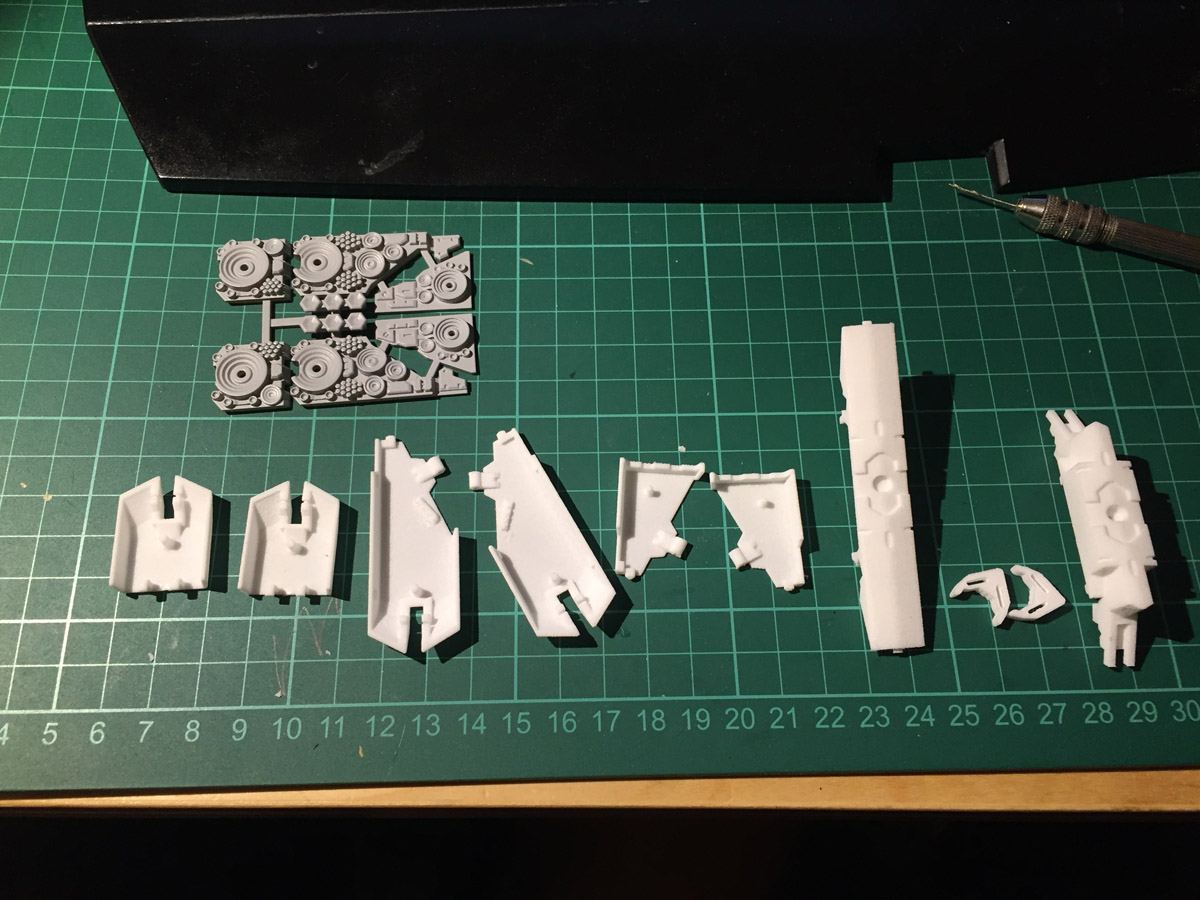
1) Clean the excess of printing powder first, test that the parts can be assembled.
2) Dip the part in Future a few seconds, the let it dry 24h, that will seal the 3D material and prevent it to soak too much primer on the first layer
After these first steps, you can:
2) apply diluted future, will dry in minutes
3) apply prime, let dry overnight (primer really needs 24h to be hard underneath)
4) sand
repeat 2 to 4 times to taste before painting. To me, you can do this 2 times only if you plan to apply thick hot-coats of paint
-
Thanks guys, well the overall pod is around 35$, that includes both WSF part and the expensive FUD part.
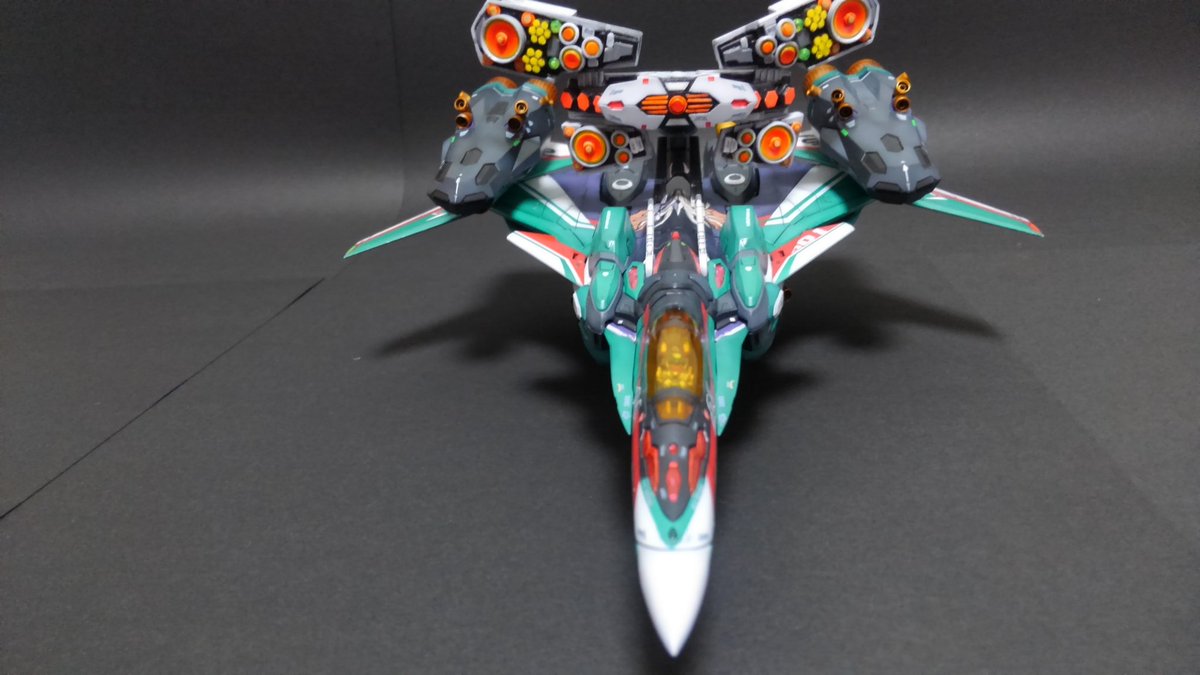
I used standard FUD for the speakers&projectoes details, But as you noticed the definition is top notch because I also used the optimal print orientation. I think that later option is still in Beta stage, not sure if anyone can use it. It comes semi-transparent, I primed it in grey to make the details pop.
Well NZEOD, I am pretty sure Chuck's 31 is coming in last after the armored Arad. These E variants always come last ...
-
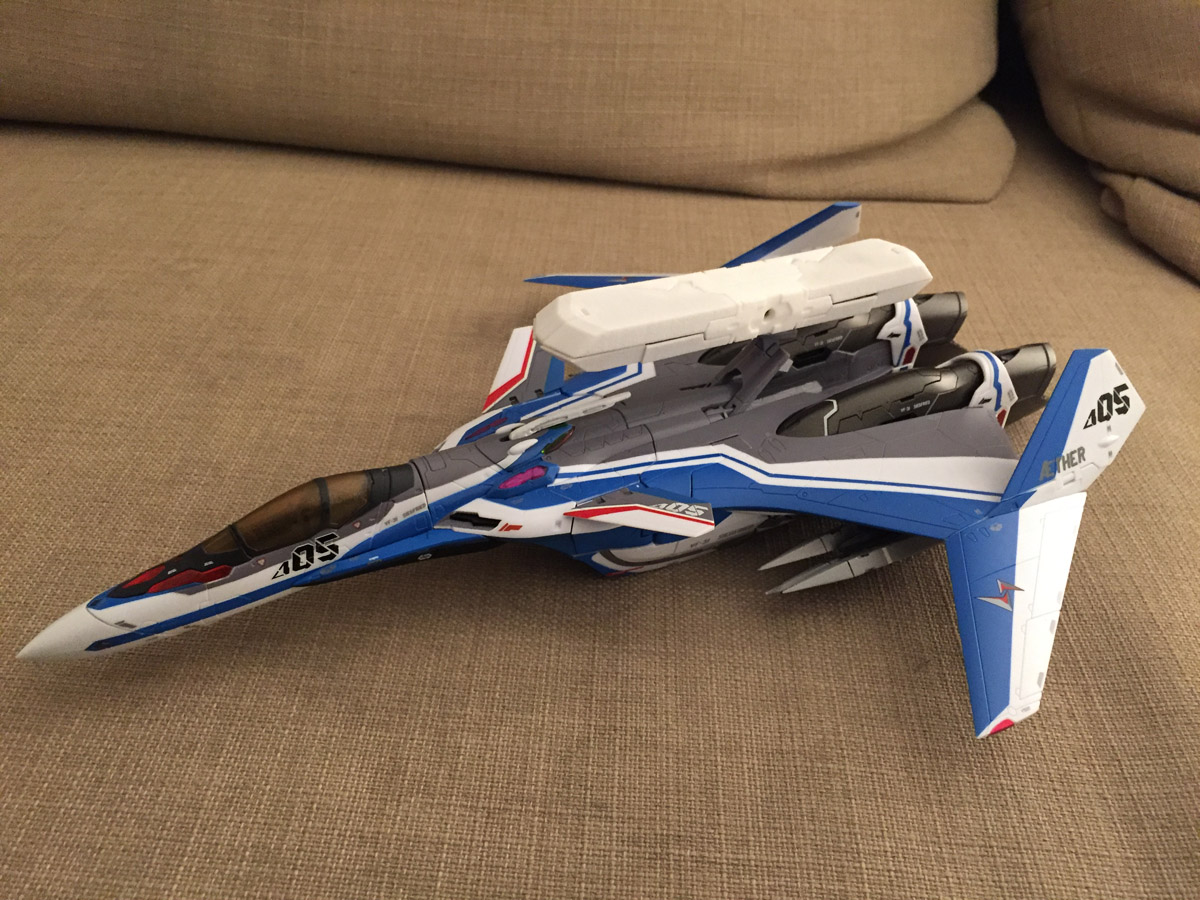
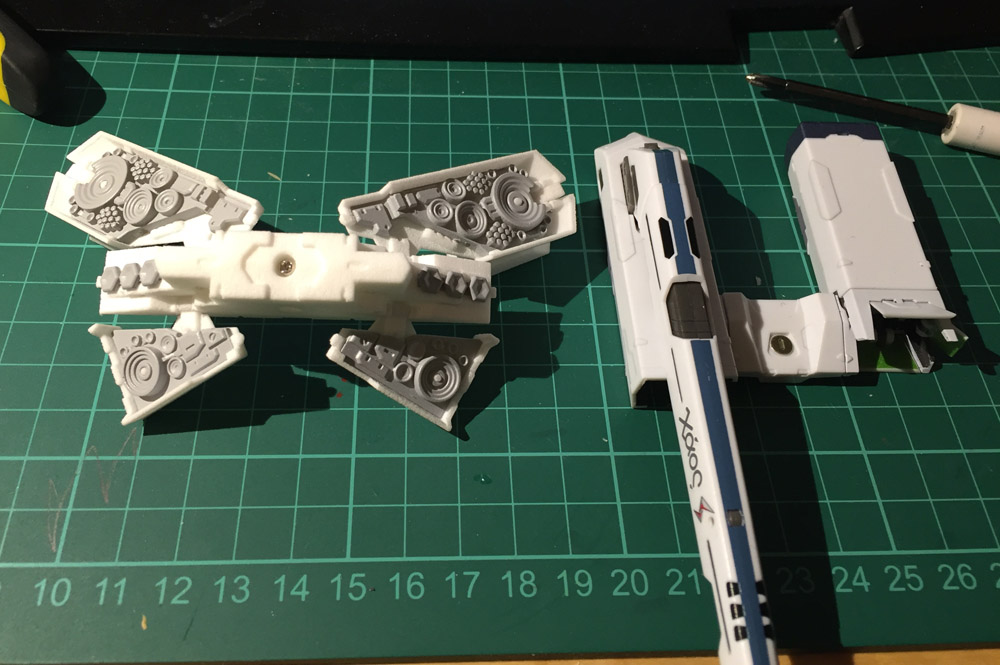
The gap is produced by the lower part of the pod not sitting flush once closed, it is fixed by adding inside a clamp to lock it in closed position.
In general, I use 0mm tolerance in general, 0.2mm when it really needs some clearance to avoid friction by example.
About the sprues, I really don't make it clean, I just add cylinder between the parts, and Shapeways engine makes the outside skin. That would be too much time consuming to make all the sprues really!
Thanks @no3Ljm

-
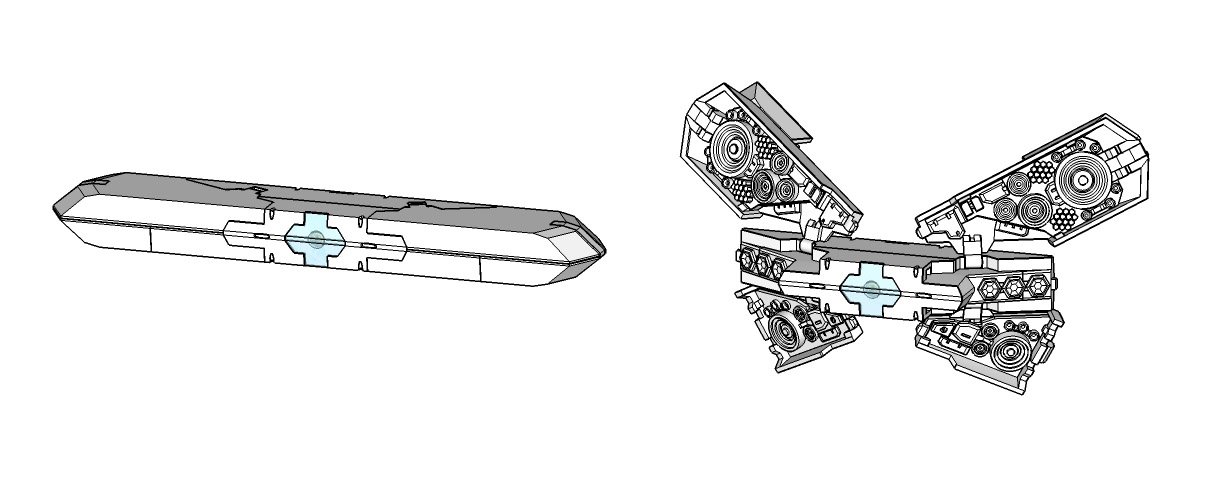
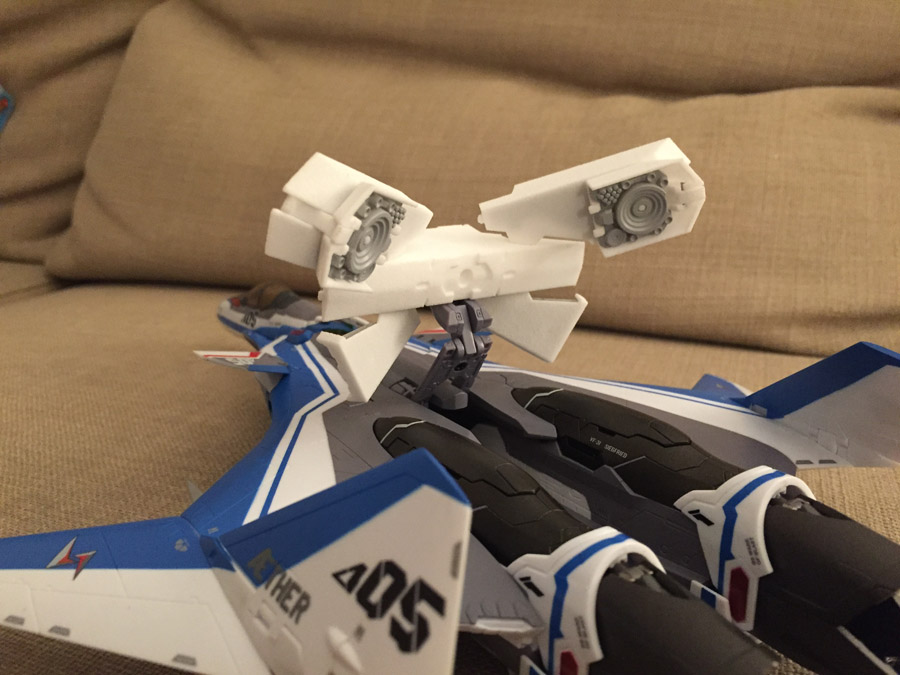
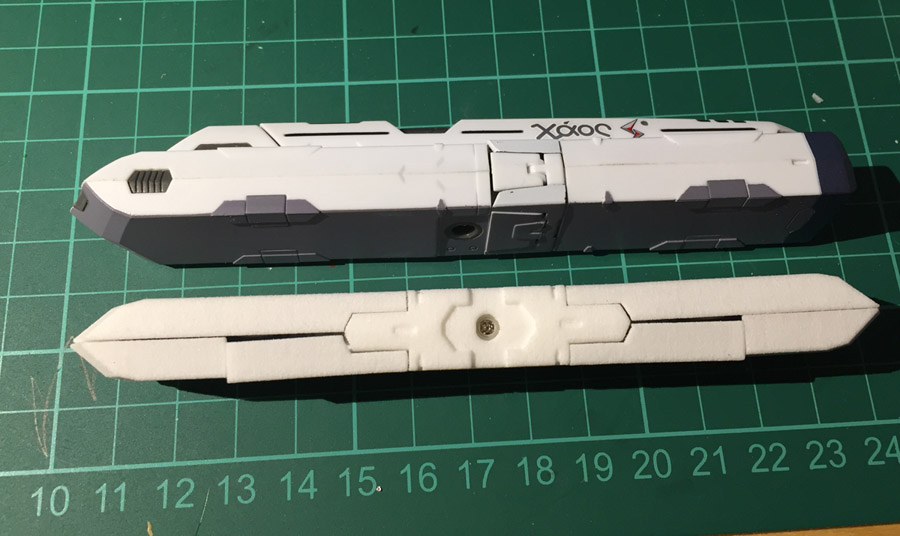
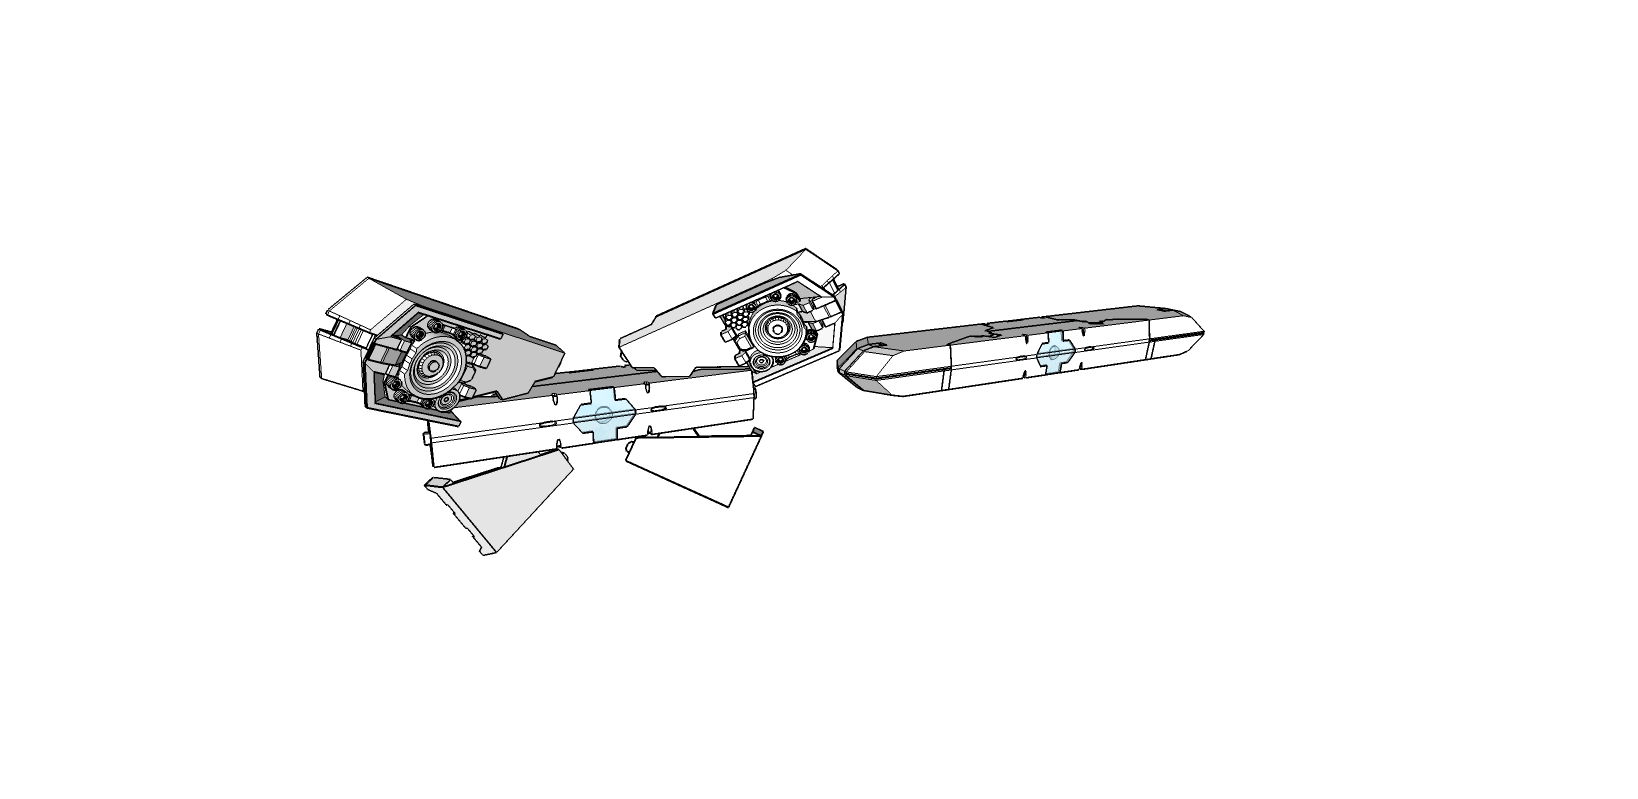
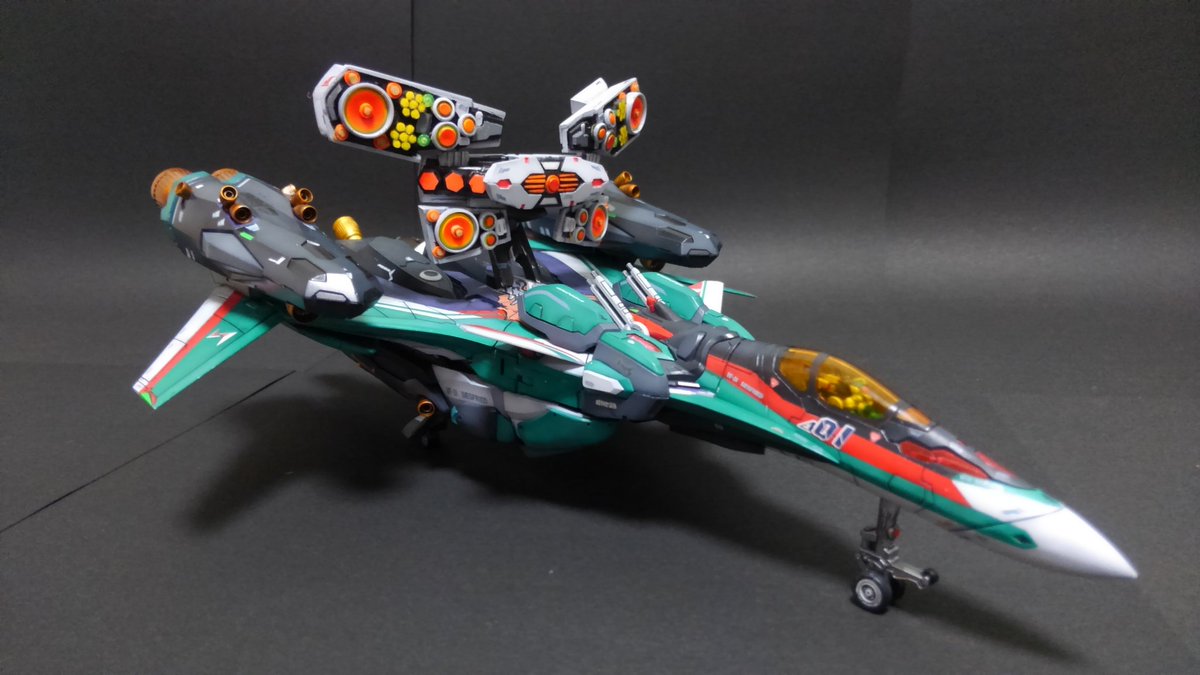
Here is the assembly of the speaker pod, every thing was fine. BUT there was an unexpected gap when the Speaker Pod was closed. With some massage it tends to close better, but still annoying.
Thankfully the fix was easy and I have already changed my 3D files to avoid it. I need to fix my copy manually or I can order the "fixed" versions in my next order (which is not soon)
-
The assembly is very straight forward. If it is really needed, I can make an assembly manual very quickly, so don't worry about it.
-
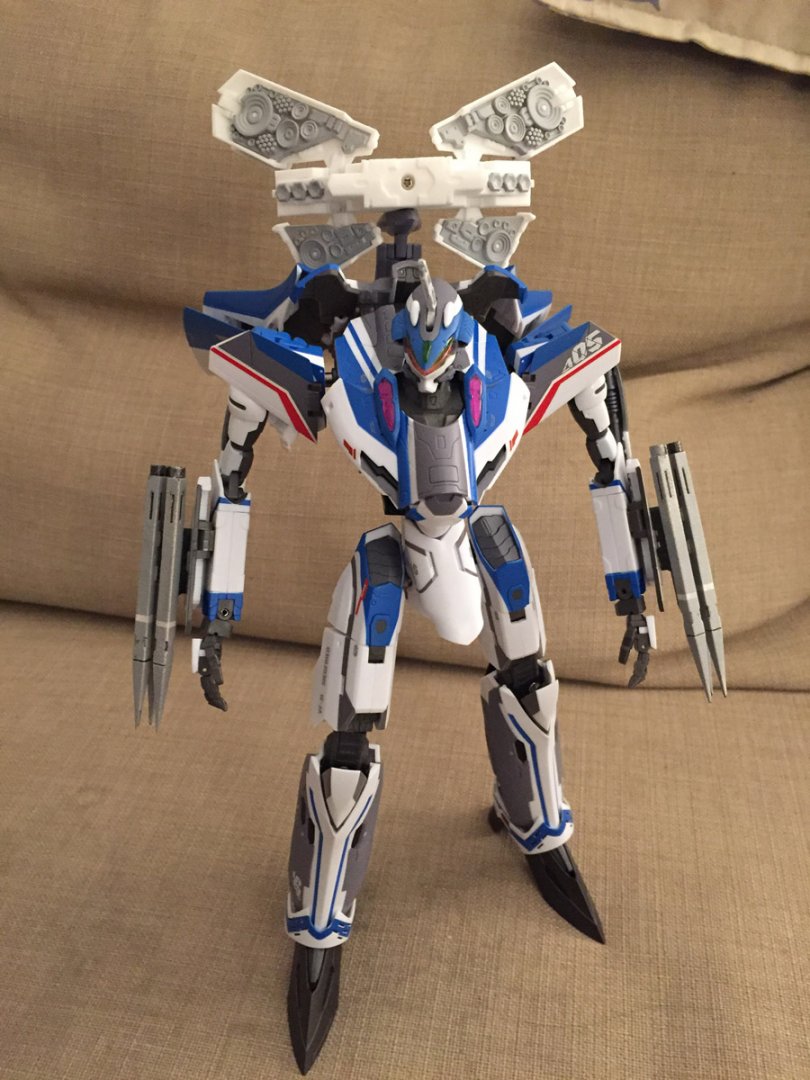
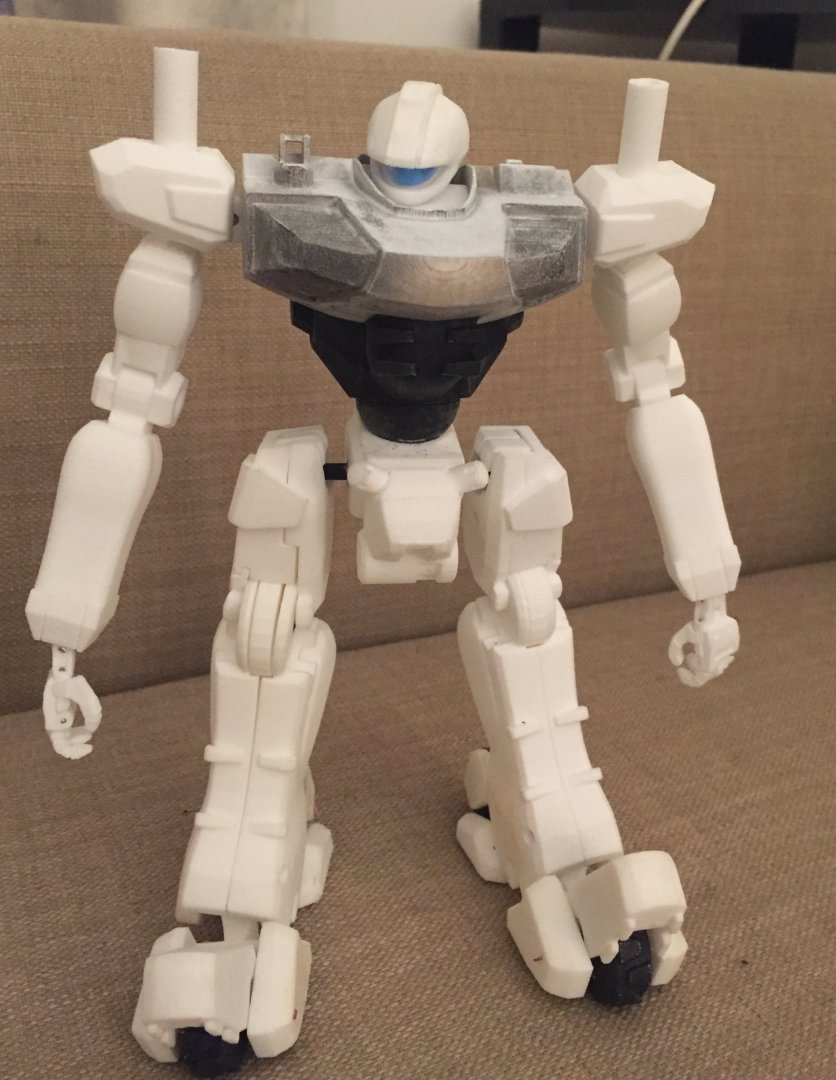
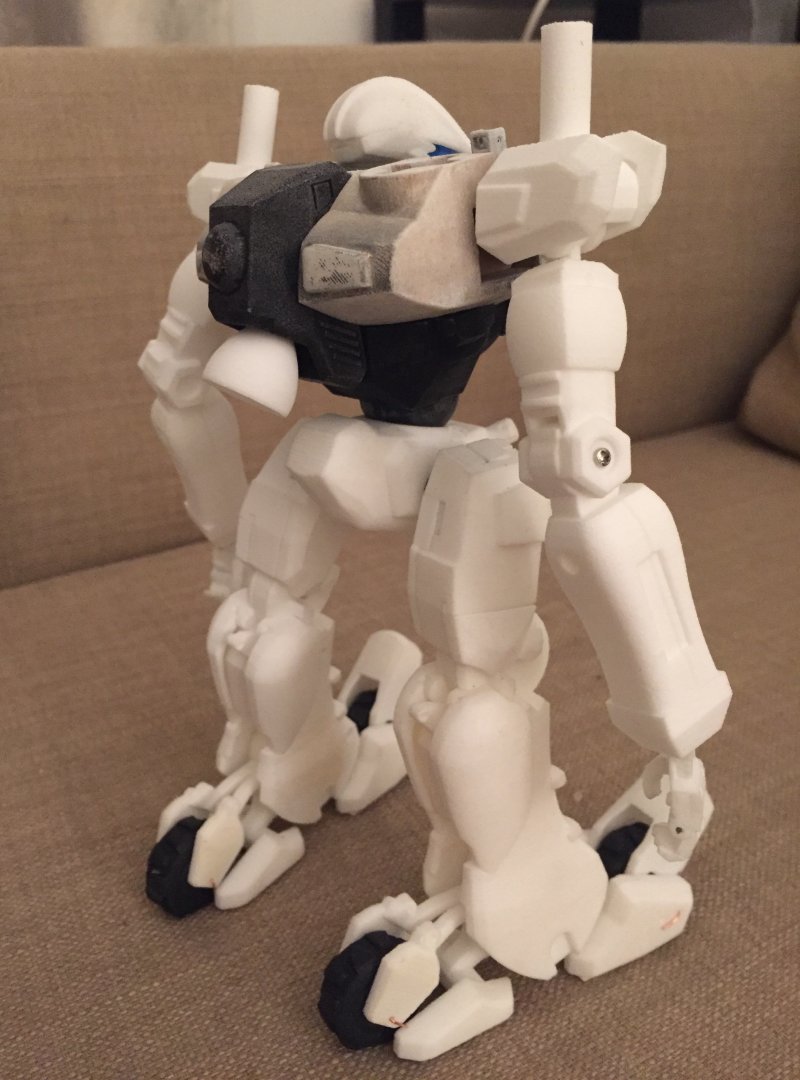
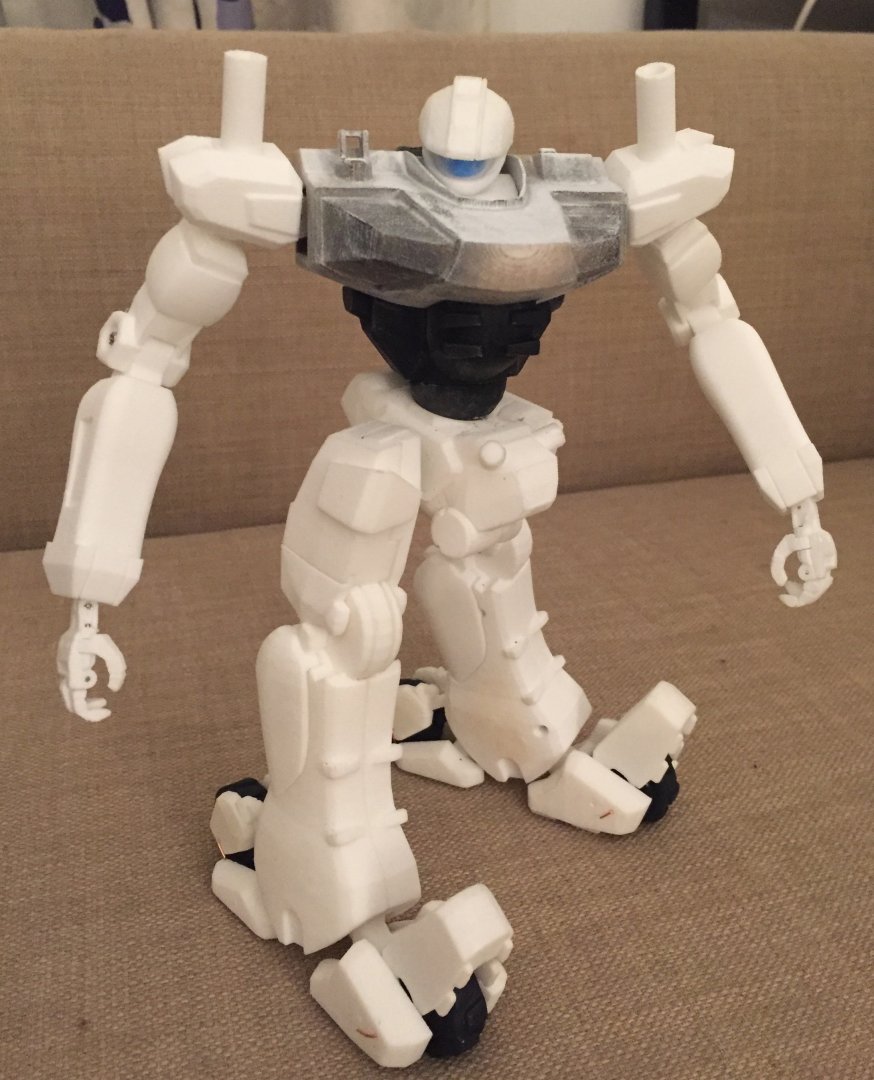
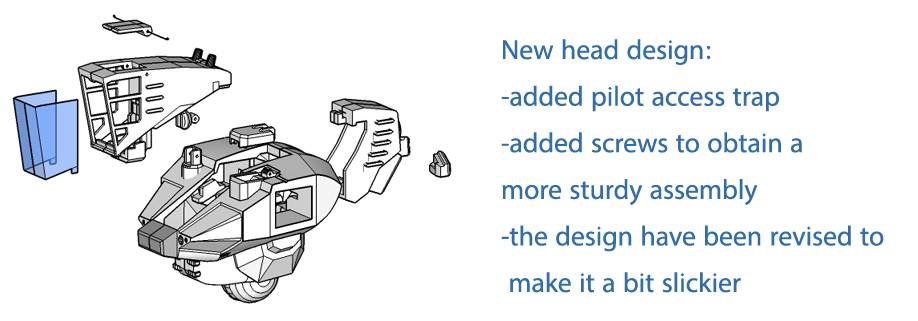
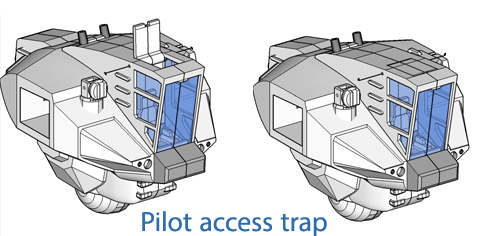
I was waiting the latest updates to announce it: I just got the new head and new shoulders assemblies and they are really nice. As you can see the shoulders hold very tight now

-
For primer and the base color, I just use the TS cans as is or lightly heated in hot water. For smaller details (metallic accents by example) I generally spray a small quantity of TS paint in a plastic bottle cap, so it can decant 3-4 min and I can brush paint it over the base color before it dries in the cap. I also use masking when necessary.
The acrylic colors are washed or brush painted. I don't have the required space to install an airbrush, I wish I had. -
I am not particularly waiting a warmer/drier weather since I can spray indoor (with a lot of air flow for those wondering) and keep the paint to dry in a warm /dry place. I am waiting for the new replacement shoulder parts to arrive (together with the Speaker Pod hey:) so I can assemble them and have the whole destroid to be smoothed/primed and then painted.
I already choose the colors:
-Tamiya TS-46 Light Sand spray as a base color
-TS-42 Light Gun Metal for the metallic parts on the hands, feet and body
-bluish grey acrylic color for the rifle part of the hands
-off white acrylic color for the big laser guns -
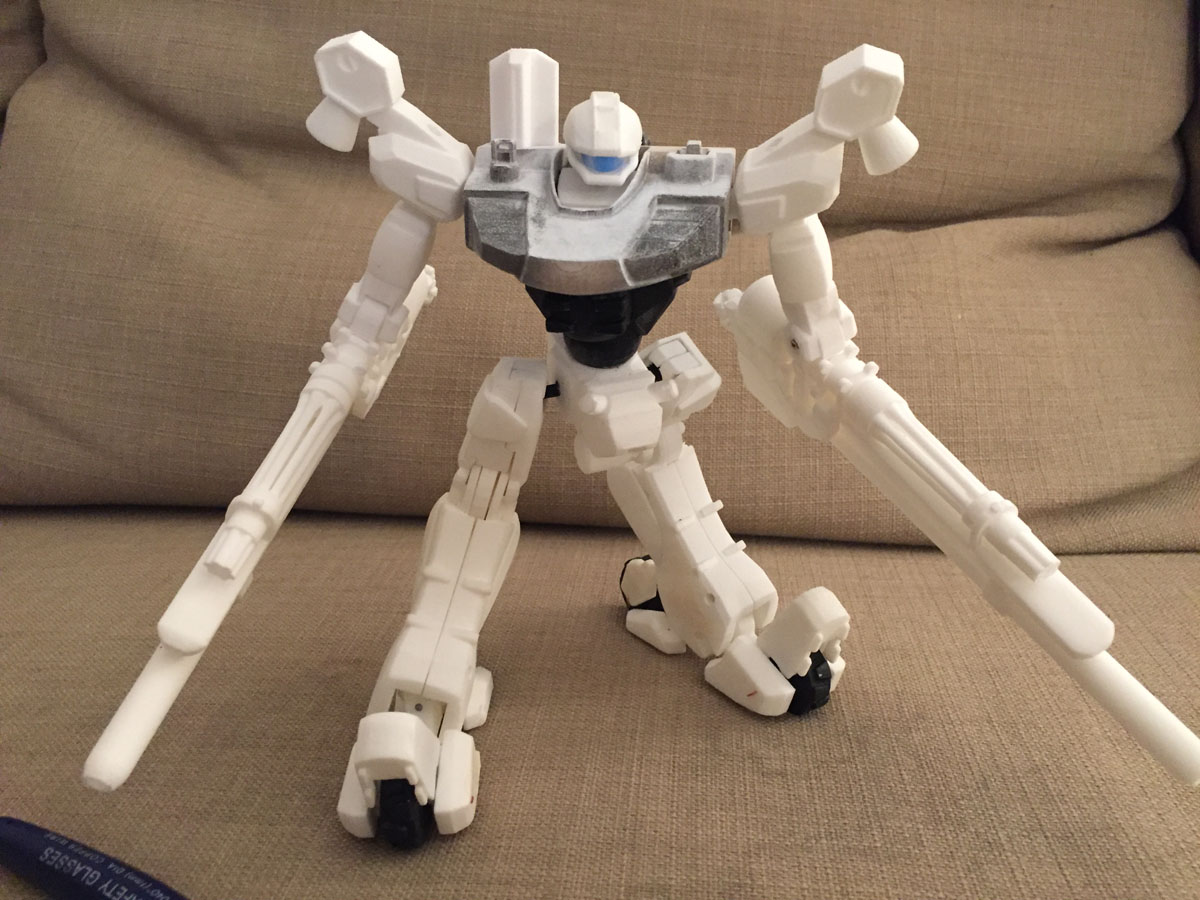
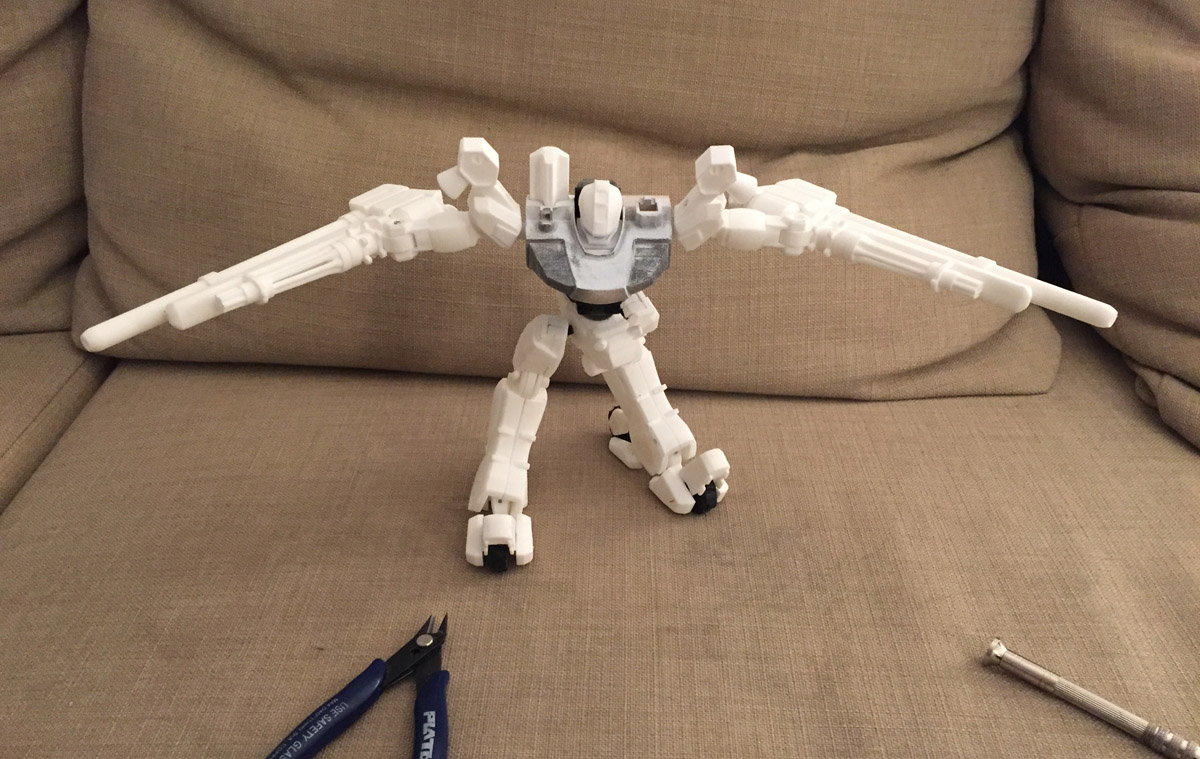
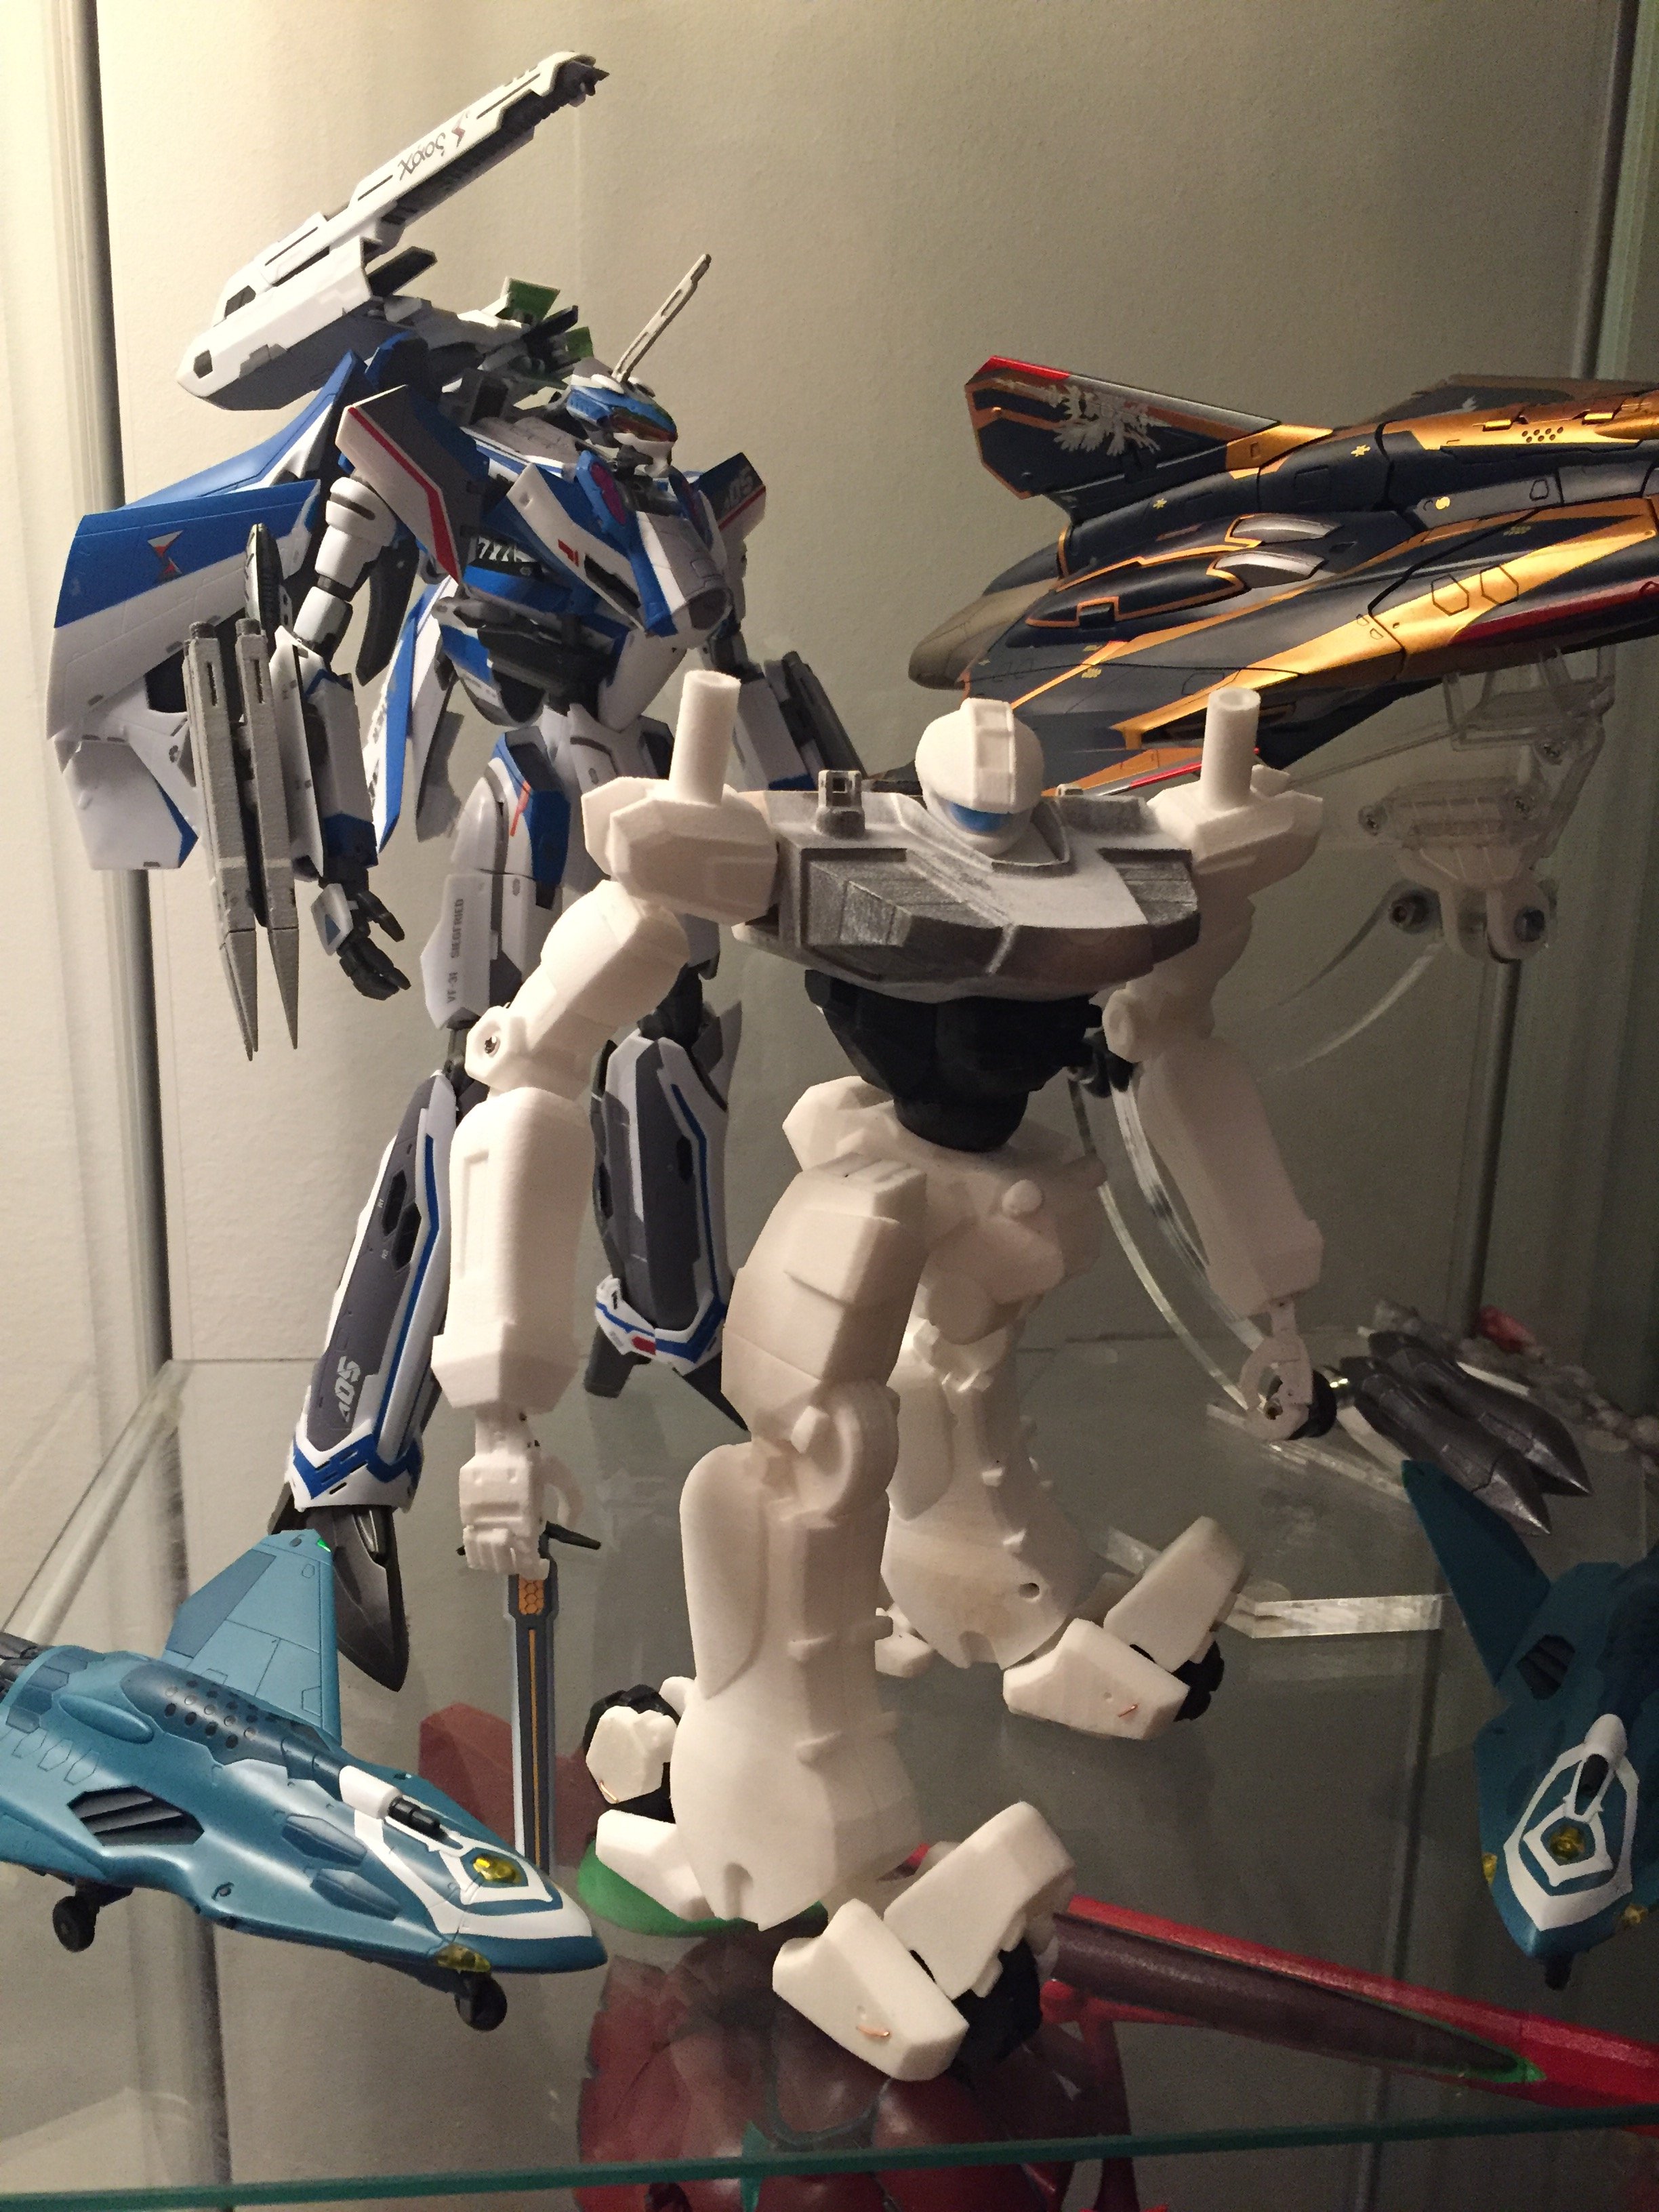
Little preview of the work destroid (Fireman version). This assembly uses the double ball joint shoulder, which is working great with this version since the hands end are light and doesn't carry any weight compared to the armed versions.
Tomorrow I will have the tougher shoulder assembly on the bench test.

-
I haven't a lot of faith in this regult, probably it would be a bit floppy too. But to be honest I am quiet interested by it being the only available toy at this scale of the regult.
I have asked for my proxies if they can order it and they answered that it would be better to wait when it is released. But I have been asking myself what would happen if nobody actually pay the "pre-order". Well I won't take the risk and I would advise others not to too
-
35 minutes ago, Mommar said:
To be honest, despite the fact I decal-ed my original one both the VF-0S and VF-1S really don't need anything more than the Skulls and UN Spacy markings. The White with Black and Yellow stripes are elegant in their simplicity. I kind of regret the decals on my 0.
I would love to see your "decal-ed" VF-0A
-
The original Arcadia VF-0S had already a lot of printings: it looks great as is already. Arcadia would better make first Shin's VF-0A which had barely any markings.
Anyway, I always wanted an additional VF-0S, let see how much it goes
")
-
11 hours ago, SuperHobo said:
In 2018 I finally got all of the 1/60 VF-1s I've always wanted, most importantly it was Max and Milia.
That Armored 1J pose is so nice!
-
Not 100% sure depending on the resin that Jasonc used, but cyanolit glue should be good for any resin kits.
If you don't mind disassembling the drone, you can also replace the complete part: either if Jasonc have a spare one to send to you or you can order a new Laser at Shapeways
-
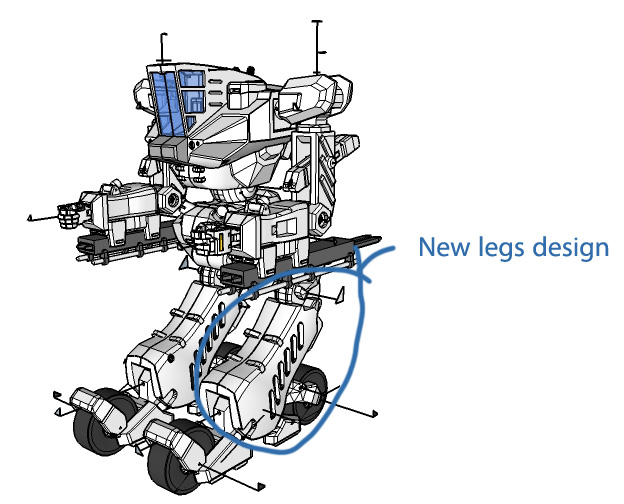
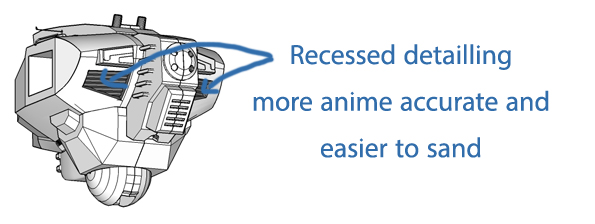
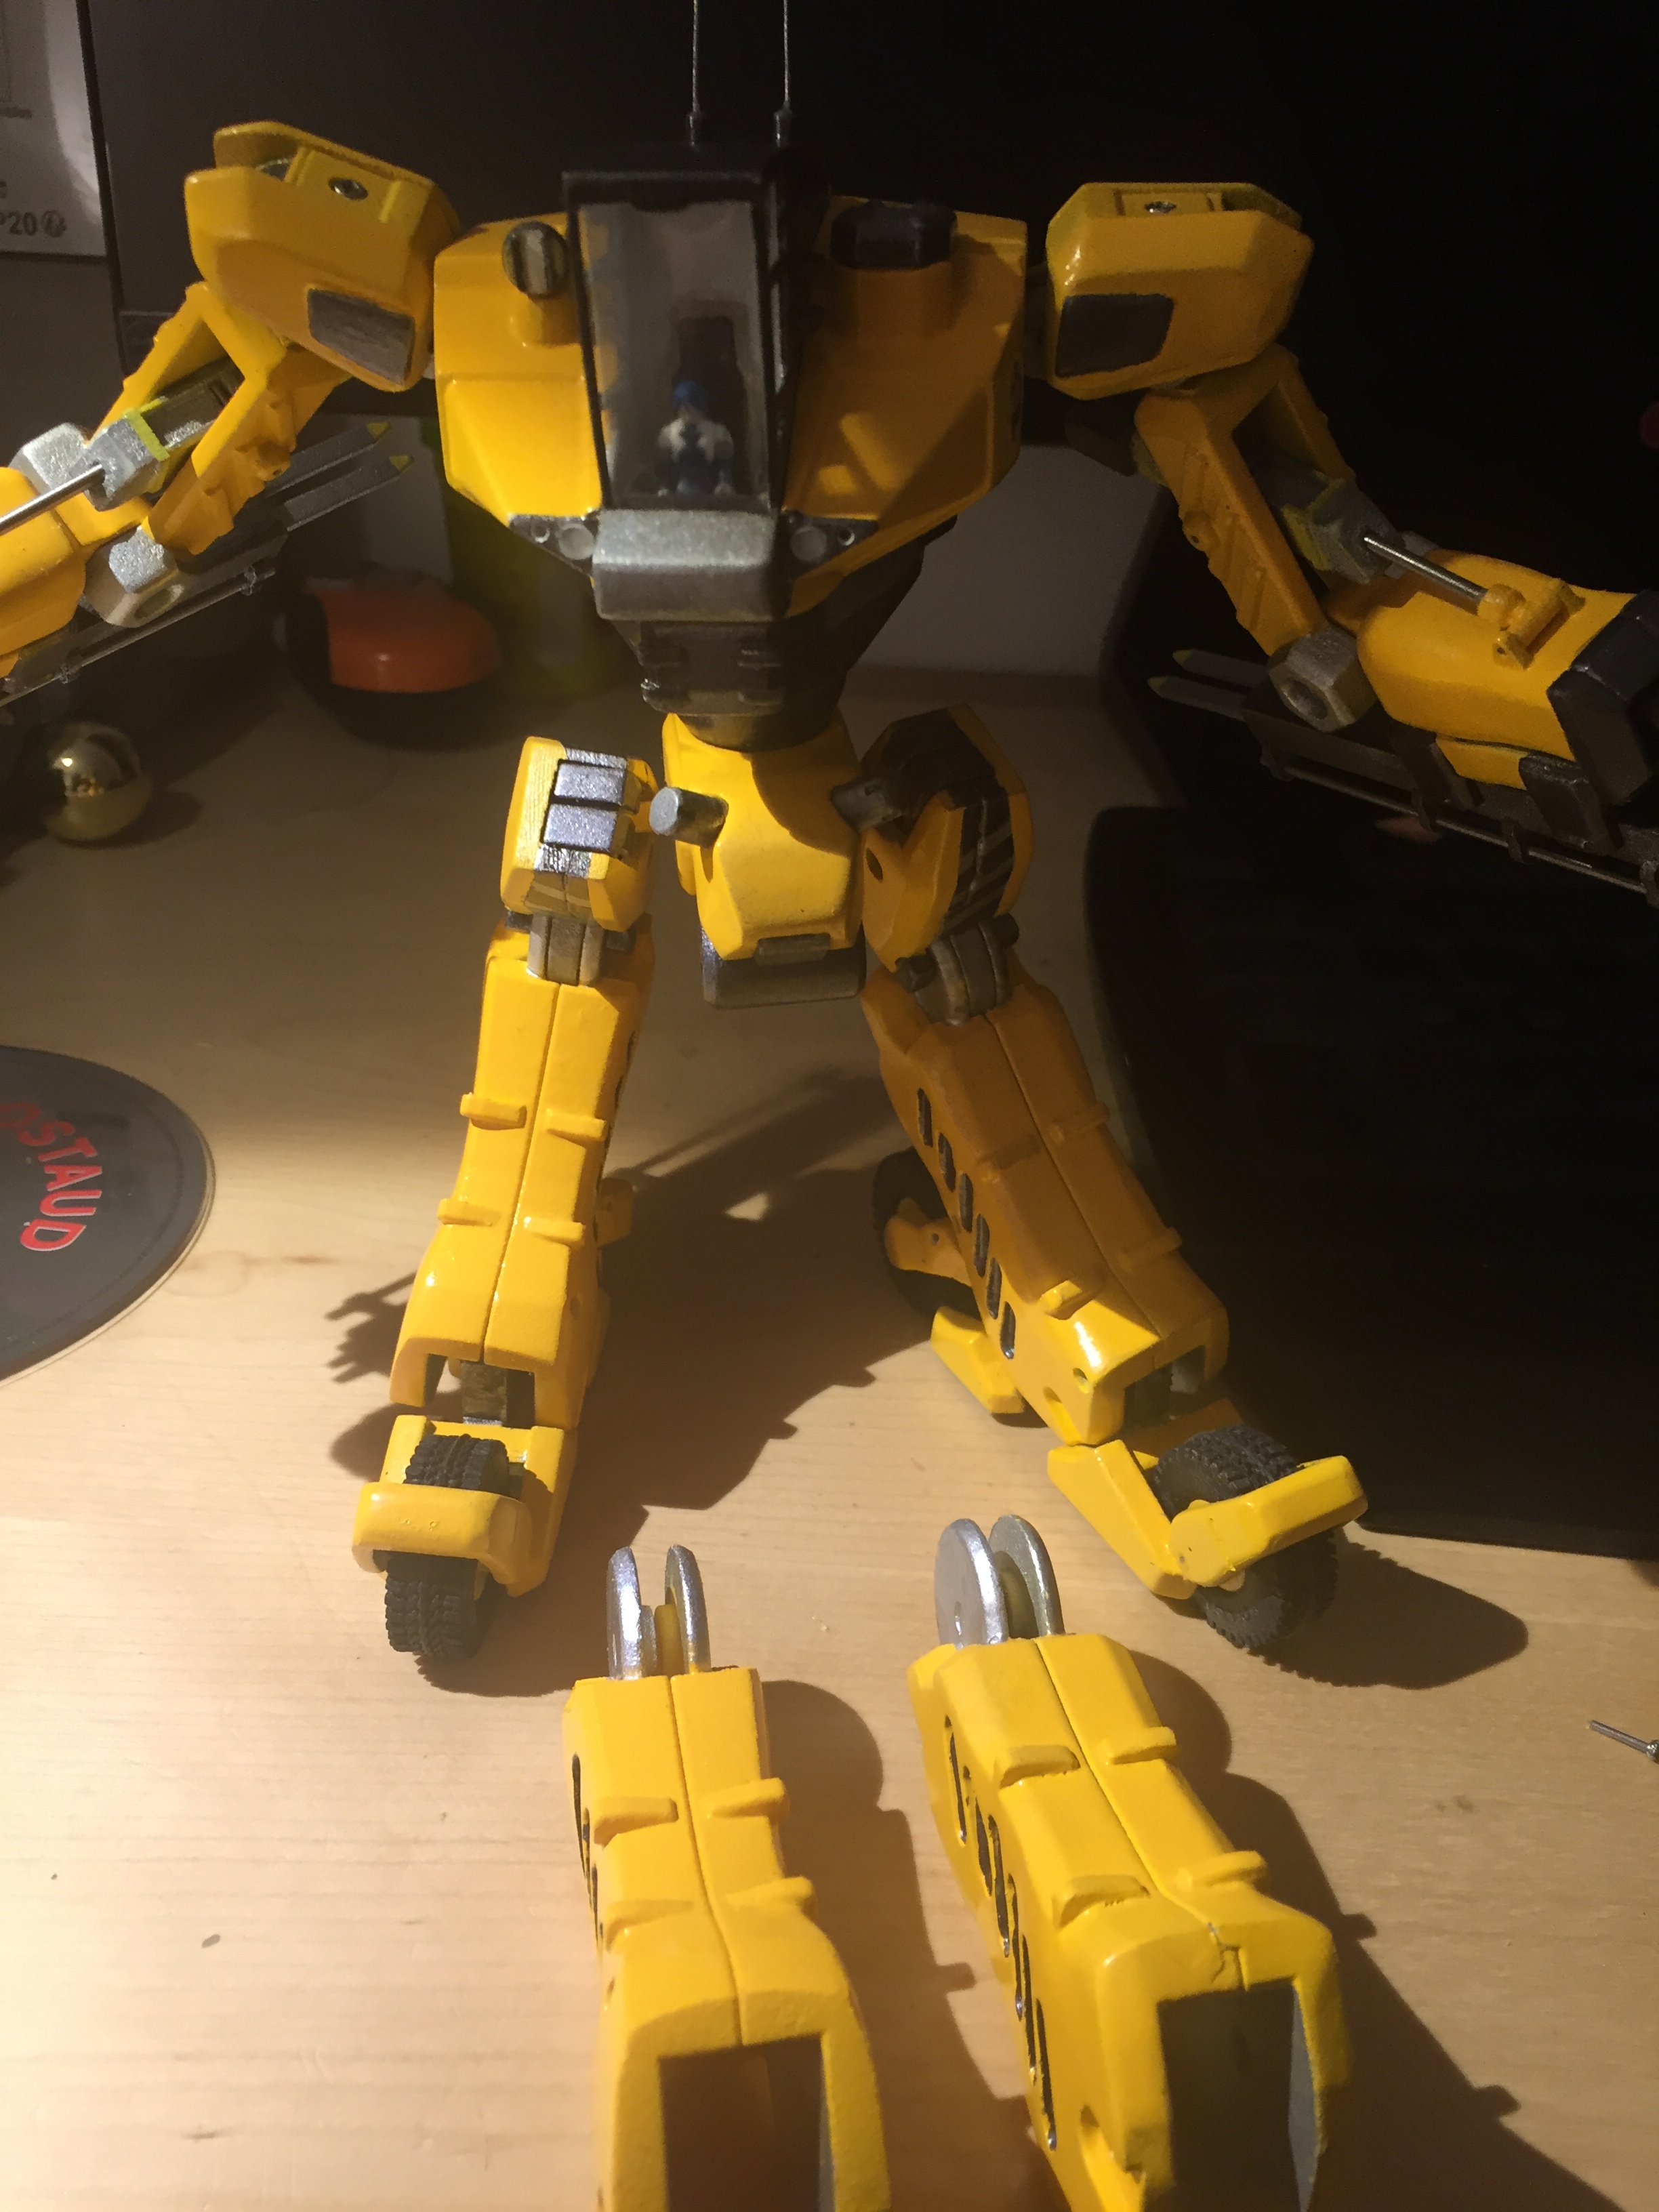
On the left the new design and on the right the flat/old design

-
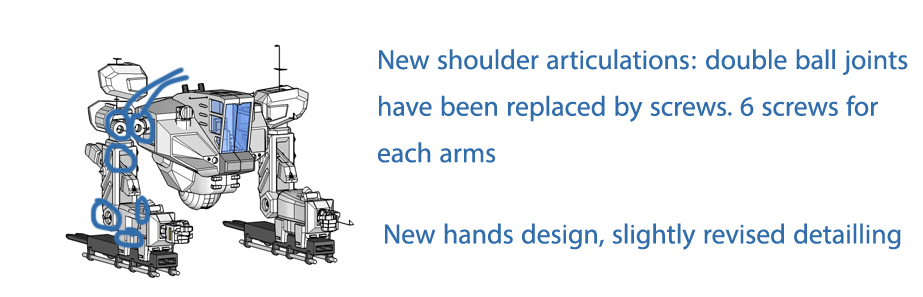
I always felt the legs were to "flat" on my Workroid. And I always wanted to make small fixes to one of my favorite design in Delta. So I just updated the design on Shapeways to what I call the "renewal version / version 2". I only tested the new legs design. I will be testing the new arm articulations when I receive the parts for the Destroid since they have 100% same functionality and 90% the same aesthetics. Thanks to a better use of sprues and printing volume (I am getting better at it!), the new parts are slightly cheaper now.
Here are the major fixs:
-
22 hours ago, arbit said:
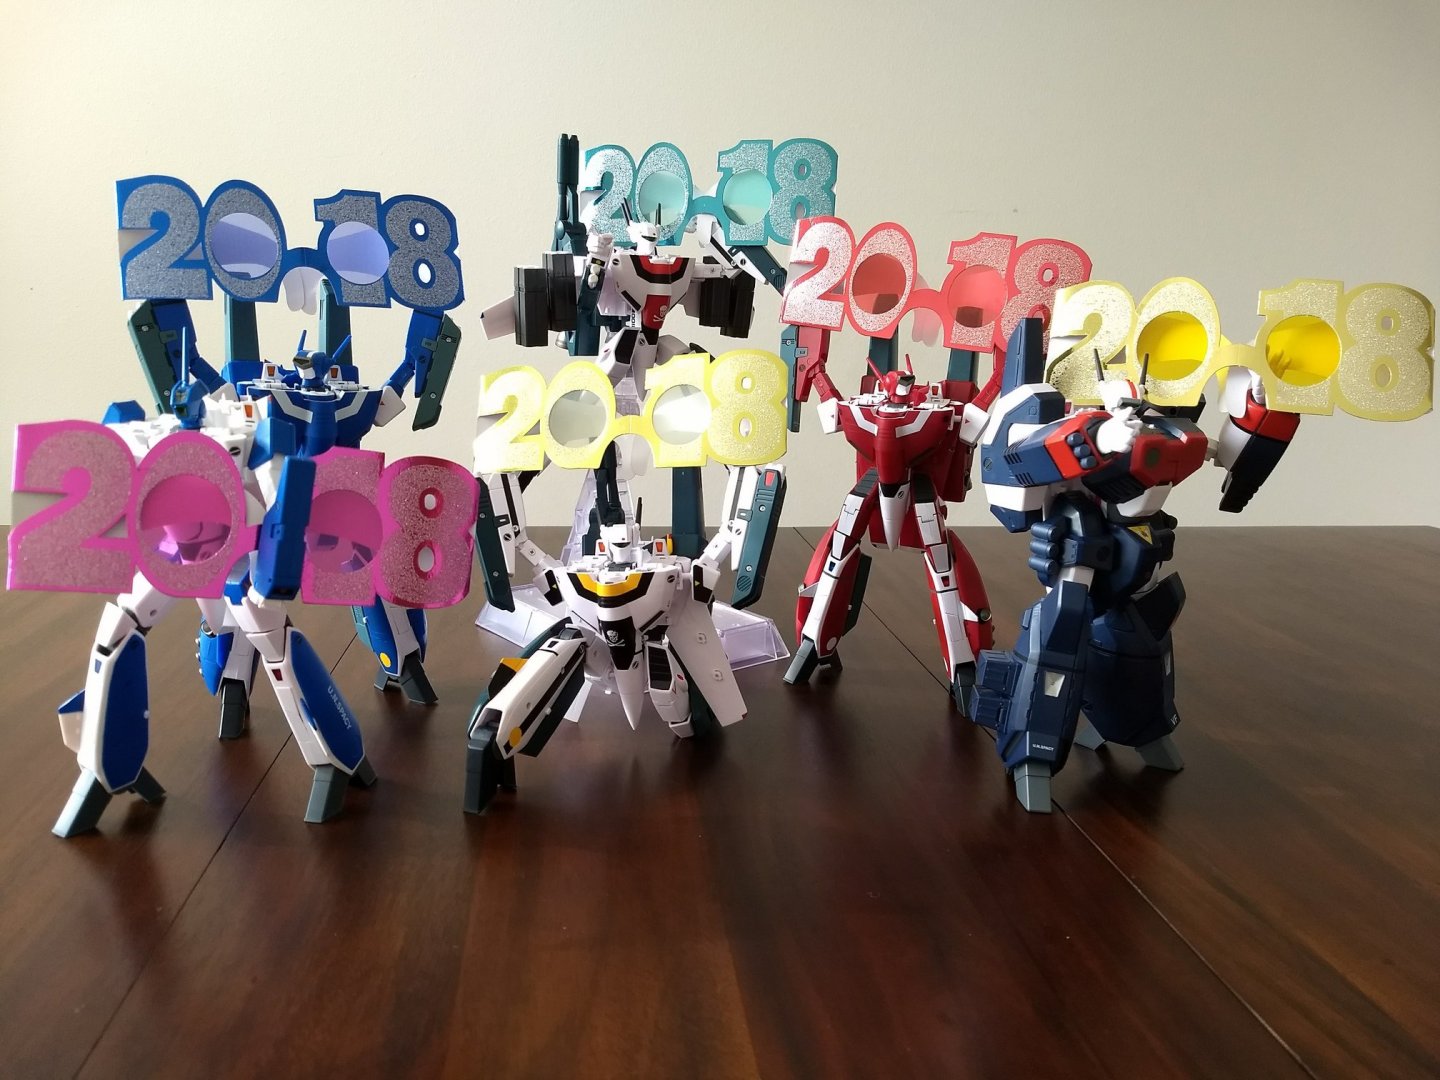
In which I finished the Nautilus and accessories. Happy new year!
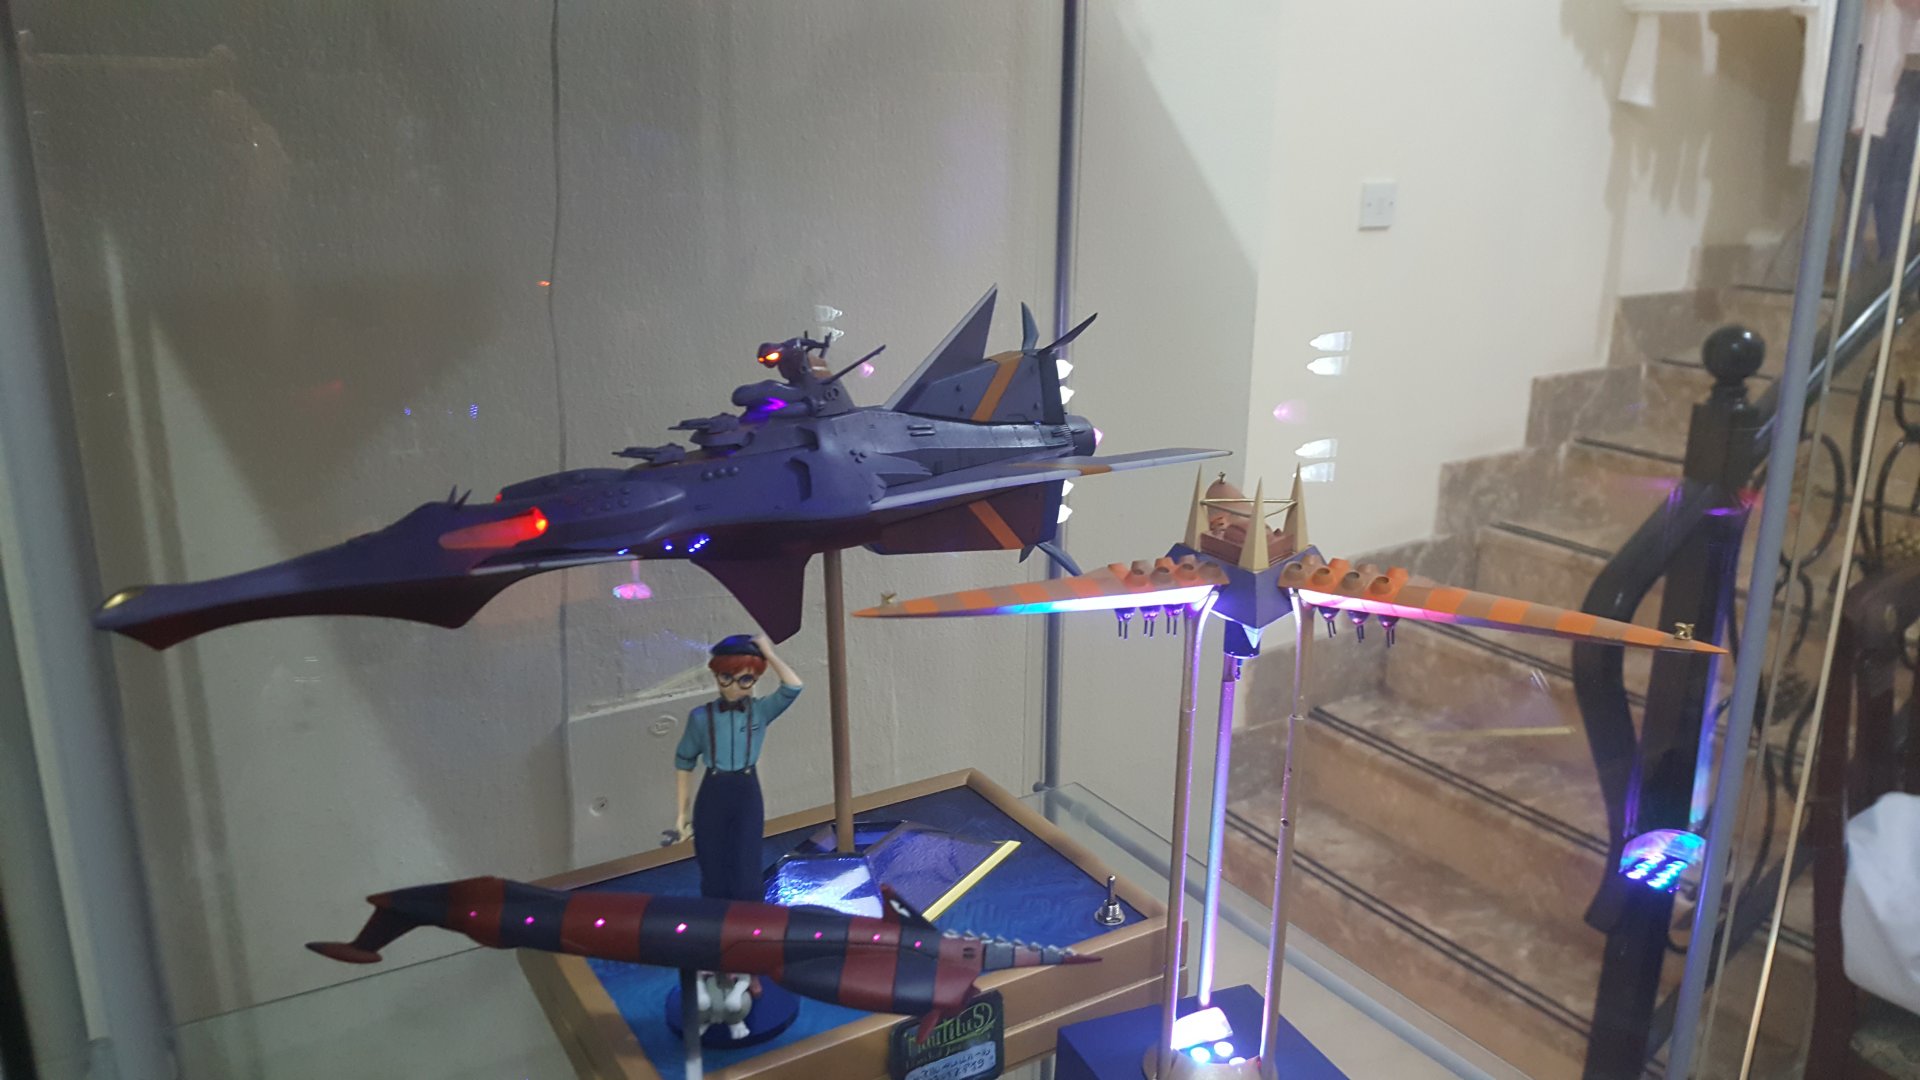
These make a pretty darn cool display in the night
-
I am in
-
7 hours ago, NZEOD said:
Thanks for the link, so another guy also tried the design in 1:72 scale. It doesn't look like a 3D printed though but rather a scratch build.
-
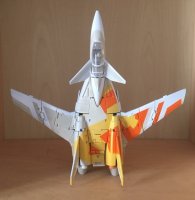
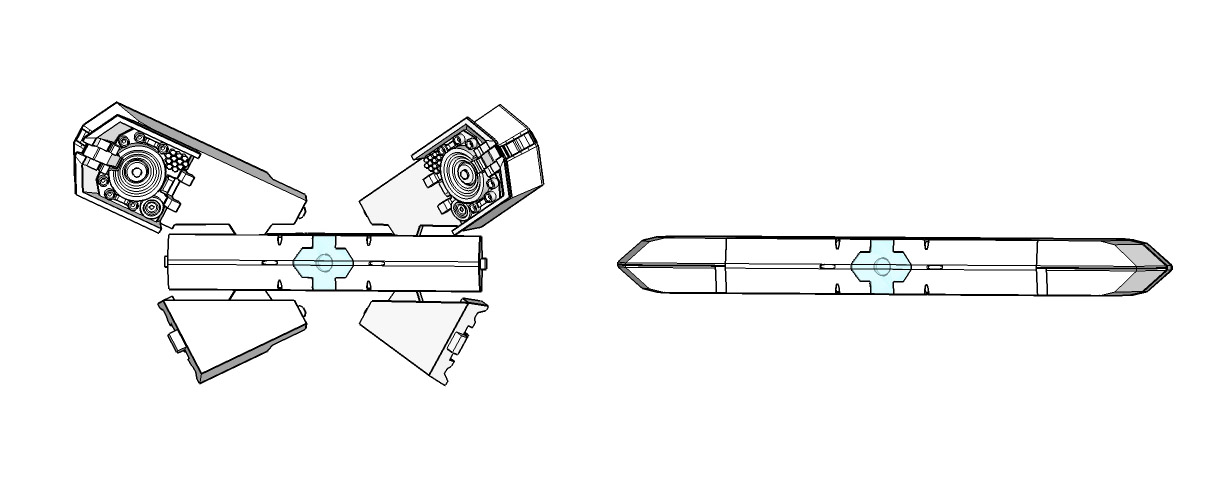
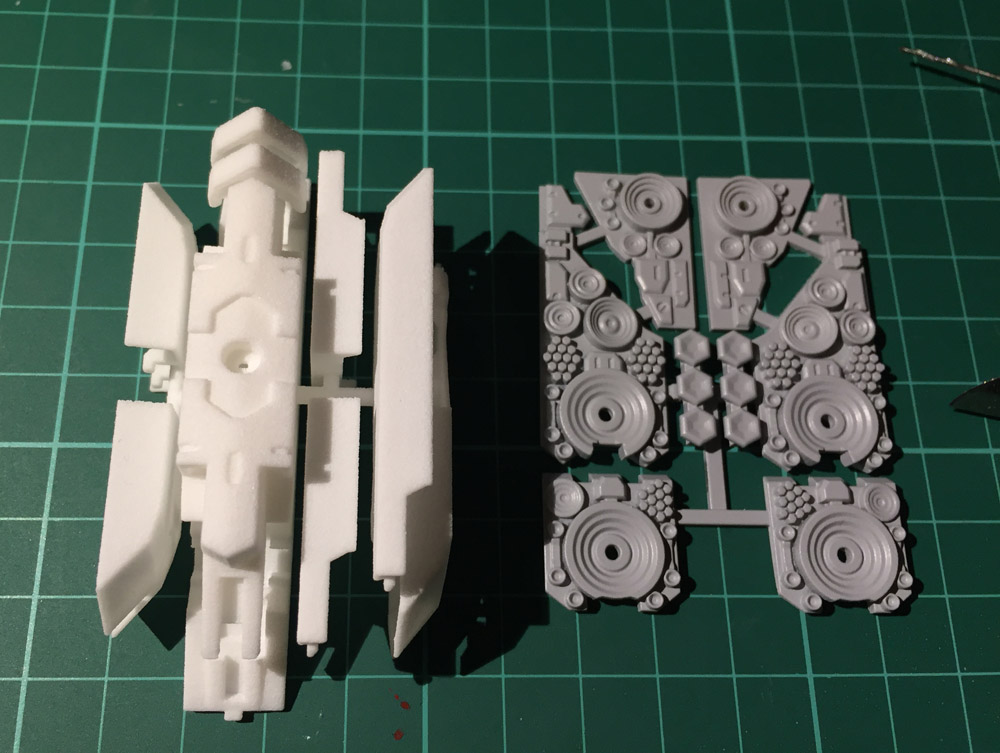
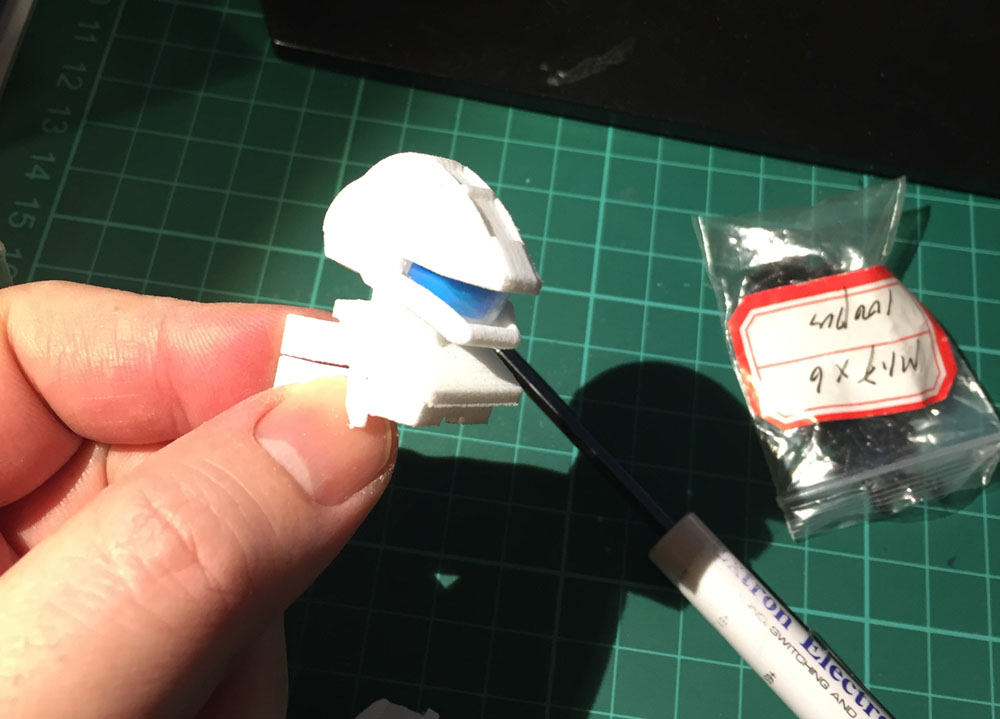
I finished the speaker pod and placed an order to test it. It would be composed of 2 models: one for the main body in WSF and the other one in FUD for the speakers details.
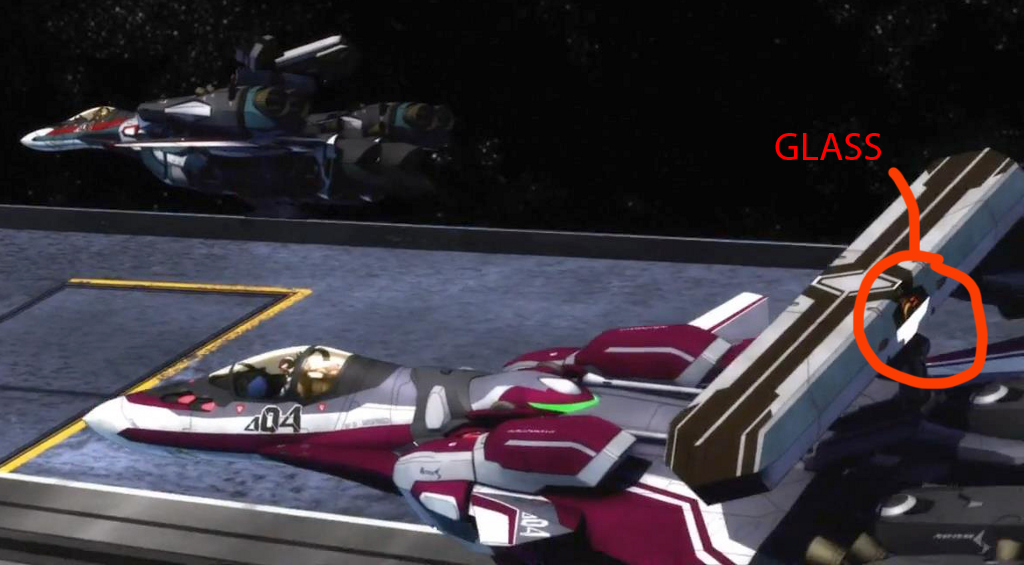
You will need to cut 8 rods (1mm diam) and one screw M1.7x6mm for assembly. Optional to cut 2 plastic sheets to obtain the "window" as seen in the anime.
It shouldn't need glue since the FUD parts would clip into the WSF bodies. I will let you know how well fit they are when I receive them.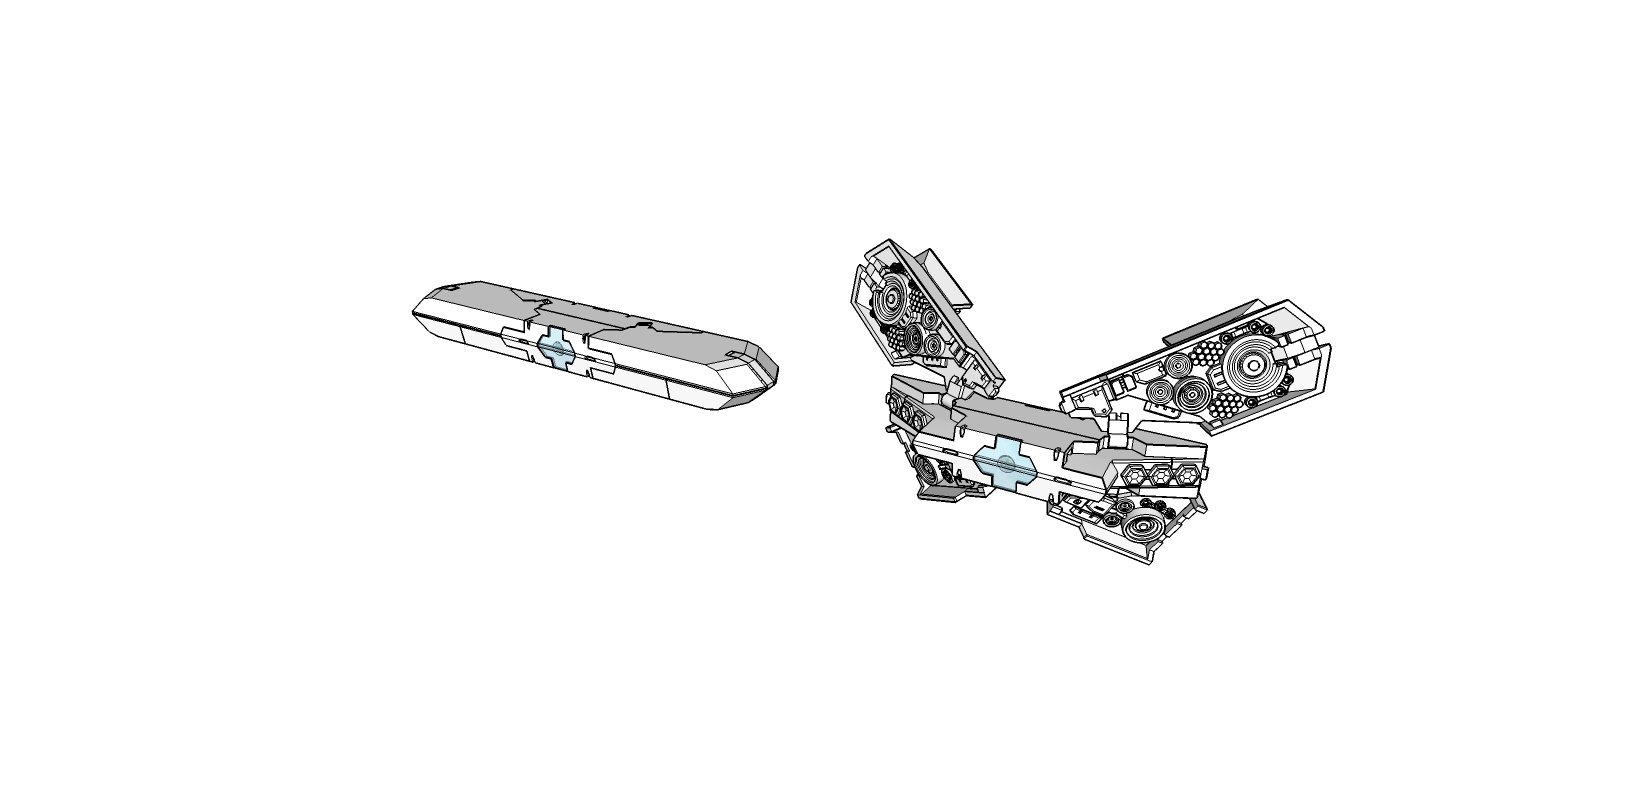


WIP: Alternate Weapons Pods for VF-31
in The Workshop!
Posted
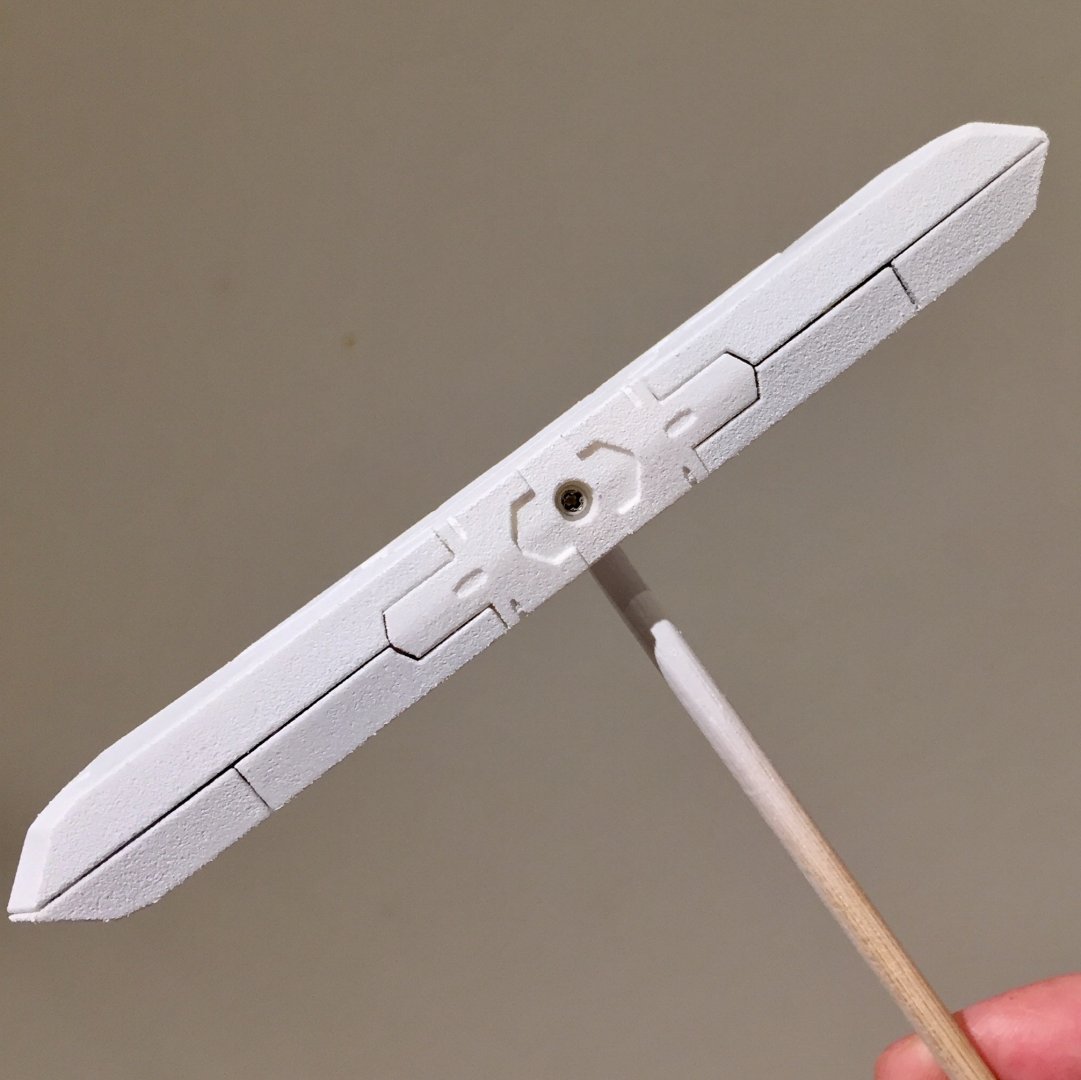
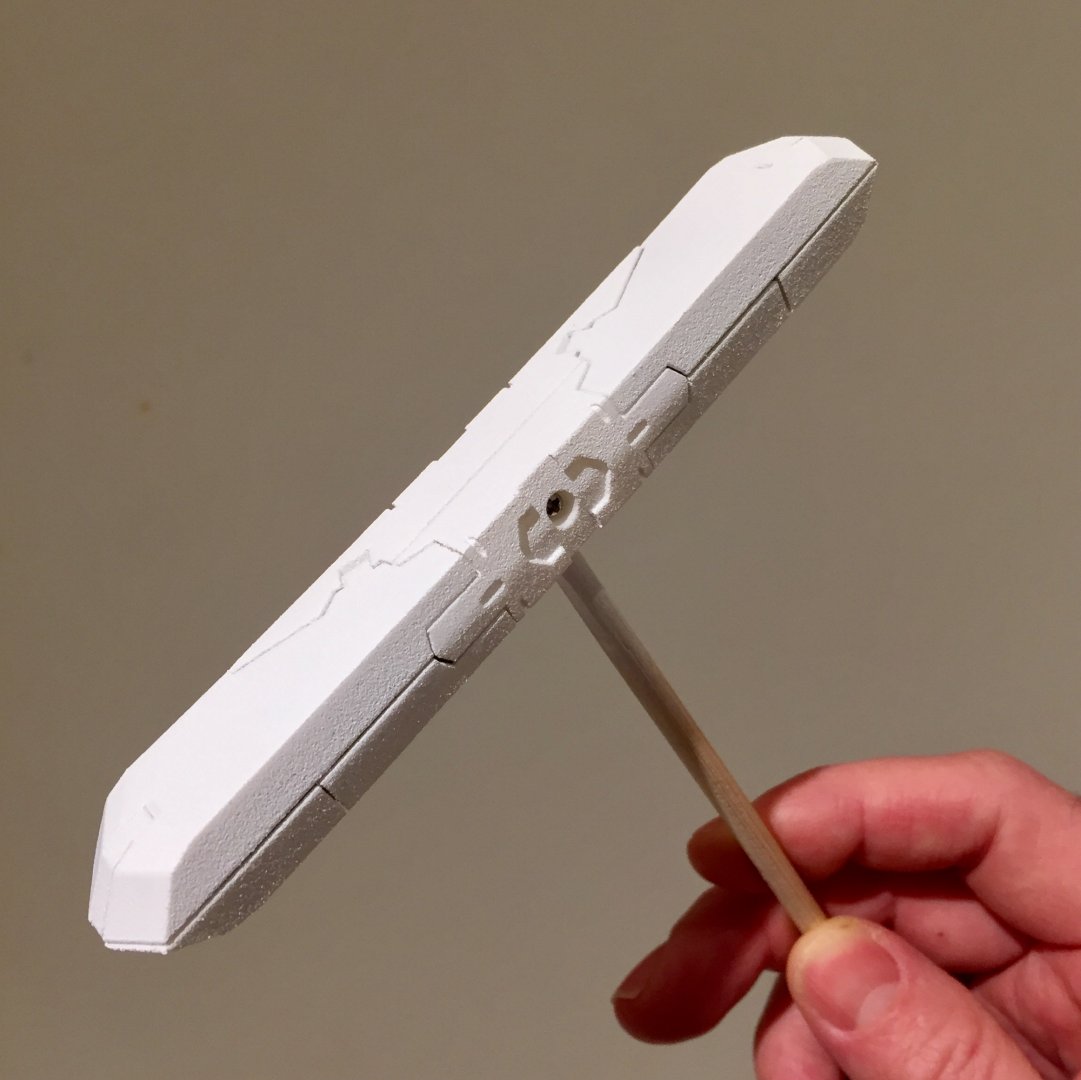
Sanding is complete and I am pretty happy with it") Now I need to paint it.
Now I need to paint it.
First step will be to apply the colors on the 3D file so I can make a pdf of the masking patterns I need and print it so I can easily cut the masking and the glass.