
Xigfrid
-
Posts
2607 -
Joined
-
Last visited
Content Type
Profiles
Forums
Events
Gallery
Posts posted by Xigfrid
-
-
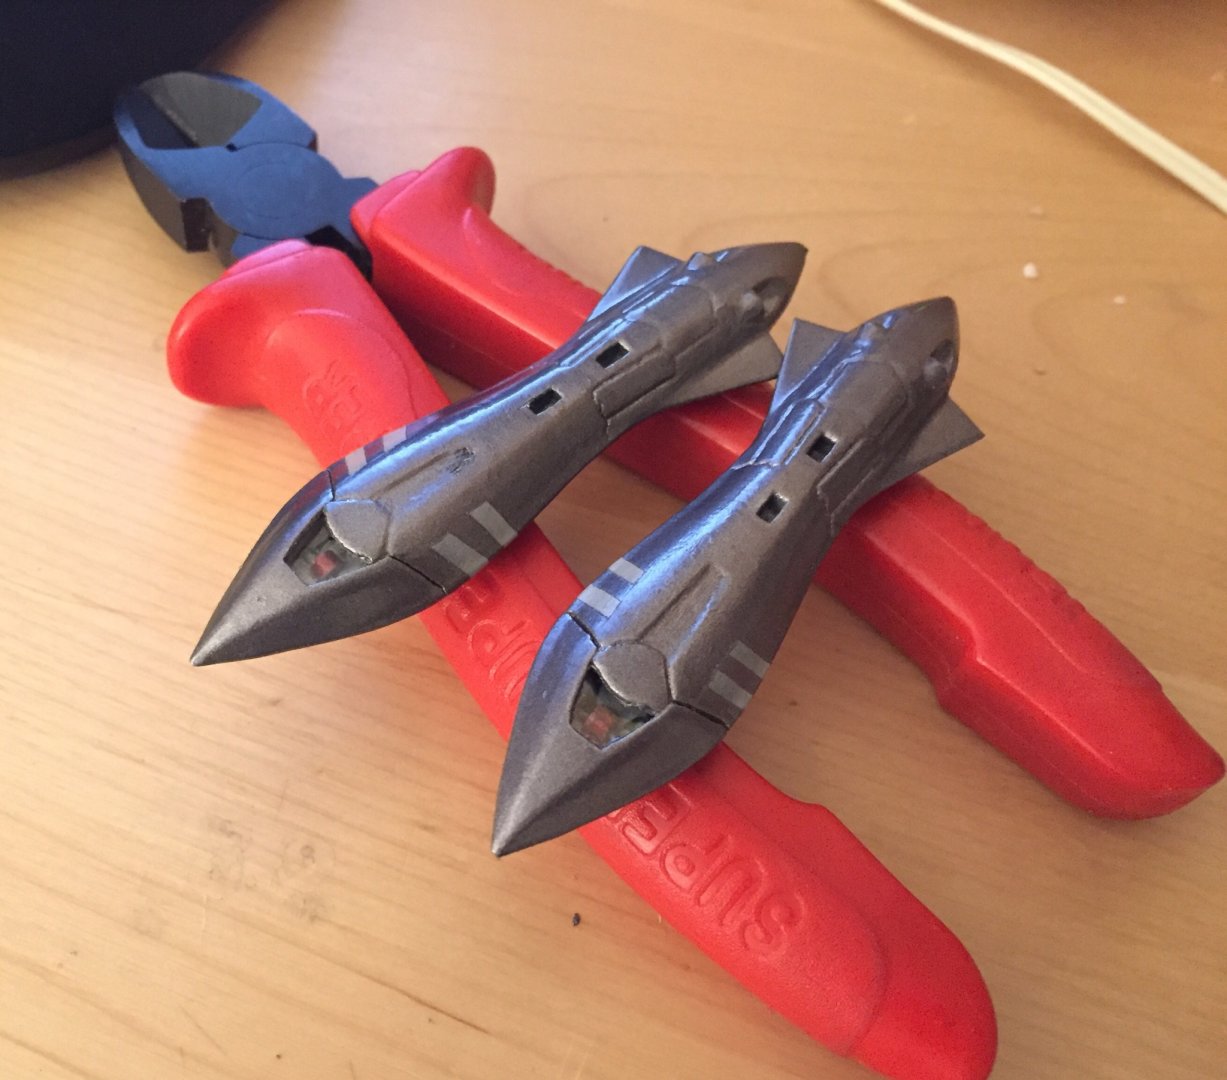
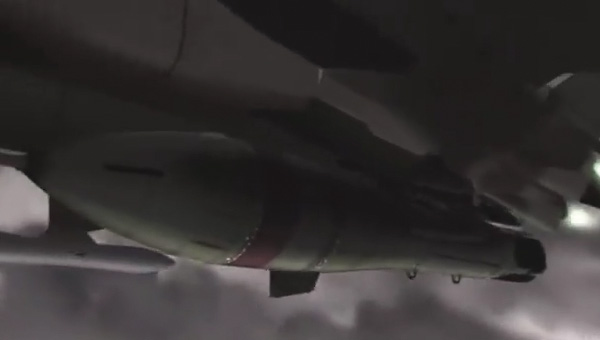
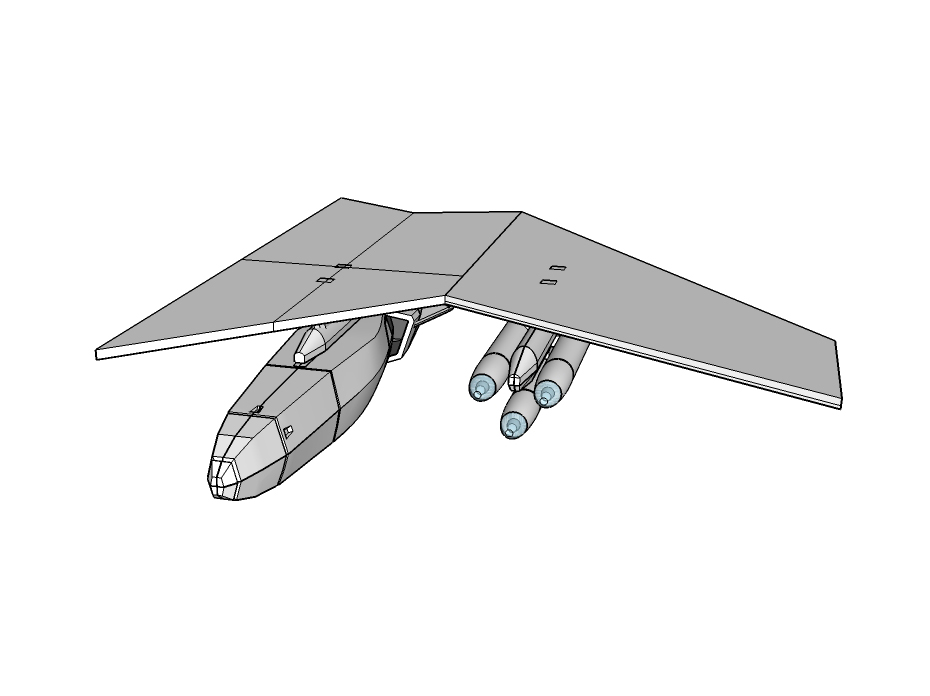
PaCSWS-2C on Roy
-
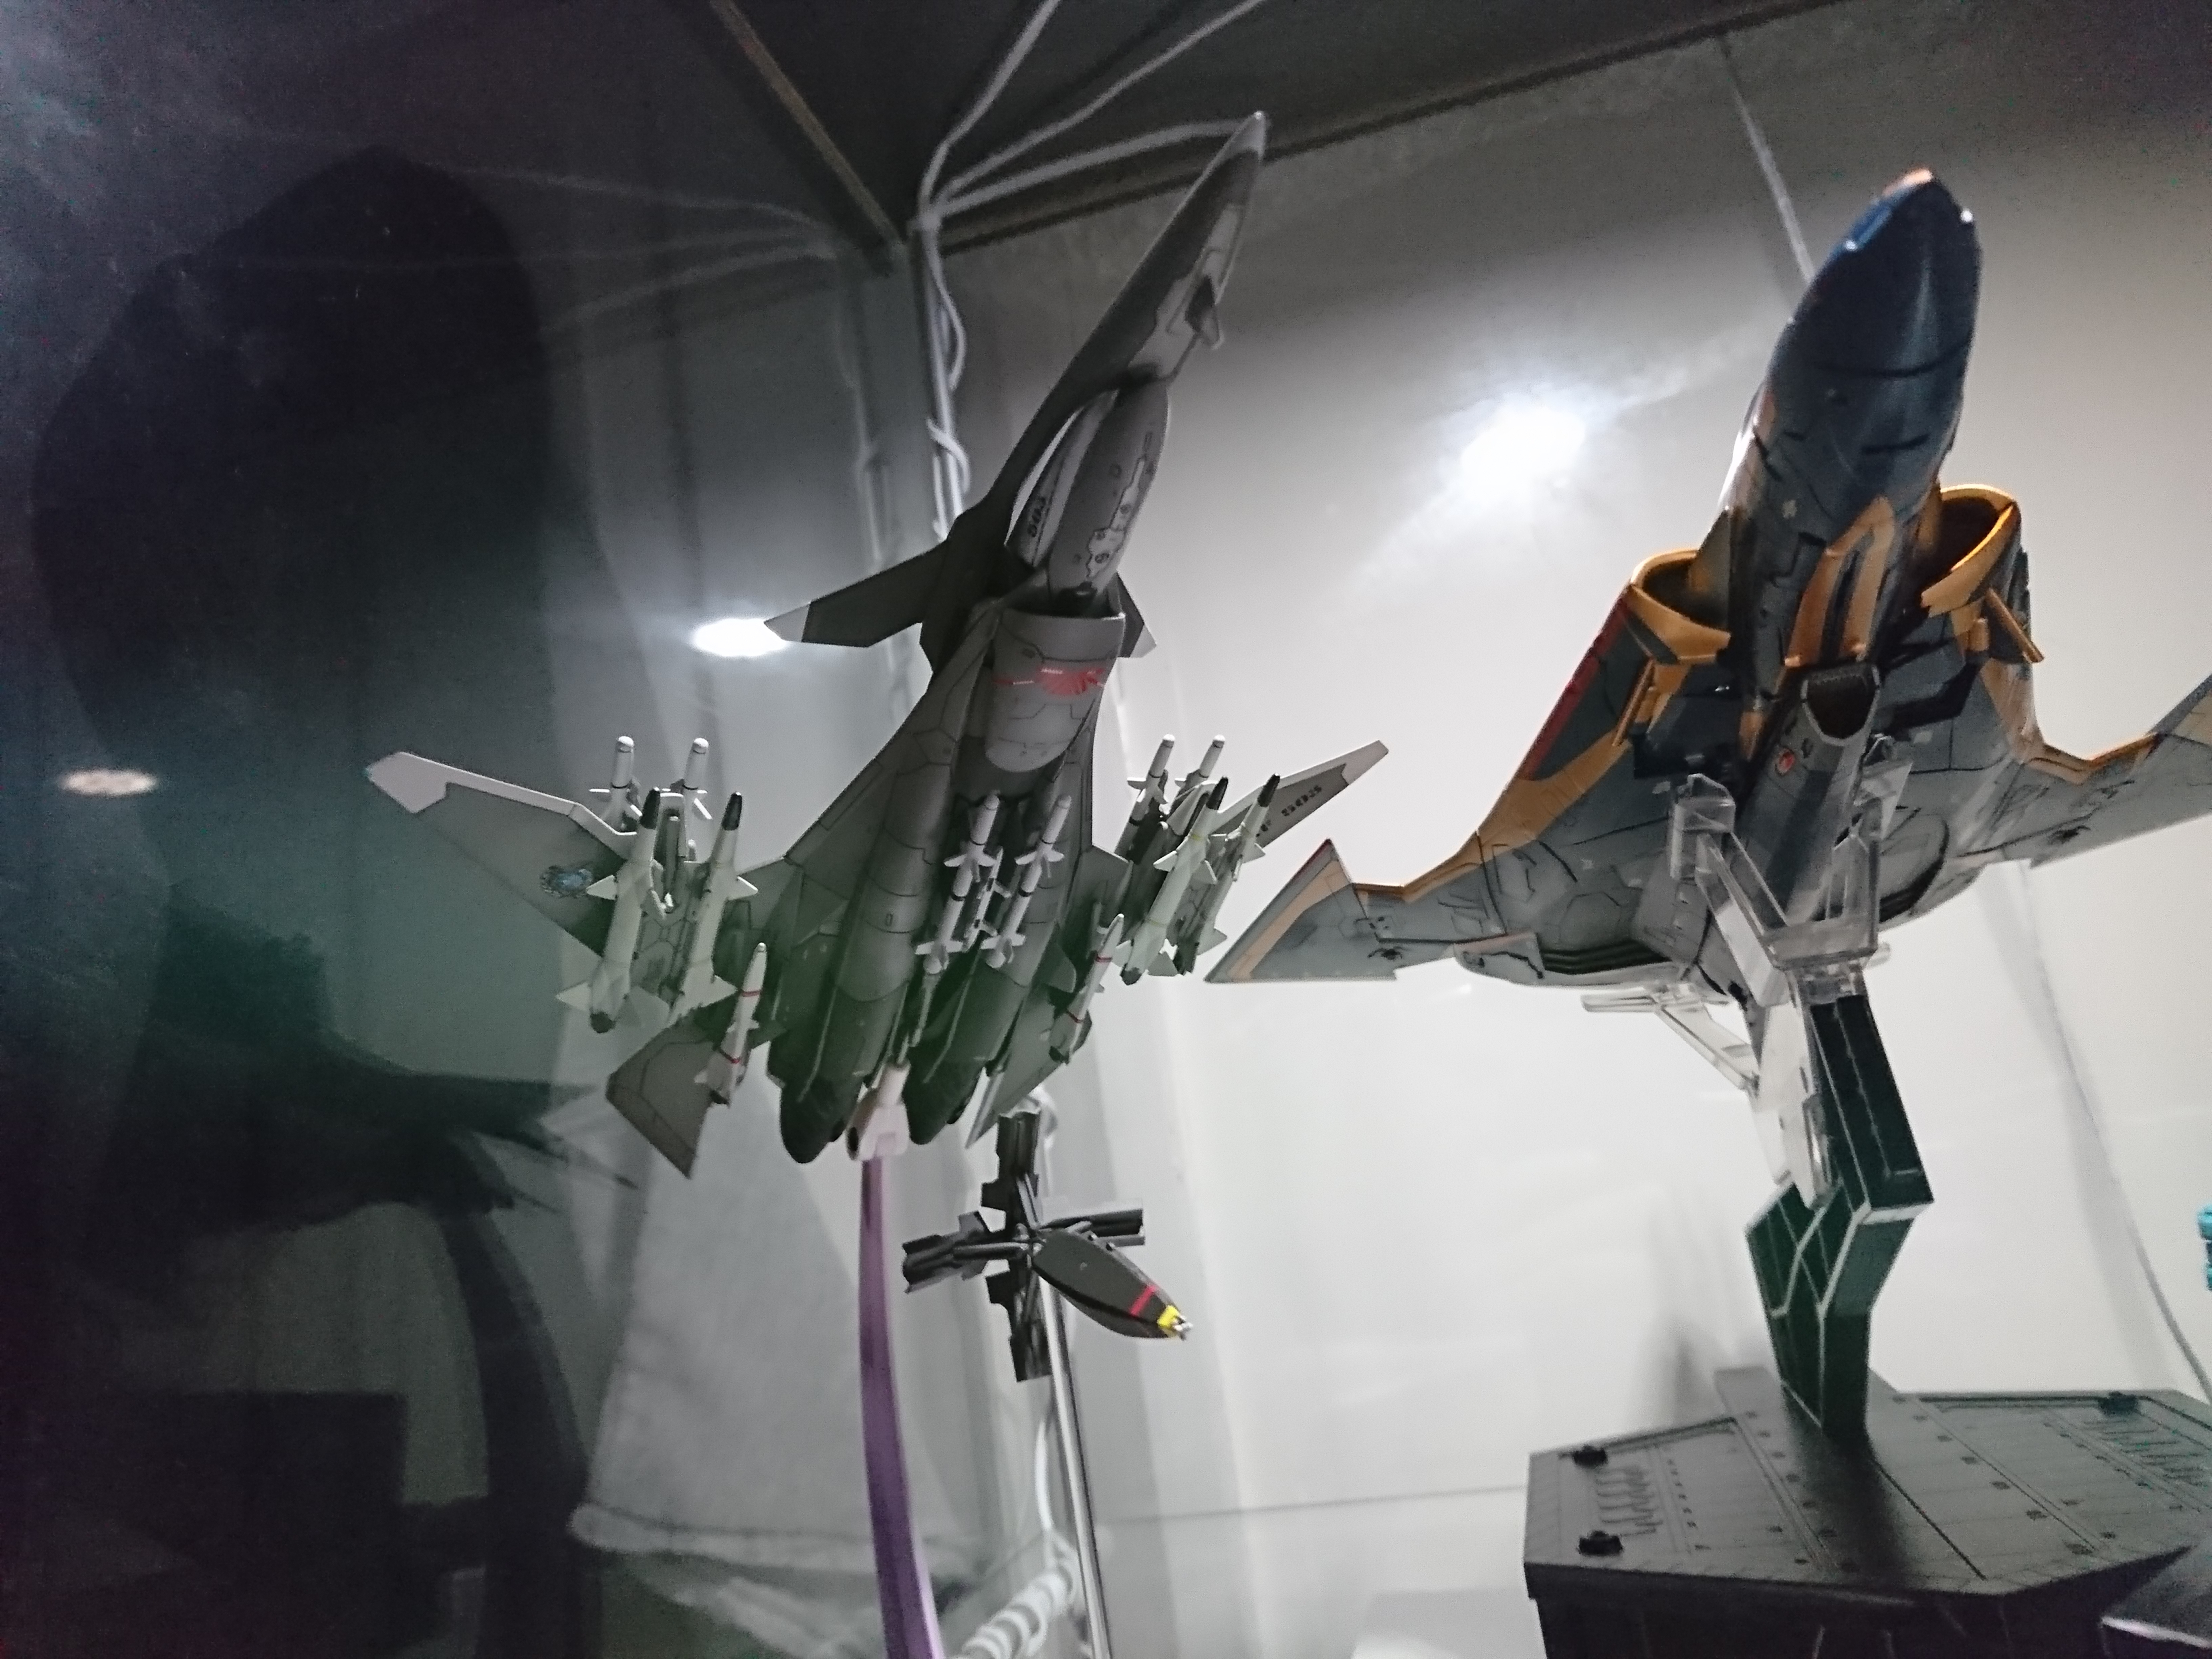
Hey thanks for the praises, but these missiles are not mine. In fact you can tell that because my PaCSWS-2C have a larger glass window for the embarked camera. None the less, the custom missiles will really fit this 31A variant, I can't wait N-Y to ship mine too

-
I don't know if this price is for a BNIB but I would let go my VF-11C for half of that
-
On 16/03/2018 at 5:22 PM, jenius said:
After seeing how simple and affective the locking mechanism was on the KC SD VF1 toys,I agree.
I just looked at your review video and I could only guess that the attachment is more like Bandai DX. Which is a much more robust design over the Yamato/Arcadia design only because it can't rotate to accommodate different wing sweeps.
On a side not I had one peg on my 30th anniv Roy hard point that broke this weekend. I had to glue and reinforce it with a mixture of Cyanolite glue+ babypowder
-
I just received @Jaustin89 parts but unfortunately I have been short in time to disassemble the supers from my 25G and to mount them on my 25F with the Fold Booster. Will take pictures as soon as this is done, promise.
-
@kajnrig thank you for the feedback, I am sorry for the fit issues you are facing. As per the 1:60 scale, for the assembly I don't even bother with sanding the parts before assembly, I just clip the FUD inside the WSF shells.
You are probably right about the fact that this model should be exclusively made in FUD, but it would be only fixed position because I can't see how one can insert a pin in the parts made in FUD without breaking it. Anyway, I hope you will finish it soon
")
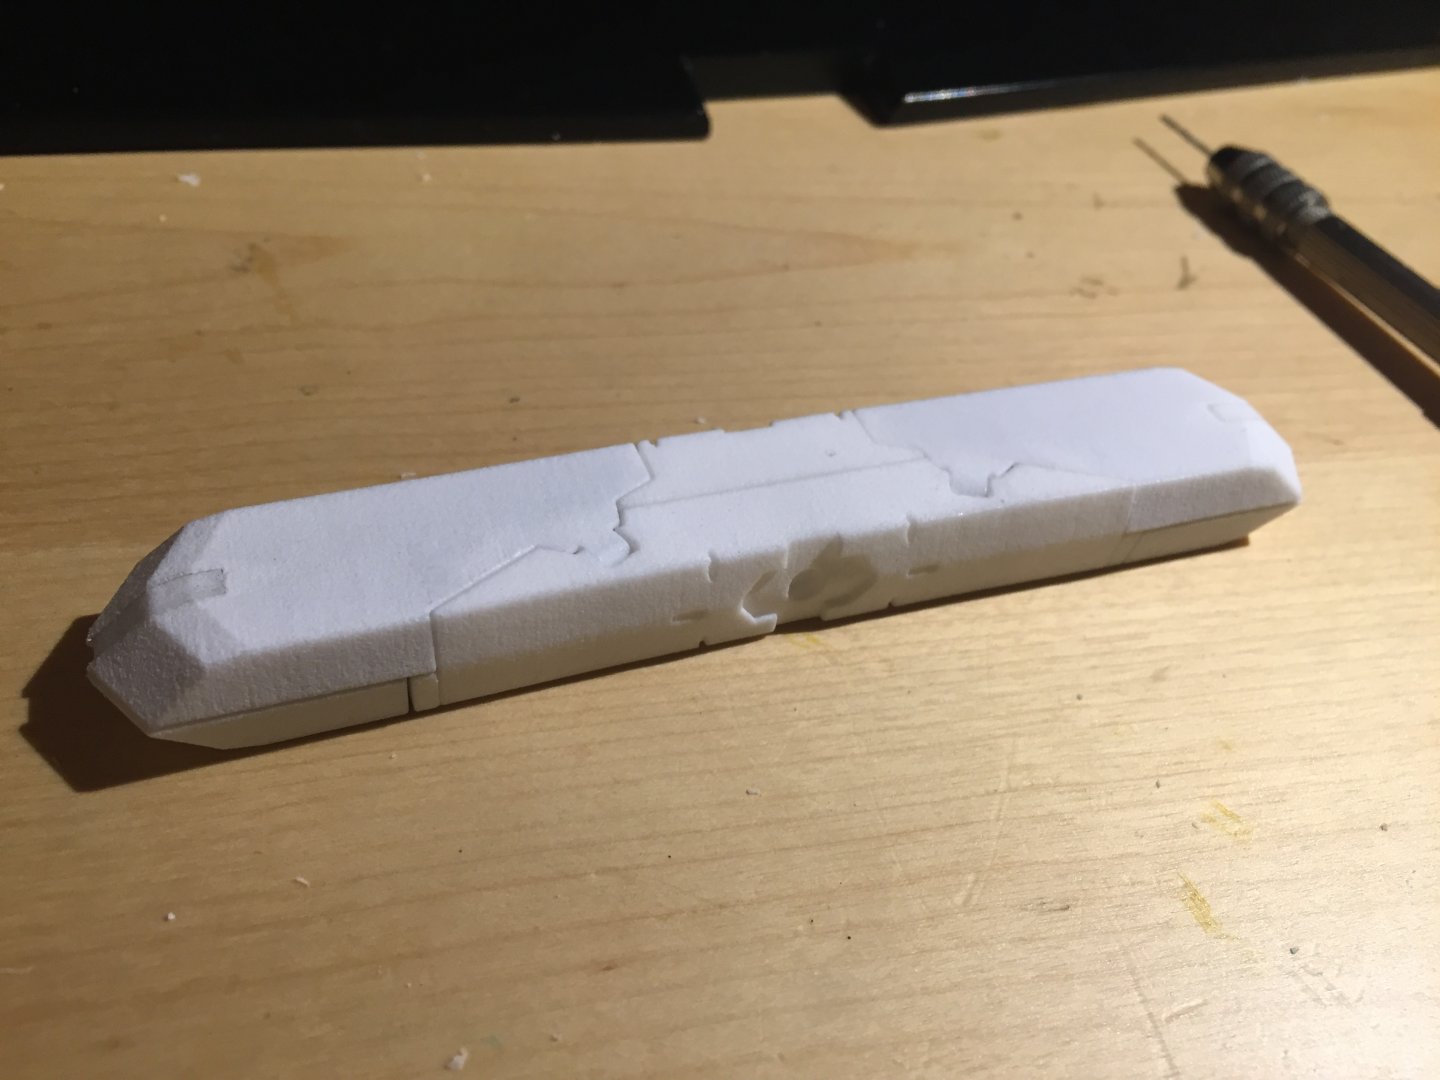
As per my copy, I am done with sanding the outside shell and I will now mask and paint it !

-
8 hours ago, Mommar said:
I really wish I had the time to prep these things.
You should give it a try. I never sanded any pylons, the white ones are small and half hidden under the wings anyway.
The AMM look like a nightmare to prepare, but a few of the bigger ones are really easy to prepare and sand.
For instance, I ordered in WSF Polished the TMM missiles and after 2 primer layers and 1 quick sand, they are good to display, that's the same for the ACSWS-1D (1A also I guess). You can sand by hand or using dremel tool EZ413 (240 grit disc) for sharp and quick results.
The PaCSWS are a bit more curved but rather easy and fast to sand with the Dremel tool 472SMost of the time spent btw is the long 24H wait to let the last primer layer to cure and to be able to sand it.
-
@IamChris How the hell did I miss this thread ?
 That's truly an amazing/refreshing project. I don't know if it's still live but I wish it is !
-
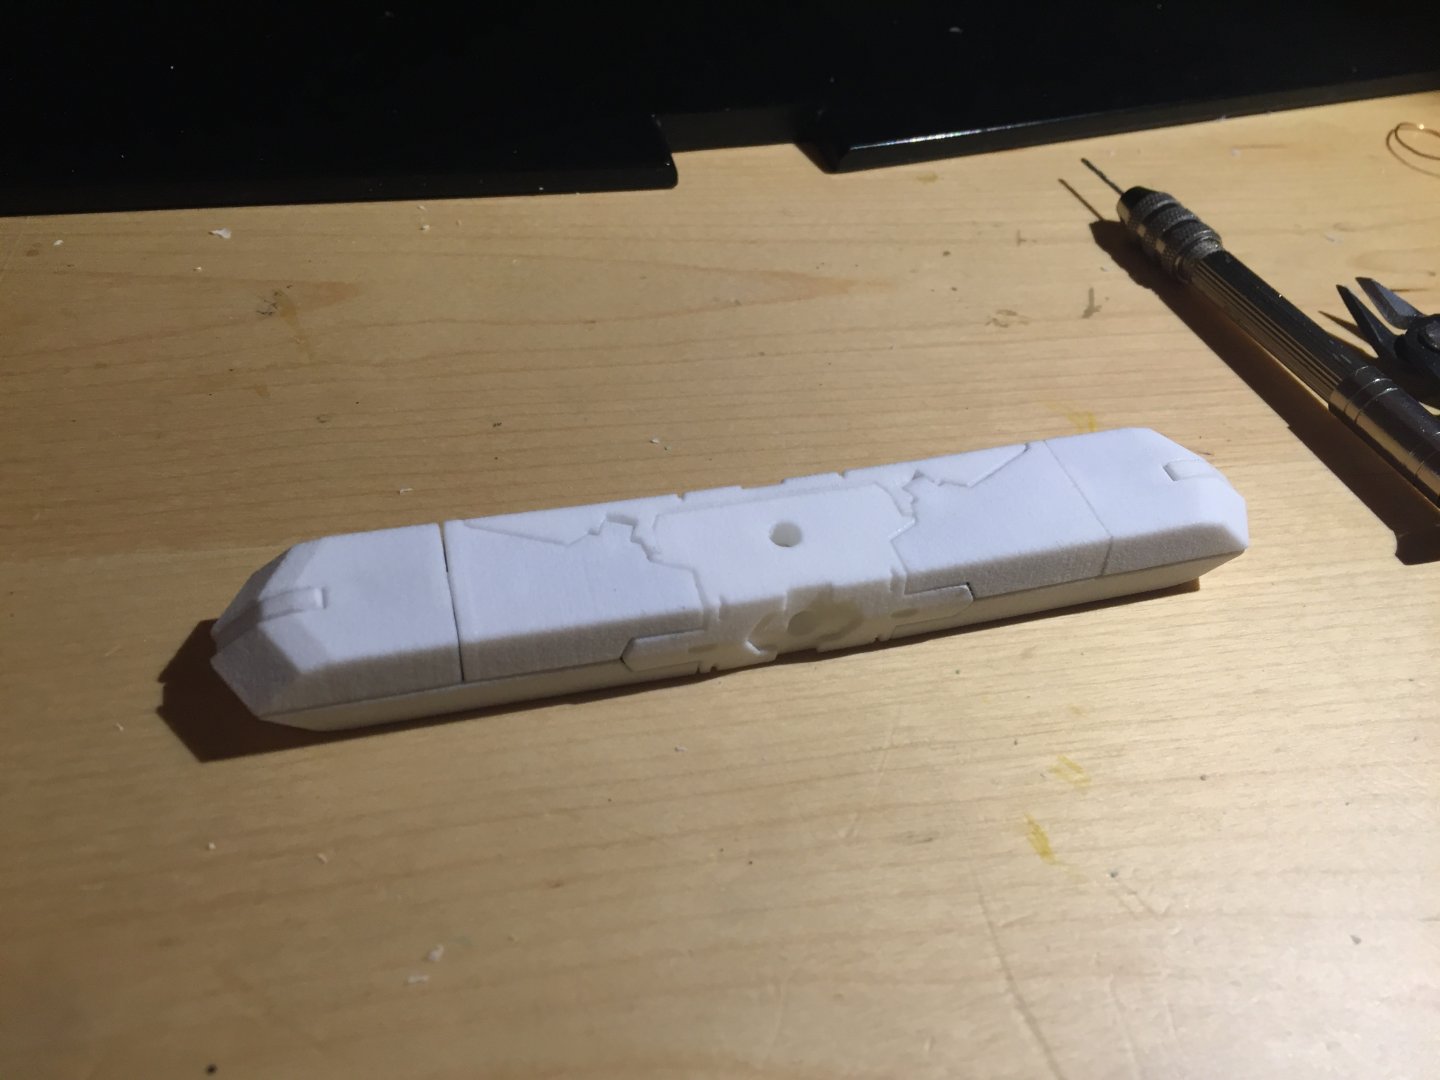
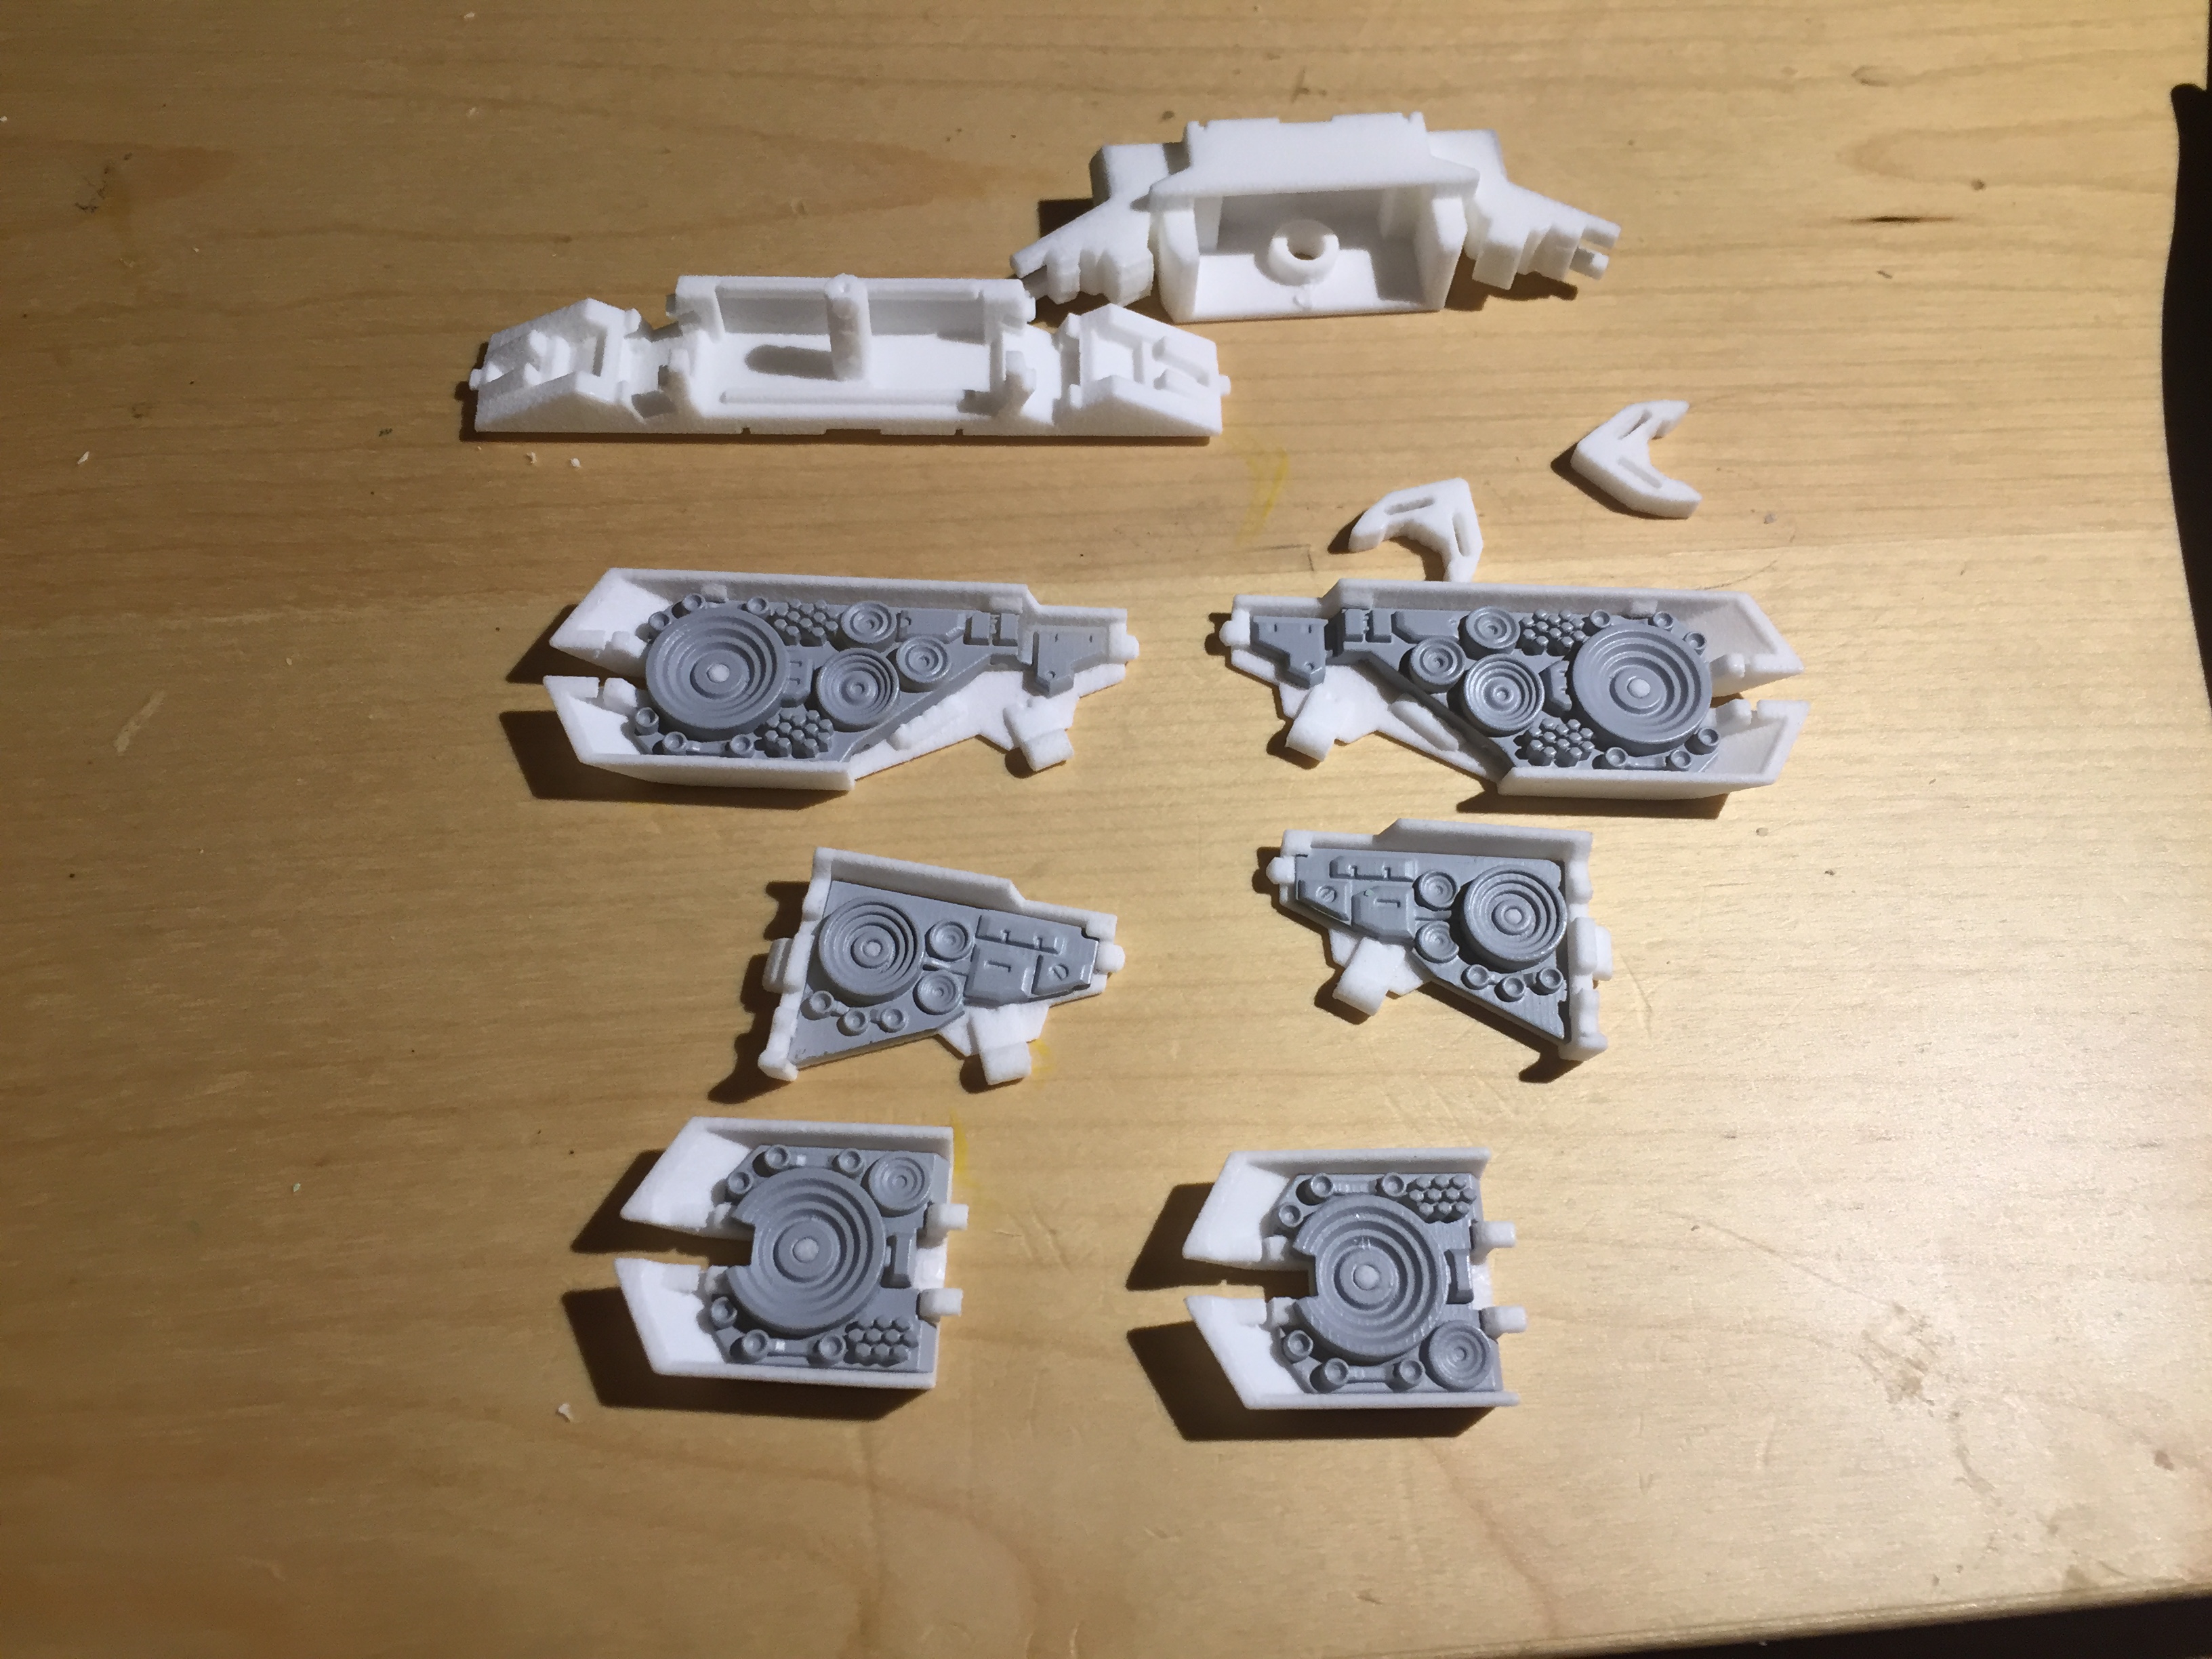
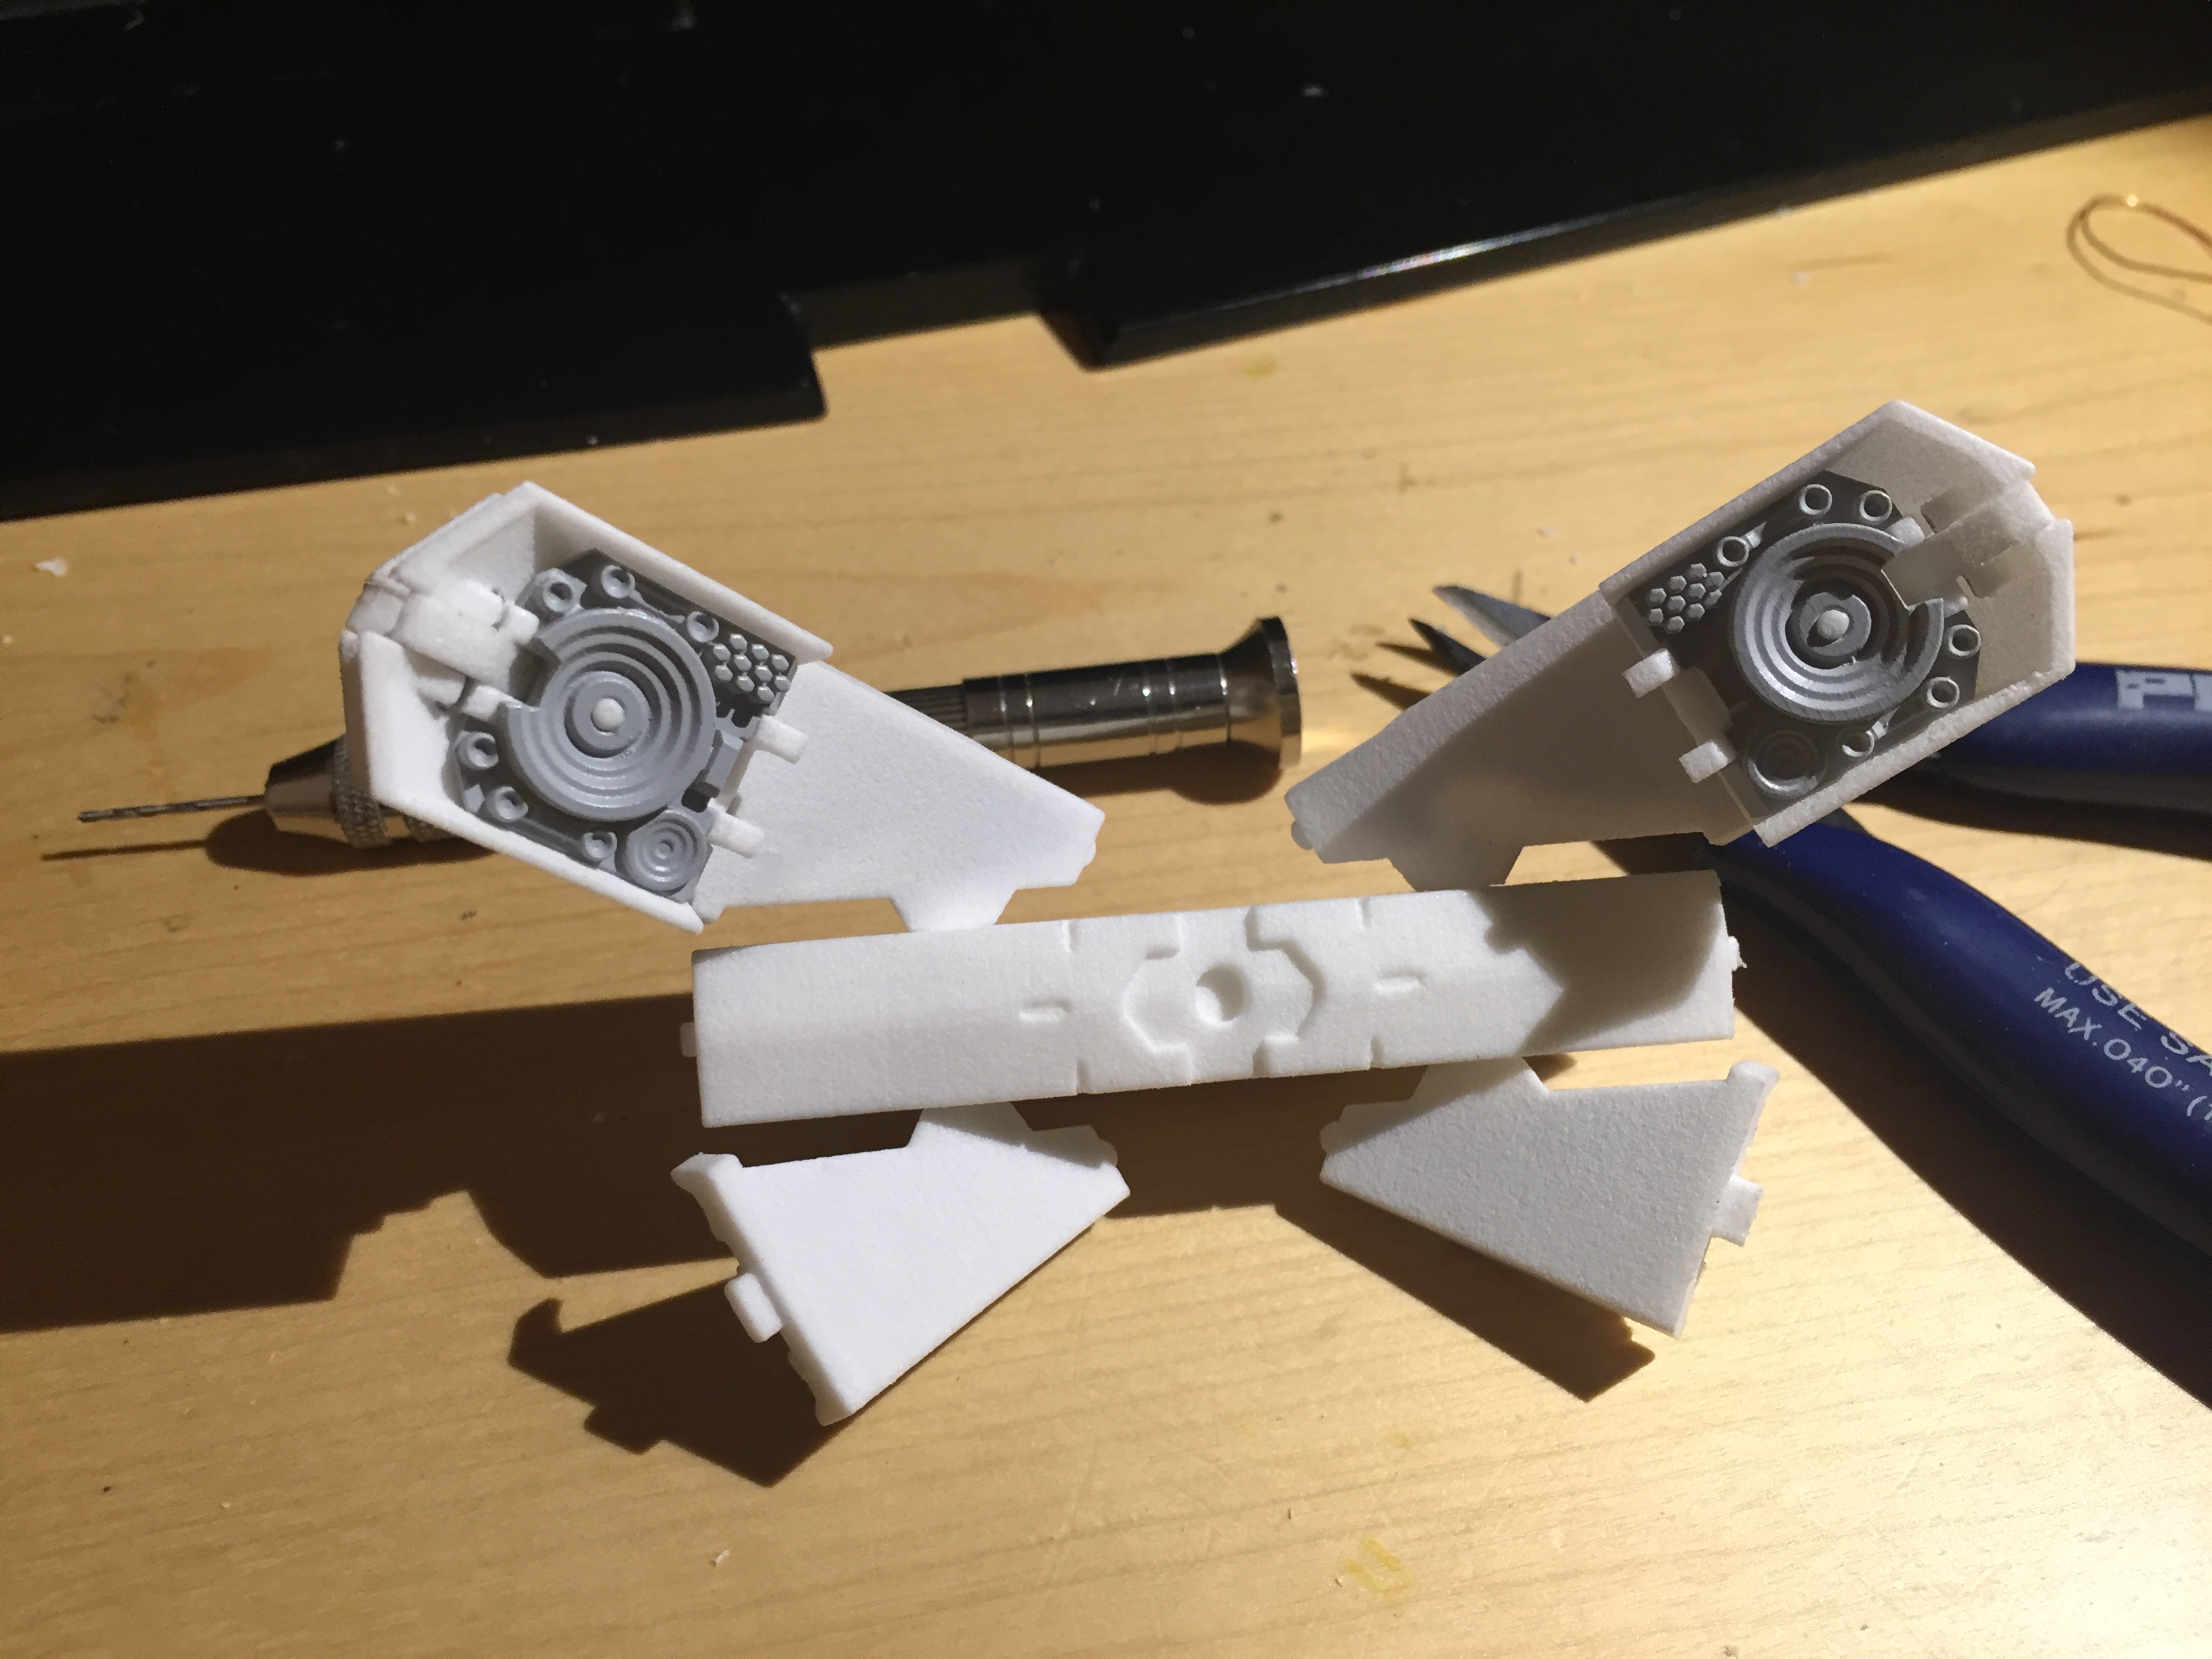
Well if you make display models only, the best material for you is FUD: a bit more expensive than WSF Polished but, you barely need to sand it and the material can hold very small details as small as 0.1mm-0.2mm.
I generally design for 1/60 scale and it means that's a toy and you need to play with it: yeah! FUD will be too fragile to allow the missile to be plug in and out of the pylon, that's why I print them in WSF. The polishing process from Shapeways is rough on the part and that's why you can have breakage on small details, but because I design panel lines to sustain 2-3 layers of prime and sanding, the polishing process won't "erase them". It costs only 1 USD to have your model polished, to me it can be worth on models that cost at least 10 USD and that you don't mind having < 1mm diameter polished edges.
I use only Sketchup but I wish I had more time to learn a 3D parametric software. Sketchup makes it so hard to re-cycle/enhance previous model, this is more like you have to make the work twice than making a simple upgrade. You can work directly to the 1:72 scale with Sketchup, but if you don't feel confortable, just work at 10x the scale (10:72) and export it at 1/10th the size for the printer.
-
Omg! I can’t wait to see you working your magic on 1/20 scale
-
A quick update on the latest version of speaker pod, I printed it in WSF Polished and FUD for internal details, and everything worked fine.

-
4 hours ago, ivorysniper said:
@Xigfrid , is this the WSF material ?. If so, these printouts look pretty neat !.
Thanks, and the print material was WSF Polished, generally I am not a huge fan of the polished option but in this case it was an impressive improvement.
-
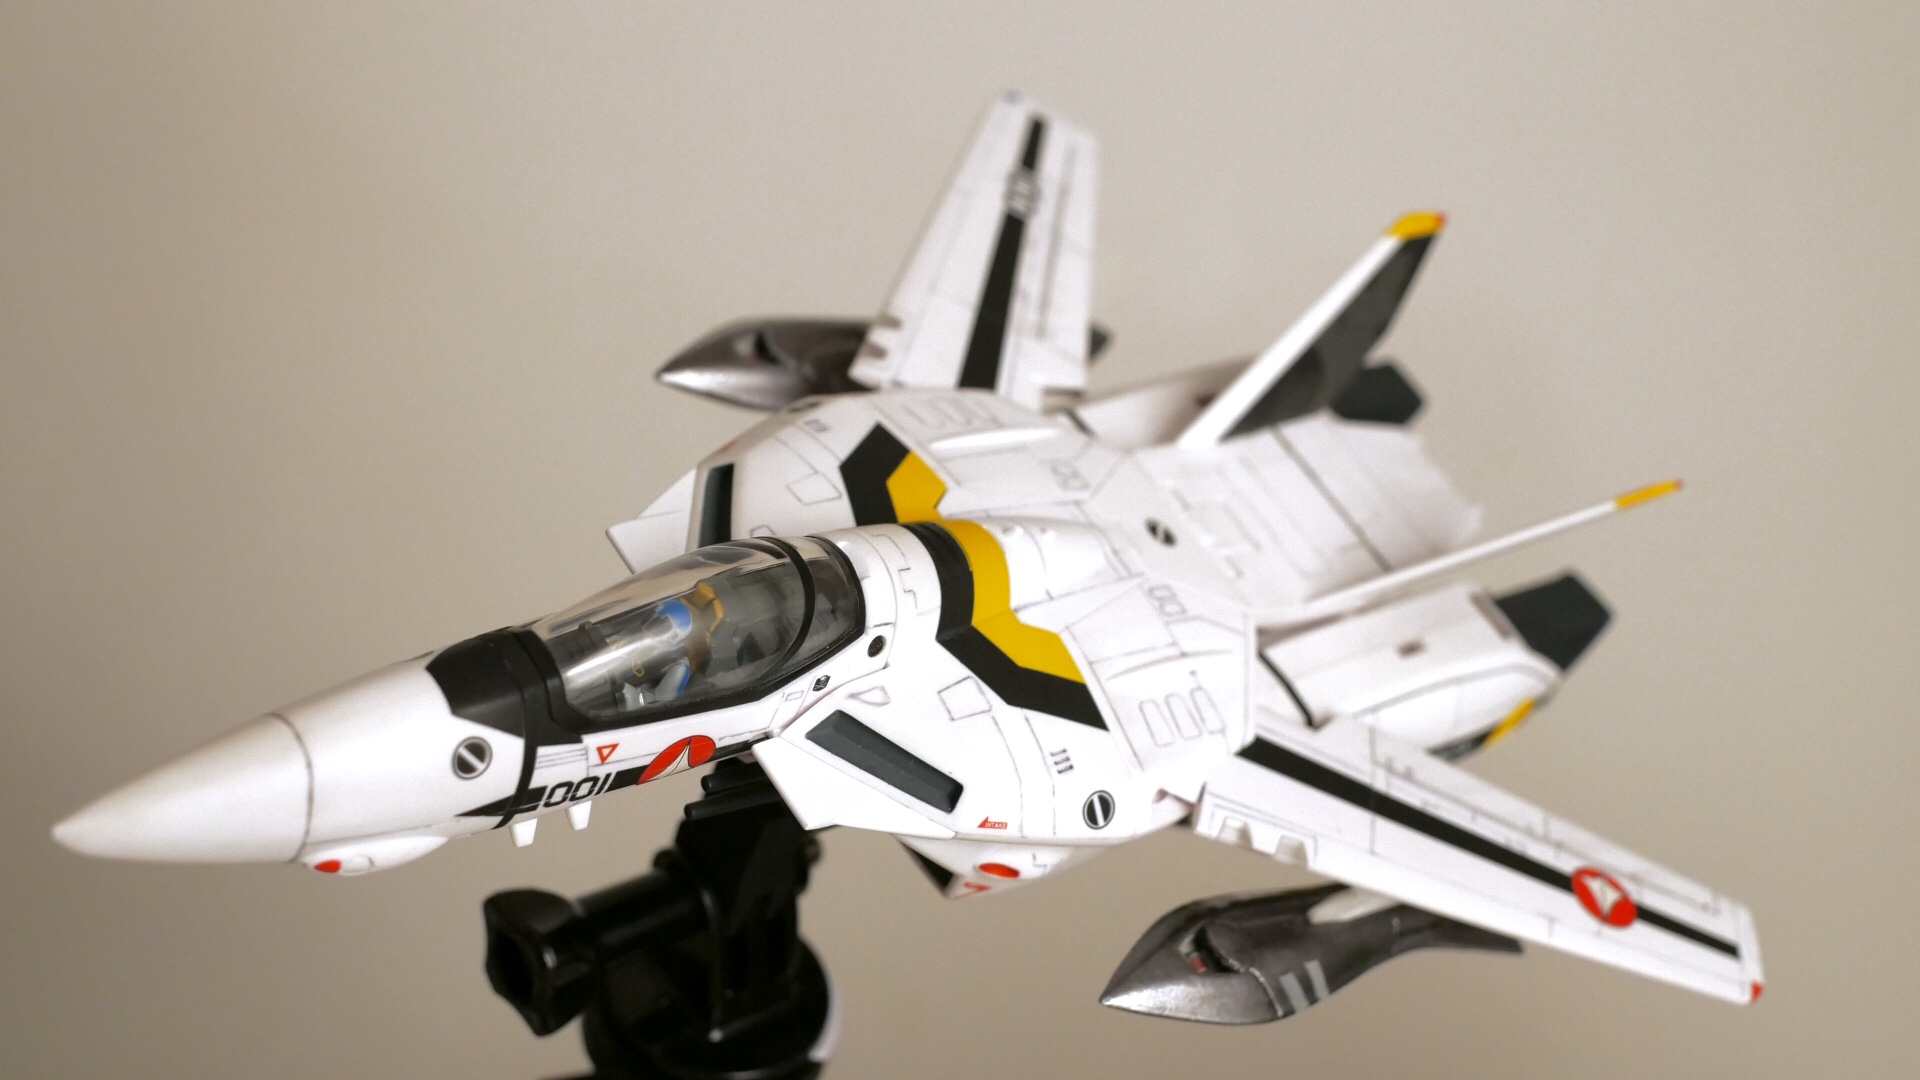
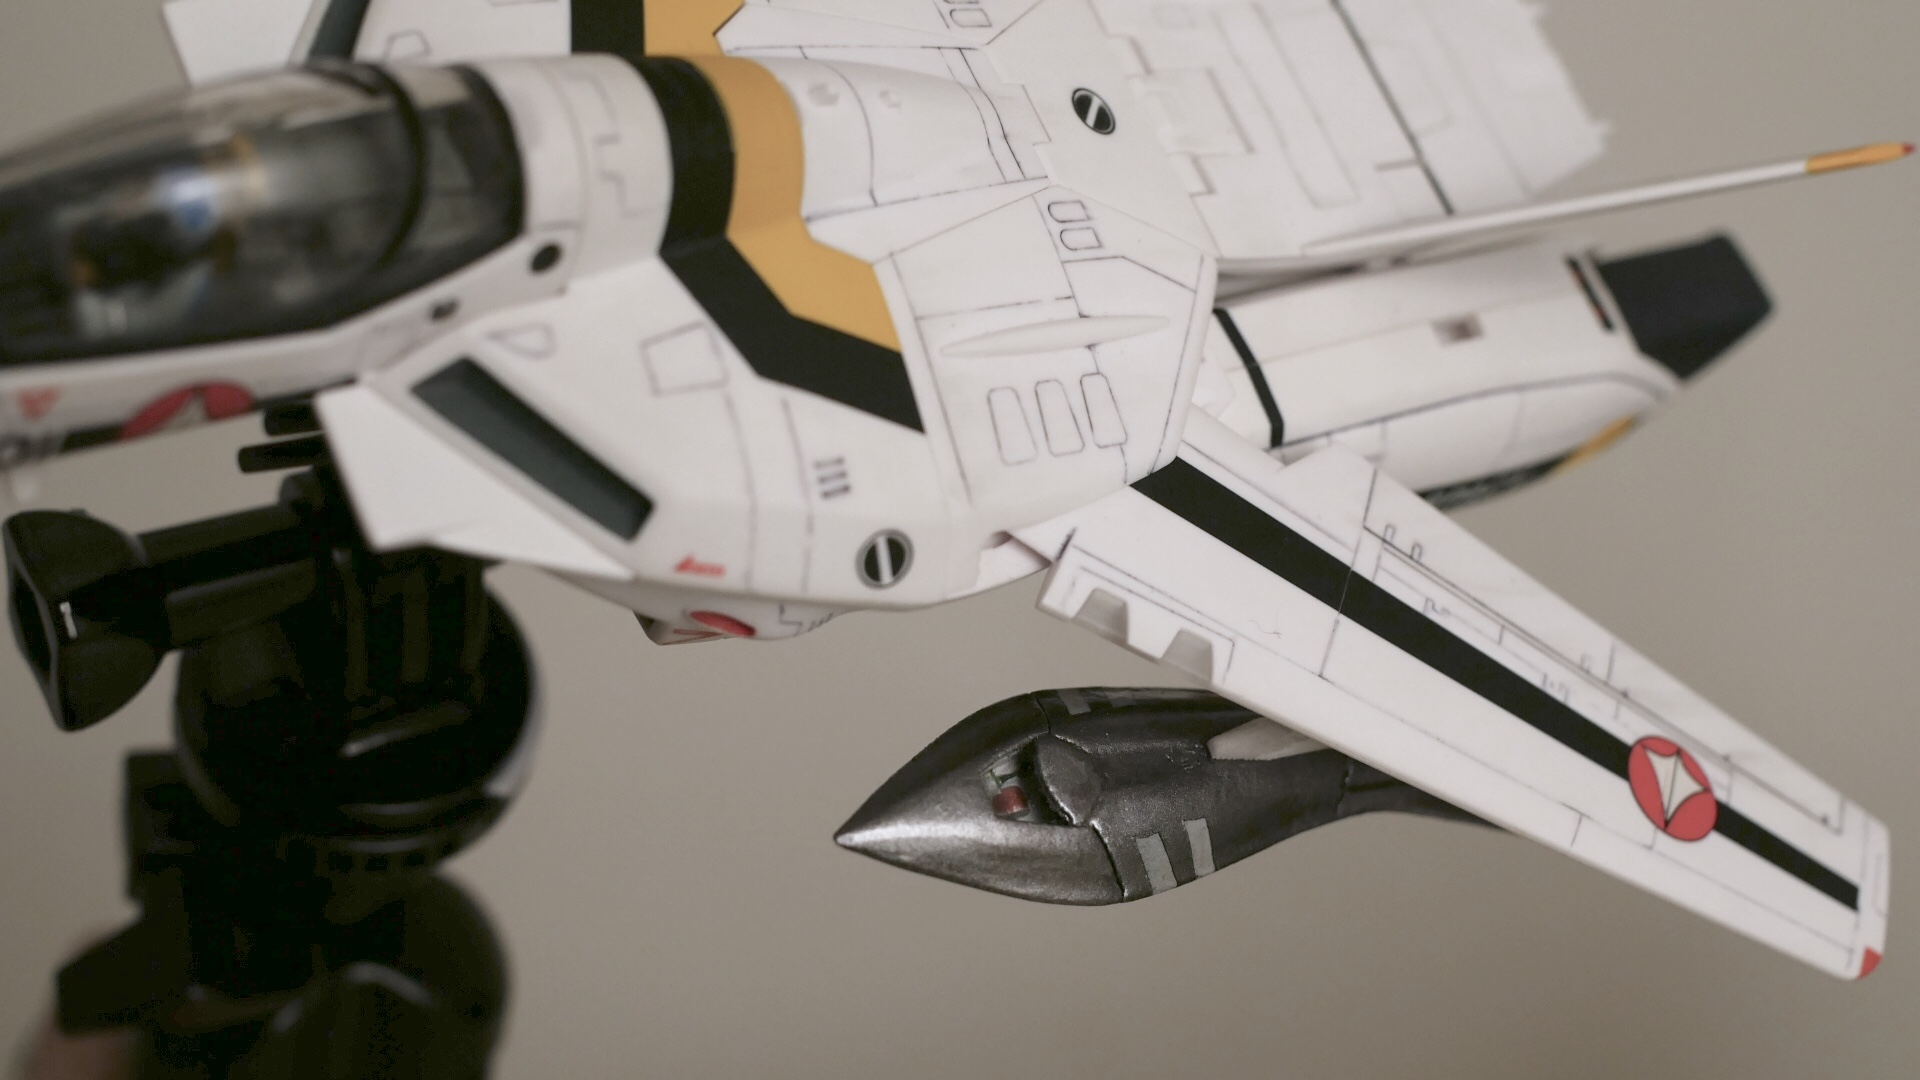
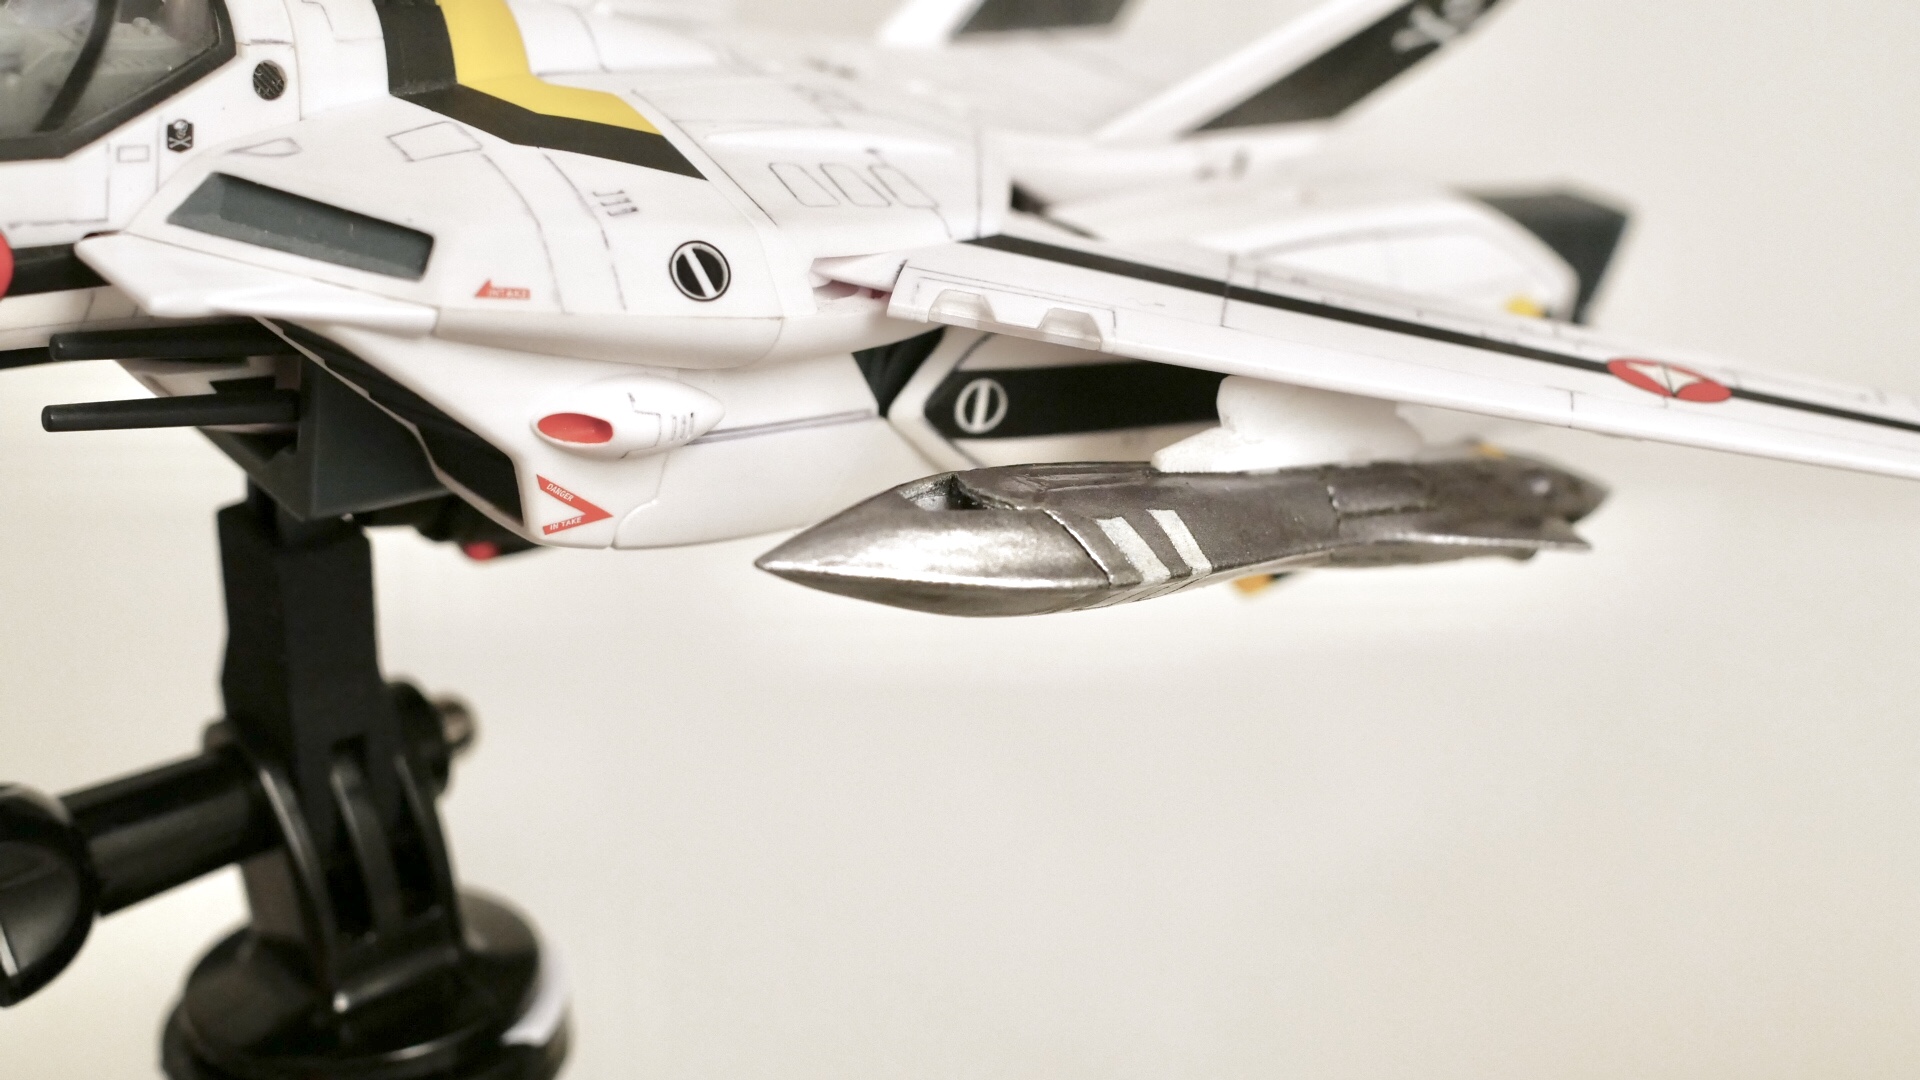
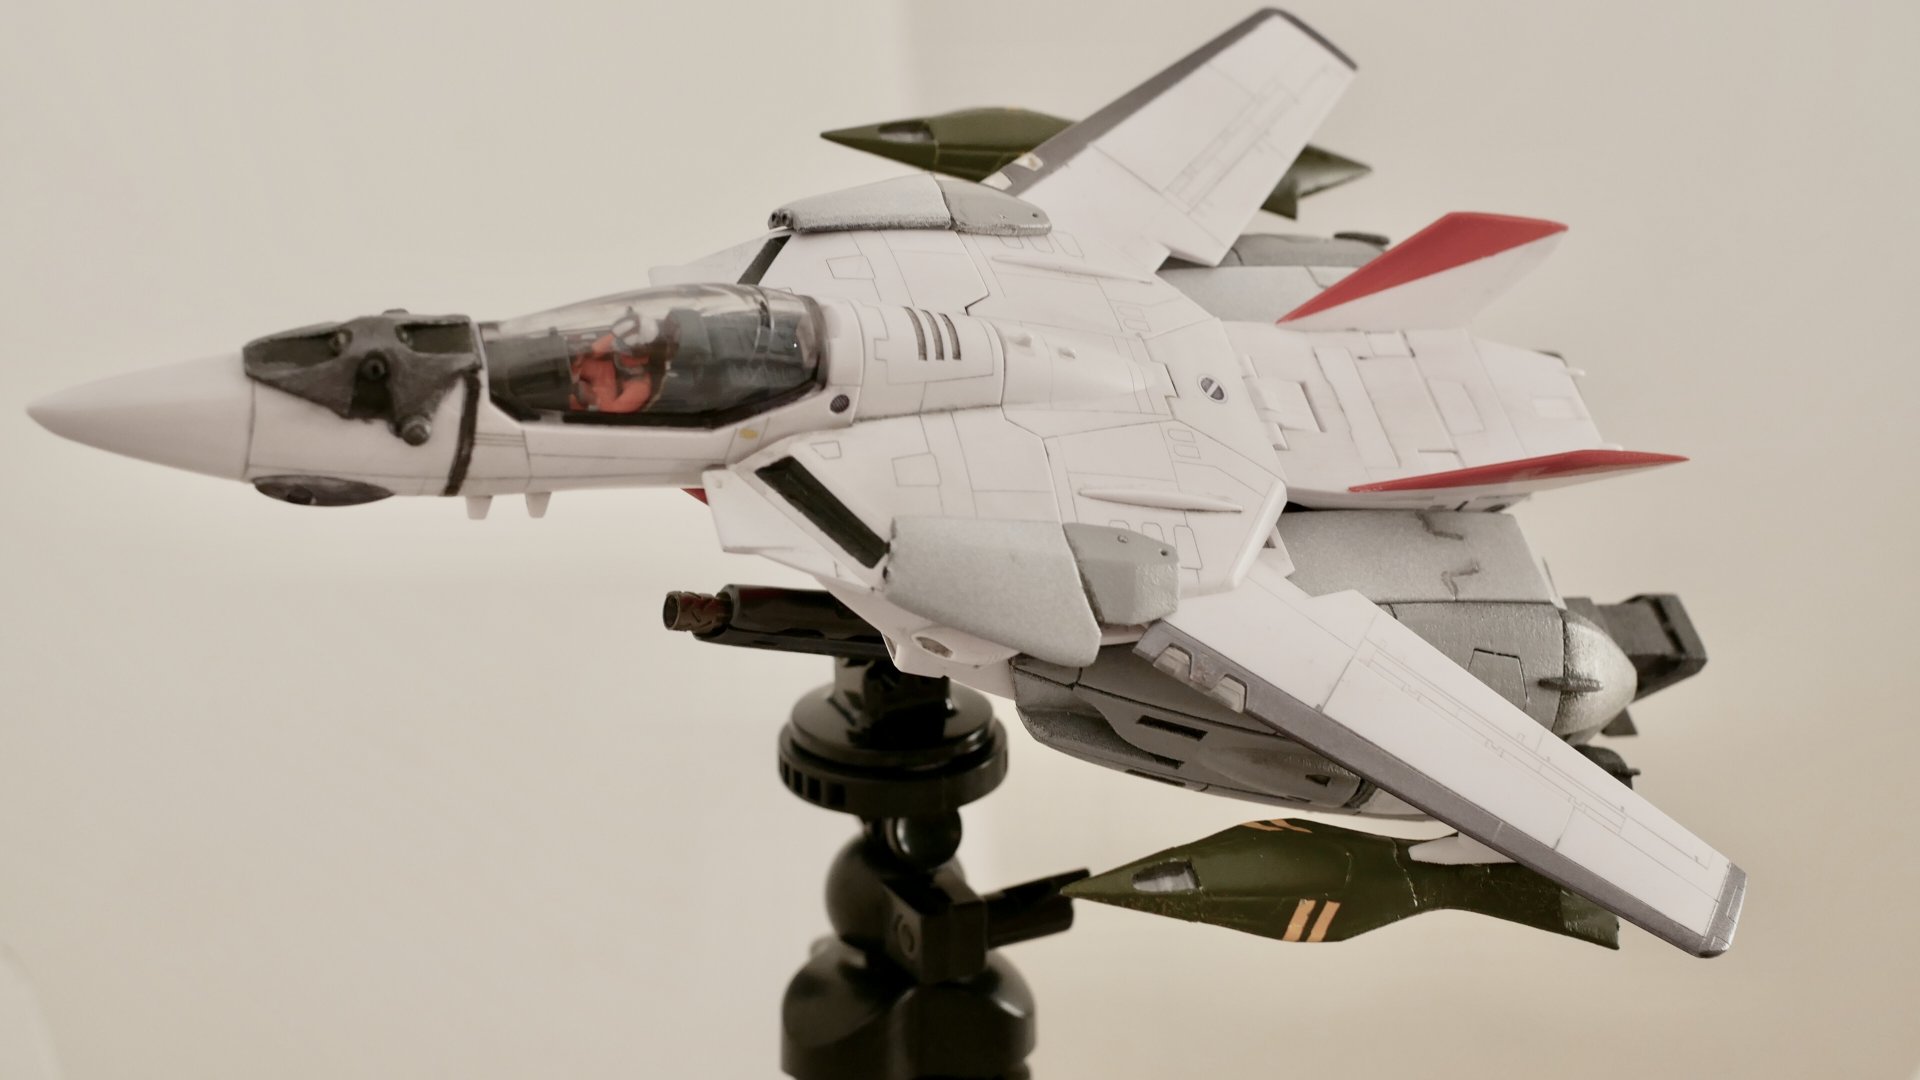
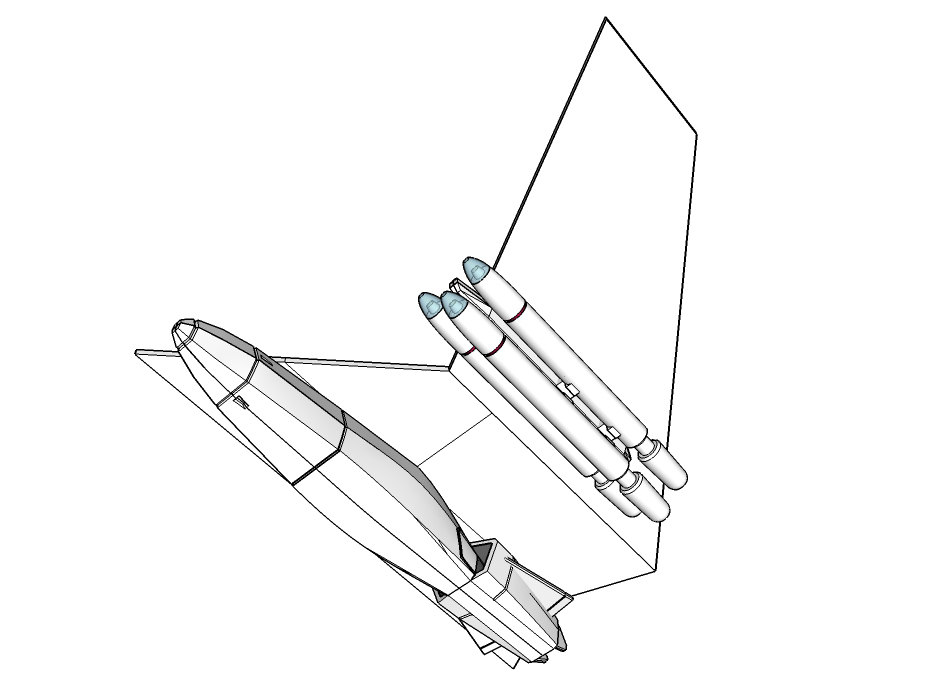
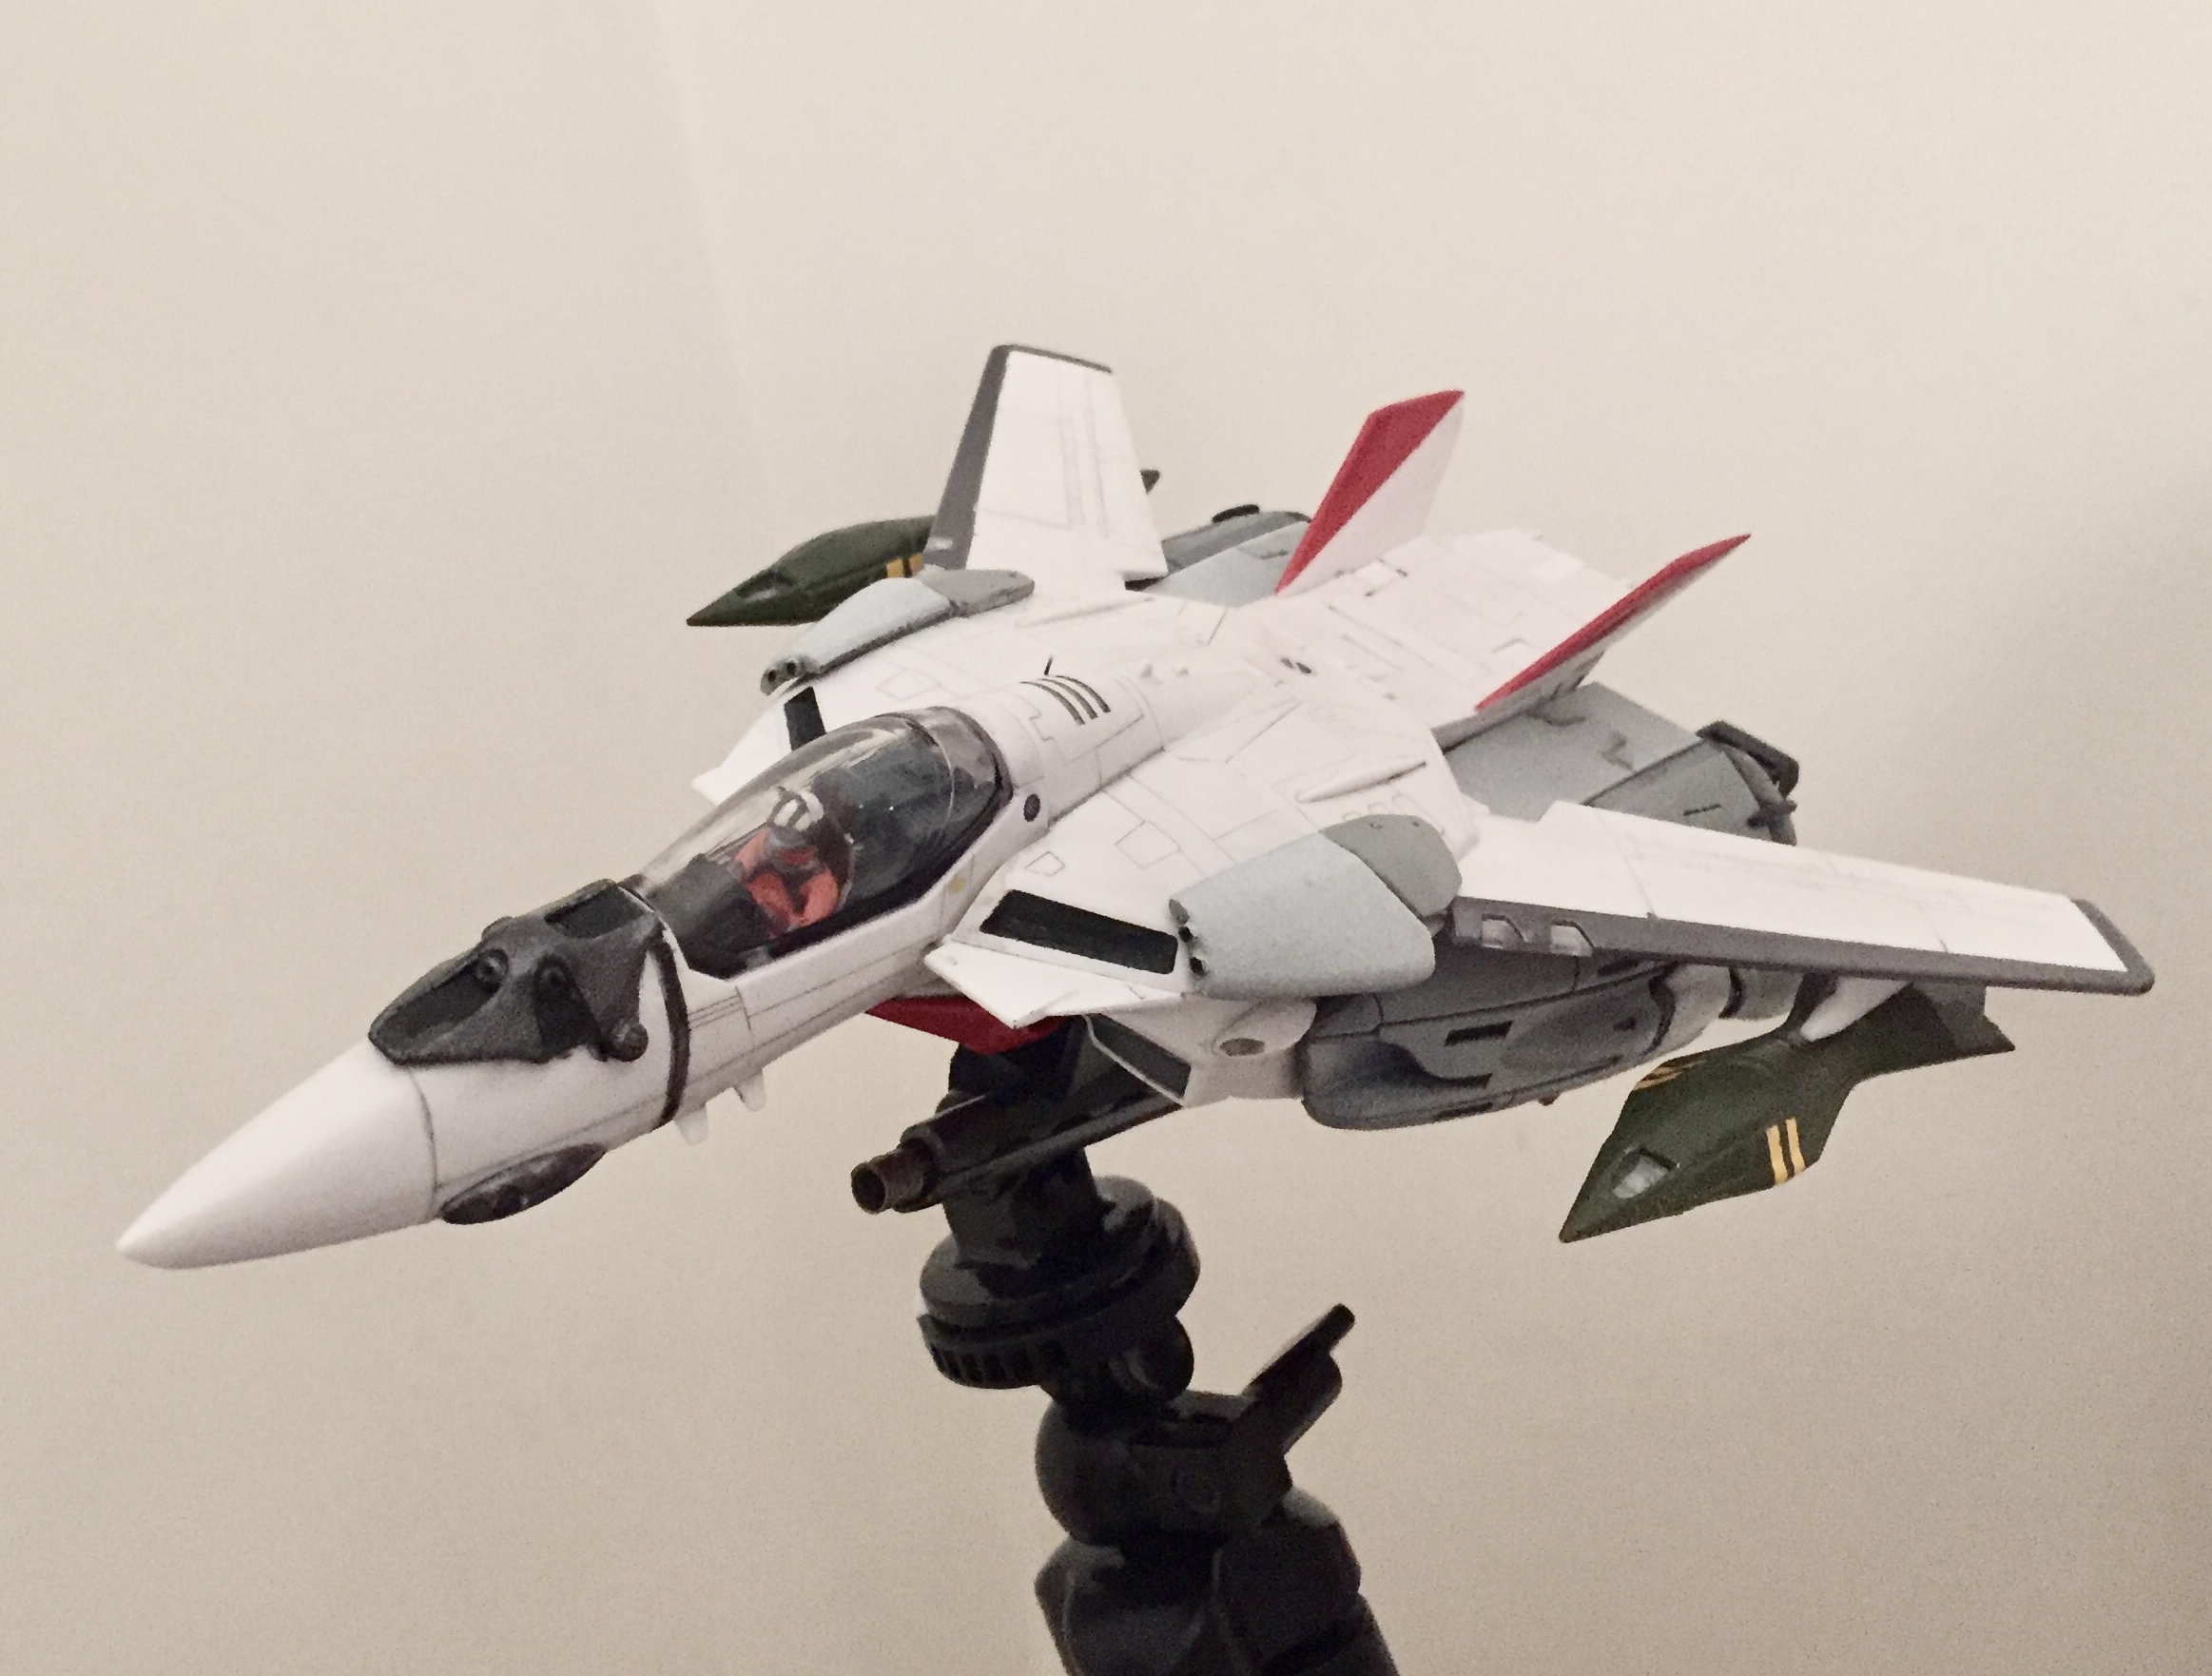
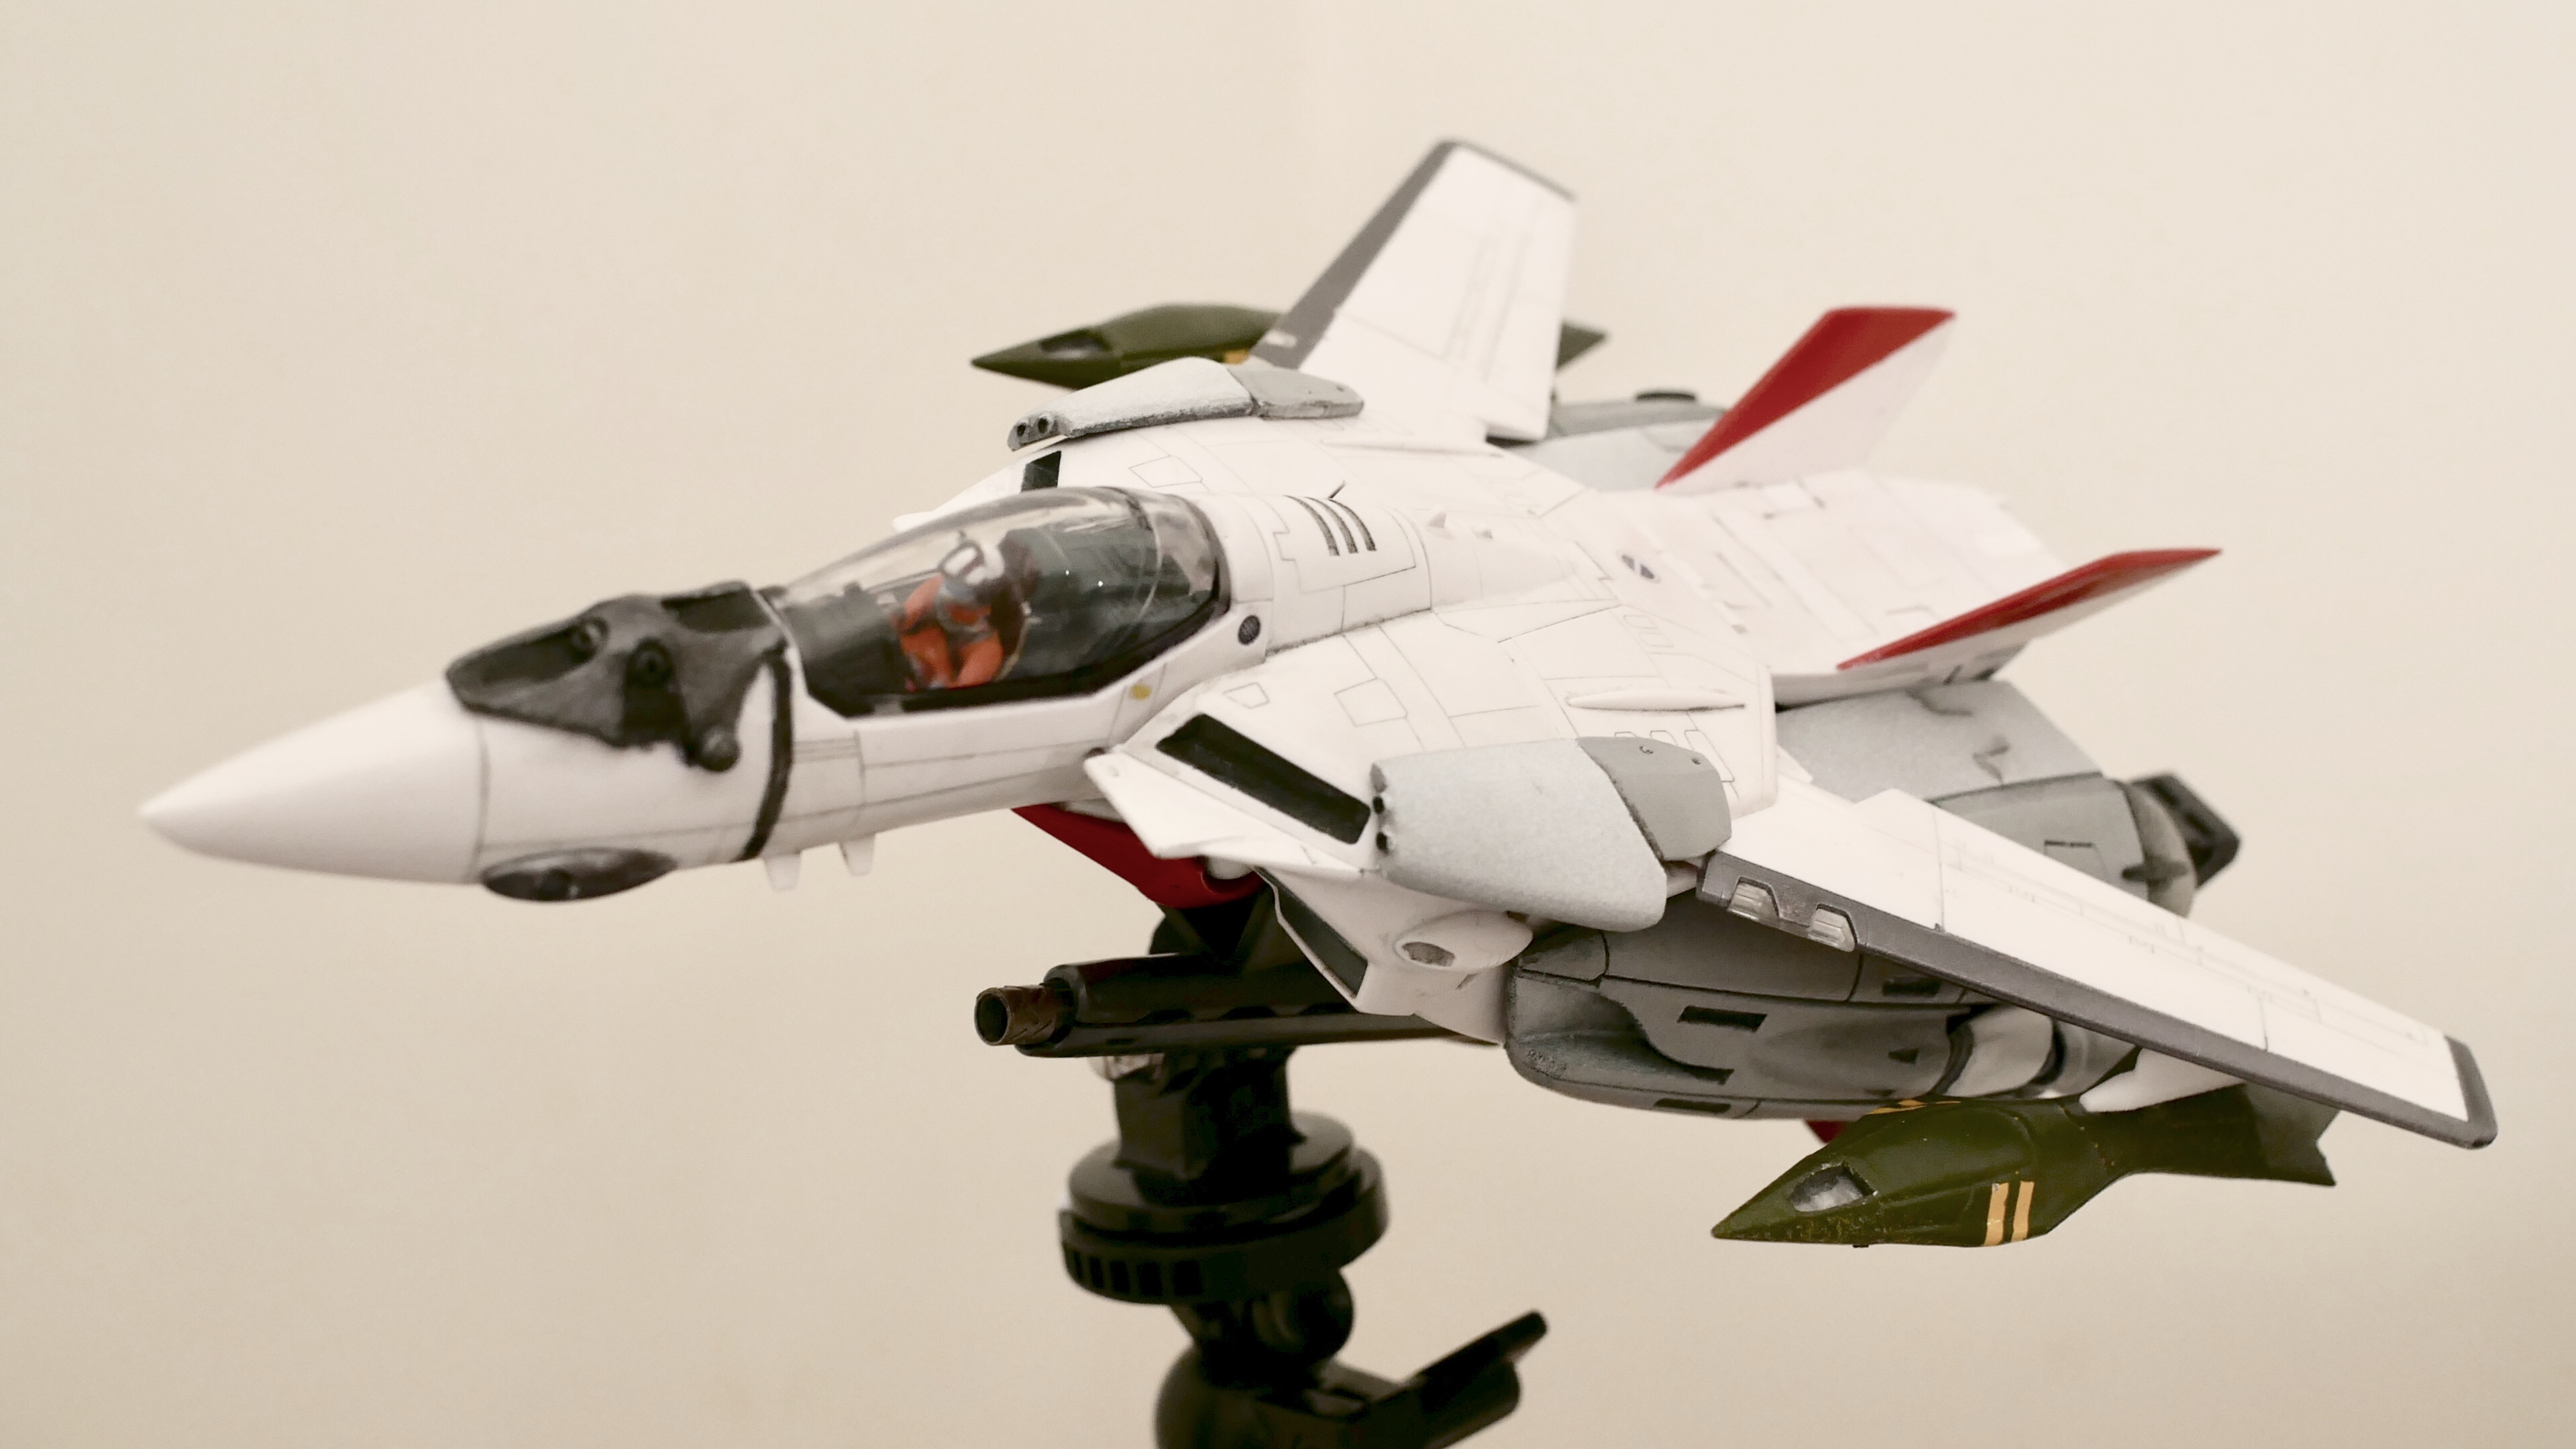
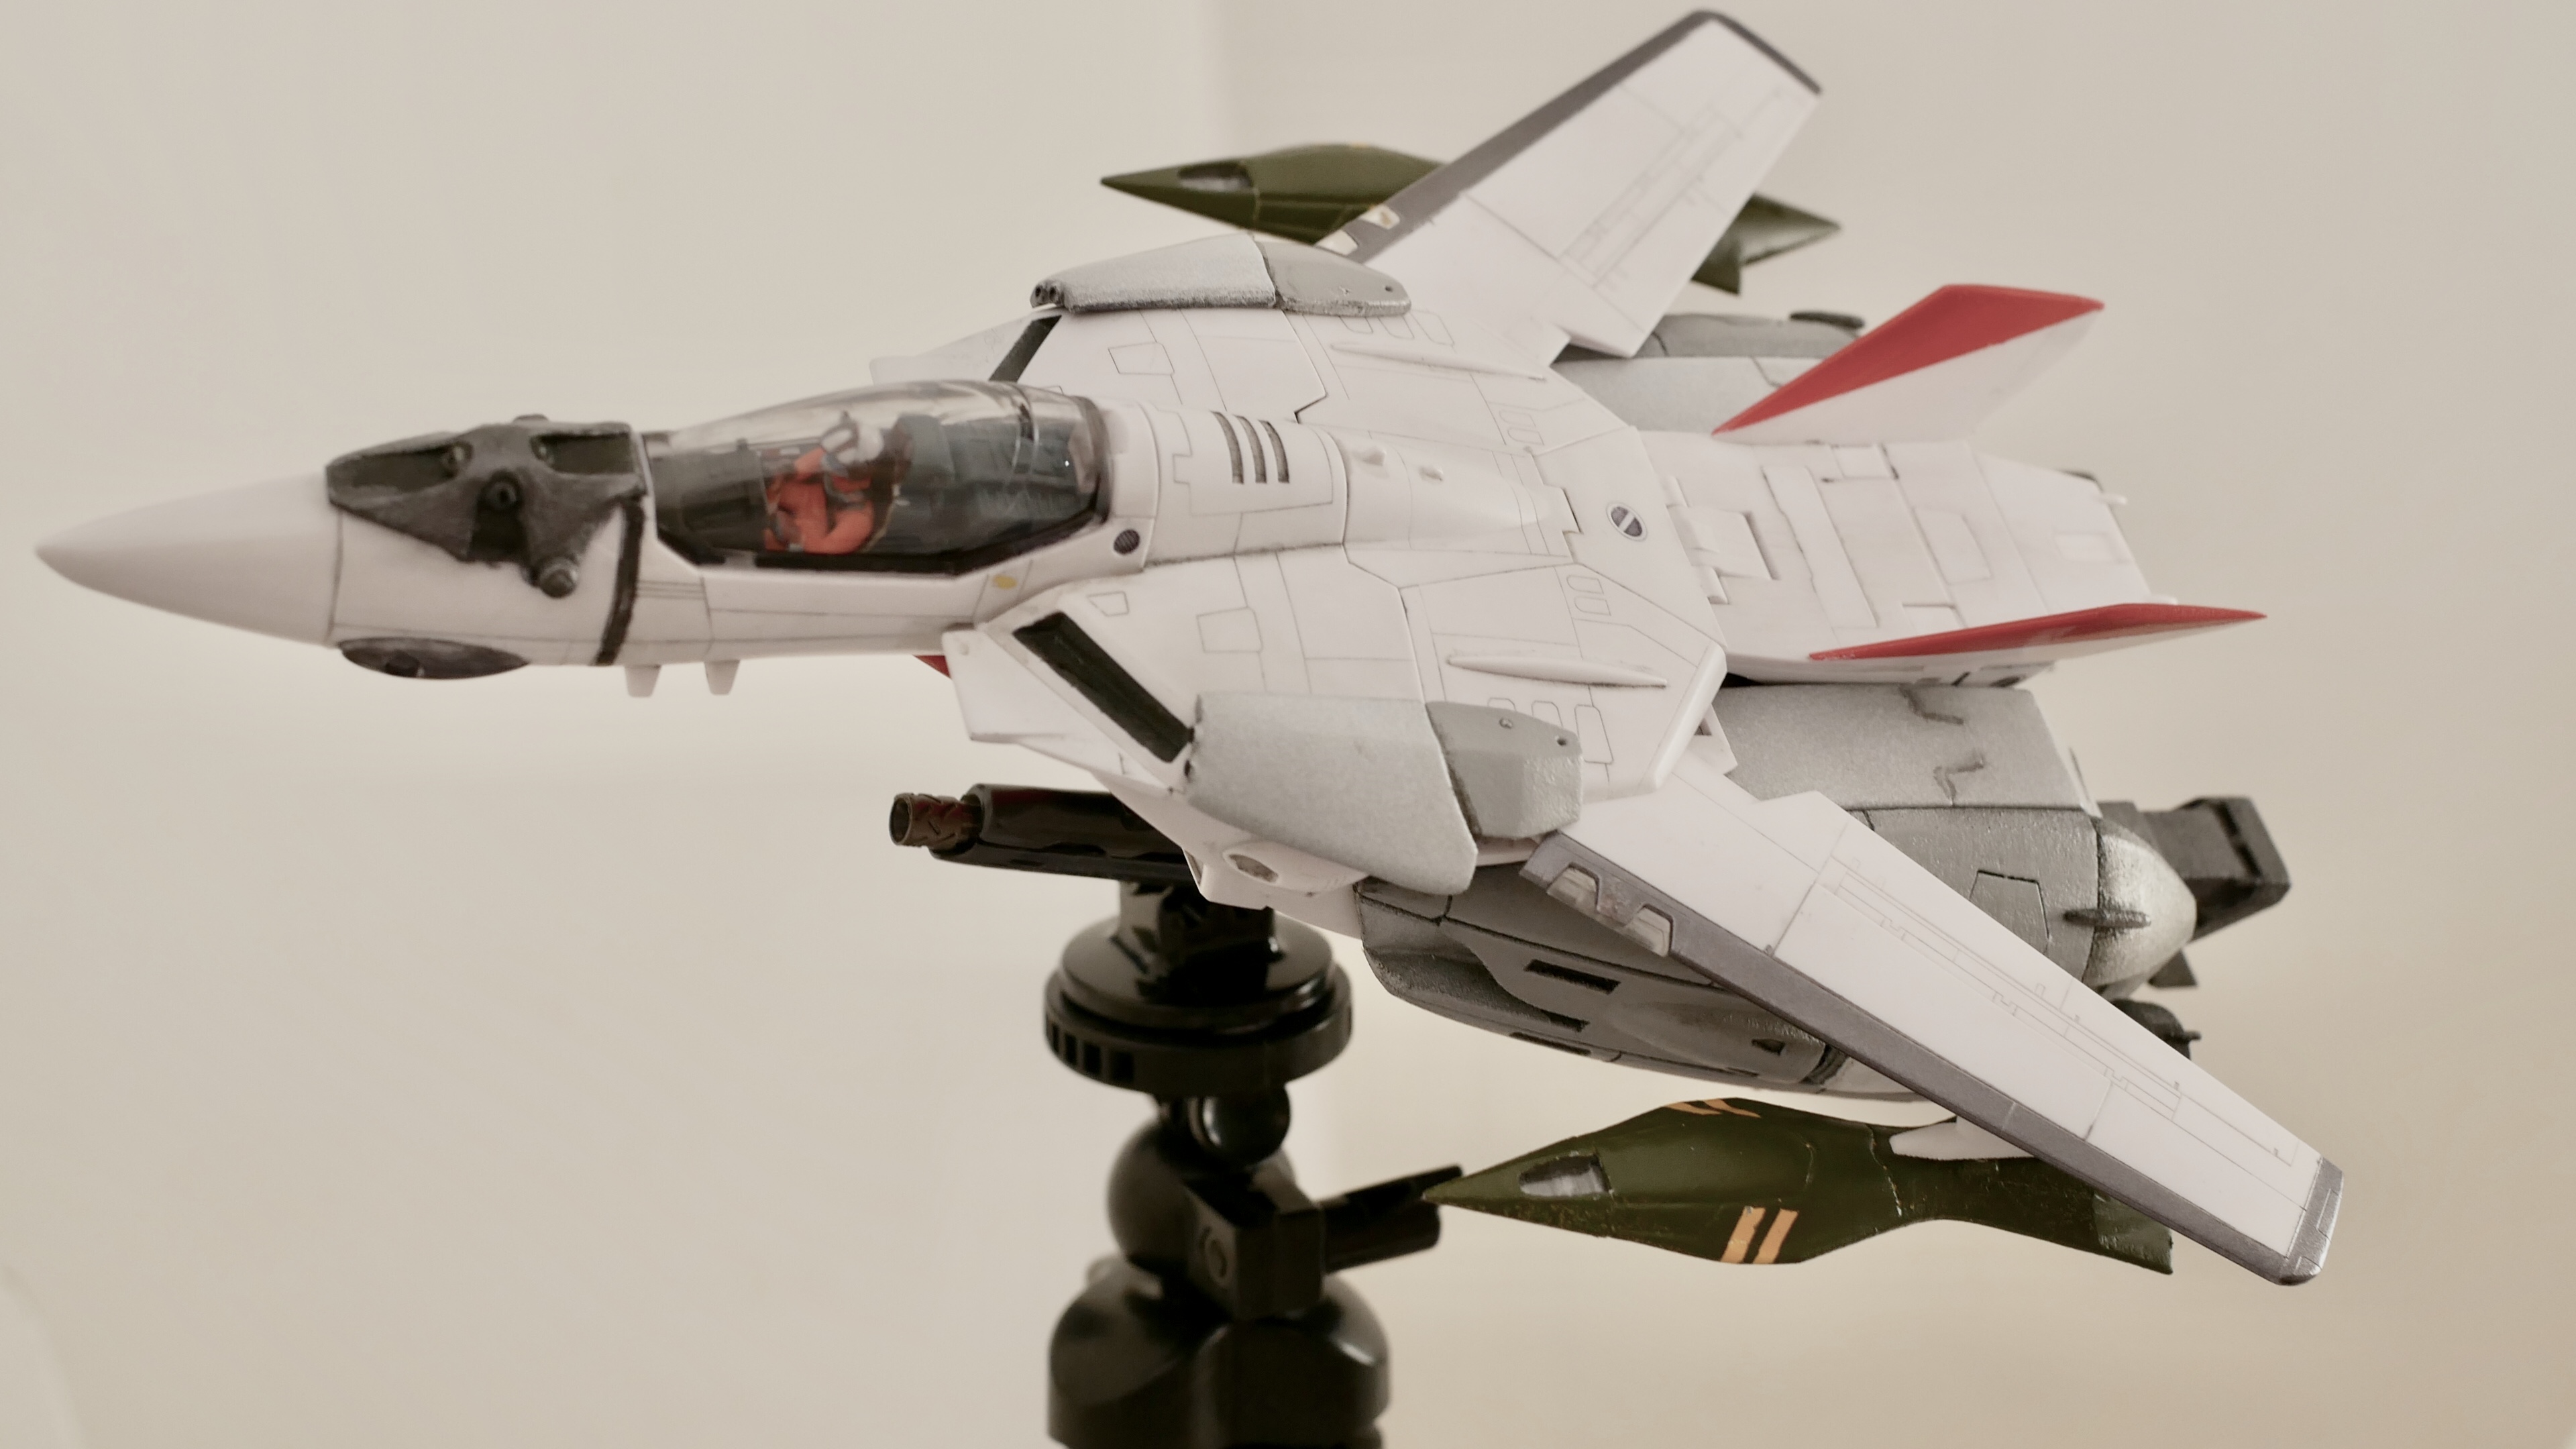
Just received a few things amongst others these “Arcadia” single pylons. Working already great! I need to review a little the central pin larger then it would be perfect.
Since the newer missiles were being painted, the old PaCSWS have been loaded.
-
8 hours ago, TrickyCustomer said:
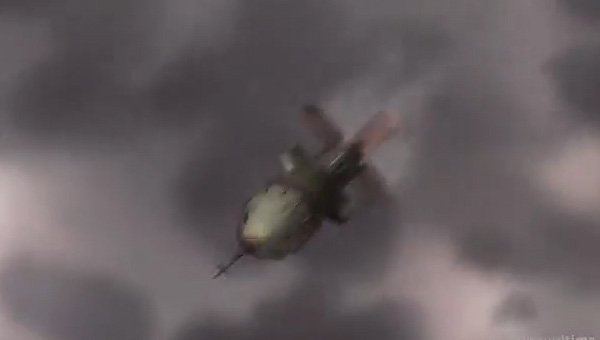
That reminds me so much of the incendiary/napalm bomb used by the SV-51 CF to burn the forest at the end of episode 4.
-
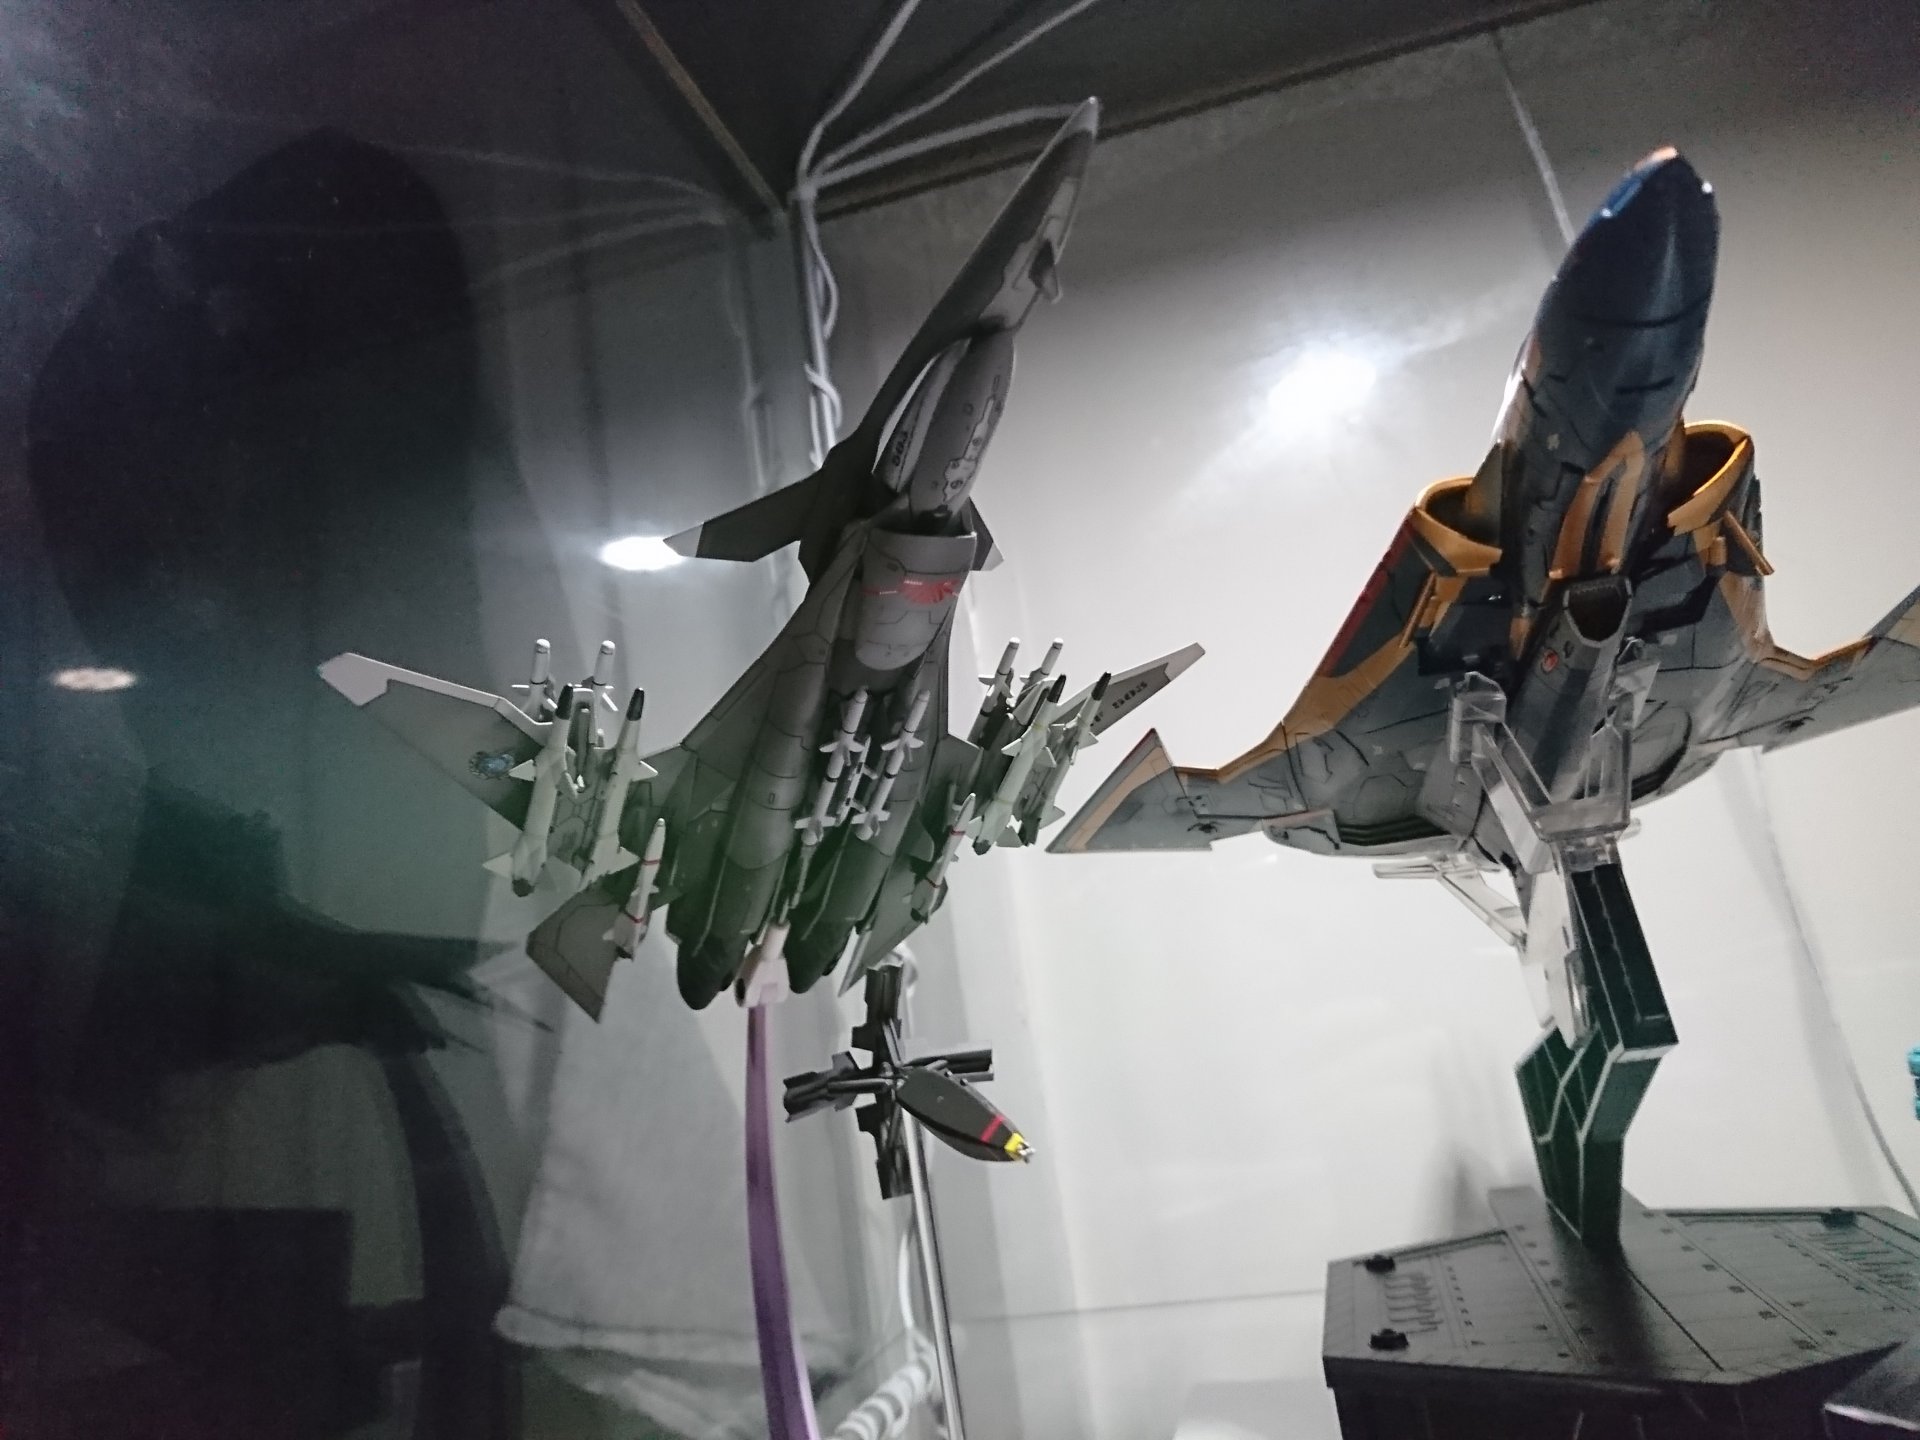
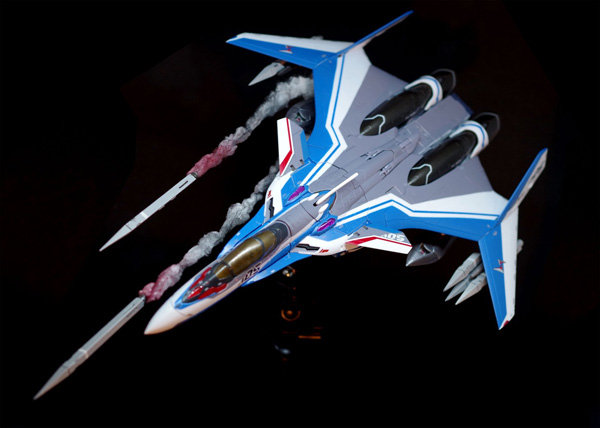
Only to take pictures. And with super parts you don’t care
")
-
Your Robotech-igy is absolutely gorgeous, I really want this kind of weathering finish and your work is inspiring.
-
4 hours ago, Blue Meanie said:
Anyone make a part like that Visor for the F that just plugs into the space where the horn goes?
That’s exactly what I was thinking, perhaps the unicorn is highly respected in Japan
-
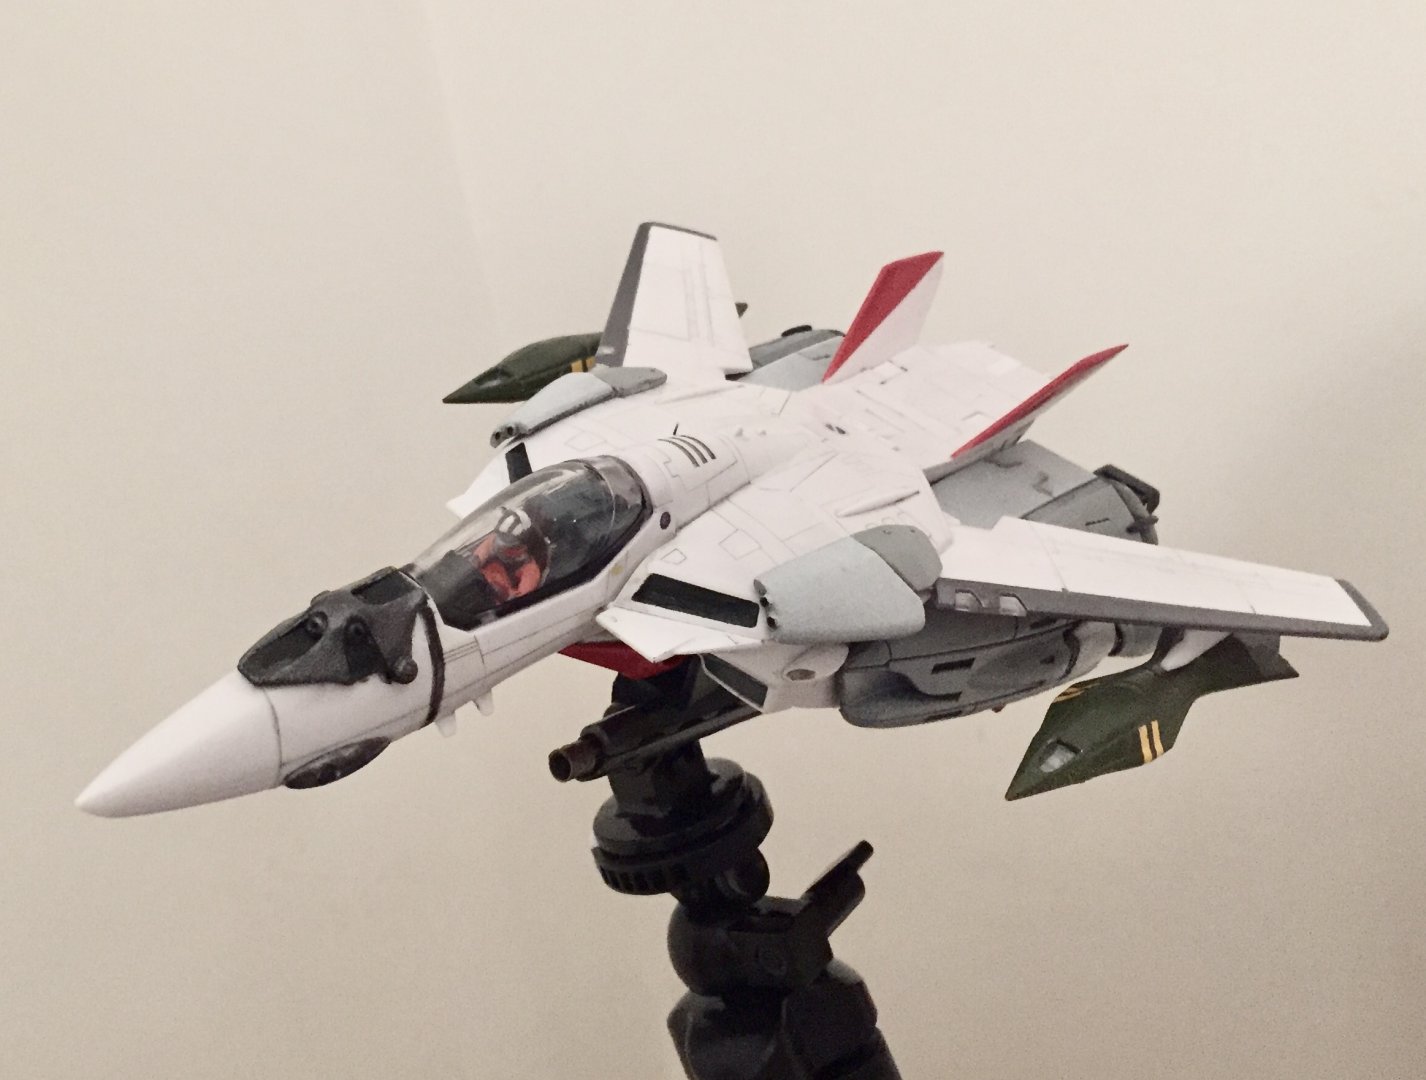
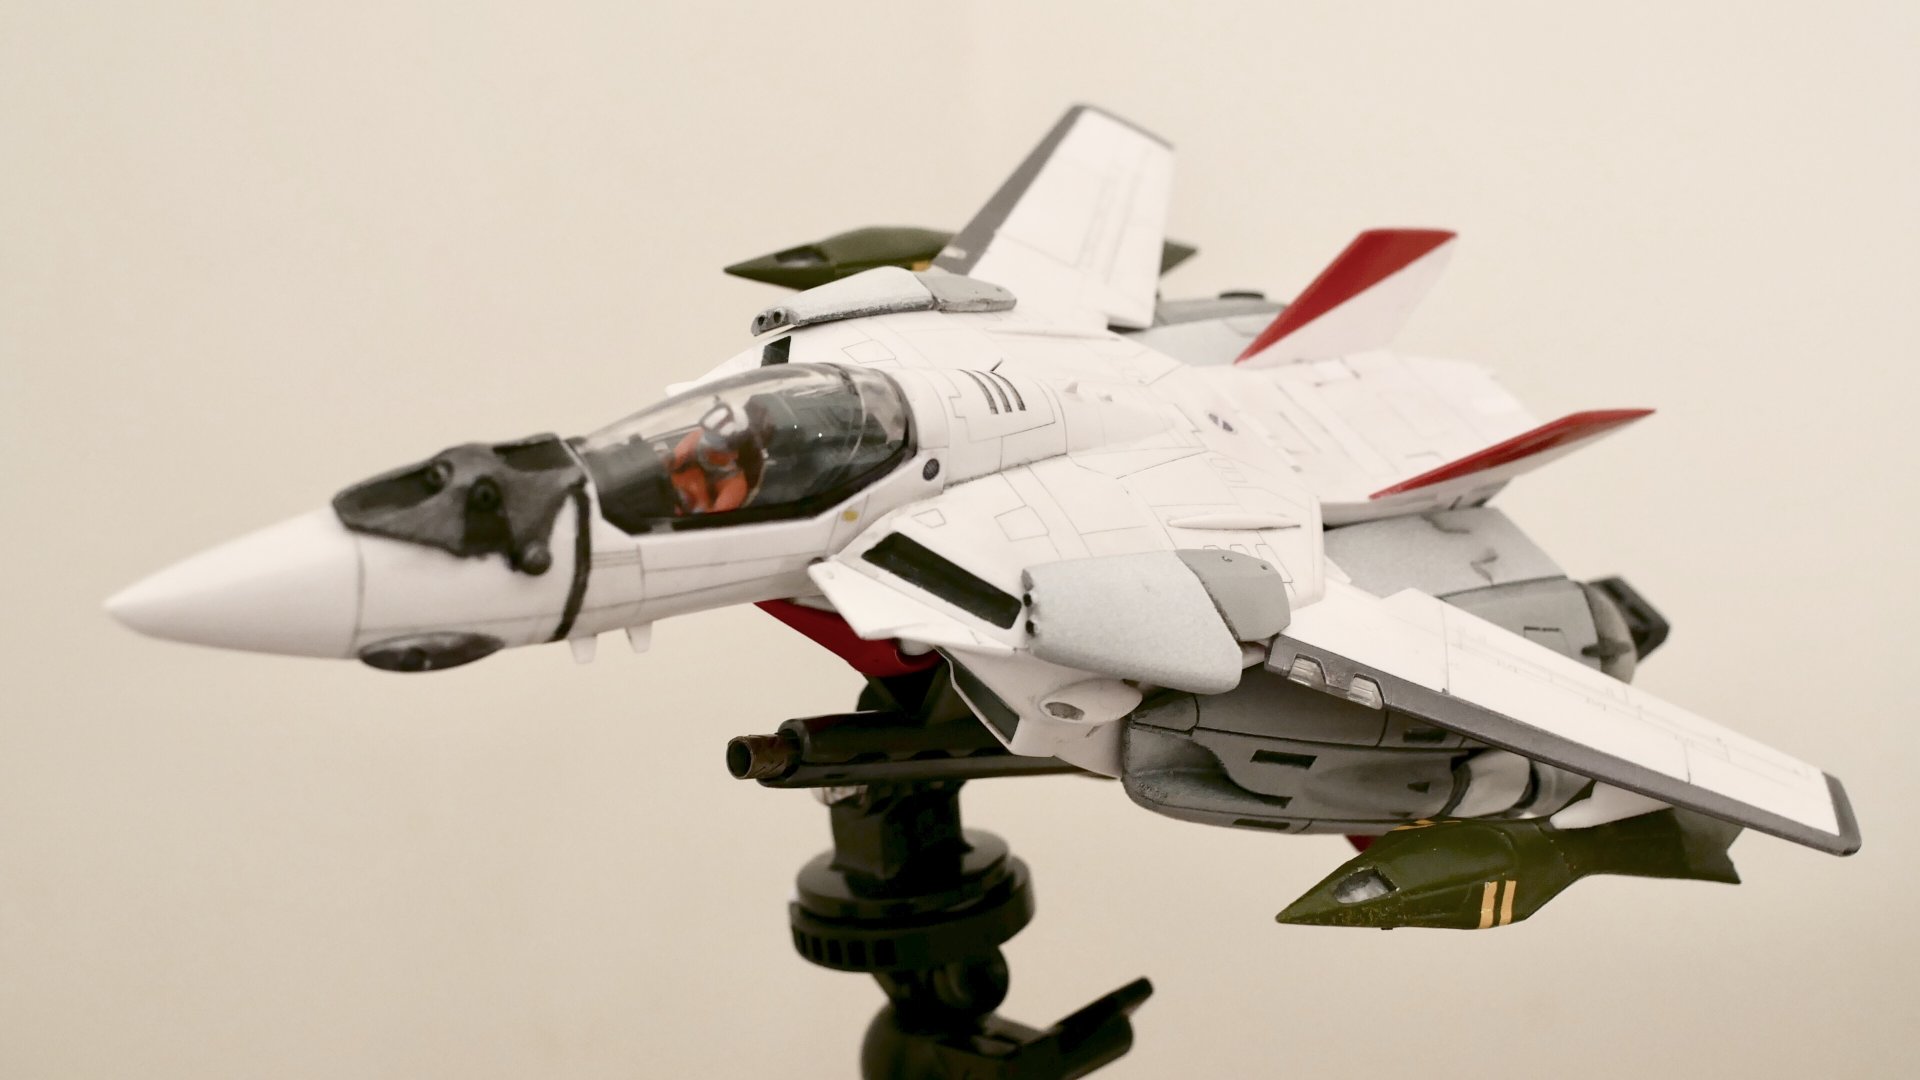
I would add that I highly don't recommend Tamiya TS Spray on first attempts, laying a thick lacquer WILL react and dissolve Arcadia and Bandai original paint. Choose a good Acrylic spray instead and stay safe by laying fine layers from at least 40cm away from the model at approx 20°C room temperature. (stay away from the plastic model Revell clear sprays!)
-
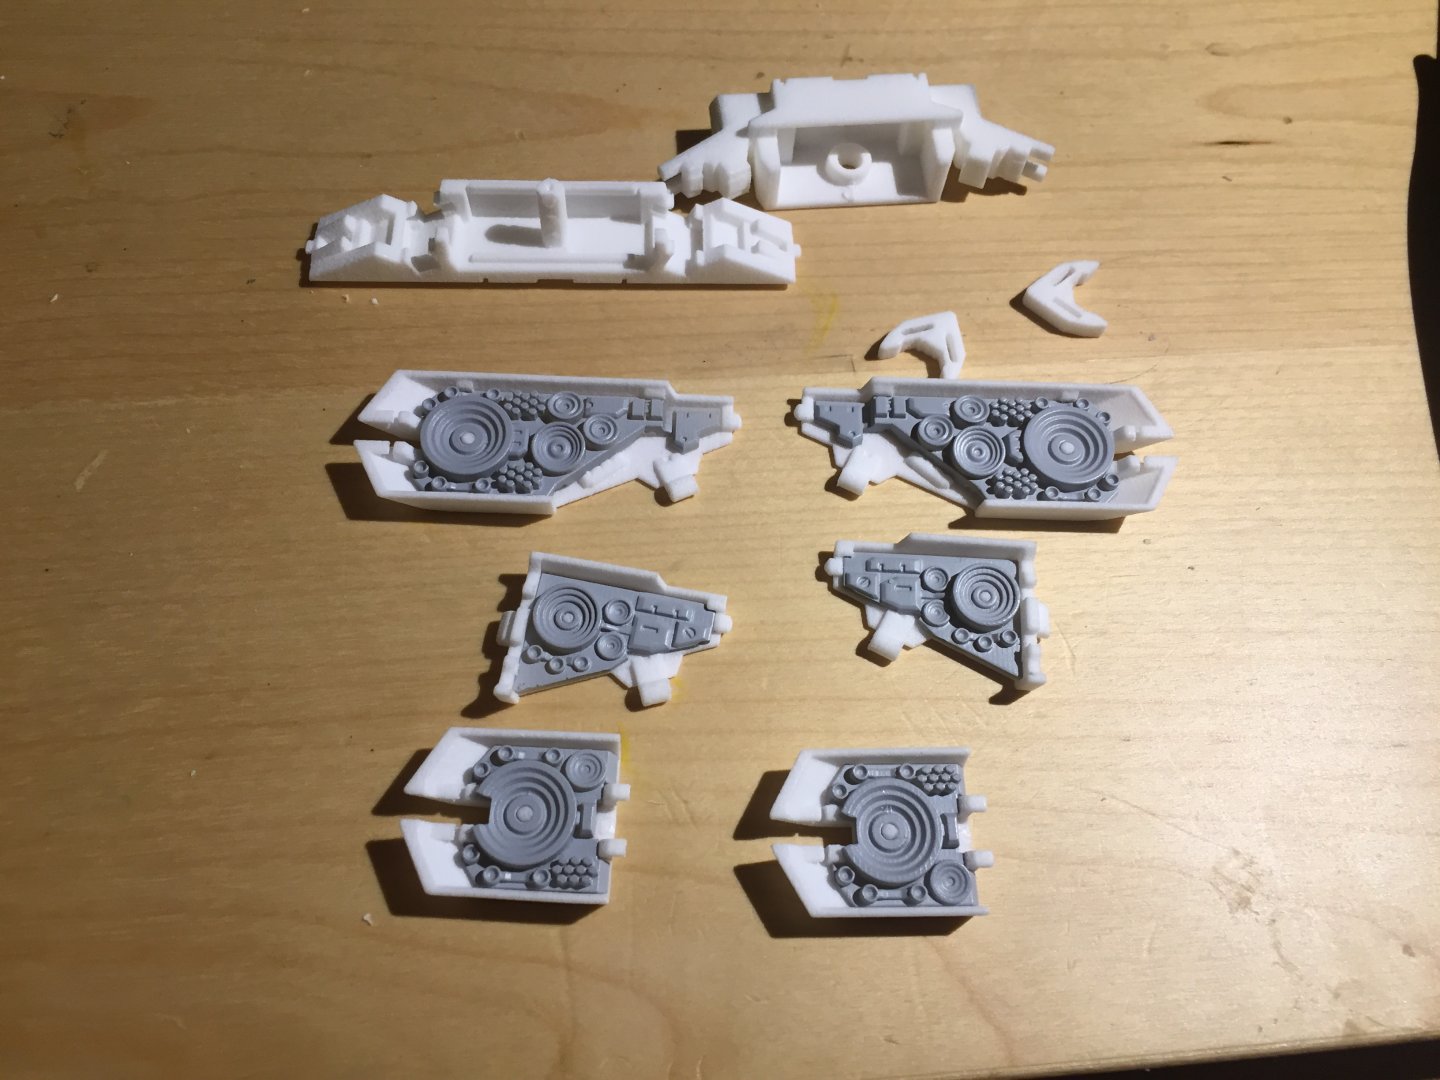
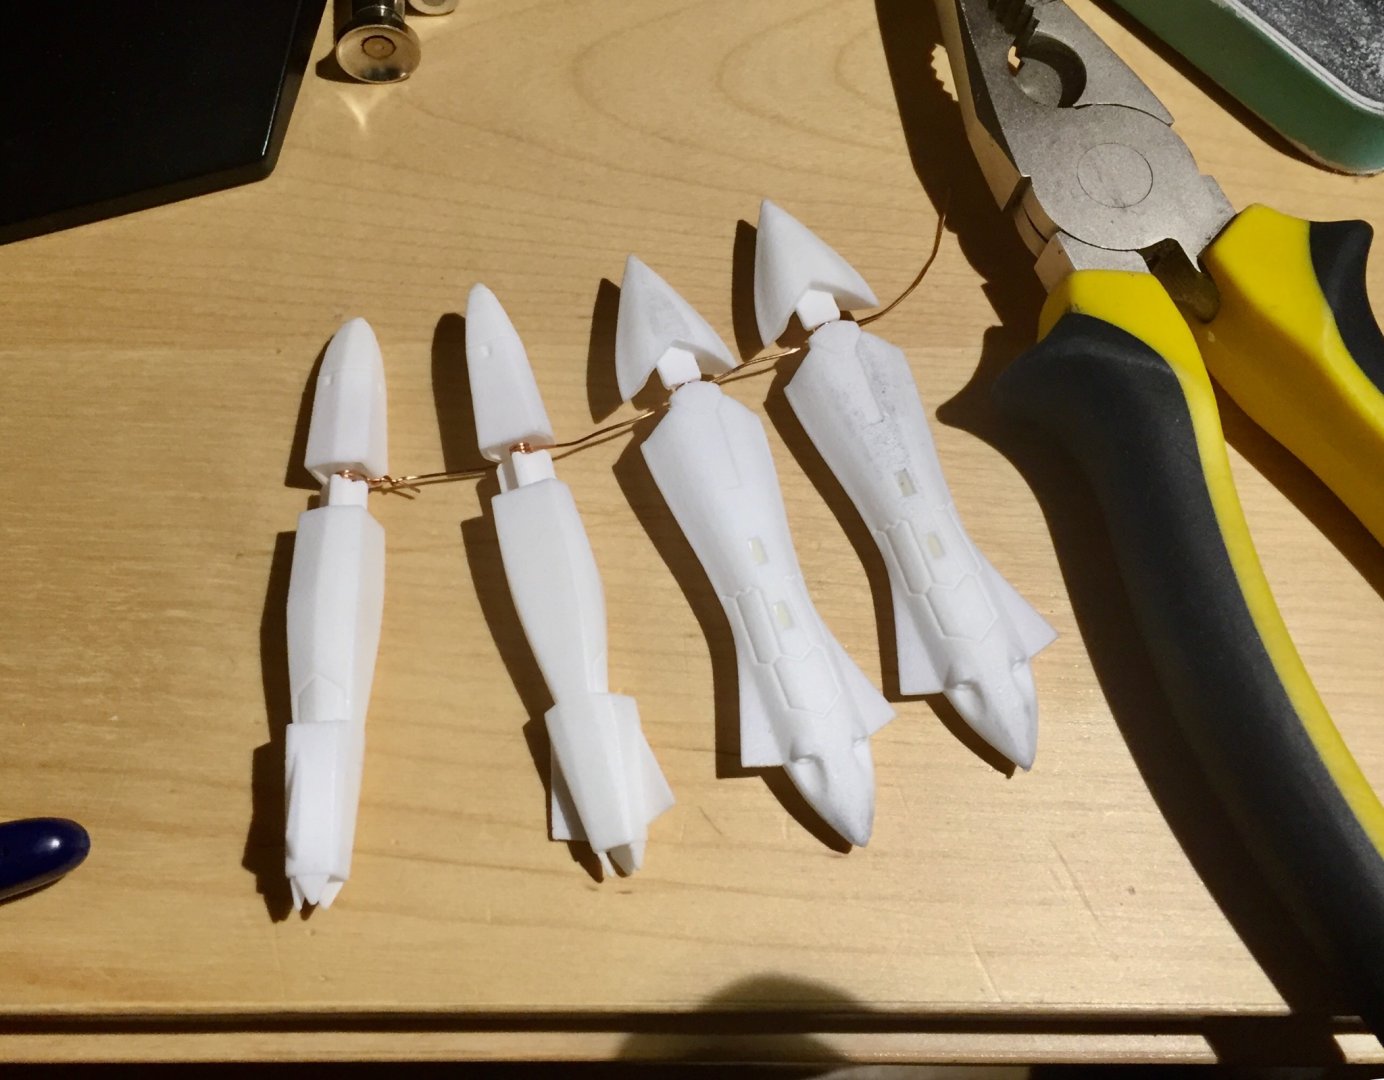
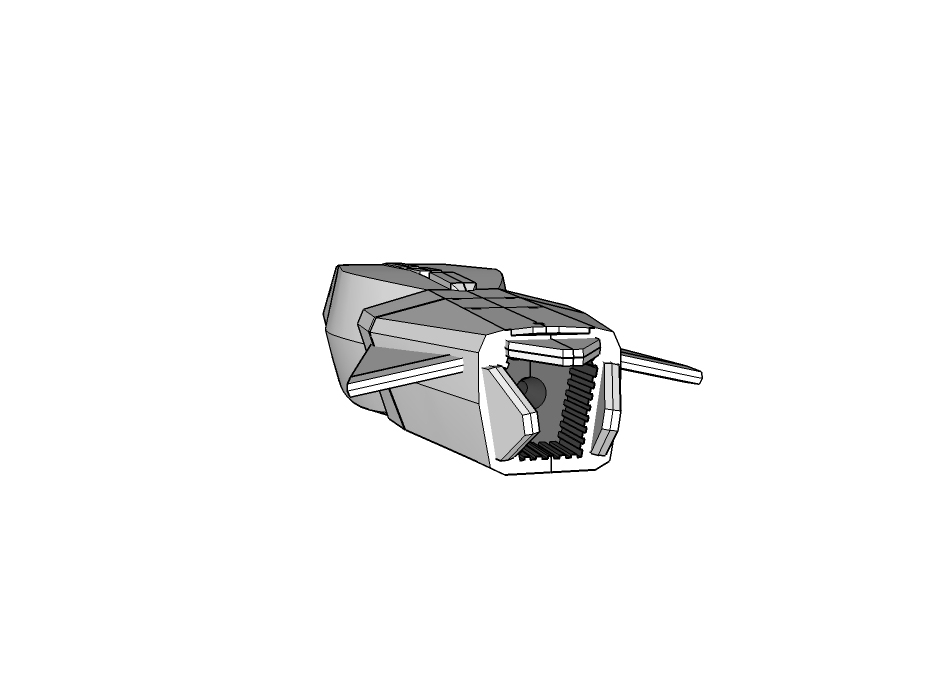
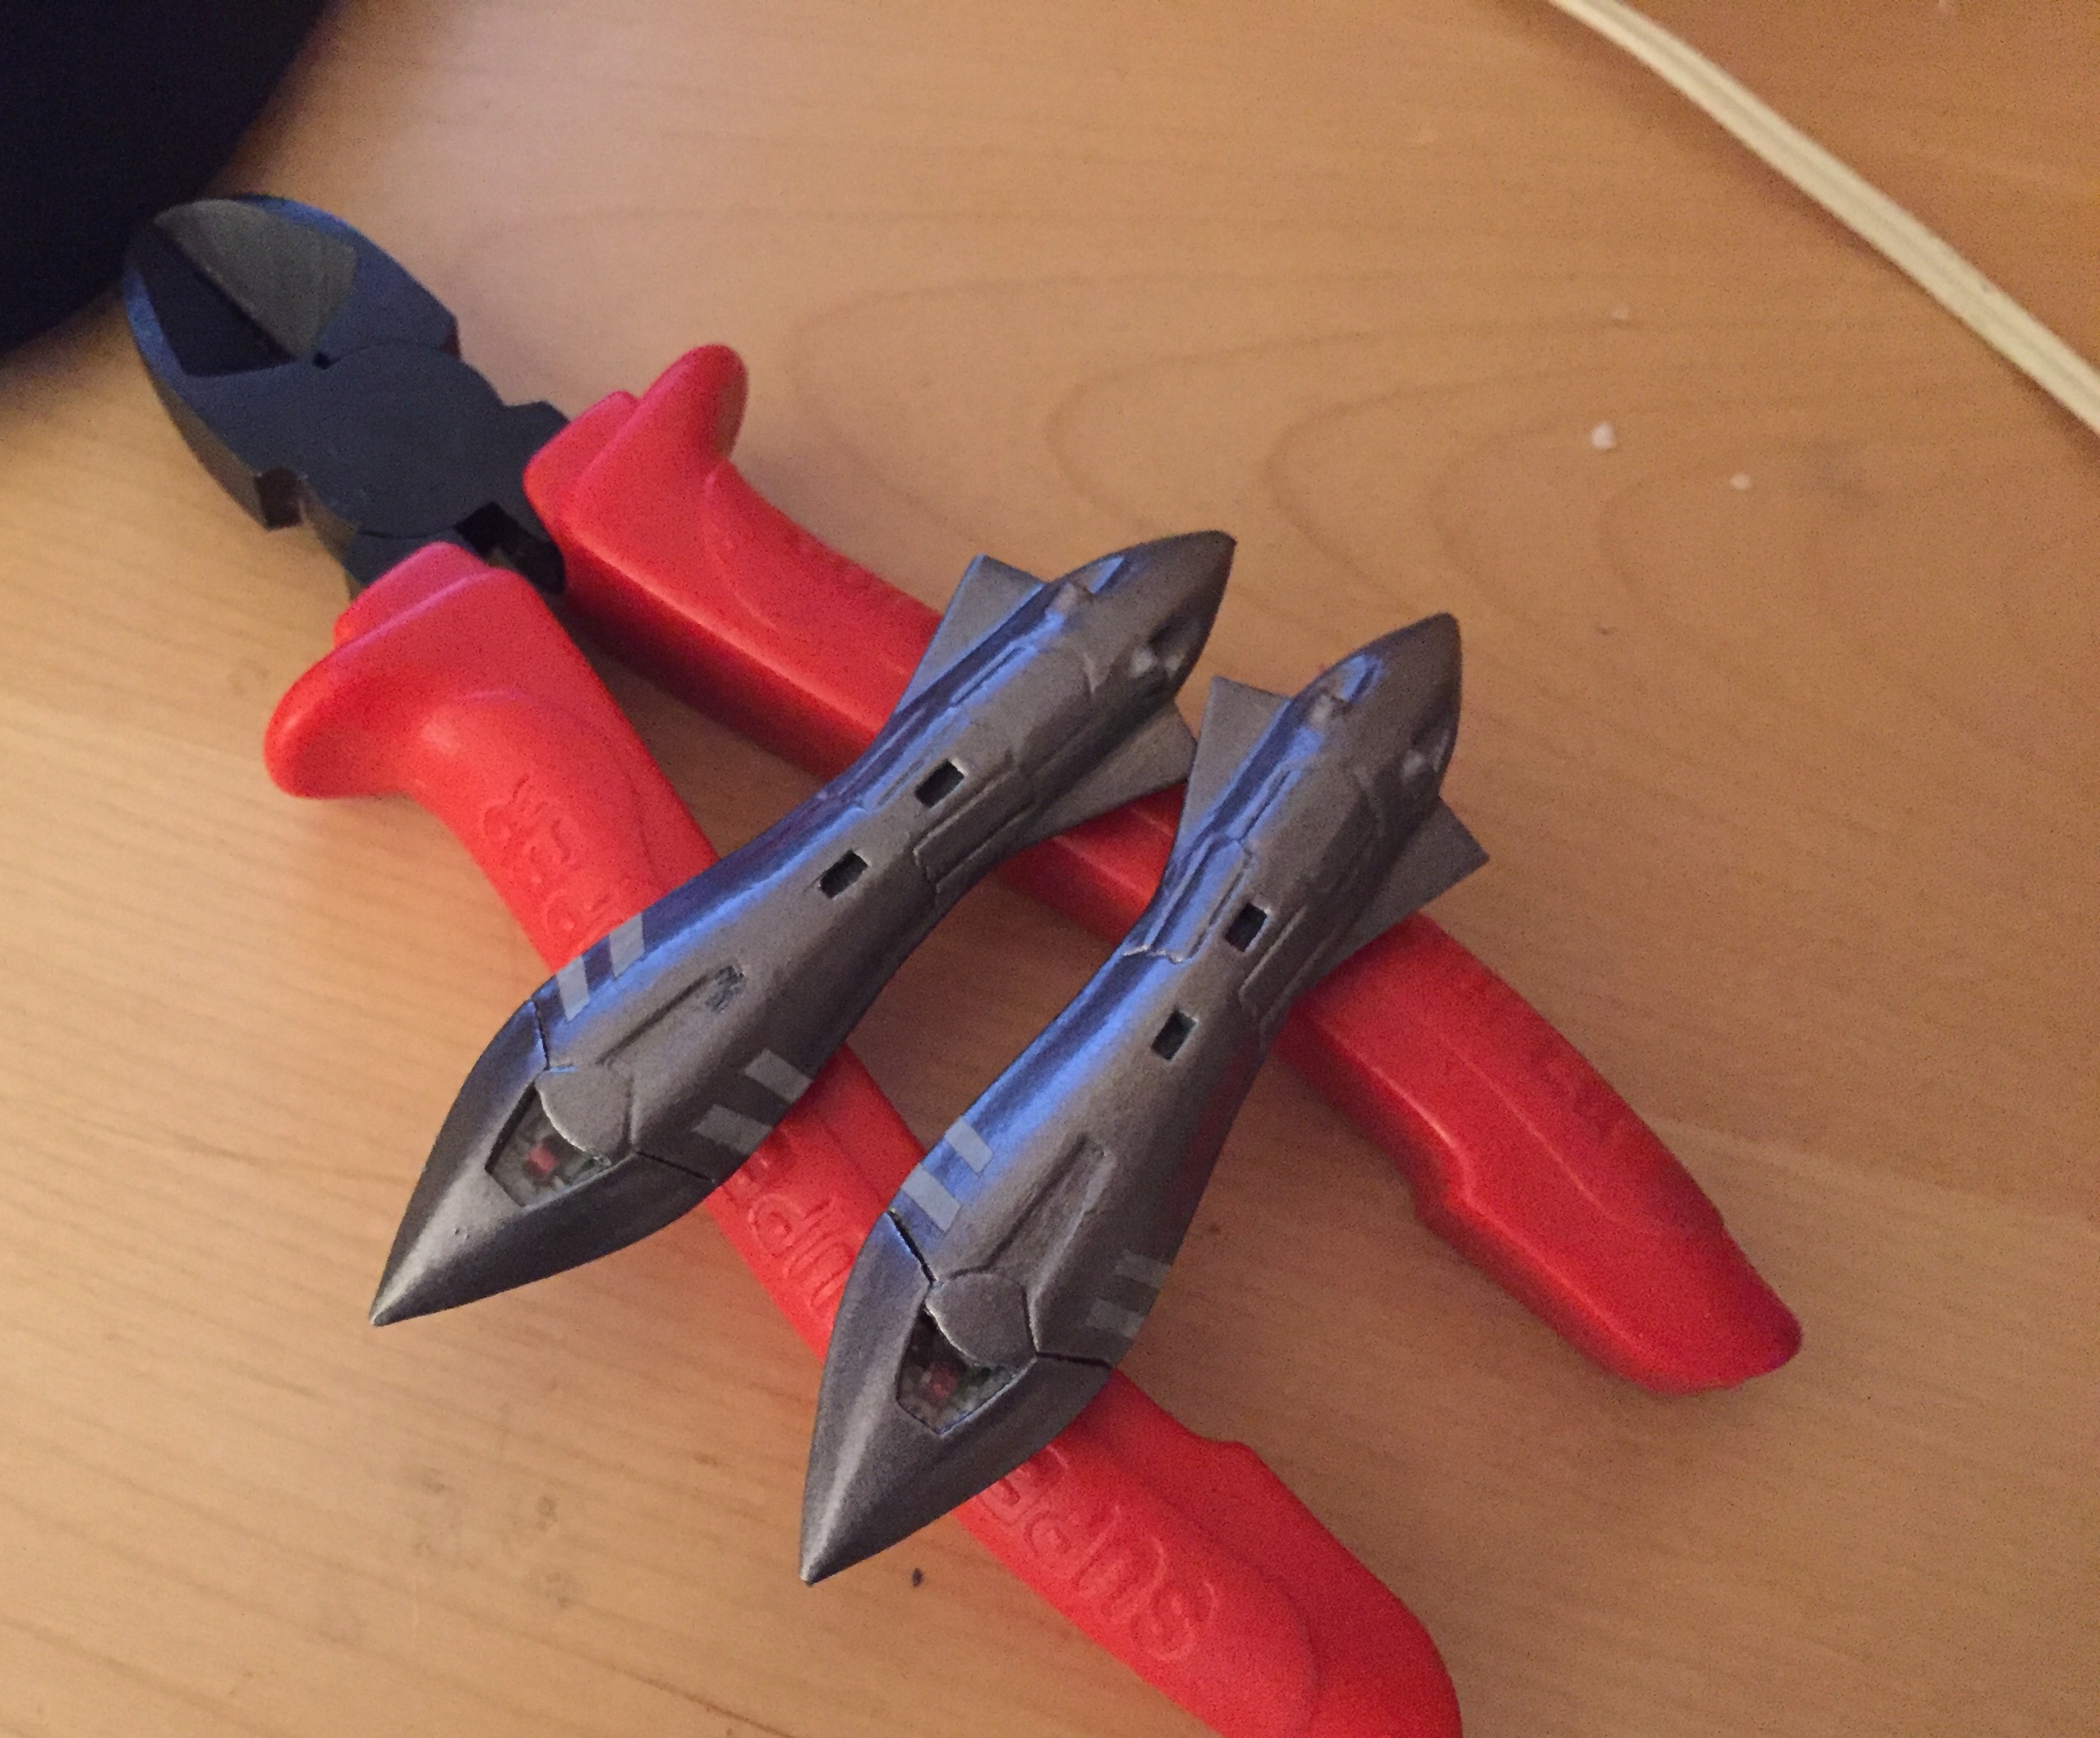
Just added two models of HMMs that can be loaded in the ACSWS-1D. The original "round" HMM and also the "SQ version" (square version) HMMs.
The SQ will look bigger and will be less difficult to sand

-
Well, you technically can 3D print the hard point that broke. Glue it back and call it a day. Or even better, like @Mommar glue back the original hard point that broke and don't think too much about it.
On this particular case, the complicating thing is that the hard points are molded into the complete wing so you want to 3D print the whole wing. Modeling the wing from the drawings should be straight forward. To obtain the same smooth finish and detailing of the wing mold, you can only do that with a DLP / SLA resin printer and because you need a functional and strong plastic you will to use rather expensive/experimental color matching techniques. Well for that you need your own printer
-
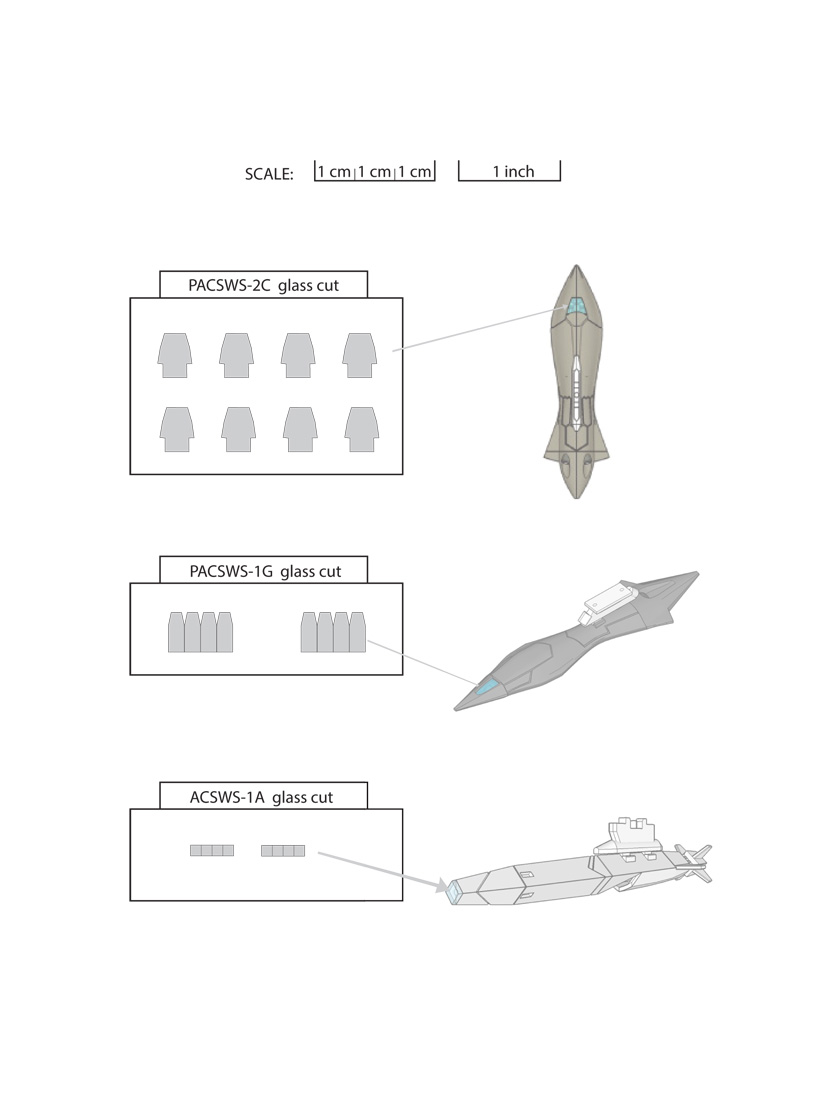
I will have the ACSWS-1D duo pack to review by next week, since I ordered a few TMM and PACSWS along I made a PDF file for the glass cuts, just to make life even easier...
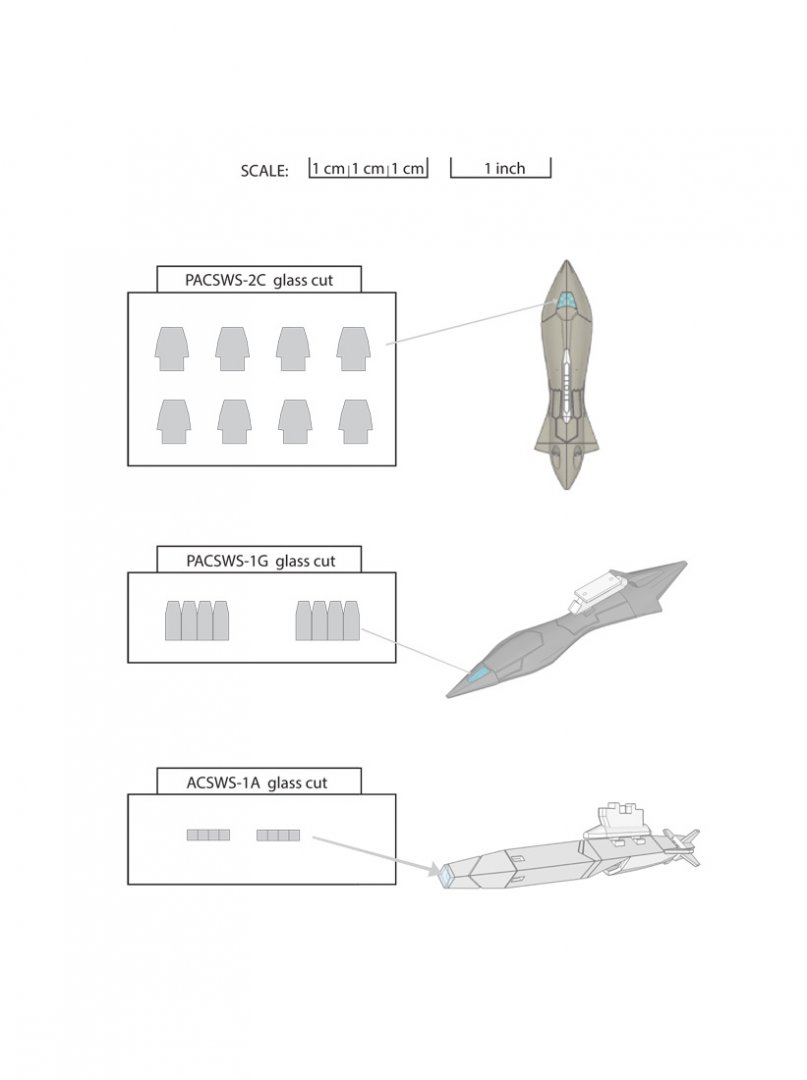
Just make sure to print it at 100% scale, double check the scale rule and cut )
-
I doubled checked my model and the hole was 3.4mm, that's a perfect match with your phone pictures so I reduced the hole down to 3mm. Sorry for the inconvenience
-
Damn, I think I will miss the Extended Manufacturing Delay ... As per Feb 2018 it has been discontinued
-
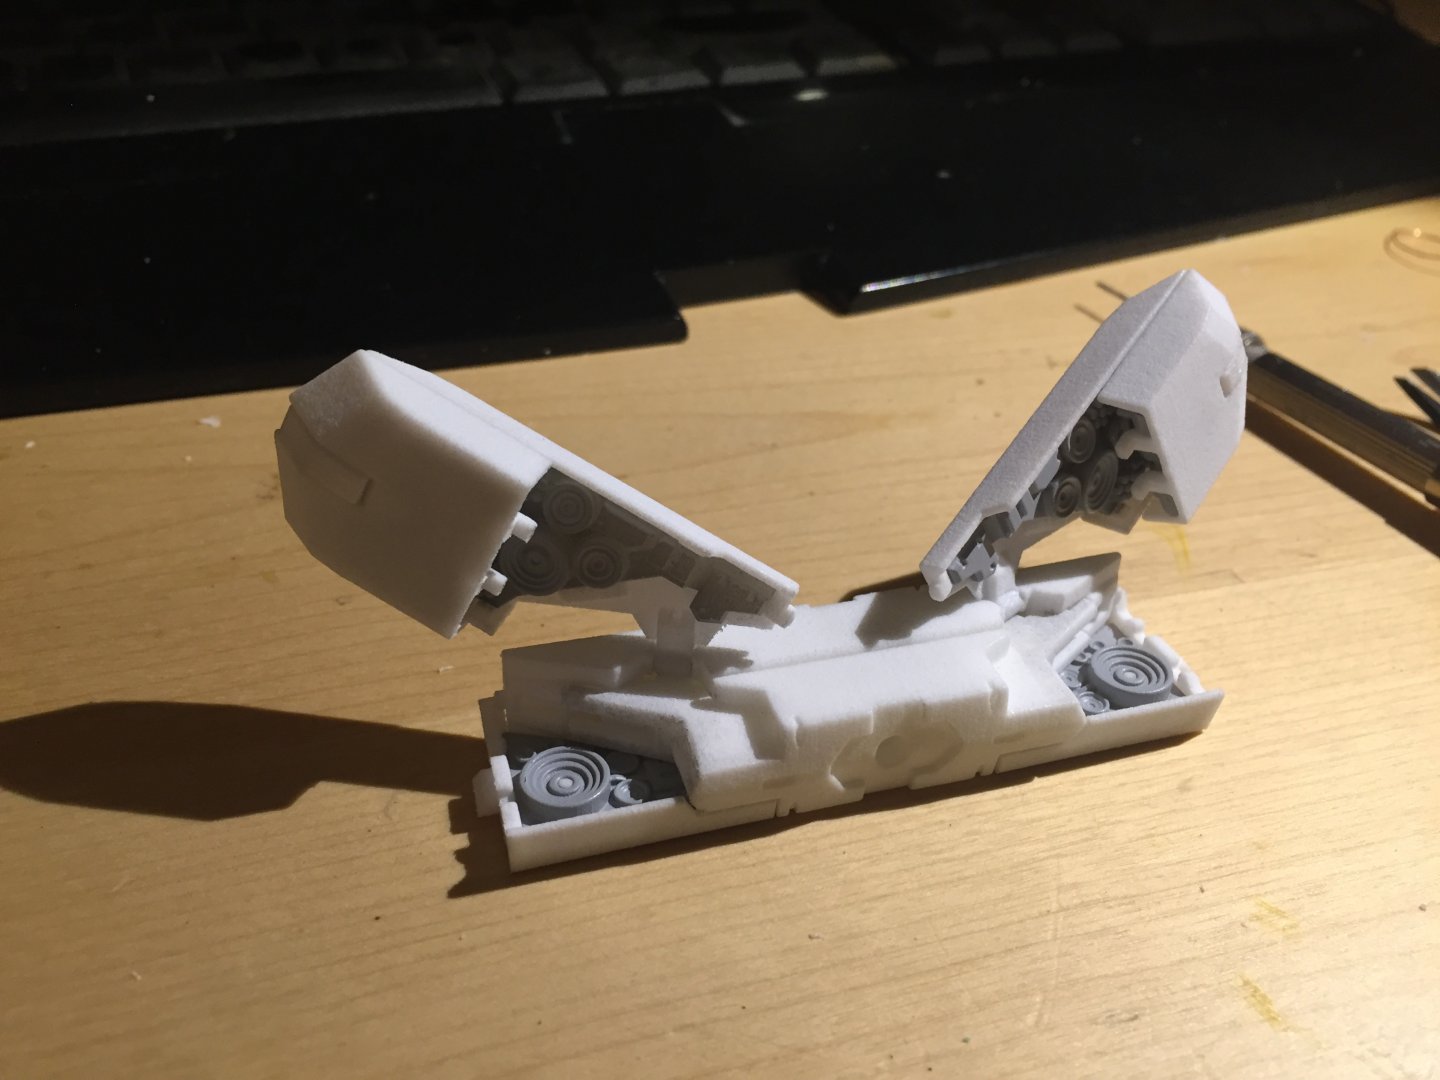
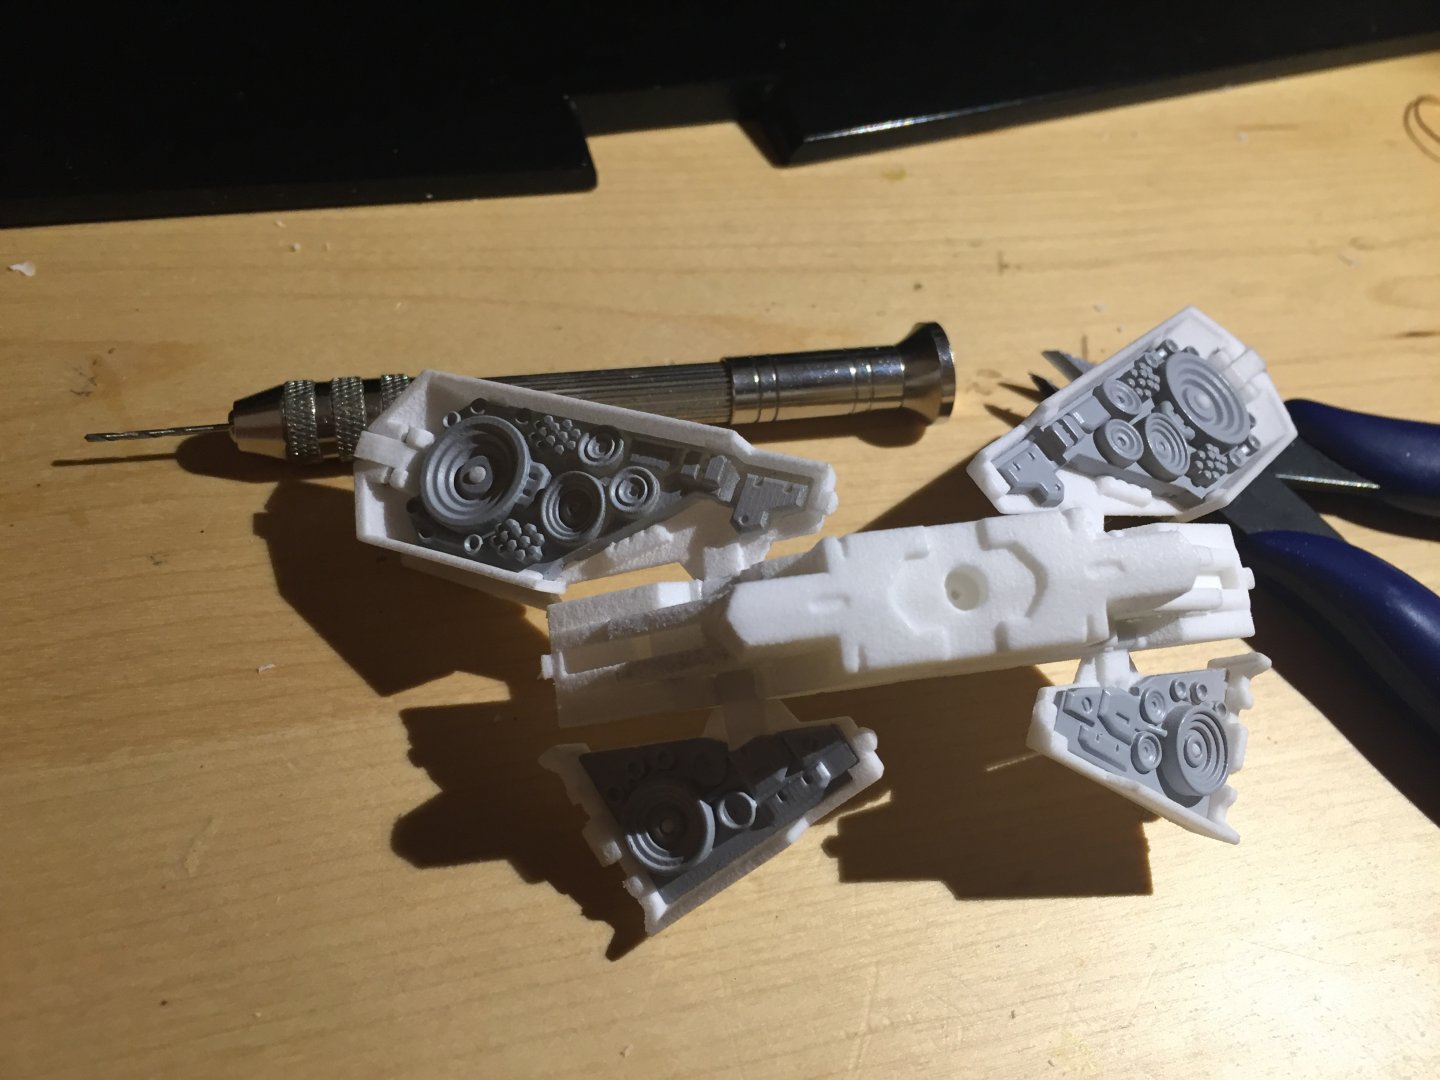
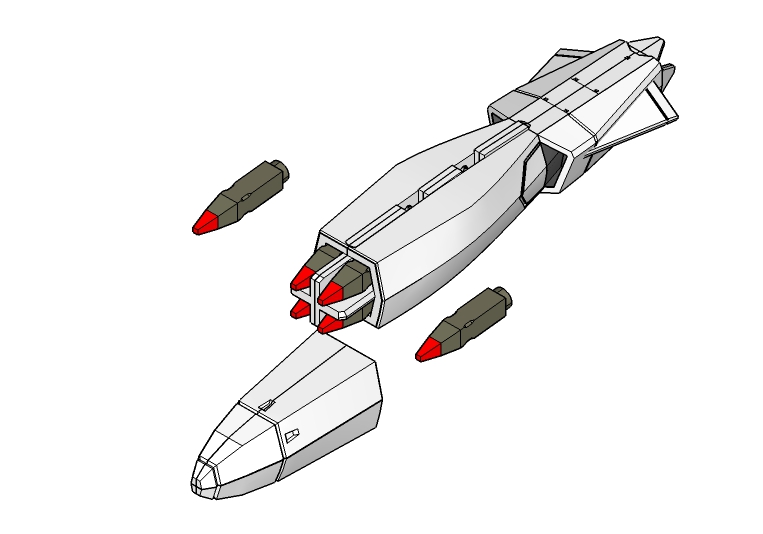
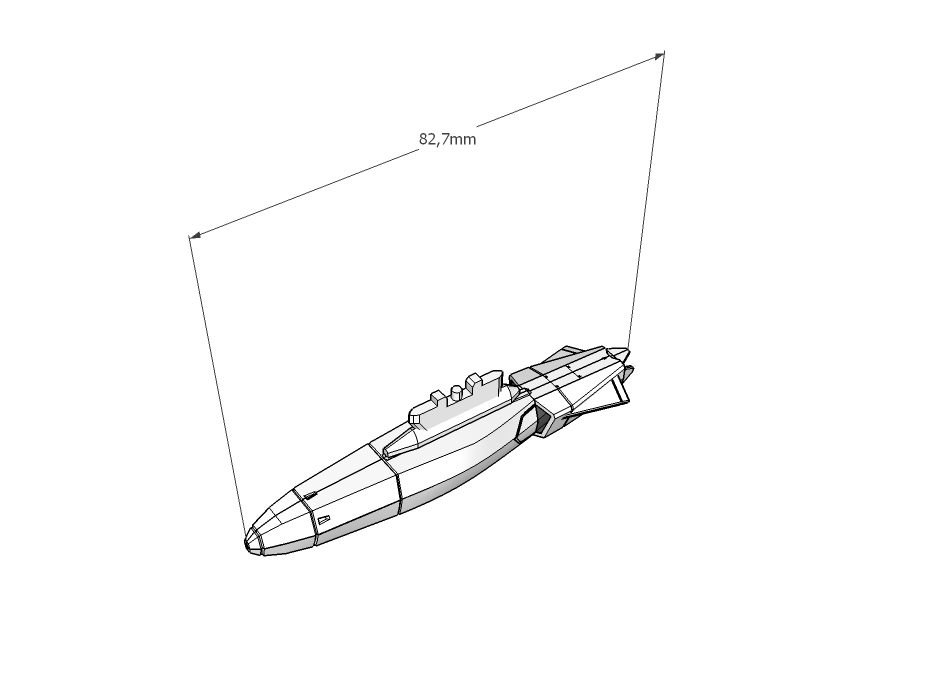
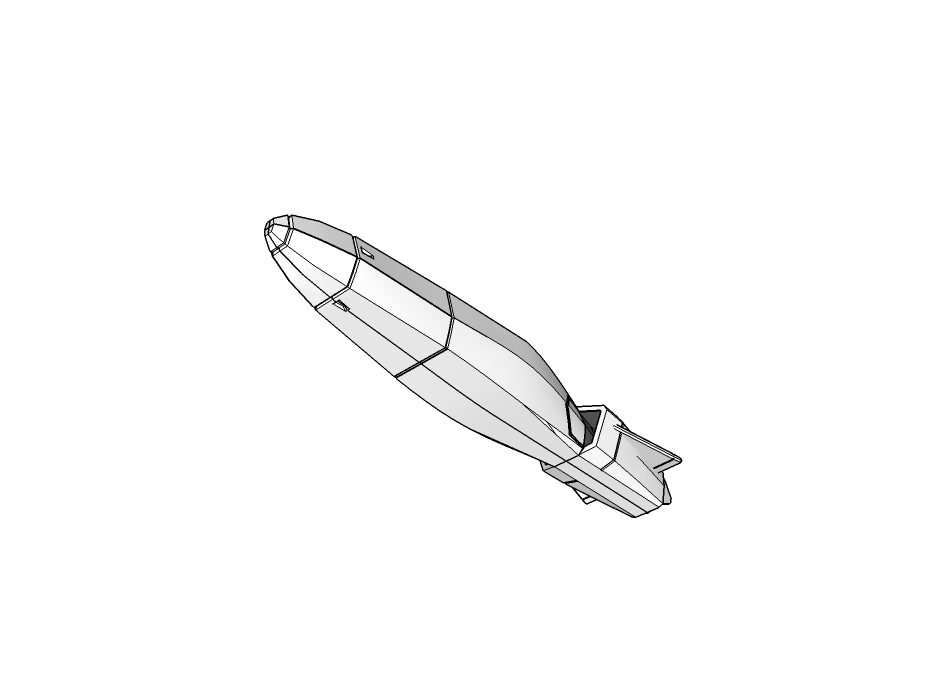
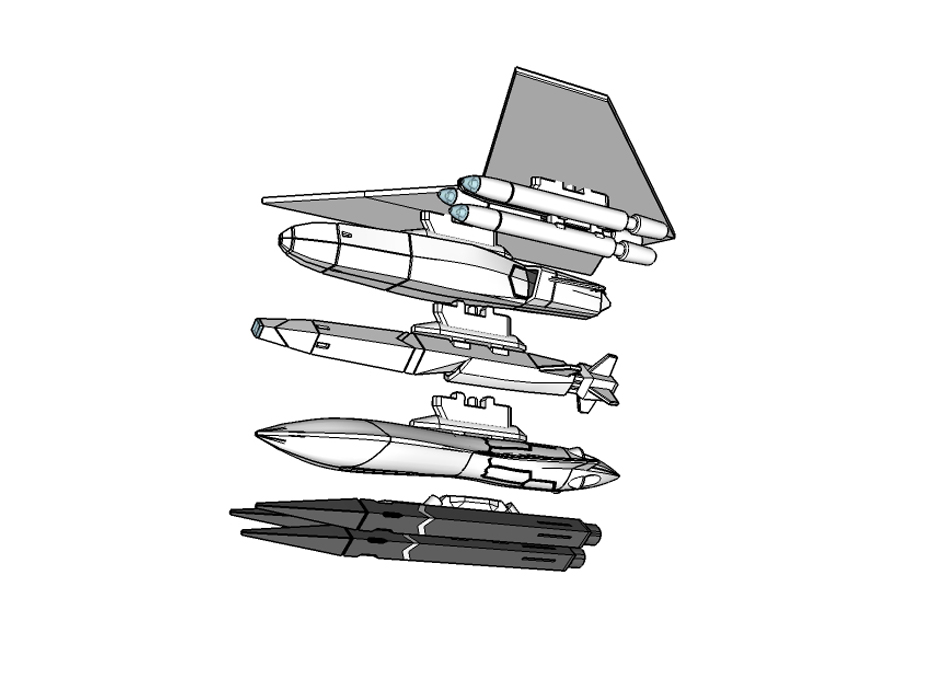
After much self debating, I decided to take over my finished ACSWS-1D model and to make the nose removable so it can be displayed with the 4 HMMs stored inside.
My idea is to have the ACSWS-1D displayed with small HMMs launching from their chambers just like what I made for the TMM. Additionally it can also be used as a "reloading" display.


3D Model Request - Missile/Ordnance for DX toys
in The Workshop!
Posted
ACSWS-1D on Akuna