

seti88
-
Posts
8251 -
Joined
-
Last visited
Content Type
Profiles
Forums
Events
Gallery
Everything posted by seti88
-
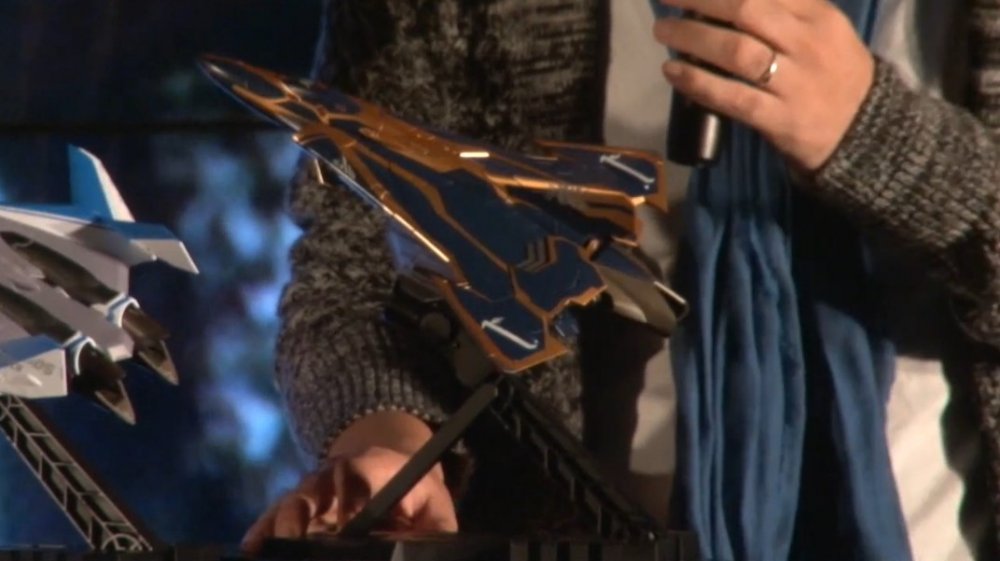
I would like to thk that it would be gold plastic, however thats going to prove to be a challenge for bandai in form fitting the parts together. I dont thk they can color inject sperately on a single sheet of plastic but they have the scale and experience as a toy company so who knows... either that or it could be a very elaborate piece of tampo...if they pull it off they will have a notch higher on their tampo-kingness!
-
where is the turrent action on the battroid? LOL and sprout dragoons too...
-
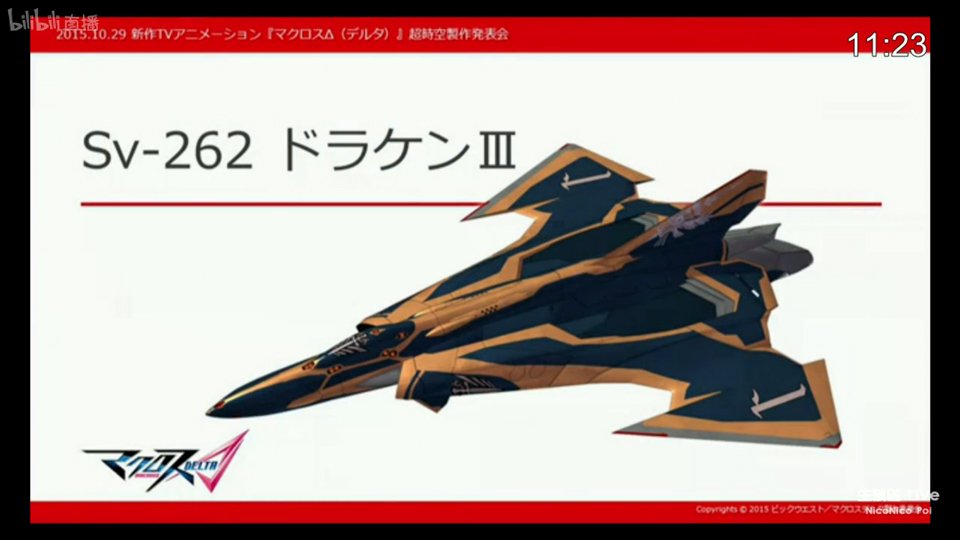
Since the unveiling of the SV-262 what are the tots abt it? like i mentioned in the delta annoucement thread, the legs seem to be more aligned to wing-facing rather than top/down thrusting...which may mean more of a built for speed valk. Am not sure abt the size of the tyhruster protrusions tho...it seems quite ok in the lineart but from the model its a bit elongated? However the color scheme is a quite fetching...
-
So if the VF-31 is a new valk, then would you plonk $ for a first release? I thk the consensus b4 was if its a 30 makeover, it would be reasonably ok. However am not sure if the 31 constitutes new transformation sequences or structure in any way different from the 30... and dont forget abt this pose too

-

Macross Δ (Delta) - announcement thread
seti88 replied to renegadeleader1's topic in Movies and TV Series
Other than the grim reaper, noticed from tochiro's post that there is another skull like insignia!
-
Macross Δ (Delta) - announcement thread
seti88 replied to renegadeleader1's topic in Movies and TV Series
Yea i missed that due to all the kawaiiness floating around I know which recolor version to wait for now -
yes, and now we can replicate that in a valk! pose them together LOL....
-
Macross Δ (Delta) - announcement thread
seti88 replied to renegadeleader1's topic in Movies and TV Series
wait i suddenly realised.....who is gonna play skull leader? no more skull insignia's? noooo........ -
here comes the double gun forearm forward pose! ala gundam wing-zero...
-
super second that to a destroid stroyline! ithat would be totally different and badass.. it may be possible, but of course they would have to contend with their own 1/60 scale releases canabalising the hi-metal line. I mean who would have the $$ left after spending on a 1/60 multi colored line.. This would be due to the fact that 1/60 would be coming out b4 any hint of himetals for the delta..
-
the cheyenne was also teased during the trailer...i wonder if that would be in bandai's line up! drooling just thinking abt it....
-
I suddenly realised that since it did not display the 30 in the new series...i thk the existing 30 toy price may ummm go up in the long run?? idk shhh....
-
On one hand i do like the color design on the valks this time and i hope bandai can pull it off stunningly in their dx line. however from a display perspective its gonna boil down to just 2 basic valk designs, and if i get those, compelling me to splash out more for a recolor may not be so appealling straight away.
-
Red variant would be reserved as a high priced exclusive.
-
Macross Δ (Delta) - announcement thread
seti88 replied to renegadeleader1's topic in Movies and TV Series
I have a strange feeling this would be fun-loving kawaii singing culture going up against reserved, mechanical medieval castle culture... and maybe they meet in the middle somehow... -
i do hope they find a way to implement those rudders on the wings better than the 30 dx tho, and have them stay in place by a mechanism and not friction. floppy rudders on the wings would not look good...
-
i hear you loud and clear!
-
Macross Δ (Delta) - announcement thread
seti88 replied to renegadeleader1's topic in Movies and TV Series
haha not too happy abt more oestrogens are we... Hopefully the regults or glaugs or dog fights would put back some testostorone and kick-*** -
Macross Δ (Delta) - announcement thread
seti88 replied to renegadeleader1's topic in Movies and TV Series
from the limited angle, It does look like a fold away mechanism of the sort at the foot portions...like the heels fold in somehow to expose only the top of the foot allowing a single thrust nozzle combination. how effective is that in vertical maneuvering though as the foot portions are aligned out ward to wings not upwards to the tail rudder... -
From the end of the trailer those certainly look like vf-29's cannon pods....however it may be too early to tell...
-
Macross Δ (Delta) - announcement thread
seti88 replied to renegadeleader1's topic in Movies and TV Series
Yes delta is looking like more a medieval fantasy vibe planetside....its different to say the least from the usual space background we have been accustomed to... -
Macross Δ (Delta) - announcement thread
seti88 replied to renegadeleader1's topic in Movies and TV Series
arigato!! -
Macross Δ (Delta) - announcement thread
seti88 replied to renegadeleader1's topic in Movies and TV Series
dont cry for your wallet, cry for your credit card... i suspect you wont be alone in that regard so that they can rape our credit cards... -
Macross Δ (Delta) - announcement thread
seti88 replied to renegadeleader1's topic in Movies and TV Series
+1 to that.. I sort of lost my mind when the cheyenne's, regults flashed through.... The banking of the SV-262 flying took my breath away....i need to find a repeat of the trailer pronto ... -
Macross Δ (Delta) - announcement thread
seti88 replied to renegadeleader1's topic in Movies and TV Series
33 valks! who needs a car eh? we should just take the bus/train/walk/cycle to work...


