Jarrod
-
Posts
162 -
Joined
-
Last visited
Content Type
Profiles
Forums
Events
Gallery
Everything posted by Jarrod
-

Bandai 1/72 Scale Macross Frontier Model Kit Thread Ver.3
Jarrod replied to azrael's topic in Hall Of The Super Topics
Yeah, the canopy was a bit tedious. I painted the body color on it first, after masking off the rest first of course. Then I very carefully cut the green bits out of the decals with a very sharp xacto blade. The decals weren't a perfect fit, so there was some paint touchups. I didn't follow the paint guide at all...I use only Model Master or Tamiya acrylics, both brands which don't really have the same color lineup that Bandai uses (I think their colors are Gunze Sangyo Mr Color?) However for the main body color I did start with actual Mr Color Wine Red that the instructions call for (the hobby shop I shop has a very dwindling supply of Mr color), and mixed it with some MM Napoleonic Purple, a bit of white, and some Kandy Scarlett to get the color I wanted. For the Lavender I started with Napoleonic Purple, added some white, and kept adding small amounts of Gull Grey until it matched the decals perfectly. The darker maroon is the main color with a bit more tamiya Purple and black mixed in. -
Bandai 1/72 Scale Macross Frontier Model Kit Thread Ver.3
Jarrod replied to azrael's topic in Hall Of The Super Topics
One last one. And sorry, no Gerwalk mode..just not a fan. Never even transformed into G mode. Jarrod -
Bandai 1/72 Scale Macross Frontier Model Kit Thread Ver.3
Jarrod replied to azrael's topic in Hall Of The Super Topics
More: EDIT Forgot to mention! The first 4 pics show the Battroid with the transformation-friendly smaller chest panel, and without the add-on neck piece. The rest of the pics show the larger panel and neck piece added -
Bandai 1/72 Scale Macross Frontier Model Kit Thread Ver.3
Jarrod replied to azrael's topic in Hall Of The Super Topics
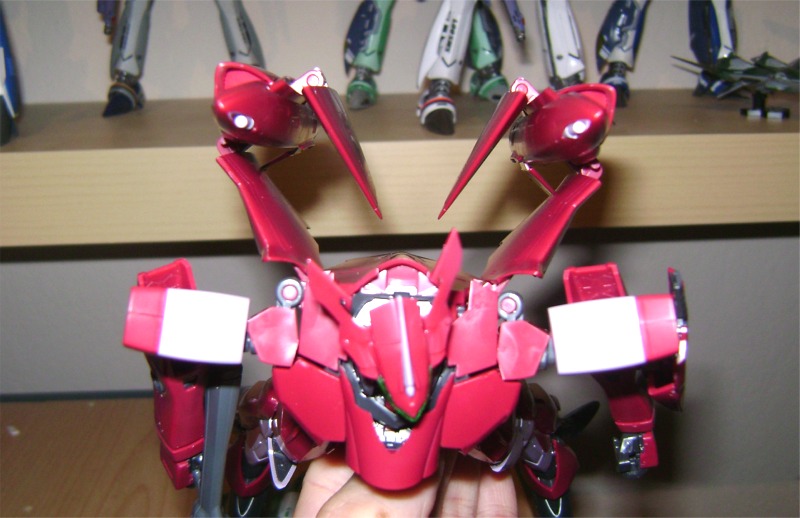
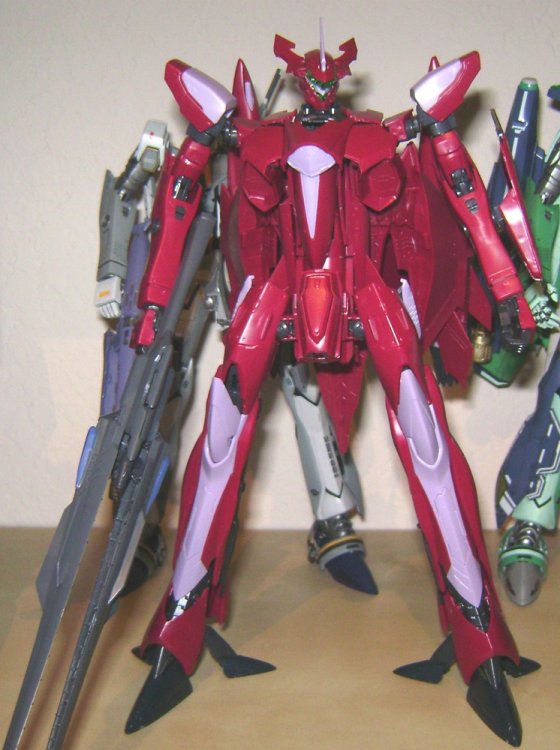
Finished my VF-27 the other day, fully painted and decaled. The main color is fully painted, the lavender is half paint, half decals, and the darker maroon is decals with small painted details and touchups. I gave this one a gloss coat, just seemed more appropriate somehow. There's three different metallics used, the dark, purple tinted grey used for the main mechanics, the blue gunmetal used for the feet, thrusters and gun, and finally the lighter gunmetal used for the gun and thruster rings. I used the clear green canopy, painted the rear half, and used decals for the rest, with the green parts cut out. Oh, and just like Alto's VF-25, Bandai got the head coloring off in the booklet and paint guide. I've painted mine like the animation model, with more lavender on the chin, and with the tops of "vents" on the sides of the head painted in the main body color. Anyway, on with the pics: -
Bandai 1/72 Scale Macross Frontier Model Kit Thread Ver.3
Jarrod replied to azrael's topic in Hall Of The Super Topics
Built the gunpod, it is quite large. Holds closed very nicely, and moves open smoothly on two sets of hinges. Very nice. Here's some quick straight assembly images of battroid mode. And sturdy, locked wings! Oh, and btw, that's with the smaller, transformation friendly chest plate, its about half the length of the optional one. There's also an optional plate to cover a gap in the neck that I have also not used.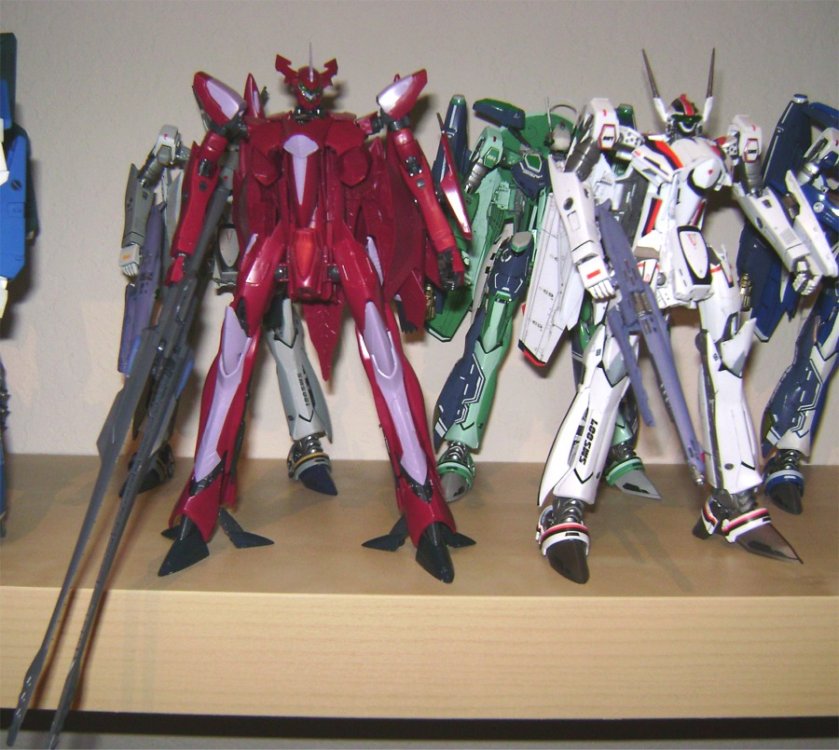

-
Bandai 1/72 Scale Macross Frontier Model Kit Thread Ver.3
Jarrod replied to azrael's topic in Hall Of The Super Topics
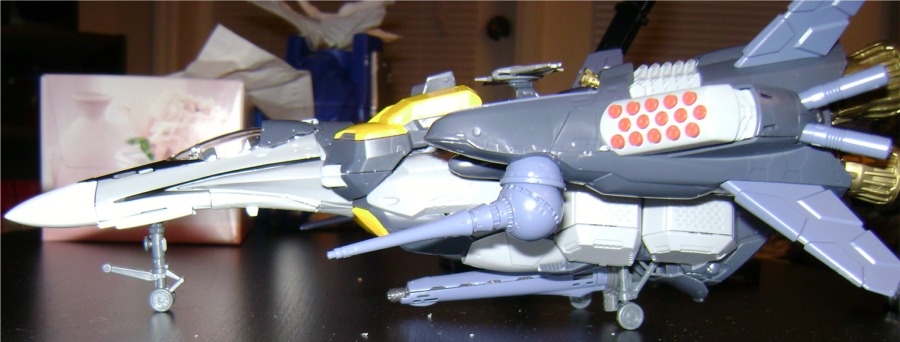
Got my VF-27 yesterday and quickly snapped it together...gonna be a few weeks until I can paint it tho:( Altogther it builds pretty similar to the VF-25, but with enough differences to not make building it boring. And overall, I think it's definitely an improvement over the Messiah. Some points to note: Pros: -Fighter mode is SOLID! The hips tab into the intakes, the legs tab into the backplate, and the wings tab into legs. The arms hold in alot better too. -Wings actually lock in the folded up position in battroid, so no floppy wings. -Neck/head mechanism is just smoother and works better, and it locks firmly into place. -The hip/waist connection for Battroid is now a strudy, securing hook instead of the the fragile tab. -Waist flap-thingy is works alot better, and stays fully deployed. -No trying to tint the damn canopy!!! Cons: -Same stupid falling off front landing gear doors. -The shoulders do indeed look just as undersized in person, and I do feel the chest is too wide as well. -Lots of tiny decals...ugh. Havent' built the gunpod yet, but it looks huge! -
Thats mine! Link should be in my sig. Jarrod
-
Bandai 1/72 Scale Macross Frontier Model Kit Thread Ver.3
Jarrod replied to azrael's topic in Hall Of The Super Topics
Yep, the VF-25 is still the same old kit, all the locking stuff is on the armor It has one of those giant ugly support peices to hold the wings up in gerwalk. Theres a pic below. Yep, I discovered on my first Alto that disassembling those parts for painting was a nightmare, so I just leave them off untill they're painted. From what I can tell, it should still have the same range of movement in the legs as an un-armored one, but I haven't tried that mode yet...I'll let you know once I try.
-
Bandai 1/72 Scale Macross Frontier Model Kit Thread Ver.3
Jarrod replied to azrael's topic in Hall Of The Super Topics
Ok here's a few just shot on my table with no proper lighting, etc. Transformed it to Battroid too....and yeah, there's NO WAY this thing stands on its own.


-
Bandai 1/72 Scale Macross Frontier Model Kit Thread Ver.3
Jarrod replied to azrael's topic in Hall Of The Super Topics
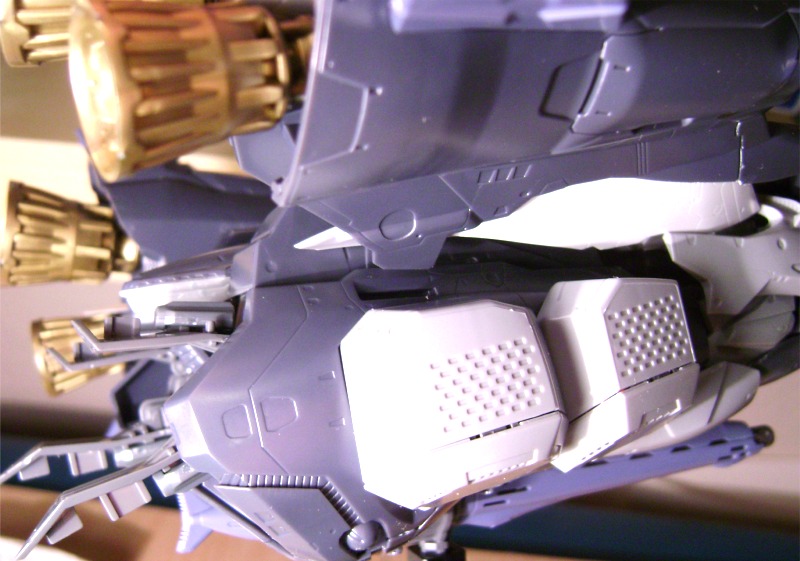
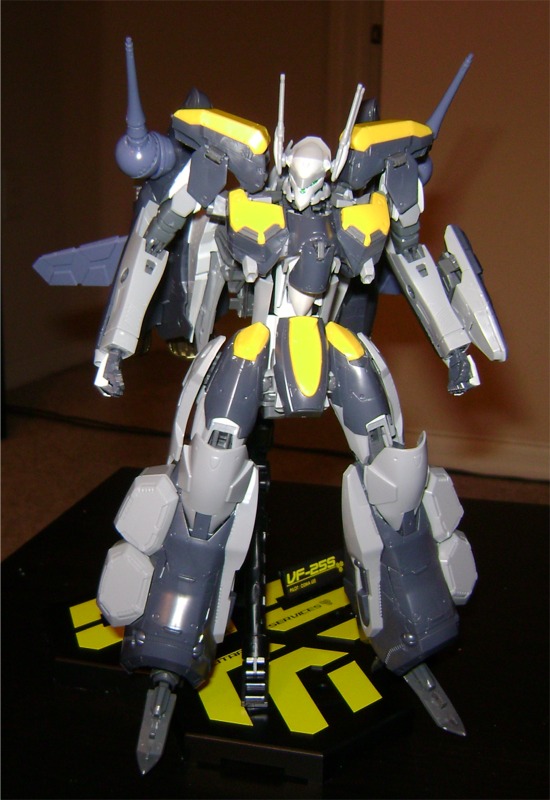
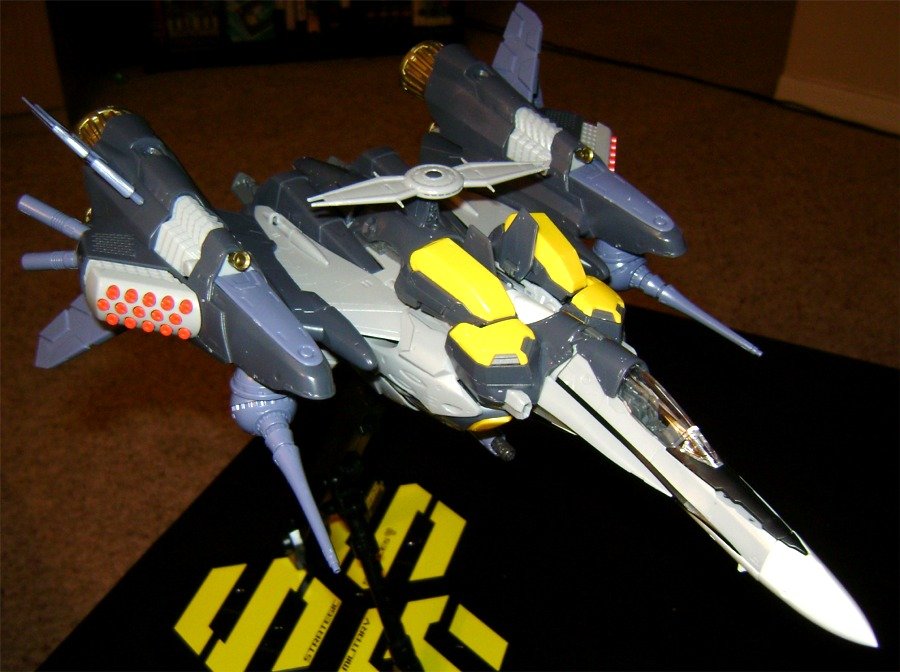
Got my Armored Ozma yesterday, and yeah, the box is qutie large. Pretty much two of the standard VF-25 boxes, and its PACKED! Spent a number of hours over the last two days snapping it together in fighter mode. Oh, and Bandai added some locking tabs, this thing is SOLID in fighter mode! The gun now attaches to the legs, with a rather large unsightly adapter, which also holds the legs together. The legs also tab into the backplate, and the wings tab into the legs. Seriously, this fighter is the exact opposite of the previous ones, like 1/60 Ver. 2 solid. Some other things to note: -There is plenty of ground clearence with the landing gear down. -Unlike the Superpack, the shoulder missle pods don't require any additional parts for Battroid mode. -The armored crotch armor needs to be removed for fighter mode, I suspected this was going to be the case. -All kinds of new support peices are included, including a piece that lets you keep the gunpod in the fighter mode location while the Valk is in Gerwalk mode(as was seen in the anime a few times). These parts are all, unfortunately very cumbersome looking. Haven't transformed it yet, might save that for tomorrow:) Jarrod -
Wow....that might really be the best clear purple for the VF-25 I've seen! Totally smokes both shades I've used, and has the perfect amount of clearity. I'm actually tempted to strip mine and try this method! Jarrod
-
Yeah, they do. They're the only new parts that have to be removed for switching modes, despite what the instructions show
-
If you're careful, its entirely possible to mount the packs on a completed VF-25, stickered or decaled. Luckily I happened to not glue any of the parts that needed to be removed. For the hips stickers, just take a super sharp exacto, and slice the already applied (and clearcoated if thats the case) decal or sticker right at the part seperation point. Now, carefully, pull the hip apart, and if want, add a bit more clearcoat to the edges of the decal where you just cut it. The only othere location that you should worry about is the wing stickers, but on mine at least, there seems to be no rubbing at all. Truth be told, the switchover was much less painful than I had thought
-
Bandai/Tamashi Nations 1/100 lineup. 2009 takeoff!
Jarrod replied to UN Spacy's topic in Hall Of The Super Topics
The old kit did look fantastic in Battroid mode, however, the fighter mode left A LOT to be desired. Fit was horrible, it was floppy, and it just looked incomplete. I'm going to assume for now the new VF100 version looks like that so it has a good figther mode, but I'll reserve my judgement until I see more/better pics of a more final version. -
Eh...I can't remember the ratio, just mixed until I liked it. I started with the clear, added a bit of blue, brushed a bit onto a peice of the clear plastic sprue, added some purple, tested again, added some more purple, tested again, etc until I got a color I liked. And yes, its hard to tell in the bottle what the clear would look like which is why I used the clear plastic sprue as a tester. Jarrod
-
Bandai 1/72 Scale Macross Frontier Plastic Models
Jarrod replied to Graham's topic in Hall Of The Super Topics
FWIW, I just airbrushed directly on the outside of the canopy. I originally tried to mix some Tamiya clear blue into Future, but the Tamiya did not mix well at all, and looked a lot like oil in water. -
Yeah, they orange is definitely not as opaque as I'd like...not bad mind you, just not perfect. It definitly looks better in person tho. And no, on white underlay like Hasegawa unfortunatley. And again, no, the grey stripe does not have a cut out for the SMS logo. As for magnets, I dunno...I don't think theres enough room in the wing glove without some serious modification. Or at least not in in the right place. I think added a simple tab and slot would be easier...and I might still go and do tha myself at some point.
-
Bandai 1/72 Scale Macross Frontier Plastic Models
Jarrod replied to Graham's topic in Hall Of The Super Topics
Clearcoating definitely helped! There were still a few little spots that I think will always wear, but it was a trememdous improvement. I have...it really takes away alot of the metallic look unfortunately. -
Bandai 1/72 Scale Macross Frontier Plastic Models
Jarrod replied to Graham's topic in Hall Of The Super Topics
FWIW, the paint I used on mine was Tamiya acrylic, airbrushed, and it adhered with no problems at all. I've never primered any Bandai stuf, and never have a problem. As for glueing the ABS(at least the parts that need/could be glued) I've always just used plain old hobby super glue with no isues. This ABS isn't like the same kind of ABS that you'd find on an assembled toy, its feels and acts a bit more like model styrene. I've glued, sanded, and painted it the same as the rest of Bandai's plastic. -
Bandai 1/72 Scale Macross Frontier Plastic Models
Jarrod replied to Graham's topic in Hall Of The Super Topics
Yeah, David you're correct. If you follow the directions, you'll be fine...they are totally correct. It's the built kit in the studio photos thats incorrect. -
Yep, not only is the gear way too big, Alto's way too small too. He's almost 1/100 scale small...I meant to mention that somewhere in the review.
-
Oh yeah, I airbrush on the acrylic stuff. I used Model Master Clear Gloss acrylic (the last little bit I had) with a bit of some Tamiya clear blue and a bit of Model Master Purple Pearl.
-
Transformation to Battroid: Whoa. The VF-25 has the complexity of the SV-51’s torso, crammed into a smaller, tighter package. Getting the hips into the right position means rotating the legs about a full 180 degrees. Oh and make sure you fold the rest of the torso into the right position first, or the hips will be in the way. Getting the neck piece into the right spot can be a tricky, and I always have a bit of trouble getting the chest slipped over the nosecone, it’s a very tight fit. Now make sure you put that nose gear door back on that just popped off:) Battroid mode: The beauty of this kit, IMO. Proportions are near dead on, even directly compared to official lineart/screenshots I have a hard time finding many compromises. Poseability in the arms is fantastic, with double joints elbows, universal shoulders, and a bicep swivel. Legs are pretty decent, with double jointed knees, very good side to side and front to back foot movement, but with limited hip range. Like most VF’s the intakes just bump into too much to have a great range of movement. Head is on a ball joint, plus the neck tilts forward and back. And there a waist joint! It doesn’t have much range, but the waist can rotate side to side. The Battroid mode is definitely the most solid of all modes too, the chest sits close and tight, and the hips peg securely to the abdomen, and the backplate folds and stays down very well. All in all, the Battroid mode is about as perfect as I could want, solid, poseable, and looks great! Again, with my 1/72 Hase VF-1 Final thoughts: If you like the VF-25, get this kit! It’s everything I’ve come to love from Bandai modern kits. The kit goes together easily, and is designed to look great straight out of the box, (or even better with some paint and panel lines). The stickers are great for novices, while the decals are great for the more skilled builders. Despite some small stability issues, the VF-25 looks fantastic in all modes thanks to engineering that, IMO, easily rivals that of Yamato’s latest offerings. This kit is the reason I’ve wanted Bandai to do a new Macross kit for years. Thanks for reading.
-
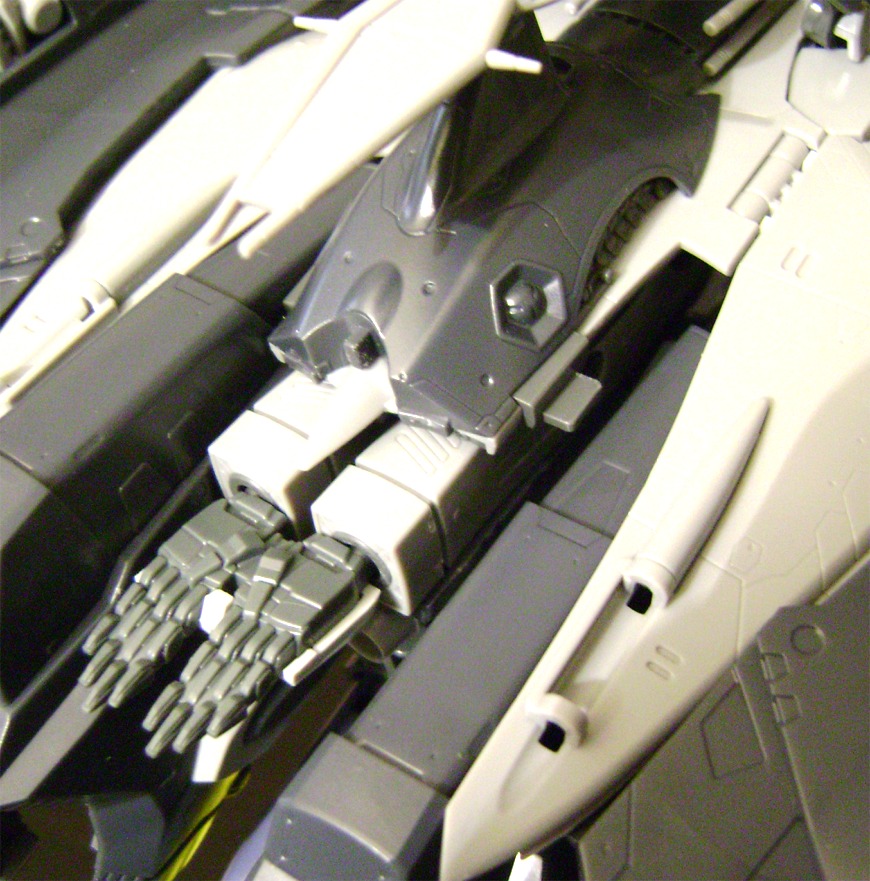
Transformation to Gerwalk: Pretty simple VF-1 style transformation. You’ve got to swap the hands, and add in the shield attachment piece tho. The legs have a cool hidden lock for the extending ankle part to ensure that the feet remain fully extended. Also in another clever bit of engineering, you can fully bend the knee forward until you extend the upper joint. Gerwalk Mode: I’ve never really been a huge fan of any Gerwalk modes, but this one does look pretty good. However, it feels a bit flimsy thanks to the center of the fuselage being partially disengaged. Not really much else to say…this is probably the only time I’ll have it in this mode. Alto's first "flight"
-
So, I’ll start out by saying that I’ve been anxiously looking forward to this kit from the moment it was announced, and Bandai did not disappoint! I’ve been snapping Gundam (and the like) kits together for about 15 years now, and more seriously building (fully painting, panel line wash, clearcoat, etc) plastic and some resin kits for the last 6 or so years. So I’m quite used to Bandai’s kits. I was kinda afraid Bandai might cheap out and not put as much effort/engineering into a Macross kit as they do with their Gundam stuff. That fear was quickly put to rest as soon as I opened the box, saw the runners and flipped through the instruction booklet. The VF-25 was every bit as complex and well engineered as Bandai’s newest Master Grade kits! Anyway, onto my review: The Parts: The VF-25’s box contains an impressive 13 runners of parts, all molded (save some small details) in their appropriate colors. Clear parts are included for the canopy, sensor thingies on the nose, and the Battroids visor. None of which are supposed to straight clear….Of noticeable absence is the familiar runner of Polycaps, good riddance I say! Also included are 5 metal rods, a small sheet of Bandai’s infamous foil stickers (for some missing details/paint), and two sheets of markings, one waterslide decals, and one clear backed stickers. Assembly: For those familiar with say a MG Gundam of the last few years, the VF-25 is very much on par with that. For those not familiar, it is all snap assembly, with near perfect fit between parts. Each main assembly (arms, nose legs) features an inner frame/section that contains the workings/transformation parts enclosed within the white outer parts of the Valkyrie itself. The parts are designed so that most seam lines are hidden or disguised as panel lines. Much like a lot the new MG kits, there is a heavy emphasis on ABS joints, in fact that’s all there is in this kit, not a single polycap is included. (I, for one, am a strong supporter of the ABS joint system. In my experience, polycaps get way looser, way faster. ABS does have a habit of loosening as well, but I’ve found a tiny drop of super glue does wonders for this.) The metal rods are used for joint pins for the rear tailwings, the main wing assemblies, and for the center fuselage rotation joint. On my particular kit the joints that rotate the shoulders into Battroid position were quite tight, and I filed the hole a little wider. I also found that the nosecone and the elbow joint pieces did not stay together very well and needed to be glued together. I also glued (after painted) together the lower arm halves and outer shoulder halves for a bit more solidity. Besides those small issues it was a very straightforward and satisfying build. Paint: I generally do not paint my white (what can I say, Bandai makes a solid looking white plastic!), but I always paint every other color. I painted the mechanical details(inner frame, hands, etc) in a custom mixed metallic grey, the gunpod in a custom metallic purple-grey, and the feet in a custom dark metallic brown (sensing a pattern here?). The black is plain black and the small red head piece and wing details are a custom orange-red mix. The visor is clear green as is the gunpod sensor. The canopy and nose sensors are actually tinted blue, but it seemed to dry much clearer that it sprayed on, oh well. I opted to paint the wing lights instead of using the rather poor, dull decals. Now I’m ashamed to admit it….but I actually used the foil stickers for the white on the crotch piece. I’d originally painted it white…twice, but when neither shade of white was anywhere near the shade of the kit I begrudgingly put the sticker on…and it really wasn’t too bad! Markings: I used the decals almost entirely. They fit great, and with a little help from Micro-Sol, formed to the parts perfectly. The decals adhered wonderfully, and were neither too thick nor too thin, great decals all around. I highly recommend trimming all the clear film off the stripes to achieve a better fit, and don’t waste your time with decals if you’re not going to used Micro-Sol or a similar product, it makes all the difference. I did use a few of the stickers tho. After I applied the grey wing decals at the wrong angle(oops) I then had to use the stickers, plus I just went ahead and used the black wing stickers too just to make sure they didn’t scratch off when folded. I also used the white stickers on the tailfin leading edge for color consistency. After the decals were dry I used Testors Model Master Semigloss as a protective clearcoat, as the decals WILL scratch and tear without one. Finally I used an oil wash for the panel lines. The finished kit: Fighter Mode: Very close to the lineart, and just a great looking jet all around. It’s not entirely stable however. The fuselage and arms hold together great, the legs hold firm, but don’t peg to anything, relying on just the strength of their joints to hold them in position. The main wings unfortunately just sit there. I can turn mine upside down with everything in place, but a little shake and the wings fold up. A peg or stopper of some kind would have been great. So, fighter mode looks great, and the fit is good, but has some stability issues. Oh, and that “stand” is a useless, totally unnecessary waste of plastic. With my custom 1/72 Hasegawa VF-1