tekering
-
Posts
3913 -
Joined
-
Last visited
Content Type
Profiles
Forums
Events
Gallery
Everything posted by tekering
-
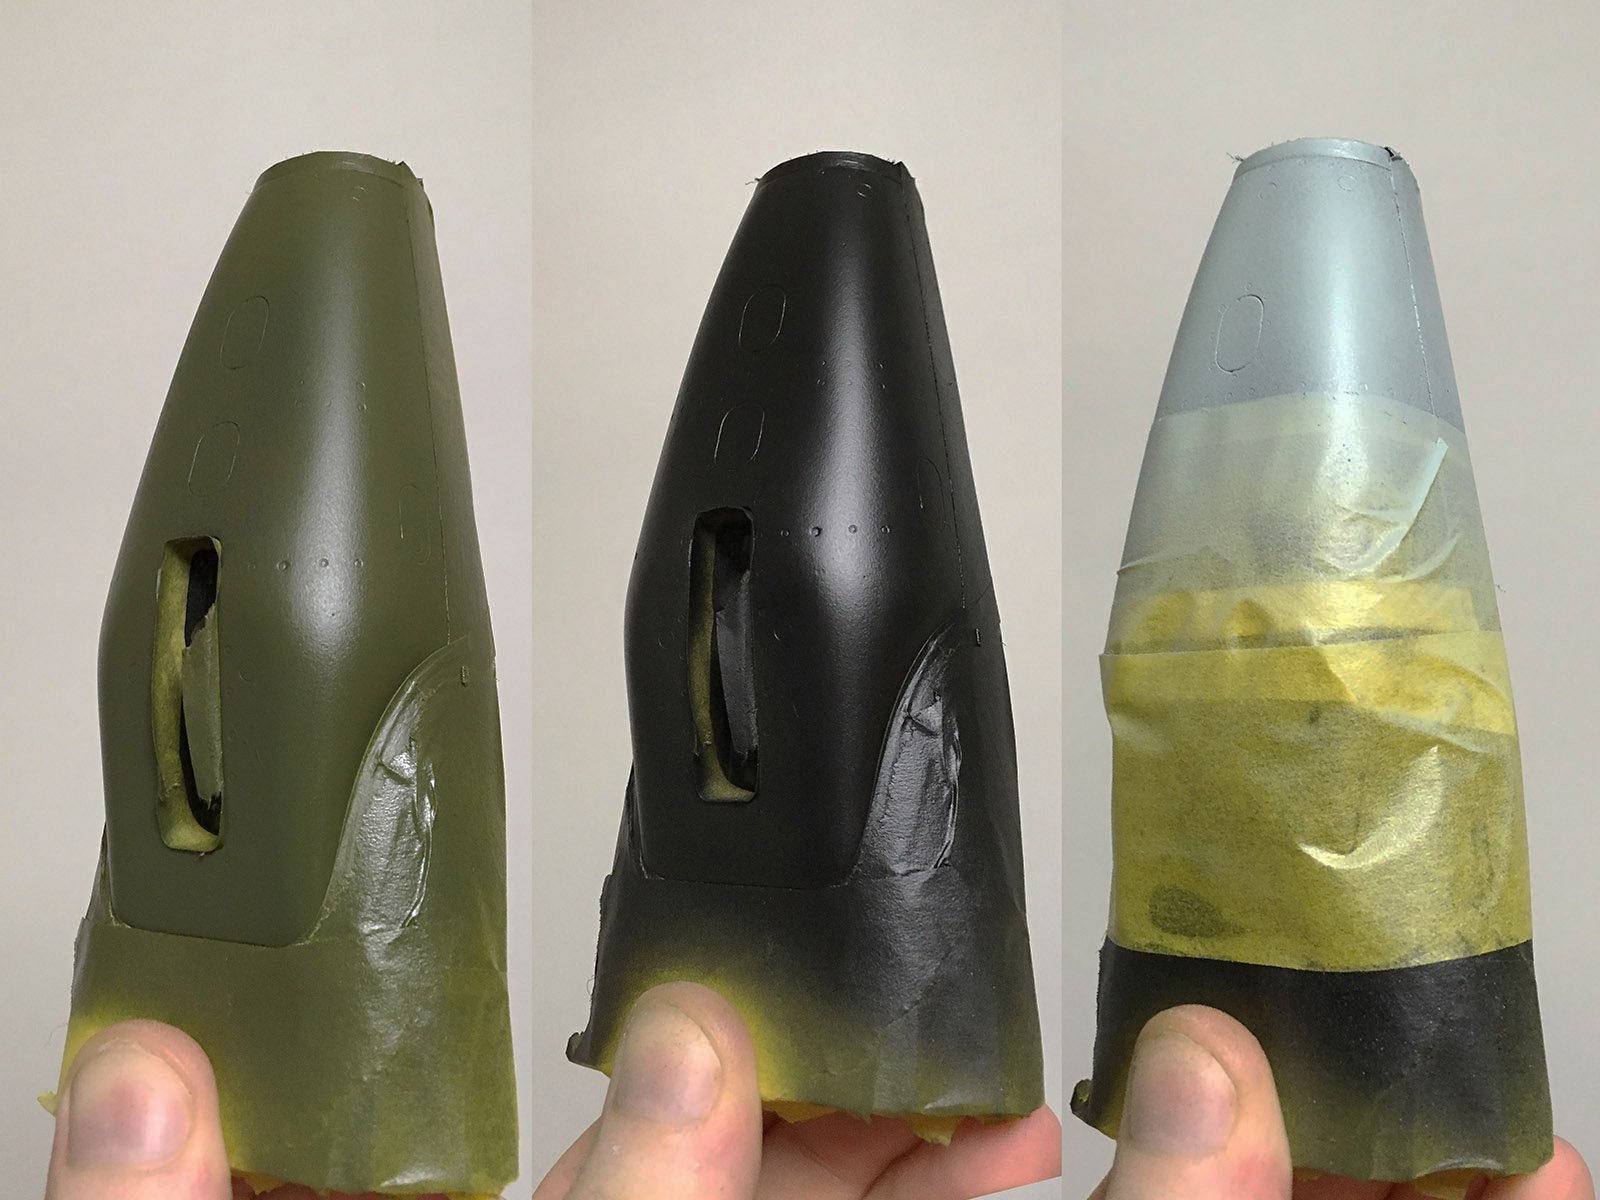
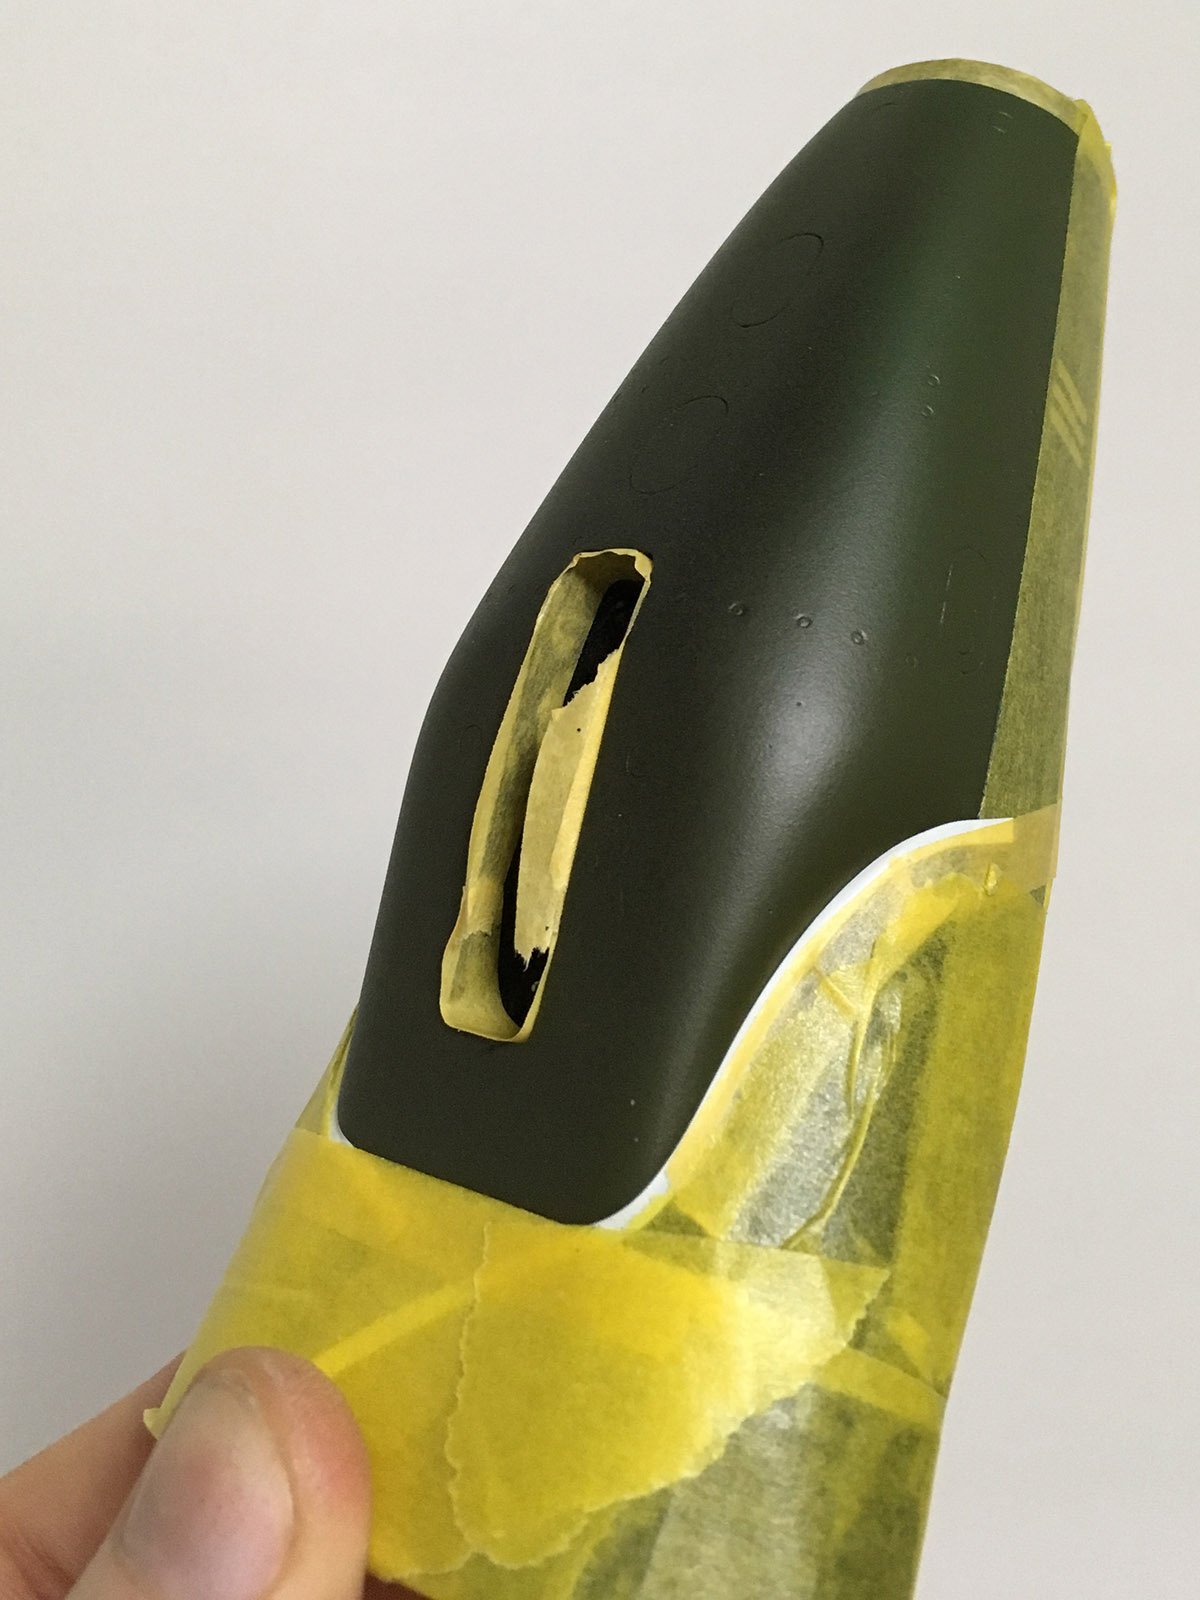
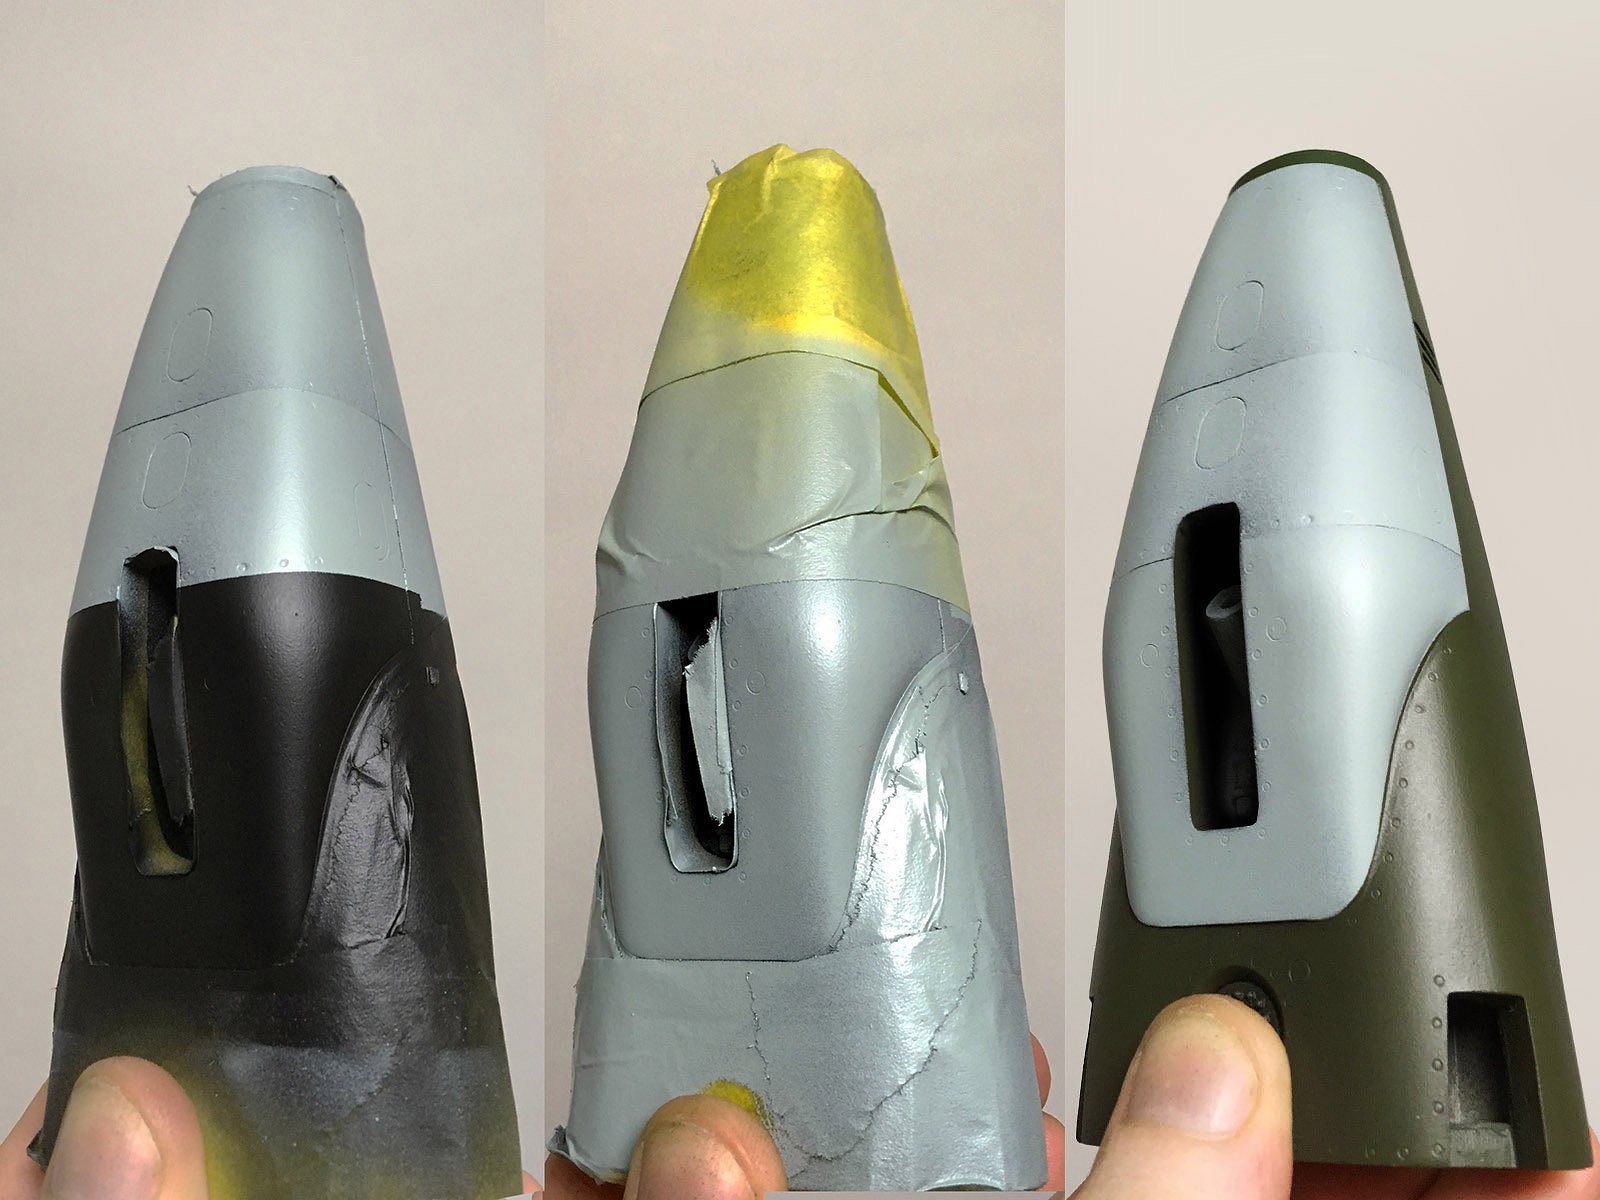
It's great stuff, and it's helped me out a great deal on this build. As it stretches, however, it's less likely to adhere to the surface as well as conventional masking tape, so I recommend using both in tandem. I apply the special vinyl stuff first, where the curves are sharpest, and then cover it with regular masking tape as much as possible. This will help hold the white tape in place, and ensure a good seal when painting over it. For straight lines, conventional masking tape is sufficient. On the left, you can see that I started by spraying another layer of the primary color (green) over the masking, which will help seal the edges and prevent color bleeding when the next color is applied. This prevents any paint from seeping under the tape. A couple light base coats of black surfacer followed. Patience is key here; if you attempt complete coverage with a single coat, you might lay down too much paint and get it under the masking. Again, to avoid color bleeding, spray at a safe distance from the surface, and give the paint a chance to dry before spraying the next pass. I then laid down another layer of masking tape, using the sculpted rivets as a guide to determine where the hypothetical panel separation might be. A thin coat of slate grey was applied to the exposed upper portion of the hull. Once that had dried, I removed the top layer of masking tape, exposing the rest of the hull portion I wanted to paint. I then masked over the upper portion I'd already painted, carefully following the panel line I'd created with the previous mask, and repeated the process for the center portion. After that section had dried, the process was repeated once again for the lower portion of the hull. The result is three different sections with subtly different shading and coverage, giving the impression of separate parts that had been welded together. Not at all, man. I want these threads to benefit everybody, so I've put a lot of time and effort into sharing my techniques and making suggestions to my fellow model makers. The more we learn from each other, the better we all become... and the more awesome resin kits get built and displayed.


-
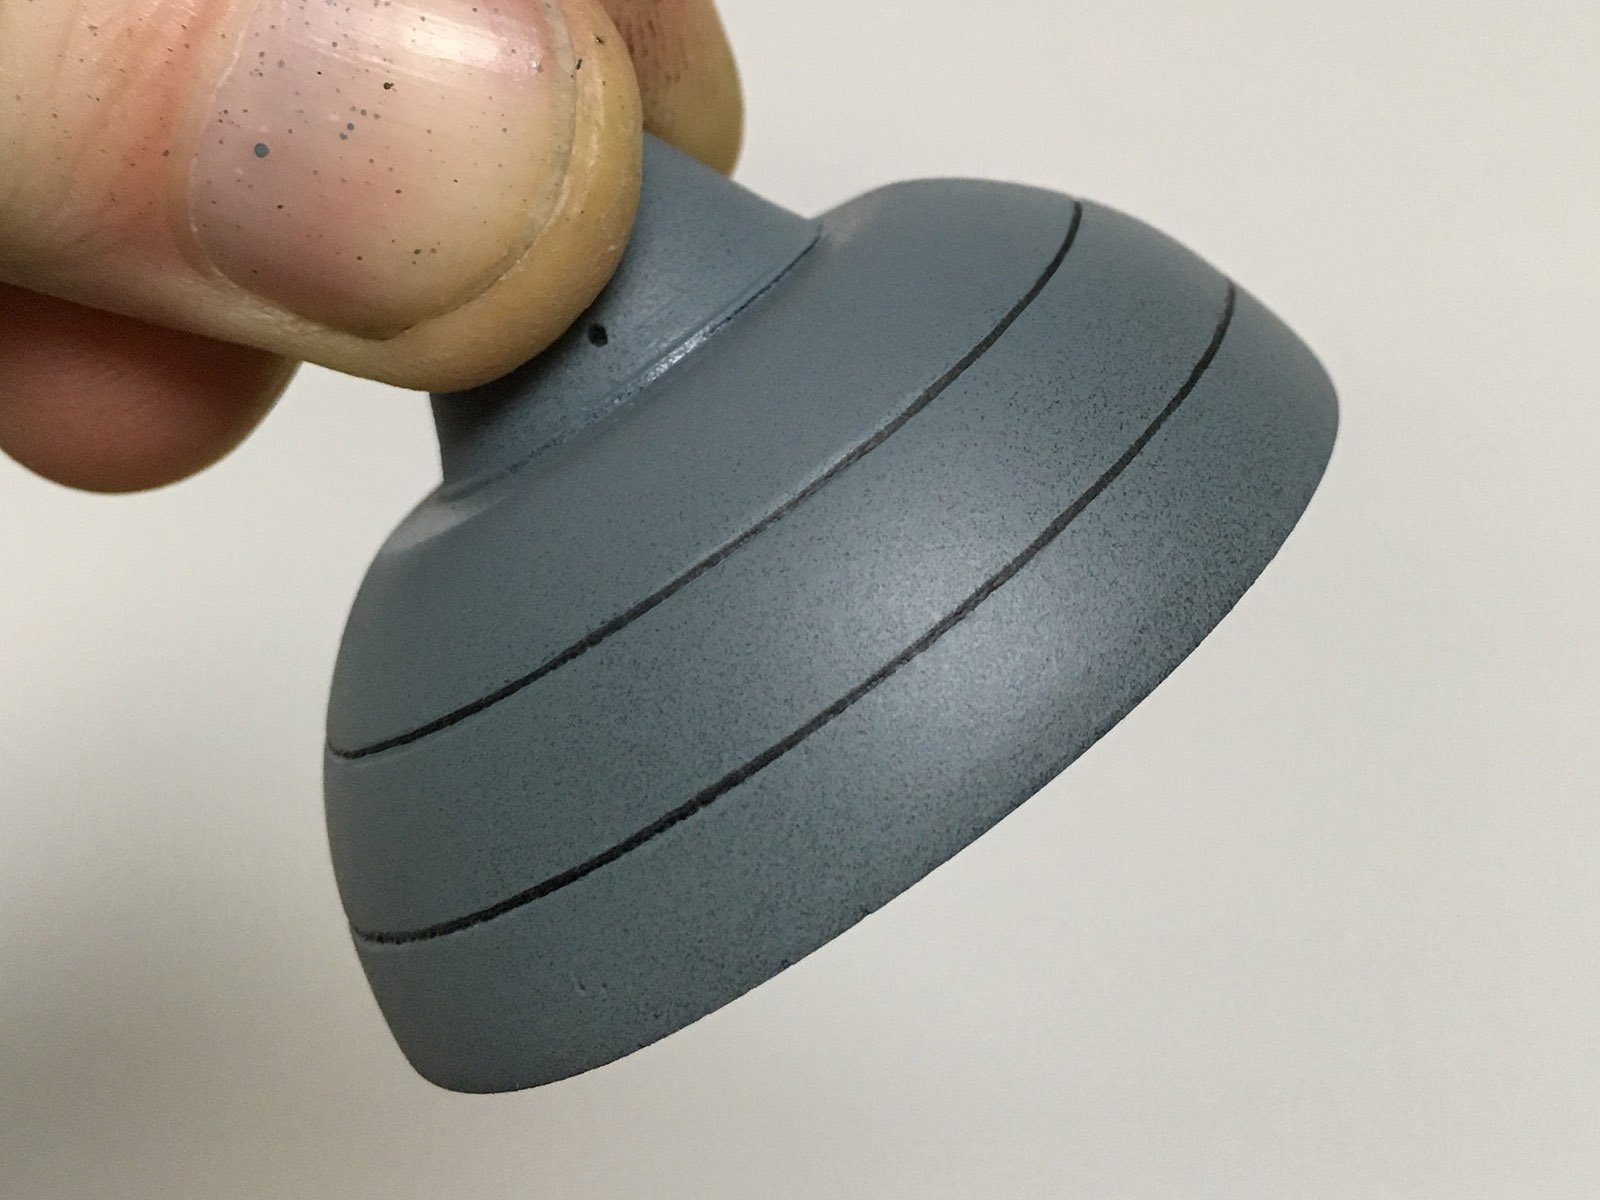
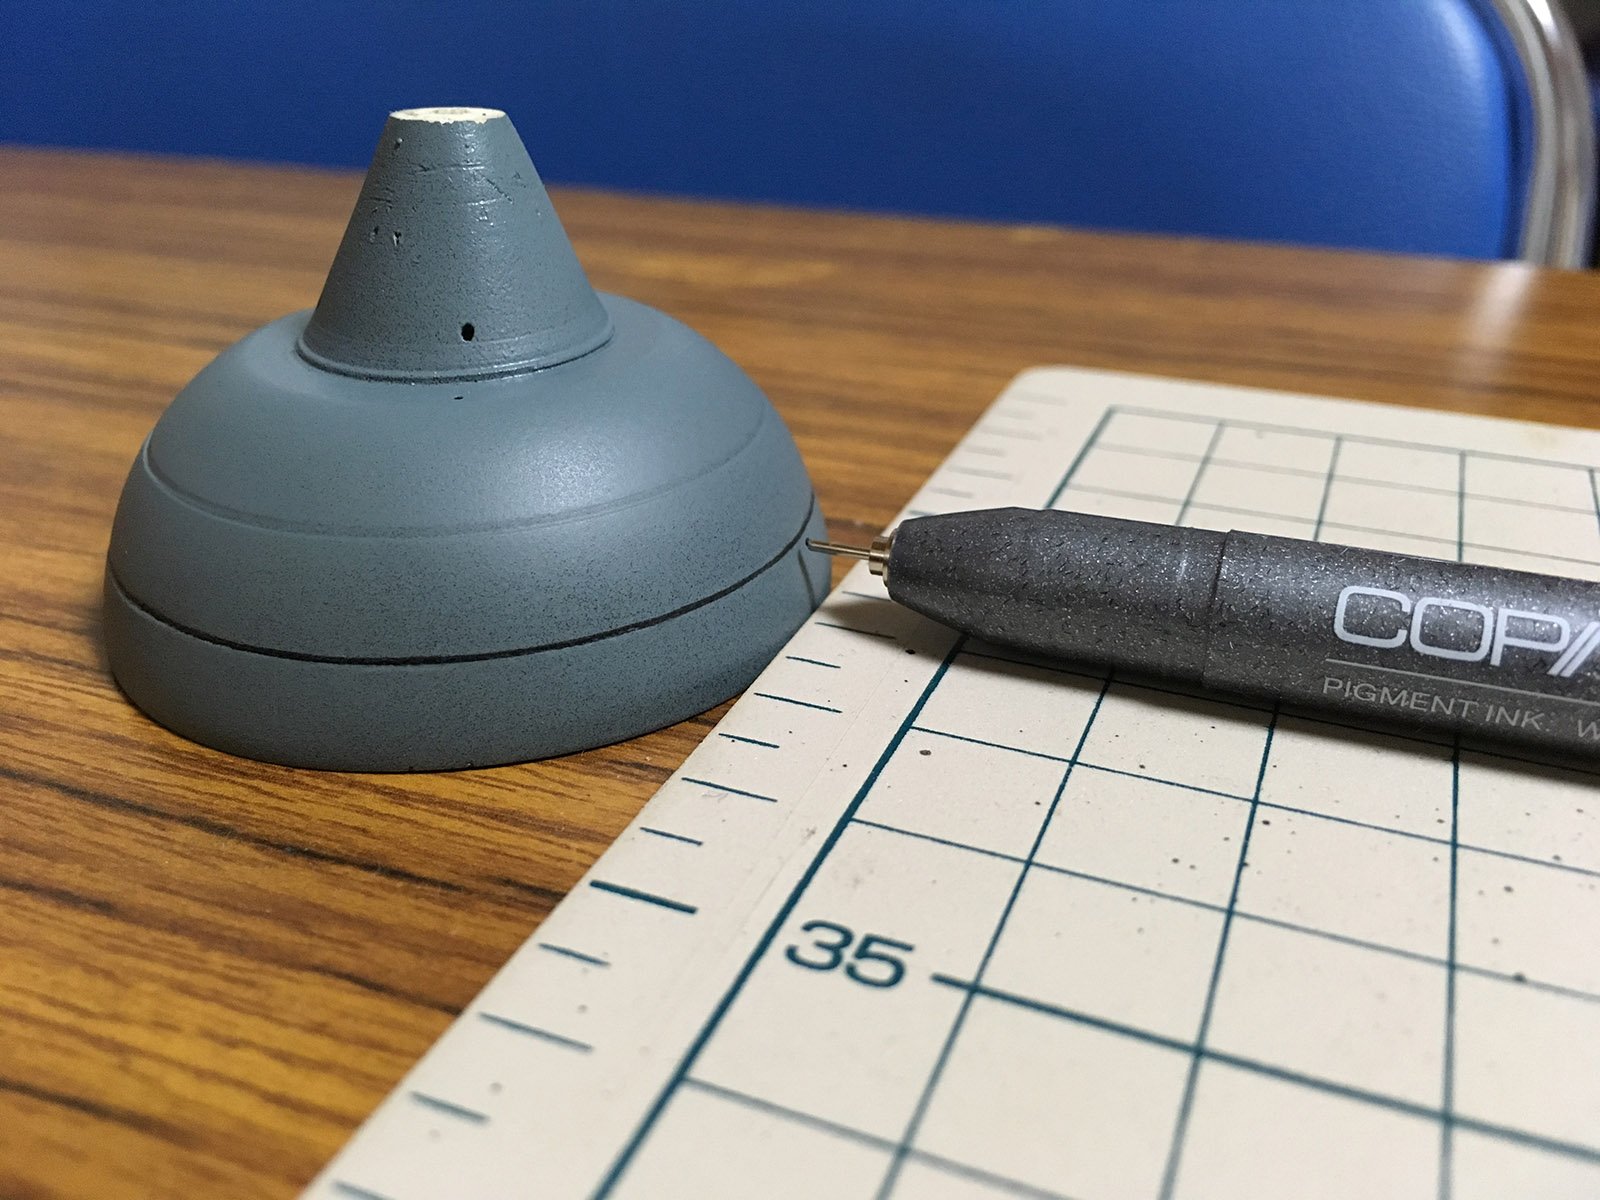
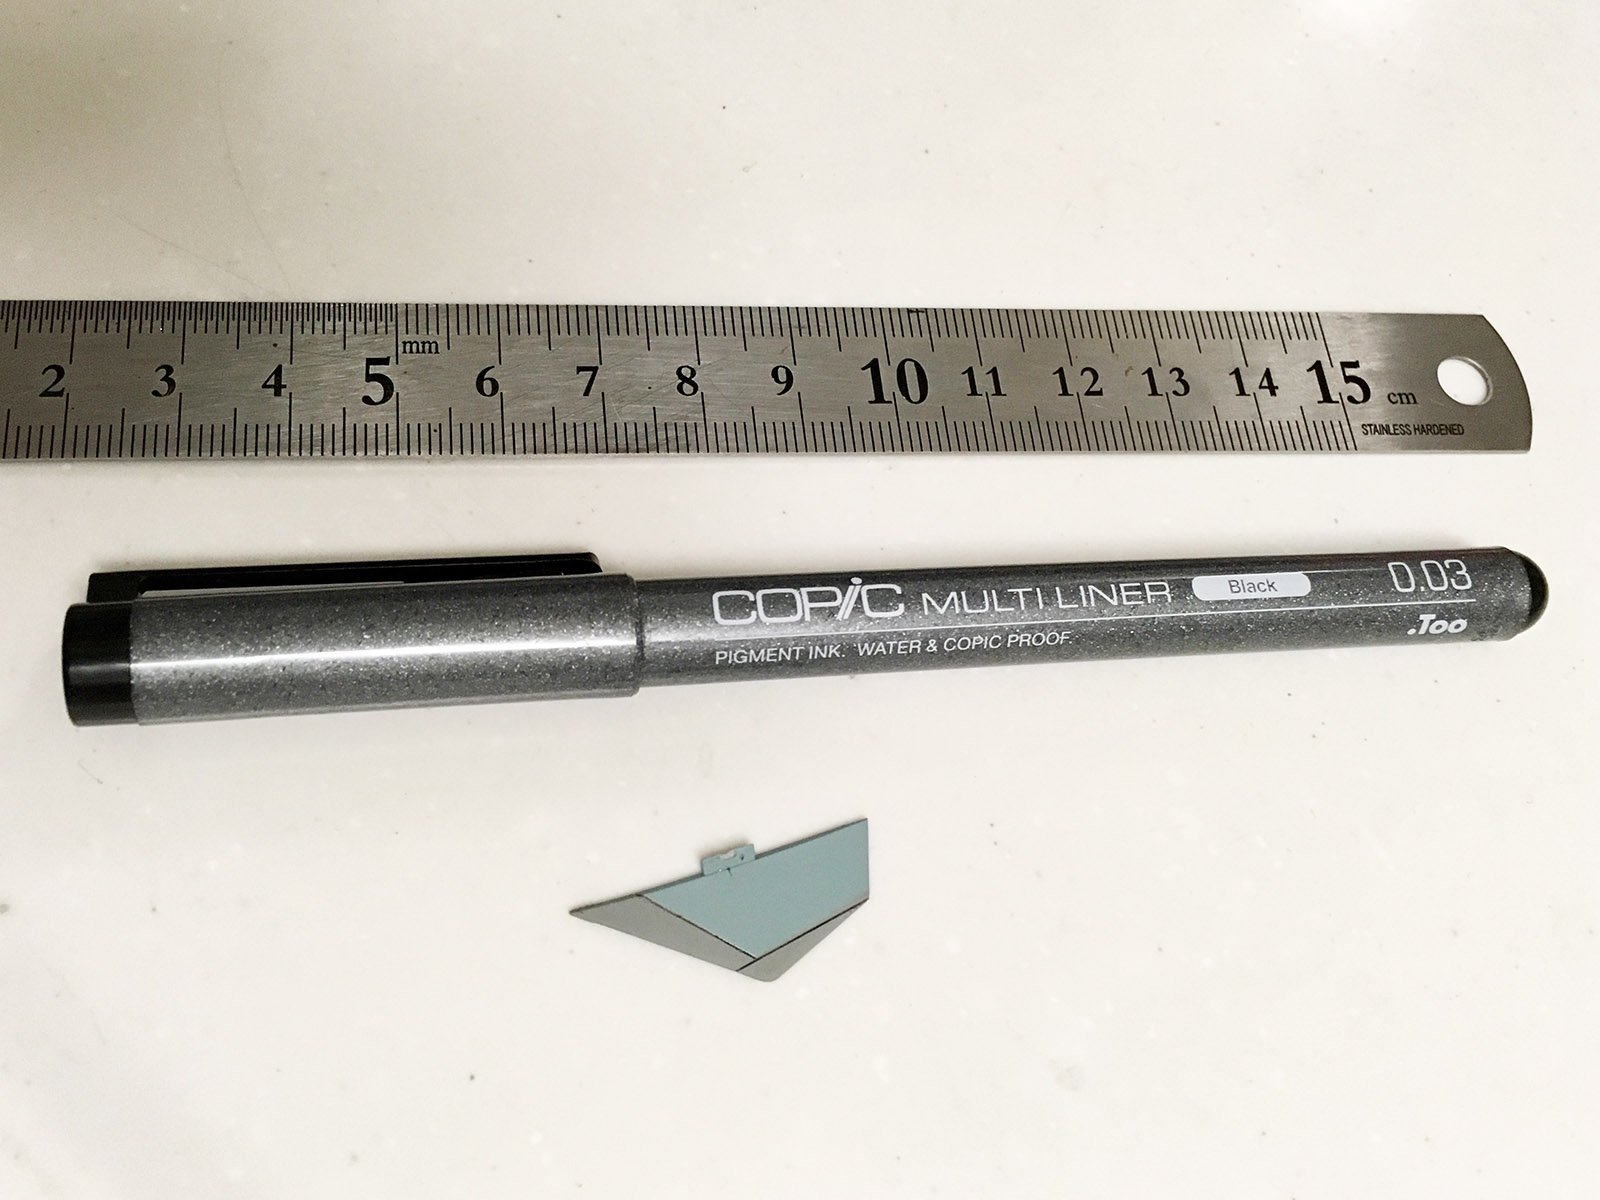
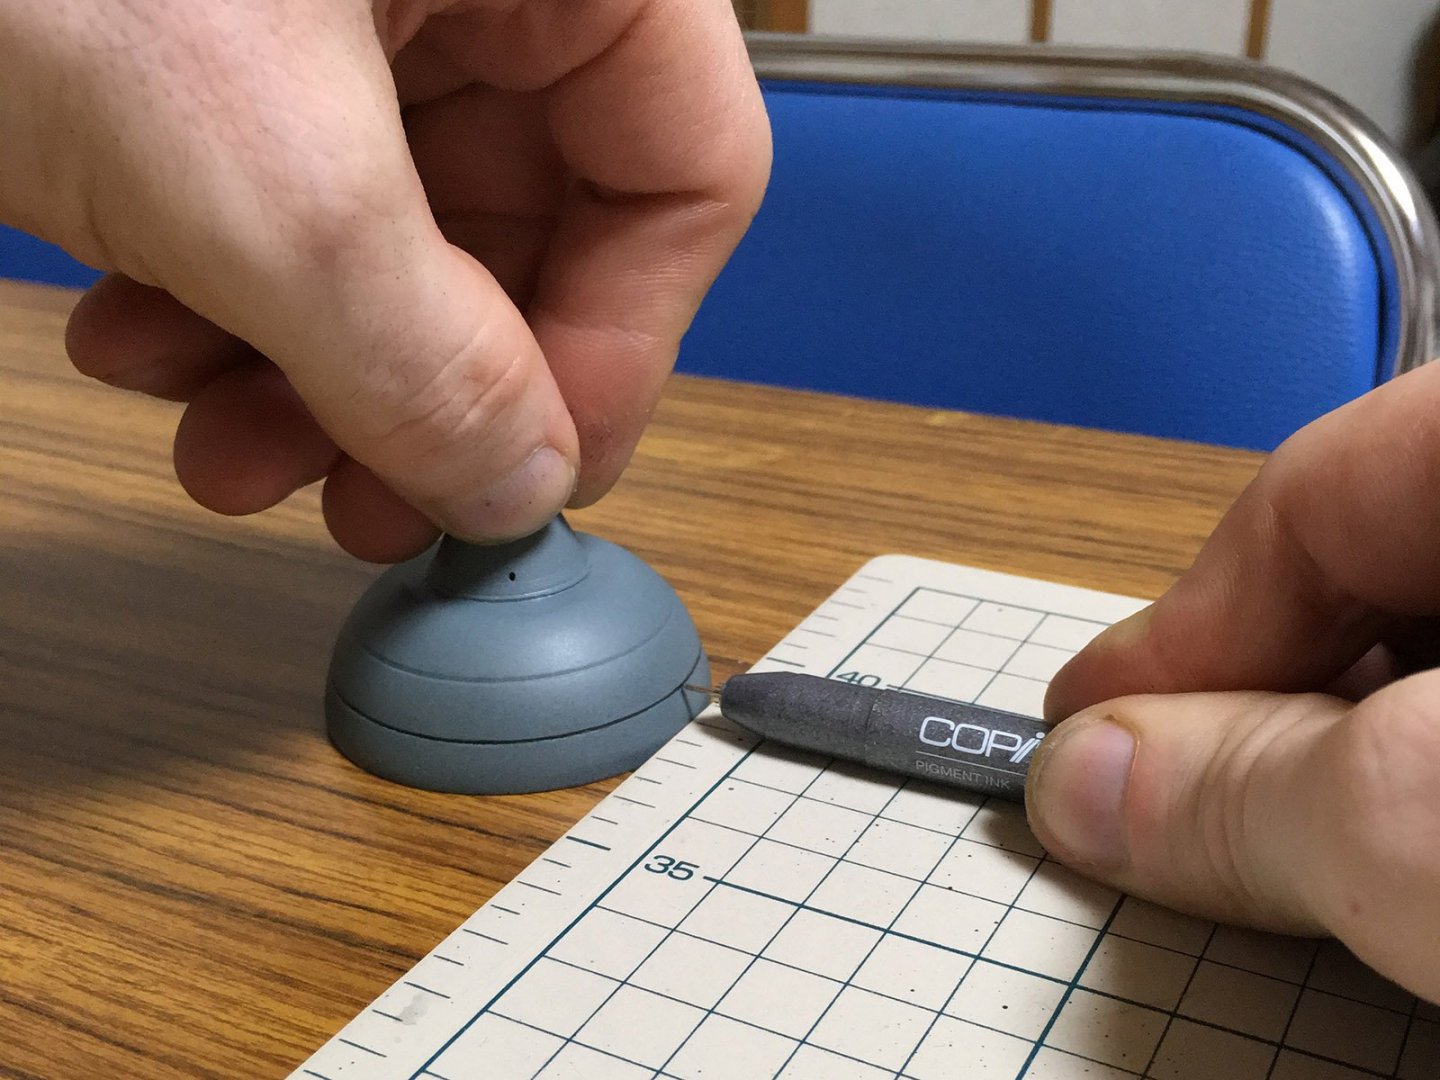
I was showing my work to one of the junior members of our local modeling group, and he asked a question that surprised me. He wanted to know how I managed to draw such clean and straight lines on spherical surfaces, like the Gnerl booster rockets. I felt a little condescending, demonstrating what I thought was an obvious technique, but the approach apparently hadn't occurred to him... ...so perhaps an amateur reading this may also find it enlightening. Hold your marker steady, and rotate the circular piece in a slow, steady fashion, so that the felt tip makes contact at an equal height around the circumference of the piece. It's best to go lightly, and make several passes to ensure the ink is evenly distributed, resulting in a clean line of consistent thickness. My apologies to those of you who find this blindingly obvious. Let's check the ol' parts bin, shall we? One of these should do nicely. It's difficult to photograph, but it definitely catches the light like glass now.


-
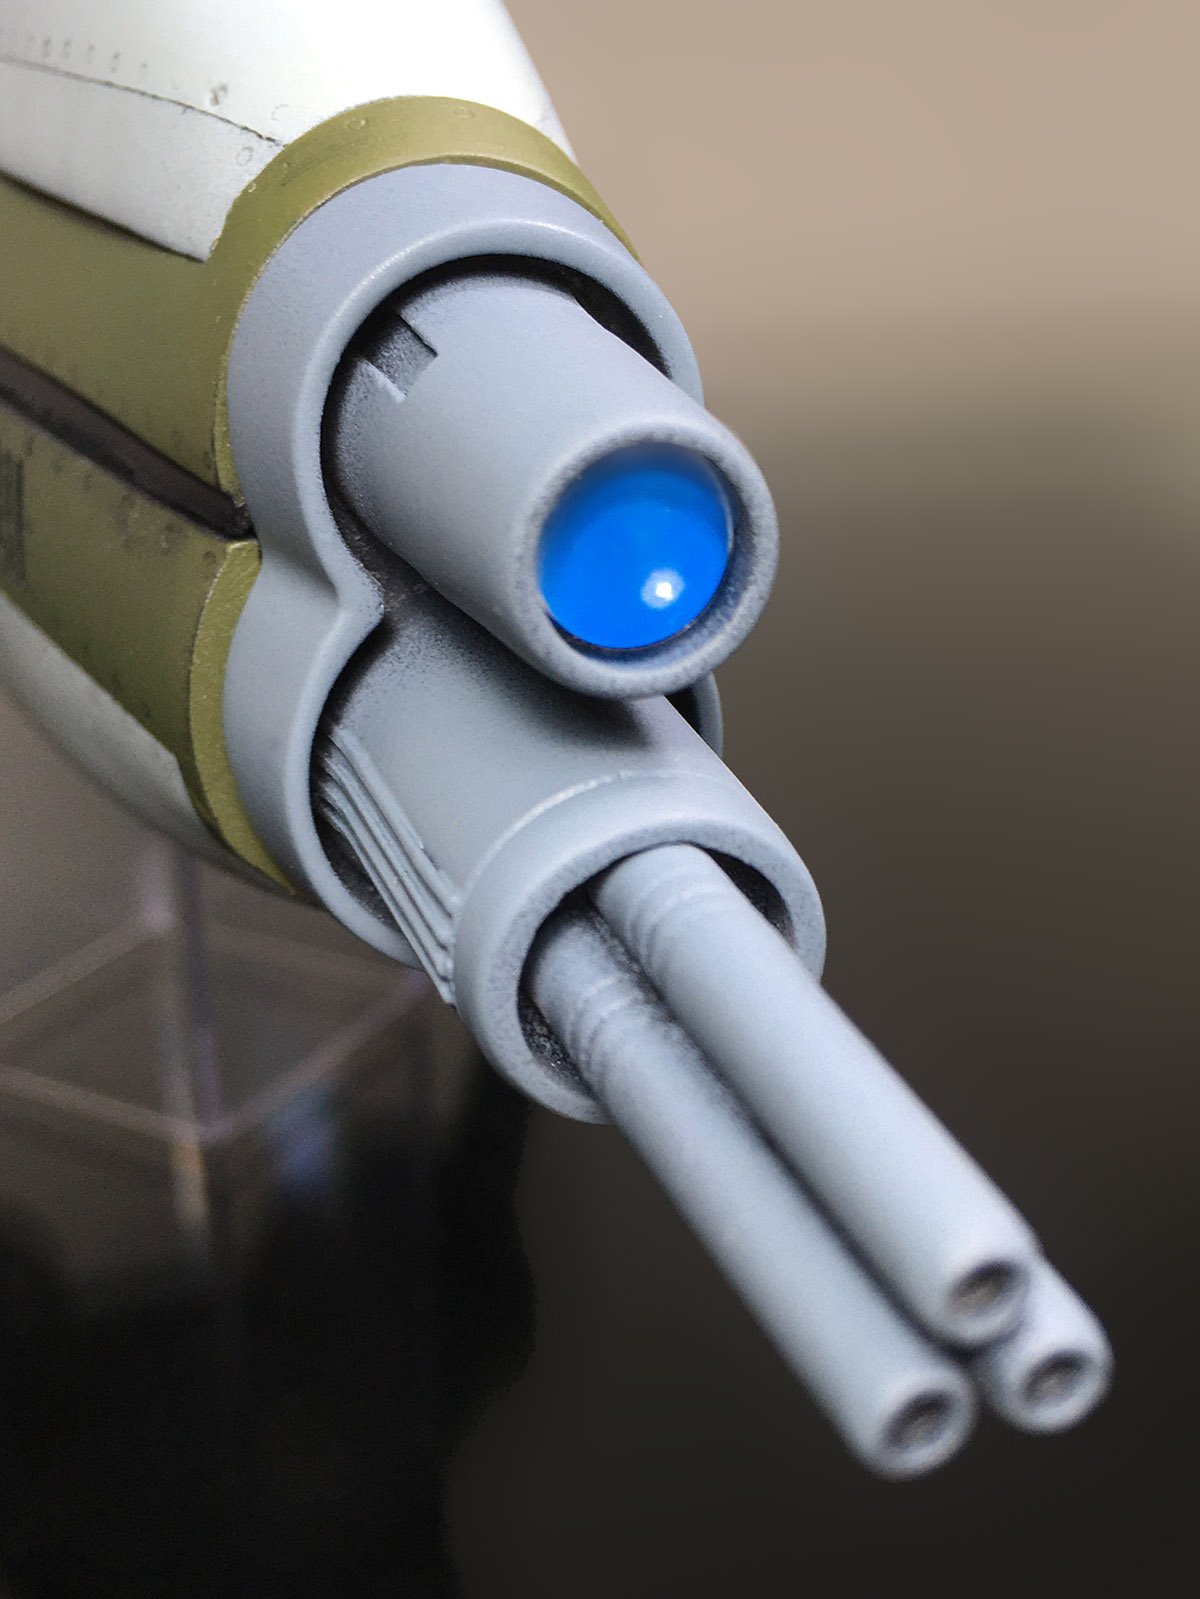
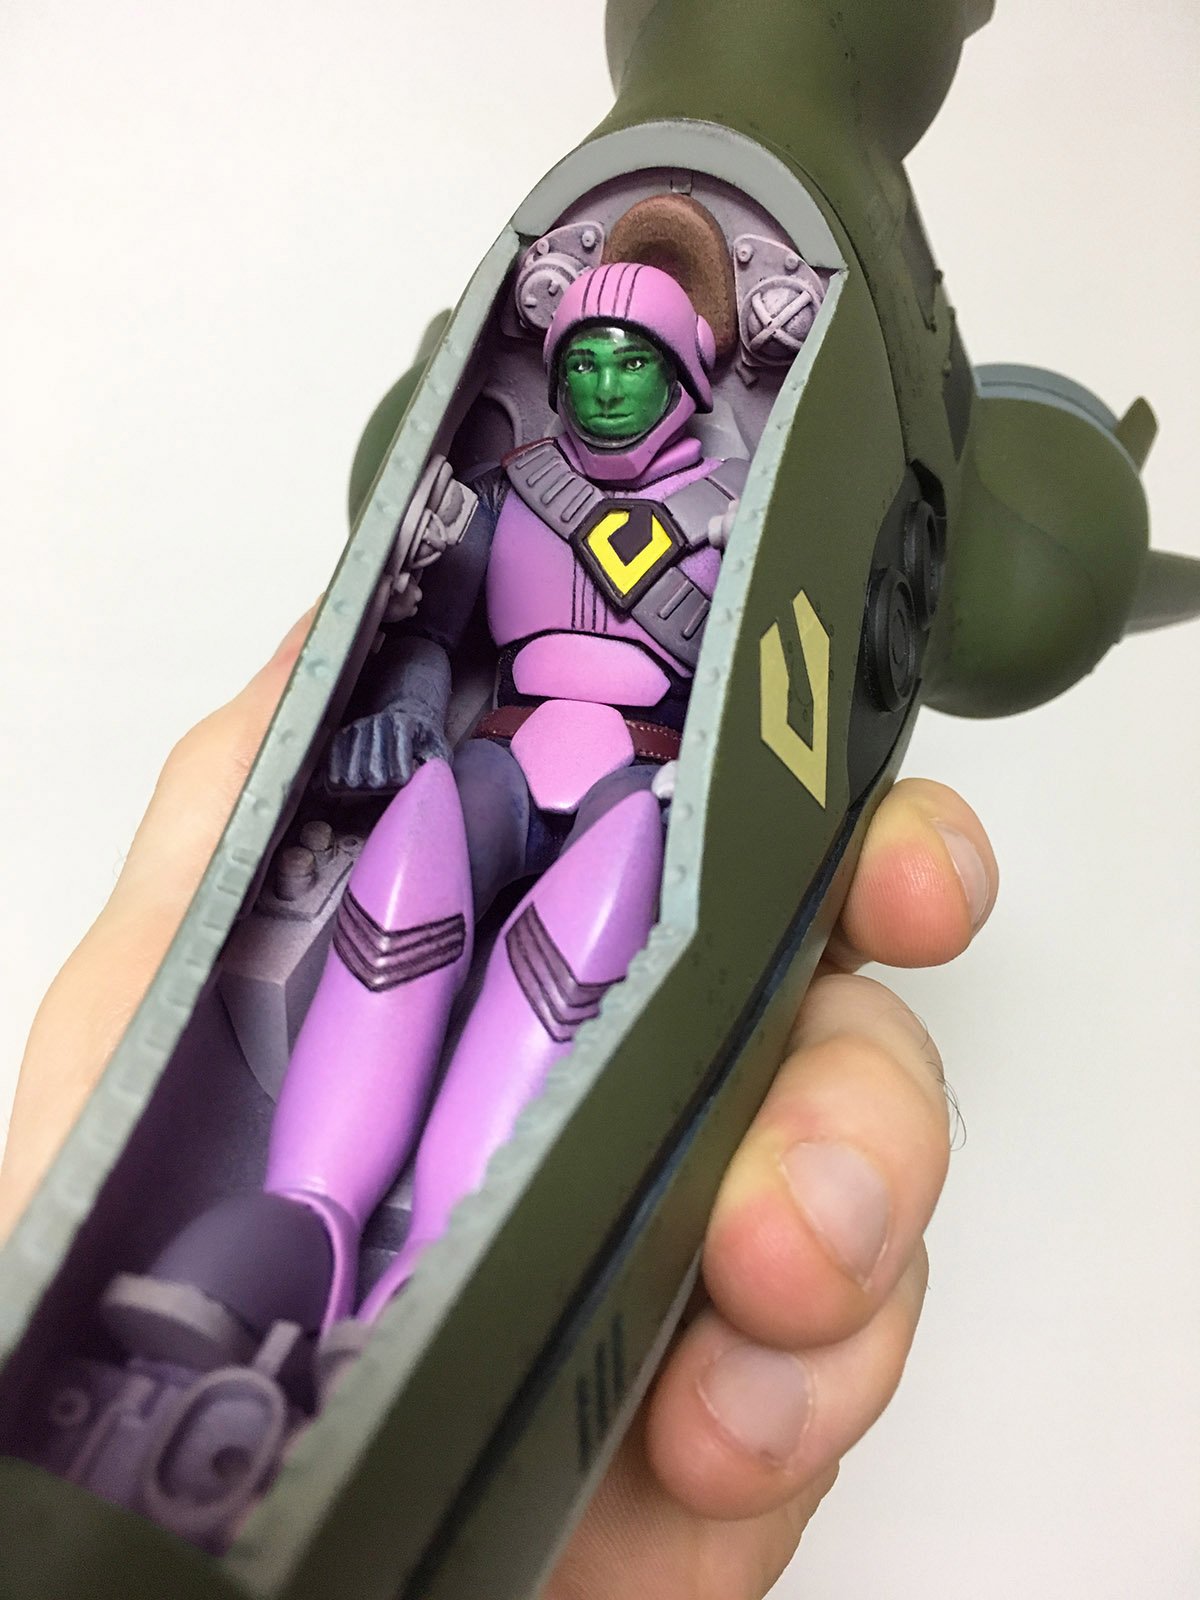
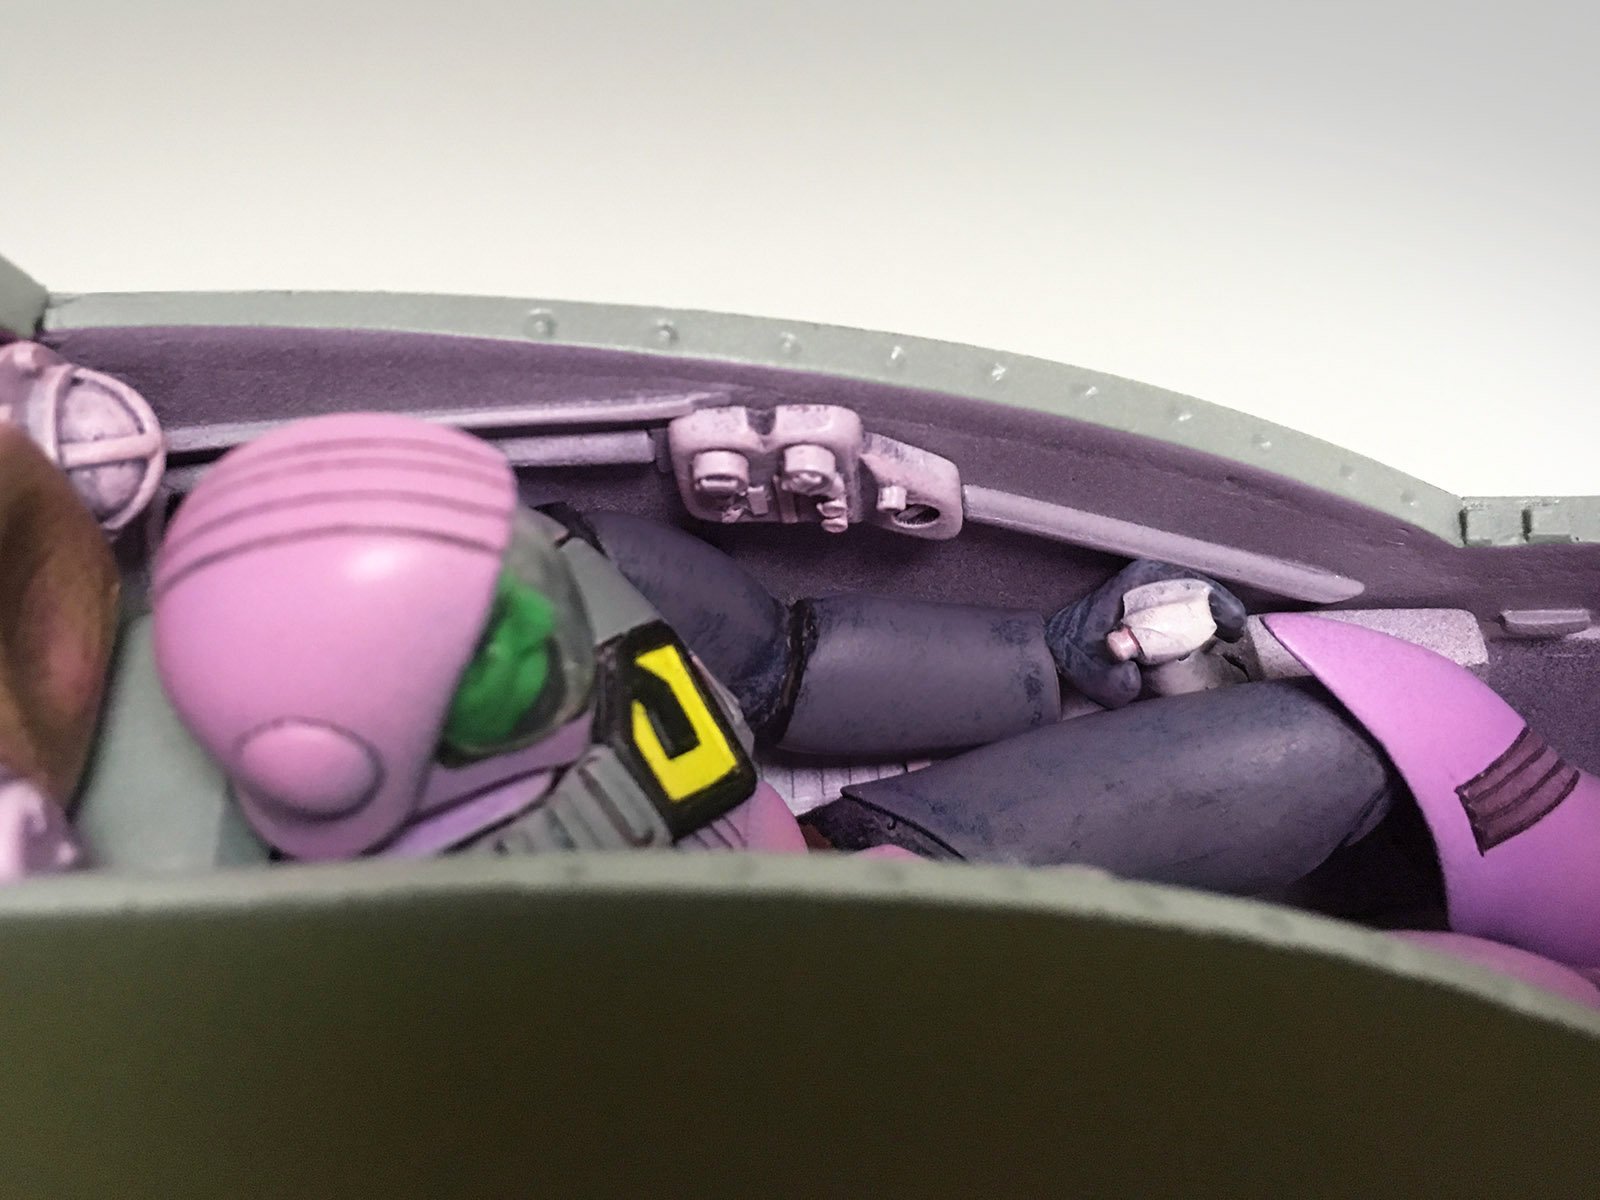
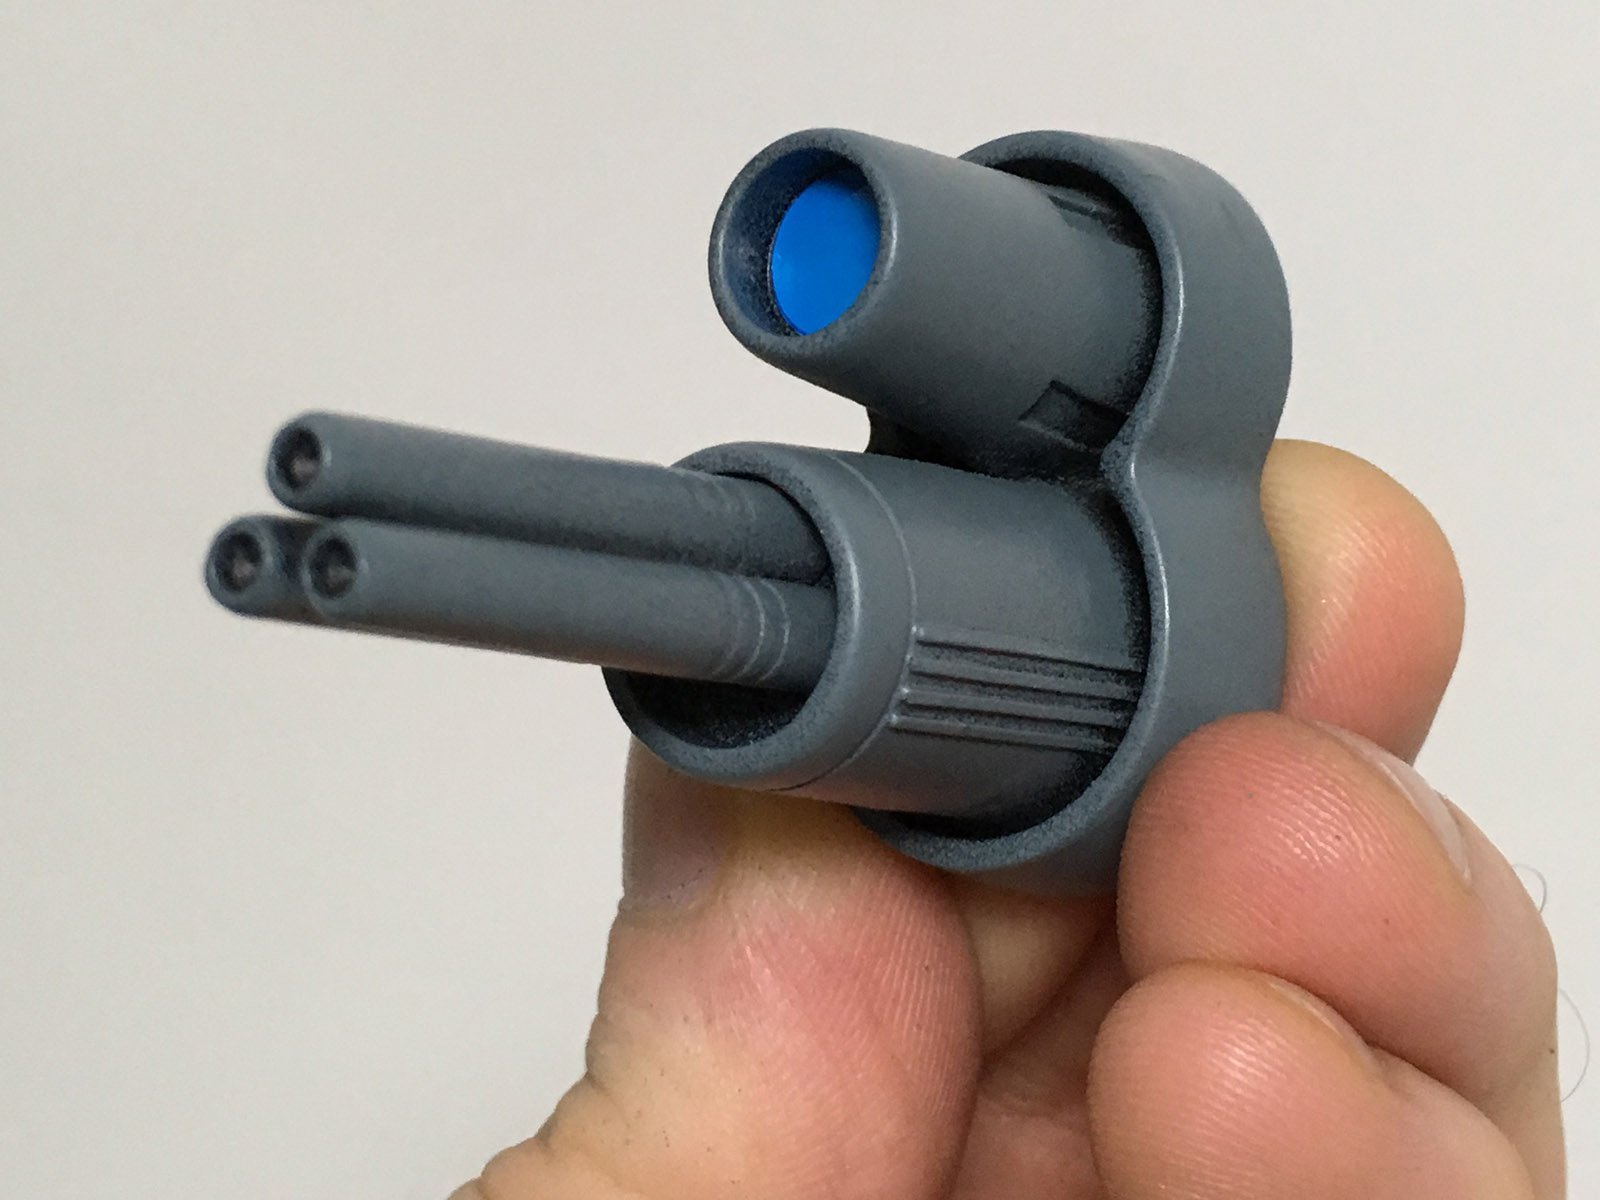
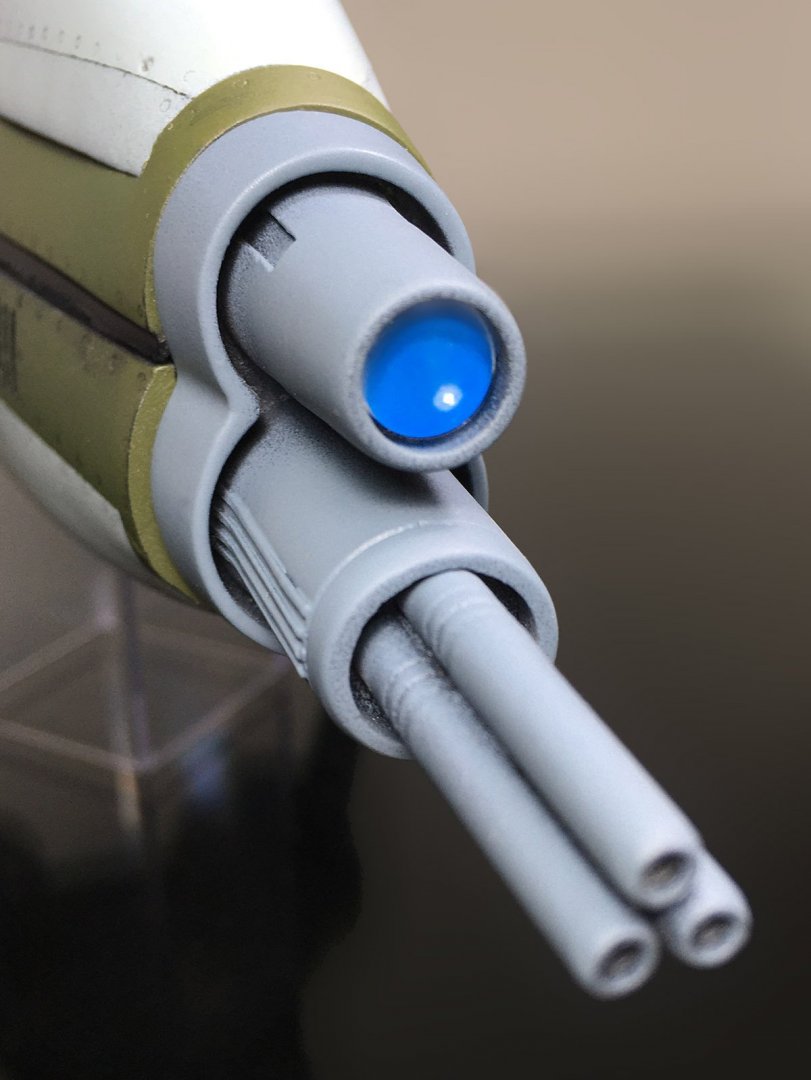
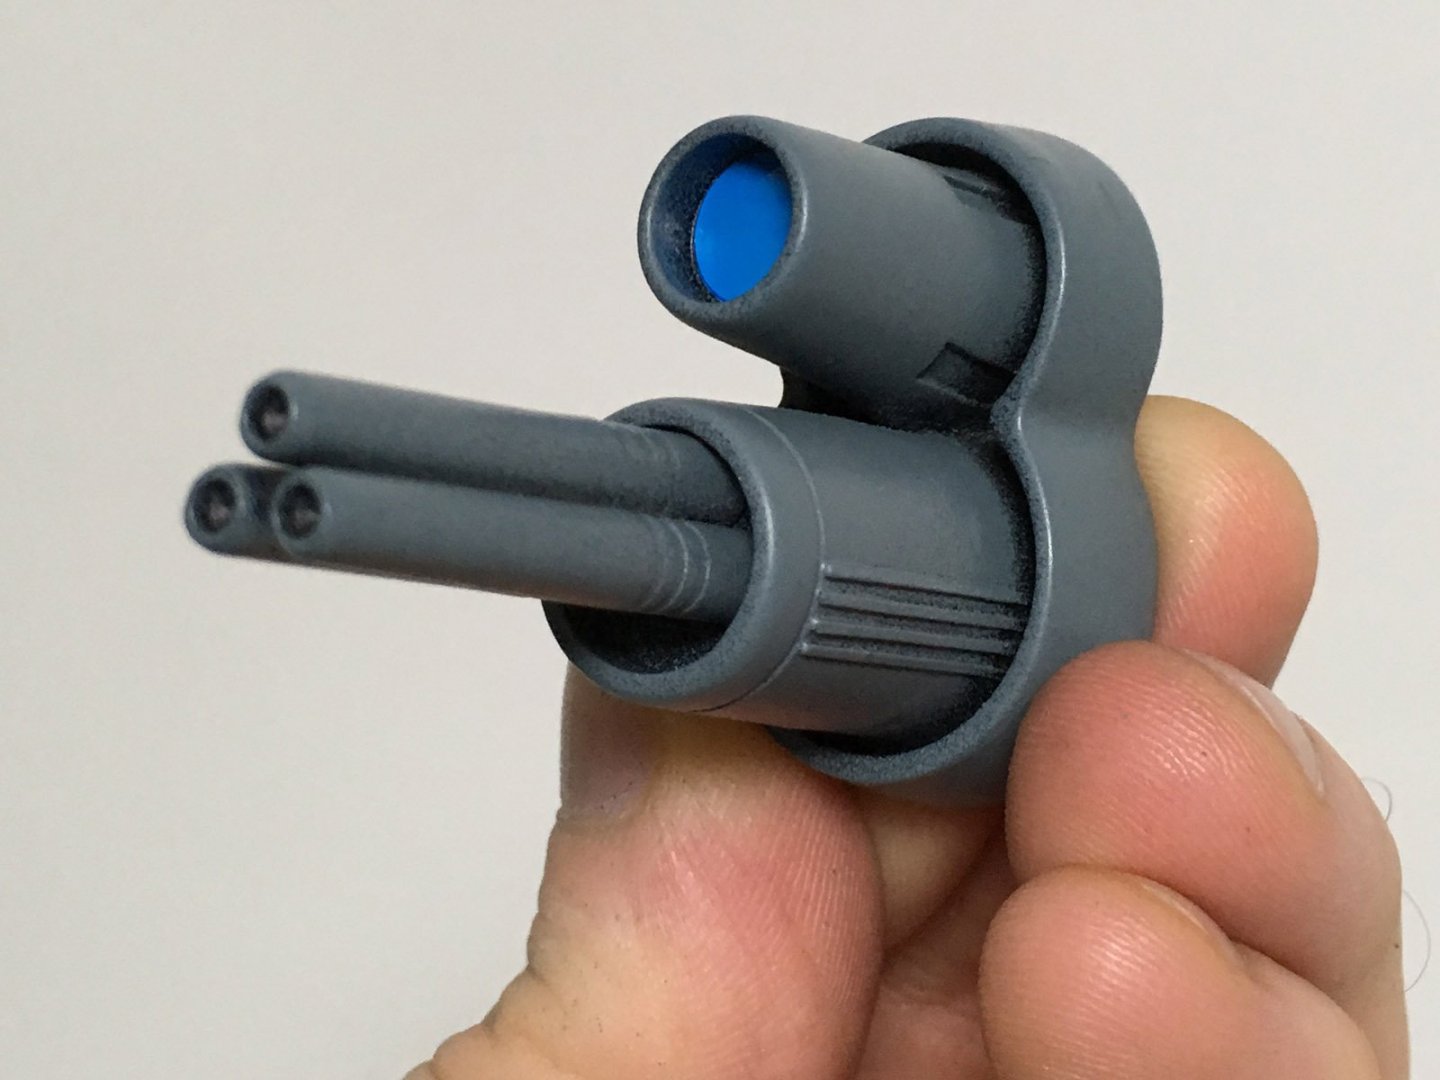
Thanks for the encouragement, guys! The pilot's mounted in the cockpit, now and forever. Note his right hand over the throttle... ...while his left hand grips the control stick, thumb resting just under the trigger. The trigger activates the triple-barreled nose gun, mounted just under the camera eye on the front of the craft; since the cockpit canopy is heavily-armored and completely opaque, this is the only source of vision for the pilot inside. Having simply matched the flat blue color of the lens as depicted in the animation, I'm now wondering if I should find an actual camera lens to mount in there instead... Wouldn't that look cool? My top coat does most of the work. I love that commercial!


-

tekering's BItComp entry #2 - Quamzin resin kit
tekering replied to tekering's topic in The Workshop!
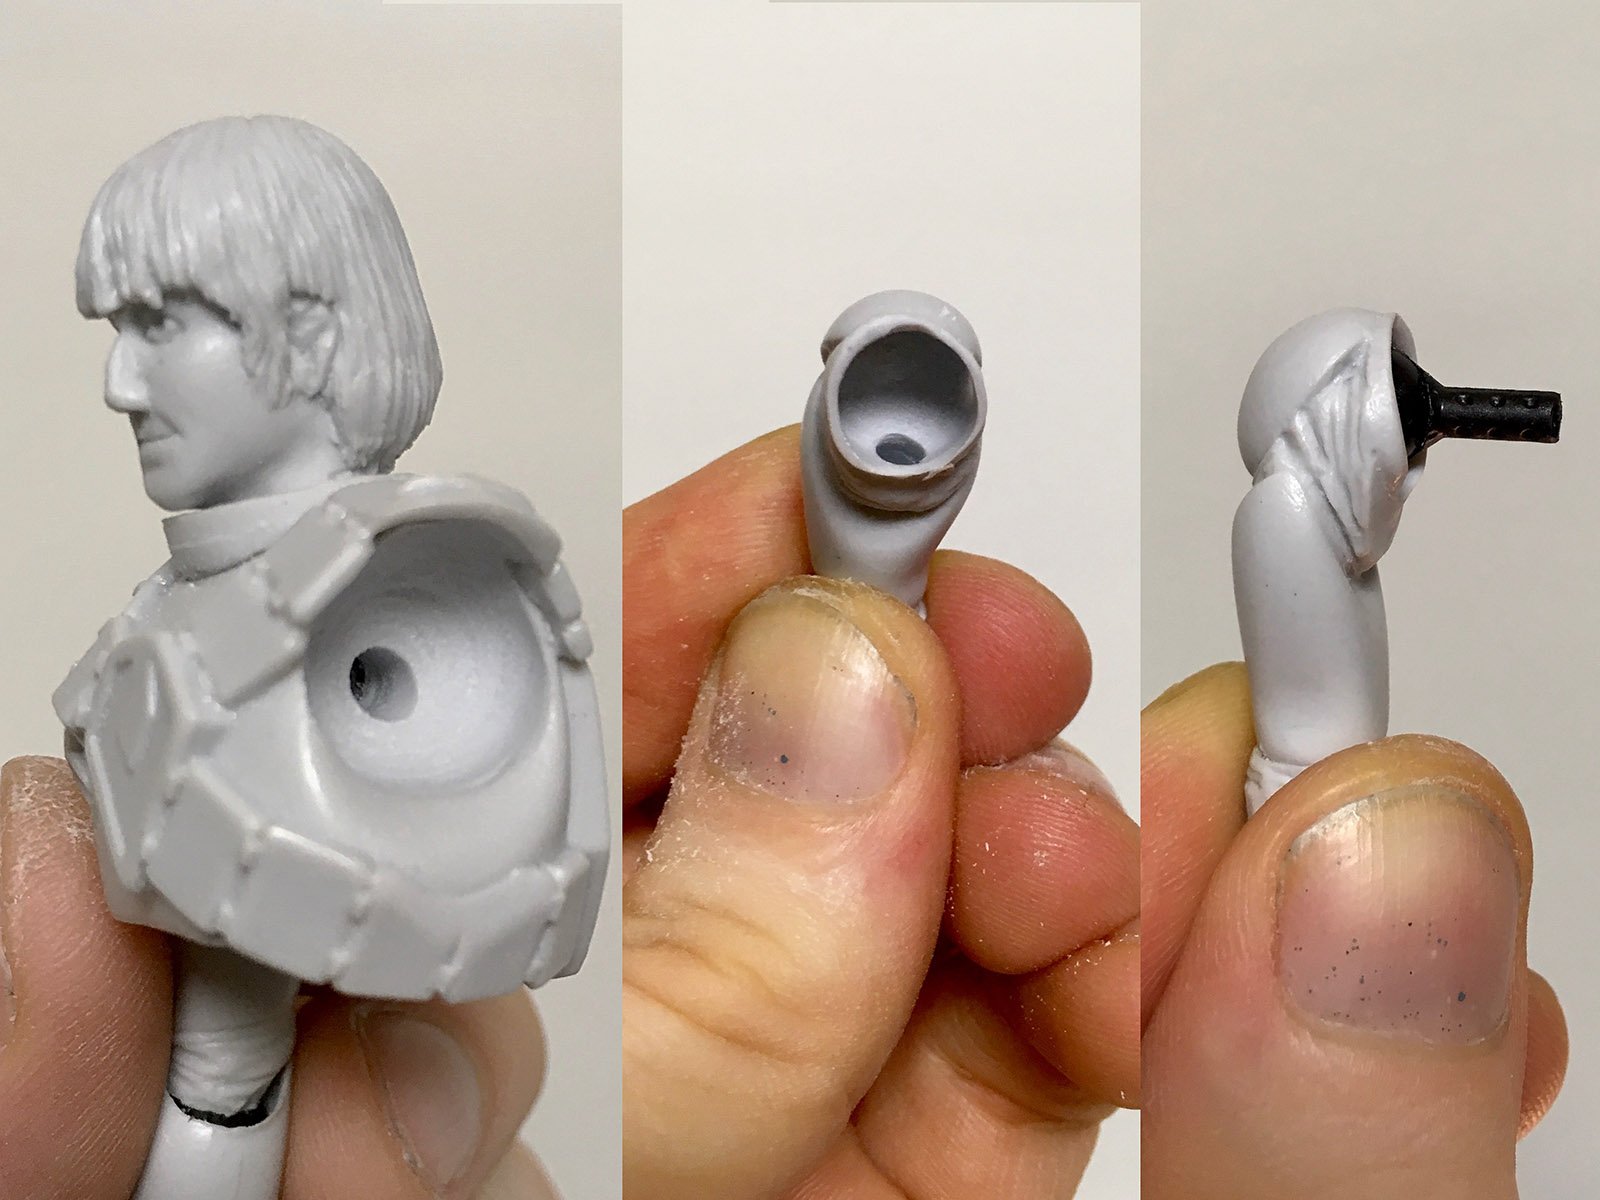
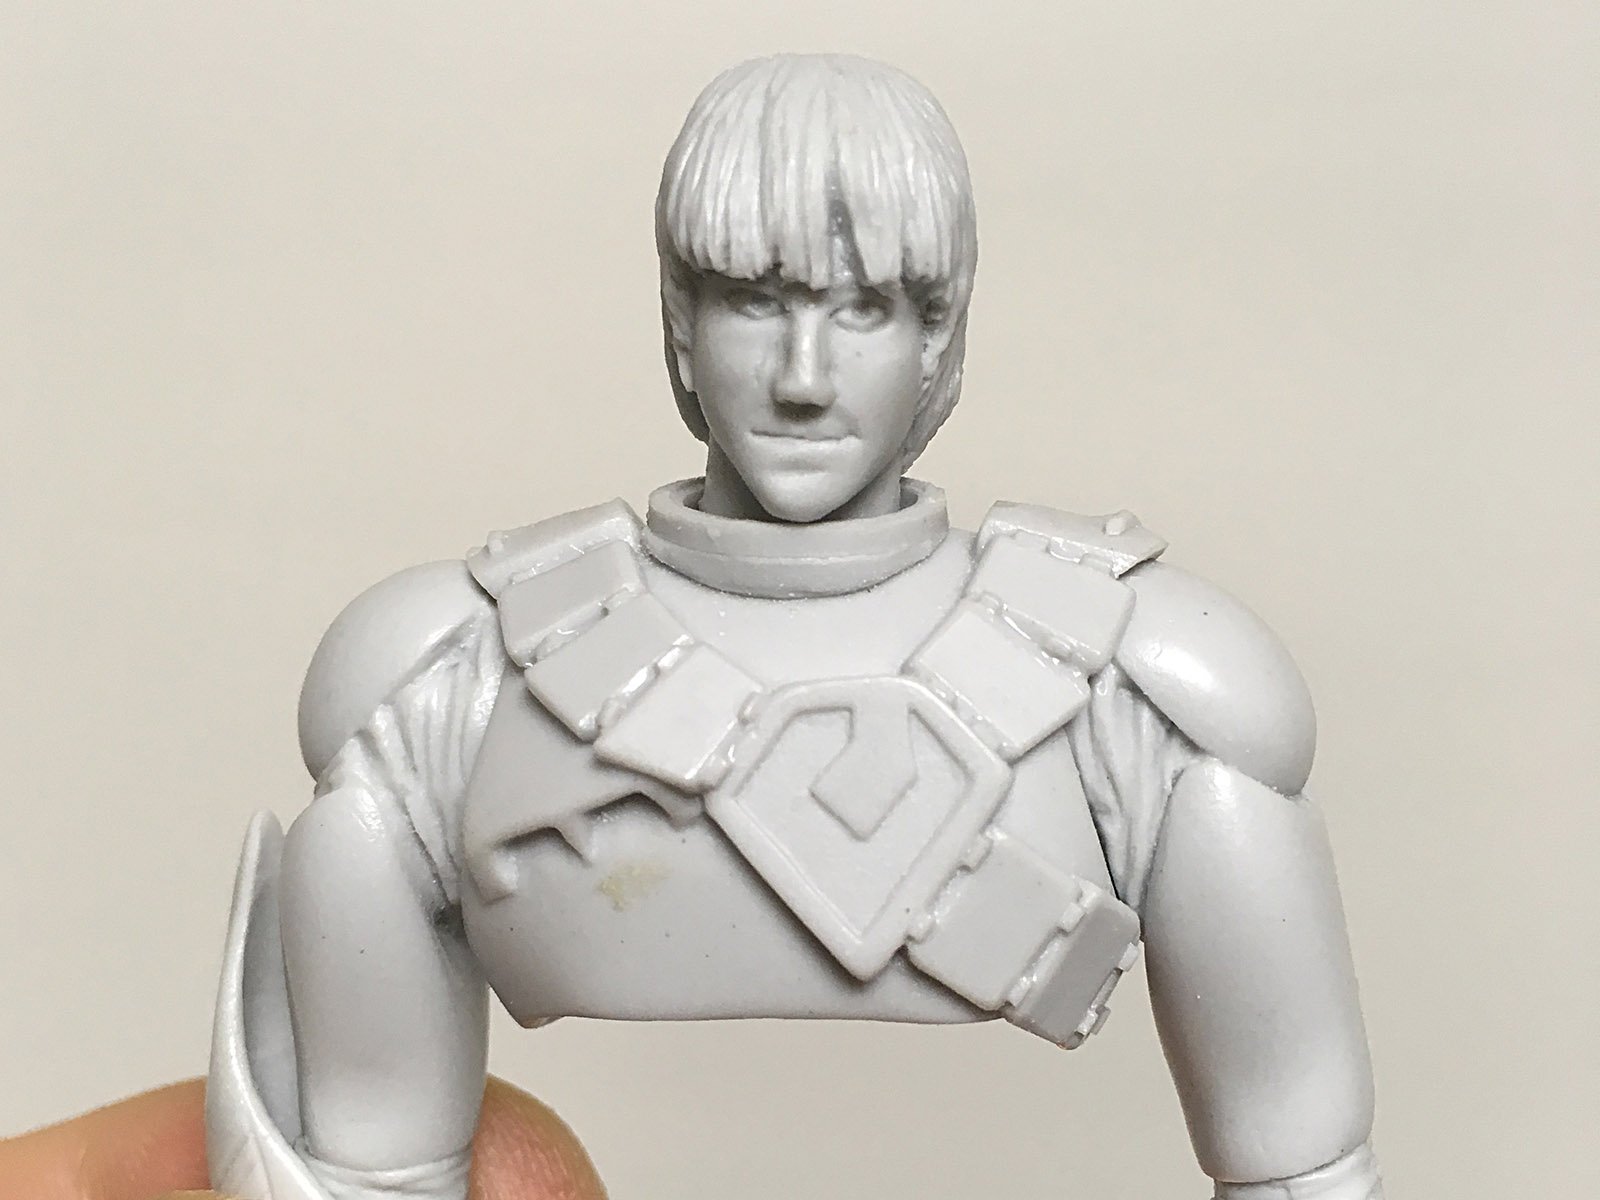
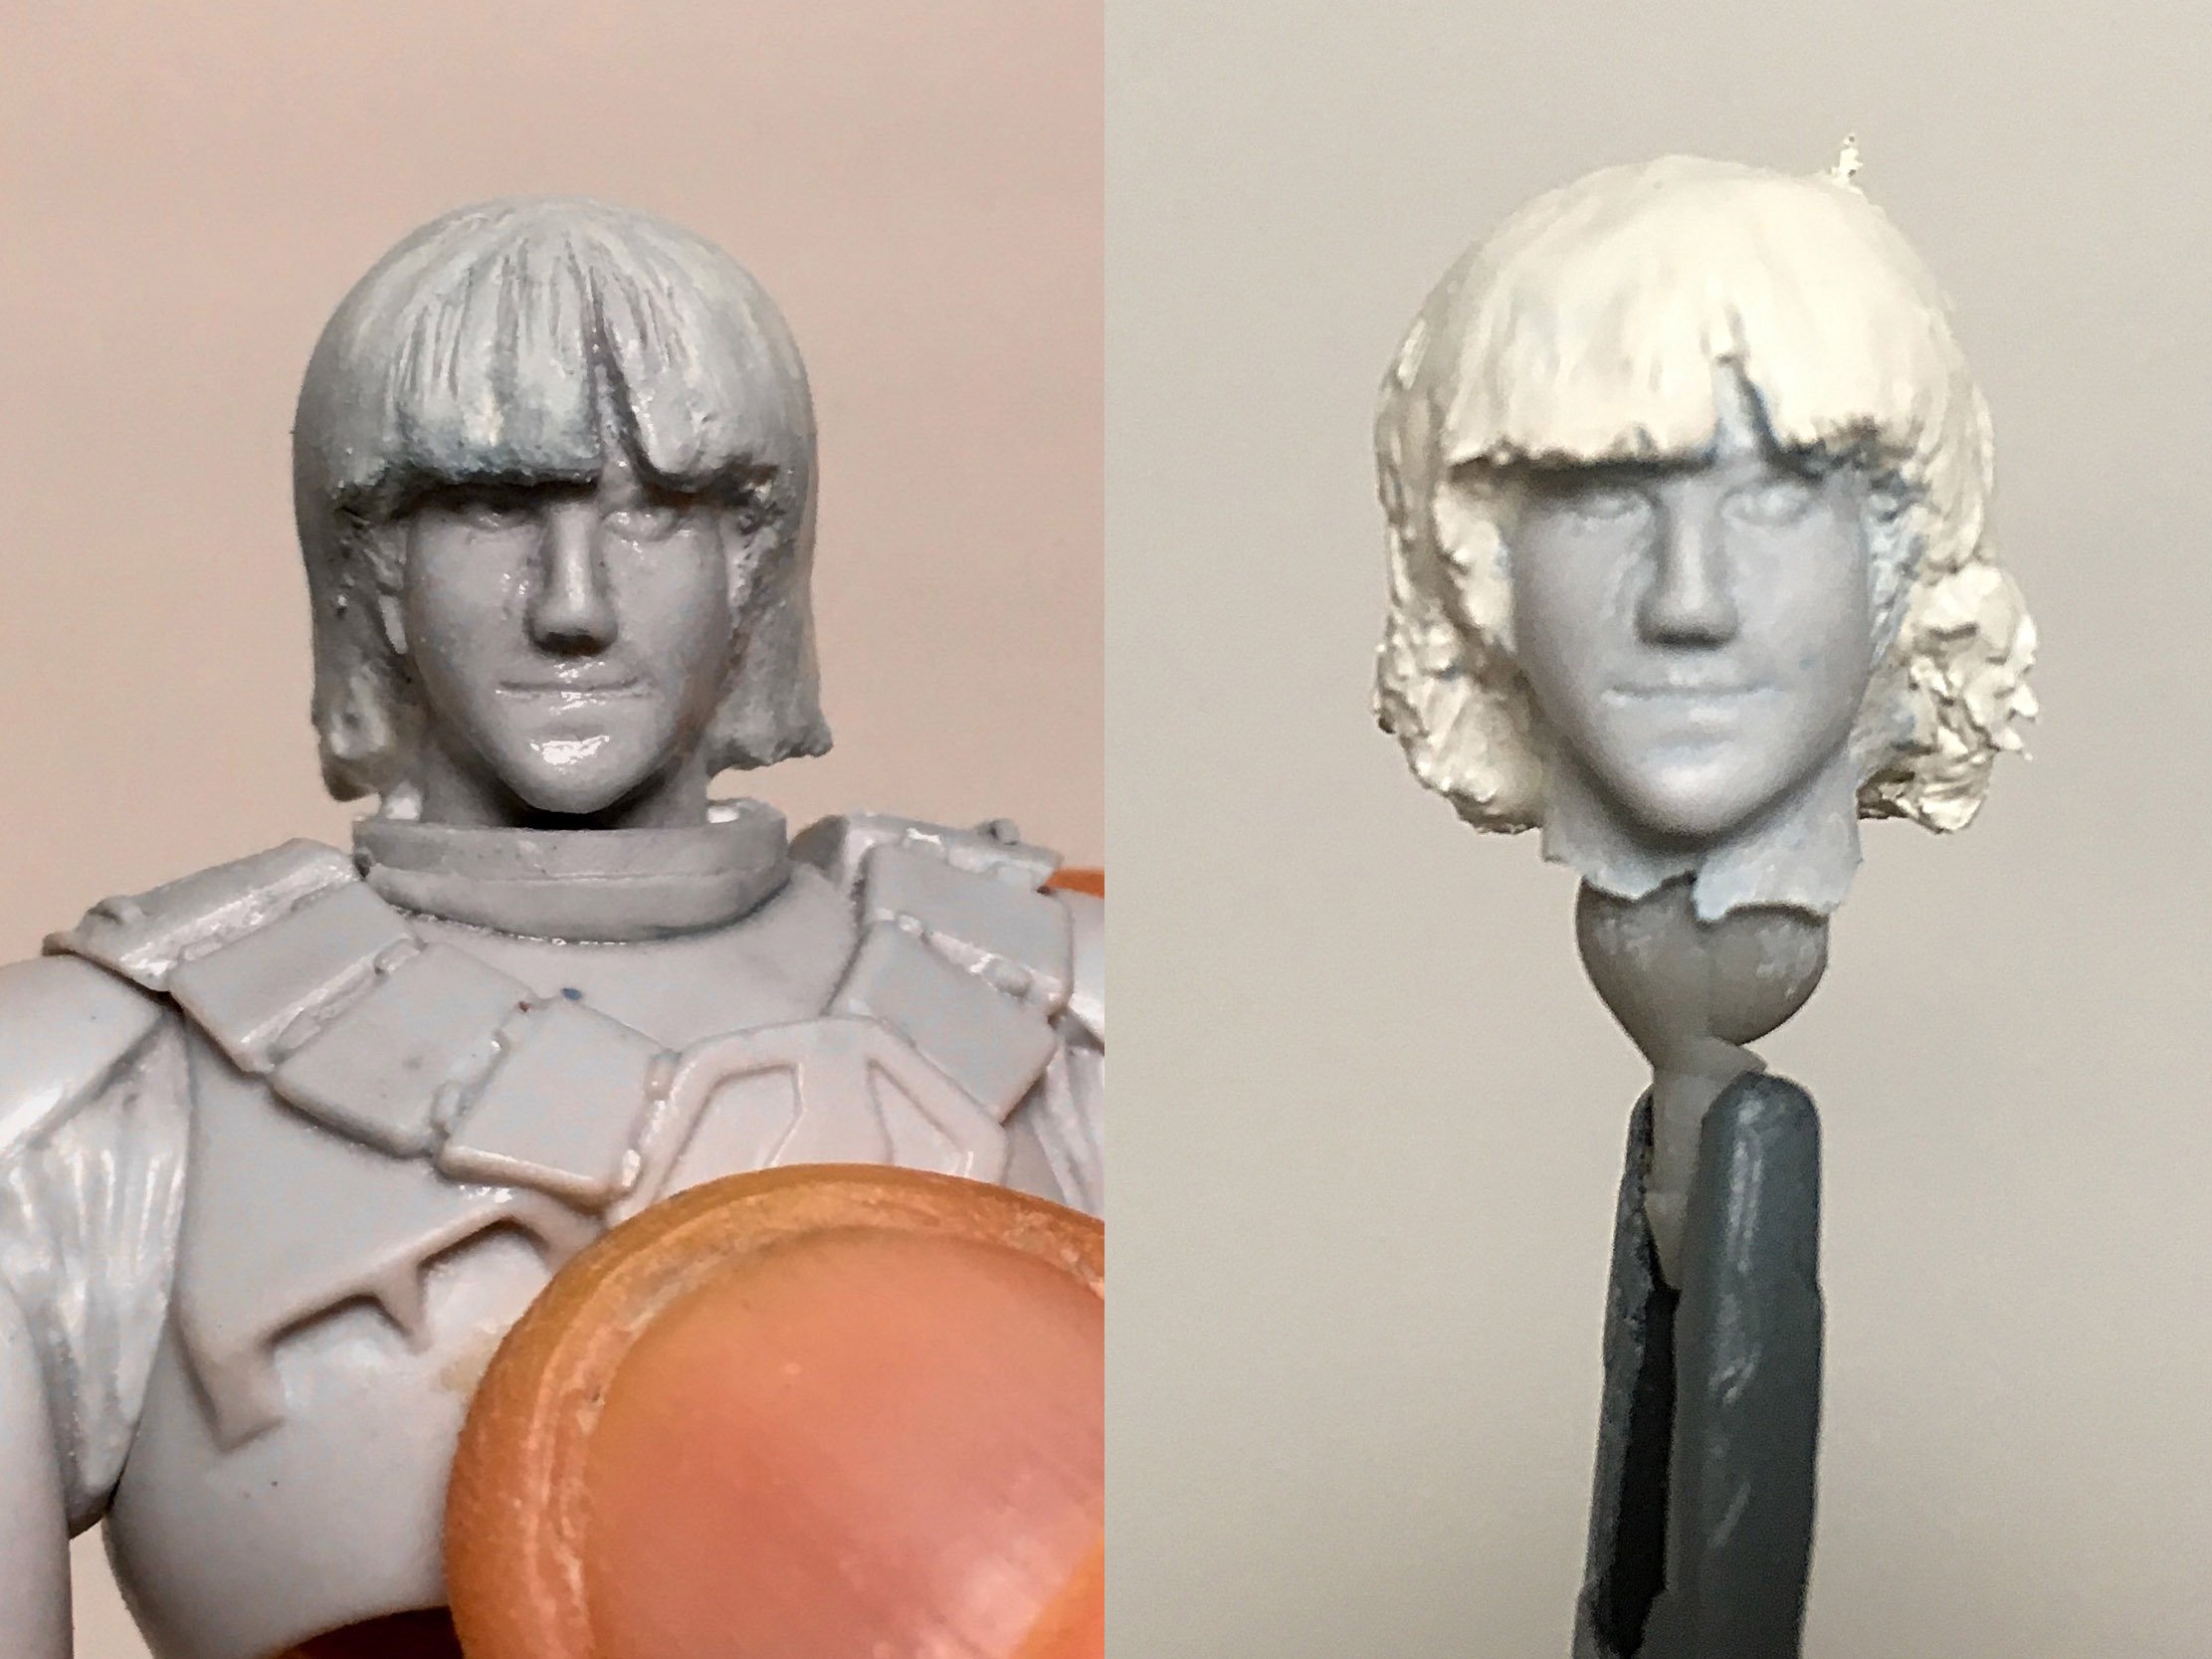
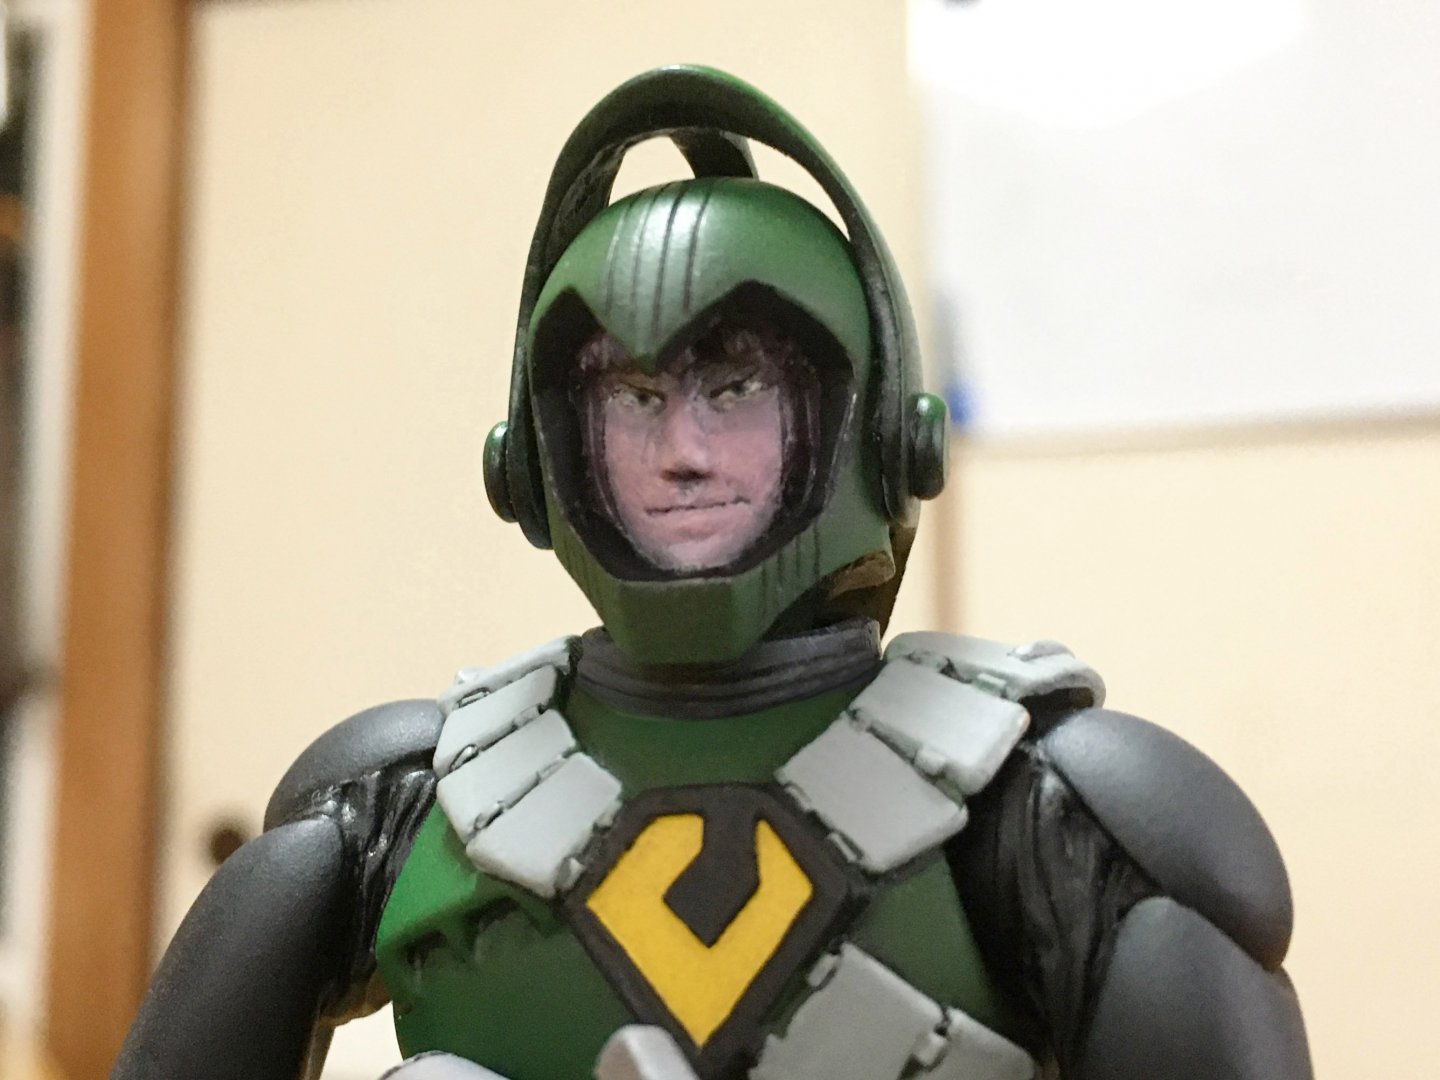
Your commitment to quality is unparalleled! I tried 2000-grit sandpaper, buffing, and polishing compound, but that's as clear as I could get it. Oh, I love that. I'm still not completely satisfied with the hair, but I'm very pleased with how Quamzin's eyes turned out... ...and the cut-joints I added to the thighs (in combination with the ball-jointed knees) allow for some more dynamic standing poses.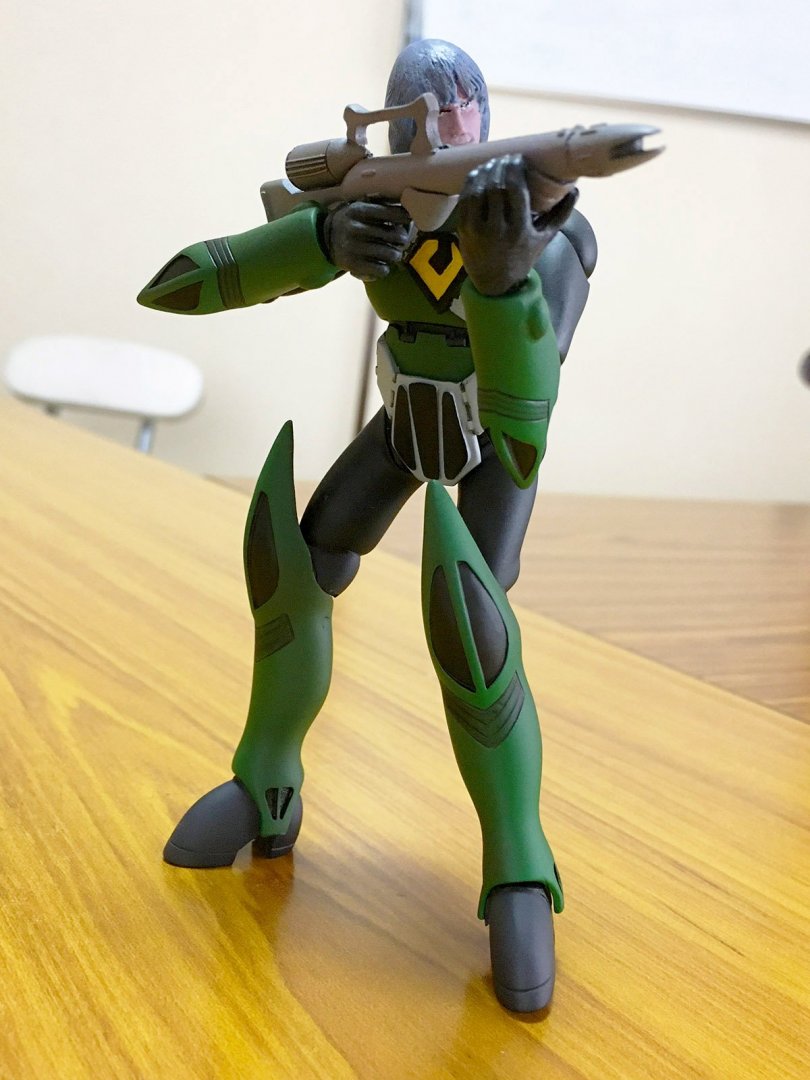

-
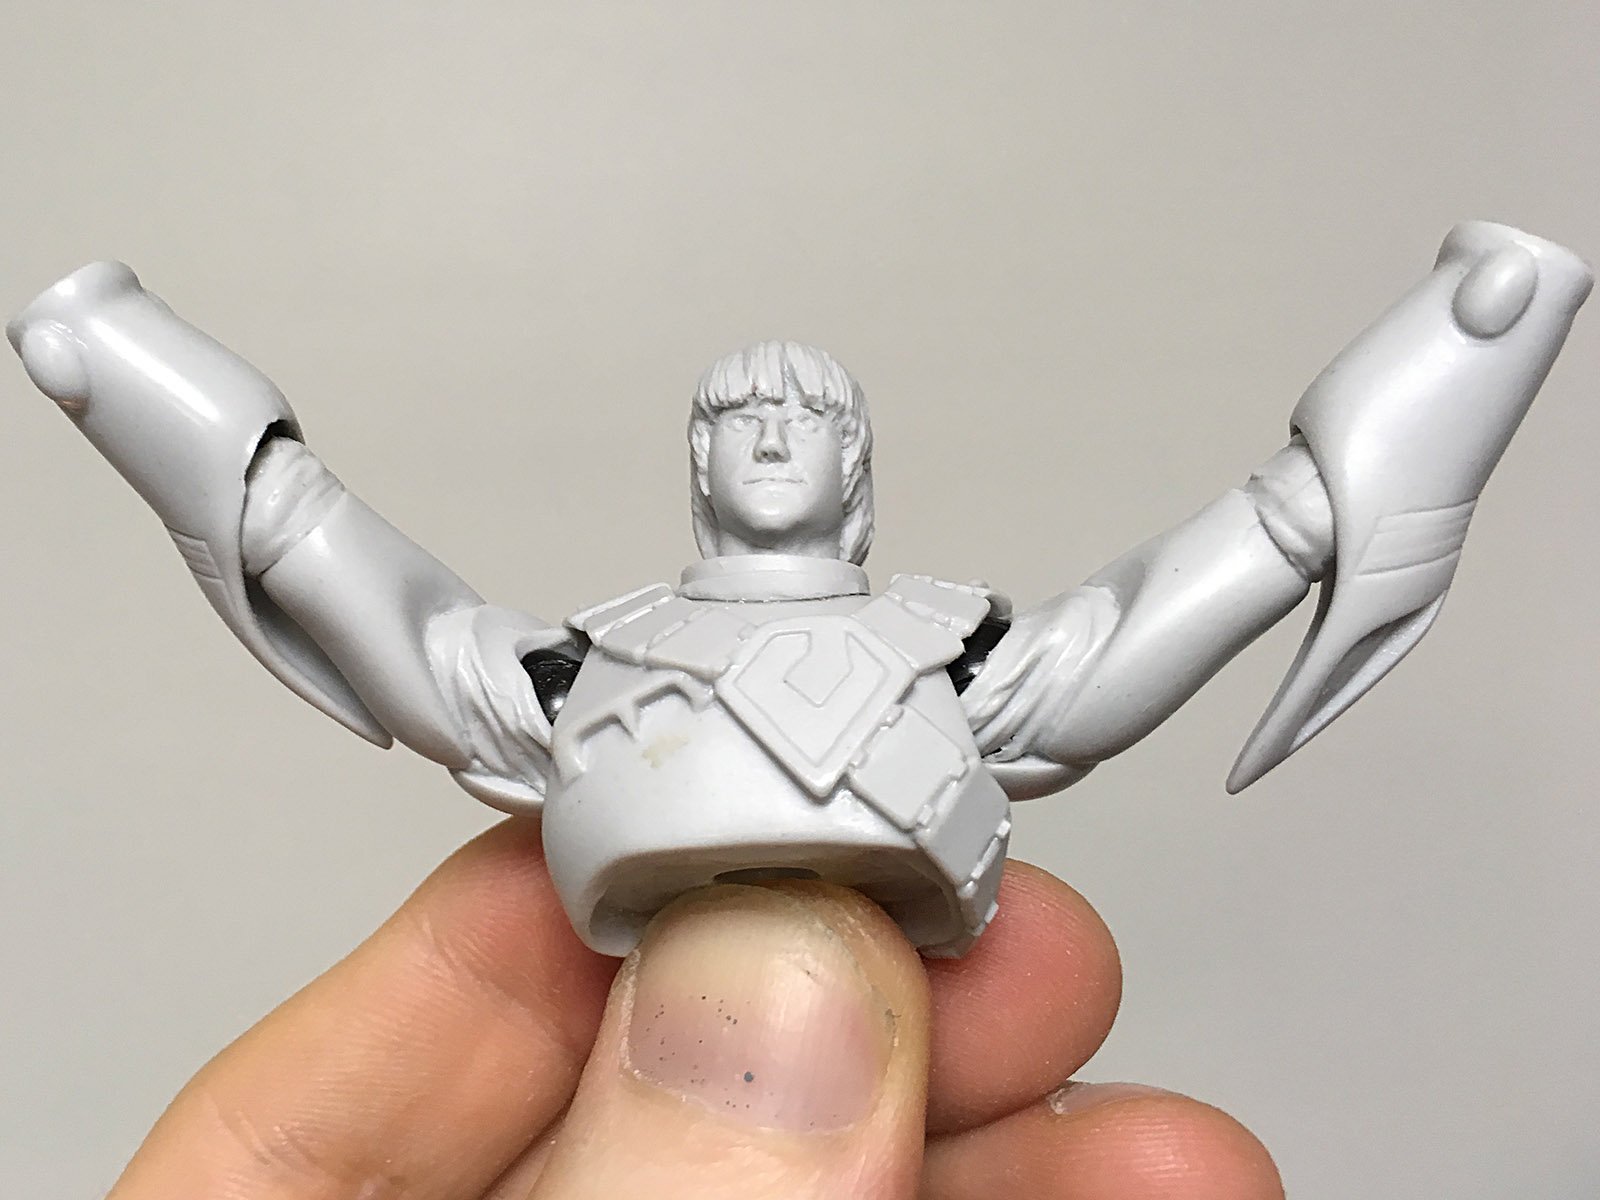
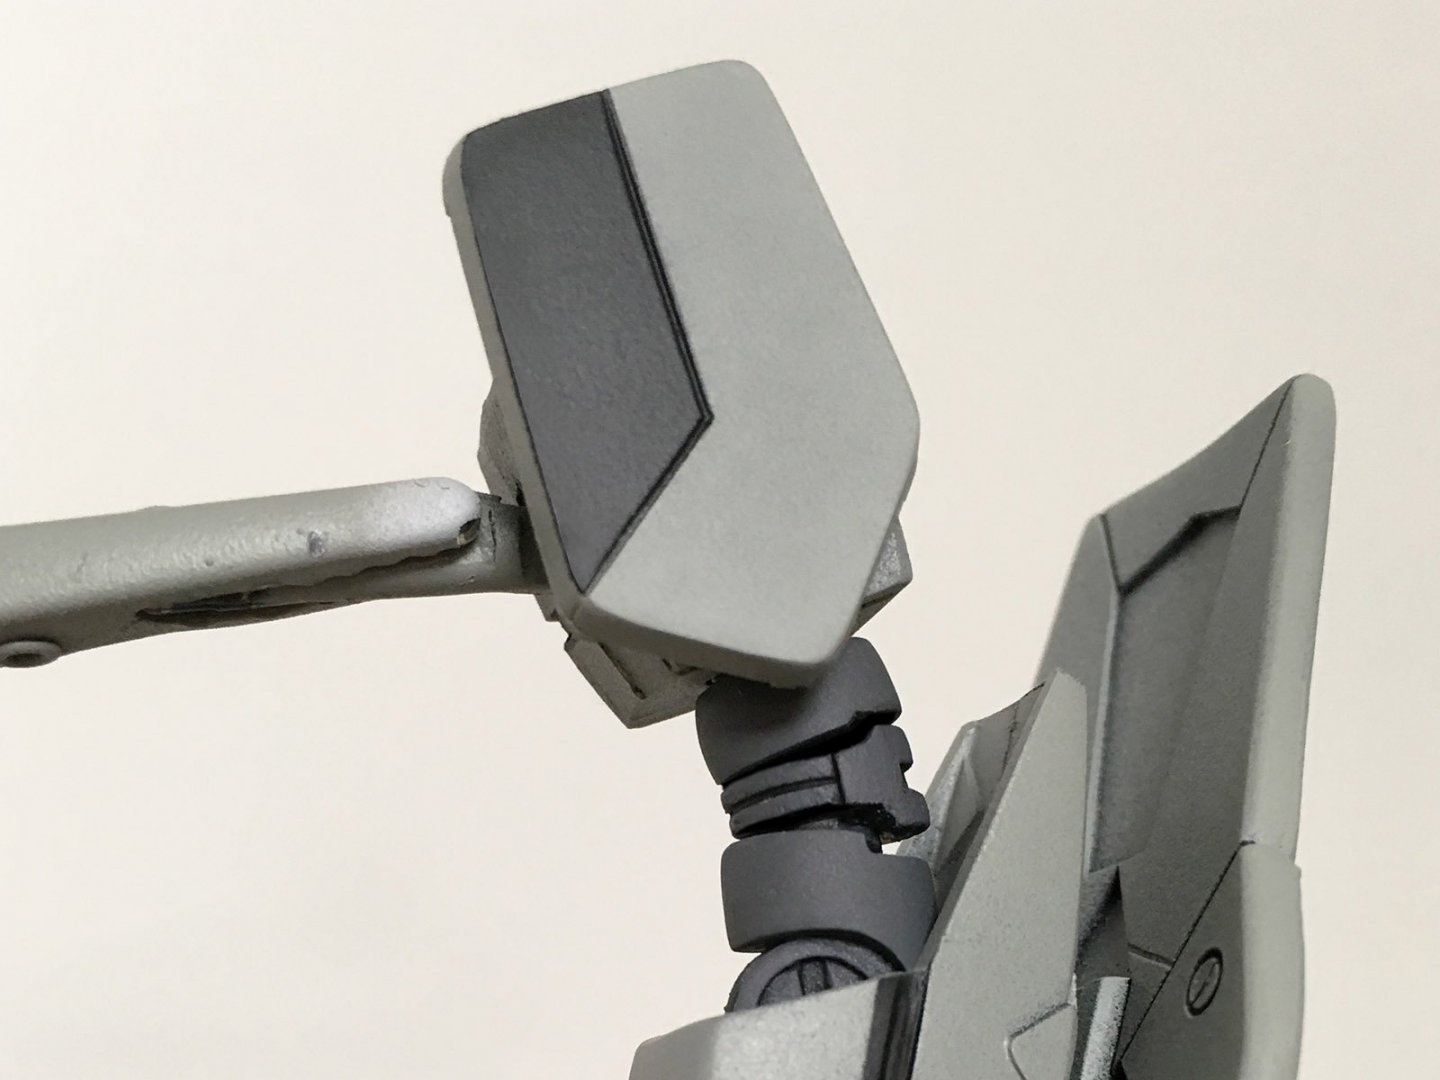
Another minor modification I made to the kit was to articulate the biceps, which both increases range of motion and enhances the figure aesthetically. Compare the animation model sheets to Yamato's figures, and you'll see one significant problem is the shape of the biceps on the toys. What is fat and round in the line art -- suggesting an armored joint -- becomes a poorly-proportioned flat cylinder instead. My earlier photo shows the stock biceps on the resin kit weren't a whole lot better. So, I started by cutting the part into separate pieces... ...and then hollowing them out so that I could fit a joint inside. Properly painted and installed between the arm and the shoulder, it now looks more accurate and increases articulation.
-
What's with the funky color scheme?
-
Japanese pro tip: Safely removes Tamiya panel-line accent colors and Gundam marker ink without damaging enamel or lacquer-based paints.
-
Ah, that explains the lack of yellow highlights. I stand corrected. Close, but his apparently didn't have the yellow stripes on the canards...
-
Surprise! Yamato produced transformable toys of both those variants over a decade ago.
-
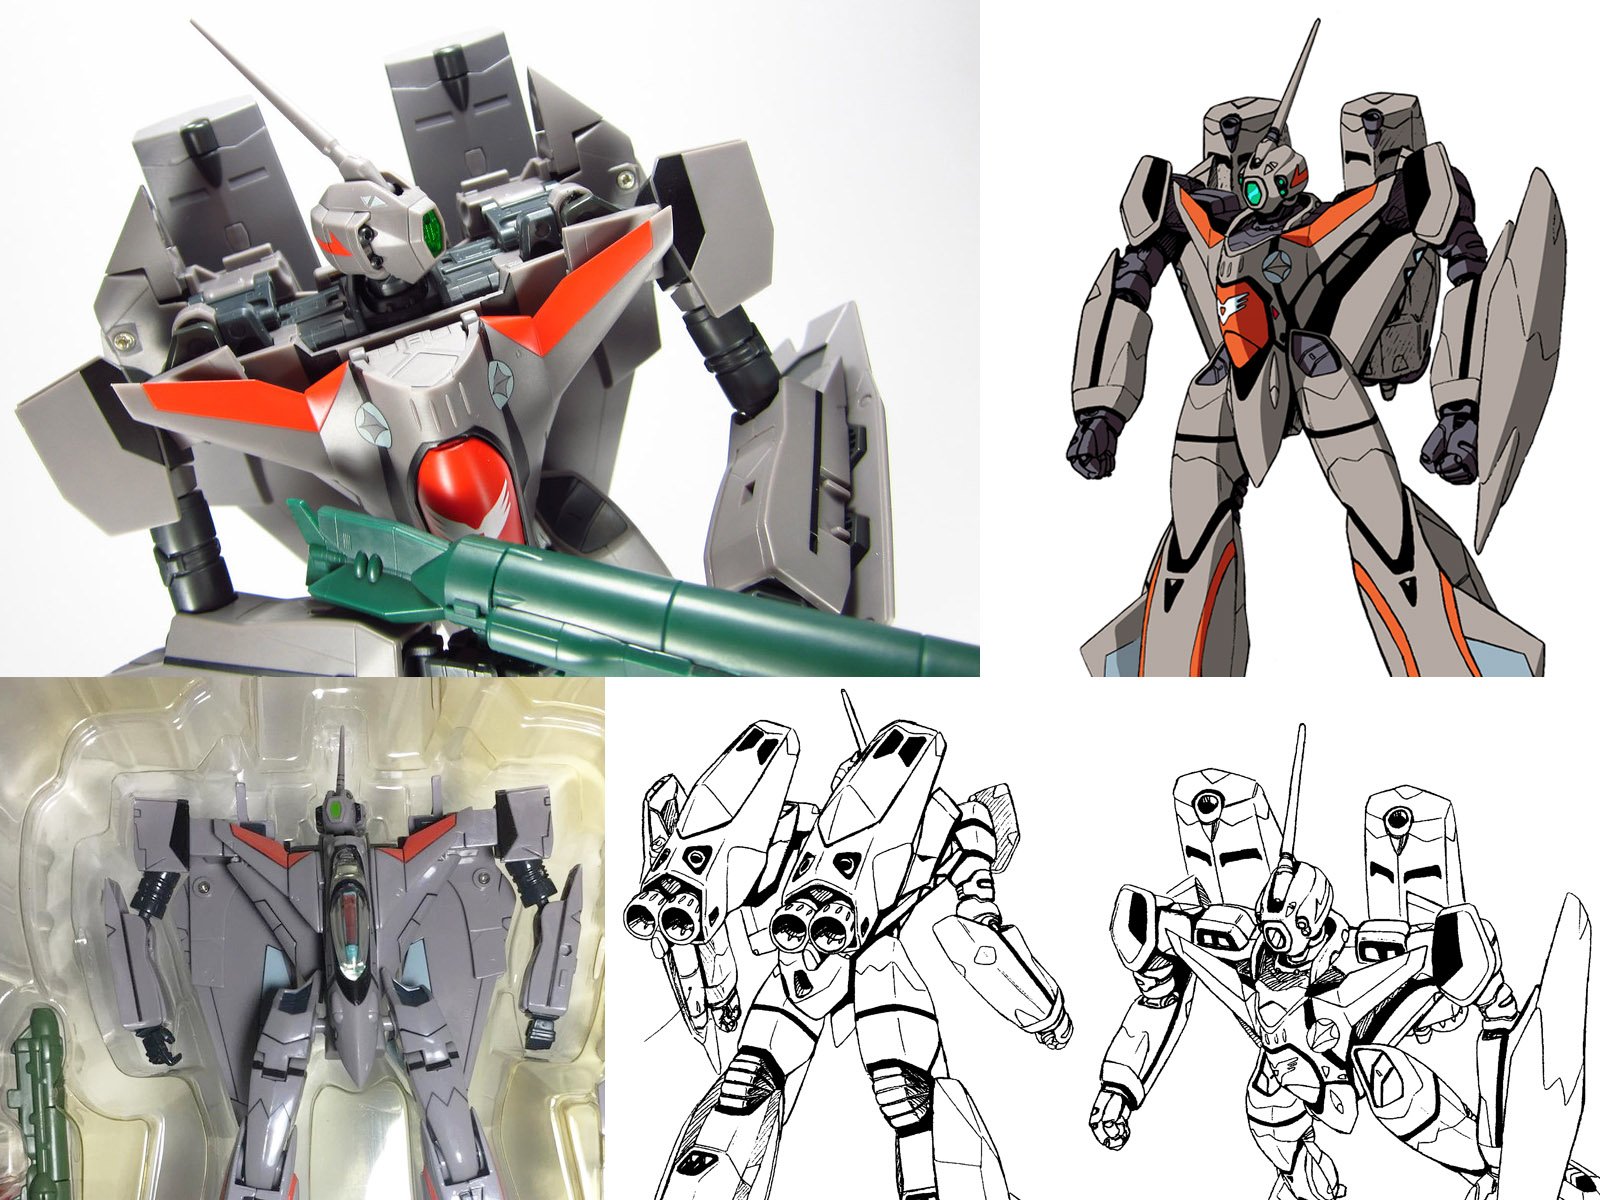
Your most recent Macross or toy purchase! General thread.
tekering replied to Gakken85's topic in Hall Of The Super Topics
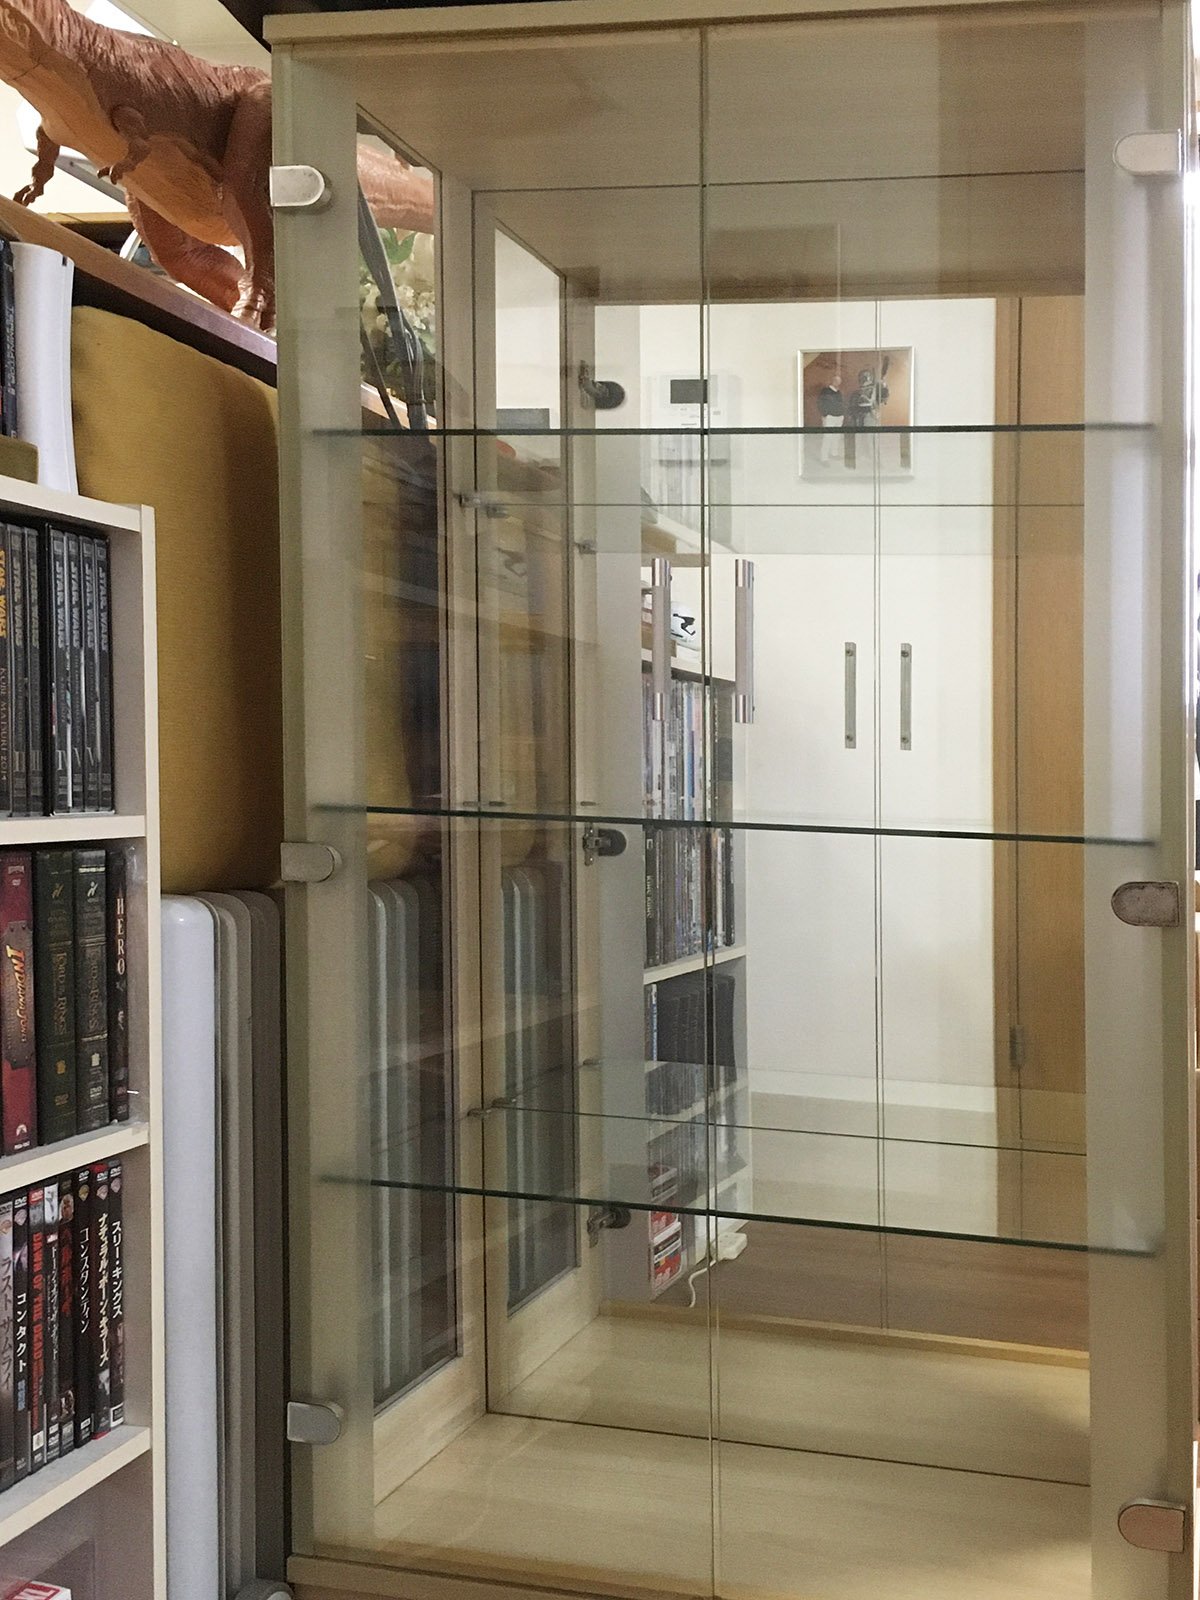
I just scored this mirror-backed glass showcase for only 7000 yen! I love virgin shelves. So much exciting potential.
-
Disney seems to have run out way back in 2007, when this was first slated for release. It's been in development hell for the last 12 years!
-
El Camino was one of the best films he ever made. It's just a shame he didn't live long enough to bask in the accolades.
-
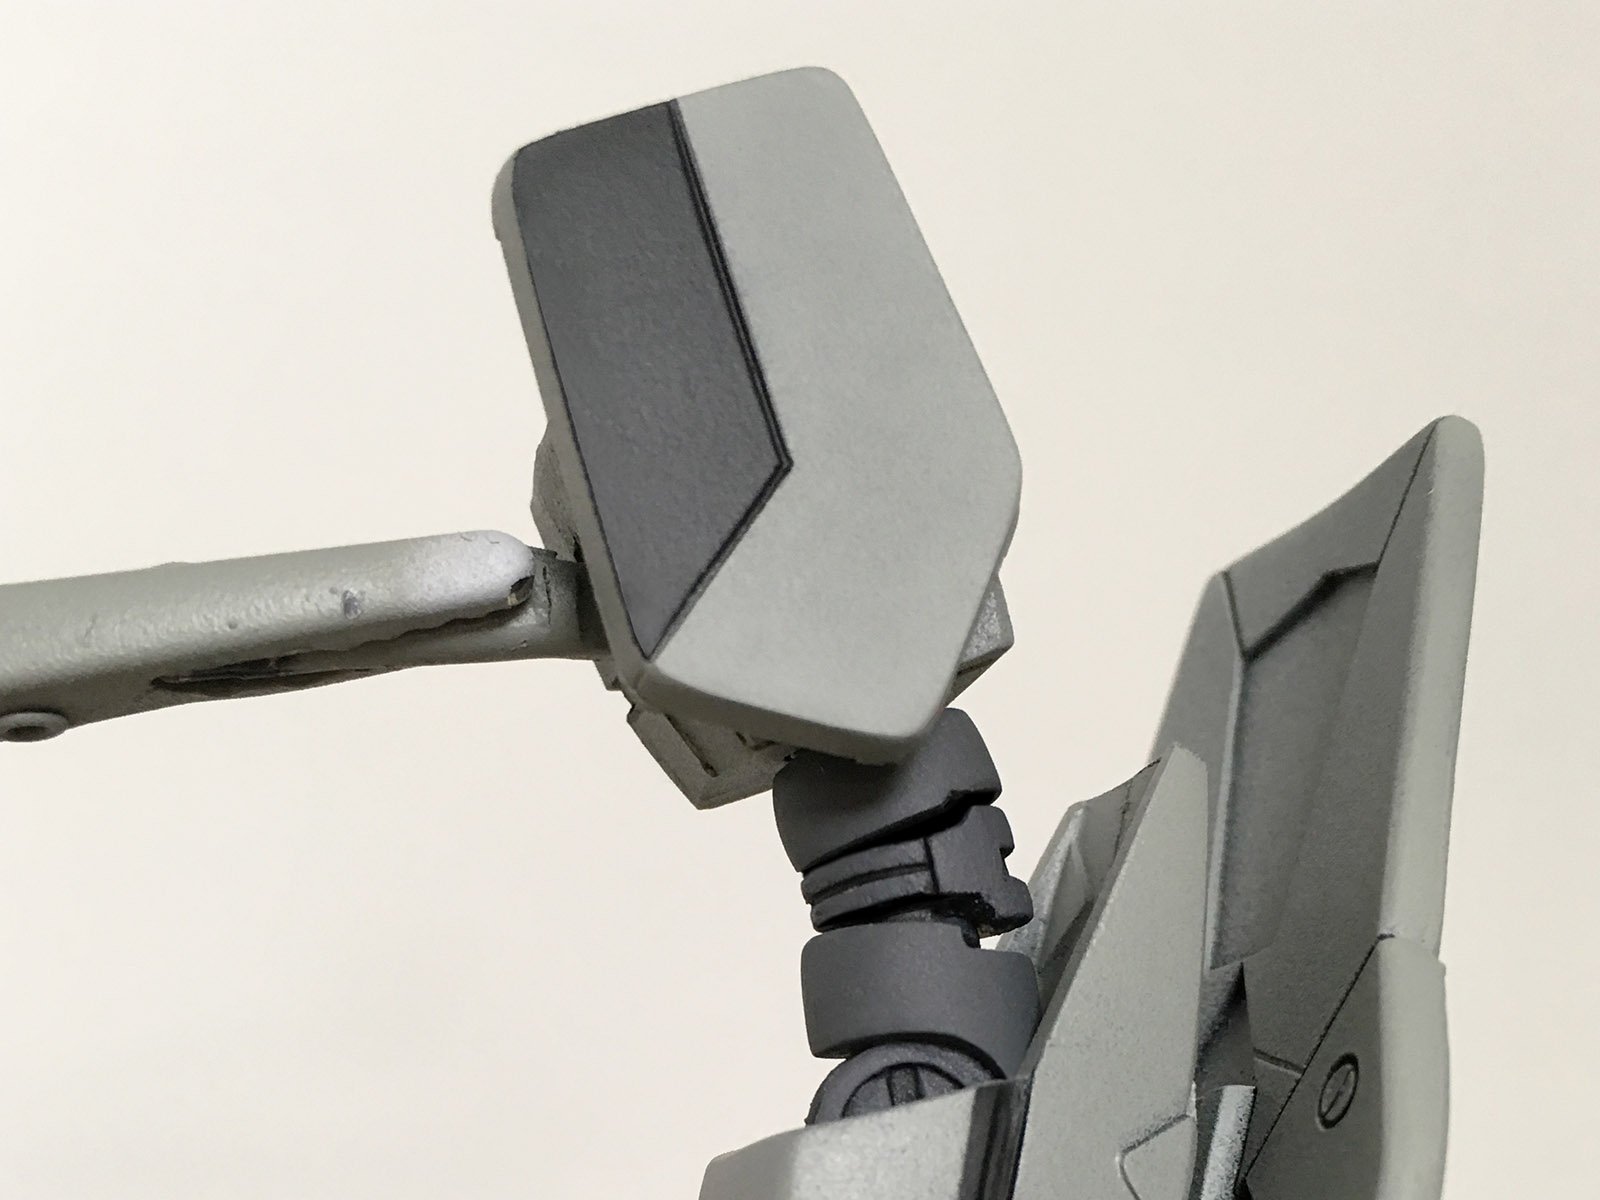
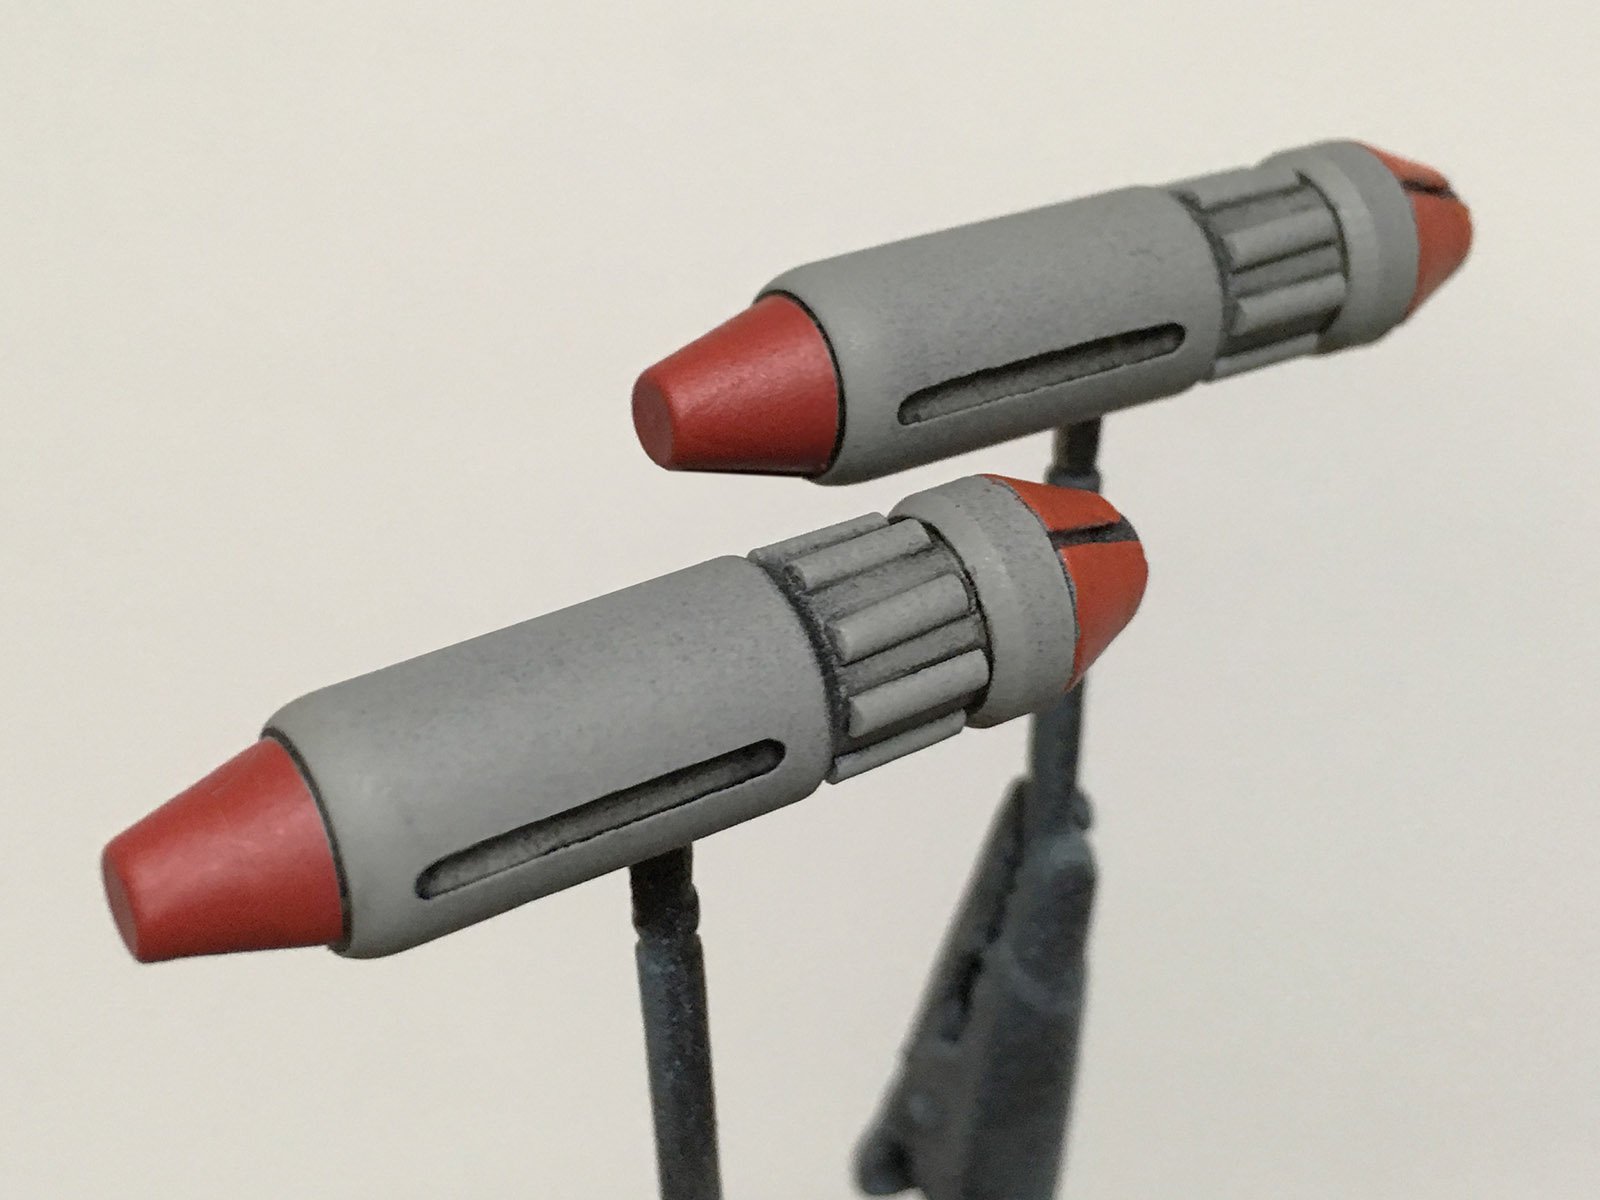
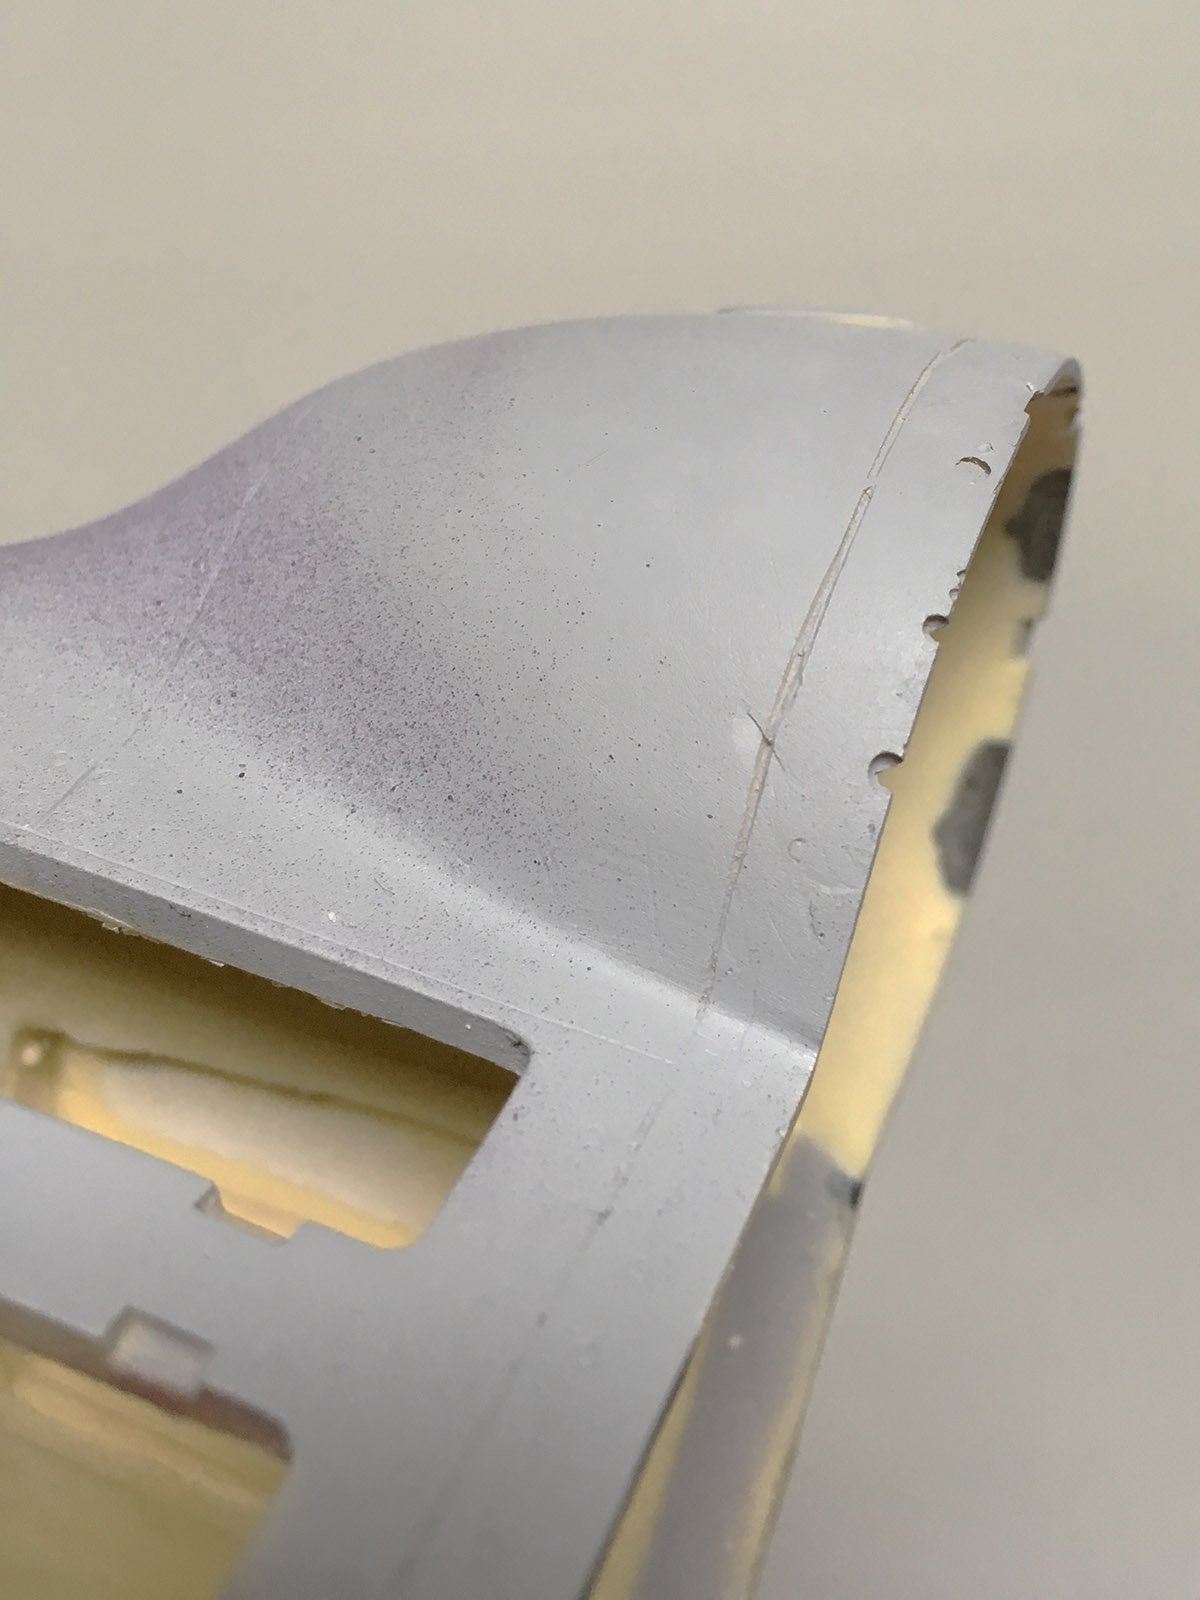
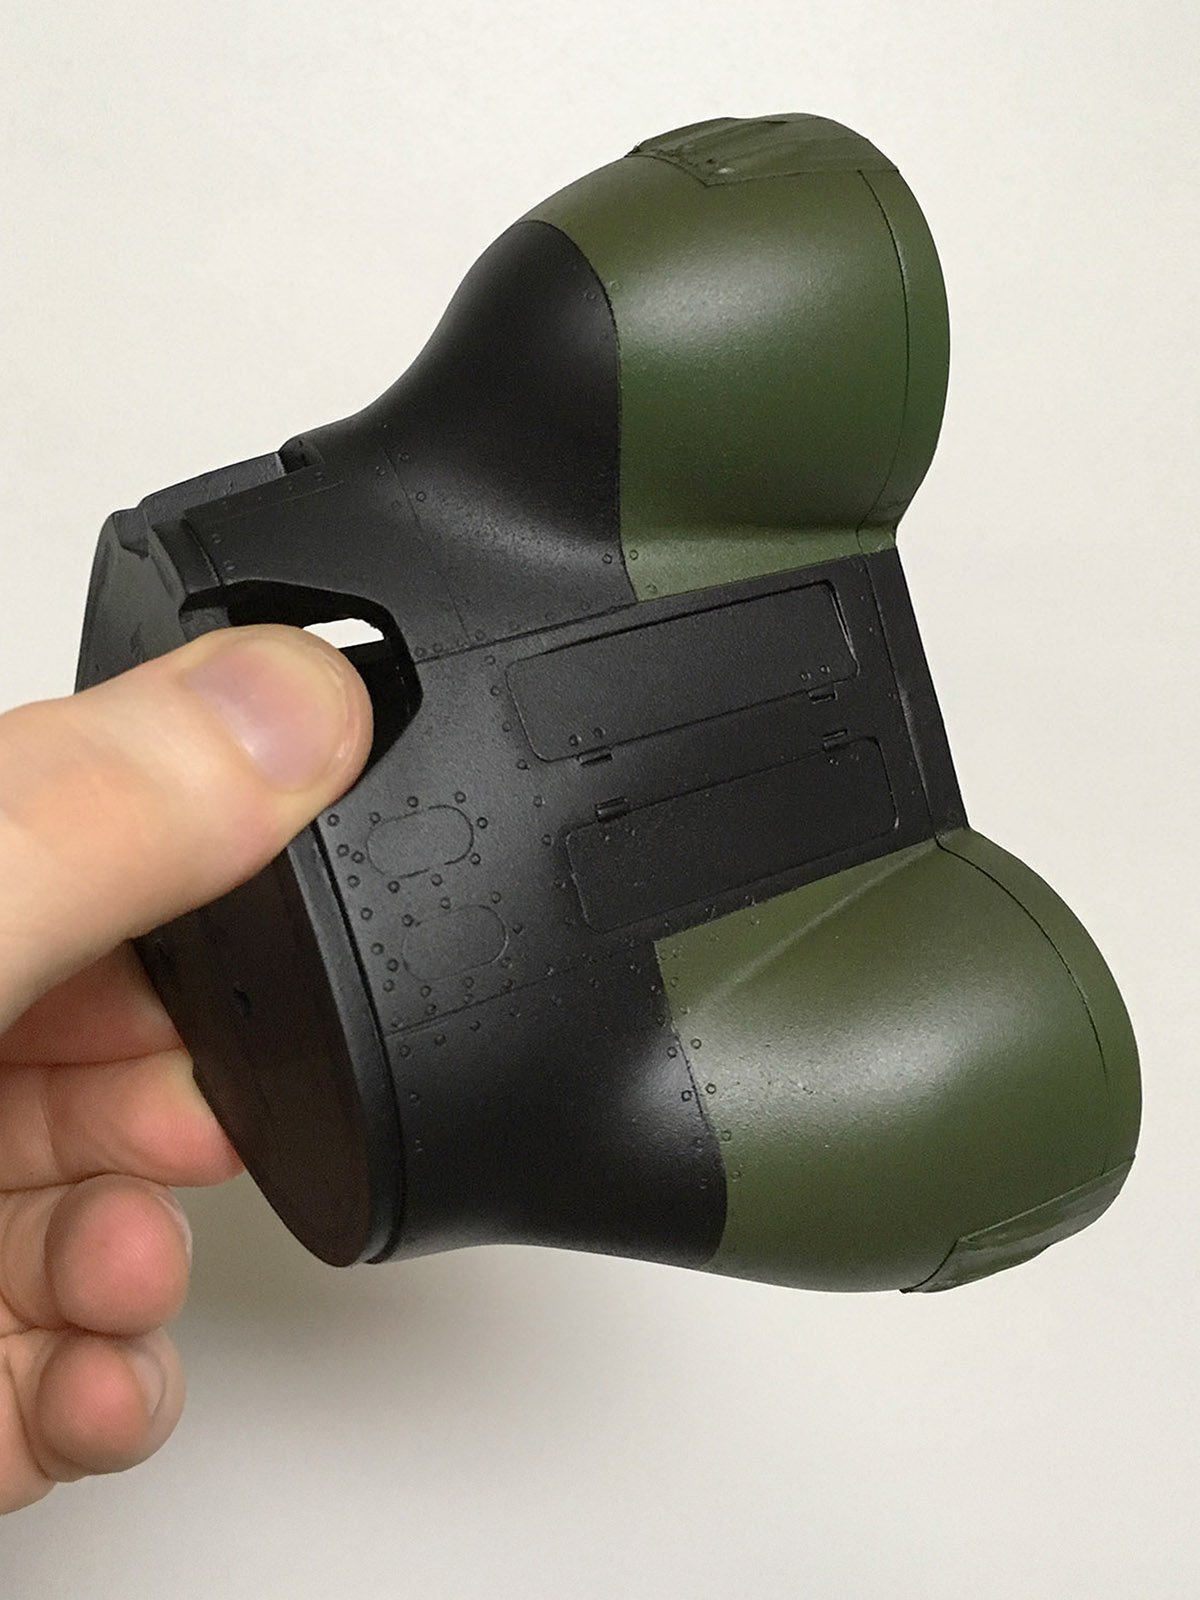
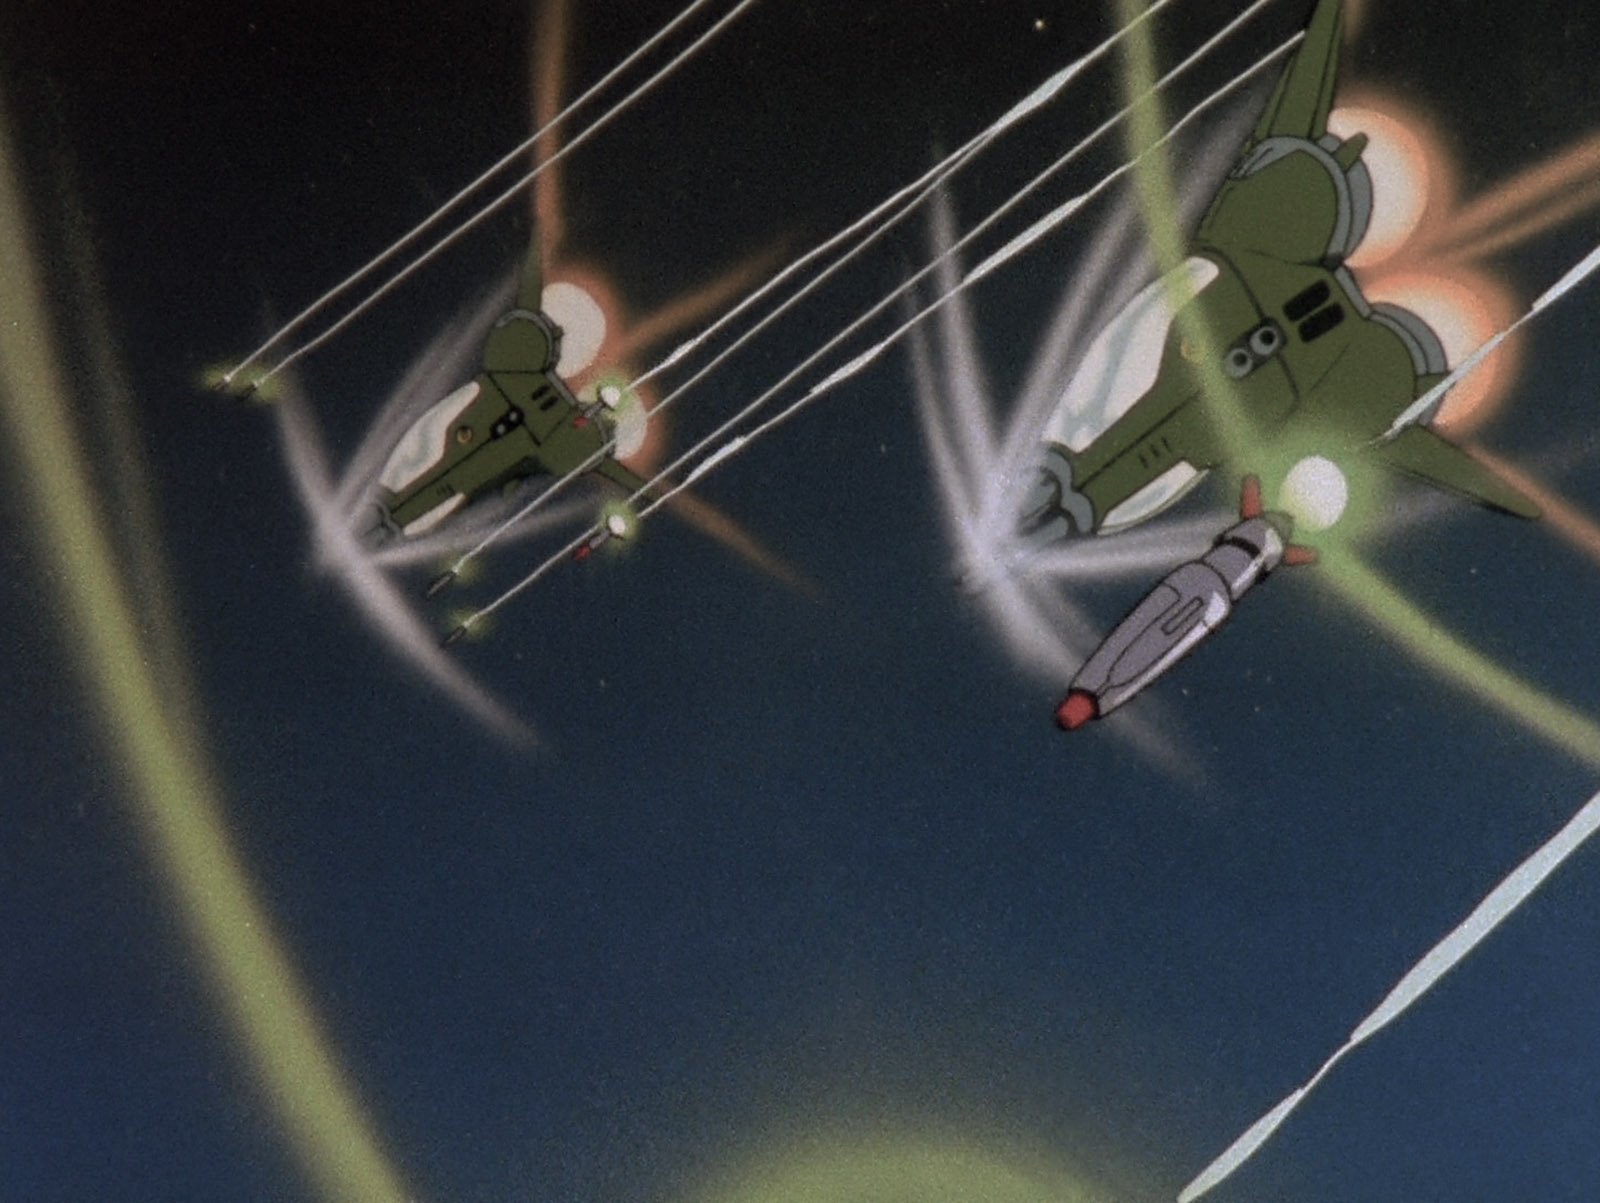
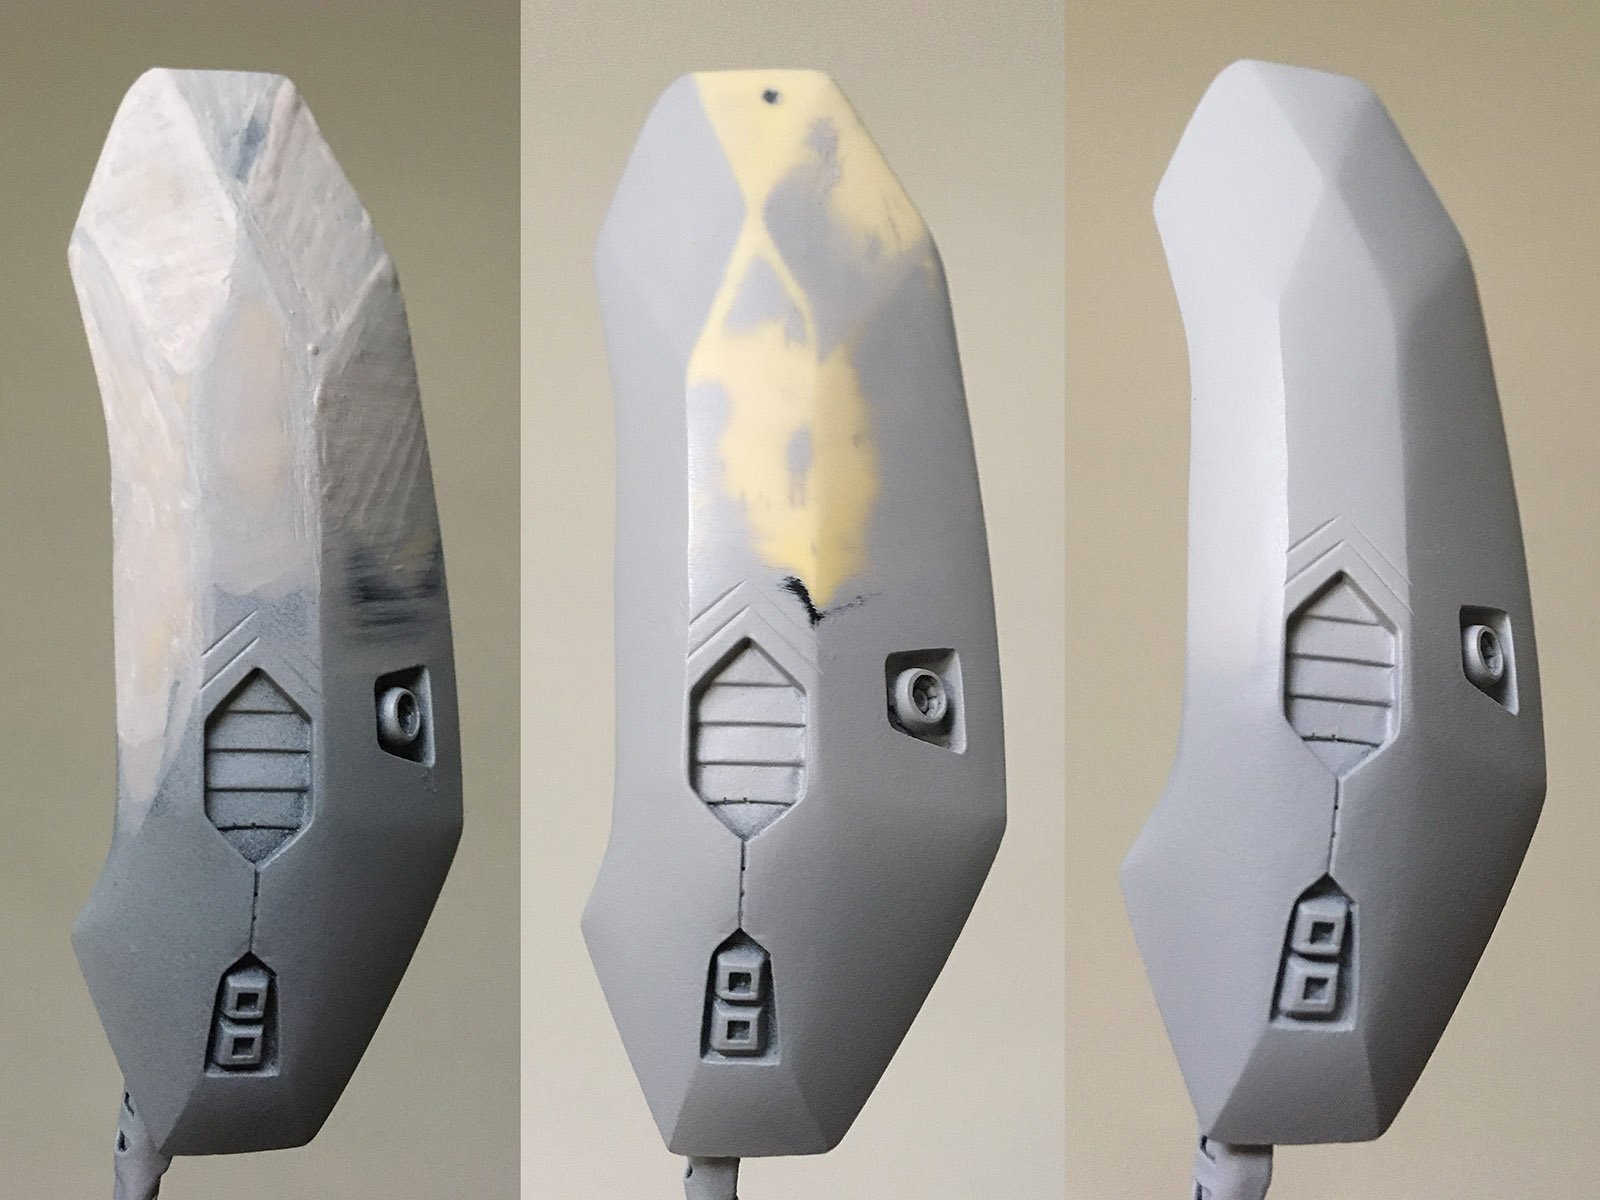
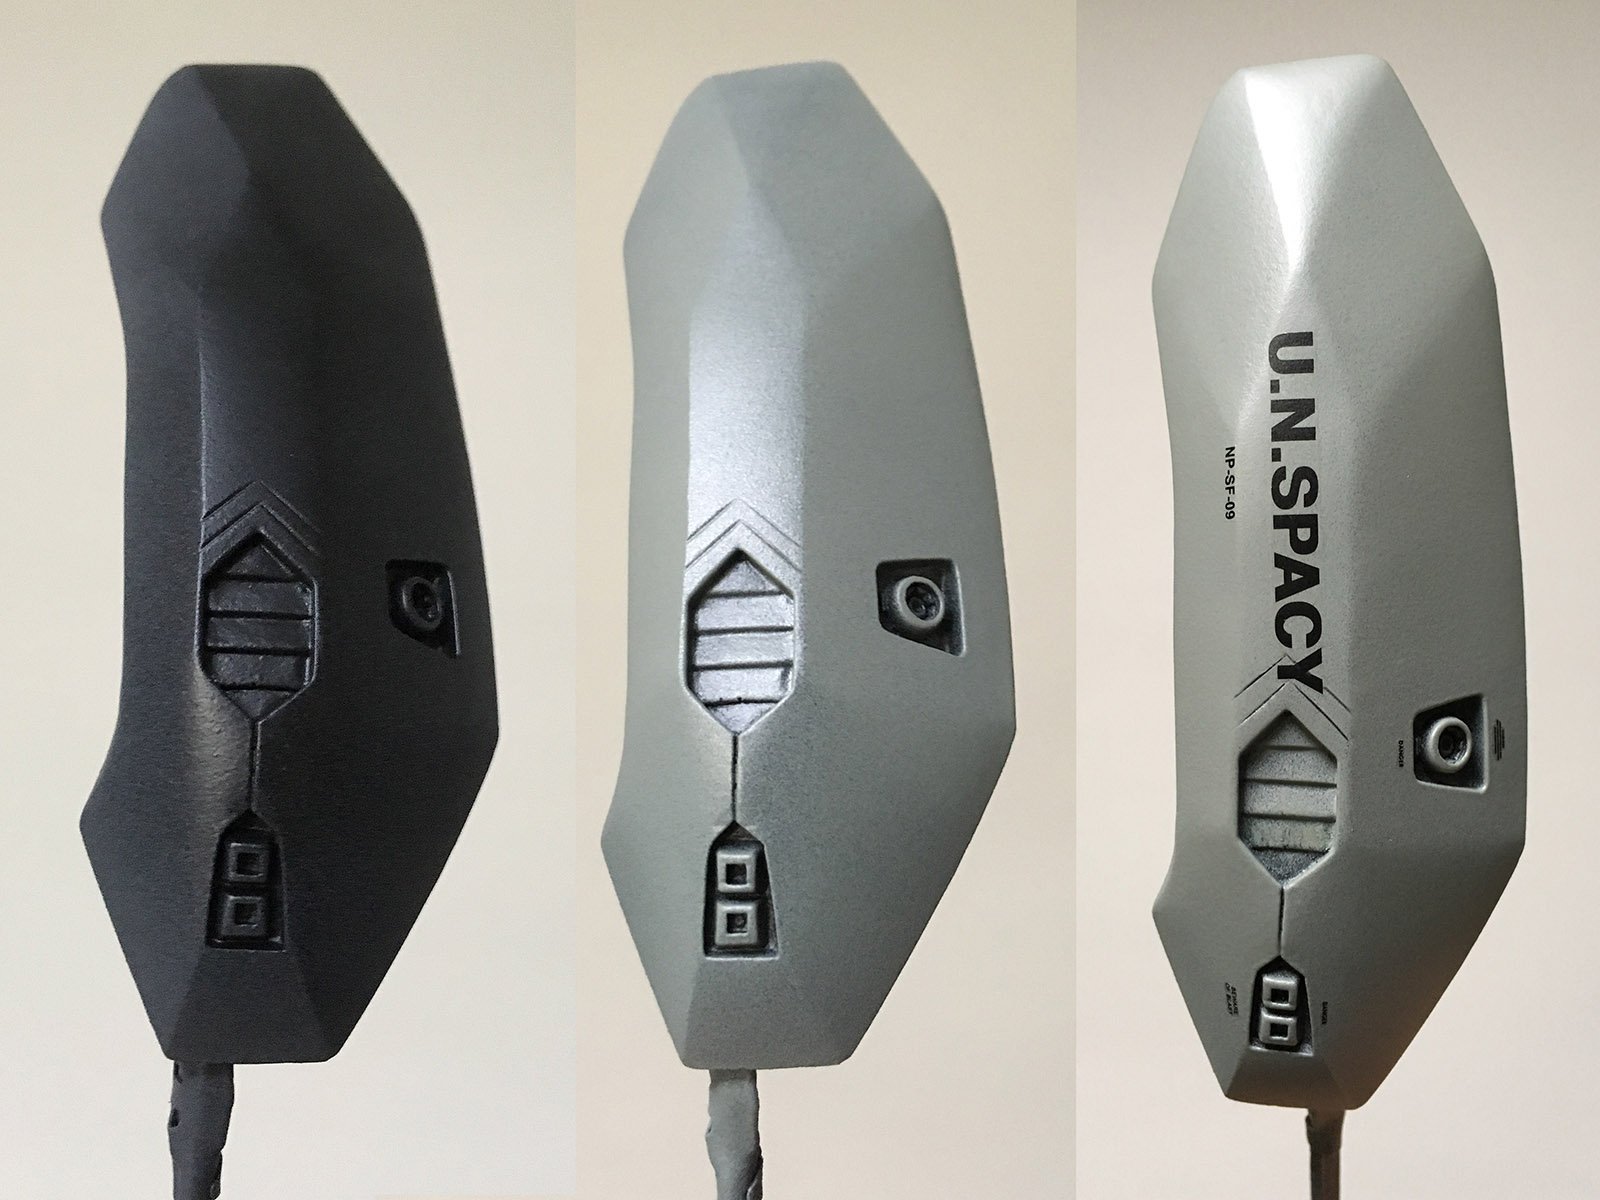
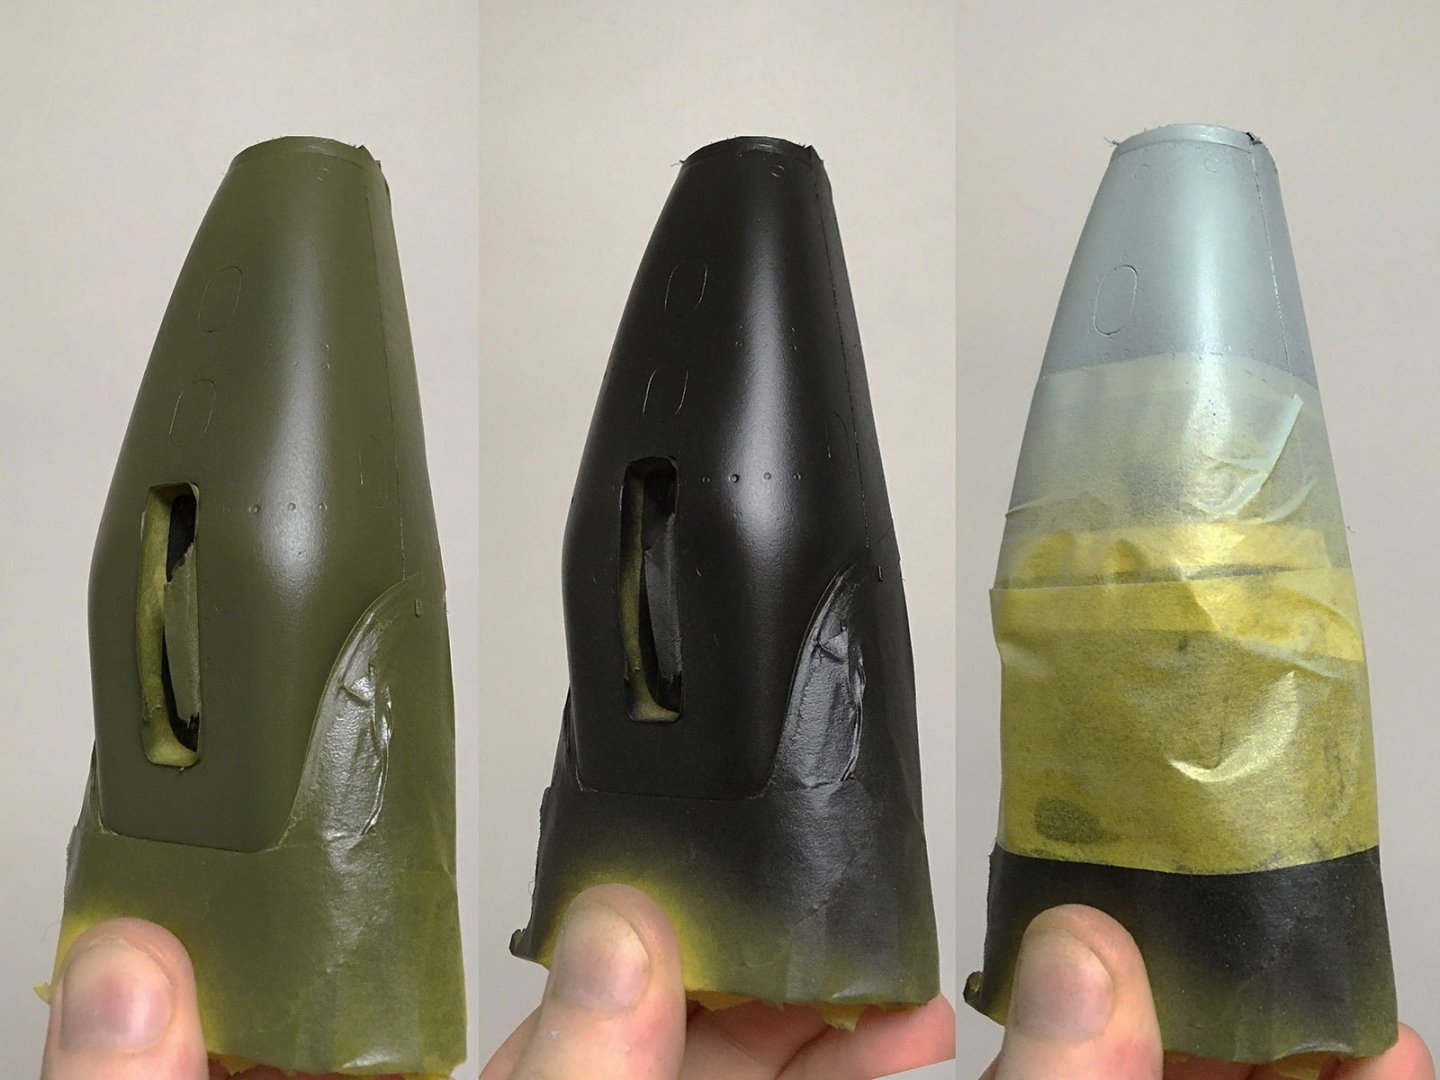
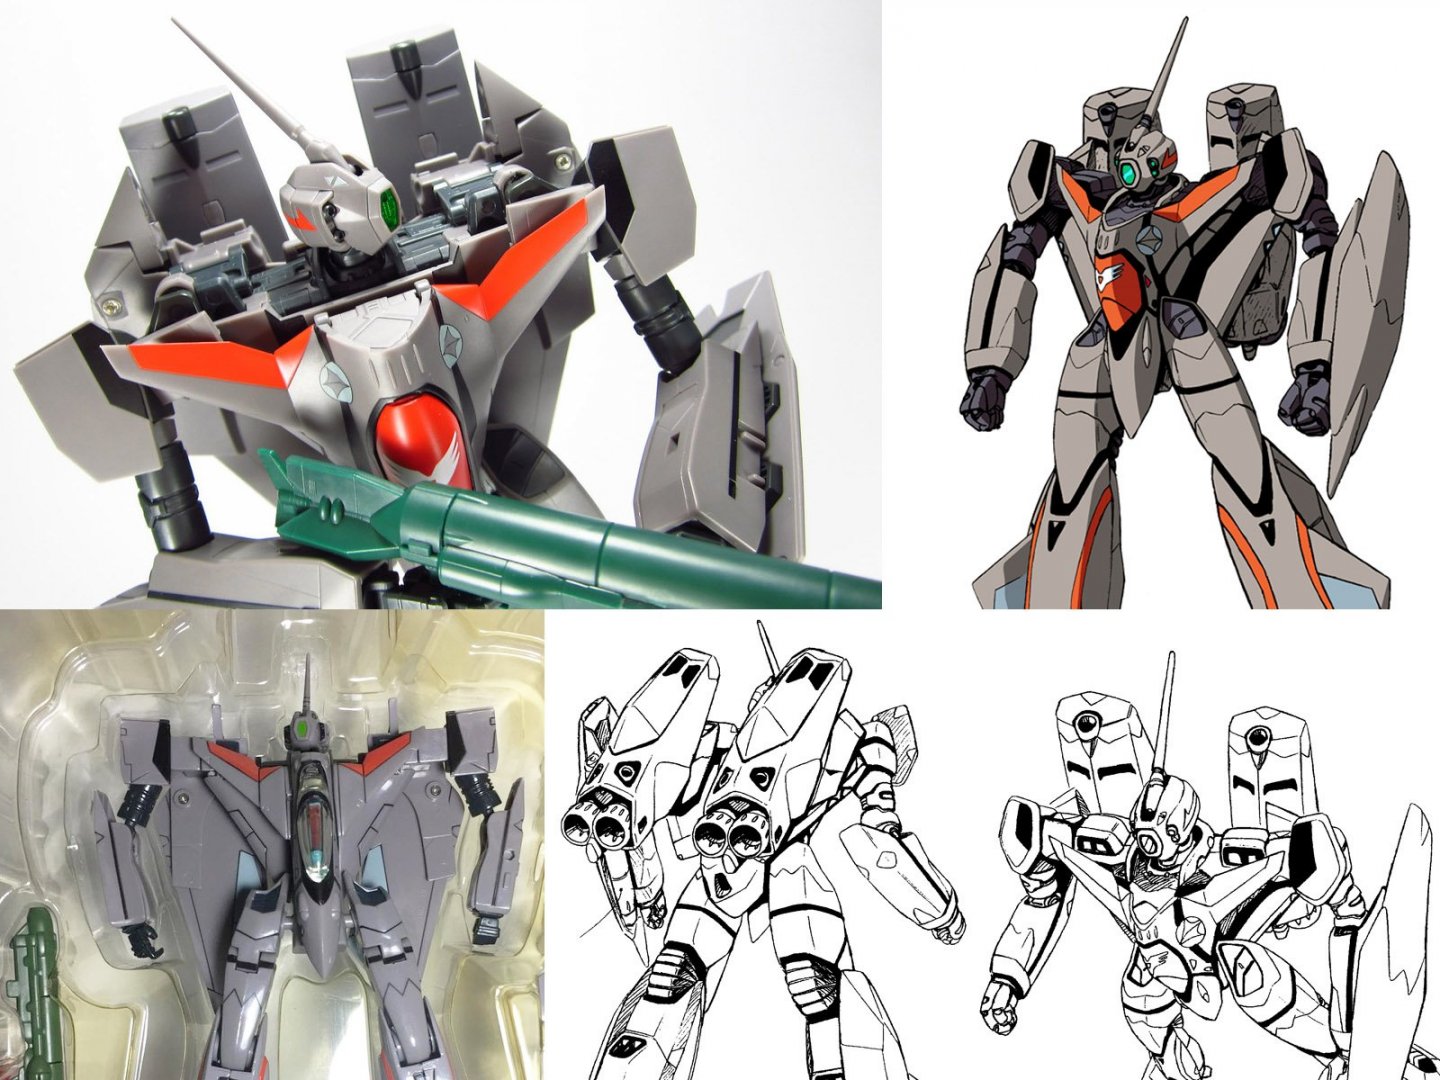
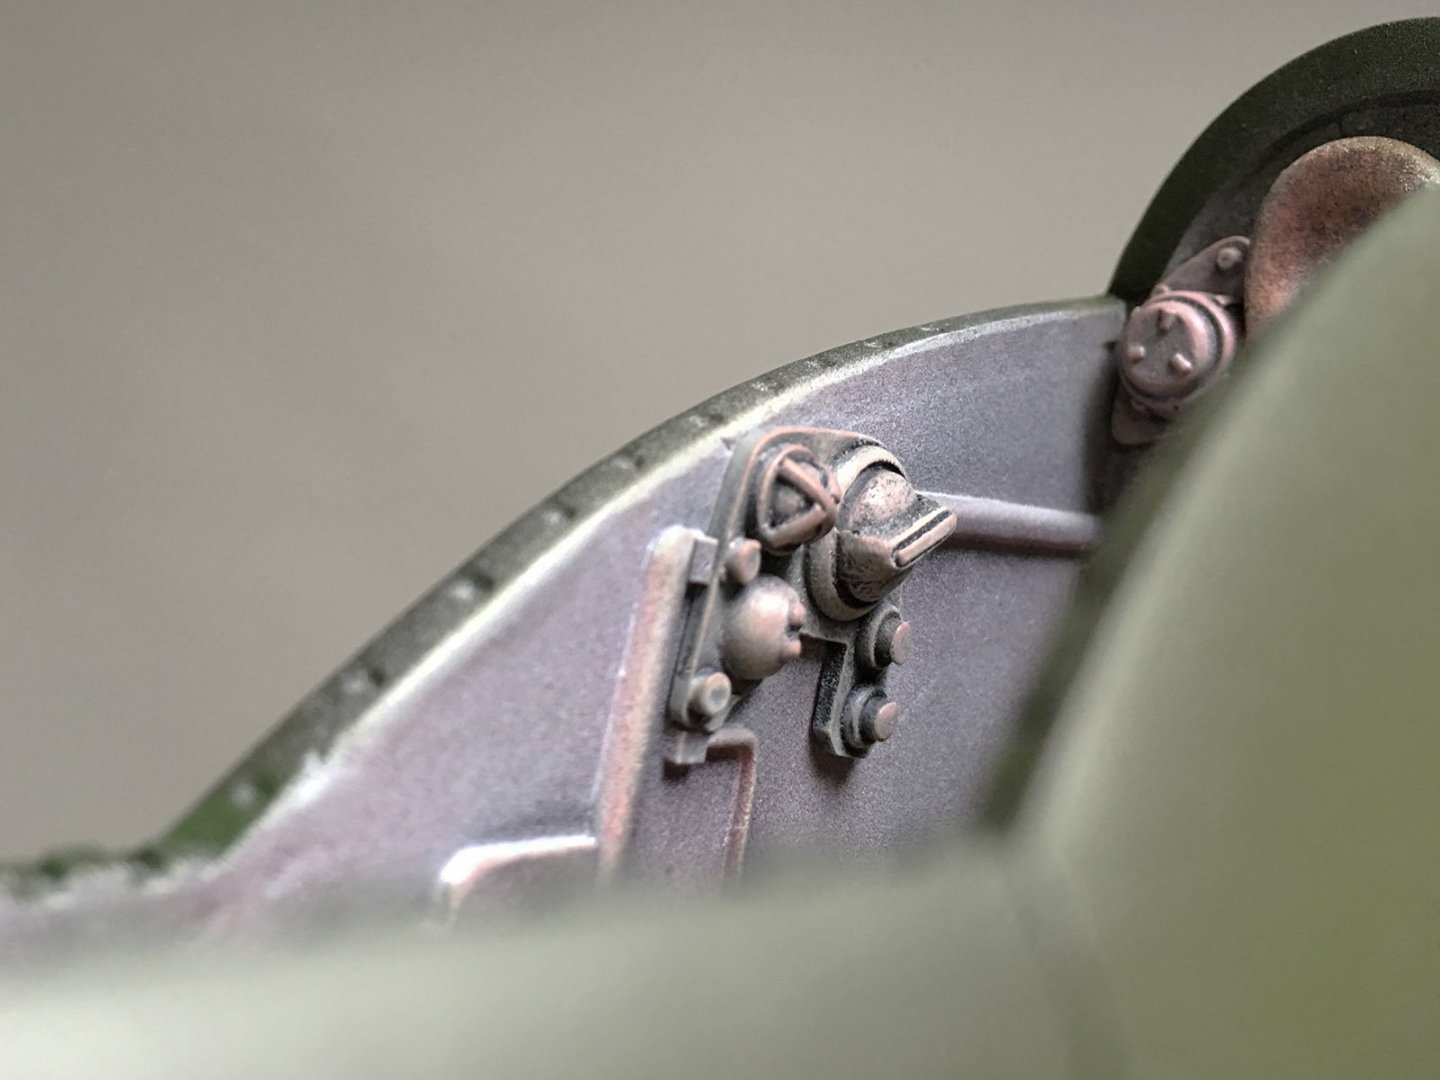
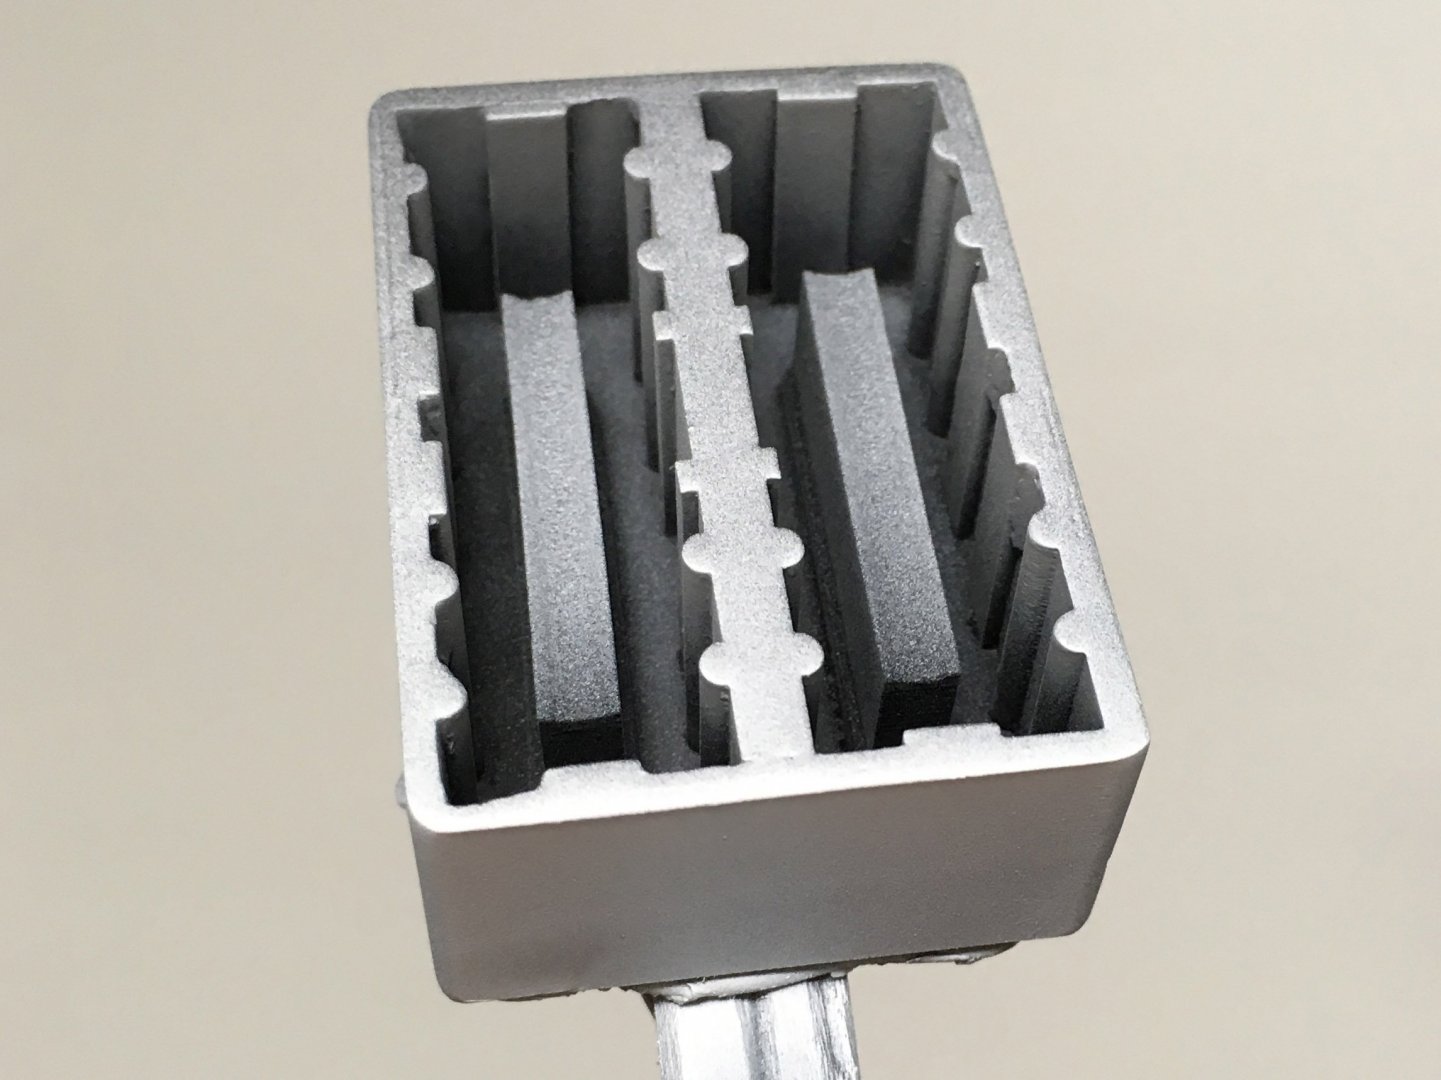
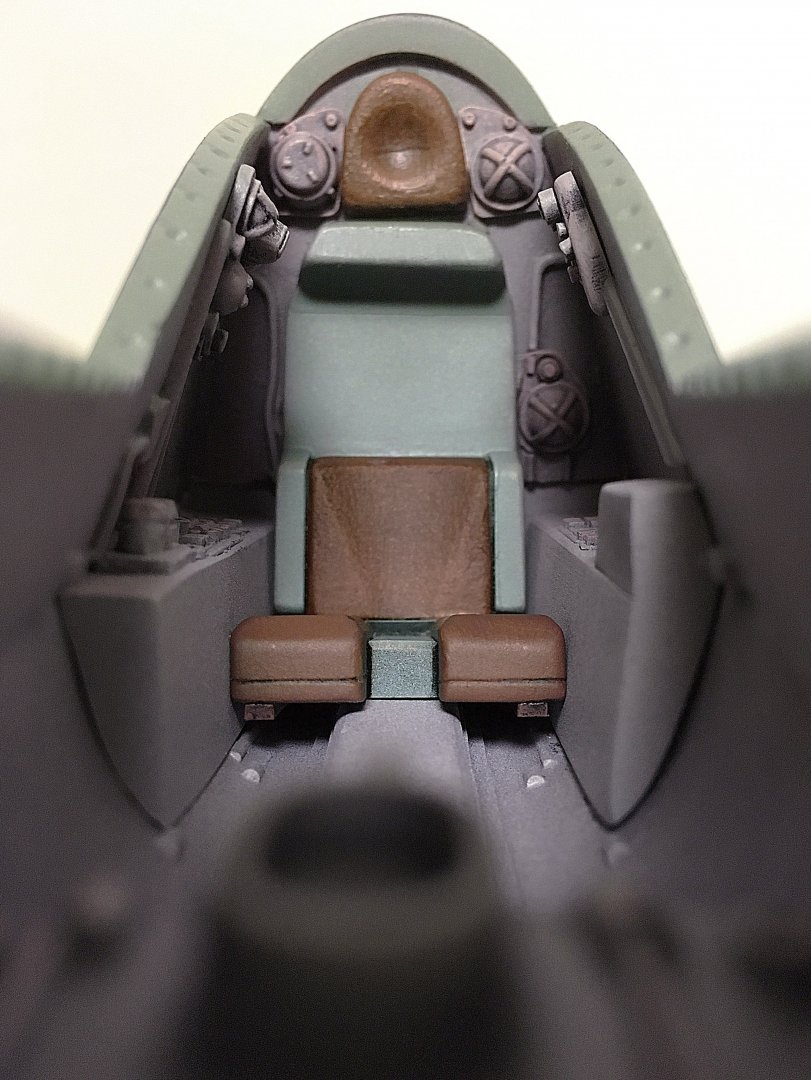
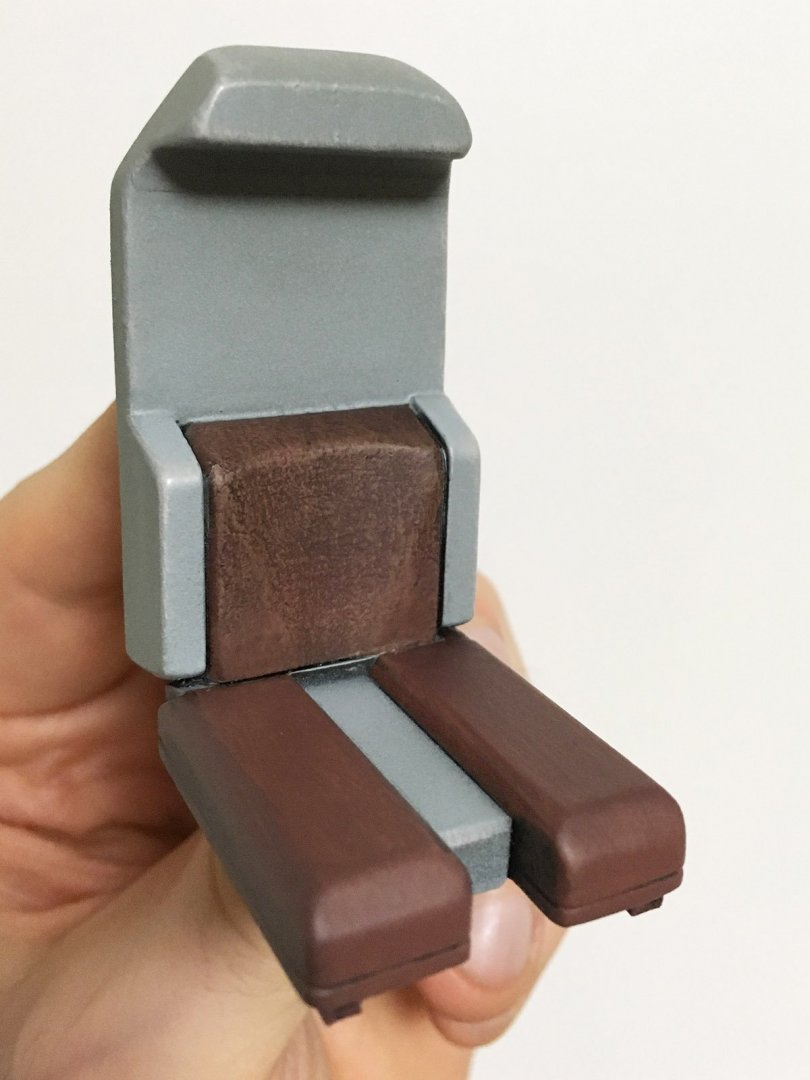
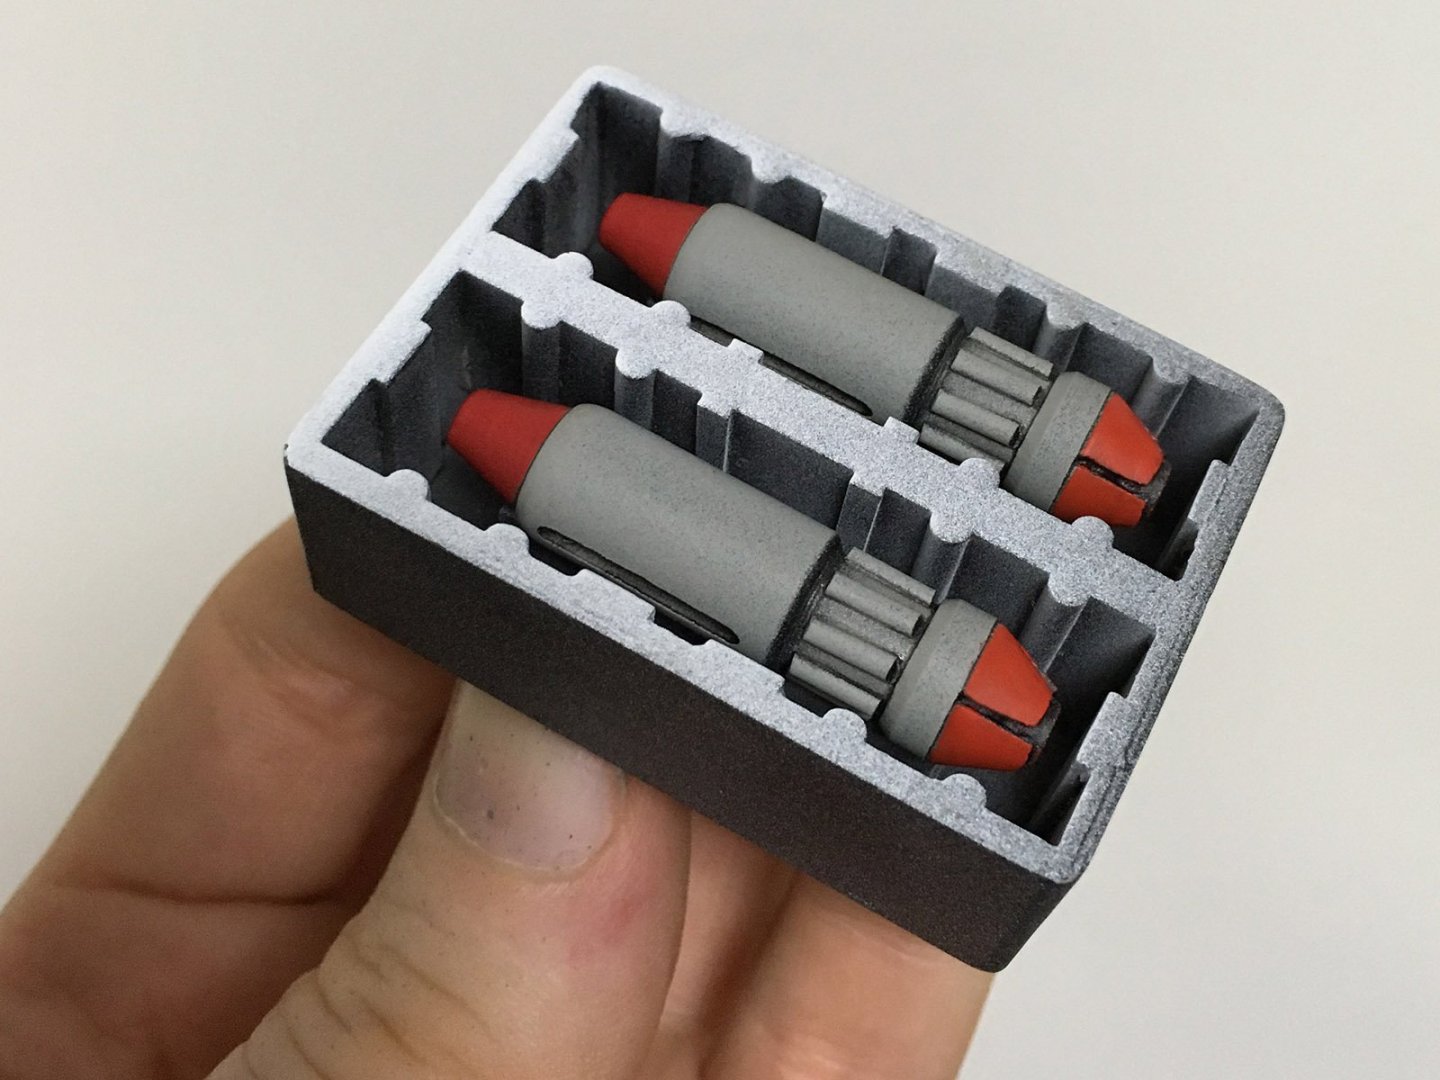
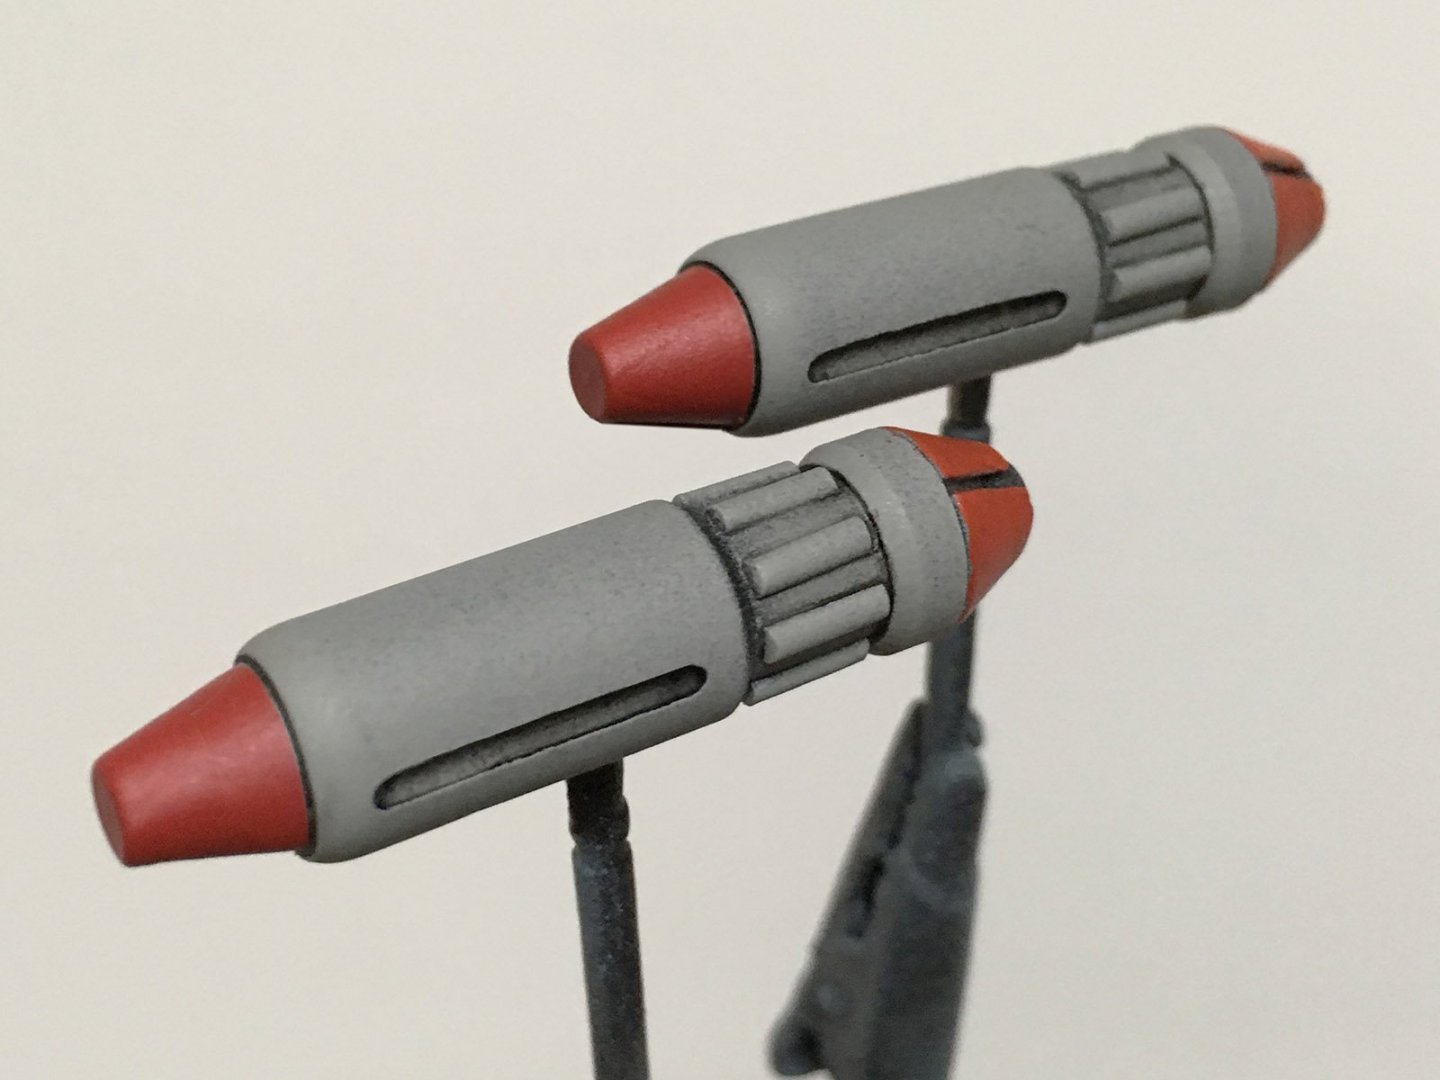
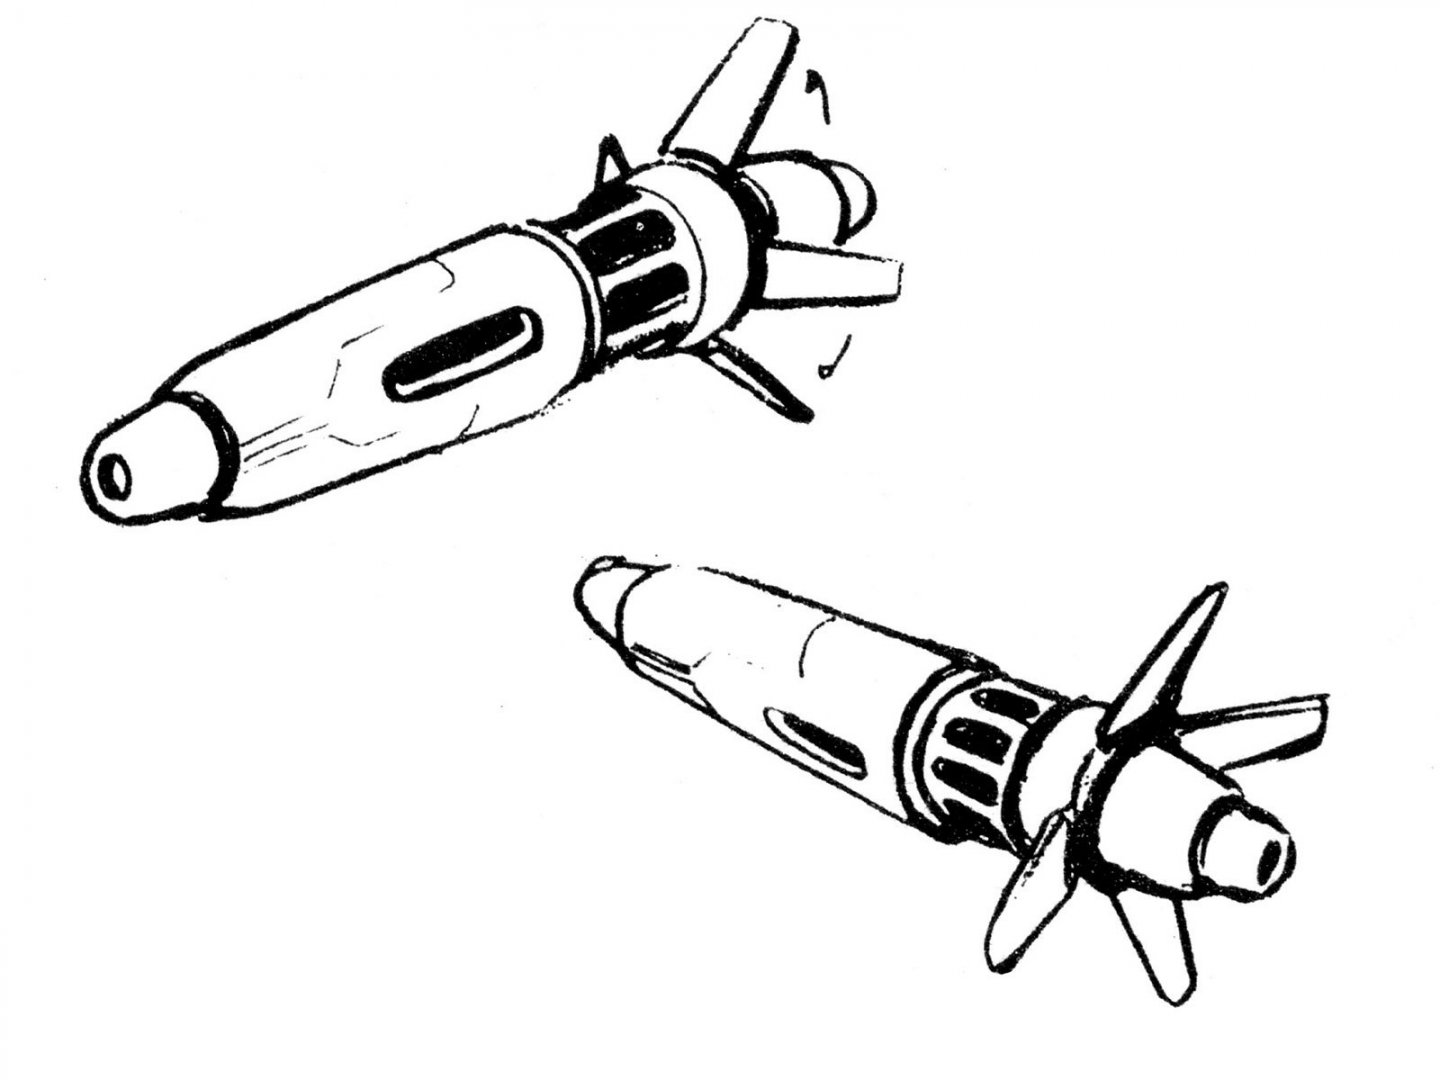
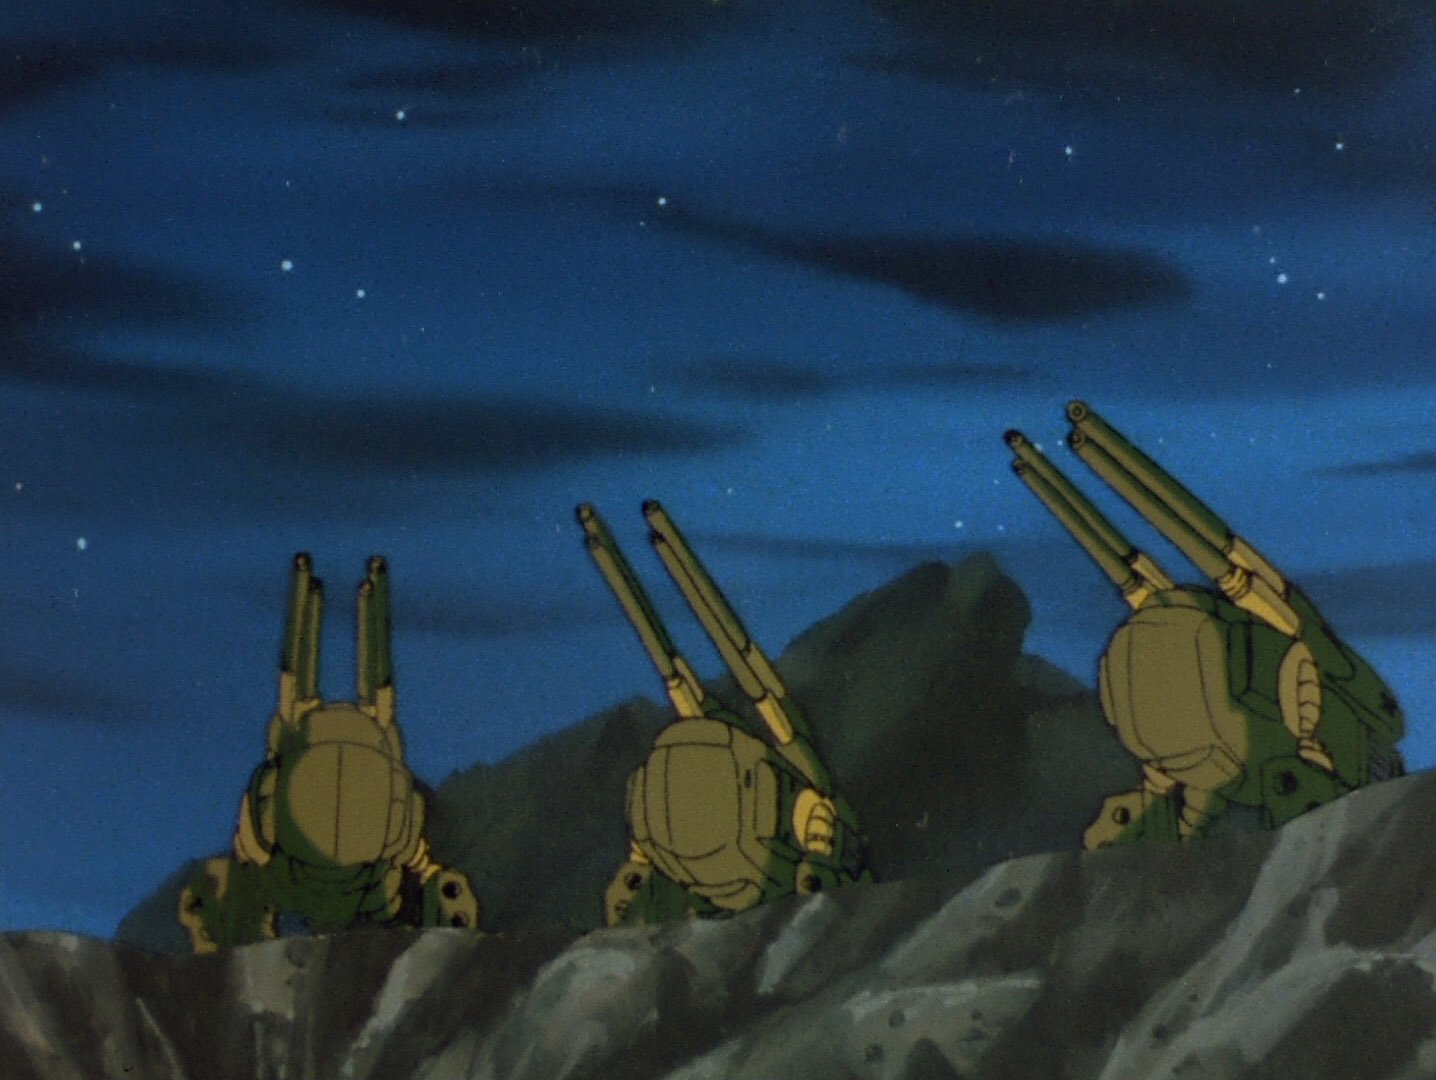
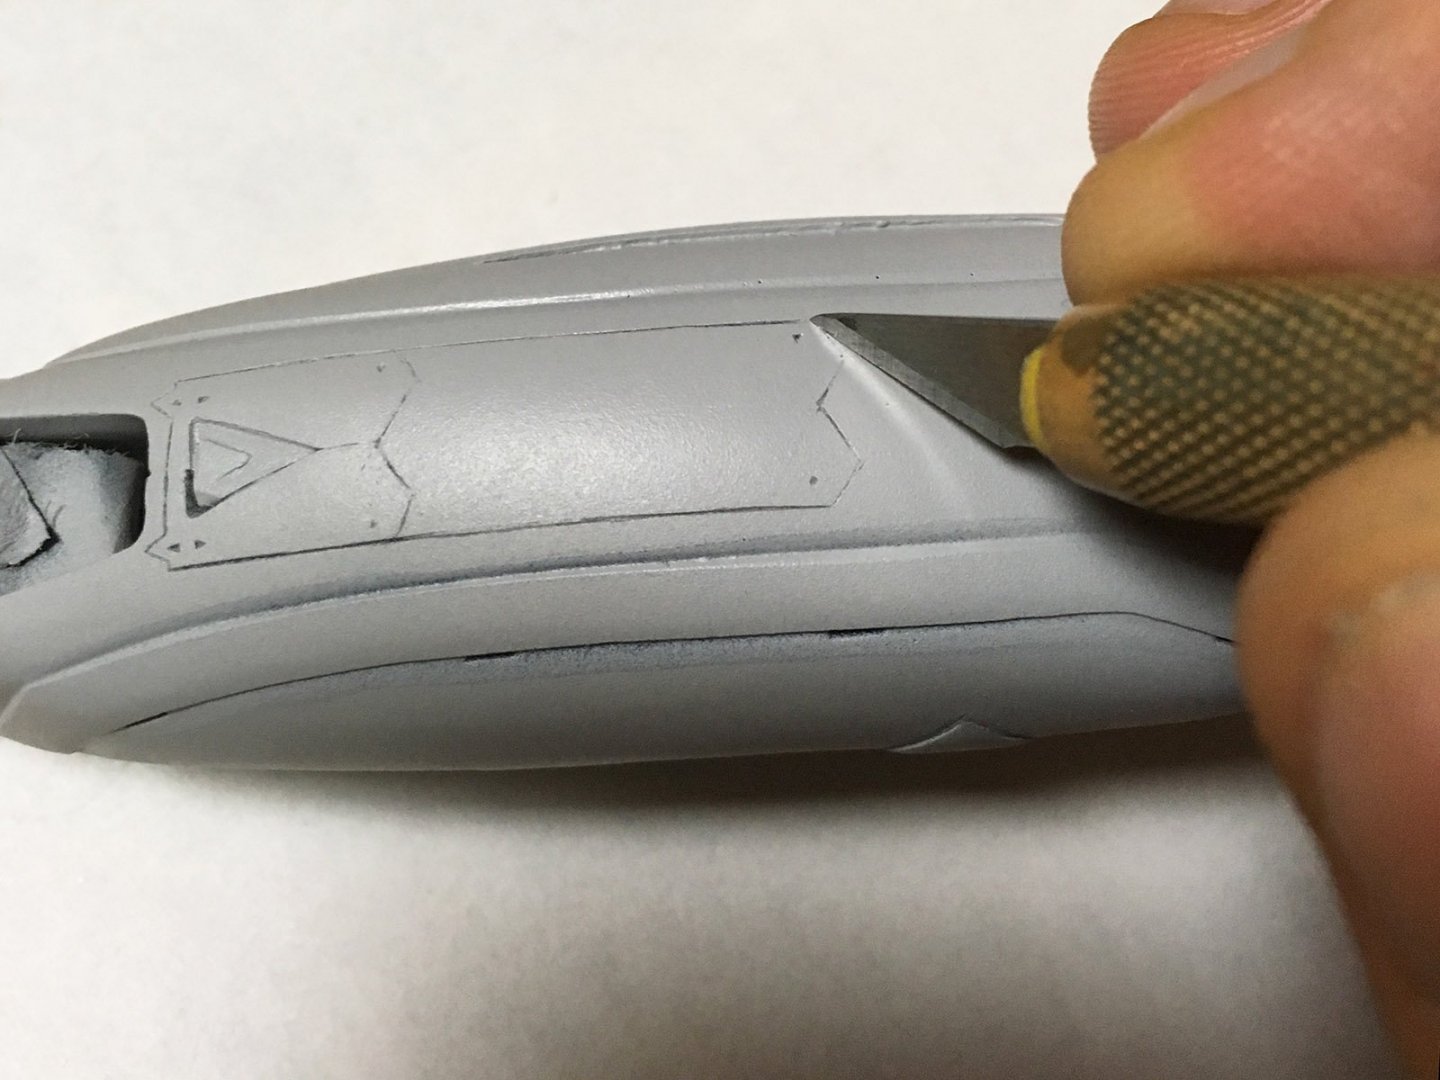
It's about time I updated this thread, too... As you can see, the surface has required a lot of cleanup work. After a lot of putty, sanding, and rescribing panel lines, I've been selectively masking off and painting the fuselage panel-by-panel, as I did the canopy cover... ...and the underside as well, following the inscribed panel lines. Before final assembly, however, all the interior detailing has to be completed, including the pilot's seat... ...which, despite all the work I've put into mixing colors, masking, dry-brushed surface texturing, and panel-lining, will be totally concealed by the pilot figure anyway. You, who are reading this thread, will be the only ones to really appreciate all this wasted effort. This missile housing will also be only partially visible once it's installed in the underside, so I've taken a very high-contrast approach to painting it. With much of the black base coat still visible in the deep recesses, and very silvery-grey highlights drybrushed over the raised surfaces, the sculpted detail will stand out even in shadow. I've done my best to match the color of the missiles to the animation, even though they look considerably different... ...but that's because Moscato's sculpt was based more on the line art than the animation. Again, the details won't be particularly visible once they're mounted anyway. I've applied the same high-contrast look to the cockpit greeblies, drybrushing light colors over a black base to ensure maximum visibility. I imagine these Gnerls were treated much like kamikaze fighters, cheaply-manufactured and expendable, so I want it to have a somewhat dirty, poorly-maintained look... After all, Zentradi mecha were designed for functionality, not comfort, and their culture was not known for high standards of maintenance.


-
This is fabulous, clean work, and it really makes me wish Aoshima had given these kits proper cockpits. The panel-lining is sublime.
-
tekering's BItComp entry #2 - Quamzin resin kit
tekering replied to tekering's topic in The Workshop!
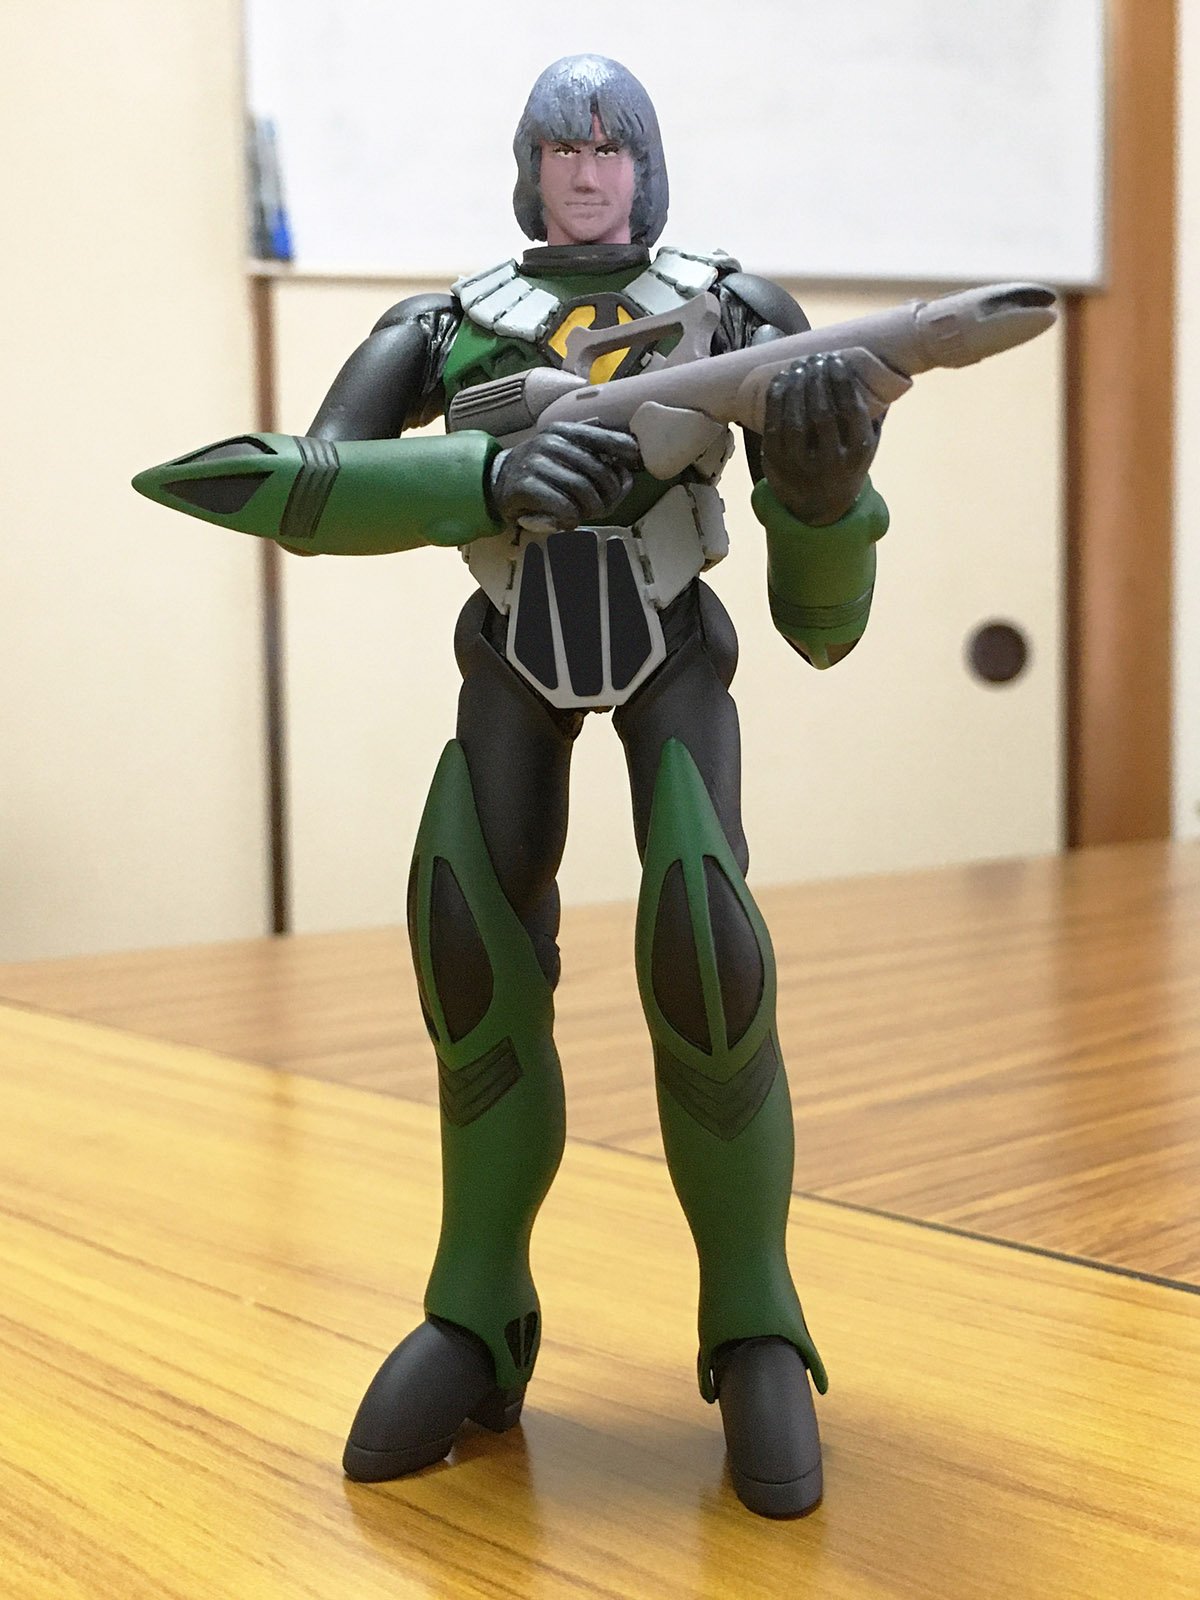
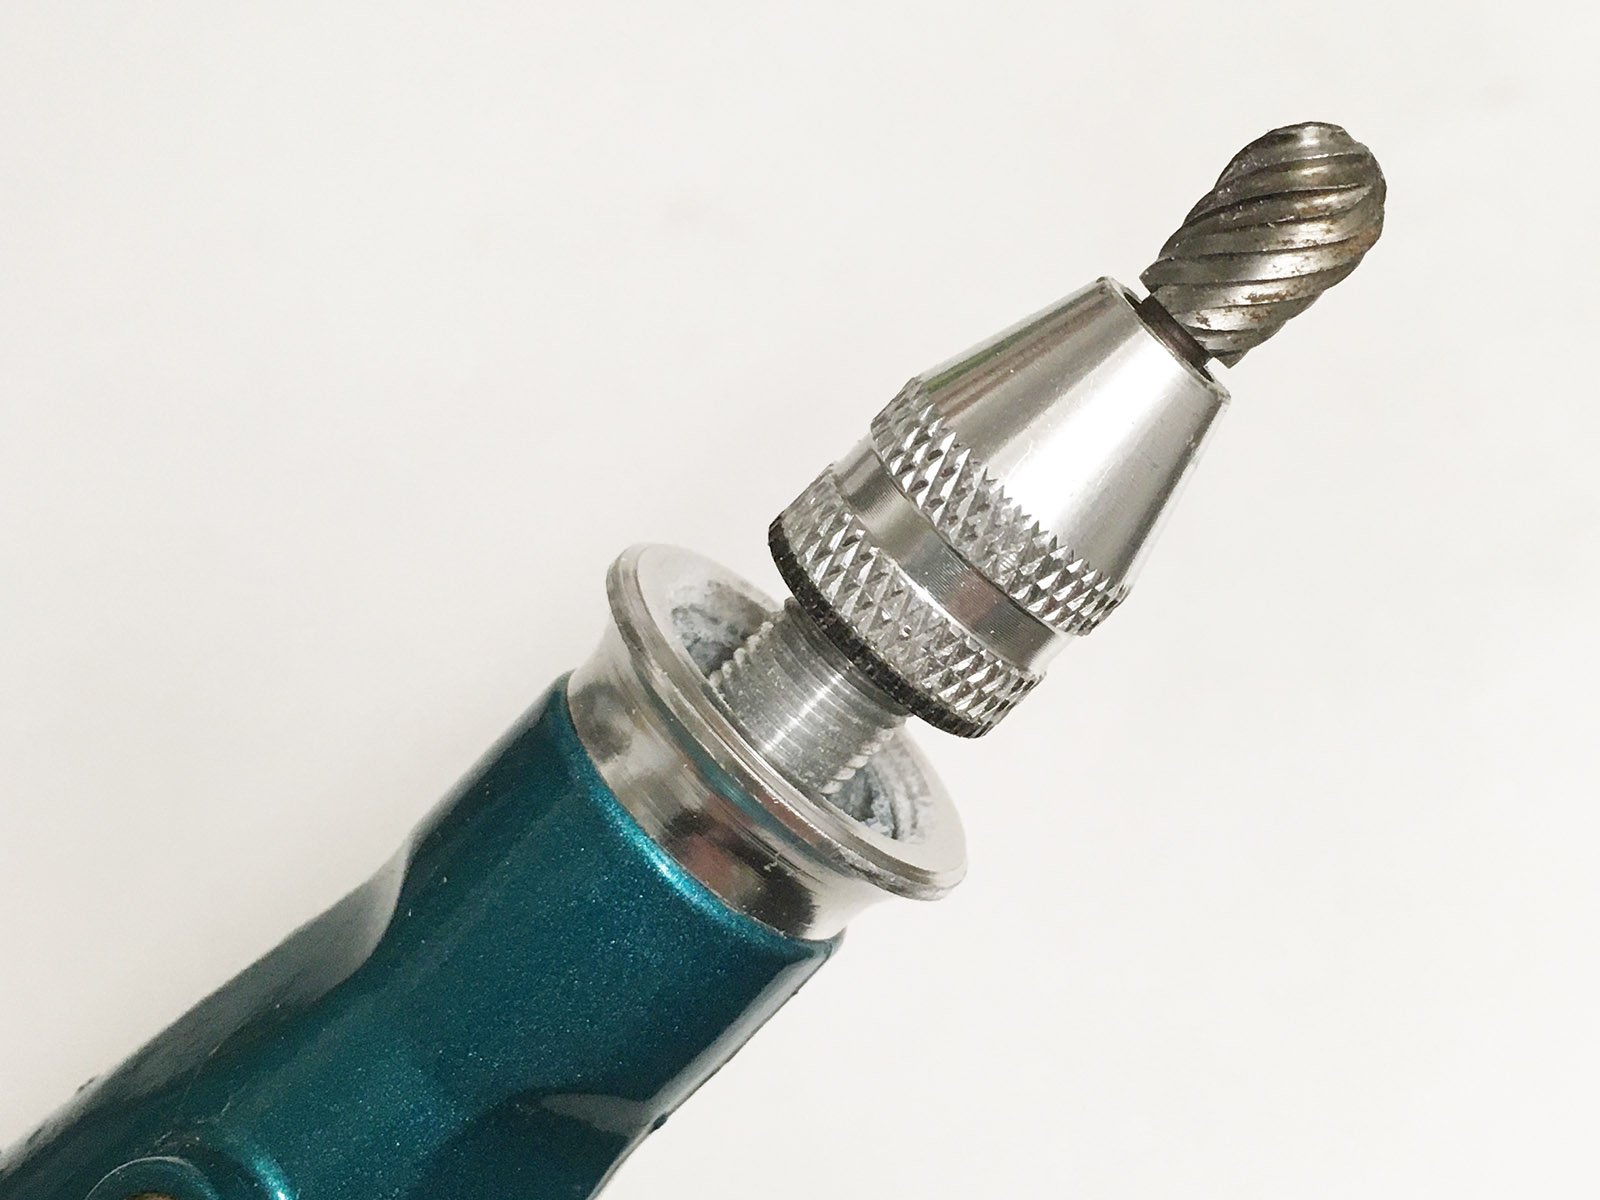
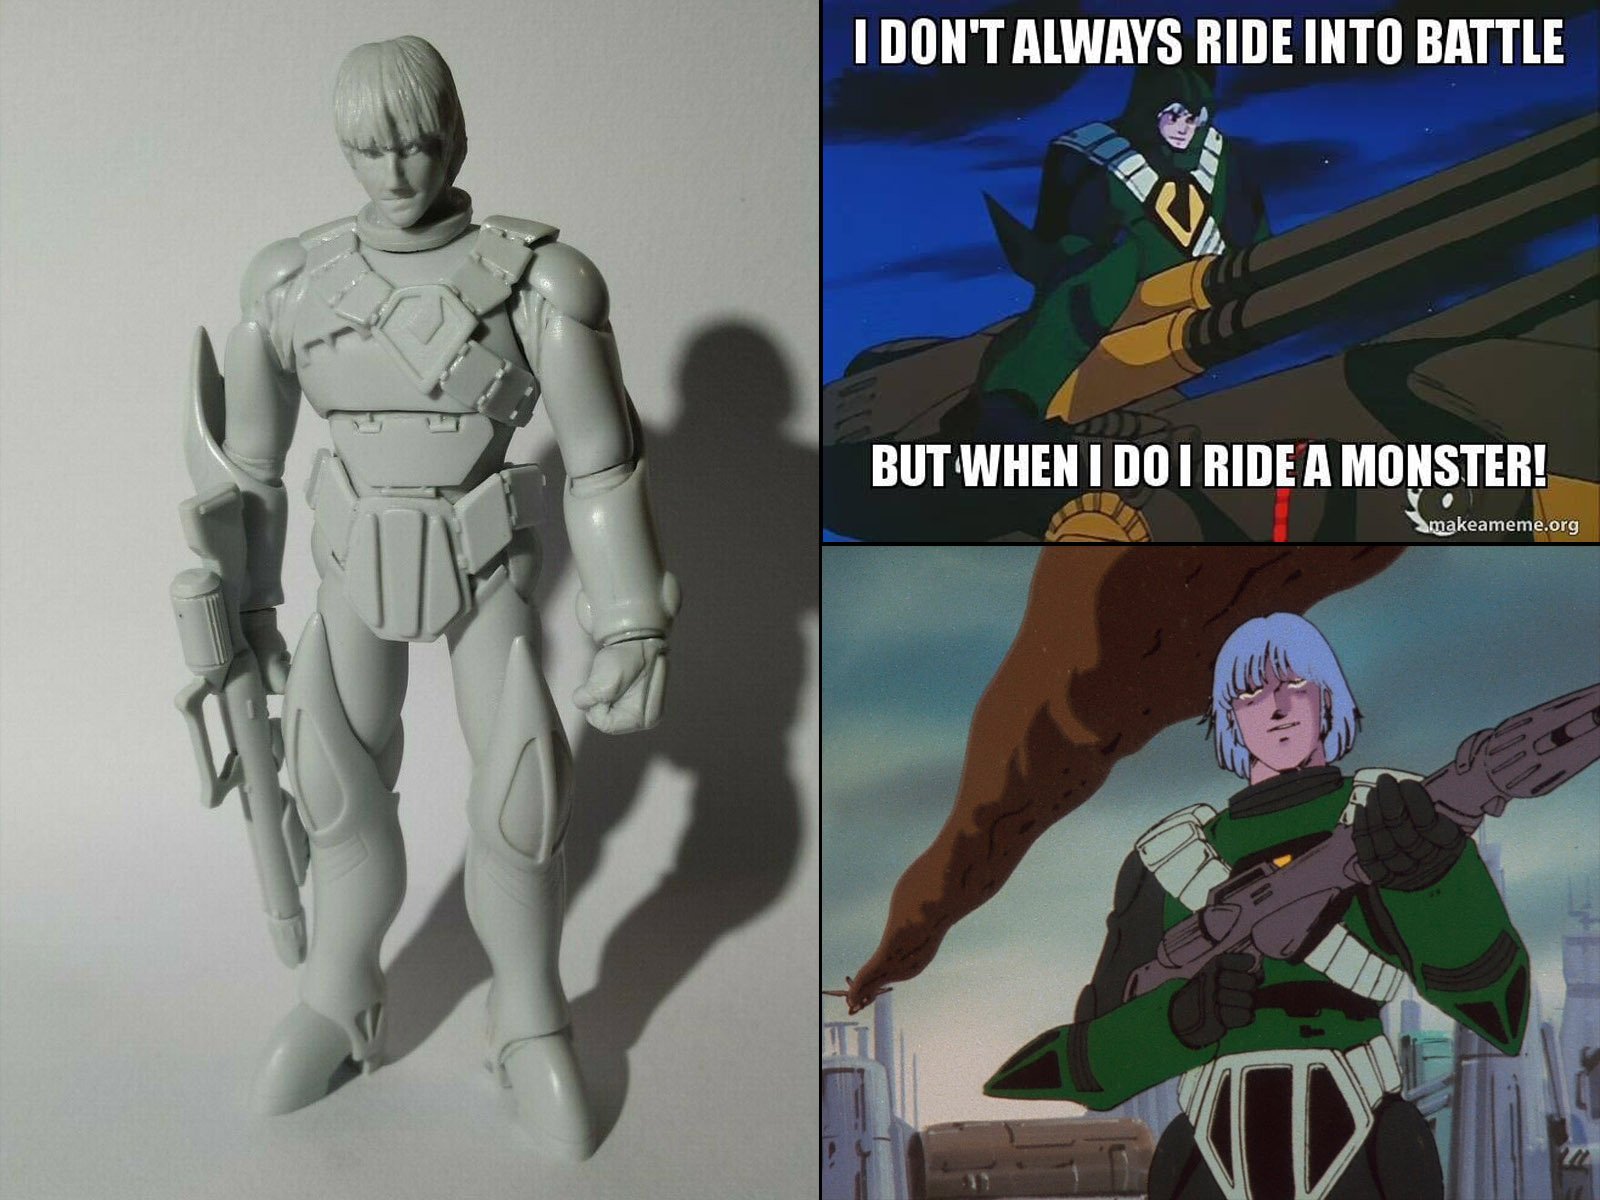
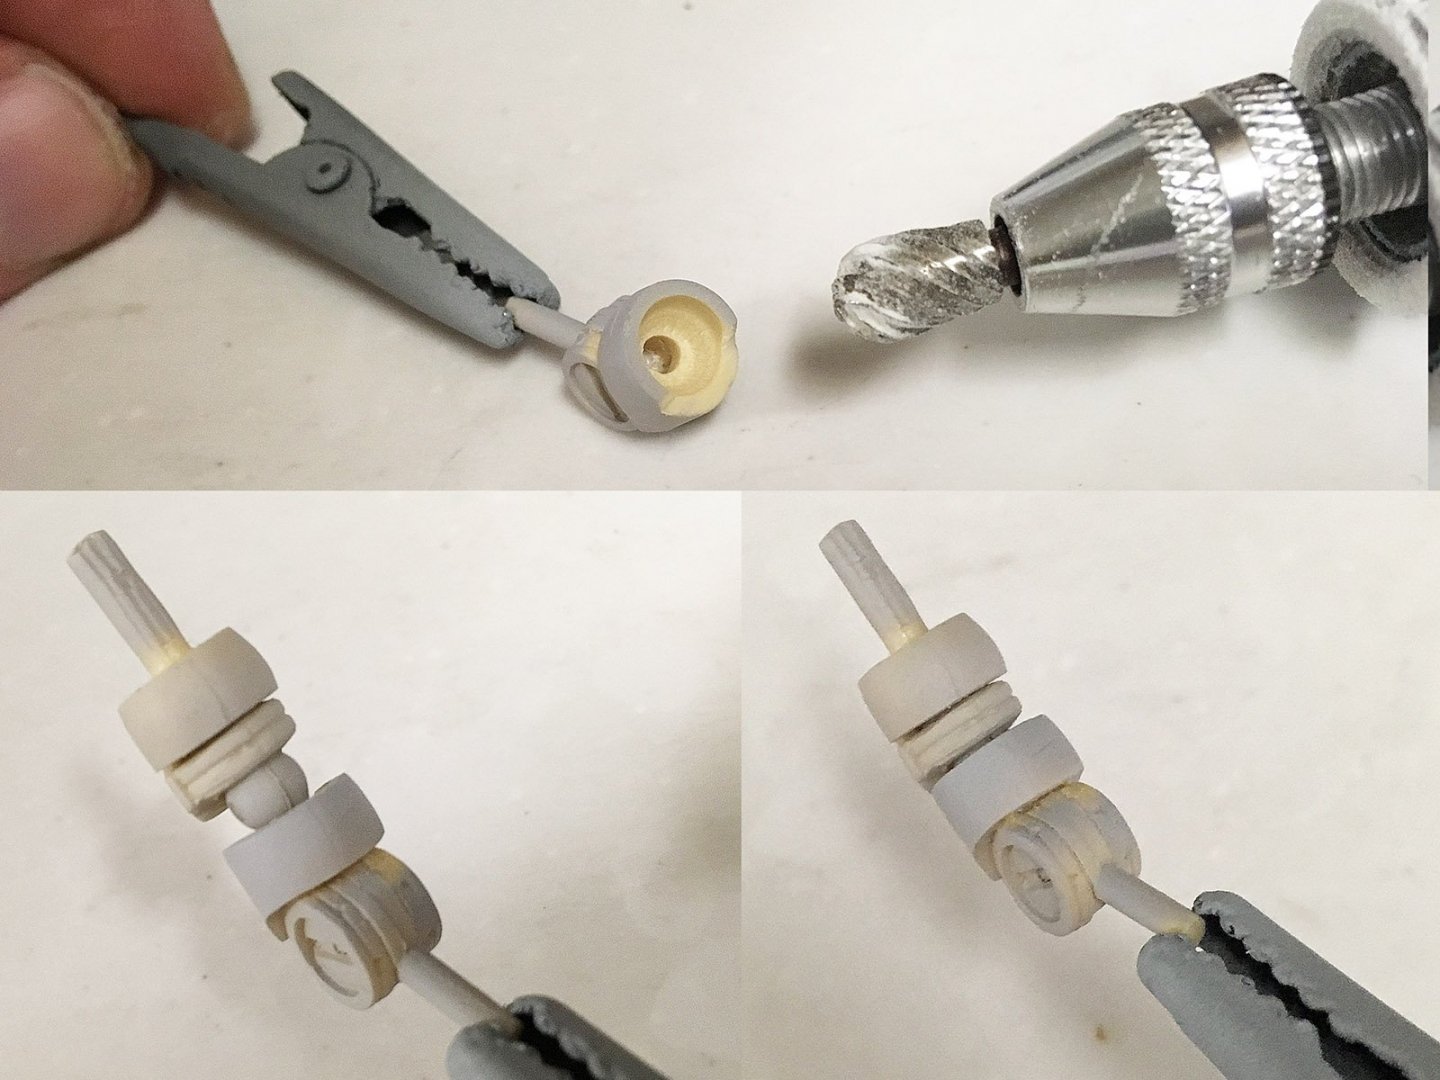
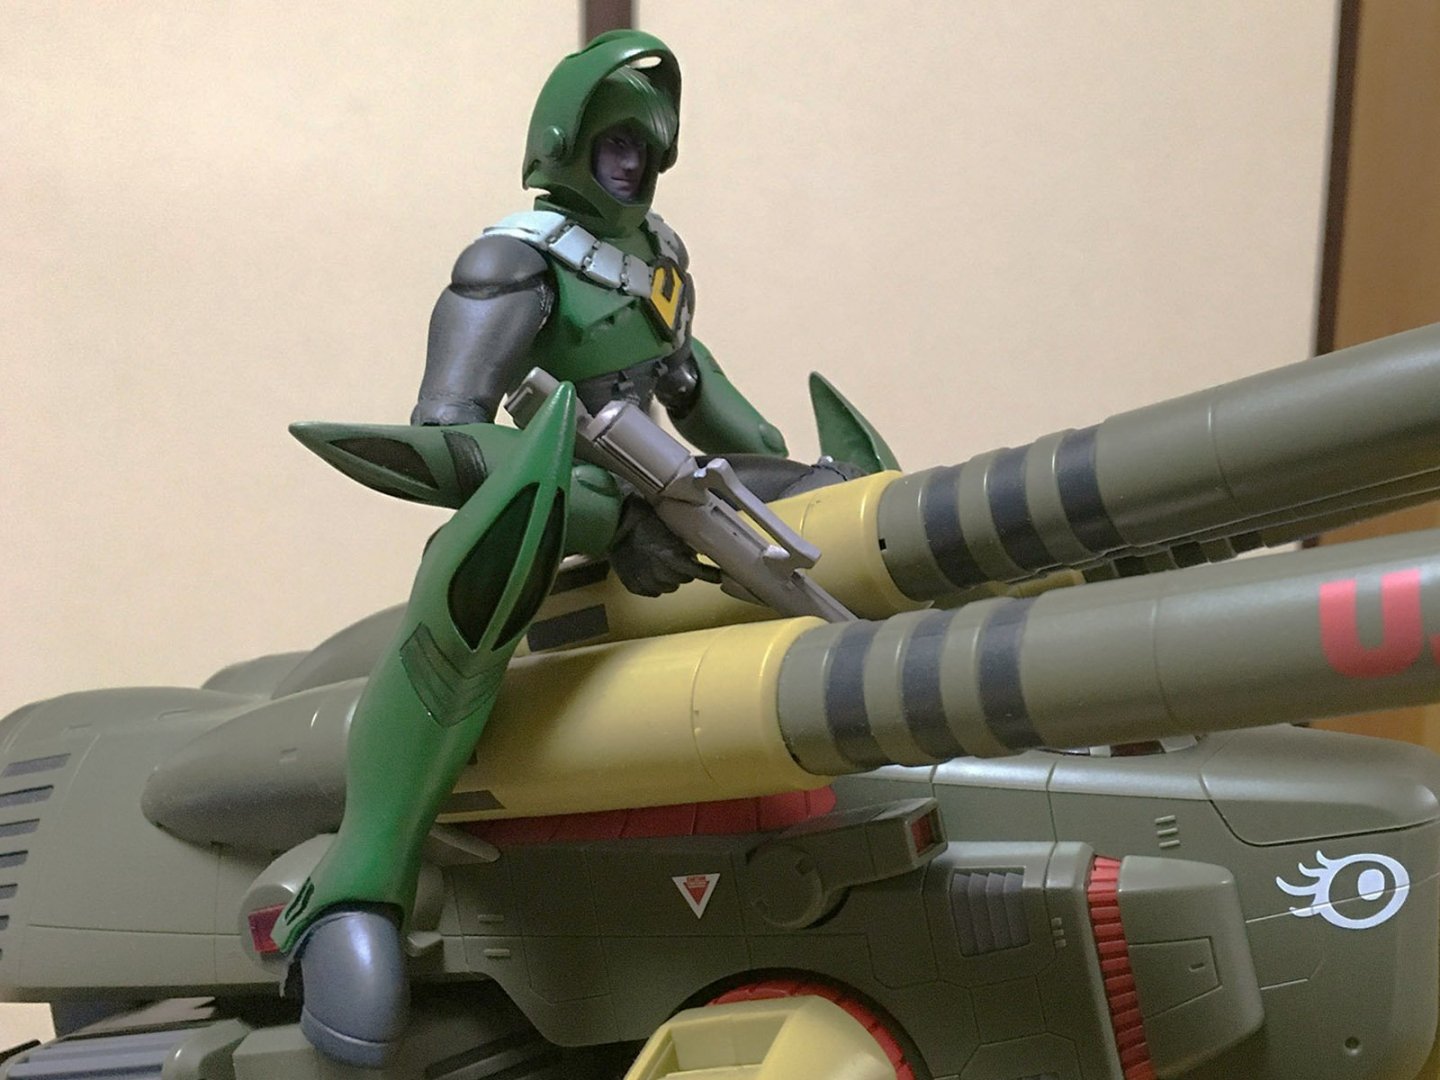
Especially not expensive, limited-production resin figures! It requires unspeakable acts of violence... ...but I'll go to any lengths to win a 1:72 Norbert Gerard. Even getting the figure into this nigh-impossible pose! I realize he wasn't wielding a rifle when he rode the Monster, but wedging his gun in between the cannons was the most secure way of keeping him from falling off... ...and seriously, you've gotta go out of your way to keep a resin figure from falling, 'cause the painted surfaces are so easily damaged. Paint rubs required me to remove and repaint his thighs several times while trying to get the right pose for him to straddle the HMR Monster. I'm still painting the codpiece, using masking tape to isolate the areas that will remain black. I'm fairly pleased with how the helmeted face turned out. He looks like an evil bastard, doesn't he? Unfortunately, the visor he comes with completely obscures his features, so I won't be using it. It's not like he used it on Earth anyway, right? I've used this Dremel head for years... it came with it, as I recall. I'm afraid I can't be any more specific than that.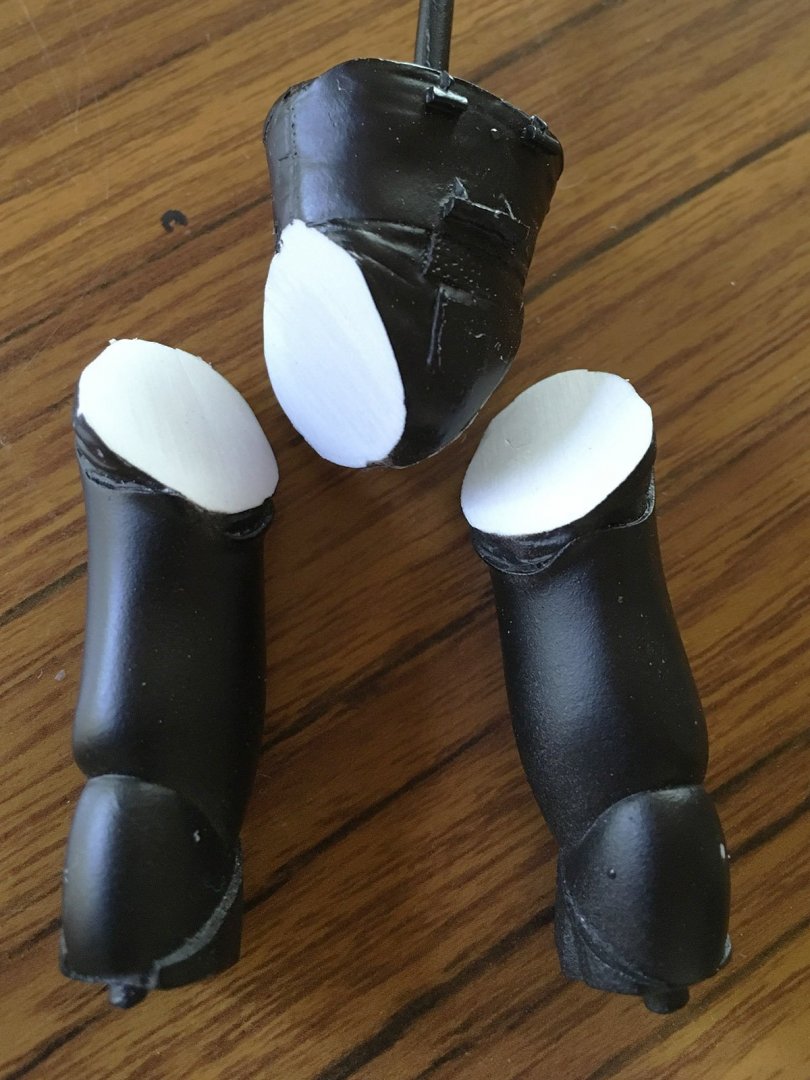


-
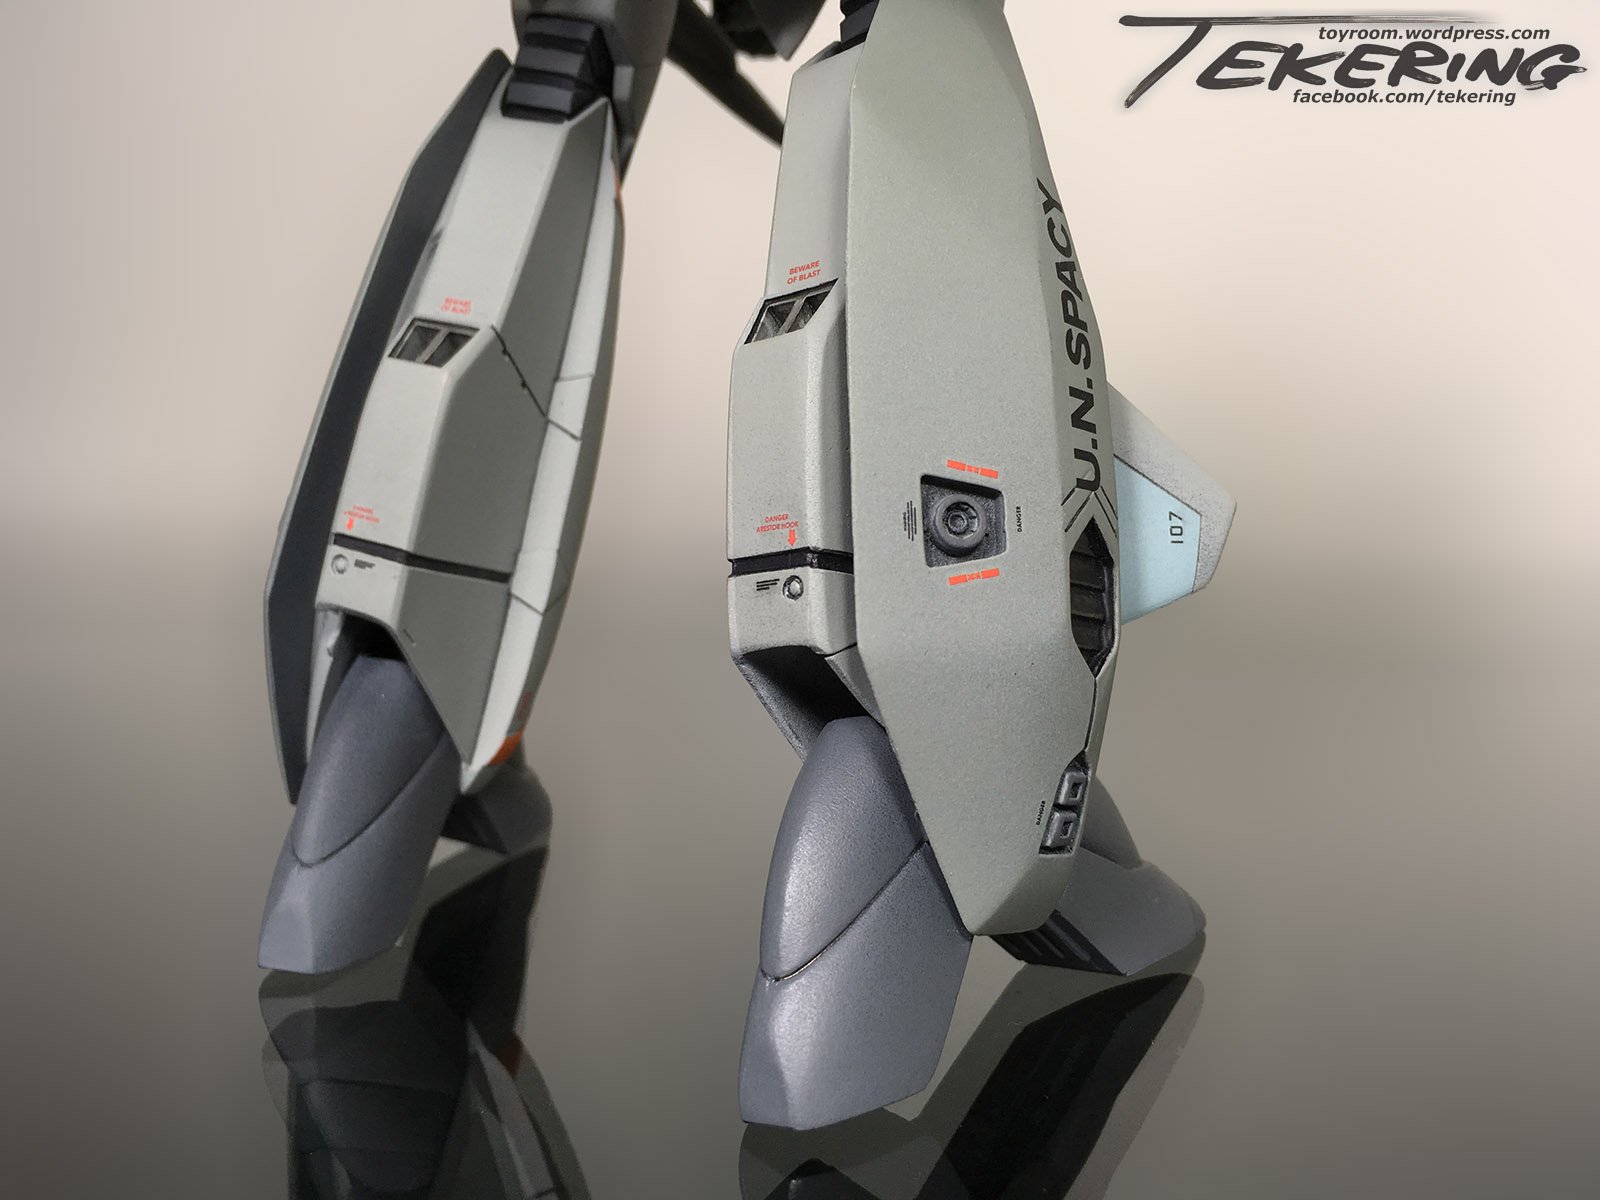
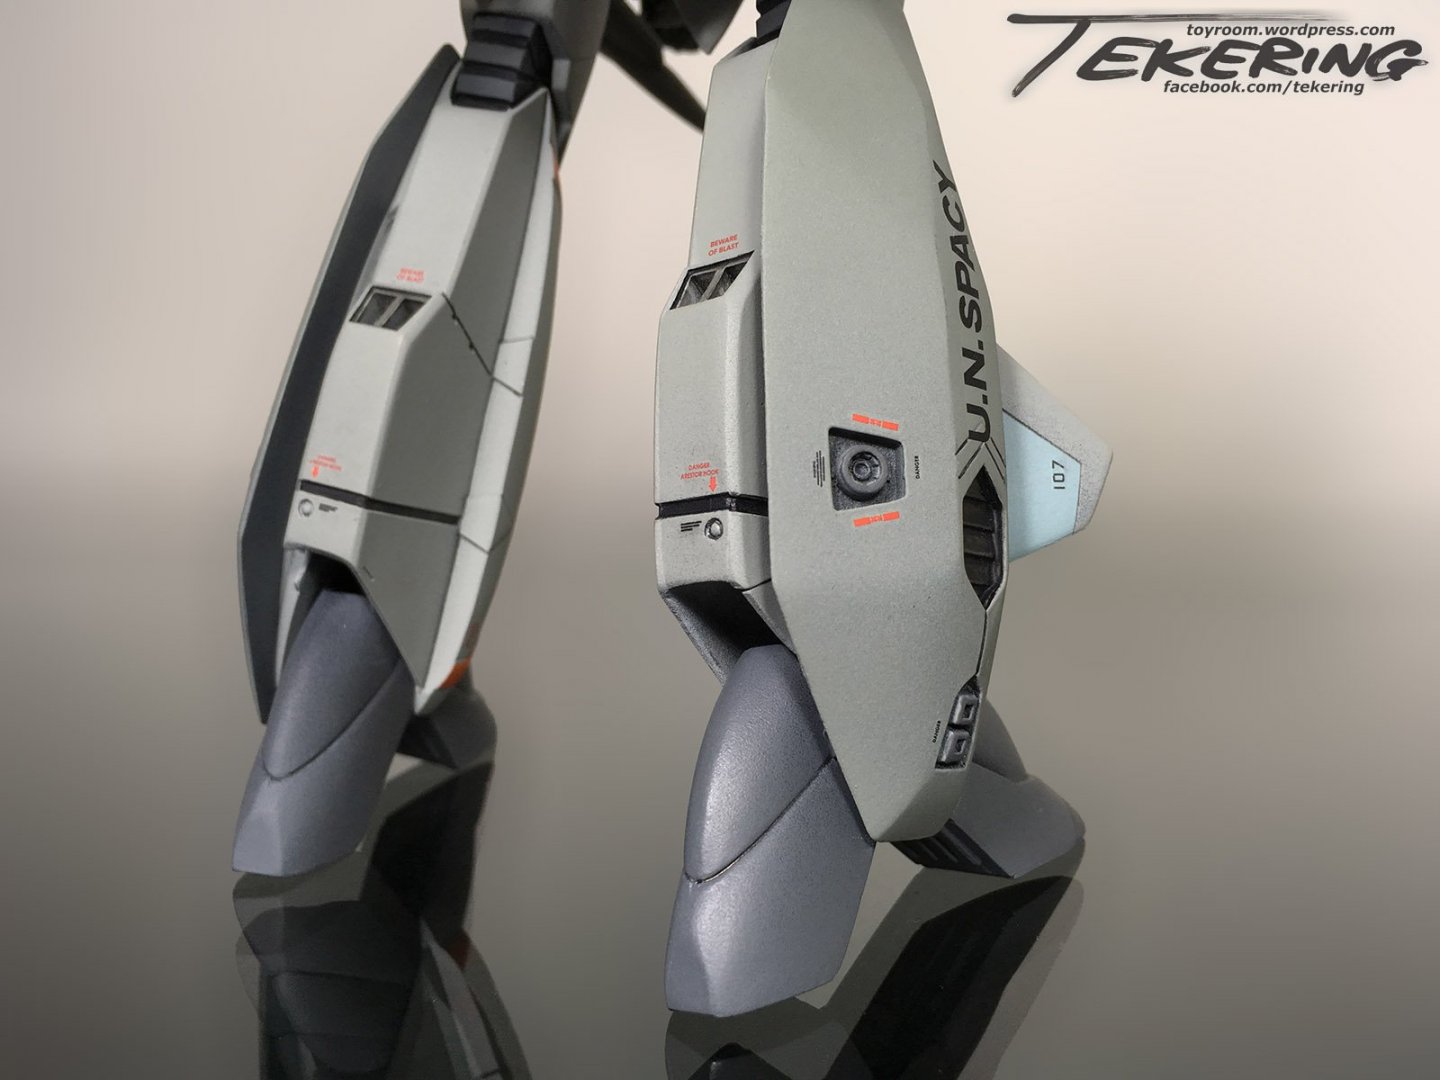
Another excellent suggestion! The medium sea grey I'm using for the primary color is a matte paint, so the surface isn't as smooth as it would be using a glossy or semi-gloss color. A layer or two of clear gloss is always a good idea before applying decals. However, it turns out the Hasegawa UN SPACY markings for the legs won't actually fit, since the shape of the FAST pack armor on the resin kit is significantly different from the fighter kit I'm stealing the decals from... ...so, lots of putty, sanding, primer, sanding, putty, sanding, primer, sanding, and more primer was required to reshape the armor... ...until eventually, I had enough flat surface area for the lettering to fit. Base coat, primary color, and a coat of clear gloss later, the surface was finally ready for the decals. Areas that are not visible in fighter mode (like the backs of the legs) have no established precedent for warnings, nomenclature and the like, so I'm free to apply whatever markings look right to me. Using a mix of Hasegawa, Wave, and Bandai decals -- some Macross-specific, some not -- I think I've managed a consistent look that's realistic without contradicting other depictions of the VF-11. I've used Hasegawa's kits and Arcadia's "Premium Finish" toys as inspiration, since I think their markings strike the best balance between anime-accuracy and real-world detailing. Bandai's DX Chogokins tend to overdo it, and I want to avoid prominent markings that are inconsistent with the animation.


-
tekering's BItComp entry #2 - Quamzin resin kit
tekering replied to tekering's topic in The Workshop!
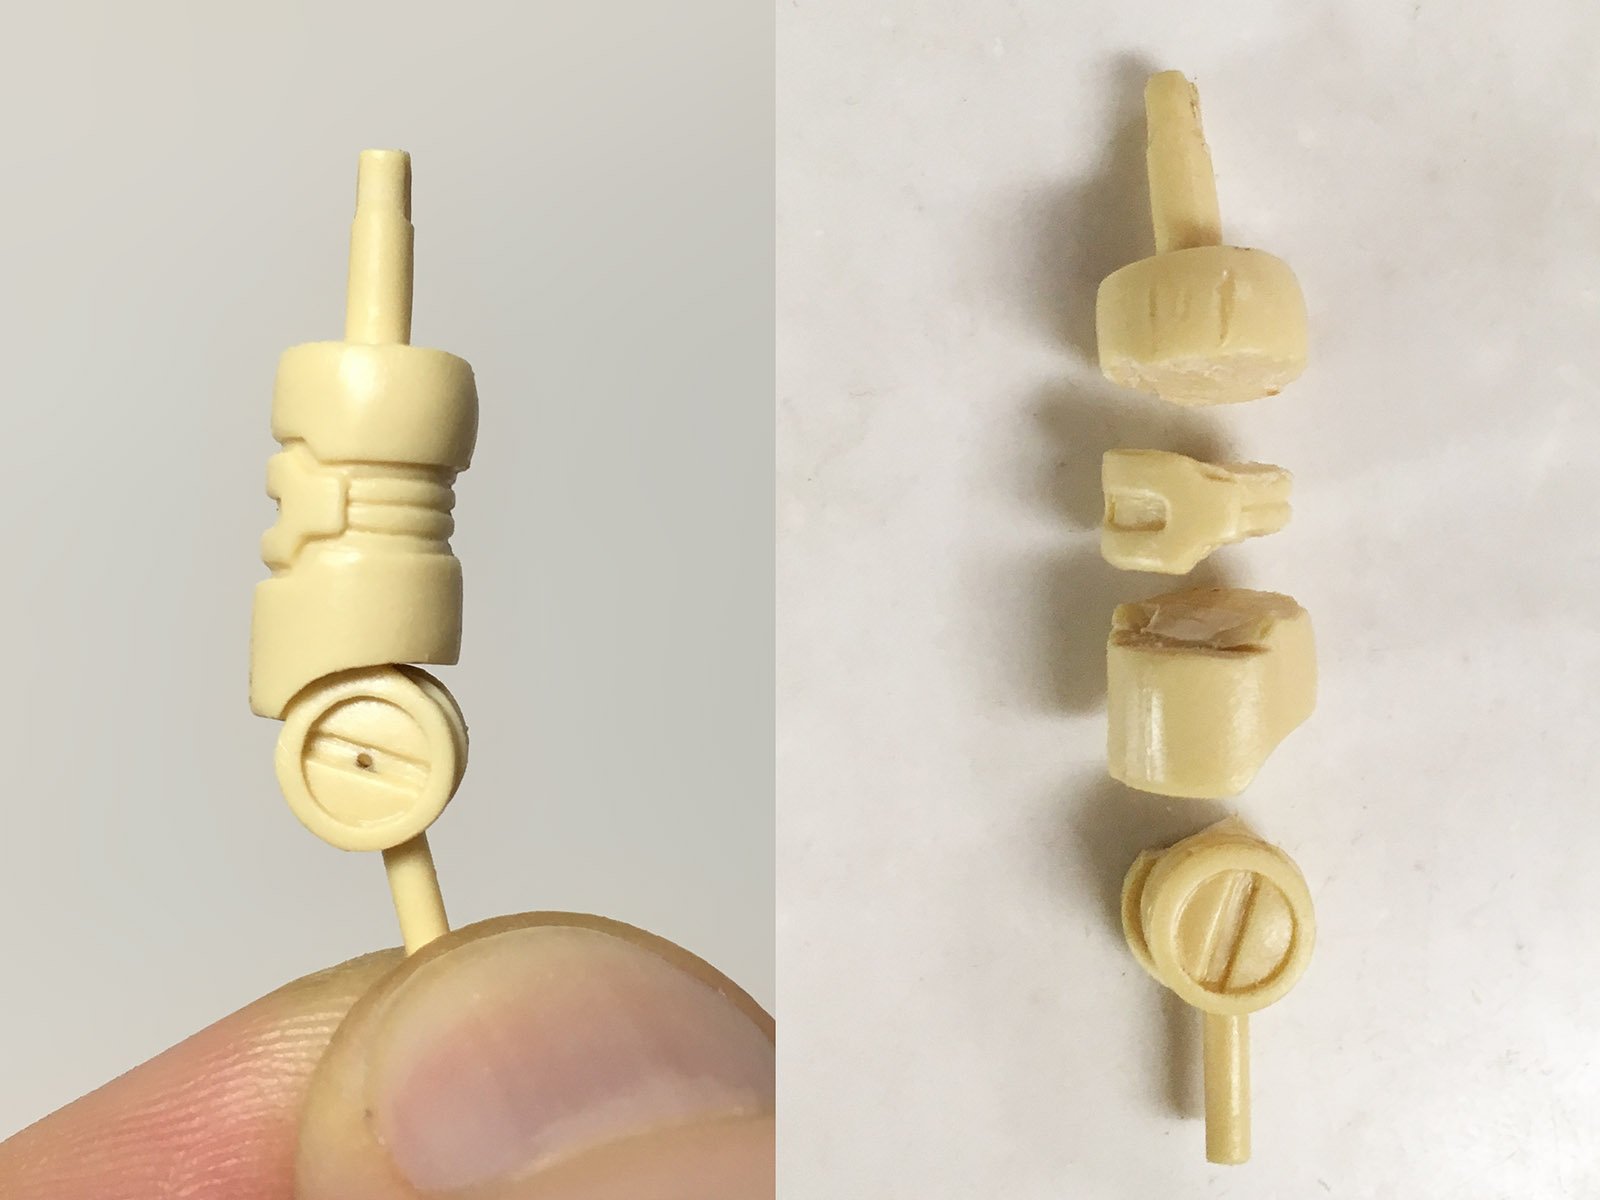
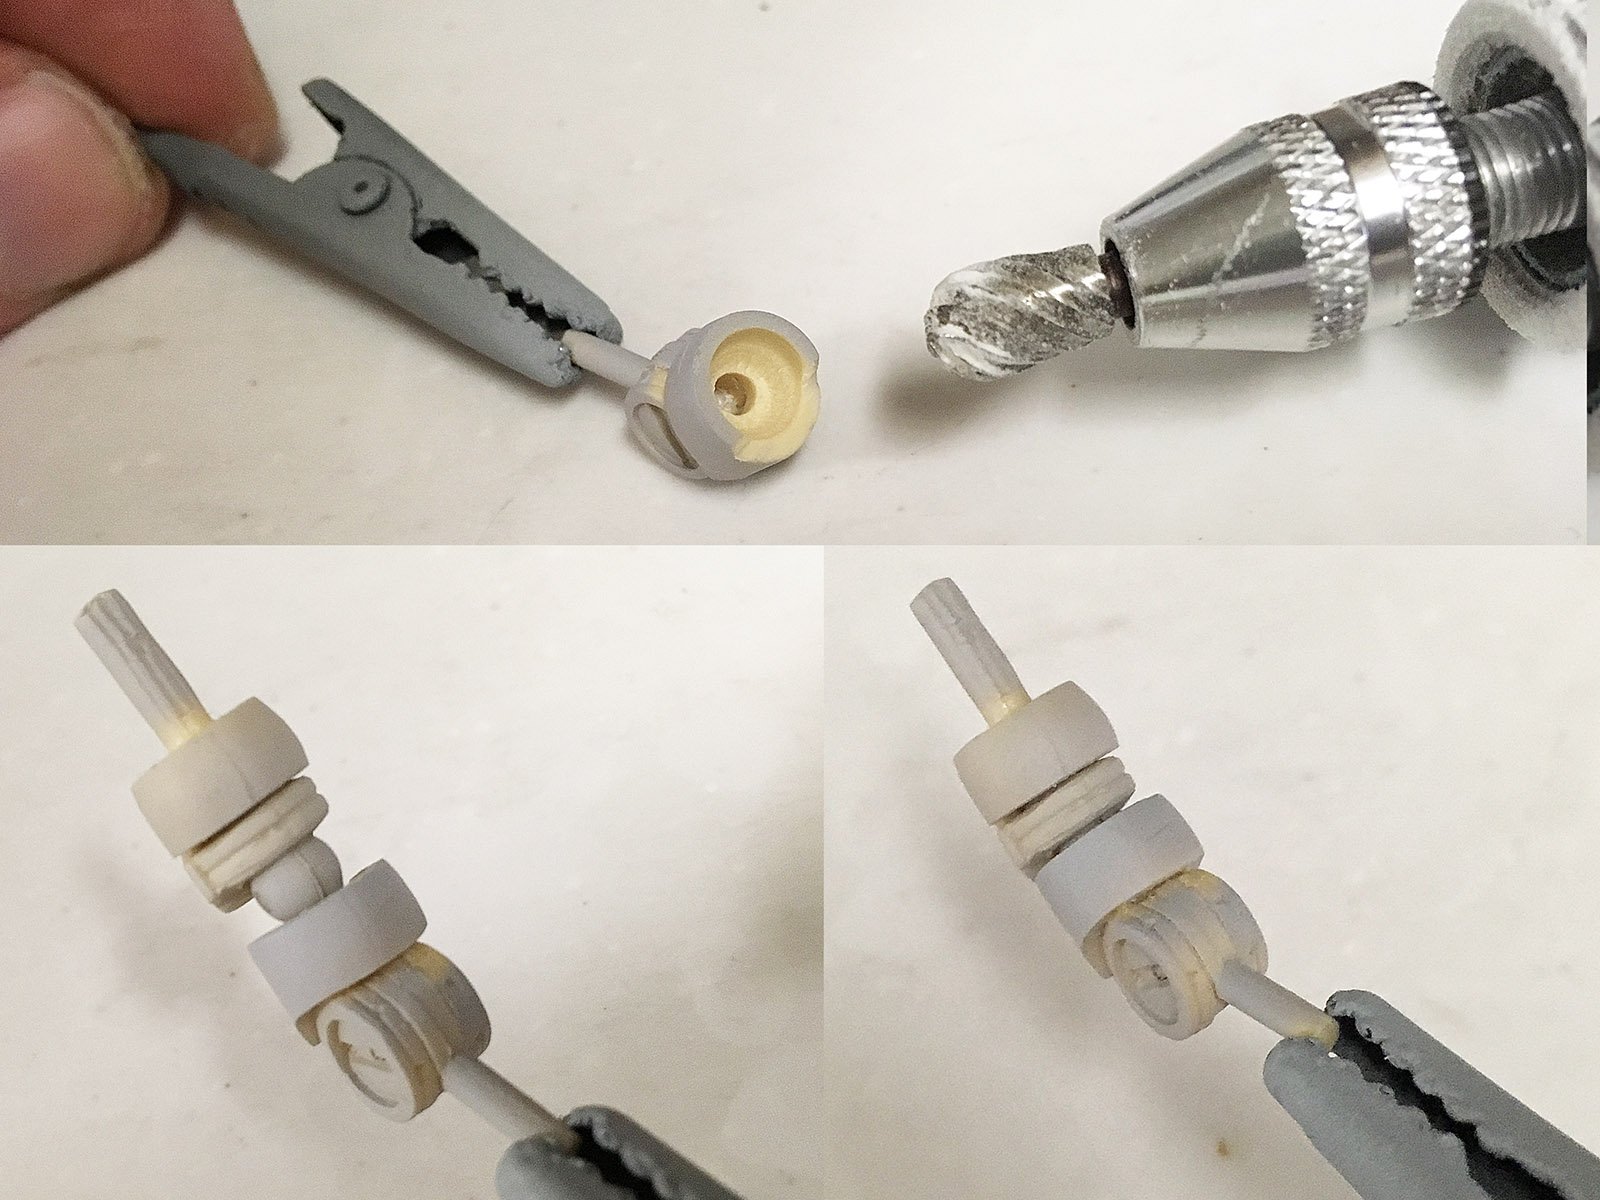
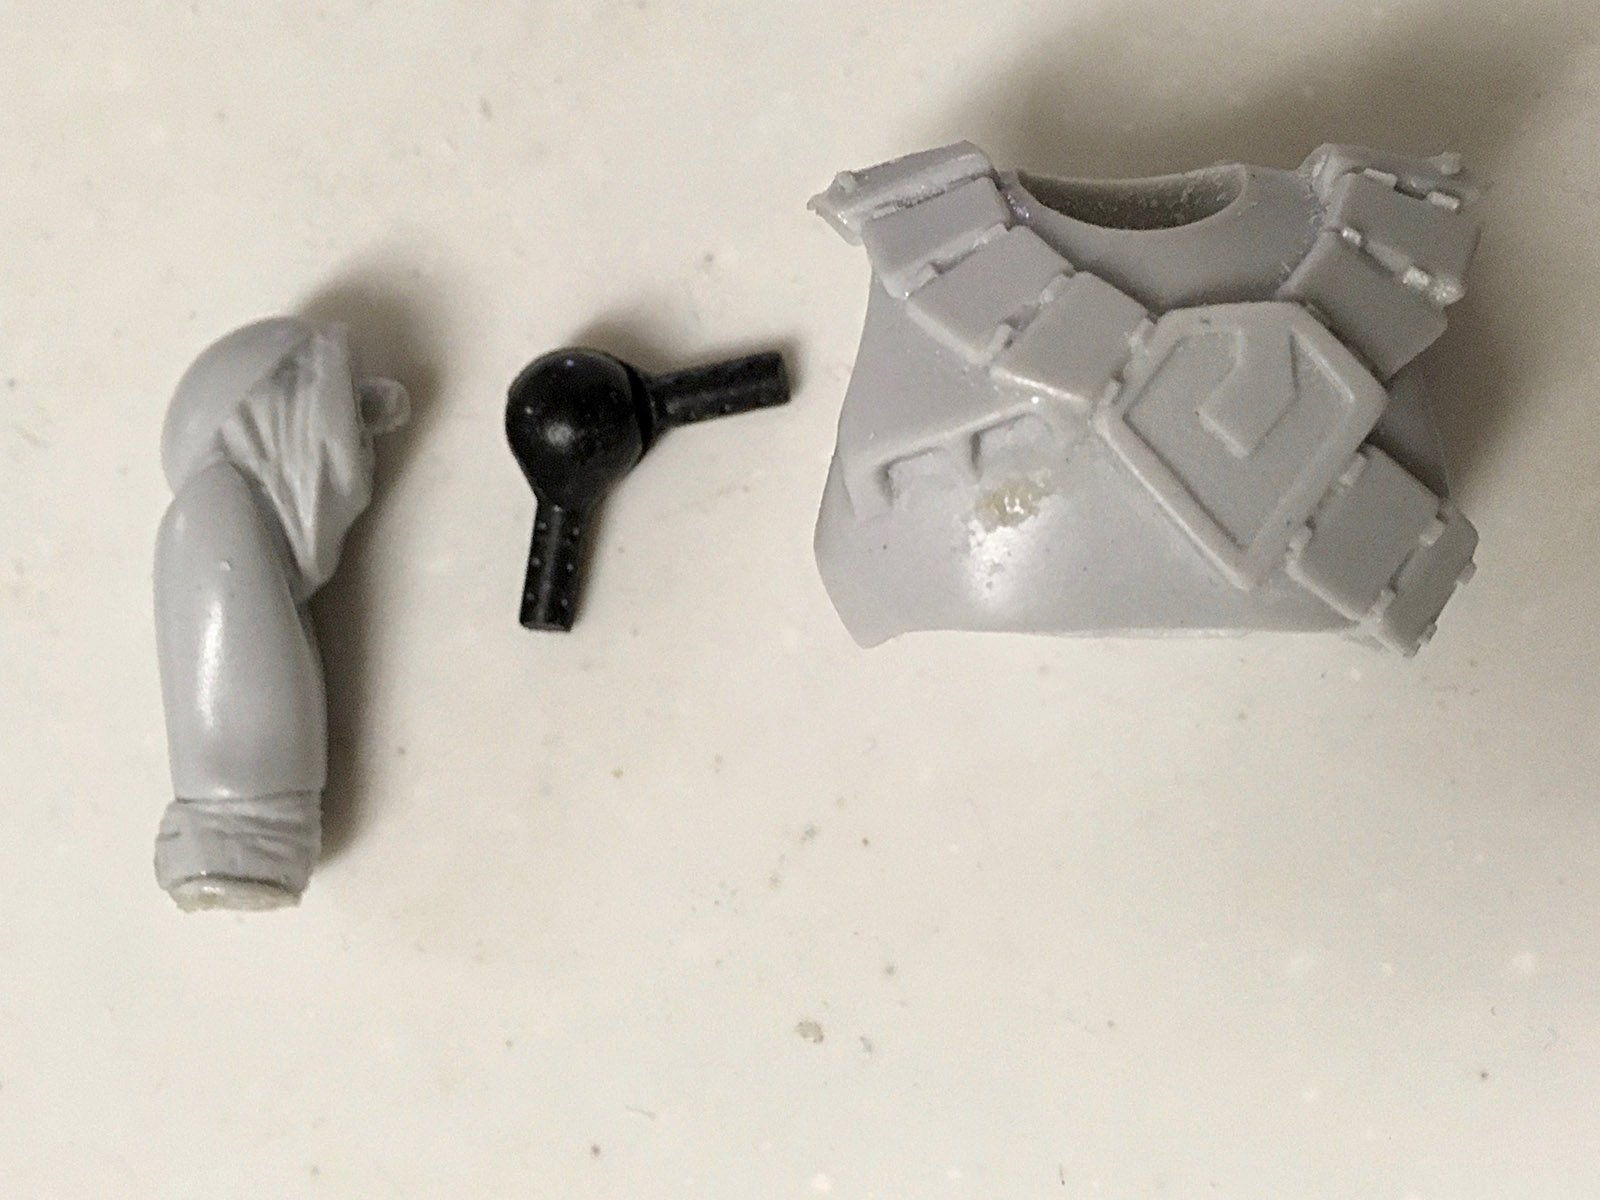
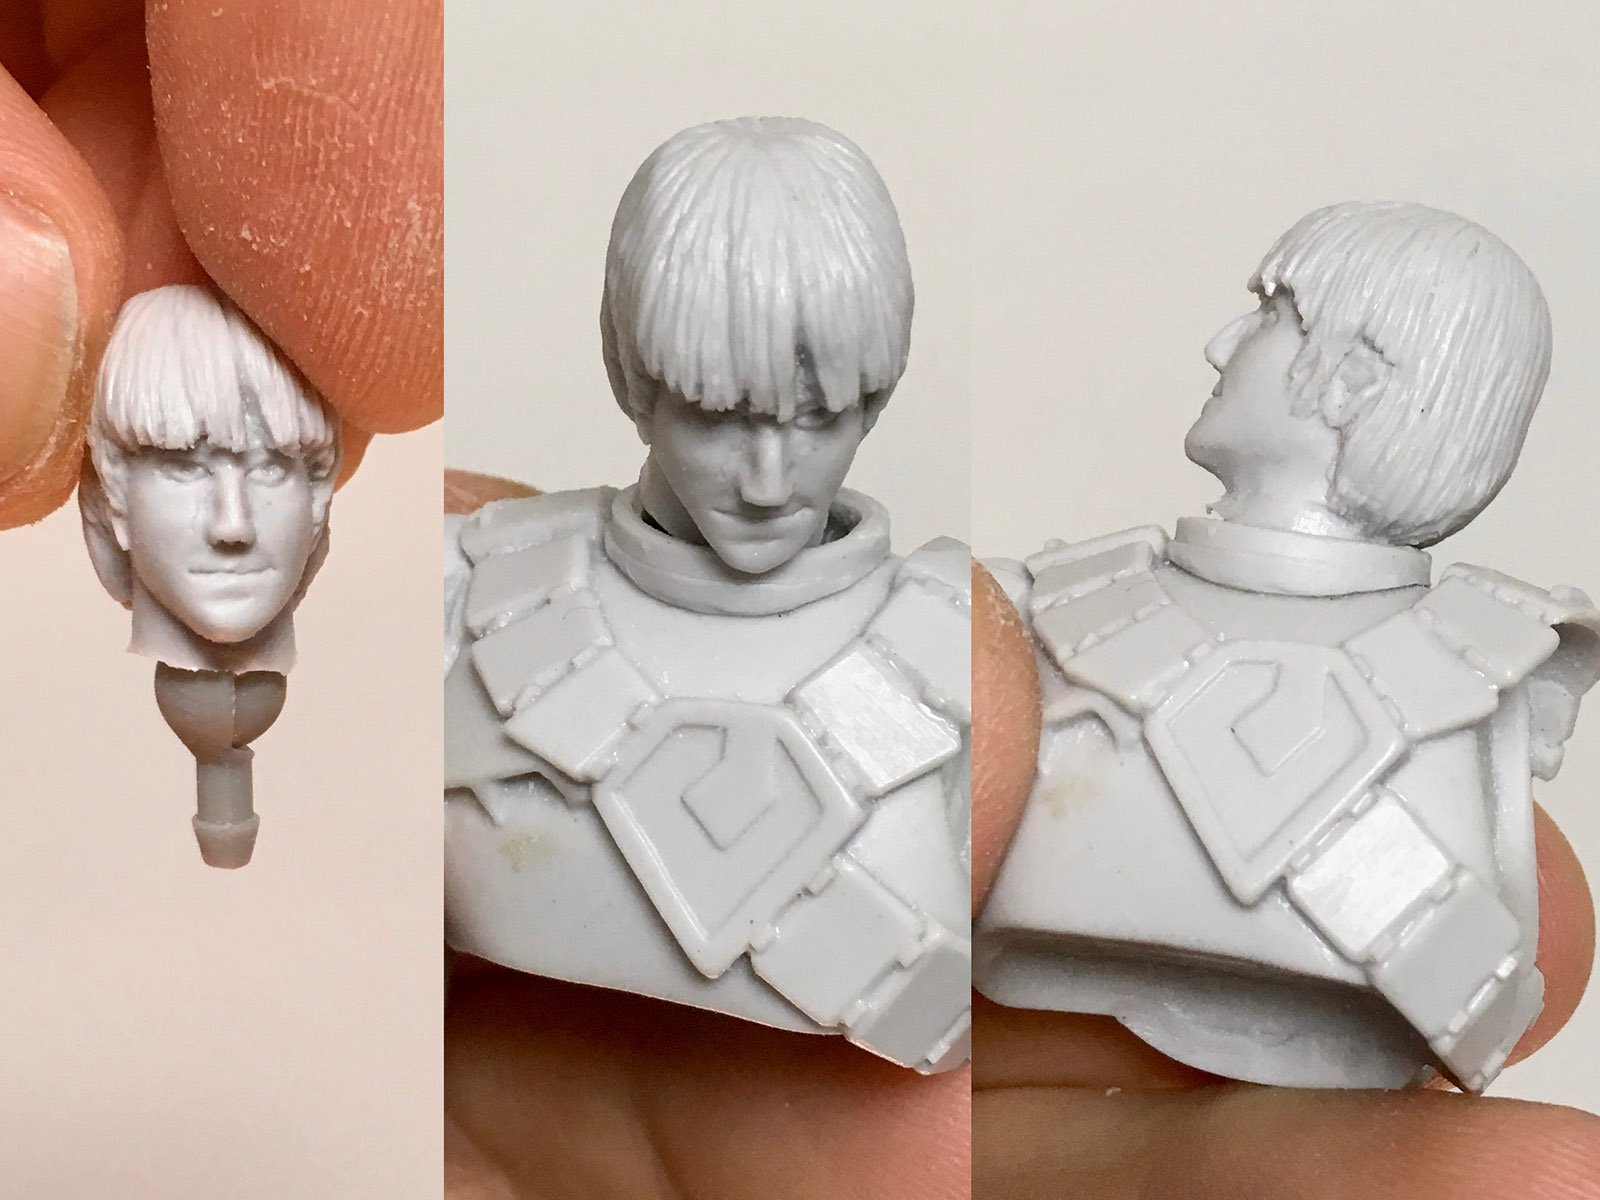
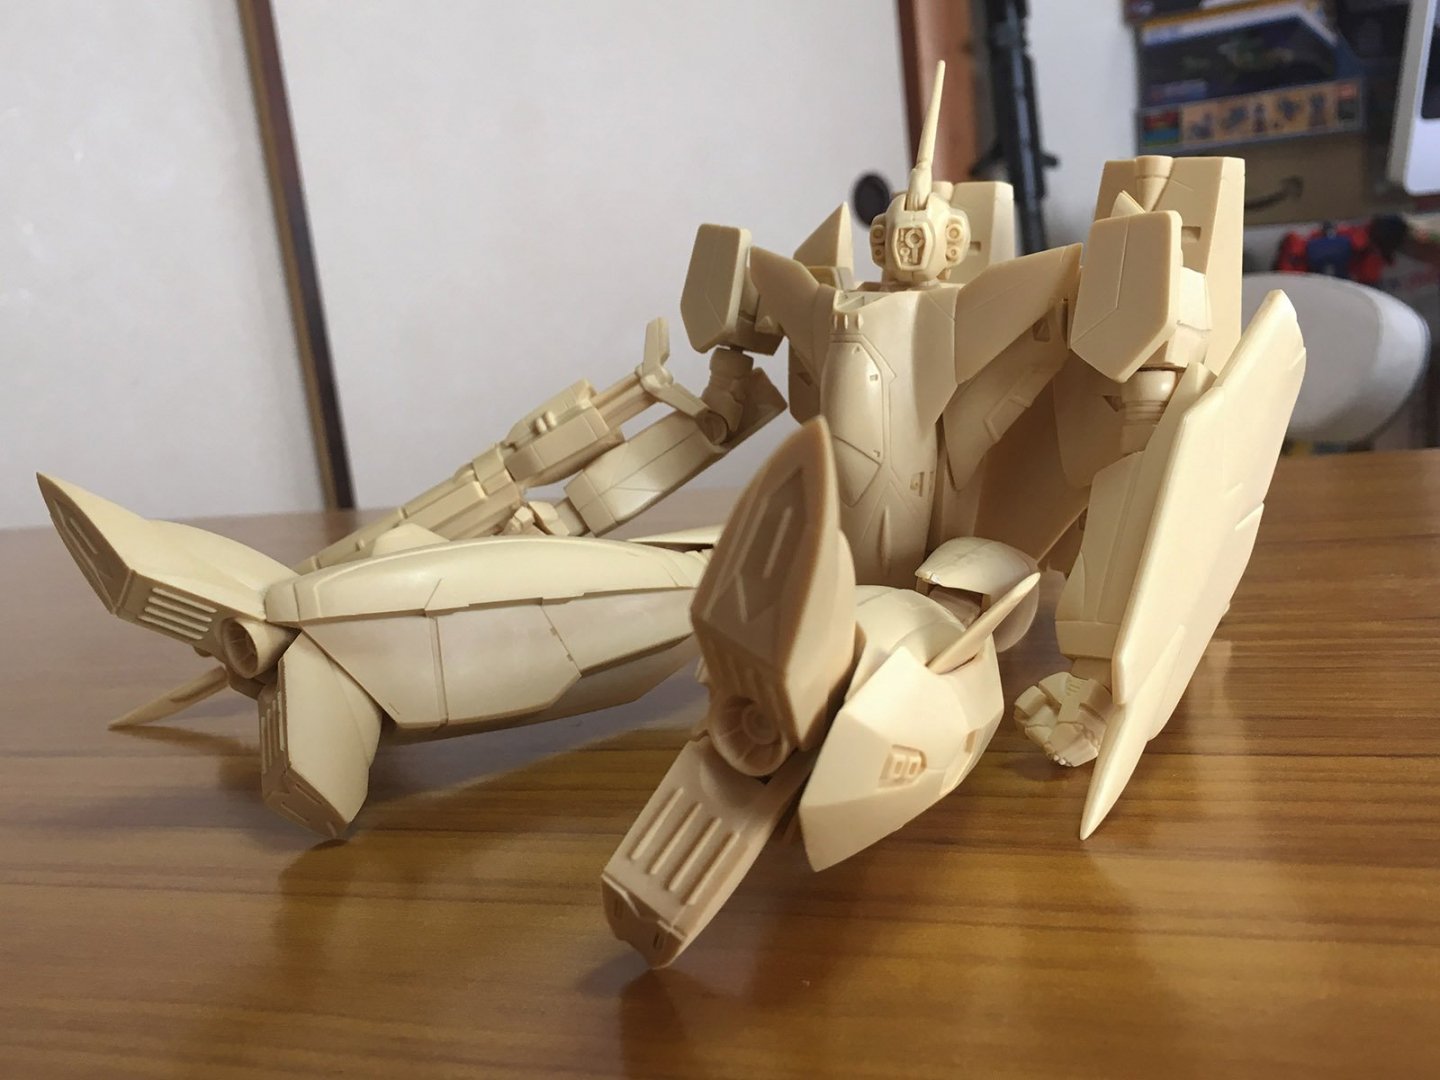
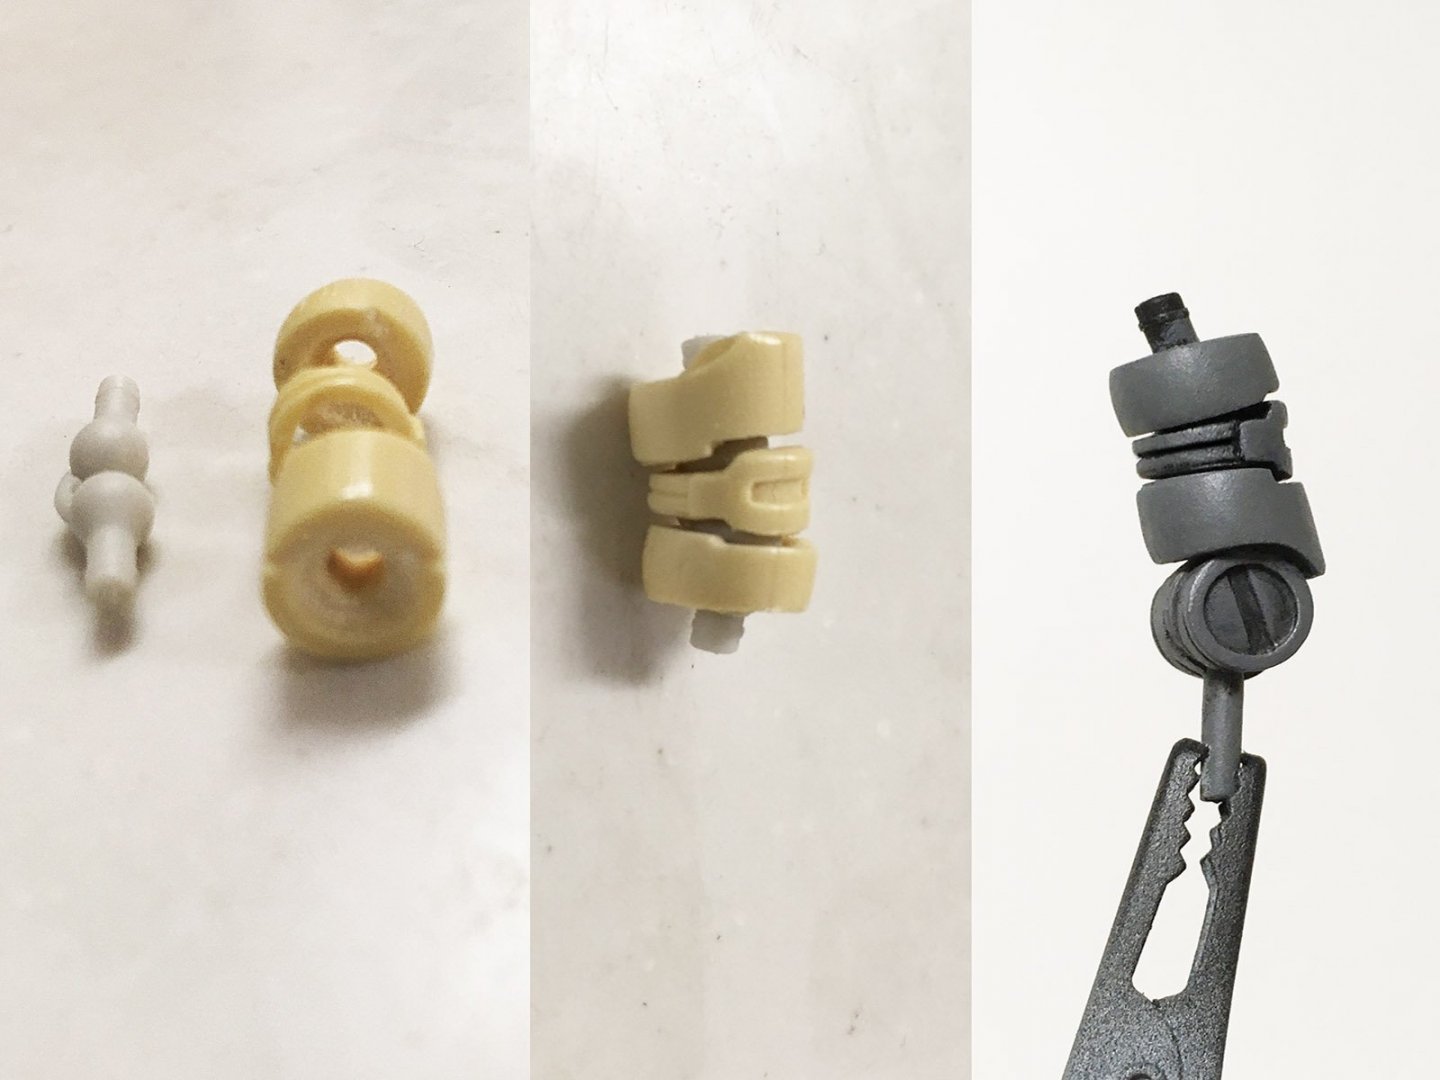
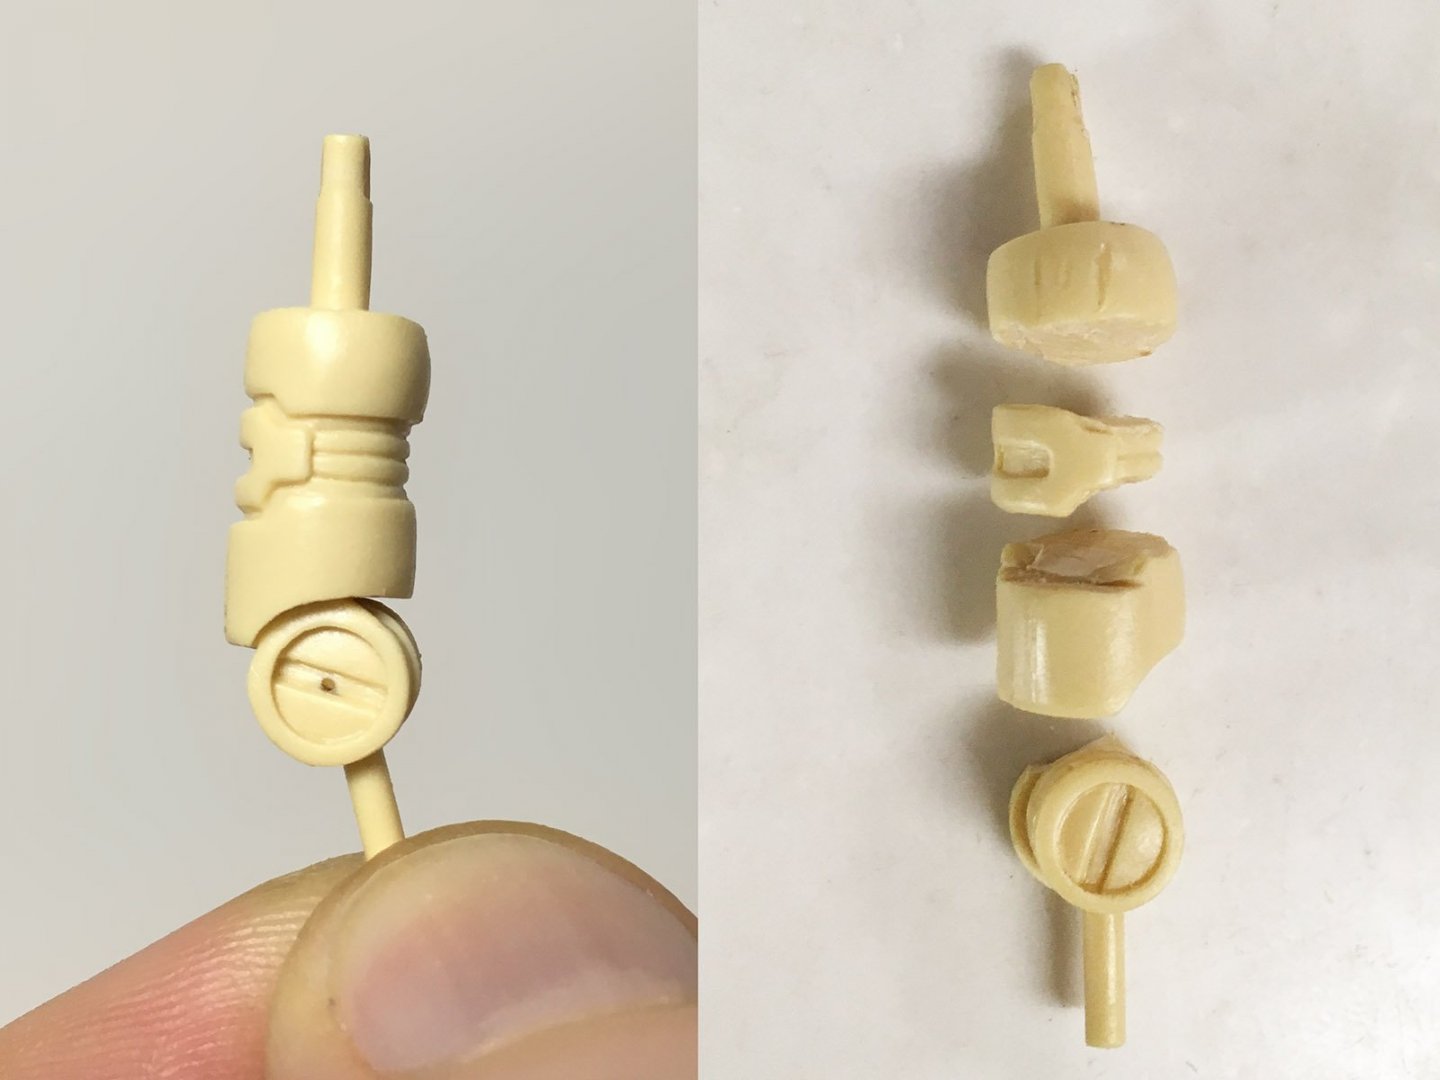
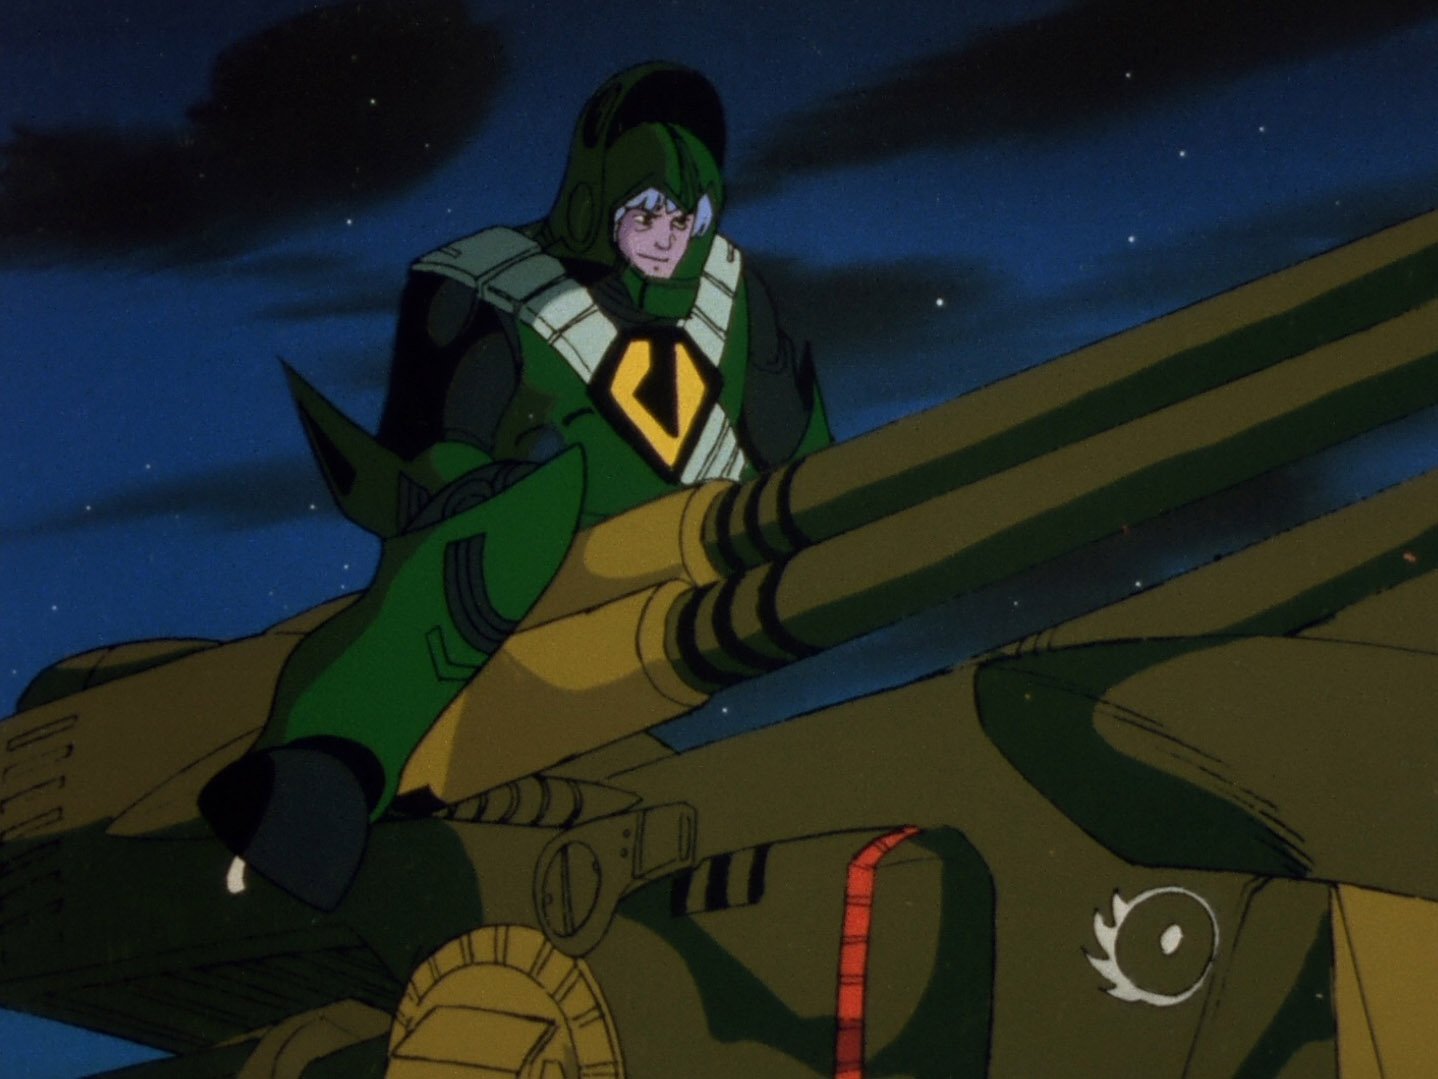
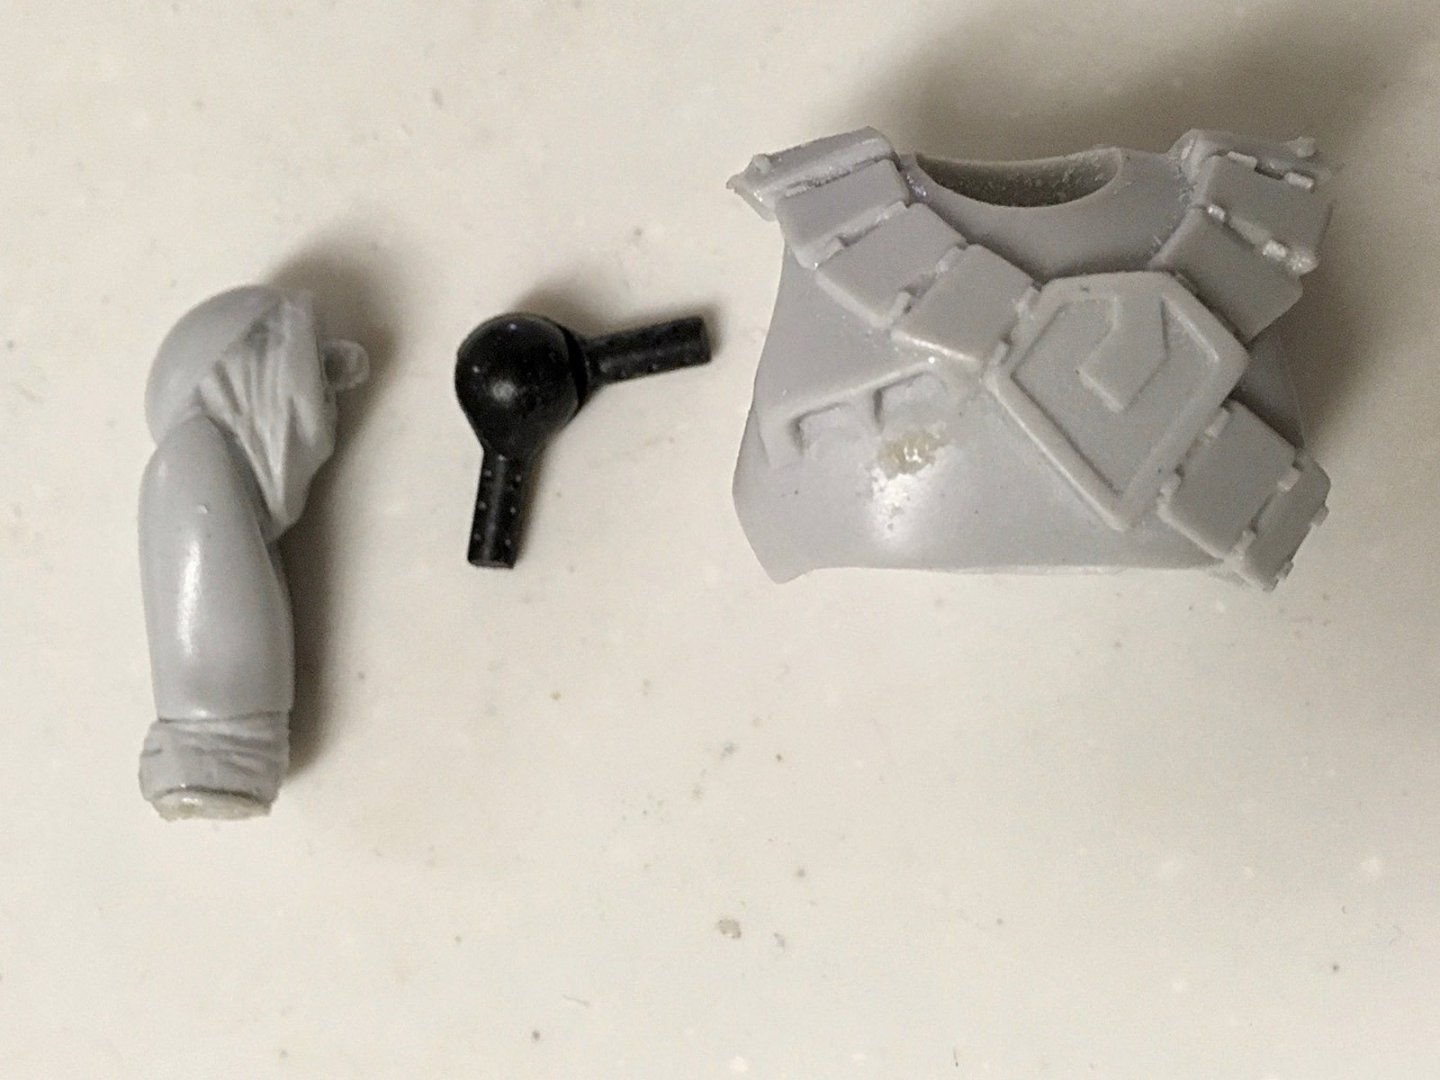
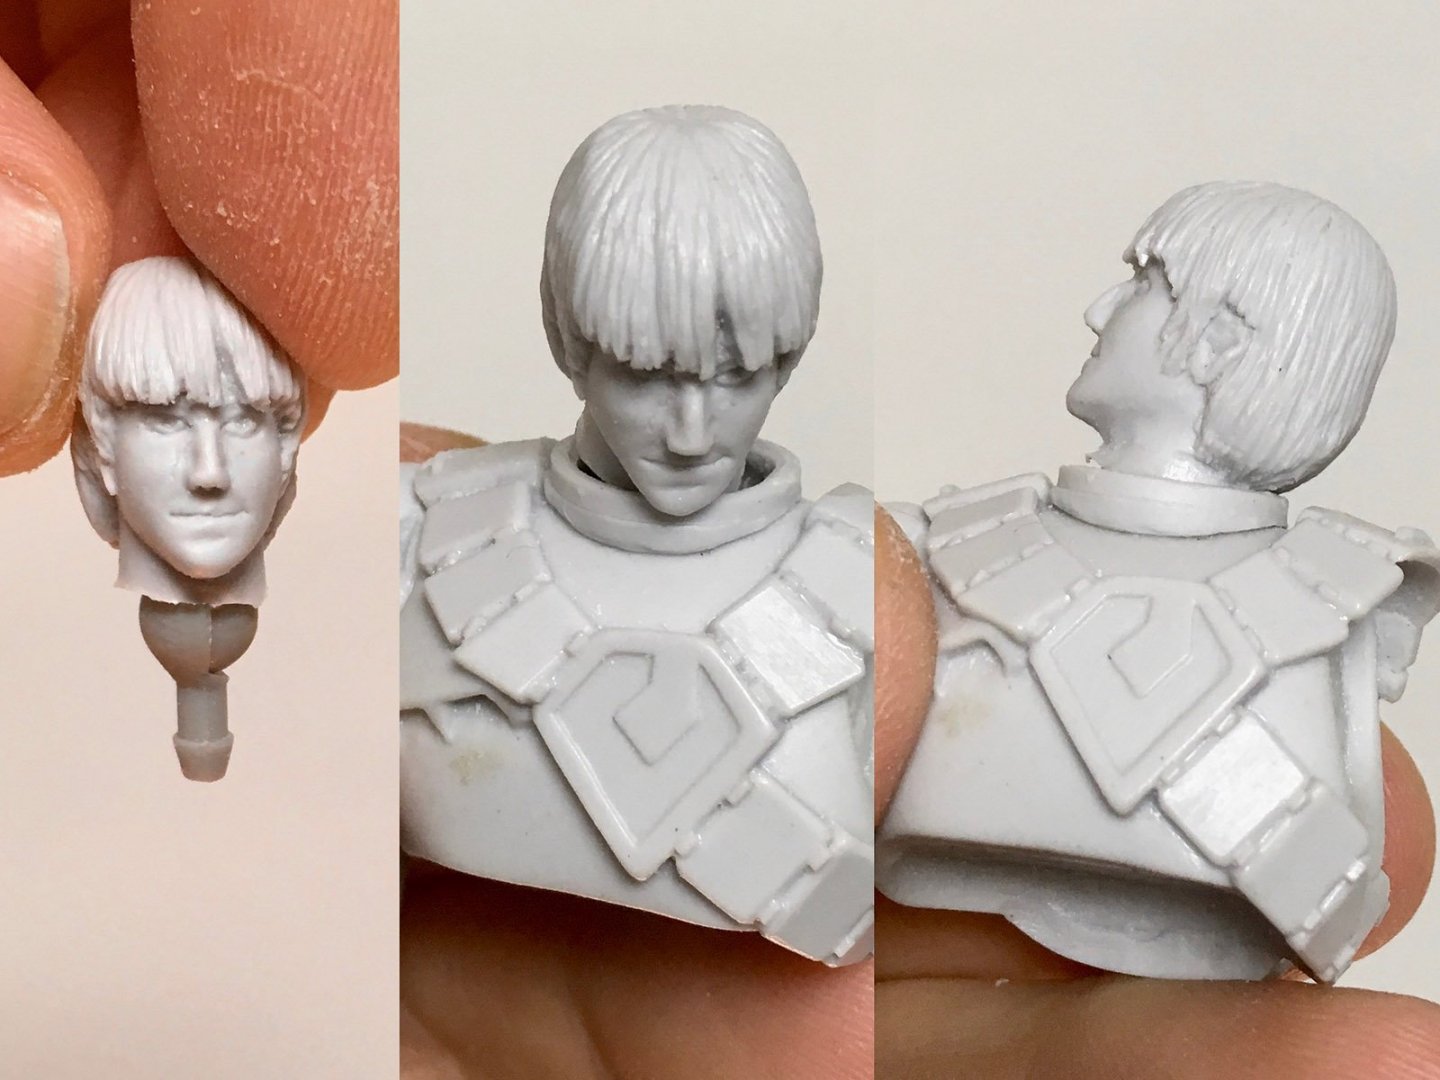
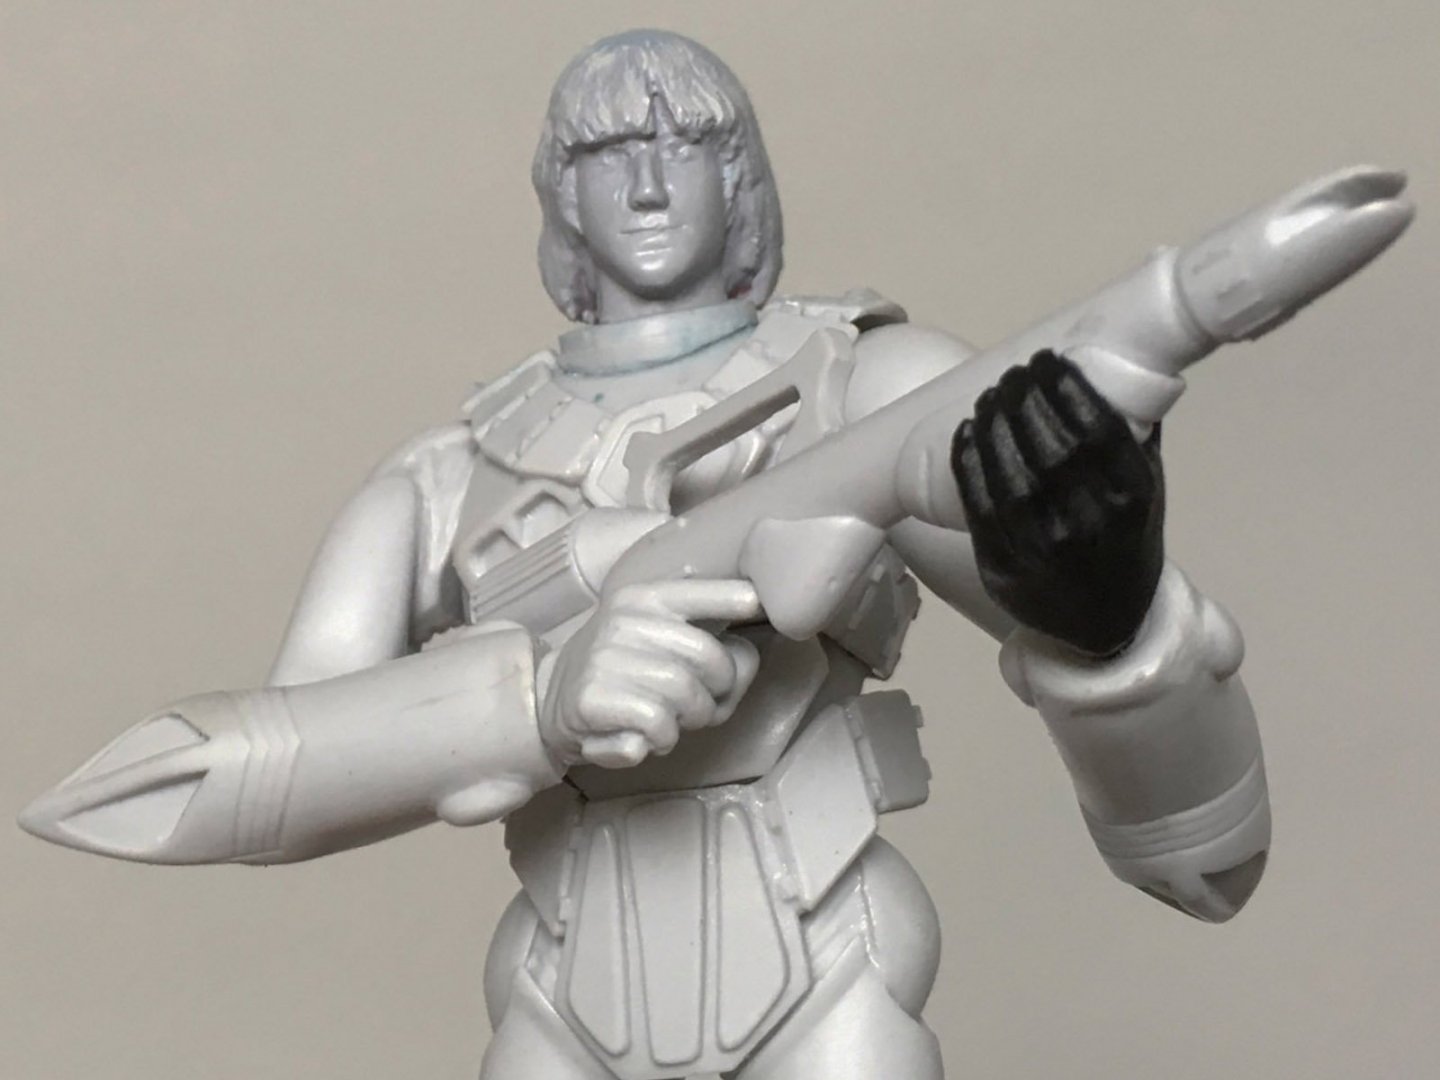
So, I've been putting this one off while I tackle the much larger Gnerl (and the much more complex VF-11 Battroid), figuring it would be the simplest and easiest kit to build... but in fact, it's required far more modifications than the other two kits put together! It all started on October 1st, when Return 2 Kit Form posted these images on Facebook: On the left is the stock figure, assembled exactly as intended; a resin statue, totally incapable of brandishing the rifle as depicted on the bottom right, much less straddling the Monster above it. Was this intended as a personal challenge to me, having previously declared my intention of articulating the figure? (Of course not -- it's just advertising the availability of the kit, and illustrating the character it represents.) Nonetheless, the gauntlet had been thrown down! I would not rest until Quamzin could be posed as depicted. First, I decided where to install the Revoltech ball-joints; I figured they'd be needed in the shoulders, the elbows, the knees, and the neck as well. It's not enough to just drill holes for the pegs; you've gotta hollow out sockets for those ball-joints to fit into. If you've done a decent job, the joints should not be visible at all: ...at least, not unless you want Quamzin making grand, theatrical gestures. I then drilled similar sockets into the elbows, the gauntlets, the thighs, the legs, the neck, and the torso. It's messy work, and resin dust gets everywhere. I recommend a mask and goggles for this sort of thing, especially when using power tools. With a joint installed in the neck, Quamzin can now look up and down, left and right, even glance over his shoulder. The next step was to fix that Beatles hairdo... Easier said than done, I'm afraid. First attempt was too feminine, and still too short; second attempt looked like an unruly teenager. Okay, now it's looking more like Quamzin. The left hand (stolen from a Marvel Legends Thor: Ragnarok figure) allows him to hoist the rifle in a more threatening two-handed manner.


-
If it had been intended as a joke, it would've been at Tatsunoko's expense, for having to farm the work out to other studios with lower production standards. Sometimes the mecha was so poorly-rendered, it was practically unrecognizable...
-
The Transformers Thread (licensed) Next
tekering replied to mikeszekely's topic in Anime or Science Fiction
Before Earthrise, before Siege, before Titan Returns, even, there was ToyWorld's "Evila Star..." ...and despite my reservations about the robot mode... ...it's still the best Astrotrain we've gotten.- 16946 replies
-
- 1
-

-
- transformers
- toys
- (and 5 more)
-
You've obviously never pre-ordered a third-party Transformer. Even eighteen-month delays aren't unusual.
-
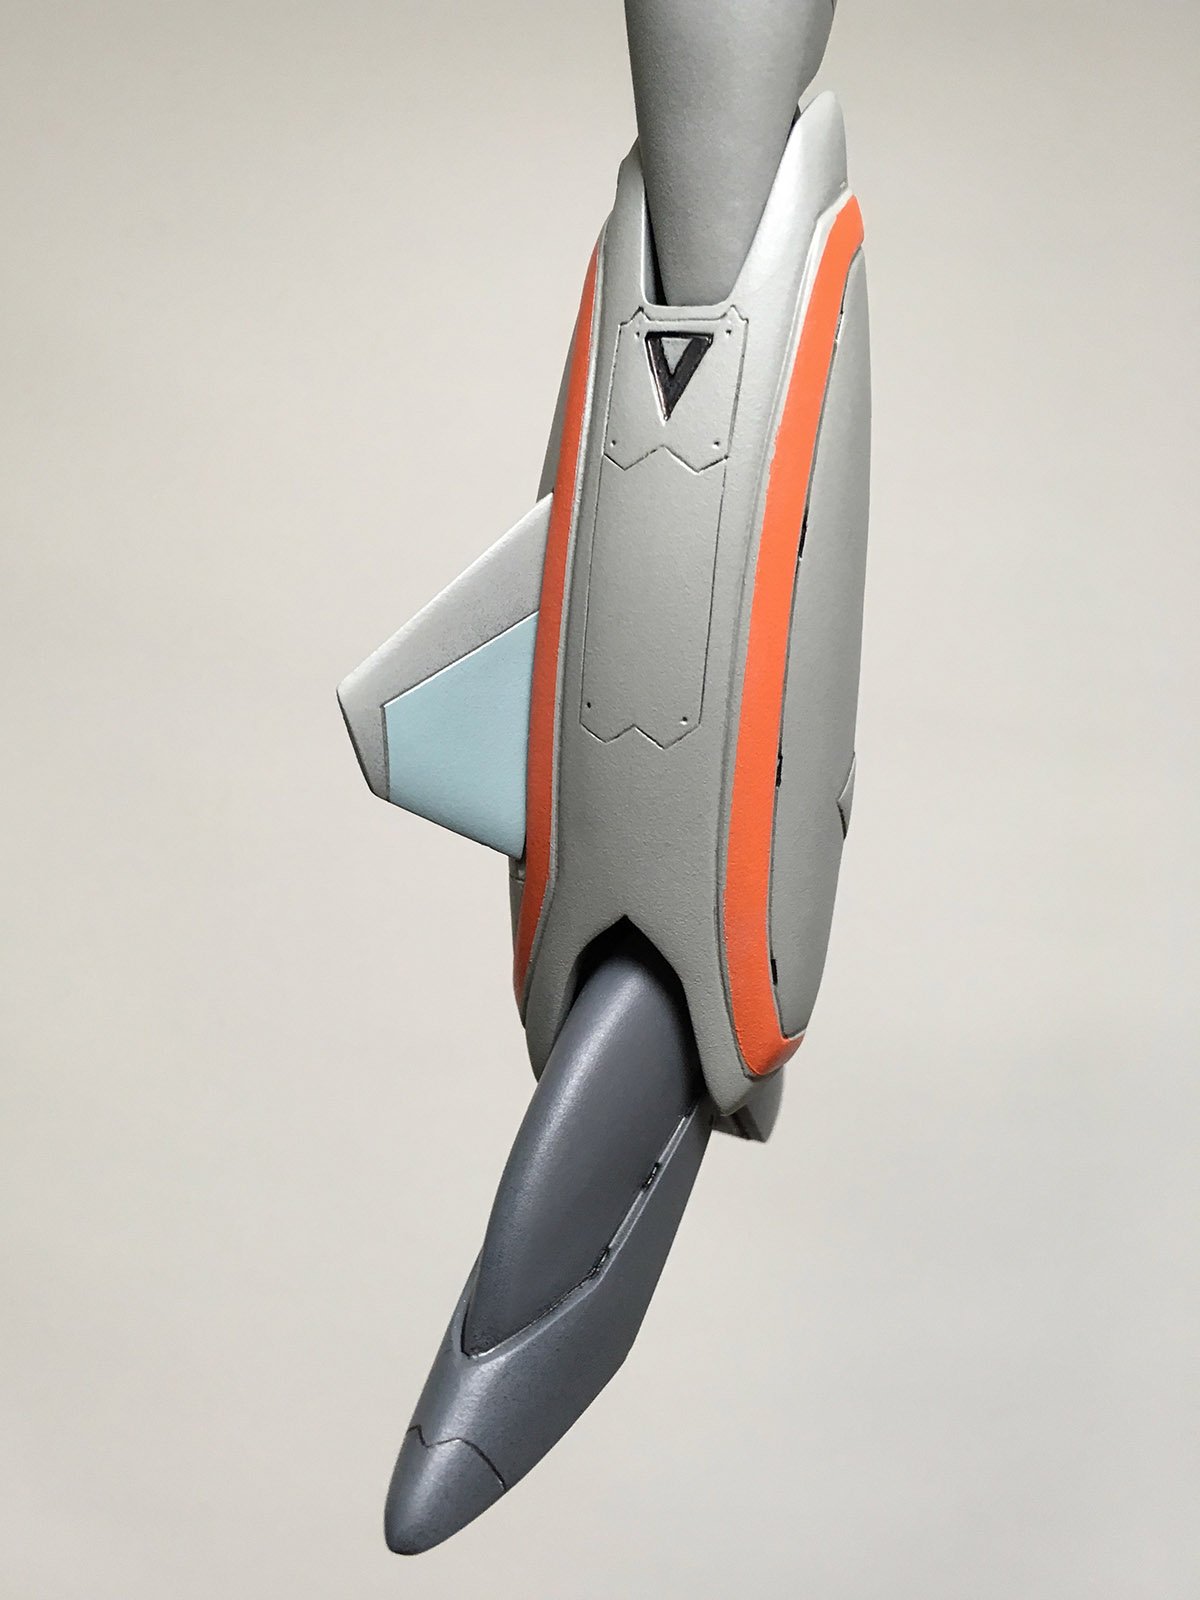
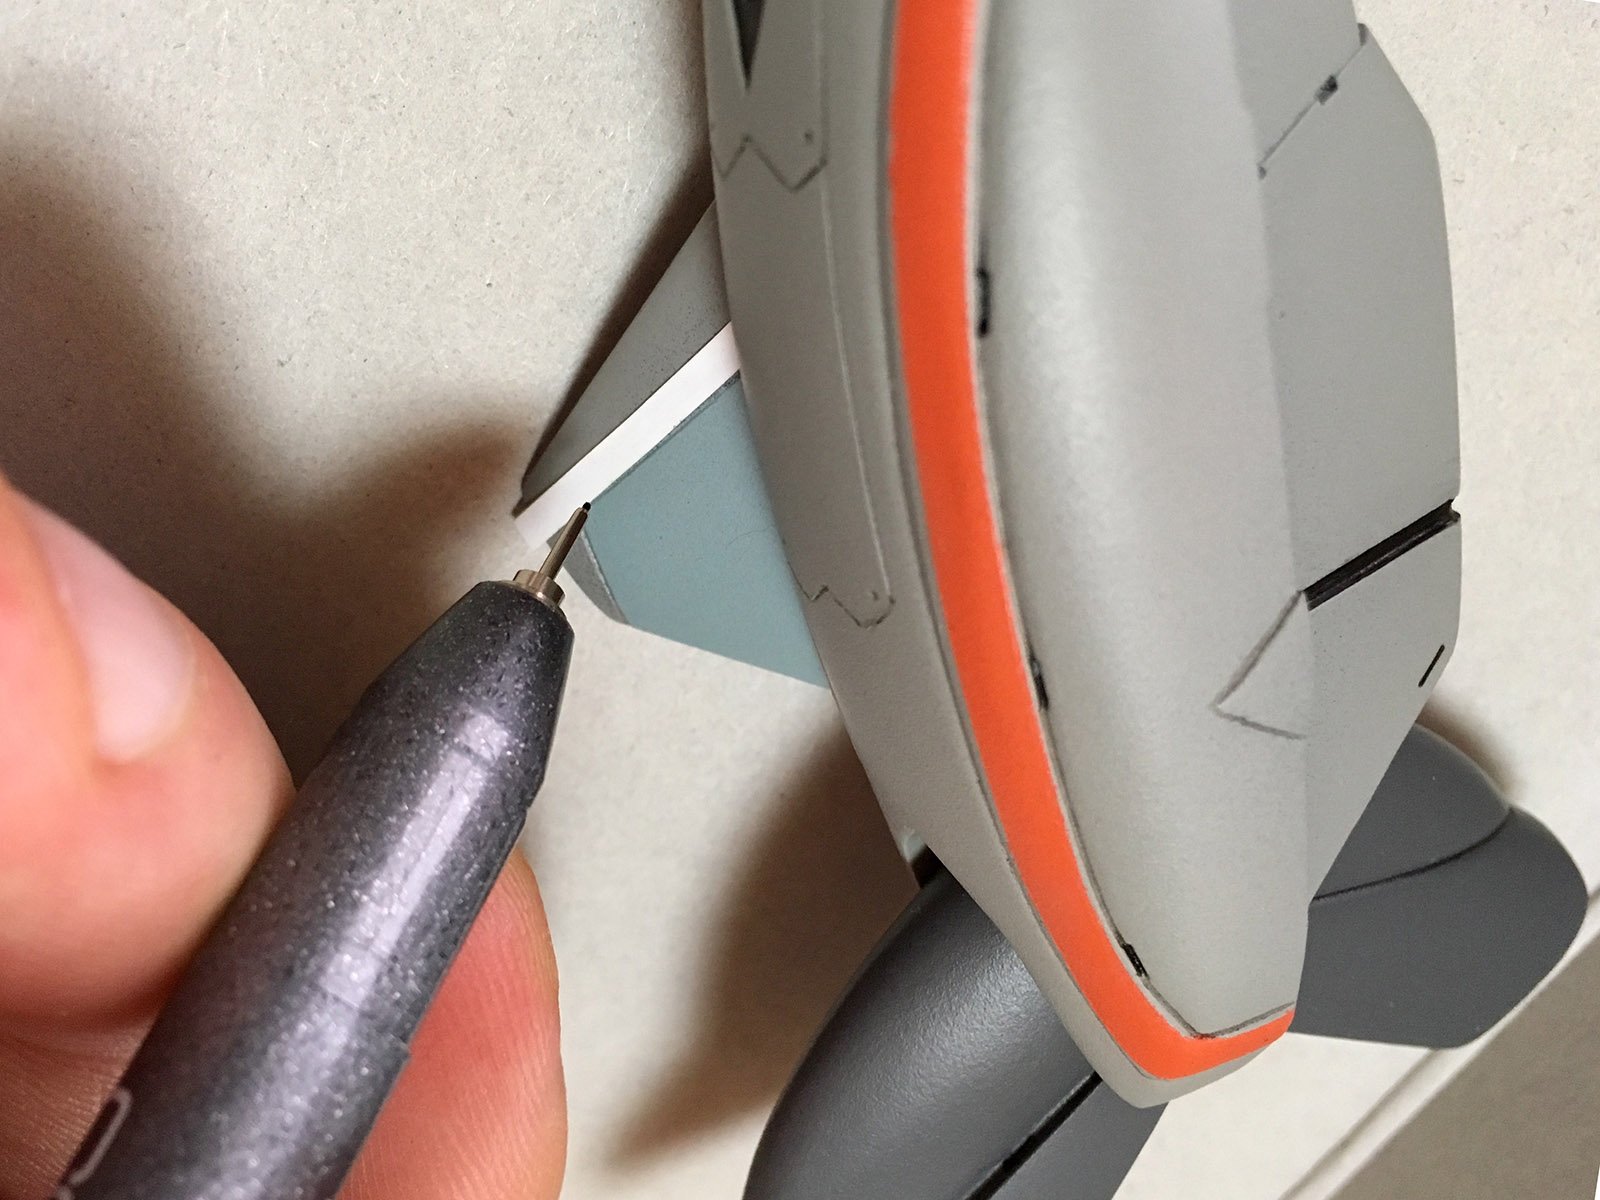
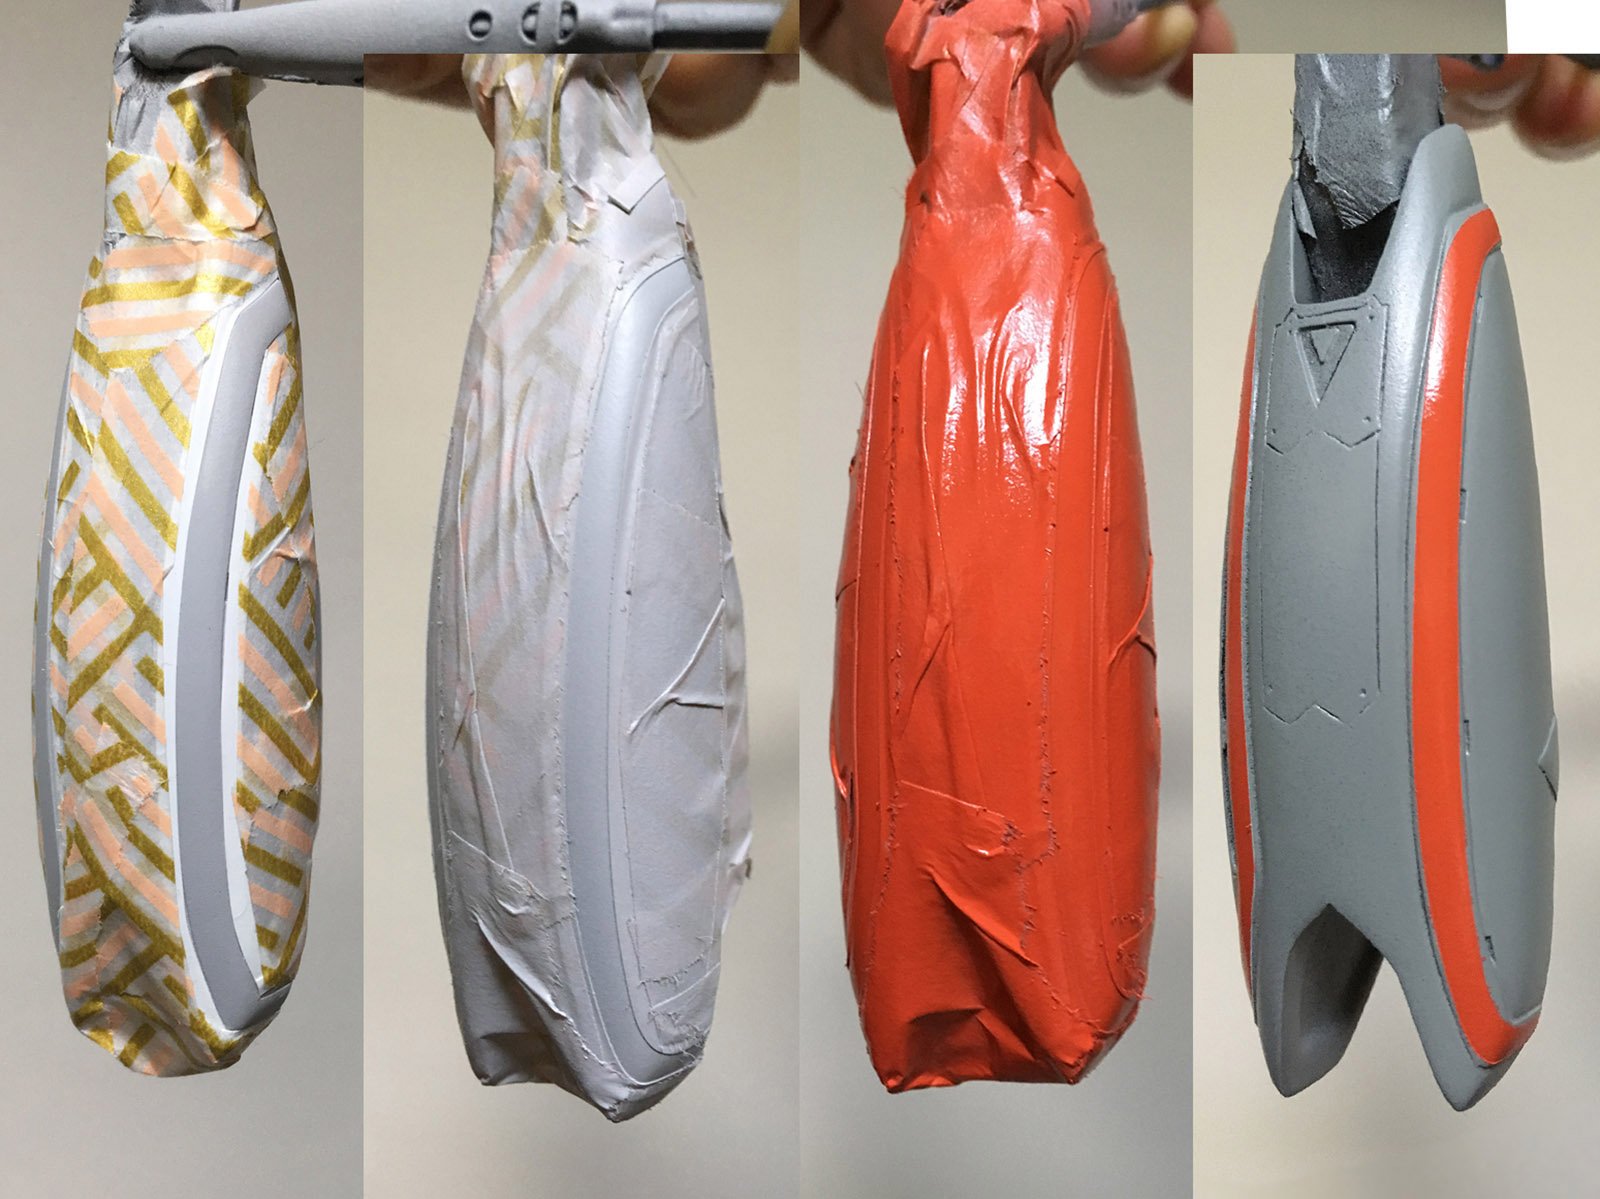
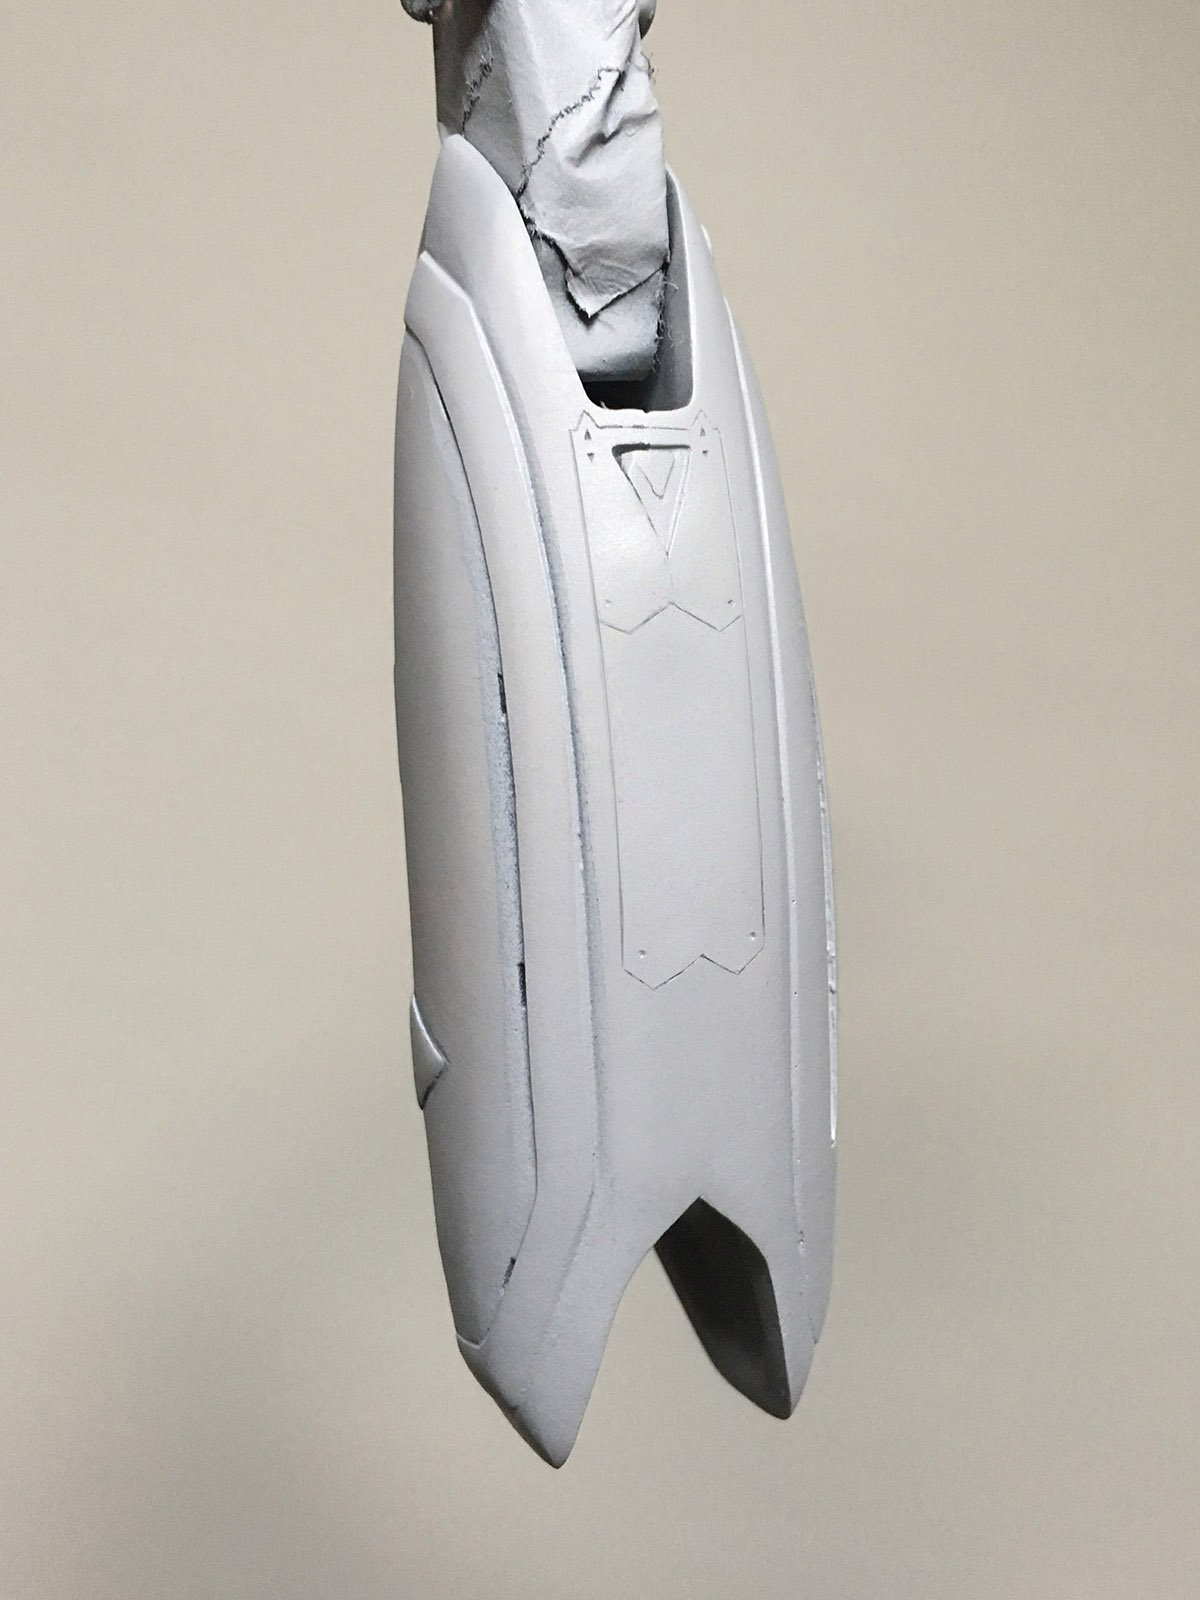
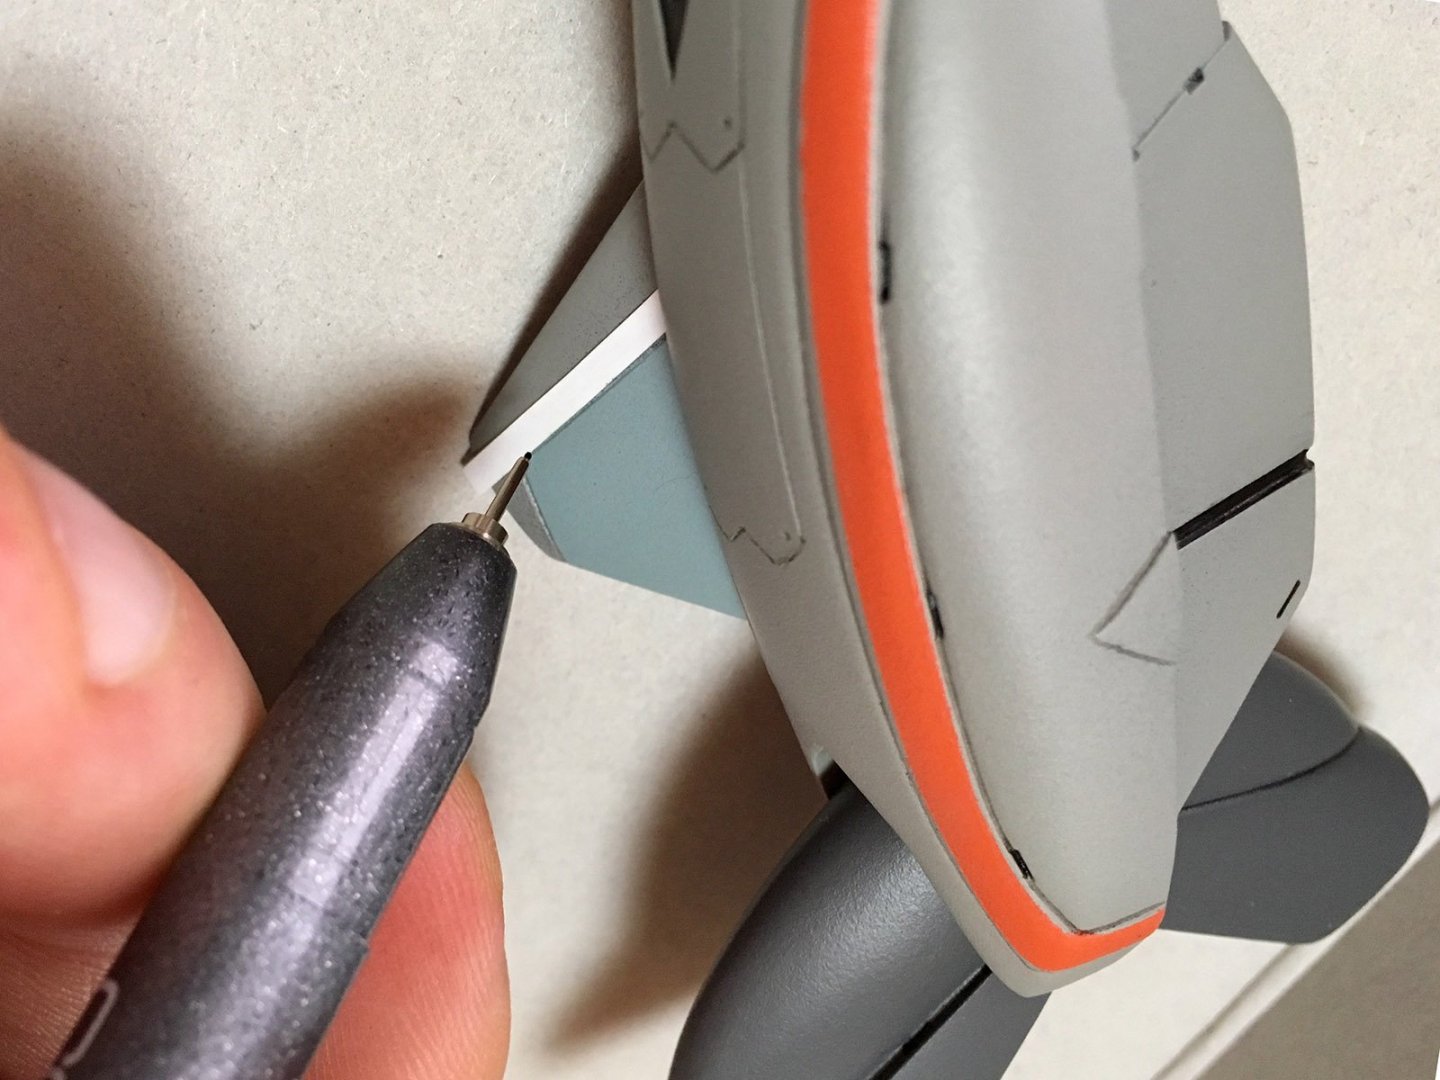
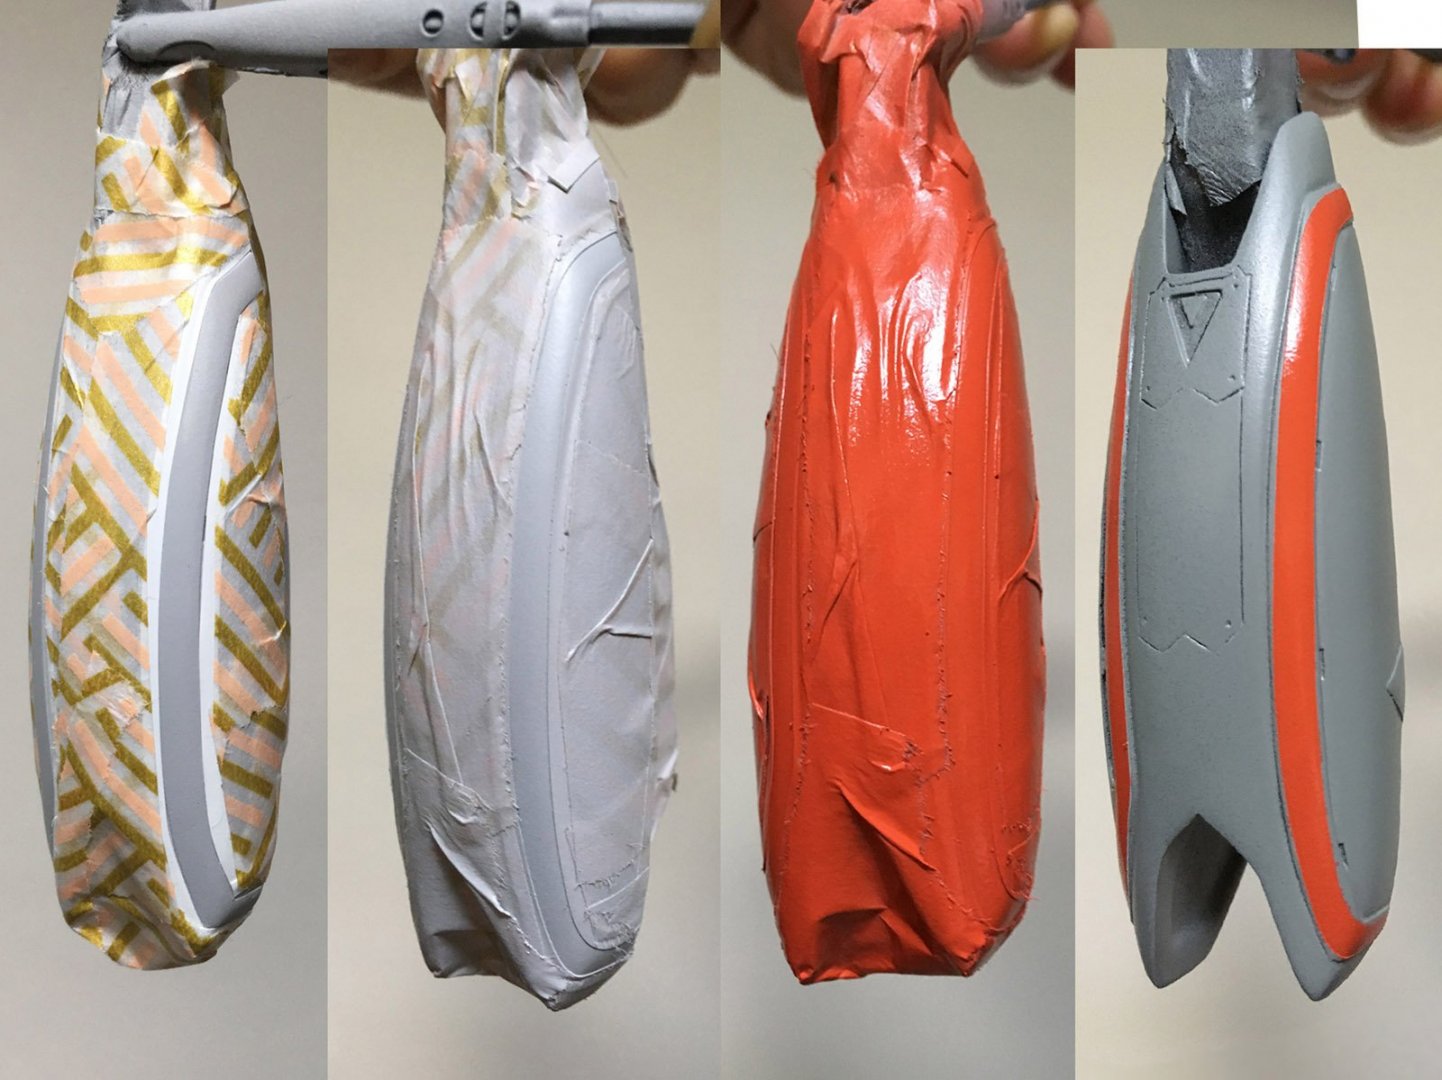
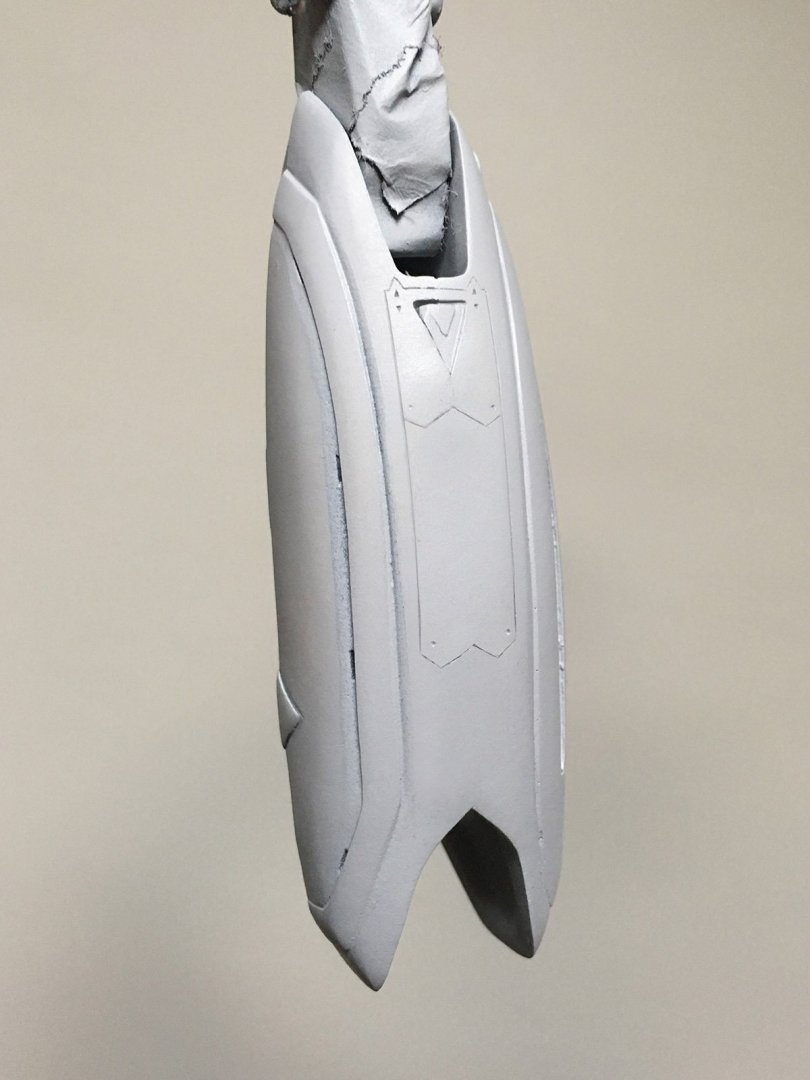
Yeah, it required a lot of grinding, filing, sanding, and putty, and then all the panel-lines needed to be re-scribed... Then more fine sanding and putty work to clean up the lines... ...and finally, the legs are ready for painting. So let's talk about masking. I used 2mm white Tamiya masking tape to isolate the stripes on the legs, and then covered the rest of the surface with generic cheap stuff: I then started by spraying another layer of the primary color (grey) over the exposed area of the stripe, which will help seal the masking and prevent color bleeding when the orange is applied. This prevents any paint from seeping under the tape. Several light coats of orange followed. Patience is key here; if you attempt complete coverage with a single coat, you might lay down too much paint and get it under the masking. Again, to avoid color bleeding, spray the orange at a safe distance from the surface, and give the paint a chance to dry before spraying the next pass. Eventually, you'll have a strong, even coat, and removing the masking tape is very satisfying. Tamiya's masking tape is also useful for panel-lining, as it provides a clean guideline to follow. I use an extremely fine-tipped marker I bought at a specialty stationery store: If you're working with flat surfaces, rulers can be useful, too. Next comes my favorite part of the process: applying waterslide decals.


-
Your most recent Macross or toy purchase! General thread.
tekering replied to Gakken85's topic in Hall Of The Super Topics
They'd have to start from scratch on that one... and I've long since given up hope. I'm making my own instead.
-
Your most recent Macross or toy purchase! General thread.
tekering replied to Gakken85's topic in Hall Of The Super Topics
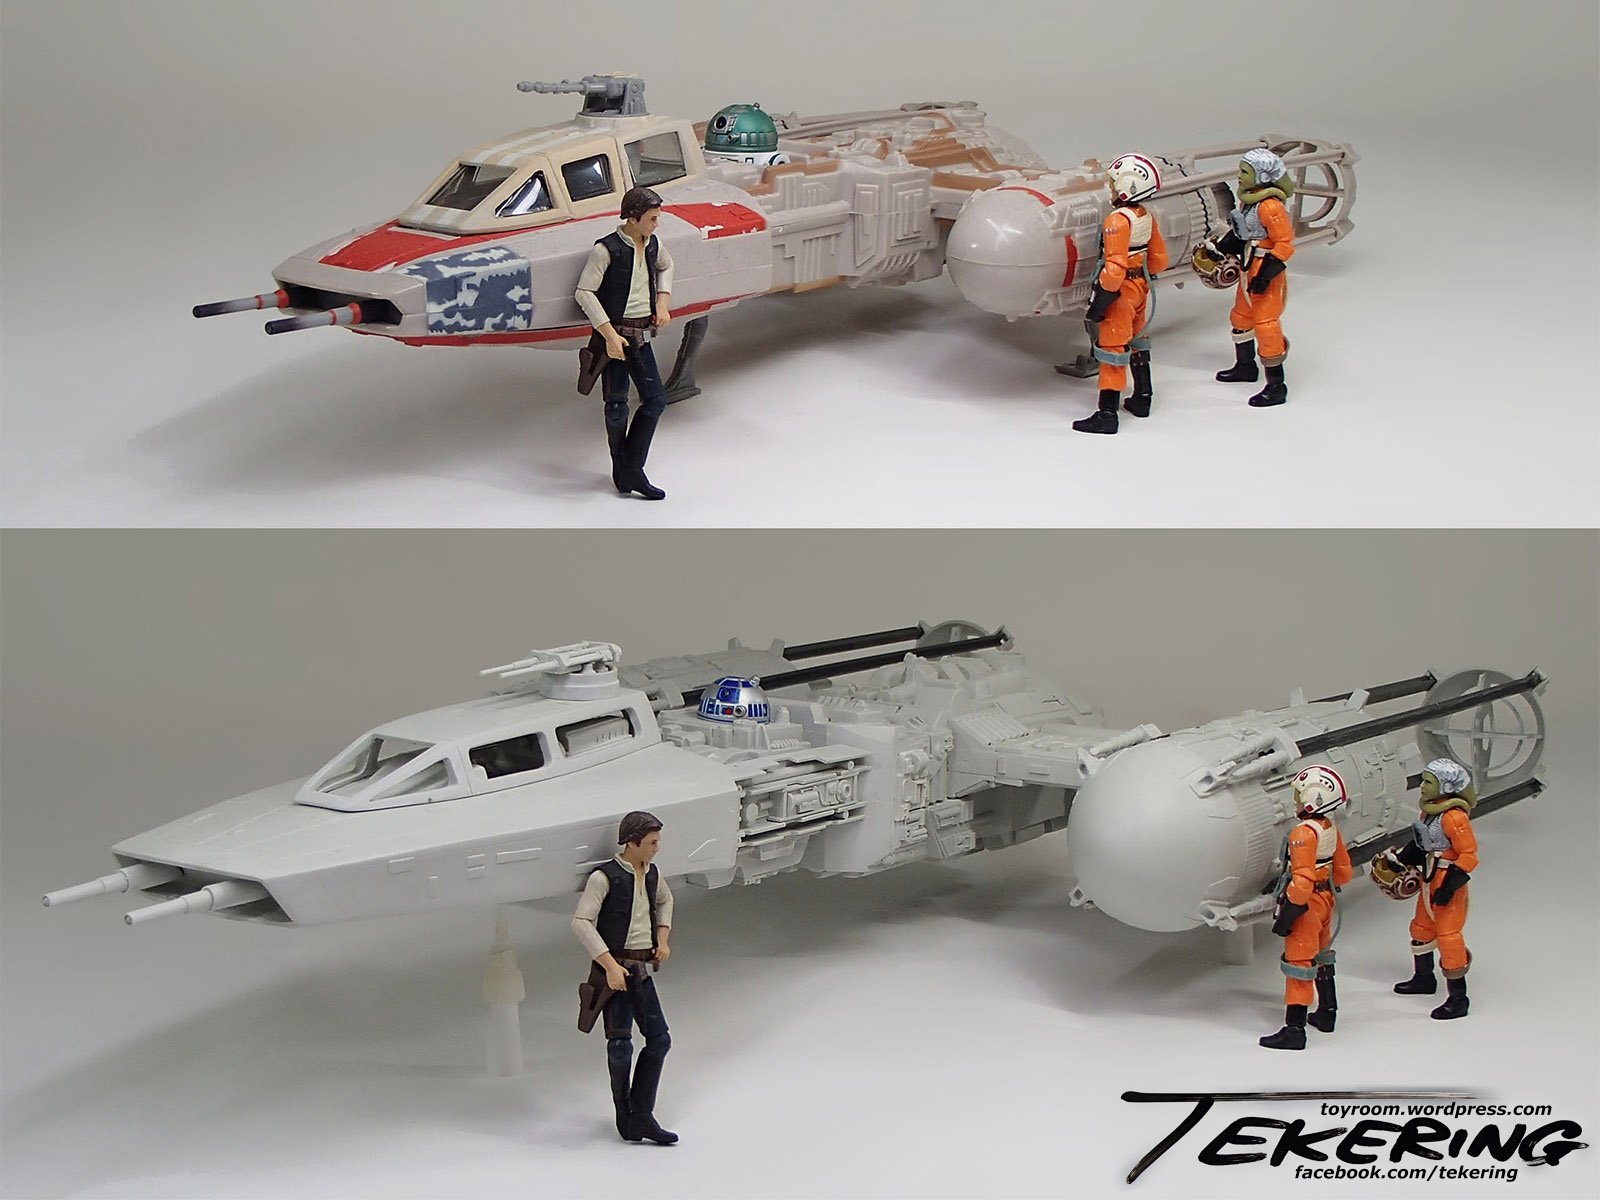
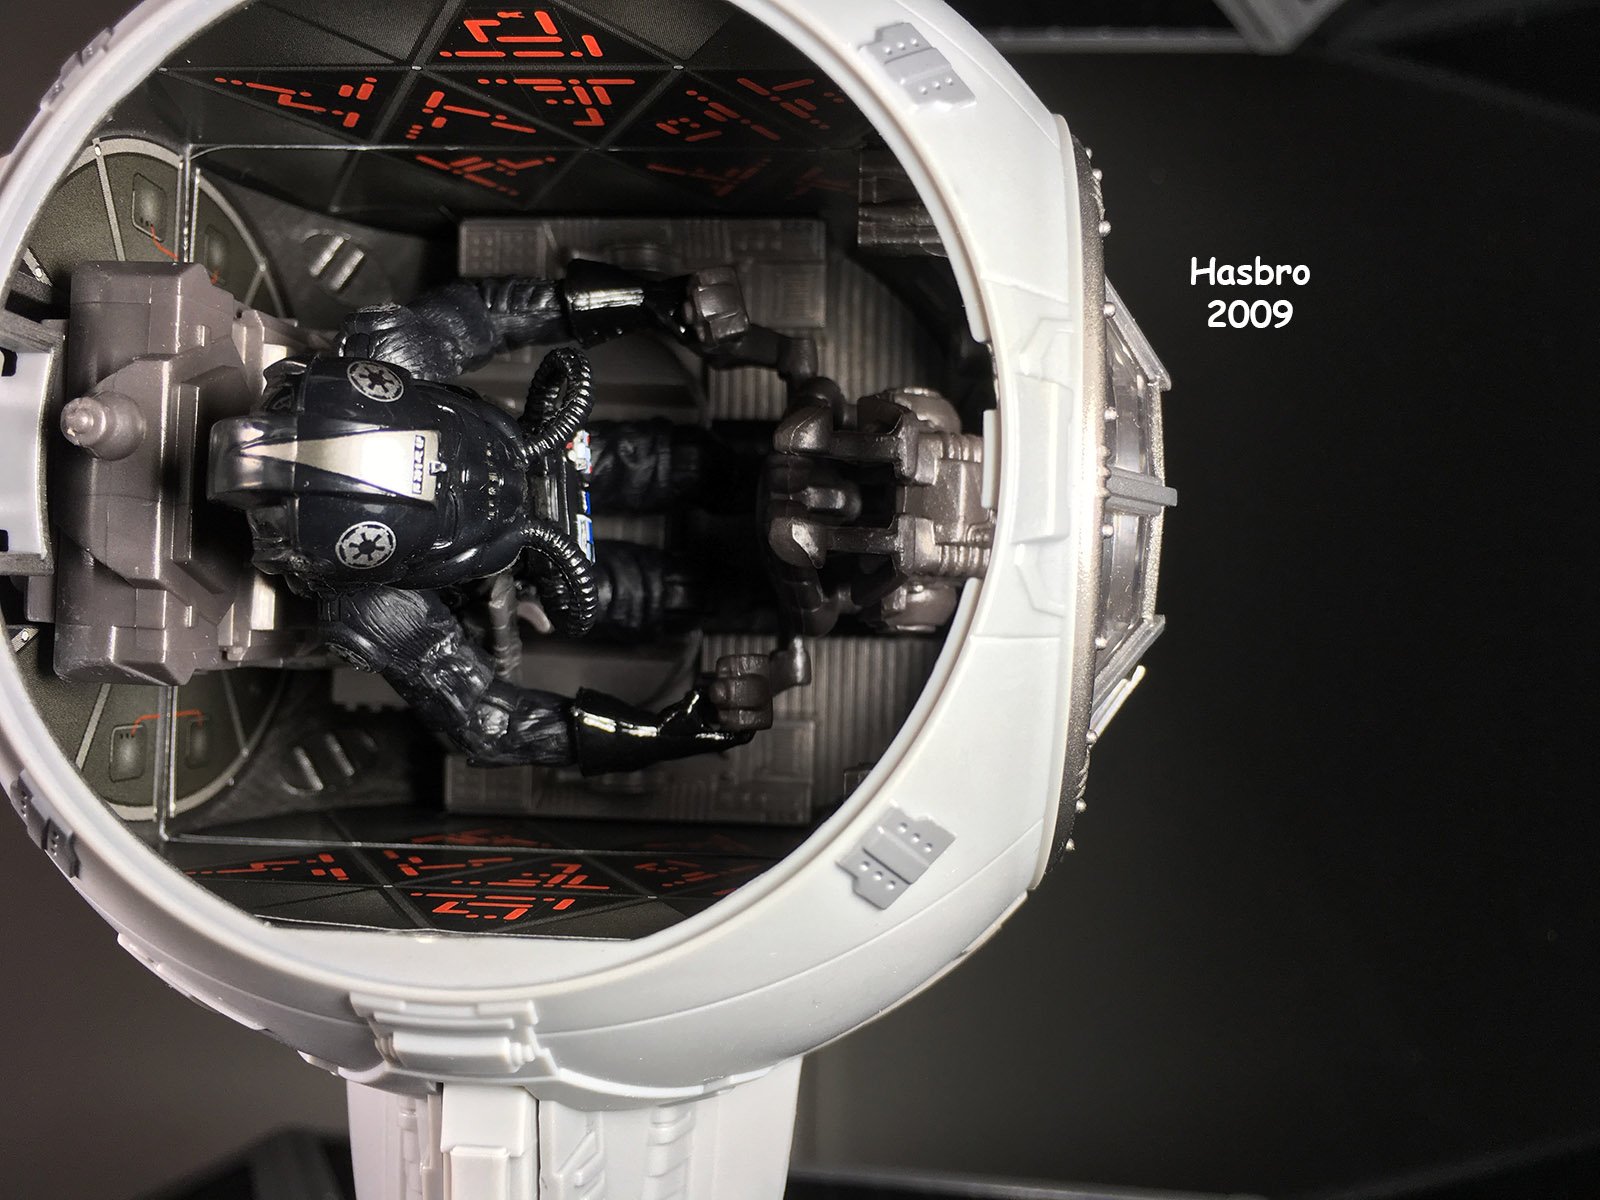
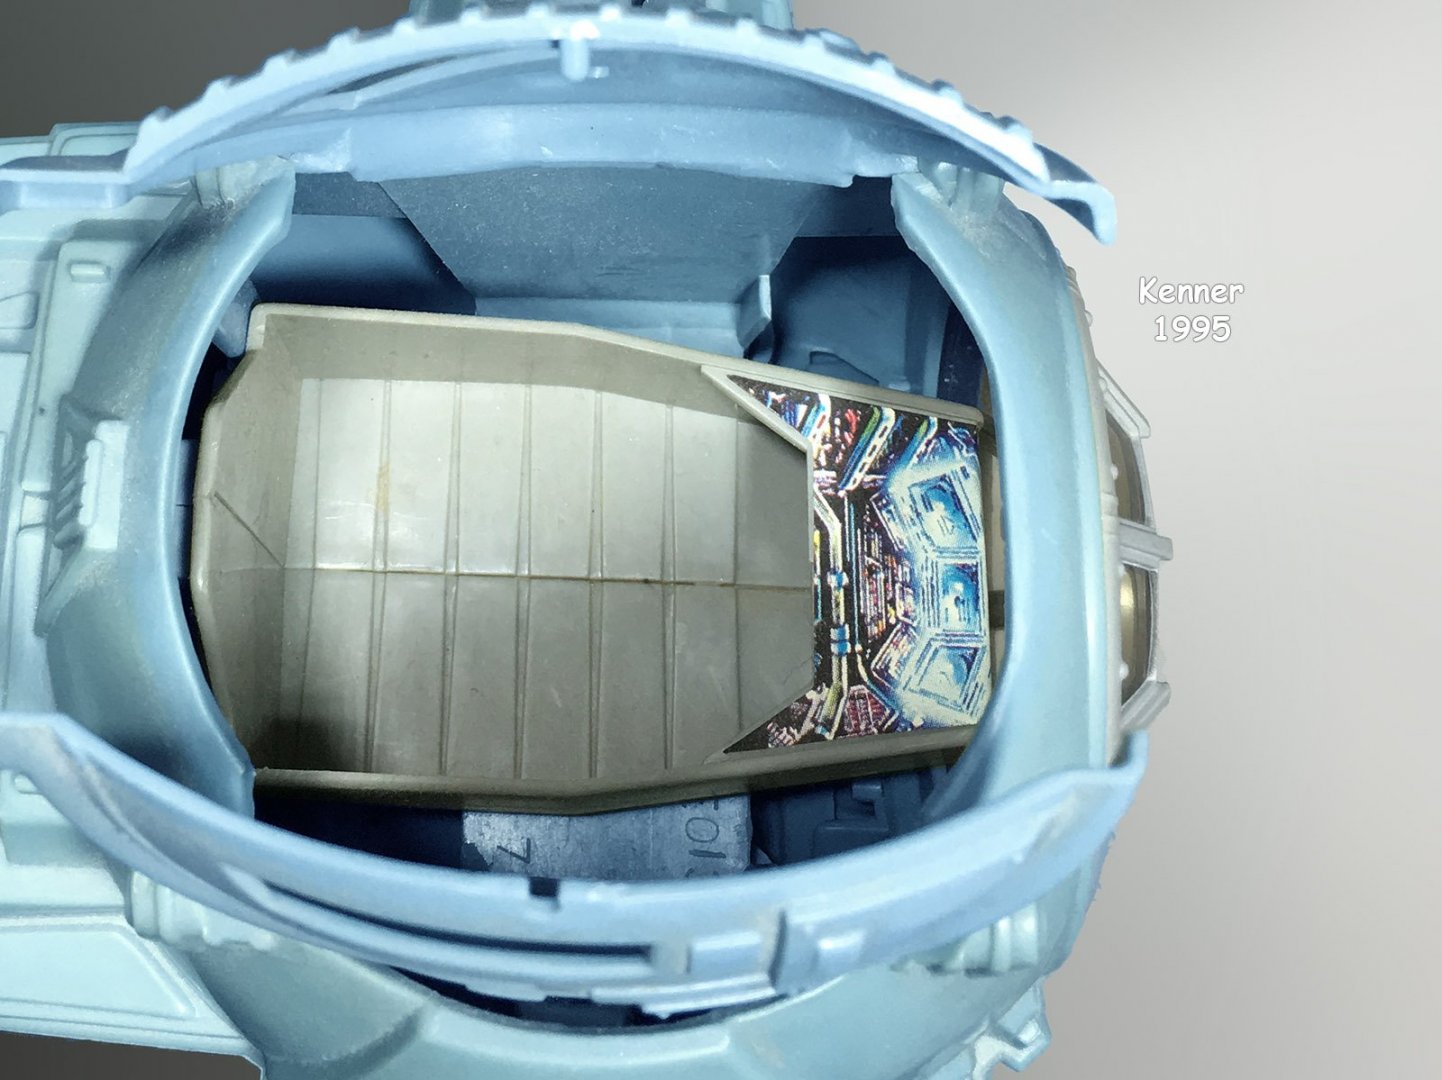
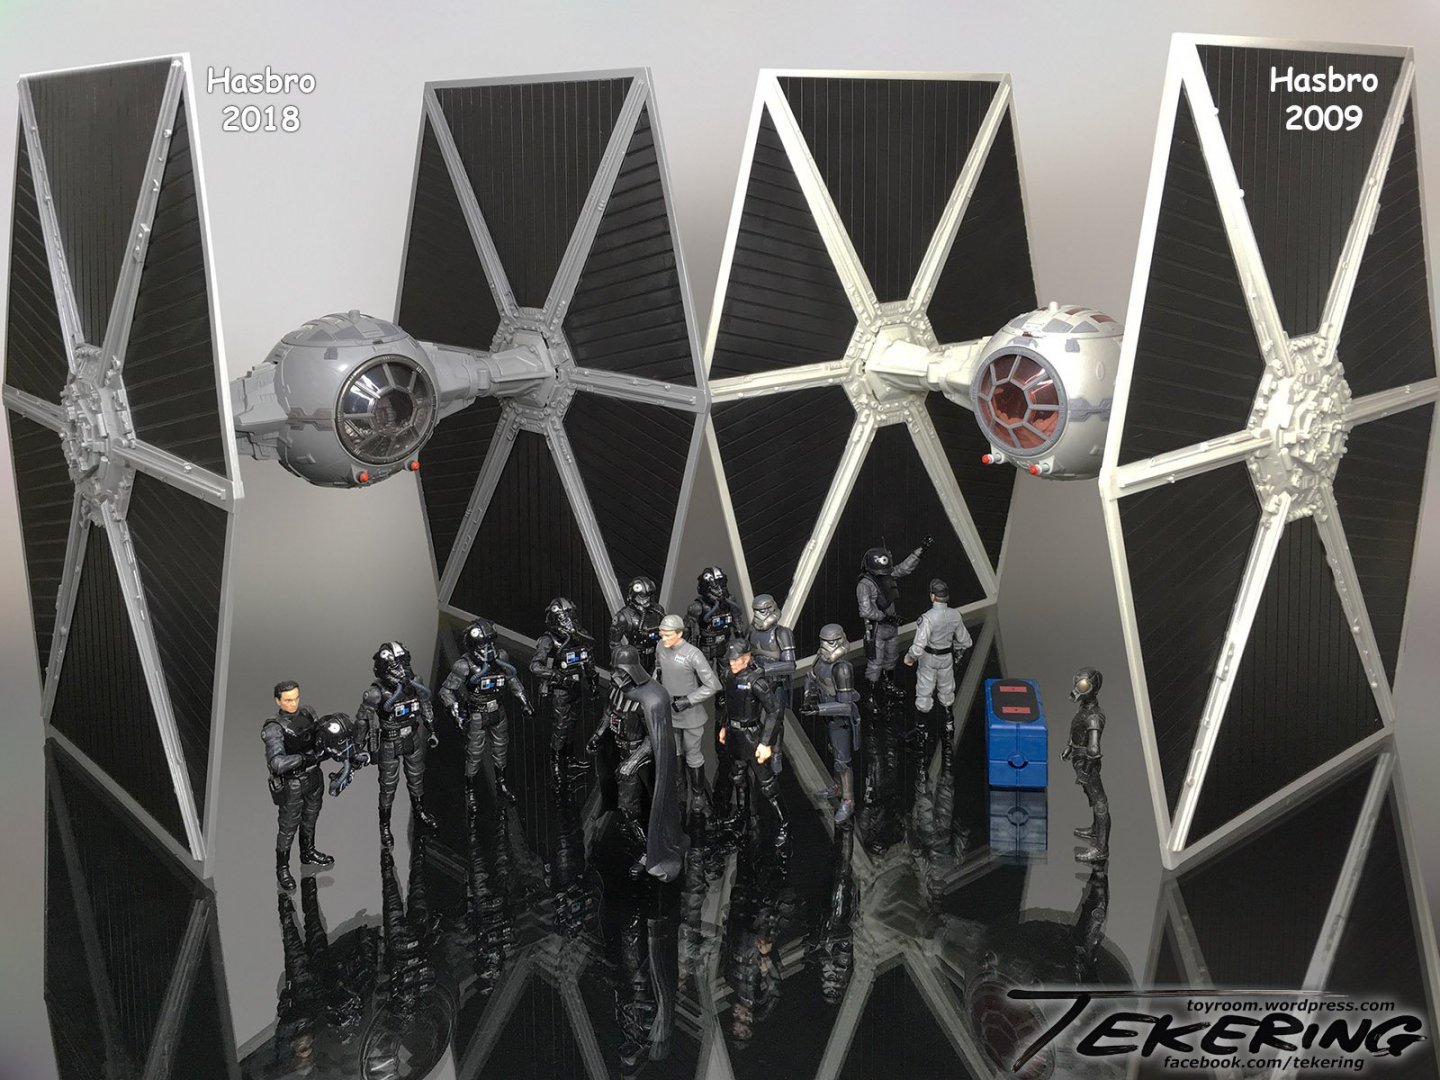
Actually, that's the fourth release with tall wings... but the first two versions (from 2005/2006) used retooled Kenner molds, with only the wings being new: Hasbro's first "Vintage Collection" TIE used a completely new cockpit module, but with the old Kenner wings... The 2009 "Legacy Collection" release was the first to combine both the new wings and the new cockpit, and it retailed for $40... Last year's "Vintage Collection" release used exactly the same mold, but retailed for $80. Is it any wonder Walmart slashed prices (up to 75% off) just to clear them out?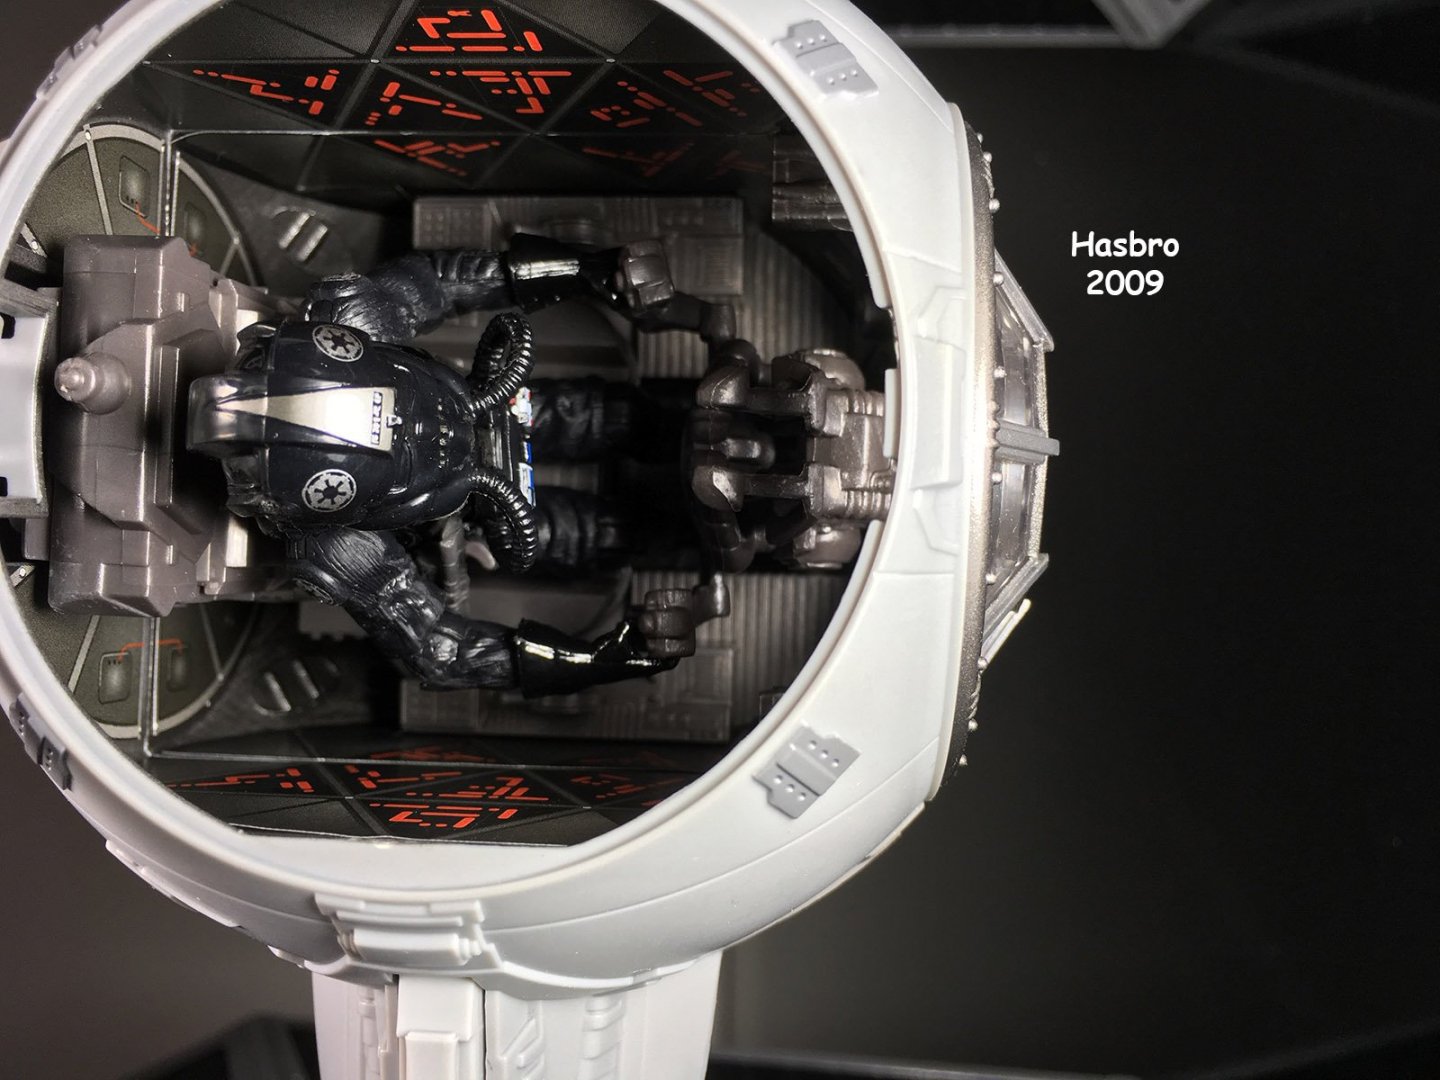
-
Oh, that's awesome... ...but I think a photograph would suffice.
-
- 64 replies
-
- 2
-
-
- vf-25 messiah
- vf-25
- (and 1 more)