tekering
-
Posts
3913 -
Joined
-
Last visited
Content Type
Profiles
Forums
Events
Gallery
Everything posted by tekering
-
Well, now that the contest deadline's been extended, I'm sure the competition will get more intense... I'll continue posting pics in the meantime.
-

tekering's BItComp entry #2 - Quamzin resin kit
tekering replied to tekering's topic in The Workshop!
It's never too late to learn, my friend! Modelers are a generous group, always open to sharing tips and techniques with others. YouTube alone can teach you everything you'll ever need to know. It's all just a matter of experience and practice. -
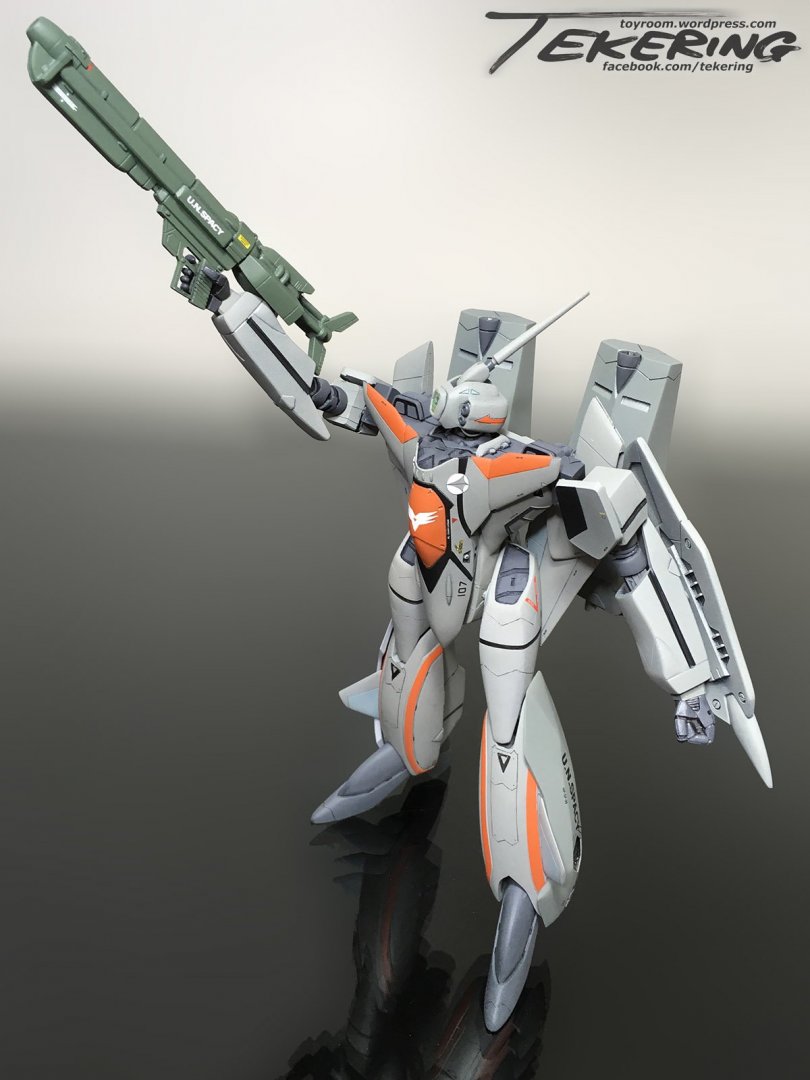
Thankfully, the judges won't have to decide; they're all my entries, after all! But my heart will always belong to the VF-11. It's the first resin kit I ever bought, twenty-five years ago, in the hopes that I might someday have the stones to build it... ...and, having poured all my resources and experience into it, I think I've managed to do the design justice.

-
Thanks, guys! High praise, indeed. Here she is parked, then.


-
tekering's BItComp entry #2 - Quamzin resin kit
tekering replied to tekering's topic in The Workshop!
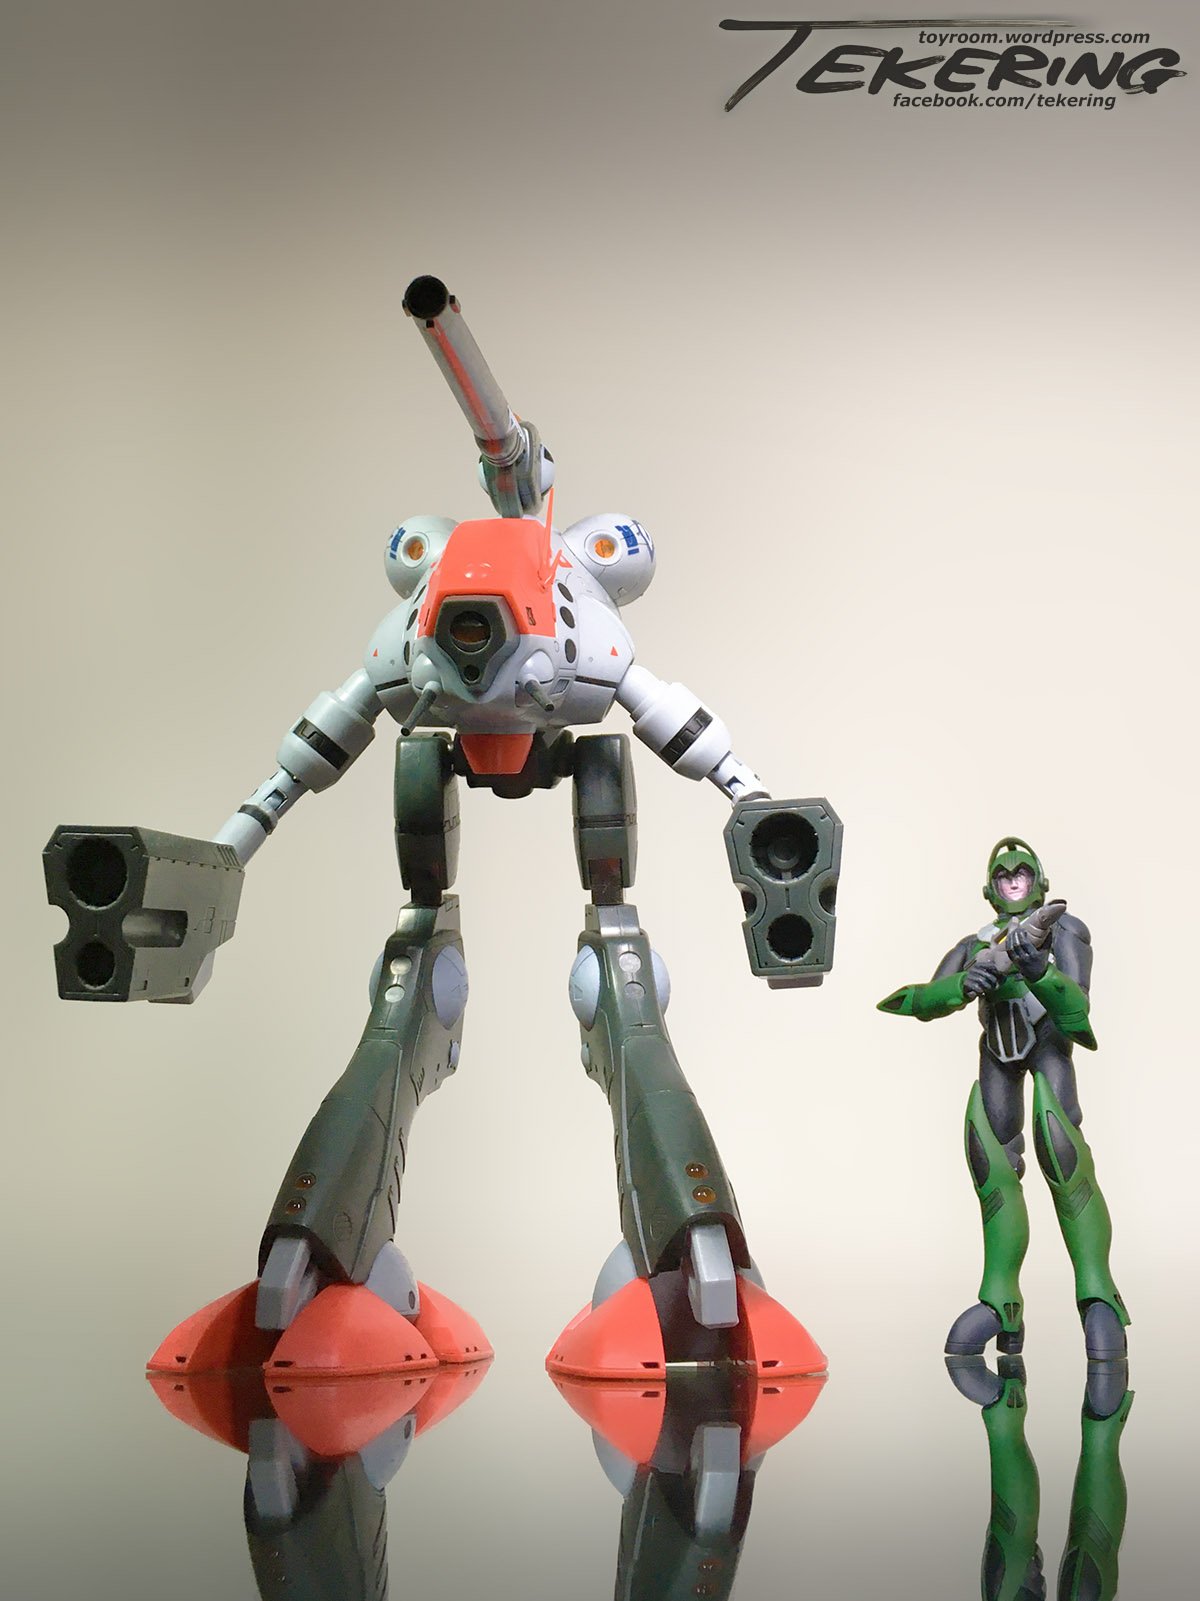
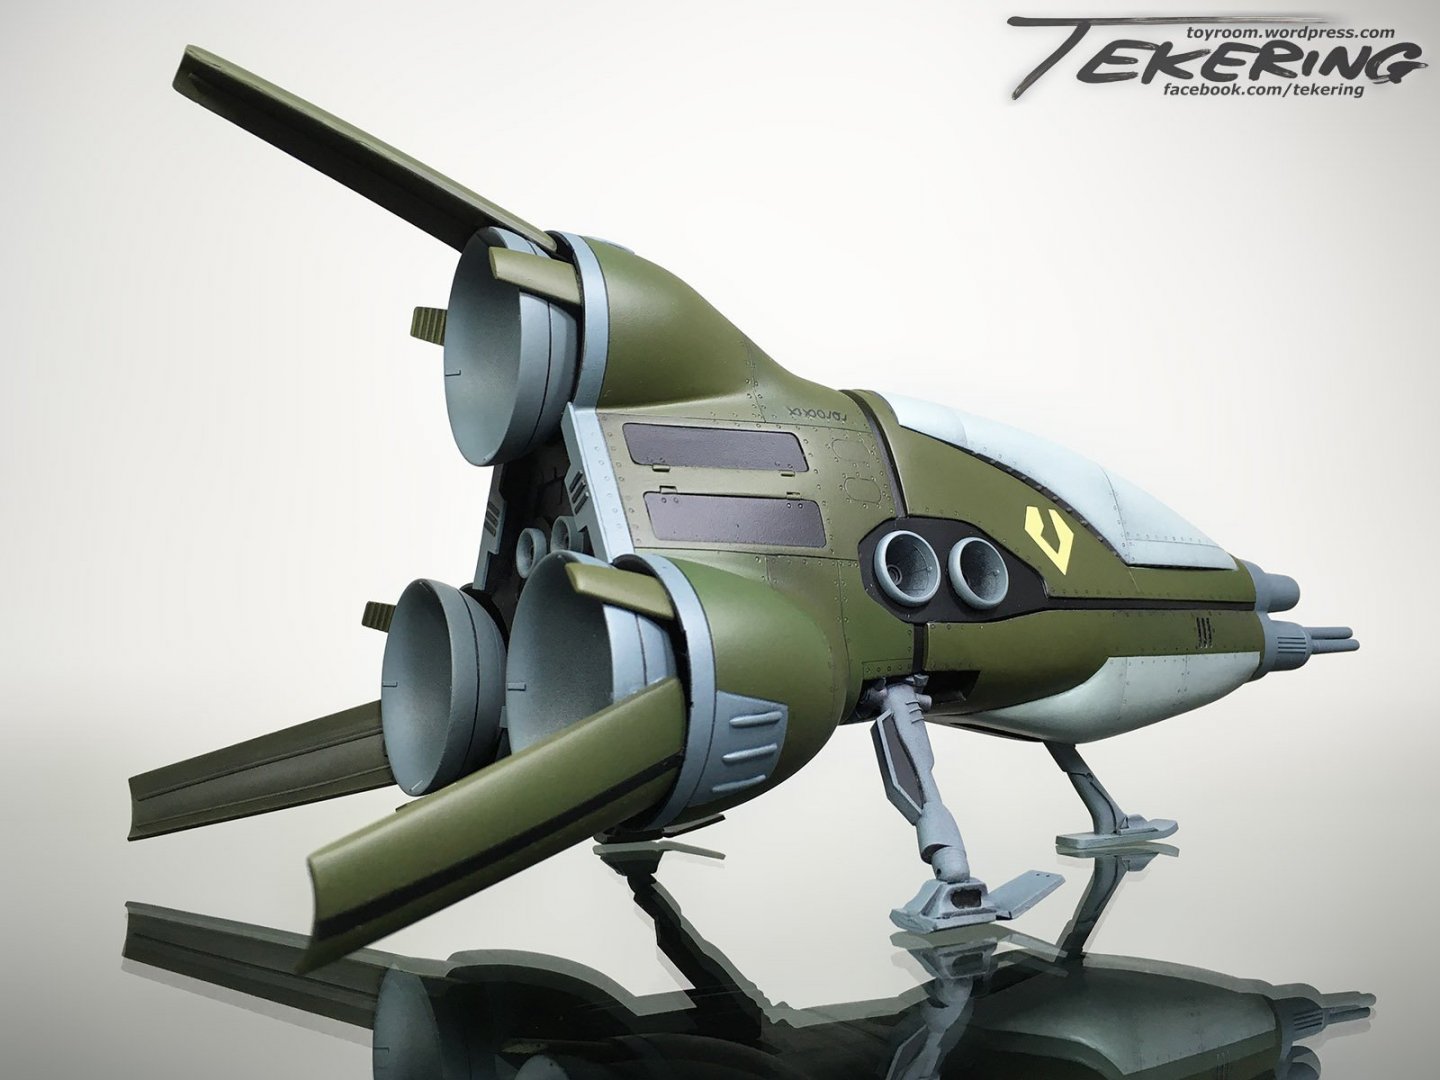
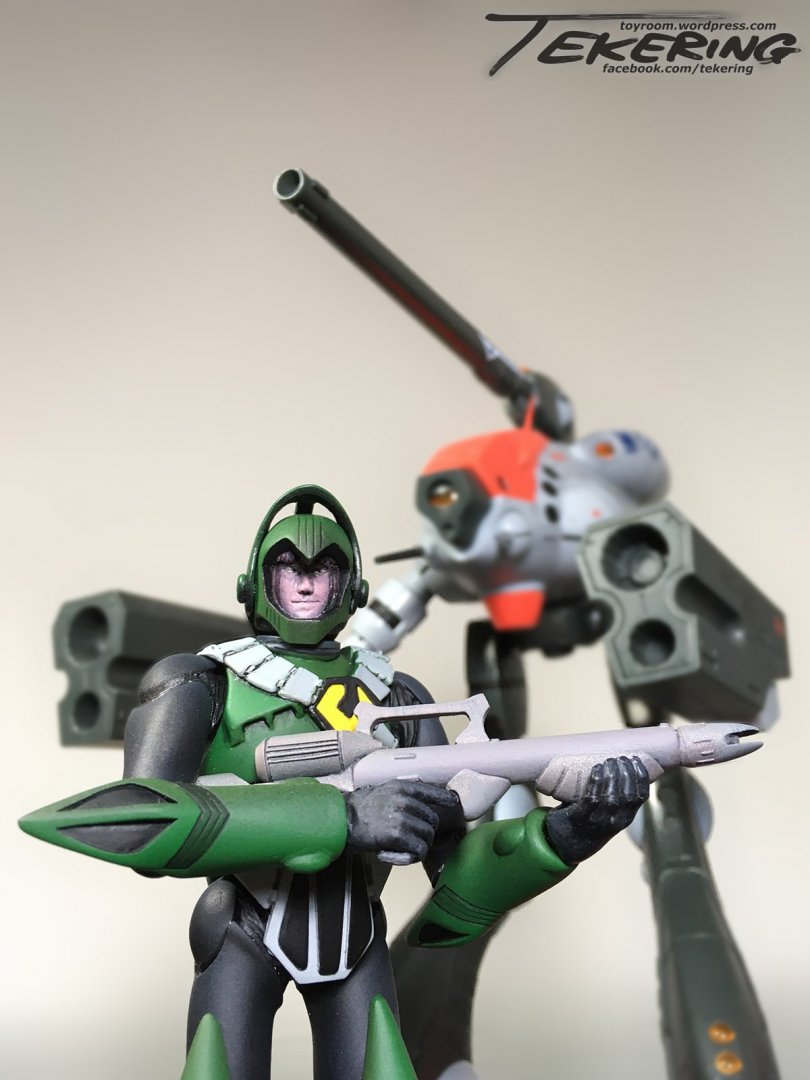
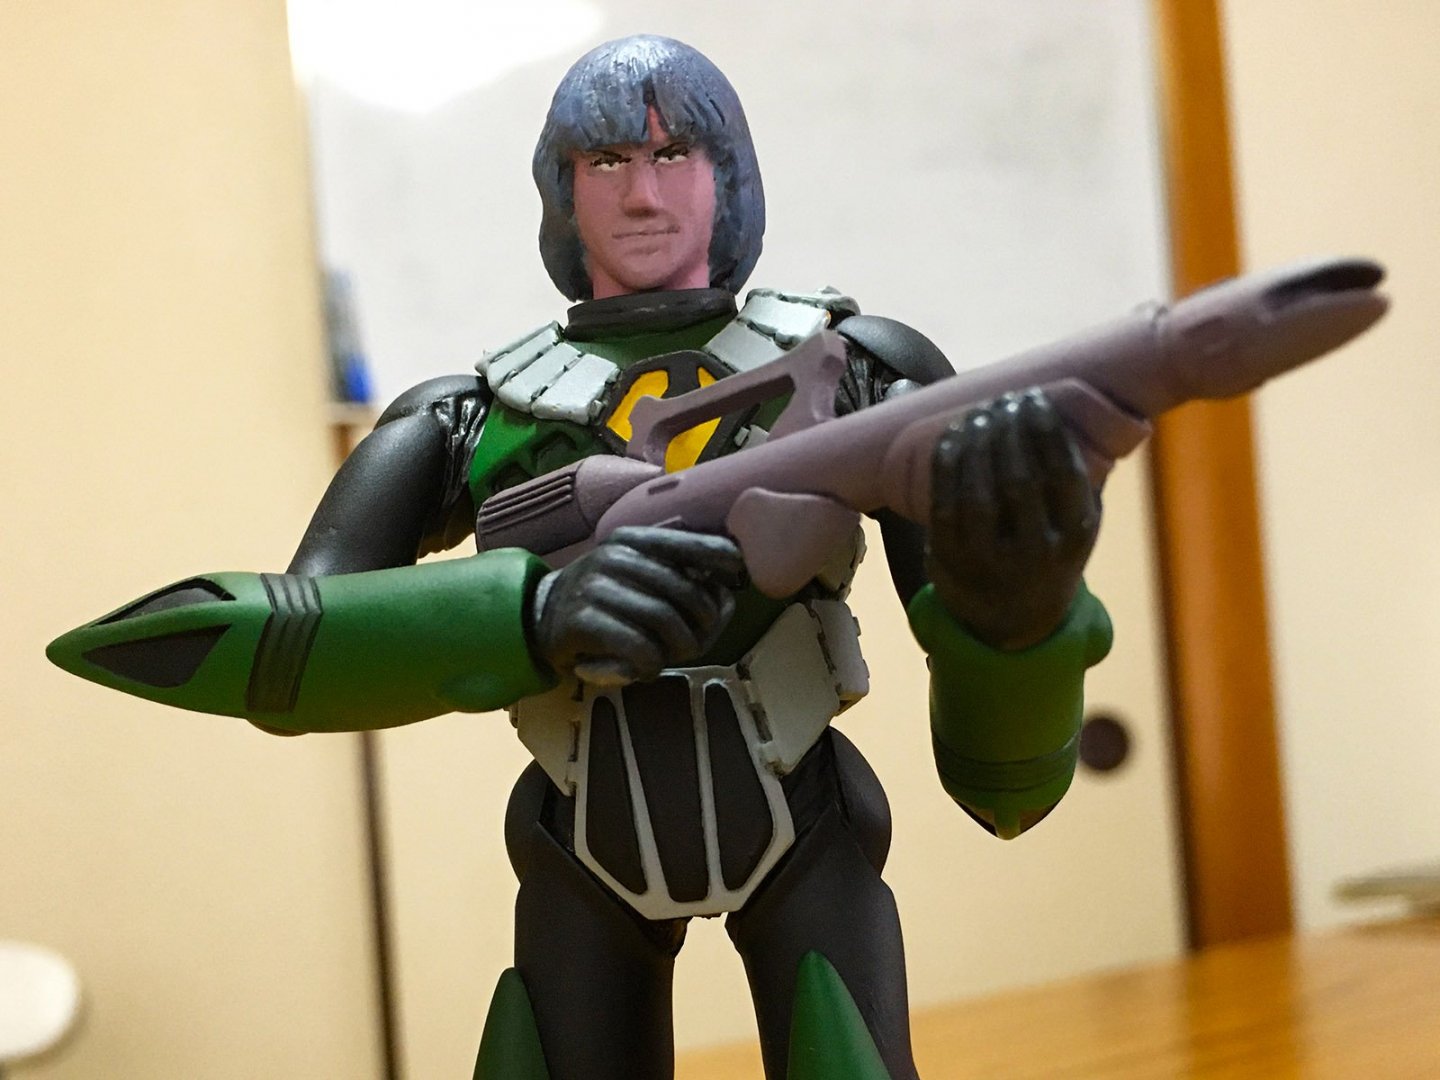
Here's the completed Quamzin with his iconic Glaug: Even with a little forced perspective, the Hi-Metal R toy still doesn't quite scale.
-
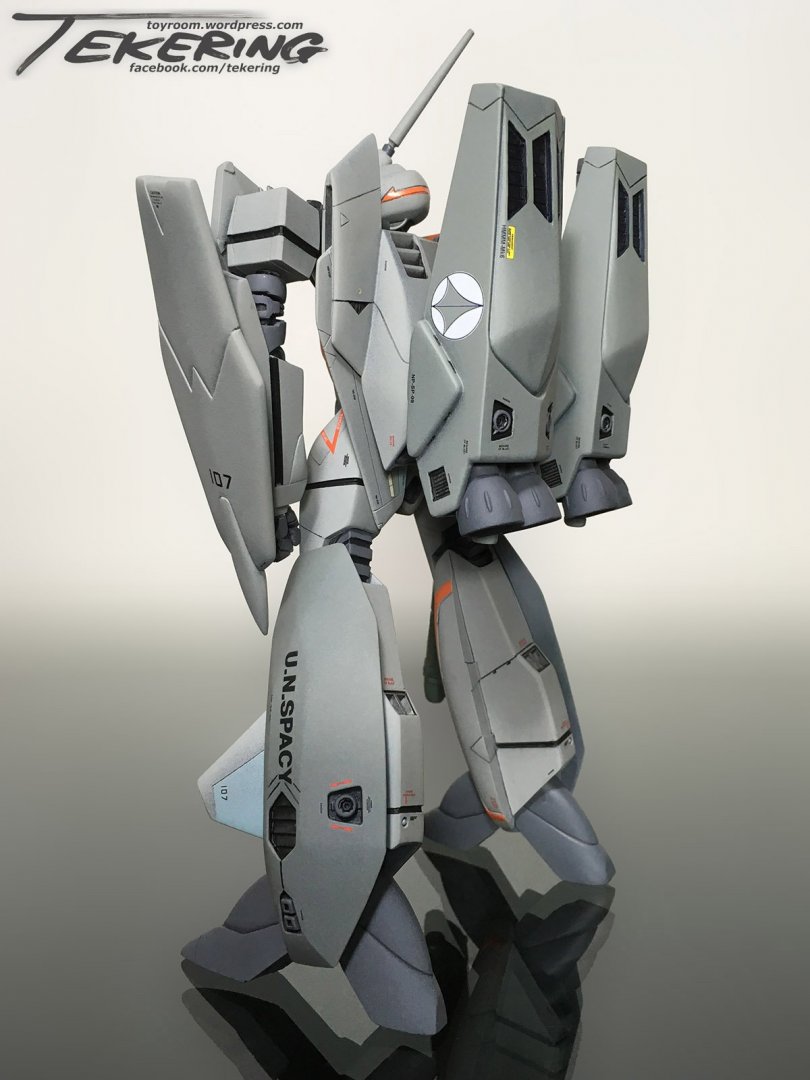
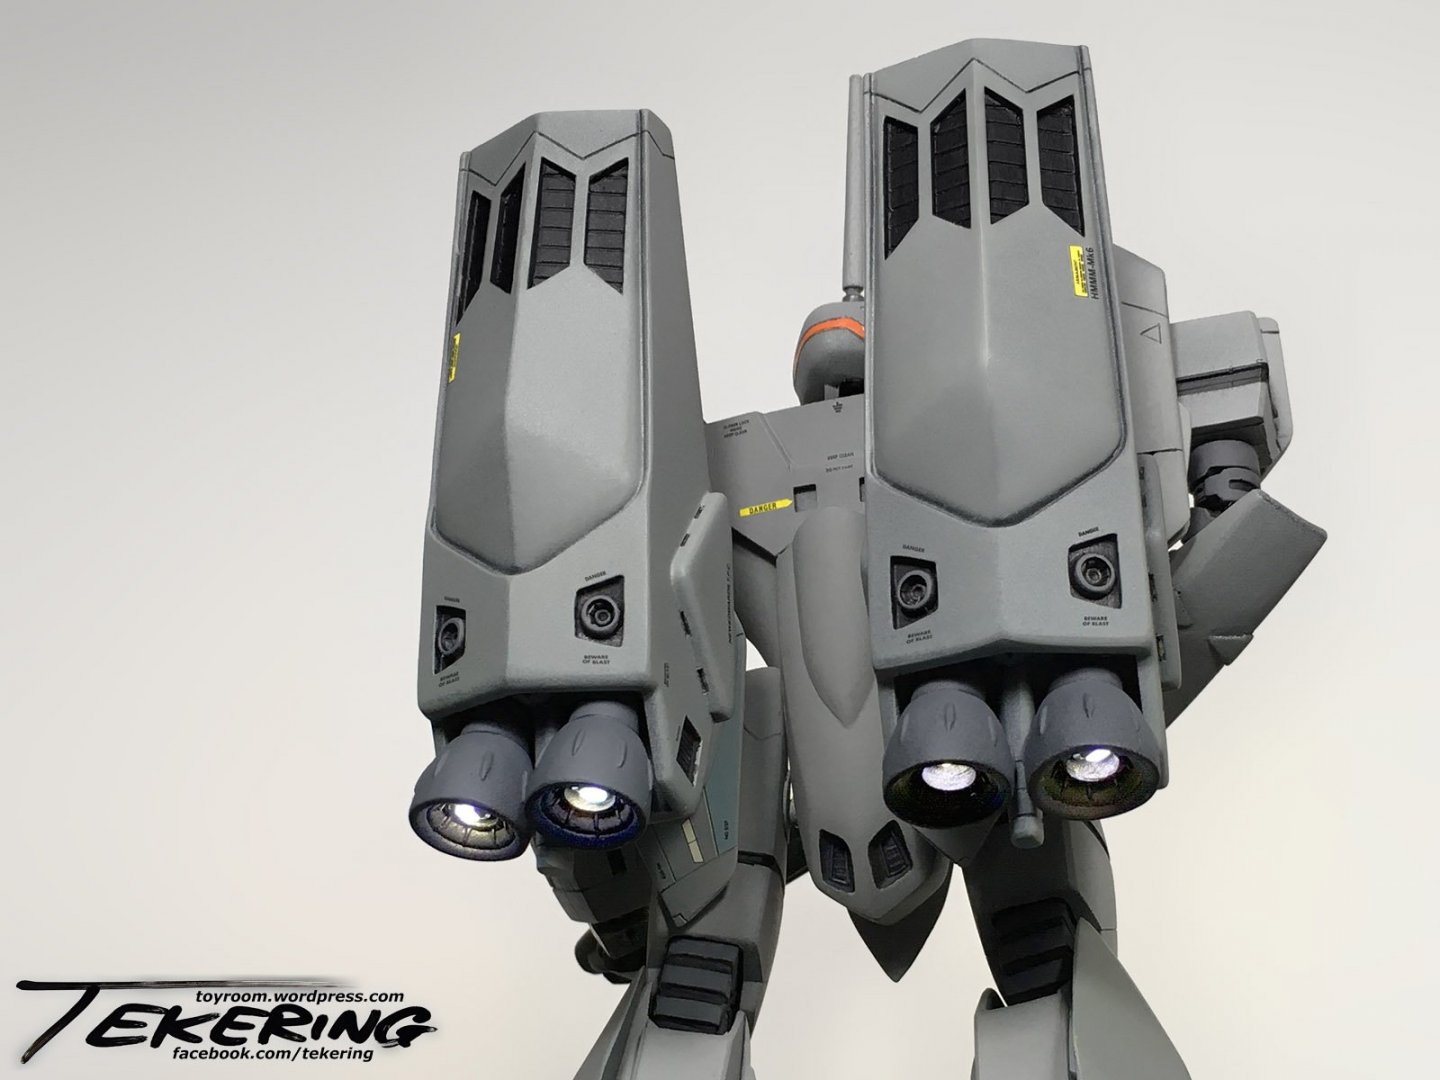
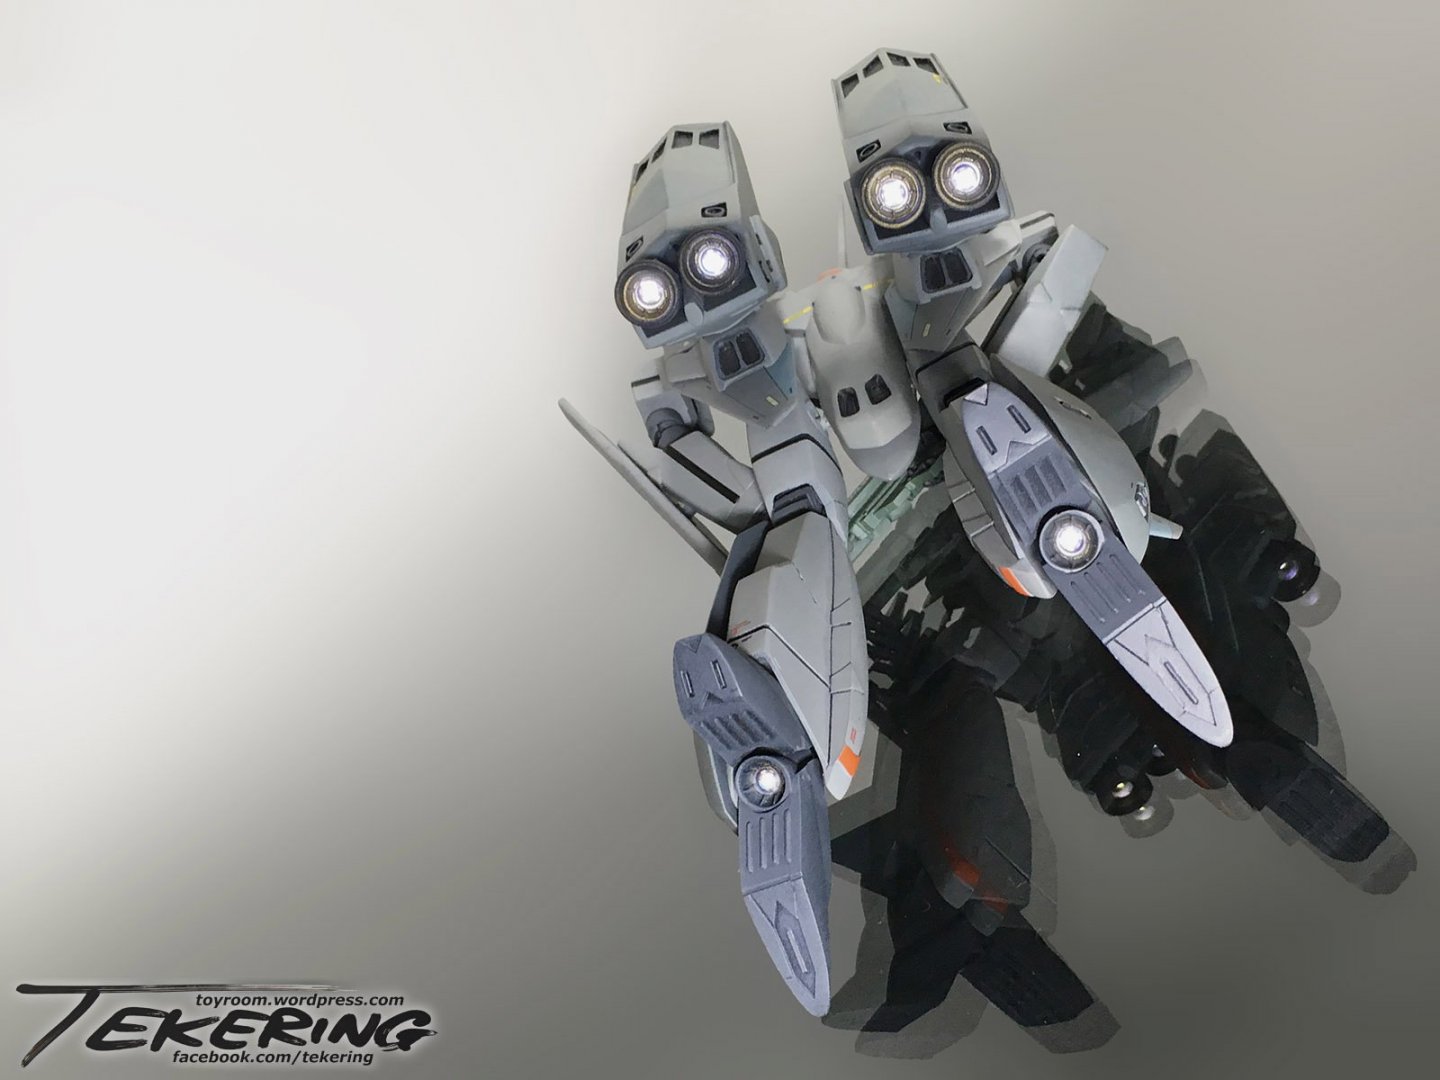
So here's the kit built stock: And here, with the legs articulated for a floating-in-space pose, and the arms articulated for a two-handed grip: ...and a shot from below, showing the LEDs installed in the FAST pack boosters and the feet.


-
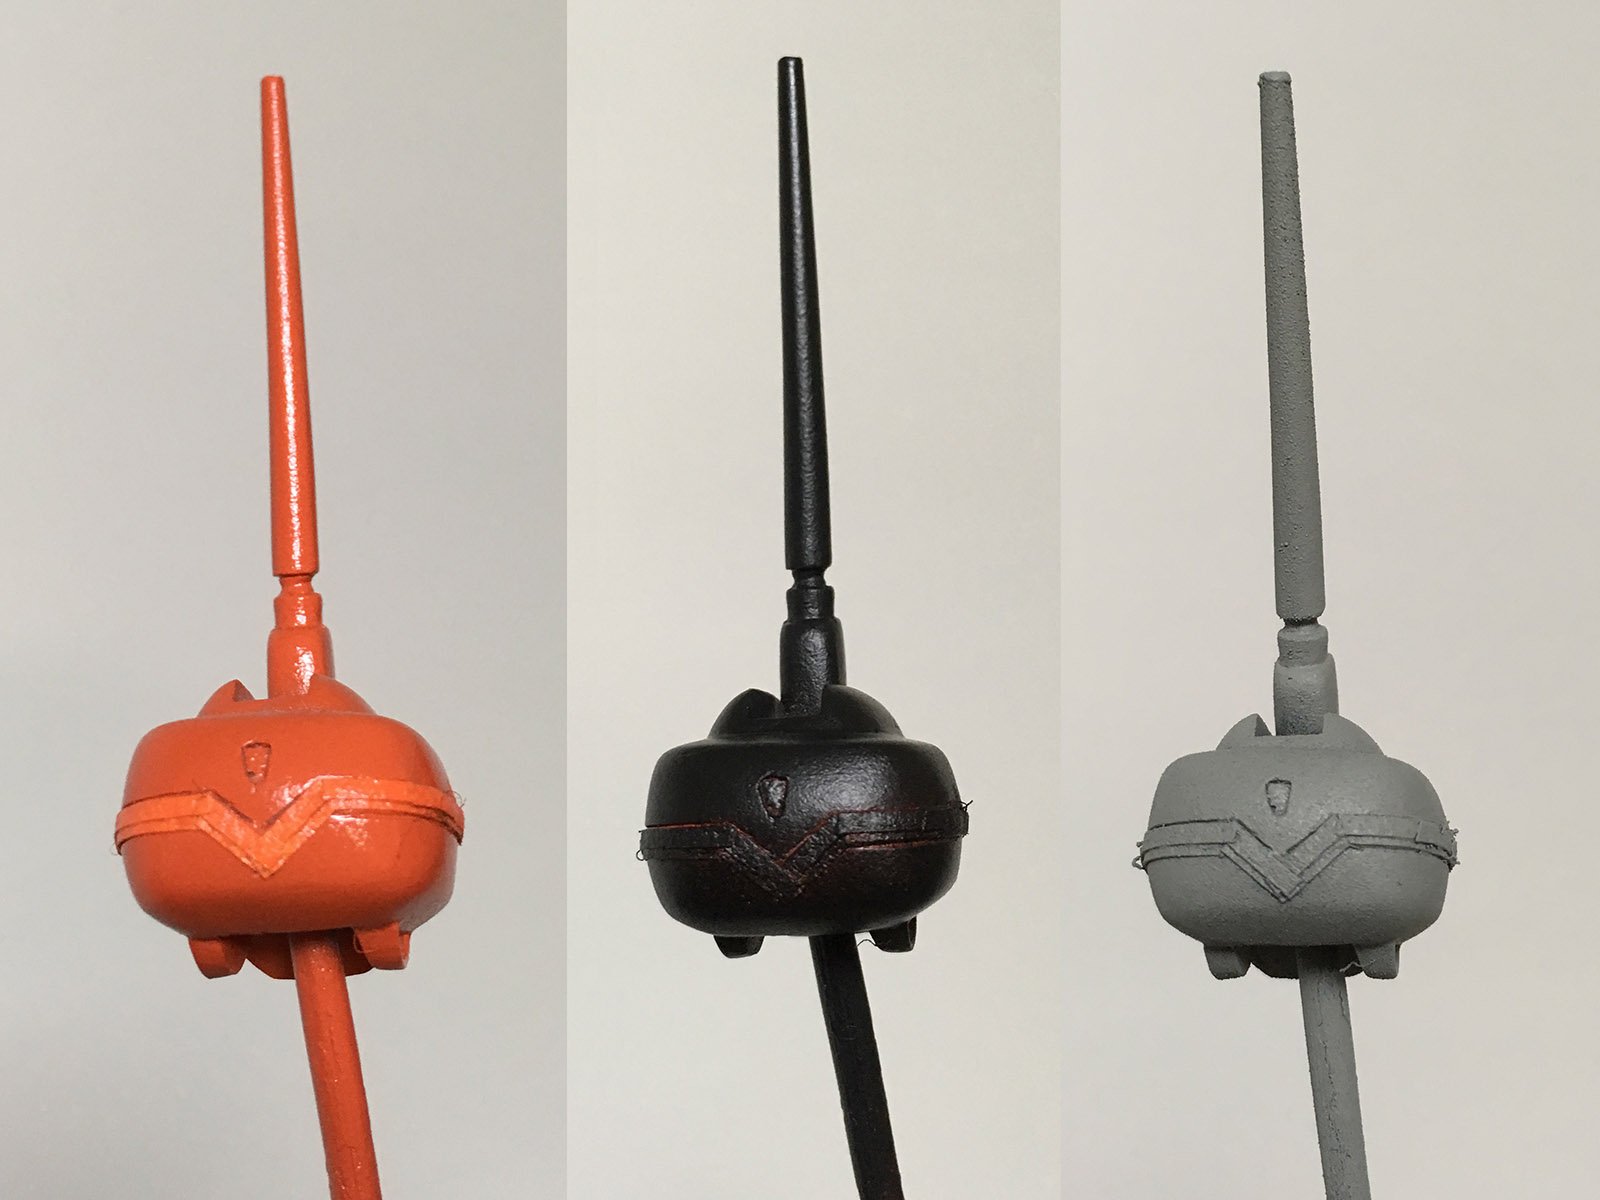
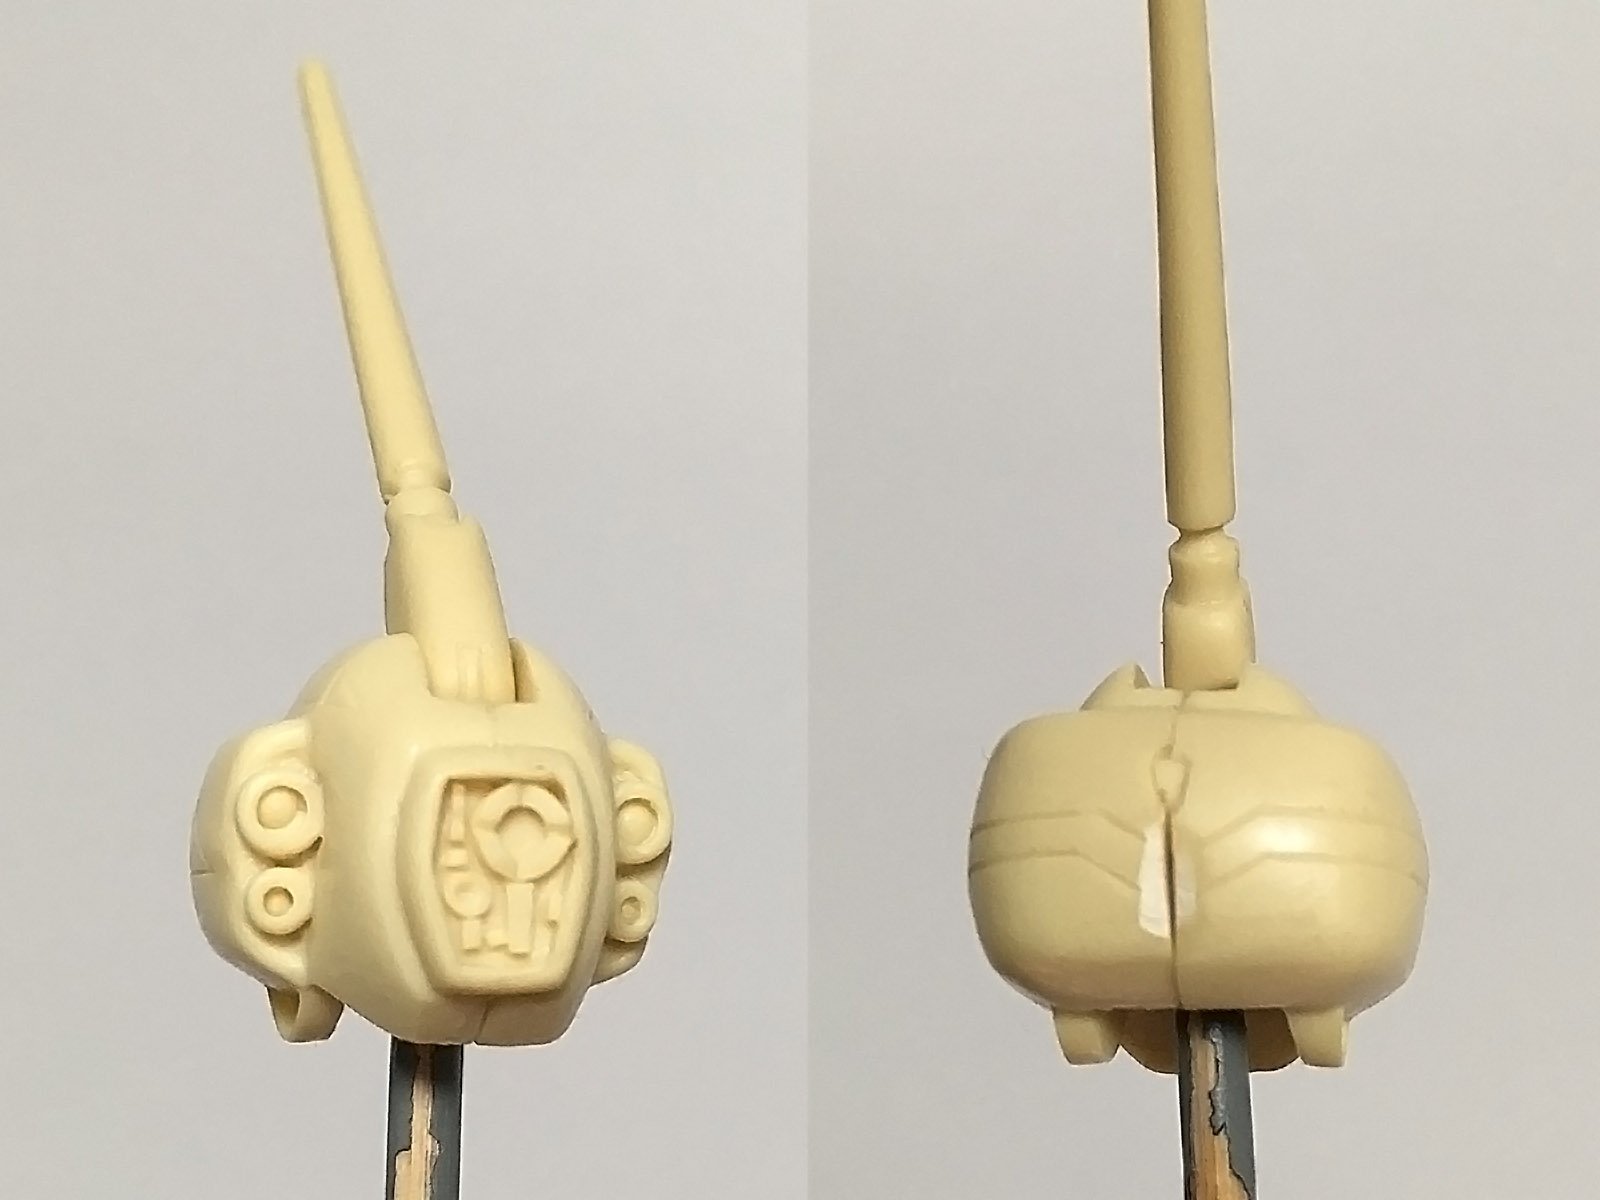
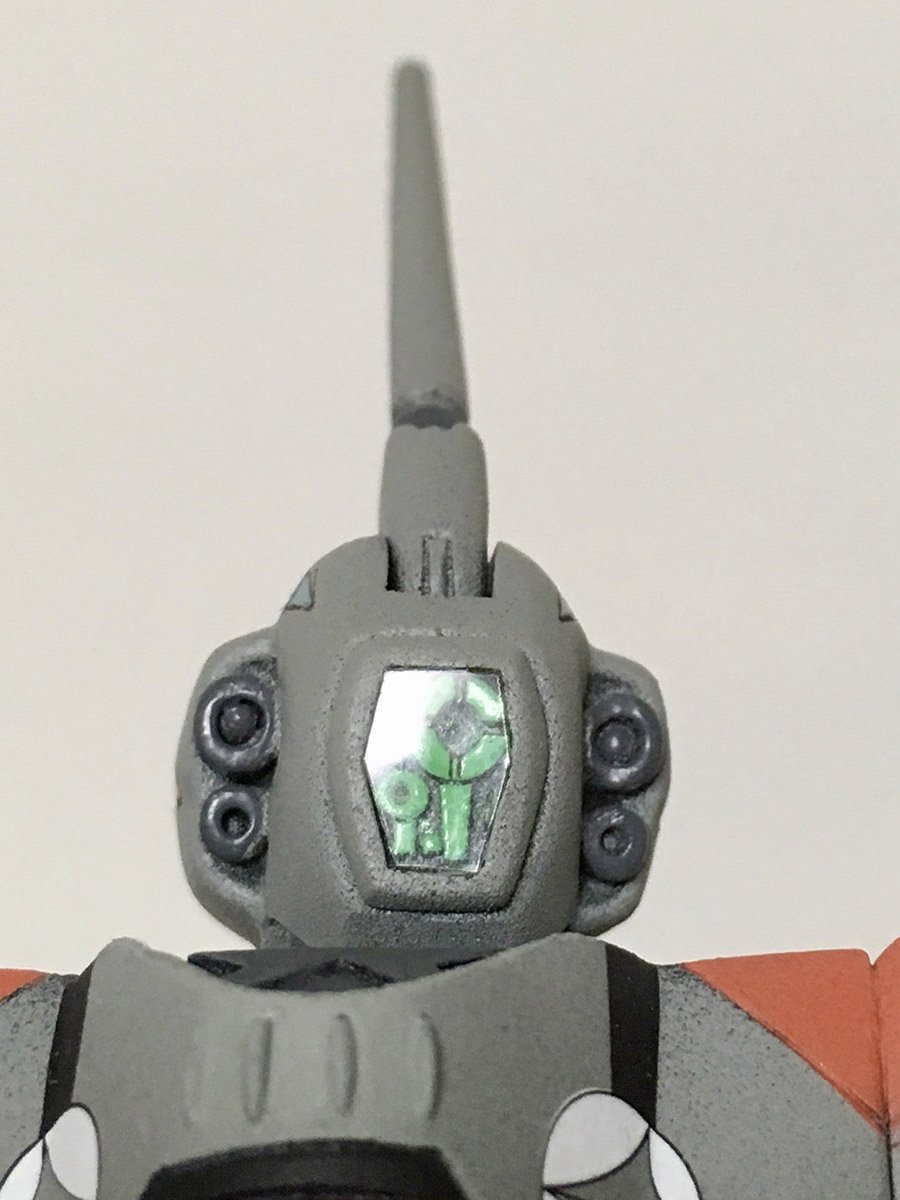
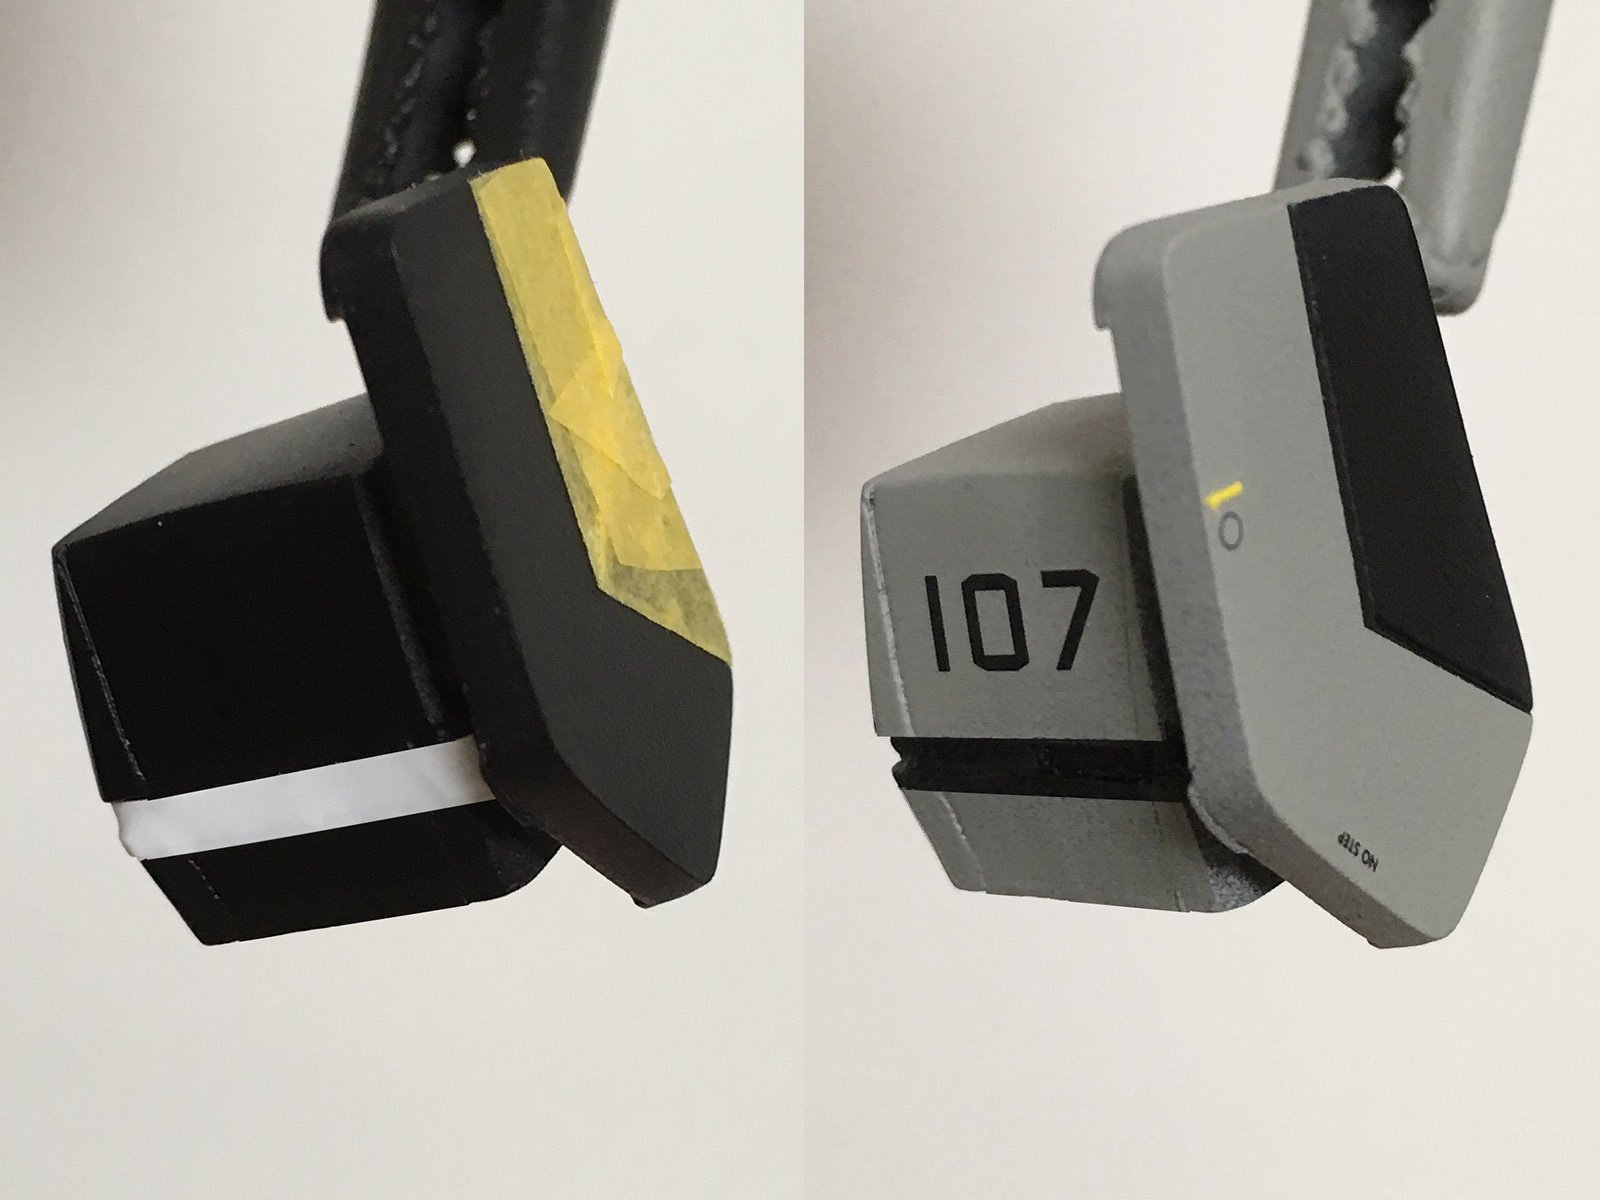
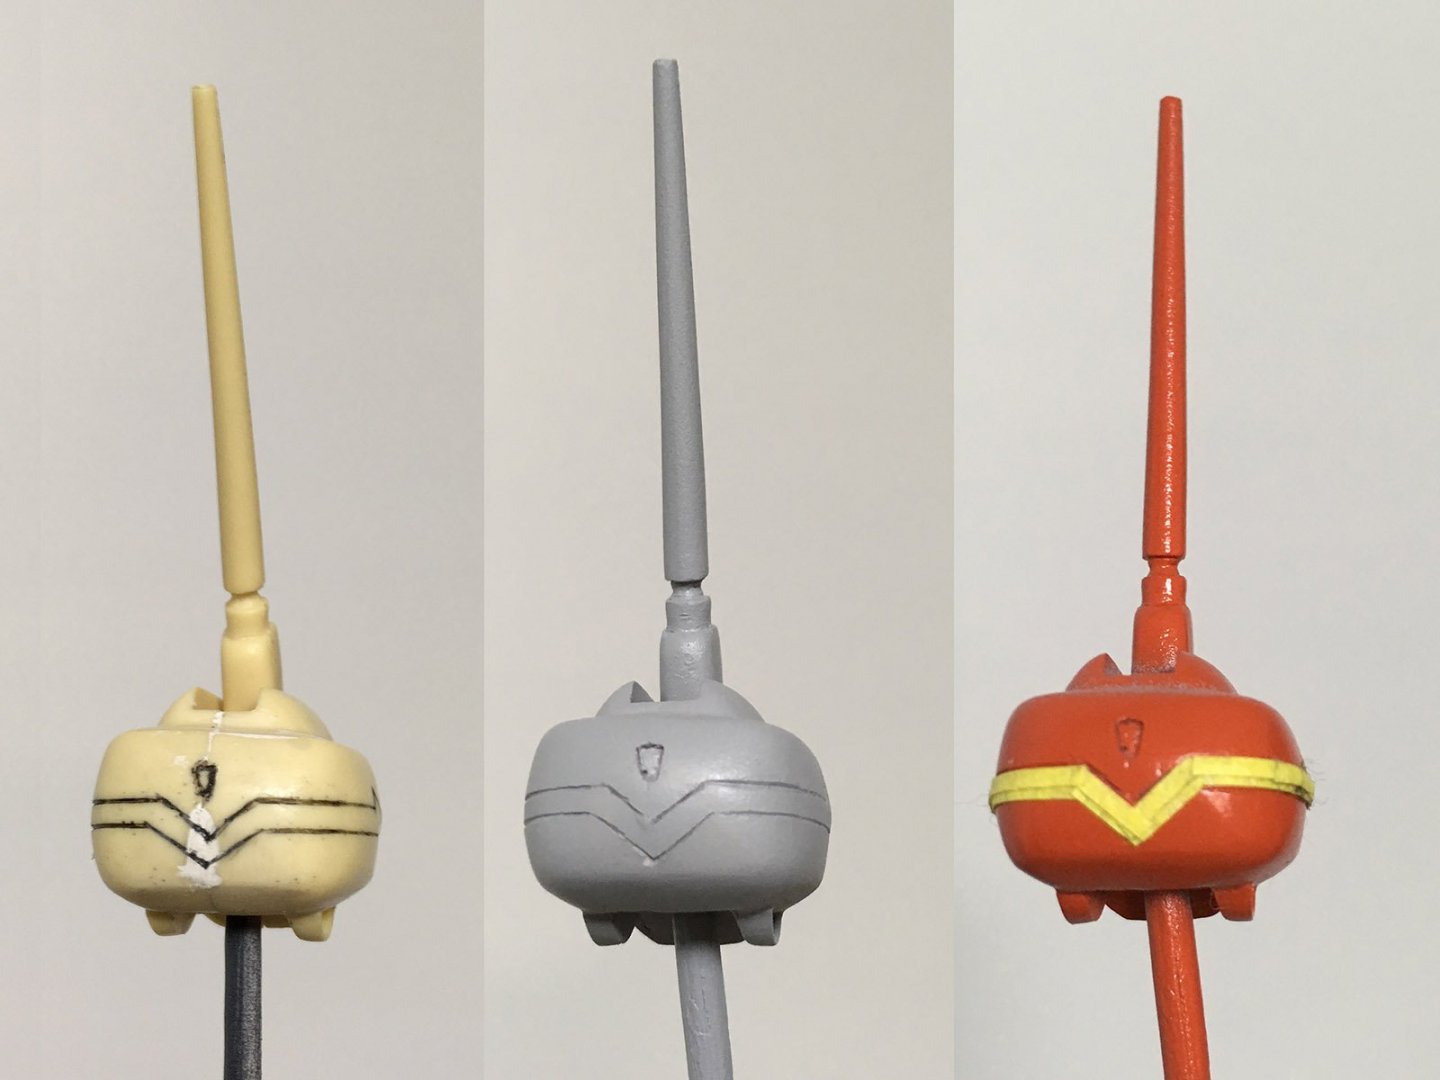
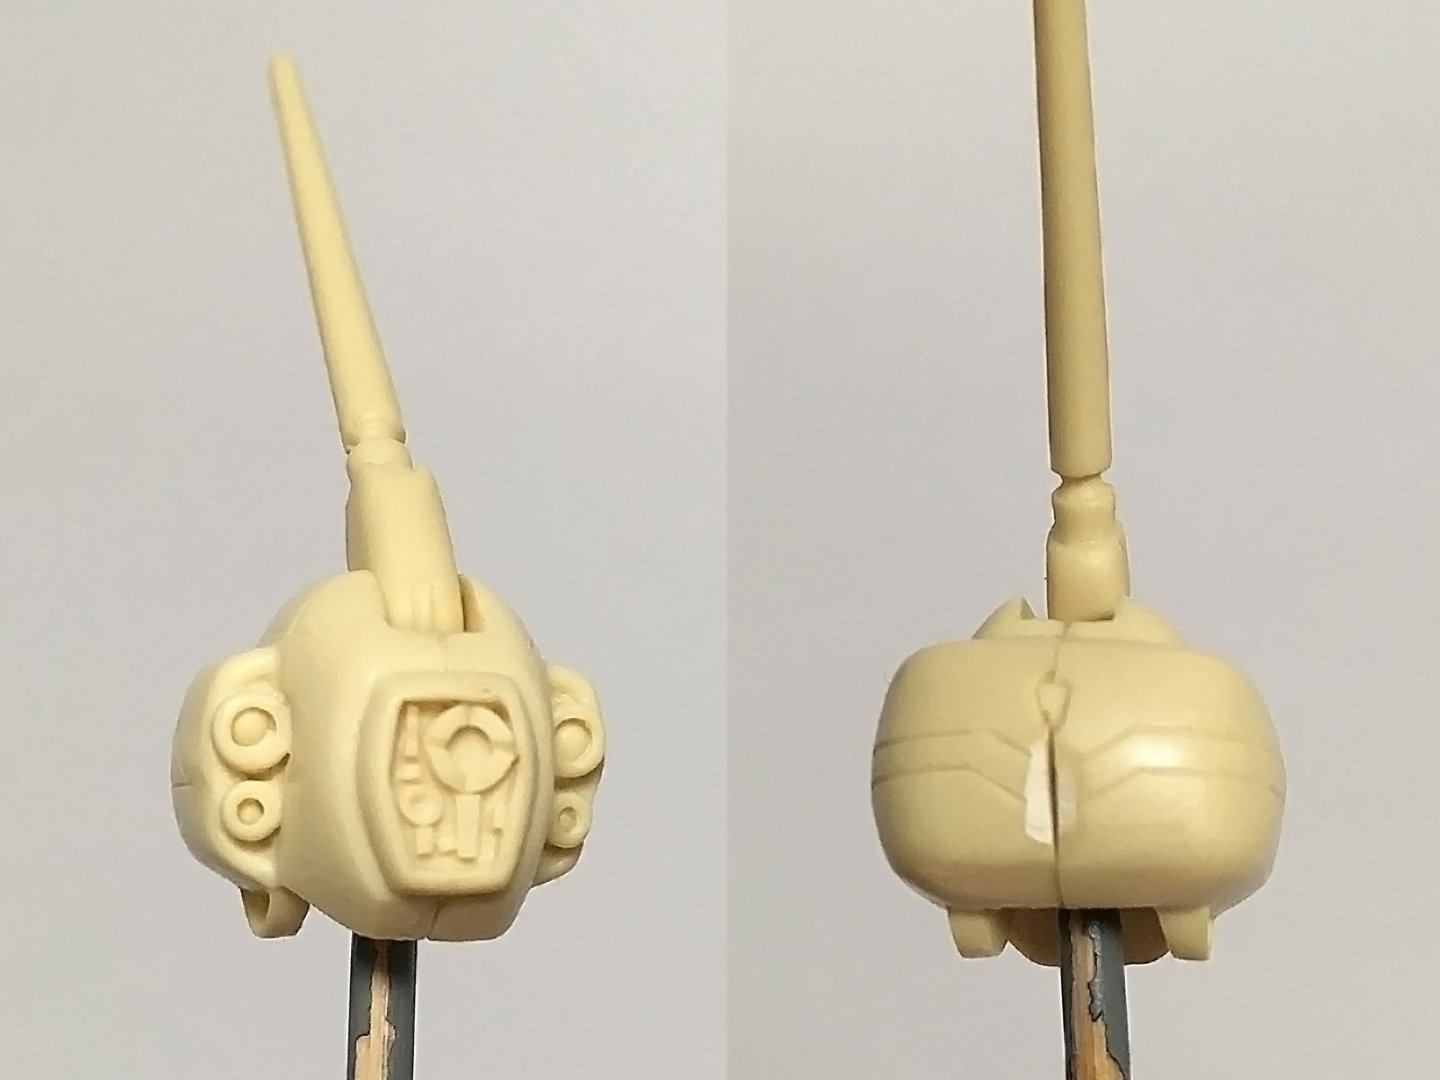
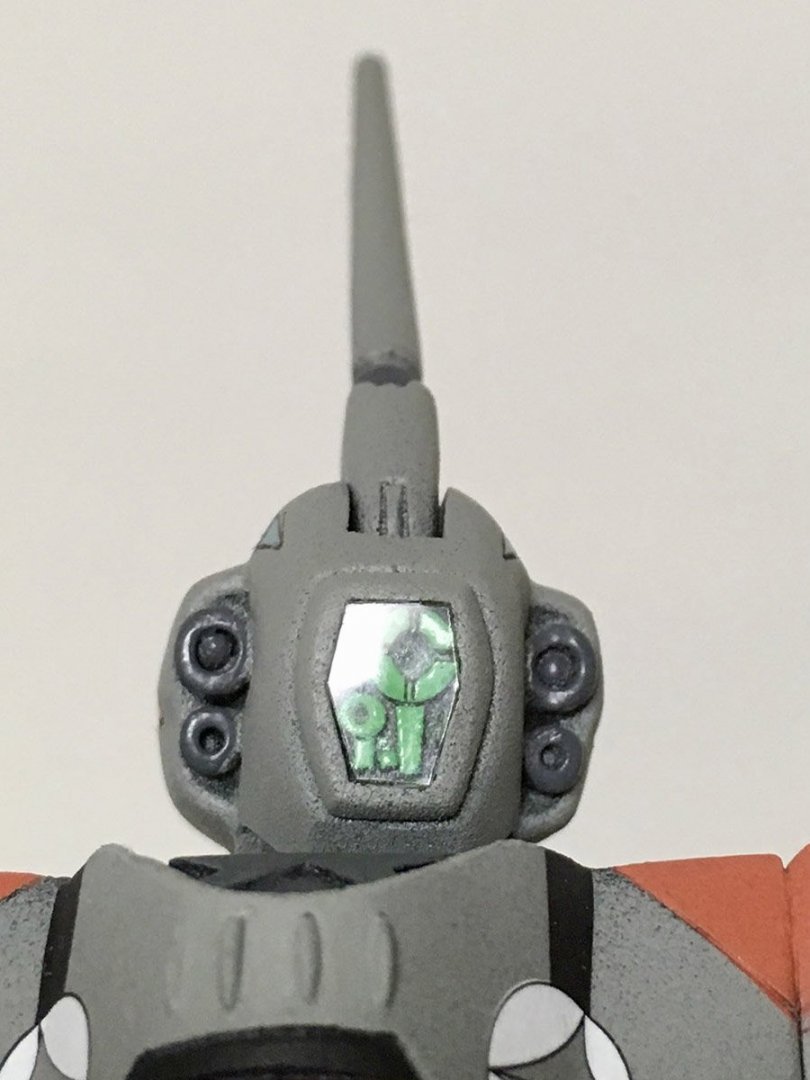
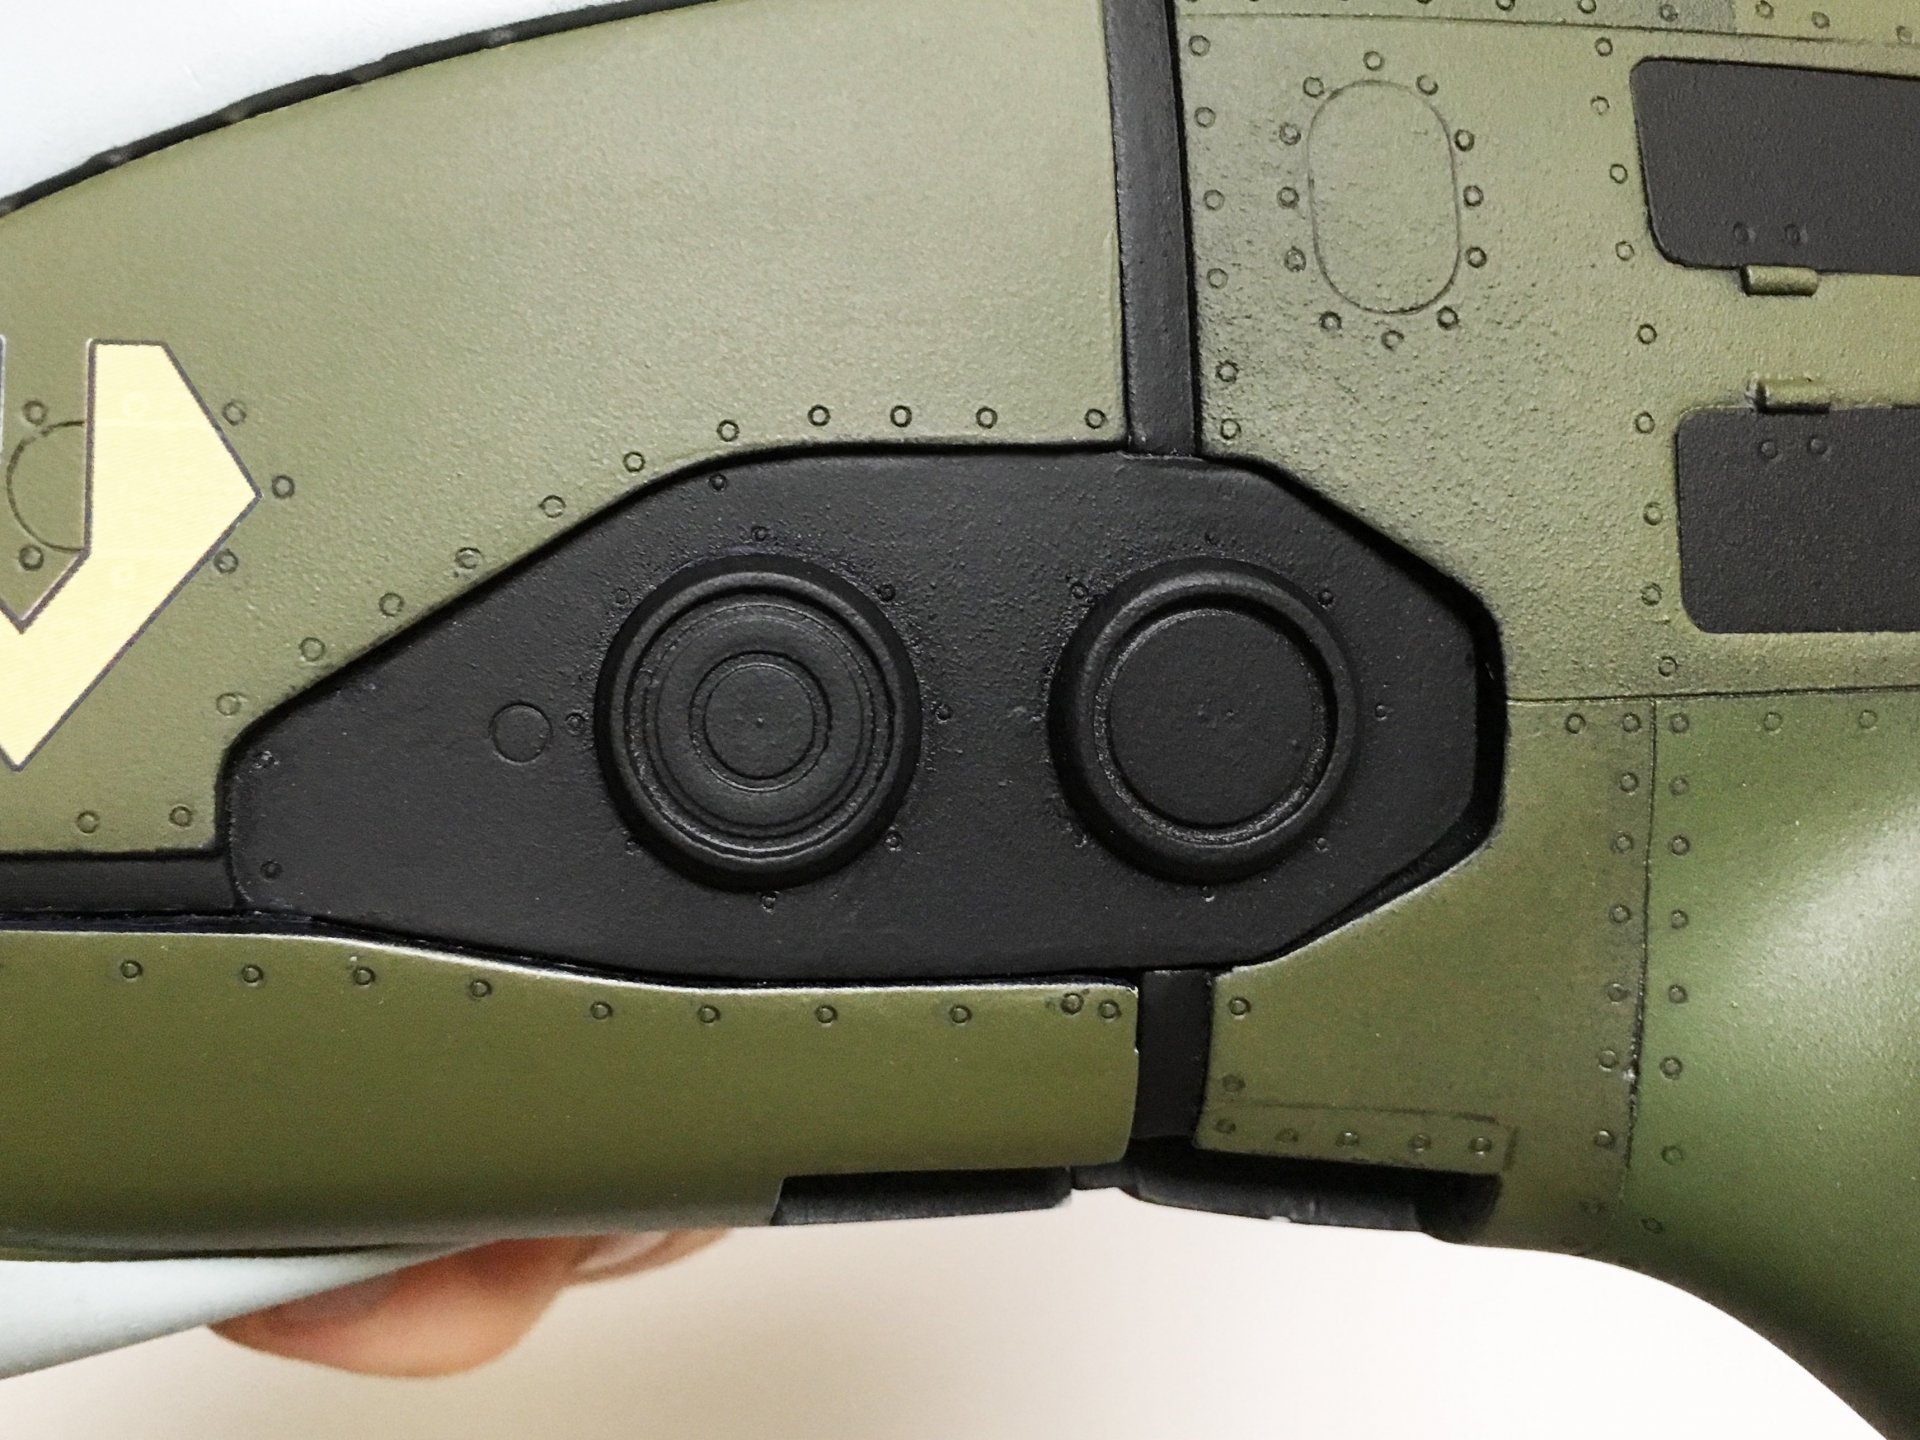
One significant disadvantage resin kits have over injection-mold kits is the higher likelihood of damaged parts (and the effort required to repair them). The VF-11 head looked good from the front, but there's a big chunk missing from the back: So, putty and sanding was required to fill the gaps, and the missing panel lines had to be rescribed. The orange color was sprayed over a coat of primer, then masked off along the sculpted panel lines. A second coat of orange was applied over the mask, to help seal the edges, and then a flat black base coat over that. Finally, the primary ocean grey color was sprayed on, and the edges of the stripes were panel-lined with my 0.03mm marker before the masking tape was removed. After a little more touch-up work, the head was completed and attached to the torso. I cut a thin piece of cellophane from a discarded toy's window box and trimmed it to fit over the camera eye detail on the face. From the right angle, it catches the light quite beautifully.


-
Bolt’s Blt comp entry#1 Neo Grade VF1 Armored Valkyrie
tekering replied to Bolt's topic in The Workshop!
I propose we extend the deadline. Unforeseen circumstances shouldn't prevent you from being able to compete, and I want to see a lot more of your pics! Why have you been without power all week? -
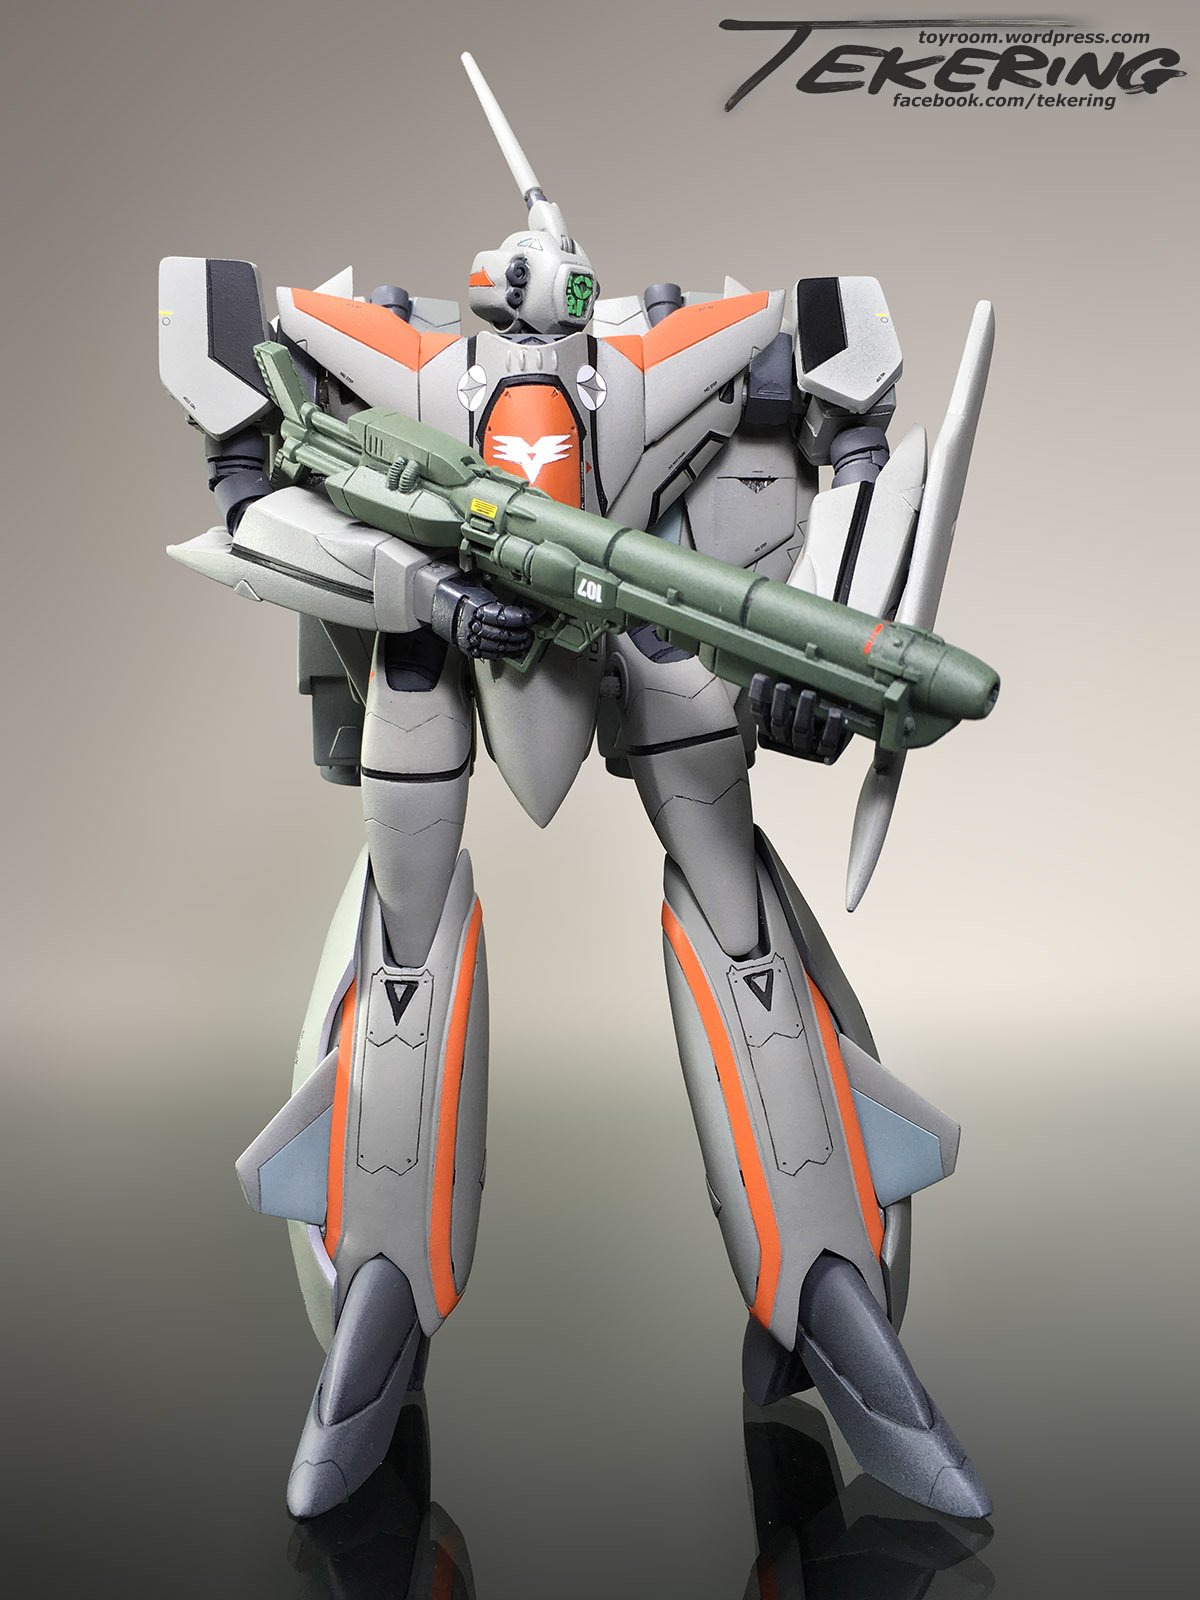
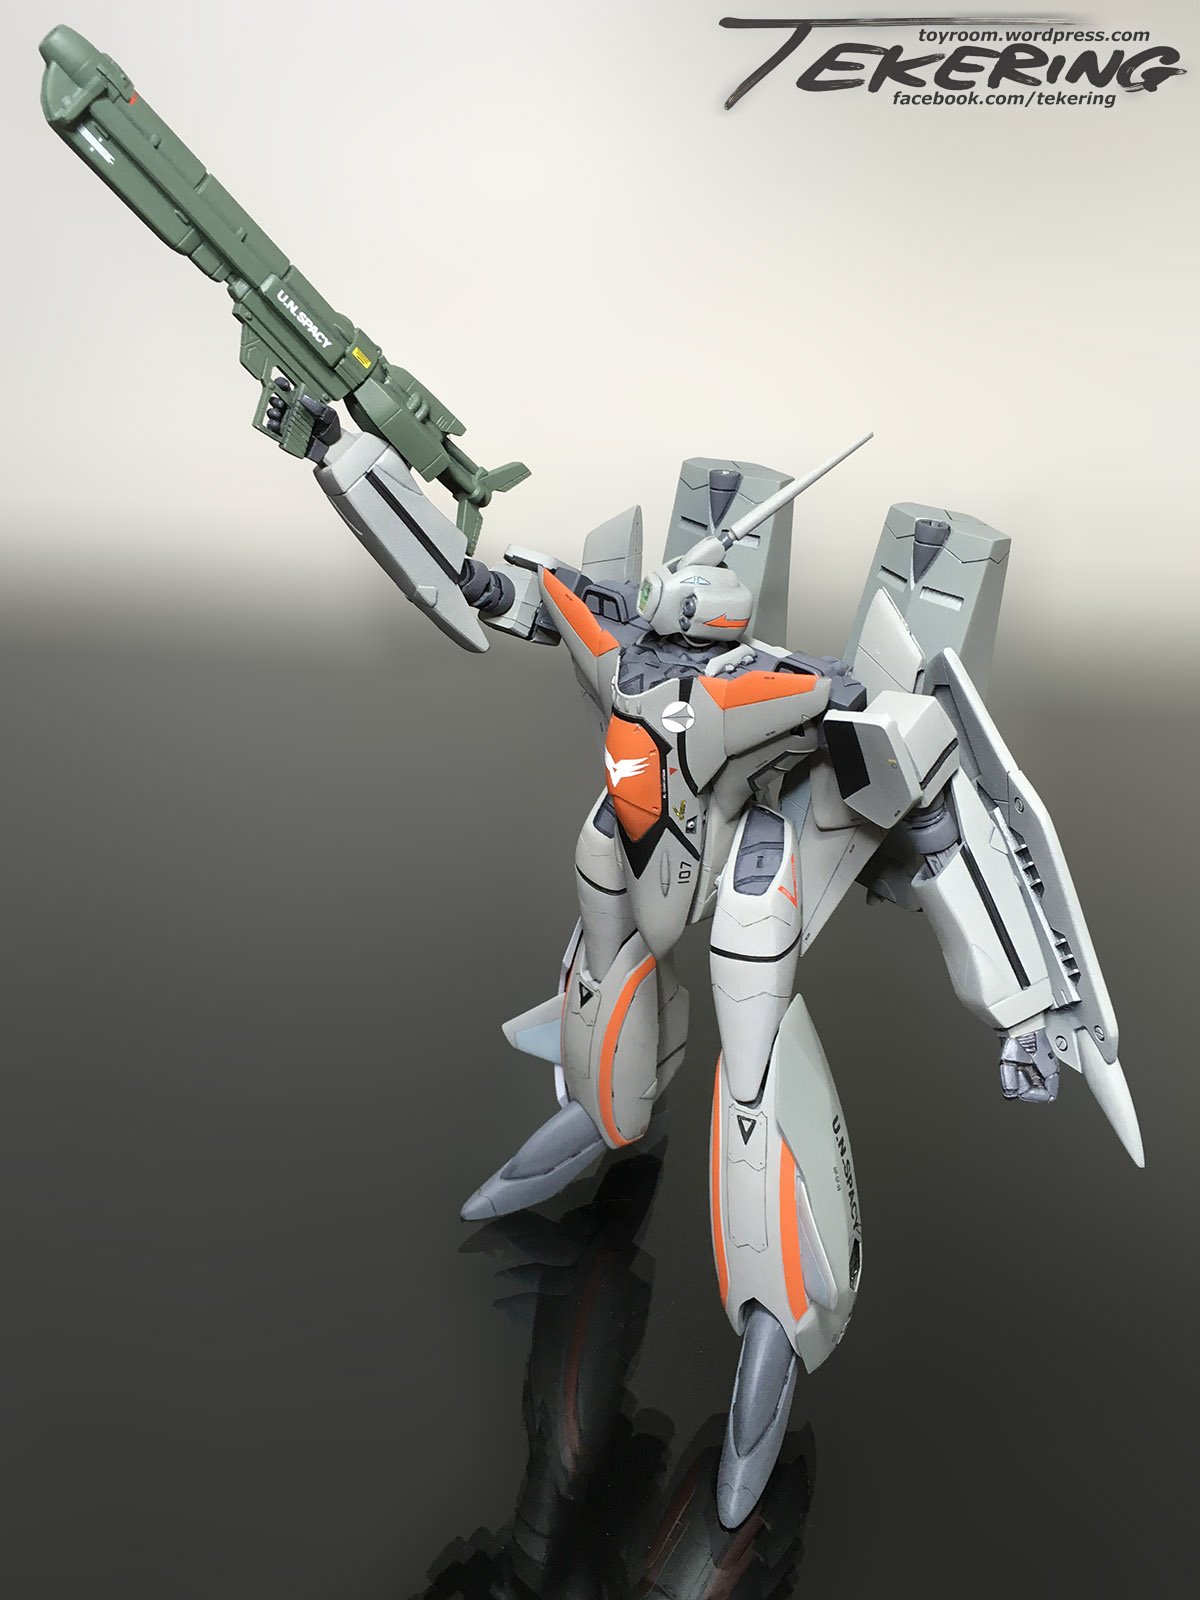
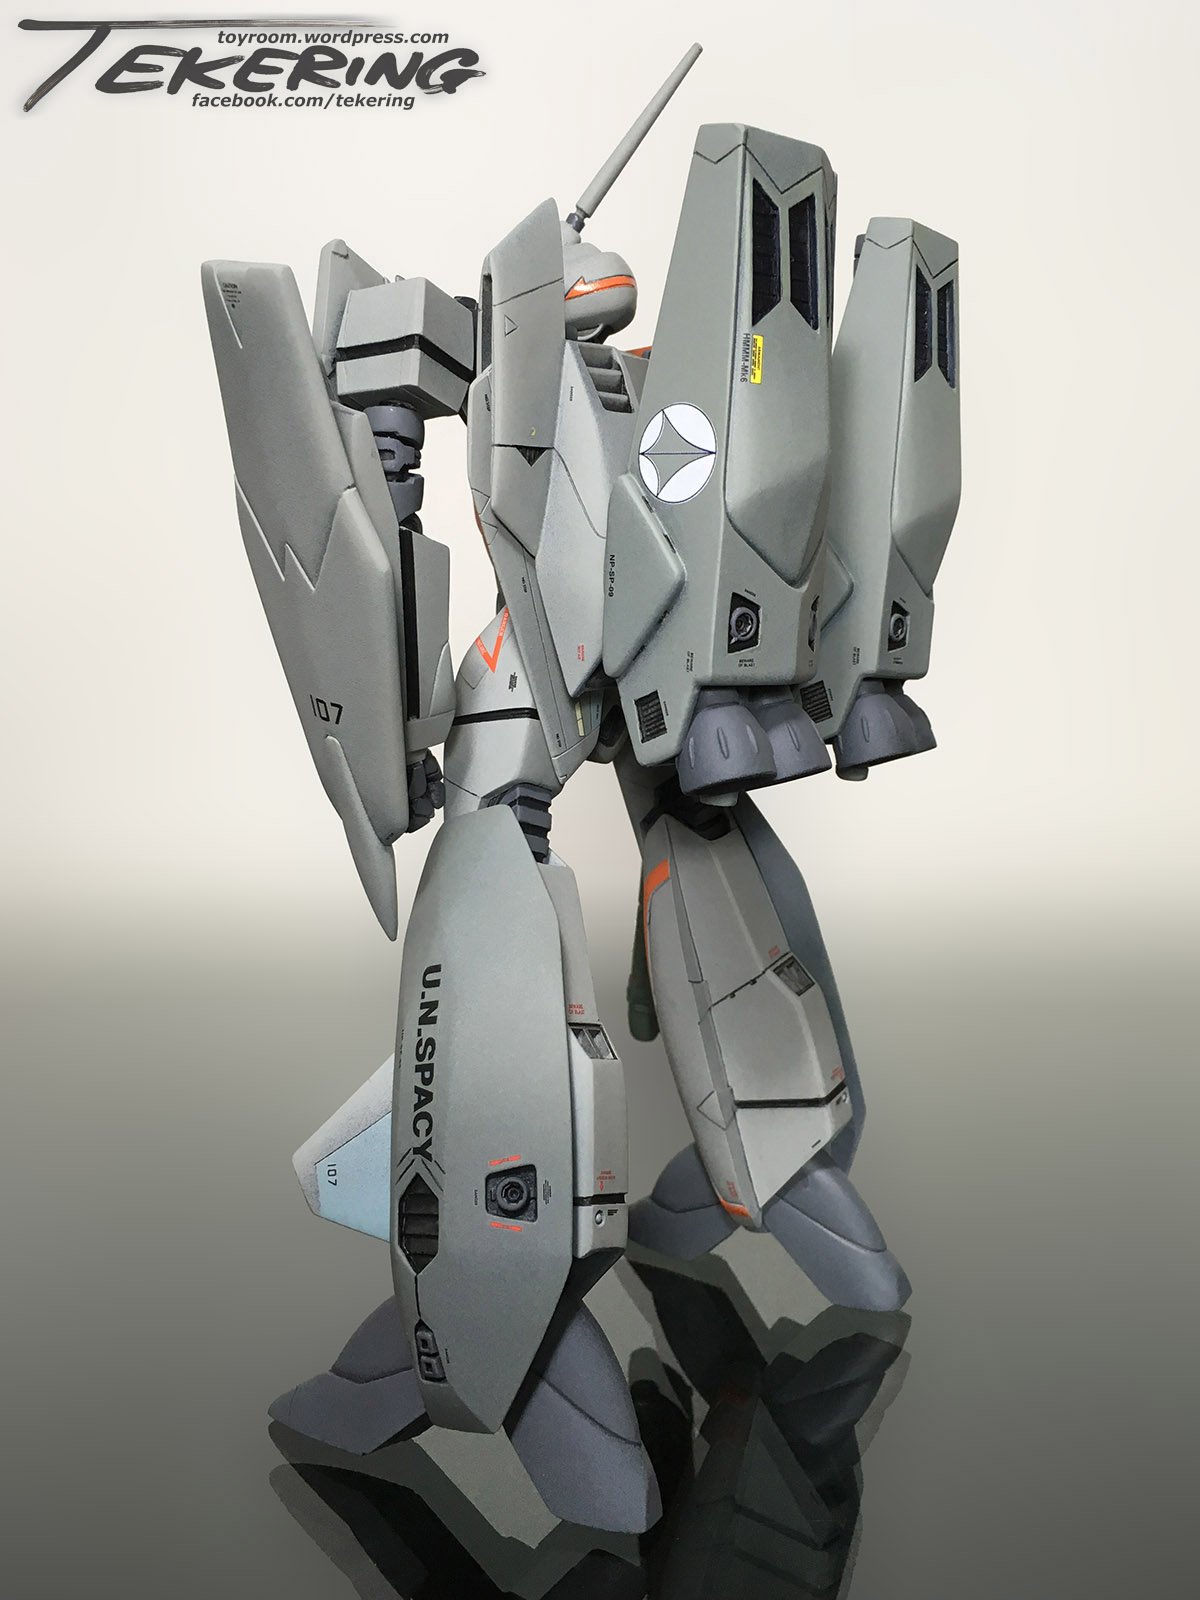
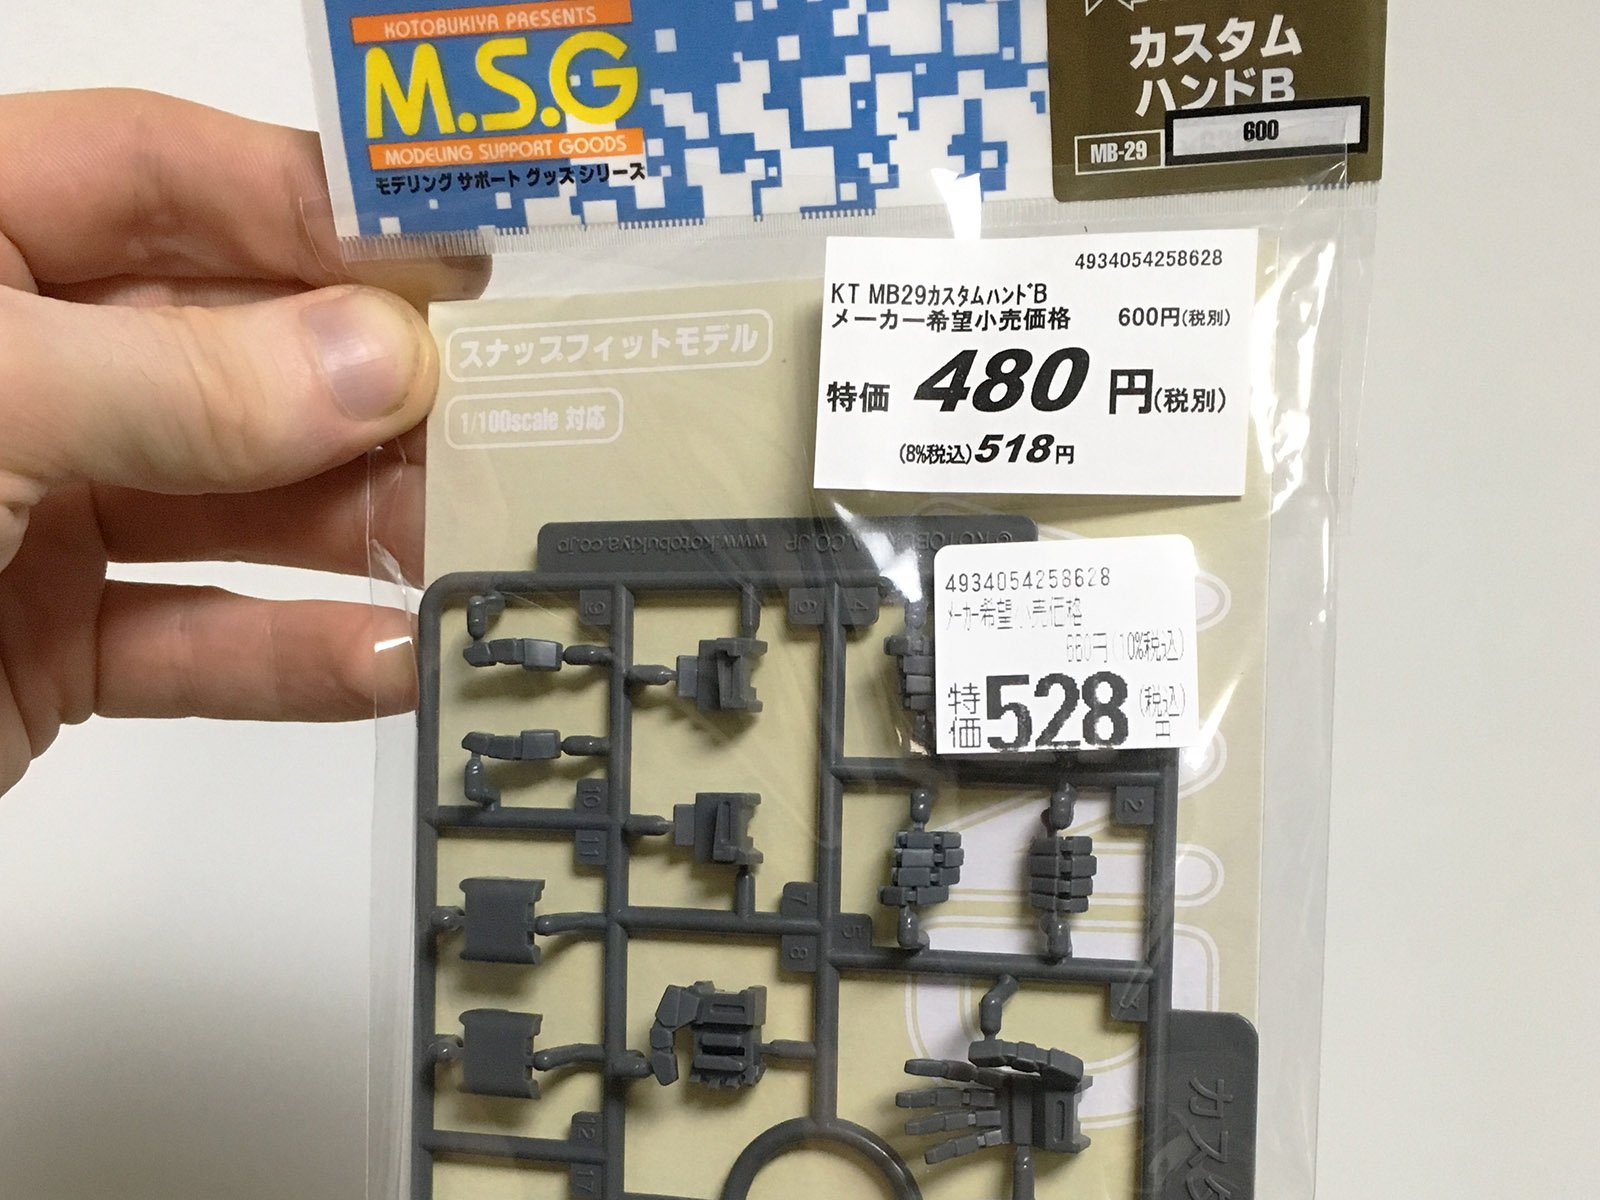
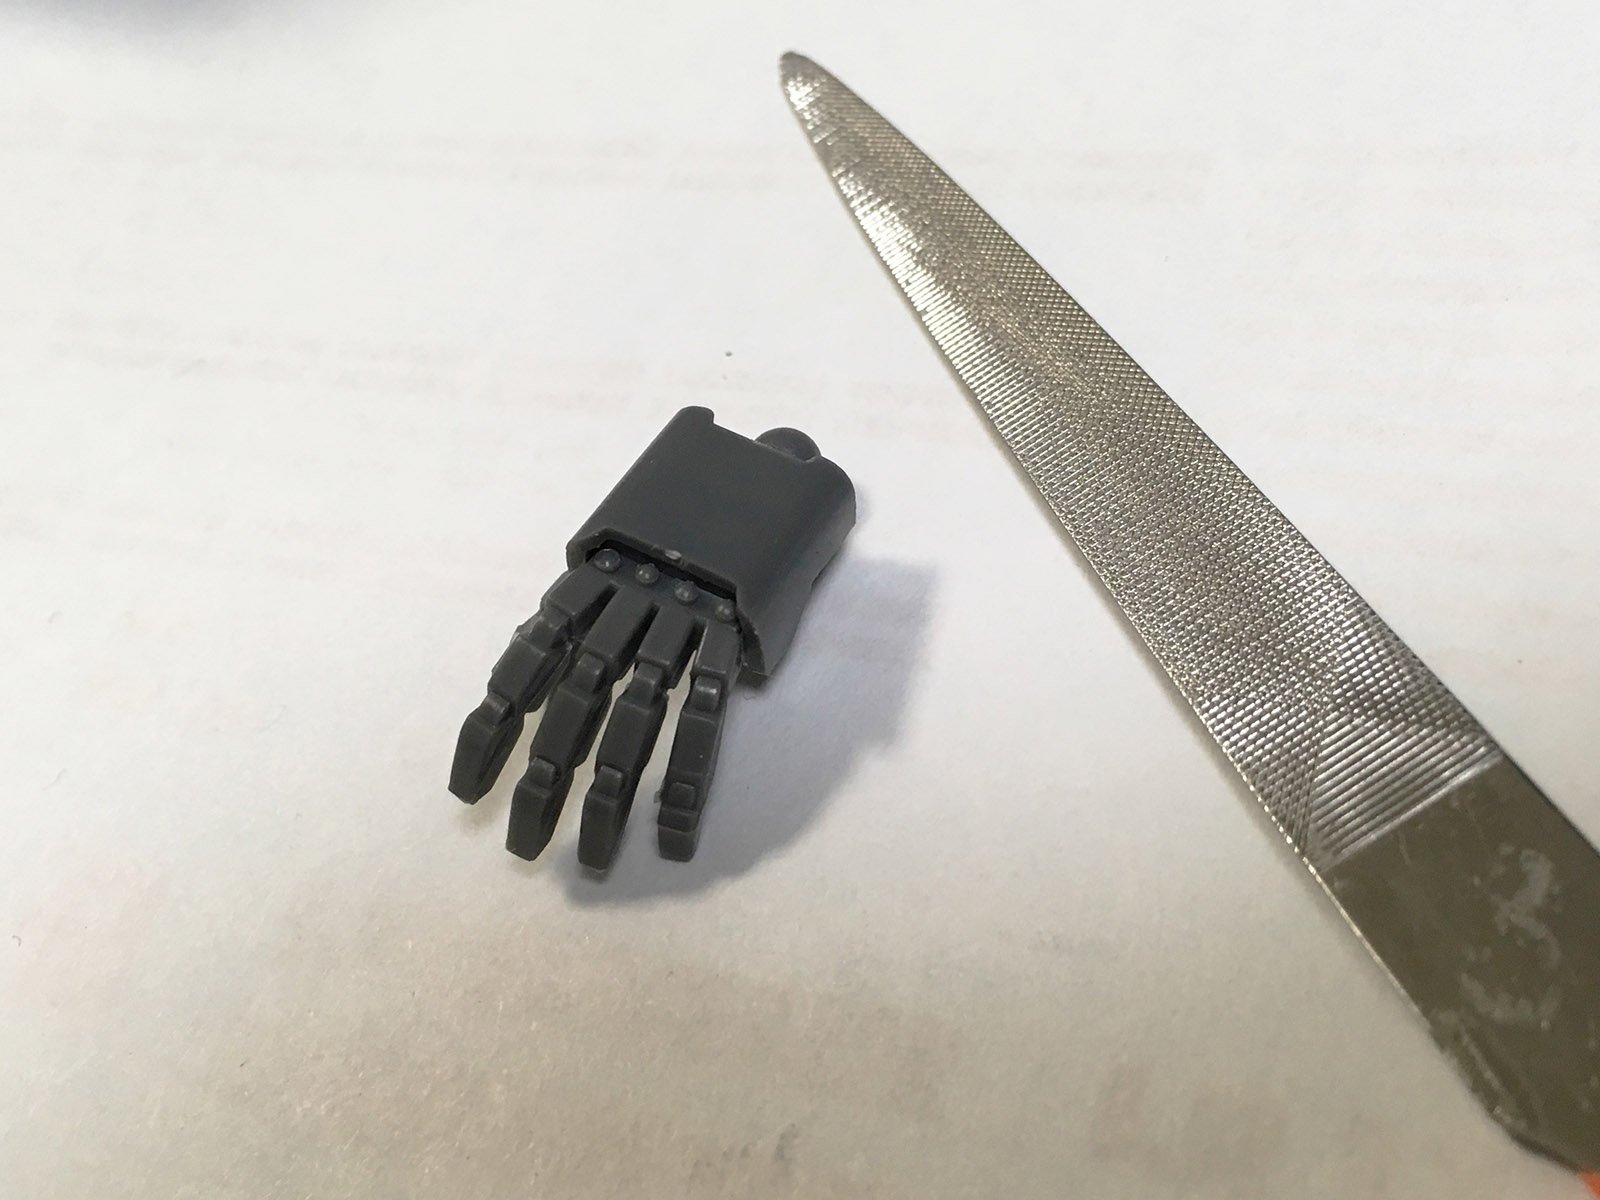
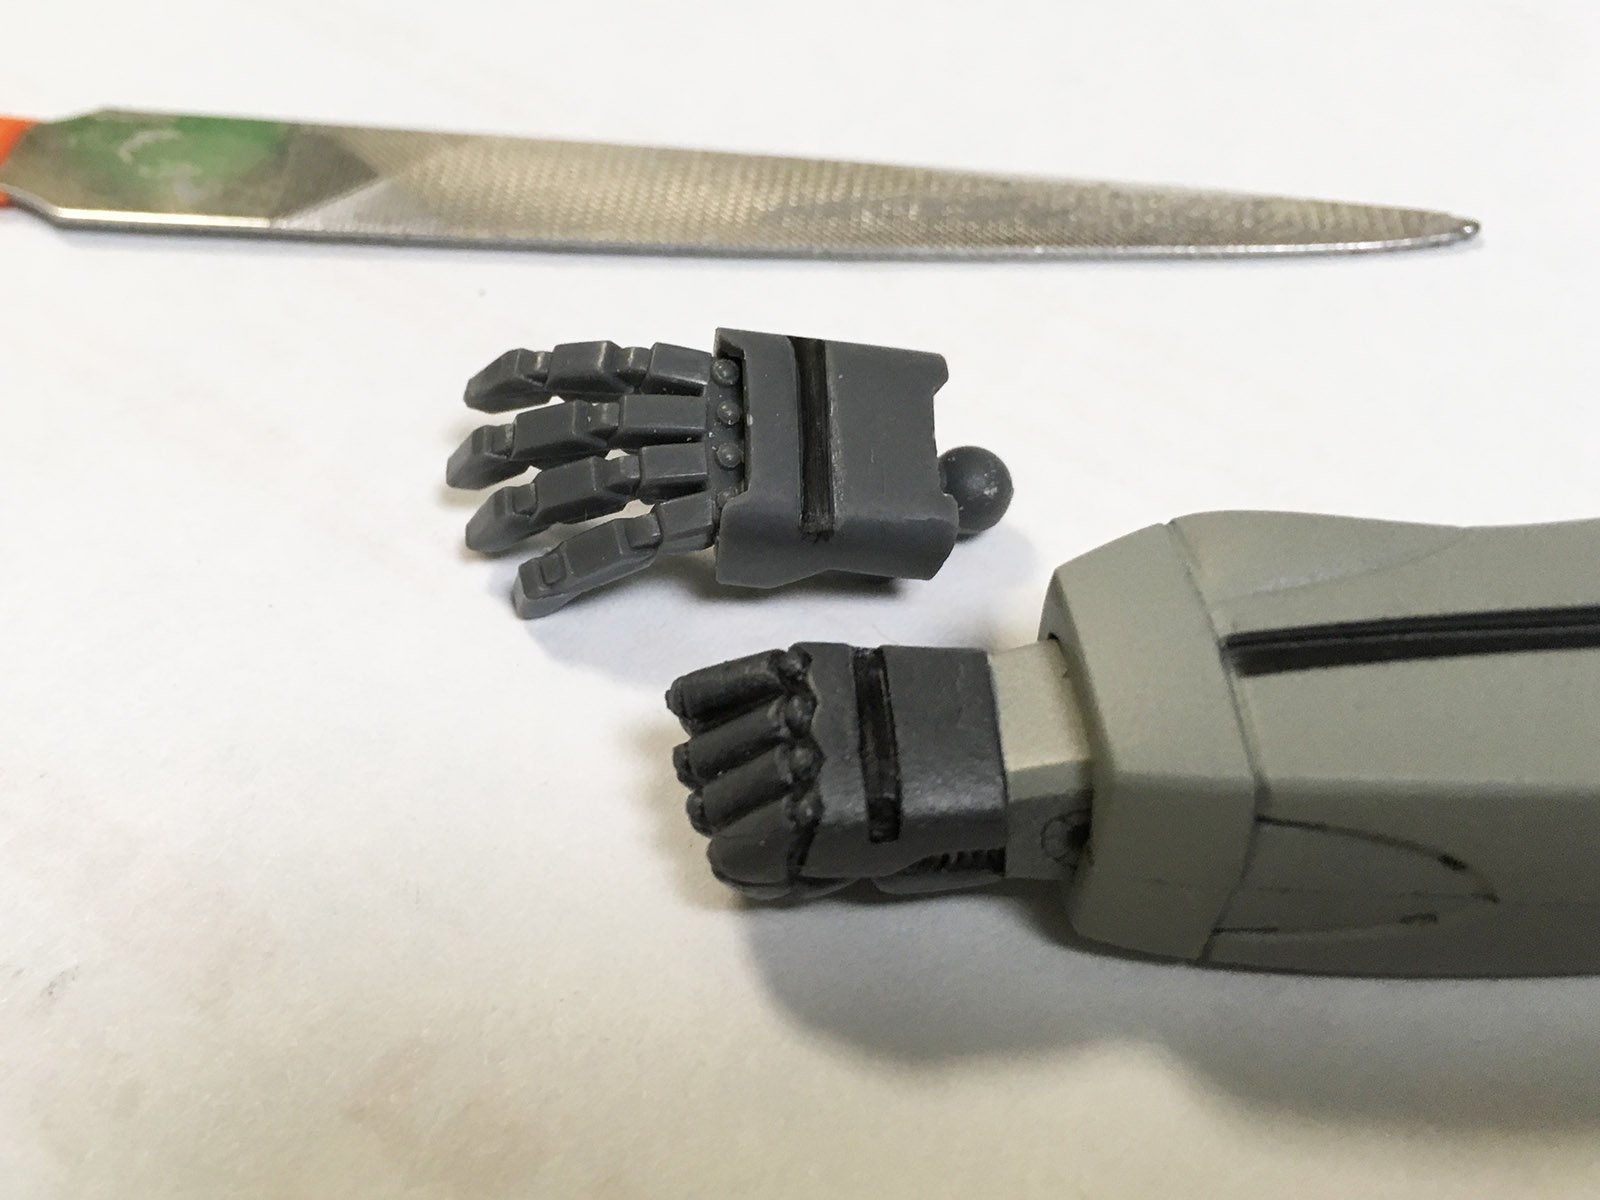
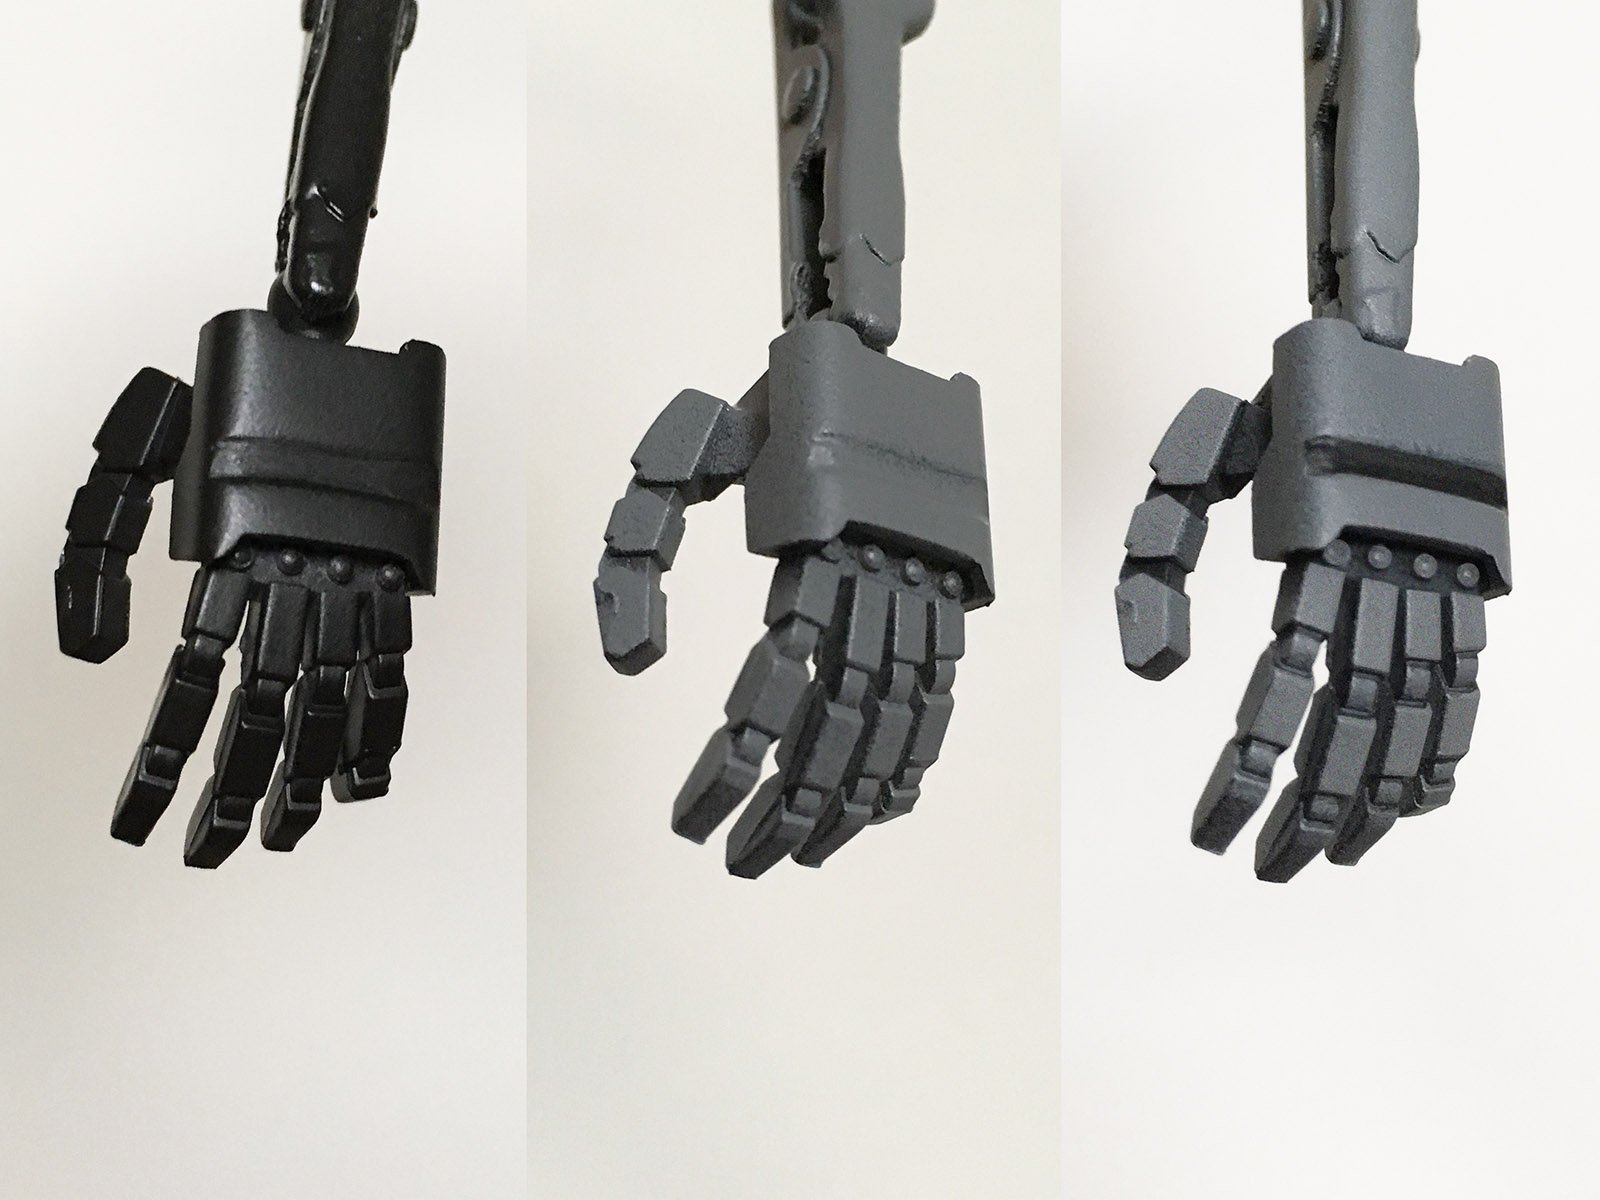
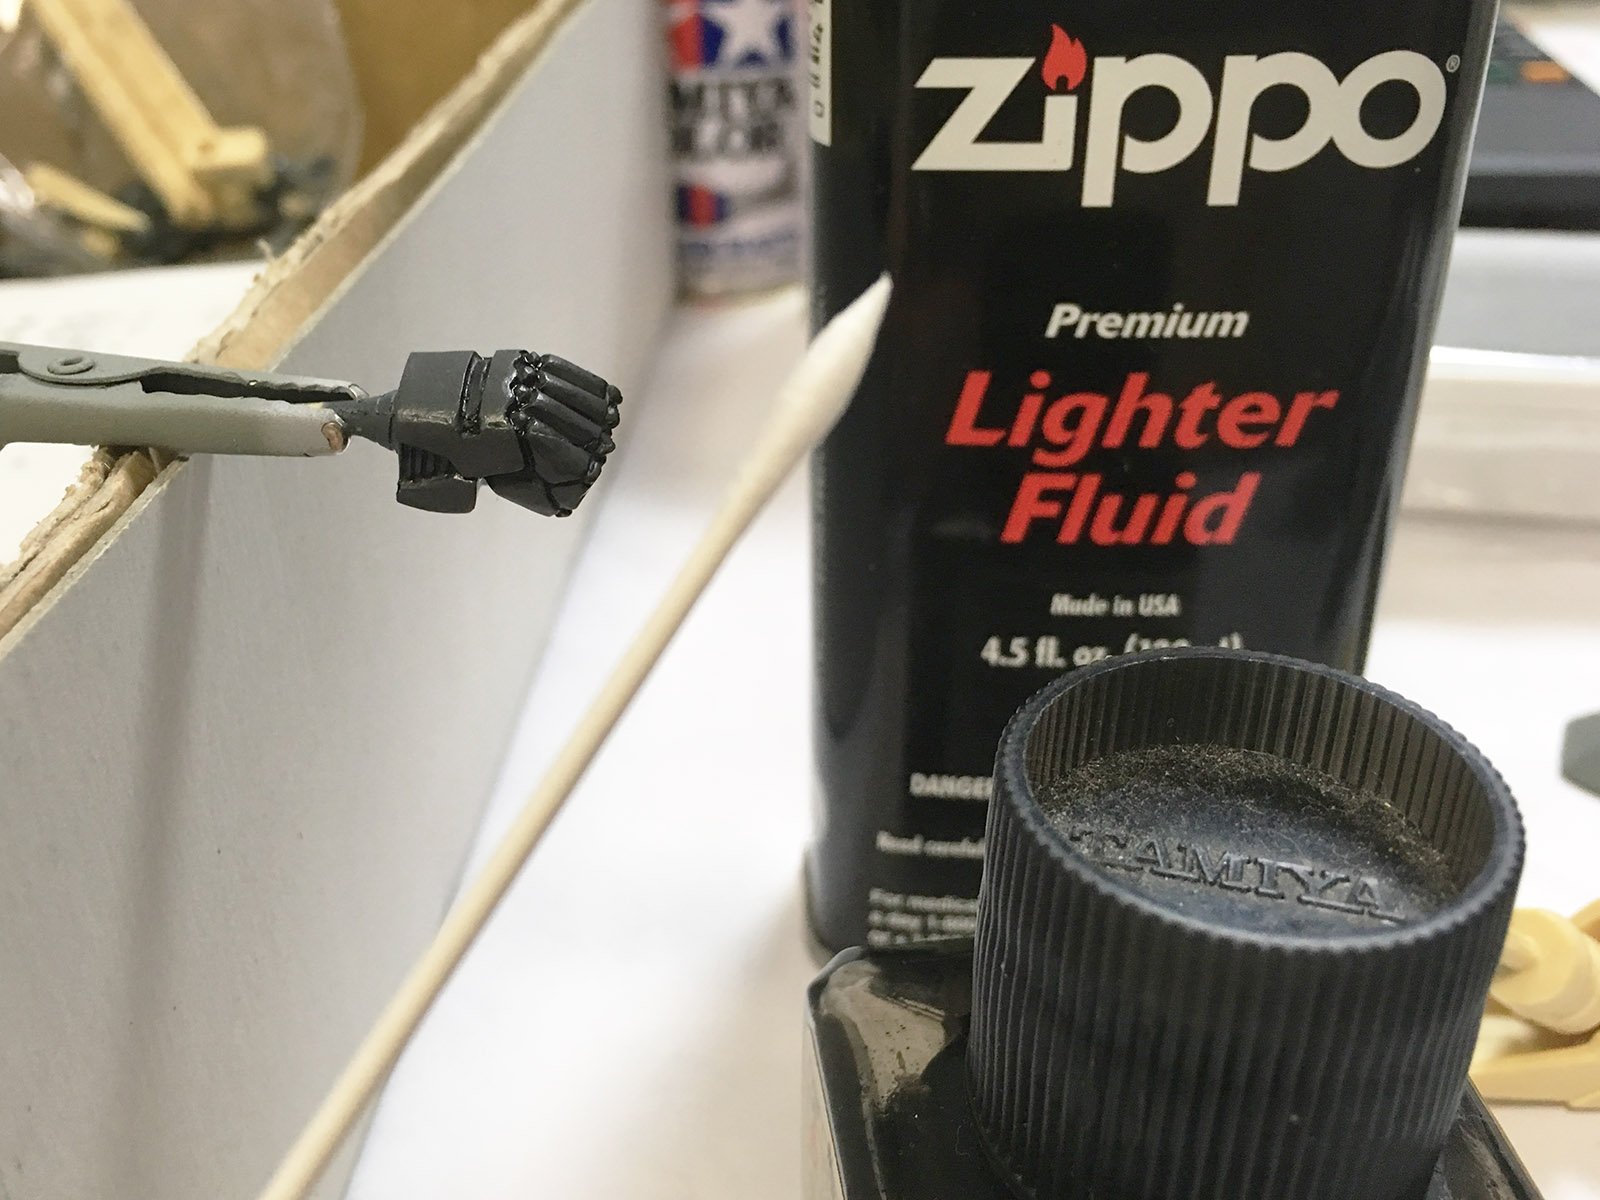
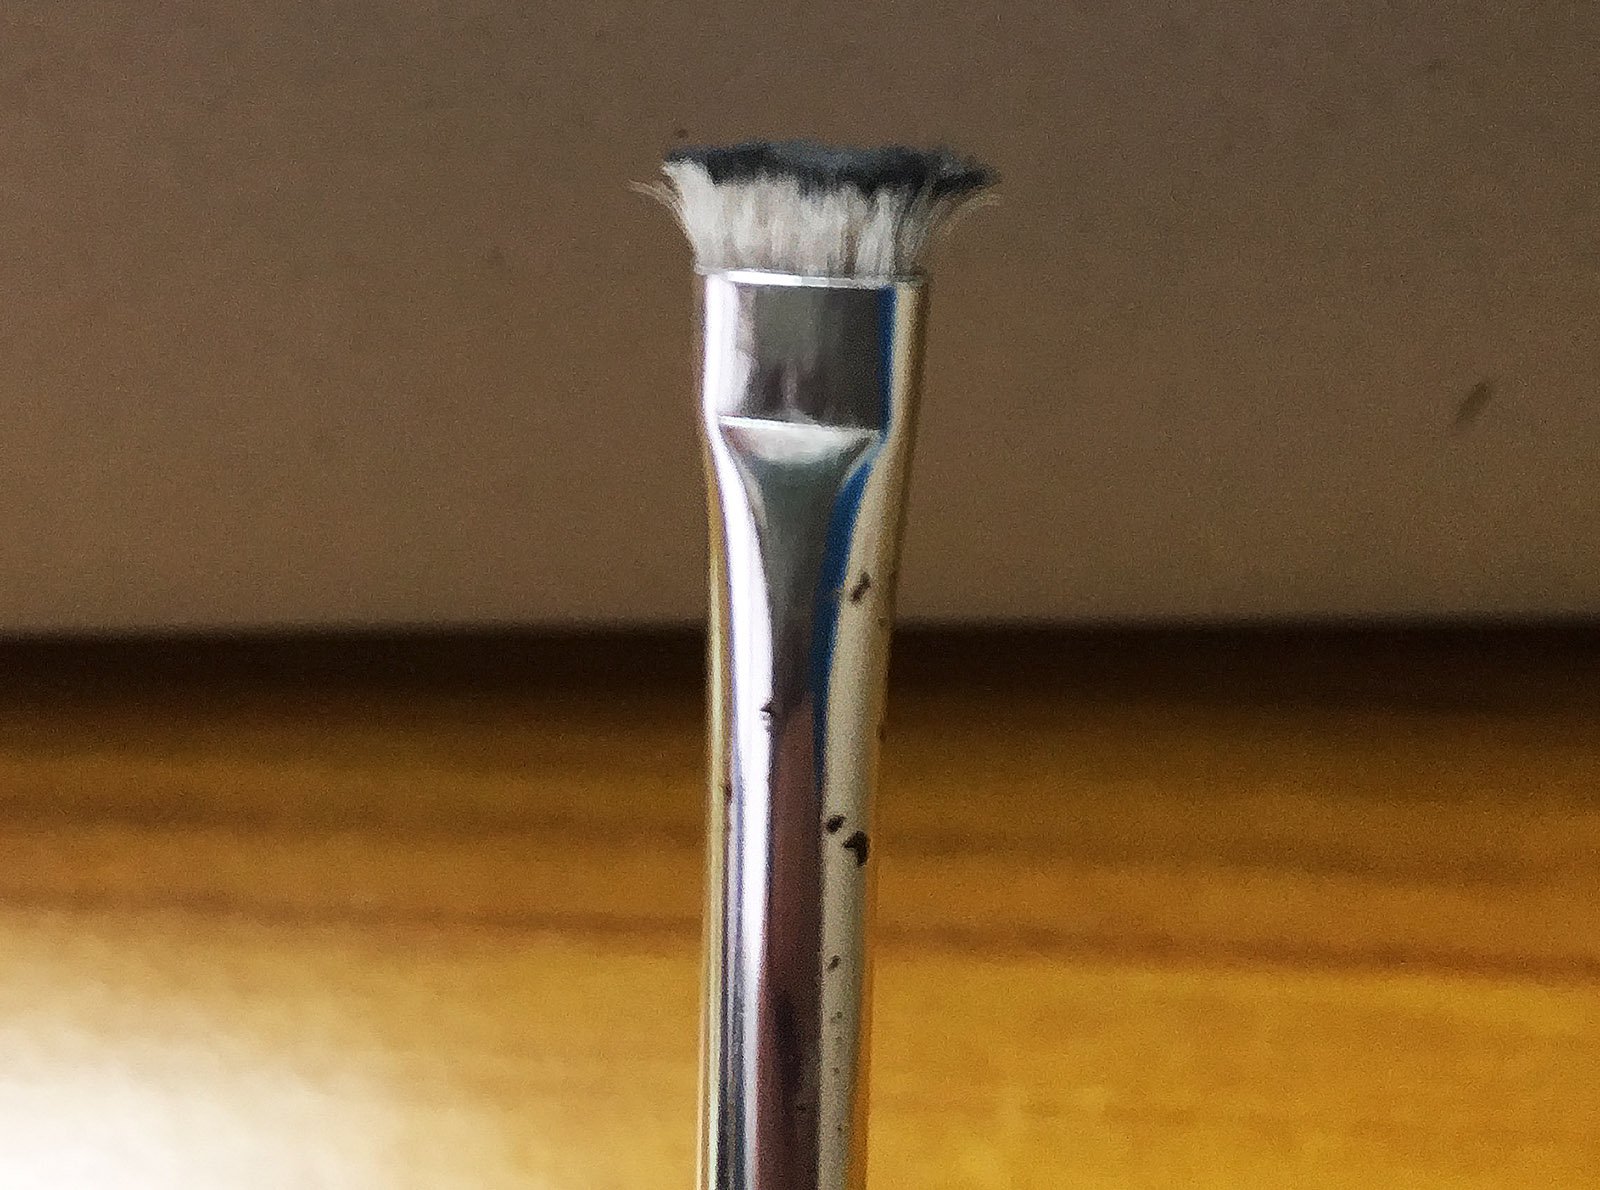
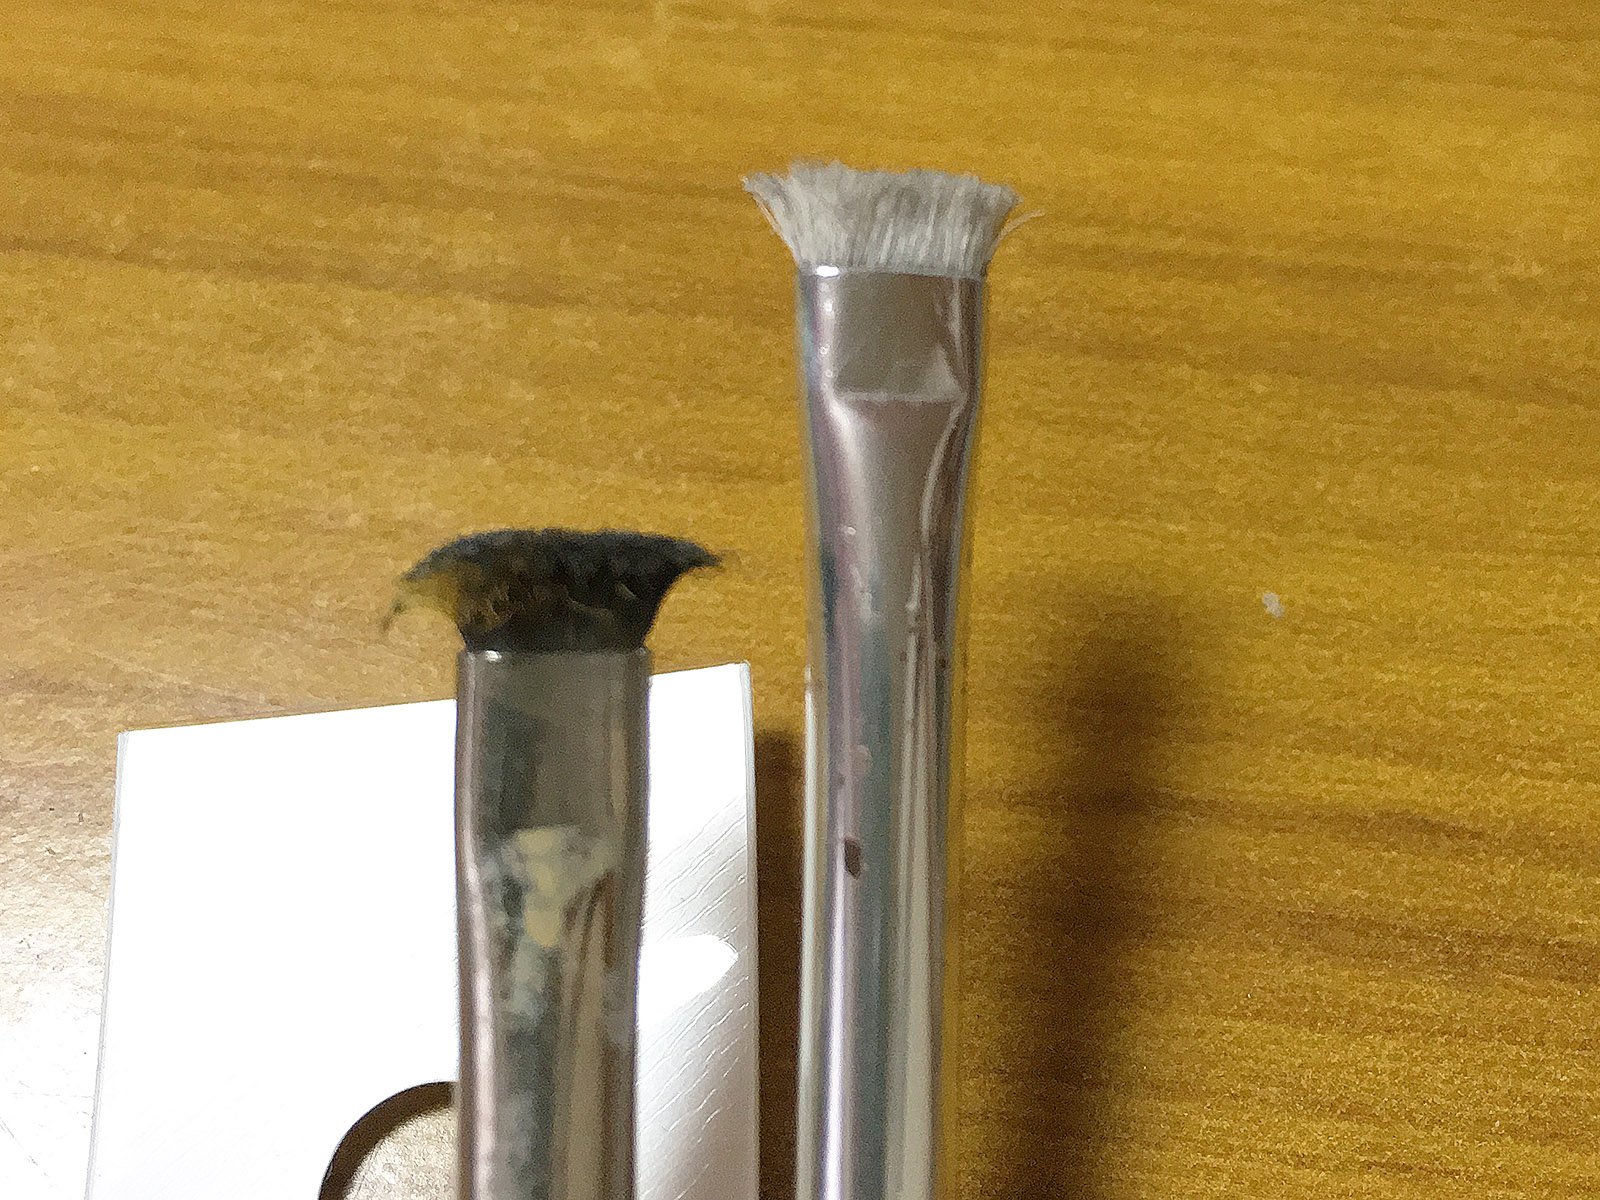
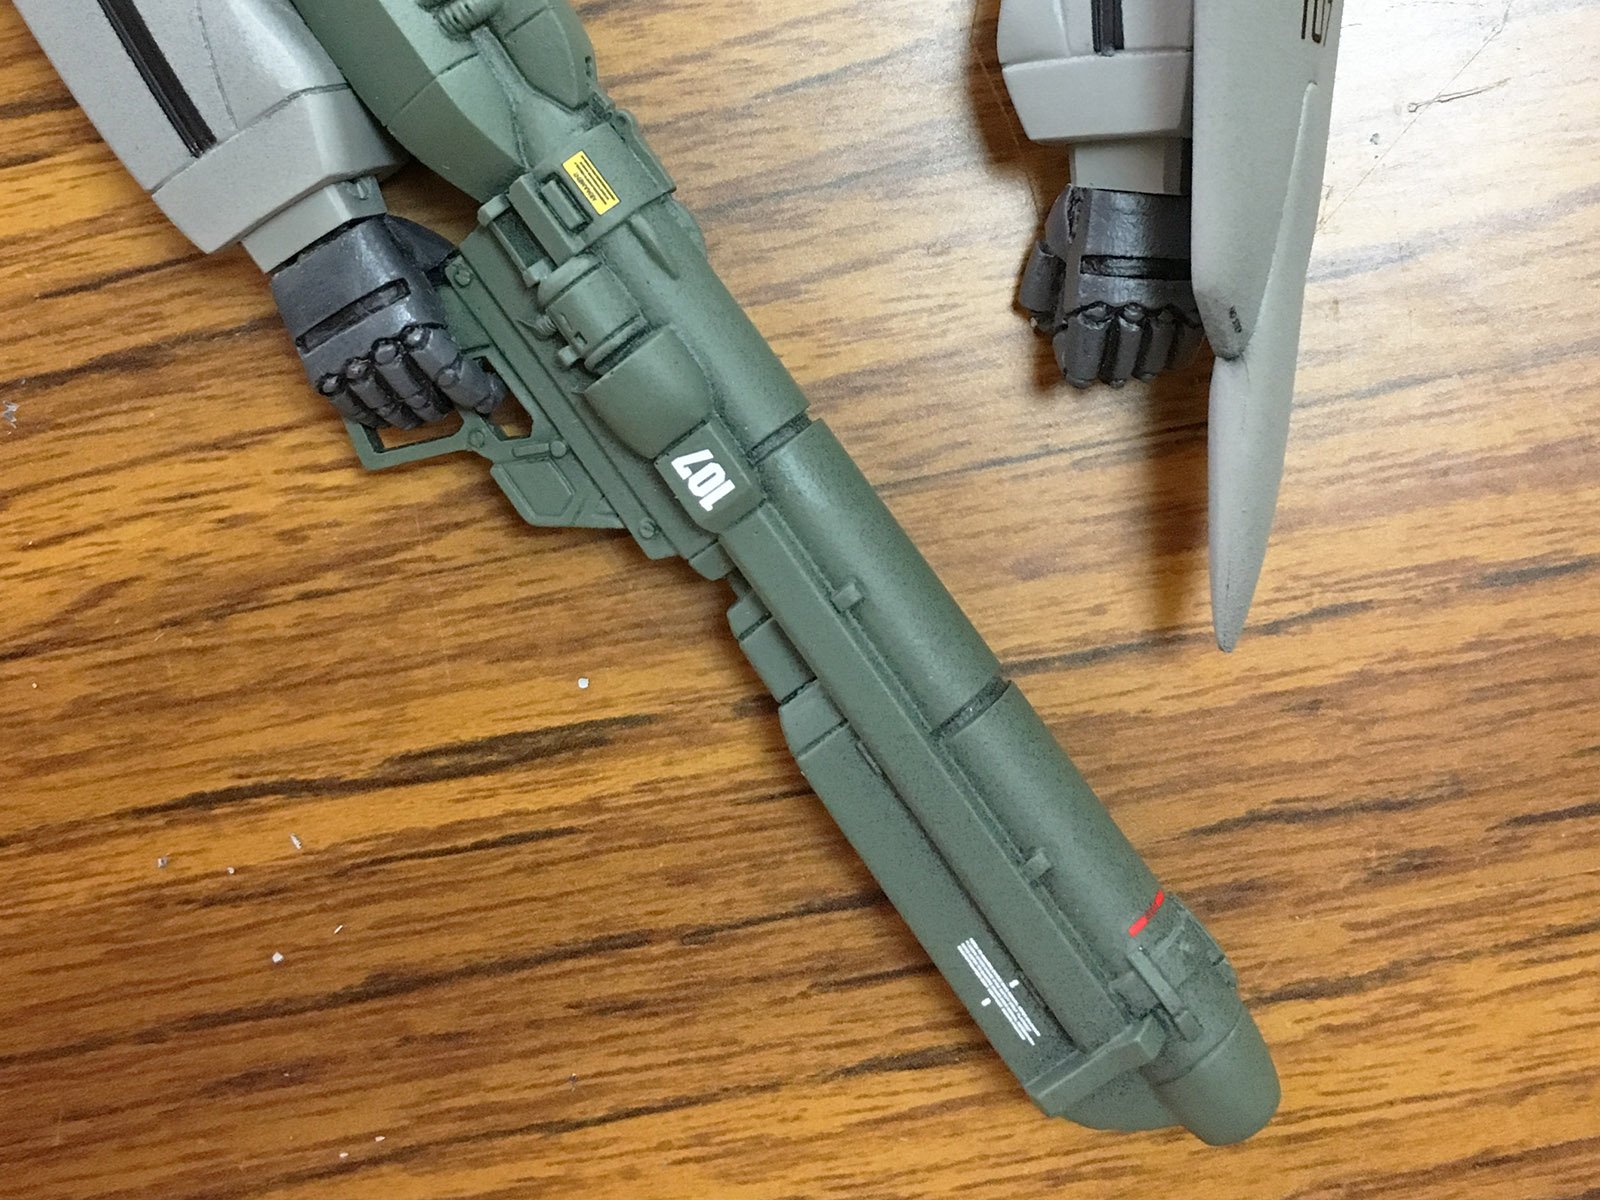
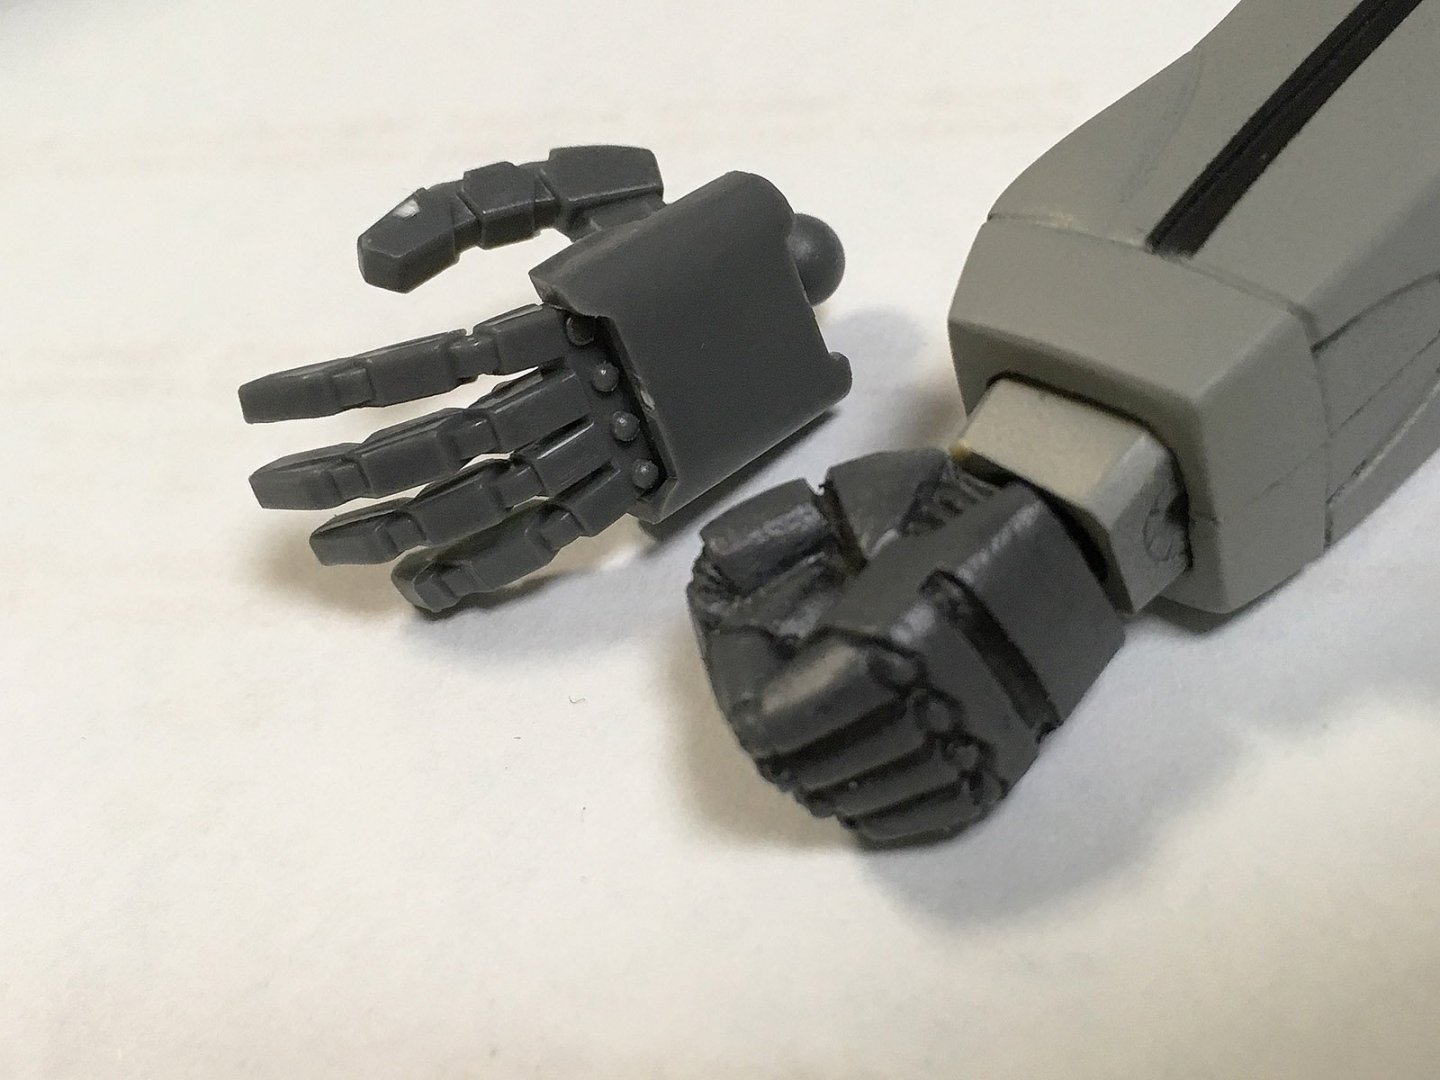
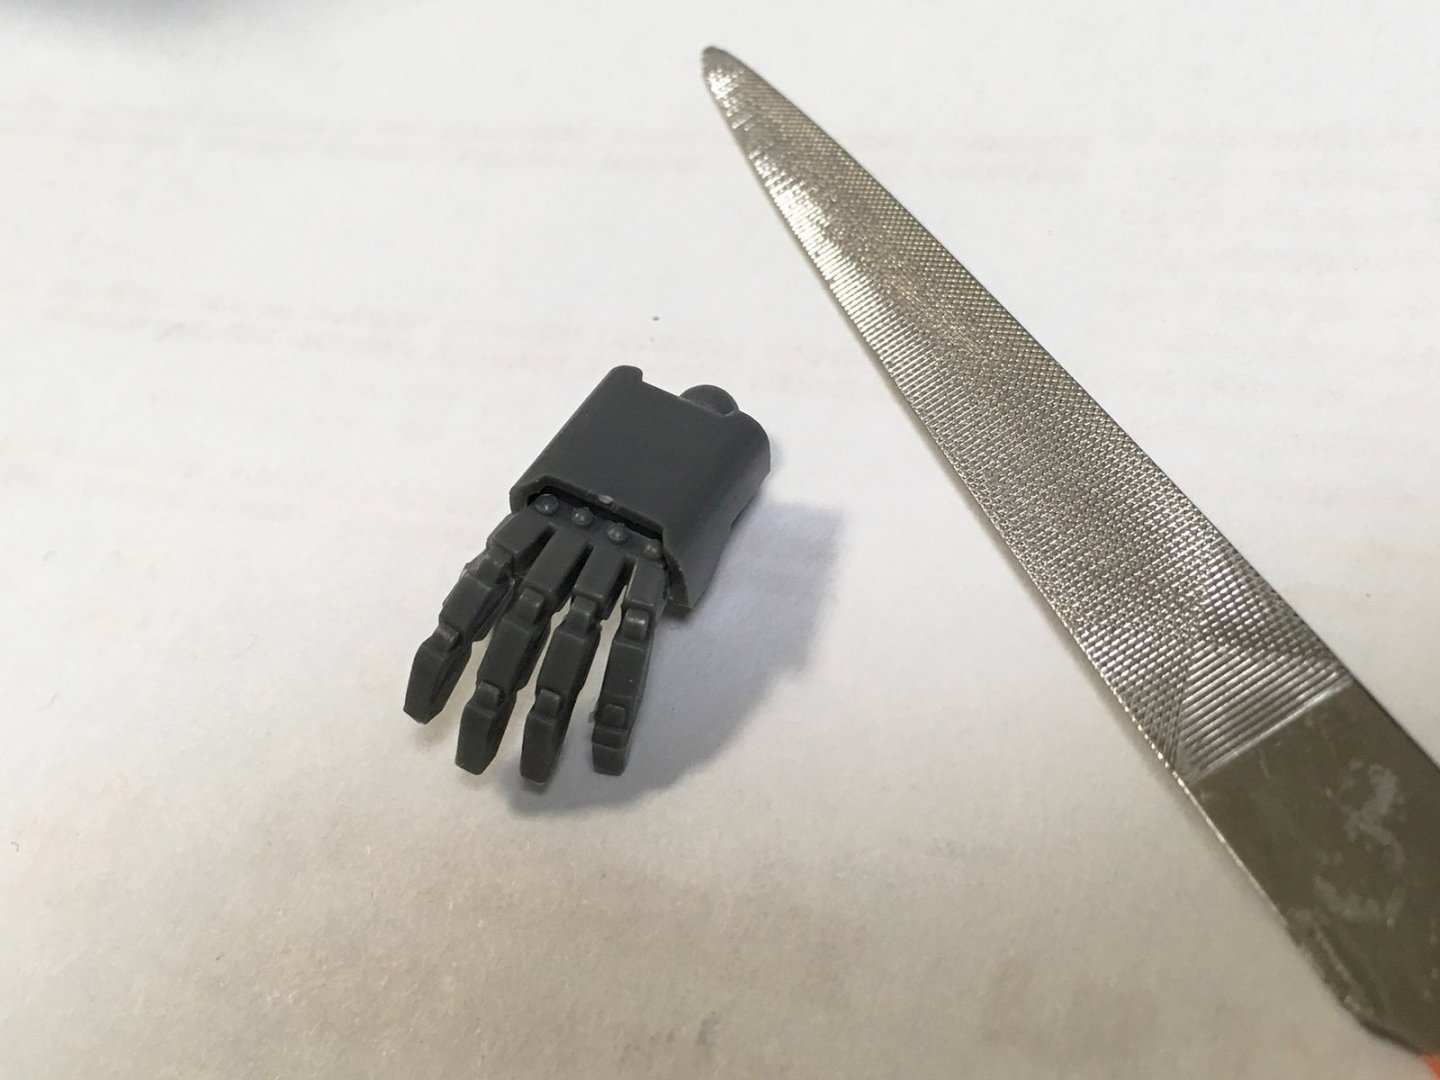
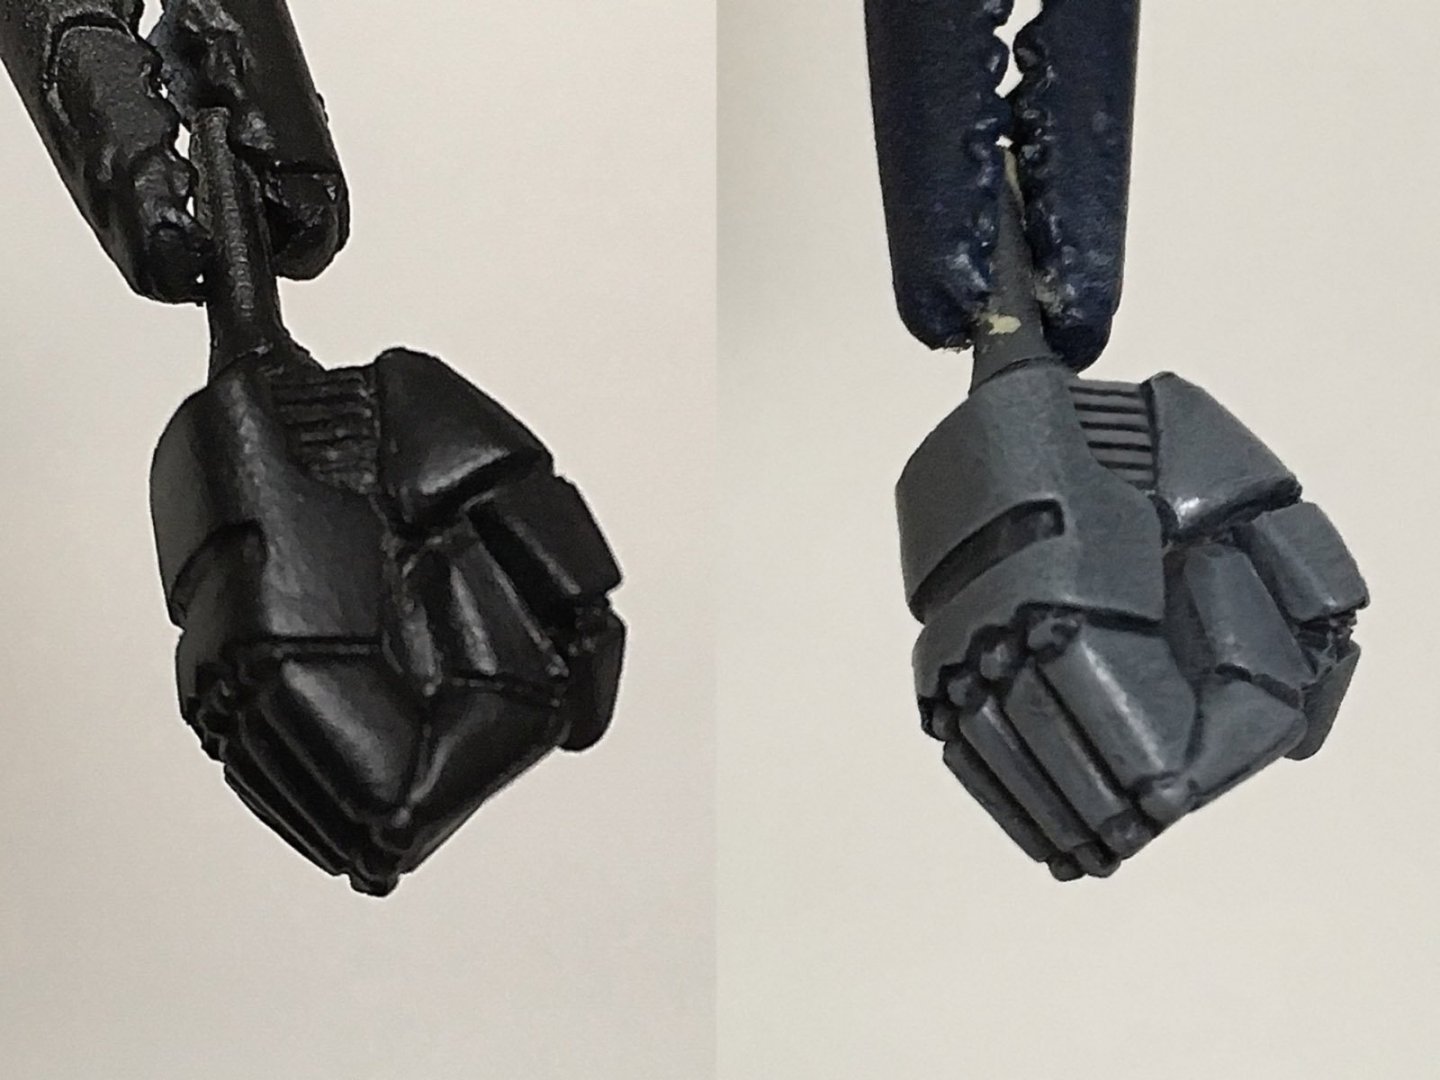
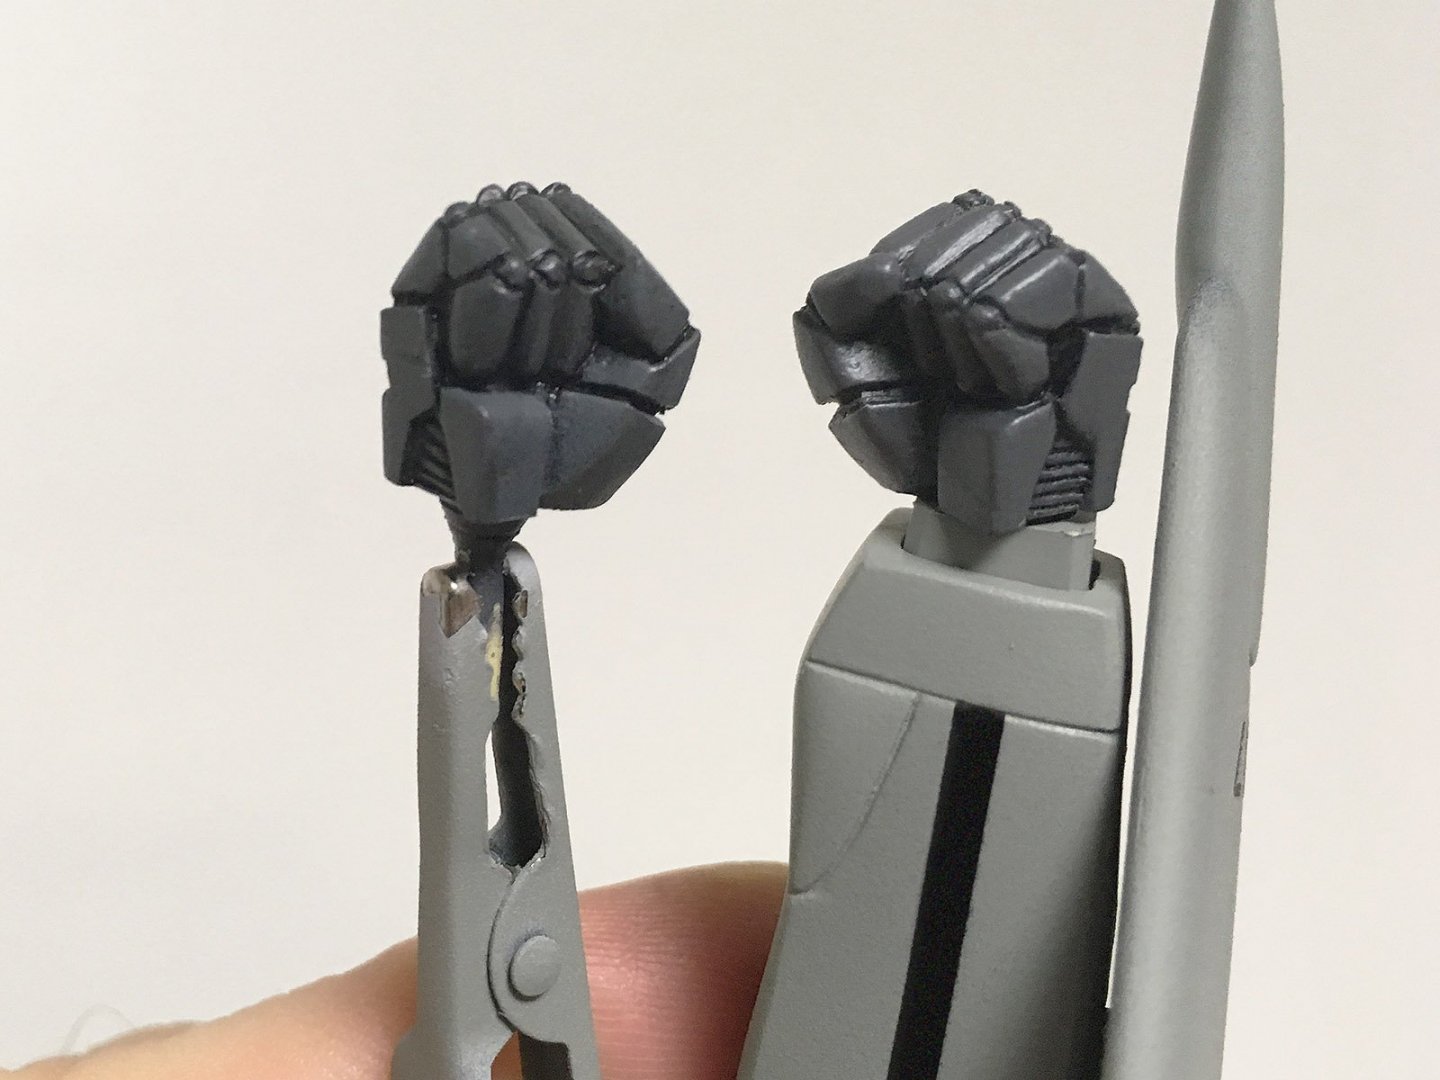
I didn't realize anyone was still paying attention! It seems the Gnerl has all but stolen the spotlight... This Battroid was a more complex build, though; even the hands required work. On that note: Let's talk about dry brushing and panel line accent washes. Drybrushing is what I call an "addition" technique, where paint is lightly applied in numerous little strokes until the desired coverage is eventually achieved. I use cheap or well-used brushes for this, with the bristles cut down to about half of their original length. With paint only on the very edges of the brush, and already half-dried as it's applied to the plastic parts, the paint tends to adhere only to the raised surfaces. This is perfect for details like robotic fingers, of course. Using a thin black wash for panel-lining accents is exactly the opposite; a "subtraction" technique, if you will. Capillary action fills all those grooves, channels and valleys between the raised edges with a watery black enamel (or grey or brown, depending on the primary color you're complementing), and then the excess has to be removed from where it isn't wanted. Enamel paint thinner or Zippo lighter fluid is ideal for this sort of thing, since it's unlikely to damage the lacquer paint your primary colors were applied with. Precision-tip cotton swabs like Tamiya sells are preferable to common Q-Tips or fabric rags. Having painted up these fists for demonstration purposes, I have no intention of actually using them... The stock hands included with the kit aren't compatible with the gunpod. The alternate right hand is a two-piece design that fits around the grip of the gunpod, but there's no corresponding left hand to hold it up by the barrel... Kotobukiya to the rescue! This hand looks to be a similar size, but it's missing some of the prominent details on the stock hand... like that channel cut into the back of the hand. My diamond file will make short work of that. I used a Gundam marker to outline the edges of the groove I'd cut into the hand, then went about painting it to match the stock hands. Here you see the results of spray painting, drybrushing, and panel-lining; a lot of work just so the VF-11 can hold the gunpod with both hands. Come to think of it, it's exactly the same mod I did to Quamzin's hand, so that he could brandish his rifle in exactly the same way!


-
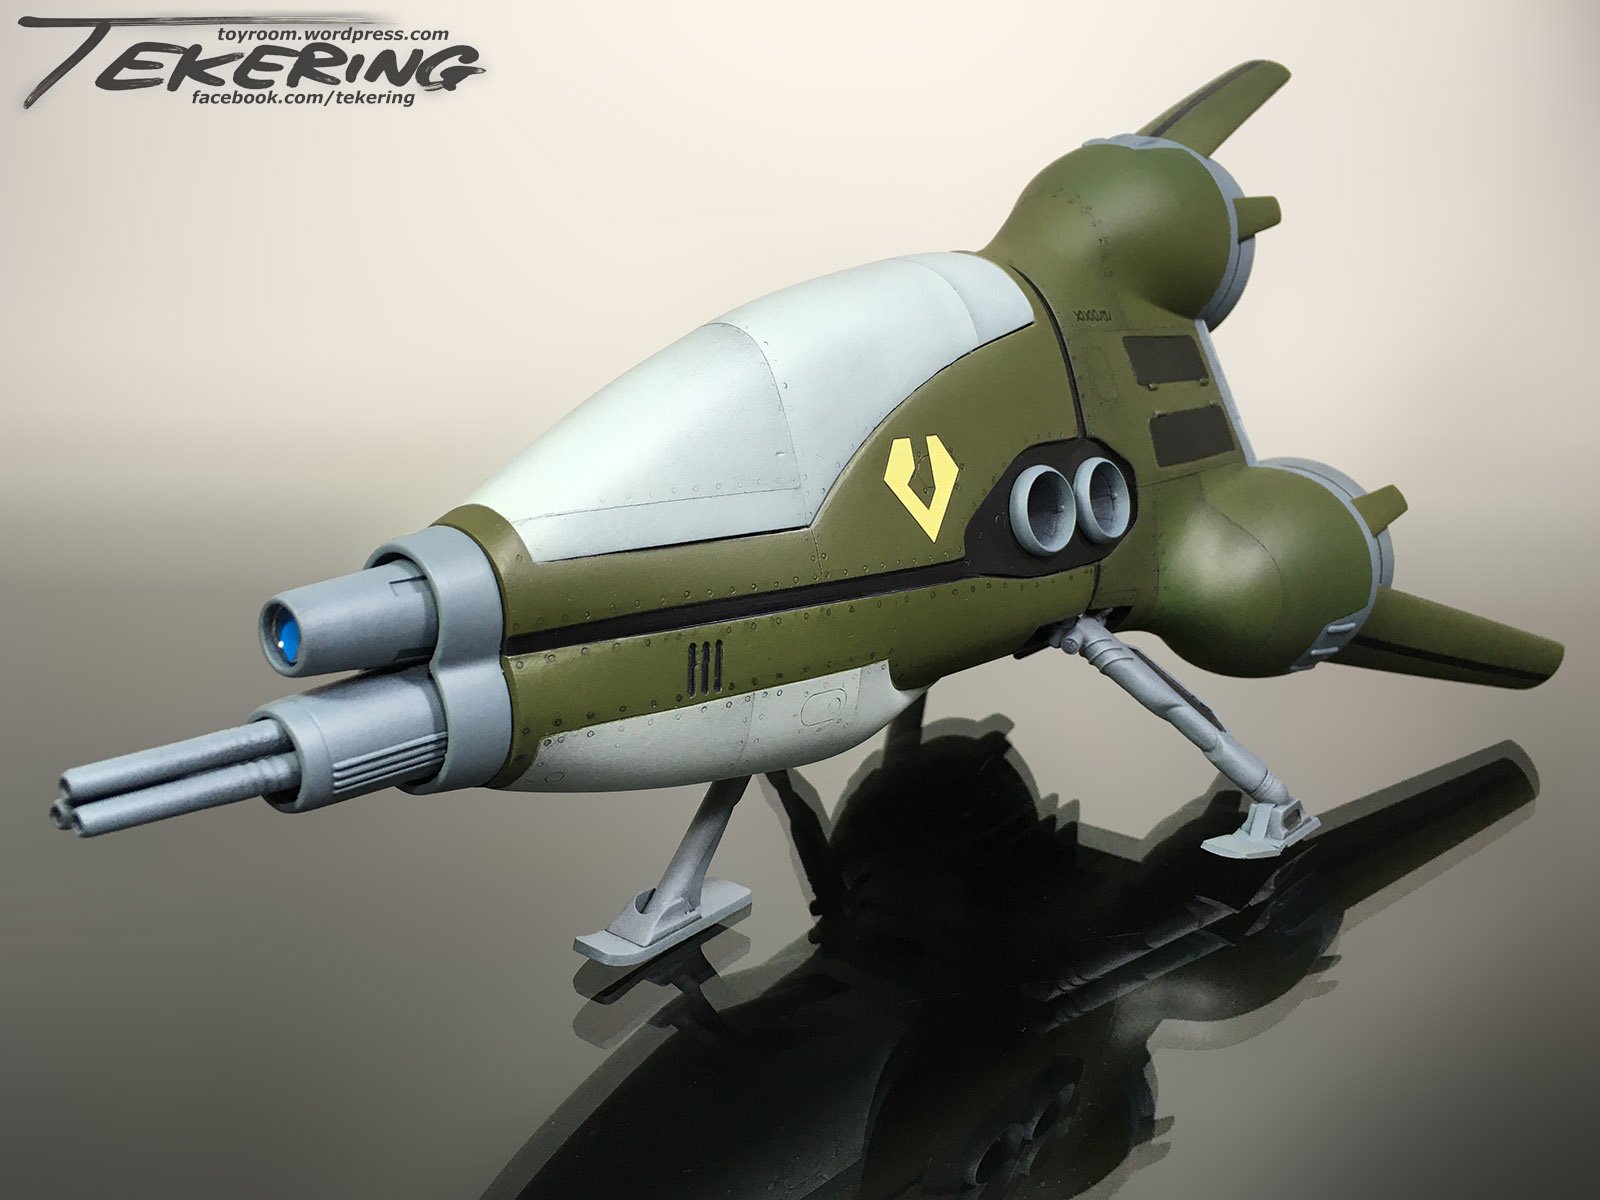
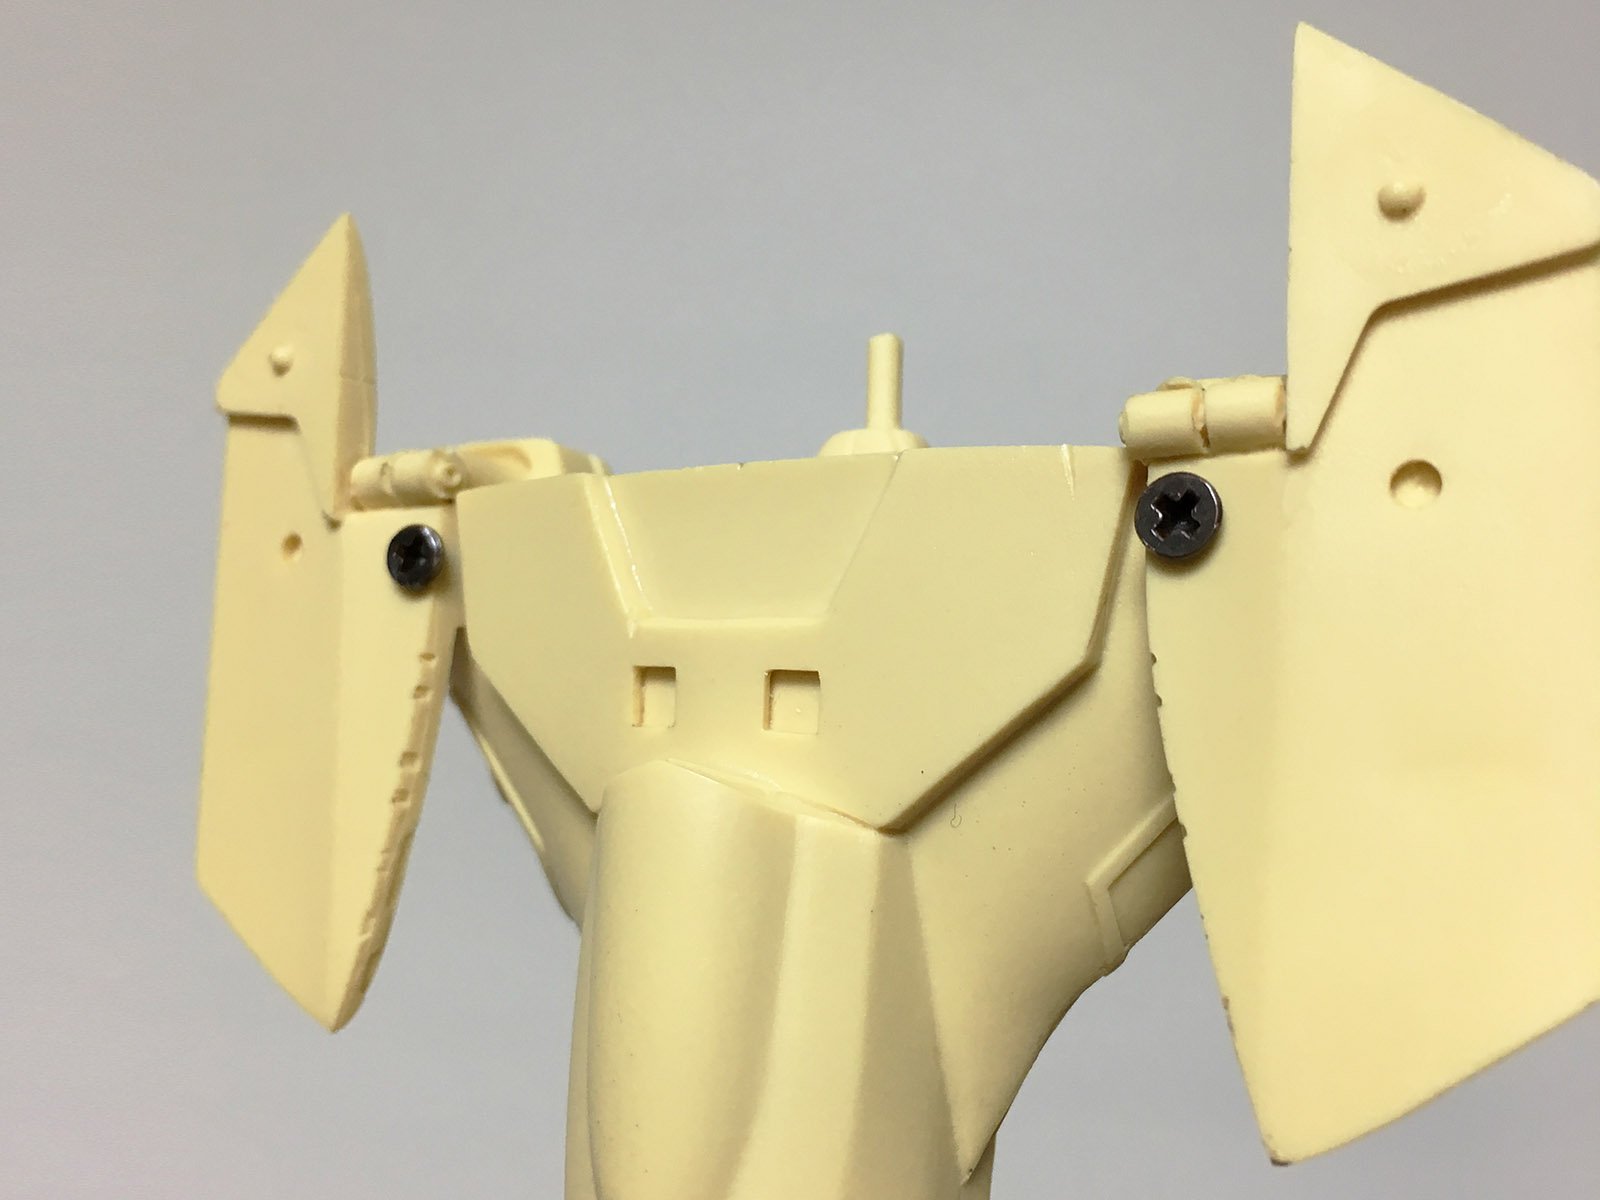
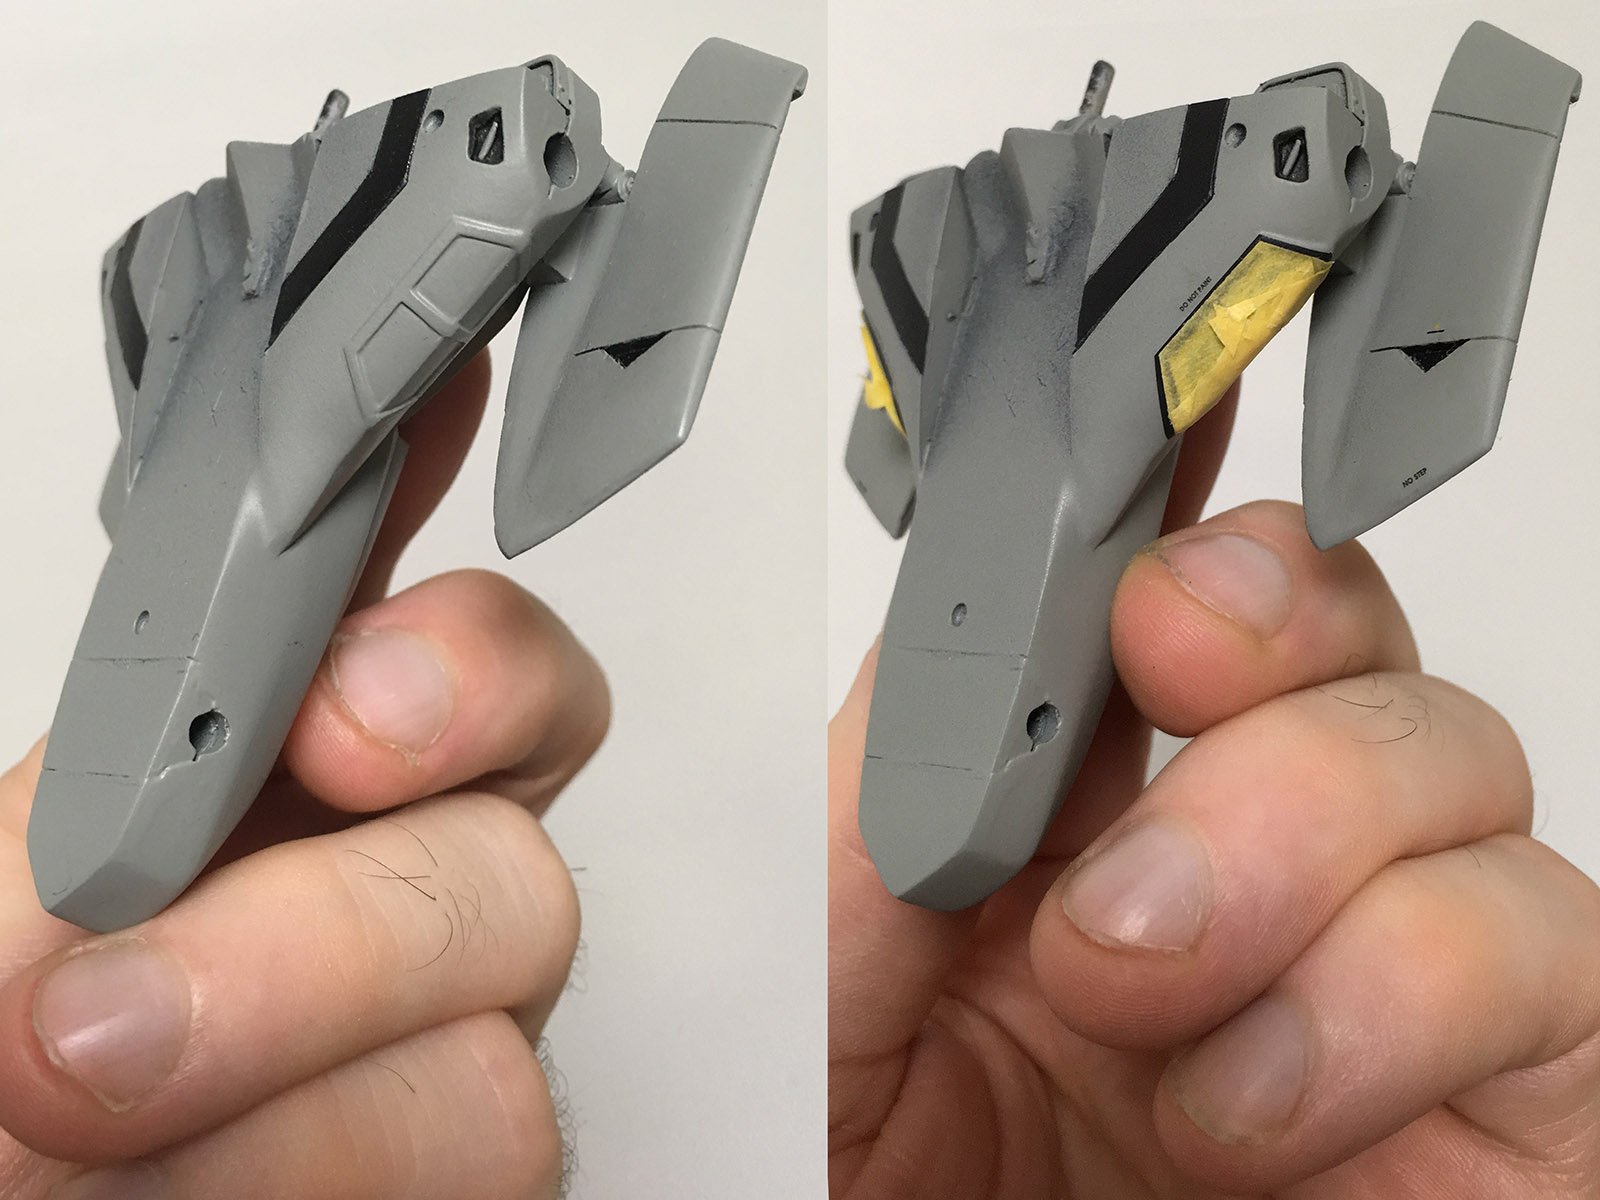
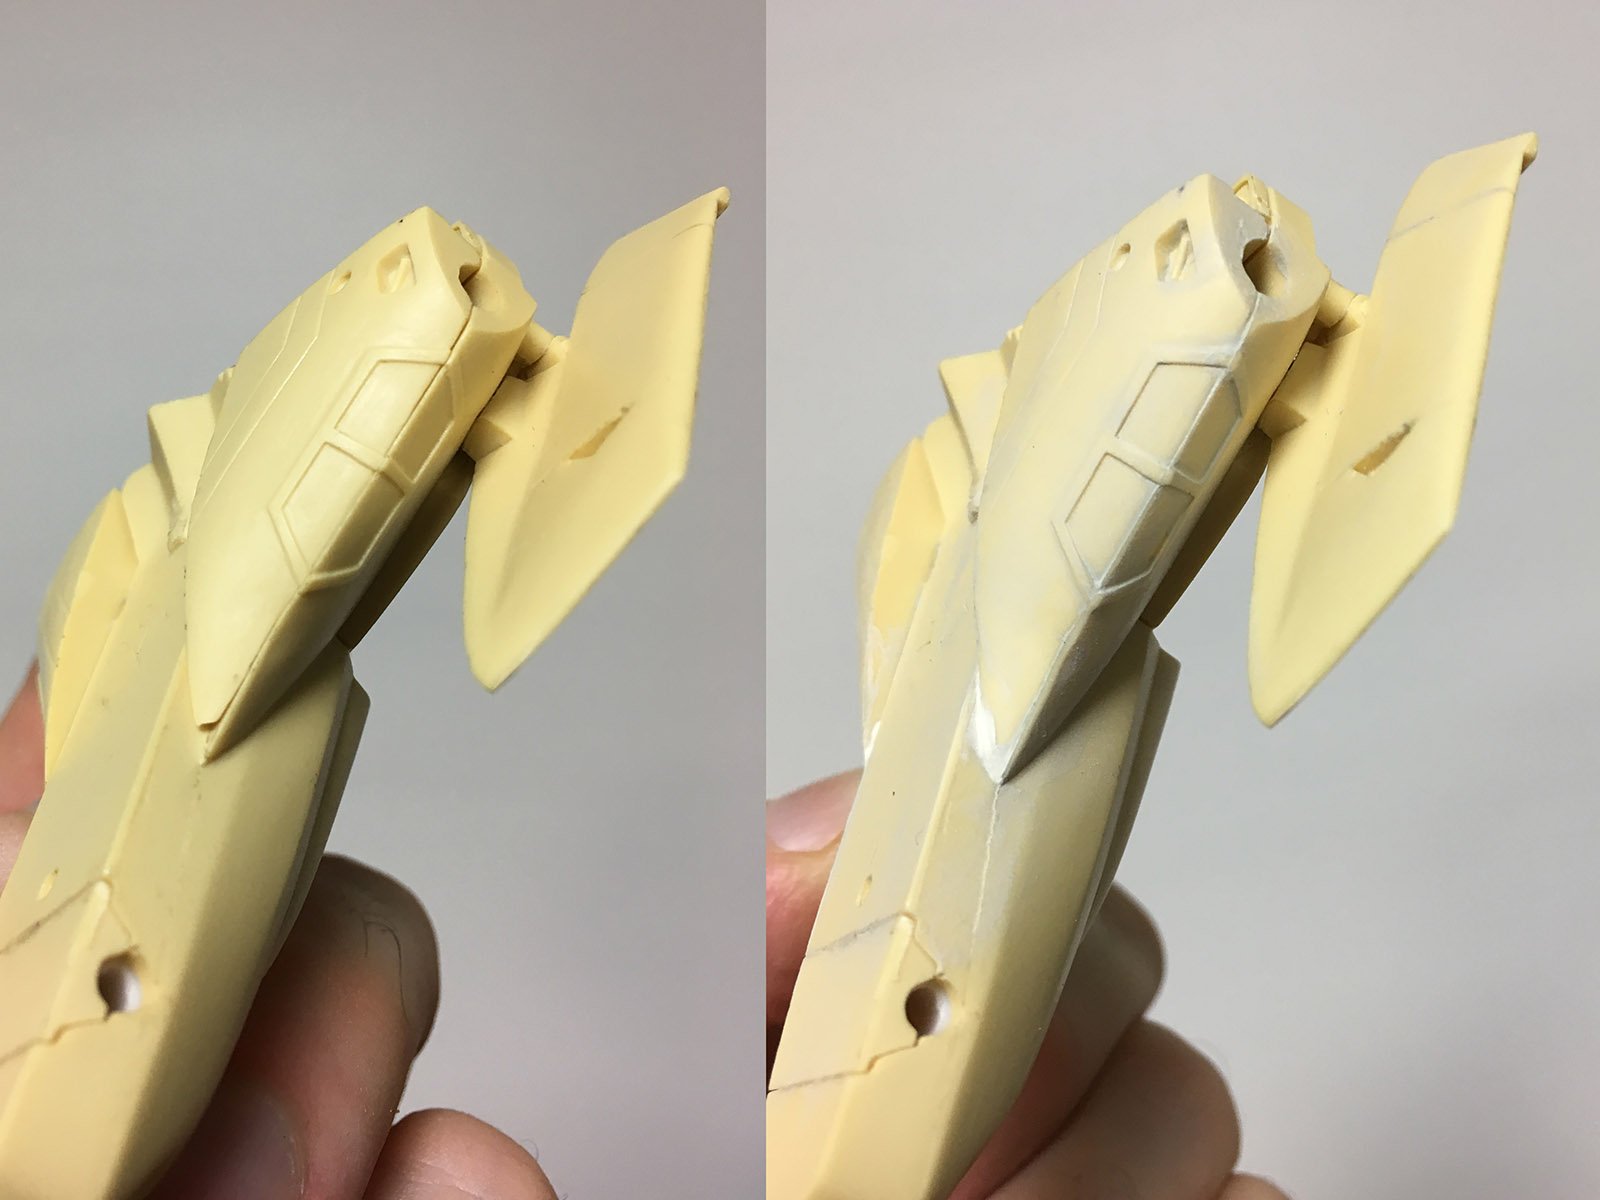
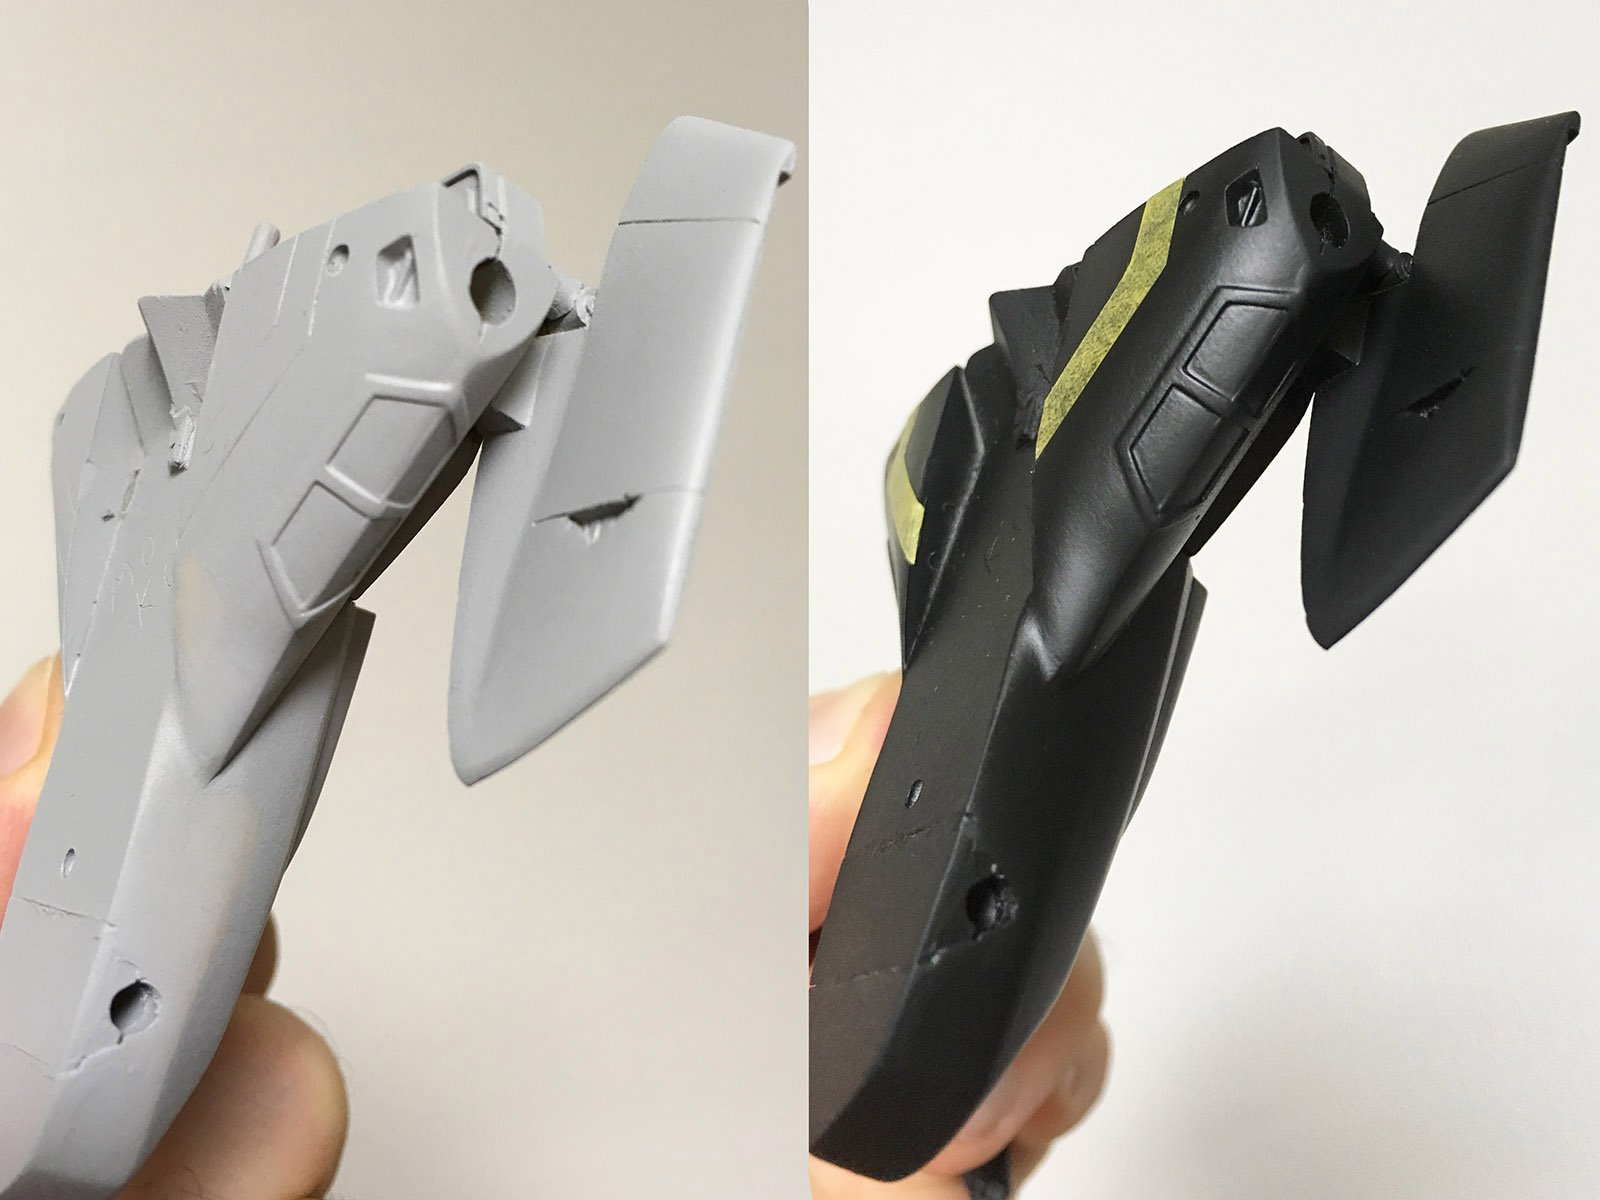
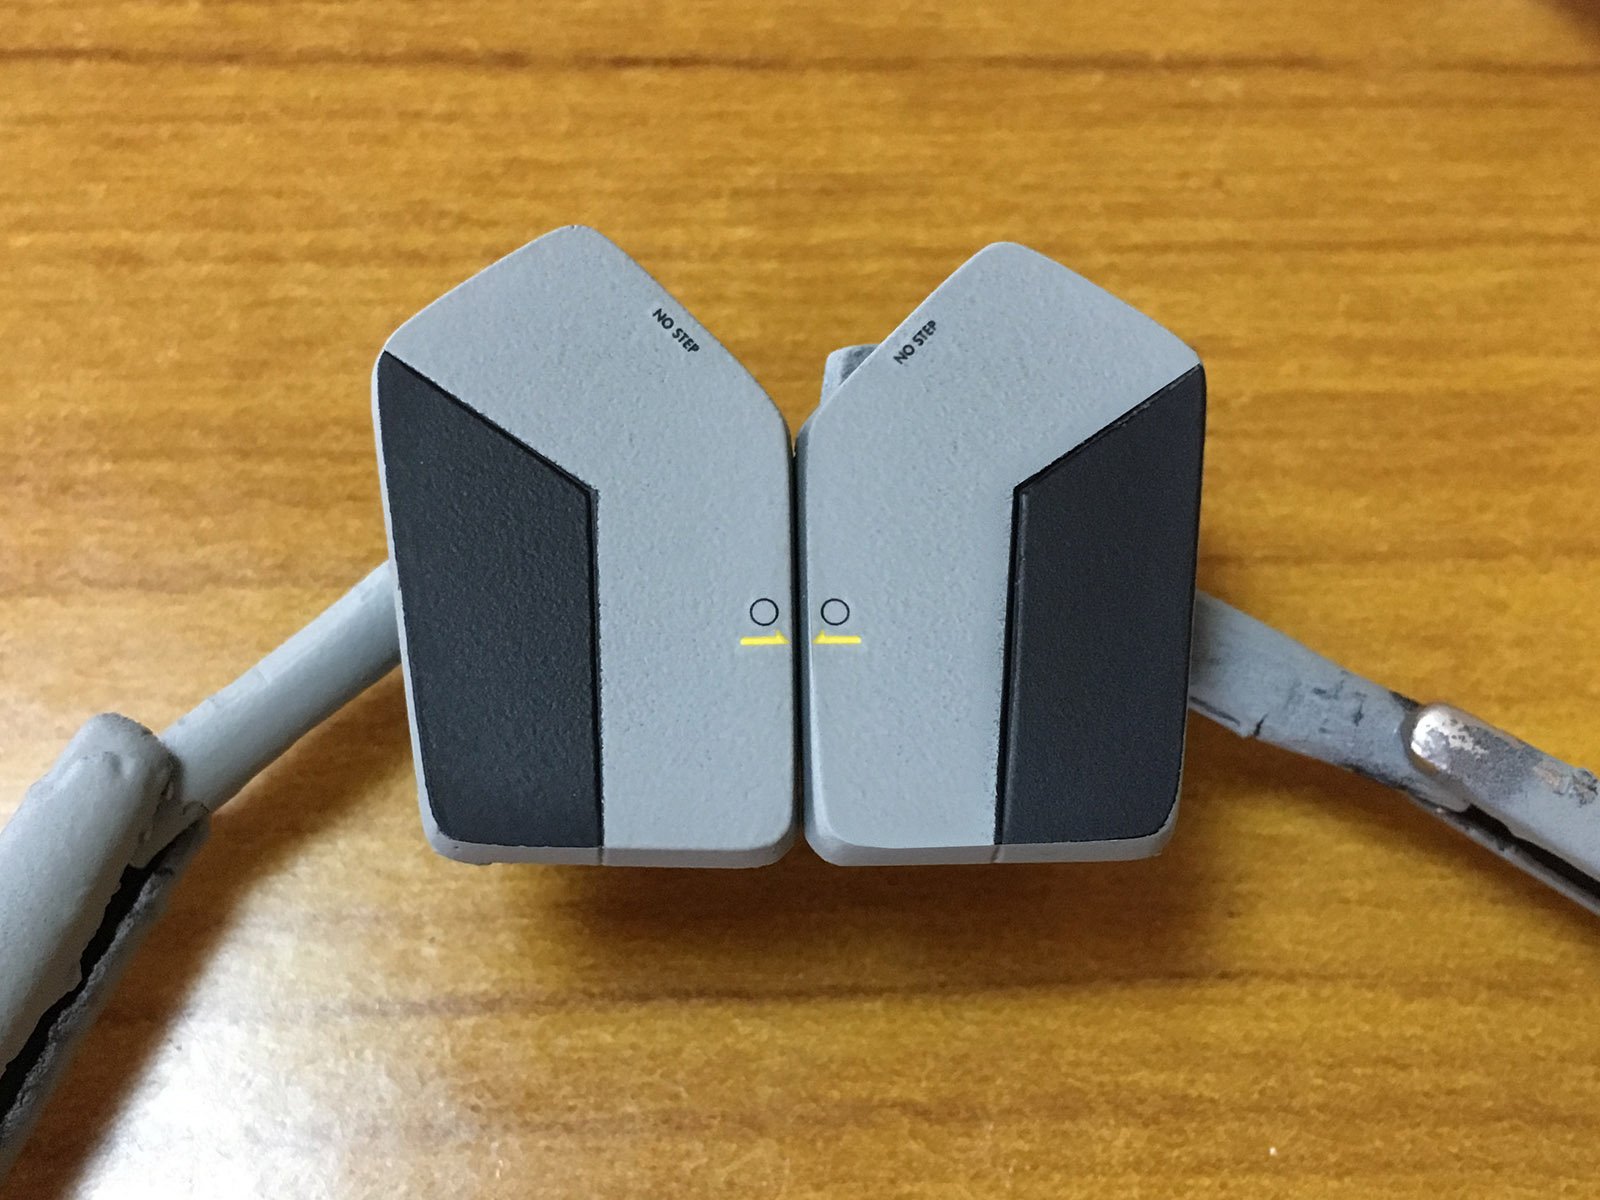
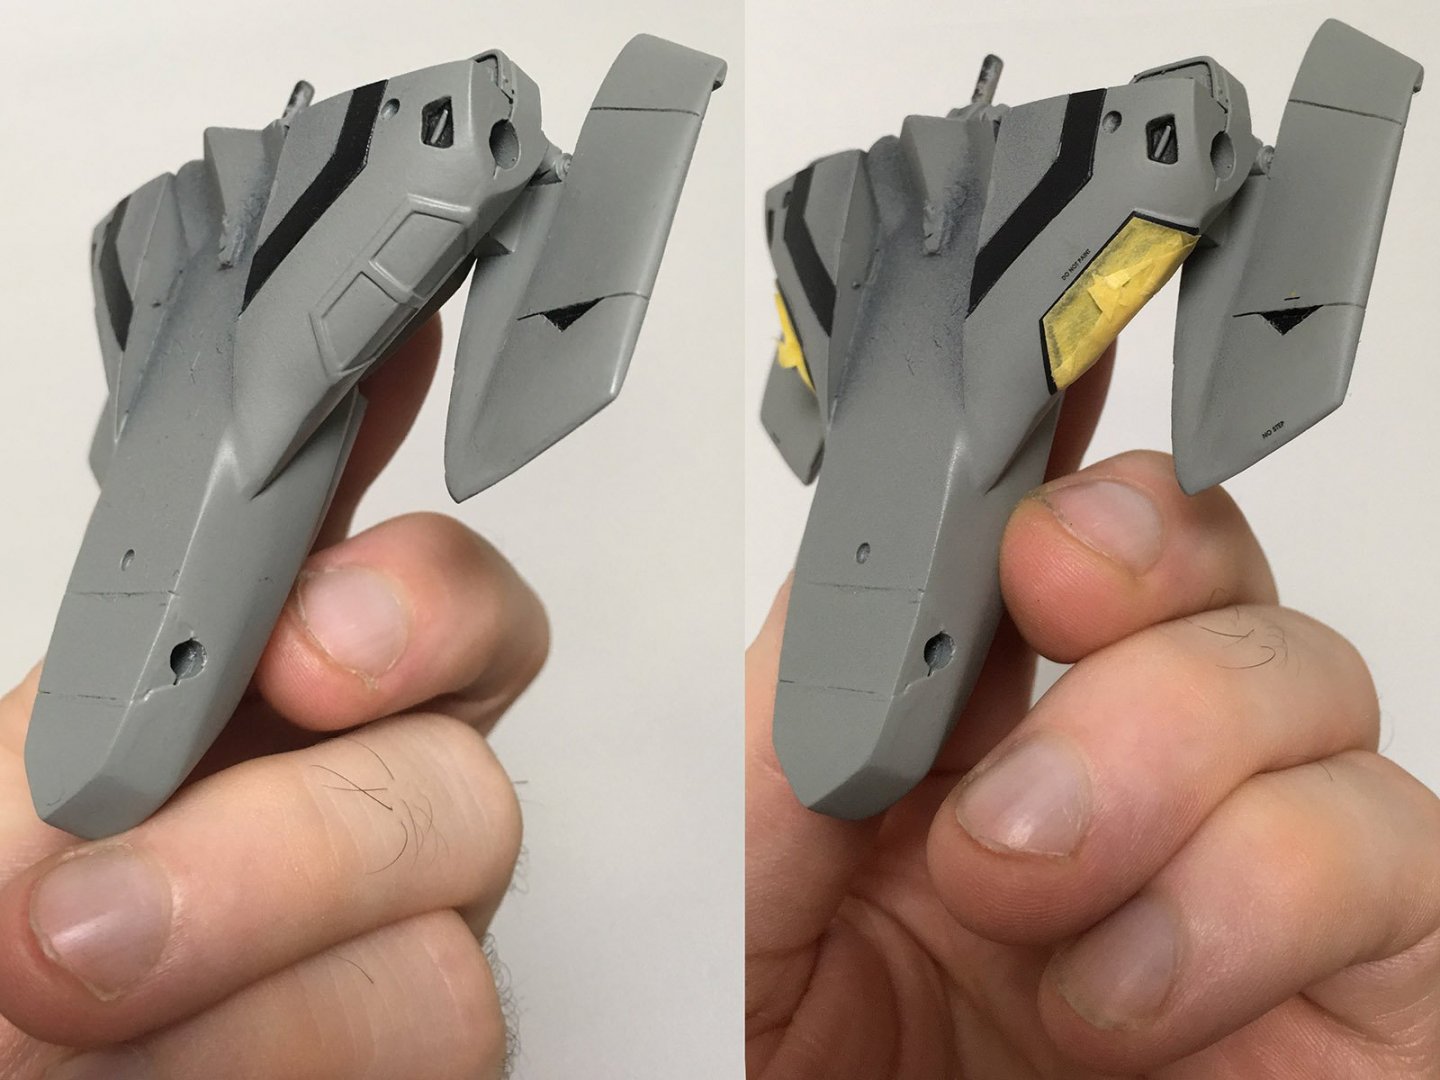
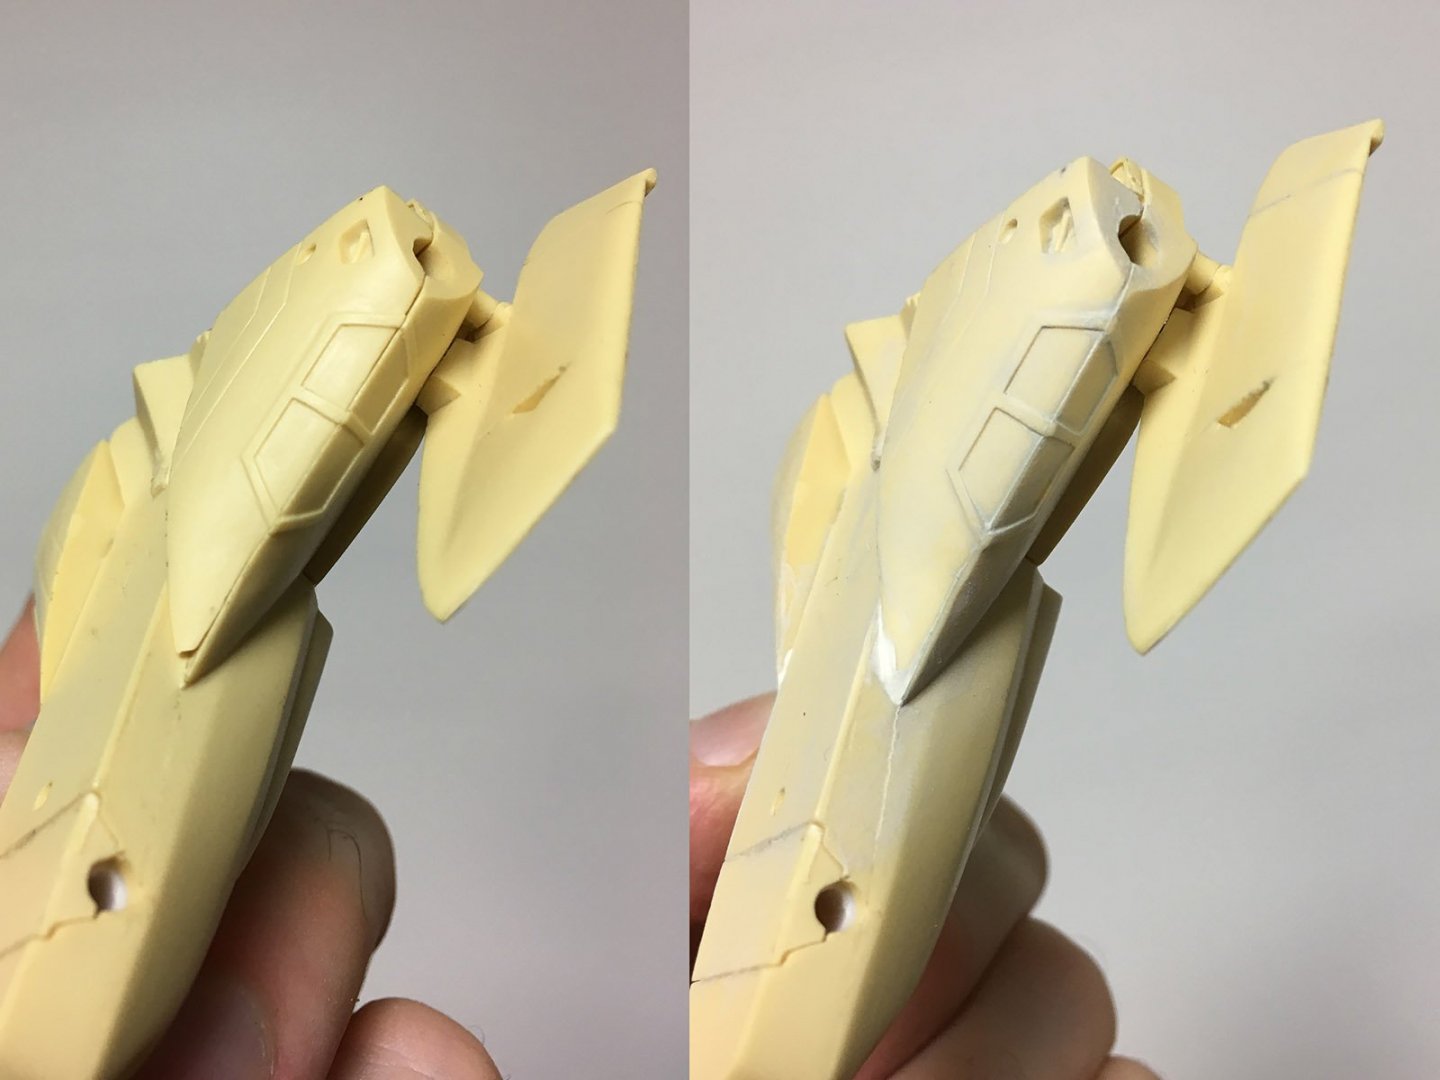
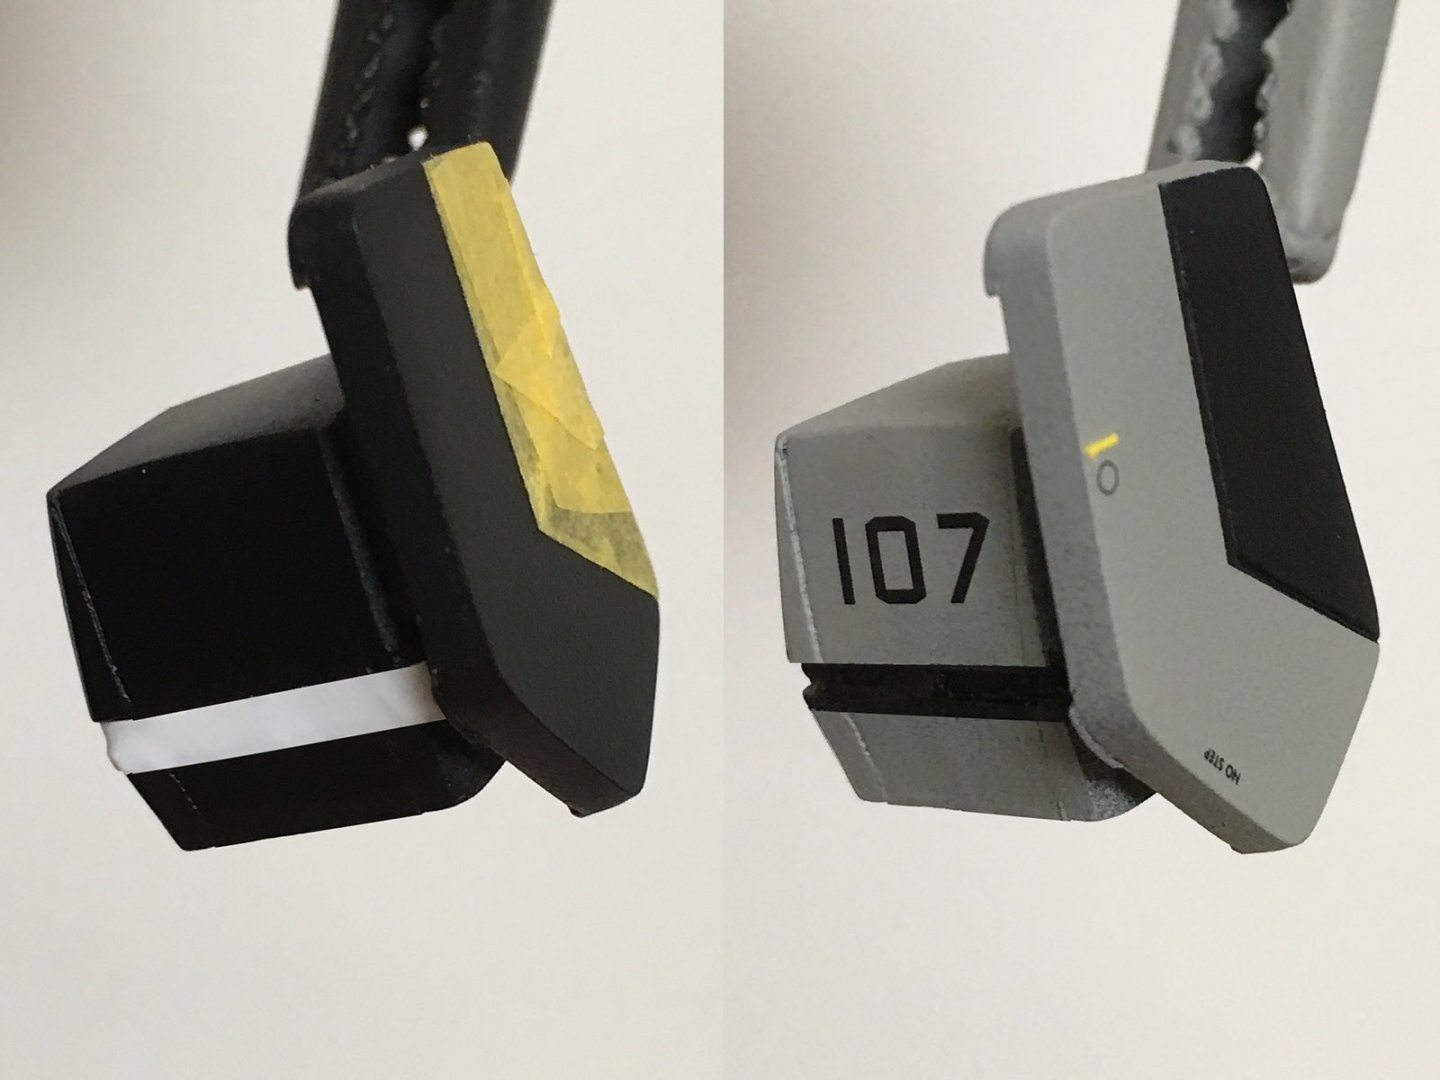
Now, those FAST packs are solid resin -- and quite heavy -- so I've reinforced their mounting points with screws, in a location that will be concealed by the wings. I then started filling in the gaps between parts with Tamiya putty, and sanding the surface smooth. A coat of primer followed, confirming the gaps had been sealed, and then a flat black base coat. I masked off the area where I want the black stripe to remain on the fuselage. It probably won't be visible behind the canards once the nosecone is attached, but I wanted to make sure it was there anyway. Finally, after a couple coats of the primary color had been applied, I sprayed the torso with a liberal amount of clear gloss and added a couple decals. The arrestor hook label is barely visible above the black triangle, but the "NO STEP" and "DO NOT PAINT"* lettering is clearly legible. Those masked-over portions are clear parts on the Hasegawa fighter kit, so I want that section to remain high-gloss. The rest of the surface will be sprayed with a flat matte topcoat. * I just love the irony of "DO NOT PAINT" warnings on a model kit.


-
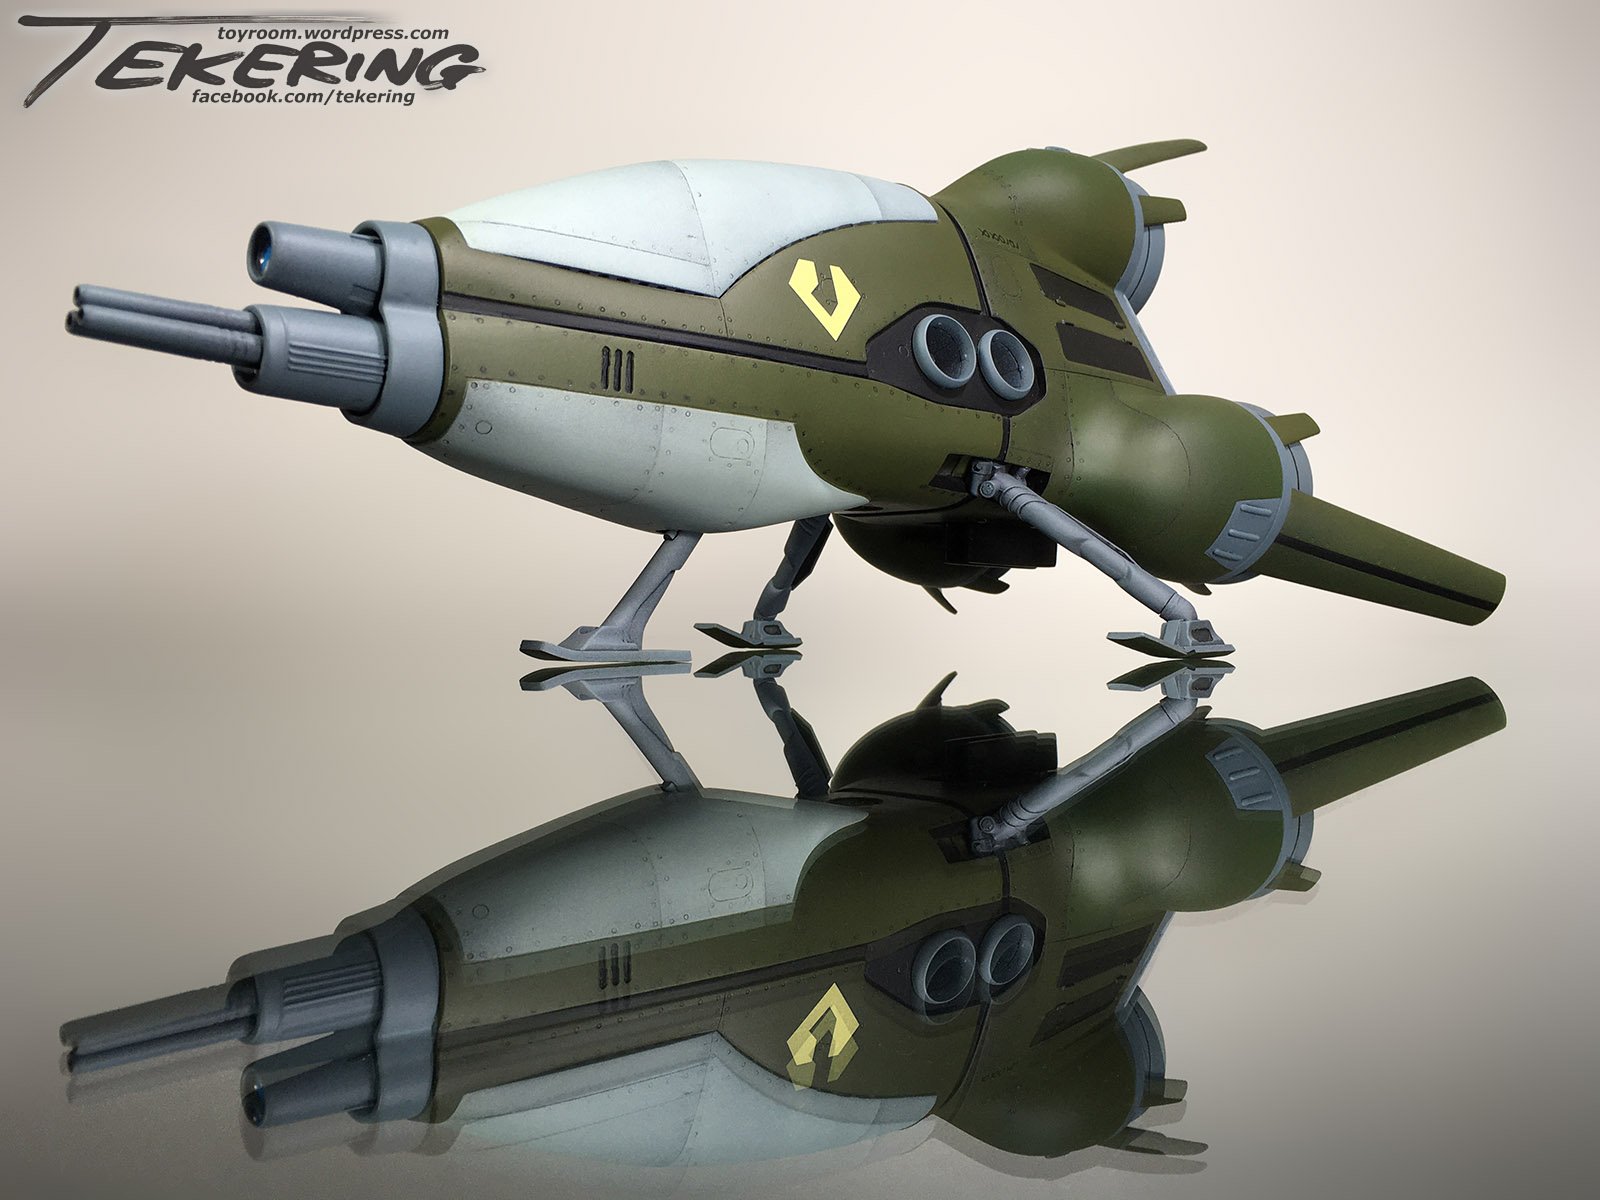
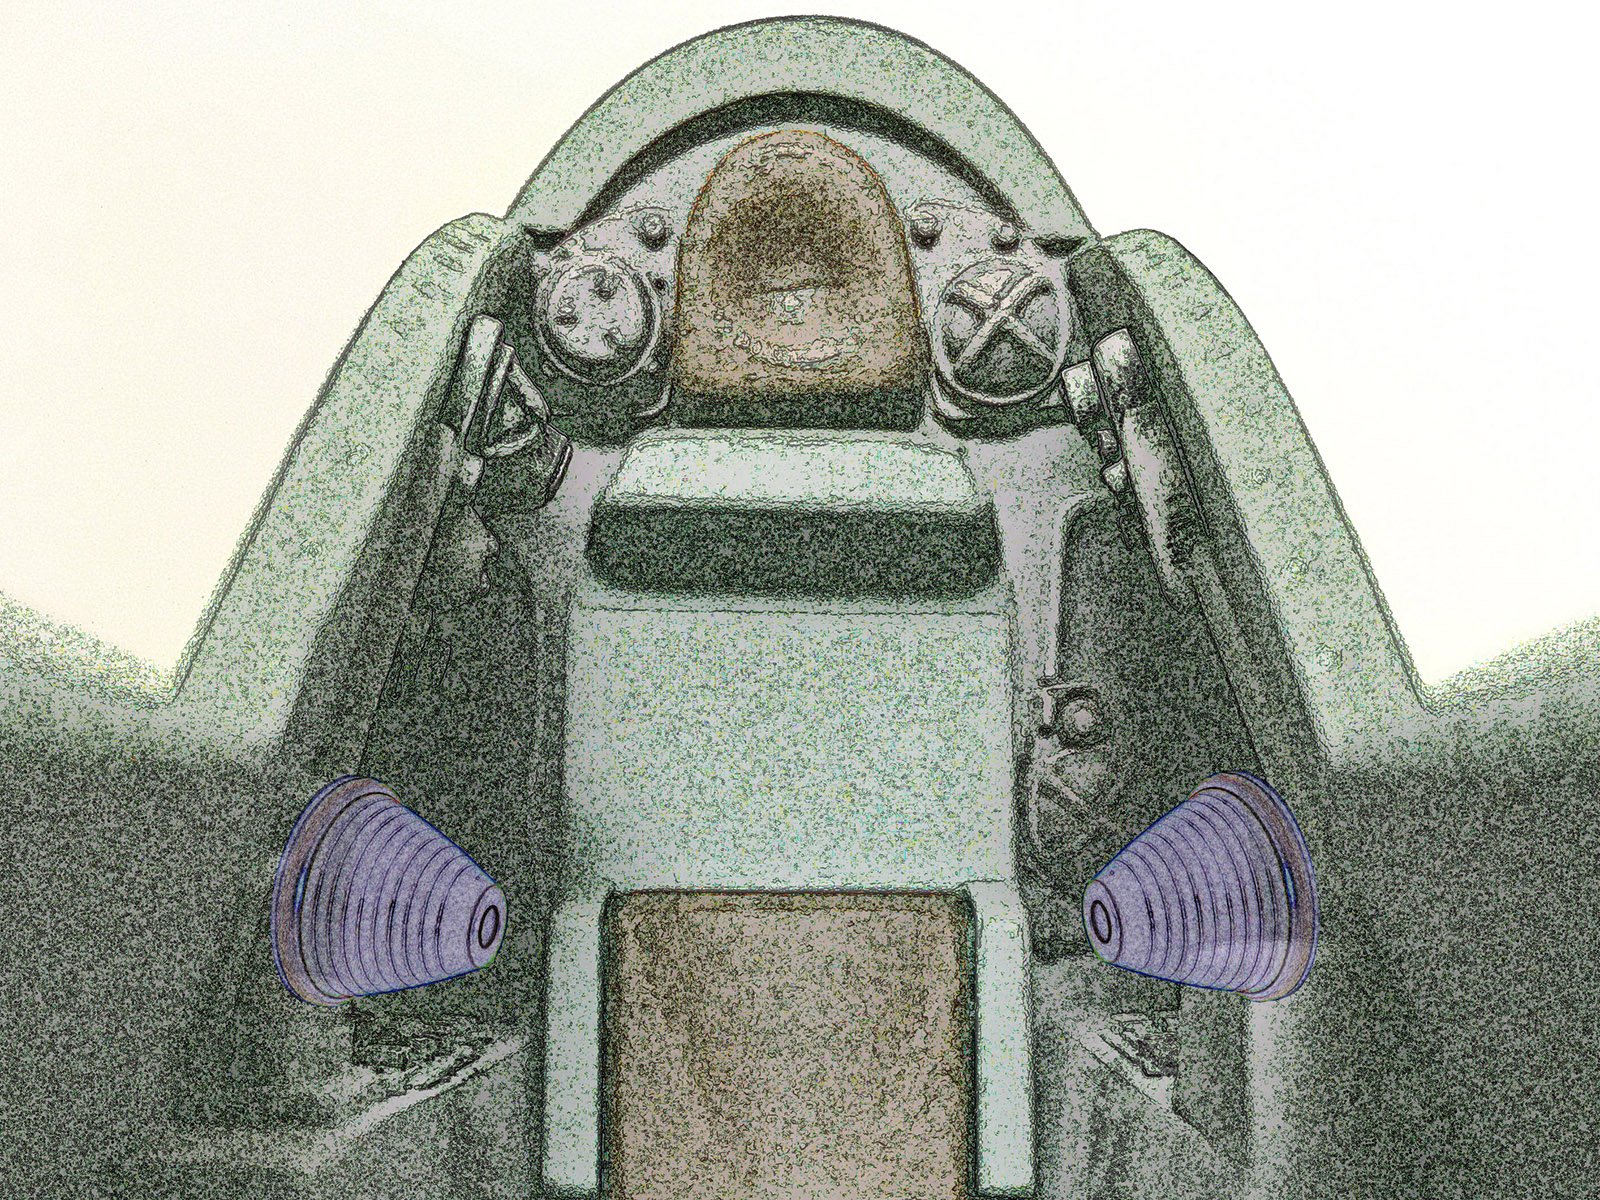
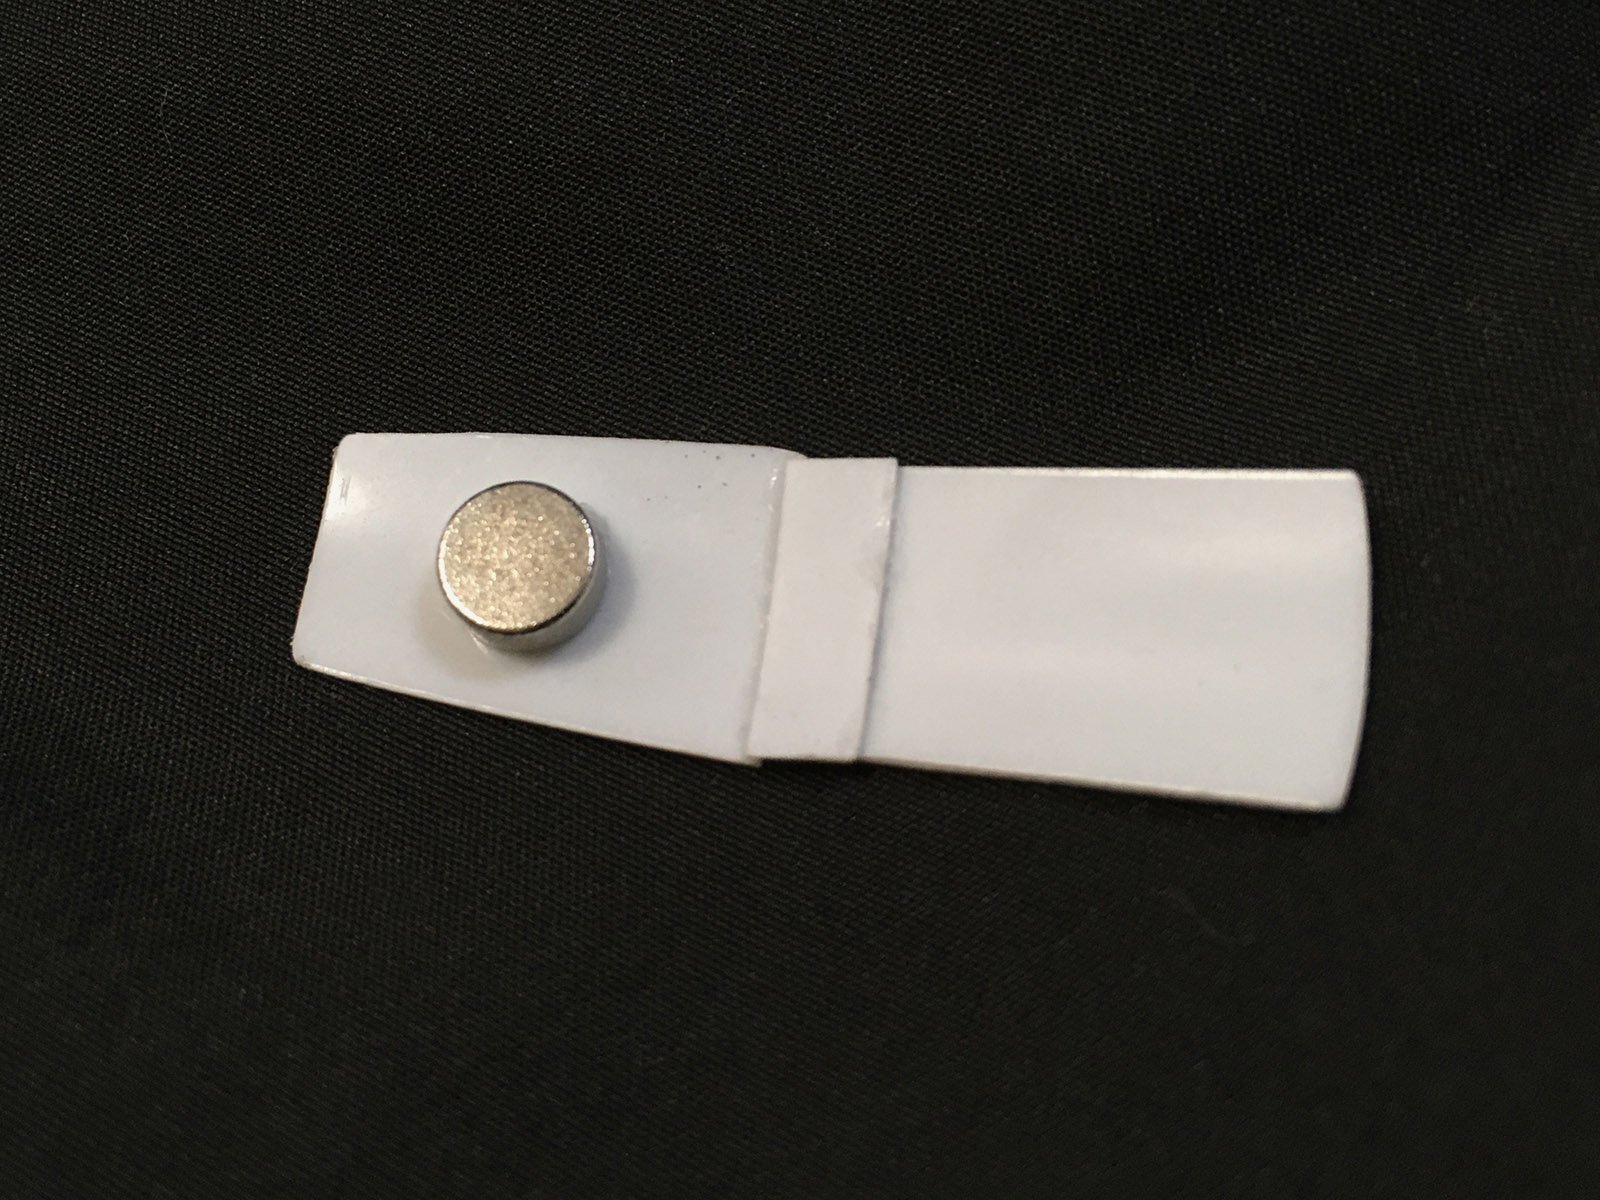
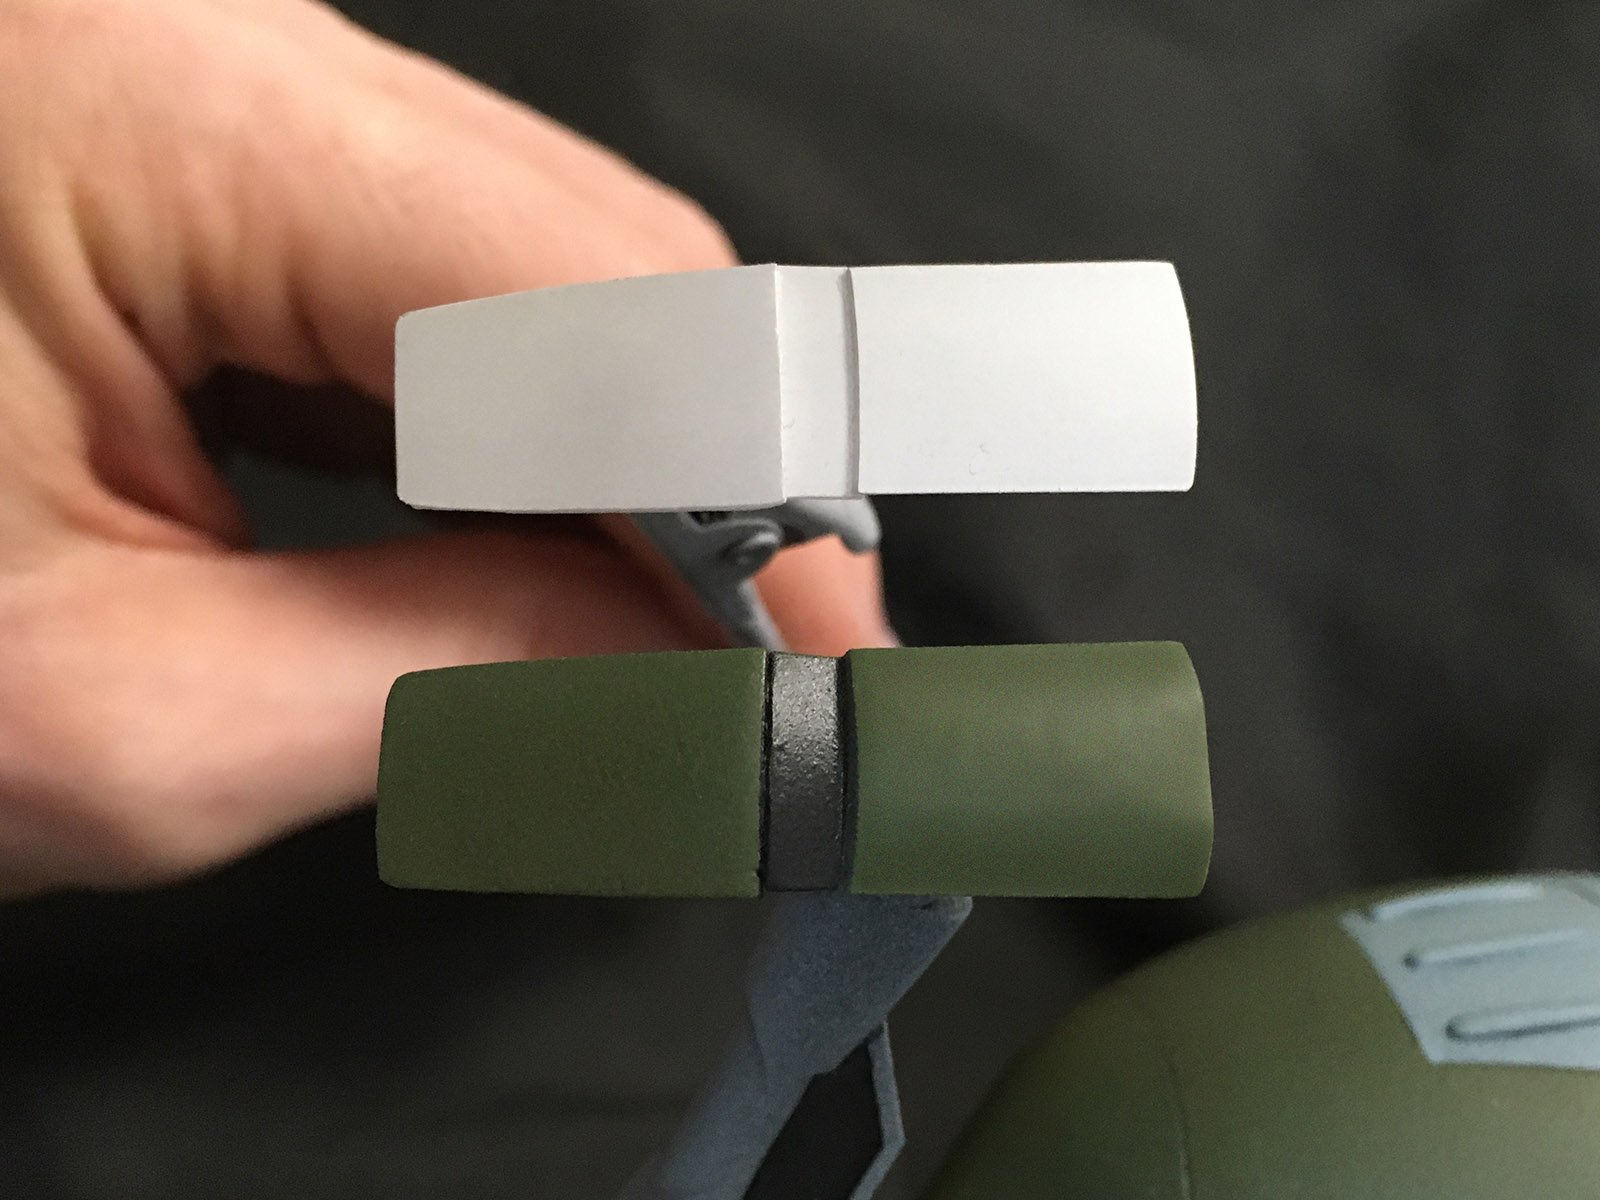
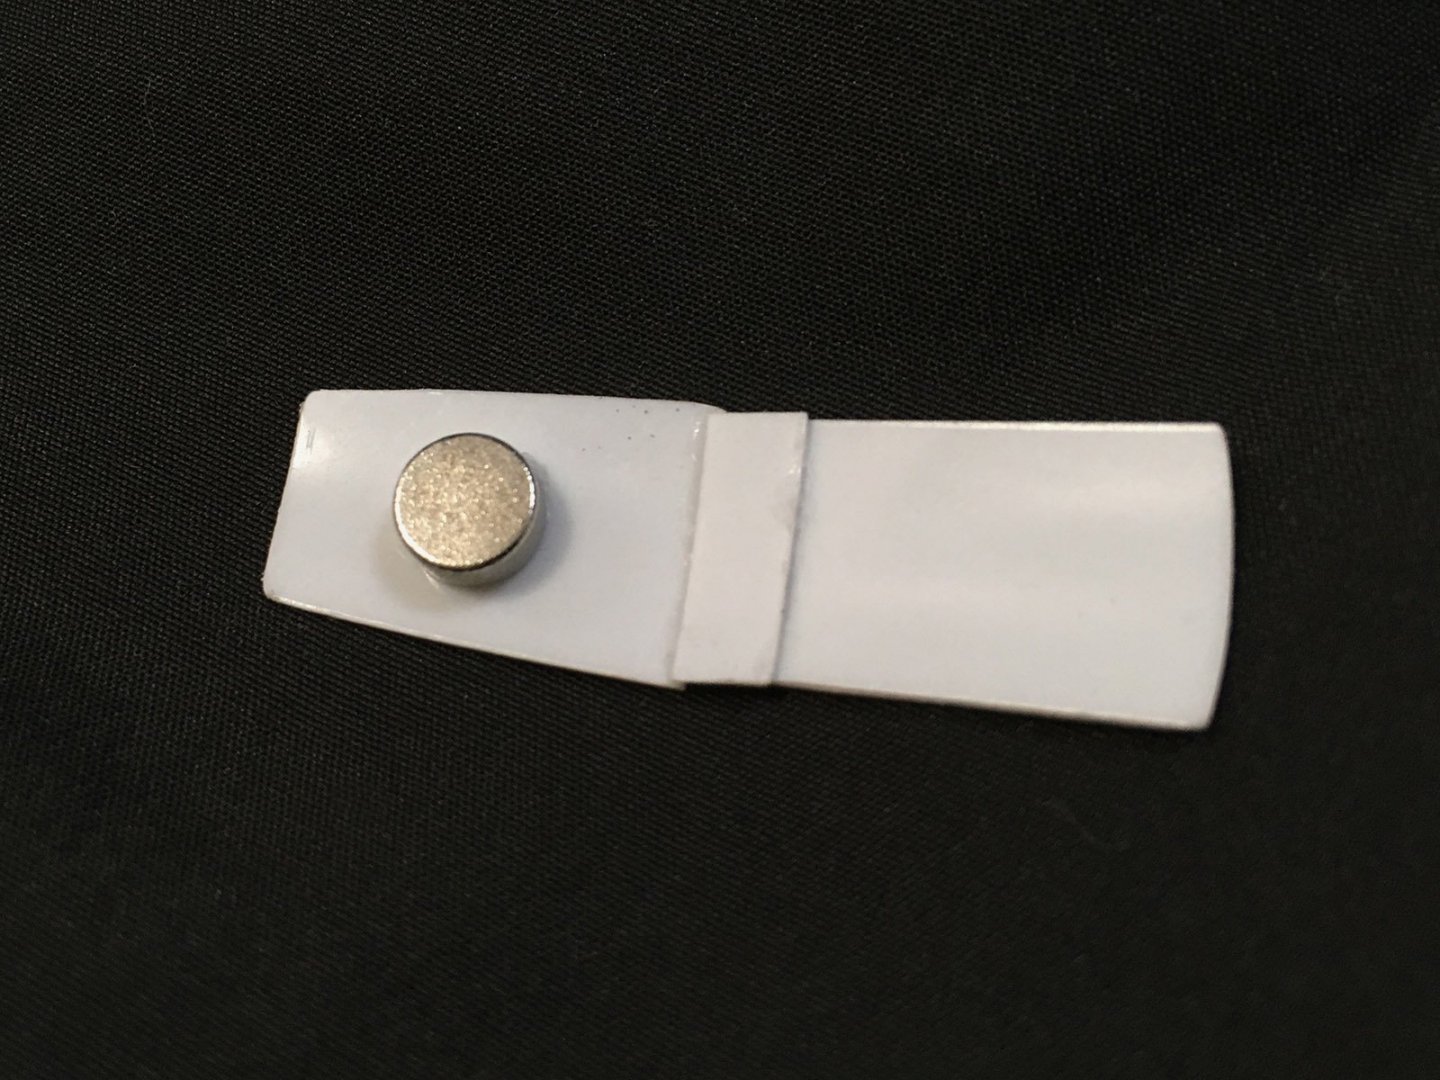
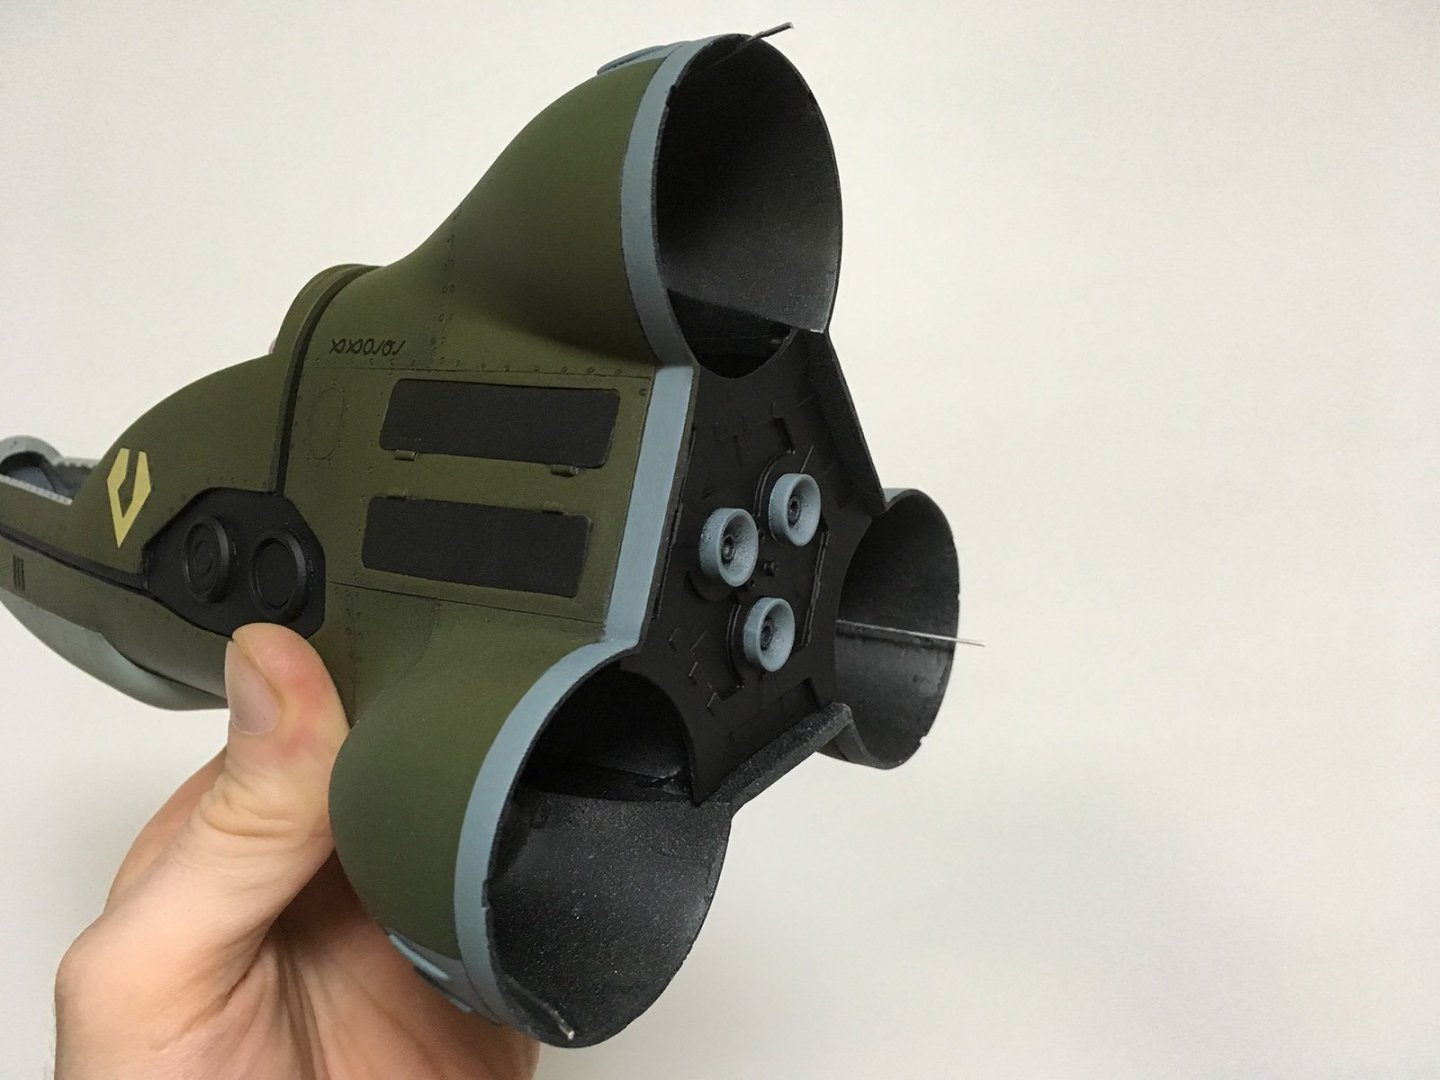
The front ones enter the cockpit on either side of the seat, where there's just enough space behind the pilot. It's impossible to photograph at this stage, but I'll try to illustrate their placement: They end up behind the pilot's elbows, see. Given all the extra effort I've put into photographing and documenting this build, I'm hoping the contest will be judged on that basis! Scratchbuilding covers for the landing gear housings took a bit of extra effort, too... Since the landing legs are removable, I needed optional parts that made it look like the landing gear had been retracted into the hull. They attach with little magnets. I then painted the covers to match. Now I'm able to display the Gnerl in flight as well.


-
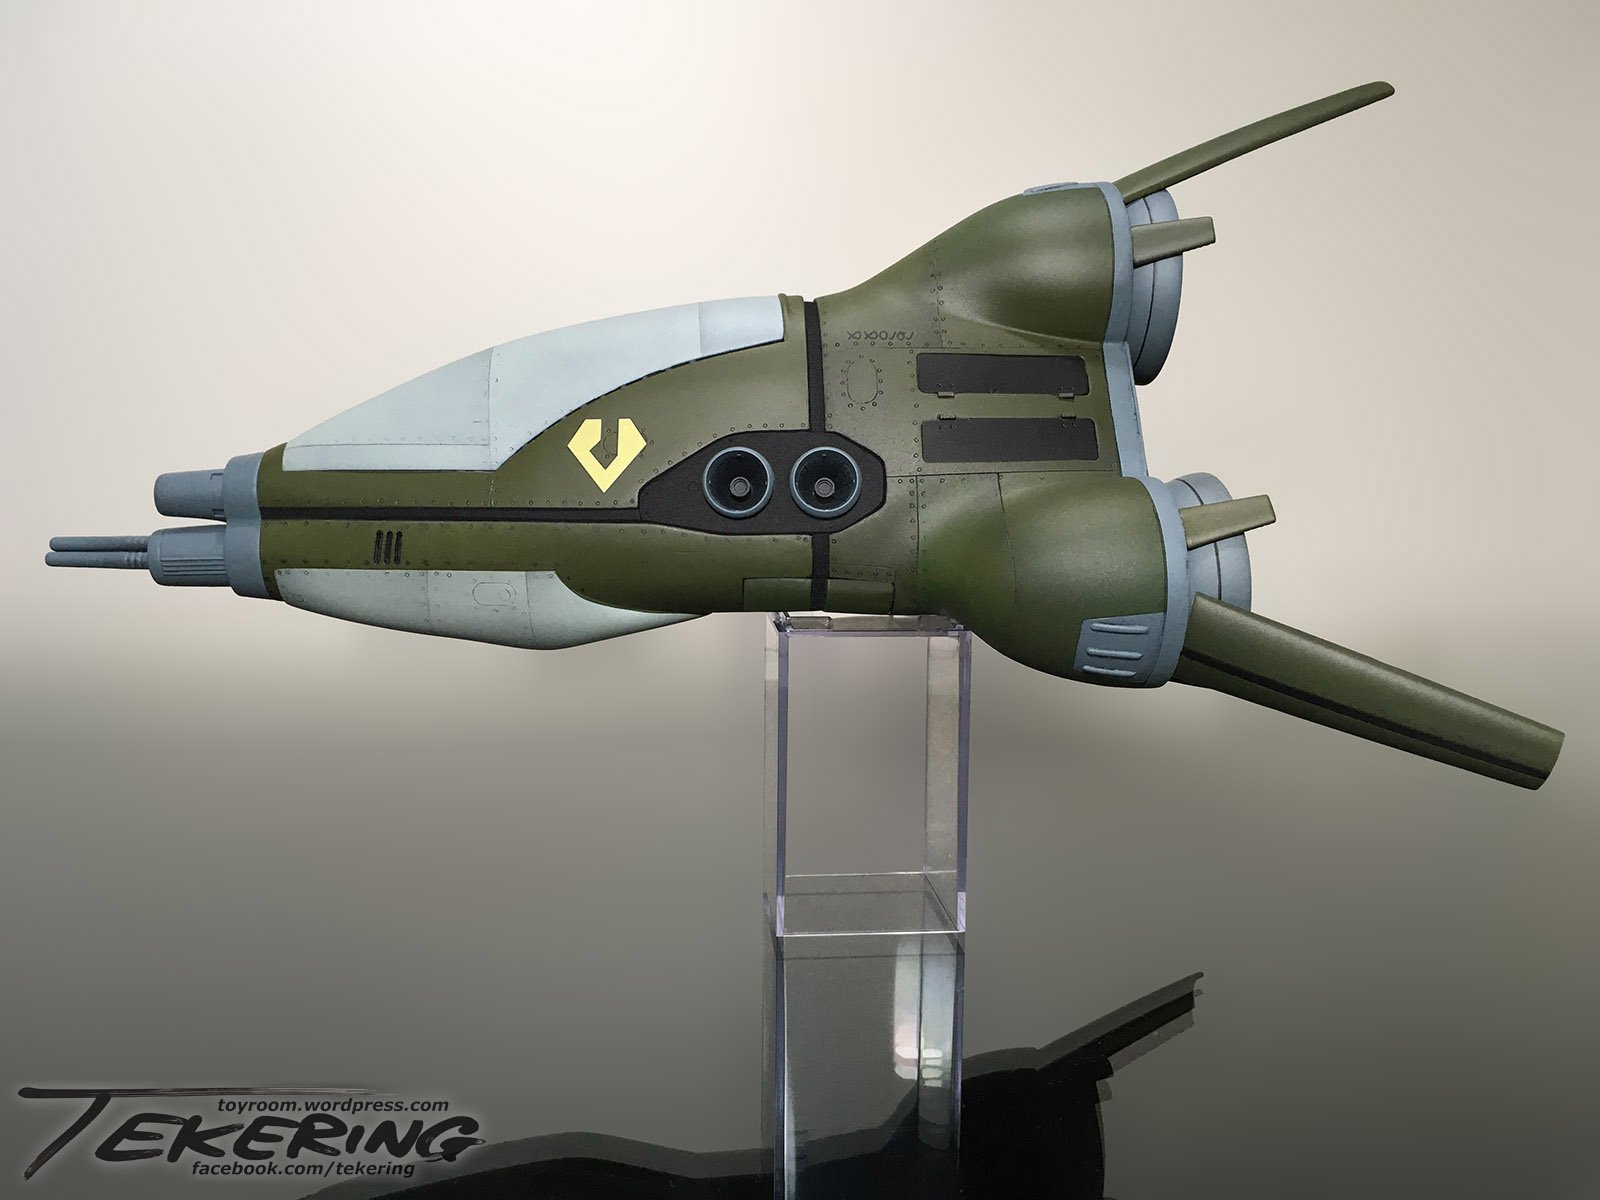
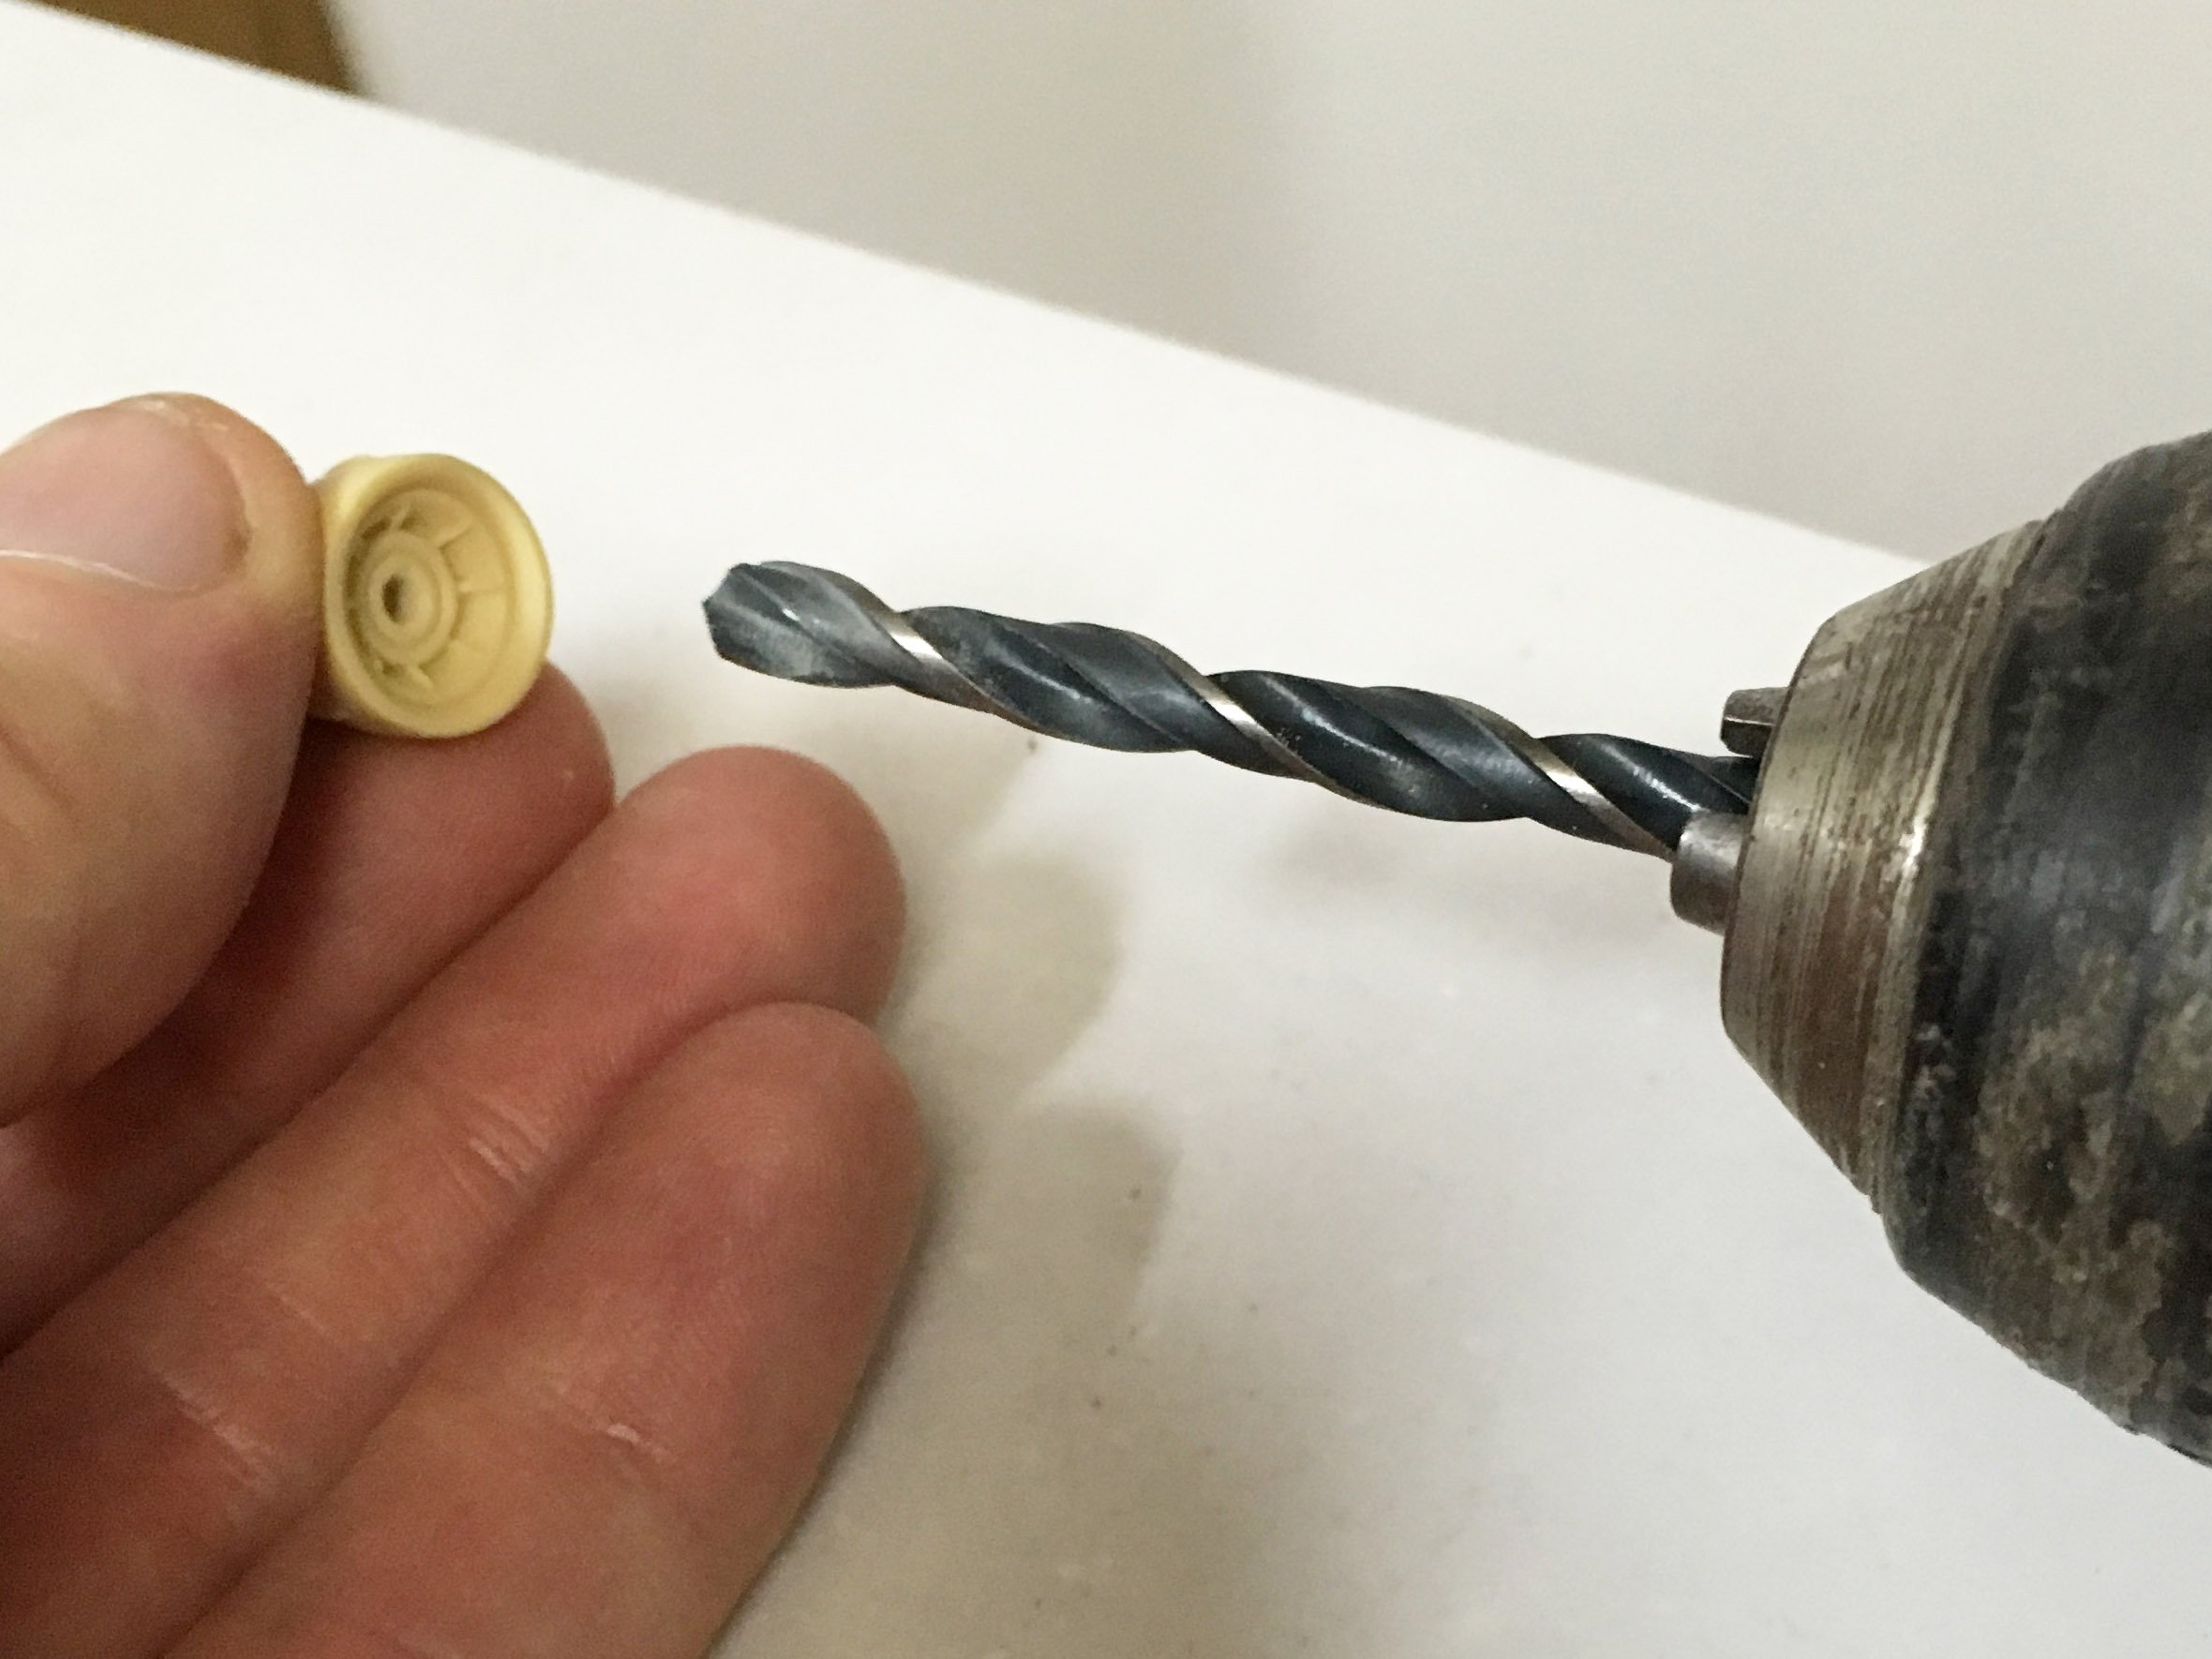
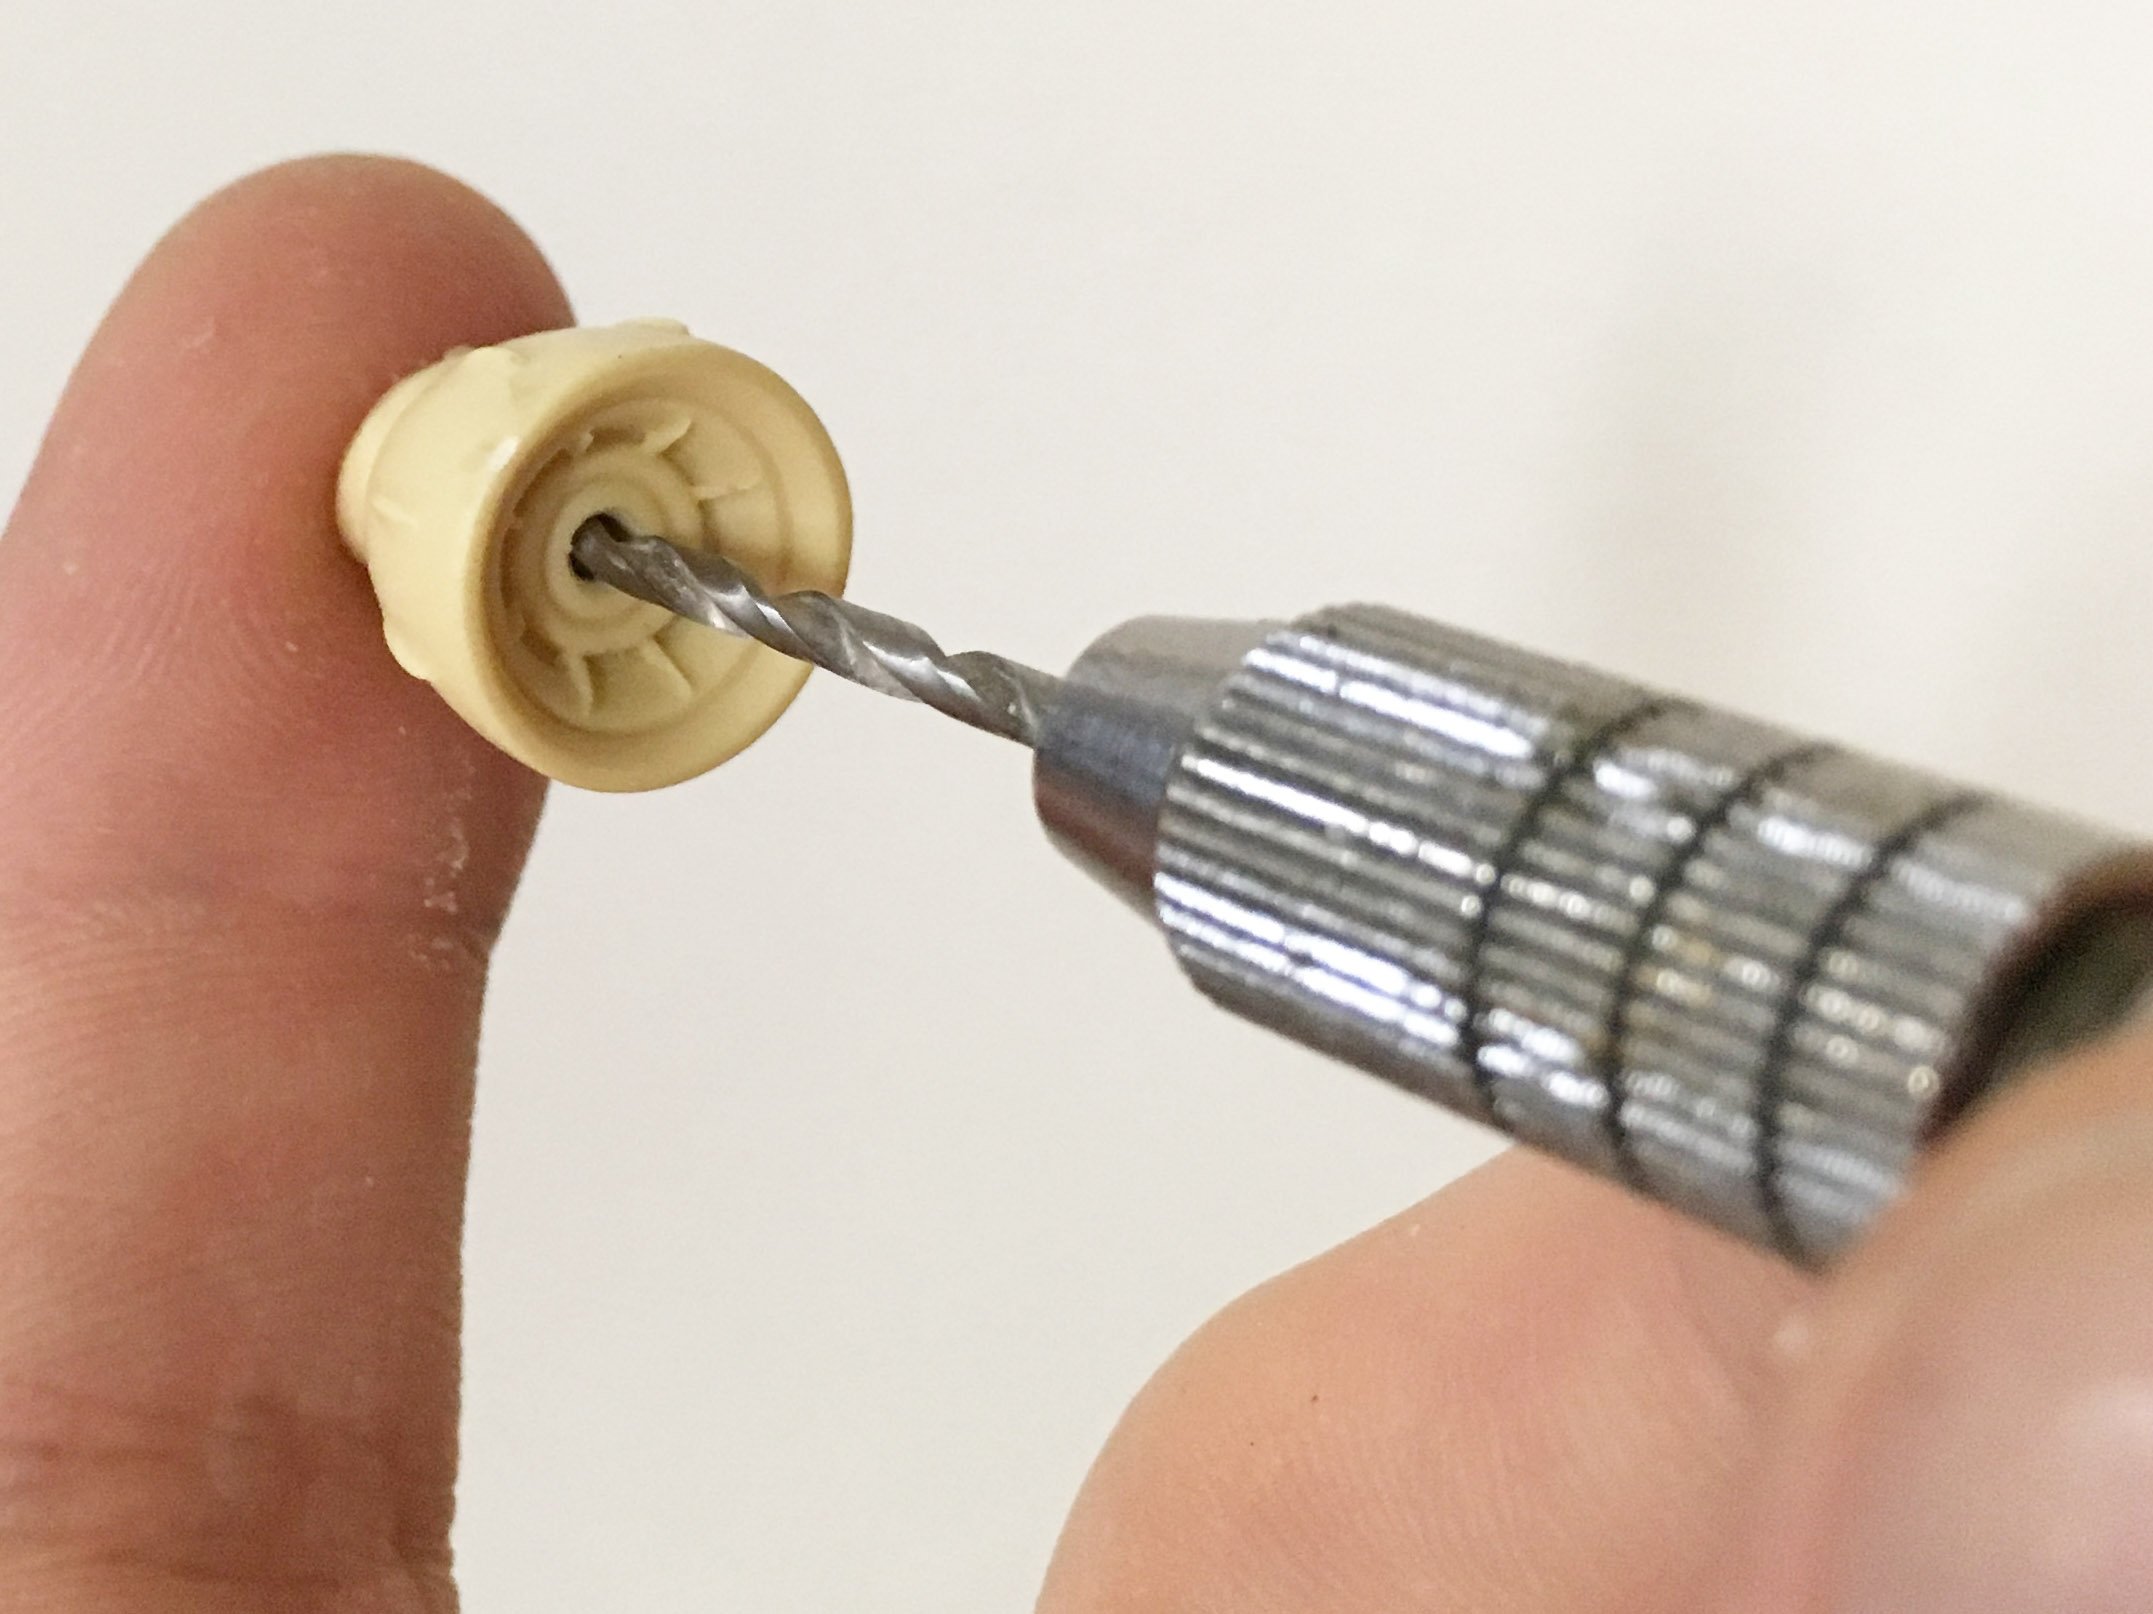
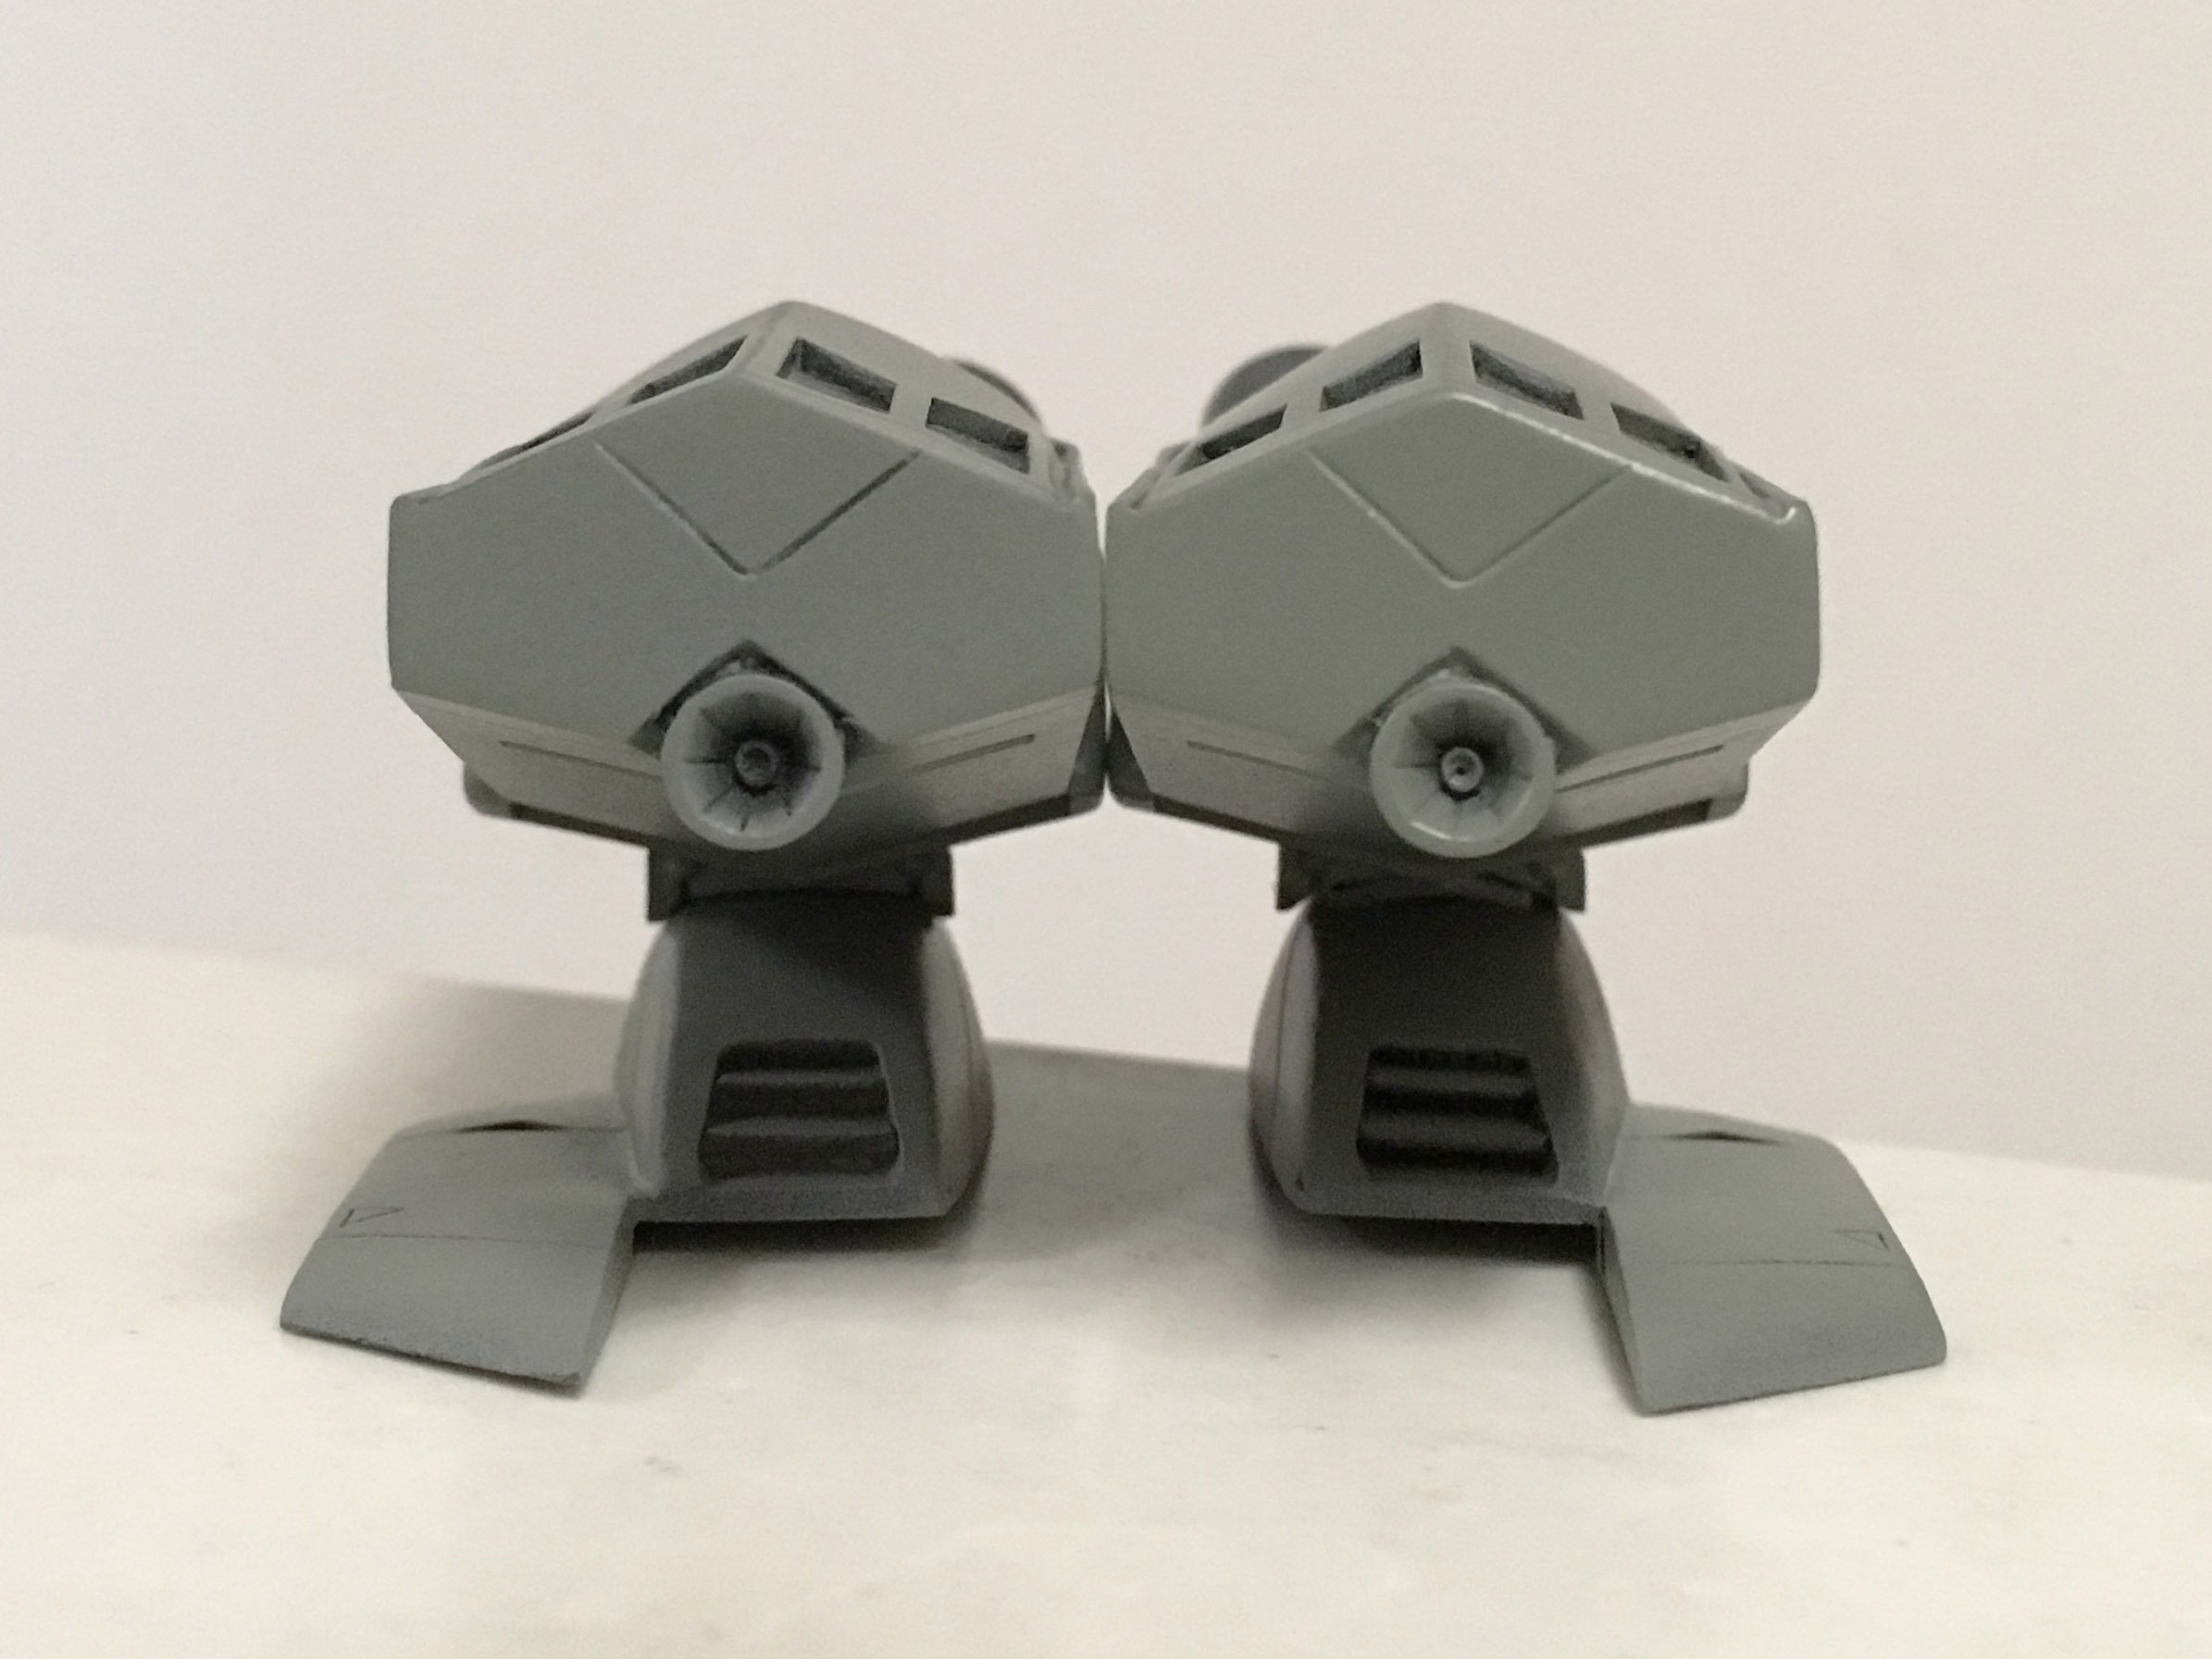
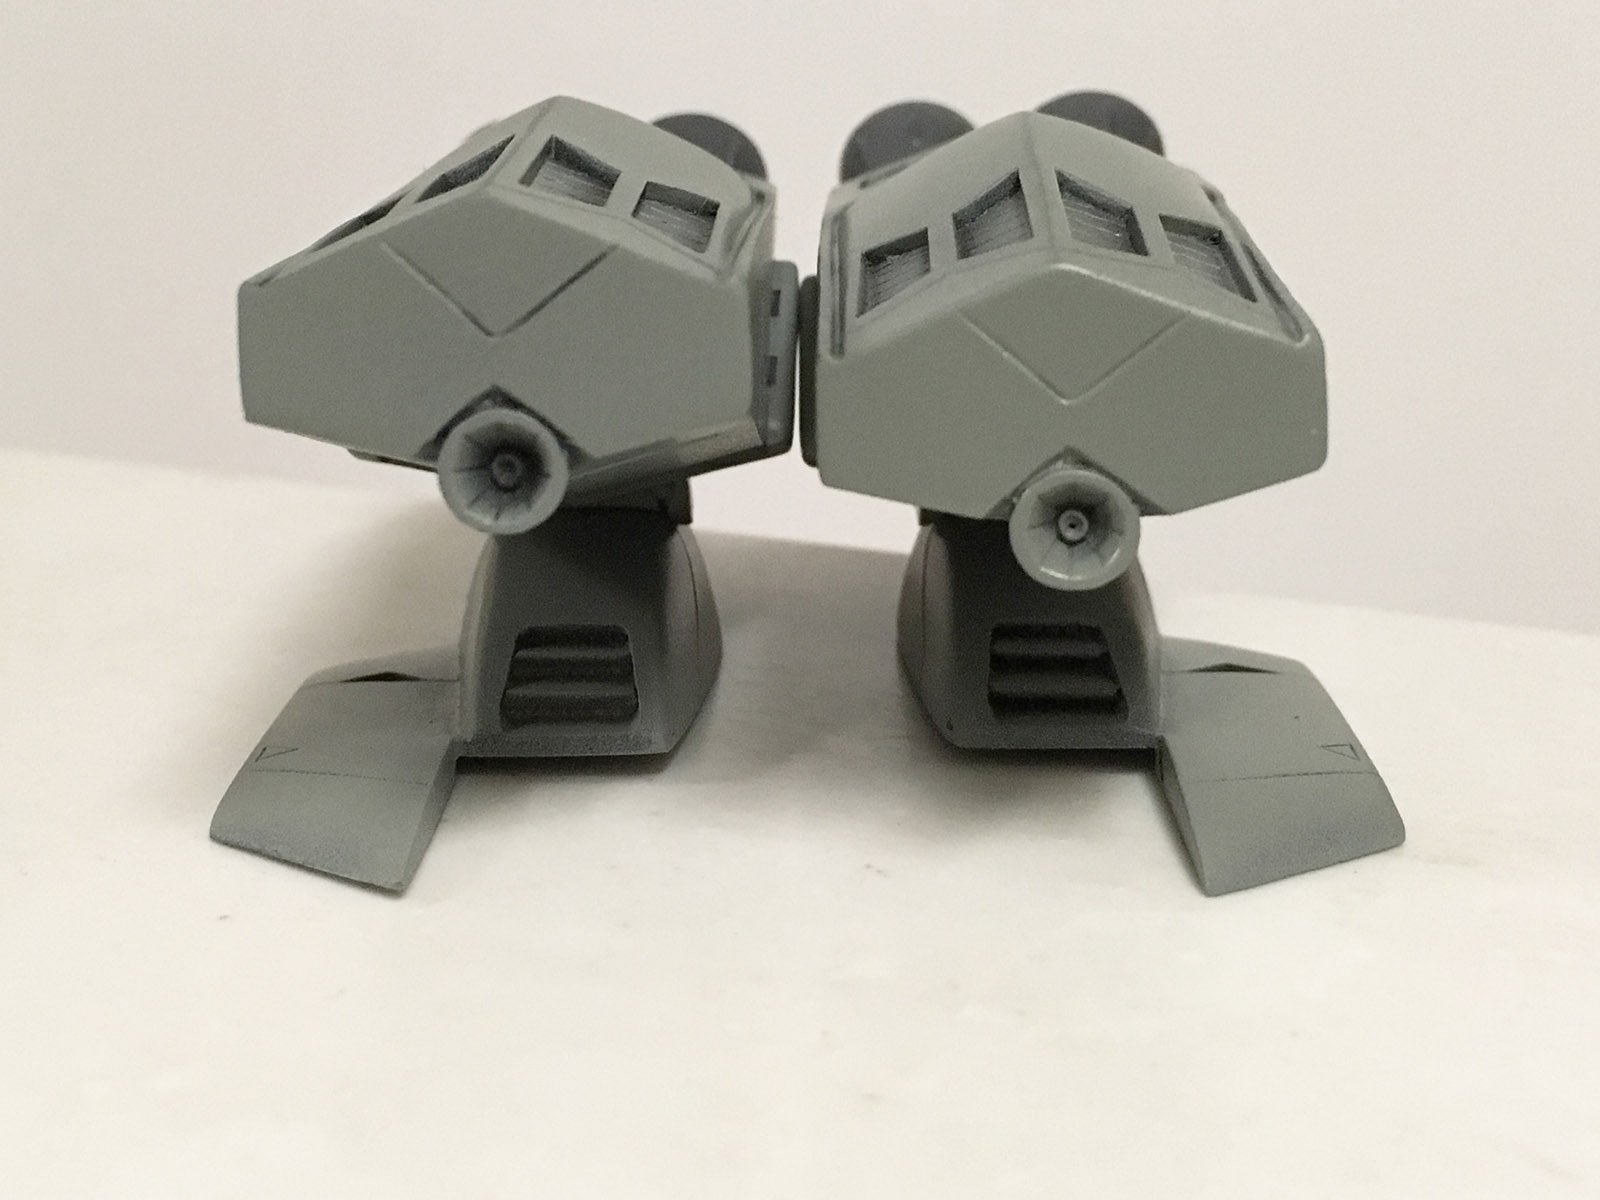
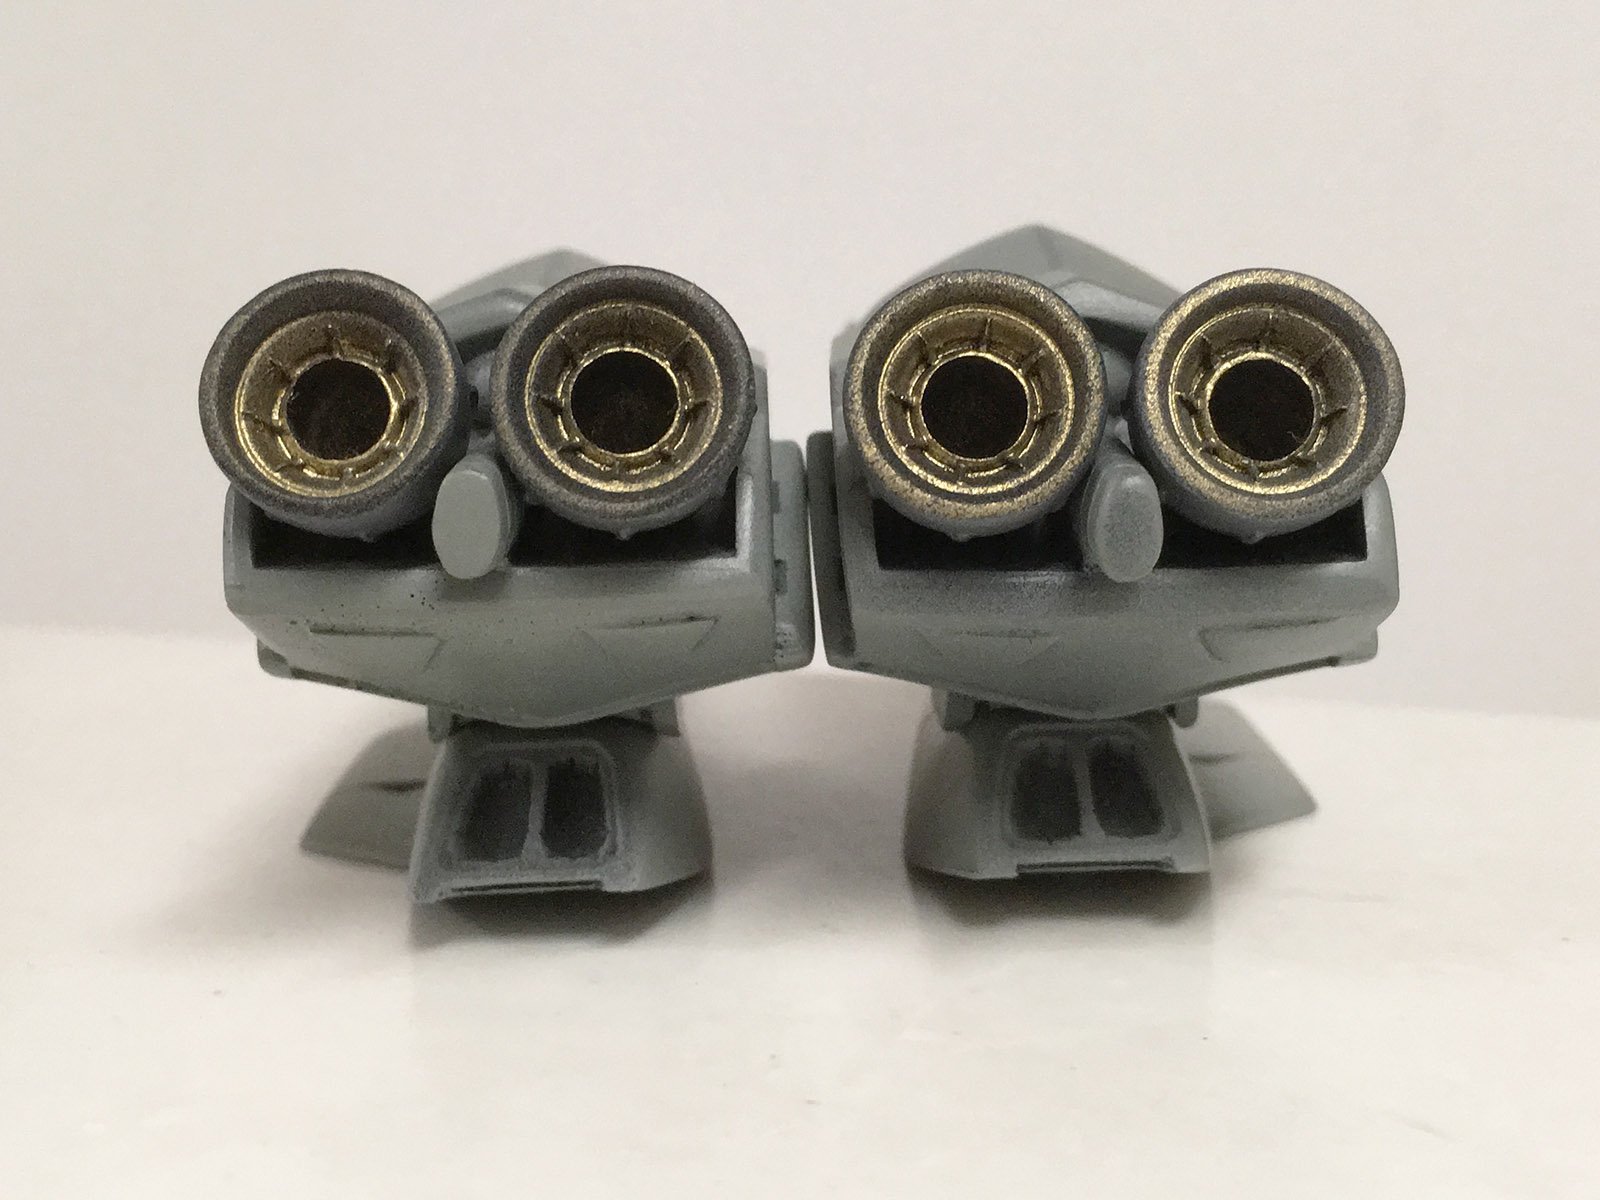
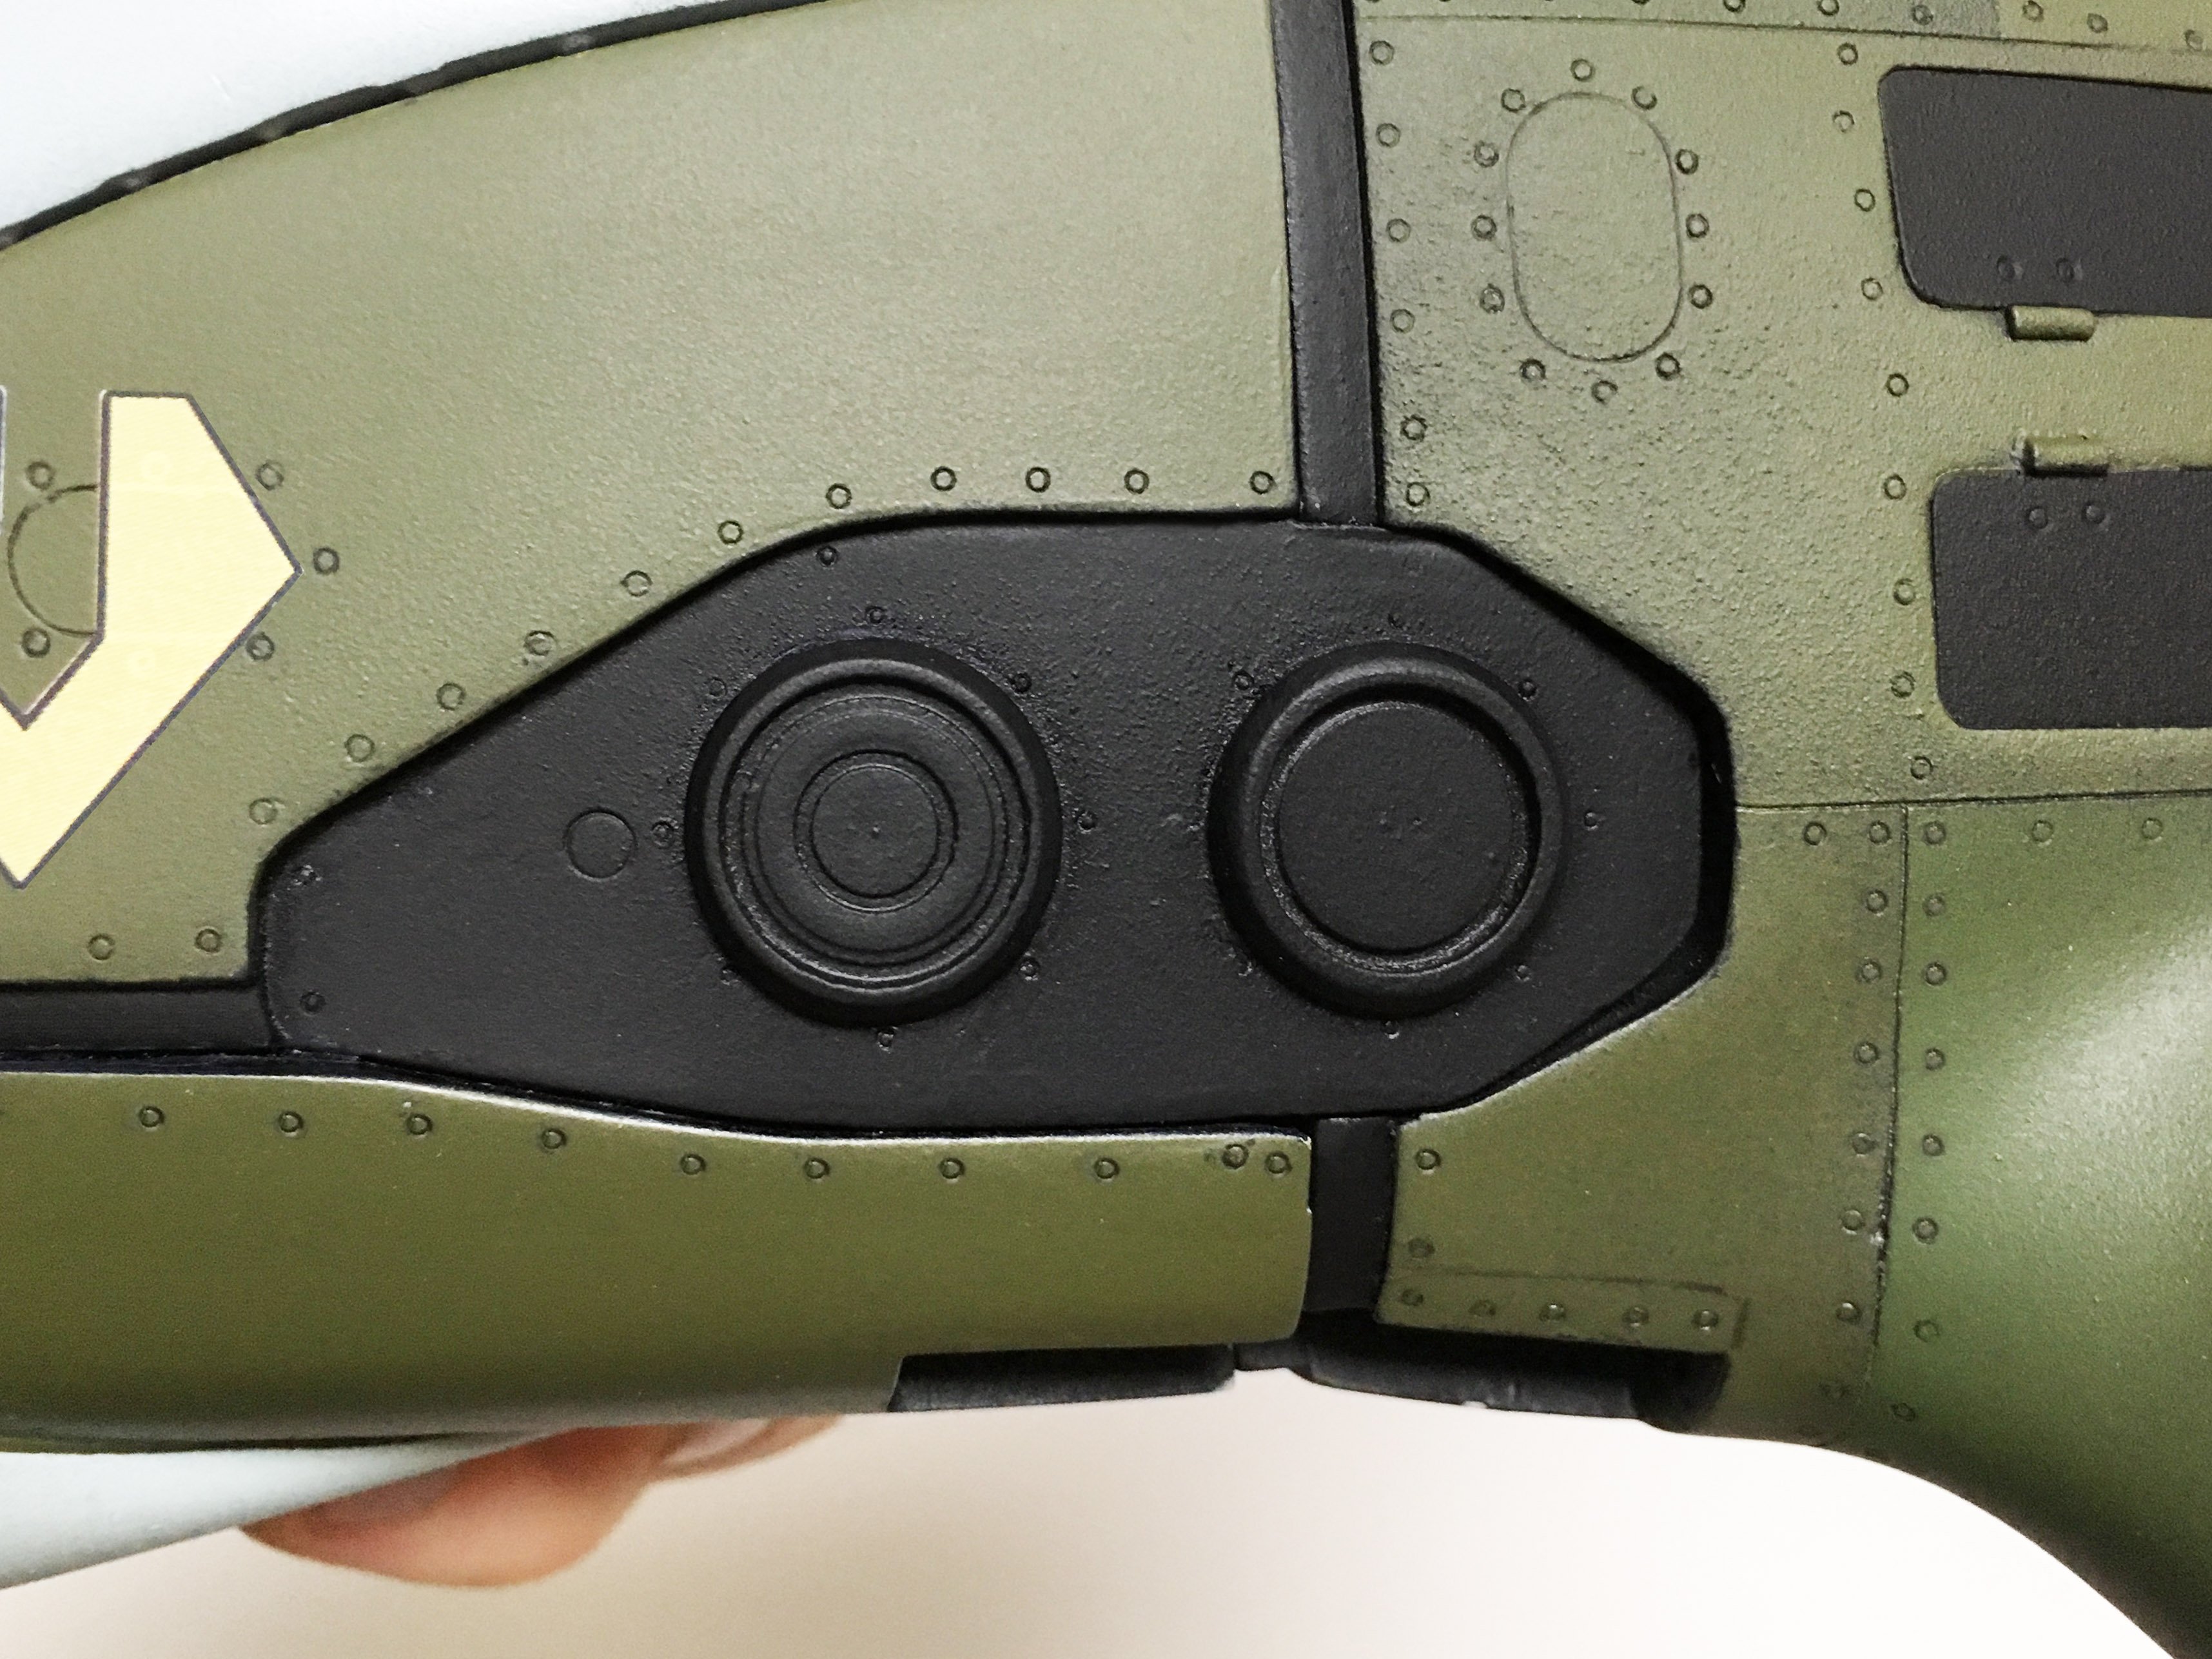
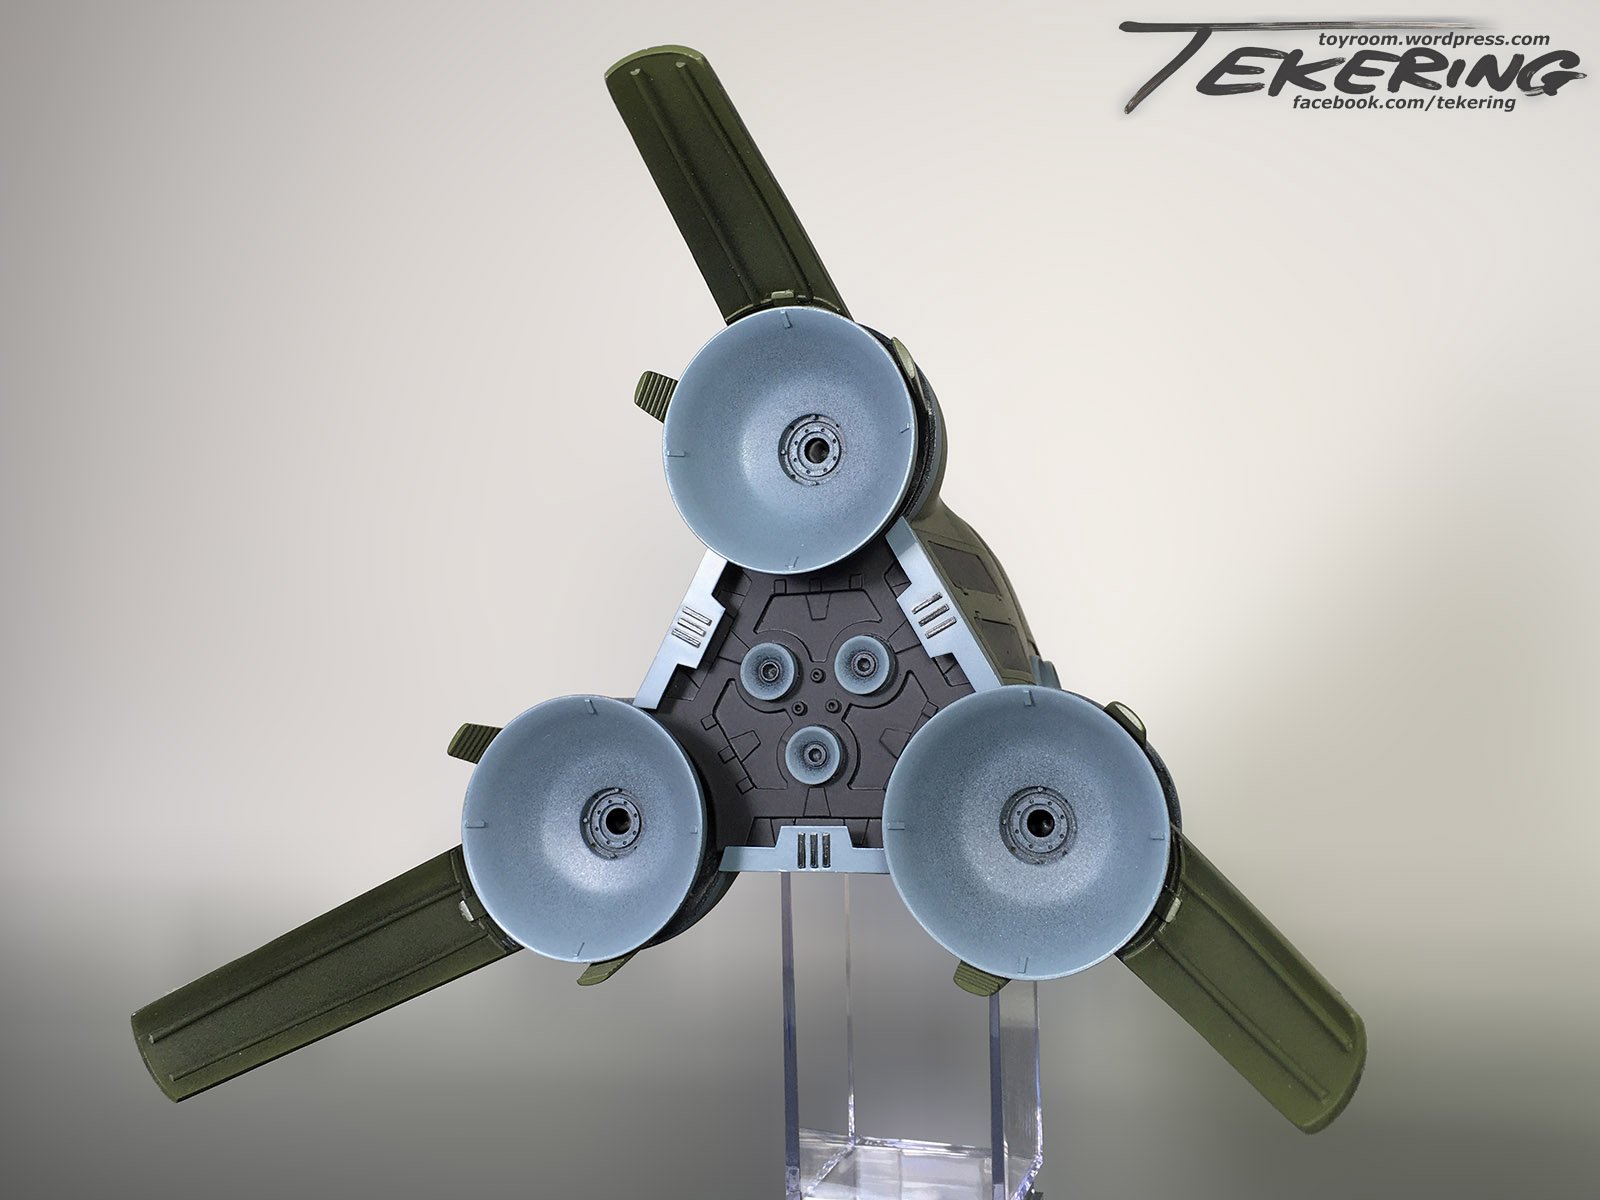
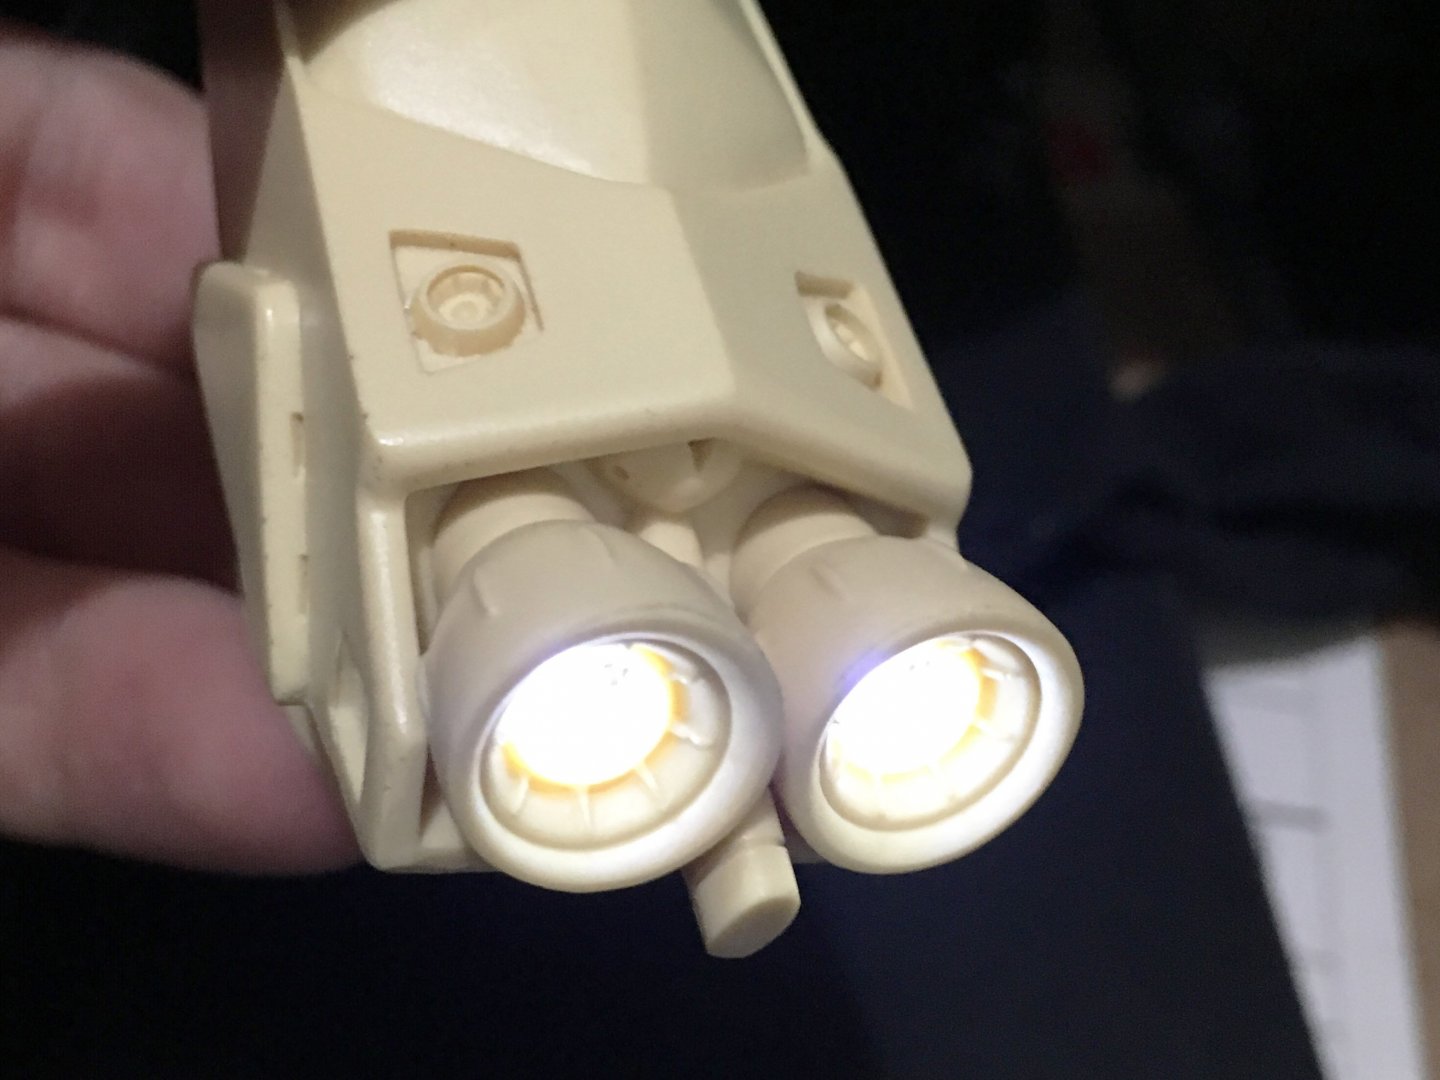
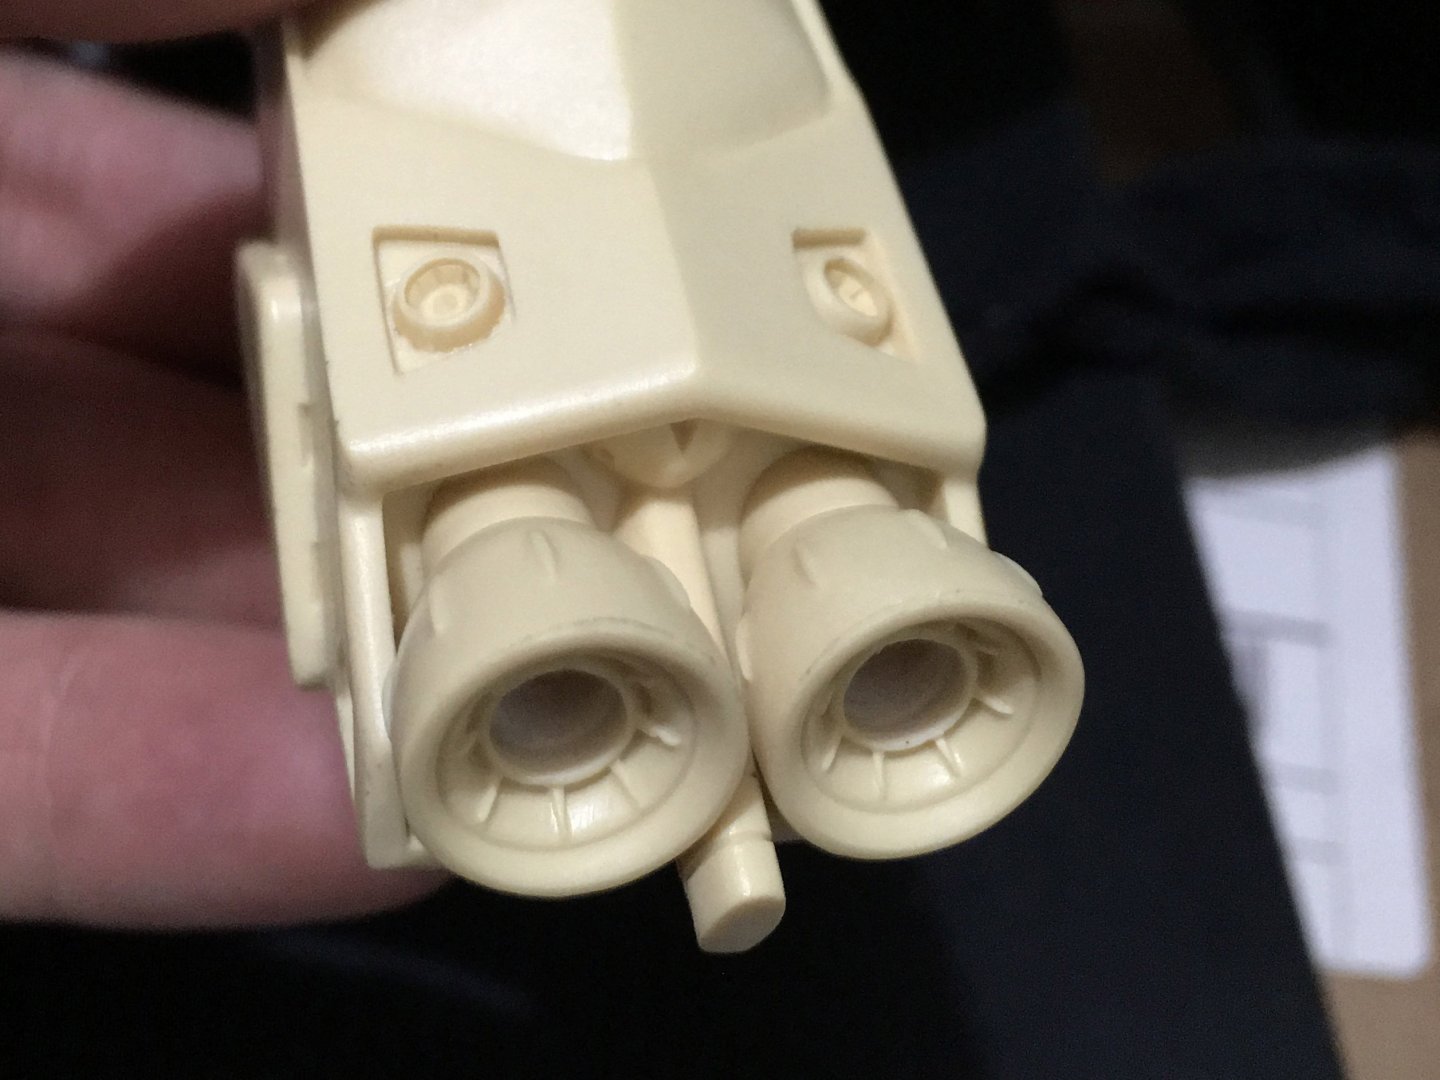
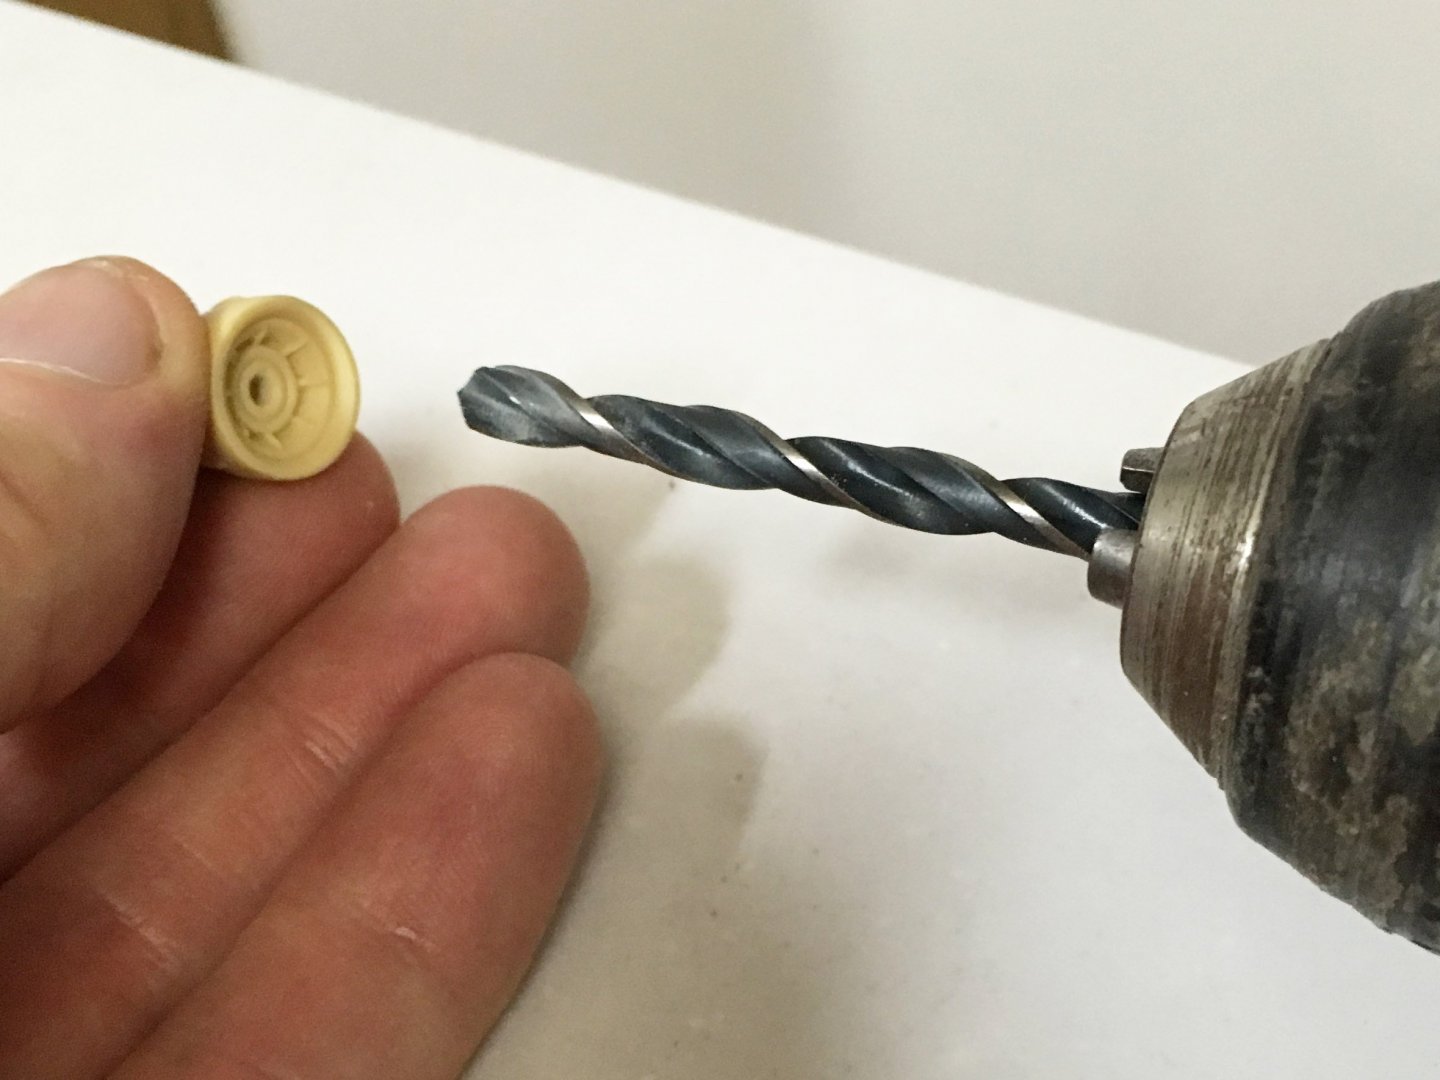
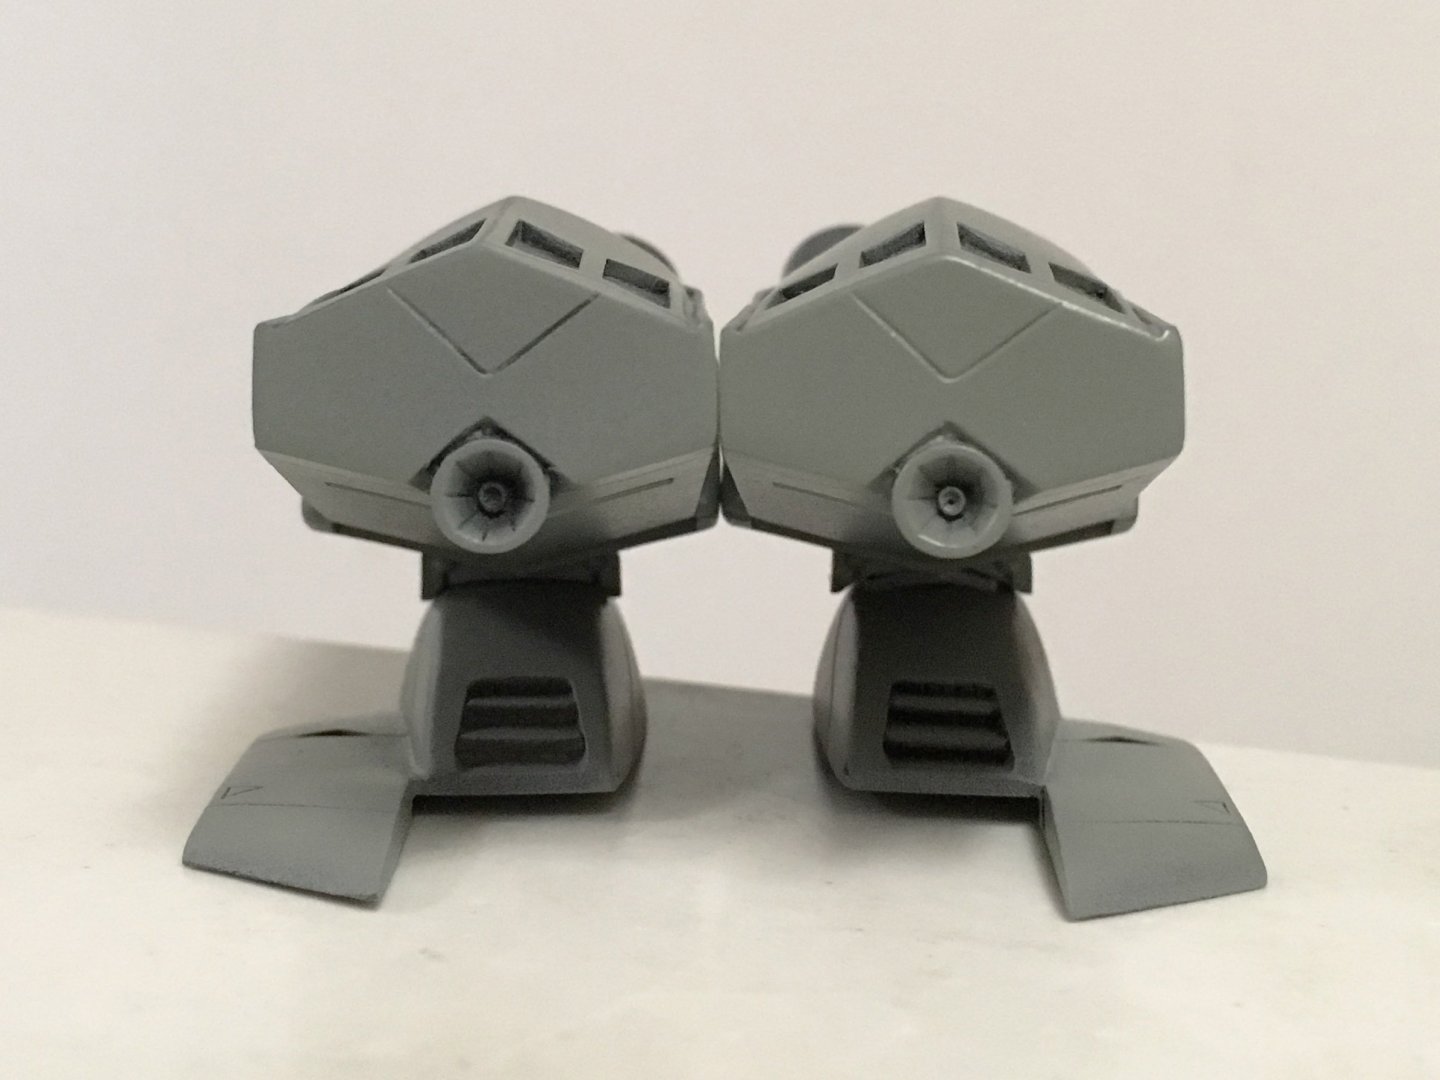
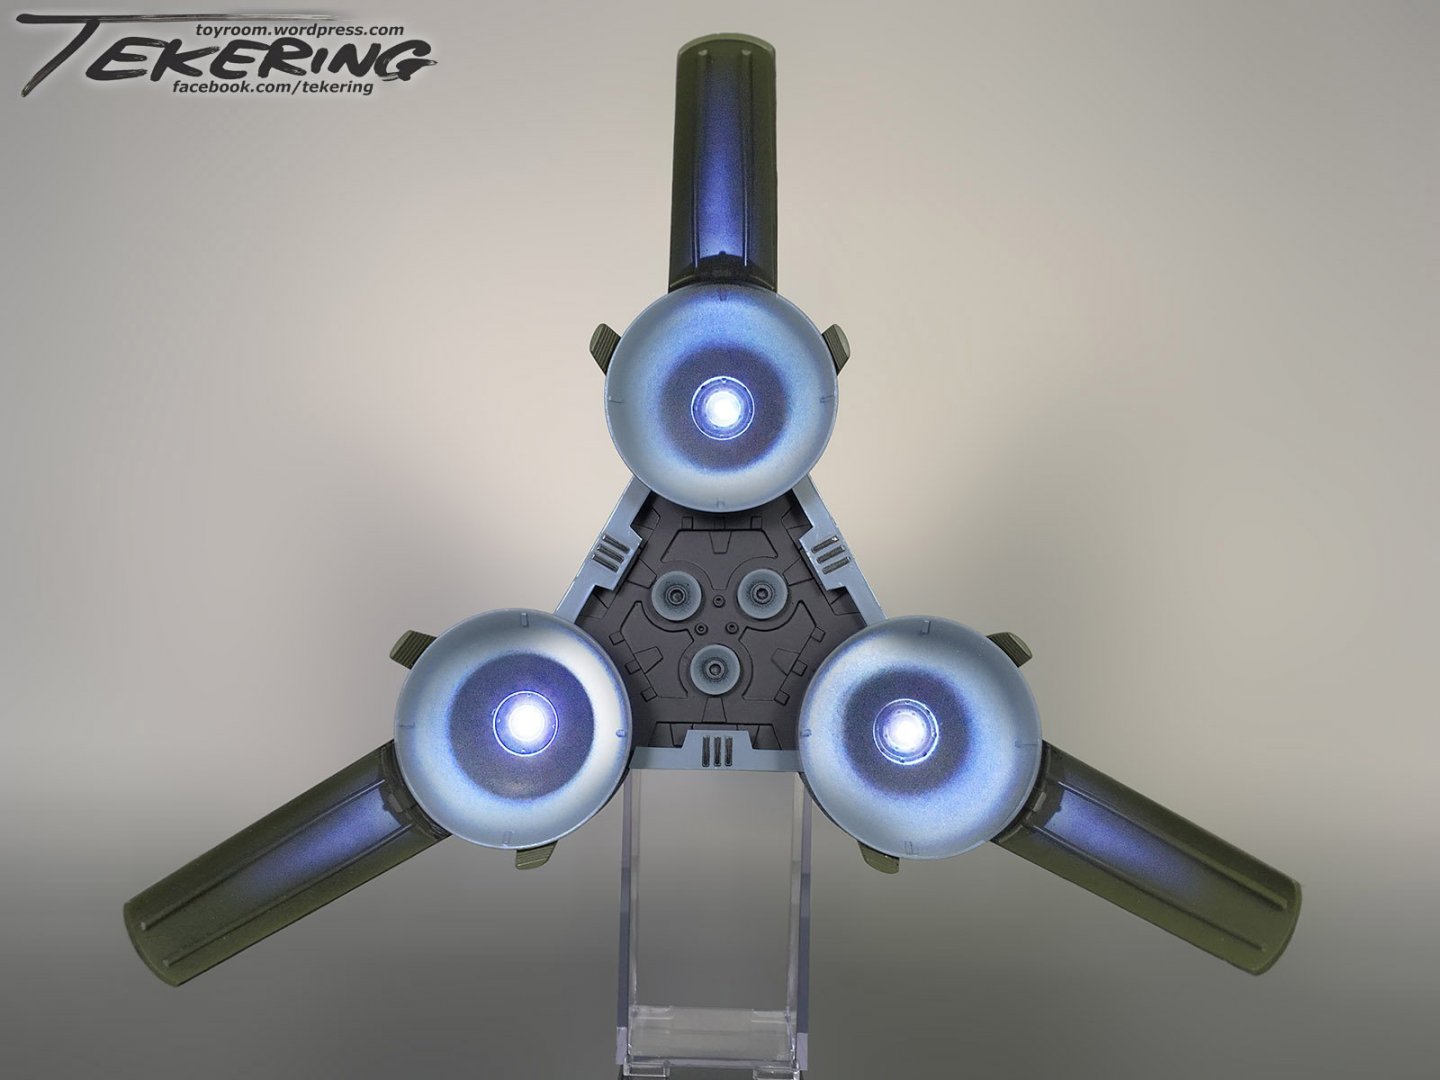
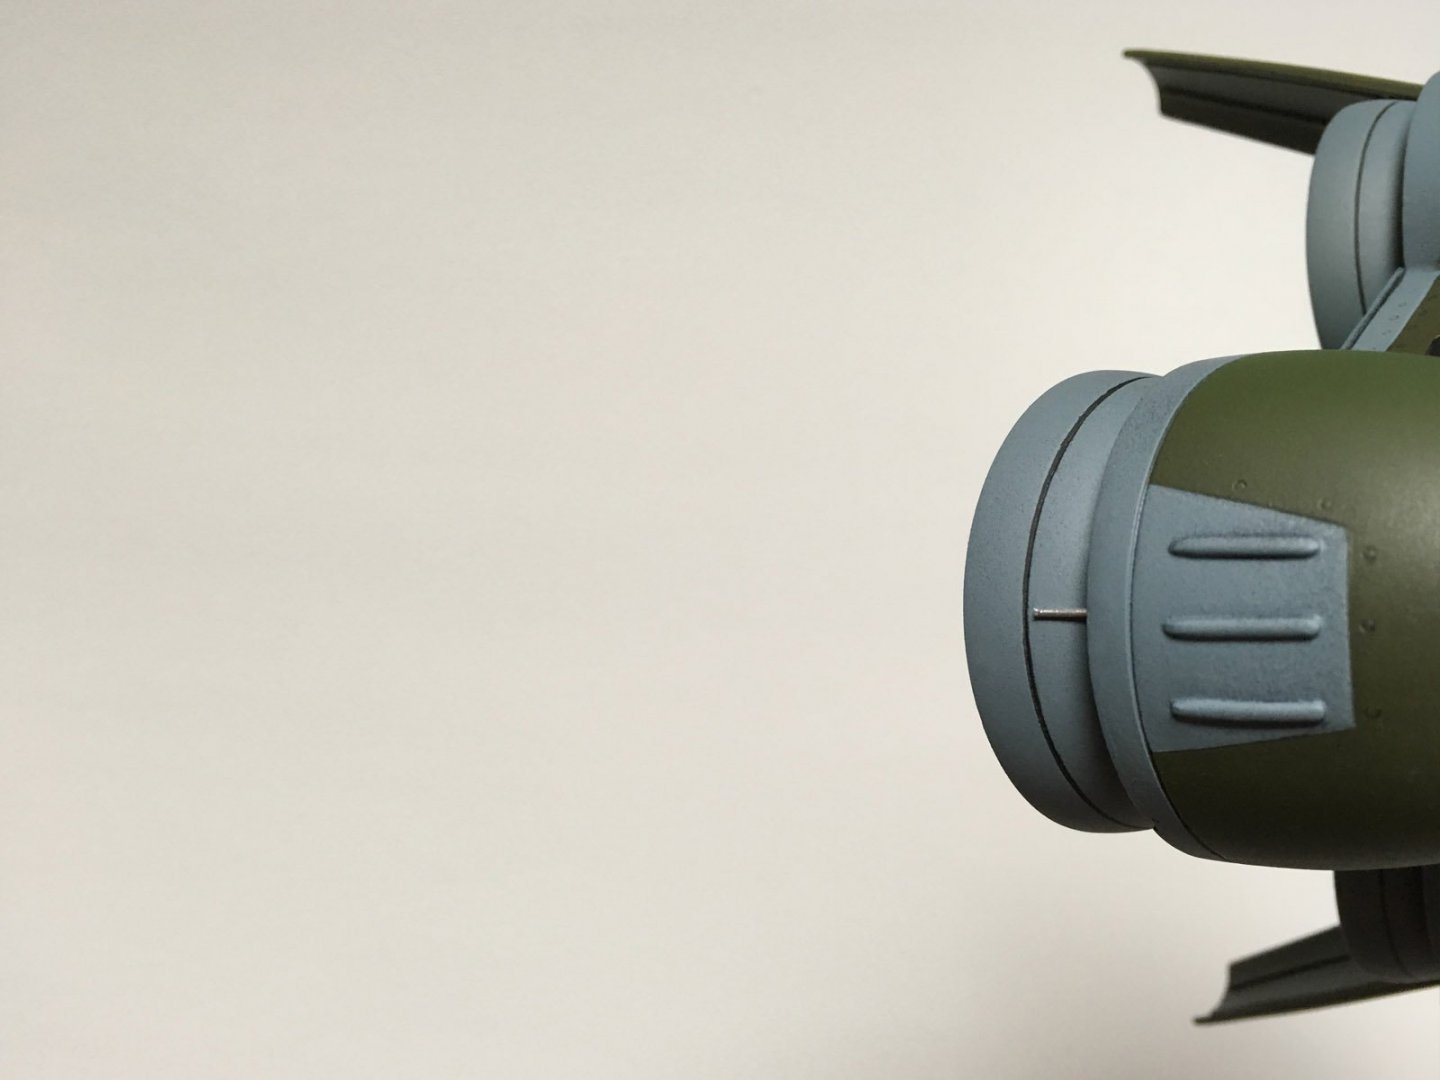
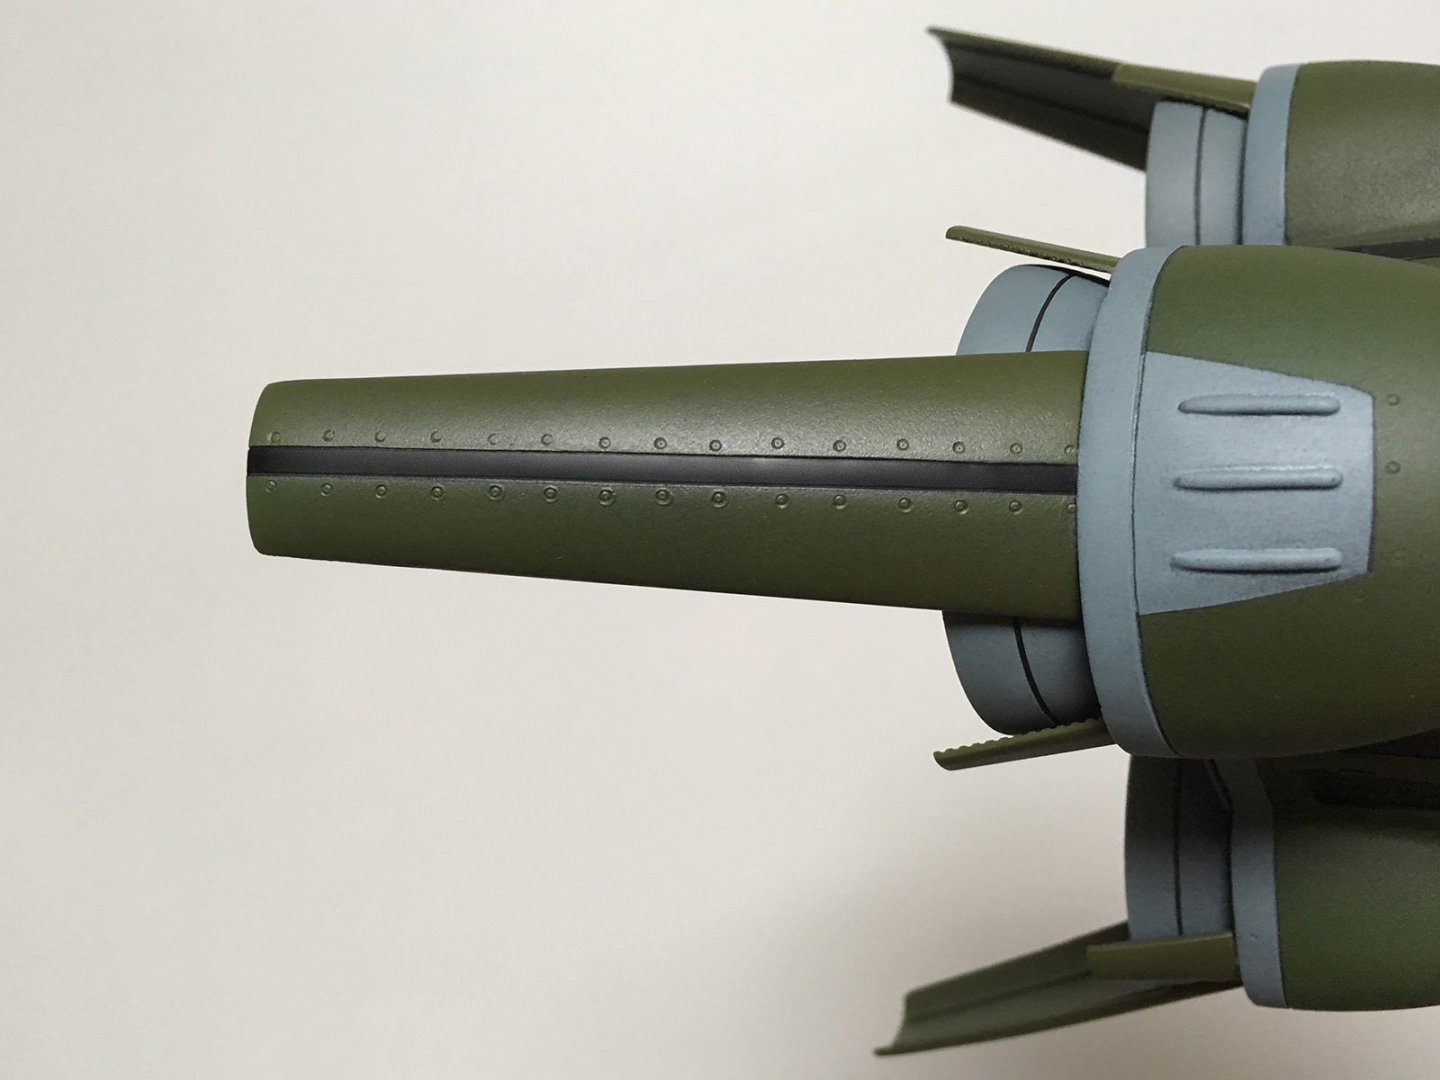
I'm destroying perfectly good sculpted detail in the engine nozzles... A small, accurately-centered guide hole will ensure the much larger hole I drill is equally centered. Once drilled, they're glued onto the FAST pack boosters. These big holes are just the right circumference to fit LEDs into. With the FAST packs mounted to their housings, they appear to be a consistent height from below... ...but viewed from above, one sits considerably higher than the other. A scrap bit of PVC sprue will act as a spacer, and correct the discrepancy in height... ...and now they're properly aligned from both the top and bottom.


-
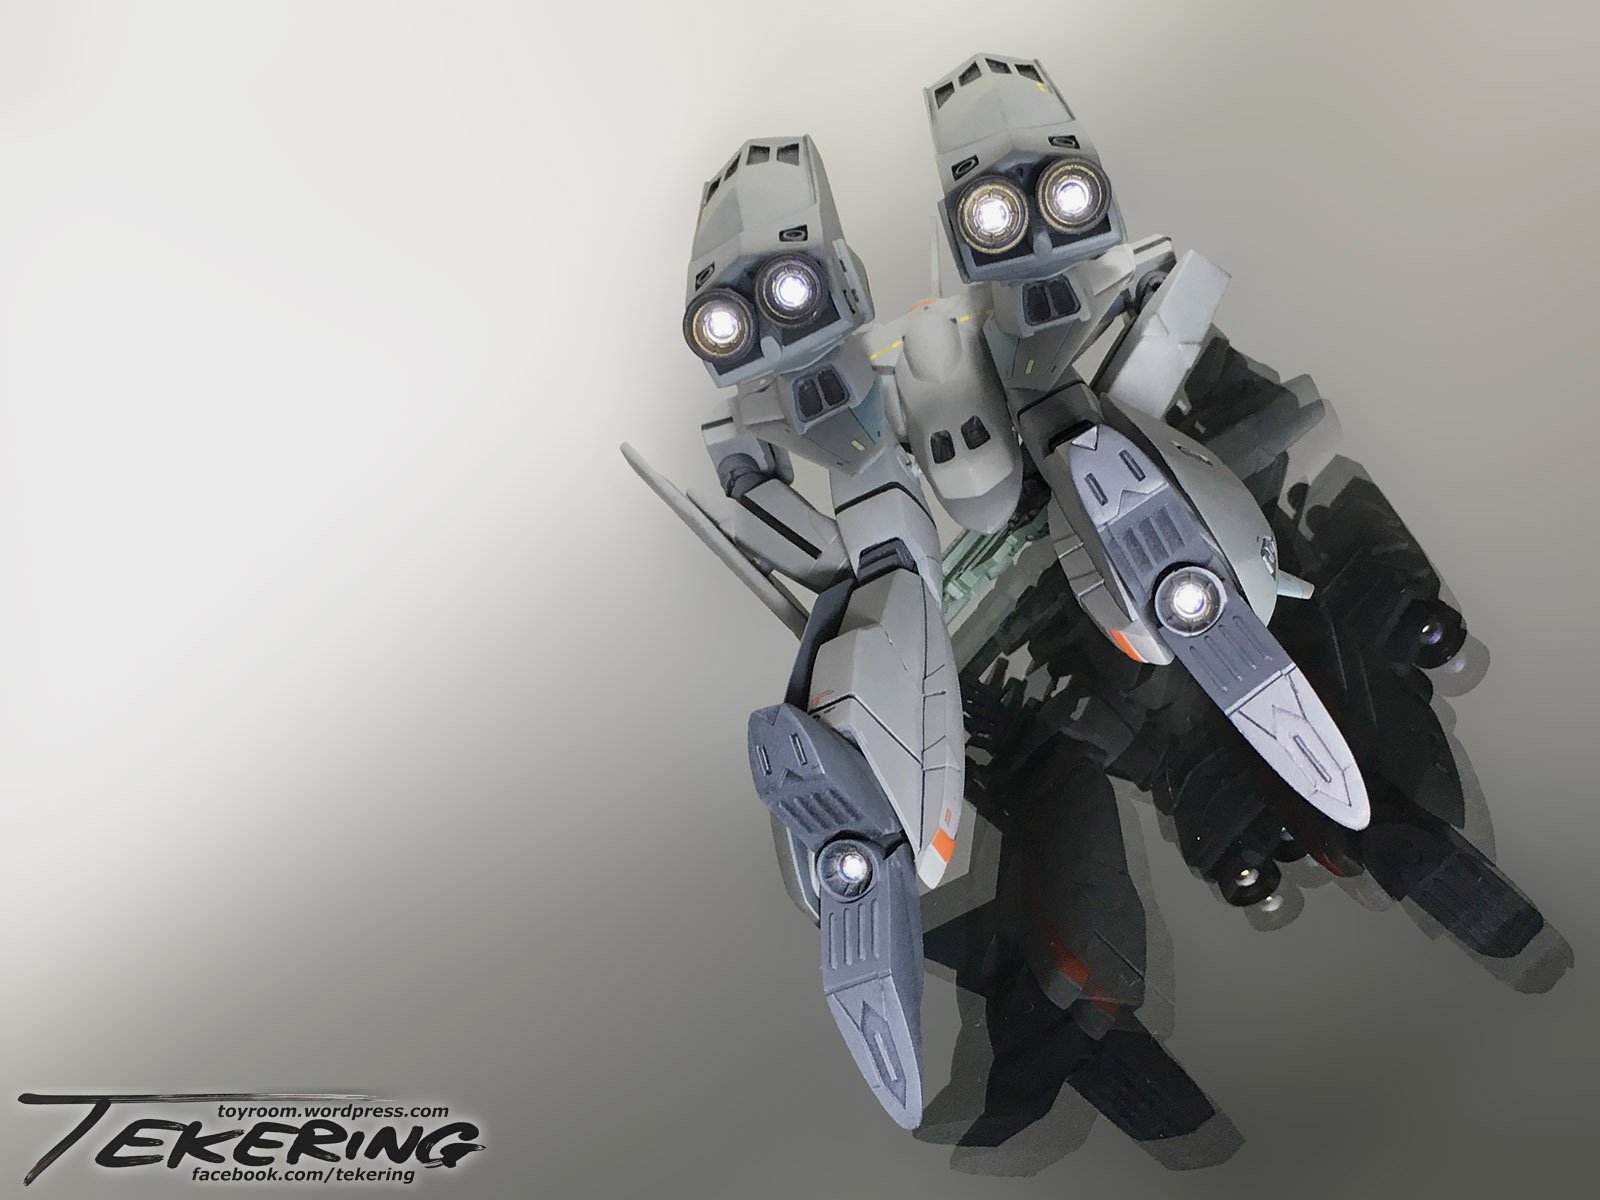
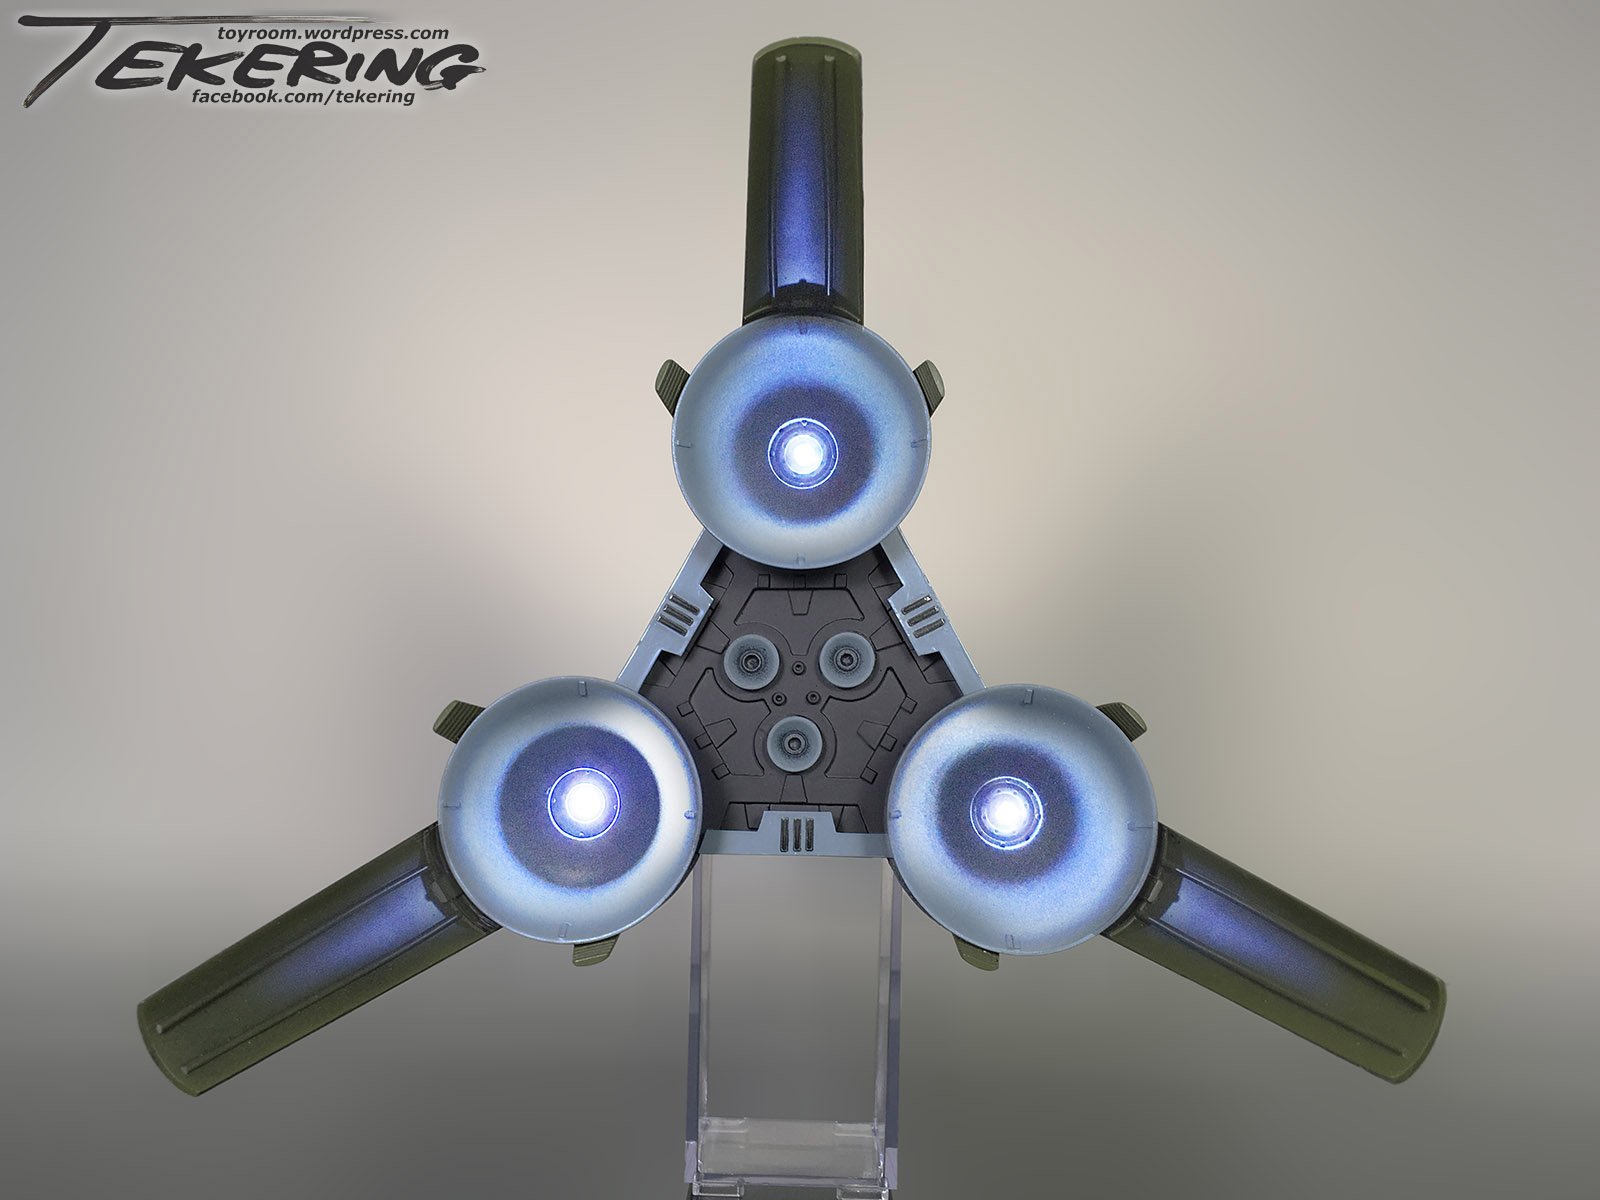
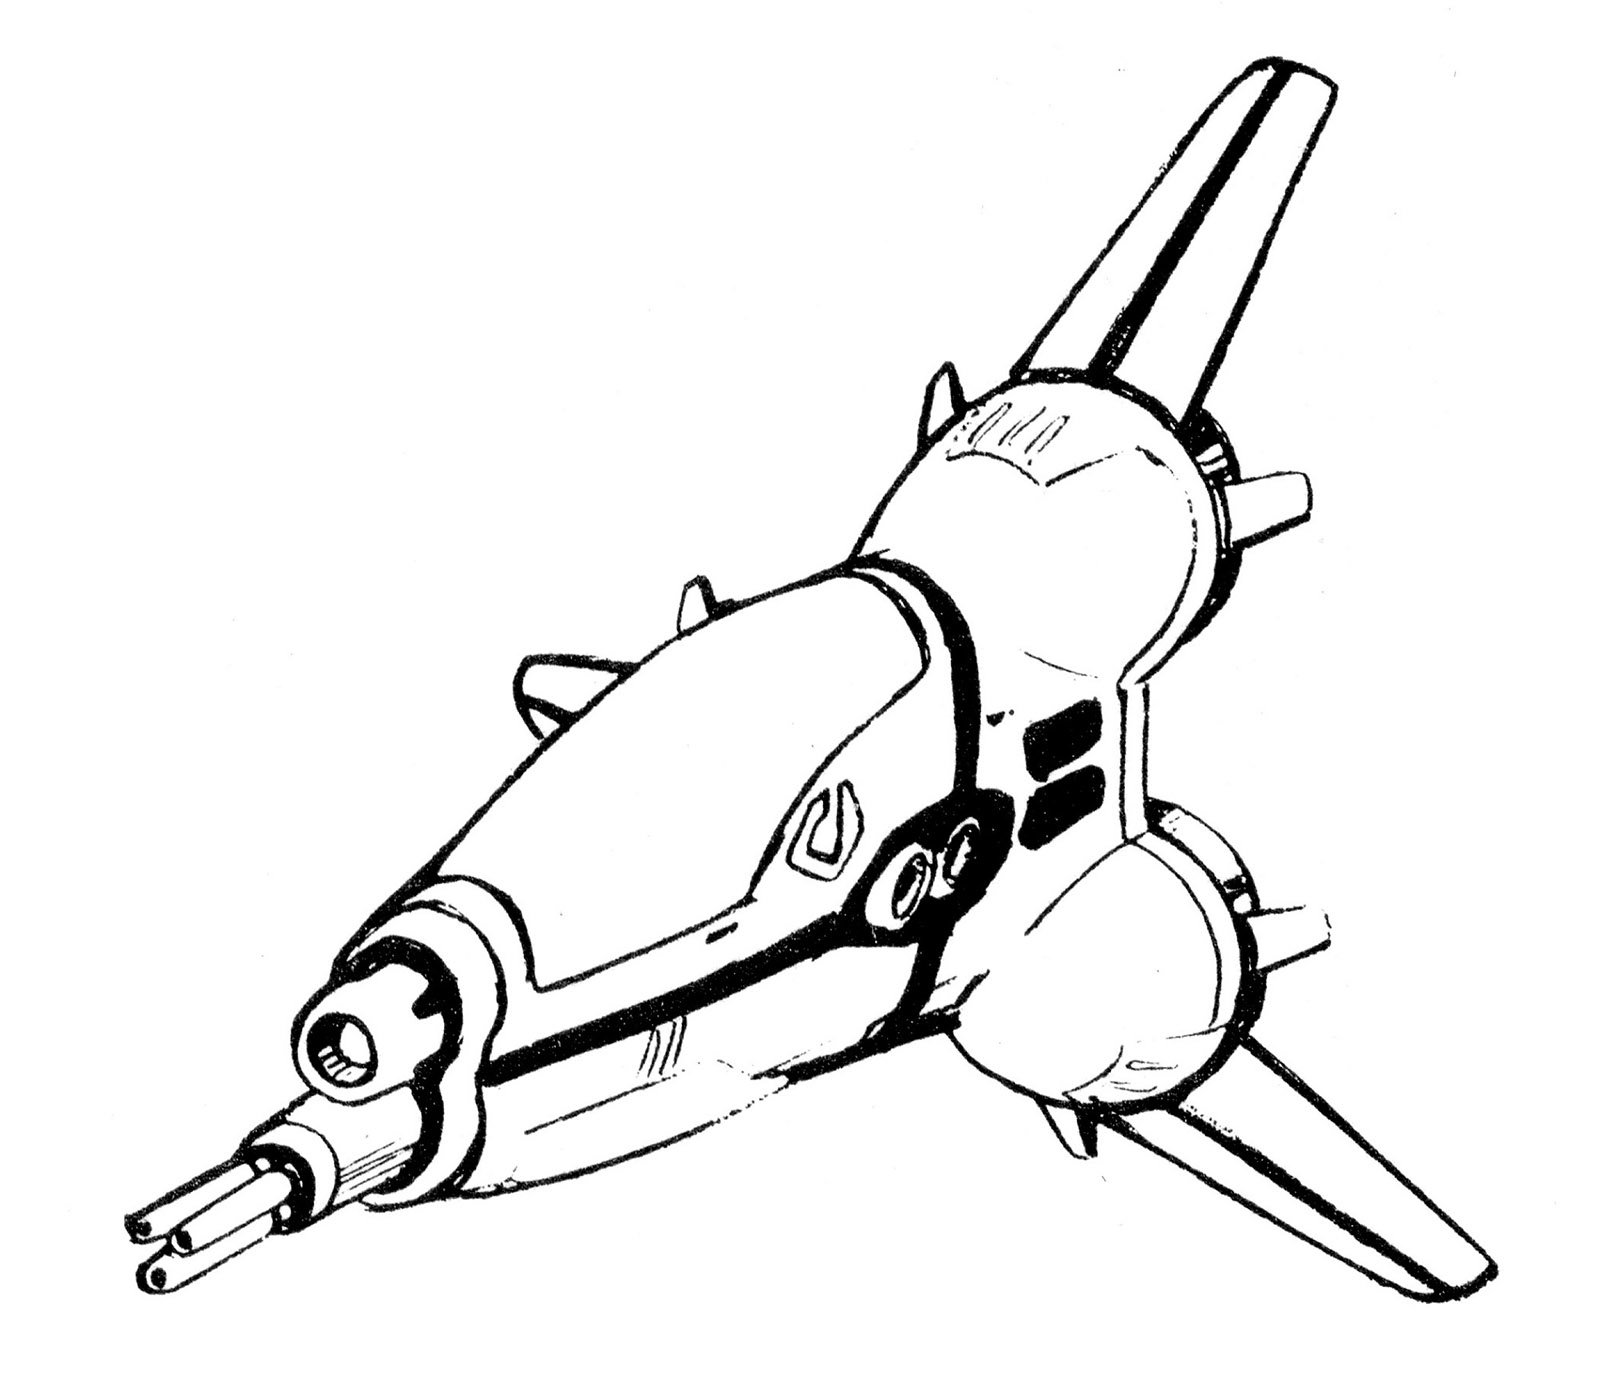
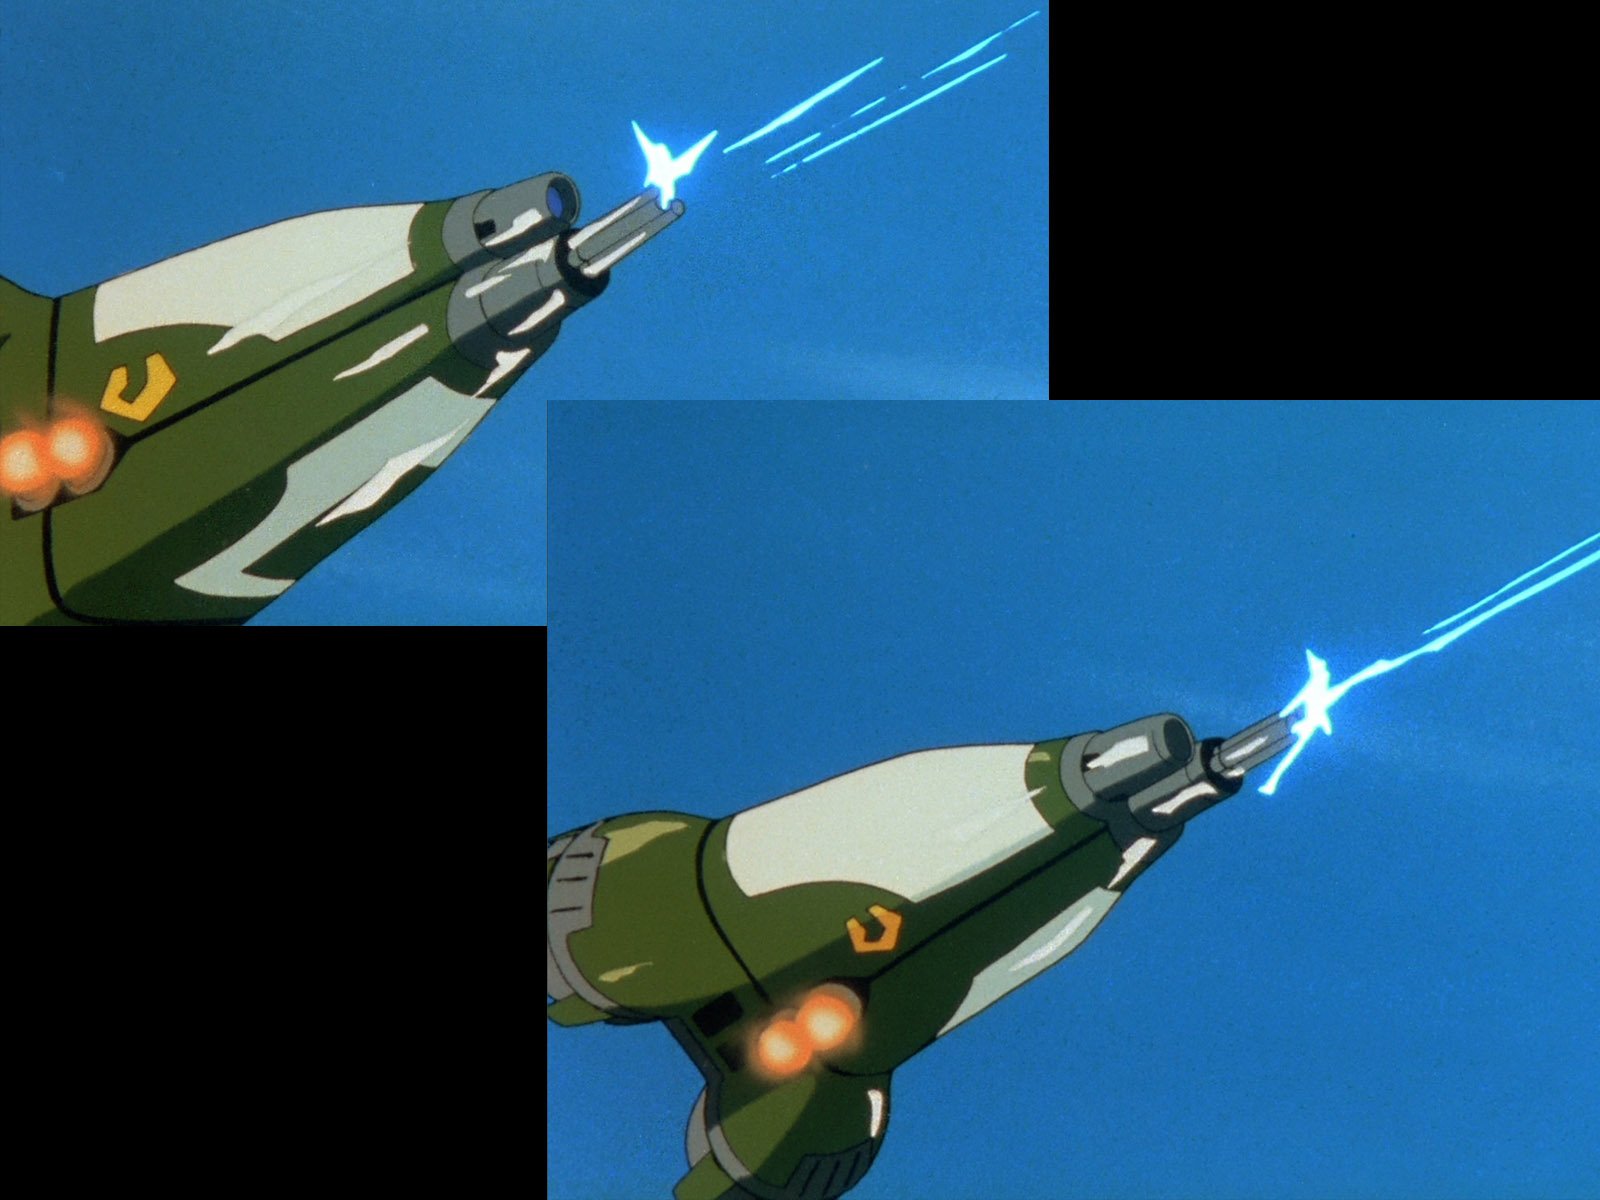
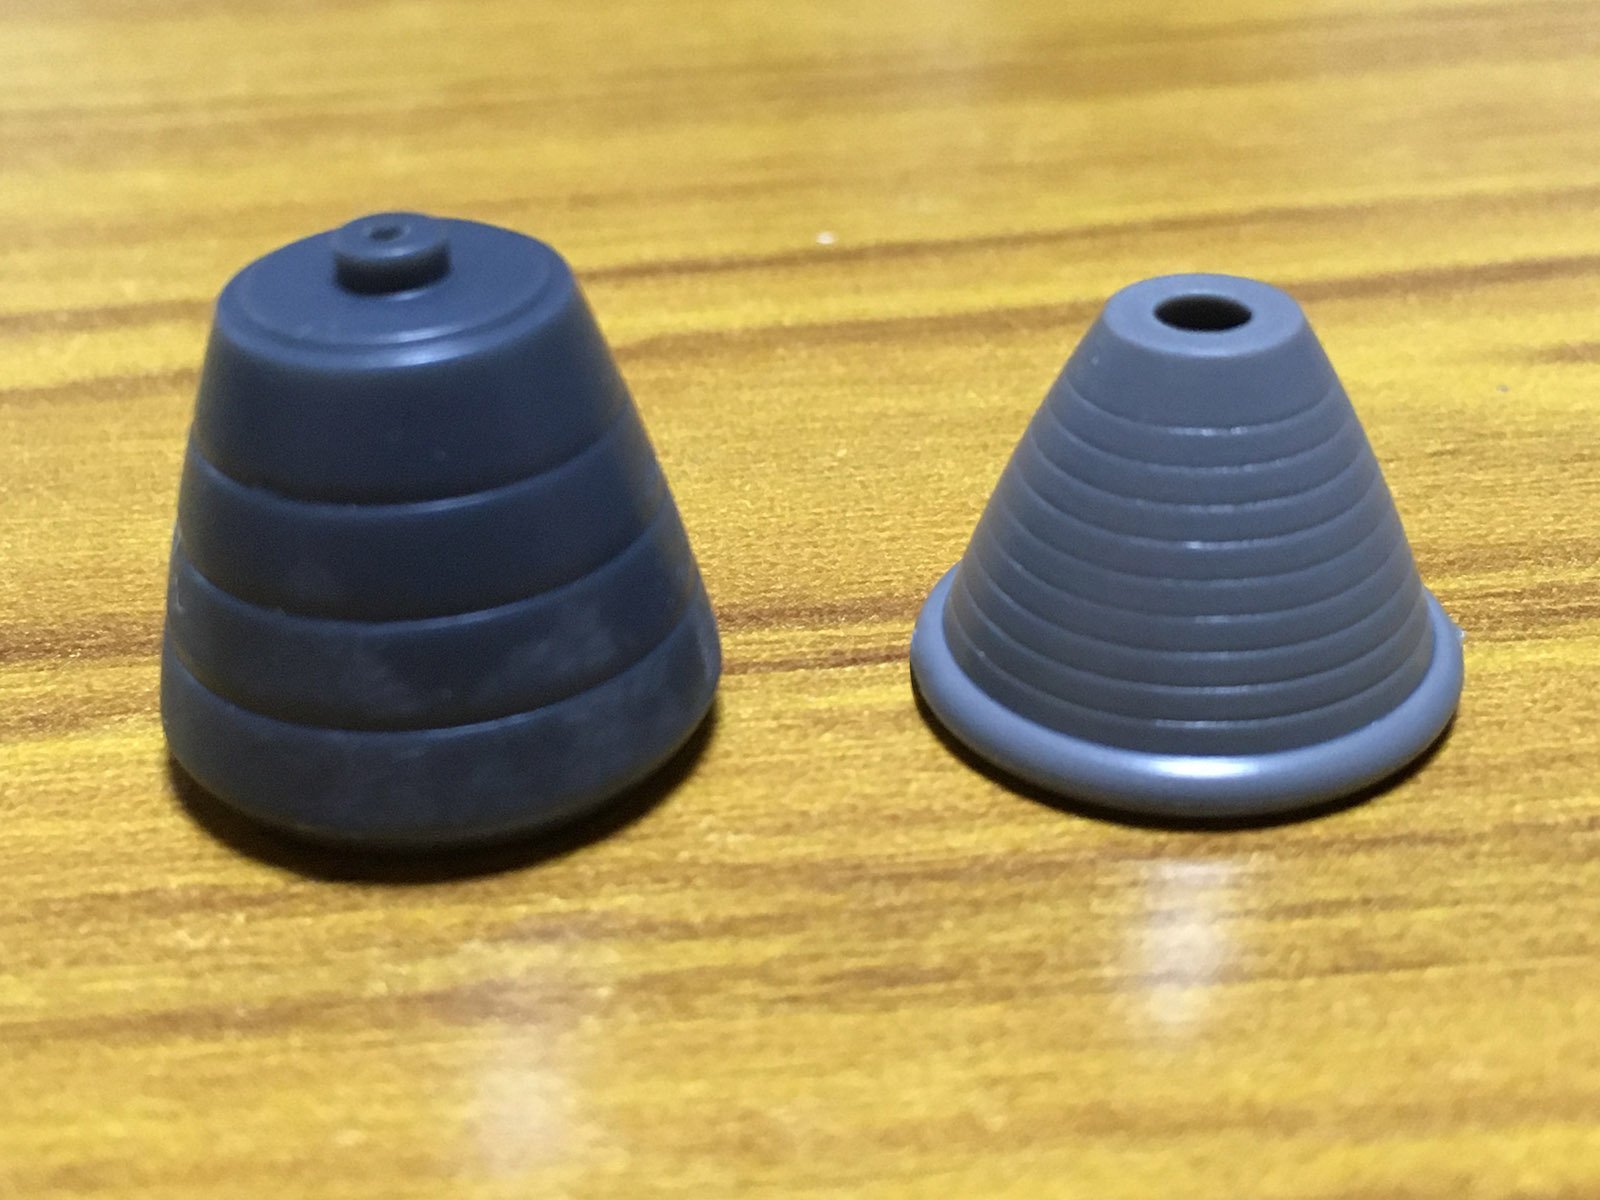
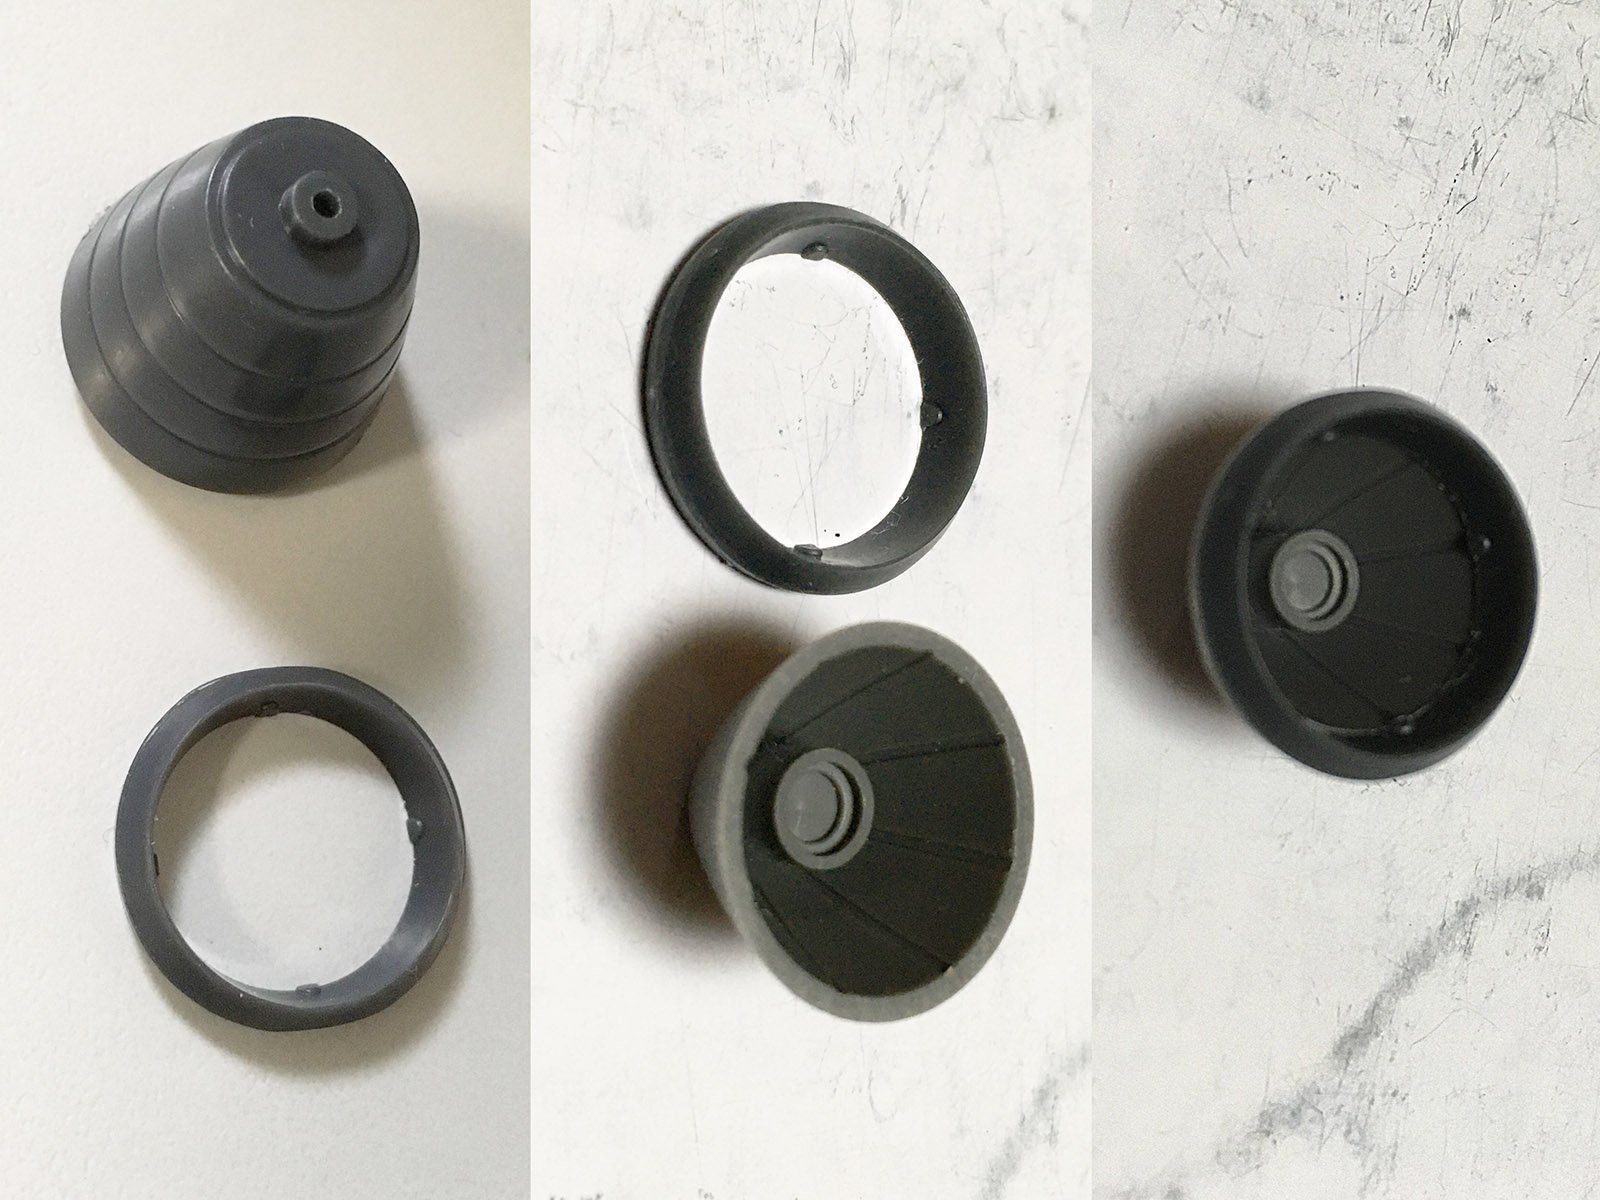
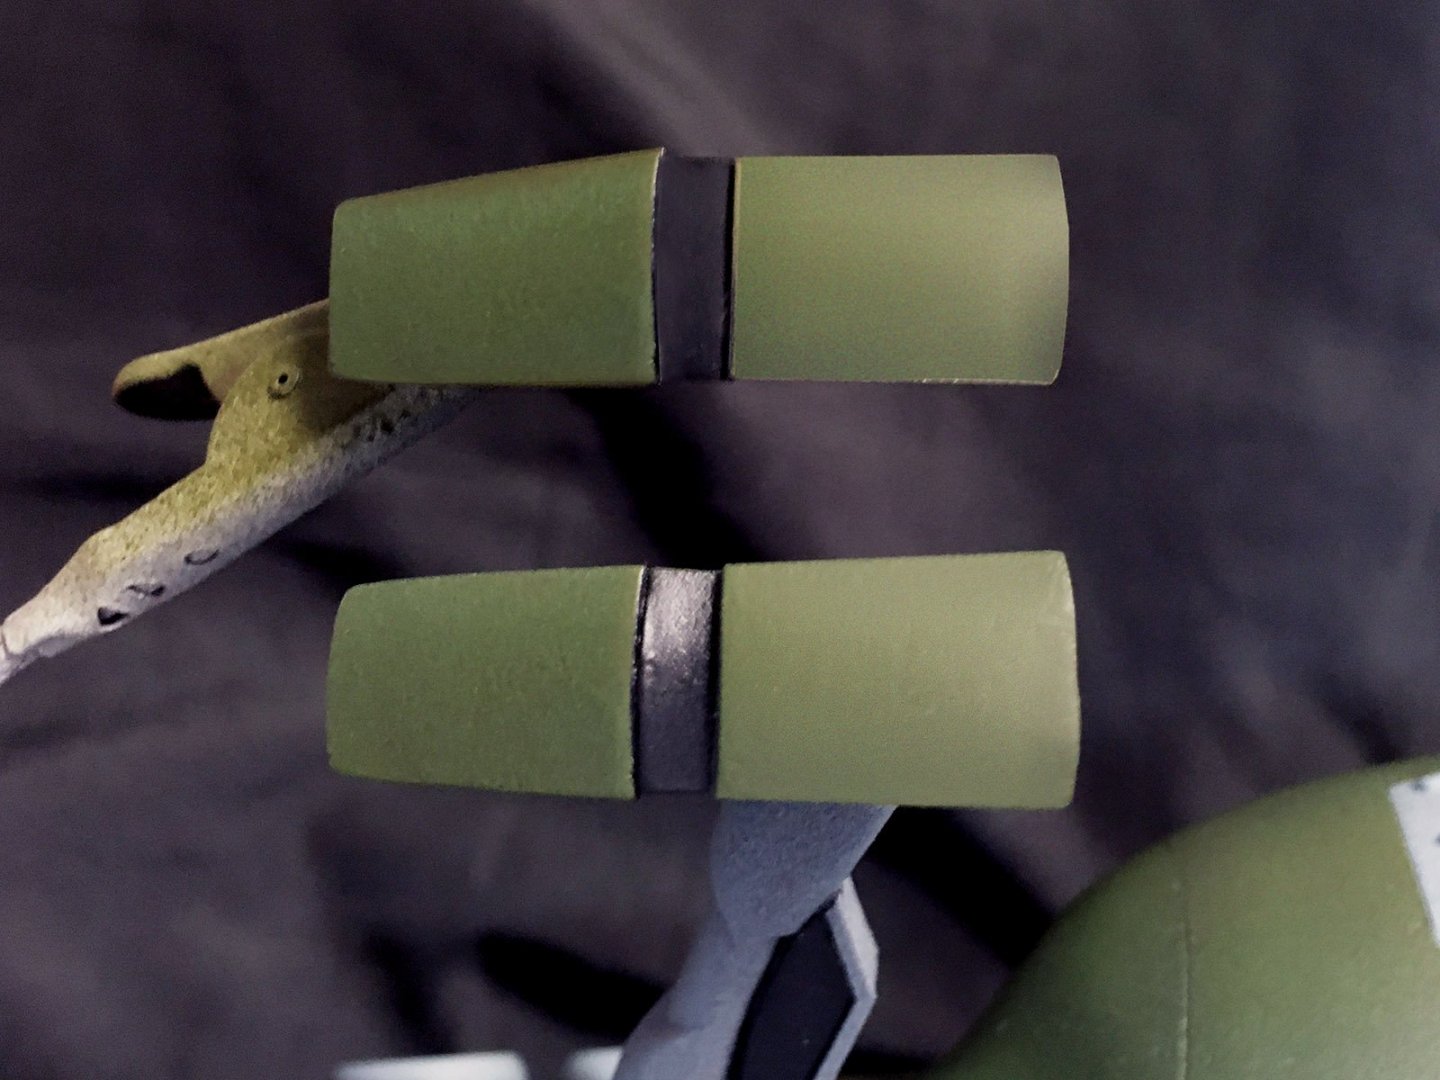
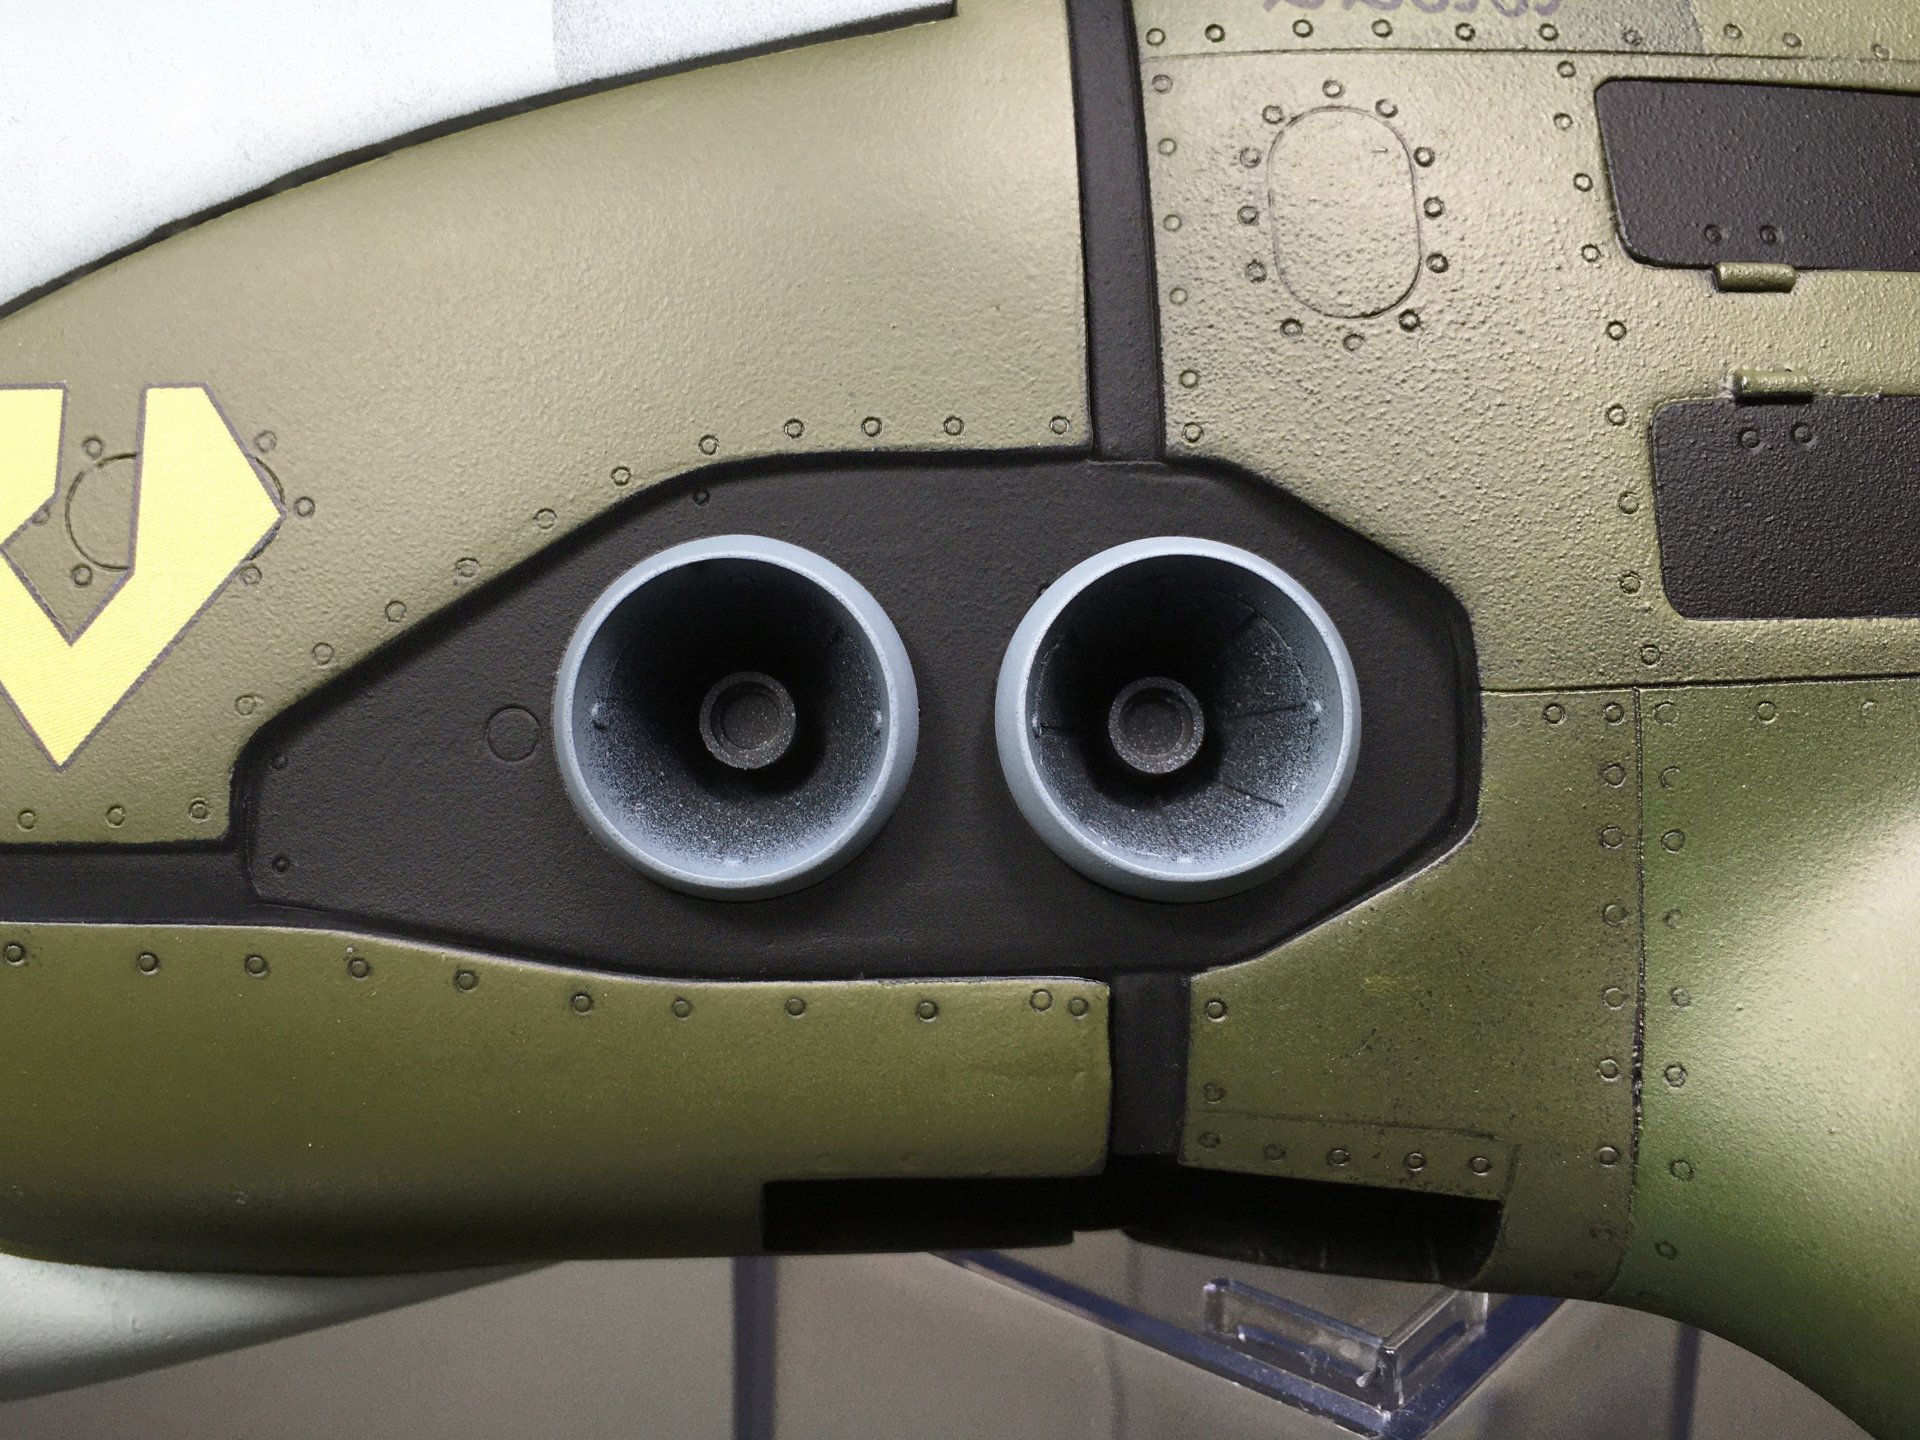
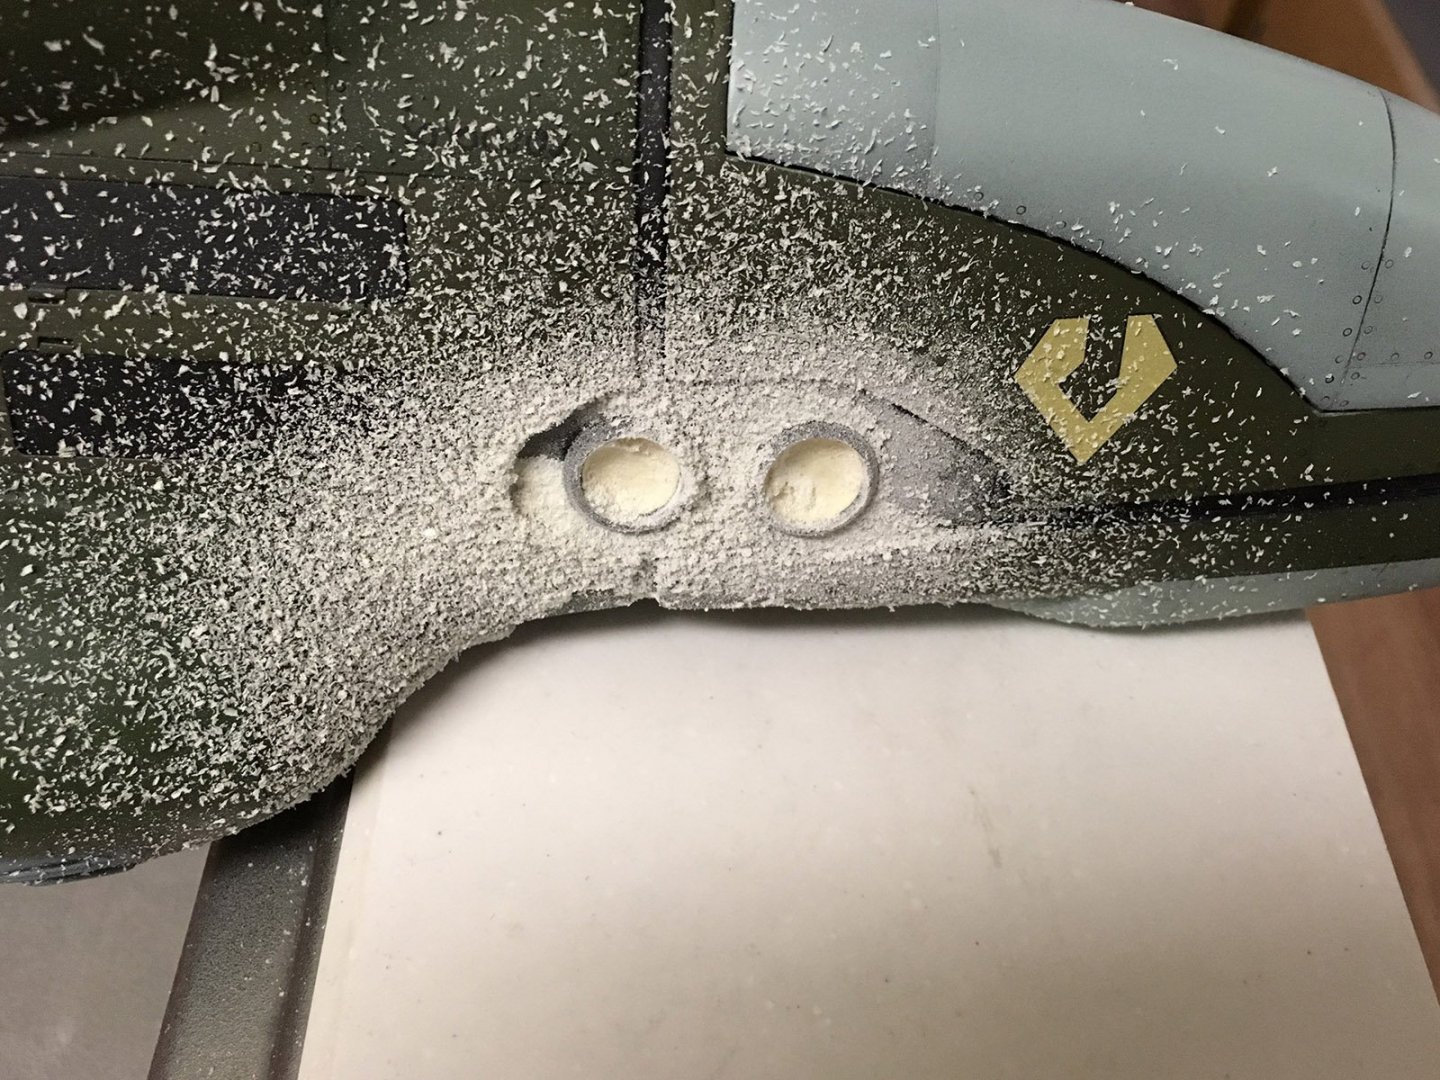
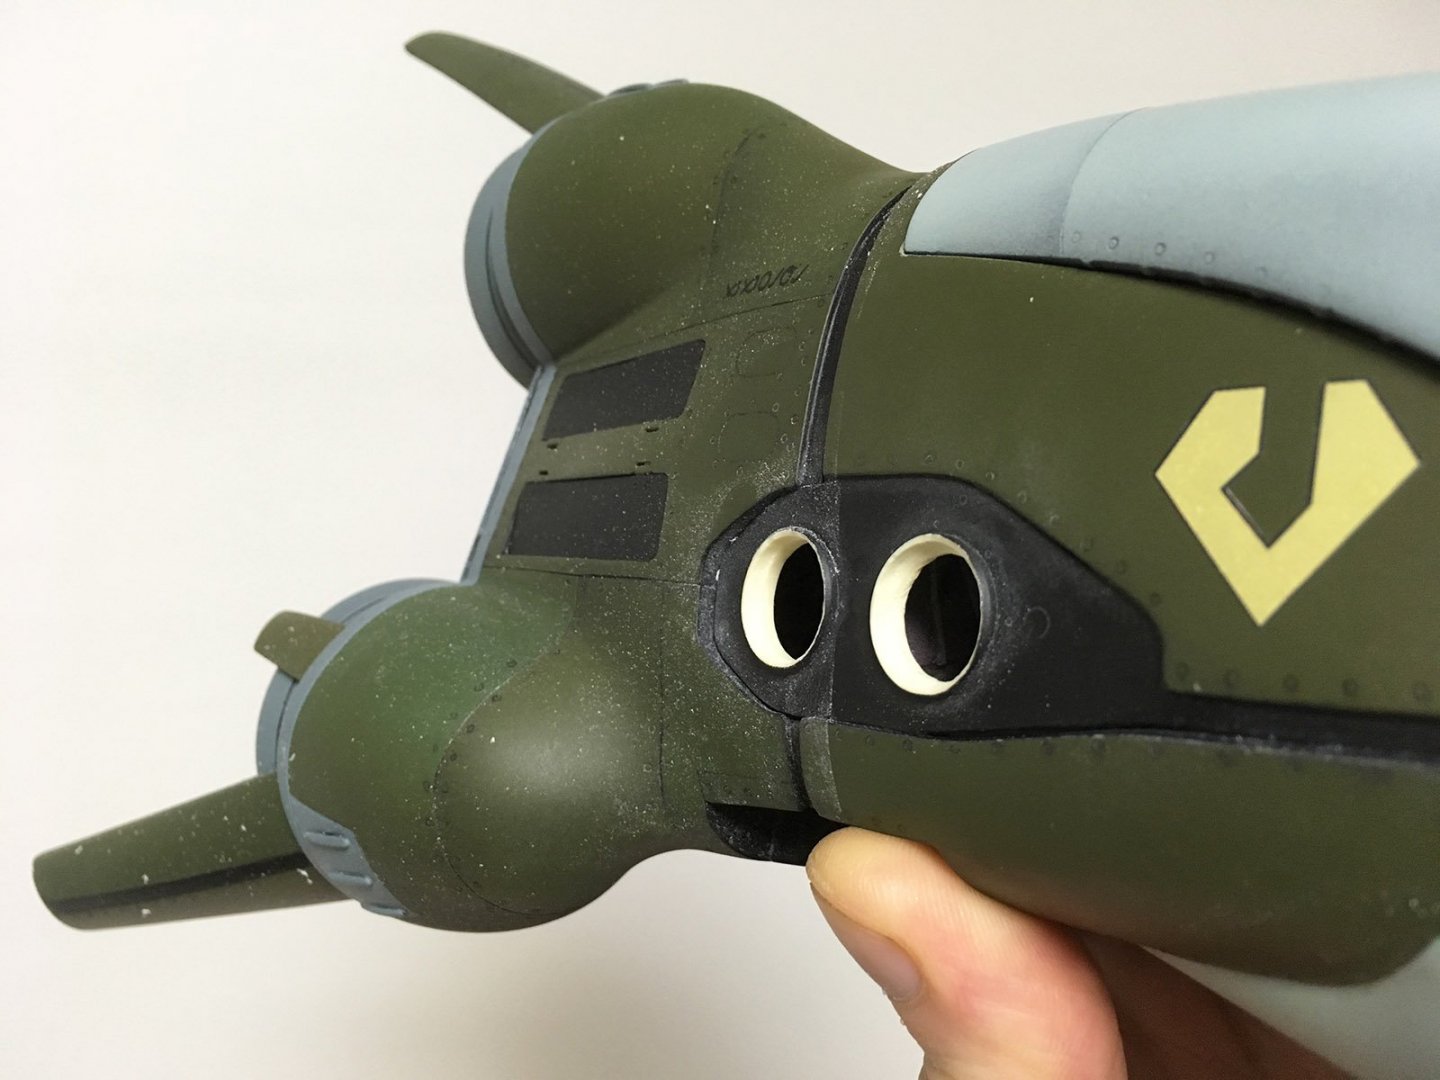
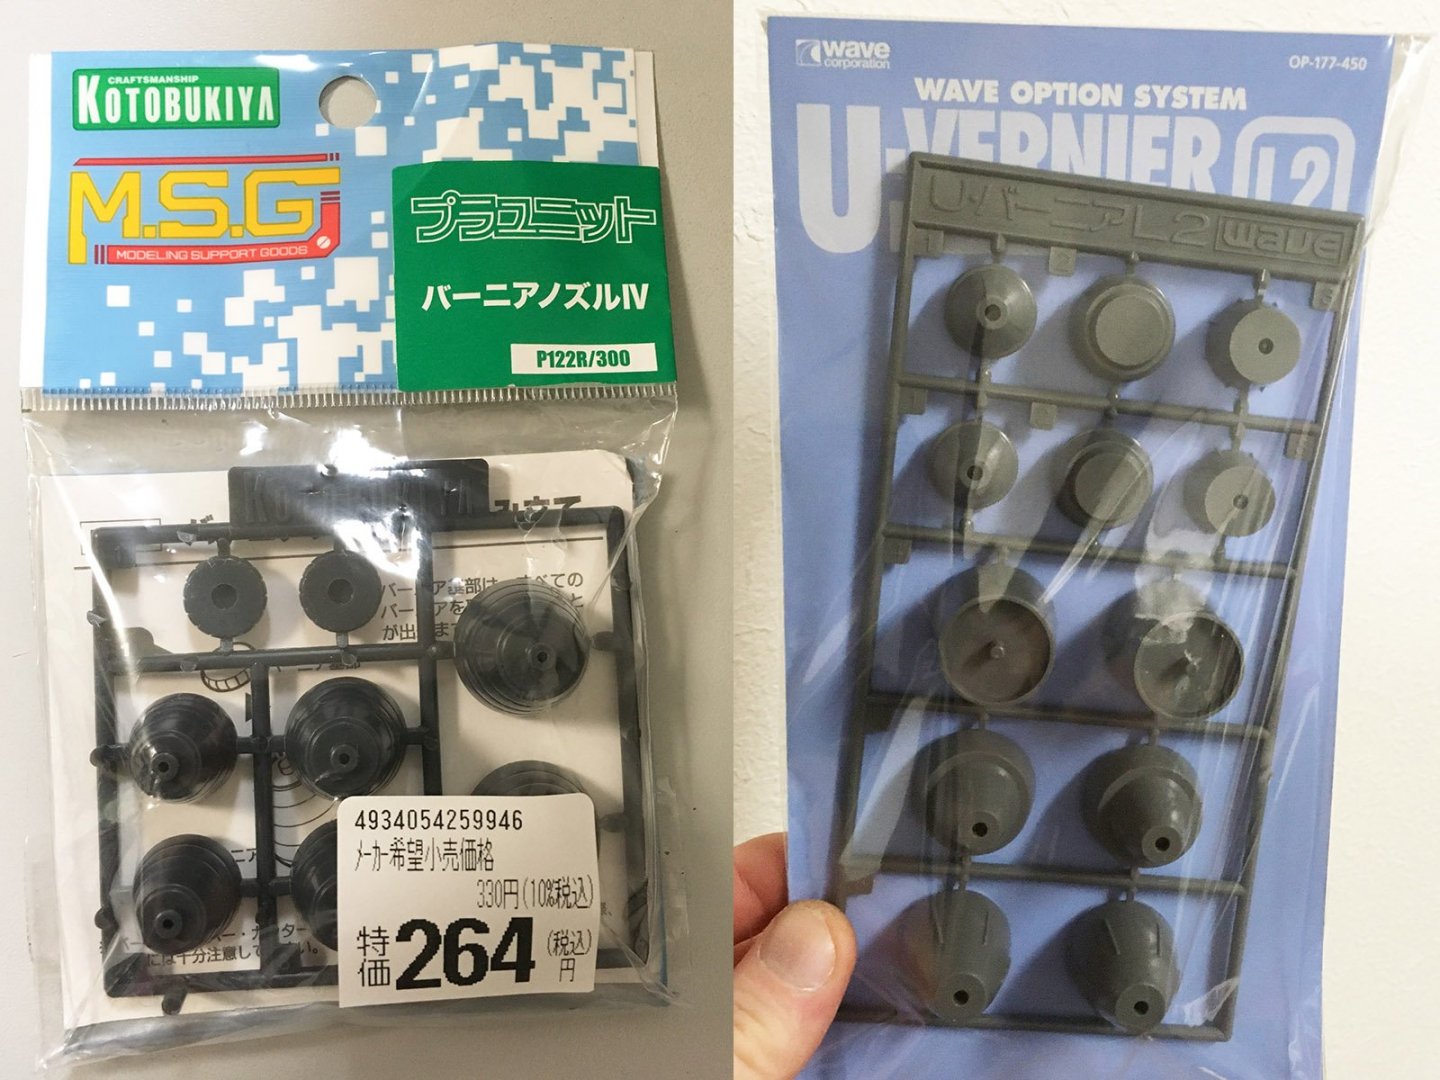
Well, that's because the electronics hadn't been installed yet. The LEDs aren't quite as bright as I'd hoped, but I love the reflections visible in ambient light. Now, there's one more substantial modification to be made before I can call this kit finished, and that's to add maneuvering thrusters to the sides: The line art is a little vague and inconsistent with the details, but the animation makes their purpose and function extremely clear. There's simply no way this fighter could possibly fly in an atmosphere without them, given the lack of wings... or even function in space, for that matter. And yet, Moscato's kit seems to have replaced them with... shallow, concentric circles...? I'm not even sure what they're supposed to represent, but they they sure don't look like they're supposed to. I really should've decided what to do about it before painting the hull, however. My Dremel made a terrible mess. Eventually, I ended up with two holes on either side to fill. Kotobukiya and Wave both have options for vernier nozzle upgrade kits, but neither was ideal; the Wave parts had thin, curved edges, and the Kotobukiya nozzles were too narrow and deep. However, by cutting the edges off the Kotobukiya parts and sanding down the Wave parts to fit them, I made four identical verniers with the right size, shape and depth to fit the look of the Gnerl's maneuvering thrusters. A hell of an improvement, if I do say so myself!


-
You did a great job painting those little figures, but... Isn't any toy or model kit a miniature? What are you proposing for this thread?
-
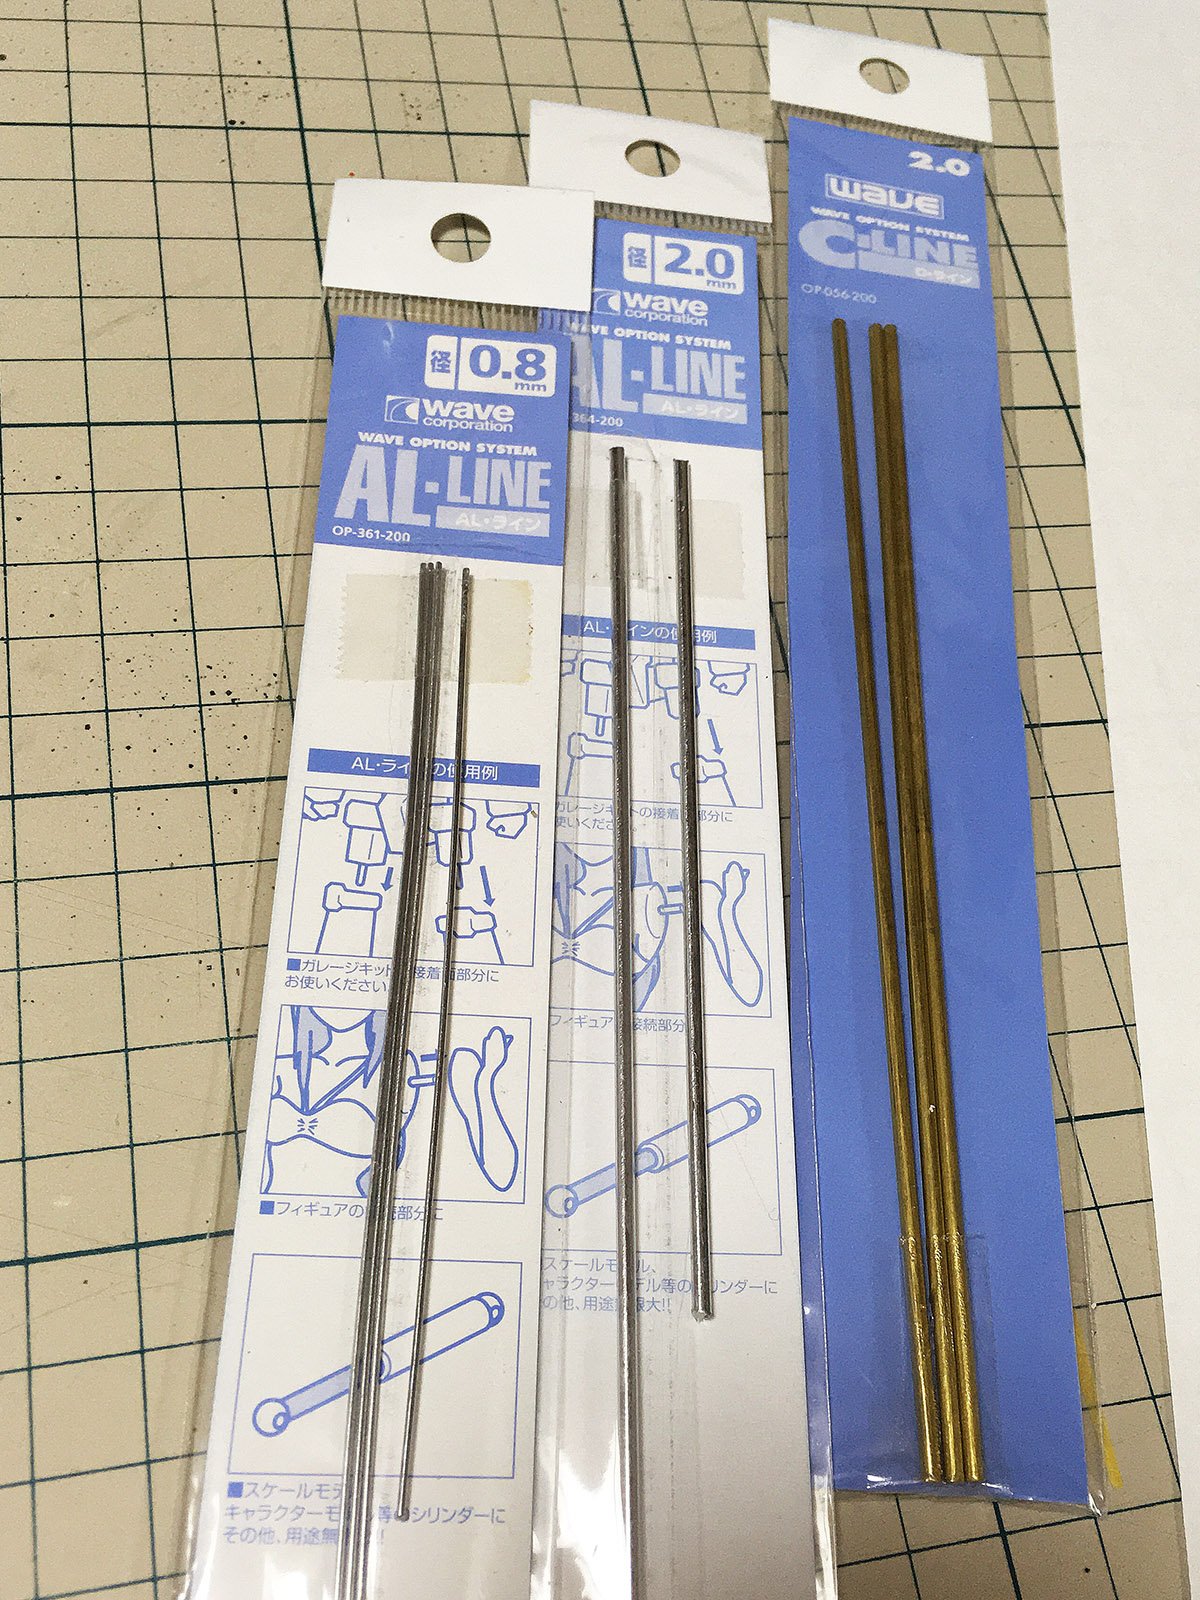
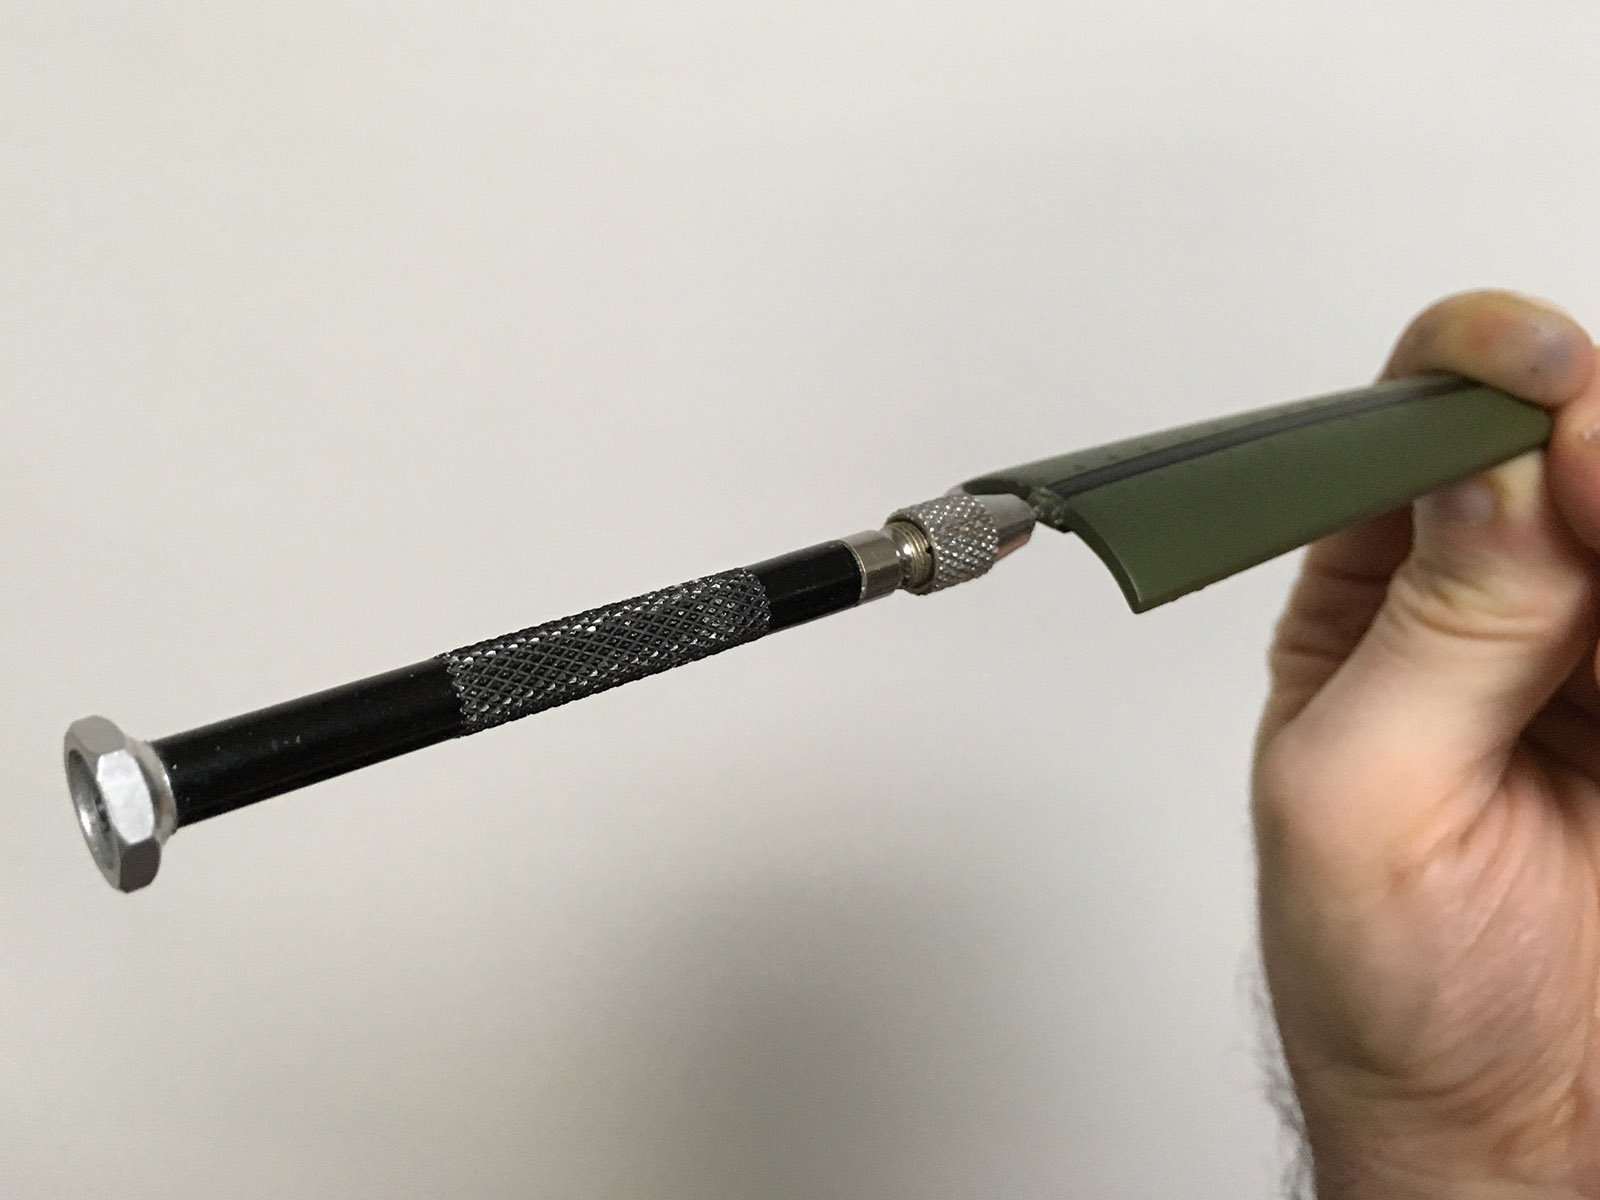
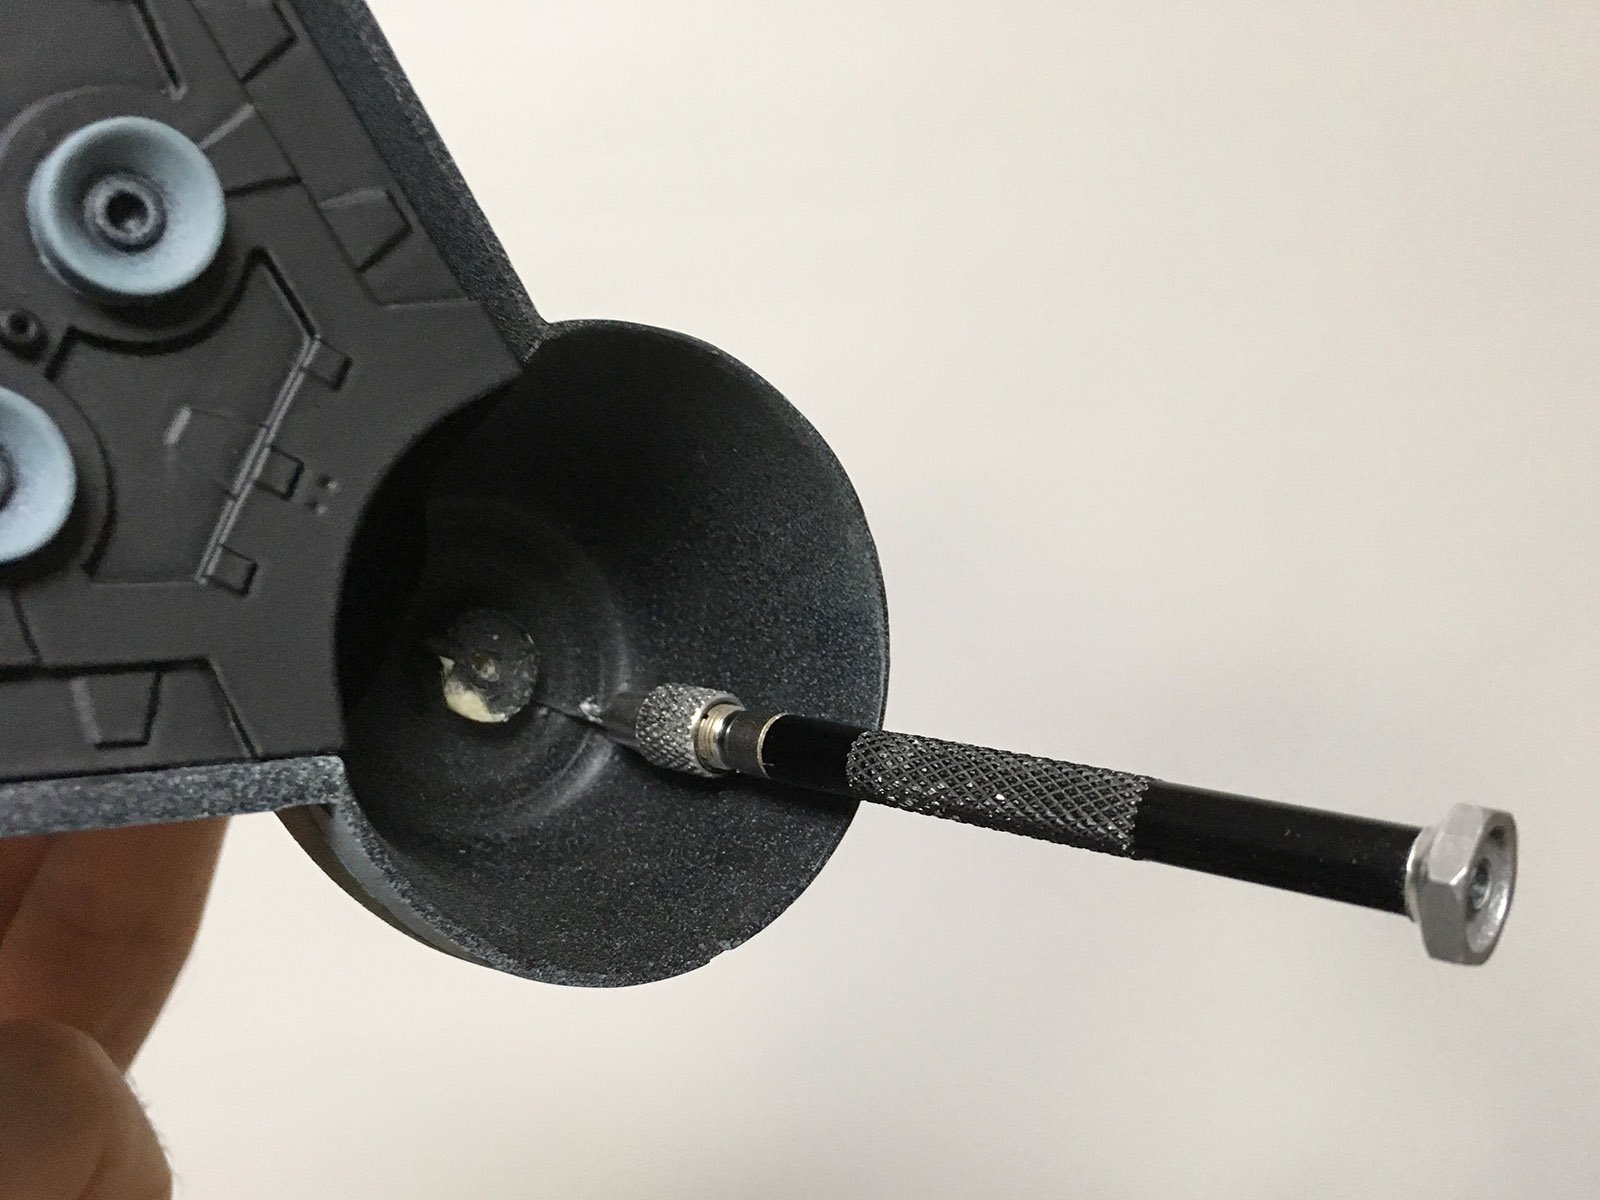
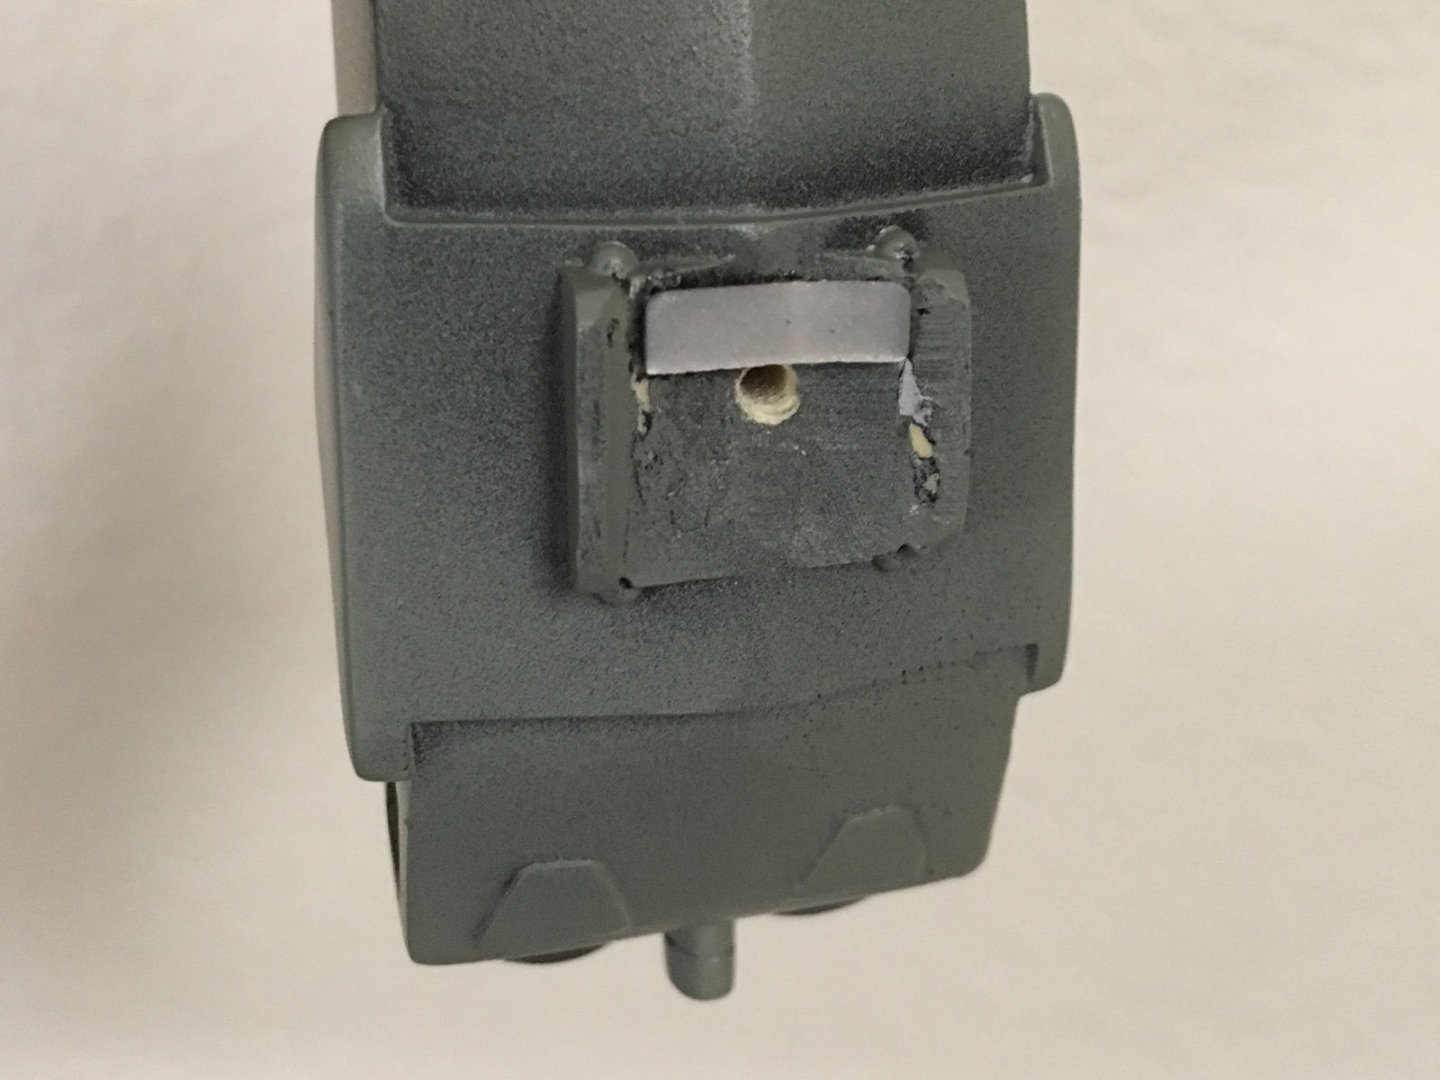
So, any self-respecting modeler should have a selection of these in their arsenal: They're extremely useful for reinforcing tenuous or fragile connection points on thin parts, like the Gnerl's distinctive airbrakes. I start by drilling a 0.8mm hole into the base of each airbrake... ...and corresponding holes into the engine housings, just below where the rocket boosters will attach. Metal wires of matching thickness are carefully fitted into the holes, so they'll protrude between the fuselage and the boosters. Once the holes are lined up and the airbrakes are connected, the angle of attachment can be adjusted as the glue dries. With metal wires reinforcing the structural integrity of the attachment points, I don't need to worry about accidentally snapping one of the airbrakes off... ...at least, not as much as I would have to otherwise.


-
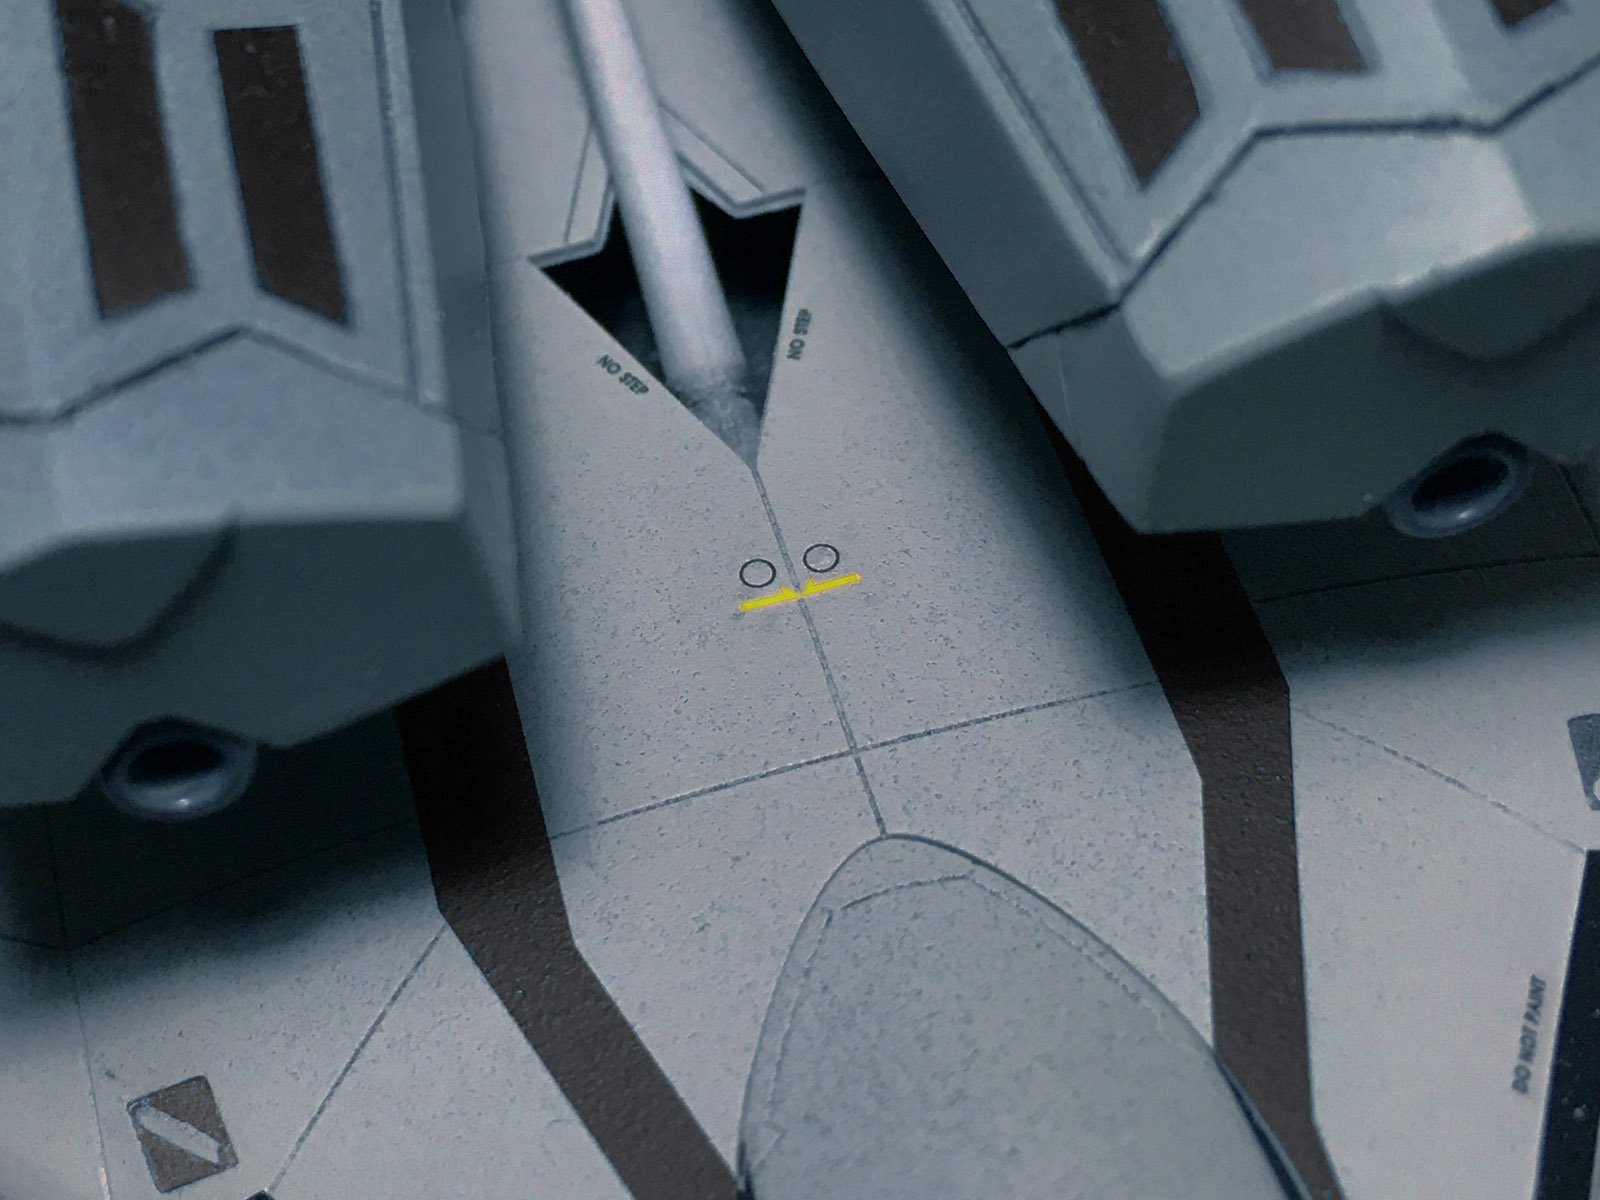
Oh, and speaking of the shoulder... I gave some serious thought to what markings might make sense there, based on the hypothetical purpose they'd serve in fighter mode... ...and I figured the yellow arrows might indicate alignment points -- magnetic locks, for instance -- which could've been used during assembly, or by maintenance personnel to confirm the individual parts were lining up properly during transformation. I added an identical pair of decals to the fuselage of my Hasegawa kit, for the sake of consistency.


-
The Transformers Thread (licensed) Next
tekering replied to mikeszekely's topic in Anime or Science Fiction
In Japan, packaging greatly impacts the value of an item on the secondary market... regardless of what it is. -
You obviously don't recall the film. There's no Rebellion, no Empire, and no peace treaty mentioned... although, to be fair, there's no backstory to contradict your version of events, either. In fact, there's no backstory at all, which was my biggest problem with The Force Awakens. How is it that the state-sponsored Resistance was such a pitiful little band of guerrilla fighters, while the mysterious First Order had greater resources than the Empire had? Well, Johnson did nothing to expand on Abrams' non-existent backstory either, so you haven't missed anything. In fact, Johnson threw out anything that referenced the Republic at all, leaving the First Order as the de facto government... but even that's assuming facts not in evidence. Say what you will about the prequels; at least they had a clearly-established setting, and the politics made sense. Lucas may not know anything about acting or dialogue, but at least he cared about worldbuilding. The sequel trilogy, however, has no internal logic or consistency, 'cause nobody put as much thought into it as we have. It's like listening to the Beatles play a Japanese pop song. It sounds great, but there's no emotional resonance because they don't understand what they're singing.
-
Terrific idea for a stand, and beautifully weathered. Inspiring work.
-
Great photography, and fantastic color choices!
-
Fantastic! I'm always jealous of you Americans at this time of the year.
-
Well, that Disney exec sure screwed up big time there...! Of all the new vehicles introduced in the film, only three got produced as toys (four, if you count the "new" A-Wing)... and of the hundreds of new characters, aliens/creatures, and First Order soldier variants featured in the film, only nine got unique action figures (twelve, if you count droids). That's a paltry sum for most toy lines; it's an absolute travesty for a billion-dollar hit like The Last Jedi. Hell, even the financial disaster Solo had more characters produced as figures!
-
Fantastic work, @jvmacross! I love your miniature Halloween Town. @Mog, how the hell do you carve pumpkins like that?

-
STAR WARS Merchandise Episode - 2
tekering replied to Black Valkyrie's topic in Anime or Science Fiction
Minus all those cobalt blue panels Revell added, of course. -
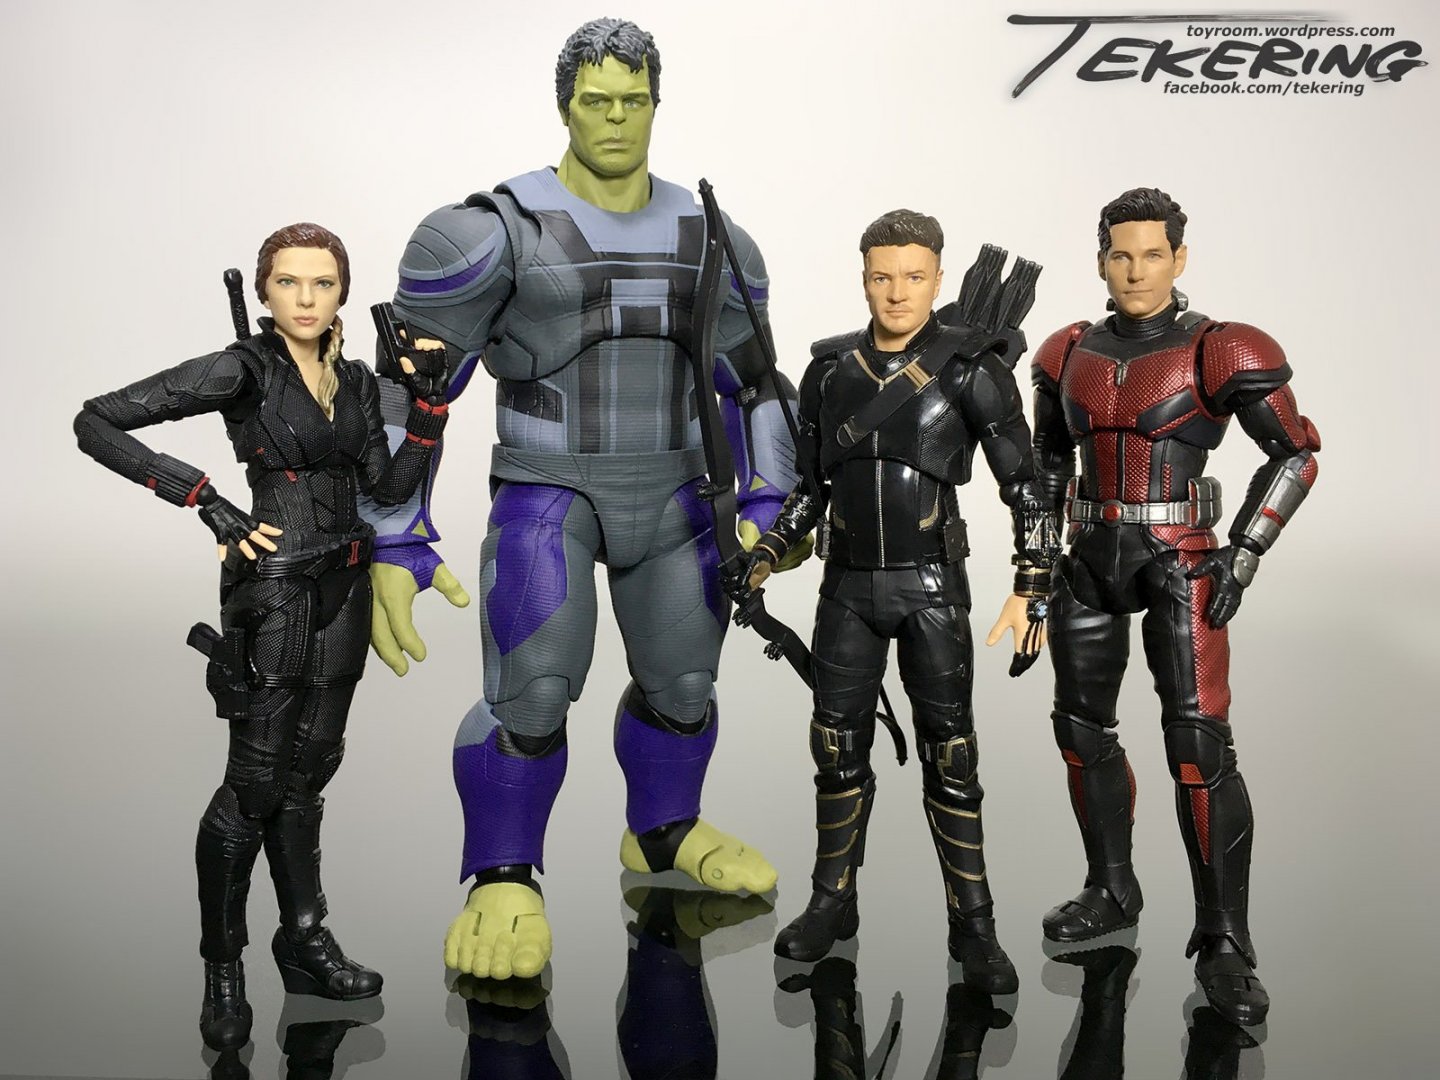
Well, they're slowly-but-surely filling out the Endgame team...