tekering
-
Posts
3913 -
Joined
-
Last visited
Content Type
Profiles
Forums
Events
Gallery
Everything posted by tekering
-
I'm keeping the option open... which is why these panels are removable: I don't think magnets will be strong enough to secure the boosters. I'm relying on the existing mounting bracket, simply modifying it so that it can be taken in and out. It should be recessed, I know, but it would seriously compromise the integrity of the booster mounts... at least, as Max Factory designed 'em. Maybe I can come up with a secure method that doesn't require linking the boosters together... Technically, no. As depicted in the line art and the animation, nothing should actually be visible there. Even the extreme close-up in DYRL is stubbornly featureless: When it comes to official products and packaging, however, there is no consistency whatsoever! The more research I do, the more confusing it becomes.


-
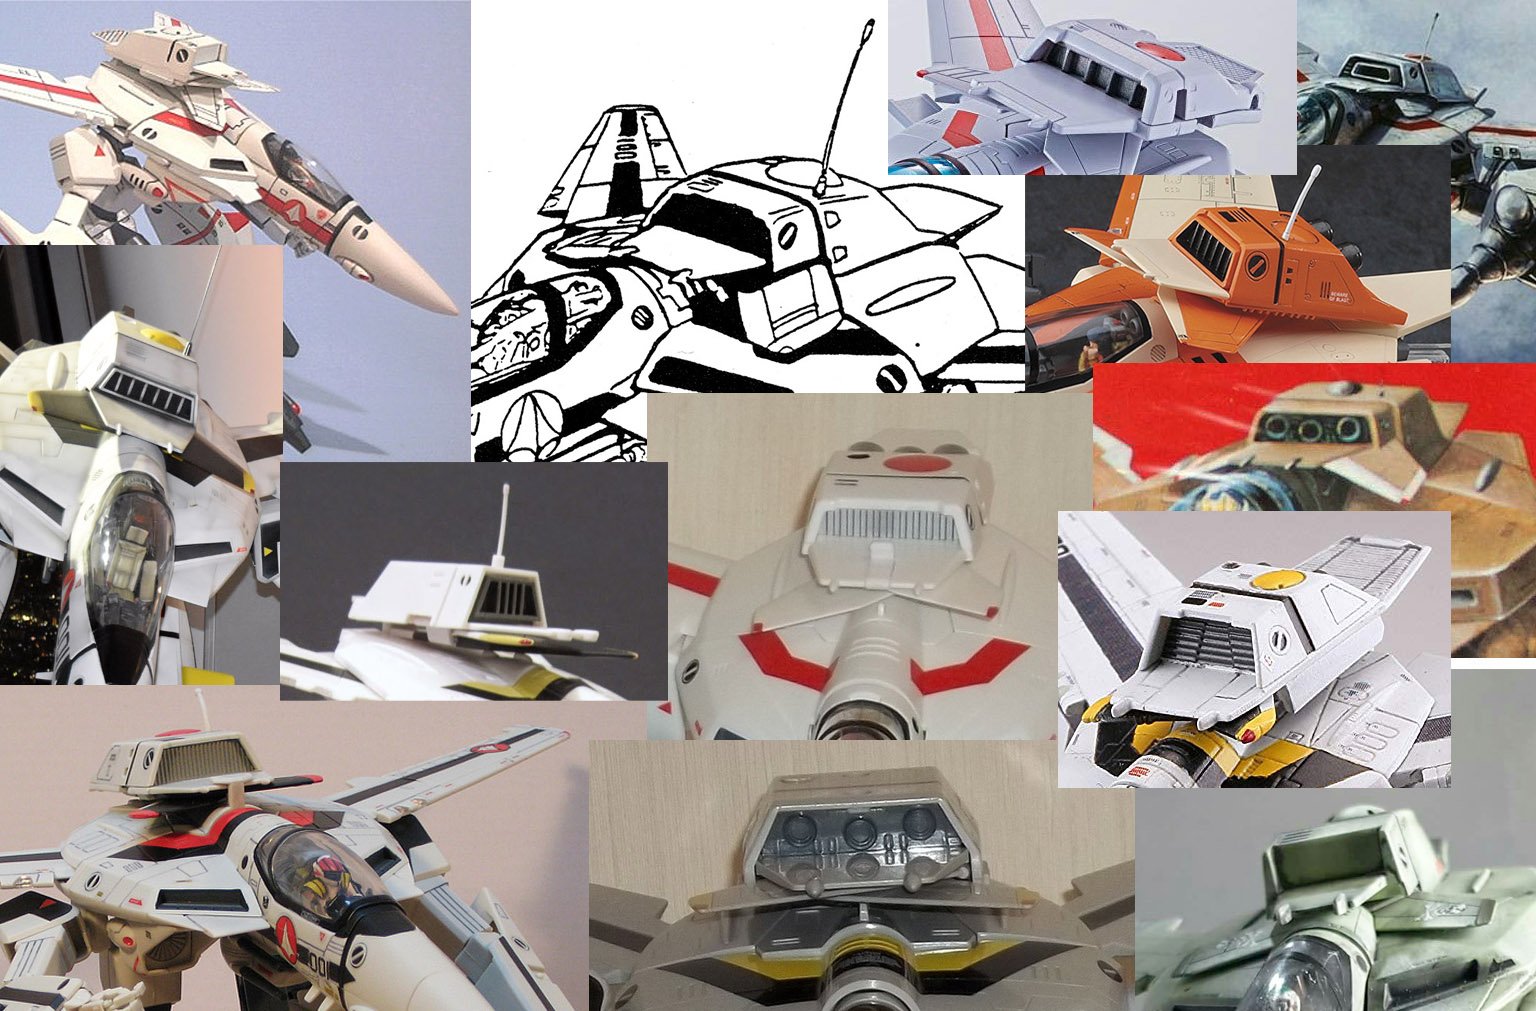
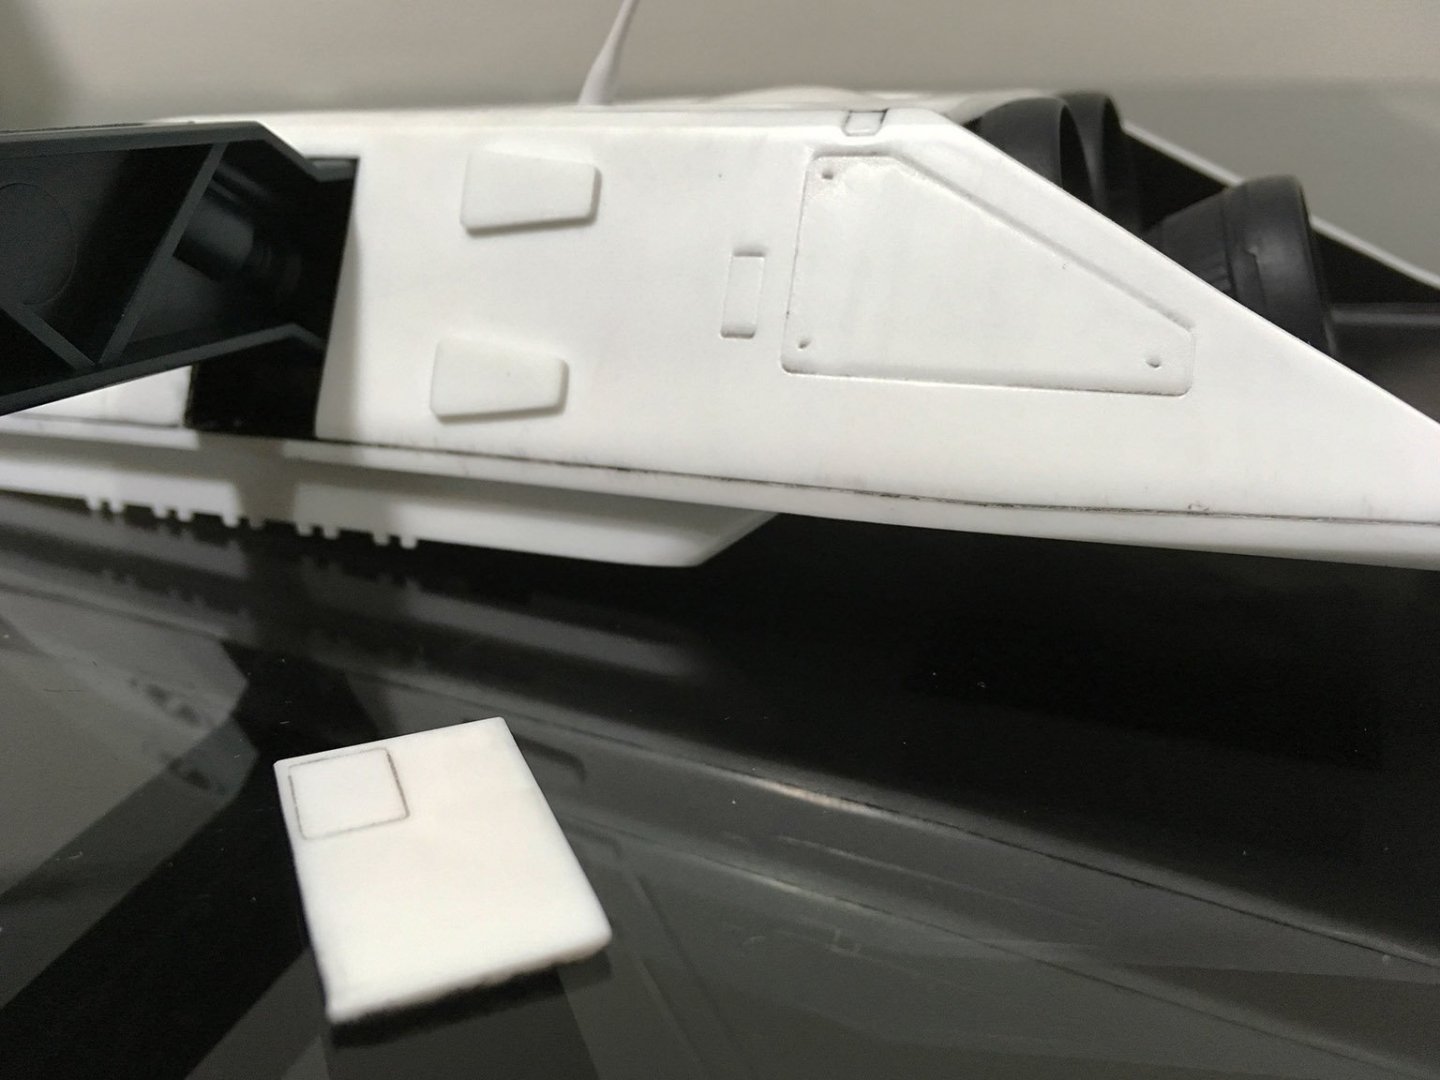
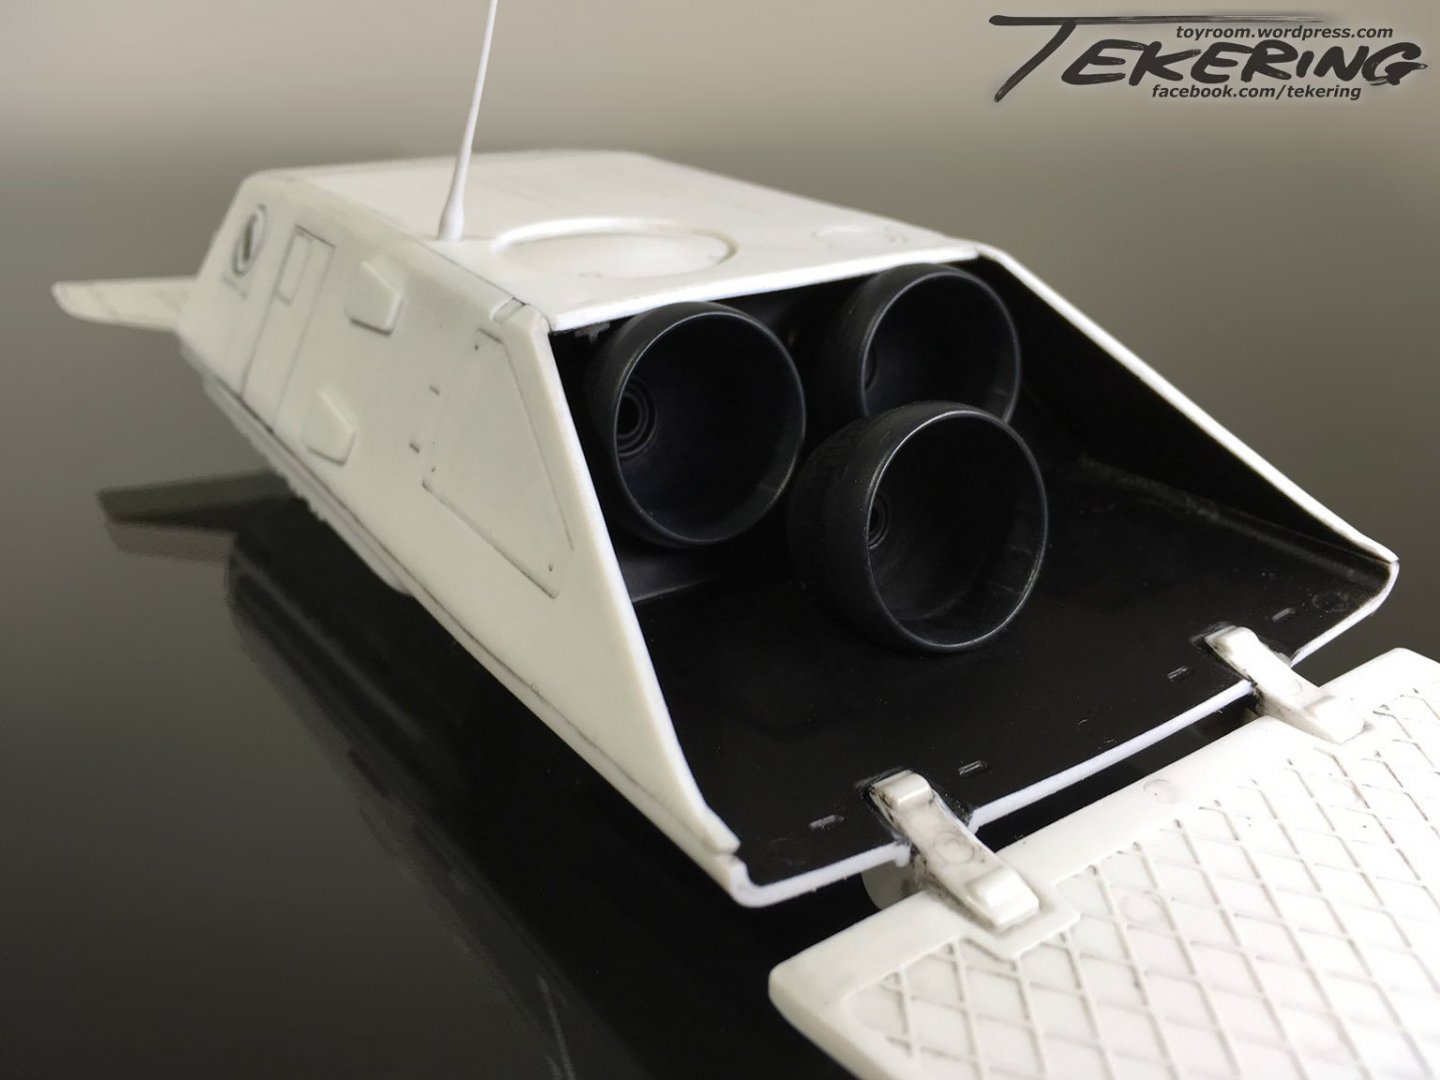
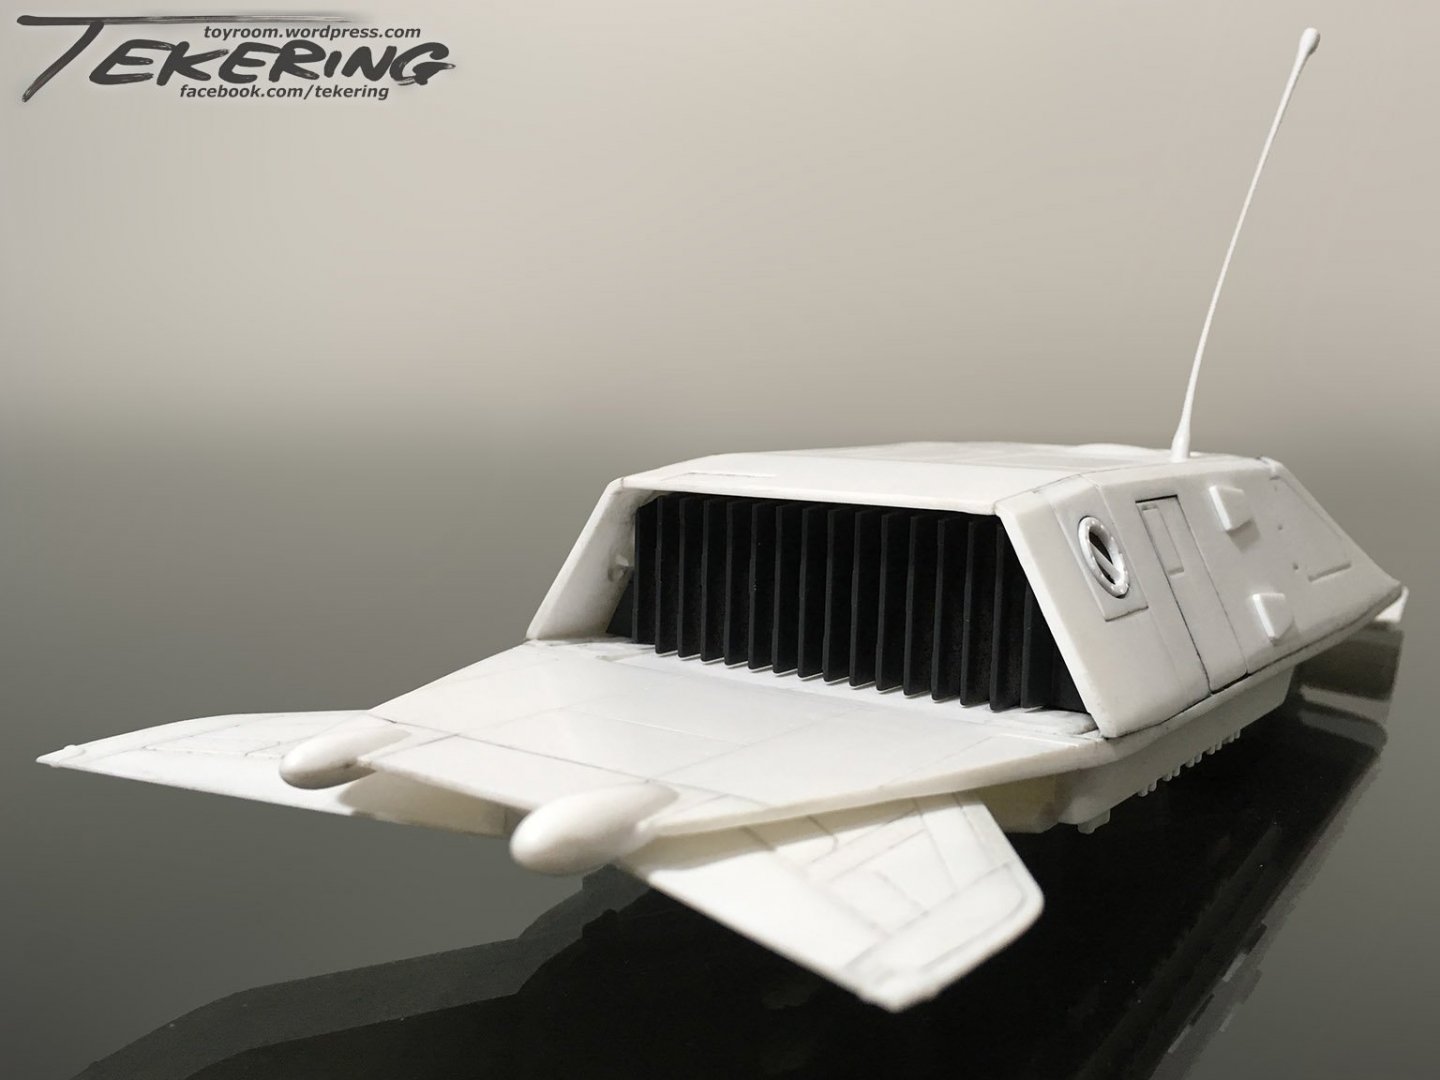
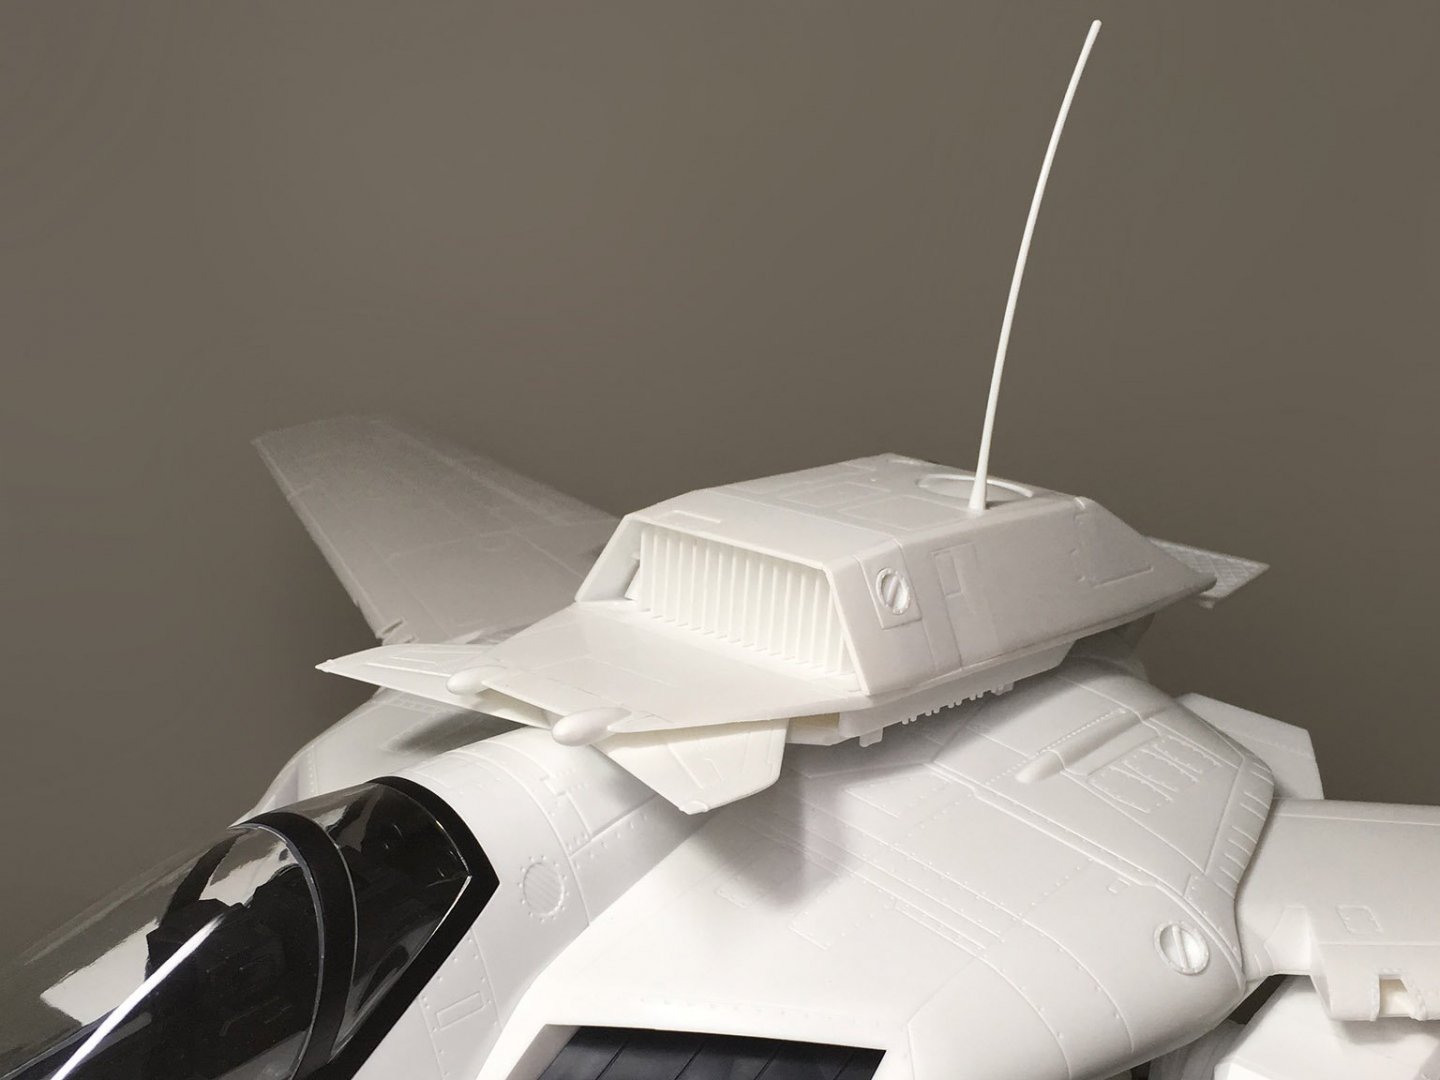
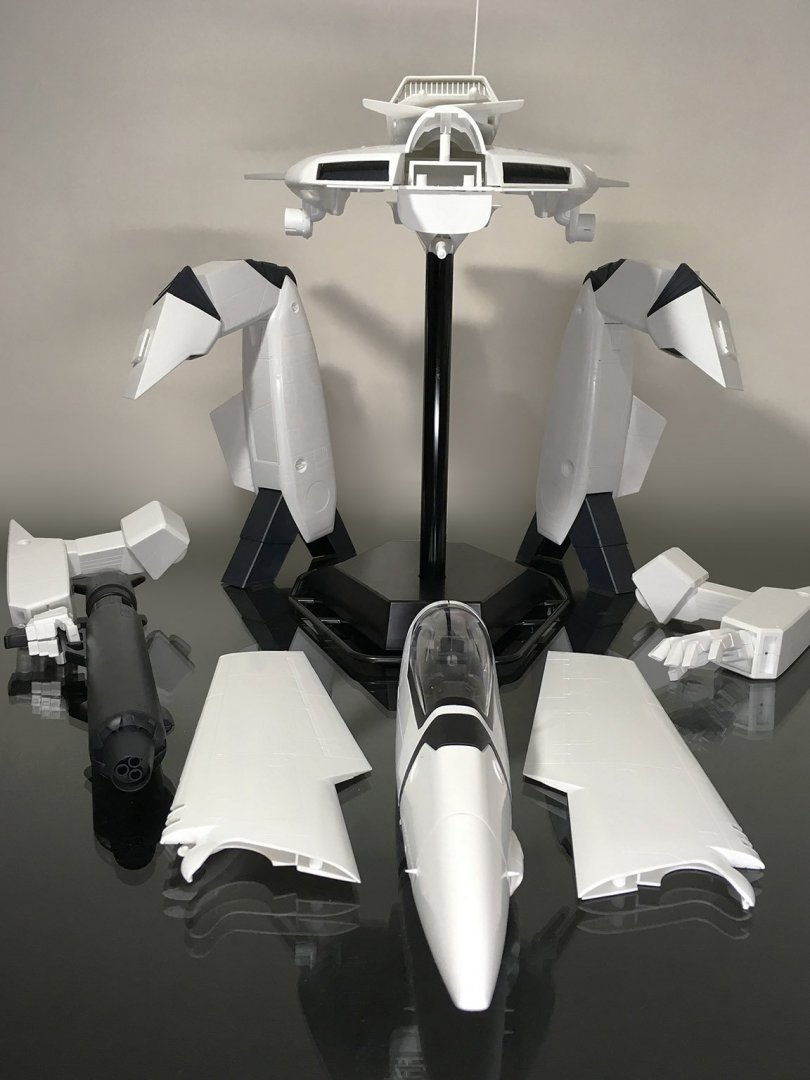
I make it 38mm in diameter, 382mm in length. I doubt that. The backpack pieces (including the folded wing flaps) are on a single sprue, and the panel that stick out the back would prevent it from fitting into fighter mode. The shape is accurate, and I think it's a good model to emulate. The detailing is all wrong, though. A great deal, yes. What came as two separate pieces I cut into ten, and selectively removed edges (mostly cutting along sculpted panel lines) to create a smaller, more trapezoidal shape once the surfaces were glued back together. I also made a thinner, more detailed antenna than my earlier attempt, built a special mounting plate to support the thrusters, and added those ubiquitous triangular shapes on either side (the most consistently seen panel detail on any drawing, toy or model, and the one Max Factory neglected to put there). The folded wingtips and trapezoidal panel above them were both removed and turned upside-down, so the sculpted detail on the panel lines would be visible. Now I can move onto the next challenge -- getting the legs and feet into a position that supports the model without requiring the stand...
- 1065 replies
-
- 2
-

-
- max factory
- dyrl
- (and 1 more)
-

Your most recent Macross or toy purchase! General thread.
tekering replied to Gakken85's topic in Hall Of The Super Topics
ANH Han Solo standing beside a First Order Stormtrooper, you mean? Or the fact that Lando Calrissian is literally in two places at once? -
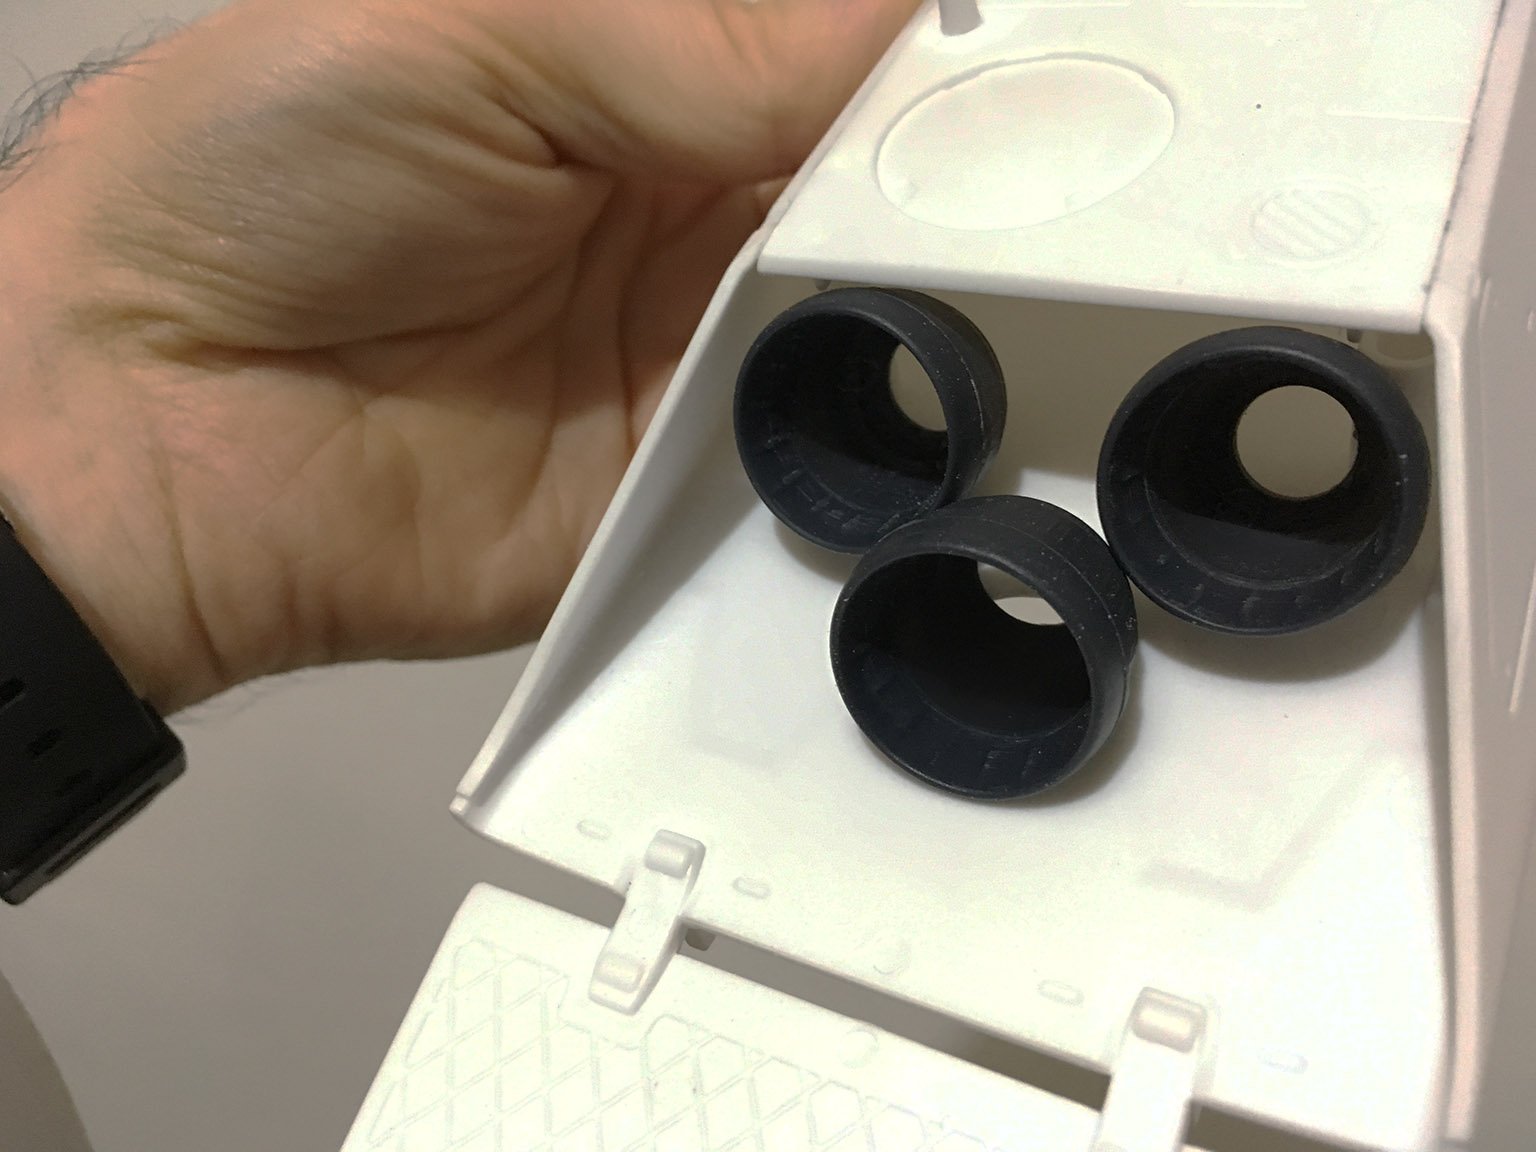
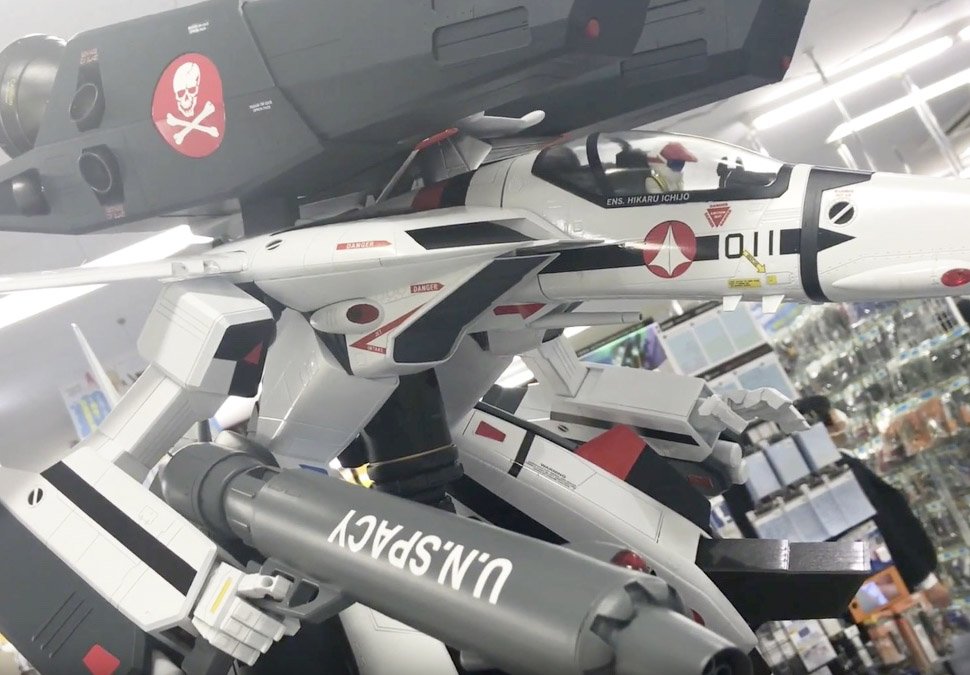
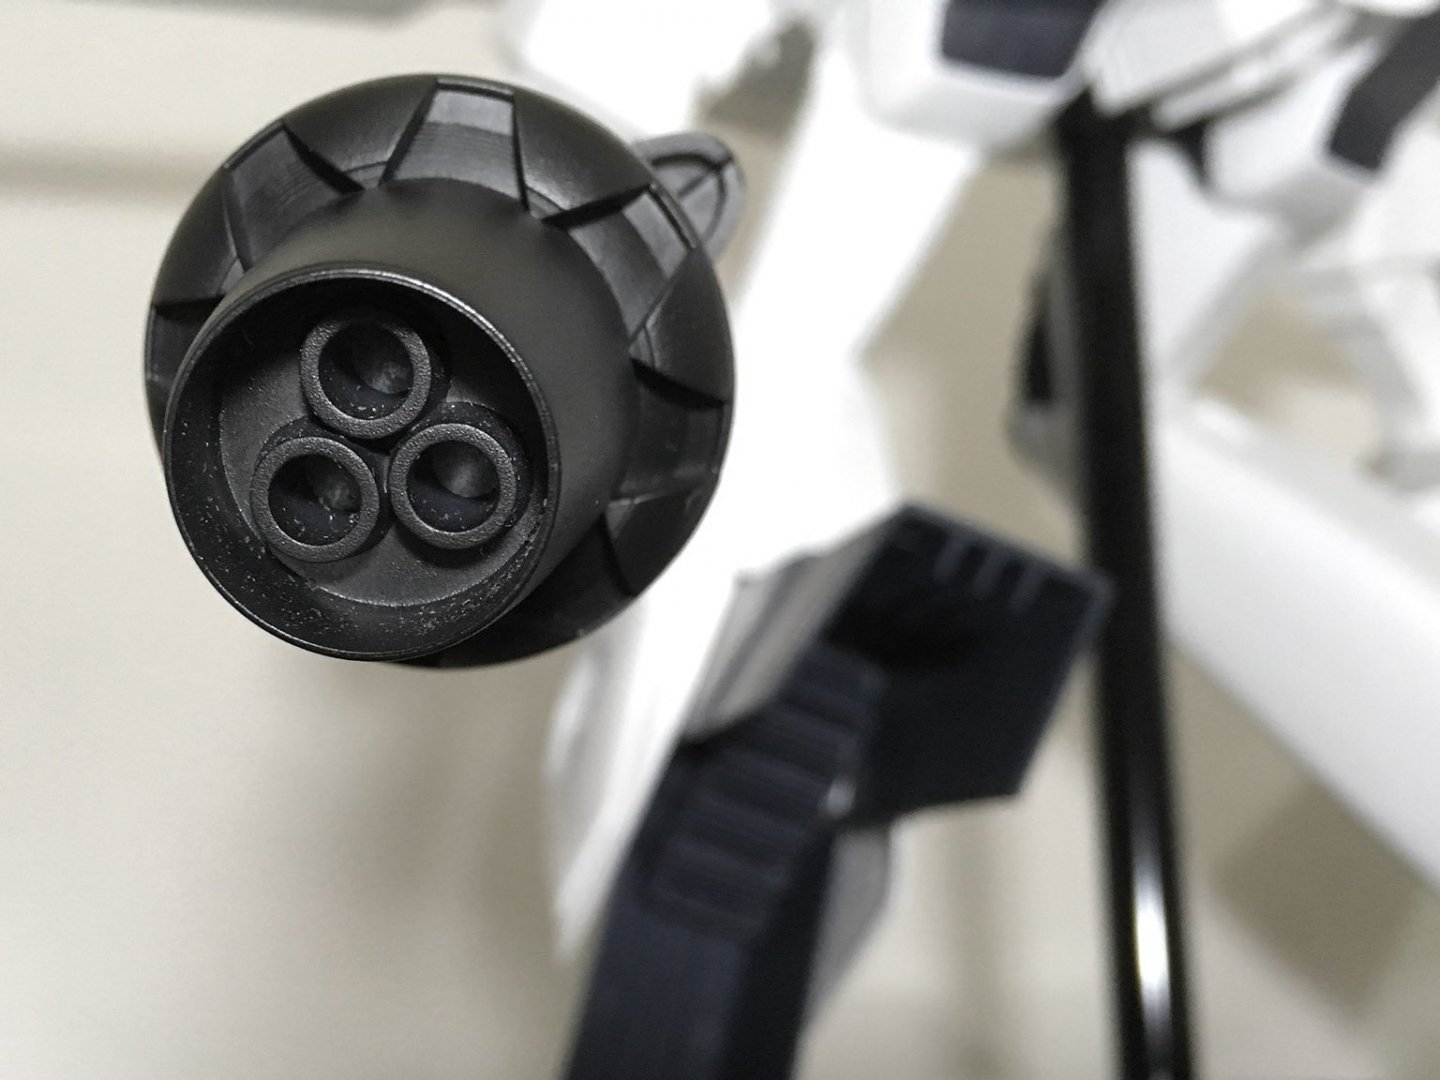
Sure, the gap's visible on both the display models... ...and so are the absurd thrusters bulging out of the backpack. Rattlecans for me.


-
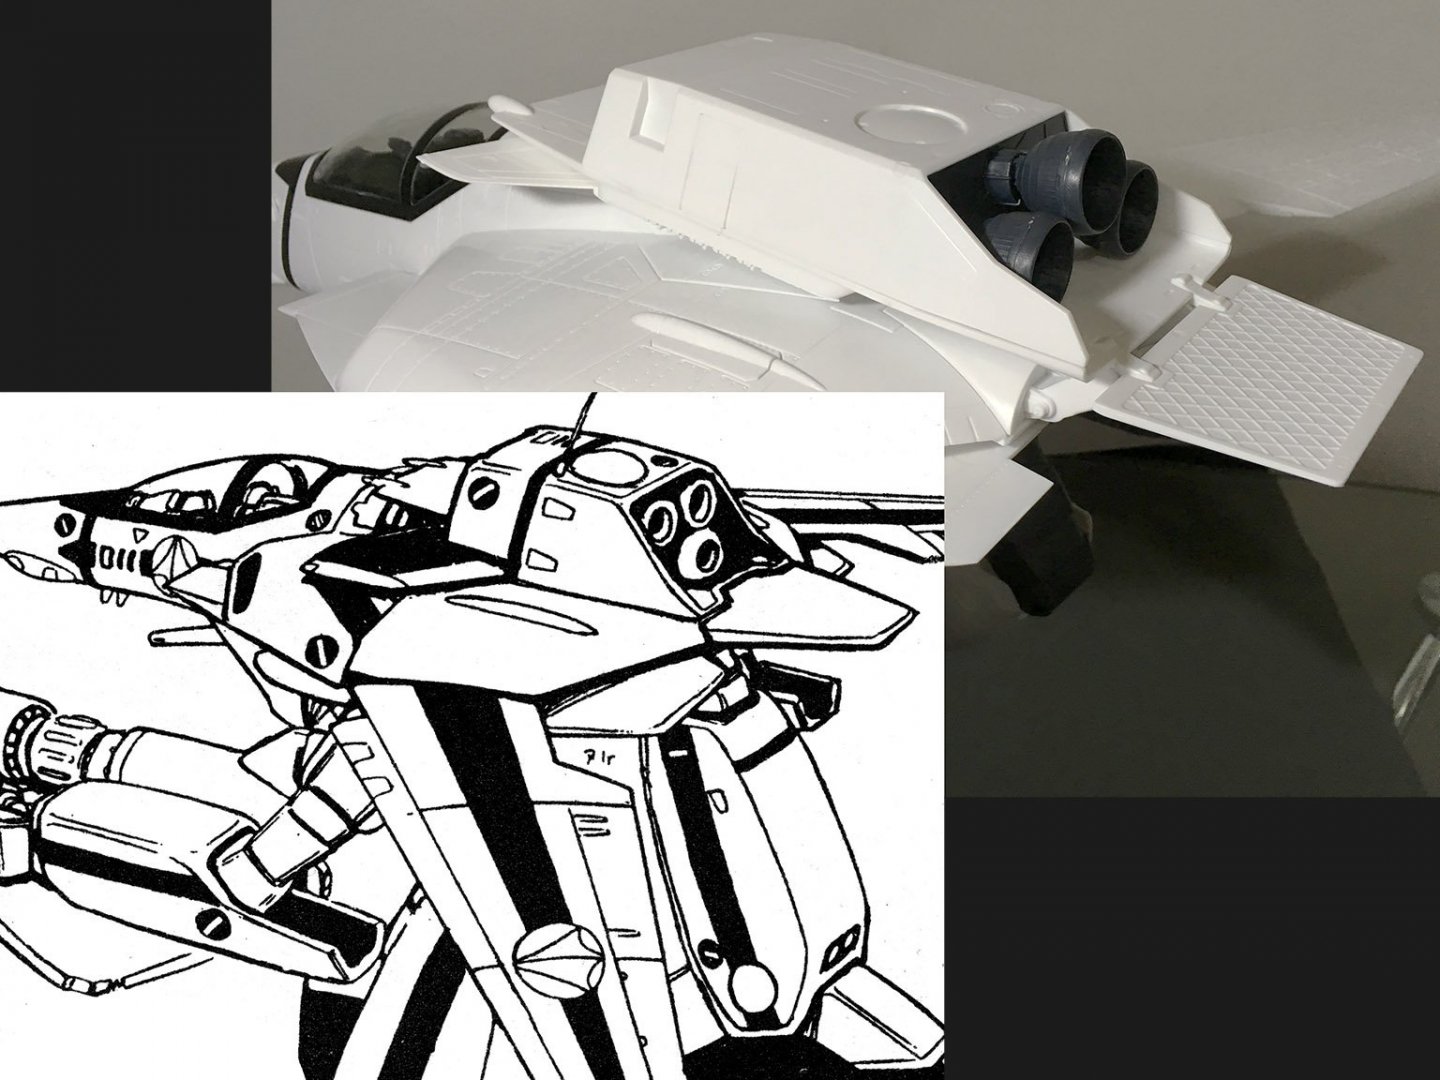
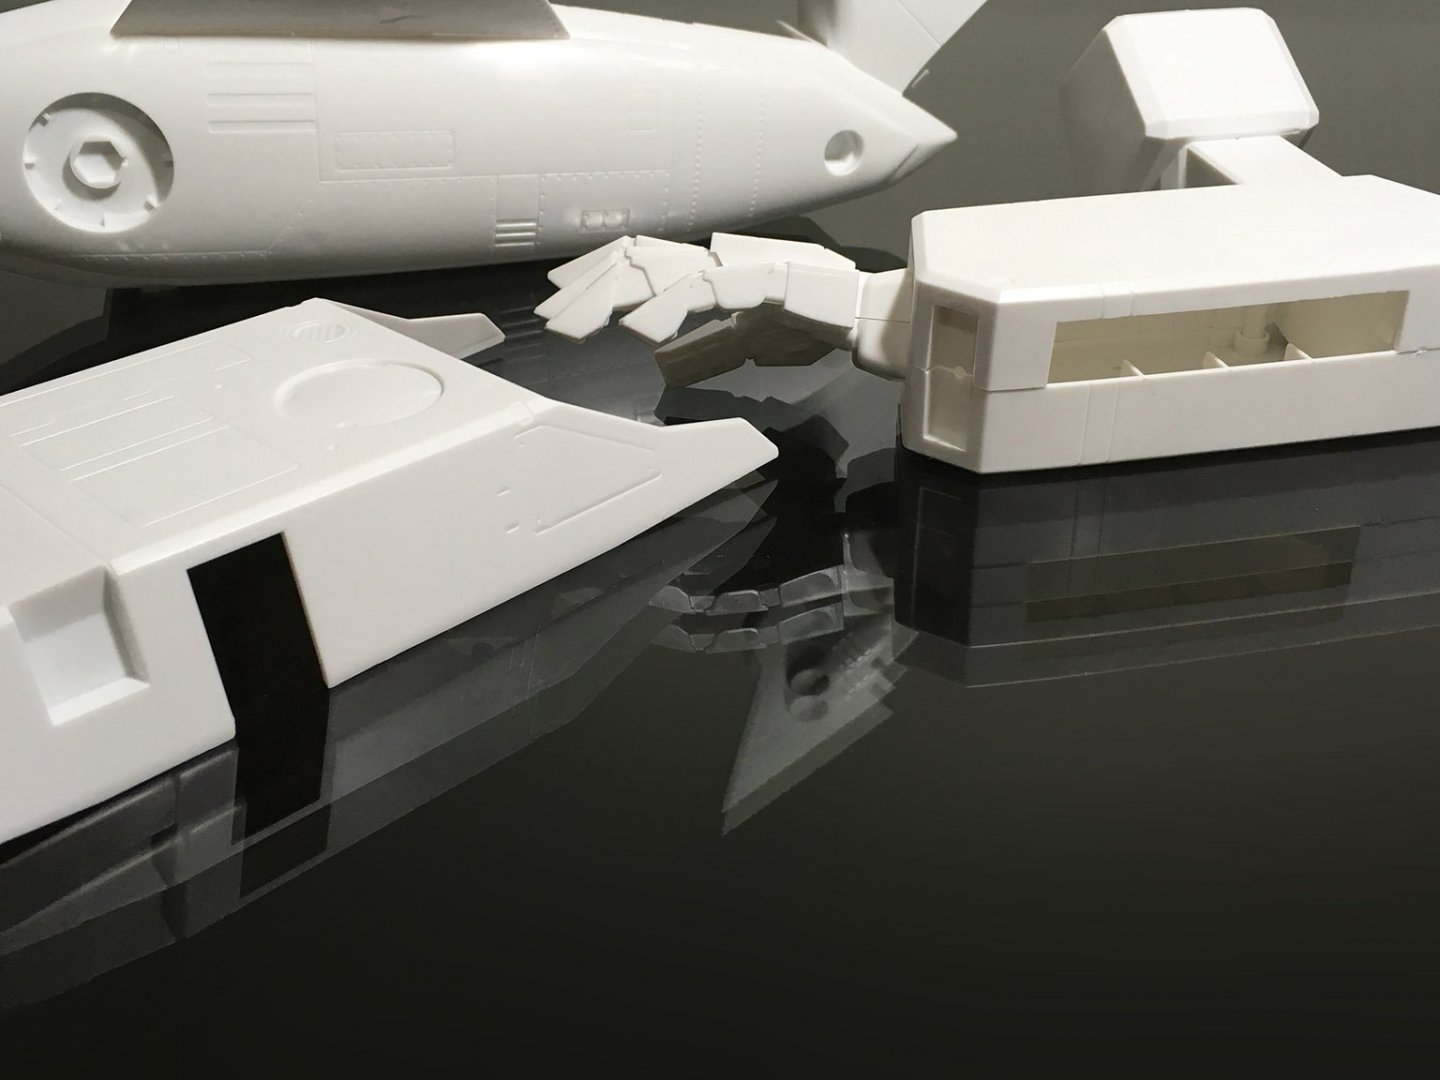
It's absurd, yes. The mounting plate can only be mounted one way, and the thrusters end up sticking out like the boosters on the space shuttle. My solution required cutting the back half off each thruster, gluing them to each other, and ditching that ridiculous mounting plate altogether. I'll have to scratch-build some kind of nozzle assembly that looks like they're actually attached to something.

-
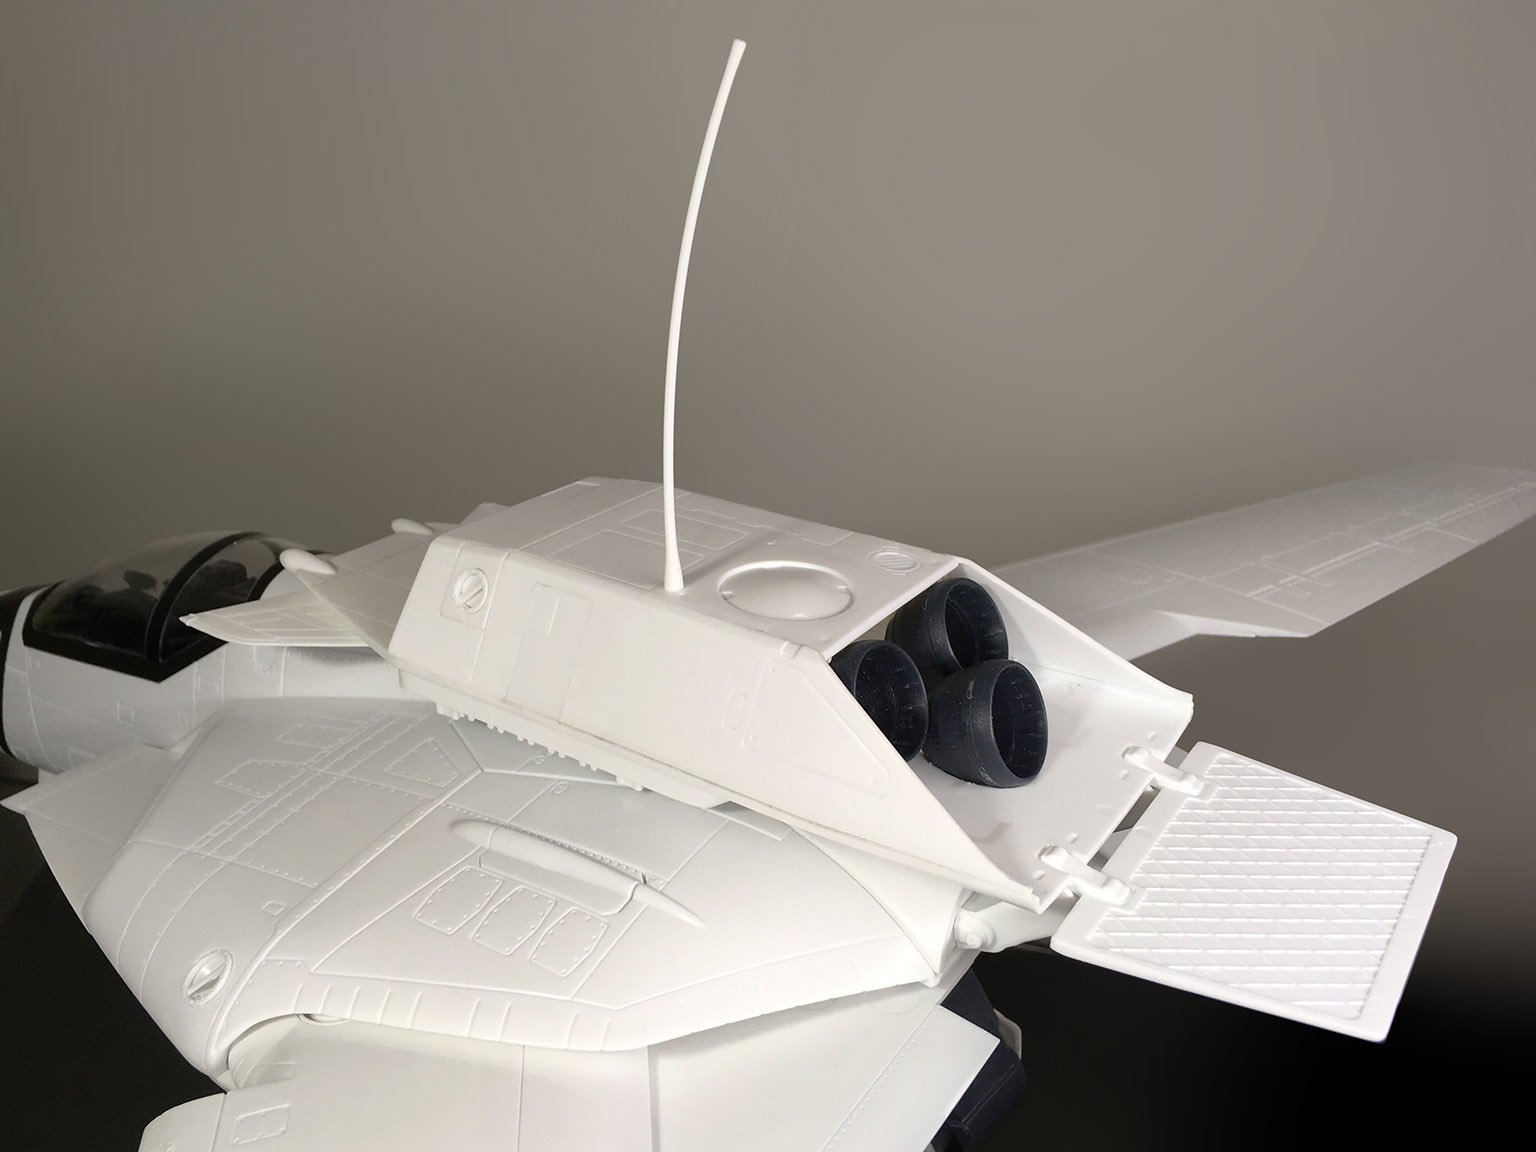
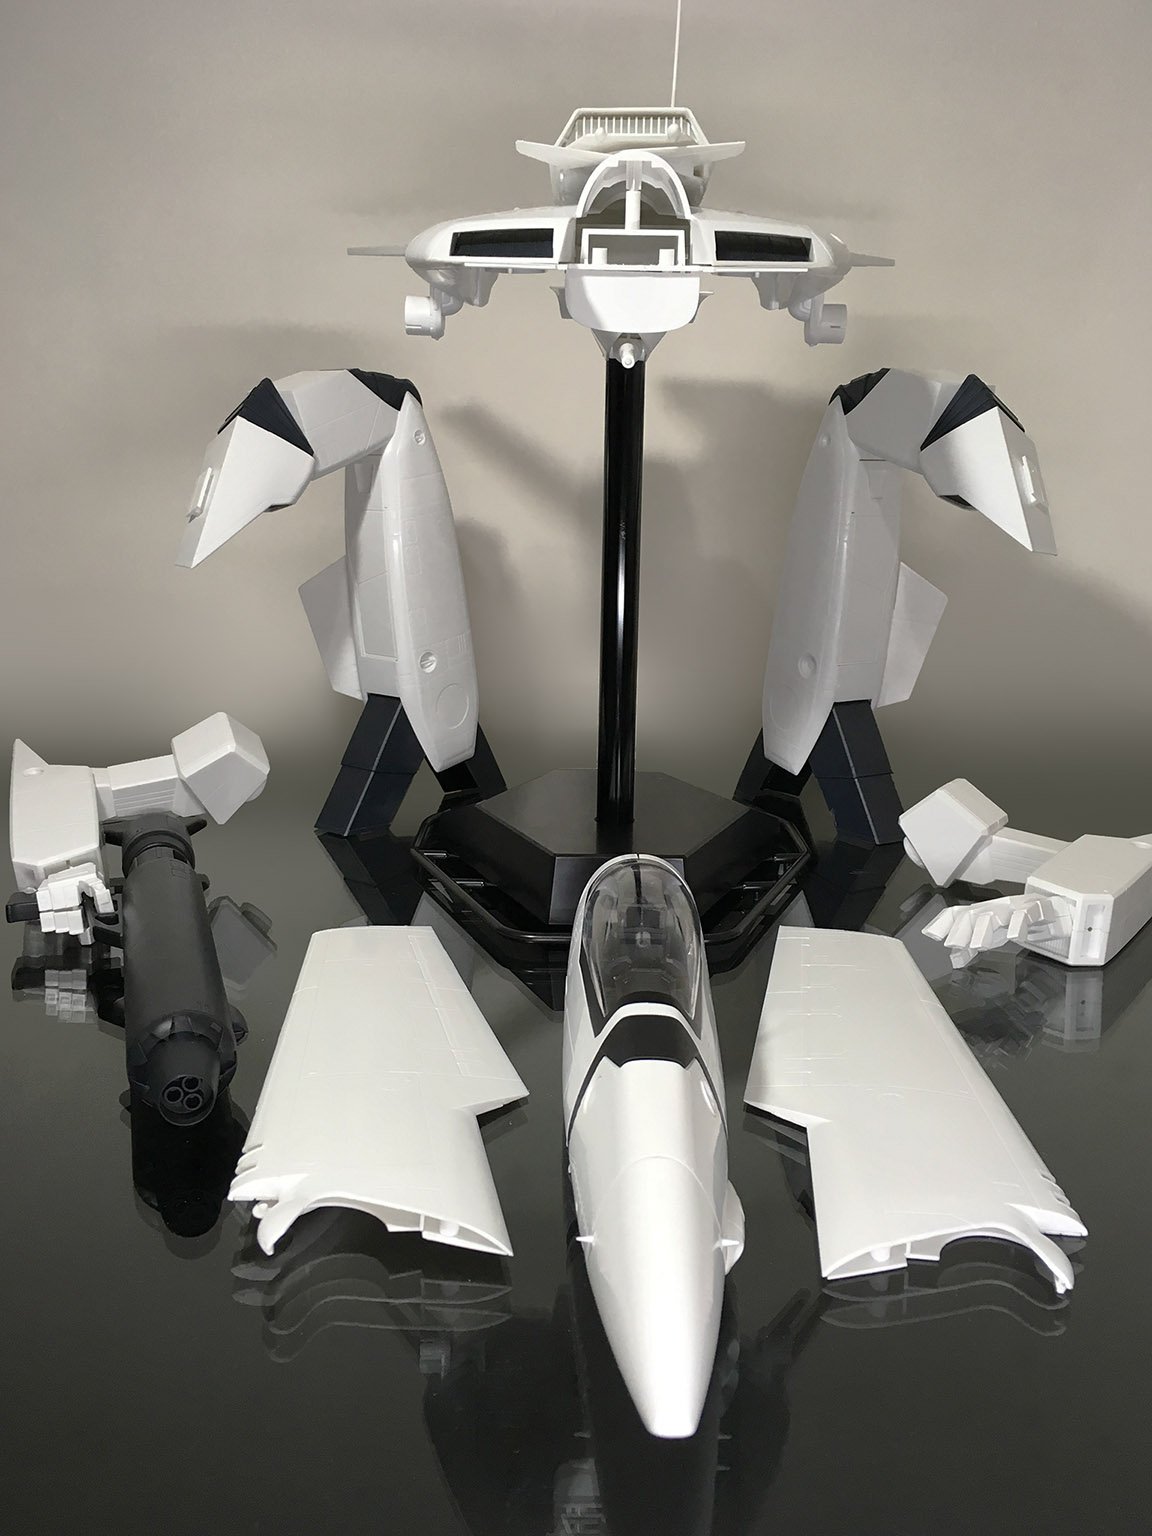
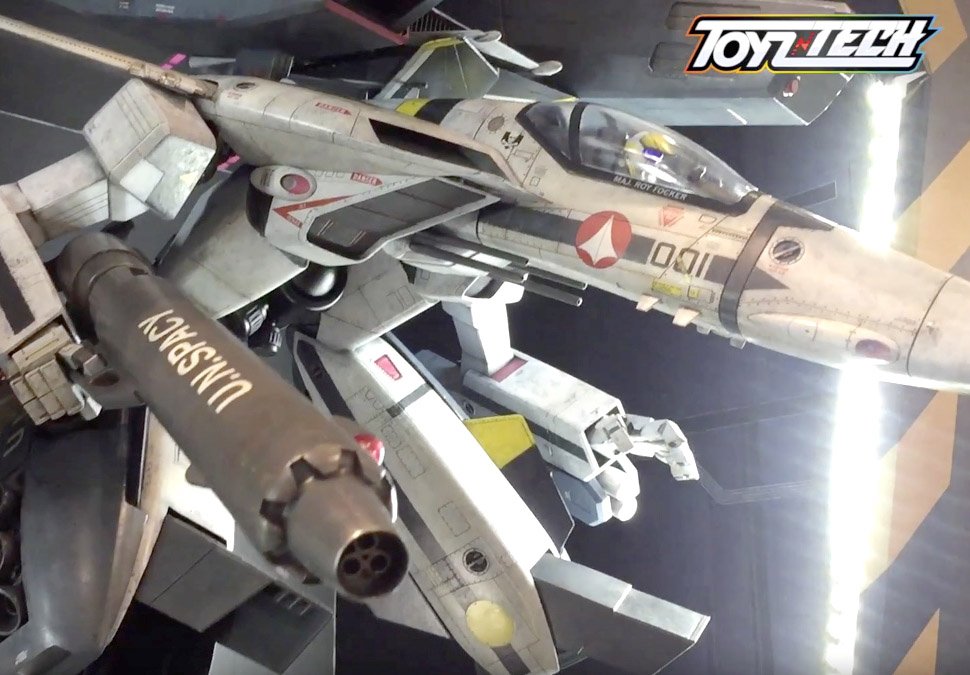
Well, it's still not ideal, but I think the backpack looks a damn sight better now... Absolutely. The arms, legs, wings and FAST packs can be securely attached (and reattached) without any glue required. The nosecone might need a little reinforcement, though, if you want it removable as well... but it could be done with only minimal effort.

-
Fascinating cultural differences! In North America, we traditionally give presents to others on Christmas. The presents are wrapped so that the contents are a surprise to the receiver. Didn't realize things were different in Hong Kong. There was a Macross TV movie?
-
At least you can pose the battroid: Trying doing that with the vintage kit!
-
Well, screw it. This backpack is just all kinds of wrong. I'm just gonna scratchbuild a better one instead. If Max Factory ever gets around to doing a battroid kit, I sure hope they ditch that backpack and start over! "Build a block?"
-
I've got a tip for you... Keep it in the box, man. Vintage kits just aren't worth the time and effort, when more accurate, modern versions are available. Hasegawa 1:72 kits are highly regarded for their accuracy and fine detail, and Bandai did an entirely new variable model kit of their own a few years back. I think you'd find them easier and more satisfying to build, and modern standards of articulation give you a great deal more display options as well.
-
Well, the hands, the pilot, and the cockpit details are all DYRL-specific, so you'd have to get pretty creative if you want a TV-accurate Hikaru VF-1J... There's not a lot of wasted space in the box to begin with, though... and unless you get the pieces removed from those massive sprues, they're not gonna fit into a smaller box anyway. No, just the "Gawalk."
-
Star Wars: Galaxy of Adventures (YT Series)
tekering replied to spacemanoeuvres's topic in Anime or Science Fiction
Count me in. Thanks for the heads-up! -
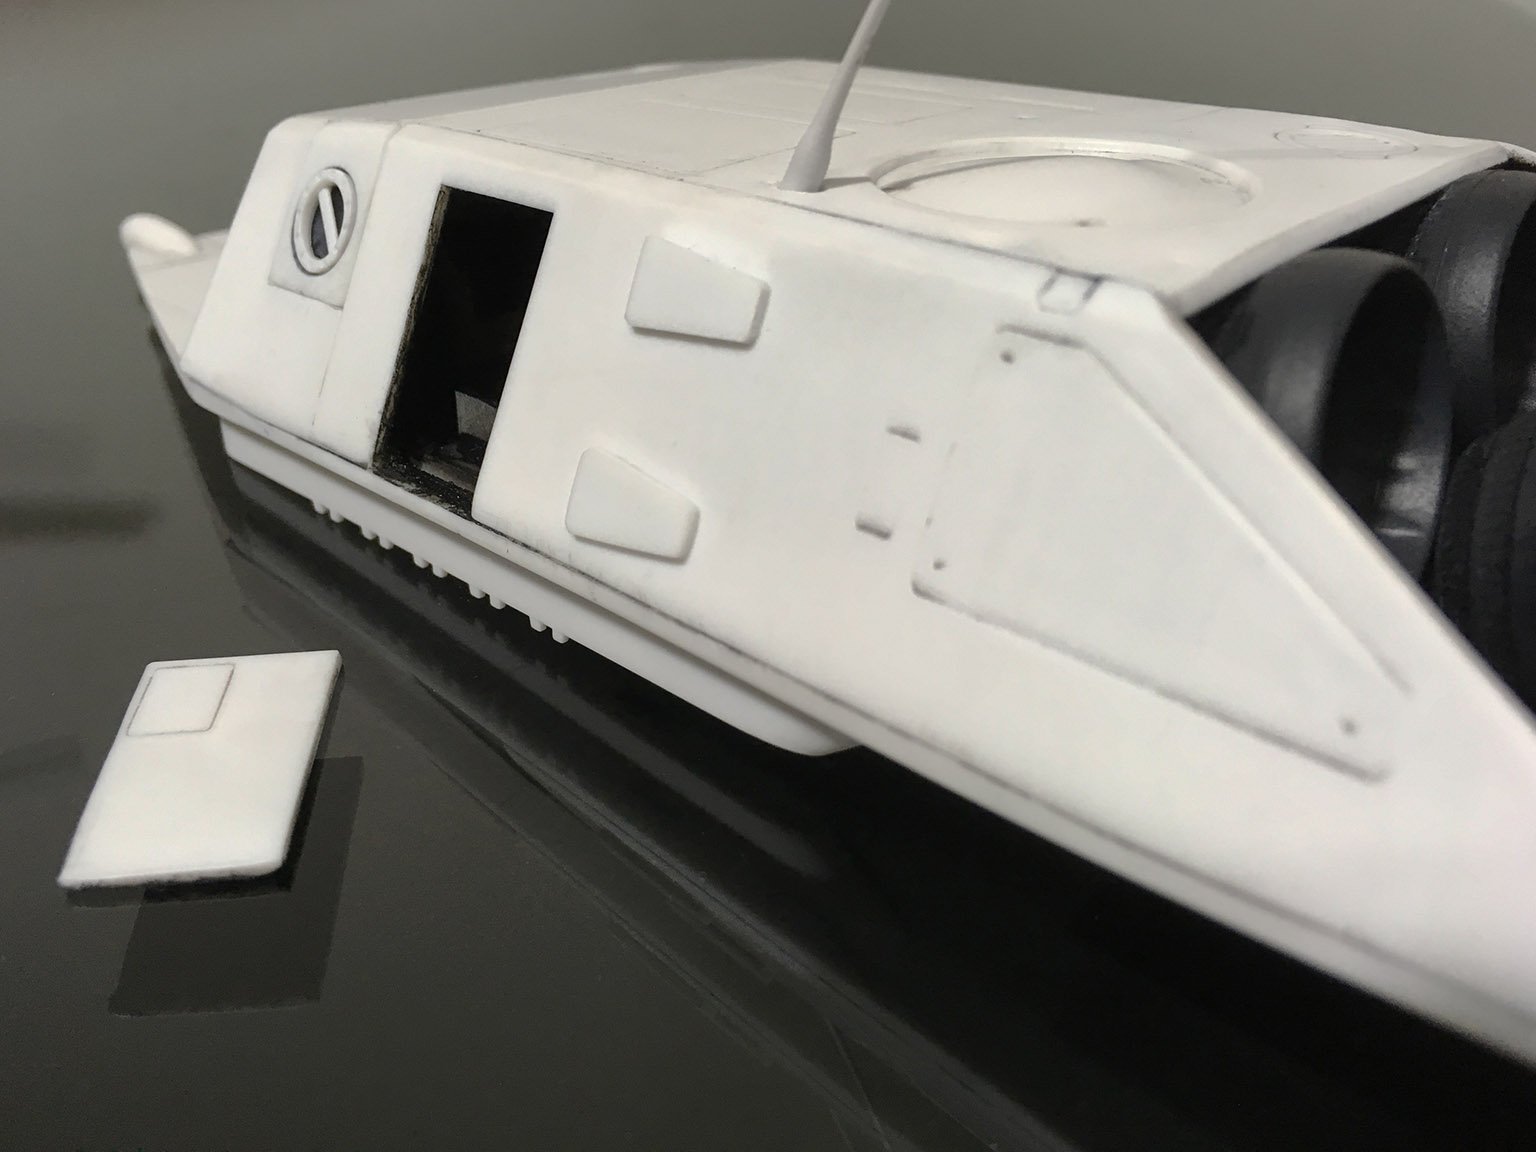
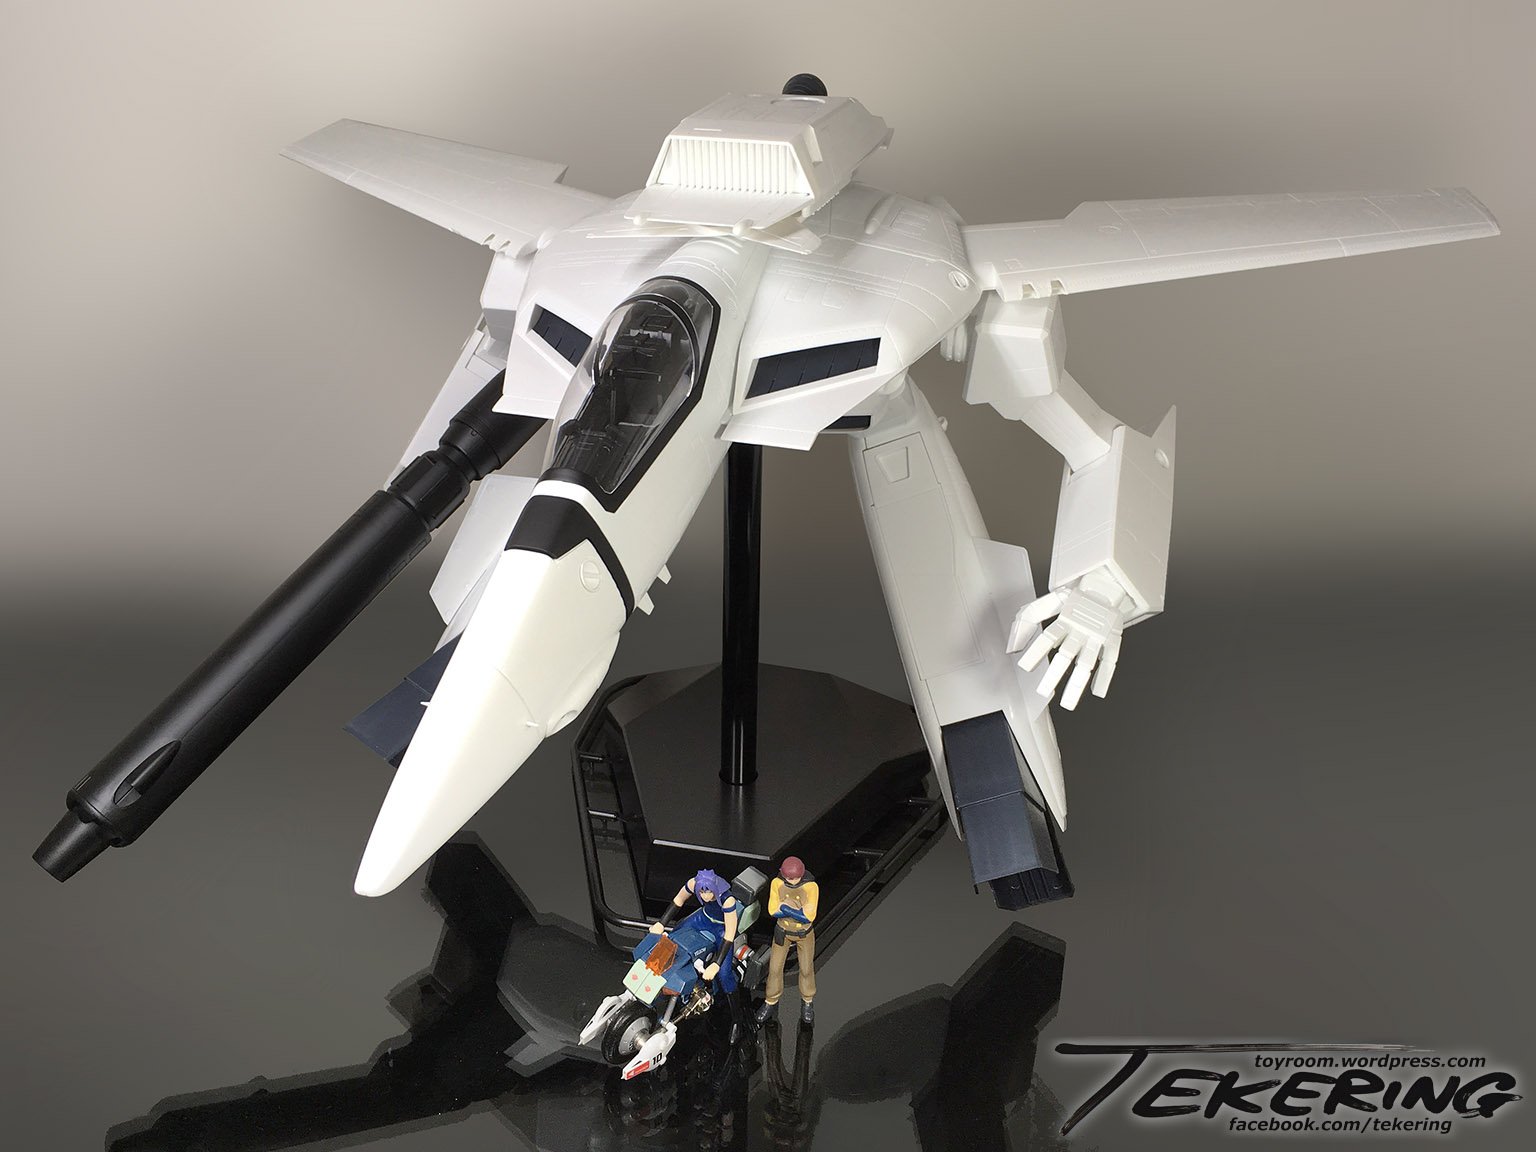
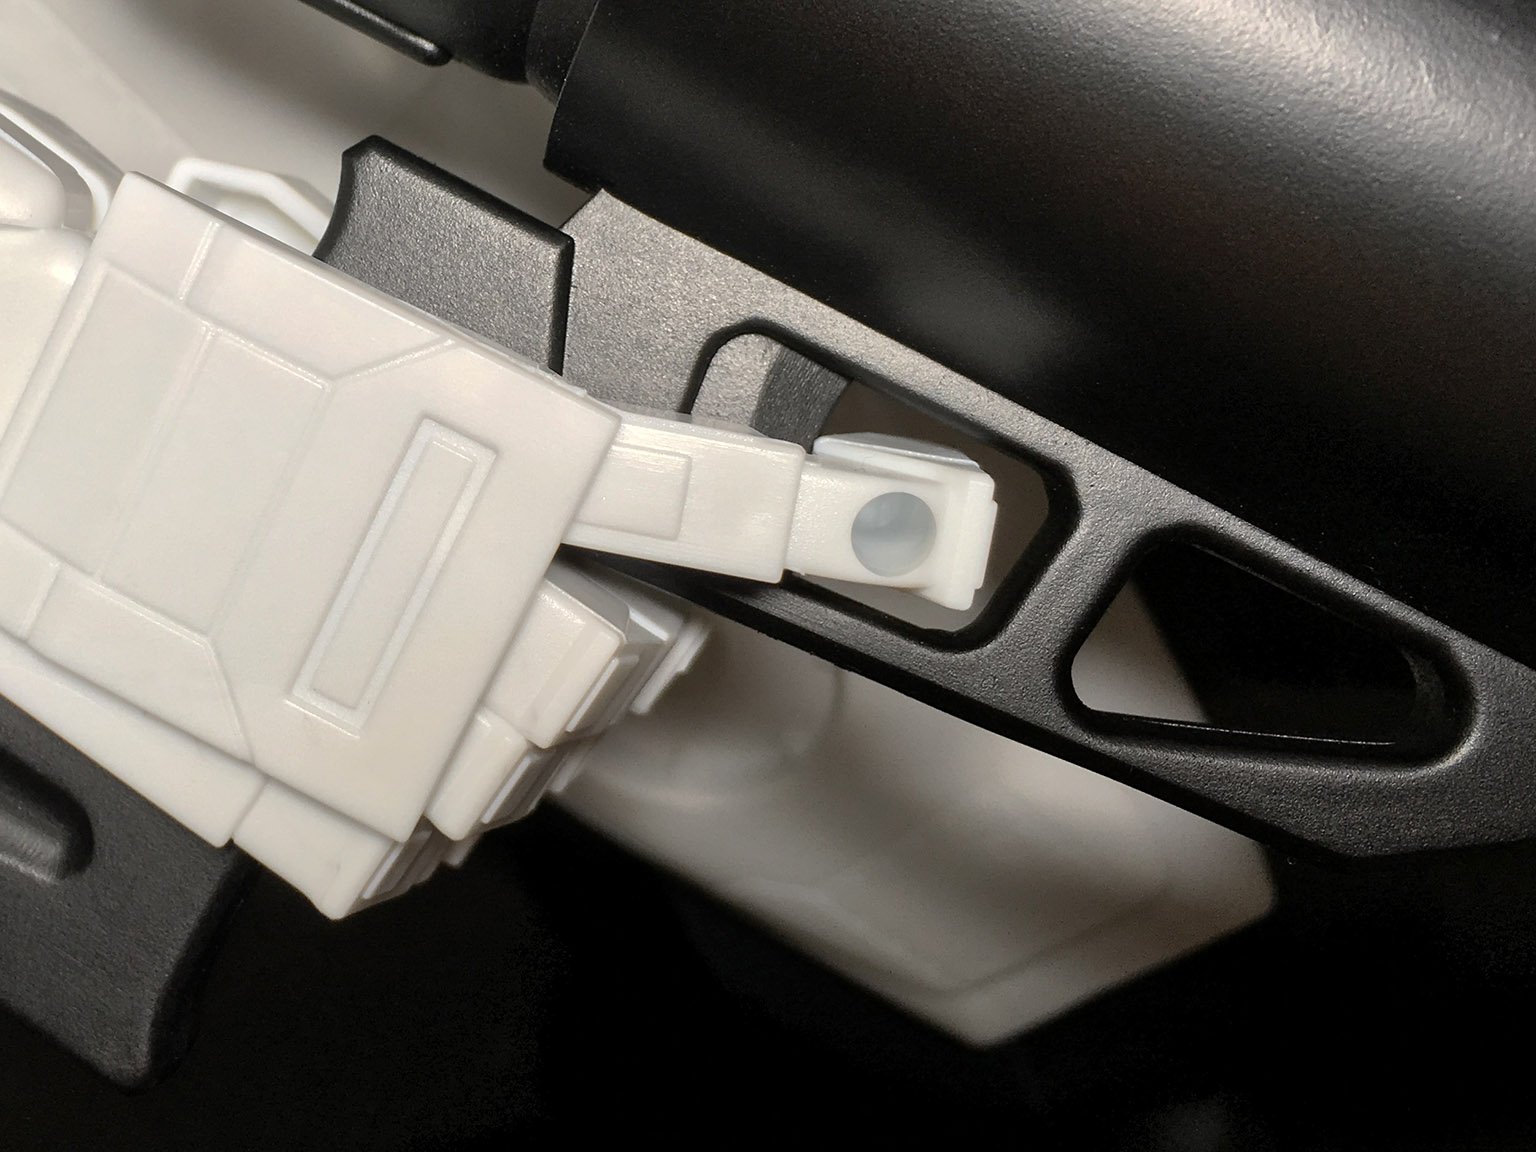
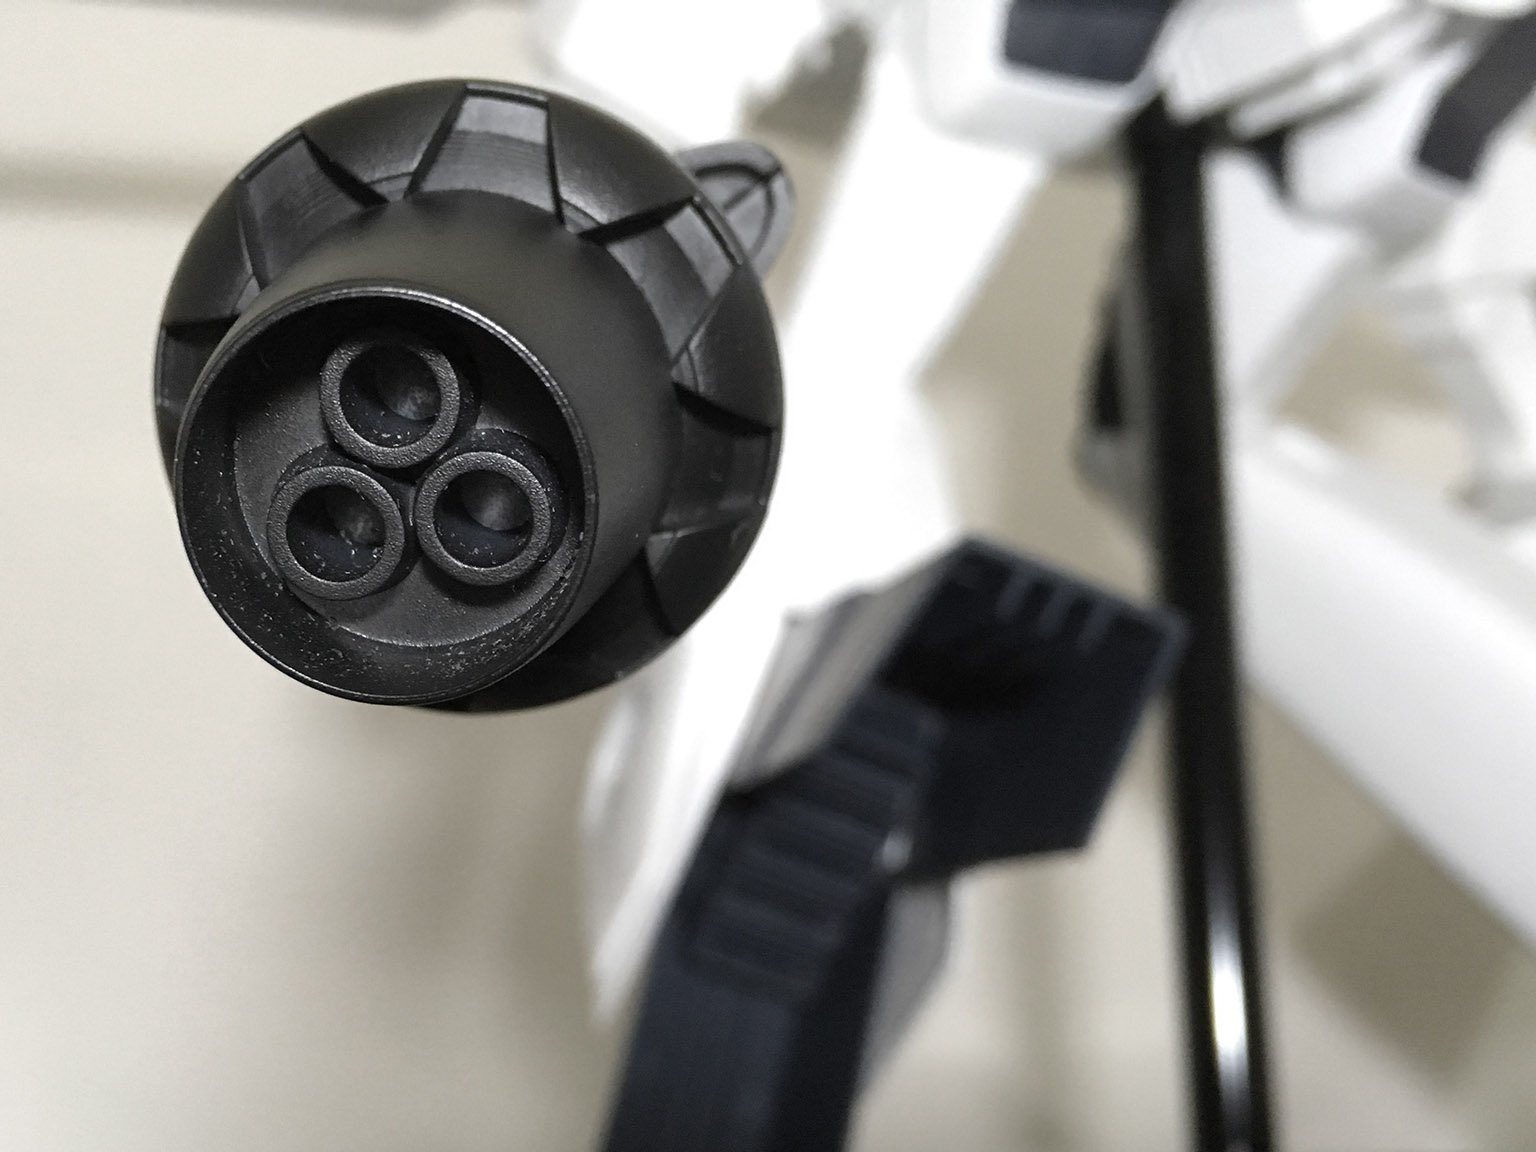
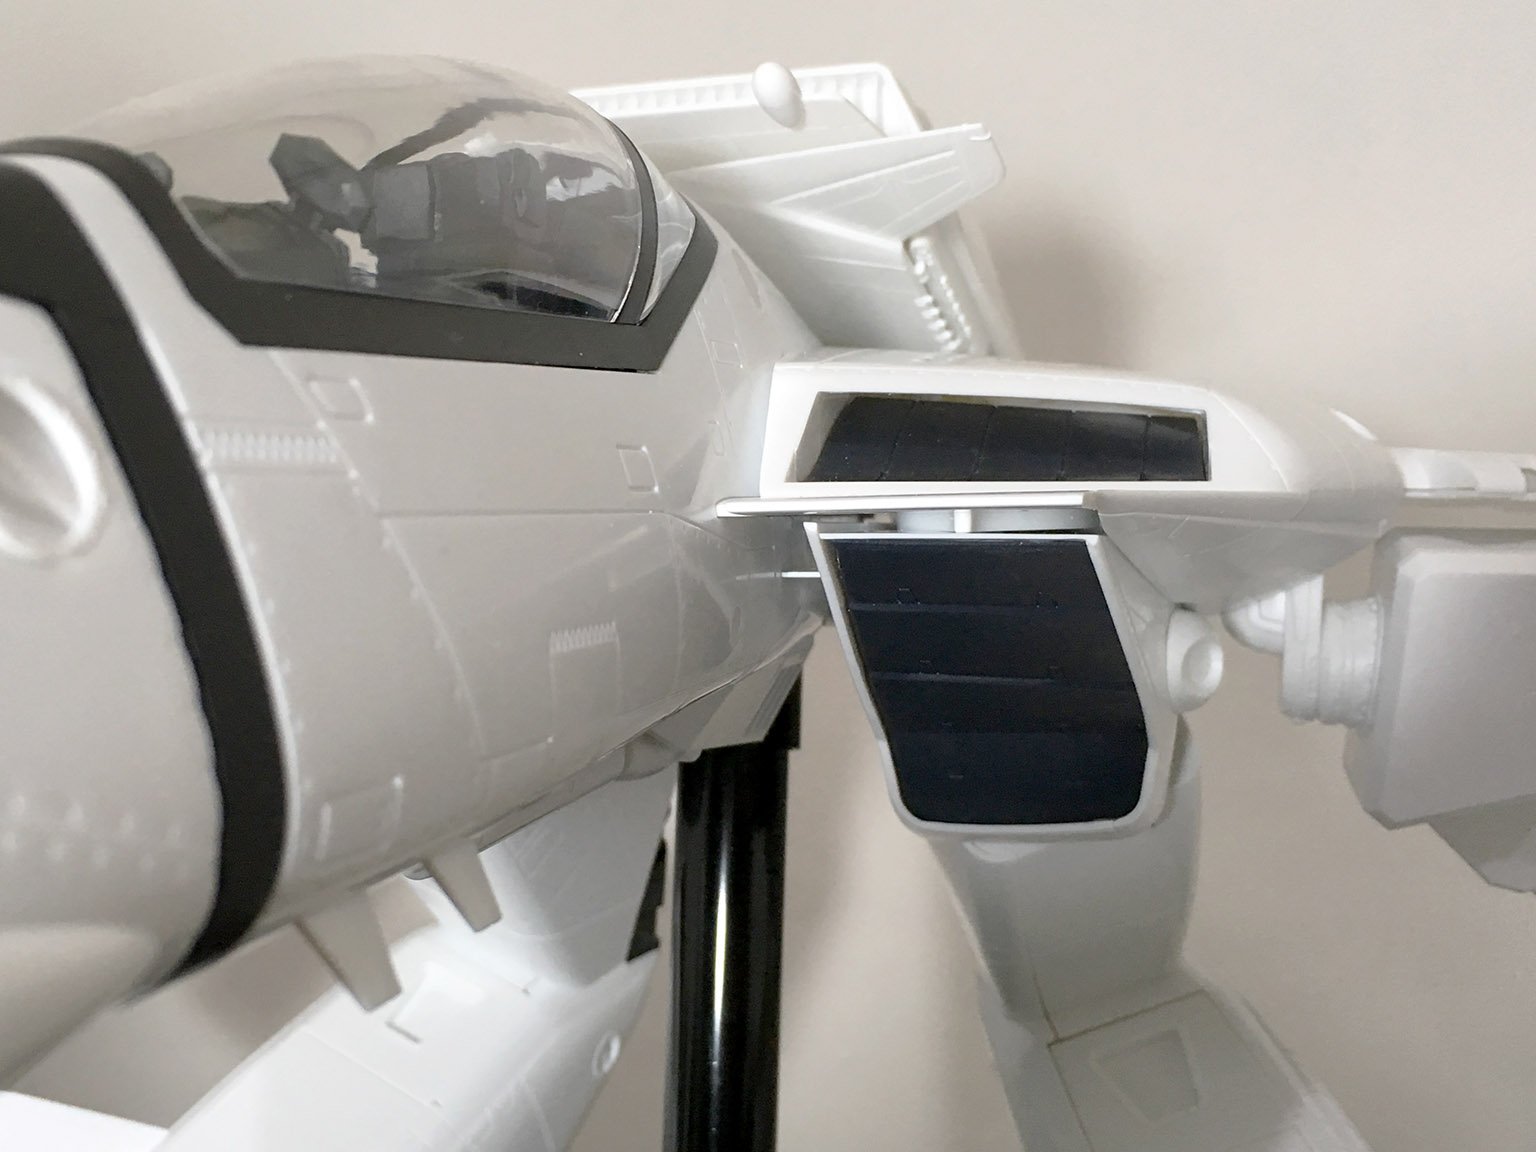
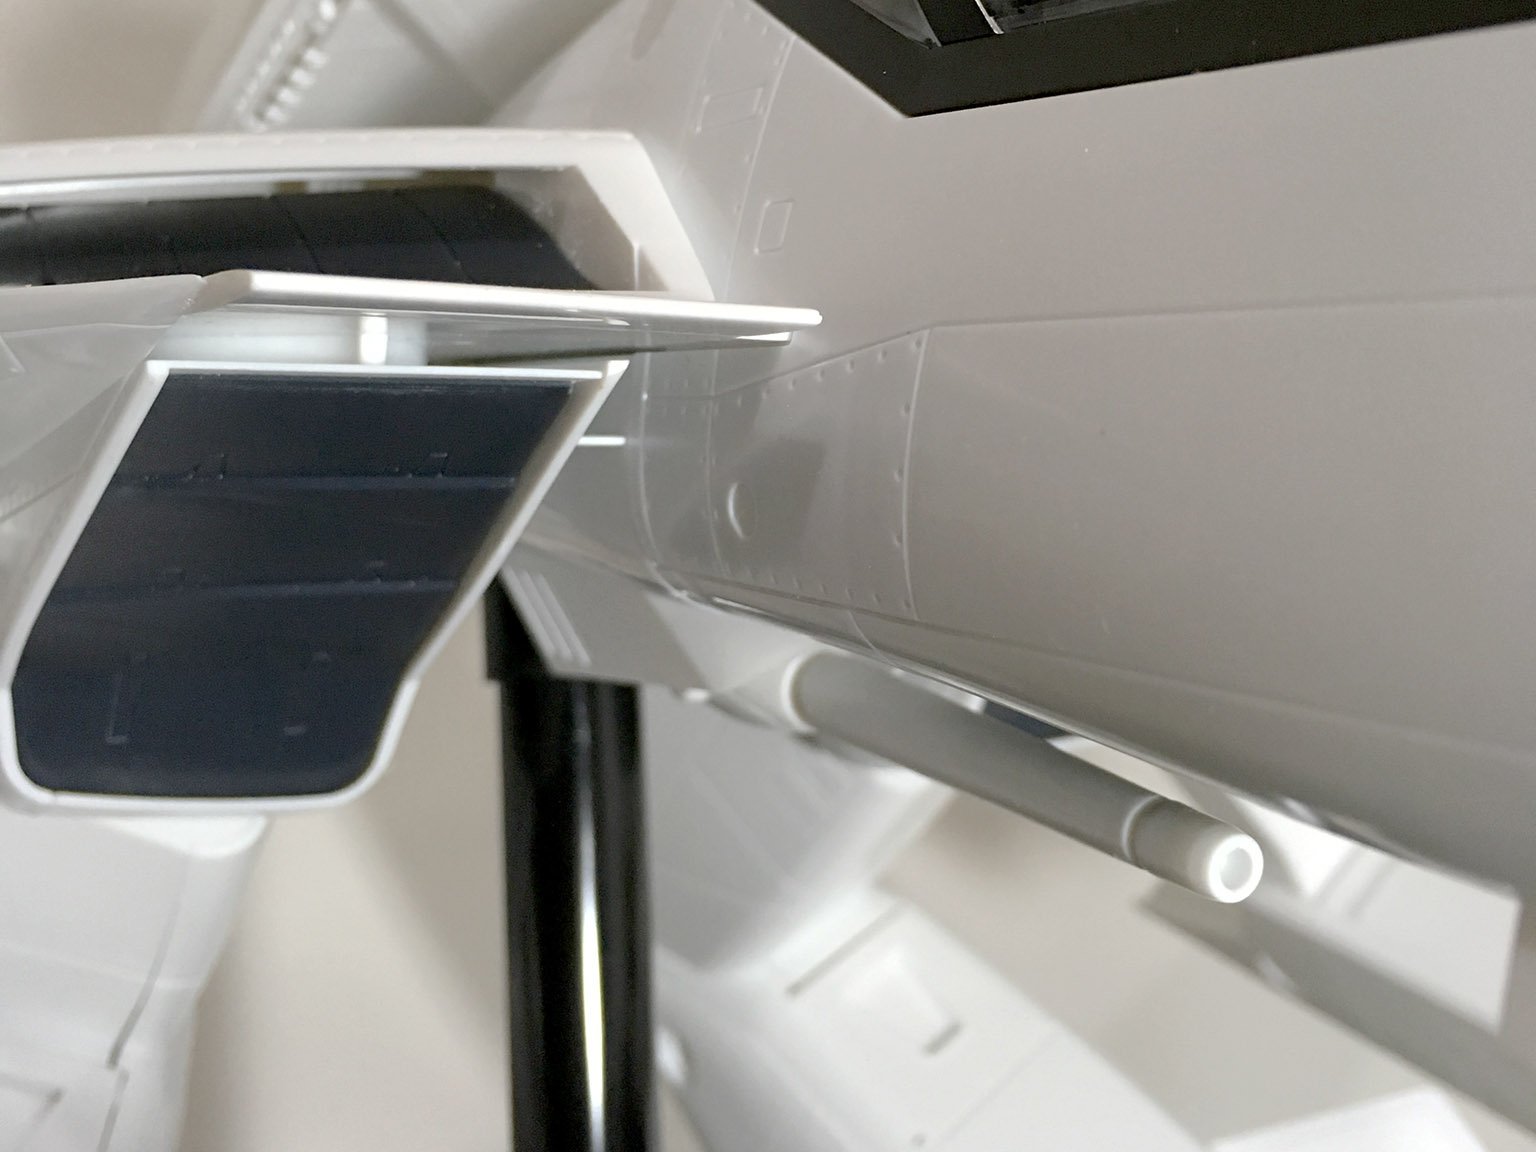
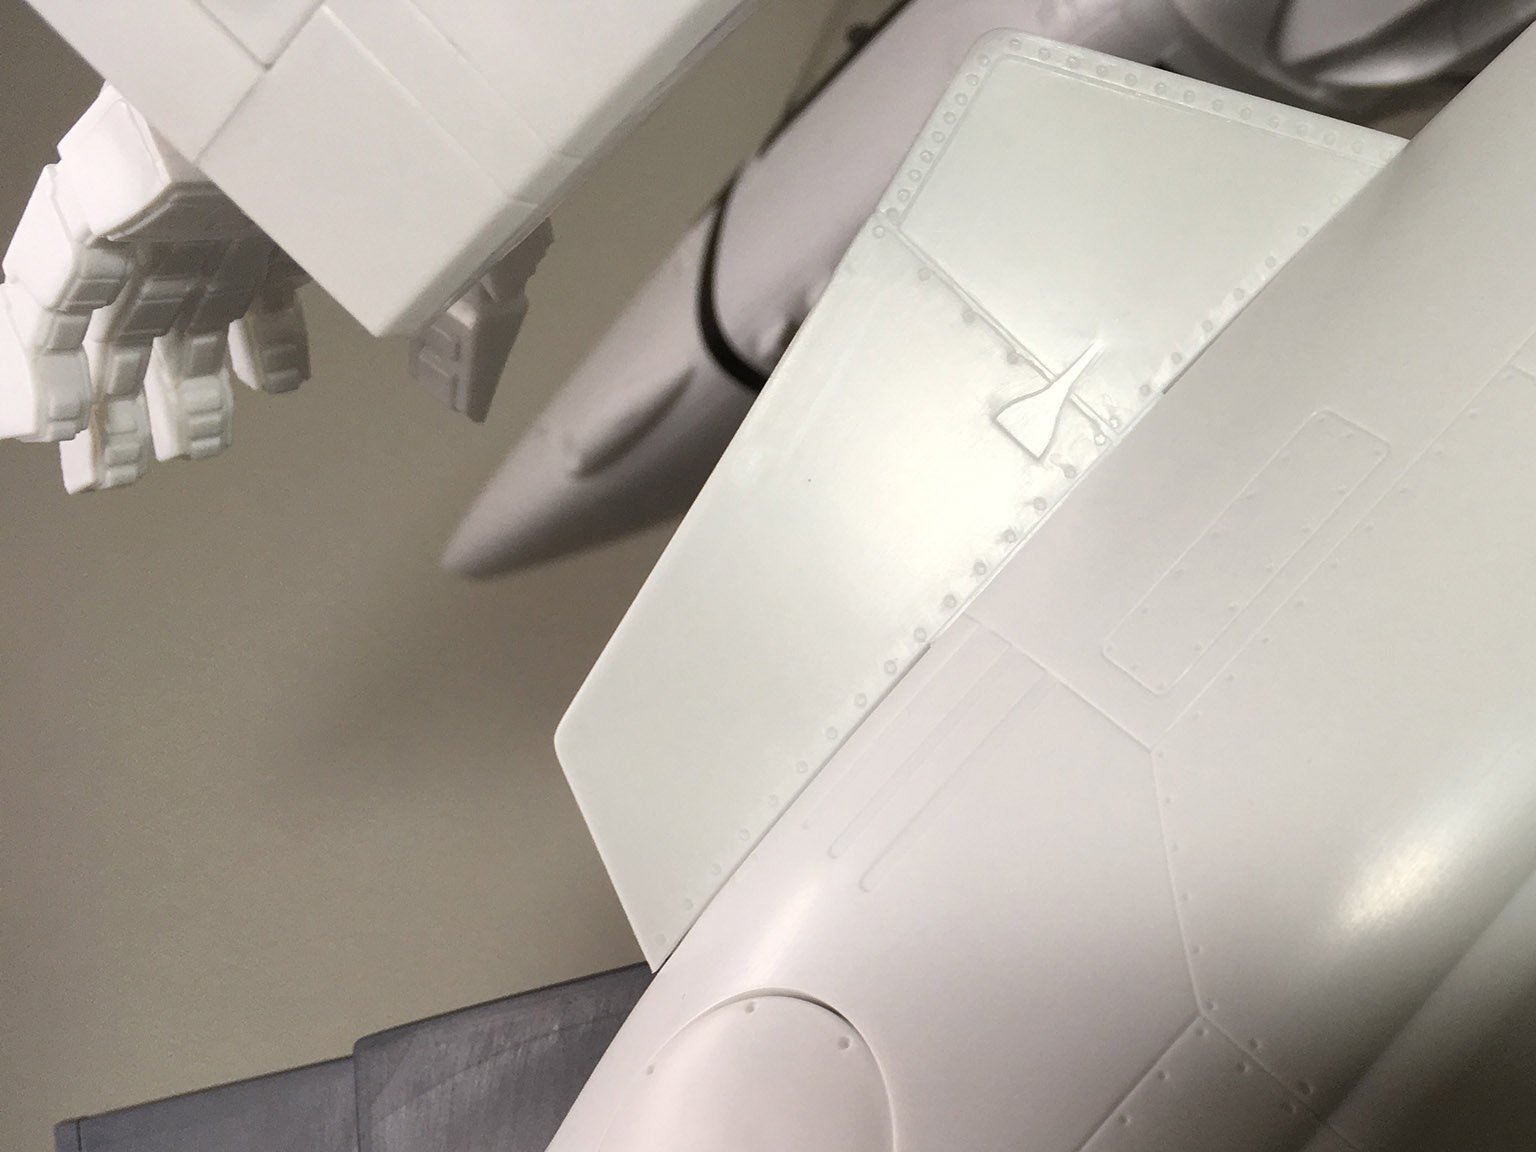
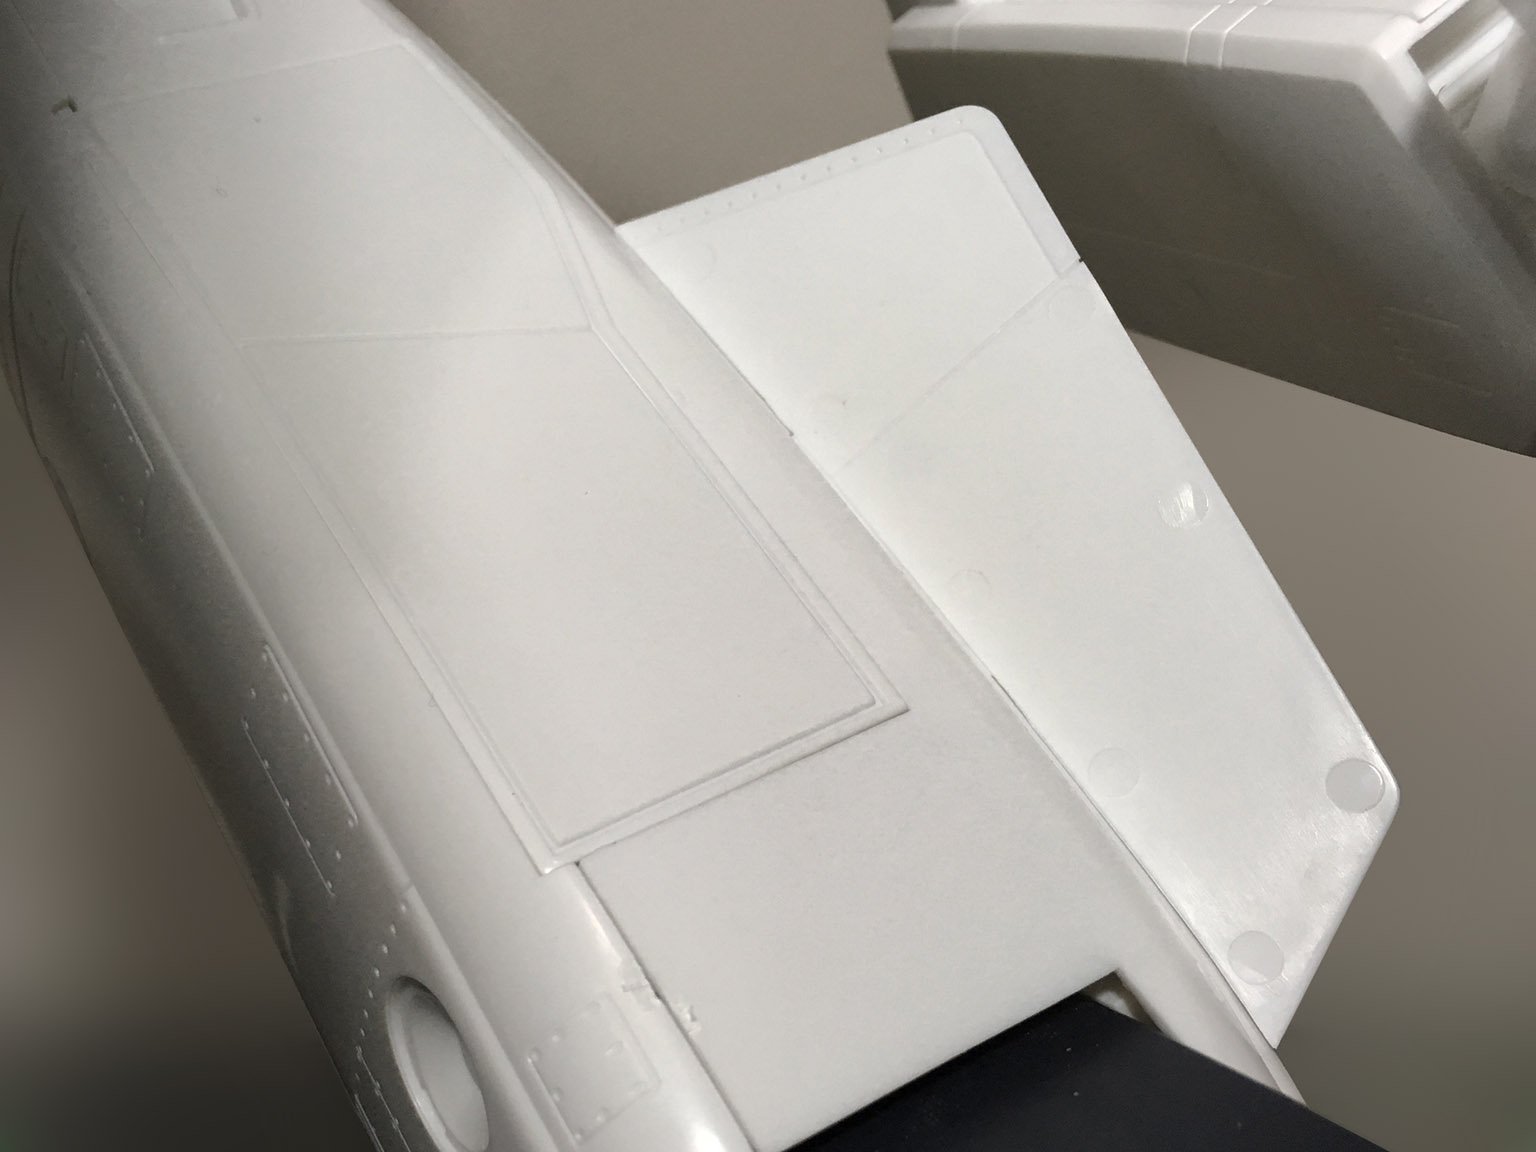
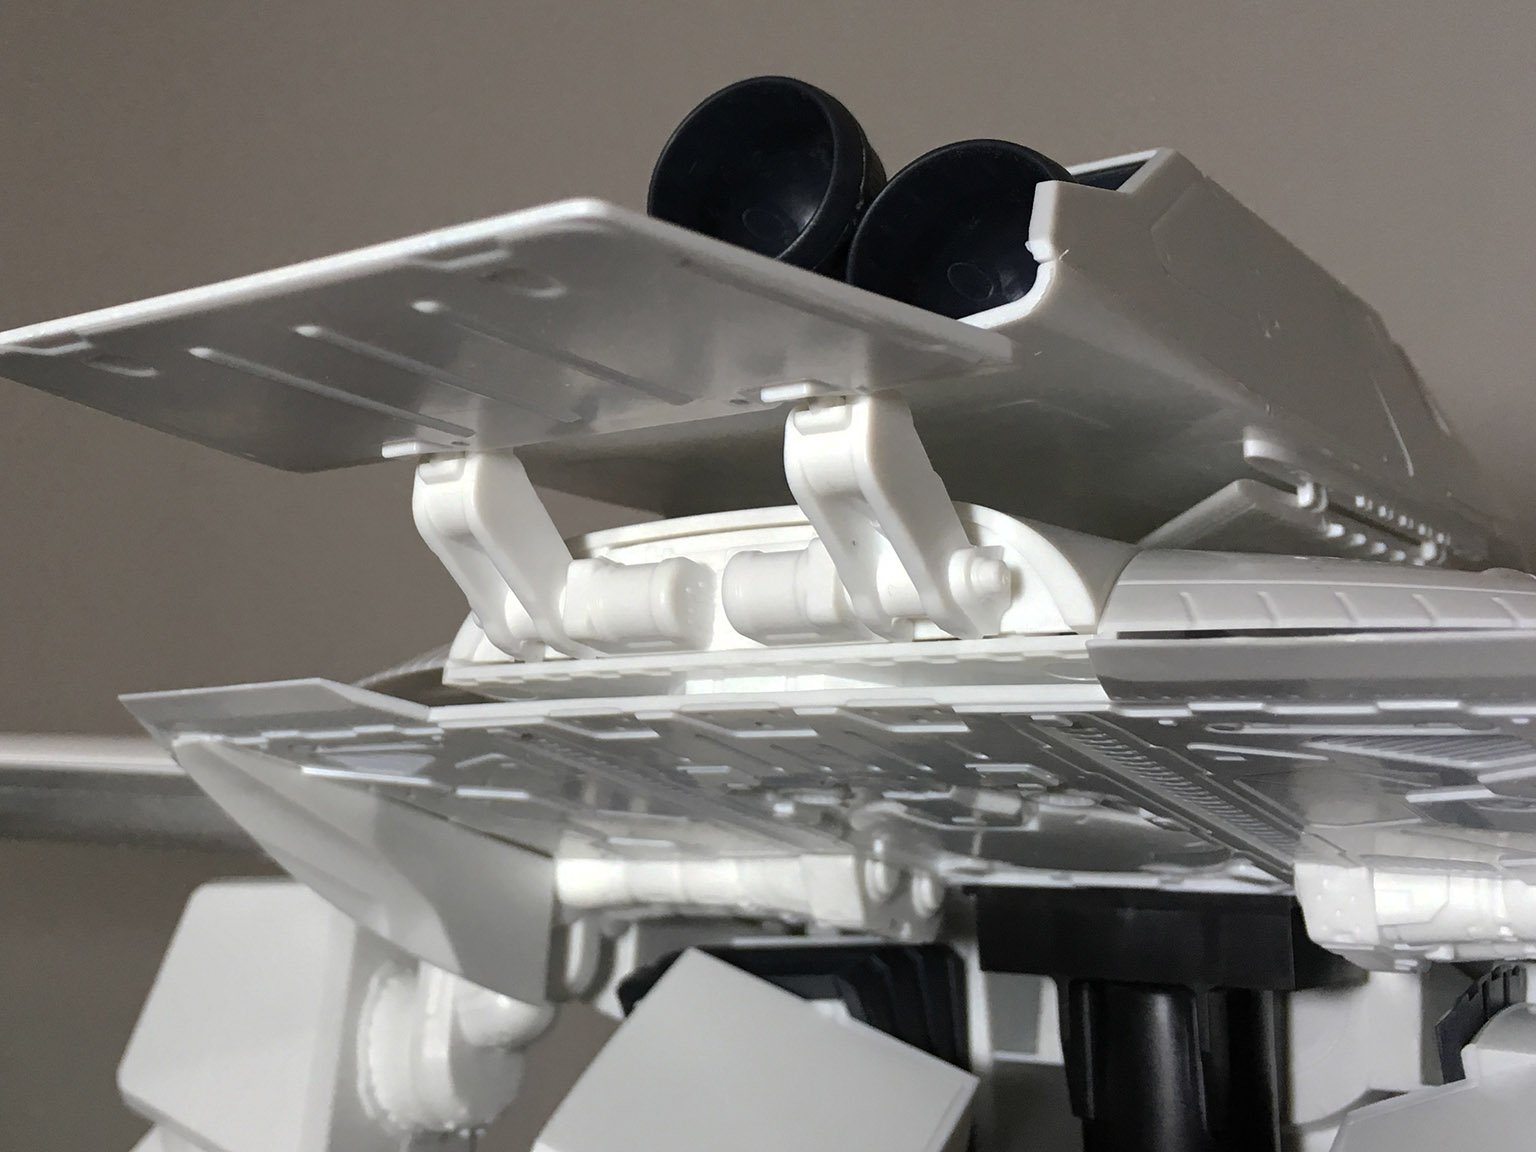
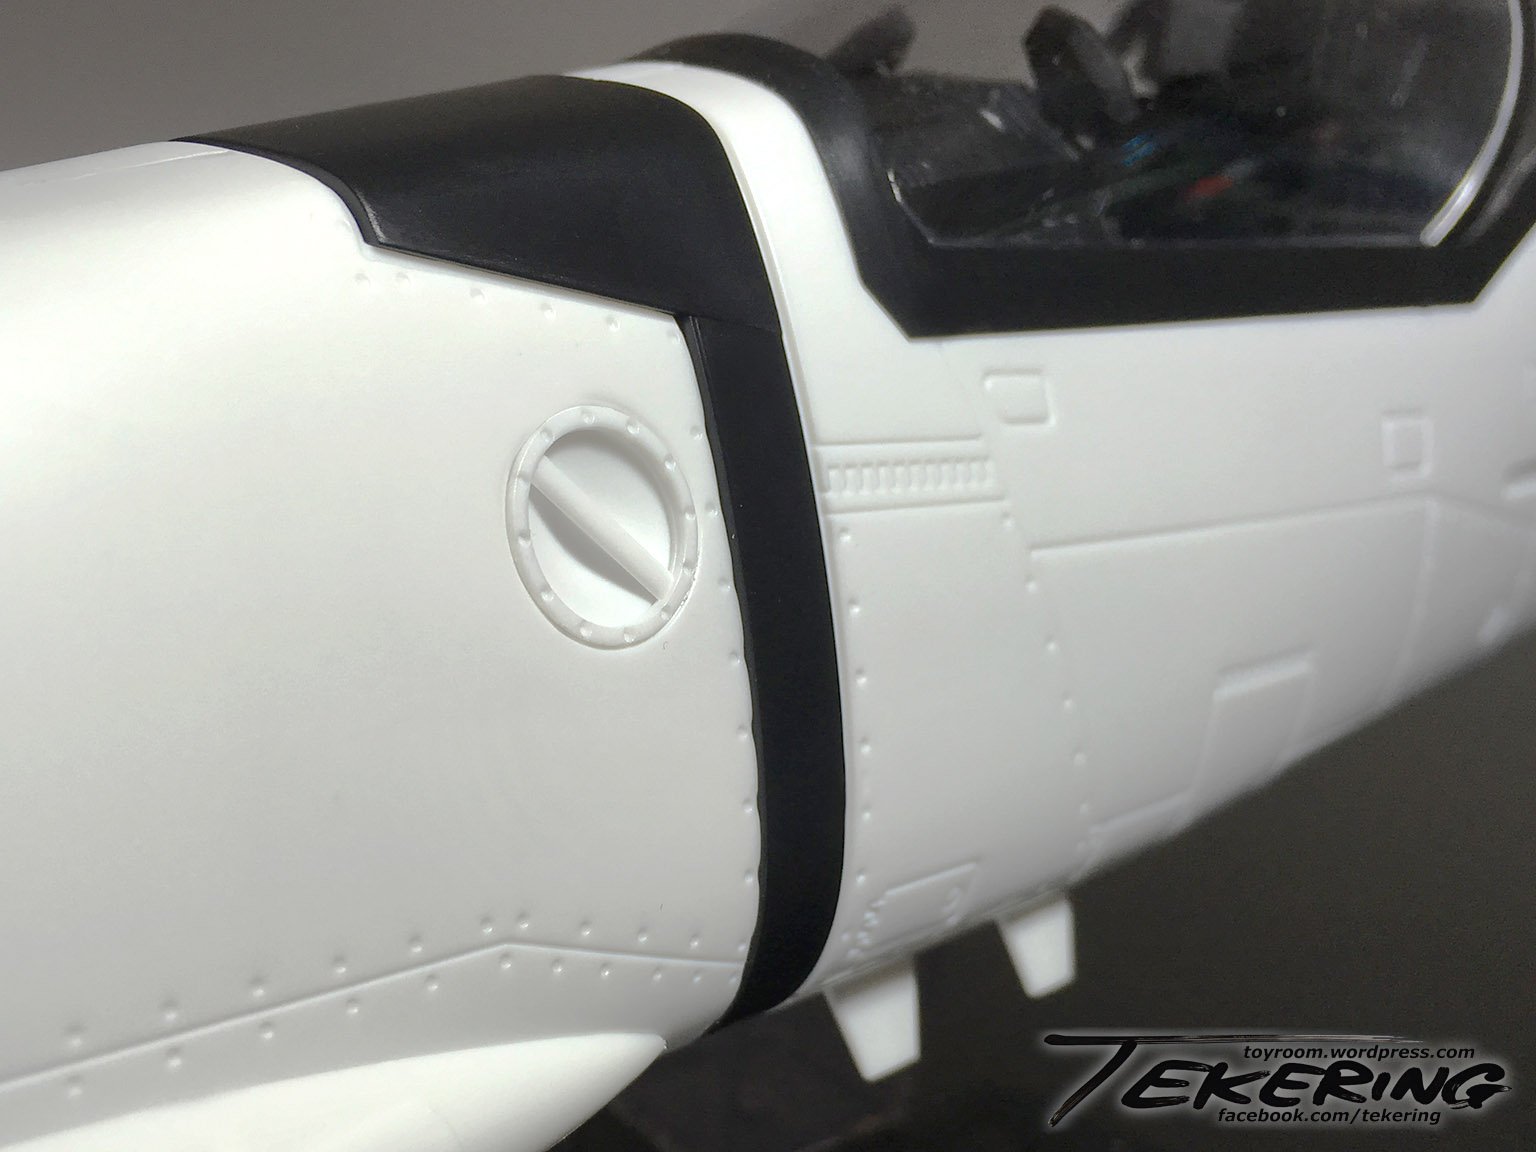
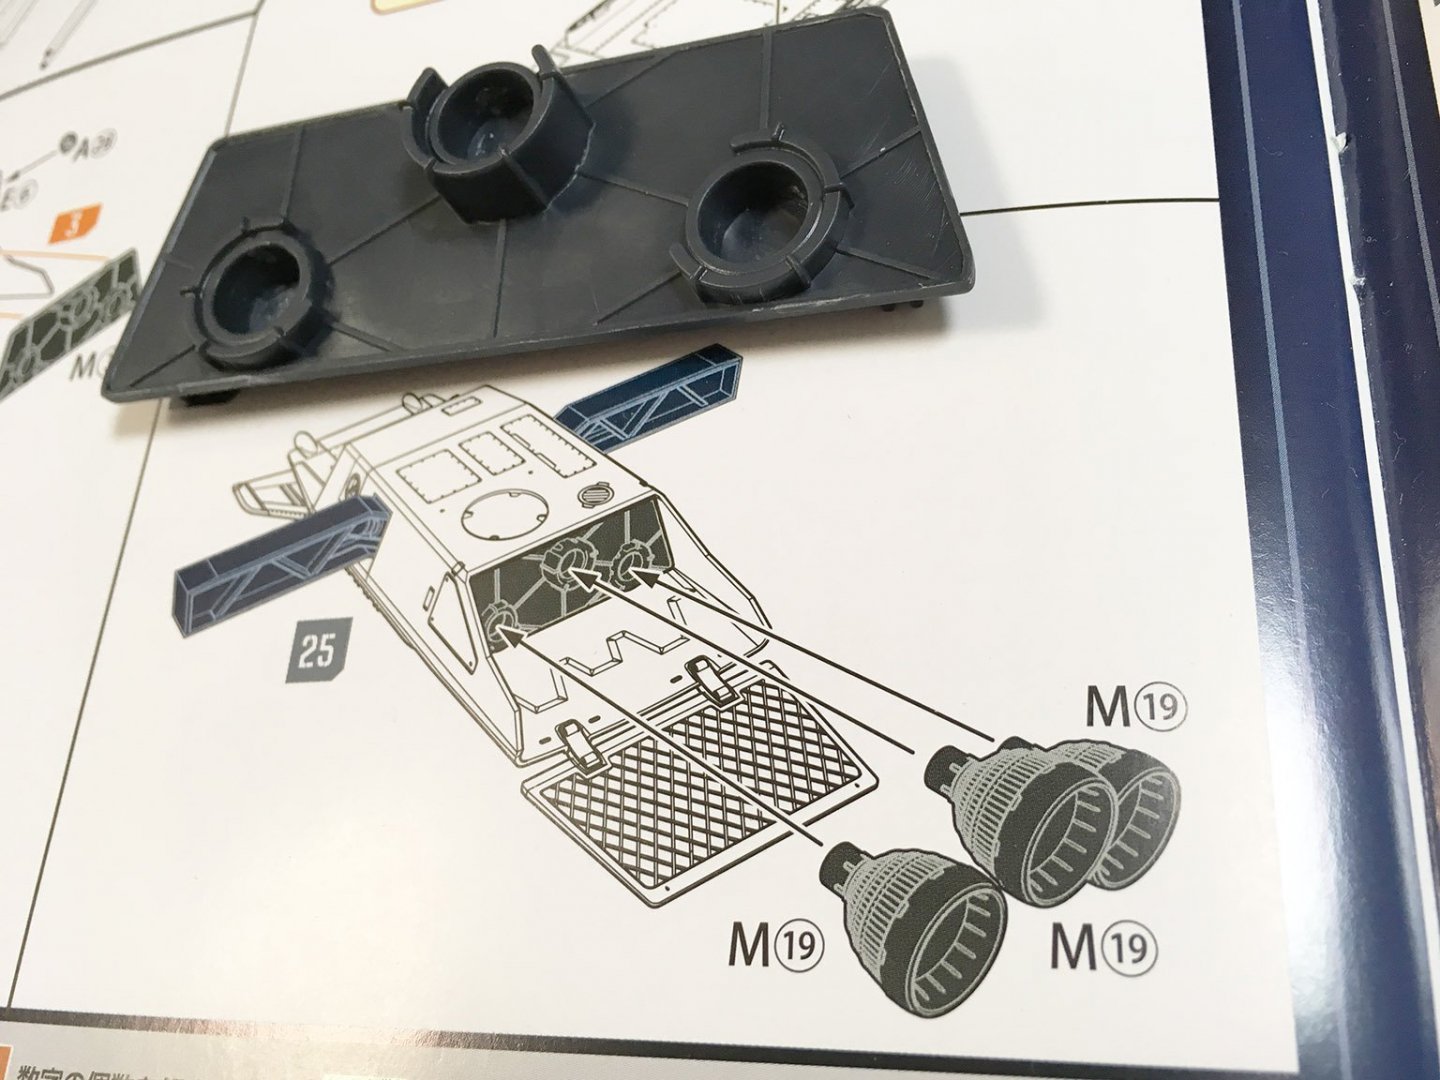
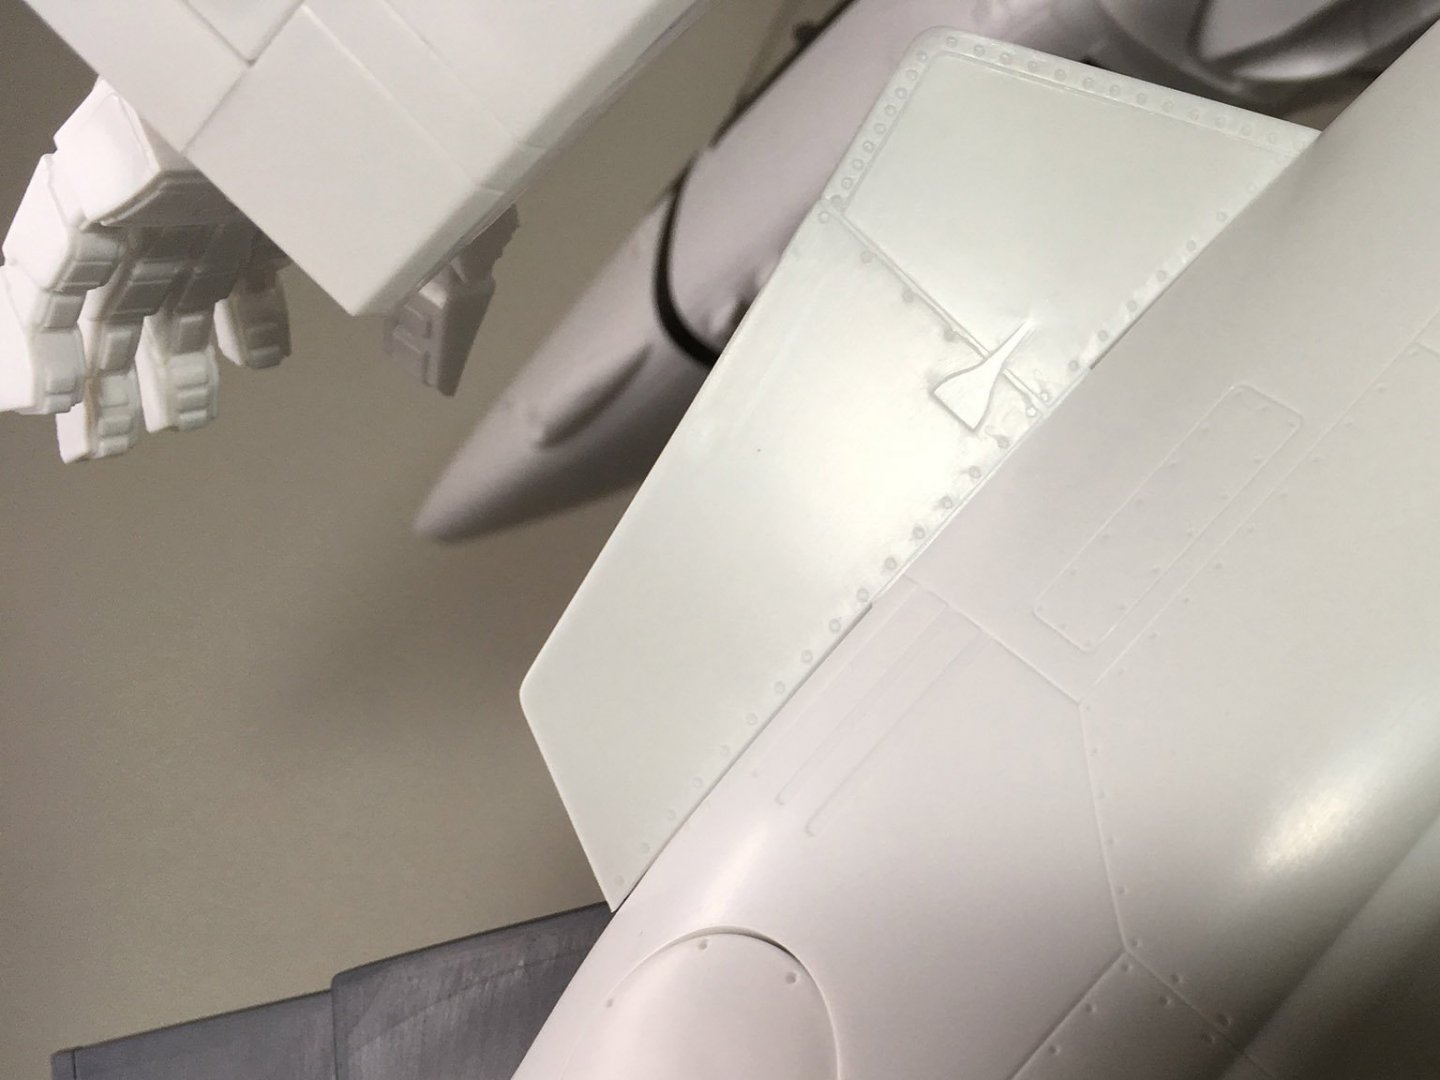
The bare Gerwalk assembled. All it needs is an antenna, and a strap for the gunpod. No trouble at all. Now, let's look at some niggling details that are bothering me: The trigger finger of the right hand has an inexplicable hole through it -- a very clean, perfectly centered hole -- and I can't possibly fathom what purpose it would serve. Having properly mounted the legs by sliding them into the locking mechanism underneath, I'm left with an unsightly gap that doesn't look right... The backpack mounting bracket leaves a strange-looking gap, too. This doesn't look like any Valkyrie toy or model I've seen before. The leg fins are lacking in any forward-facing detail, except for the ugly circles indicative of the injection-molding process... ...and yet, there's plenty of molded detail visible on the backside...! Both leg fins have the same anomaly, and -- since they're symmetrically reversed -- they only fit into the specific leg they're designed for. I think it's some kind of molding mistake. More ugly circles on the inside of the feet... and while I love seeing the engine behind the verniers like that, the interior of the leg is otherwise an eyesore. And finally, those boosters on the back are much too large, and they stick out way too far. They'll require some major modification, if they can be used at all...


-
Neon Genesis EVANGELION General Thread
tekering replied to no3Ljm's topic in Anime or Science Fiction
That goes without saying.- 998 replies
-
- 1
-
-
- evangelion
- gainax
- (and 6 more)
-
The Transformers Thread (licensed) Next
tekering replied to mikeszekely's topic in Anime or Science Fiction
Yeah, best post your questions in the third-party thread instead.- 16946 replies
-
- 1
-
-
- transformers
- toys
- (and 5 more)
-
It's getting bigger and more beautiful day by day. The stand is not only included, it's mandatory; the kit is not designed to support itself unassisted, based on the position of the legs. Of course, it's shouldn't be much trouble to modify the angle of the feet so that it can stand by itself -- something I fully intend to do -- but if you're building it stock, the stand is obligatory. Sprues A, B, Q and R would be required (which unfortunately includes the largest parts of the fuselage). ¥14800 plus shipping.
- 1065 replies
-
- 1
-
-
- max factory
- dyrl
- (and 1 more)
-
An American live-action Cowboy Bebop?
-
The Unlicensed Third Party Transformers Thread
tekering replied to slaginpit's topic in Anime or Science Fiction
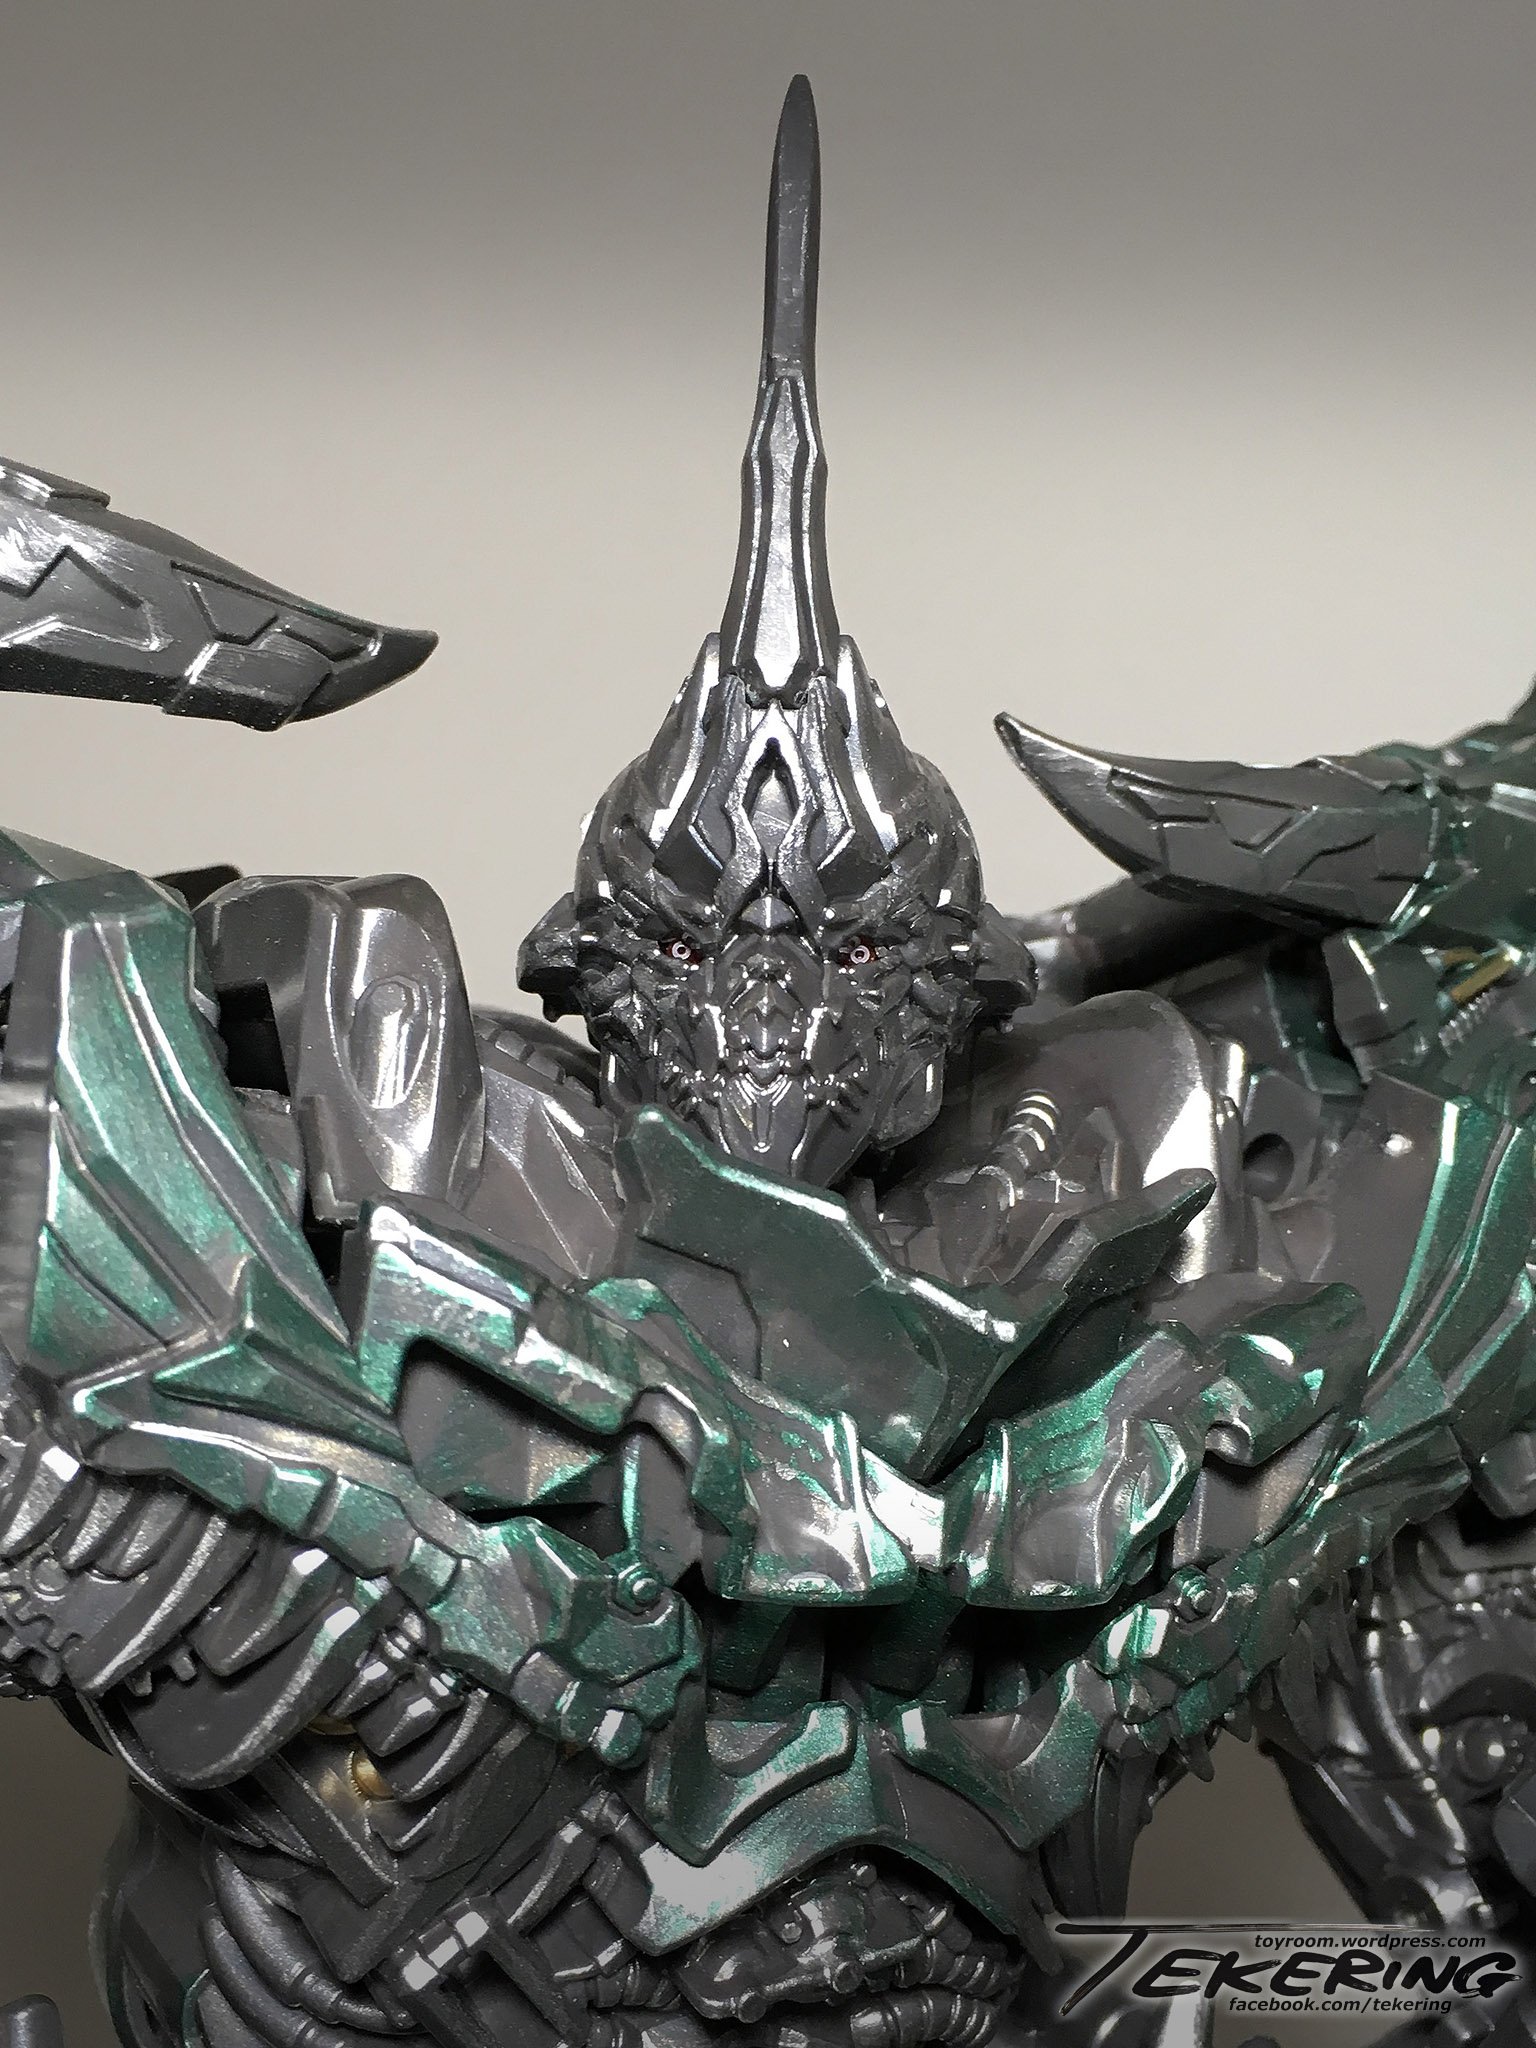
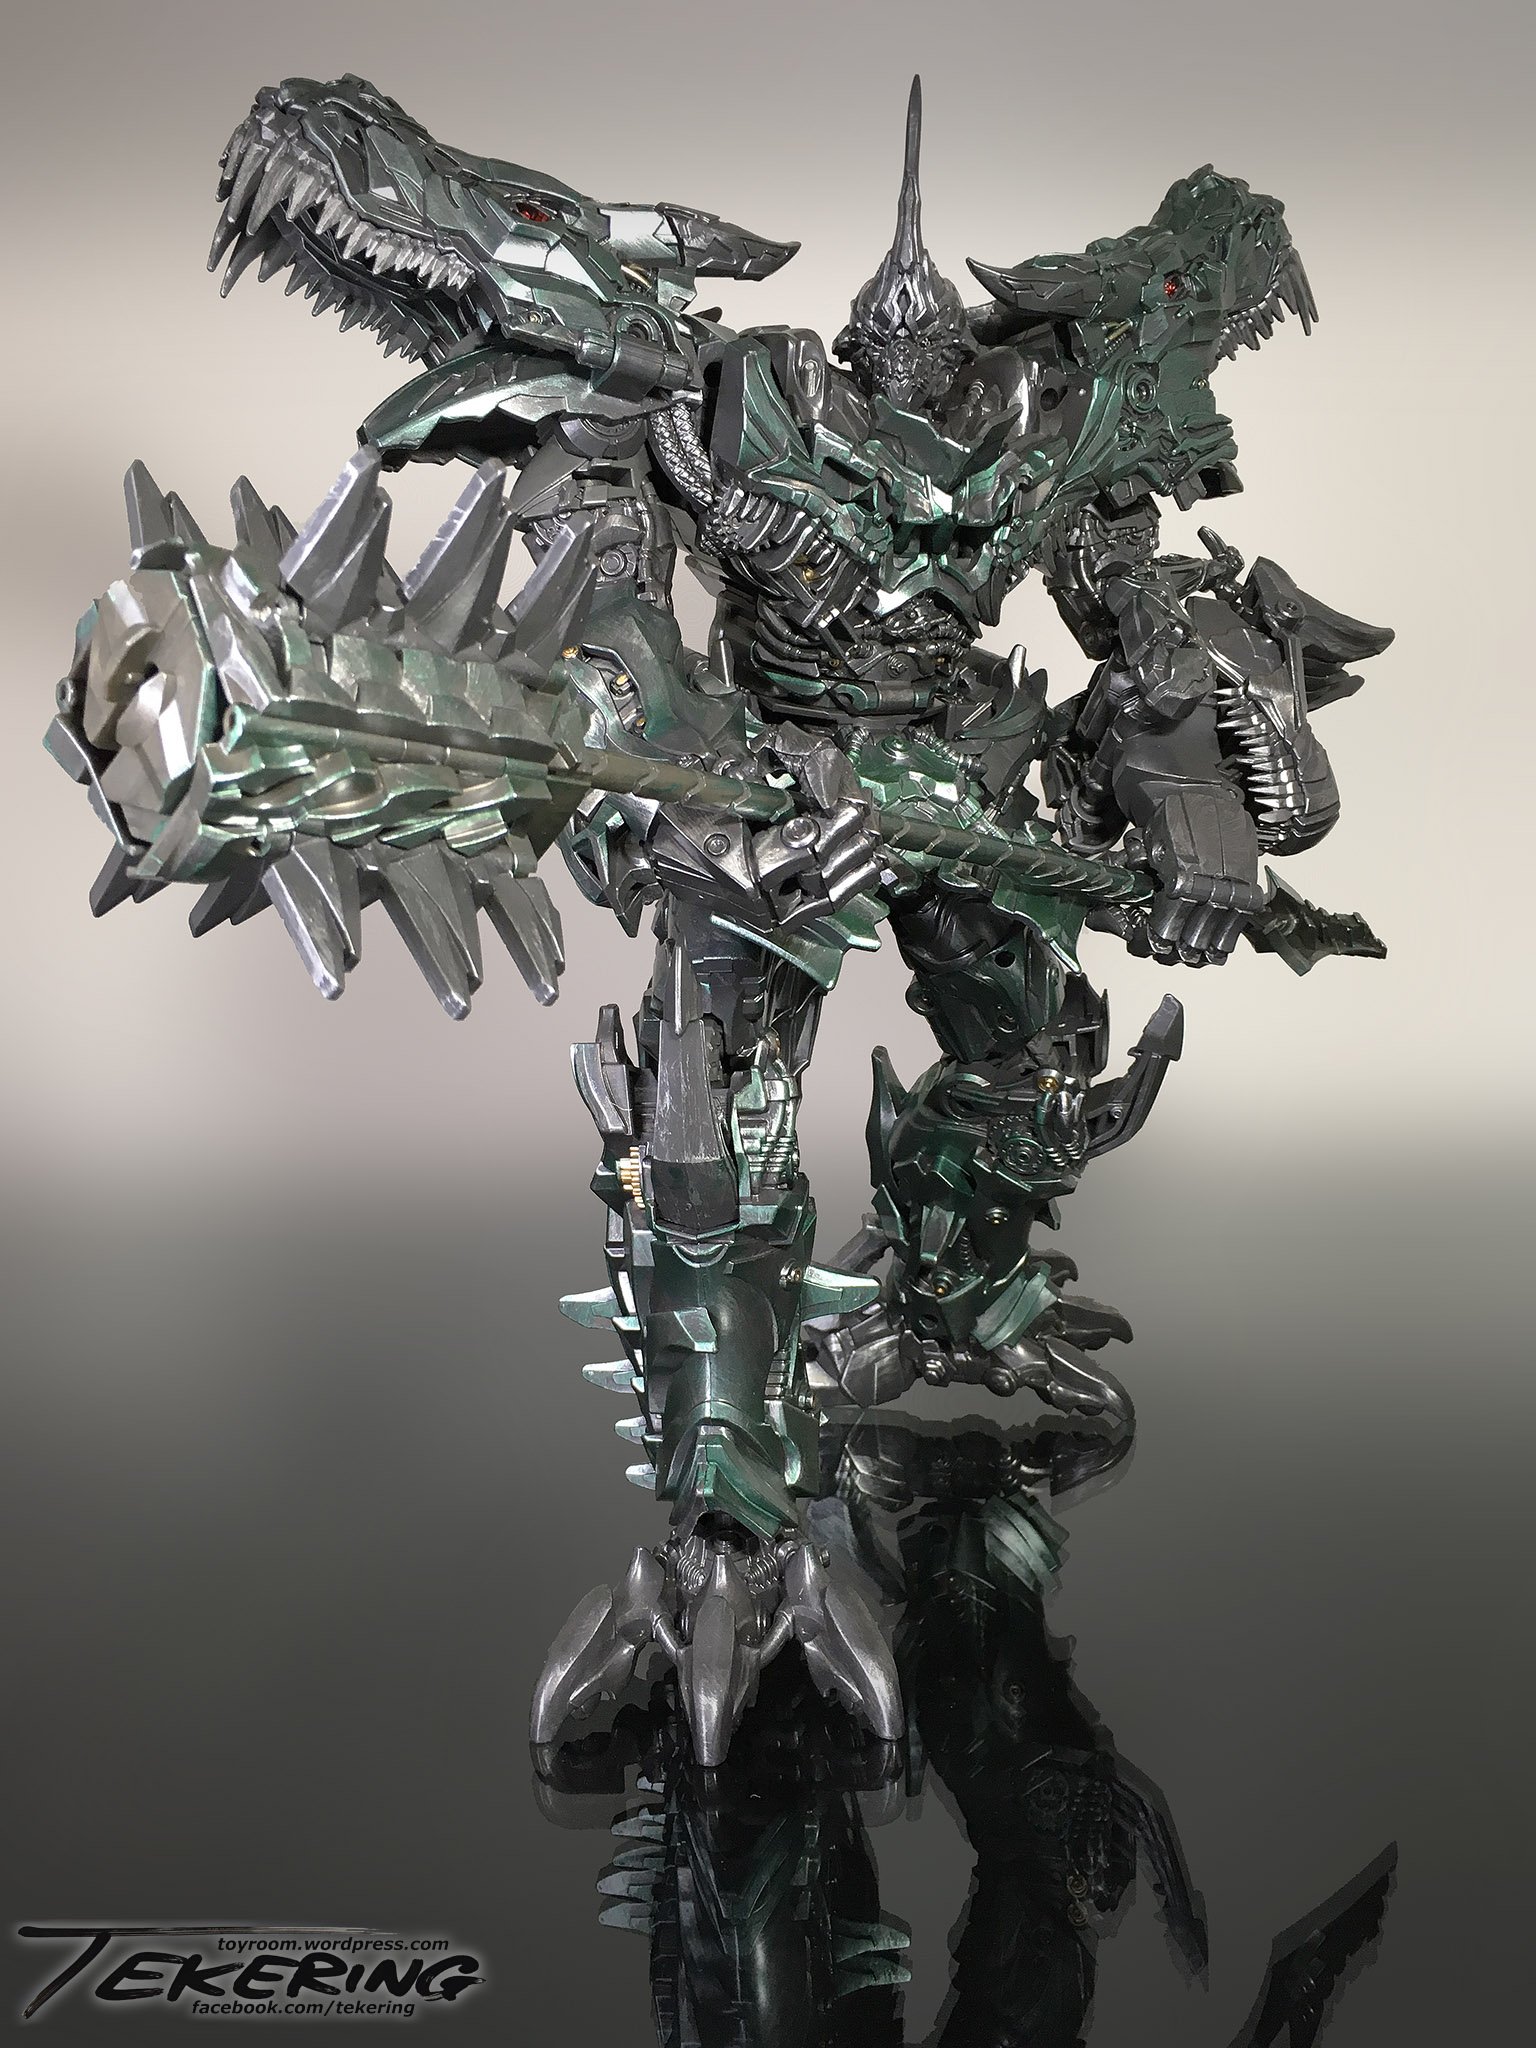
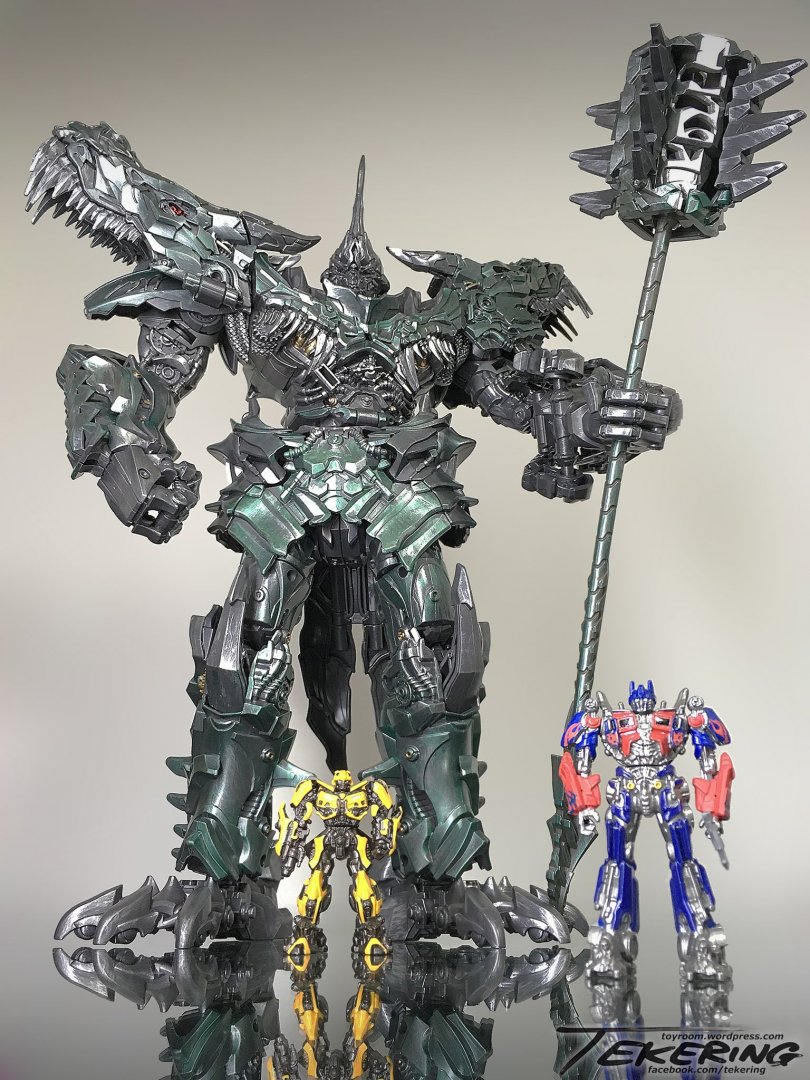
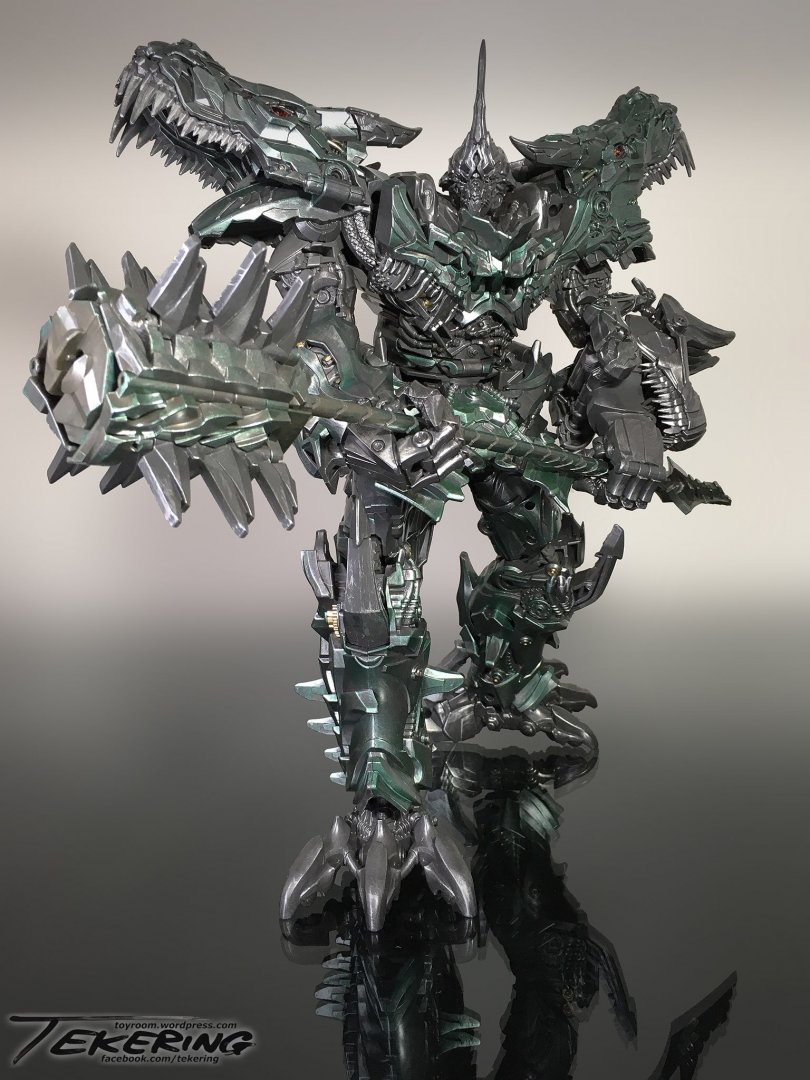
LS-05 has arrived. Beefy and imposing, he is. Photographs well with MetaColle figures. I'm not too fond of the face, though... Is this what AOE Grimlock was supposed to look like? Congratulations, TJ! I never sell anything myself... which comes with regrets of its own.

-
Your most recent Macross or toy purchase! General thread.
tekering replied to Gakken85's topic in Hall Of The Super Topics
LS-05 just arrived. A very big Grimlock indeed.
-
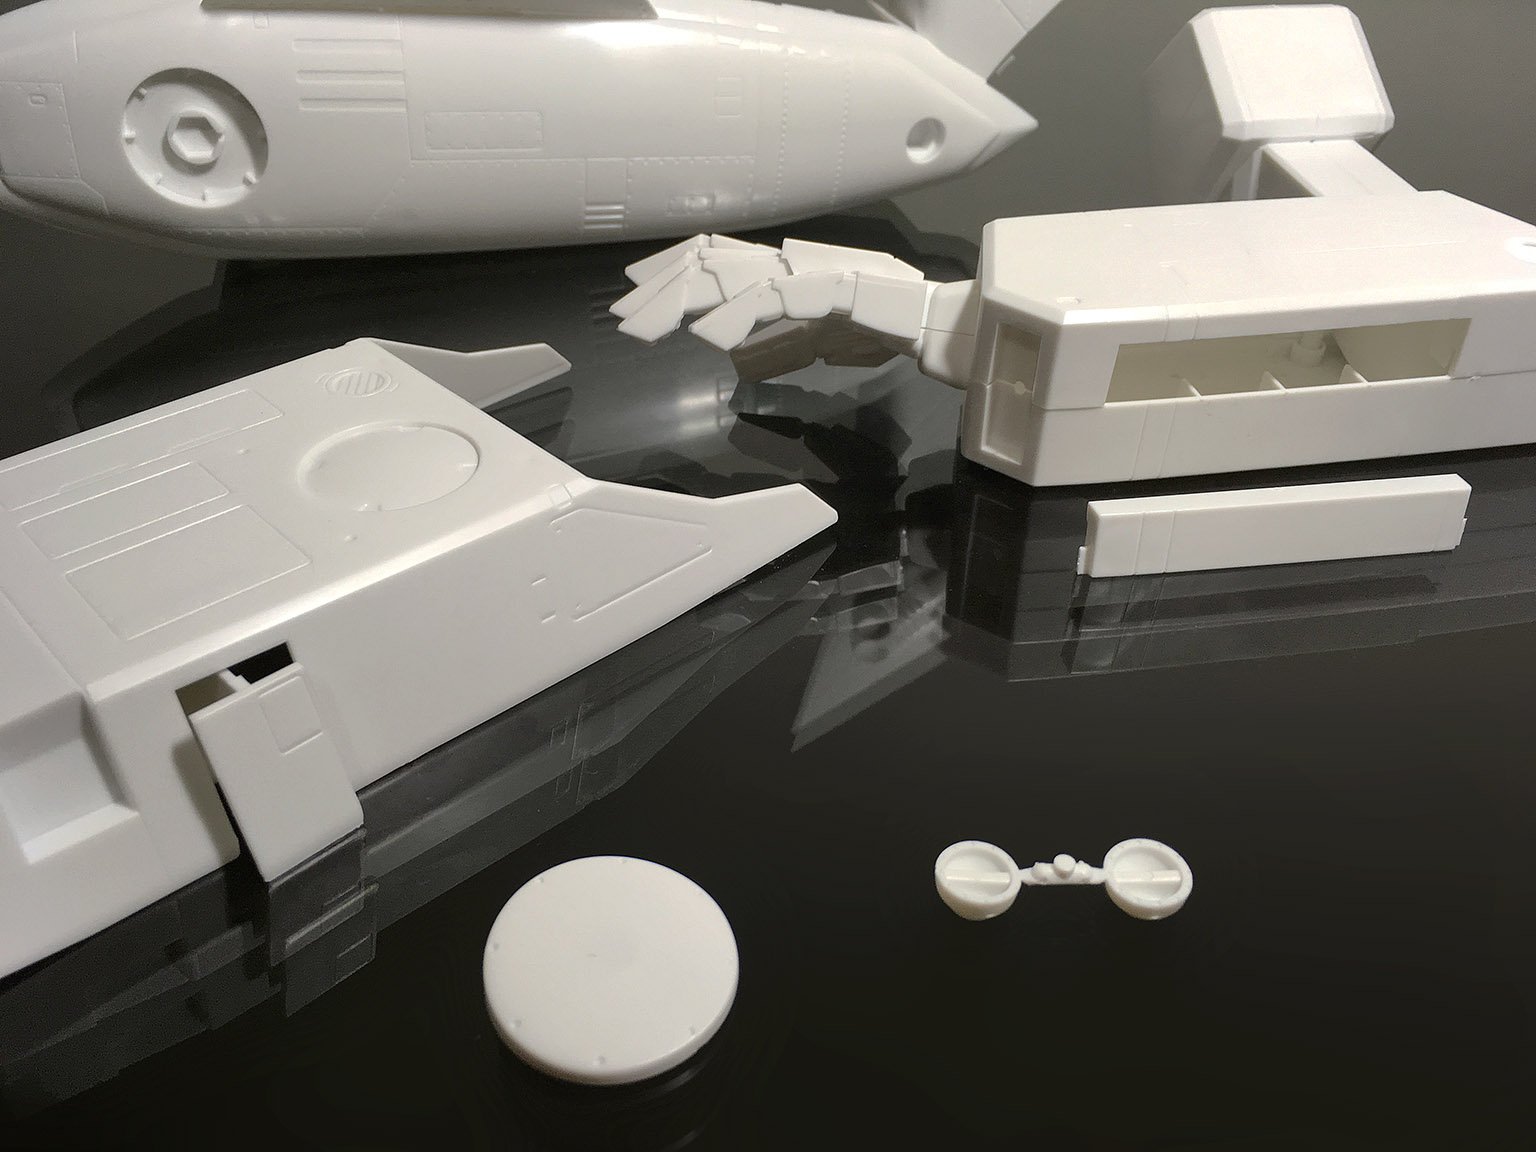
The short answer is no. There are obvious gaps and mounting points for the FAST packs on the arms, legs, and through the backpack on top... and while the instructions do indicate the -1A, -1J, or -1S head options, there's no mention of gap fillers or other options for assembly. A close look at the runners, however, reveals several additional parts the instructions ignore: So, as it turns out, the kit actually includes all the necessary pieces to complete the Gerwalk either with or without the FAST pack armor.

- 1065 replies
-
- 2
-
-
- max factory
- dyrl
- (and 1 more)
-
Gundam Show Thread - MSG thru GQuuuuuuX
tekering replied to Black Valkyrie's topic in Anime or Science Fiction
Wow, the voice acting is profoundly unconvincing in that trailer. Overacted almost to the point of parody. I hope the show's a little more restrained than that. -
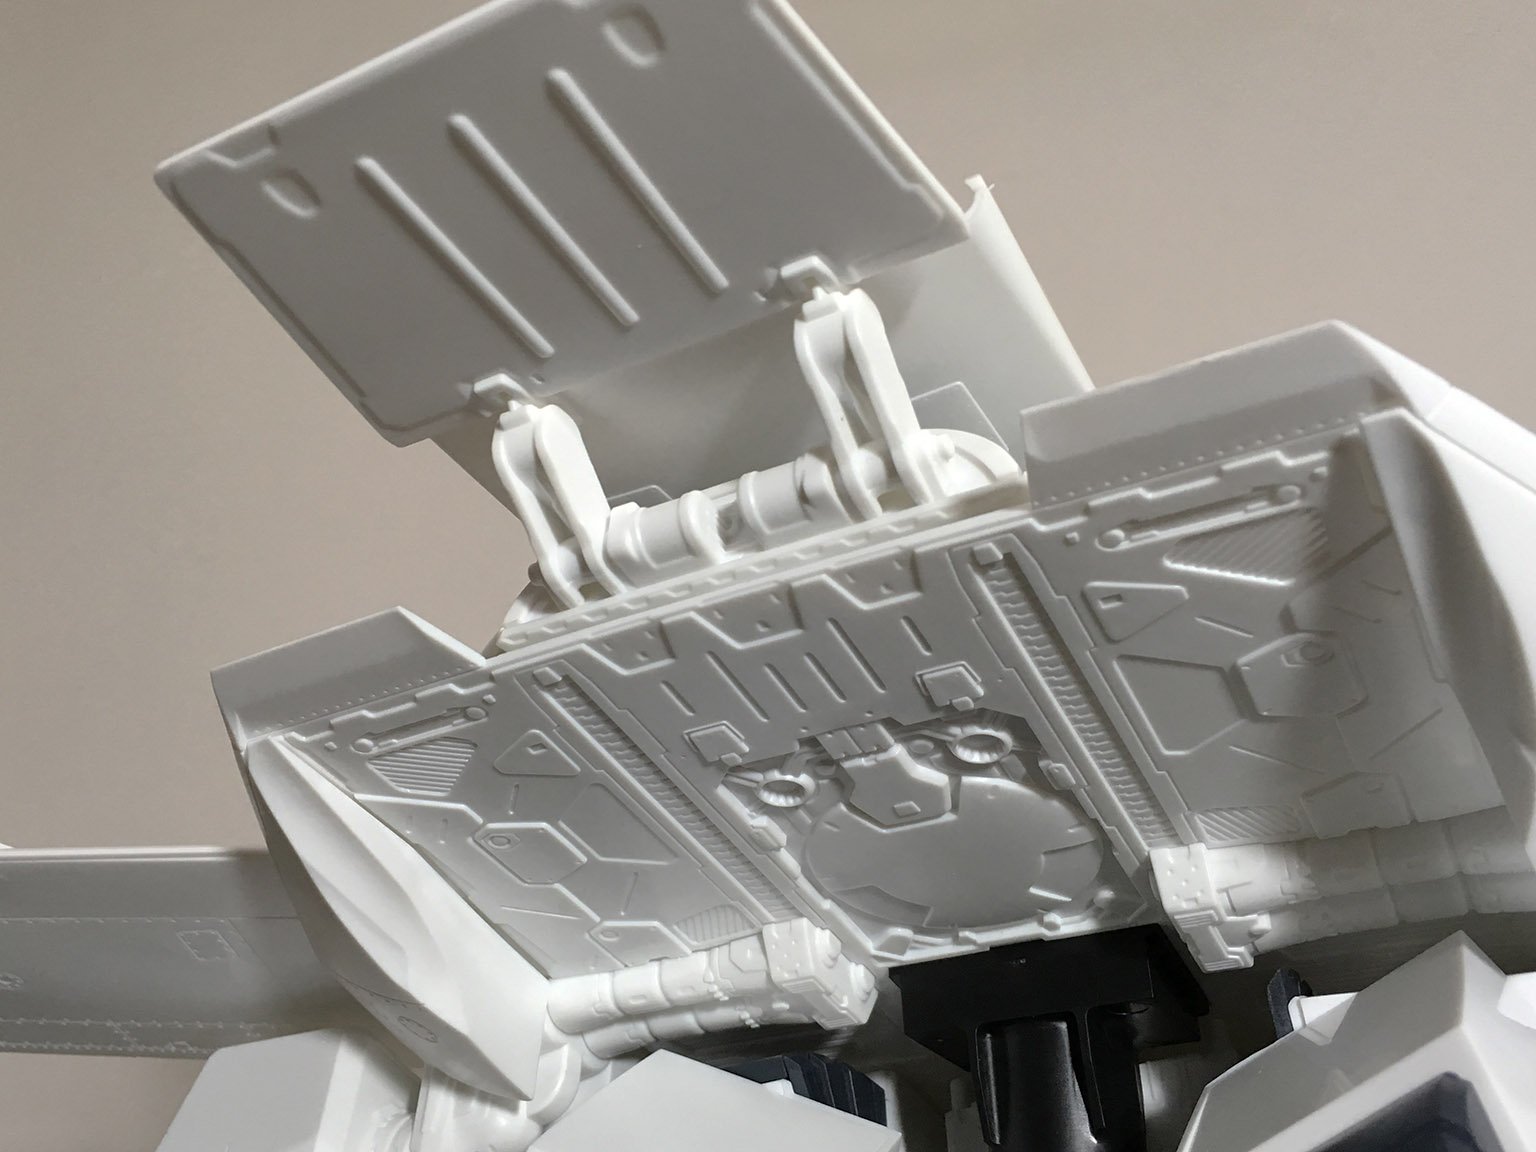
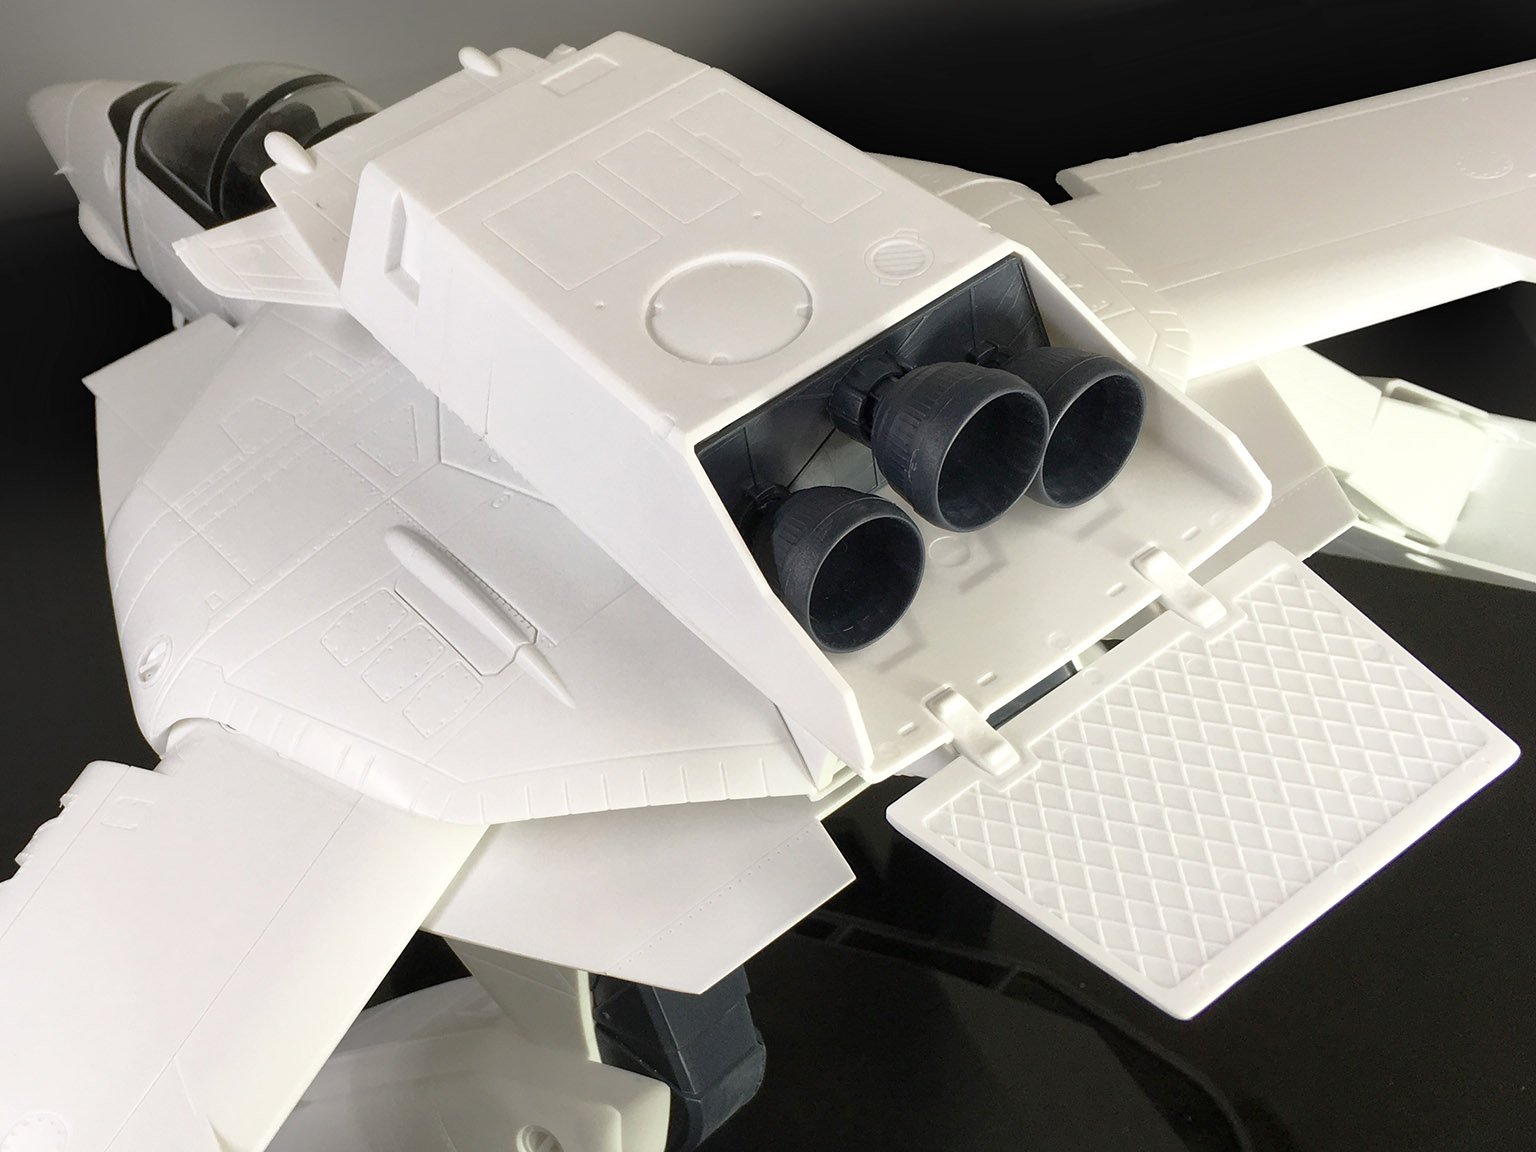
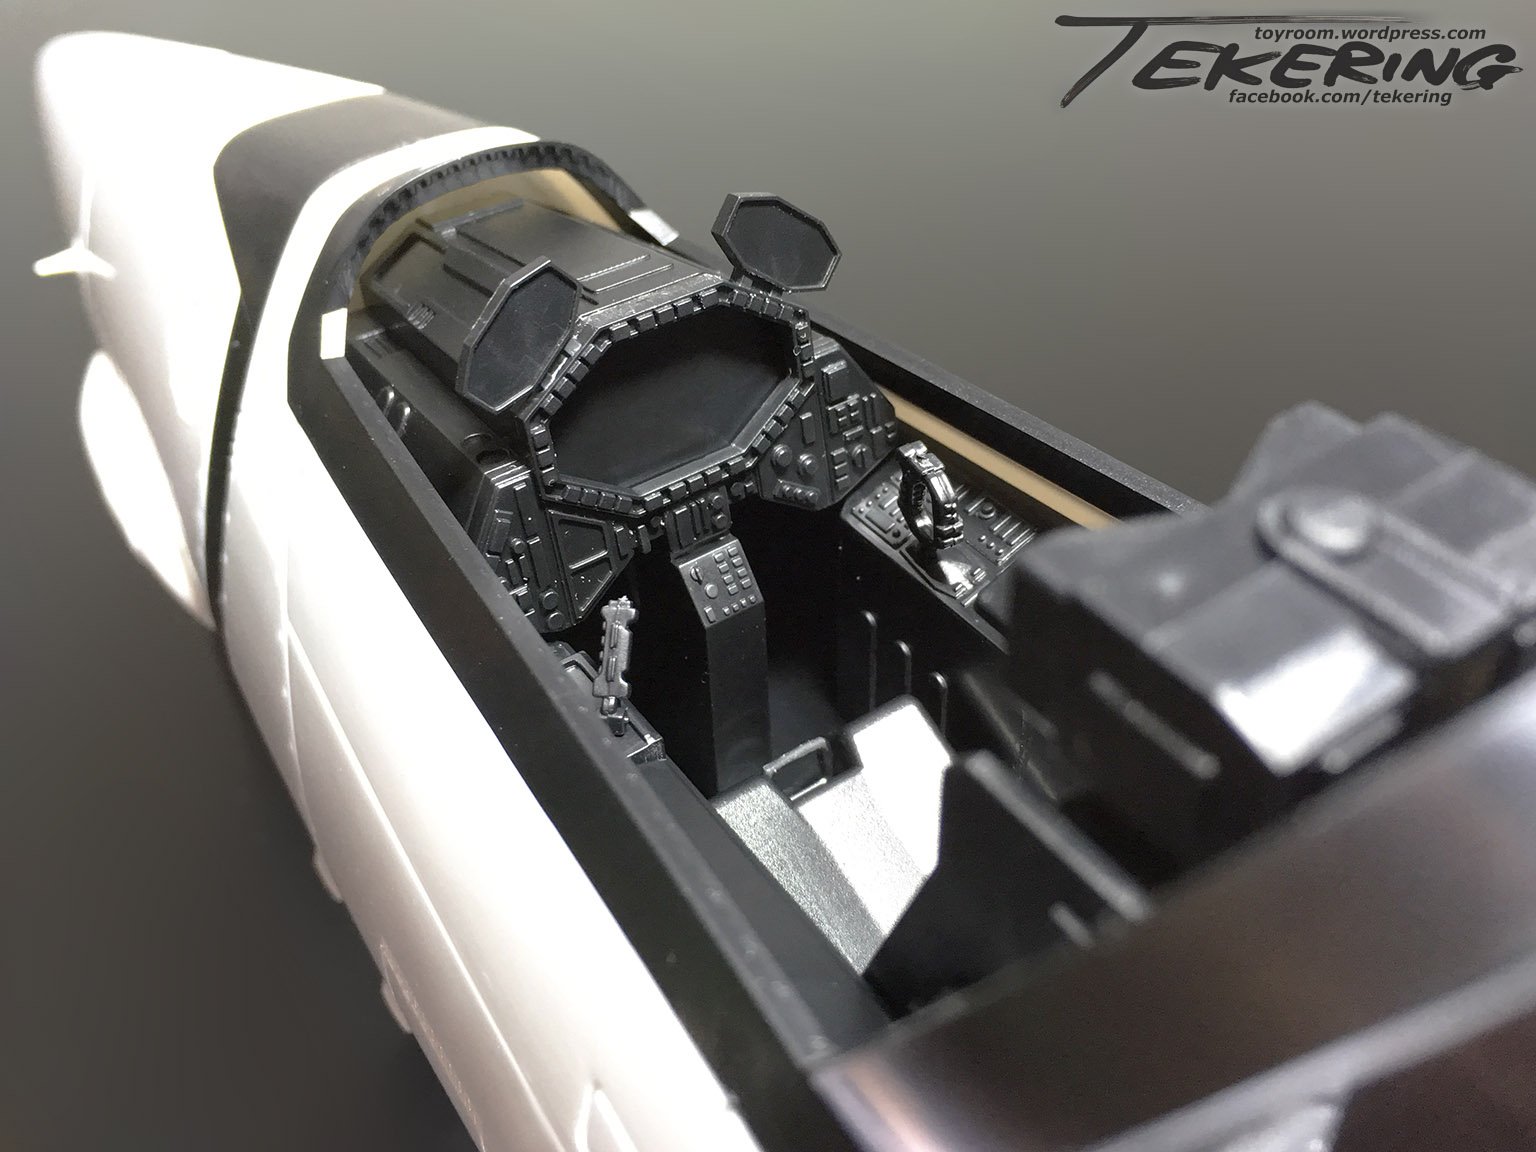
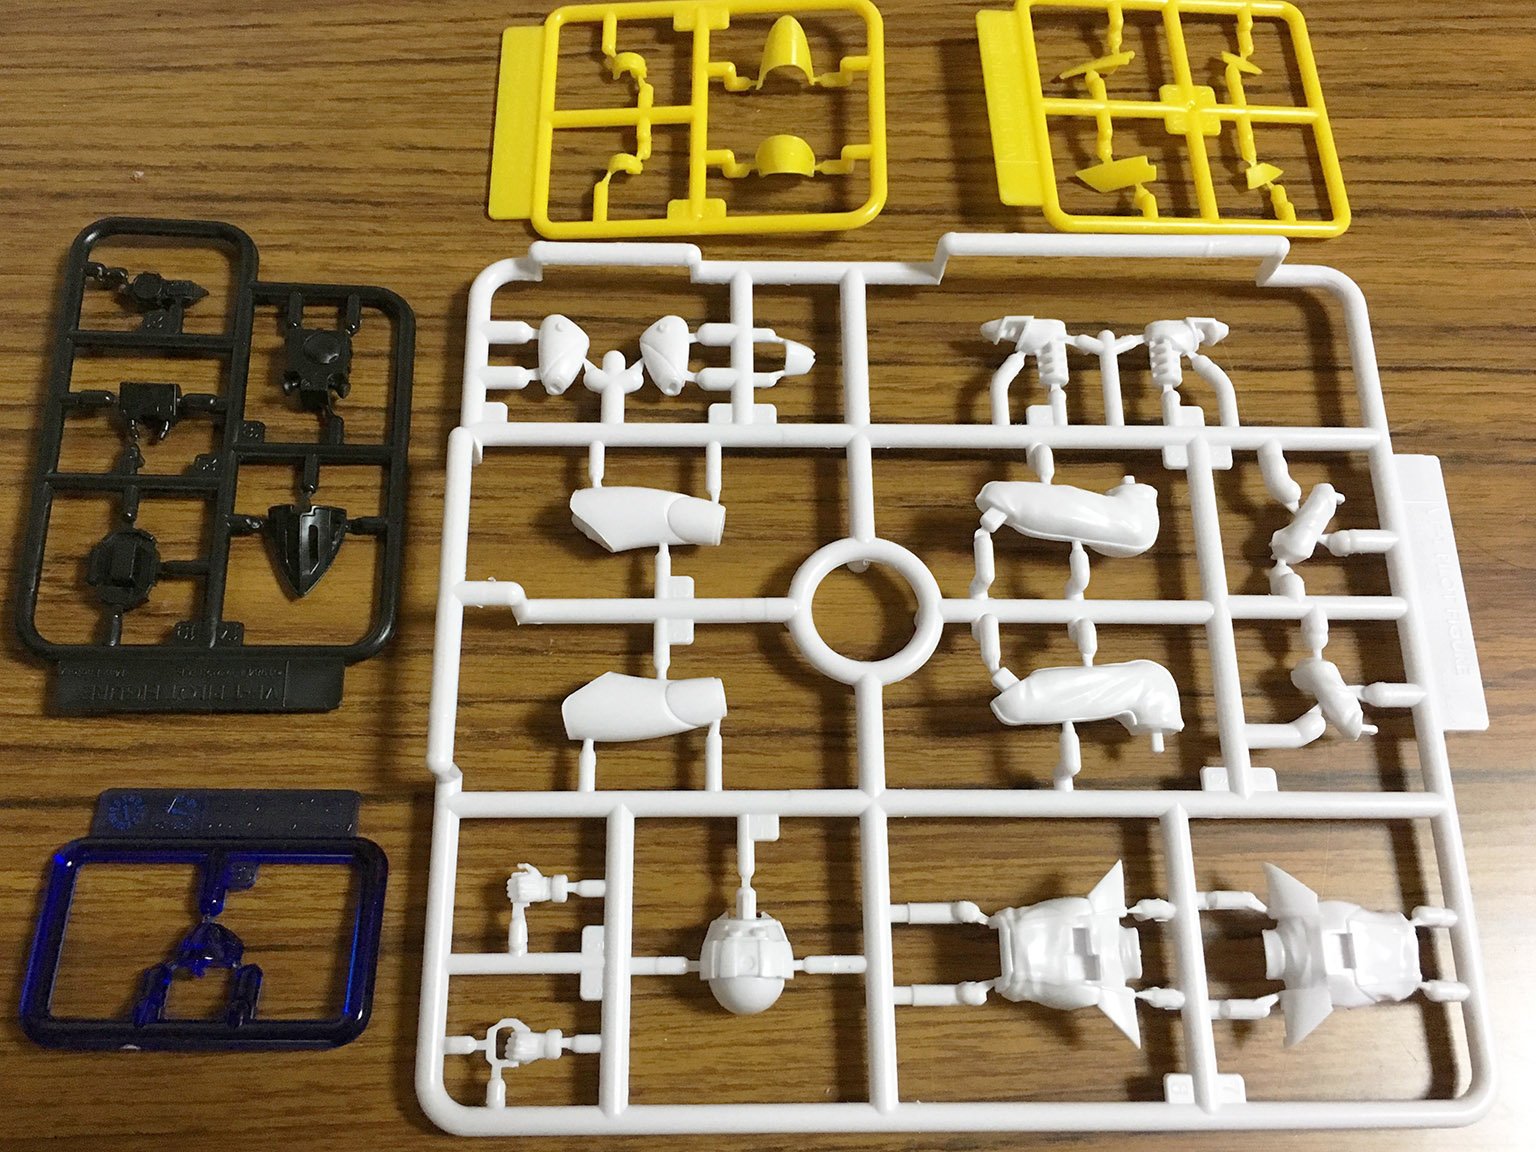
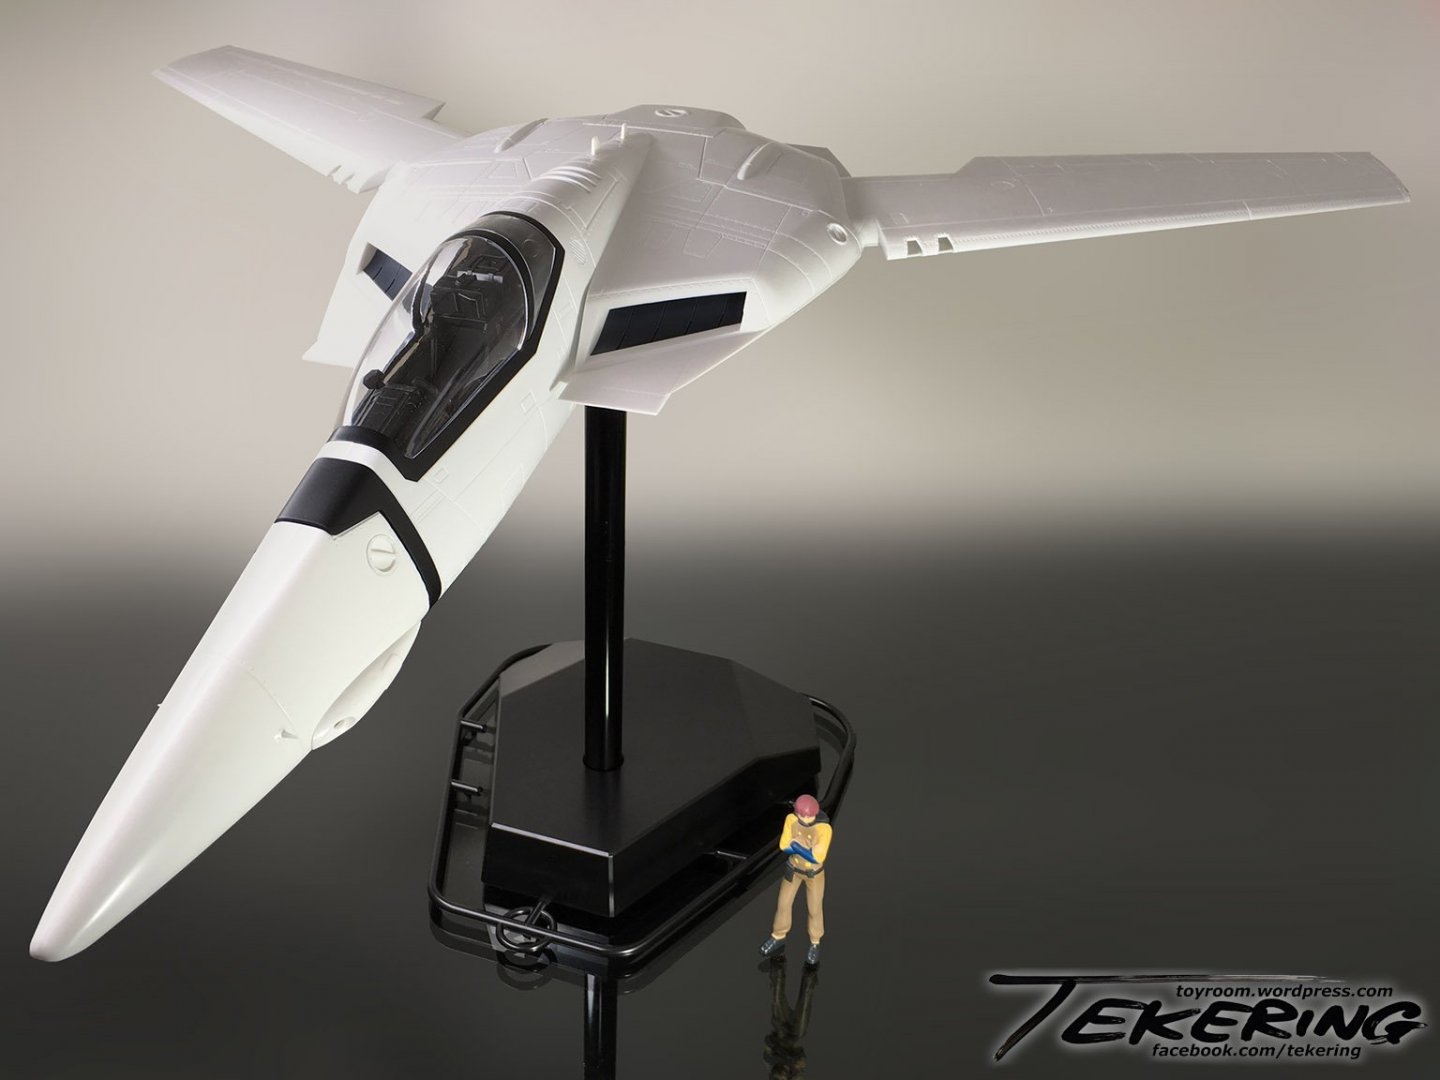
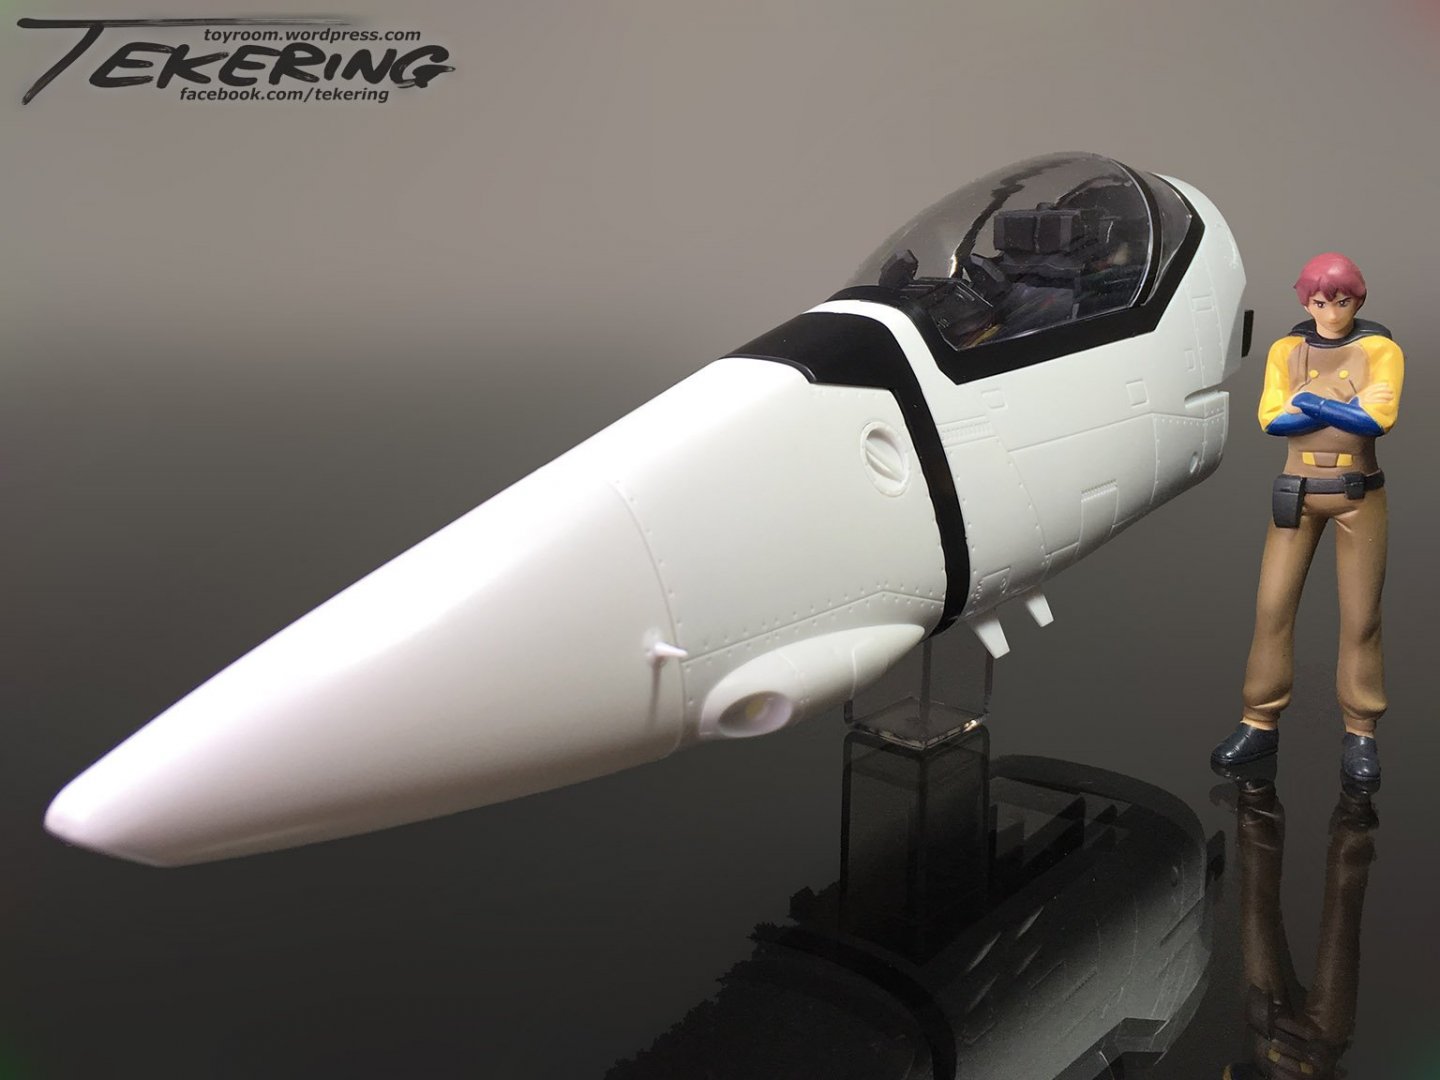
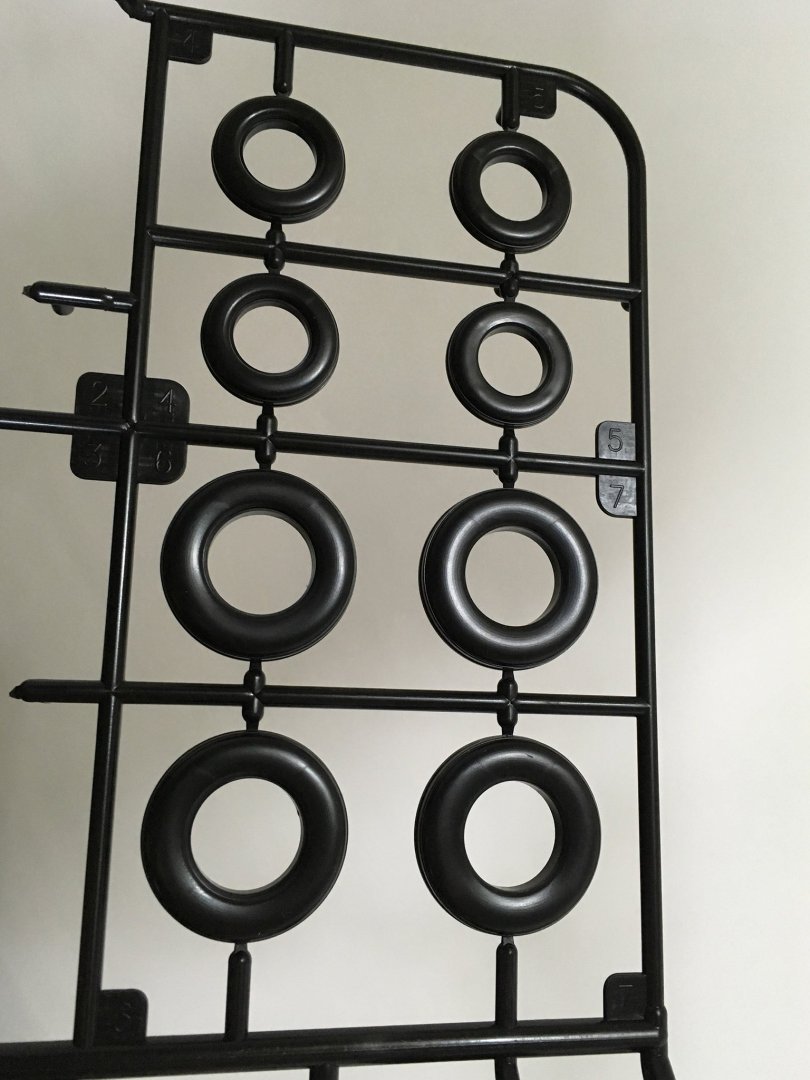
Something like this? I'm slowly starting to warm to this kit. It looks great, it's quick and easy to put together, and the proportions are fabulous. The cockpit's a lot more accurate than that ridiculously-overpriced 1:6 scale speaker -- even completely unpainted, the details are striking -- and there's plenty of room to mount LEDs behind the panels if you're so inclined... The pilot is similarly impressive, and I may even put an LED in the head. The large scale allows for some detail never seen on a Valkyrie toy or model before. This nosecone looks like it could actually be unscrewed and disassembled for maintenance! Oh, and if there's still any question as to whether a fighter mode retool is in the pipeline: The black sprue includes tires for landing gear (which have no purpose in this kit whatsoever). I'm gonna finish rough assembly before I start to paint the Valk (haven't decided on a color scheme yet), but I've already started painting the pilot. There will definitely be demand for it.


- 1065 replies
-
- 1
-
-
- max factory
- dyrl
- (and 1 more)
-
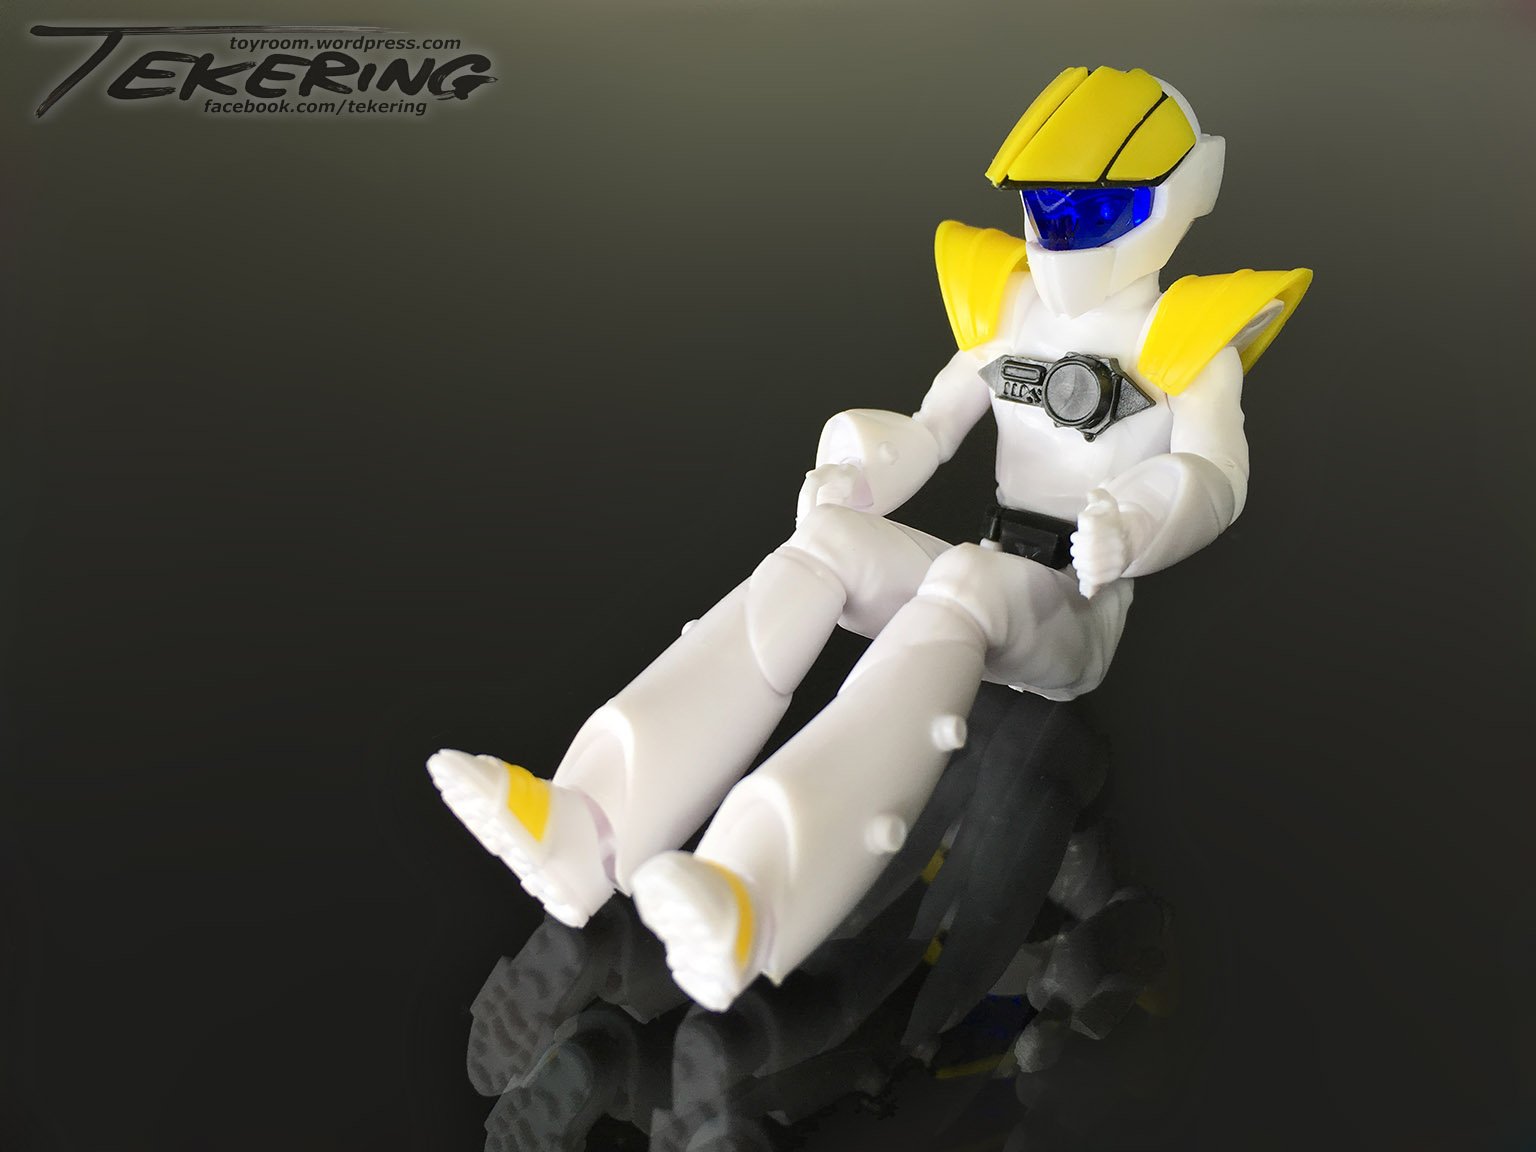
It's called "suspension of disbelief." Actually, the figure is comprised of 30 separate parts, for ease of painting.

-
I sprayed a thin, even coat over all the armor parts once the decals had dried. I think the inscribed panel lines on the HMRs are too thick, and panel-lining would betray the scale... at least, using conventional paints. A very sharp 2B pencil might work, though...
-
If I can get enough duplicate decal sets, I want to do up all my HMRs in a similar fashion. Tiny markings can make a huge difference.