

Rock
-
Posts
396 -
Joined
-
Last visited
Content Type
Profiles
Forums
Events
Gallery
Everything posted by Rock
-
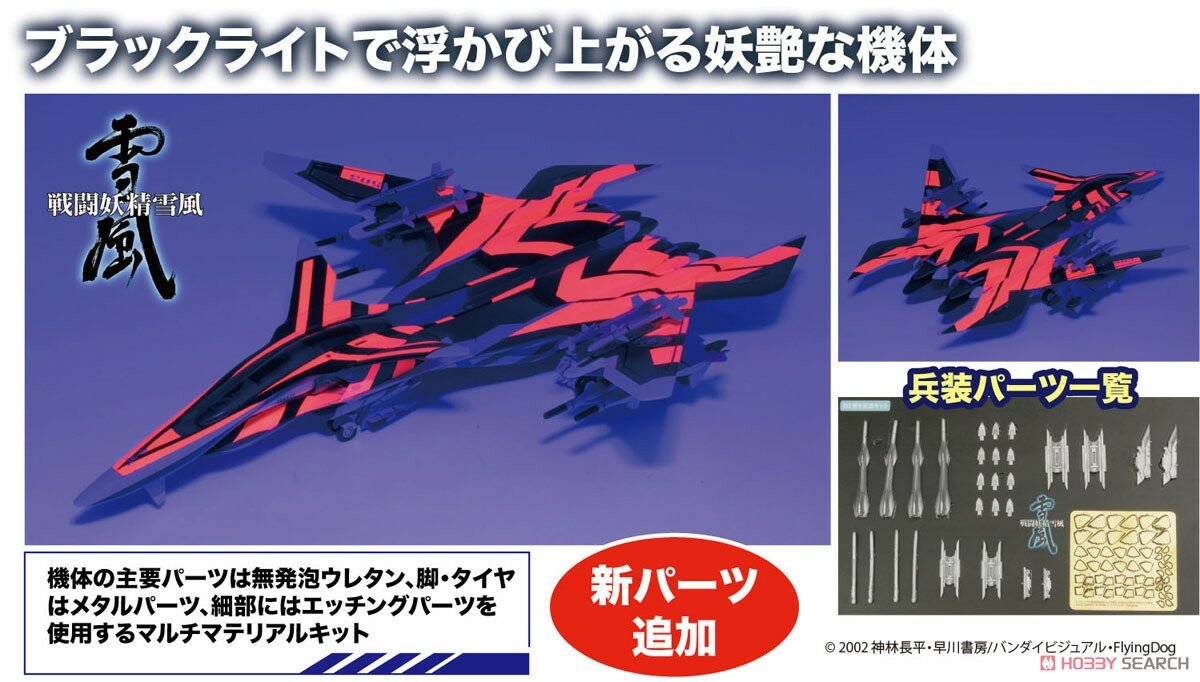
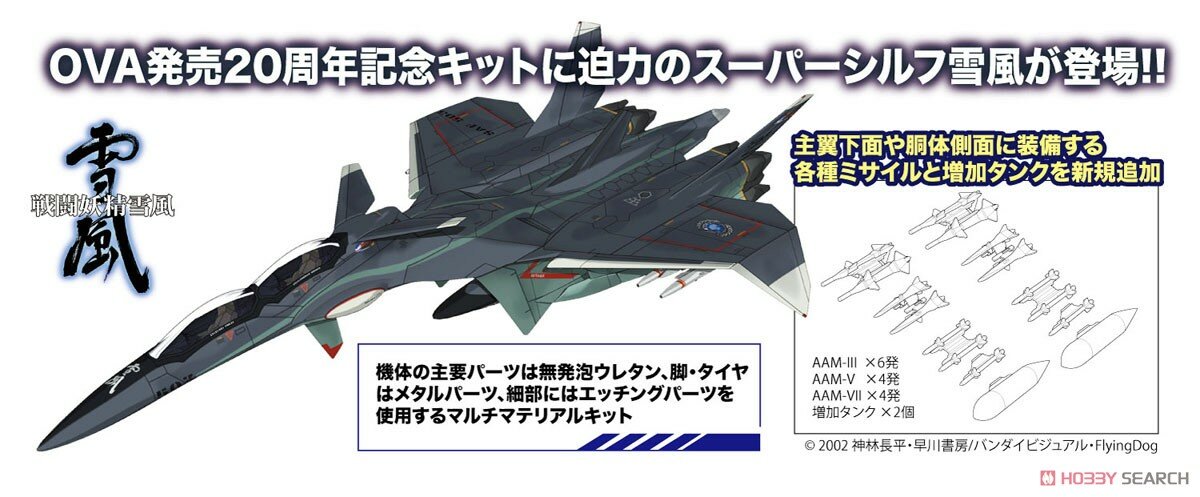
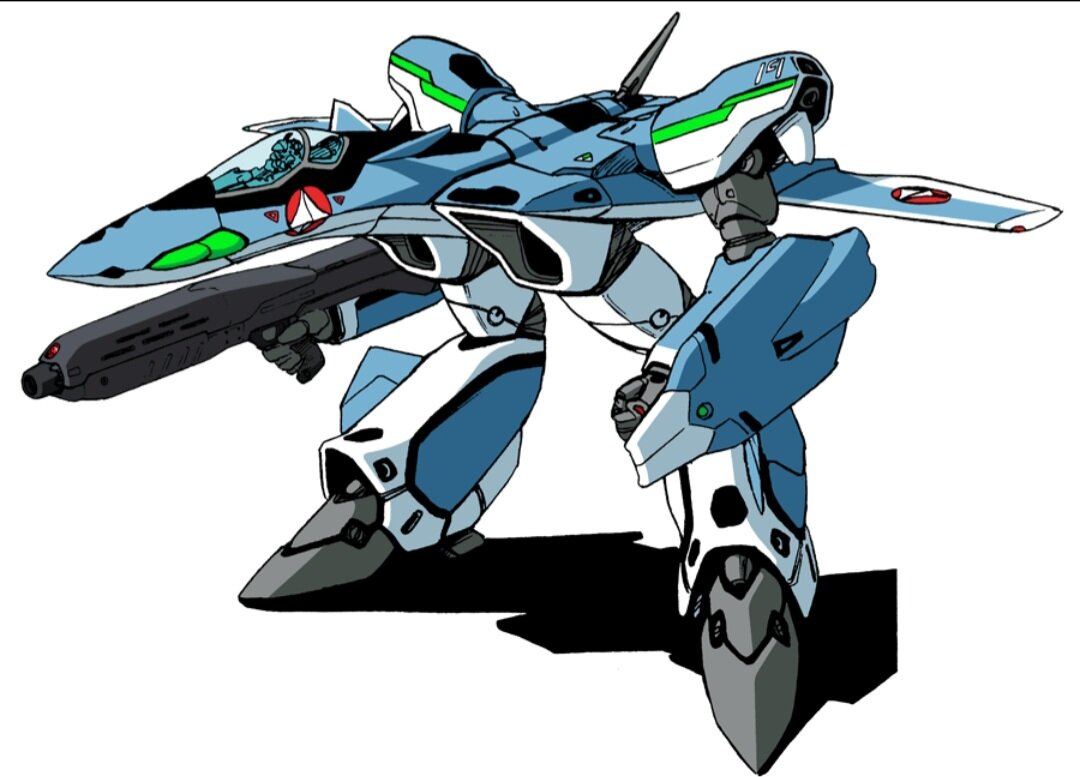
1/72 Platz Mave Yukikaze (Jam Sense Jammer) with ordinance for late June/July! Same as the previous updated (Feb 2023) Mave that included missiles but also includes fluorescent decals! https://www.1999.co.jp/eng/10912815 Not new but, the Super Sylph update also seemed to fly under my radar last month. https://www.1999.co.jp/eng/10918717 Also this 3d model! https://www.artstation.com/artwork/xJZk84

- 1056 replies
-
- 1
-

-
- yukikaze
- sento yousei yukikaze
- (and 6 more)
-
Slow and stead my friend.
-
https://www.animenewsnetwork.com/news/2023-06-05/animeigo-to-launch-kickstarter-campaign-for-macross-ii-anime-release/.198835 "AnimEigo's Robert Woodhead announced at the Animazement event last week that AnimEigo will launch a Kickstarter campaign for its release of the Super Dimensional Fortress Macross II: The Movie original video anime (OVA) this summer. The company will reveal more details at its panel at the Otakon event, which will take place on July 28-30. Bigwest announced in July 2022 that AnimEigo would release the anime on Blu-ray Disc. Woodhead previously revealed on Twitter at that time that its release of Macross II would be an HD transfer and not an upscale."
-
You sir, are giving me dangerous thoughts. With all the Ver Ka Zeta, I decided to revist an old friend built nearly 20 years ago, that became a project 10 years ago, to see daylight 2 days ago. Lol
-
/mission_cmpl
- 90 replies
-
- 8
-
-
- macross vf-x2
- vf-19 excalibur
- (and 2 more)
-
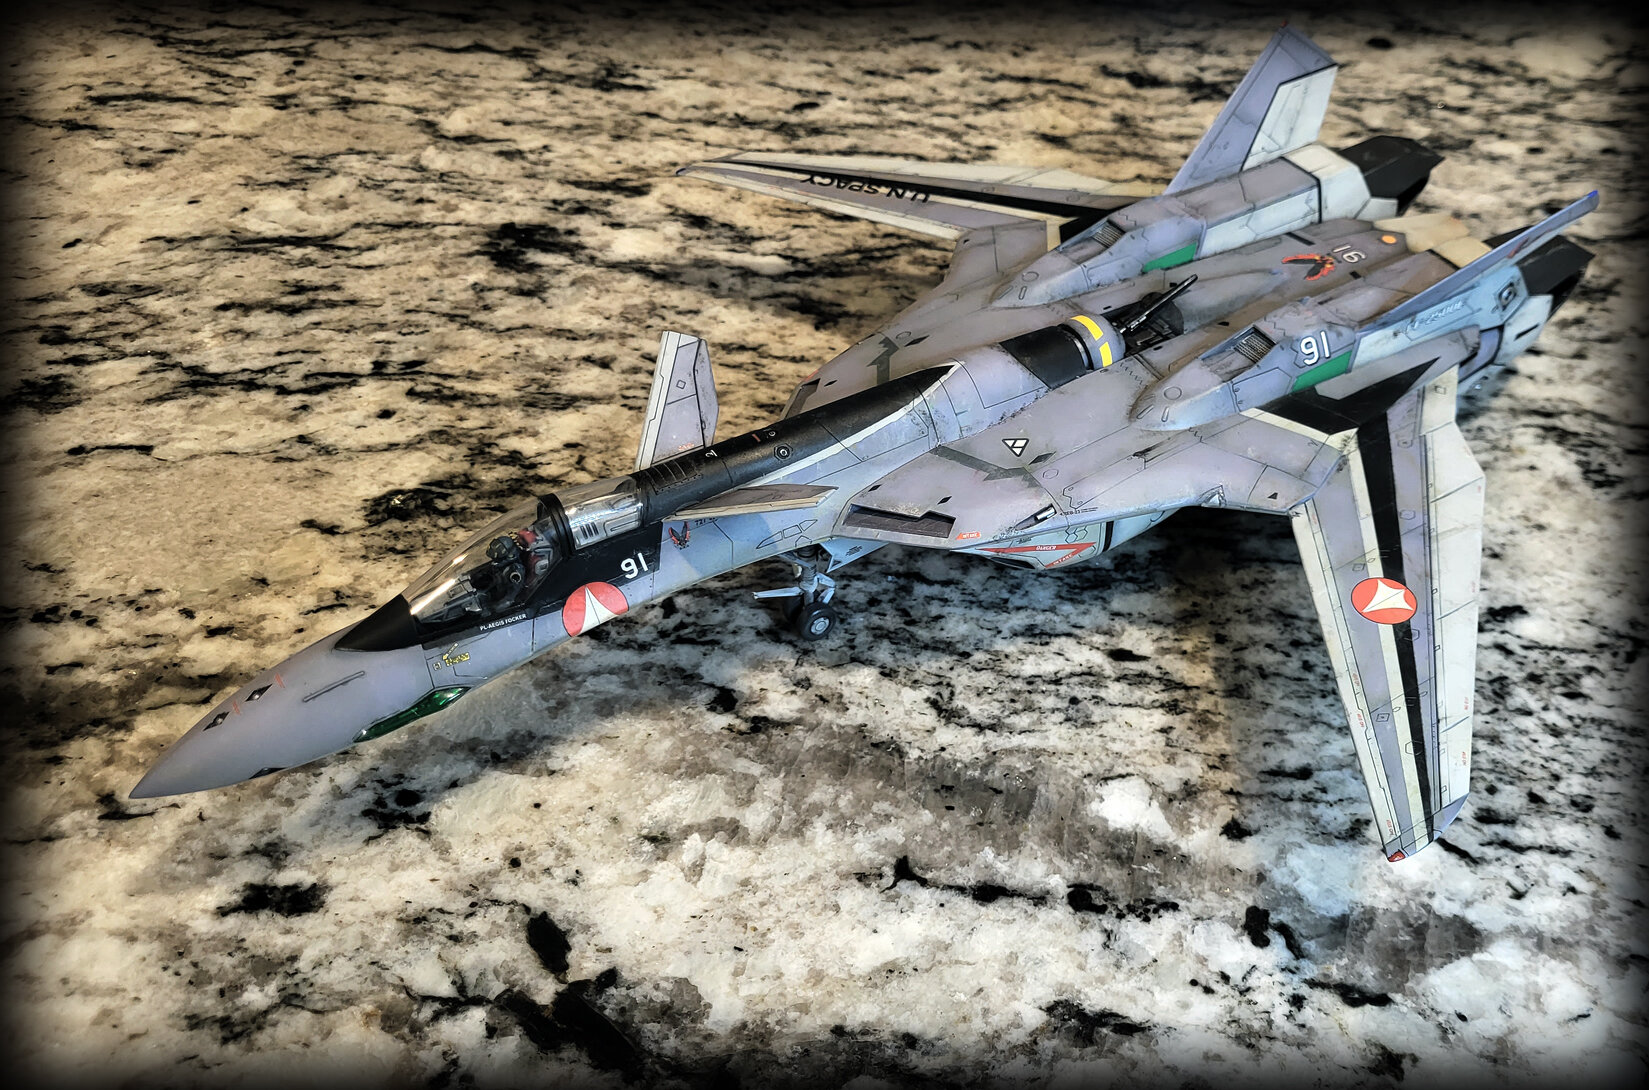
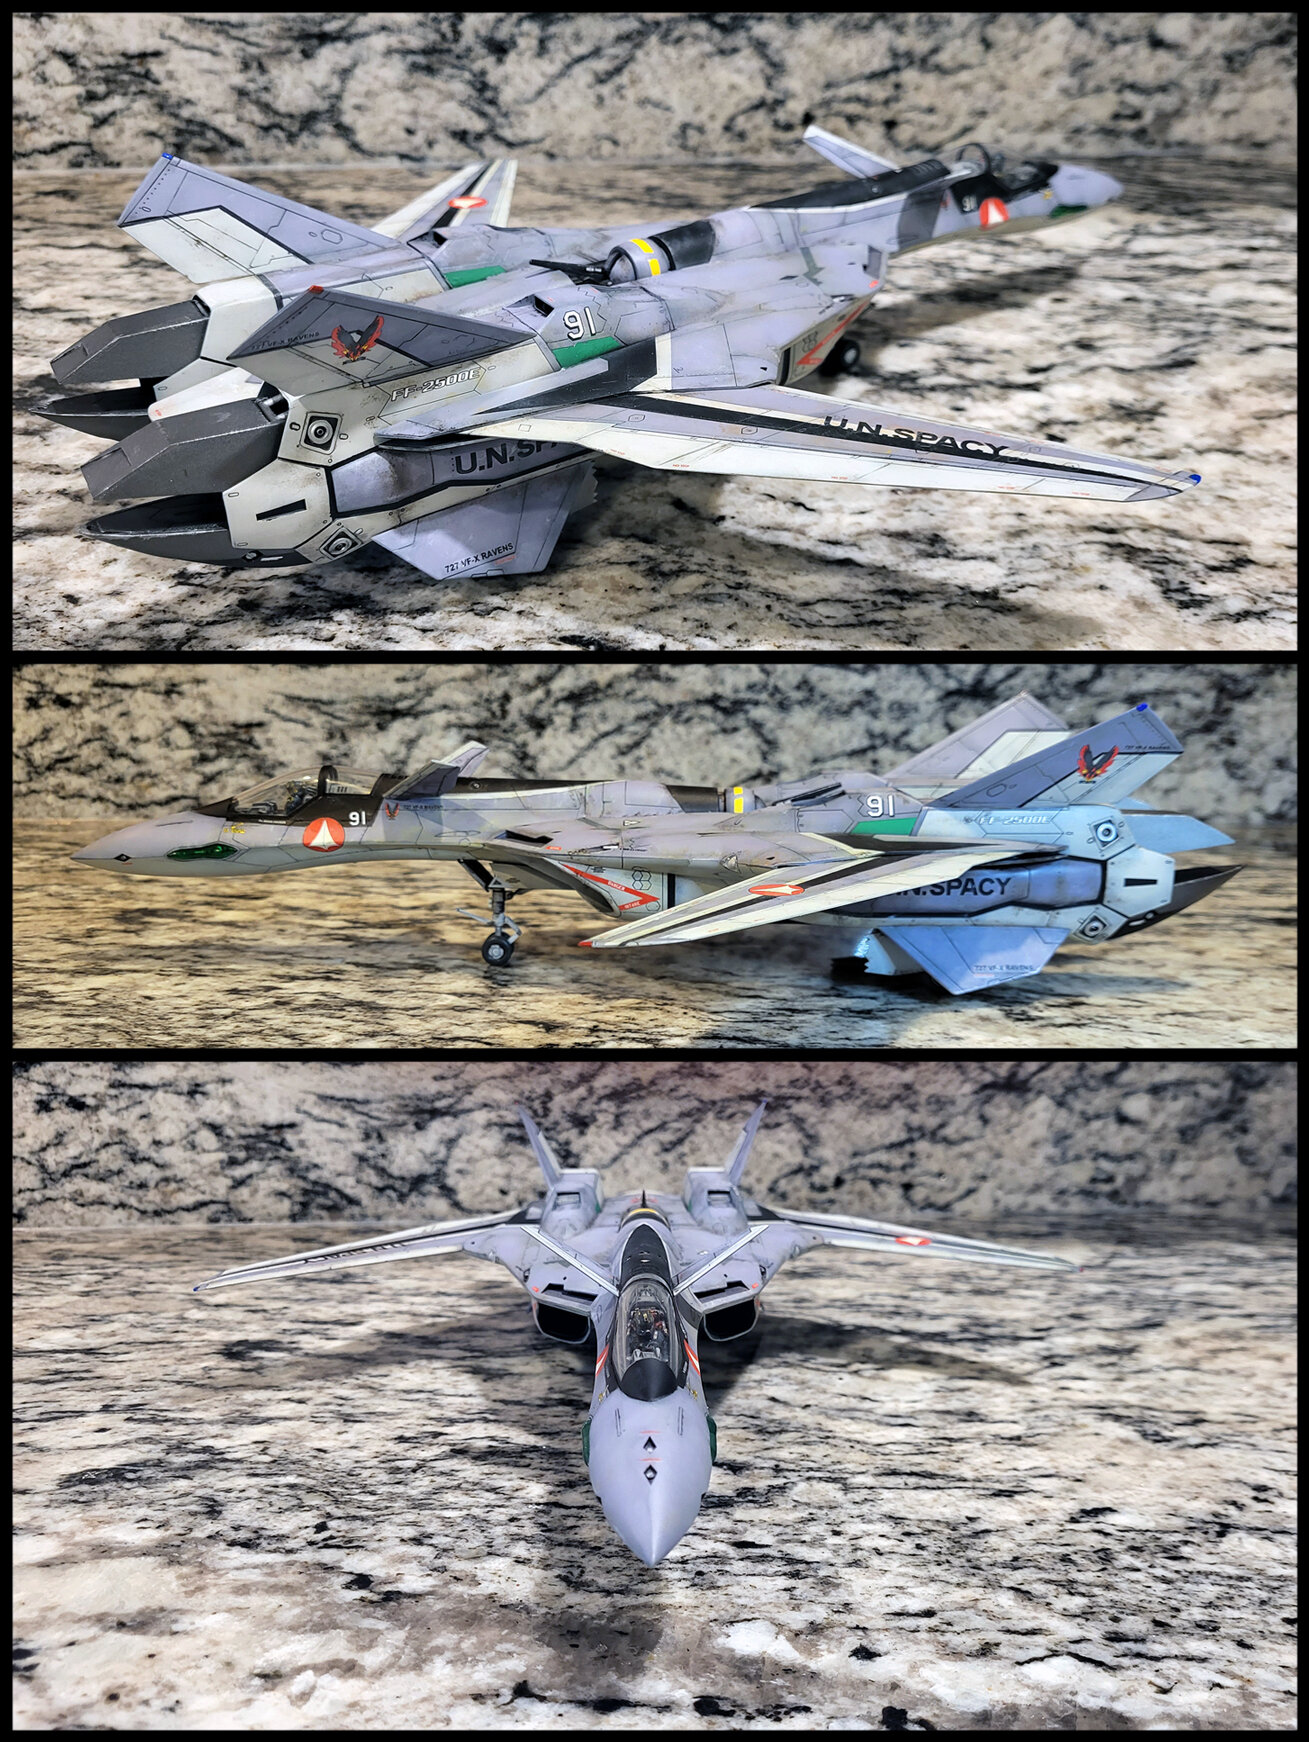
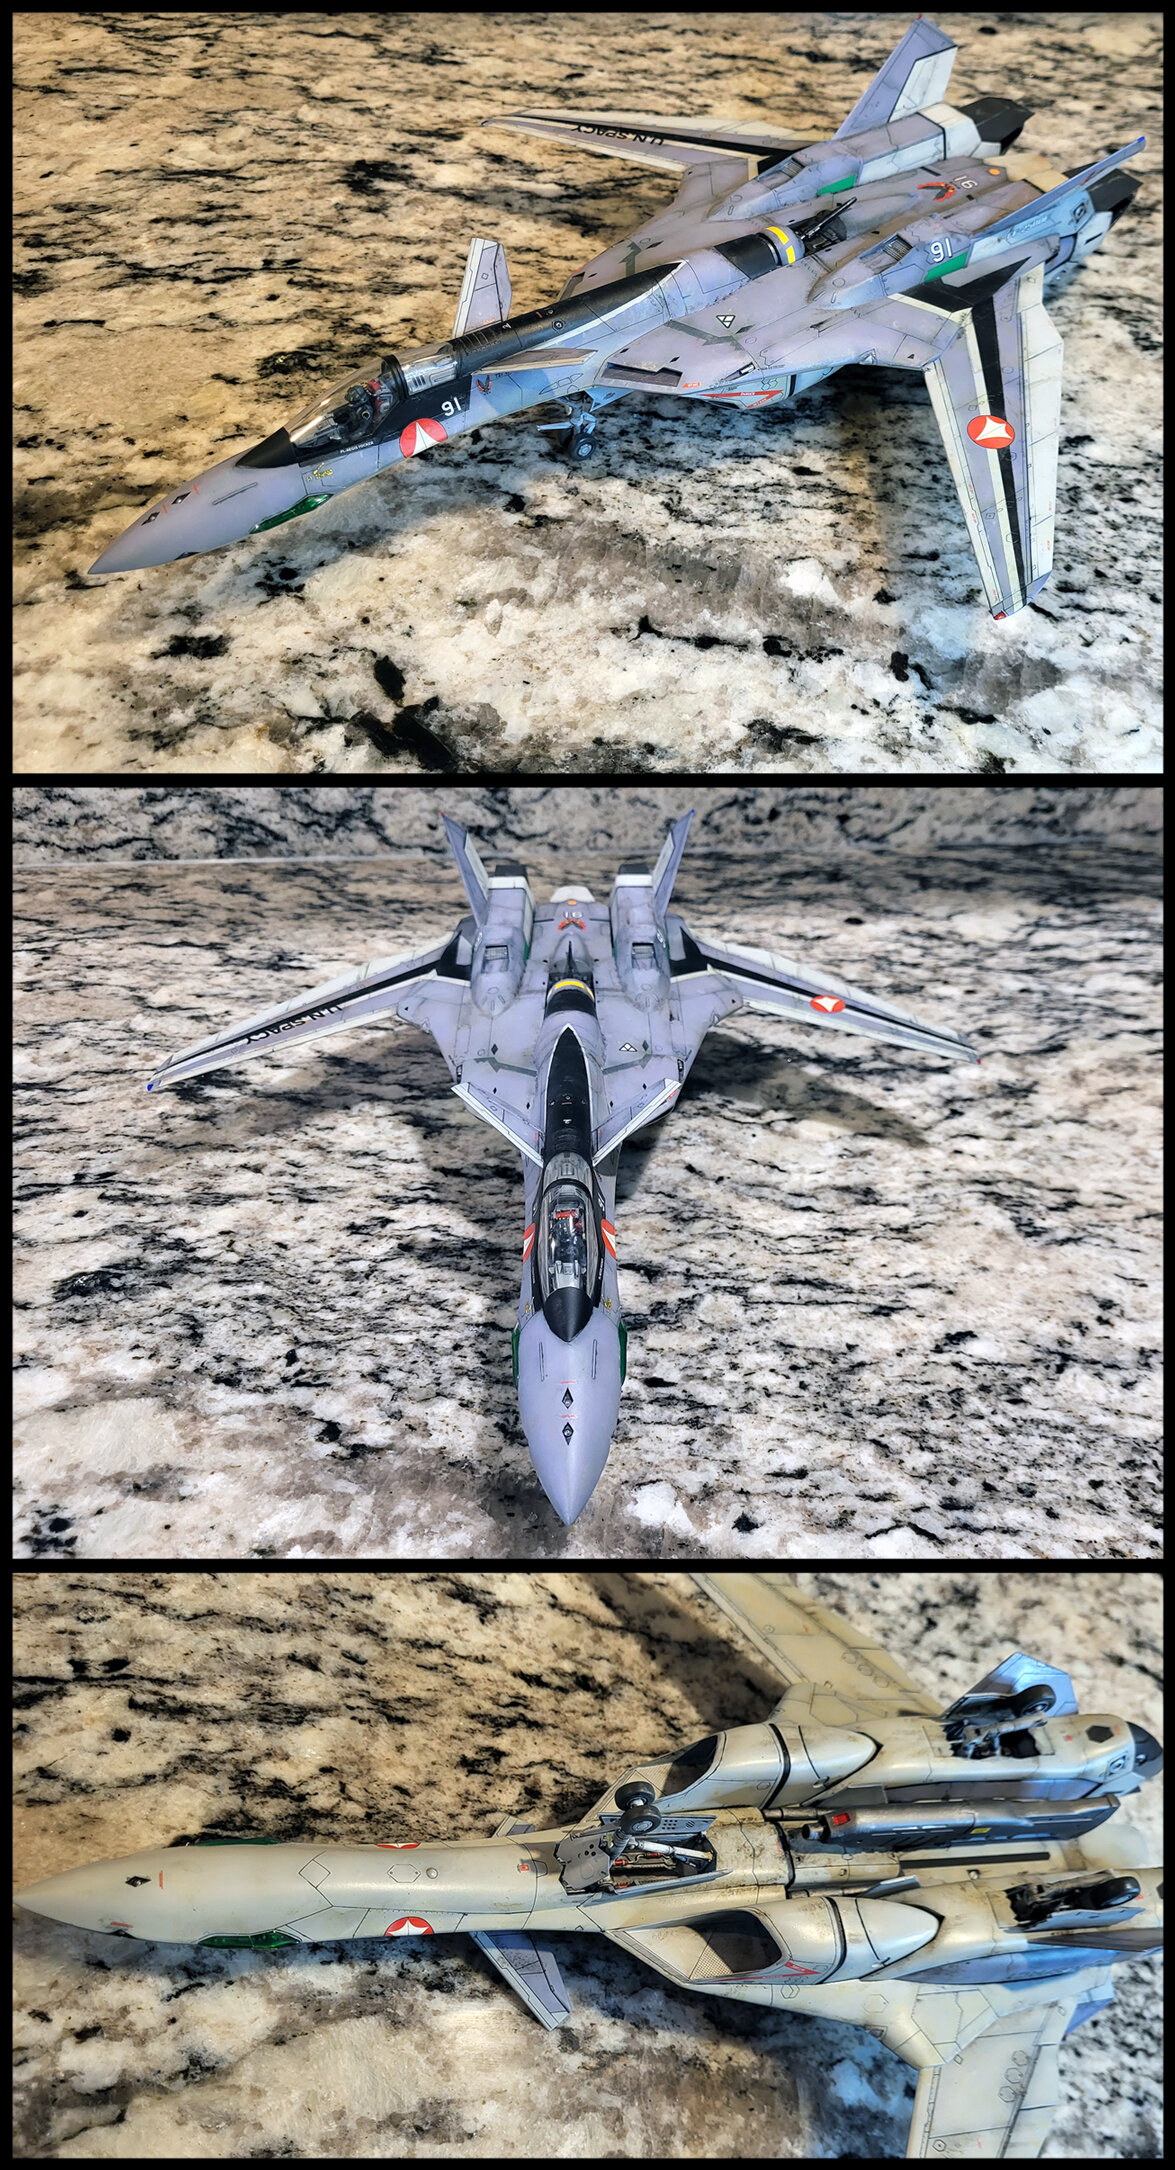
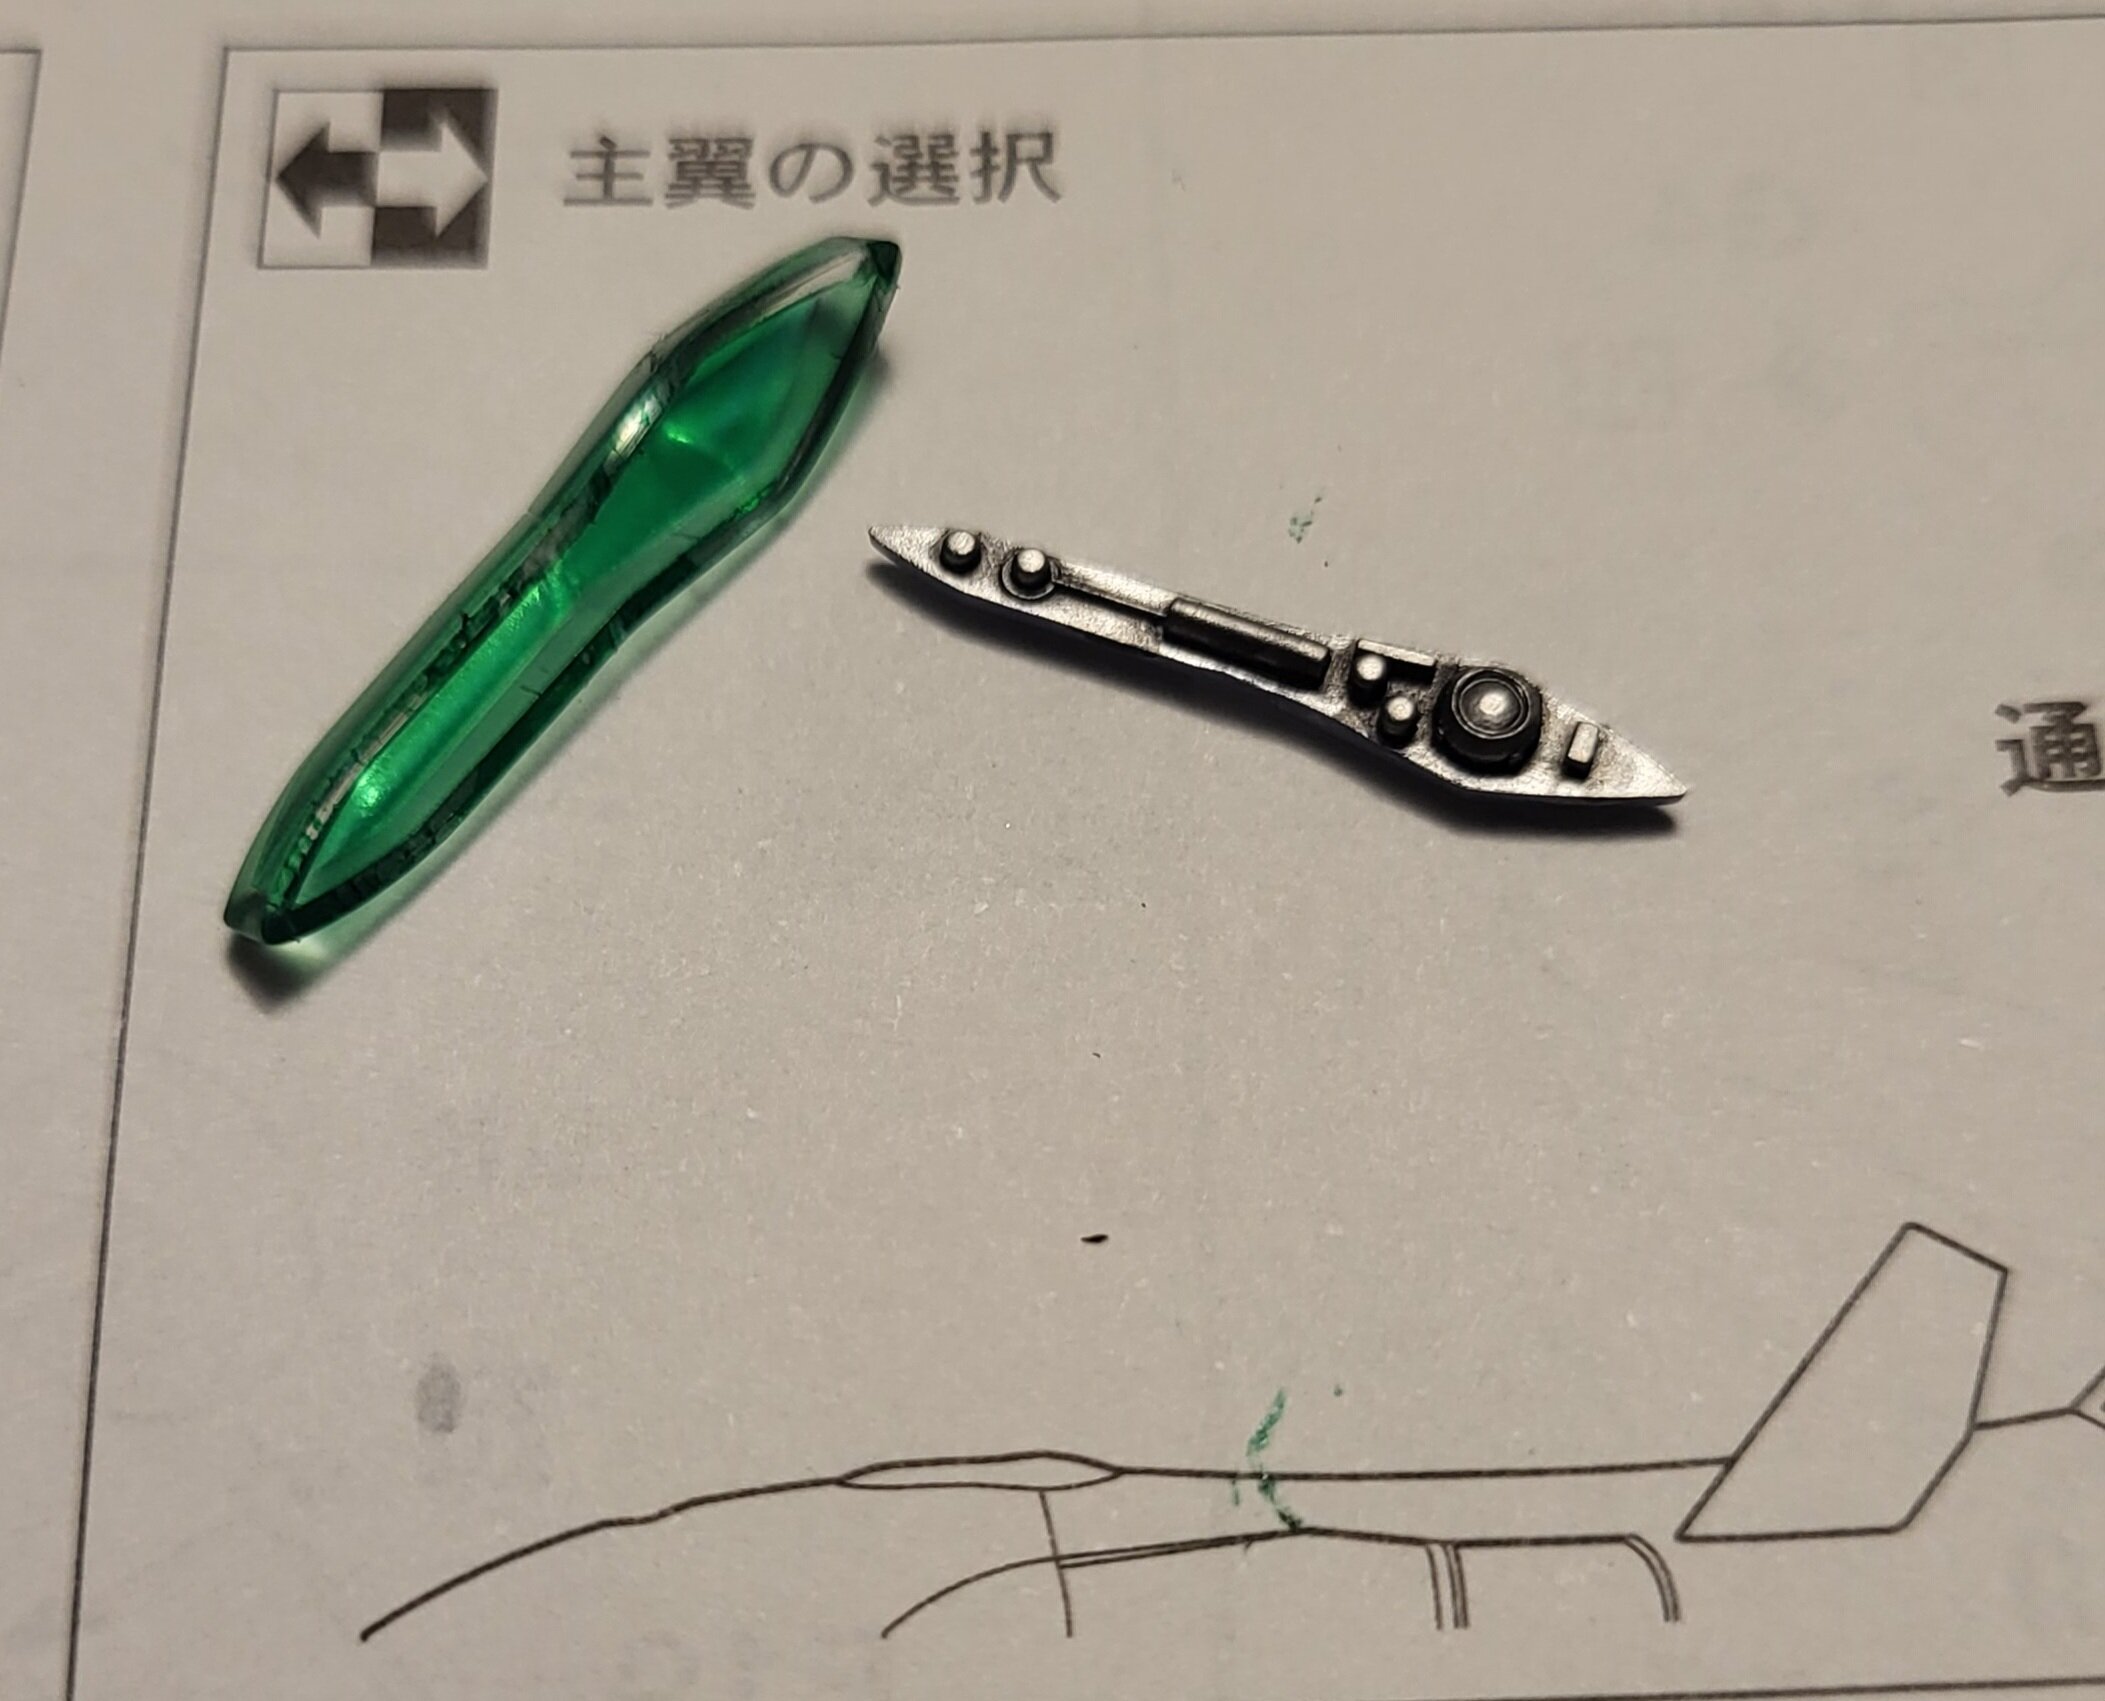
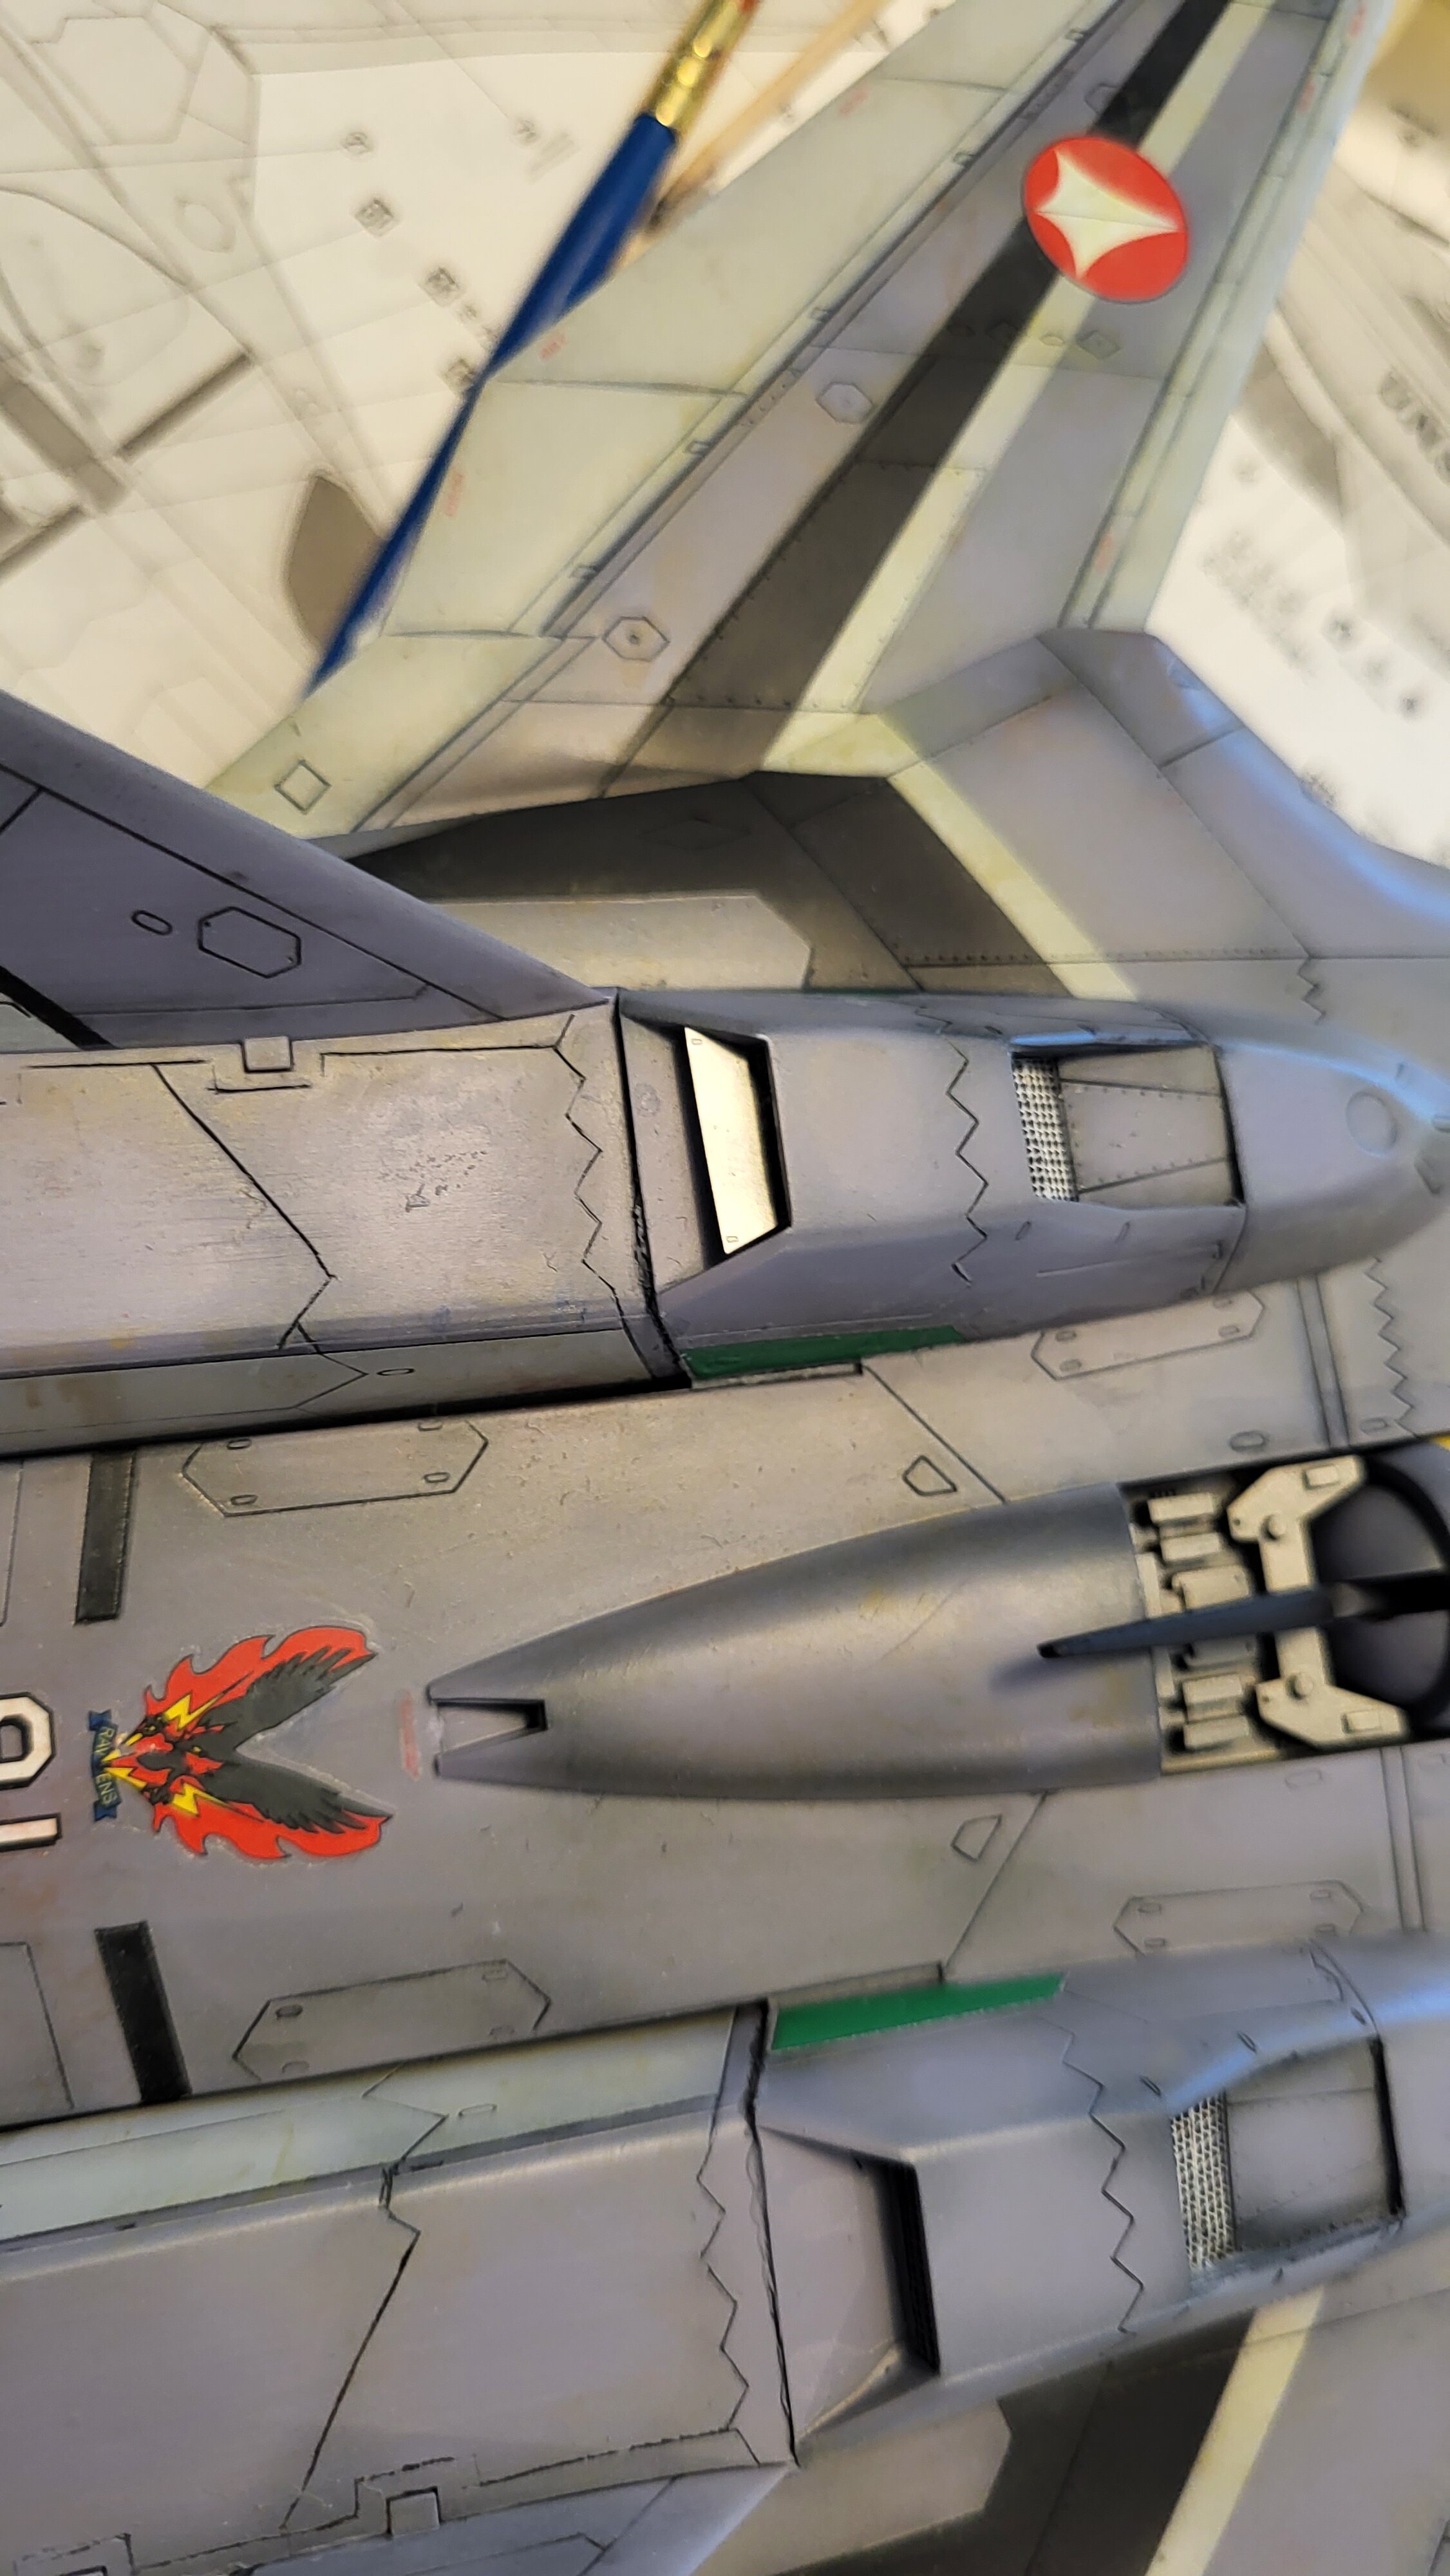
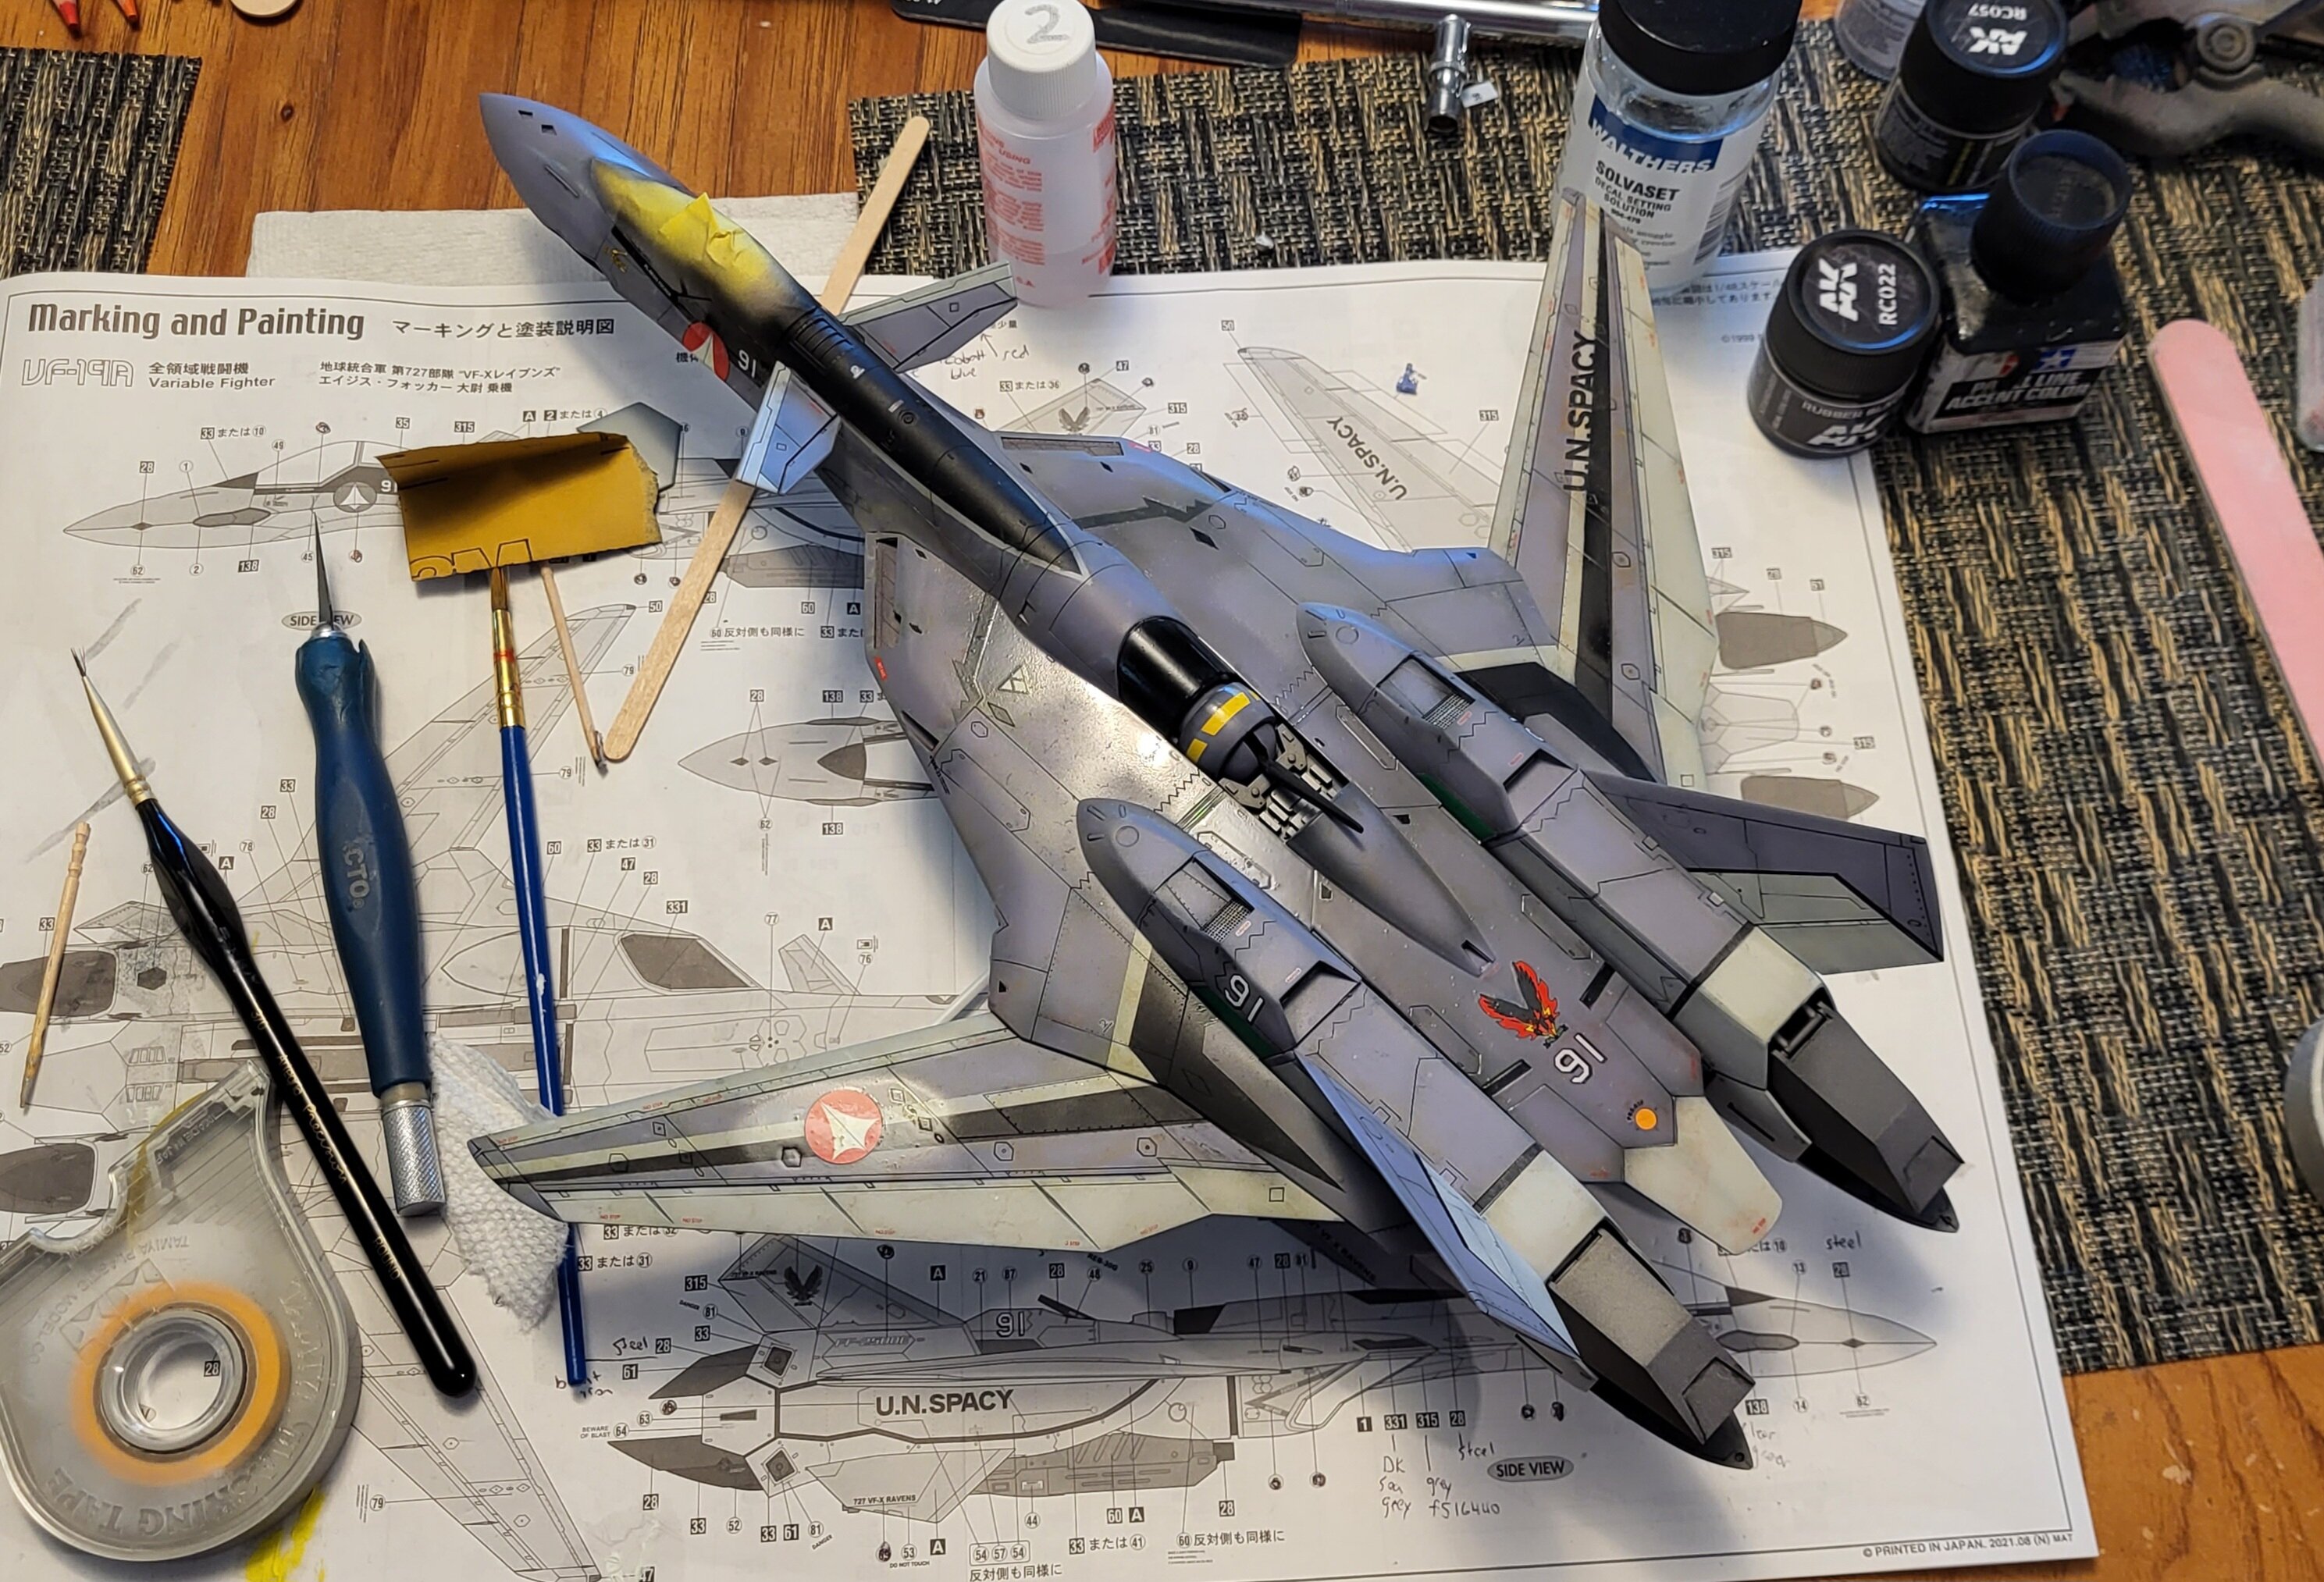
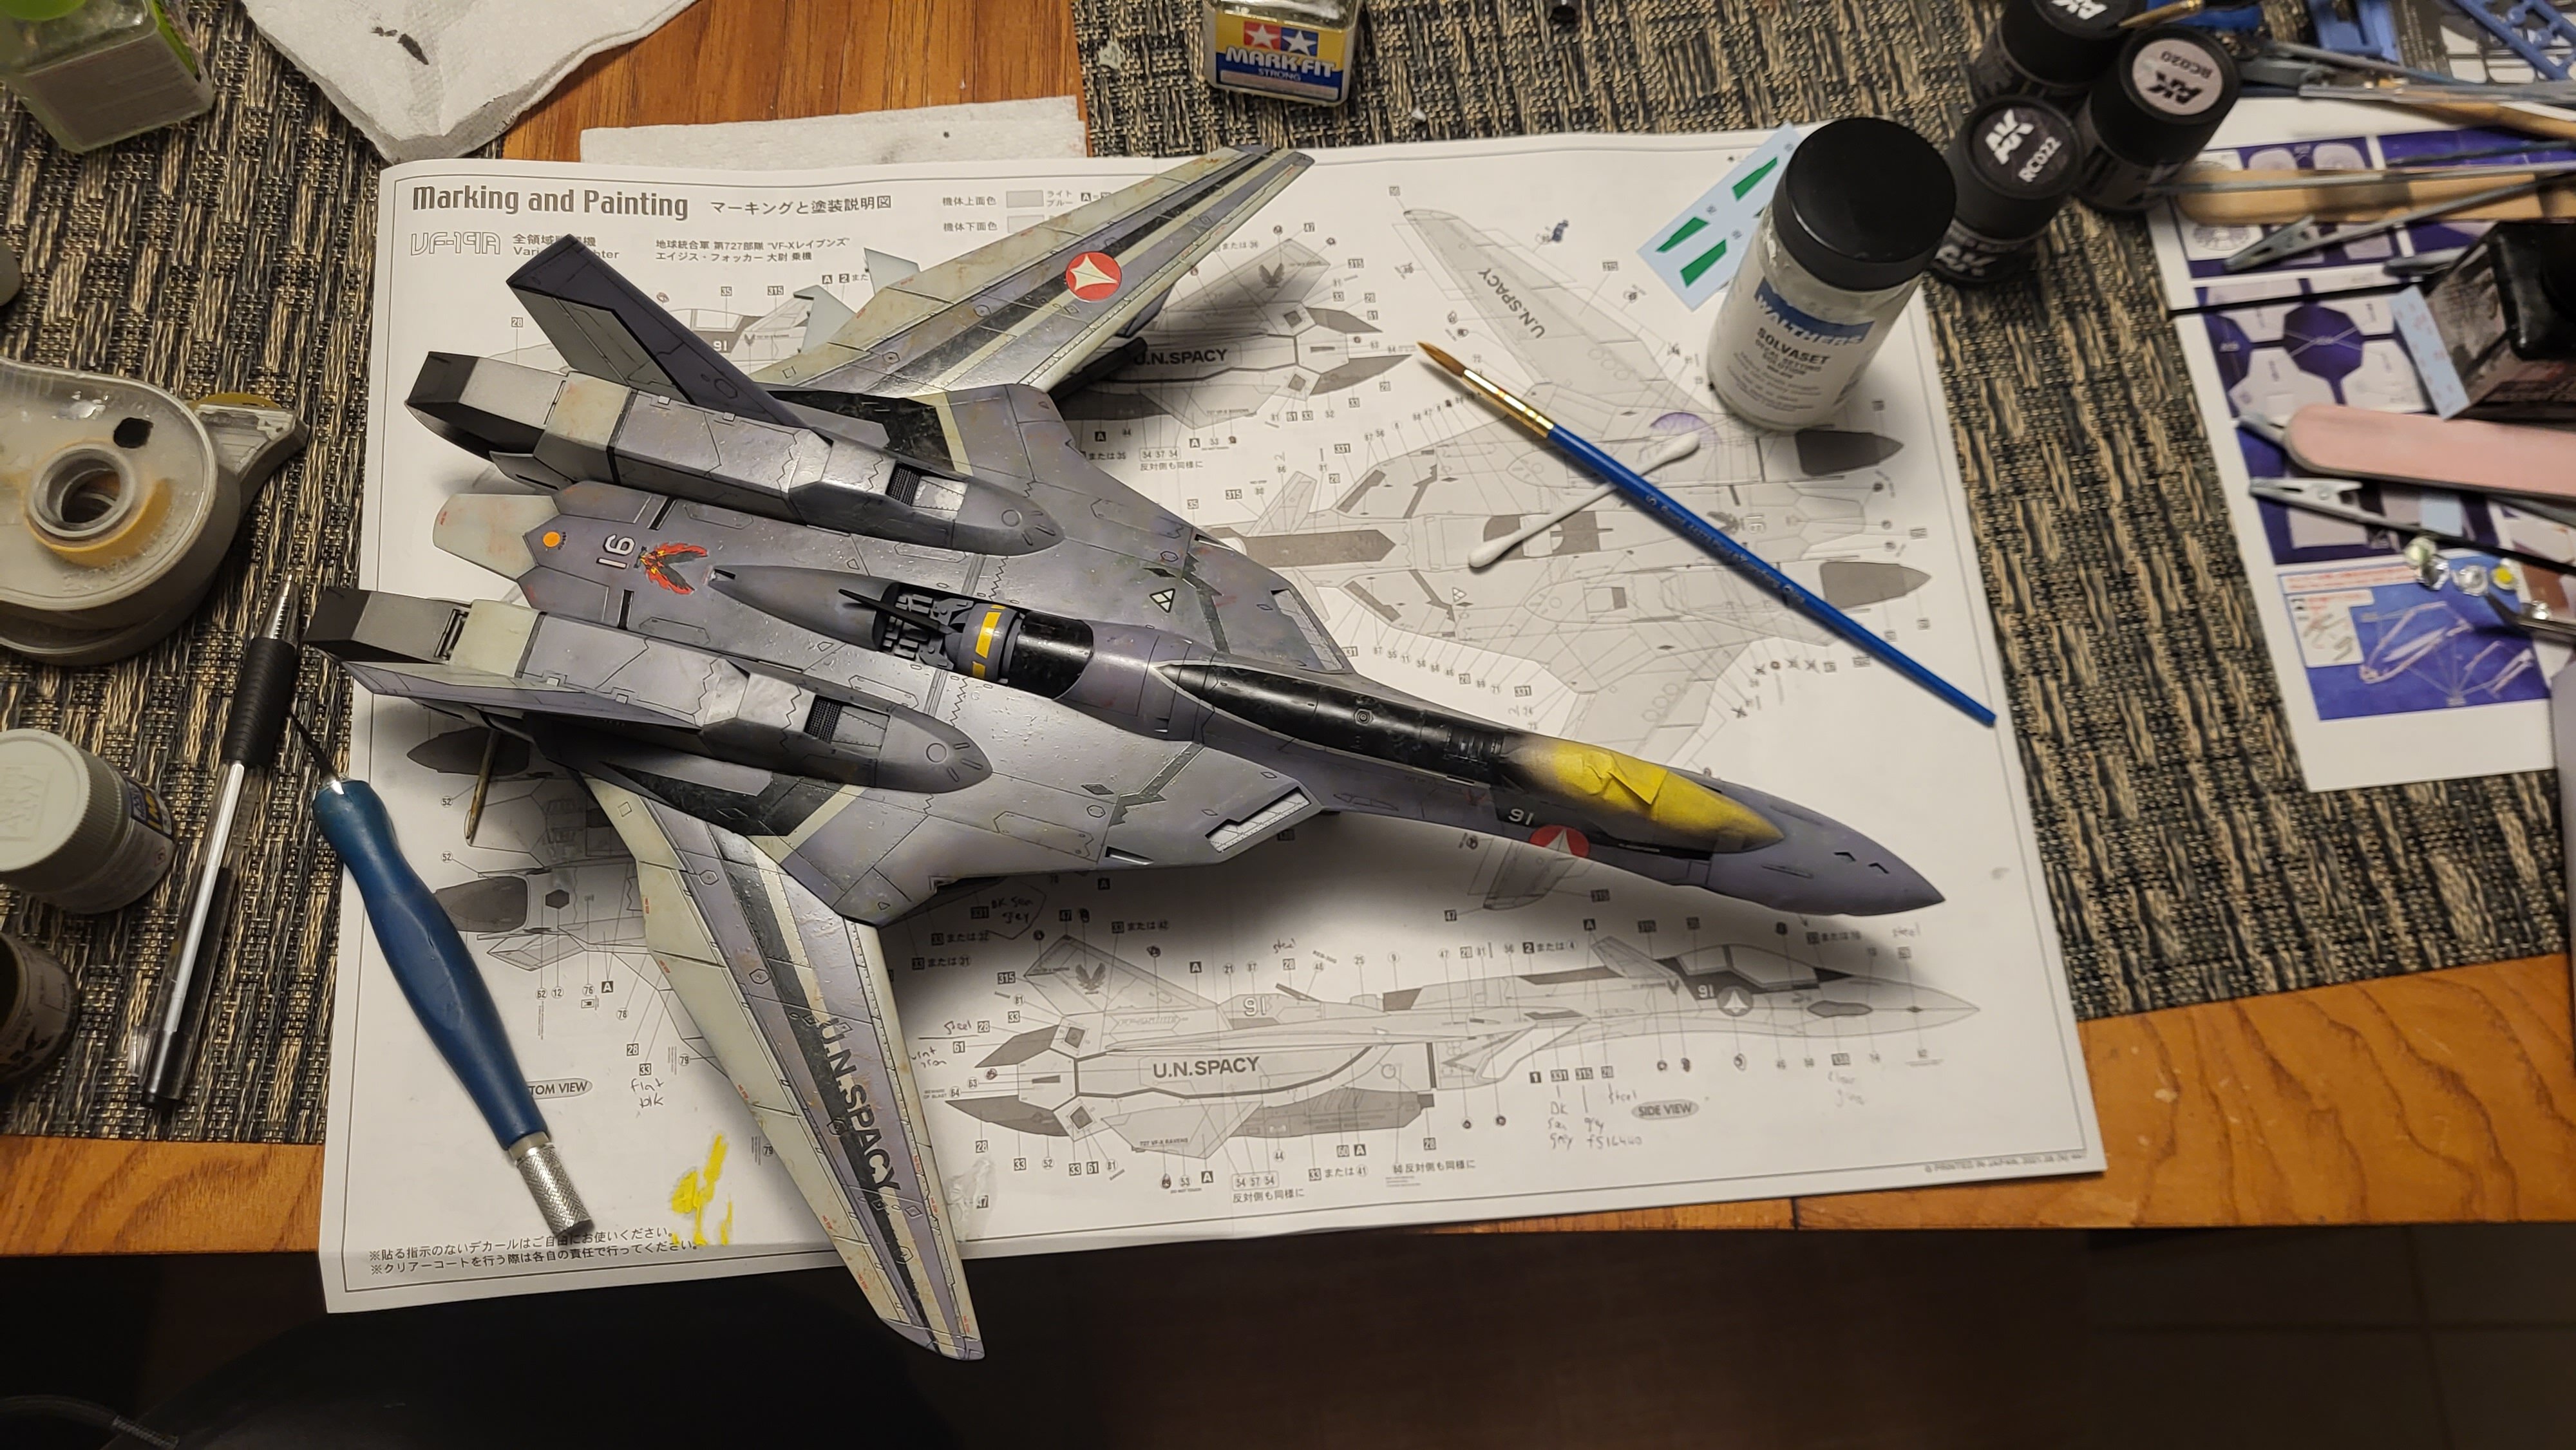
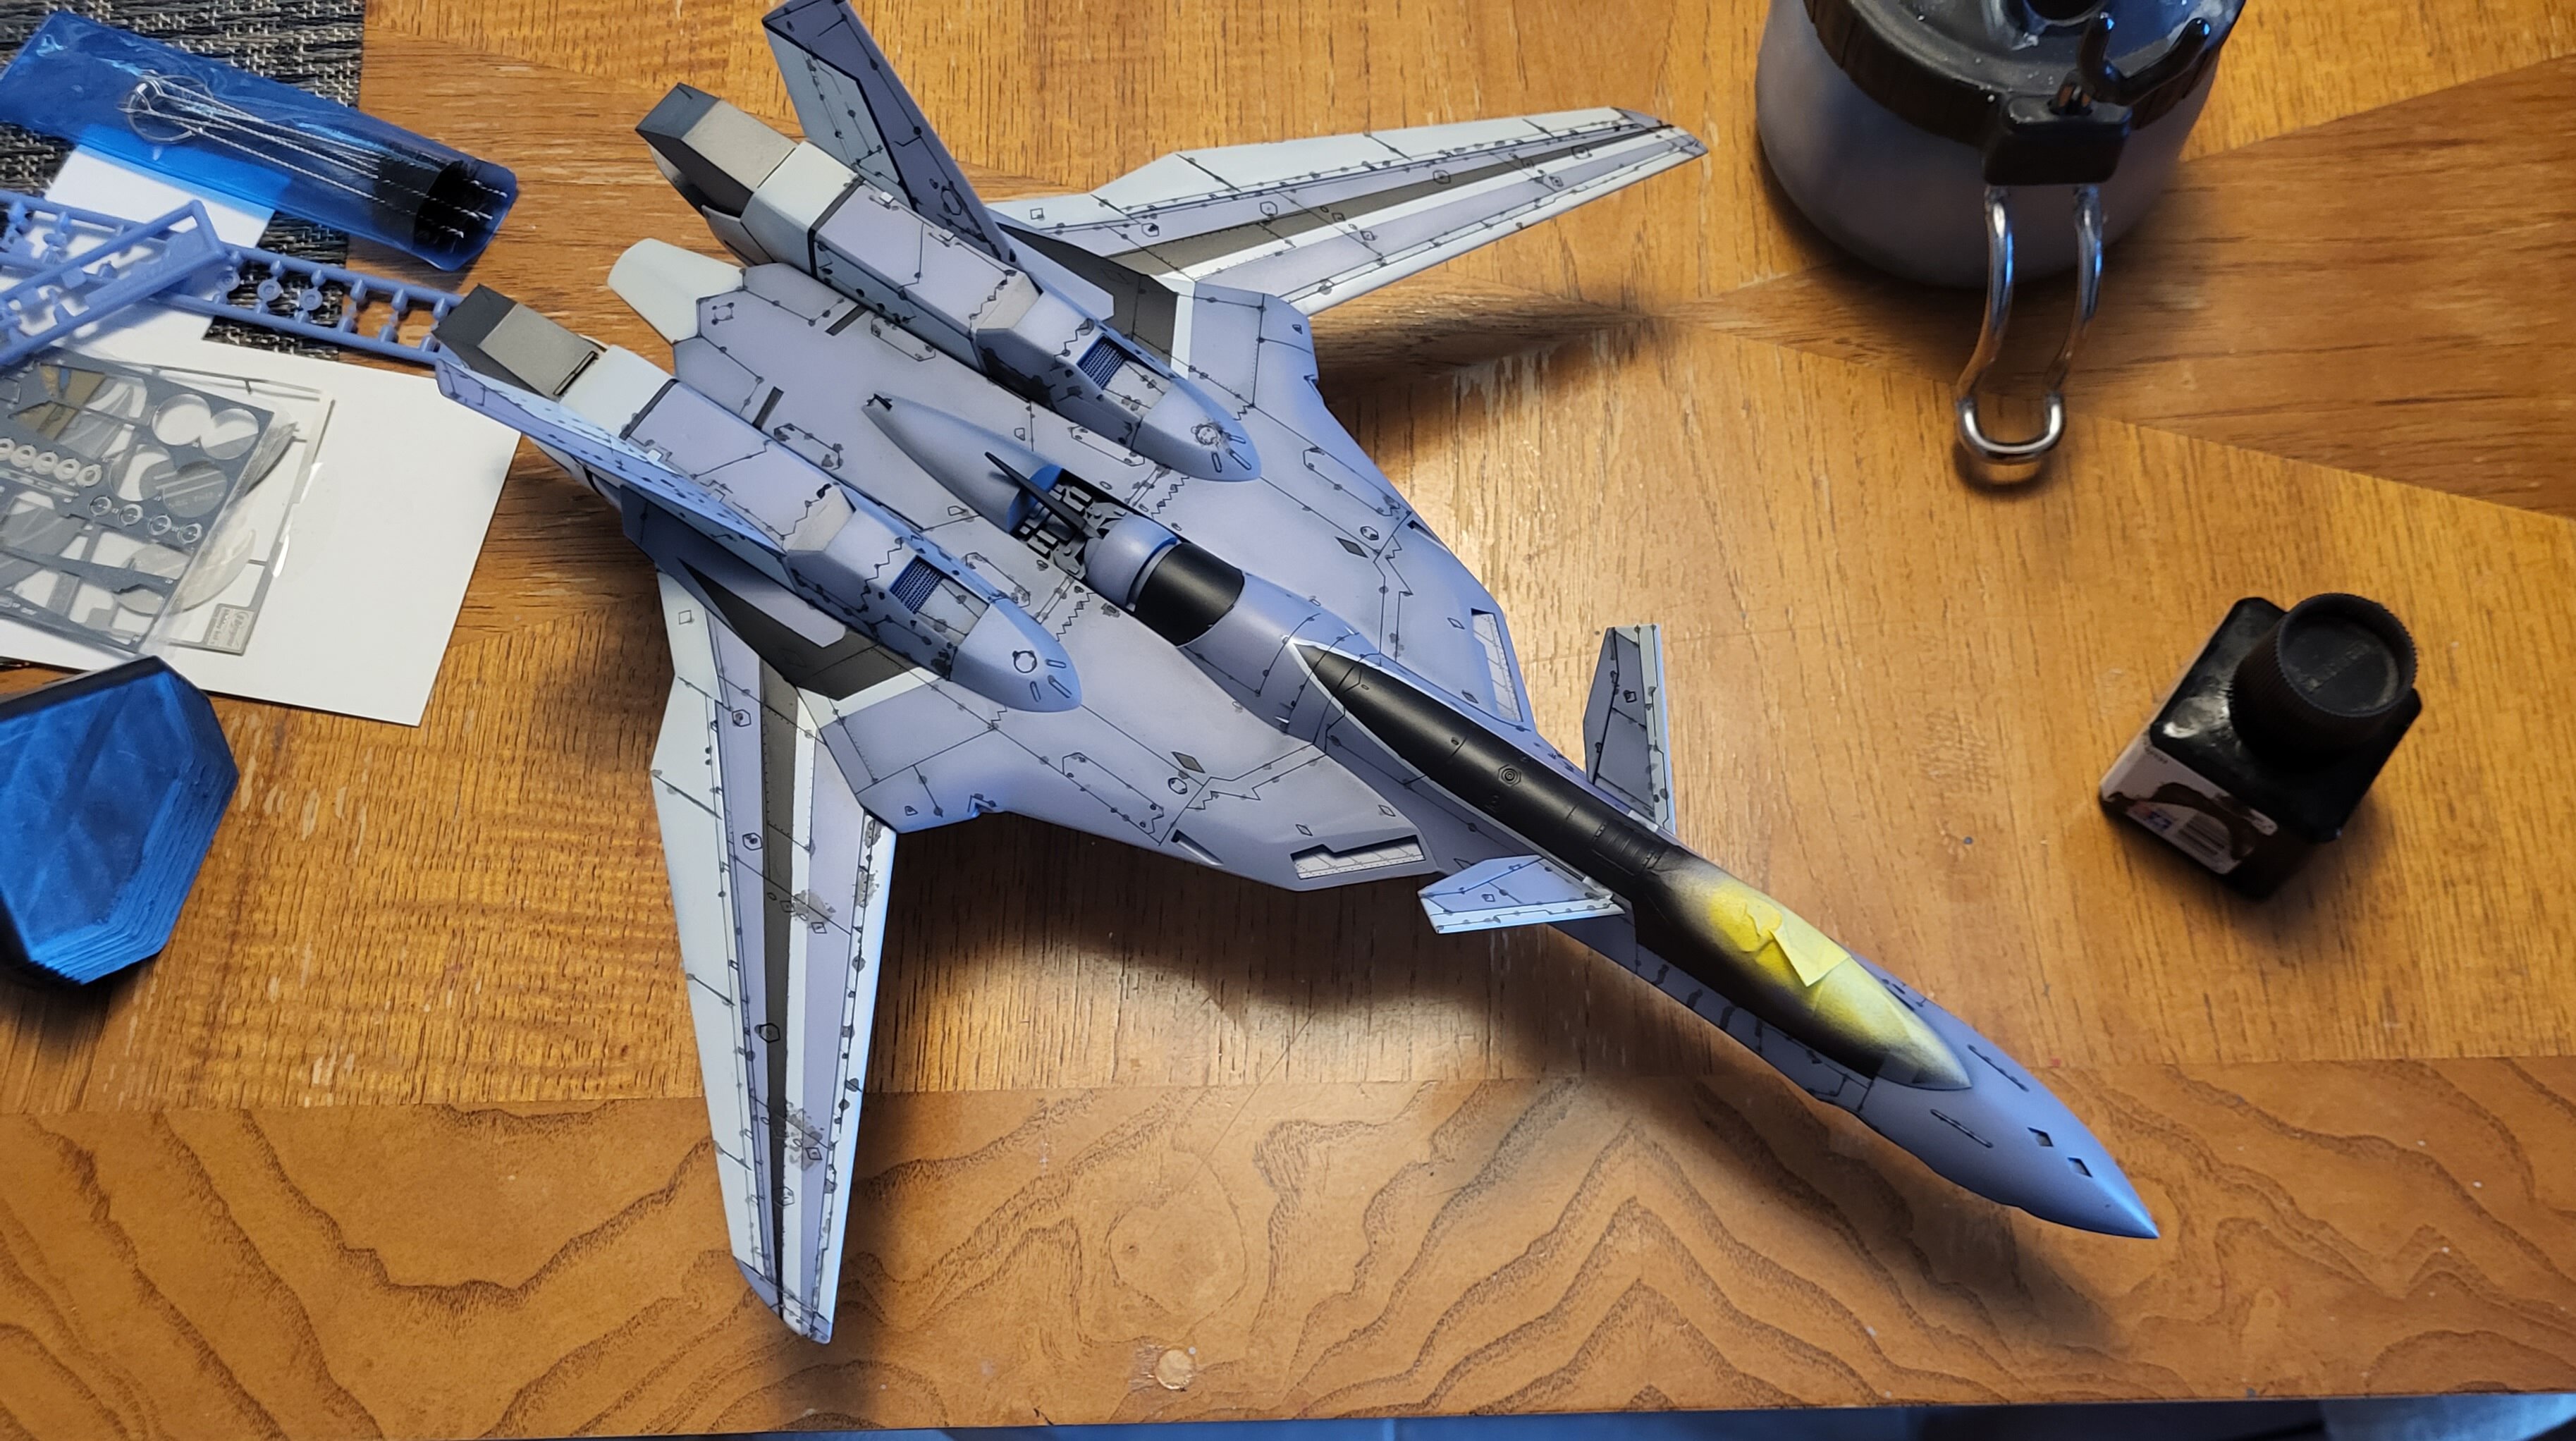
Final attack! Not much luck finding a set of resin 3d printed mossiles flr the girl. I tried test fitting some Sparrows/Pheonixn ordinance I had on the parts but they all seemed way too large. Anyways, thr clear parts. AK Aliminum, black wash followed by Tamiya clear geen and Testors Silver on the backside of the lenses. I should have done the lens on the body sooner, so I could have done a better job making them flusher with the body. A bit of Ultra Glue to secure them. The last batch of metallic bits, nozels, and gun barrels painted. Gloss black and polished aluminum for the base. I wanted a bit of contrast with the flat paints without them being too stand-off-ish. A bit of accent handpainting all over. Here, I highlighted the 3 details behind the canopy with some aluminum, a wash and then used a 1/64" pen vice drill to deepen the center nozel details.bit of chipping and dry brushing followed. At this point the final caution markings applied, the marker lights painted and a matte clear was finalized. A bit of touchup, panel line correction and contrasting gloss on the lights/lenses and she will be ready to sortie! note: if anyone wants these leftover/unused decals and PE parts just throw some postage my way and they are yours. I'll toss them in am envelope and to you whenever I can. Otherwise they are gone. 11/12/23 bits already taken
- 90 replies
-
- 1
-
-
- macross vf-x2
- vf-19 excalibur
- (and 2 more)
-
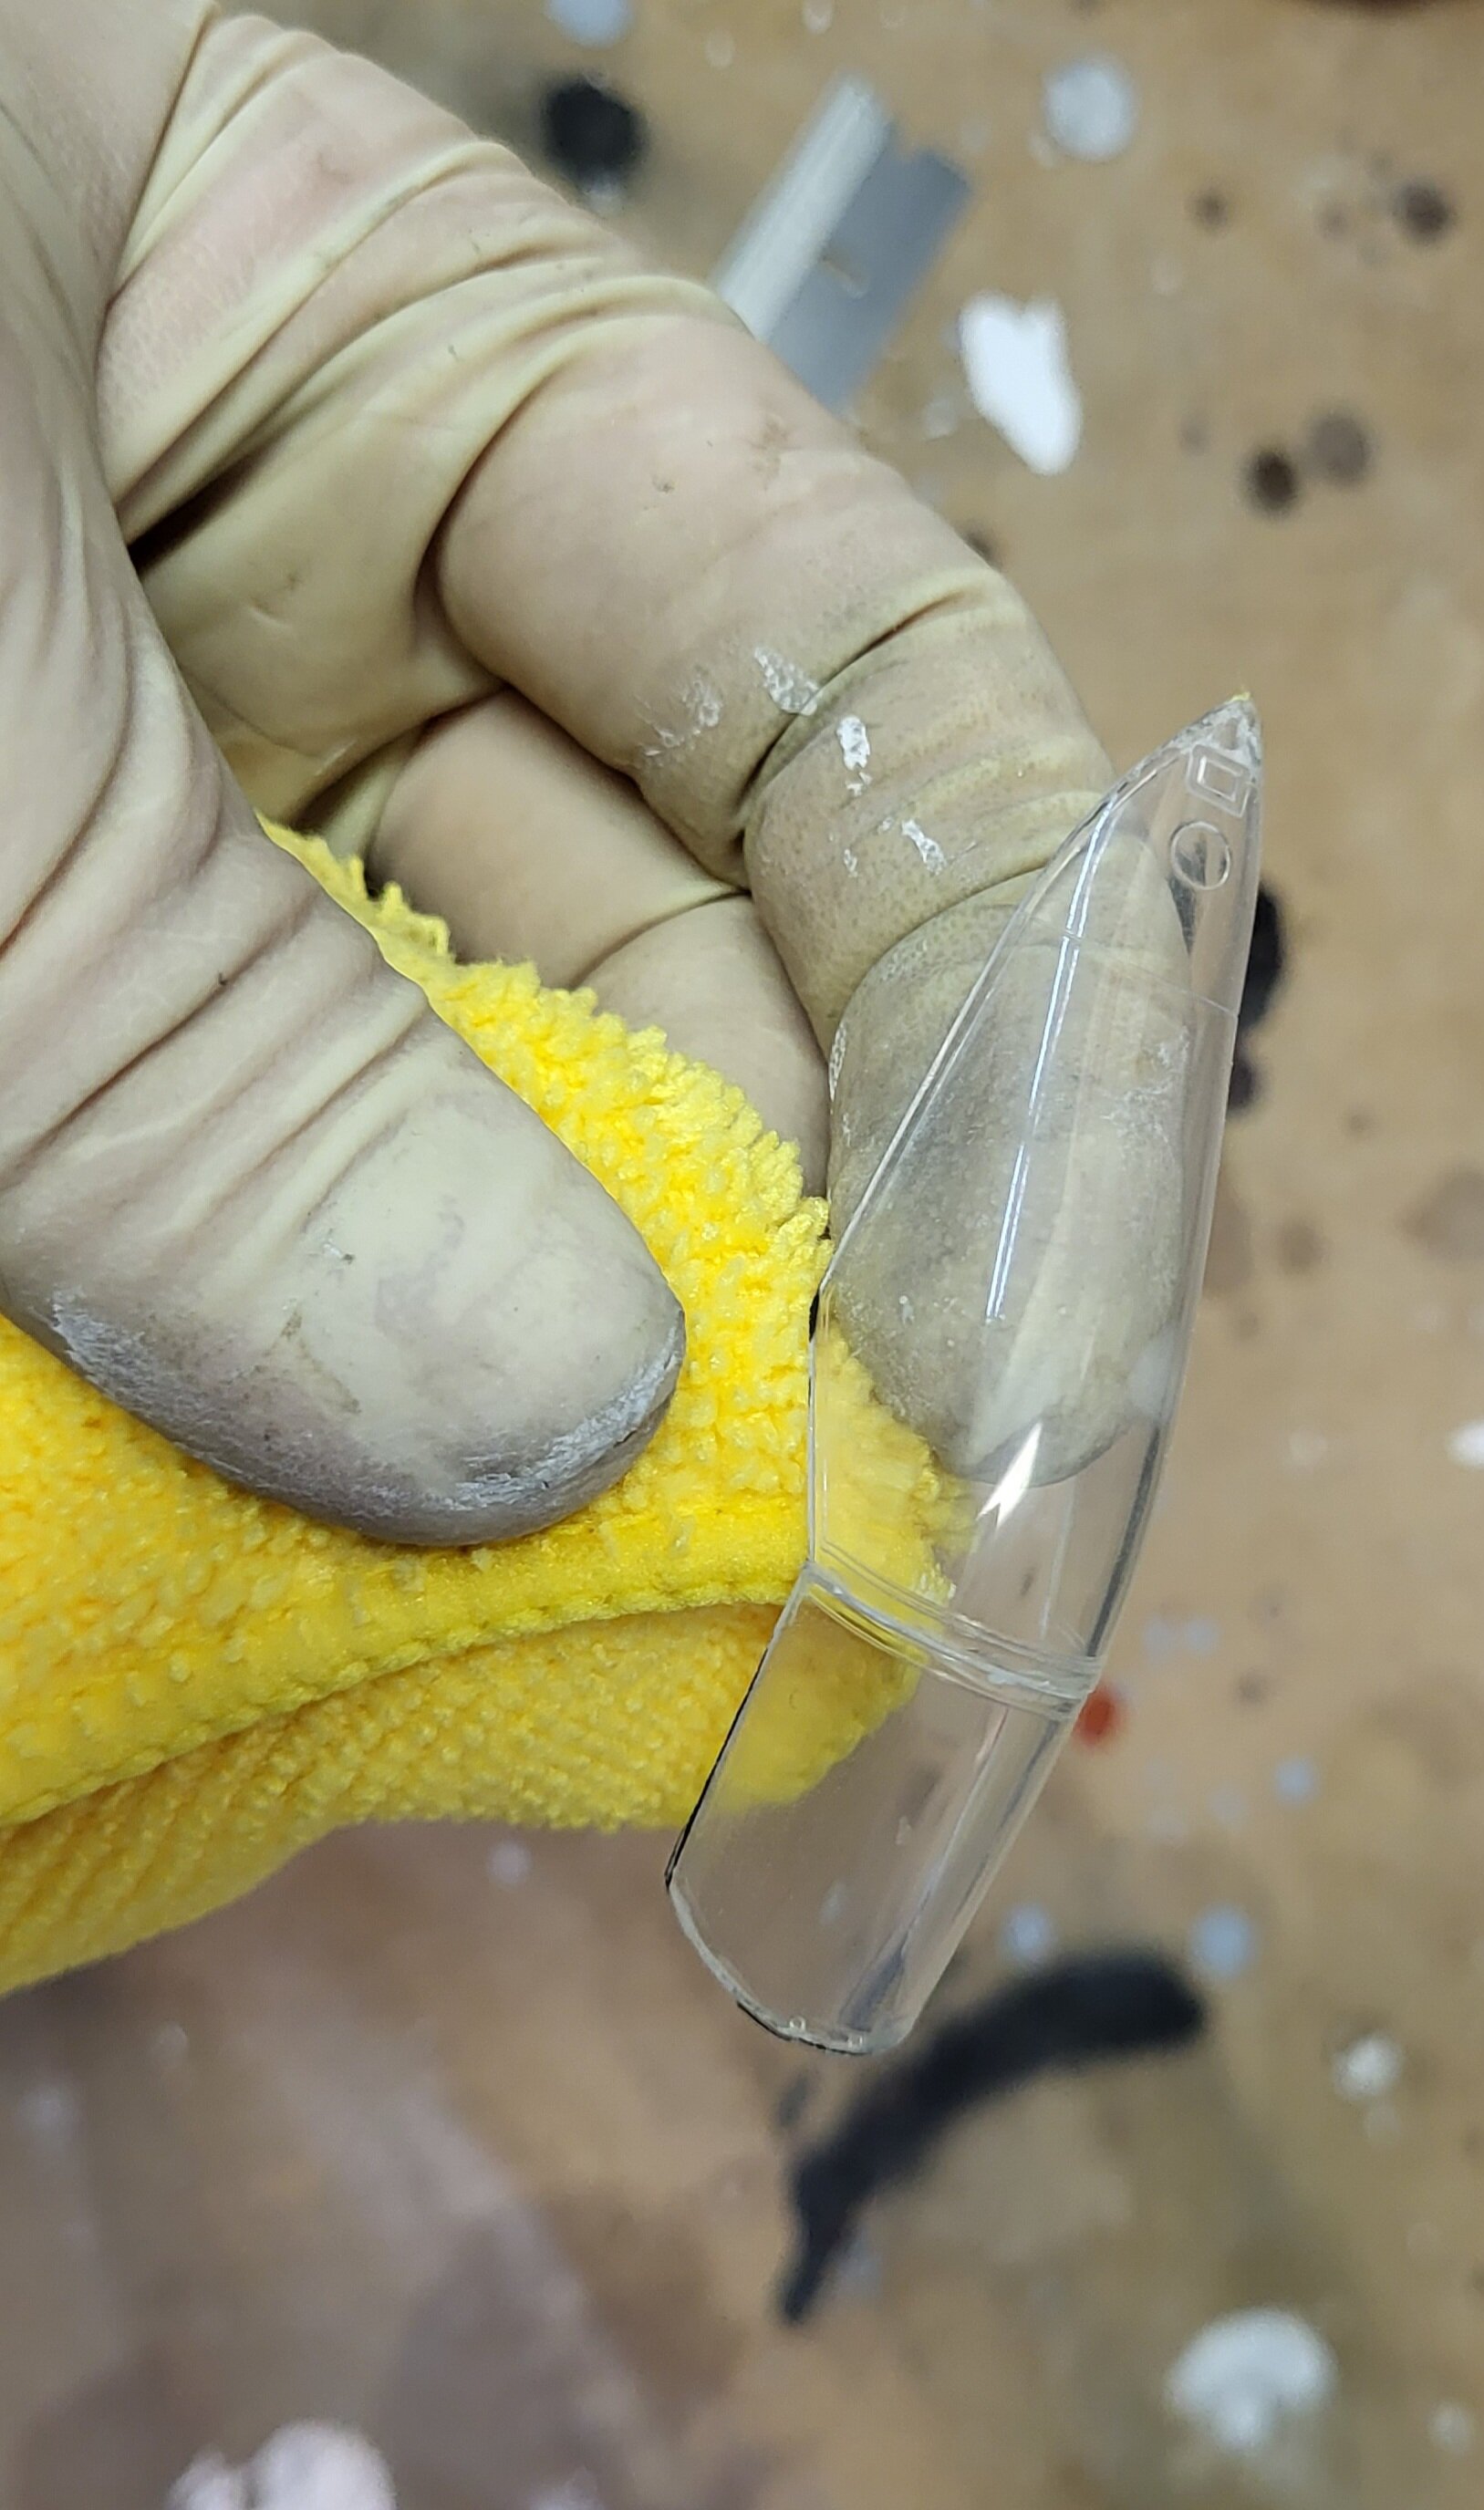
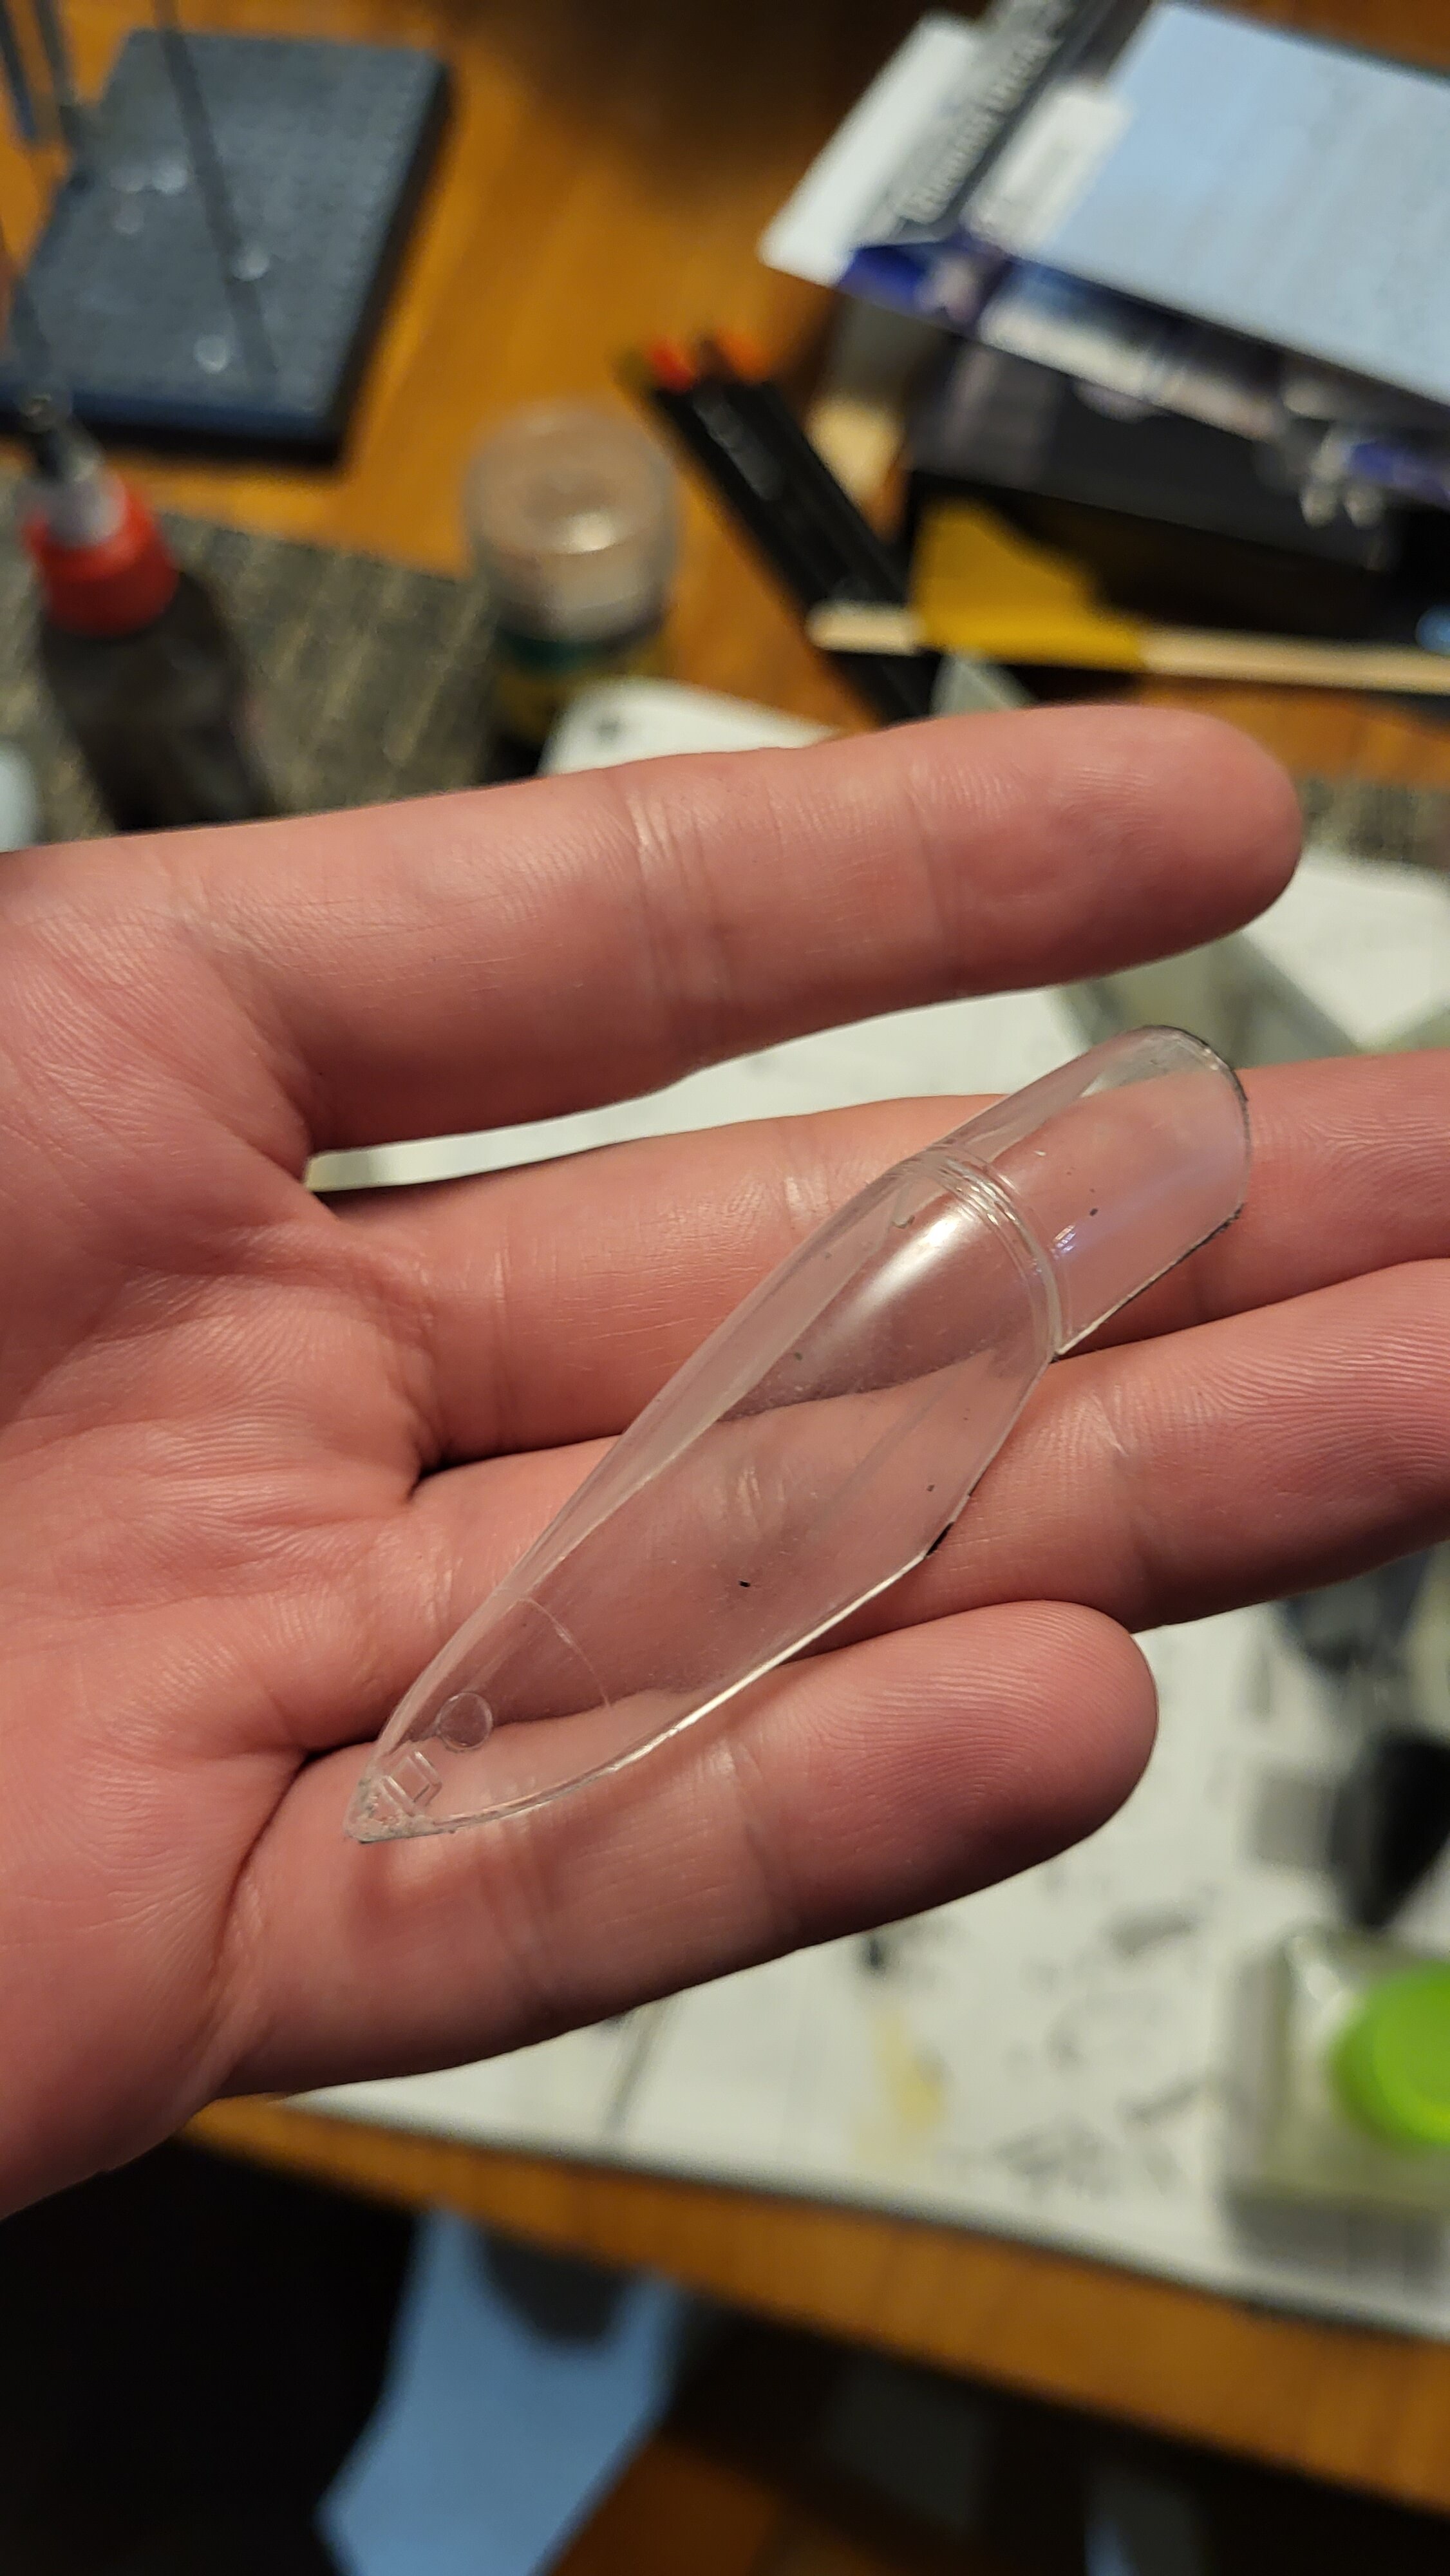
Canopy back under focus. I was suprised MIG ammo Ultra glue held the 2 clear parts together during revoval the finishing process! Anyways a quick sand with 3000 and 5000g sandpapers followed up by some compund, ultra fine polish and a glaze. All buffed painstaking by hand using a 2-sided micro fiber towel. With the cockout/pilot work done, it had to be crystal clear to show it off. Next up a mask and quick sand over the exposed areas. The part was the sprayed with some black Mr. Surfacer 1500, and then sea gray mixed with some left over mix used from the cockpit's interior. I however did not like to look contrasting the anti gkar around the canopy. a bit of Tamiya x1 to the rescue. Evrything sealed with Alcladd matte clear before being revealed...

- 90 replies
-
- 1
-
-
- macross vf-x2
- vf-19 excalibur
- (and 2 more)
-
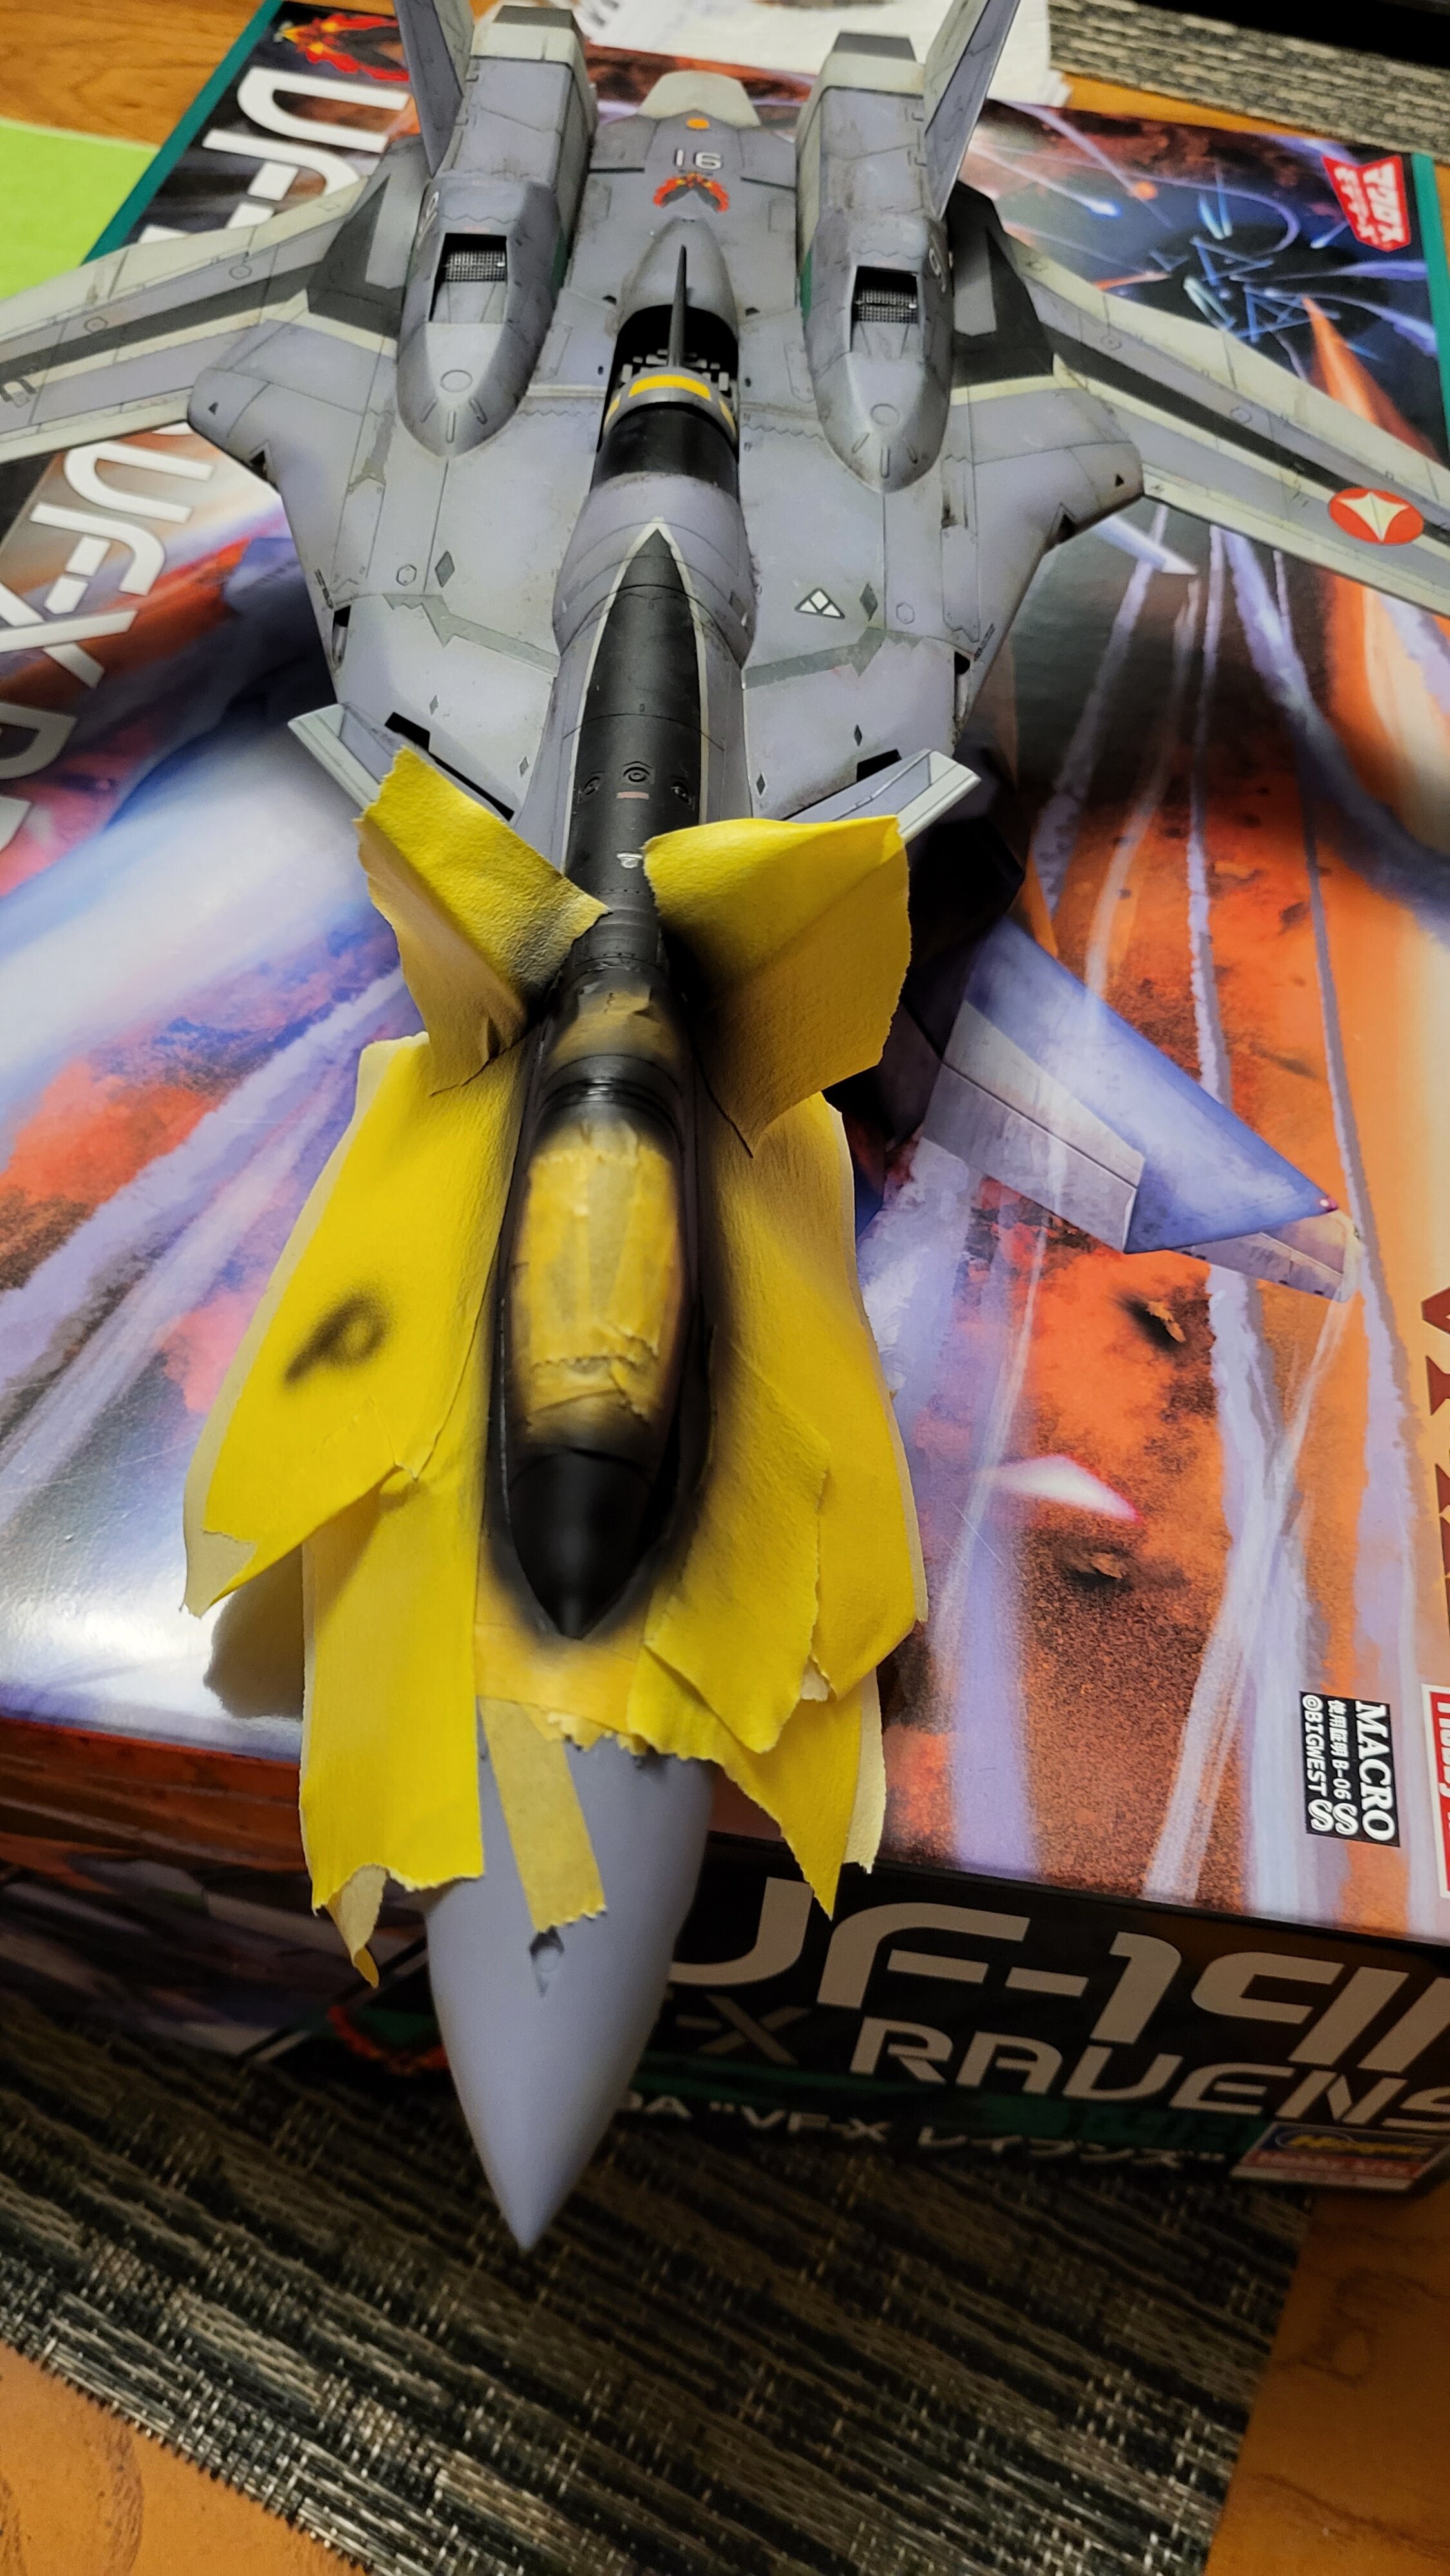
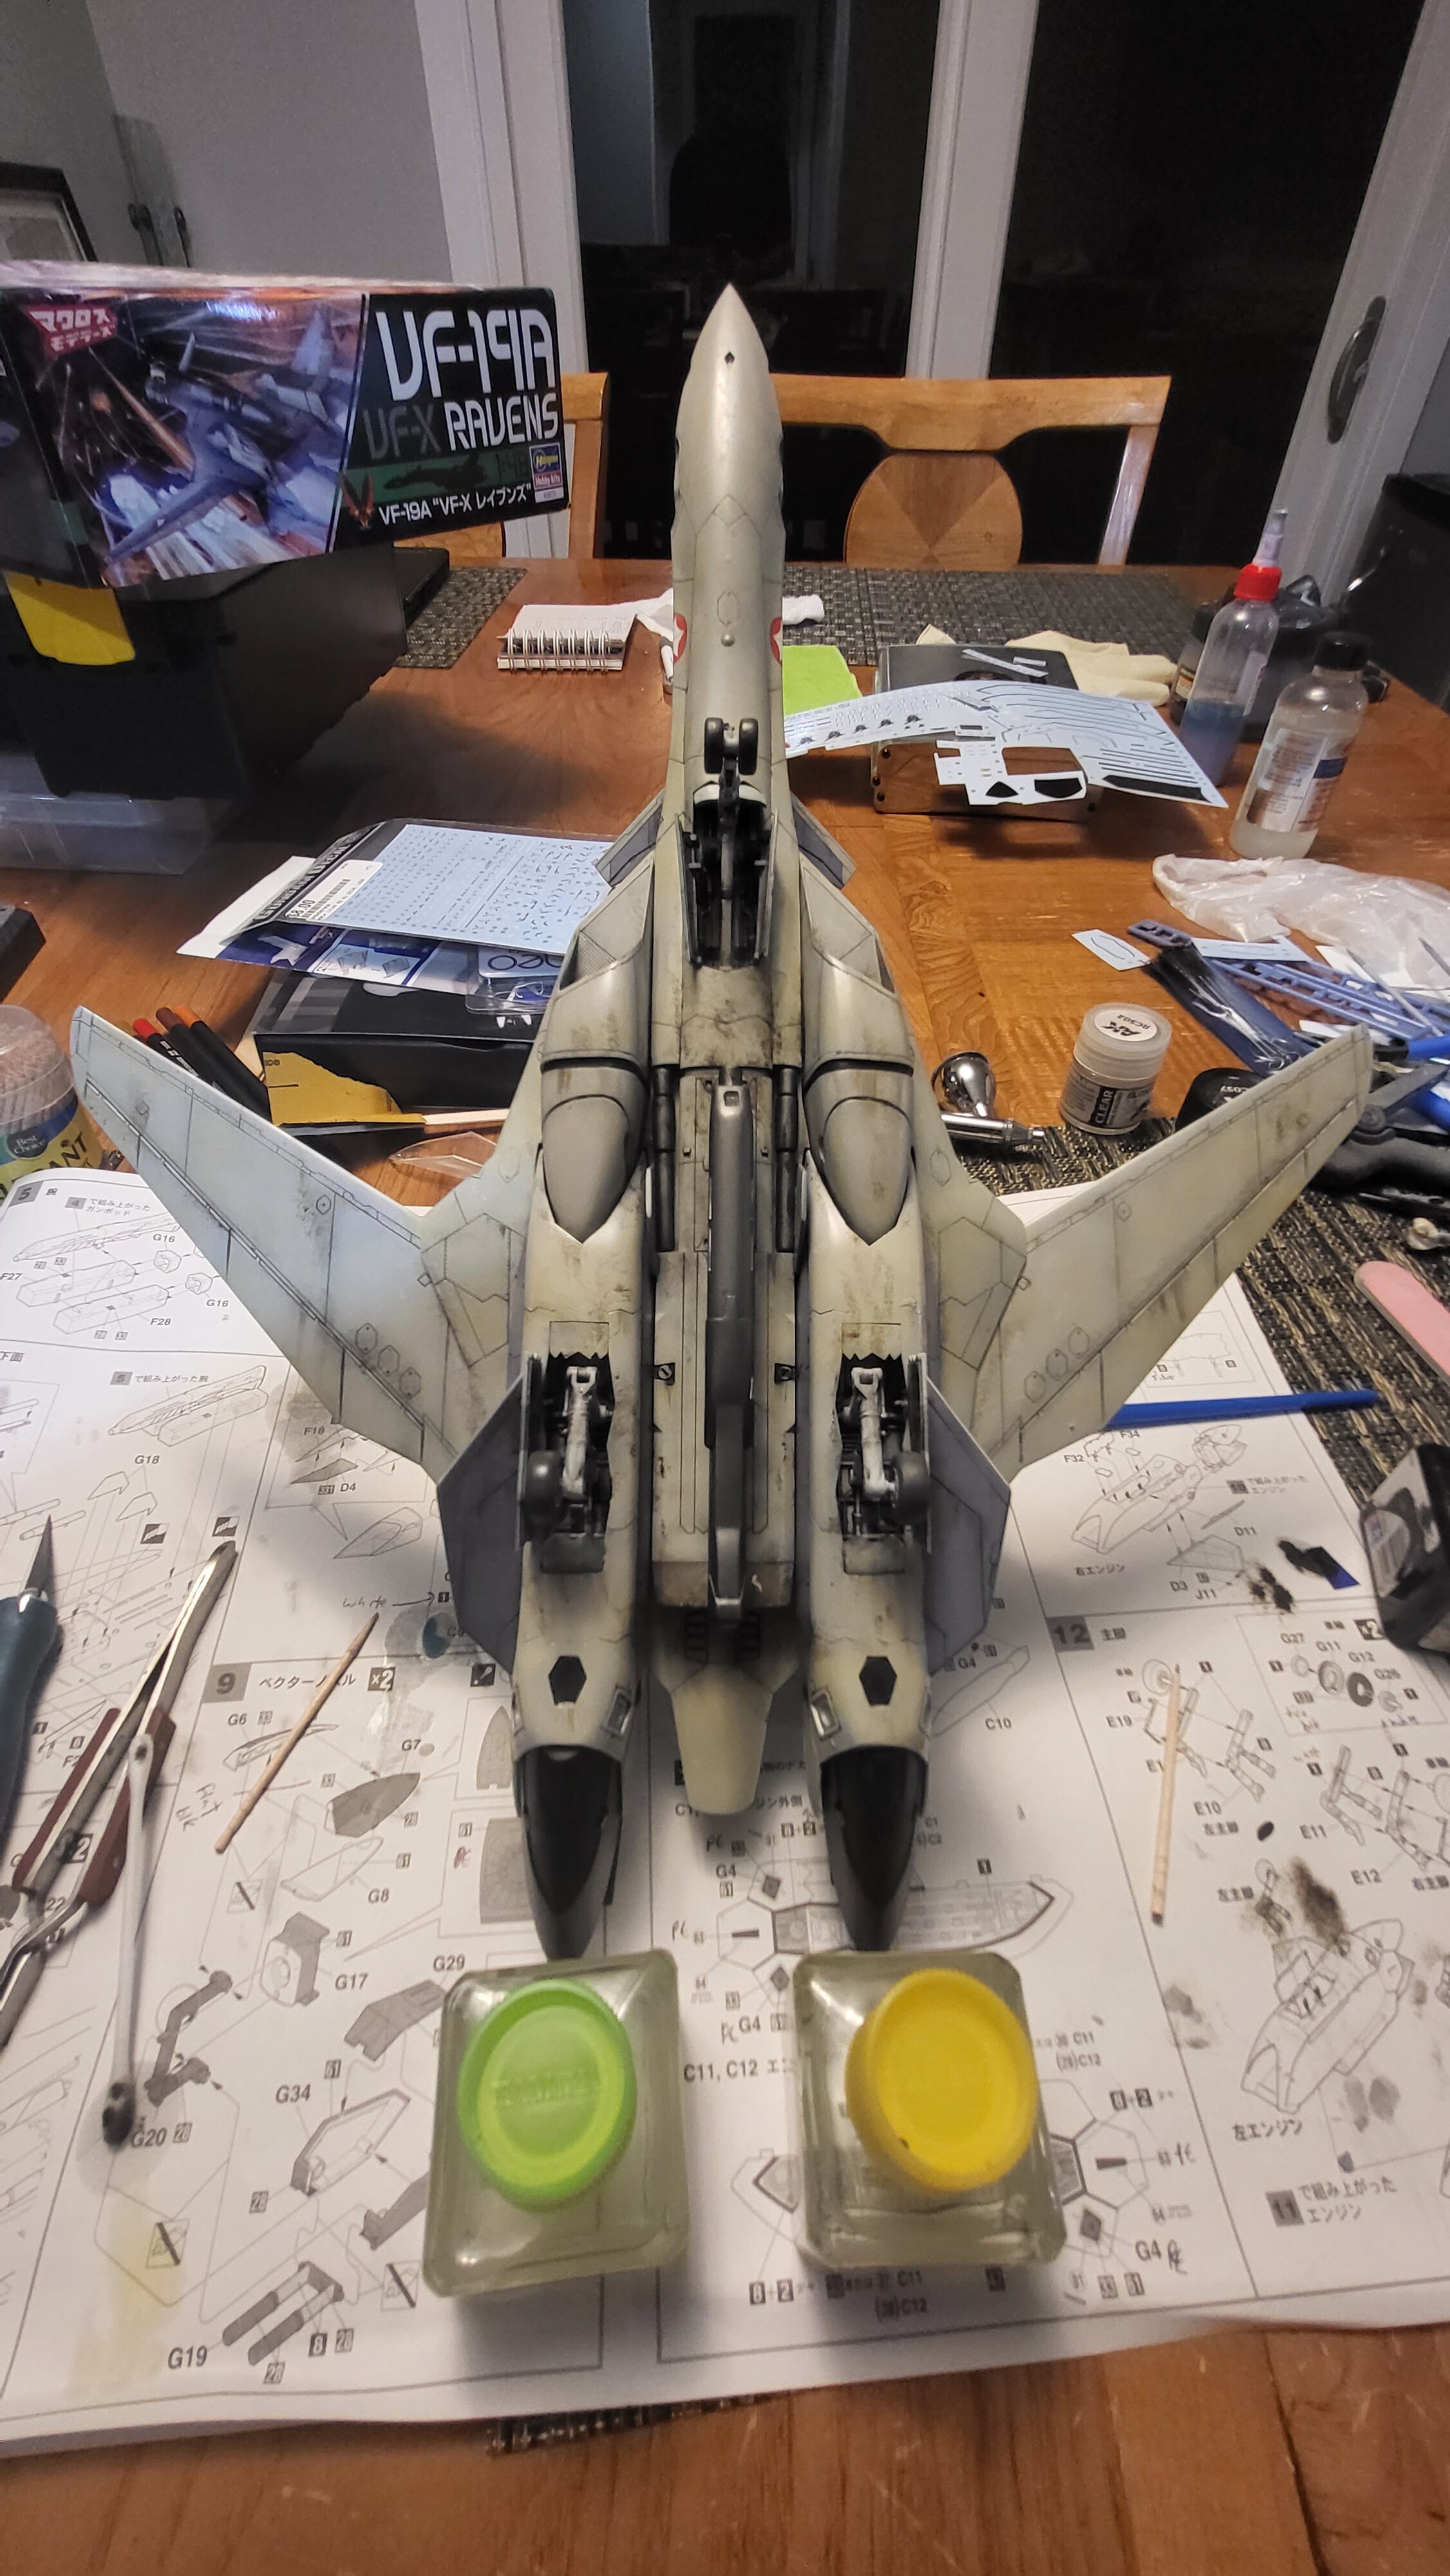
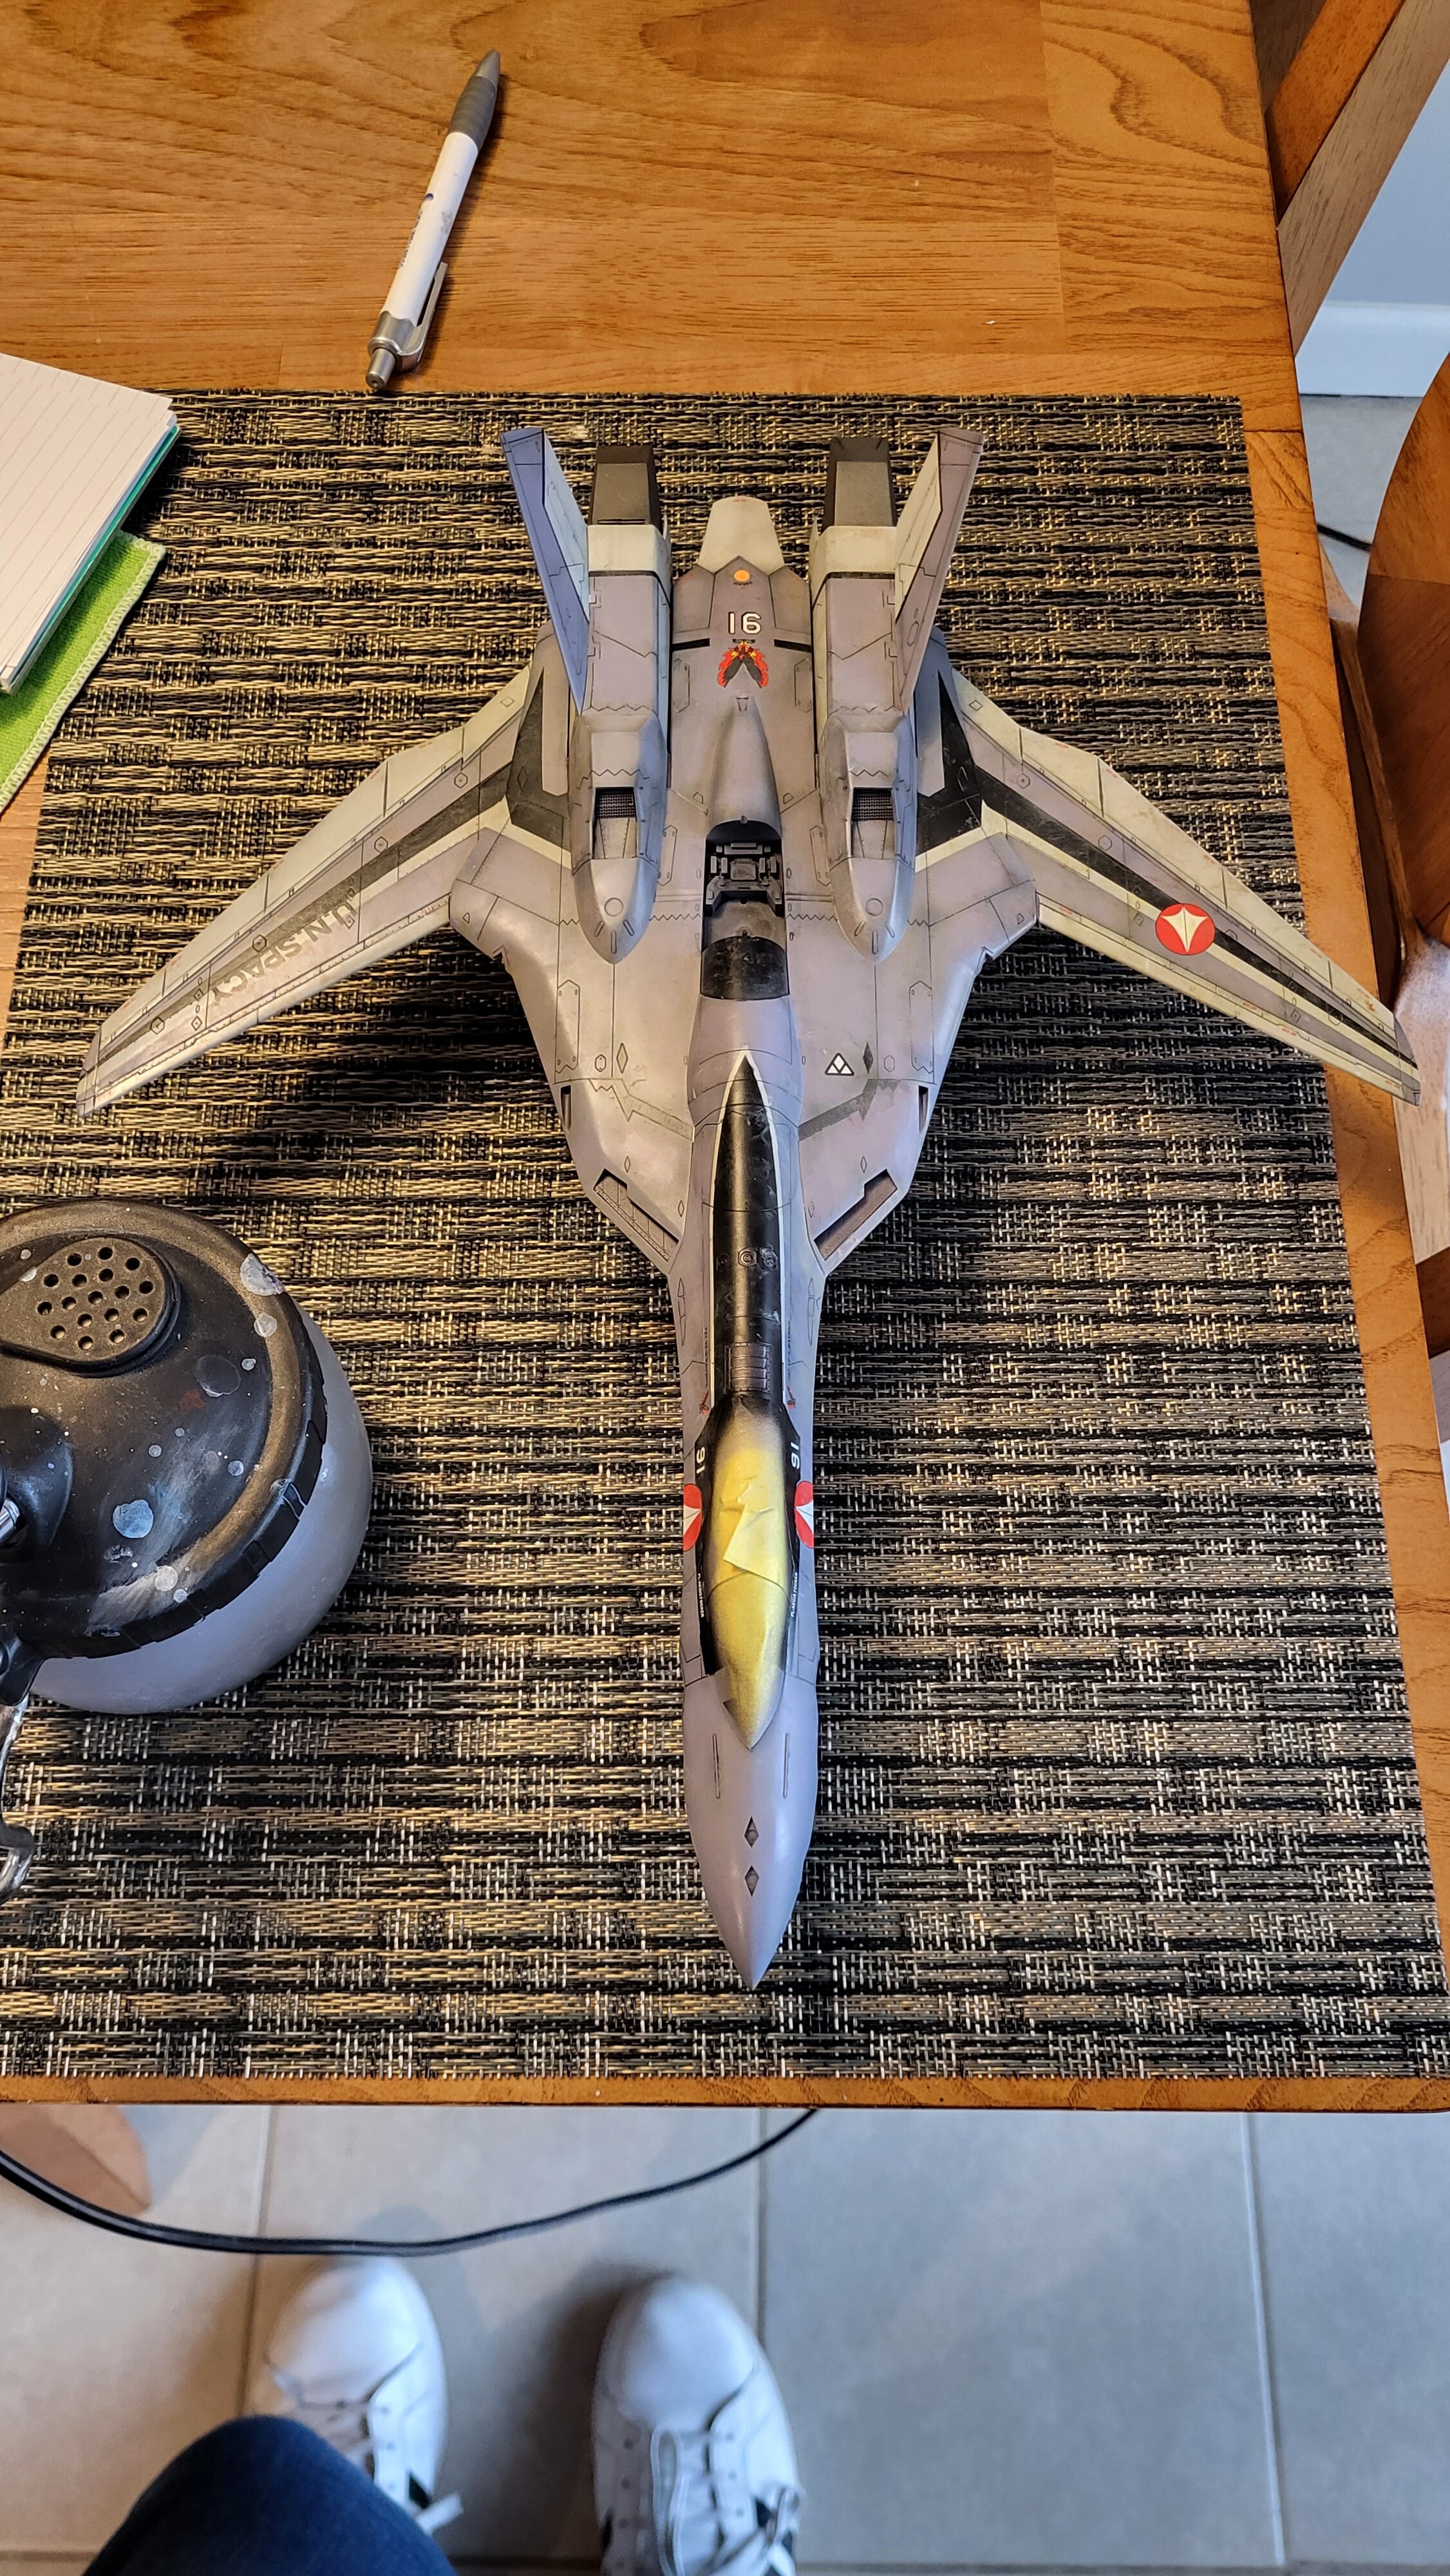
Dirty bird! Started off with an oil dot filter of white with just a bit of earthy brown this time. Maybe 1 drip of yellow orchs made its way in (and took over) but, who can tell. Lol A bit of black liner was used to create some random oilsteaks... before I realized I needed to stop playing it safe. Bottom needs to wear! Oils l, spirits and stabbing the plane a few hundred times oughta do it! A youch of grime and a bit of spot detail painting was throw into the landing bays to make it interesting and then the doors were washed and installed. I dare think that the bottom is assembeled minus the nose gear's headlamp amd decals (sigh.) I am thinking this gal meeds some ordinance. Might pilfer something from another aircraft. I don't think I have ot in me to scratchbuild a bunch of missiles. Up next!
- 90 replies
-
- 1
-
-
- macross vf-x2
- vf-19 excalibur
- (and 2 more)
-
 No grey shoulders this round.
.jpg.47e0cf8a575c5bcd81f0fb7908cf5e43.jpg)
.jpg.aad16cc756a9648796aa9958cb6aa695.jpg)
.jpg.2377cc64f5e05389b0209c9fc82111d5.jpg)
-
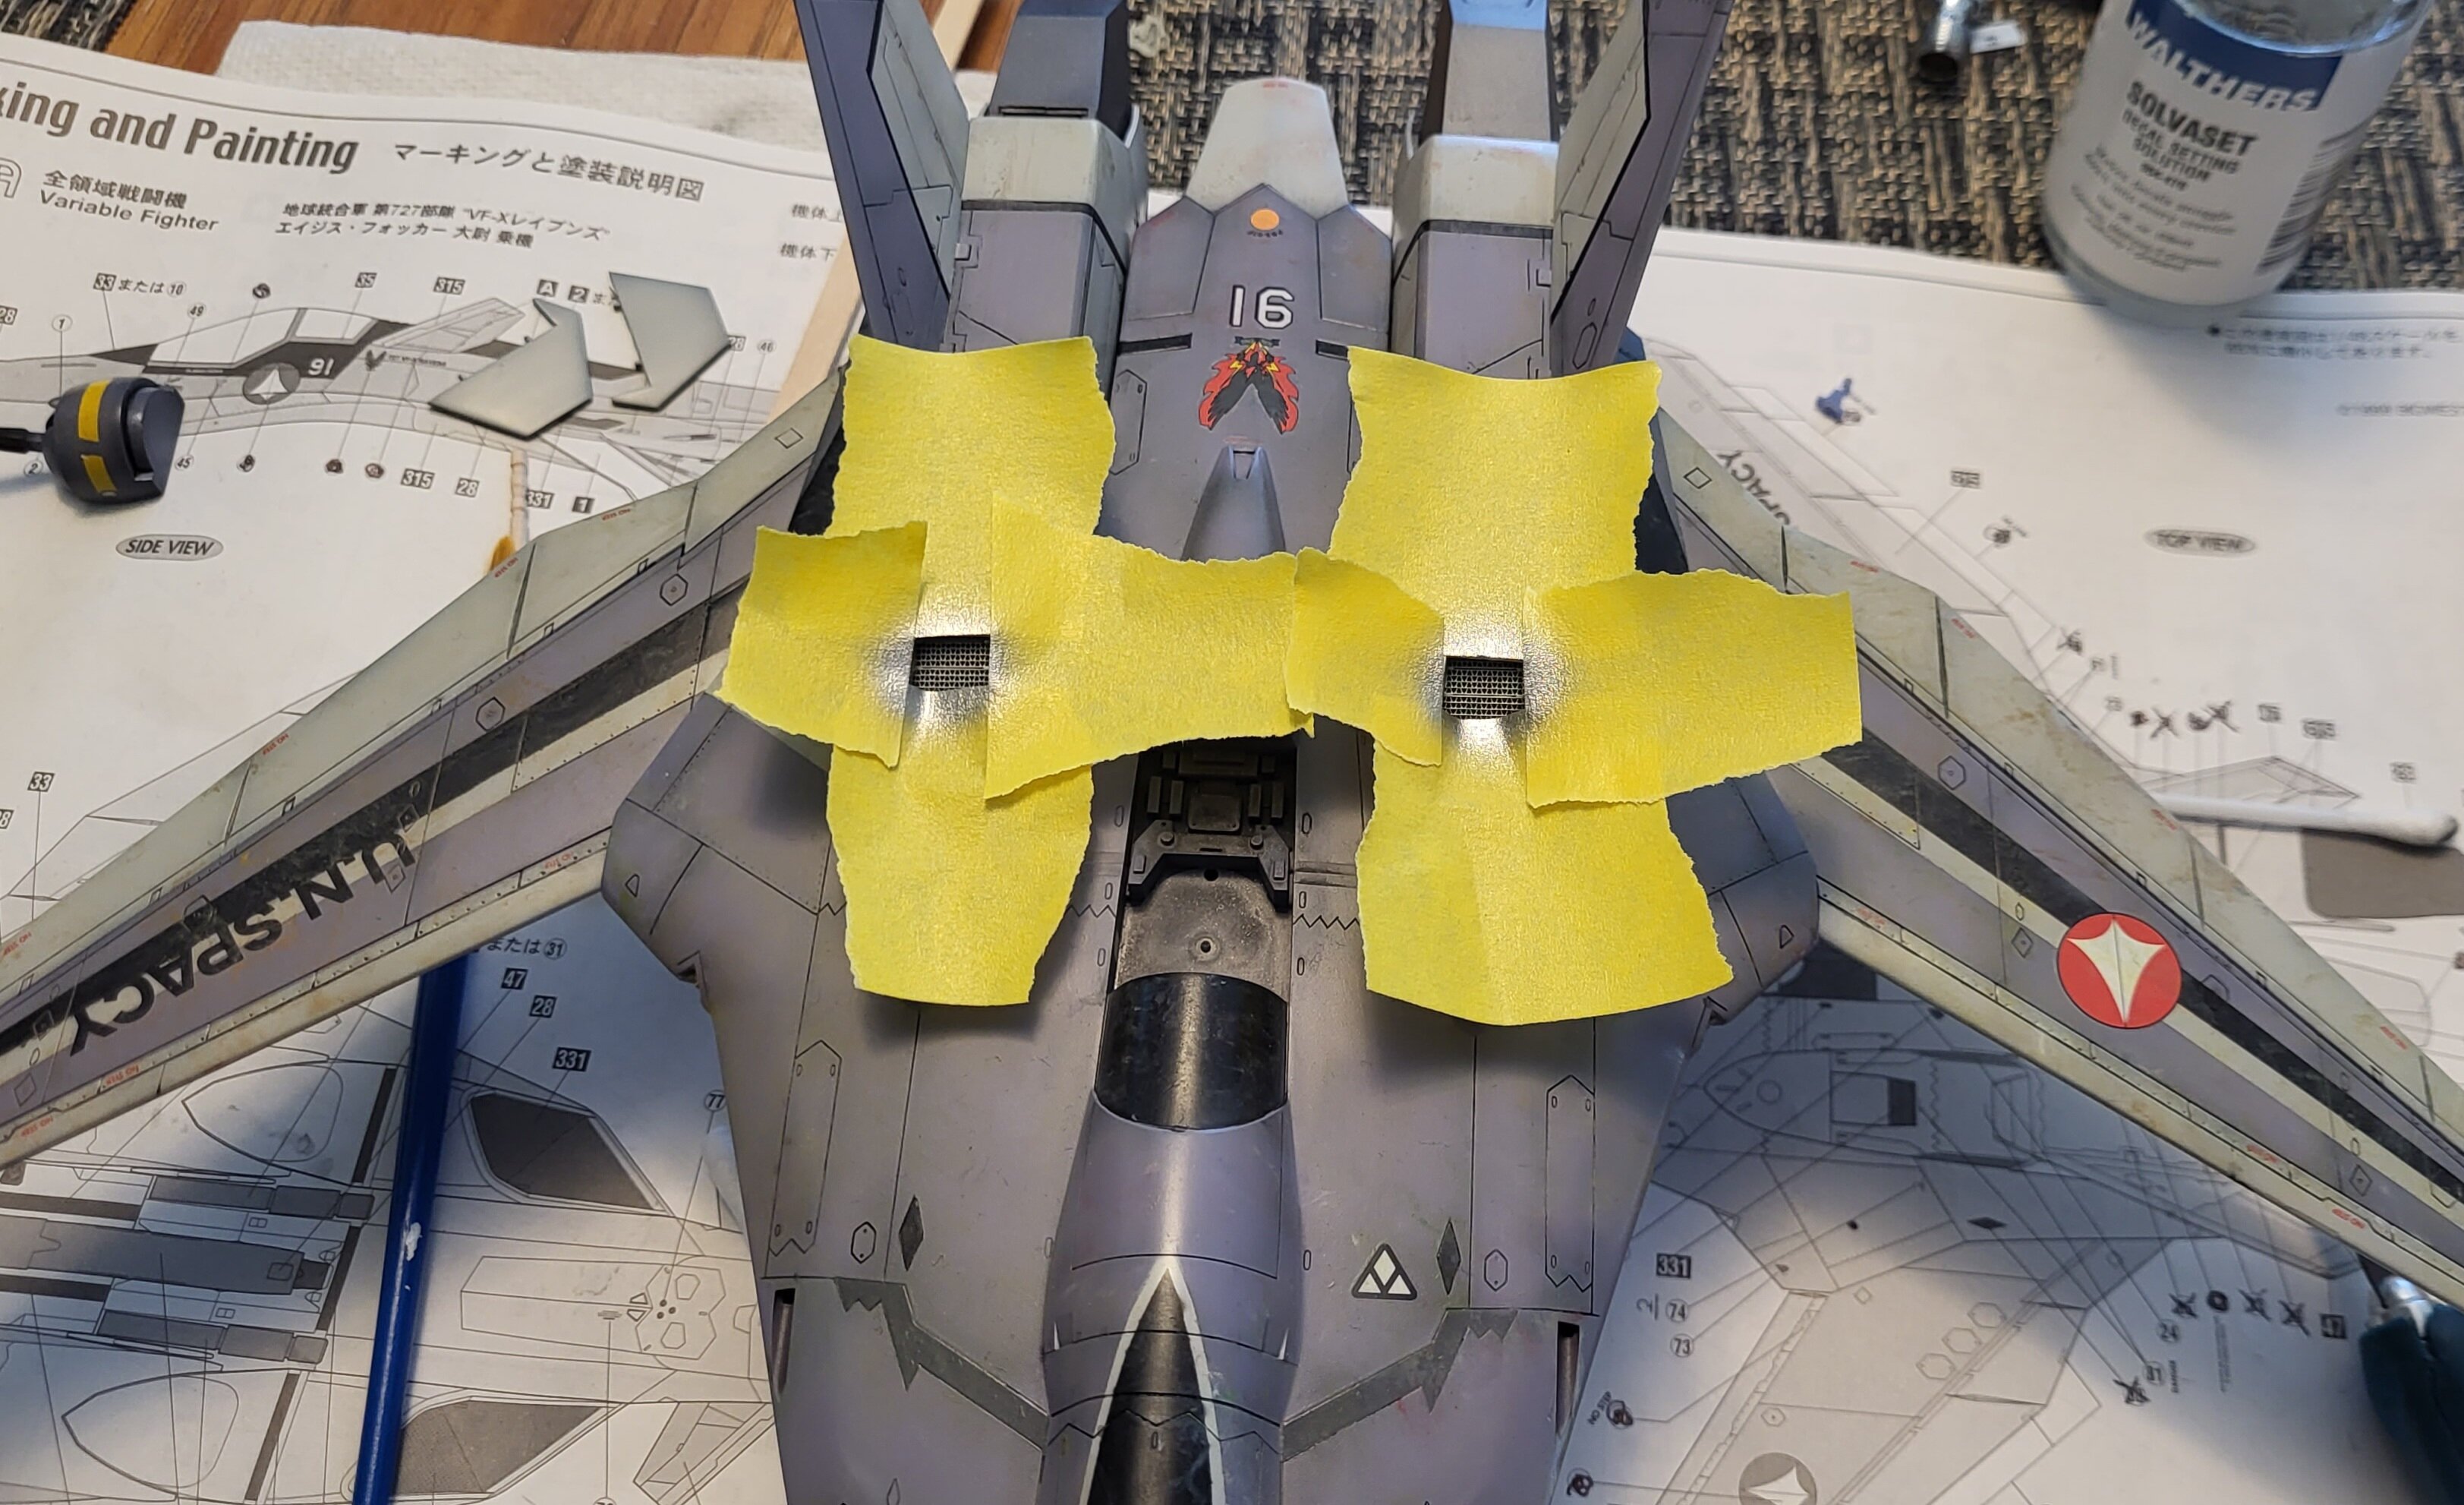
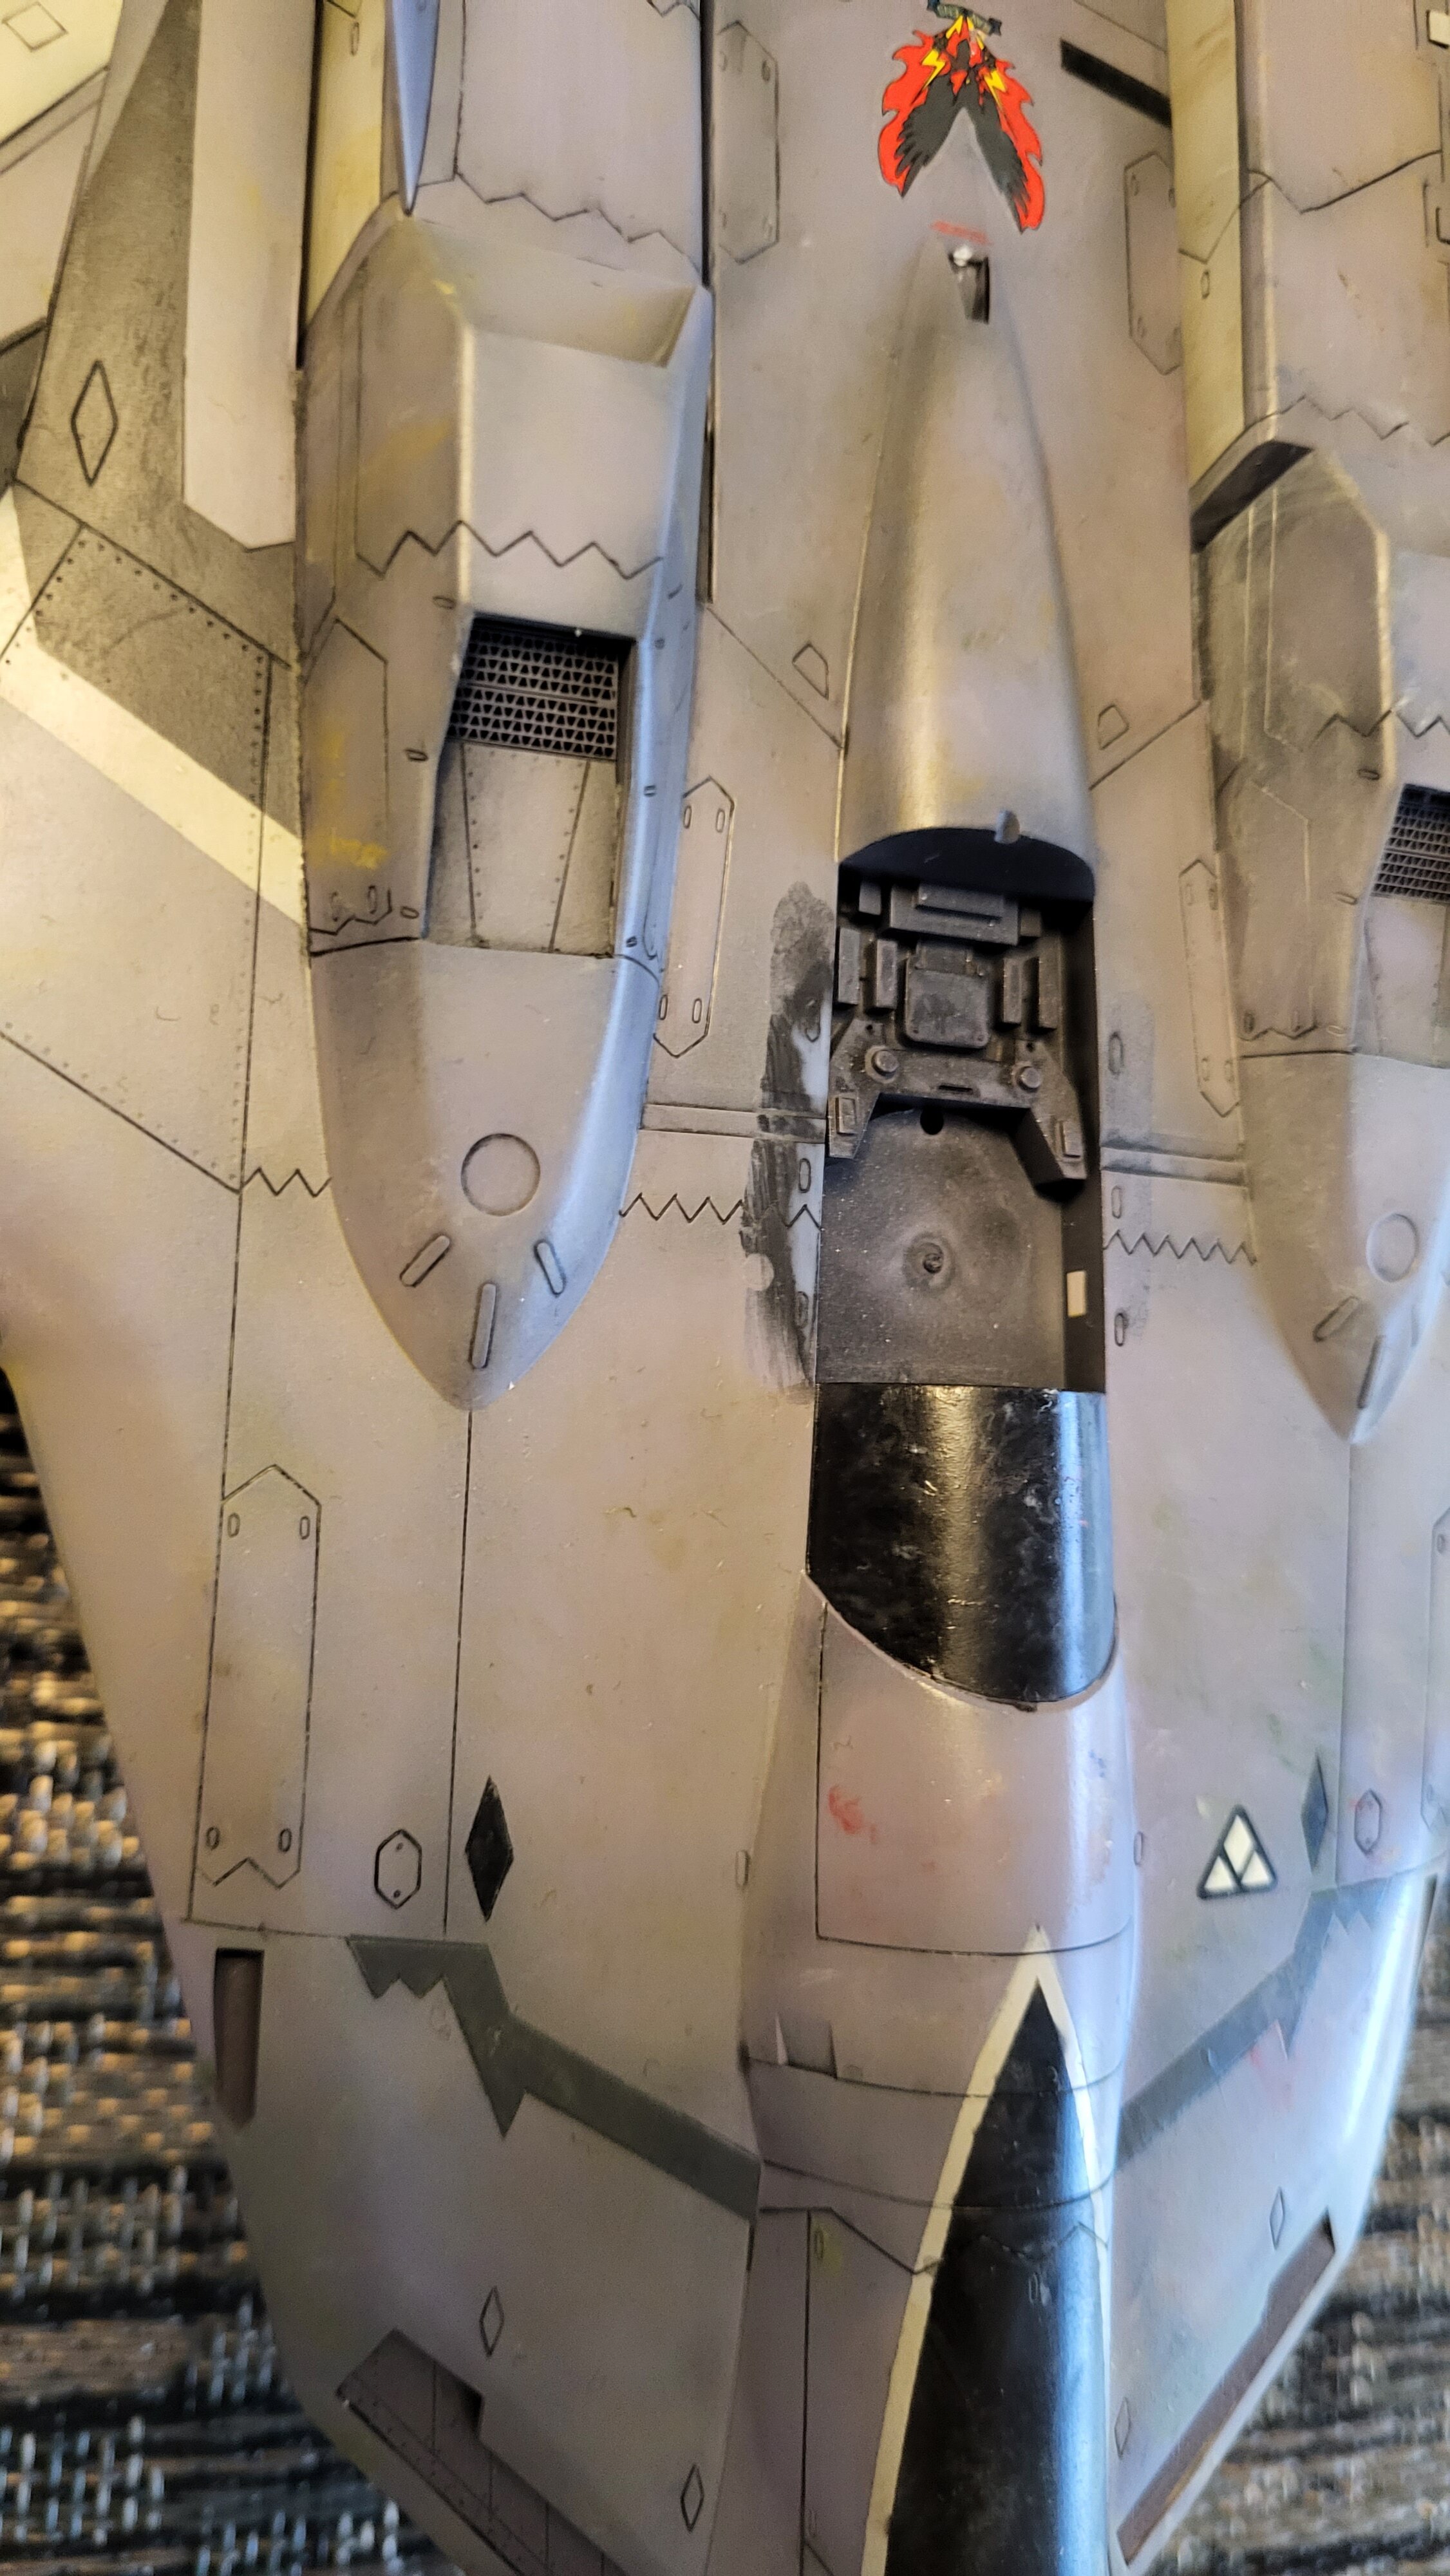
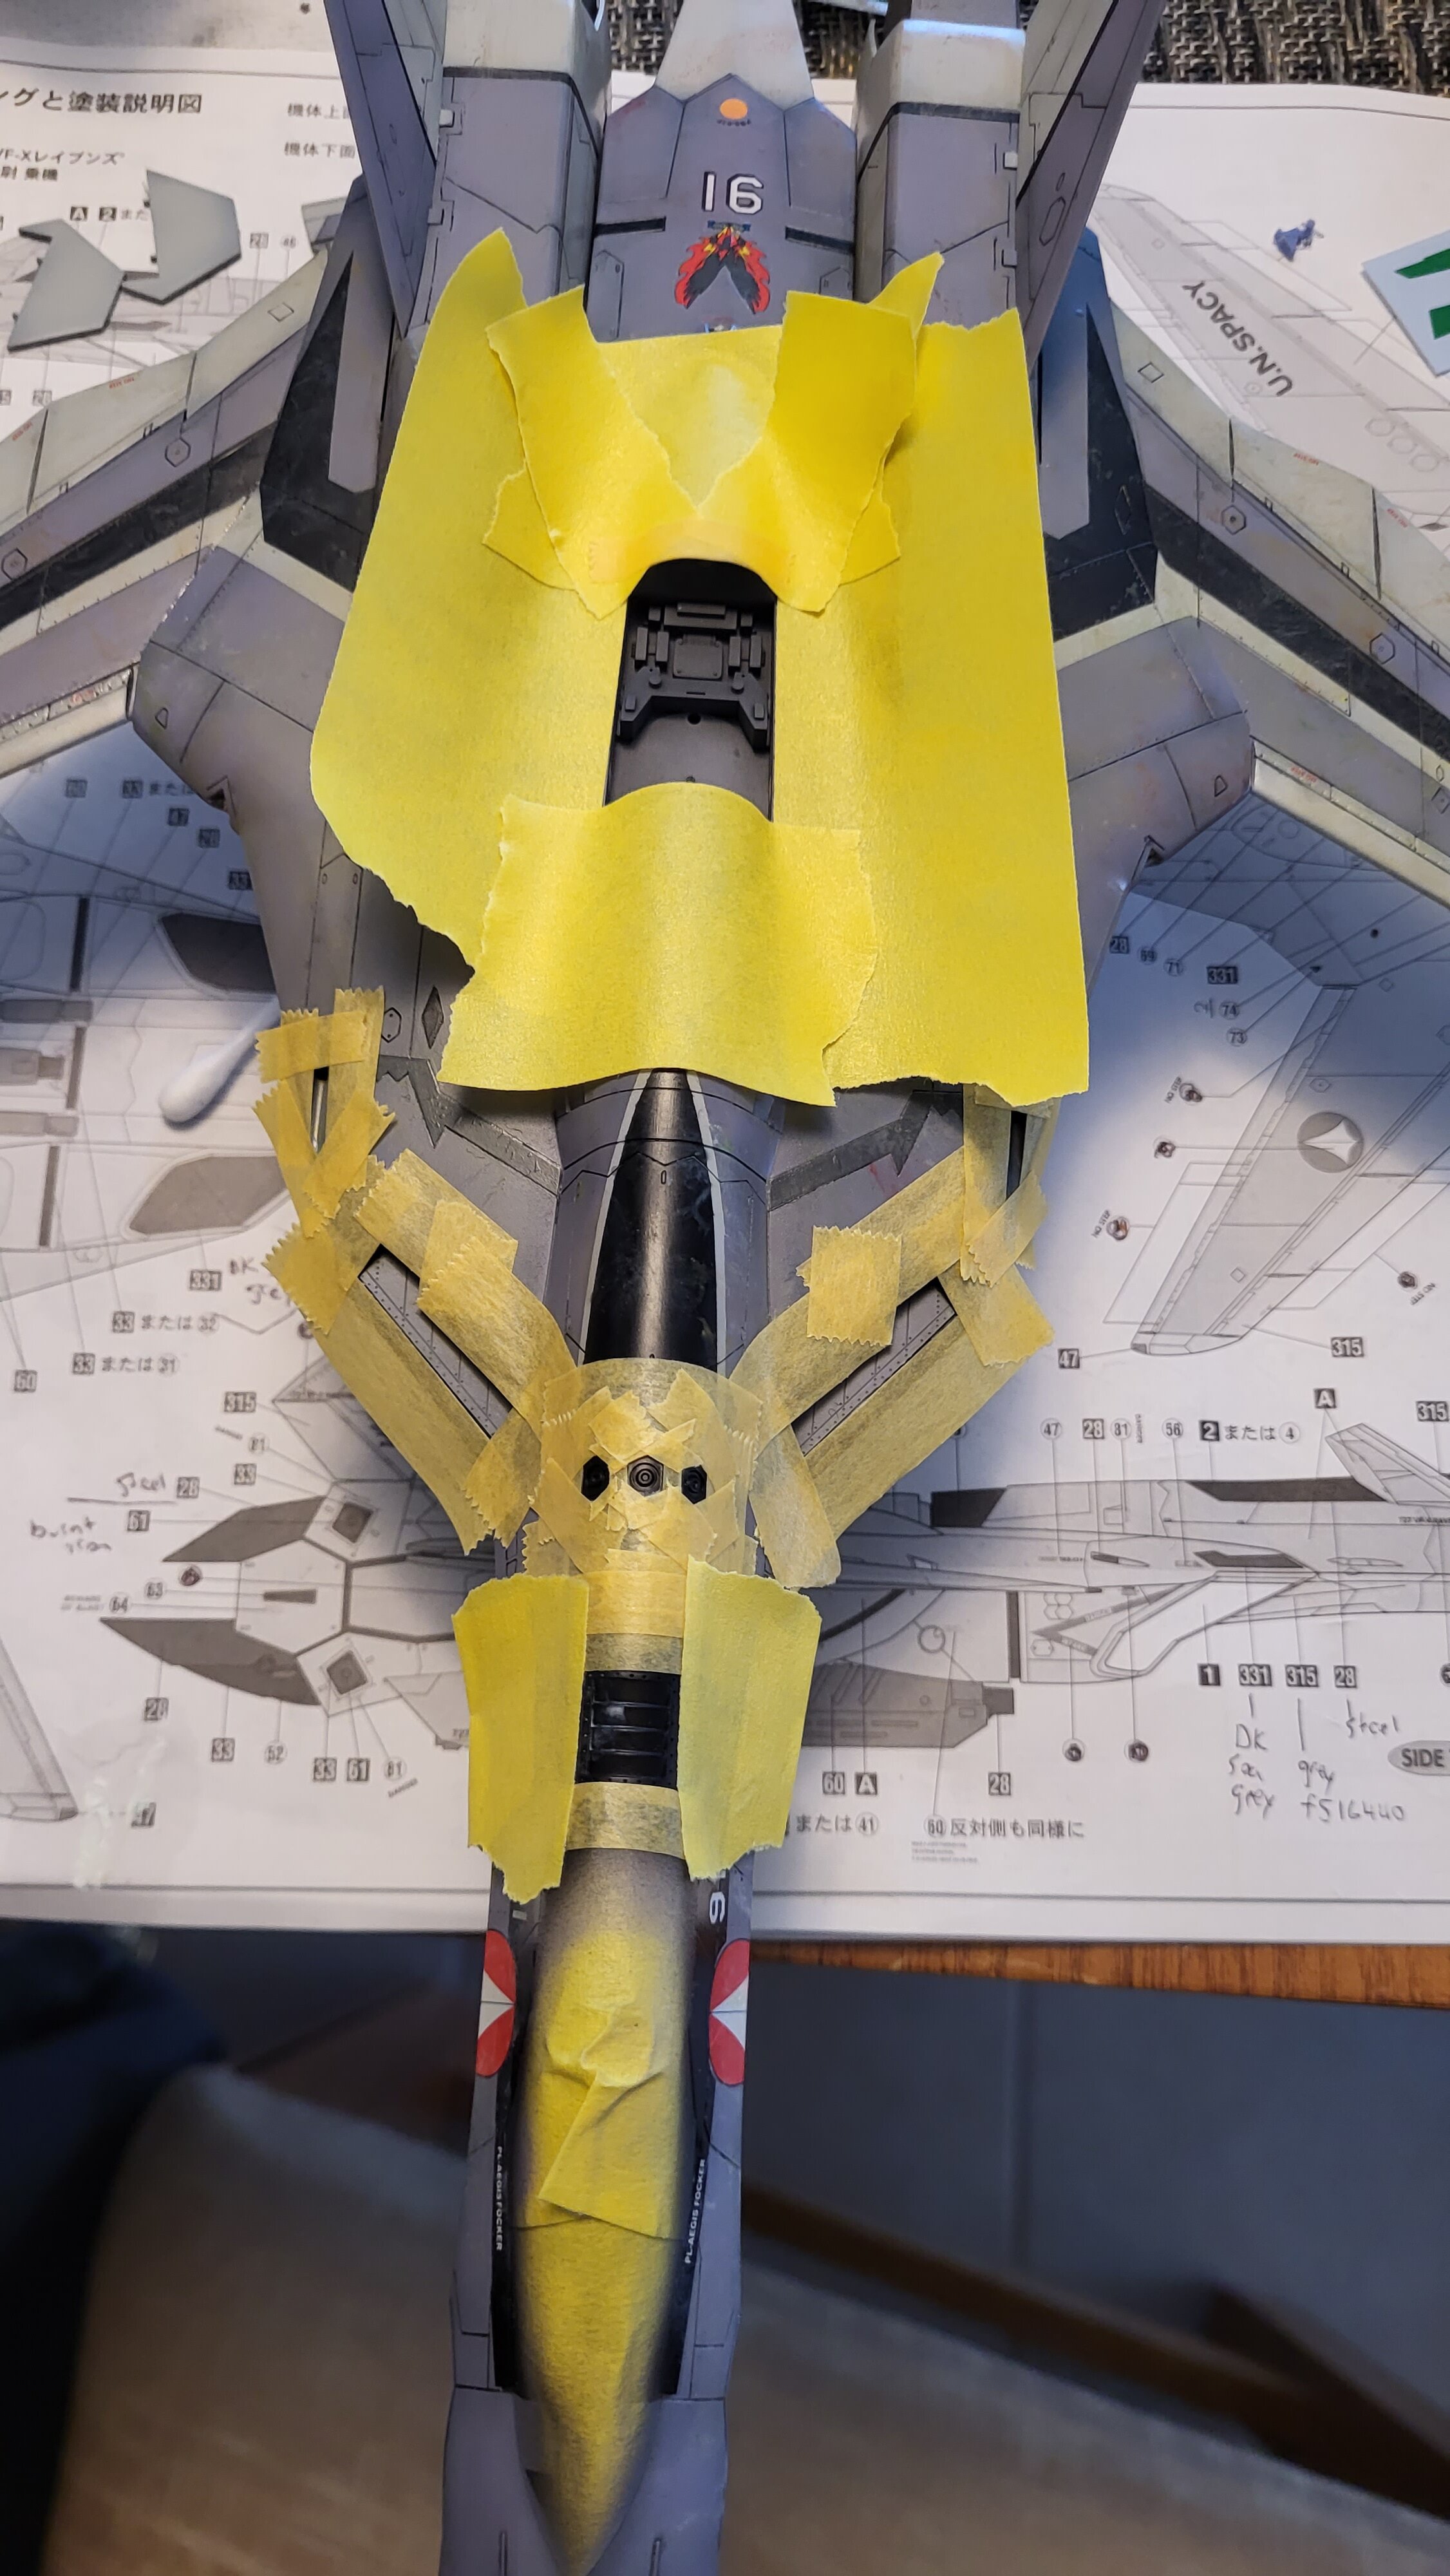
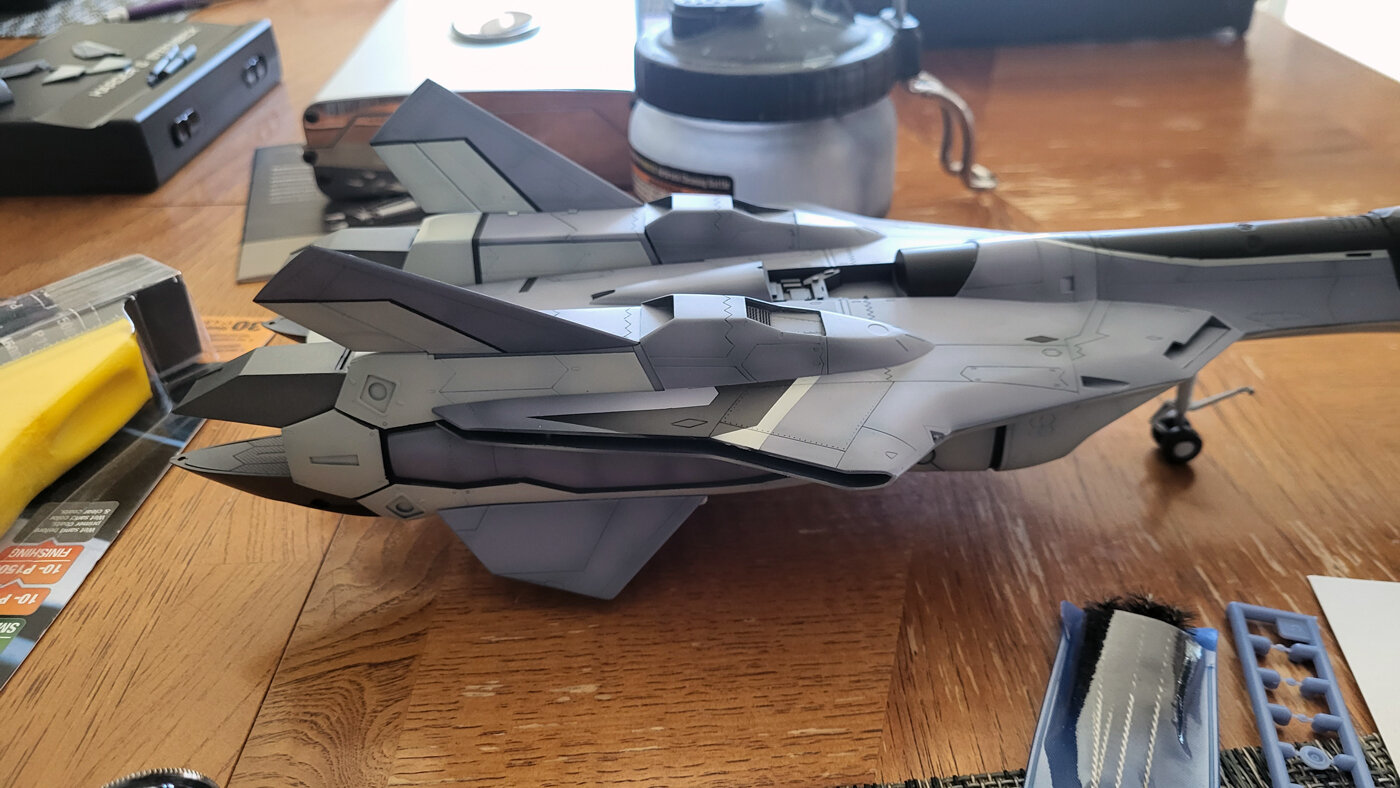
This bird is moving. Ready on not. Getting touch ups done. Quick masking and sone over thined colors are being freehanded onto the surface to further tone down my oil work. I'm fairly happy with the result. Also painting in a few areas such as black diamonds all over the body and the inner detail around the head (2nd time now.) Sadly, decals for this kit continue to plague me. They just keep shredding, some while being dipped in water. At this point it is probably 1 out of every 3 applied ends up being spliced back together. 🙃 However, the top is done! I'm going to steal some other kit's caution markings for the underside going forward. The PE became a nightmare. I didn't apply the fins because I wanted to paint them, and the mesh different tones. This was a huge mistake as they fit super tight during my initial fitment and not at all after paint. After breaking the grilles off a few times and trying to save them, I'm throwing in the towel here. I may just glue some plastic plate in or leave it as is. Maybe... just say it is different than the YF-19's design. So, afterwards I painted the remaining mesh with some aluminum. Lol With all that done. The topside was hit with some matte topcoat. Next time we will unmask the canopy and 1/2 the bird will be done!
- 90 replies
-
- 4
-
-
- macross vf-x2
- vf-19 excalibur
- (and 2 more)
-
The 'Hey look at this really cool model build I saw' post
Rock replied to Shawn's topic in Model kits
I love this Idea on 3D missile dodging and have always wanted to try this effect myself! -
I actually have the old Wave 1/100 resin I butchered 20 years ago. I had planned to rob the shields and lance from for my IMS kit to make this. I looked into grabing the old Wave Boomerang/Sarion plastic kit but hell, It'll be 3x cheaper to just wait for the future IMS version's release.
-
Not much work done with Sping housekeeping/maintenence taking priority. Time was not on my side and I wasn't able to get back to the kit. Bit of a fubar in the process. So with oils you have a large window for tweaking and reworking them. Sadly, this window closes after about a full week. While yes, mineral spirits can be used to play with fully dried oils the ammont of thinner it needed, and how long I have to let it sit wet on the topcoat is too great for the thin acrylic clear coat barrier to withstand. Touchups were needed. I used the chance of touching up the basecoat to free-hand airbrush some of the original color over areas that were a bitntoo strongly weathered. I still need to repeat the effect on the black, and grays. Masked up and got some of the details painted in too.
- 90 replies
-
- 2
-
-
- macross vf-x2
- vf-19 excalibur
- (and 2 more)
-
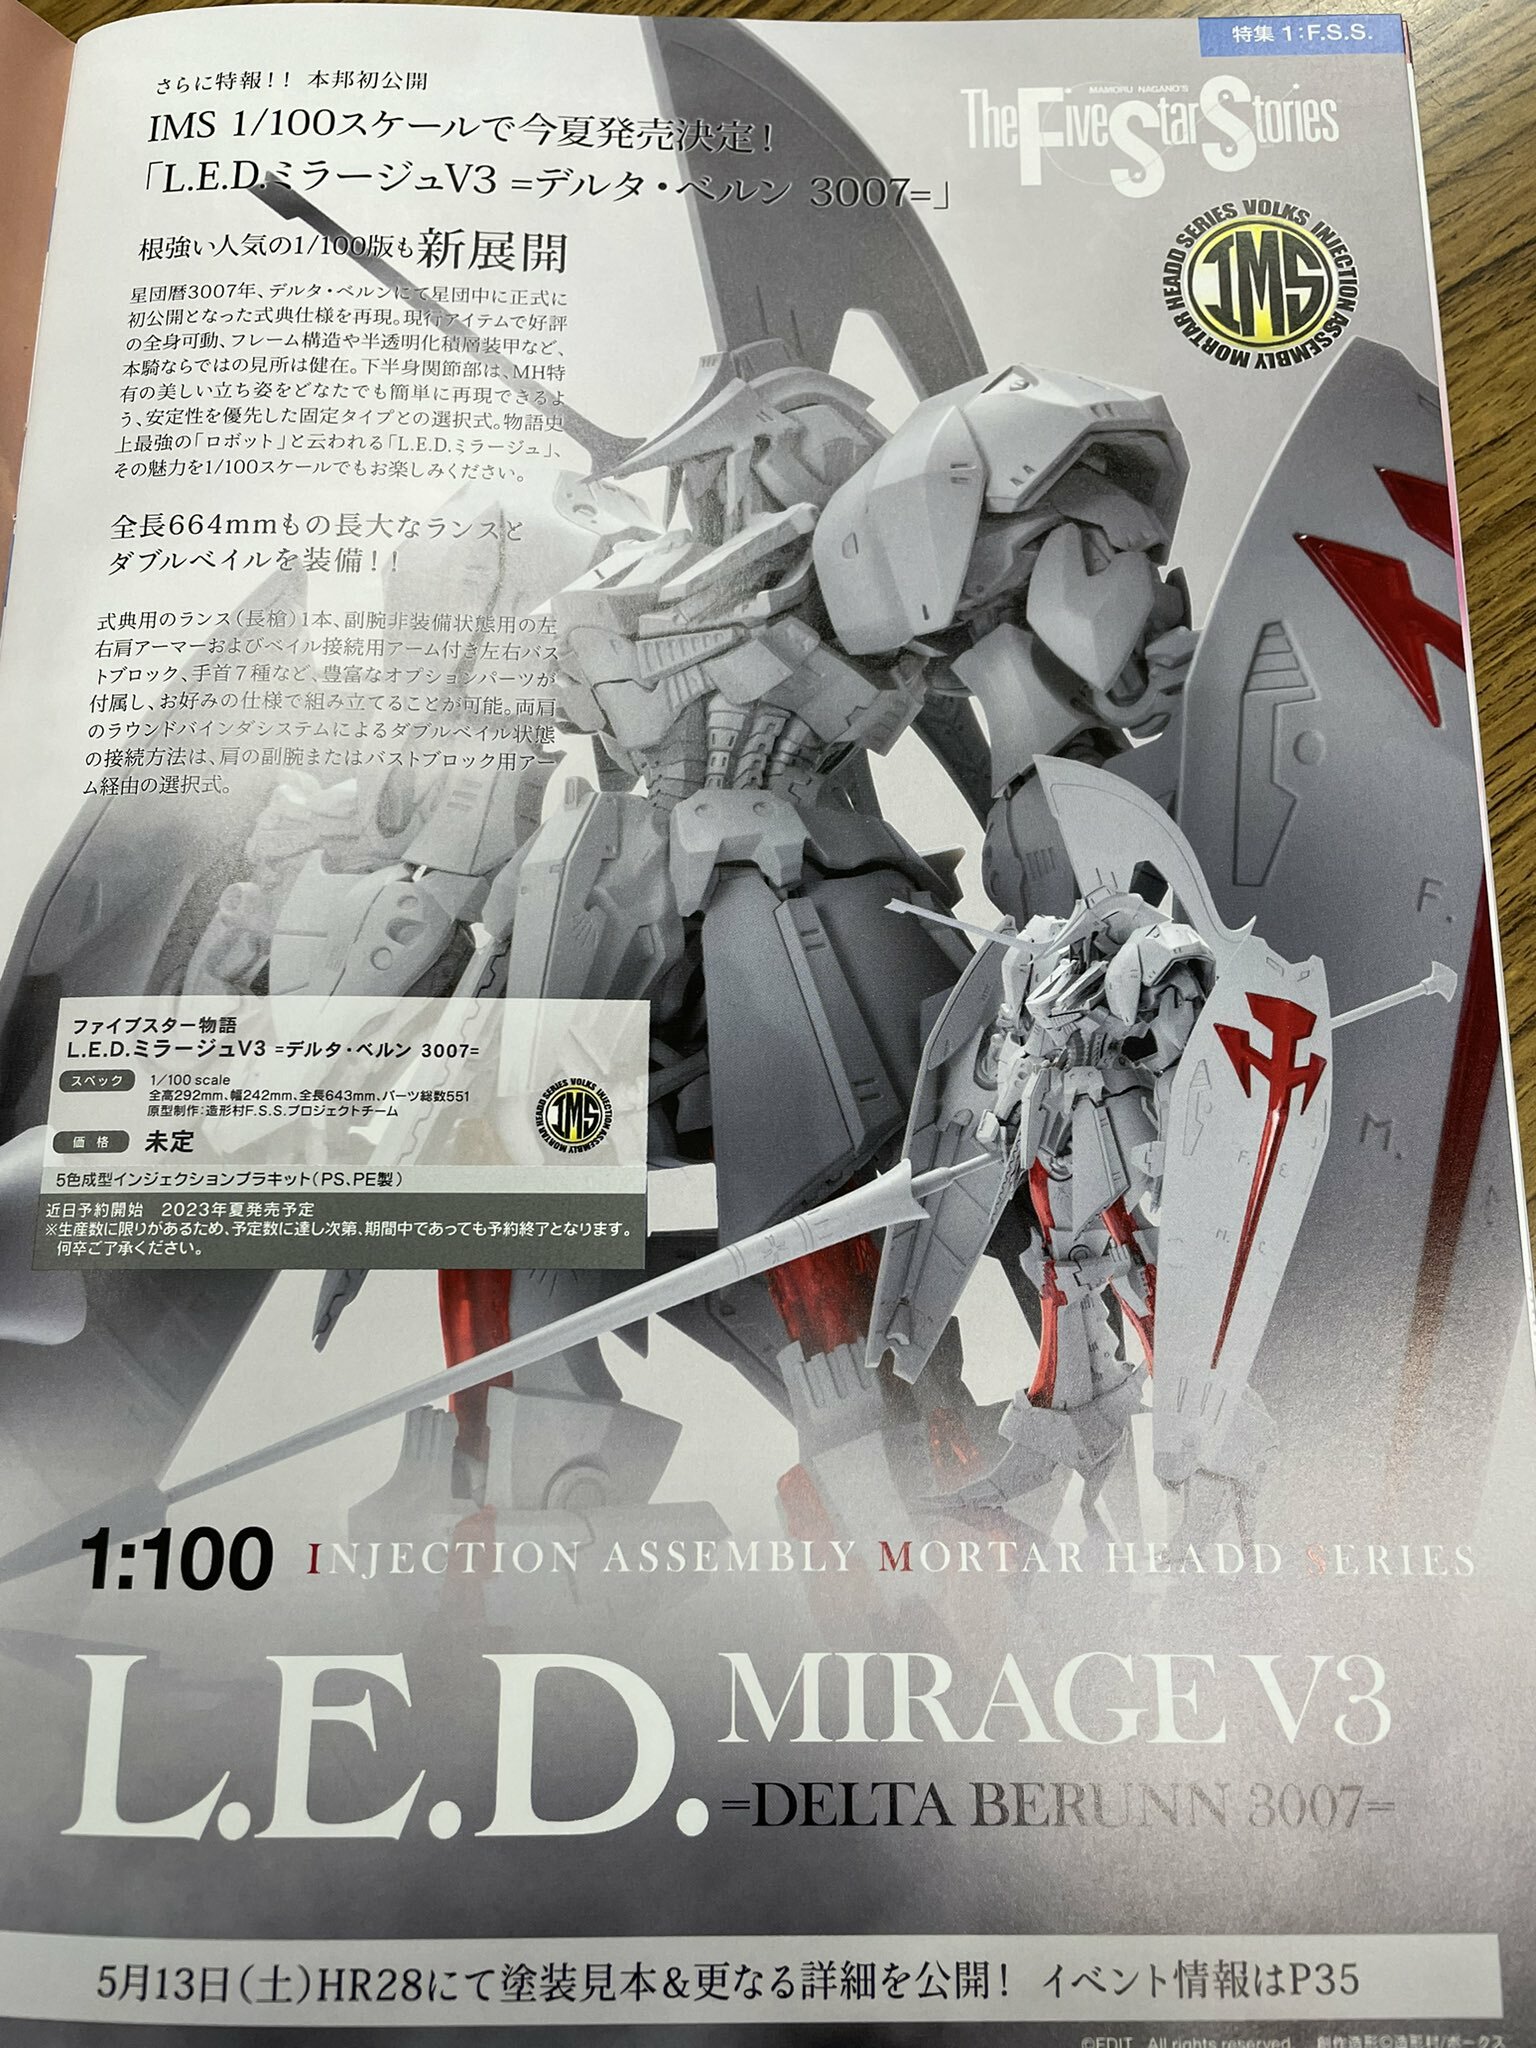
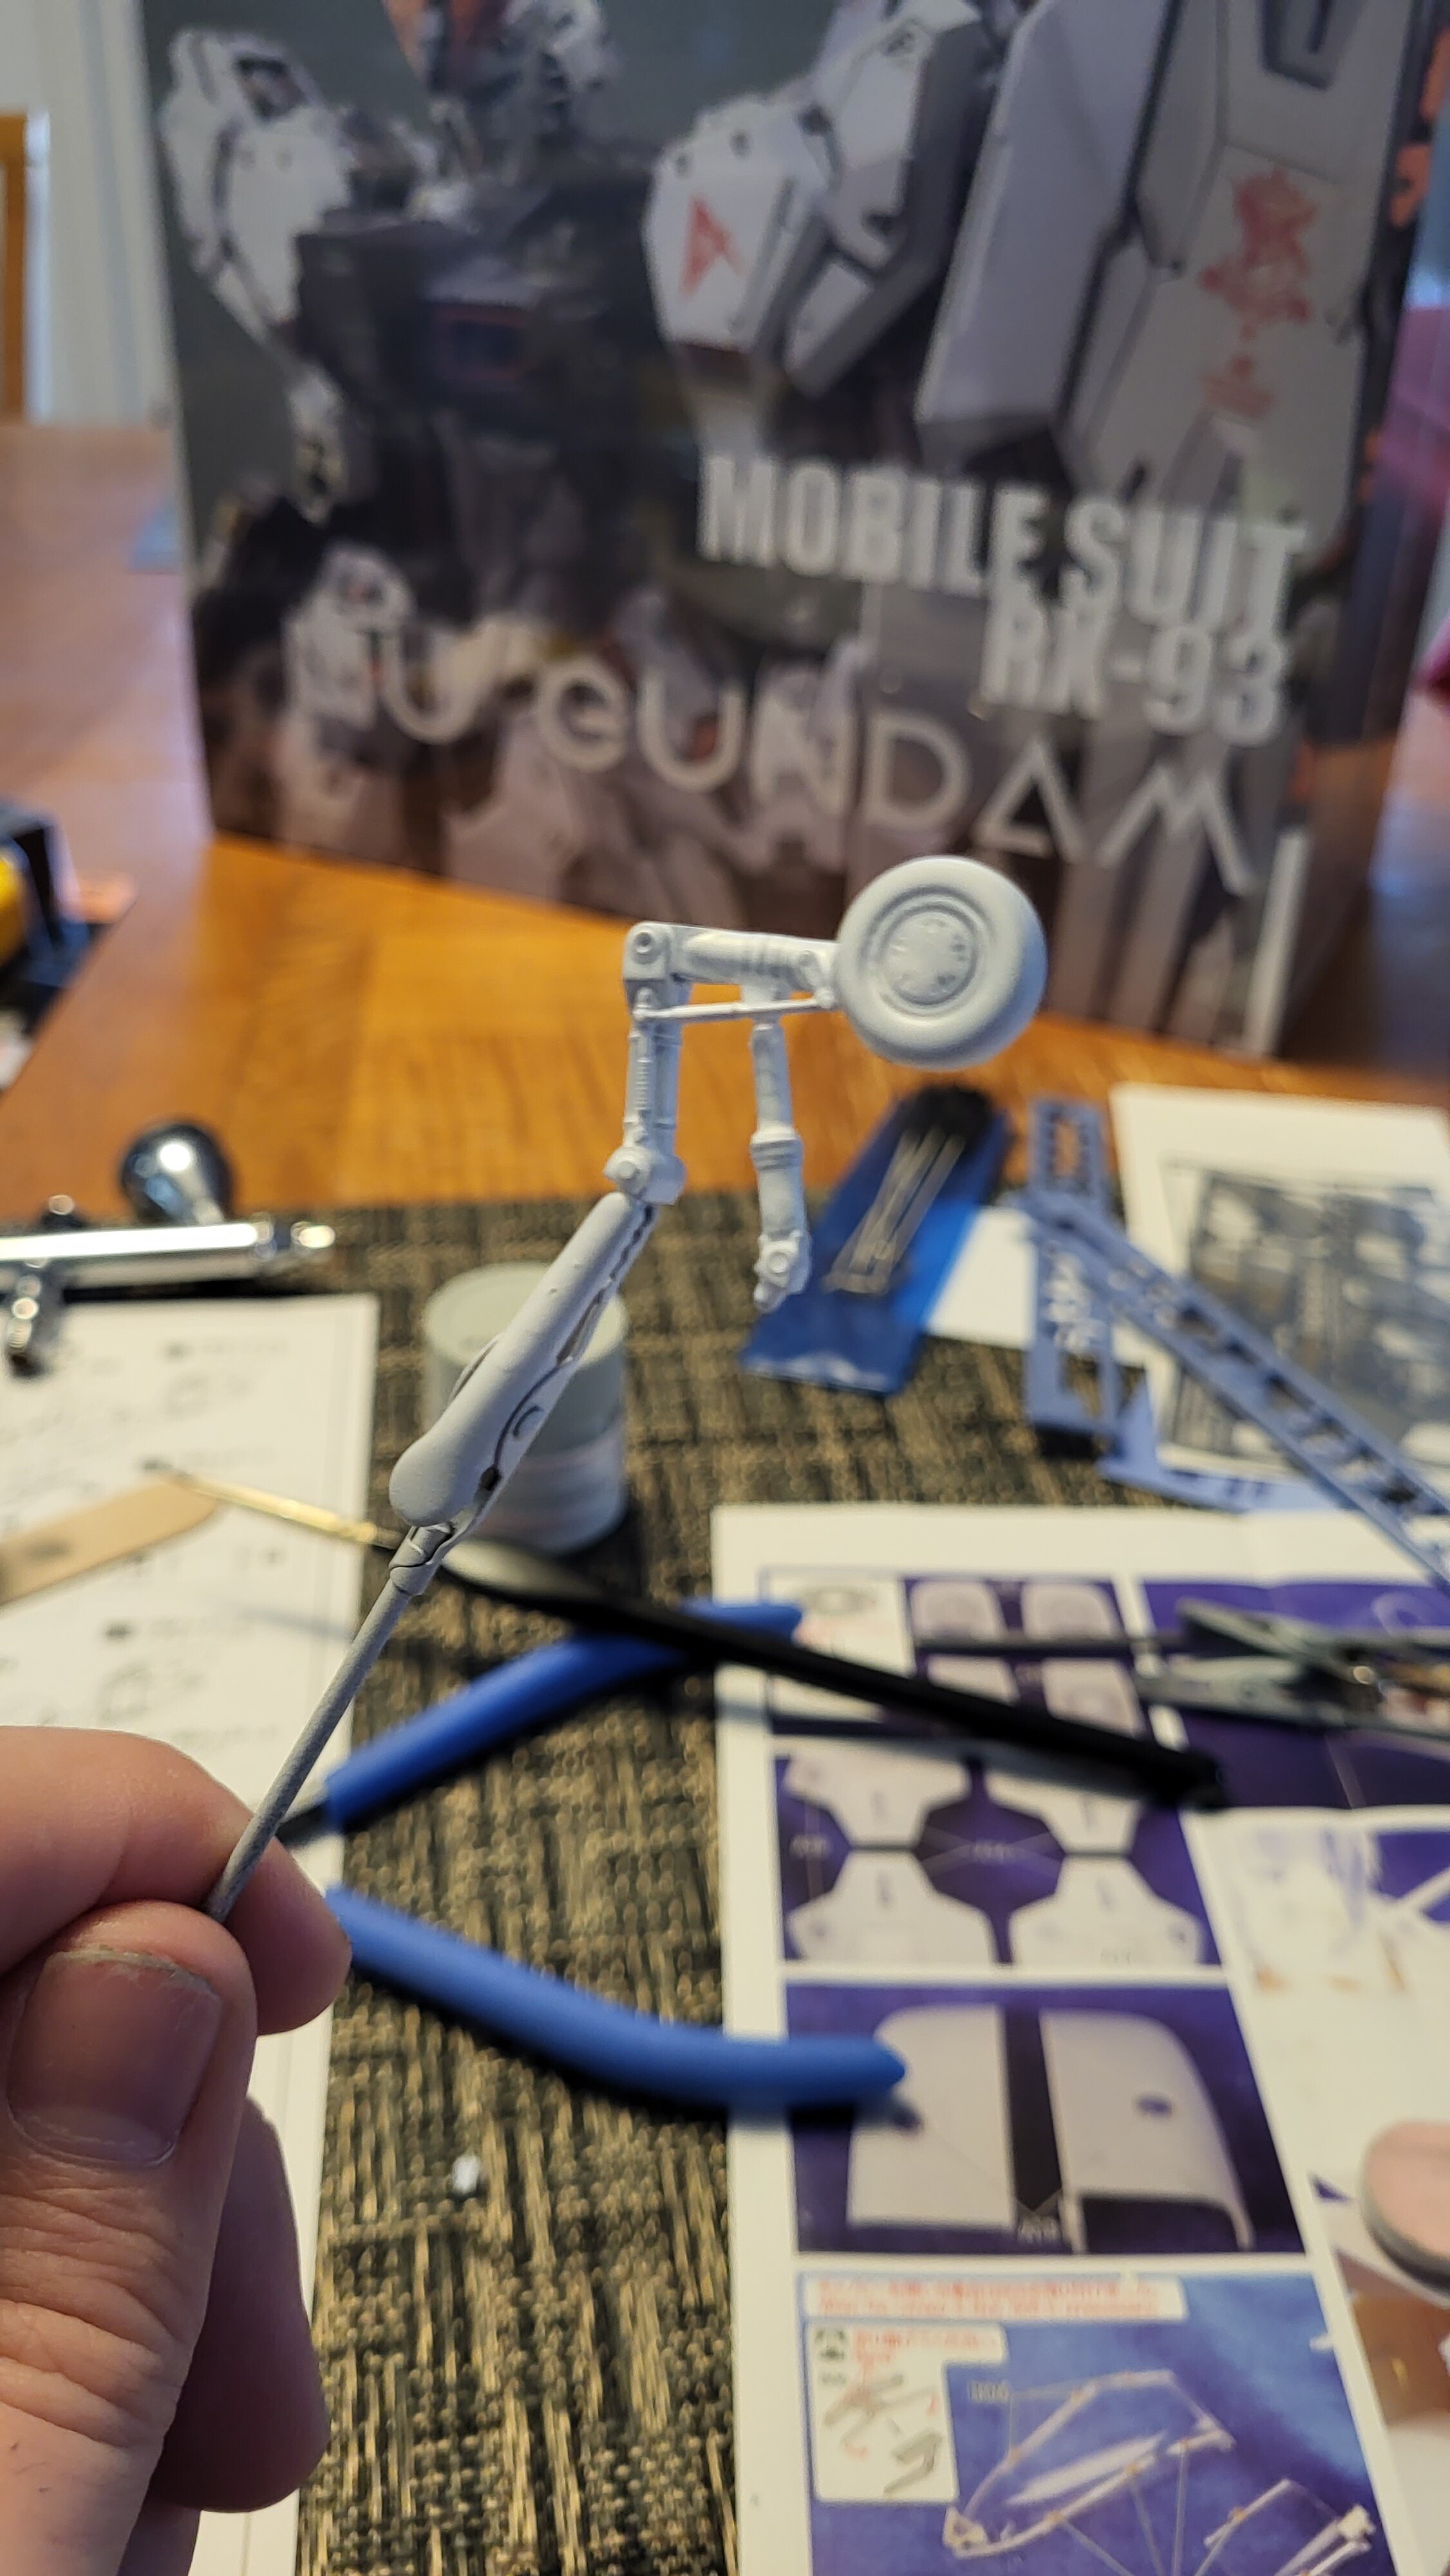
1/100 IMS Led Mirage V3. 3007 Delta Belun ceremonial version. + Light Veils, Lance, and larger head crest.
-
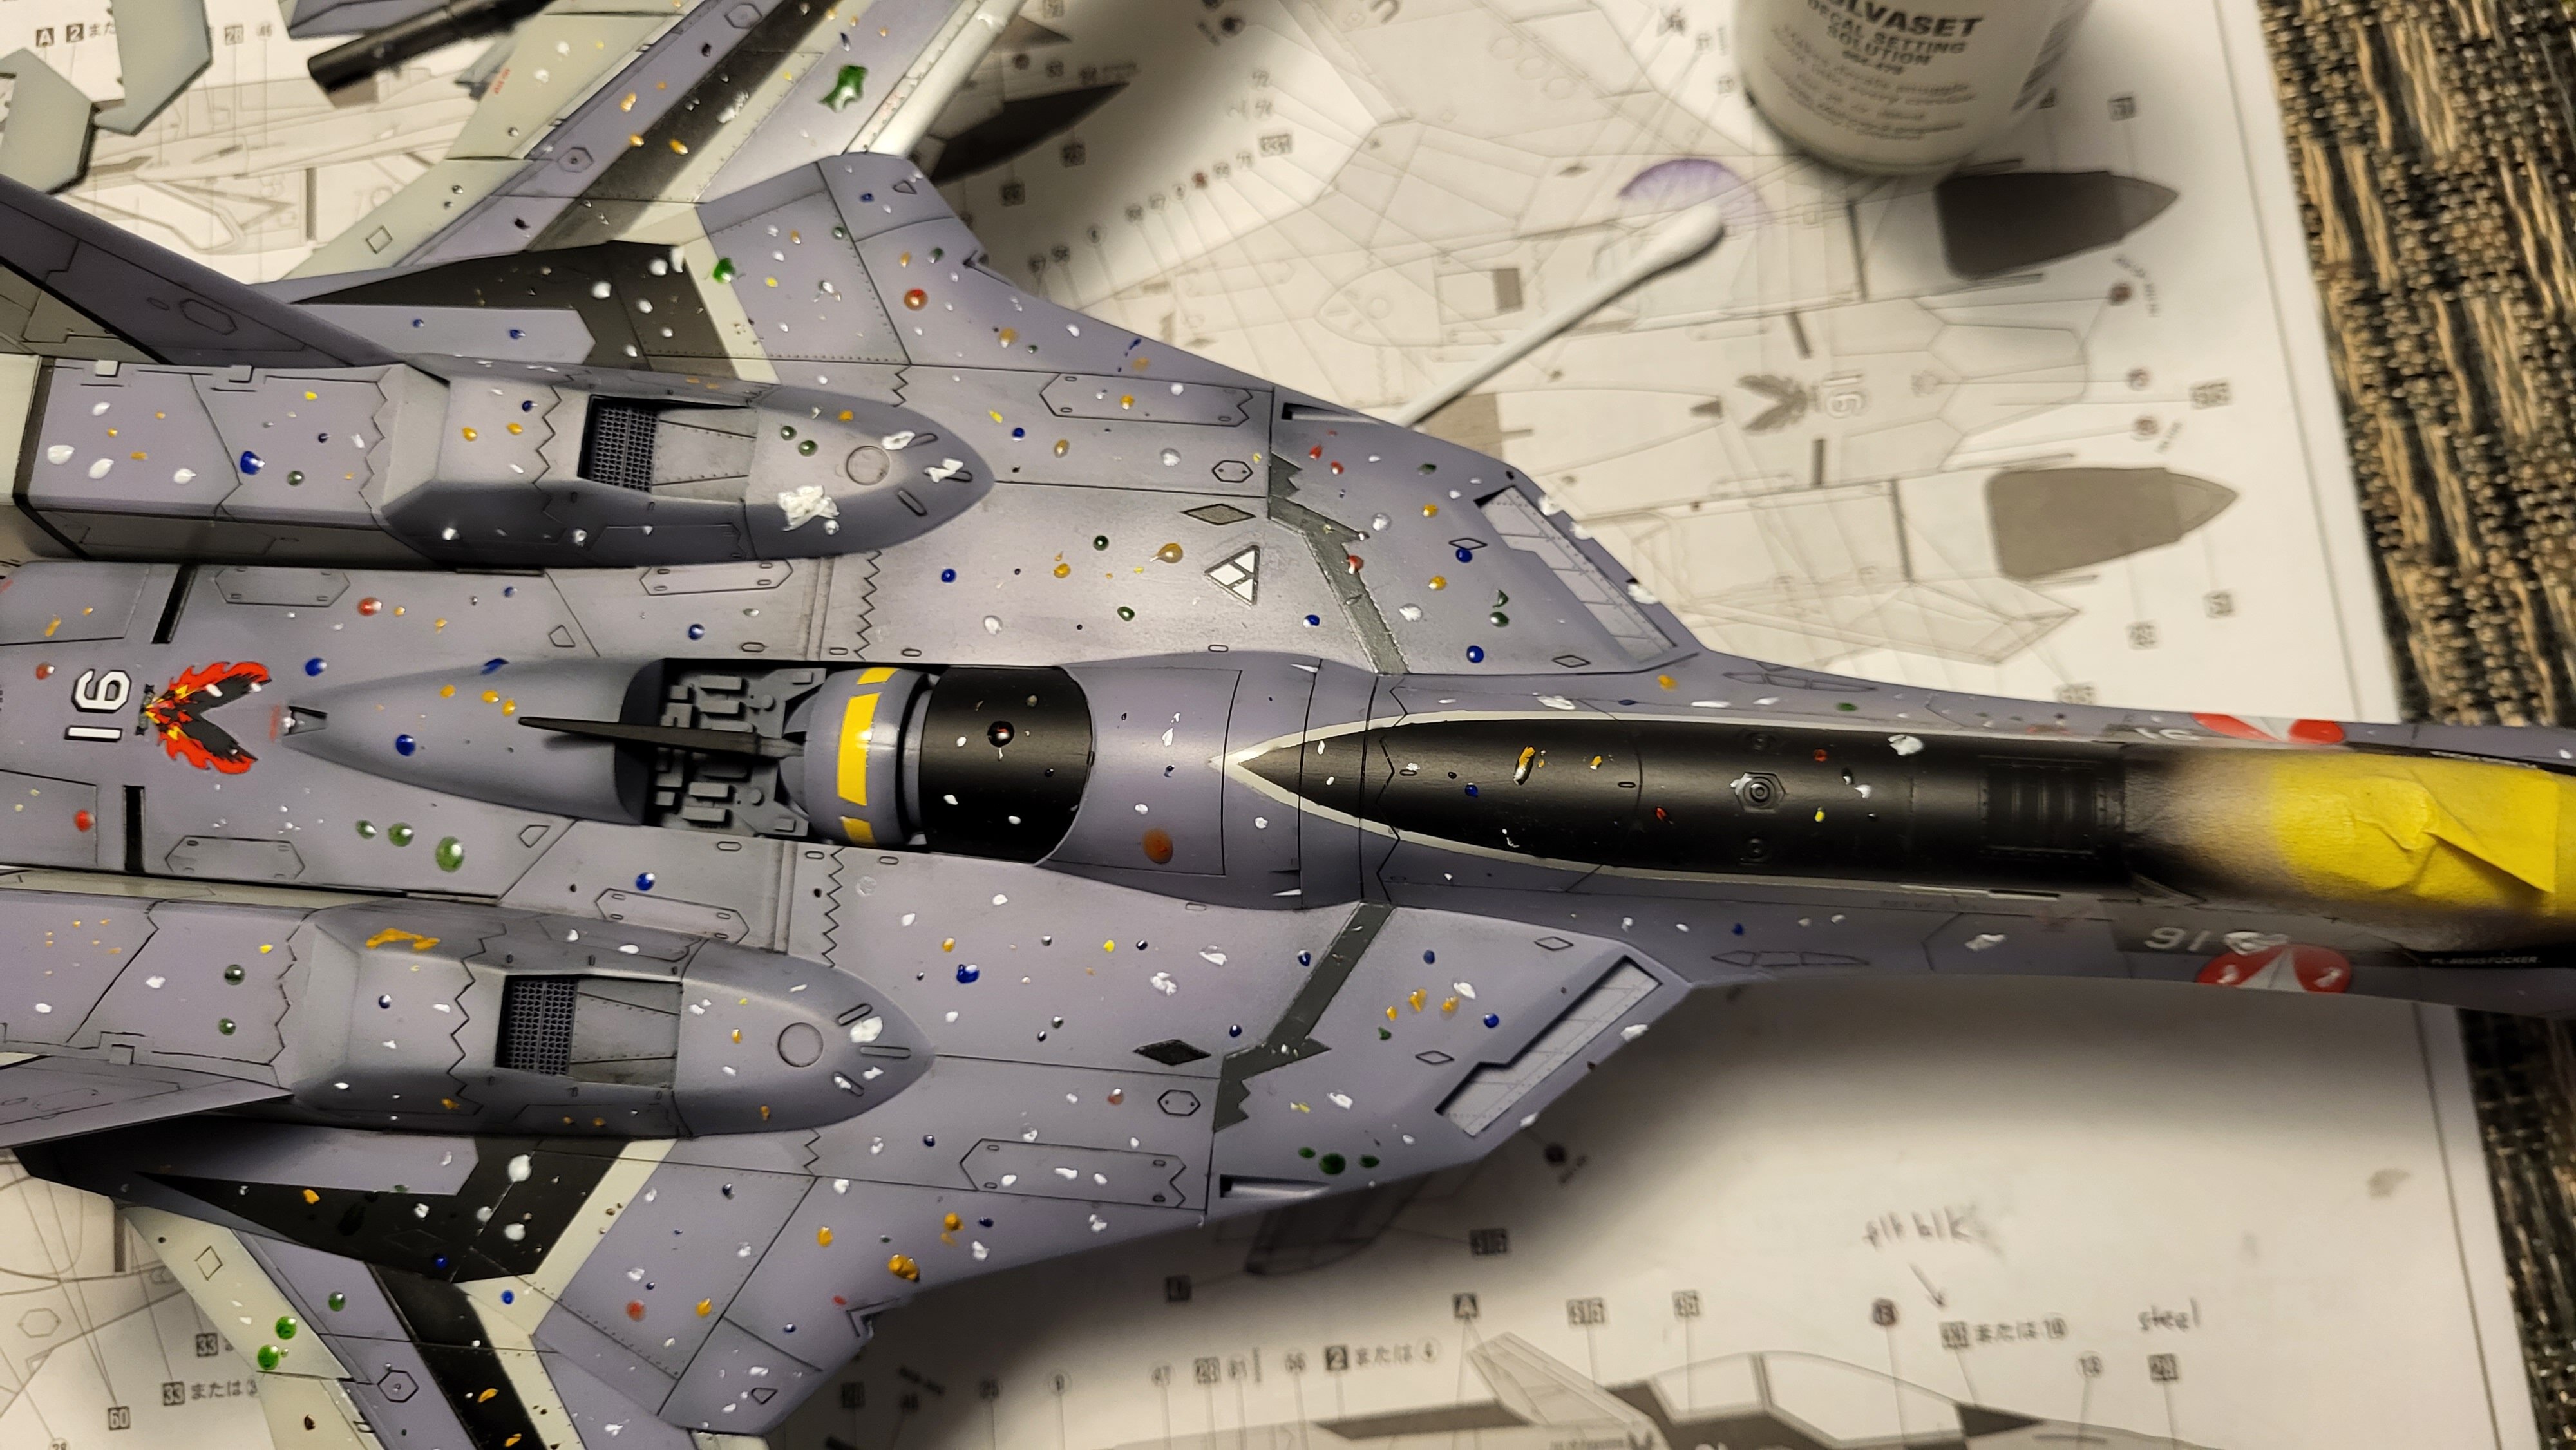
Time for a filter. Round 1. After the decals I sprayed some Alclad II Aqua clear (acrylic based topcoat) clear over the decals to seal them and prevent the next steps from finding the edges of their carrier film. I also go over the 'white' to help prevent any extreme staining should I wish to reverse the following effects. Once the clear has fully dried, I use cheap Hobby Lobby artist oils and a toothpick to dab the surface with dots of assorted colors. Most the time I only do this step with white, and a variation of the body color to keep the effect suttle. I really wanted to push the variation as I feel this valk is a bit boring as is. A full color pallet was used leaning to the blues amd greens to shoft the finish towards that cerulean blue it is supposed to be. After waiting 30min to an hour I grab a large round paint brush and oderless mineral spirits. I SOAK the brush and begin to stipple or poke all over the surfaces spearing the dots into eachother and the body color. As I'm doing this I wipe the bush on a clean paper towel when to color transfer becomes to great. The name of the game is to keep soaking the brush and create a wet surface on the kit while you work. Oils are very forgiving and take a while to dry. Effectivly you can keep stacking/repeating to process as needed. If the area becomes too messy a quick wipe and clean before repeating the process will tone the effect down. It is very important to do this with time. I often find the effect to strong when the surface is still shiney and wet, but once fully dry the effect differs vastly in appearance. Right now it is a bit wet and the yellows stand out a bit much for me, making it look sandy. Some further blending amd removal may still be needed.
- 90 replies
-
- 2
-
-
- macross vf-x2
- vf-19 excalibur
- (and 2 more)
-
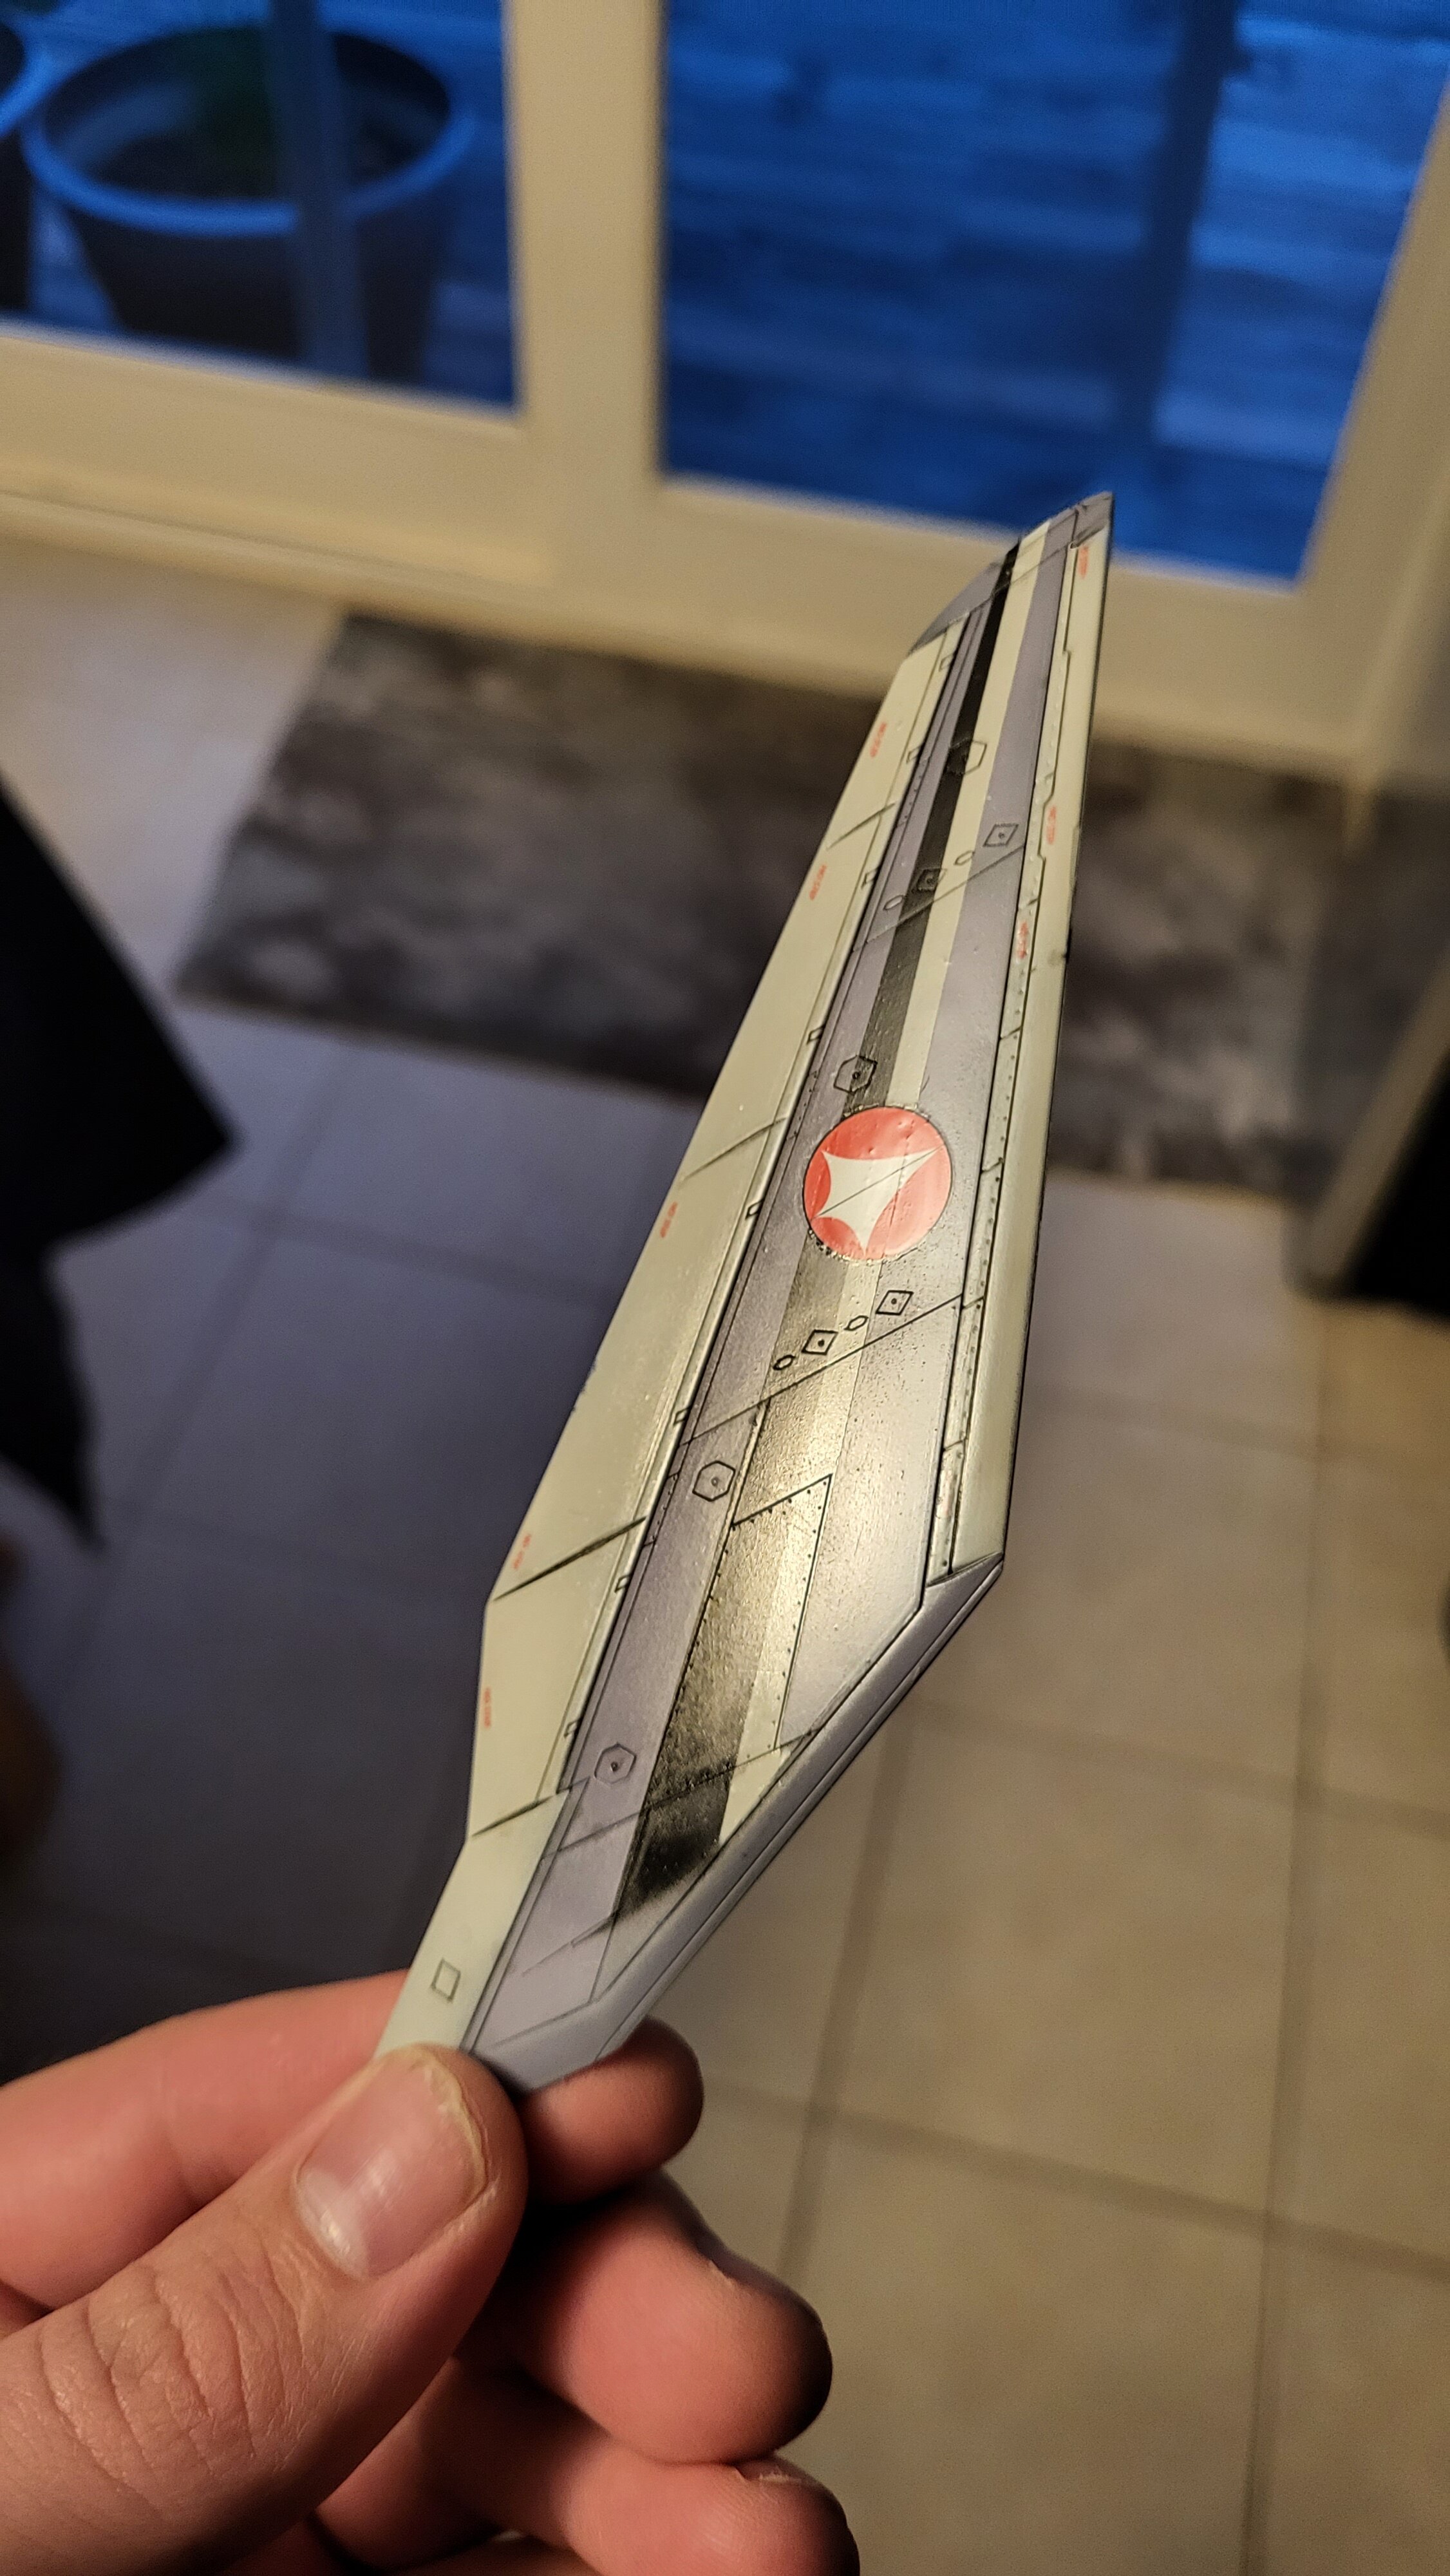
Can anyone clarify if the green accents on the shoulders/legs were supposed to match the clear green lens details on the accents to the sides of the cockpit? Hase just includes decals for them which contrast the clear parts. Trying to figure out if it needs to be corrected.
-
Oh crap, thank you for the link. They also have posted a bunch of IMS event liniyed kits such as the Led Mirage Inferno Napalm ver.2023 (clear armor) limited edition for msrp. Sure beat the 500-600 through 2nd hand channels!
-
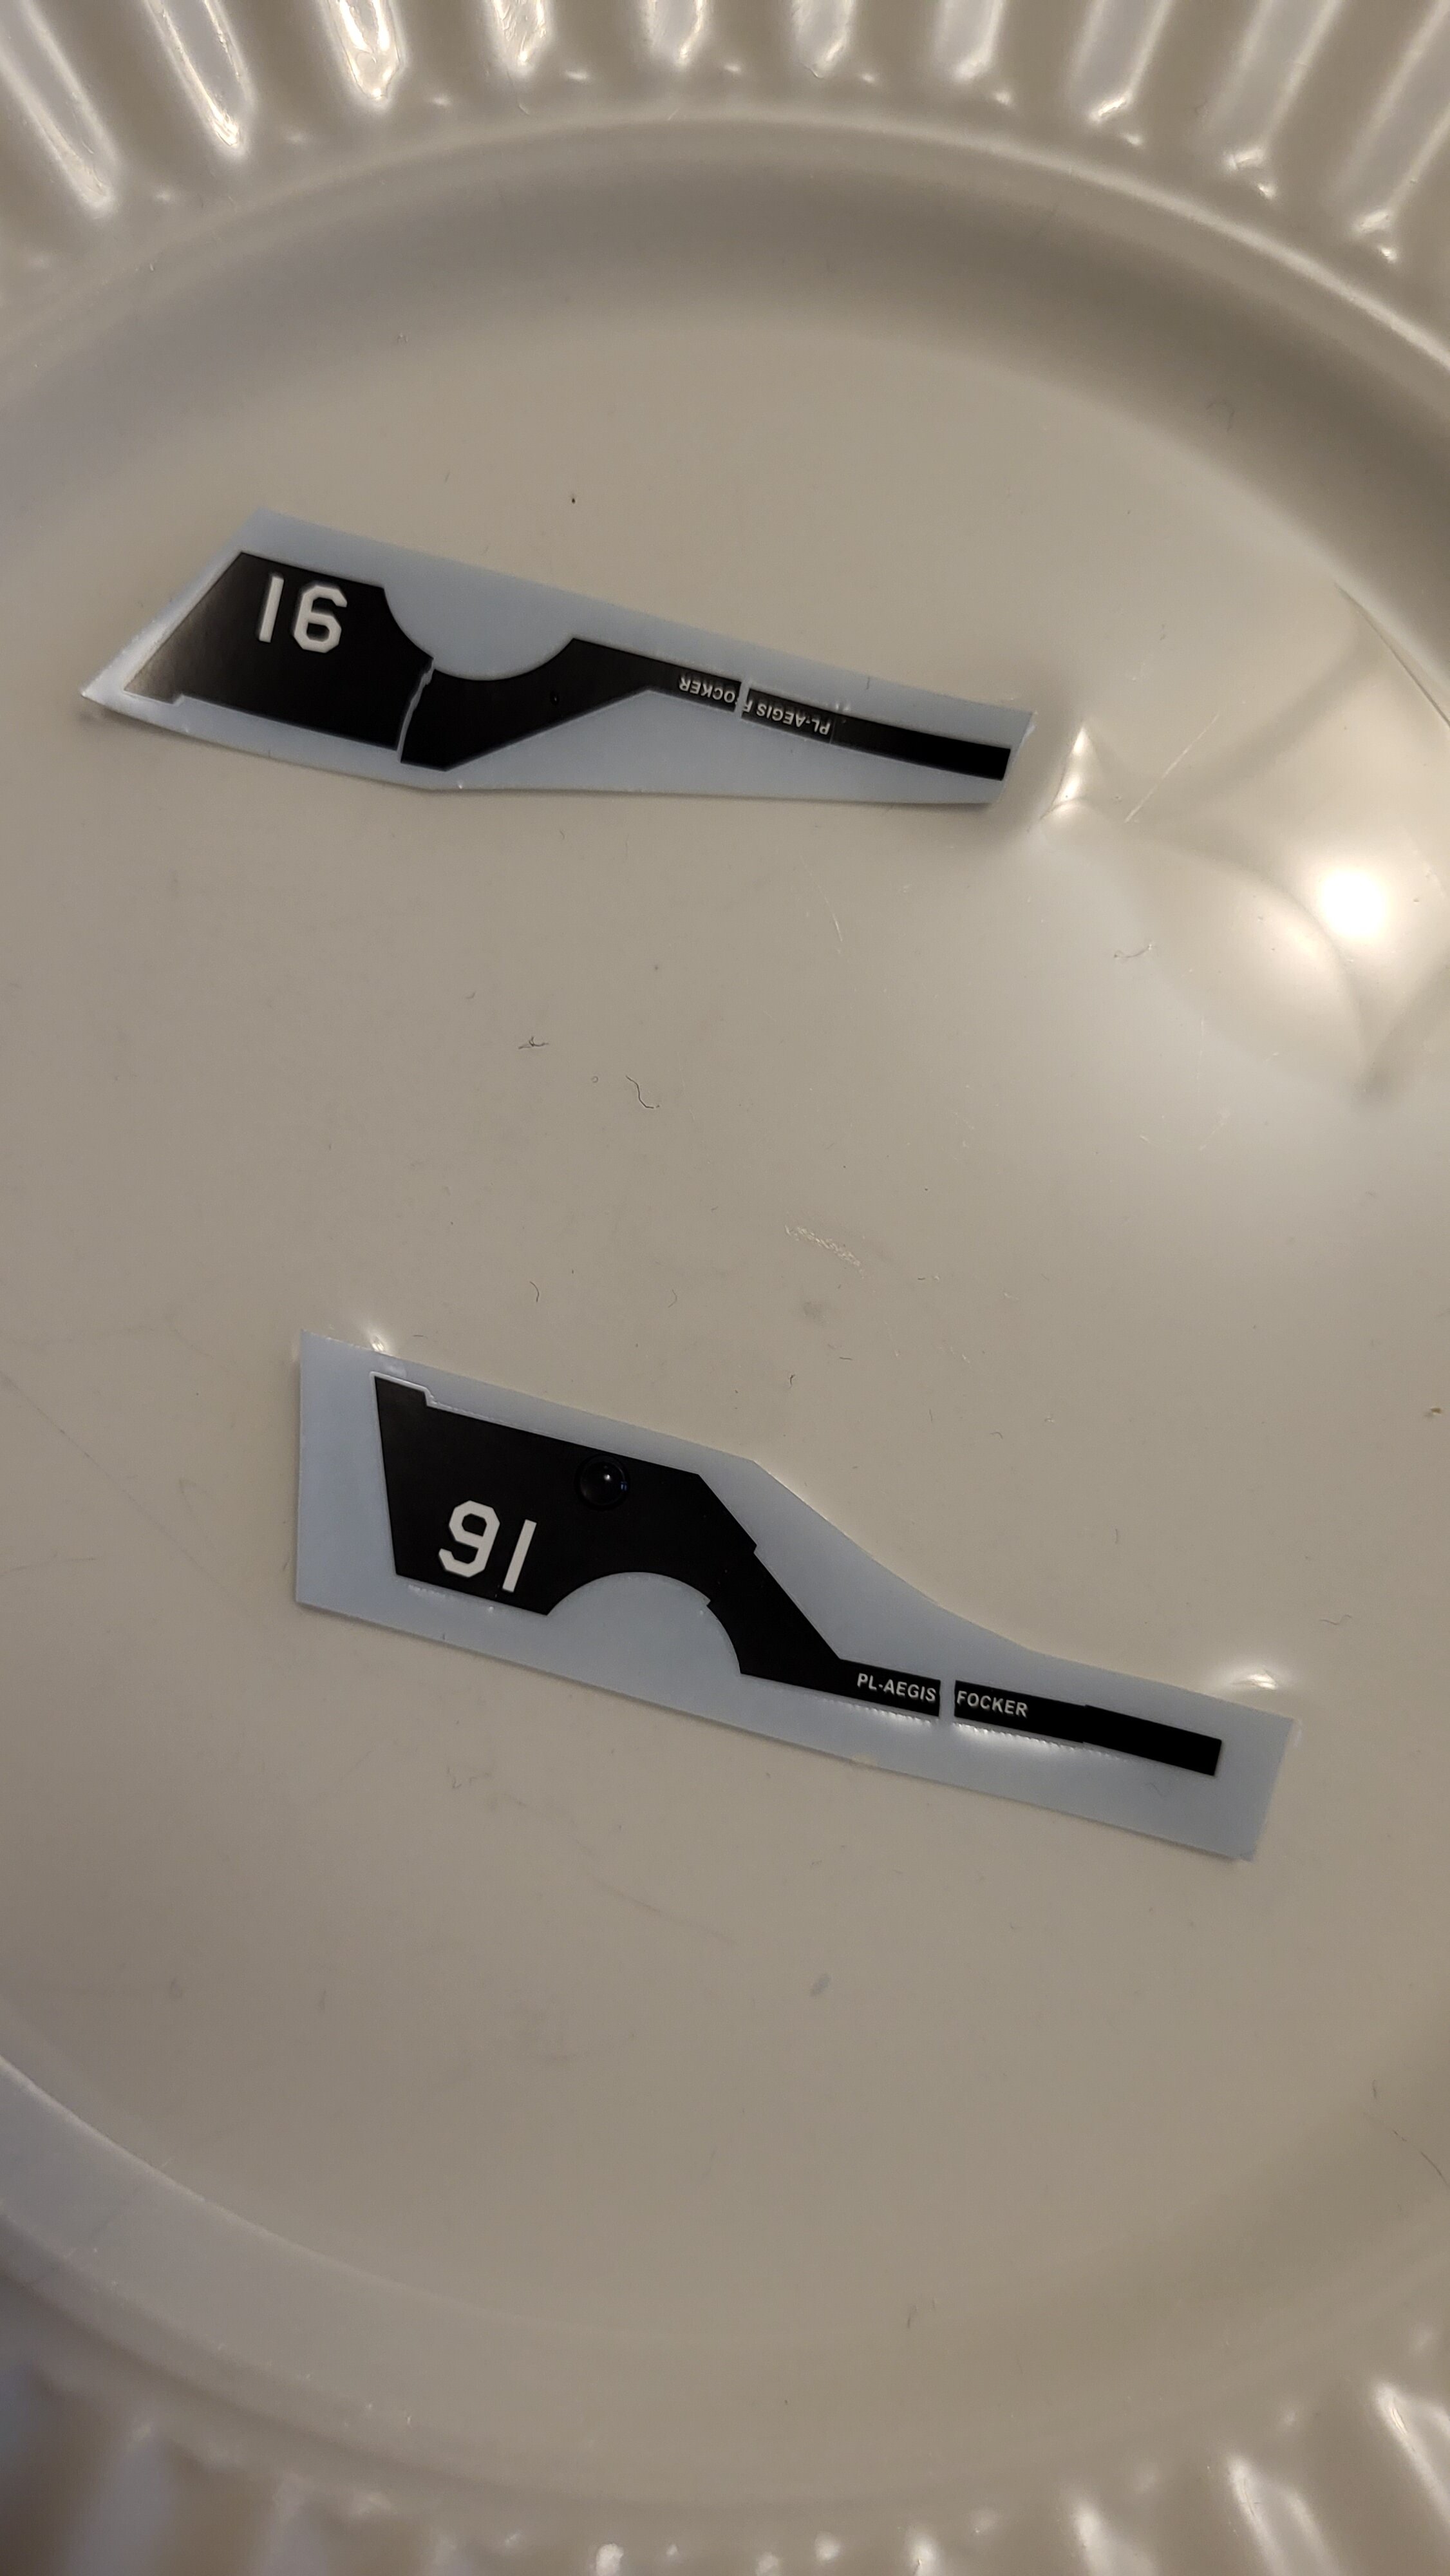
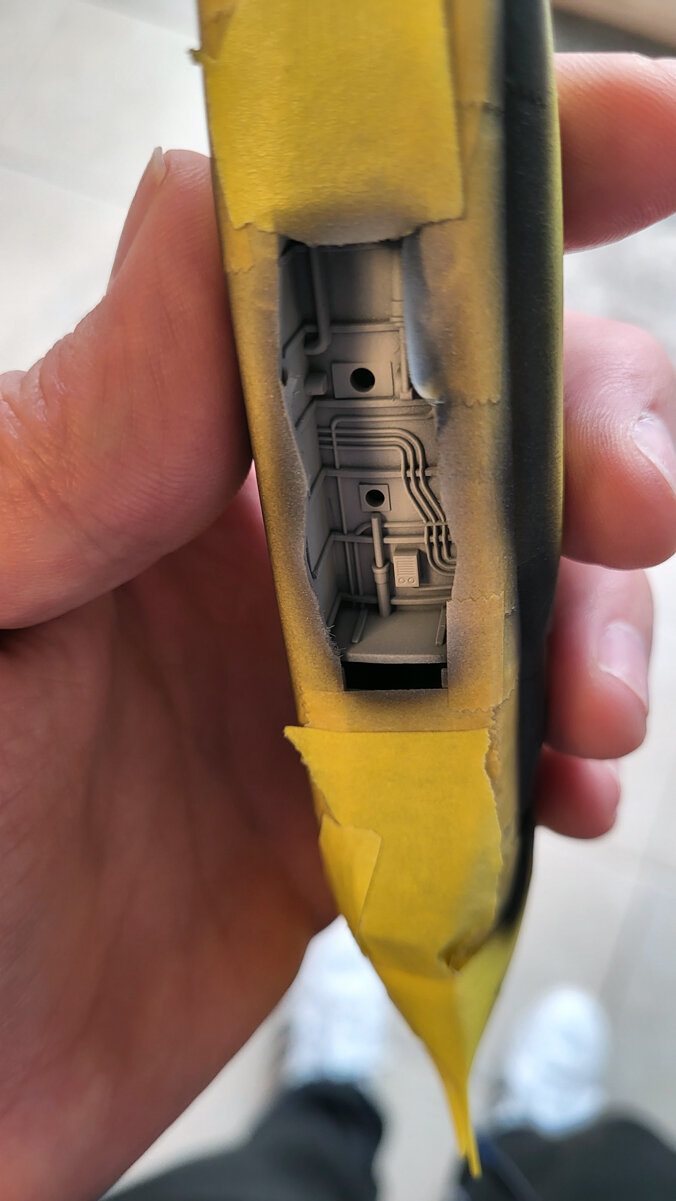
One last screw you from Hasegawa. The kit isn't even a few years old and the decals are breaking up while soaking in their warm water. Sadly hase still makes the pilot names and 91 markings around the canopy as part of the antiglare black around the canopy. Thus they have to go on and my colors blended onto them. Simce I'm here mightbas well do the larger markings so they can be weathered too.
- 90 replies
-
- 3
-
-
- macross vf-x2
- vf-19 excalibur
- (and 2 more)
-
Round 1 of chicken pox!!!
- 90 replies
-
- 3
-
-
- macross vf-x2
- vf-19 excalibur
- (and 2 more)
-
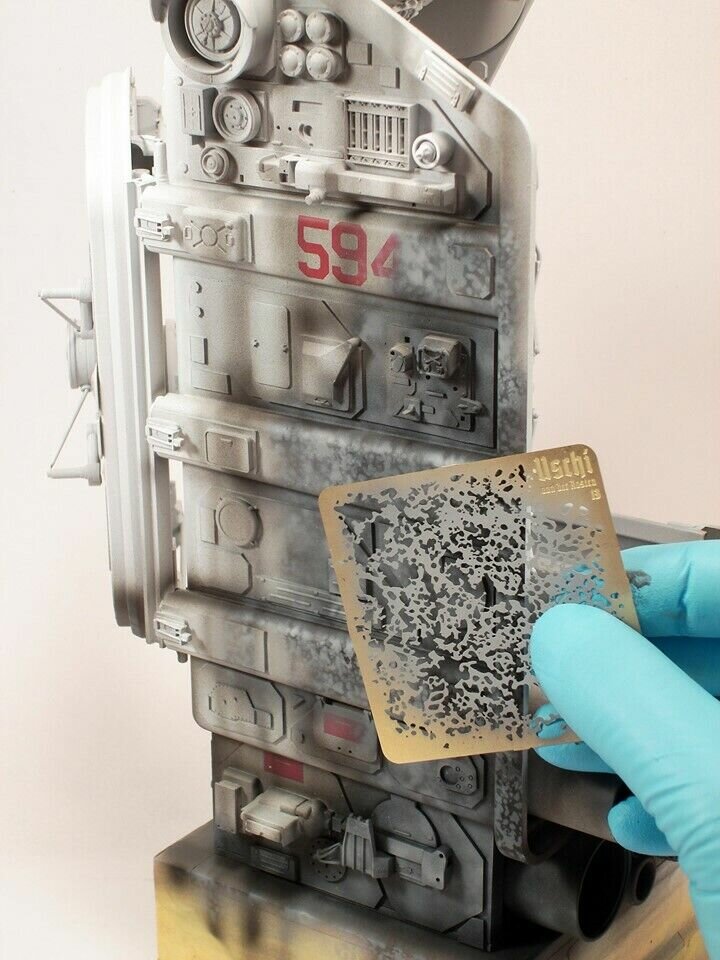
Have you considered (Uschi van der Rosten) Trinity's splatter airbrush stencils? I keep meaning to grab them for that very same reason. One of those tasks that is super fun to do for the first 1/2 hour... then your patterns get bigger and bigger until you start almost pre-shading because your arm hurts and you want it to be over. lol
-
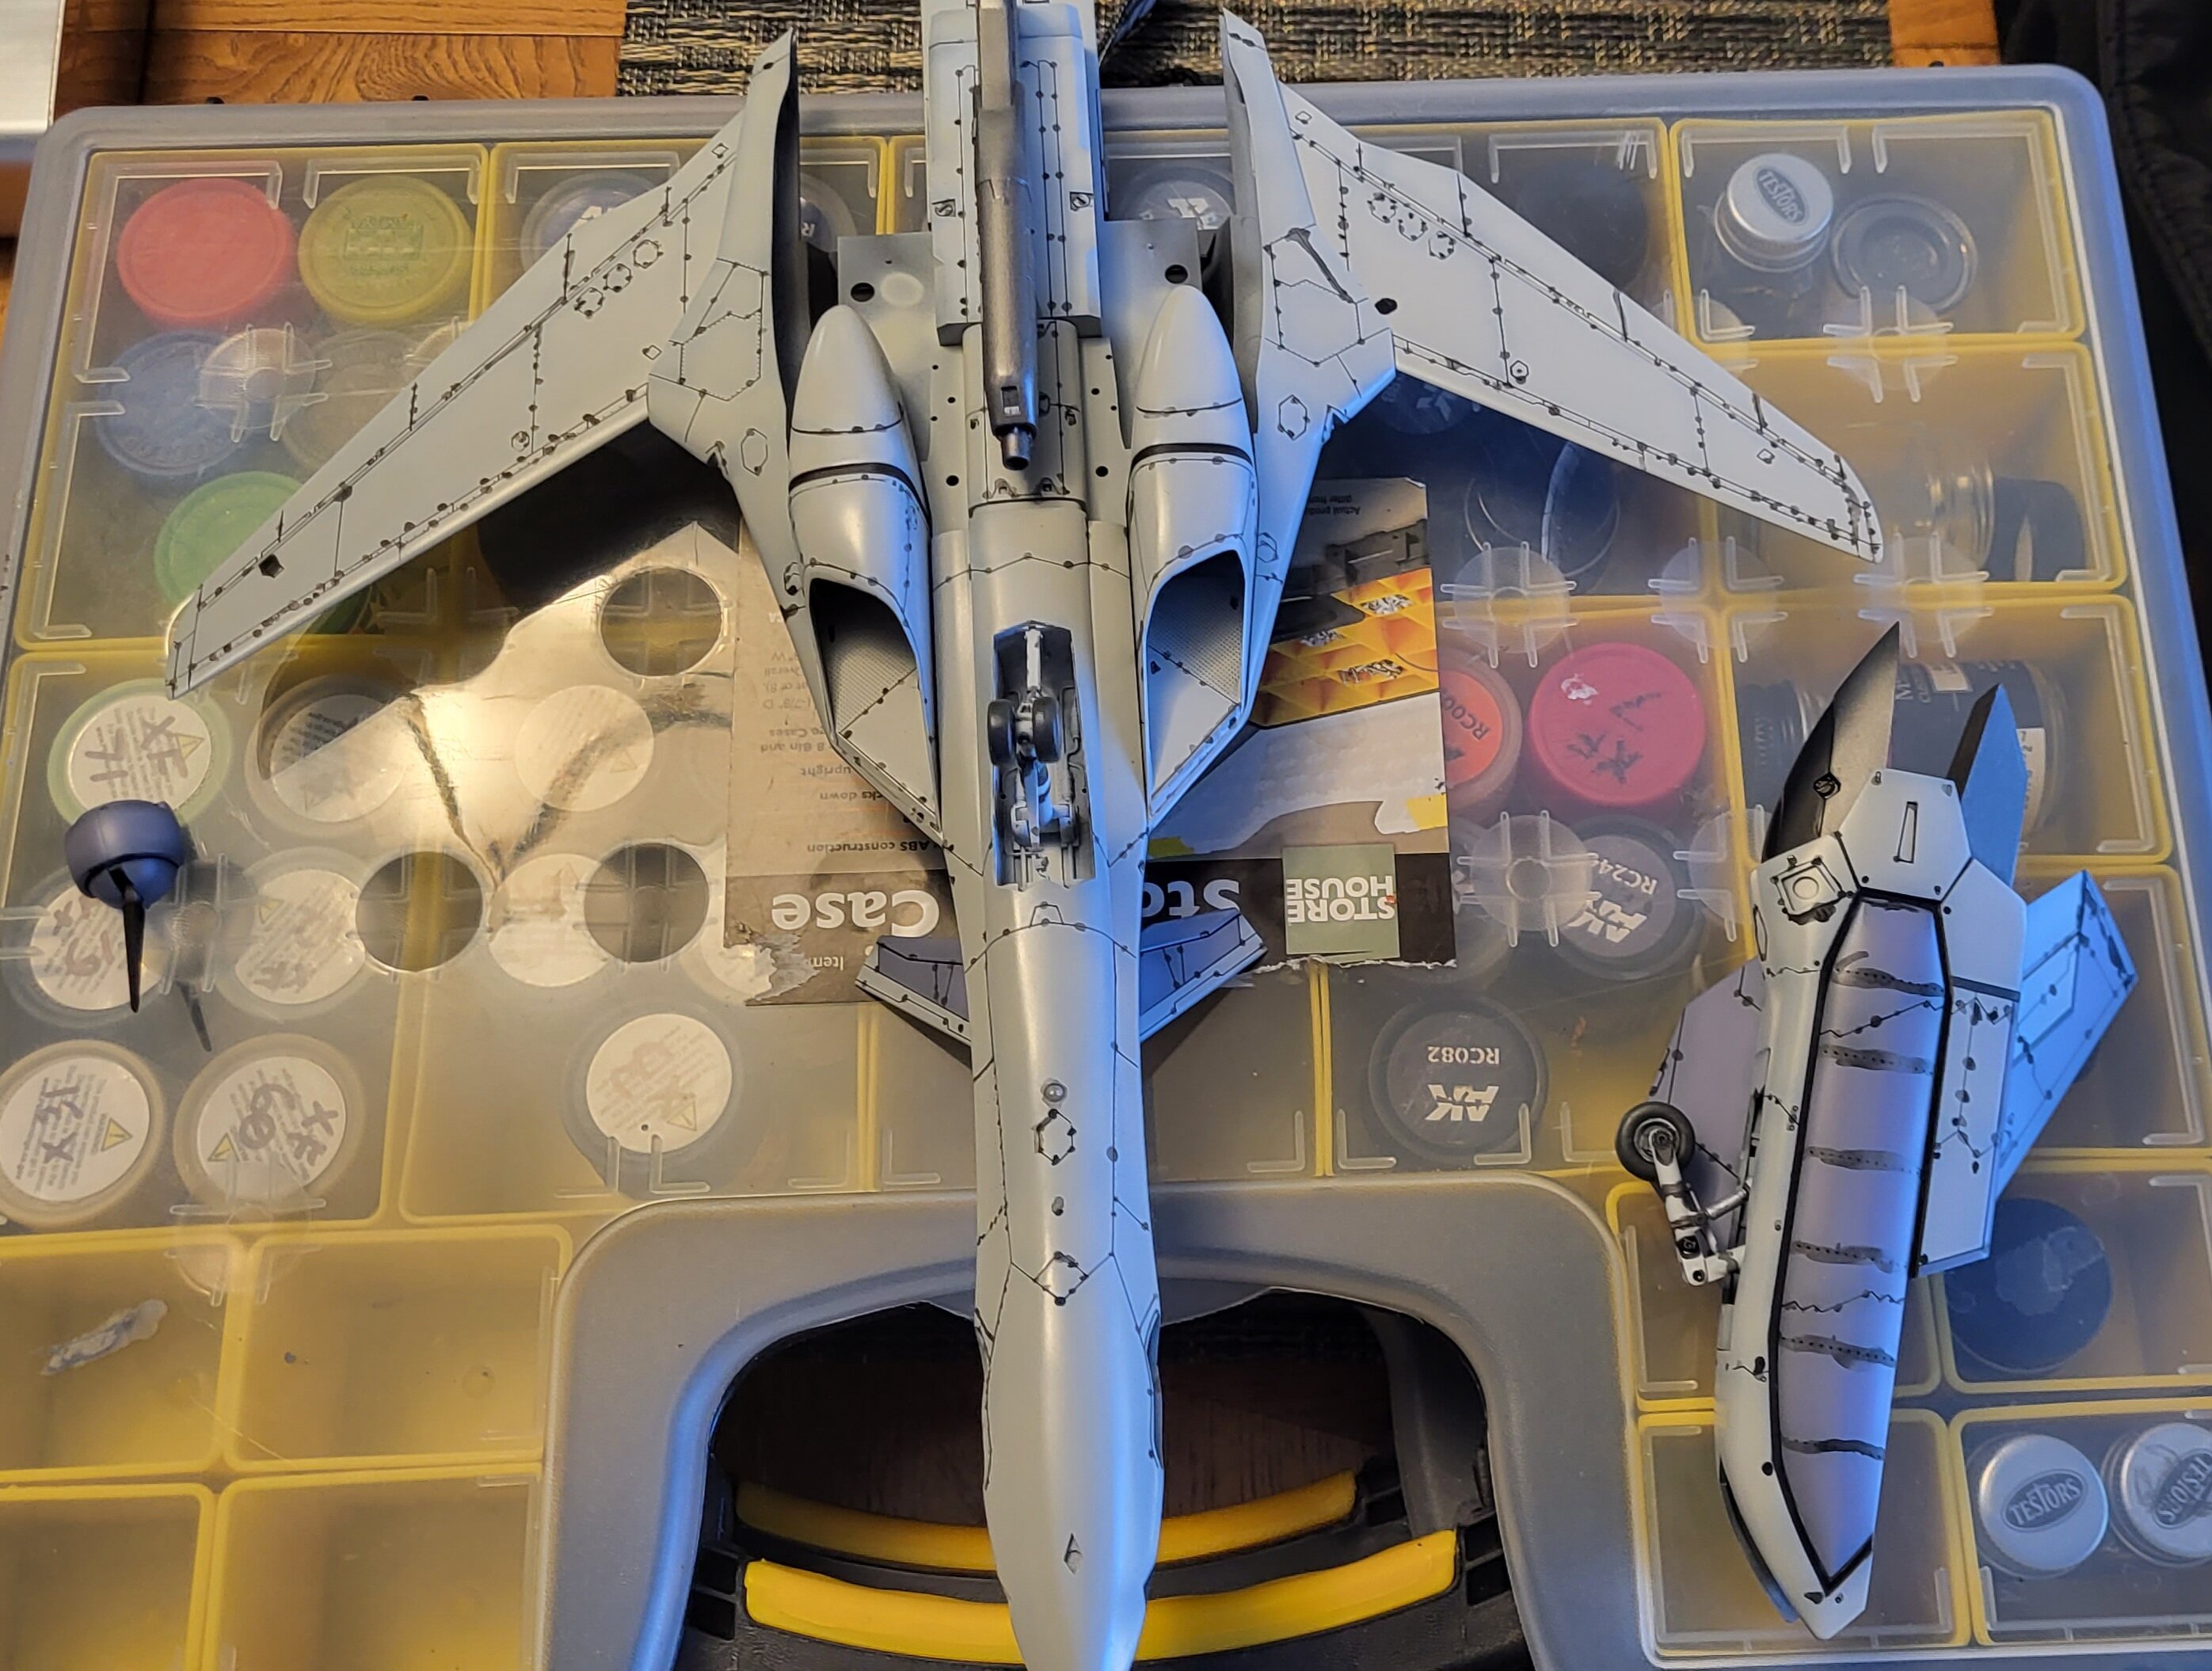
Coming up on a tail end of a nasty week long cold (flu,) I'm finally getting my fine motor skills and routines back. On to getting the arms together and the details painted. I don't remember what I used exactly (possibly alcladd duraluminum) but after a black primer coat I was able to directly spray the center to get a nice shaded effect. It was on about by the time I painted the sixth landing bay door, like the wings, I remembered the bottom of this bird is white and not the topside color. Oops Finally getting sub-assemblies together. First time seeing it up on it's own wheels too. I really like the way hase made the landing gears not require cement like most aircraft. Should make for a much more pleasant detailing experience. Got the wash mixed up as we speak so really moving now!
- 90 replies
-
- 4
-
-
- macross vf-x2
- vf-19 excalibur
- (and 2 more)
-
Any place with train model stuff or even vigger arts and craft stores such as michaels and hobby lobby. There is green moss stuff used to cover the glue/foam in floral flower arrangements. Finding it hard this week to focus on the project at hand... 😶 -
-
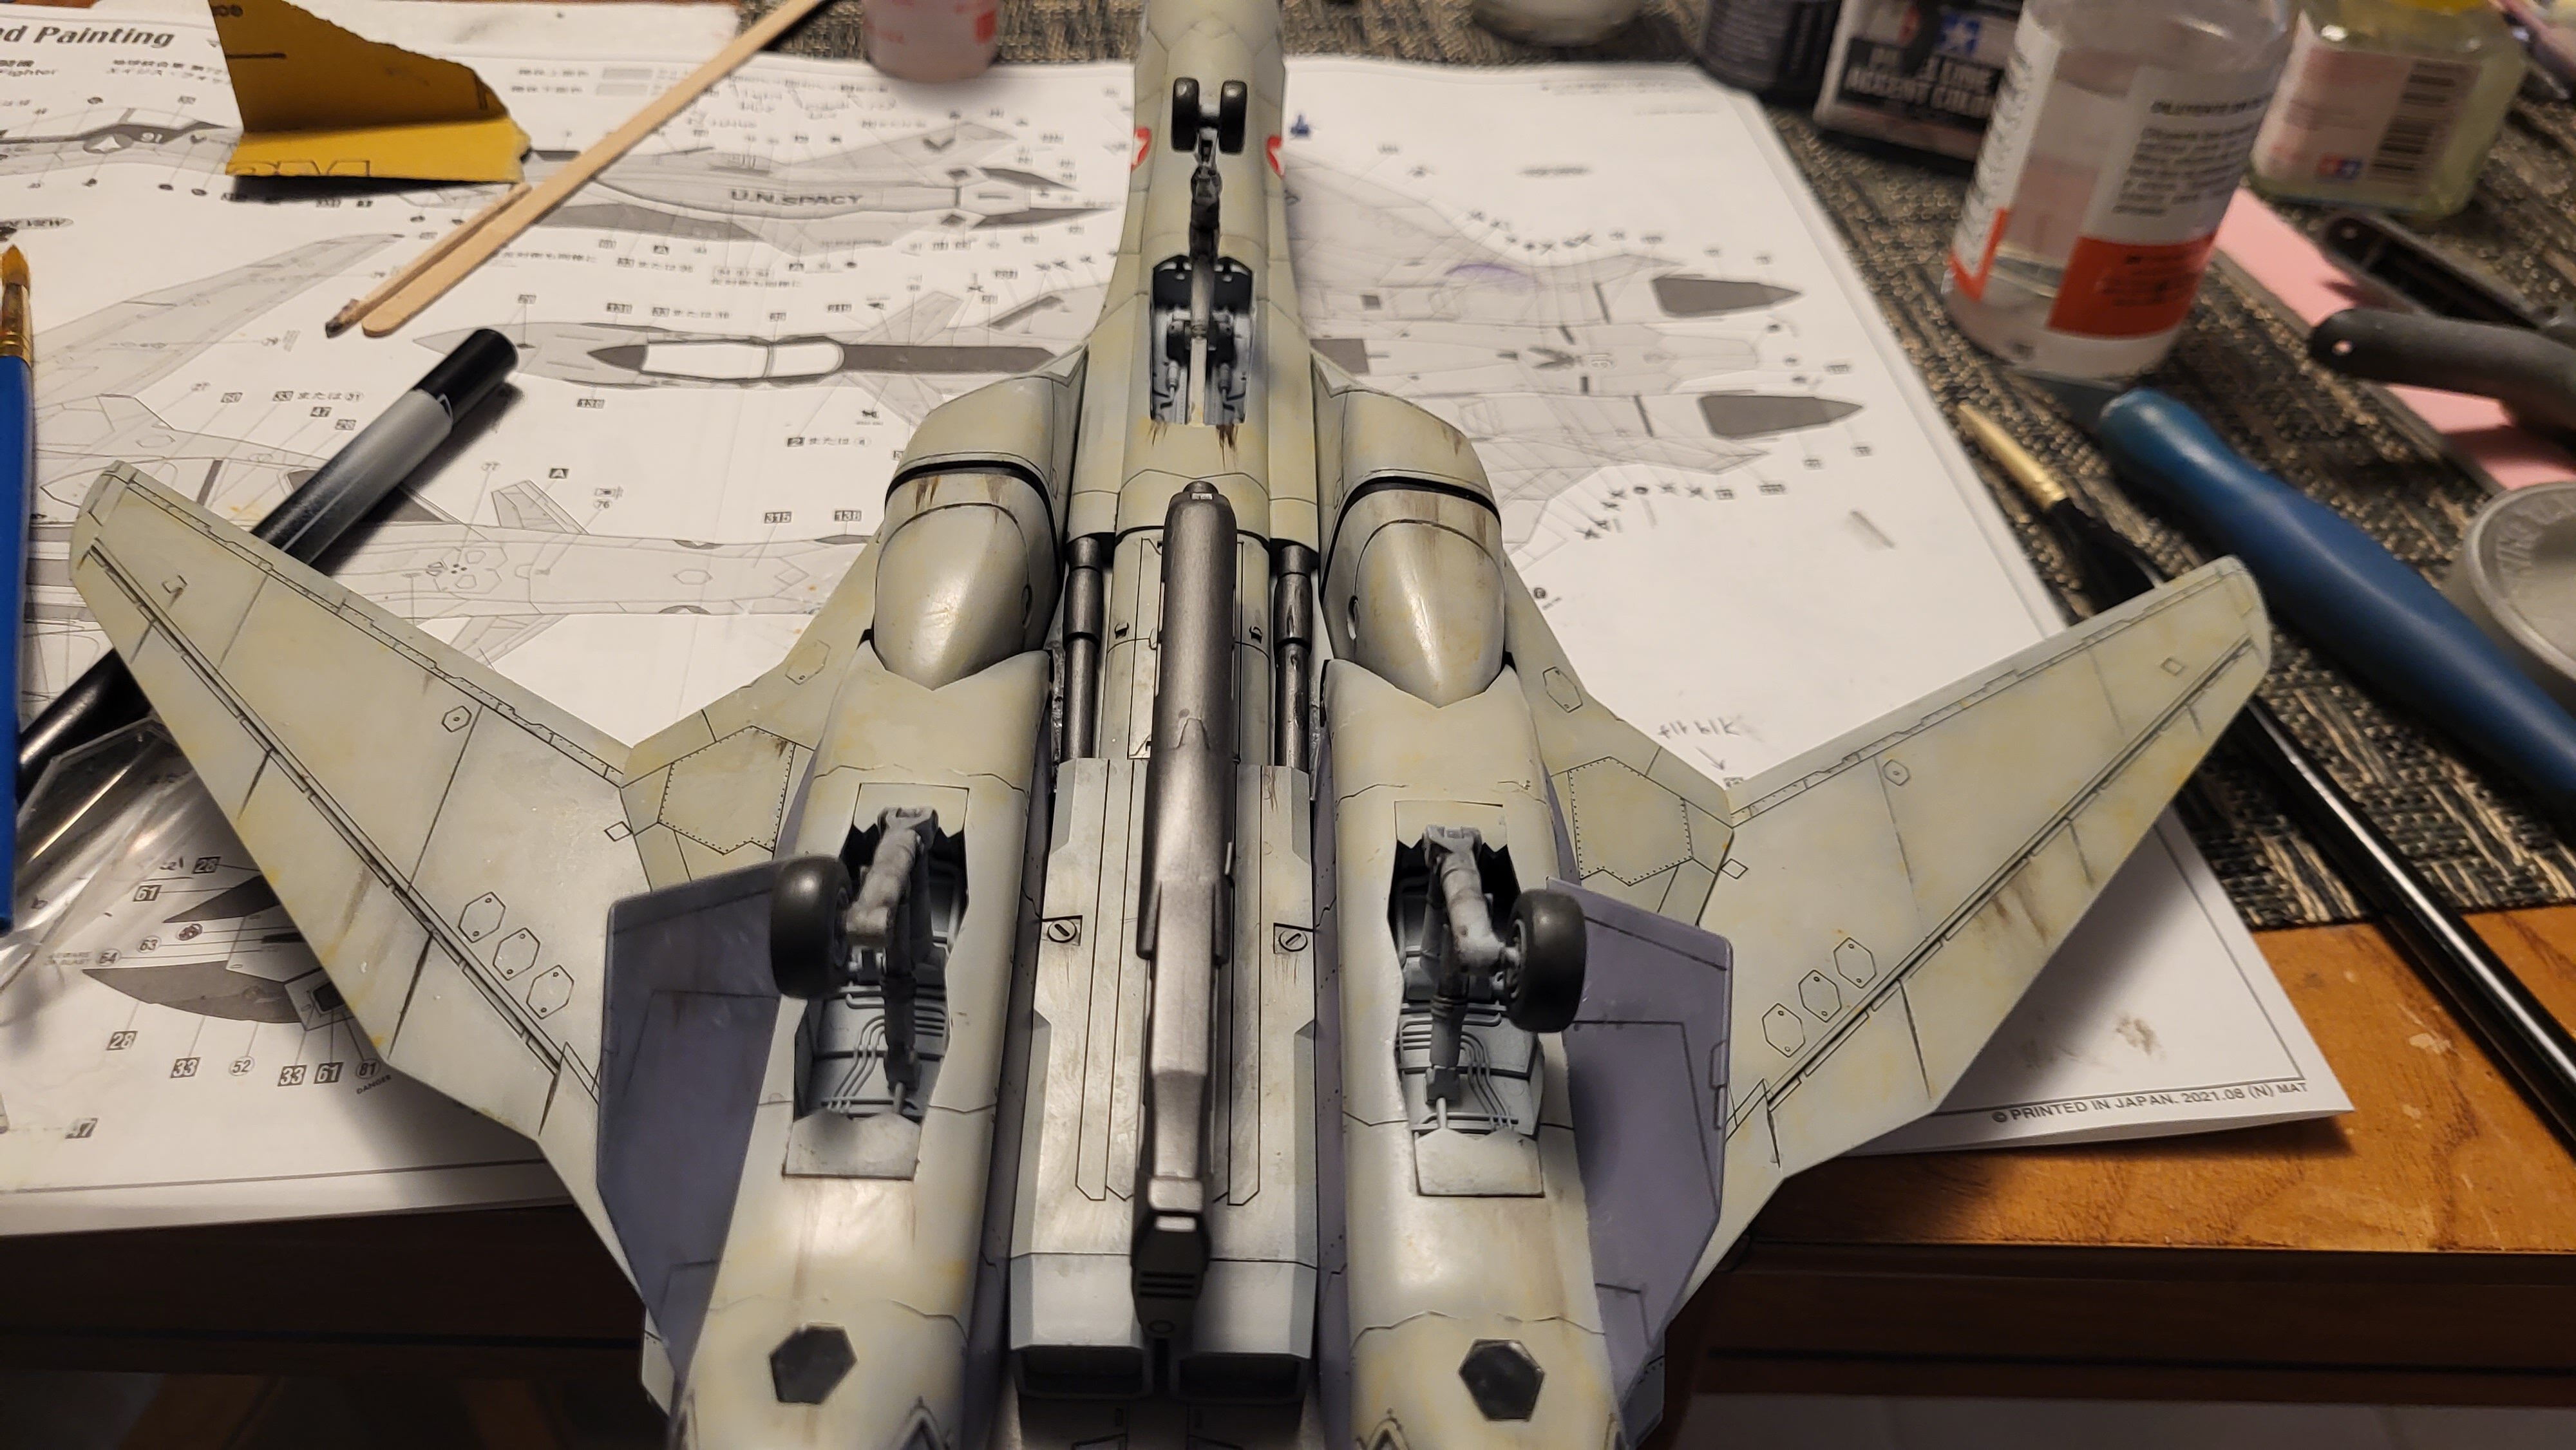
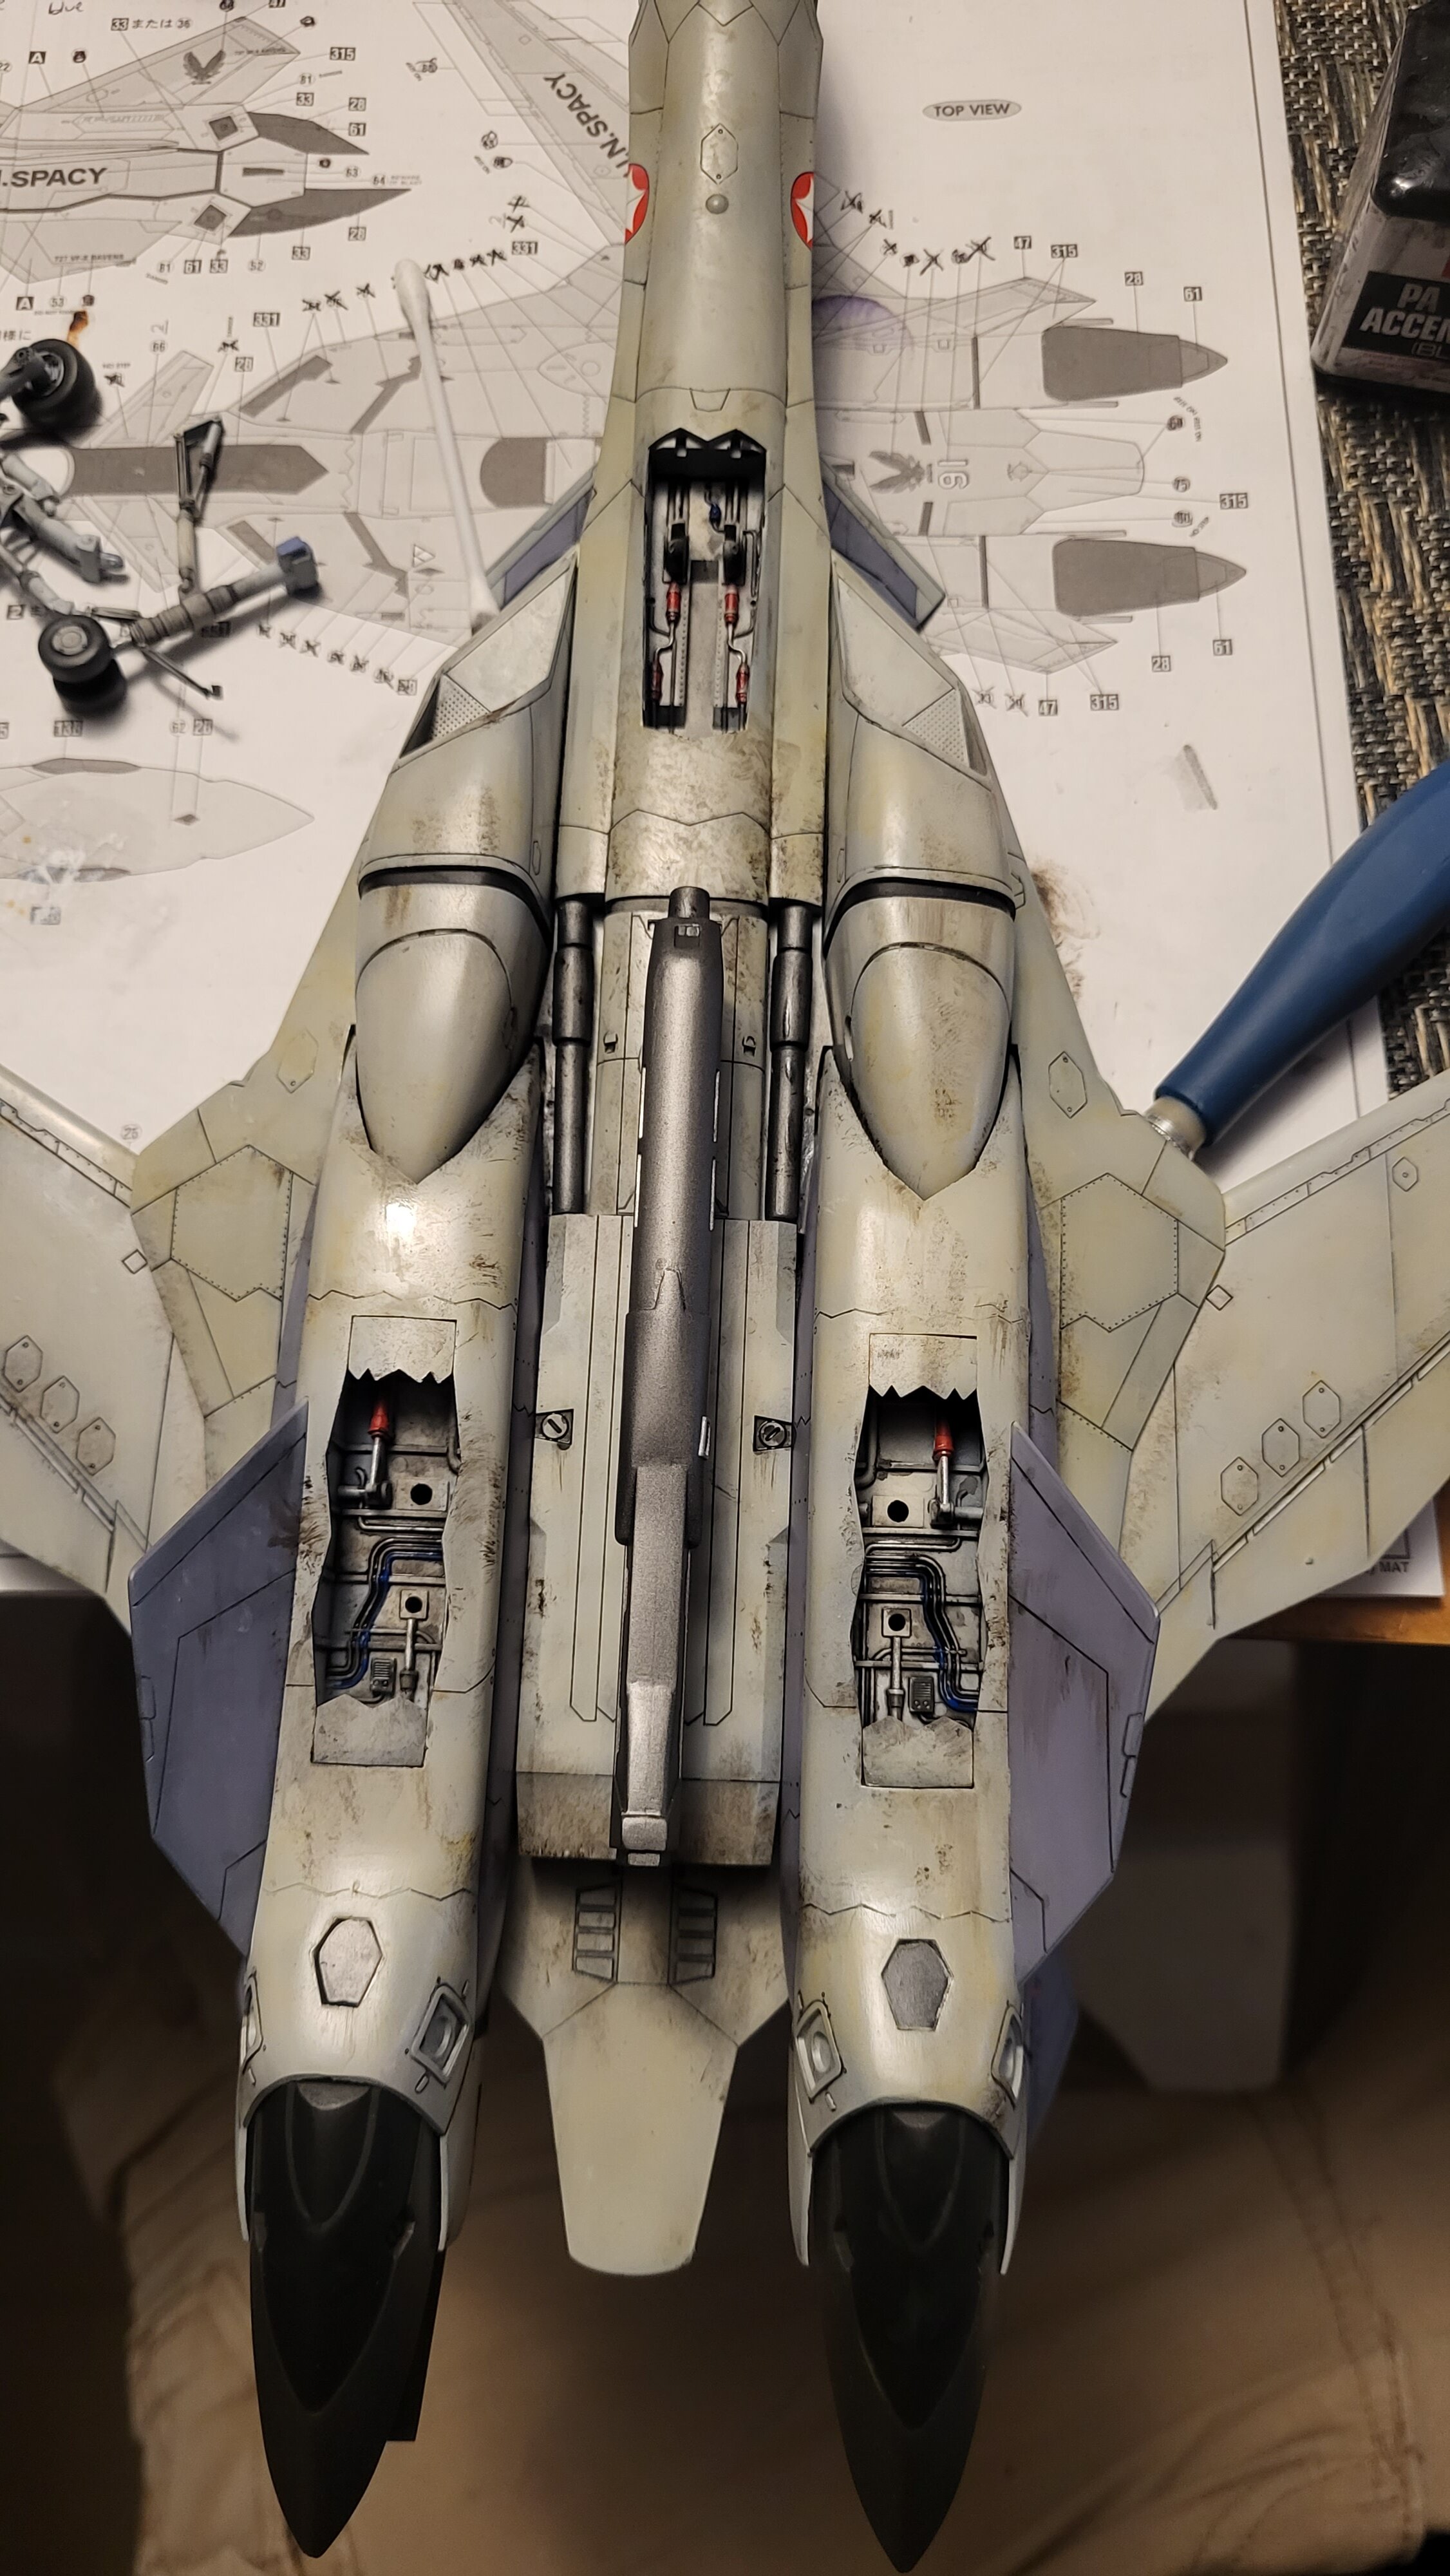
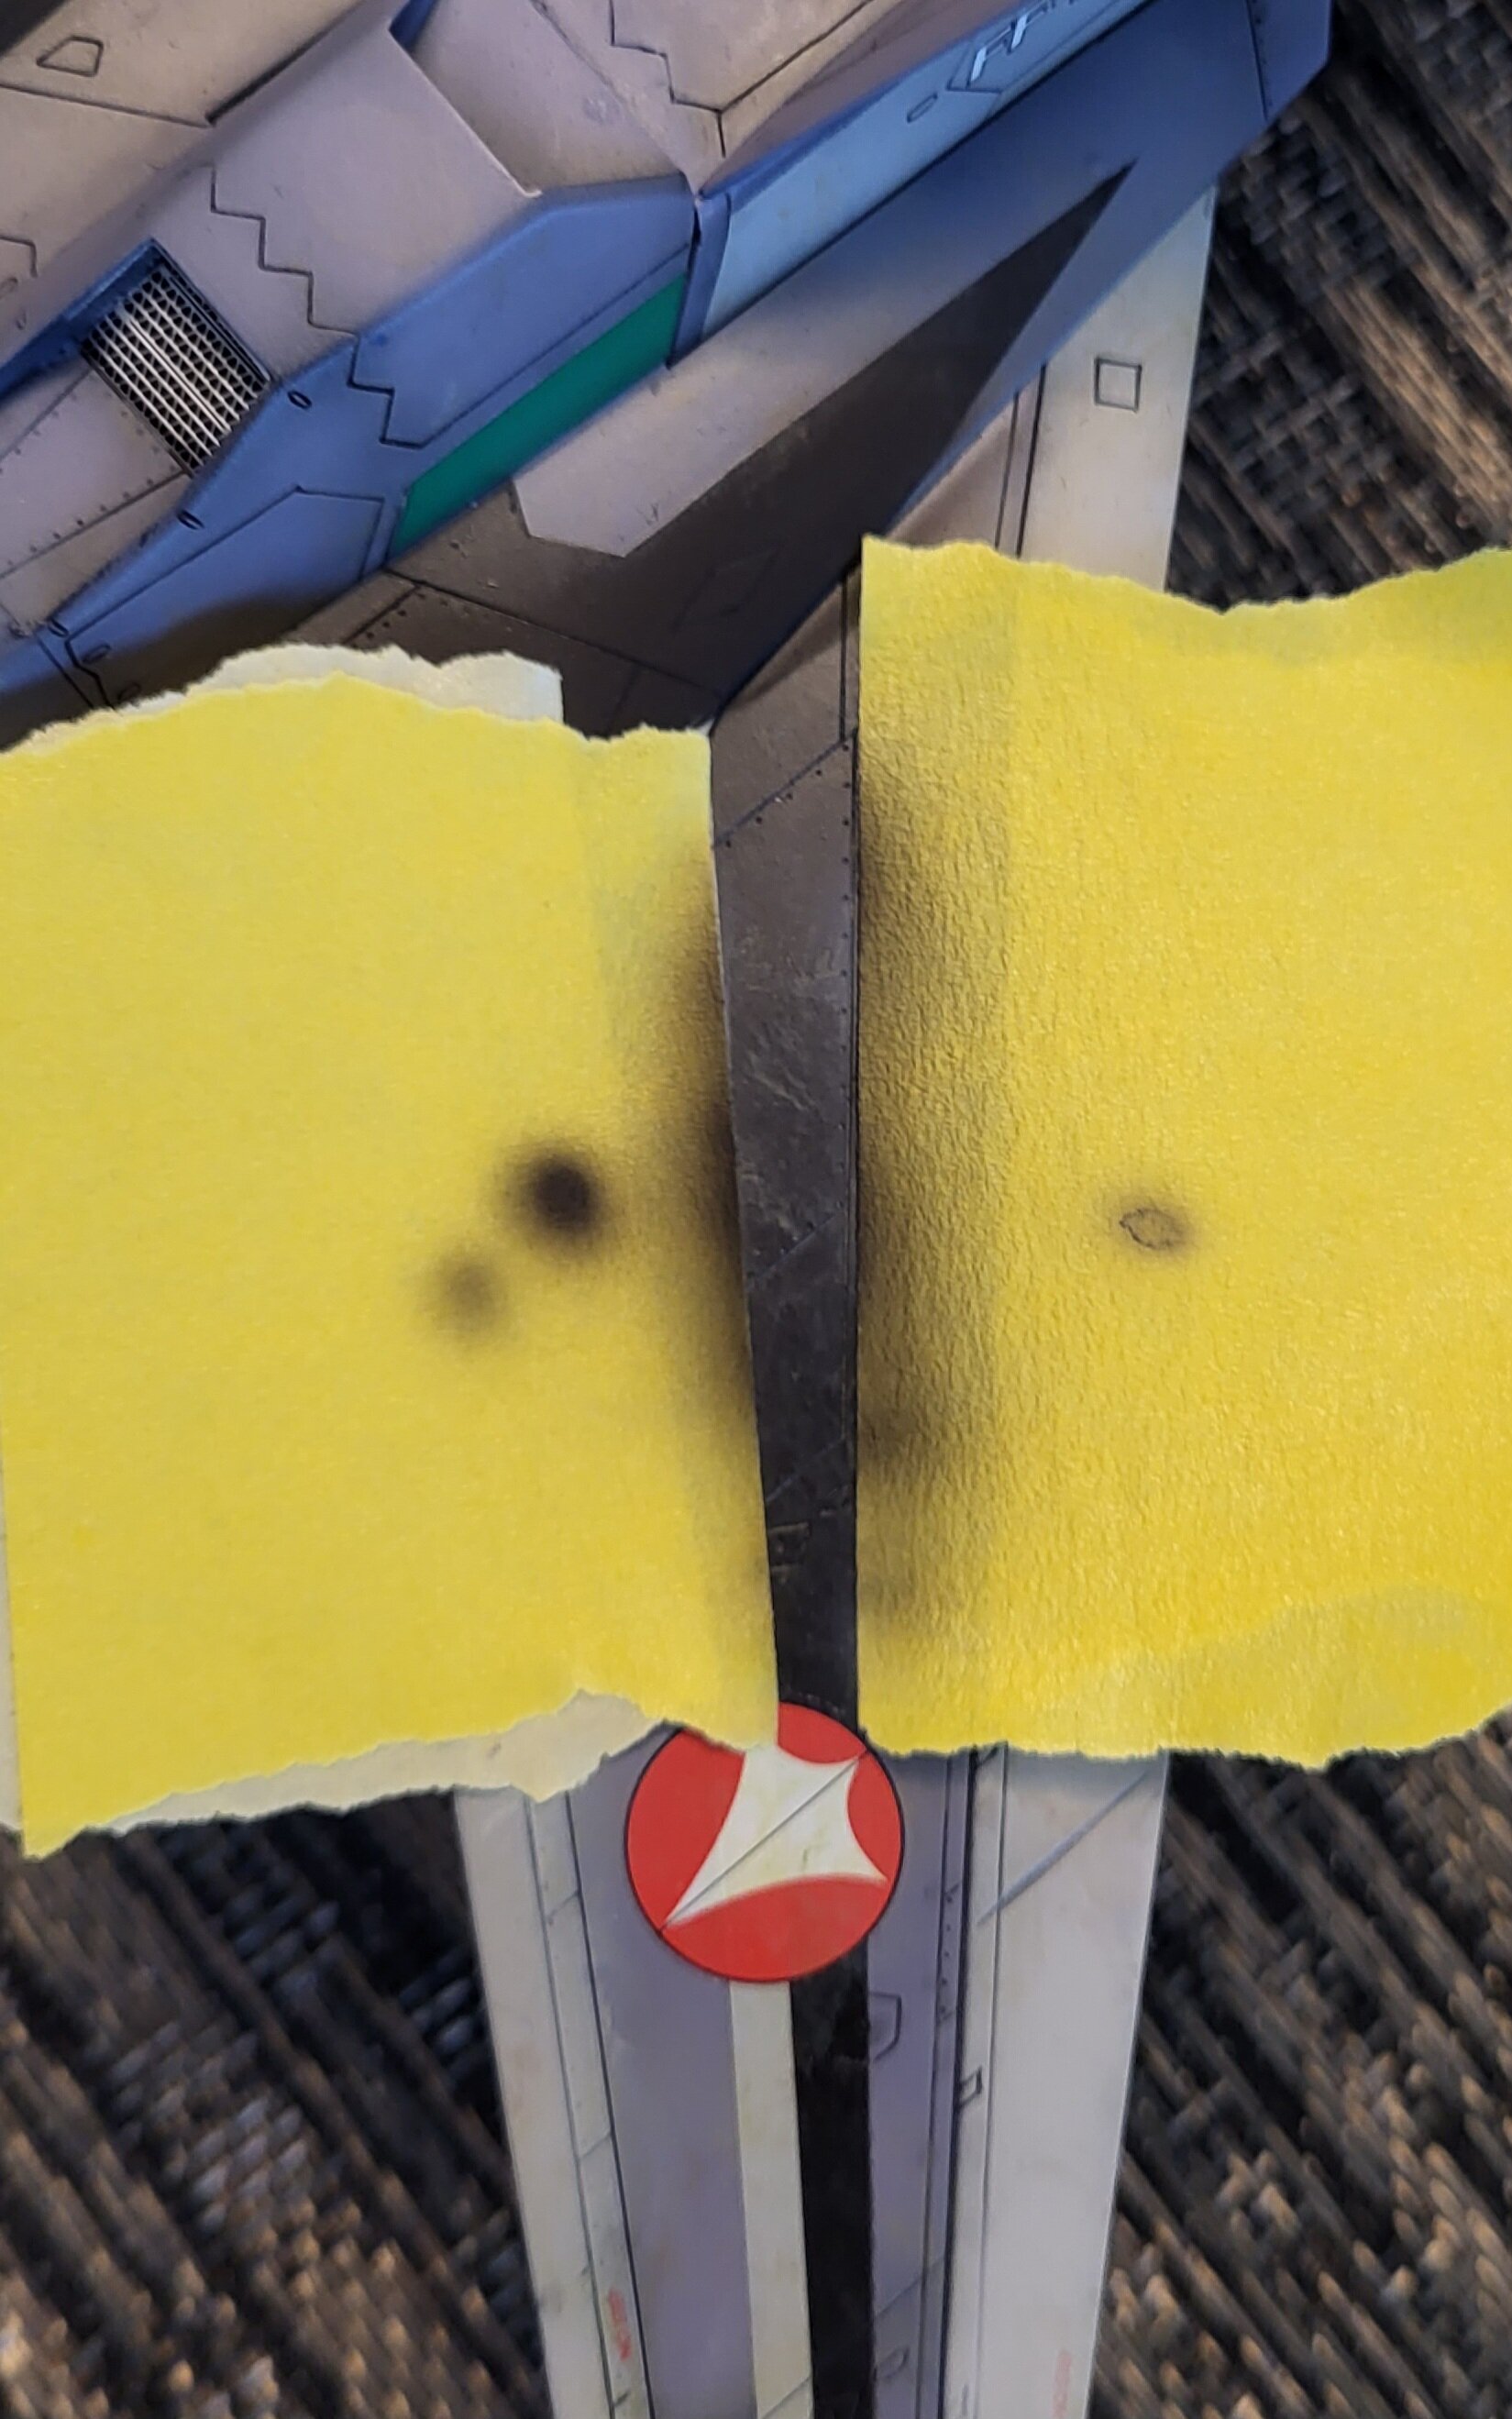
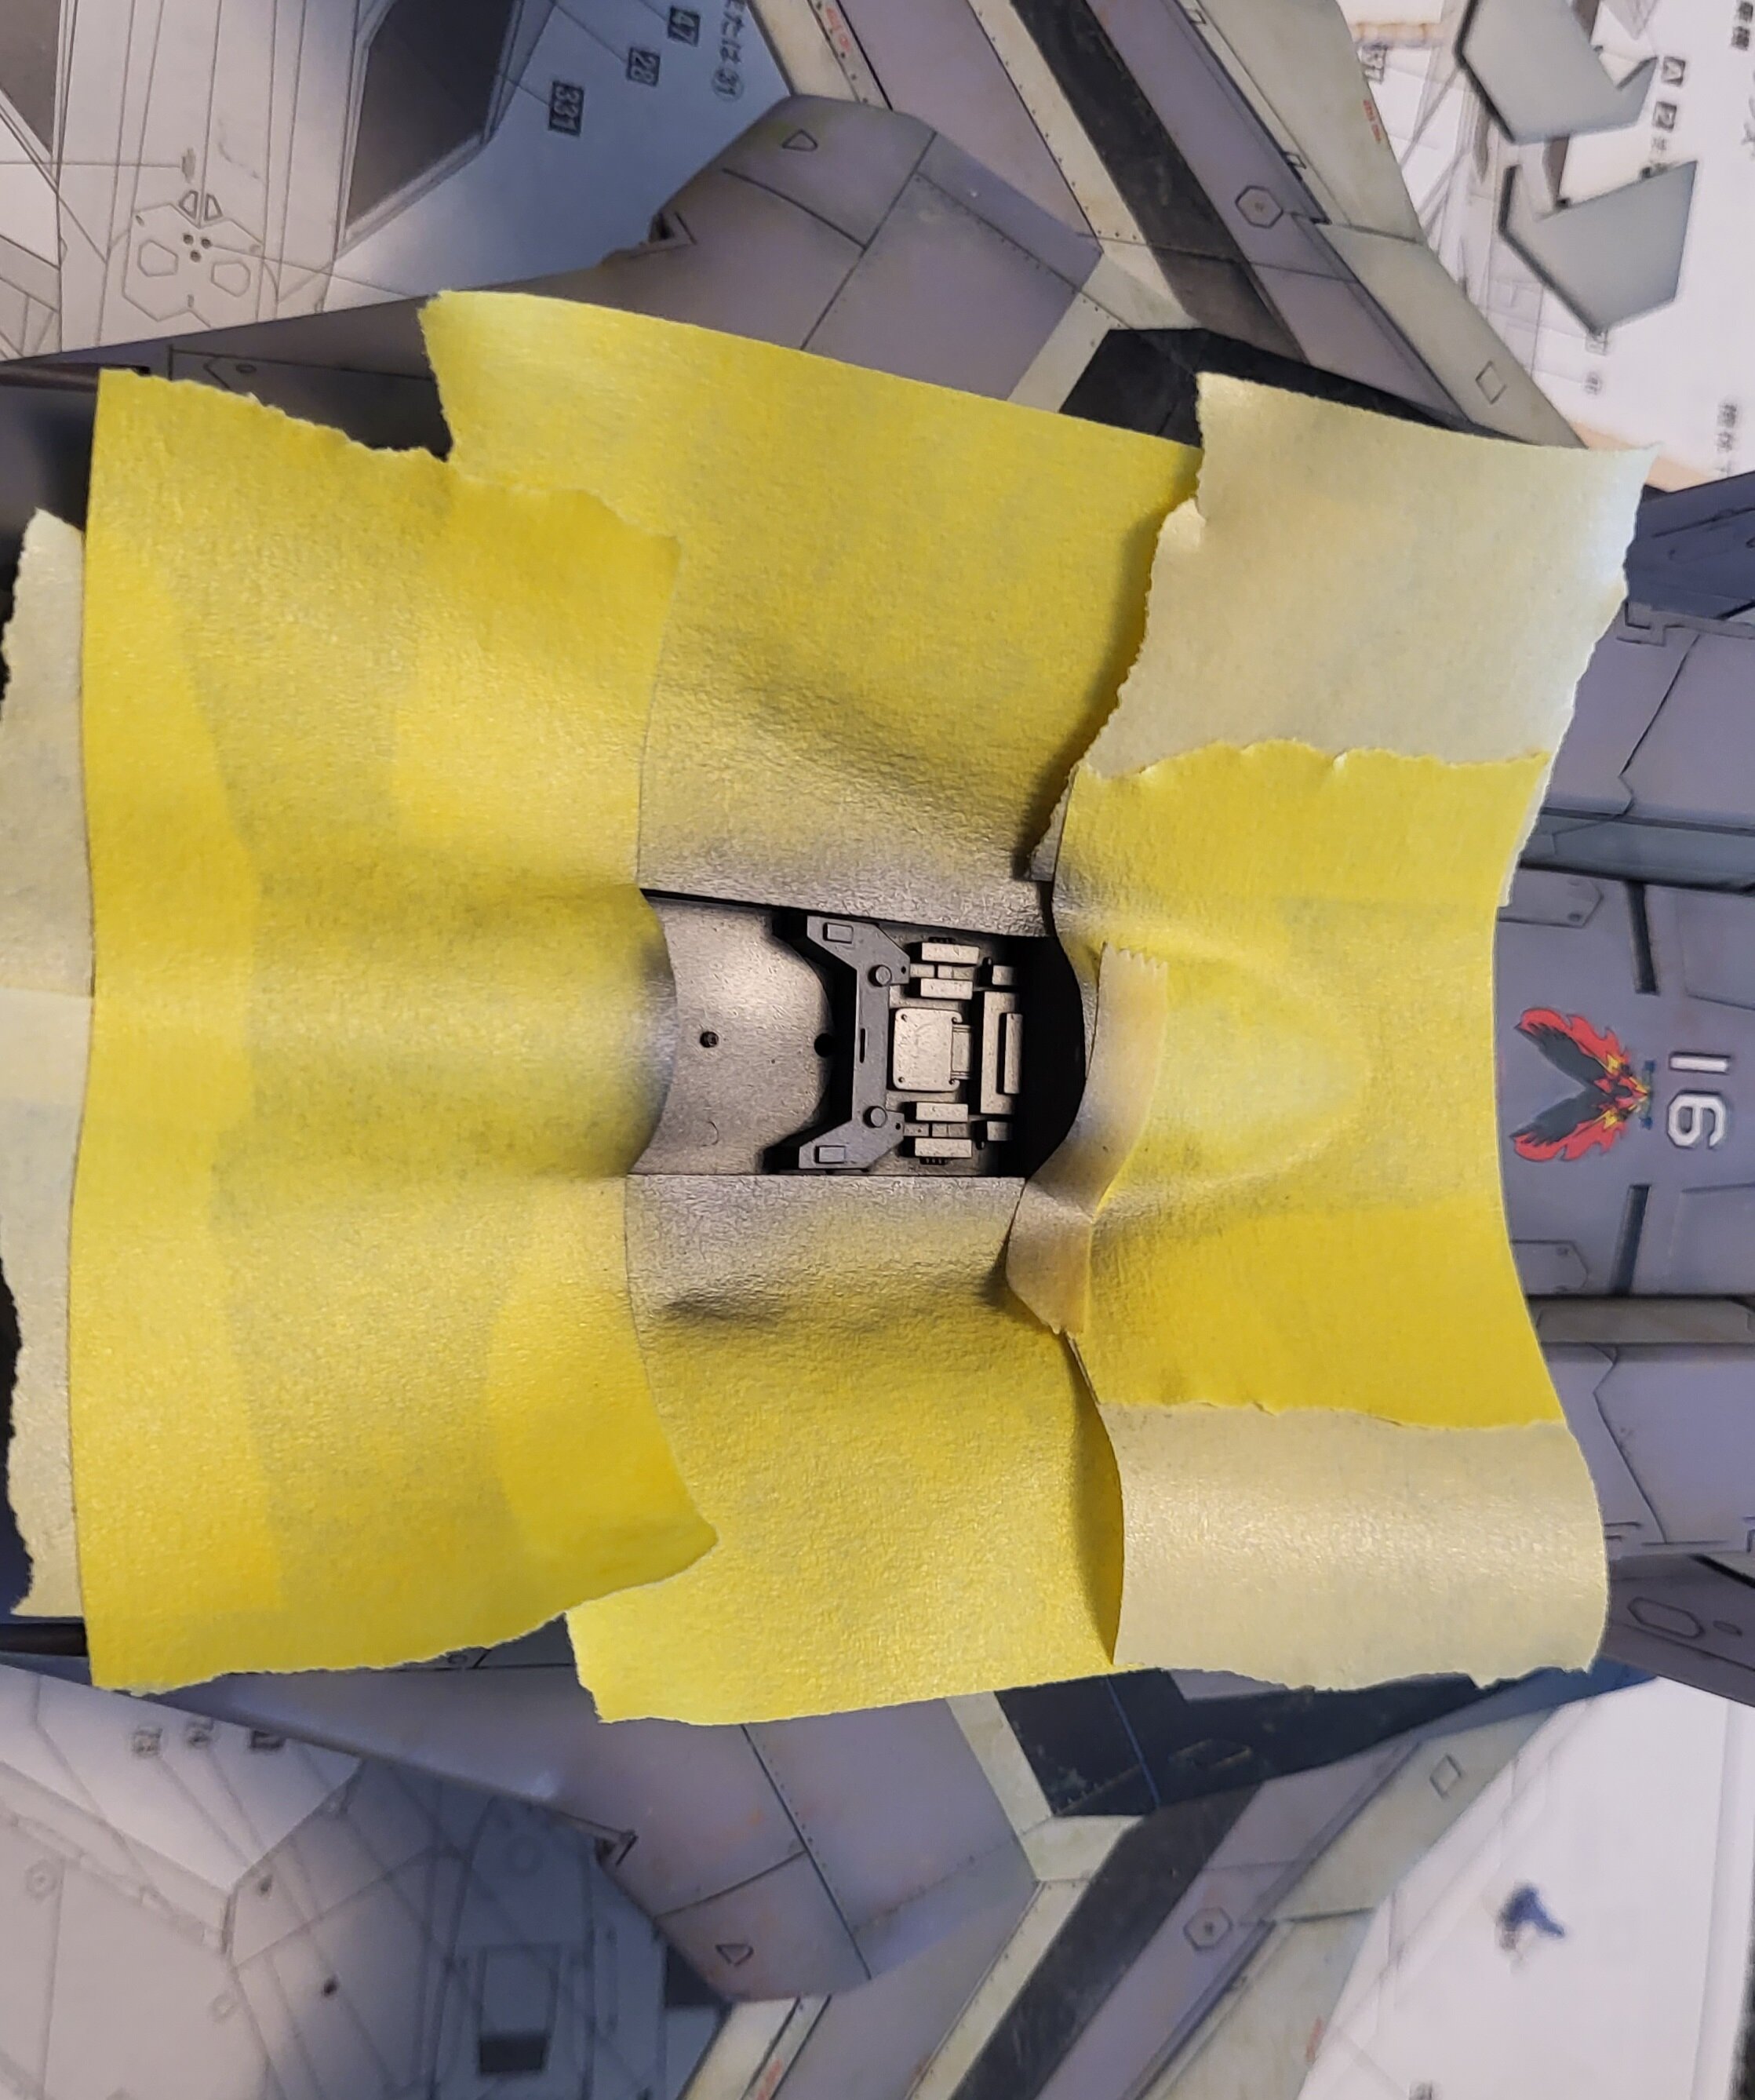
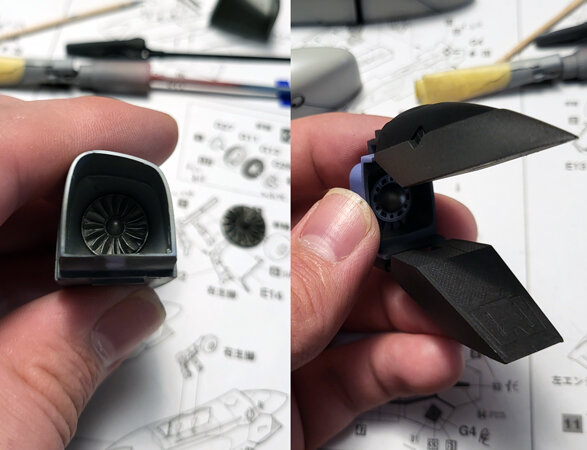
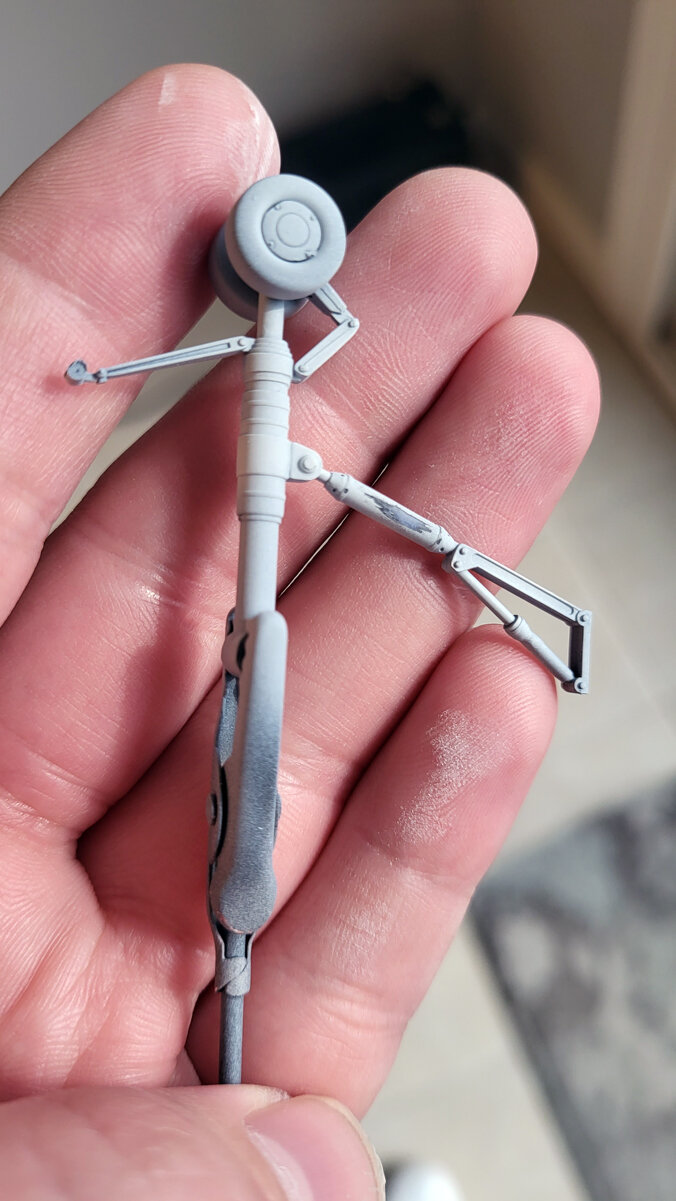
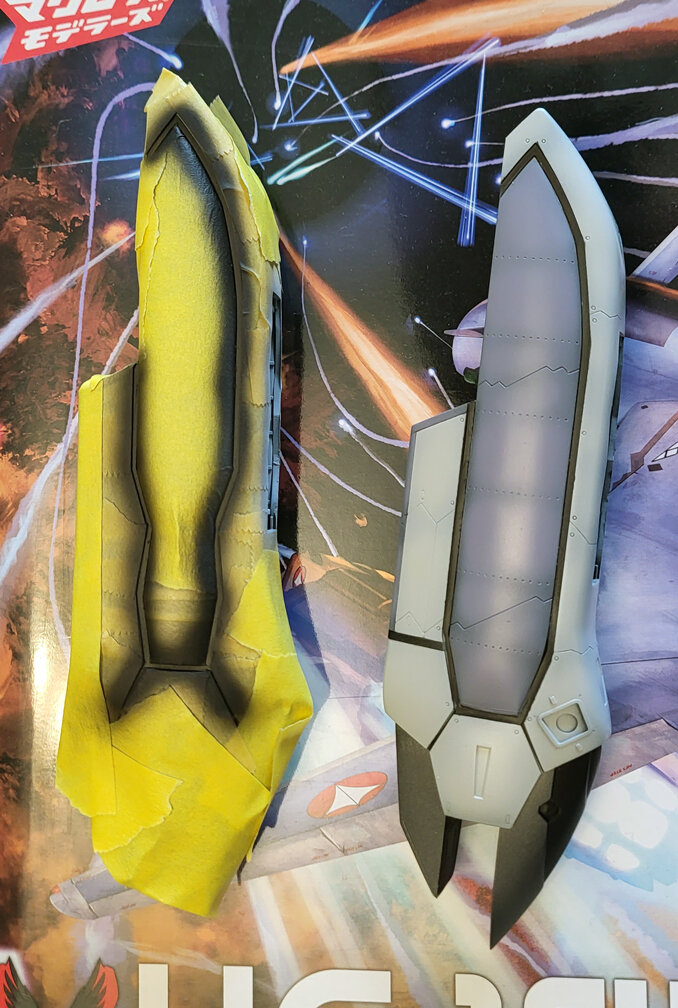
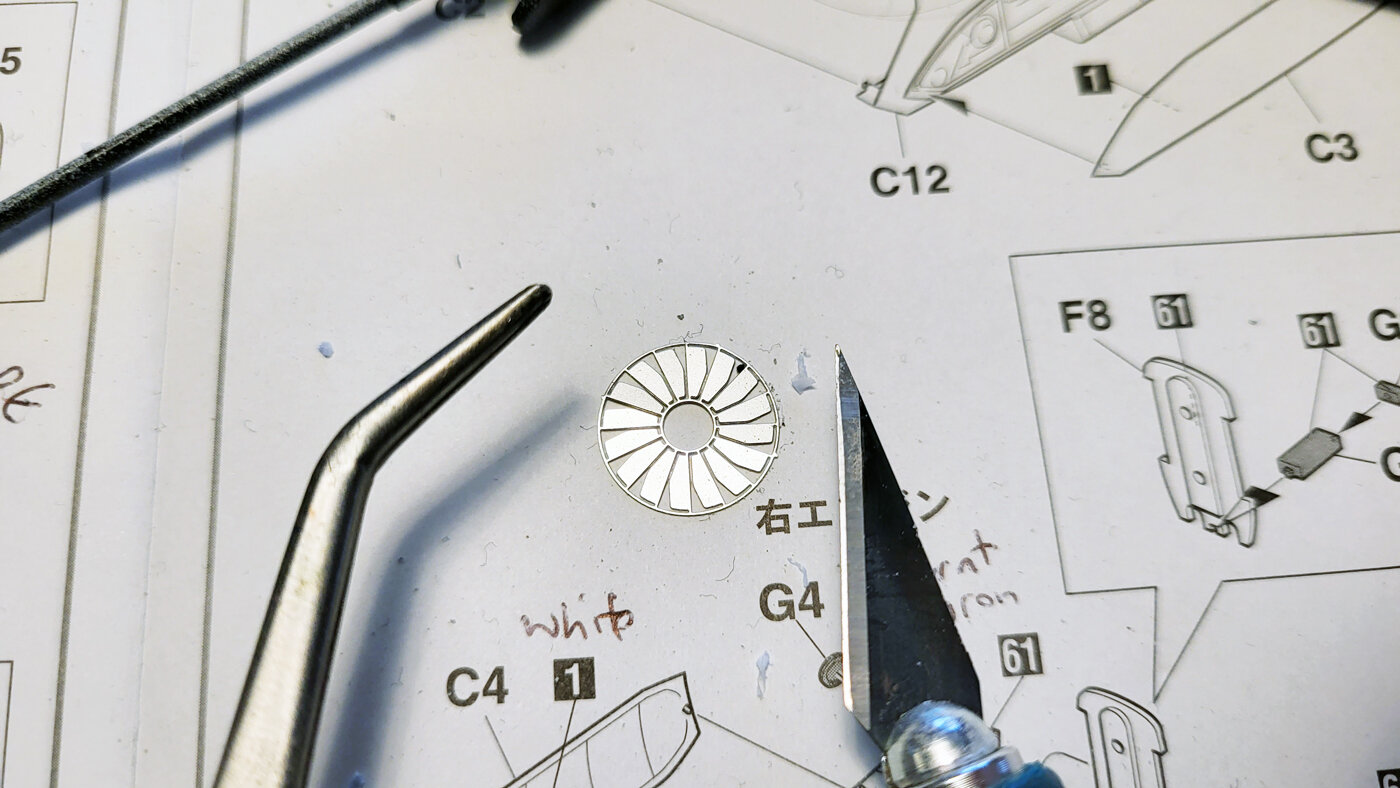
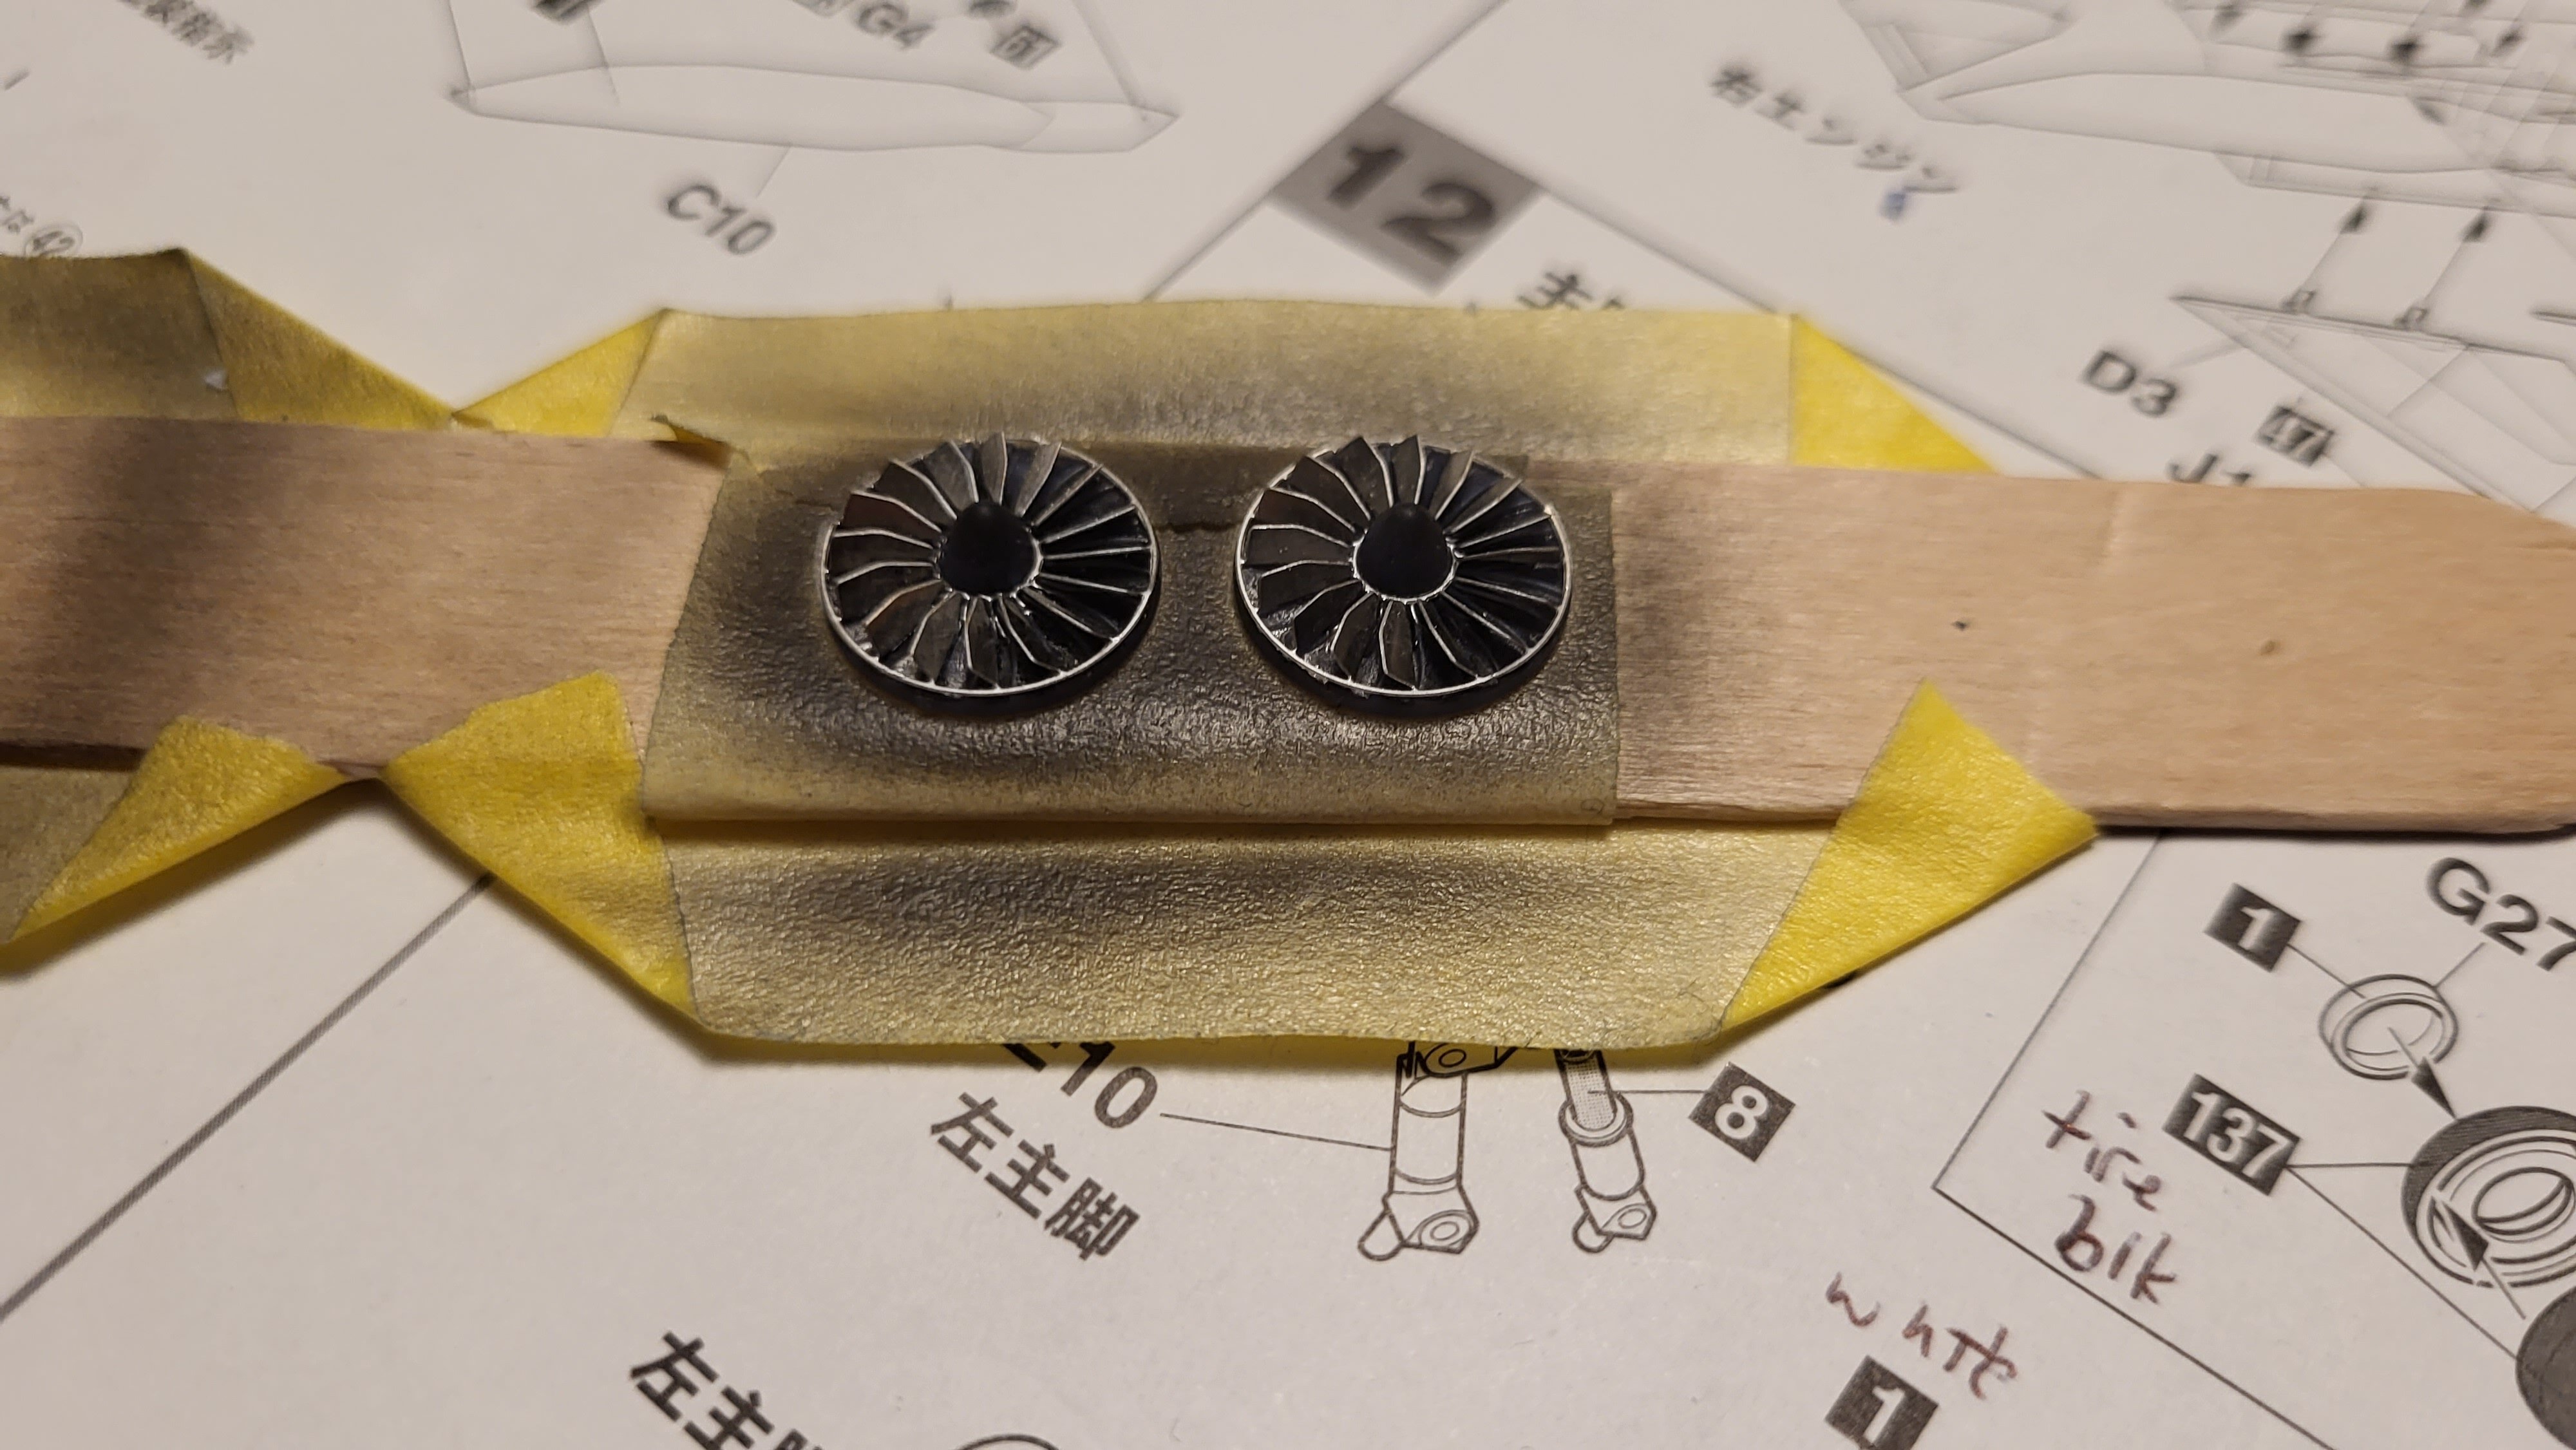
Thanks Thom. The blades are supposed to be (according to the sample image) bent at a straight 90 degree angle. I thought they looked more interesting/visible being bent at something closer to a 45 degree angle. It was easier to to pre-bend them up, glue it to the original plastic part, and then once the CA began to set up, bend them to the desired final angle. Holding them was the challenge. Once the blades were bent up the part lost all strength and if touched would disturb the angles. All kinda moot given how deep they sit inside the plane. Only IPMS flashlight judges would ever find them and that is the least of this valk's worries. Flash on, Flash off! Got the front and backs together. I don't remember what I painted them with, I think Alcladd Flat Aluminum + AK Gunship Gray I had in the gun already. Got them both installed in their home. For the intake I painted them Warm White and then just shot some black primer into the back letting the overspray fog it's way forward. Easy way to add a bit of shading, weathering and make the blades metallic gray stand out. I may go in later with some silver and dry brush the edges when I get to that point. Some more AK Warm White was used over black to finally get the landing gear bays painted. A little bit of shading was all that was needed to get the details to really show. The PE Parts on the forward bay really look at home, I was worried the edges would be too visible (they are overlay's.) From here all I think I'll do is a grime wash and then hand paint just a few accents/details to make them less boring. Touch-up on my forward landing gear were also done (missed some mold marks!) Now that I think of it I thing the rear landing gears still need to be built and painted, whoops! Lastly got, masked some panel lines and got to work! Really makes the color on the body pop! I was pleasantly surprised that I had no paint bleed thru, lifting or peeling given they sat weeks masked up and ready to attack. Dare I say, I think she's about ready for a panel line wash!
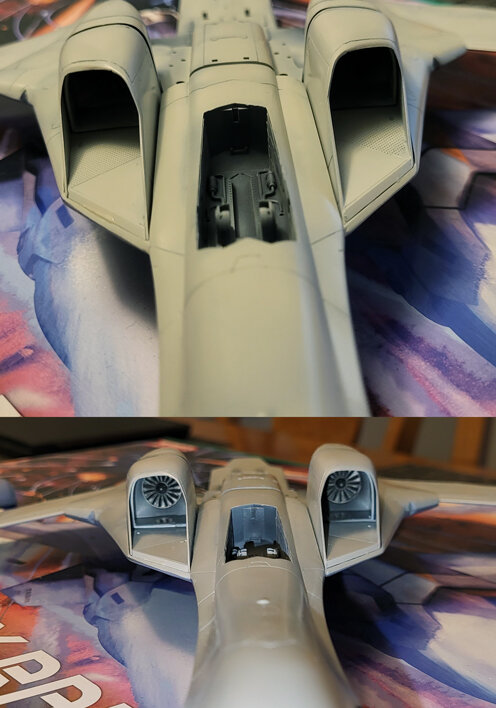
- 90 replies
-
- 4
-
-
- macross vf-x2
- vf-19 excalibur
- (and 2 more)
-
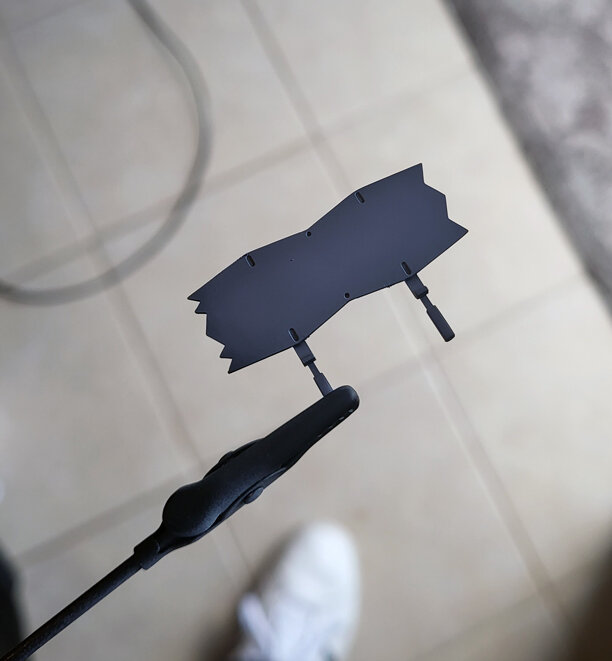
Tool time!
-
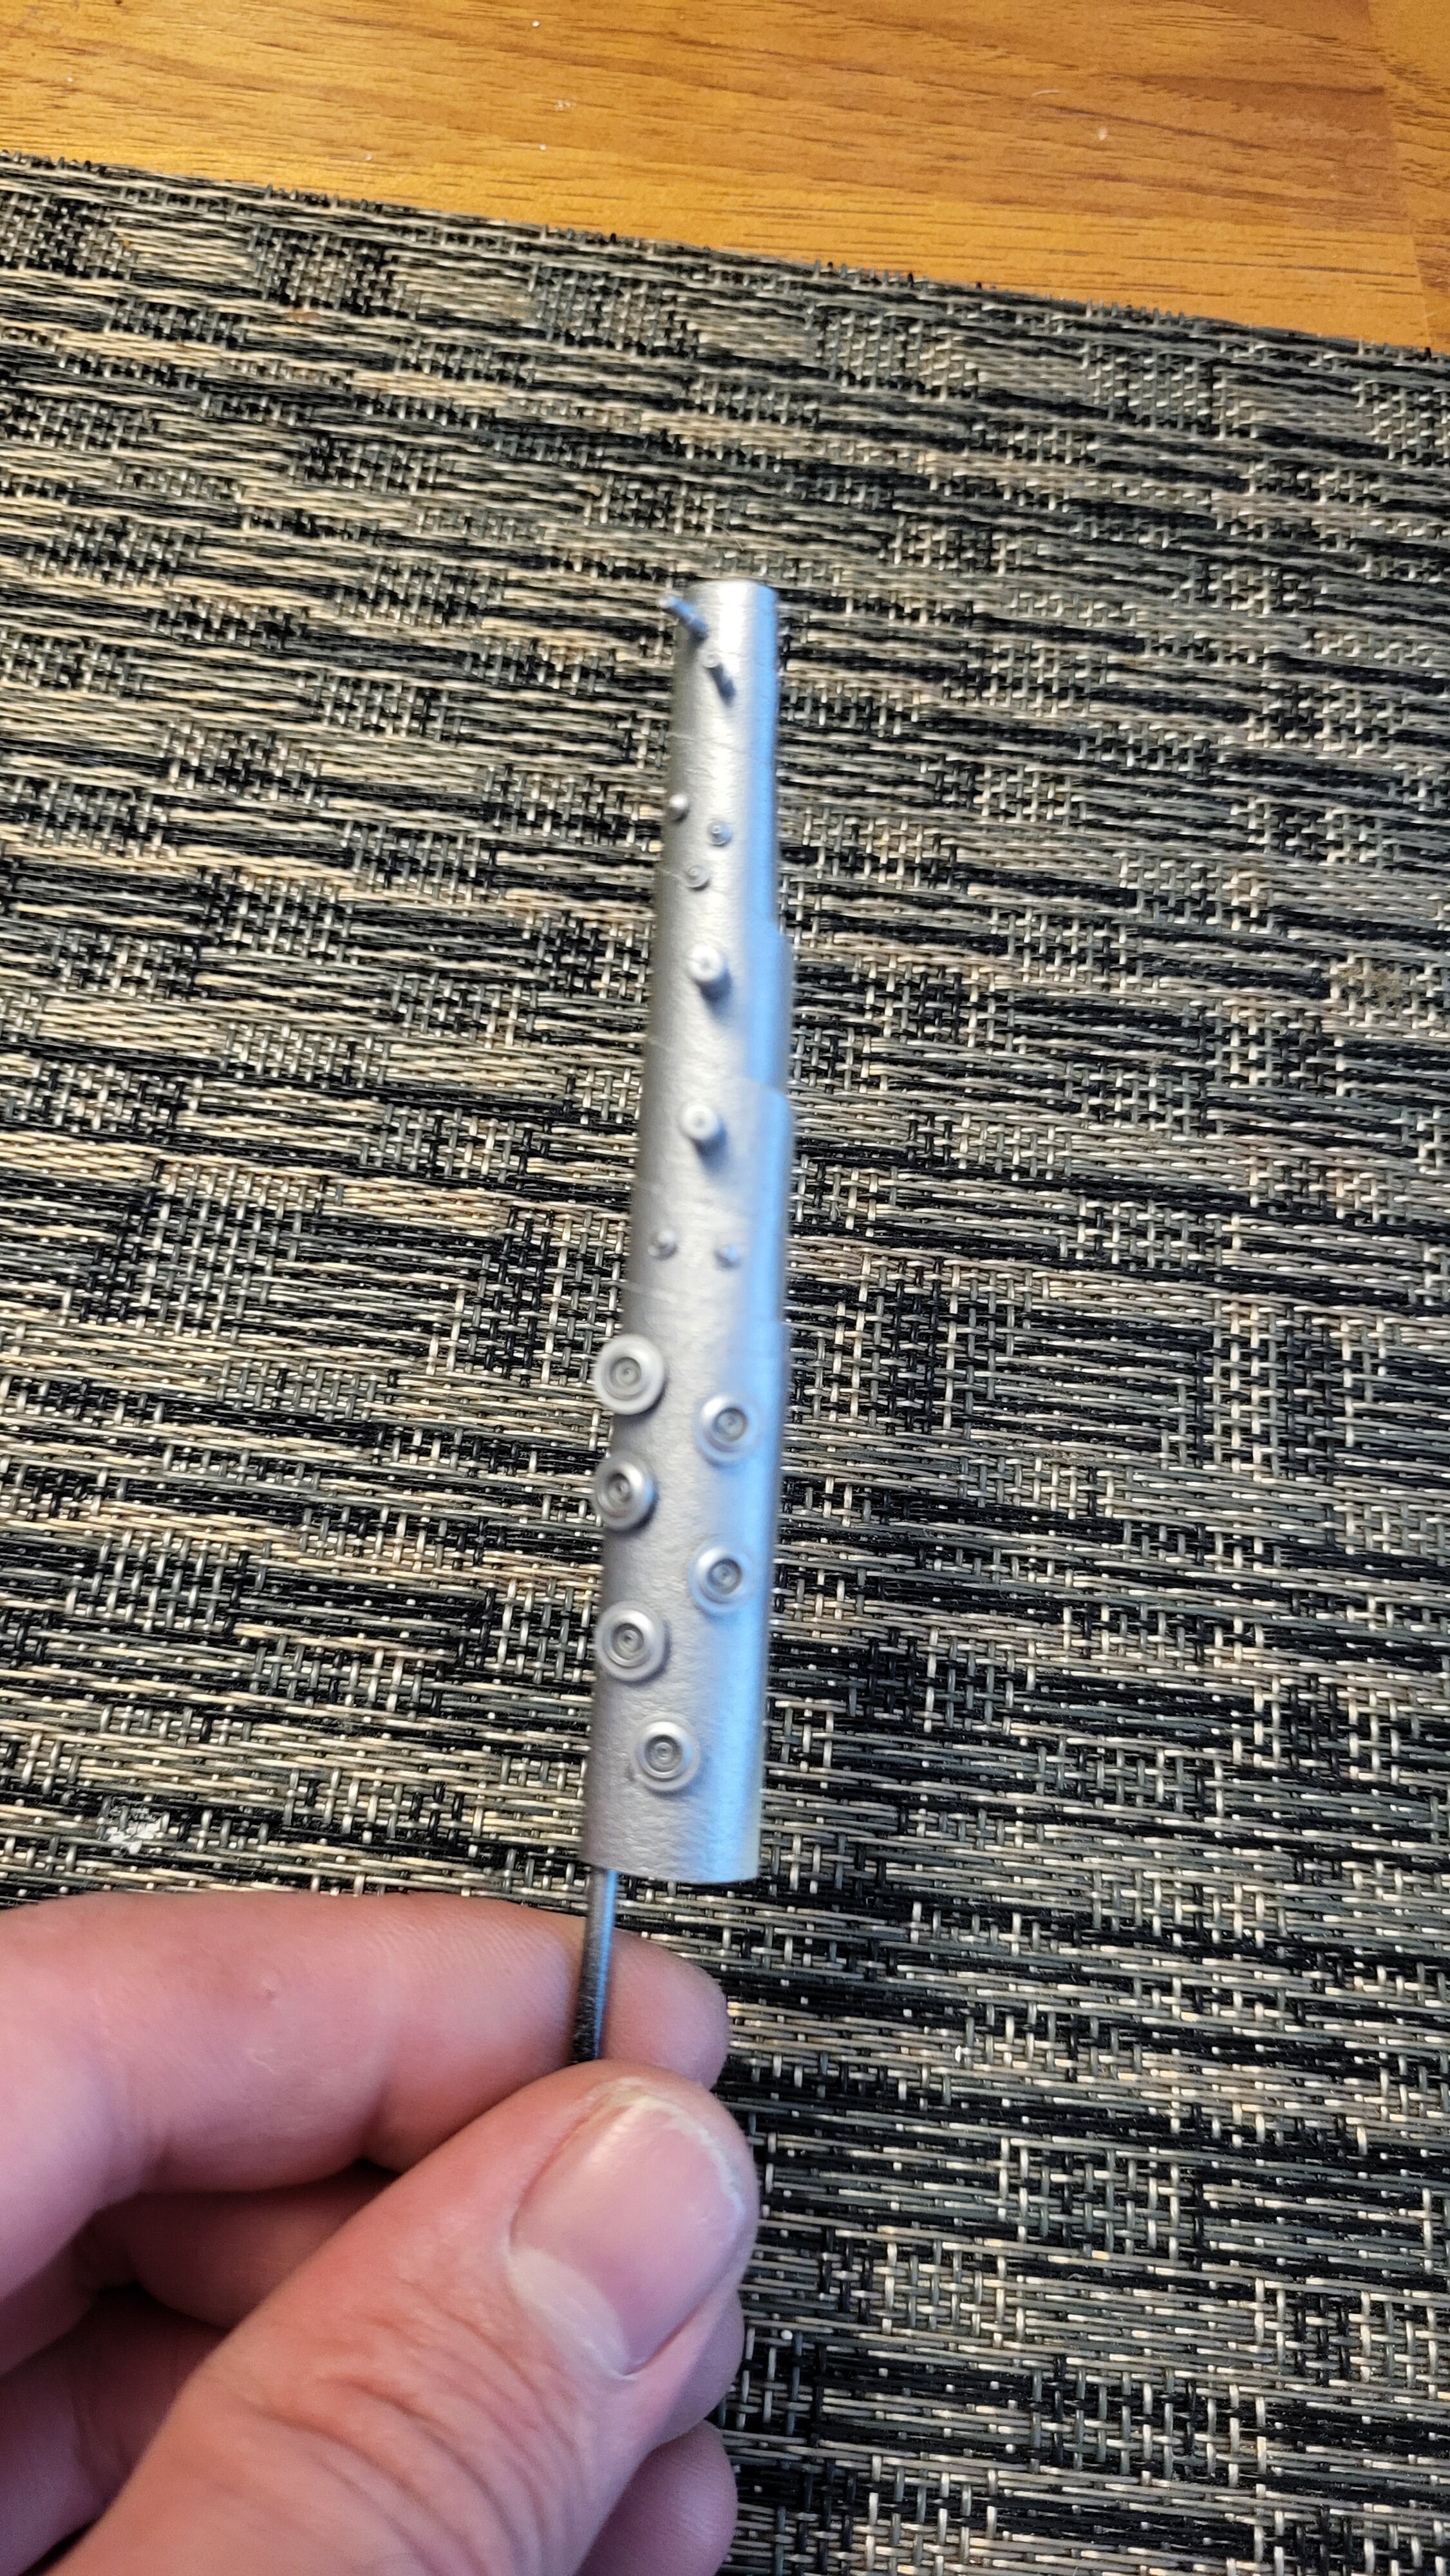
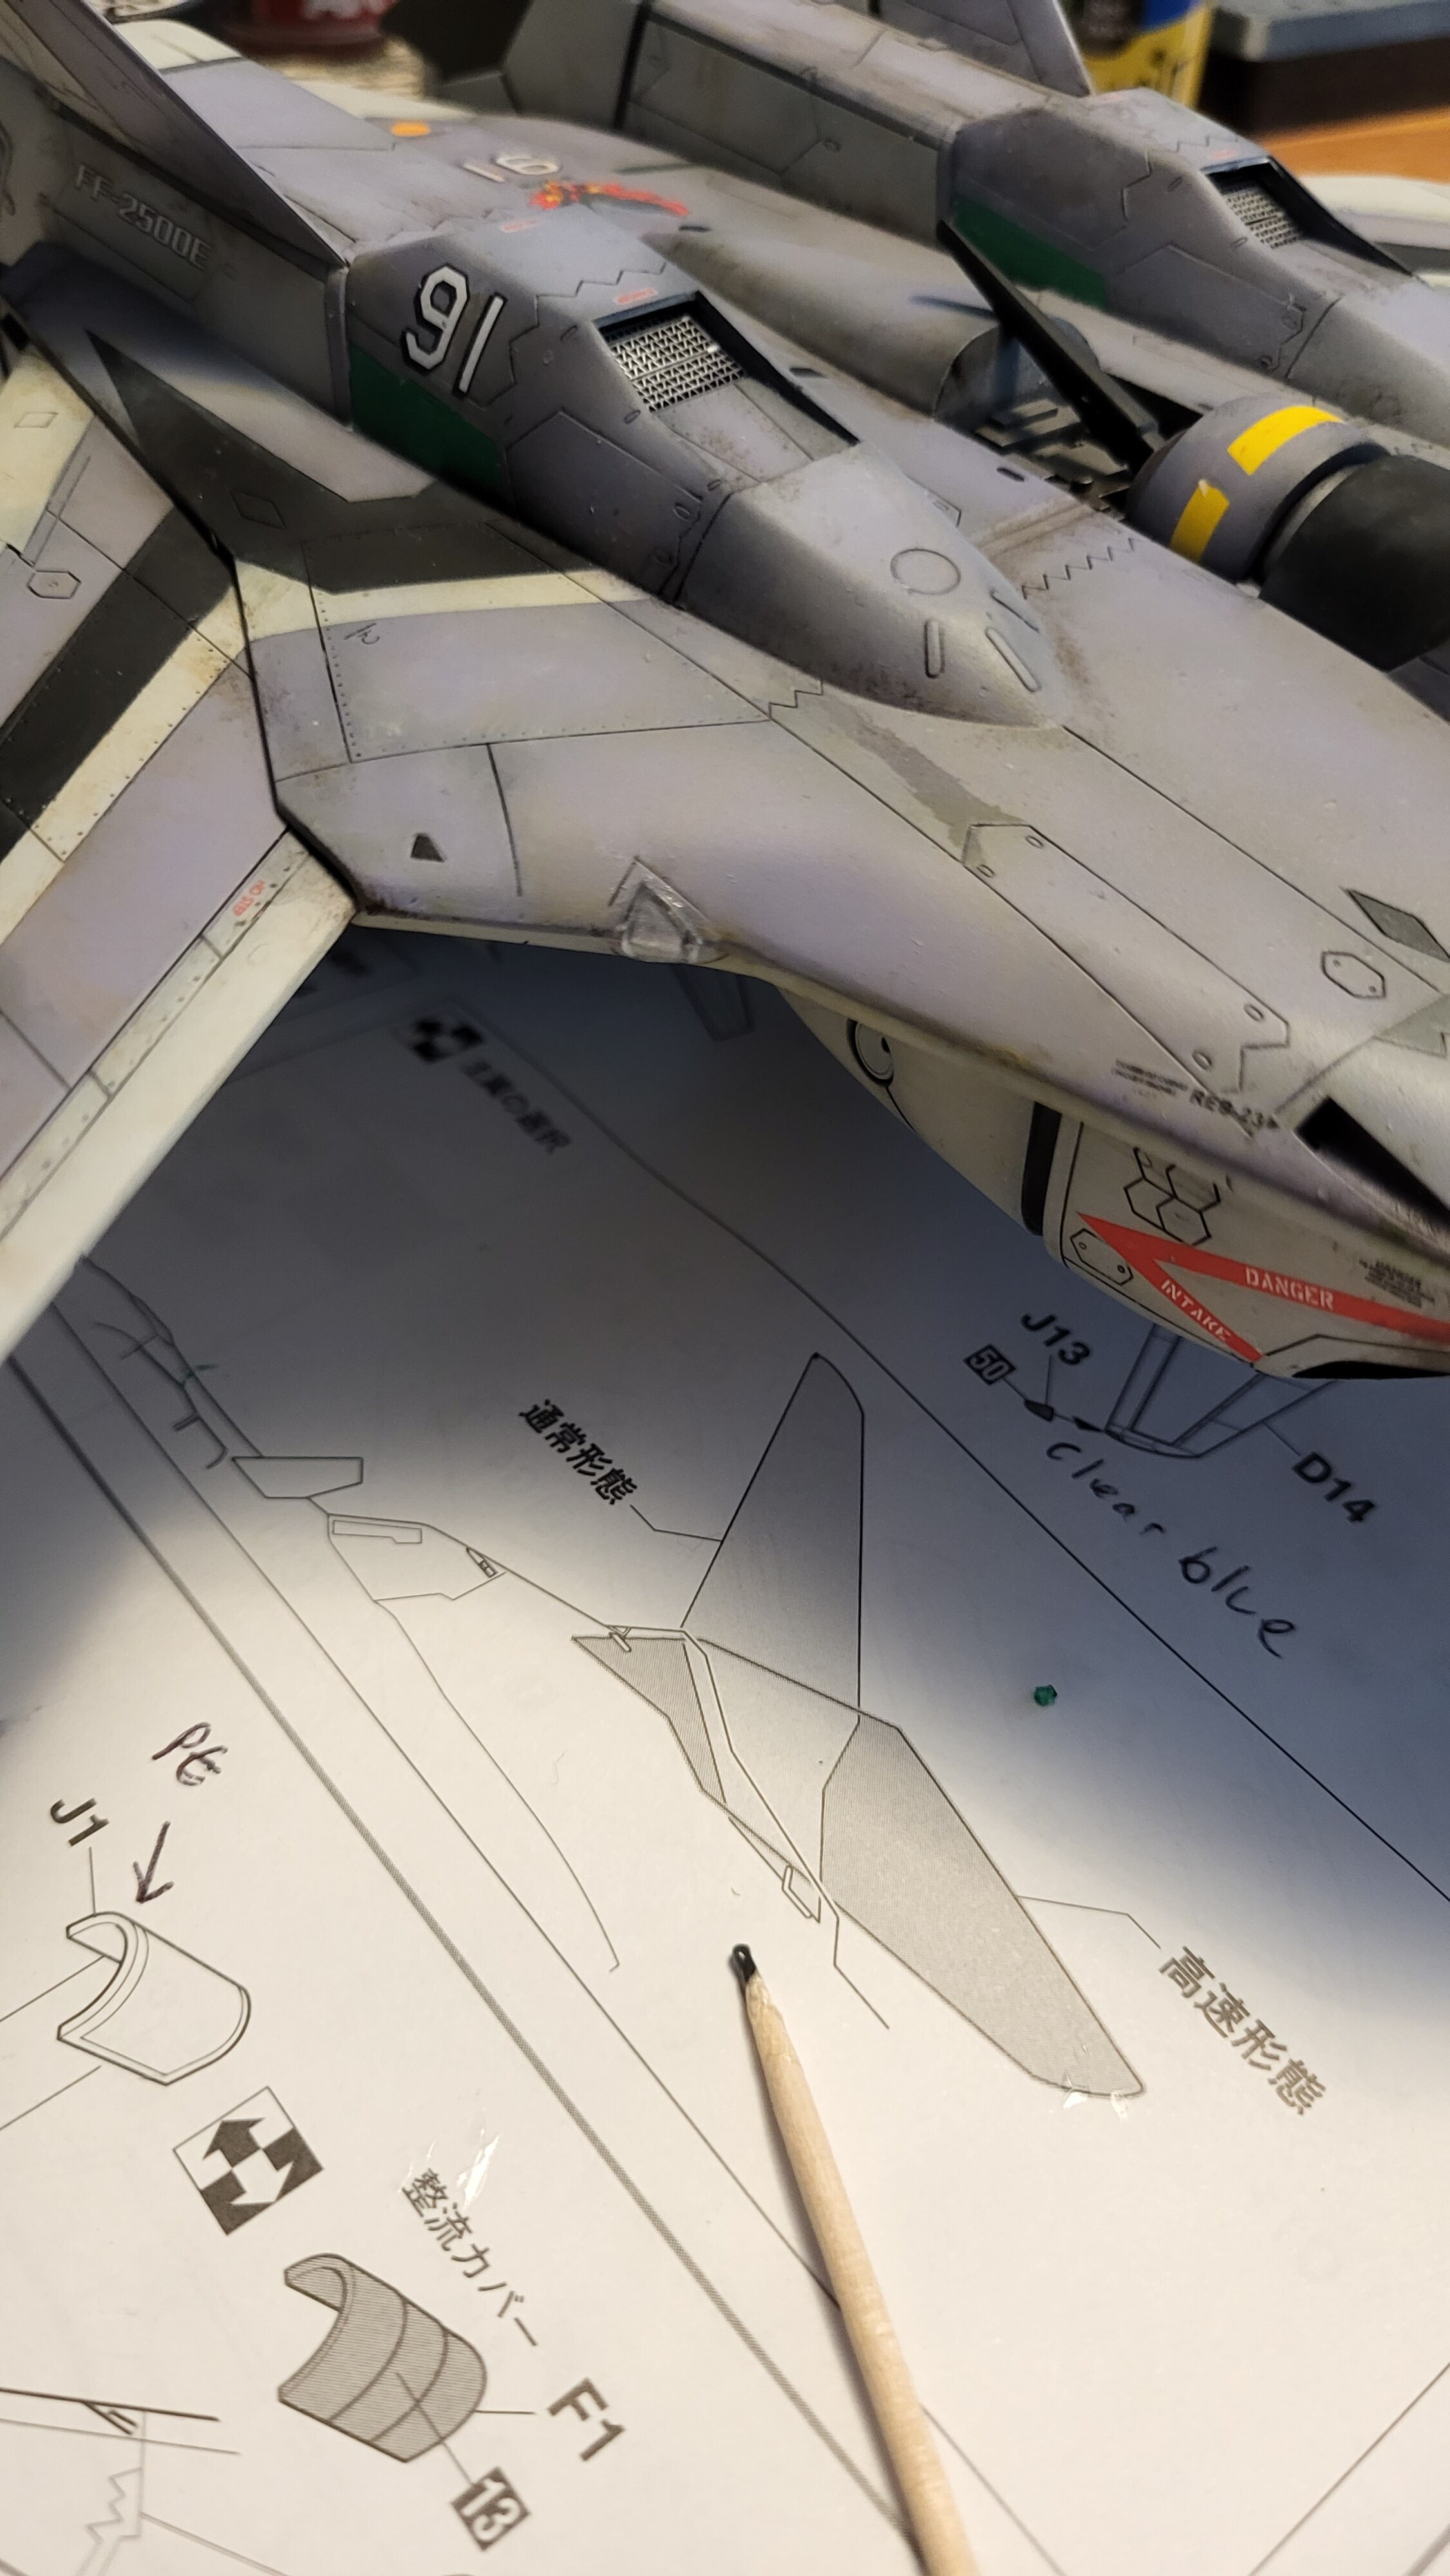
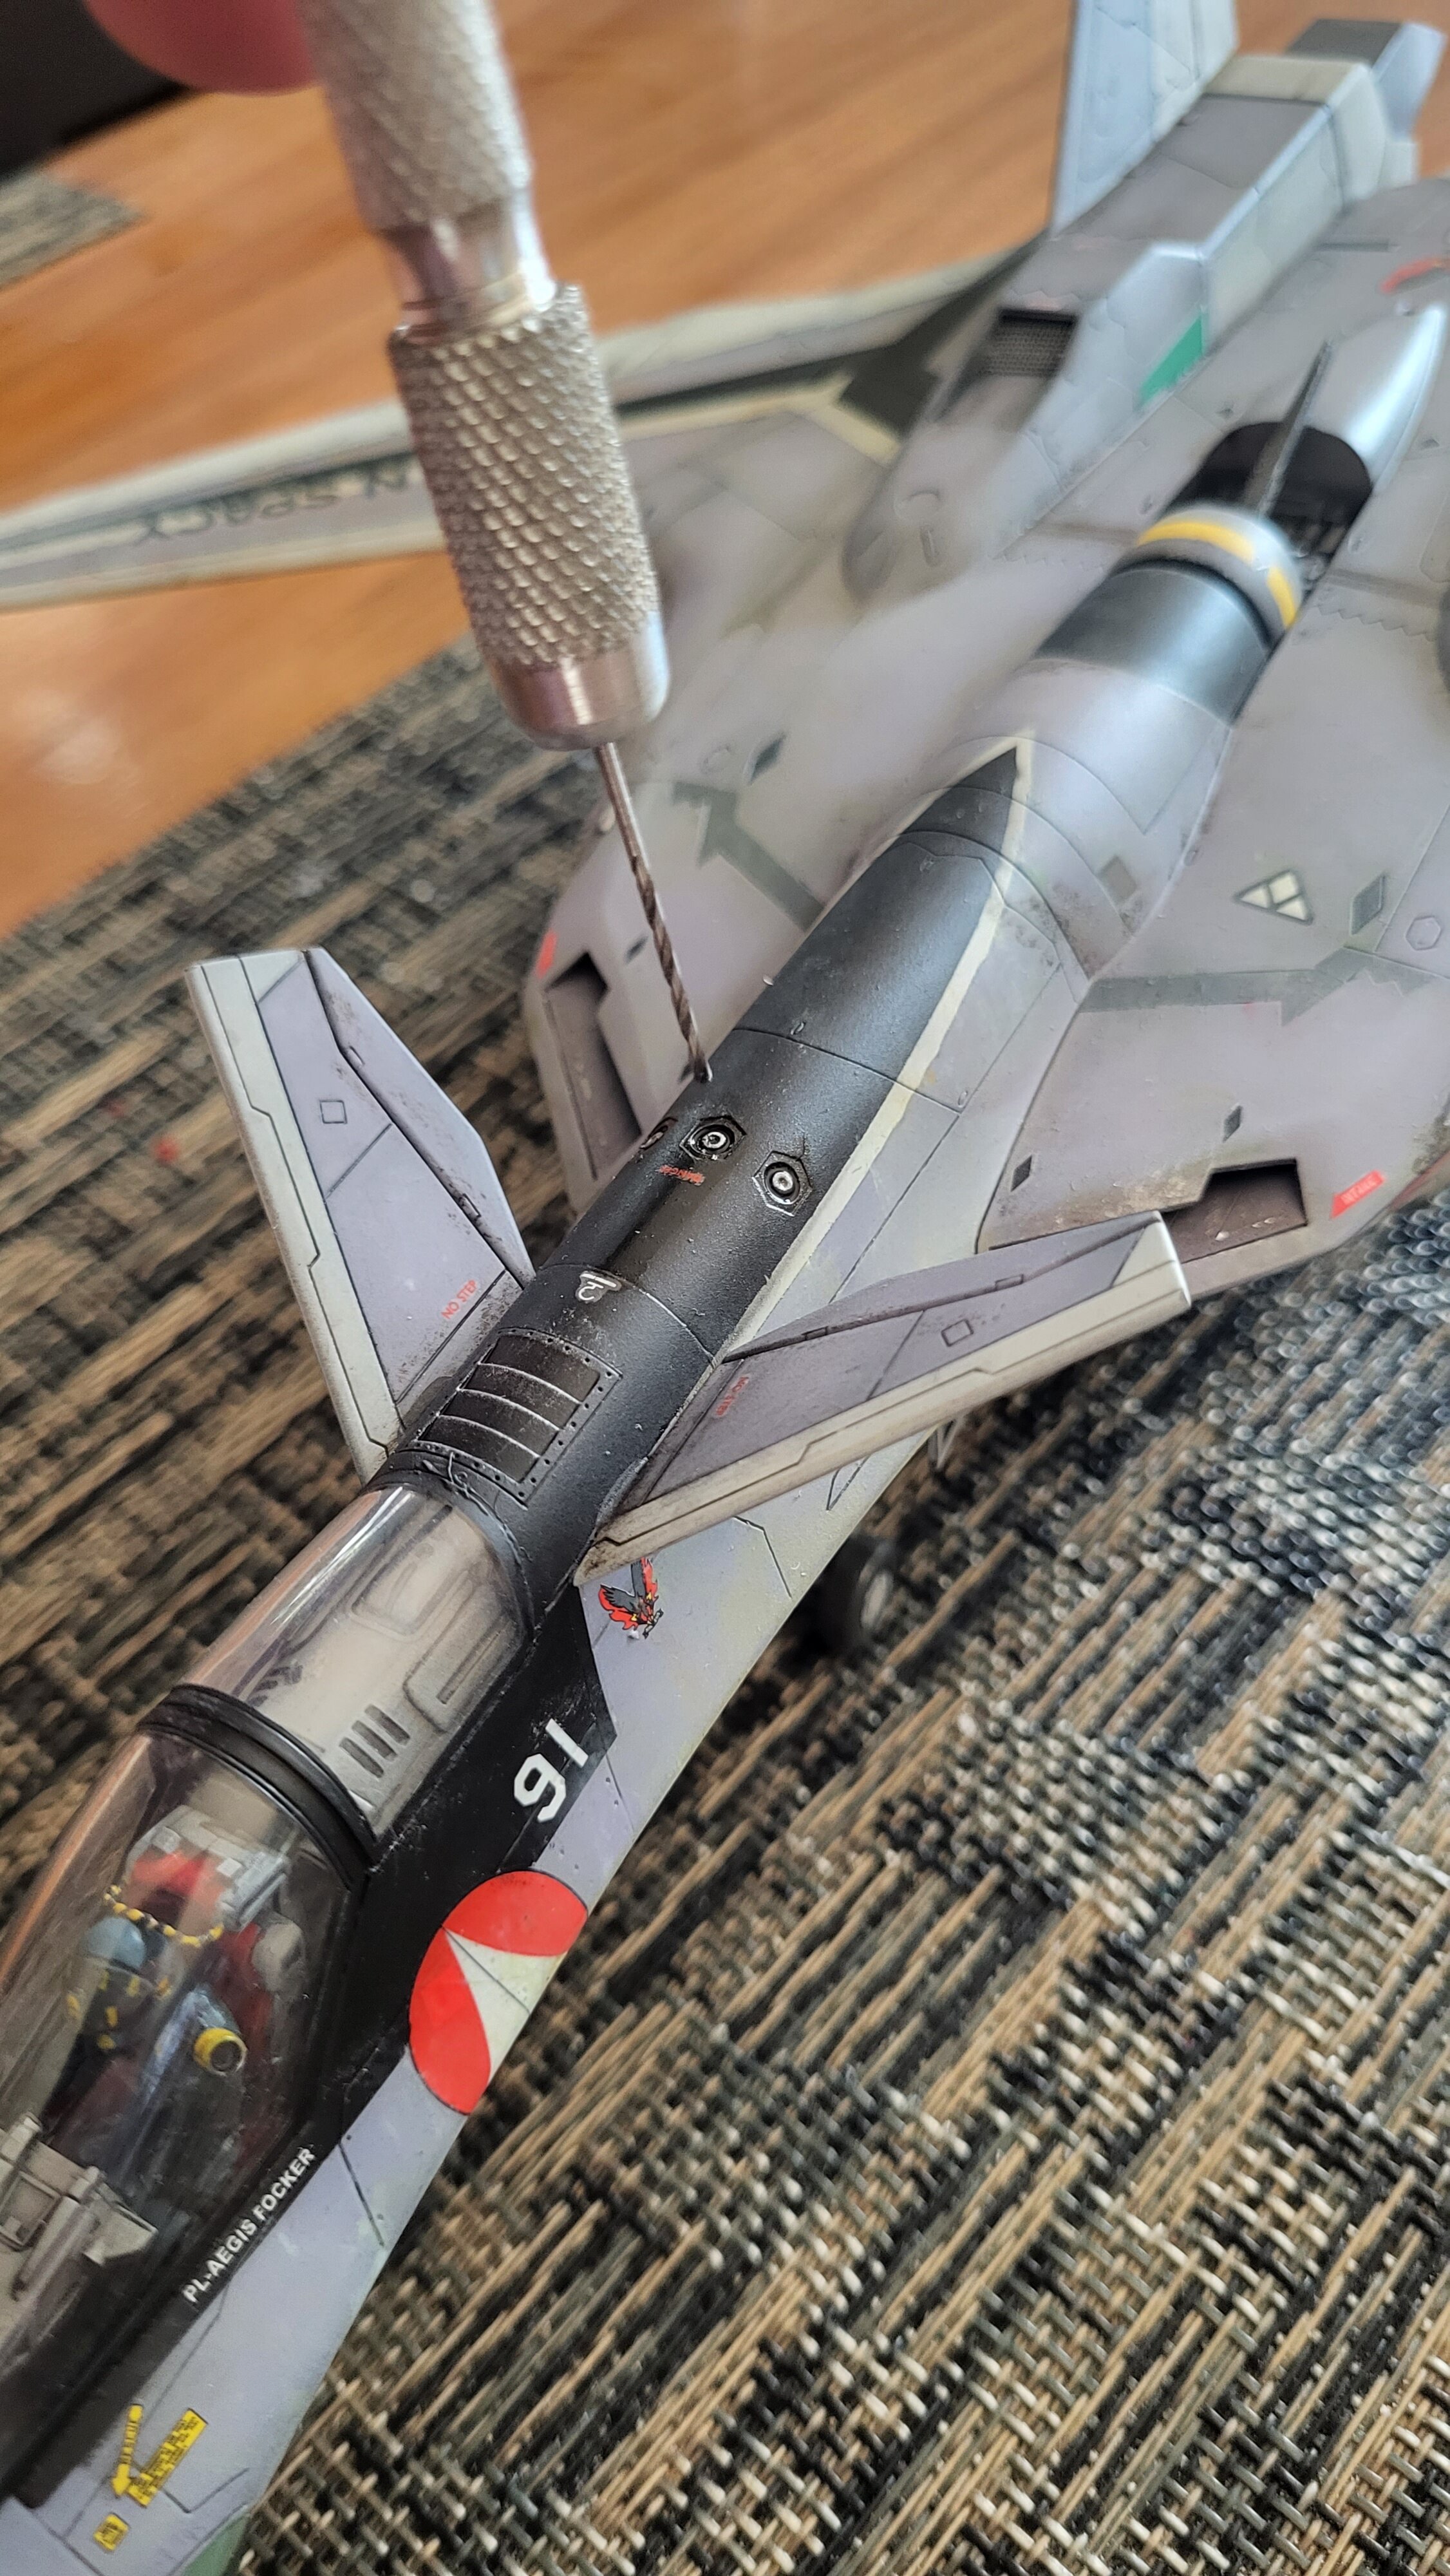
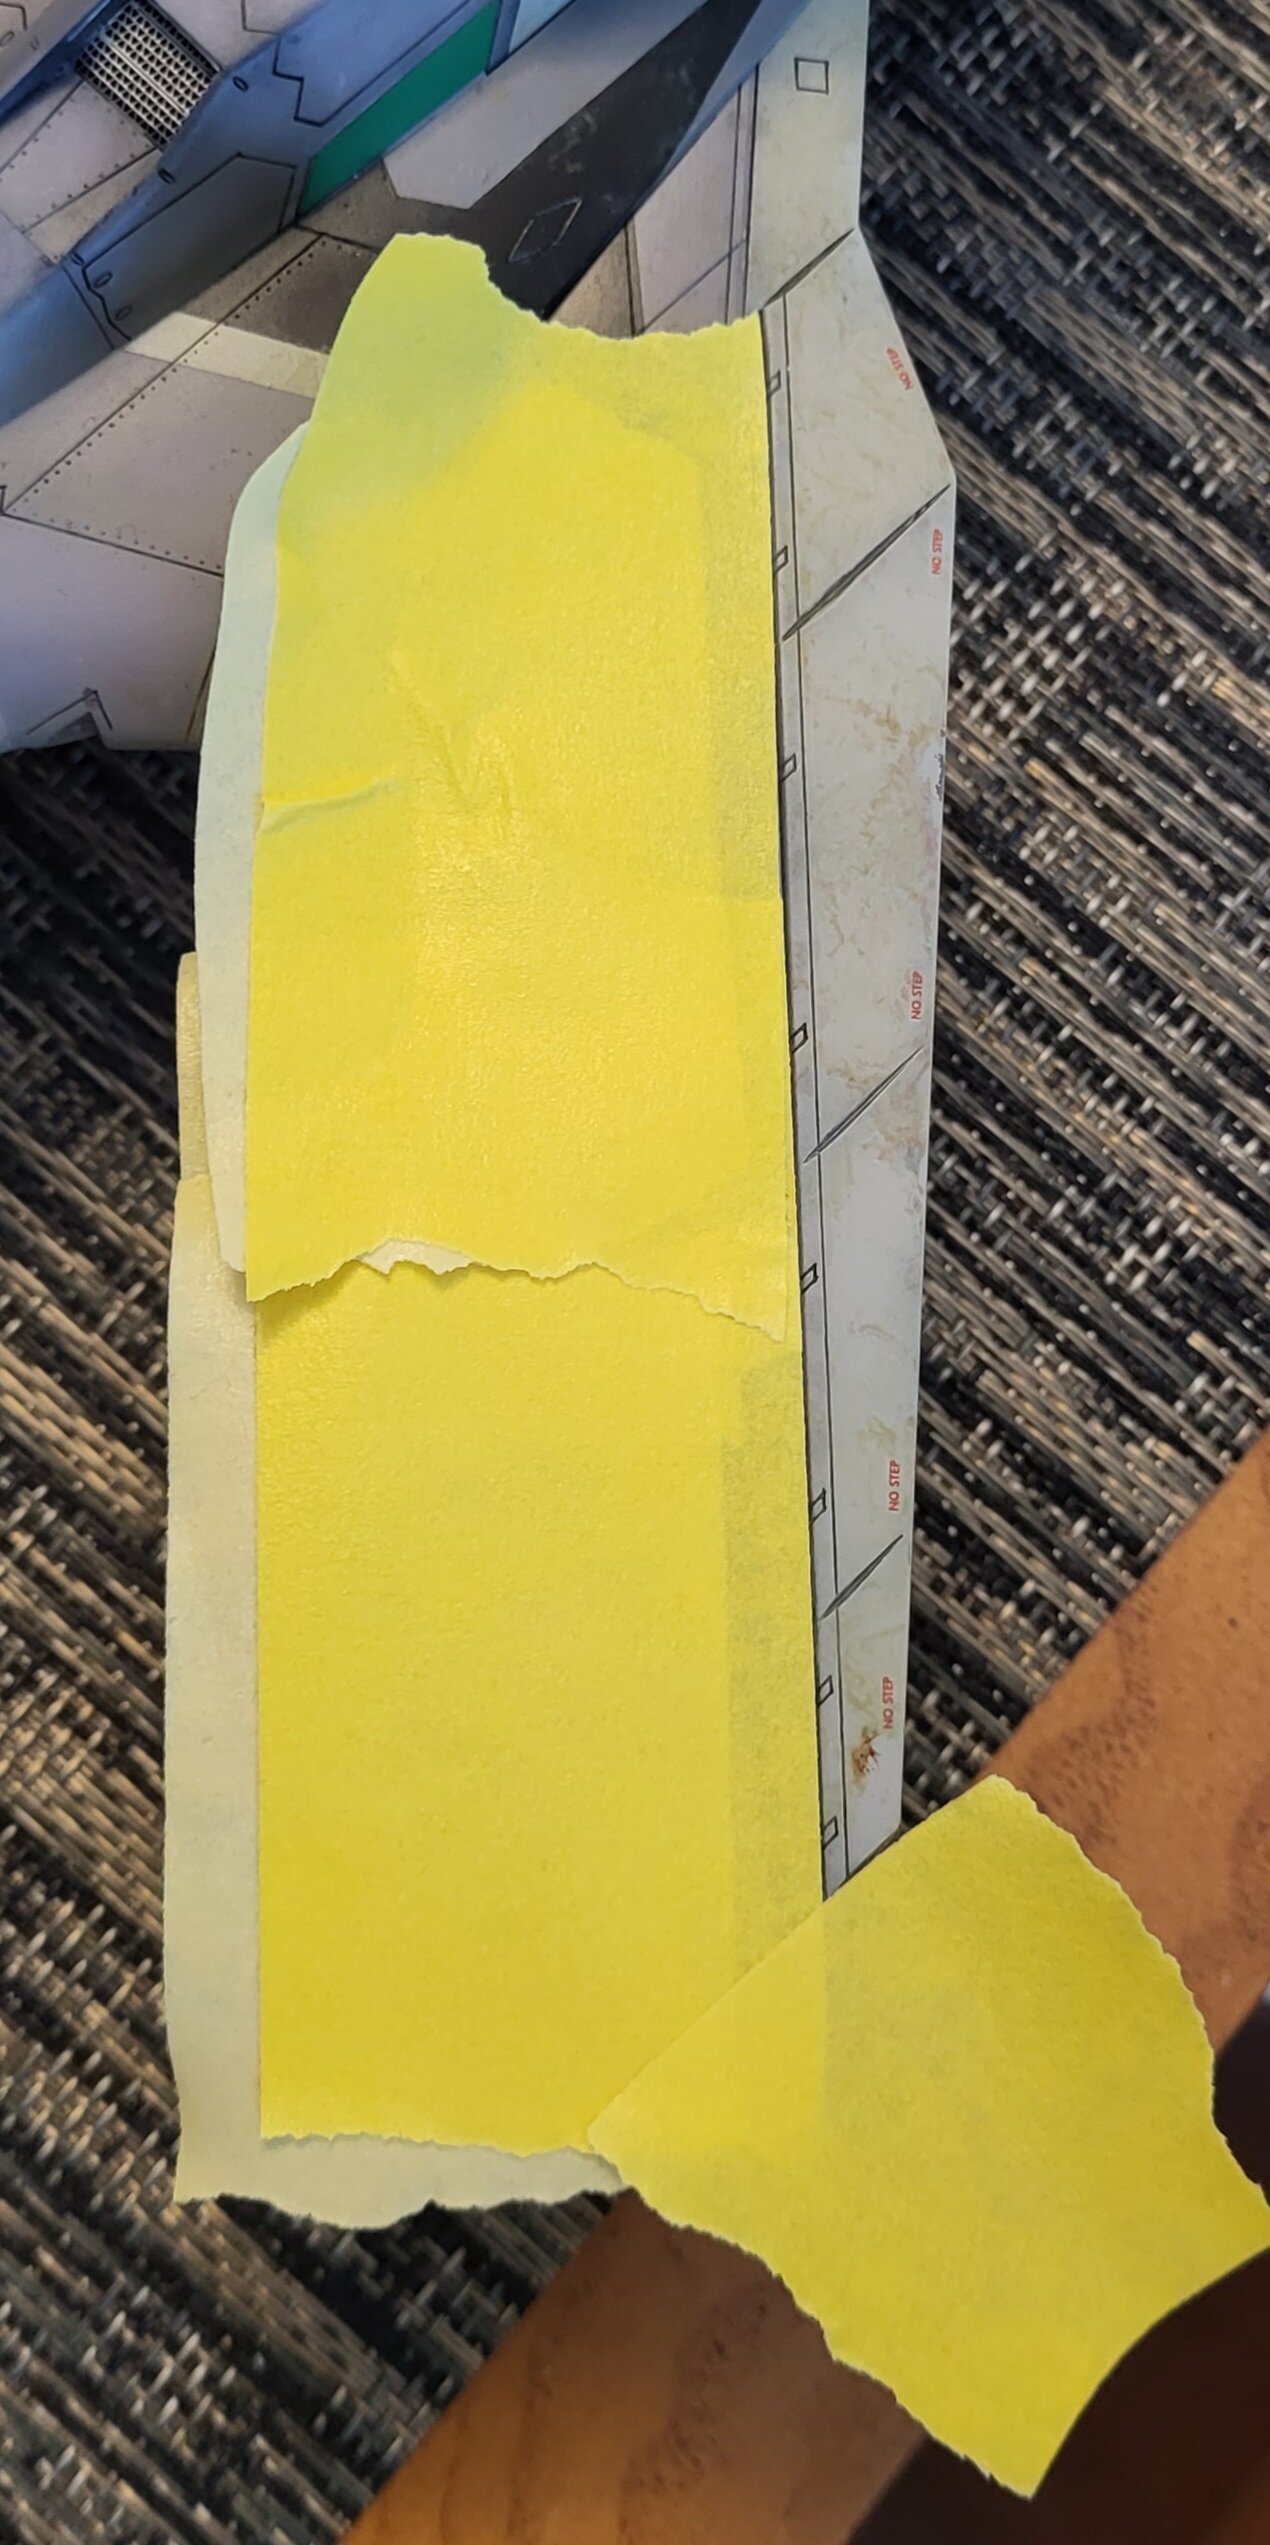
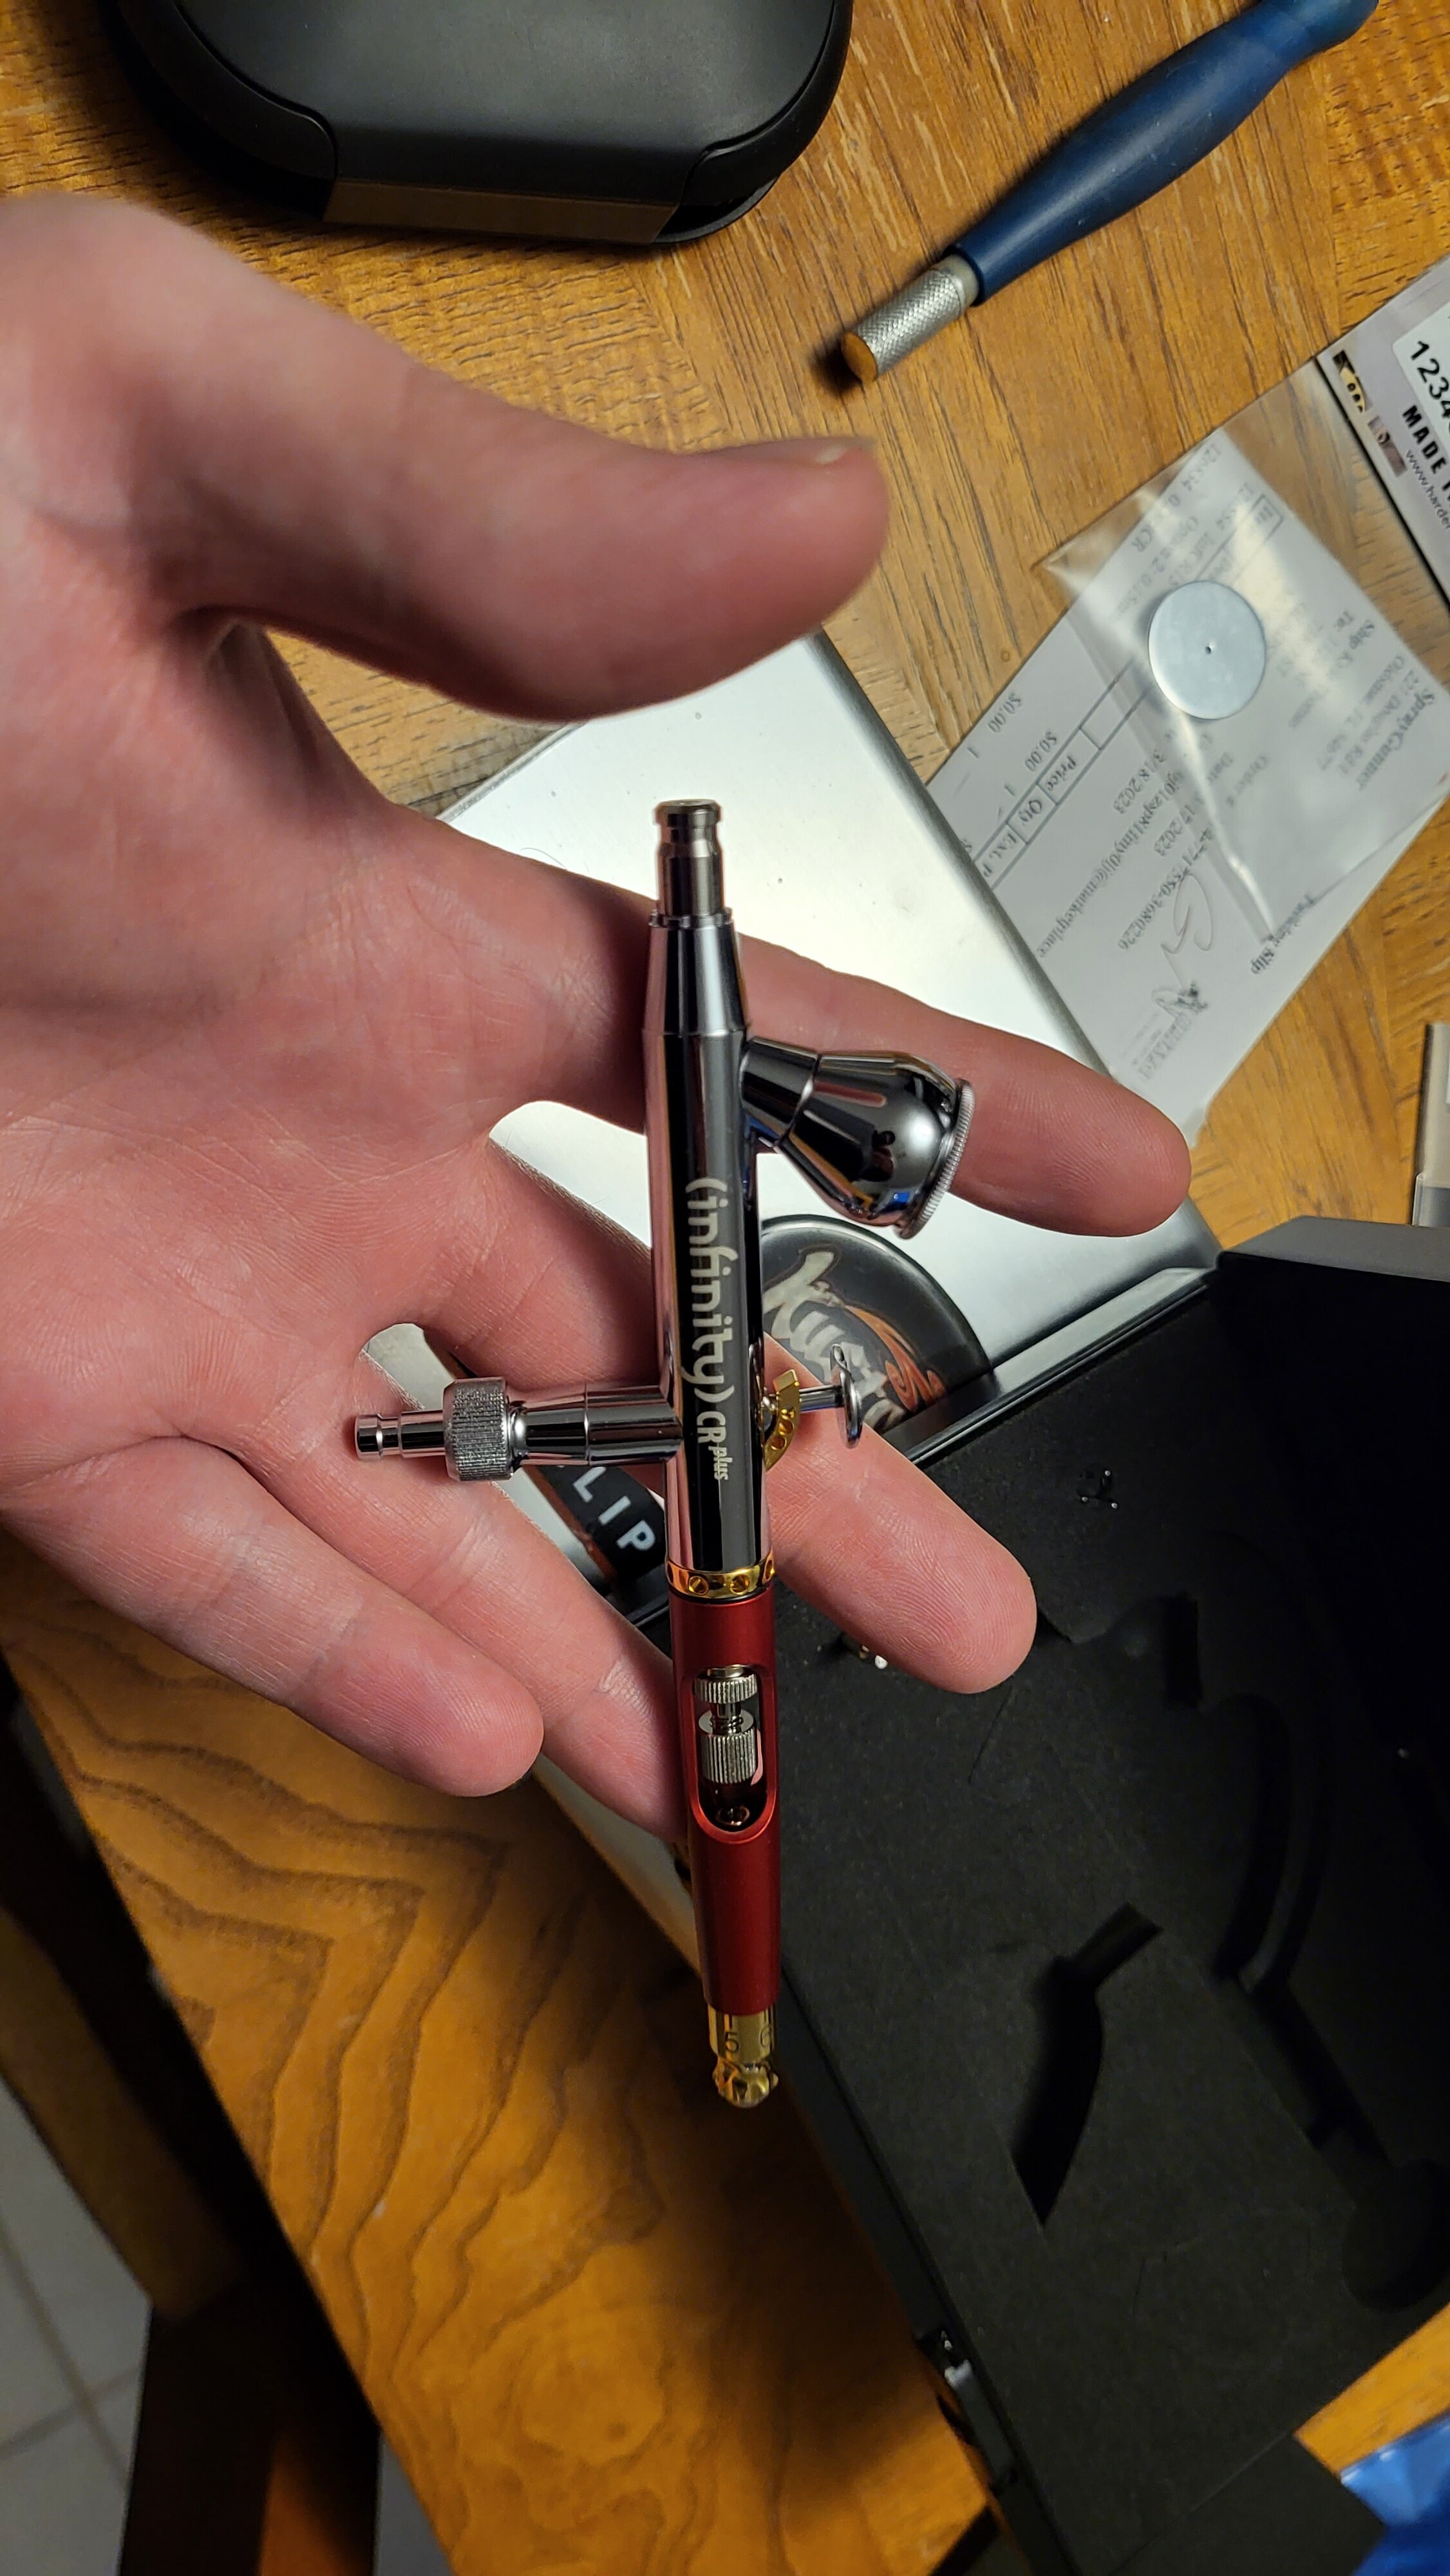
Thanks all, zero project until sometime towards the end of the Month. Managed to kill 3 airbrushes in an evening. Went to clean my Kustom Eclipse CS and the screw on tip was split, tried to swap the tip and fluid cap off my Revolution HP-TR and somehow buggered that up. Grabbed the old handy Iwata Neo (my primer ab) and somehow managed to break the tip off loosening it with pliers. Was not a good night. I'm down to an Old Badger Patriot and an Iwata Takumi Micron that I haven't used in 10+ years. I've already ordered parts to repair the 2 but they are weeks out. Grabbed and H&S Infinity CR+ which should be here next weekend. I'm going to bite the bullet and order some custom Iwata soft-jaw pliers for future maintenance. I also need to grab a handful of their o-rings as they always go MIA. Does anyone have any advice on bending up this? The PE bending pliers are useless, and it is pretty hard getting the blades all bent to the same angle with just the x-acto knife. My first idea was to put it on top of the original plastic part, and press in on the blades. the result was barely any movement due to the shallow details.
- 90 replies
-
- 2
-
-
- macross vf-x2
- vf-19 excalibur
- (and 2 more)