Urashiman
-
Posts
754 -
Joined
-
Last visited
Content Type
Profiles
Forums
Events
Gallery
Everything posted by Urashiman
-
 Sand the hand a bit first and then use Tamiya Surface Primer. Worked best for me for 3D printed parts. You'll be able to paint it with whatever color you like.
 -
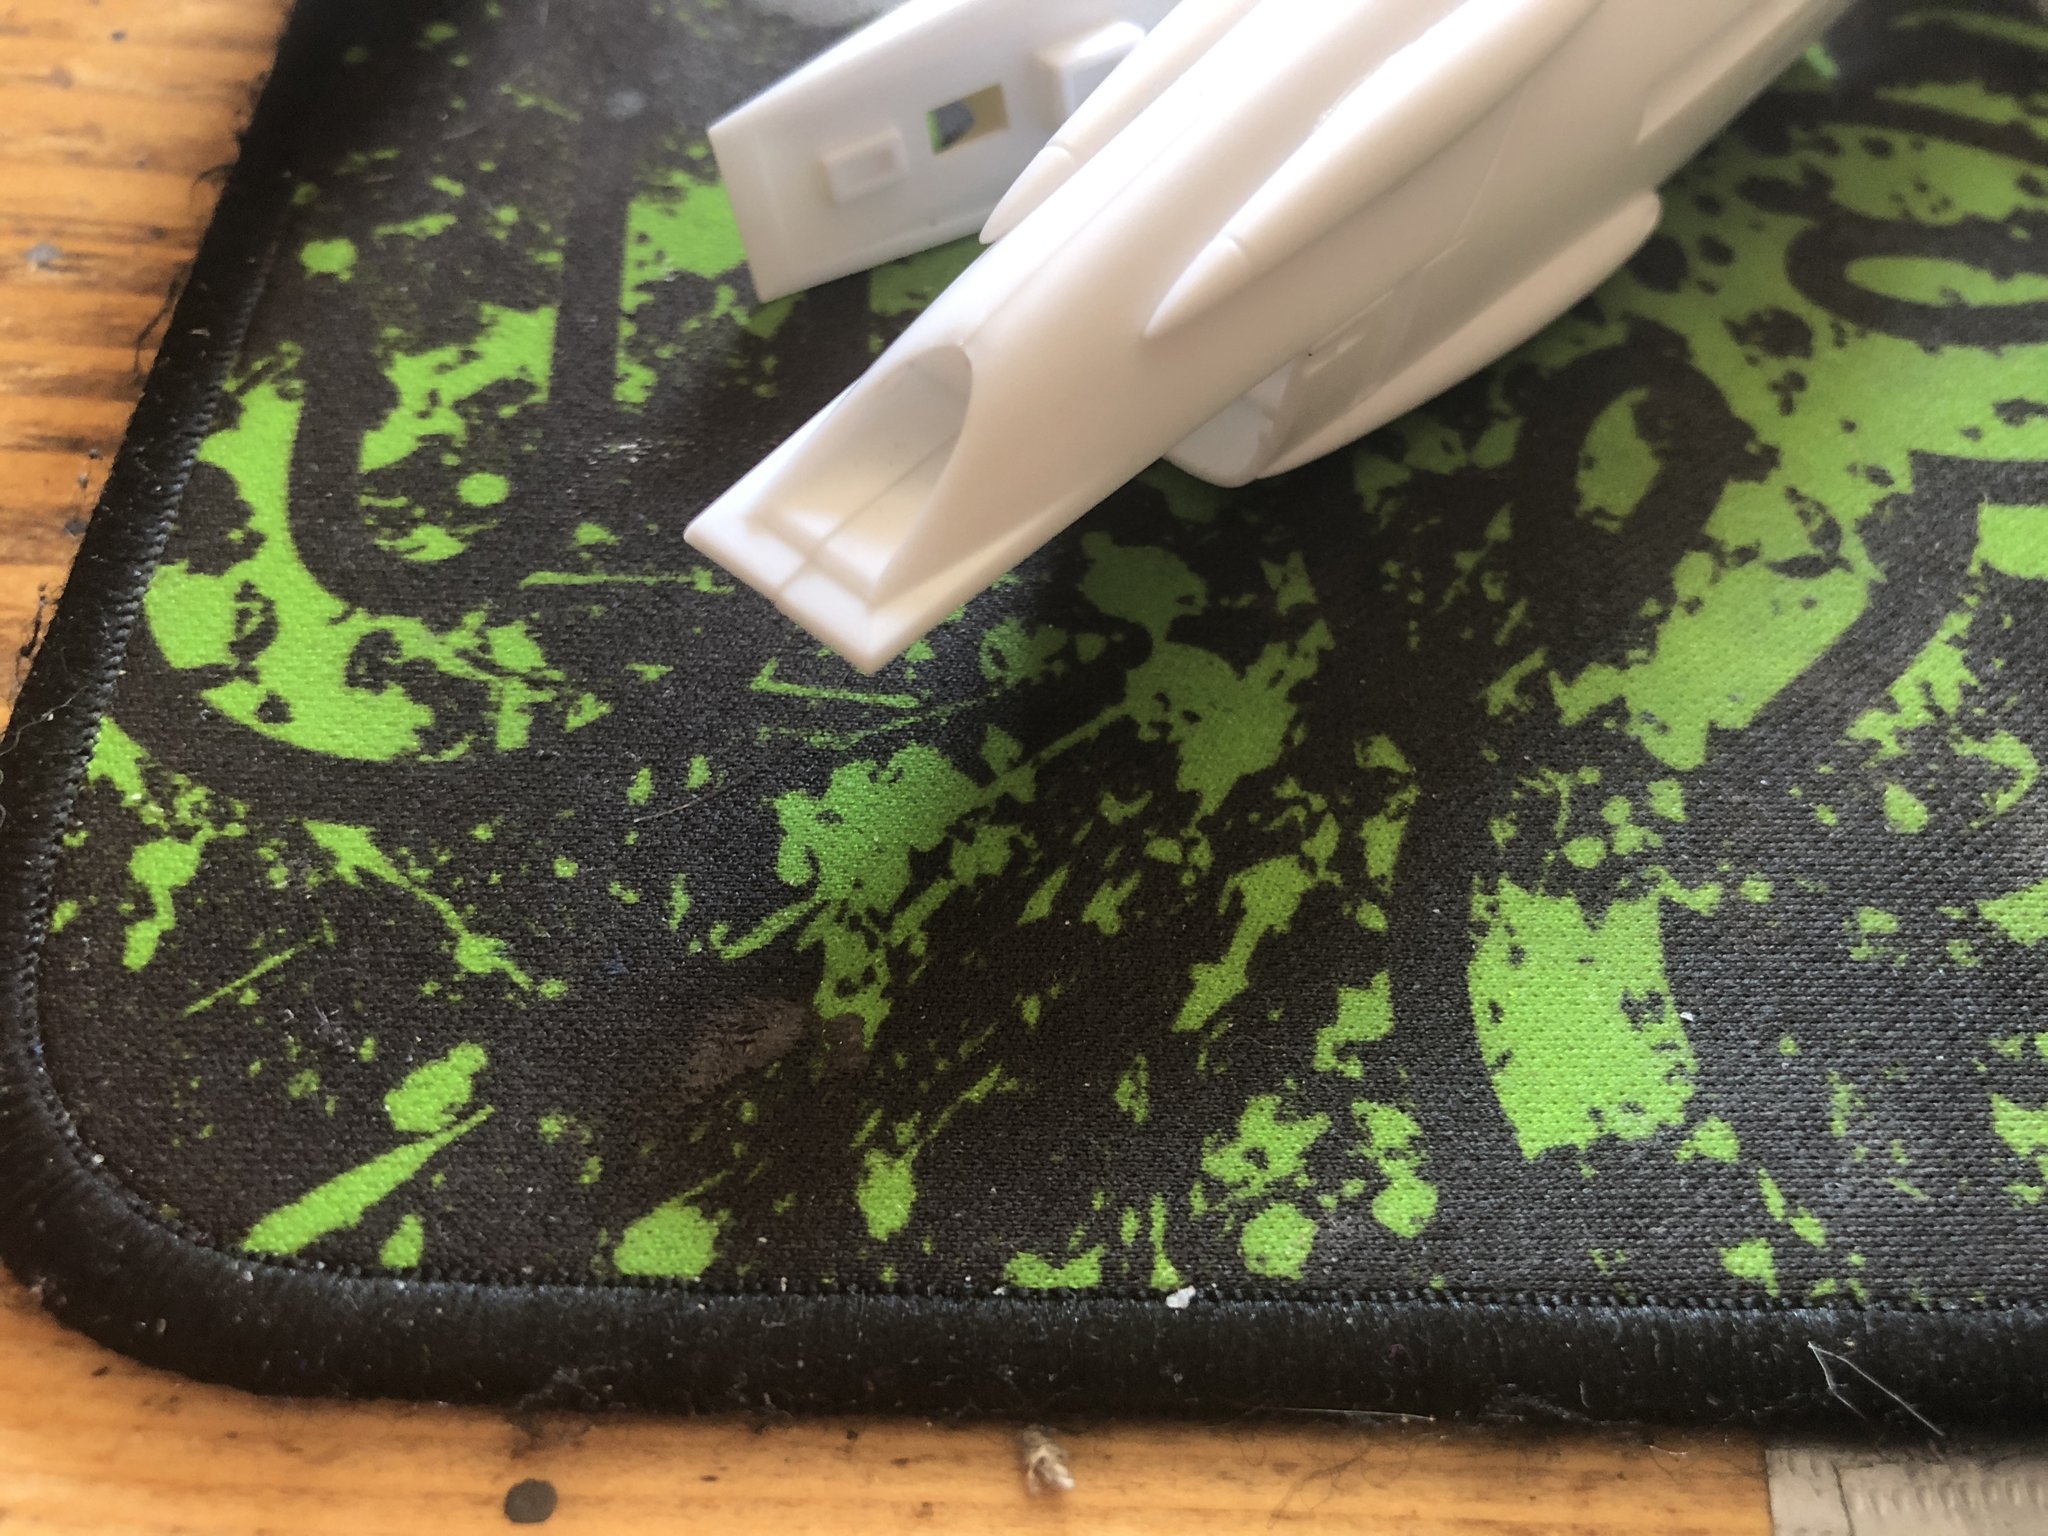
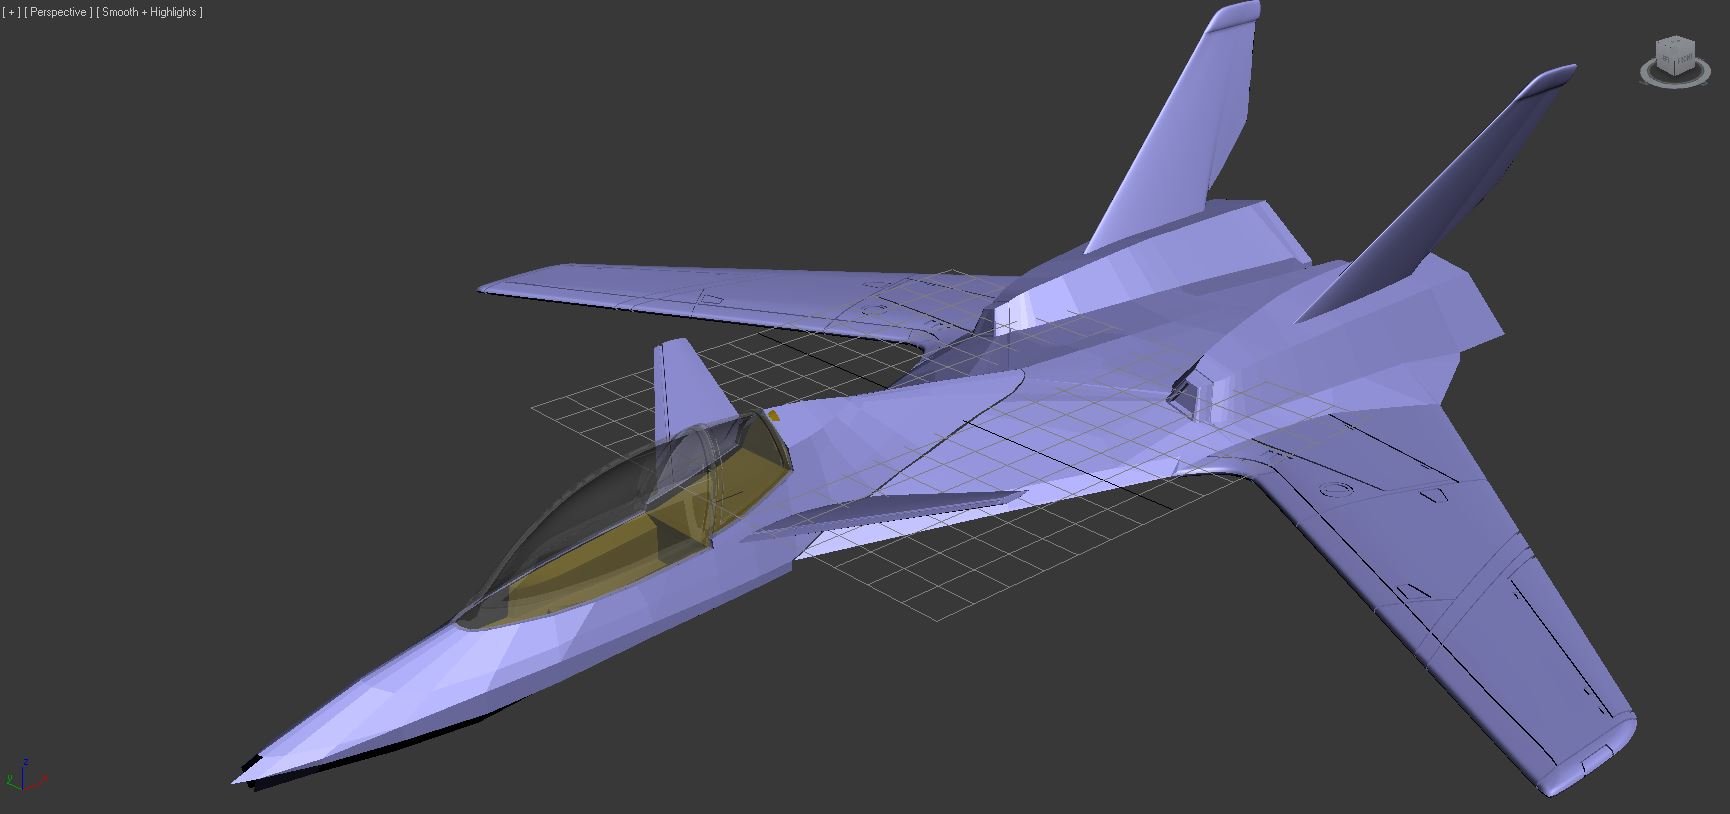
Currently working on this VF-9. It'll be a static 1/72 version, so I can display it with my Hasegawa 1/72 kits. It is far from being finished and with my perfectionism, it'll take some time. Here is a preview: Two Piece Canopy: Done Front Canards: Done Cockpit Main Body: Done Cockpit Panels + Other interior: 0% Pilot Seat: 0% Pilot: 0% Nose: 30% Main Wings: Done Fins: 90% Mainbody: 10% Engine Bays: 0% Arms: 0% Gear: 0% Exhausts: 0% Other yet unknownparts to be added.
-
Now there is a thread for 3D printing - thanks for the idea
-
Hey everyone, As 3D printing is becoming more popular and affordable, I thought it'll be great to have a place to share the current progress on active projects without posting new threads. I am currently working on a secret project which will take a while and I am not satisfied with the progress I made so far. I'll fix some parts in the next weeks and post it here. if you want to check out my old printable stuff, you can check it on shapeways: https://www.shapeways.com/shops/urashiman Happy sharing!
-
Yeah, frikkin' C05 varioprop Graupner Servos. They were huge...
-
Repurposing servos is something that is done for a long time. In the 90's I used servos as "mini" gearboxes. Check the resistance on the pot, remove the pot and solder in fixed resistors. Et voila, mini electric speed controler with mini electric motor and gearbox. This technique is mostly used for 1:87 RC cars/trucks. Nowadays, people tinkering around with makerboards use it too to create easy 360° movement servos instead of using expensive stepping motors.
-
Seriously, this is awesome. I need a 3D printer too... but before that a bigger flat. No space in my current one at the moment.
-
I think I just had a nerdgasm, awesome work!
-
The coloring scheme is so awesome.
-

-
Nice build! Got one of these sitting unbuild in my shelf, but from Revell (really old kit mold from the 90s - means much putty and sanding).
-
Holy Cow. *watching_the_drama_unfold* anyway... @ARK 3 I would recommend you to read the Forum Rules and Guidelines again. They can be found here: It doesn't matter how old someone is, if that someone doesn't play by the rules. Posting your request in every part of the forum or subtopic qualifies as spam. Your request fits into "Fan Works". Fellow Macross fans are probably able to help you in there. Else I would recommend you to visit one of the many 3D engineering boards out there on the internet. Google is you friend.
-
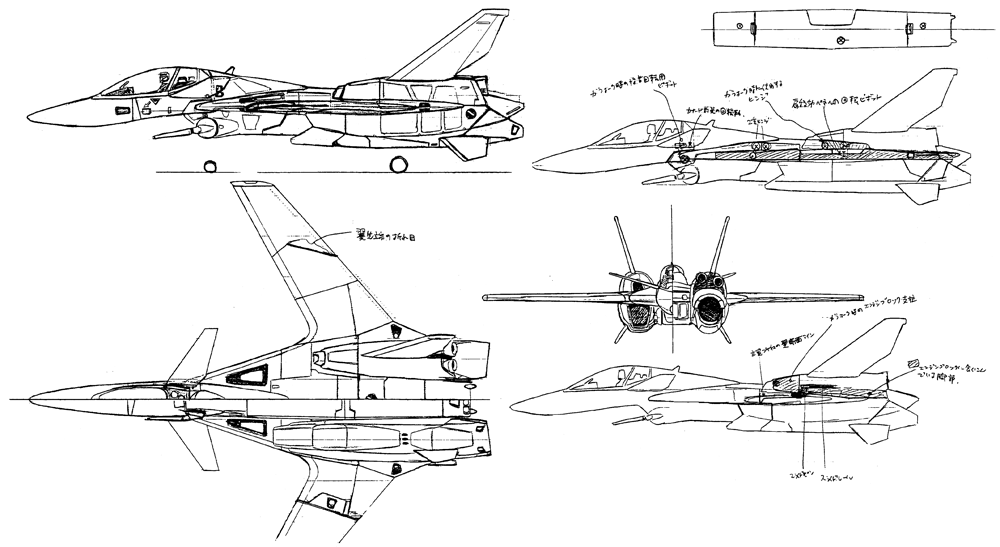
well - the original fins are not pointy at all, but are horizontally aligned to the main body, compared to the interpretion from xigfrid. Just check the official Kawamori line art below.
-
MilF - LOL! Thats a good one
-
Nice washing and weathering!
-
Yeah - that is the problem with most Star Wars models. There is alot of tech trivia on sizes and shapes due to inconsistency in the models that where created by the special effects guys.. Try searching for a scale Tie-Fighter. It is impossible due to sizes variing from 6 meters to 10 meters and stuff like this... The modelbuilders used 1/24 scale puppets in the tie-fighters in episode 4, but in the movies the tie-fighters compare to the x-wings to be huge, so (especially in the HD versions of Star Wars) tie-fighters are visibily piloted by giants (Macross Style - yeah ) The bulkier Falcon is concidered canon by most fans. Many prefer the slim version as it looks really neat and agile.
-
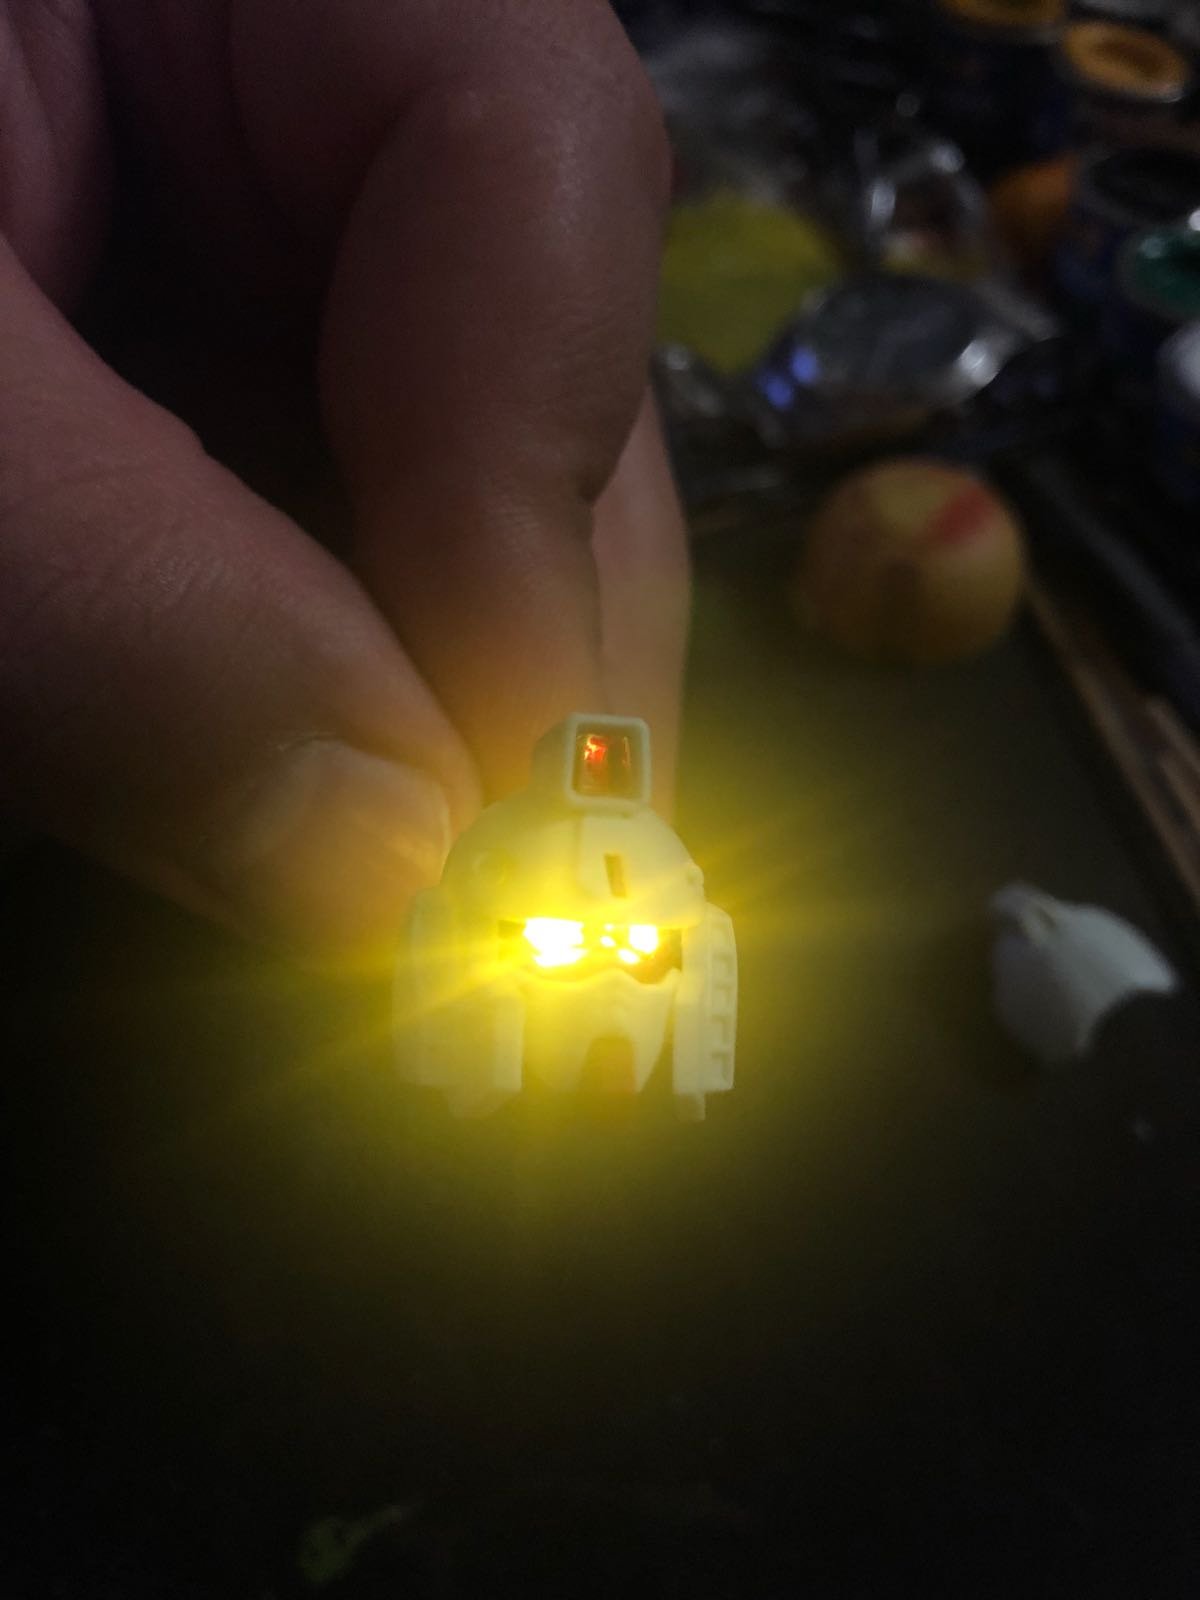
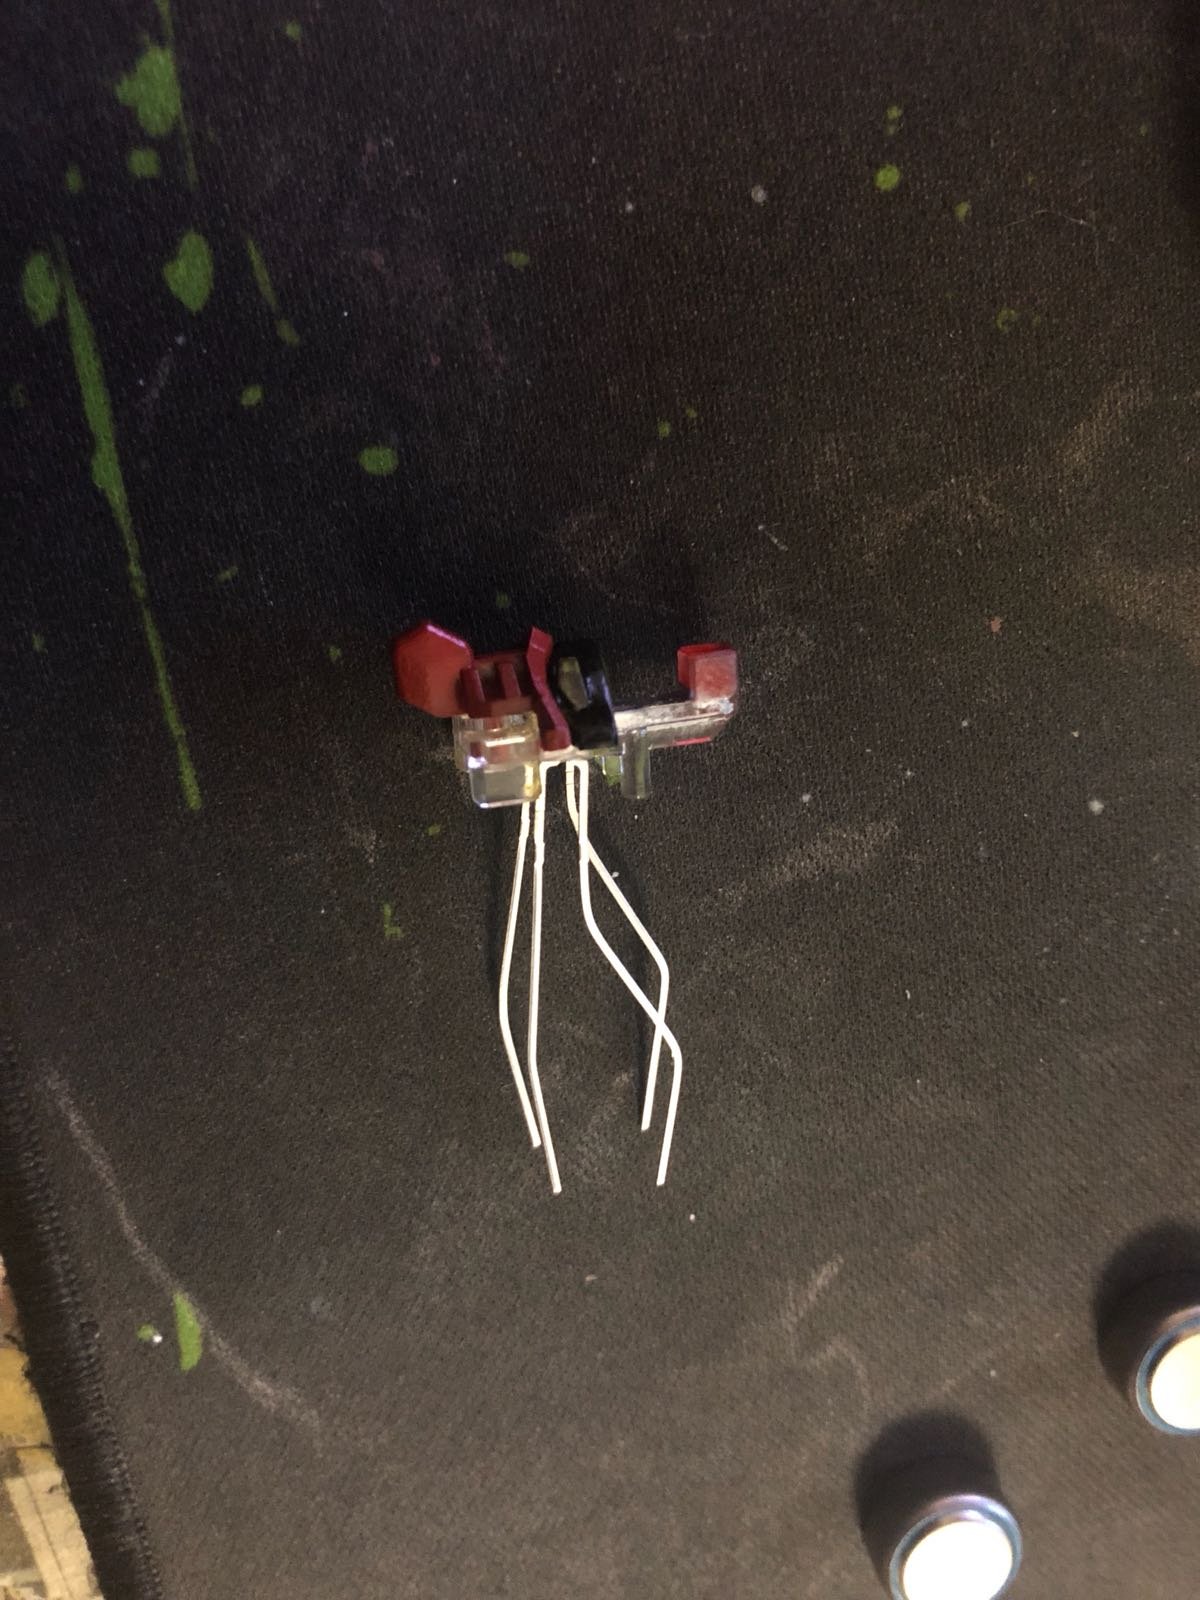
Did some SMD LED soldering for the Gundam.

-
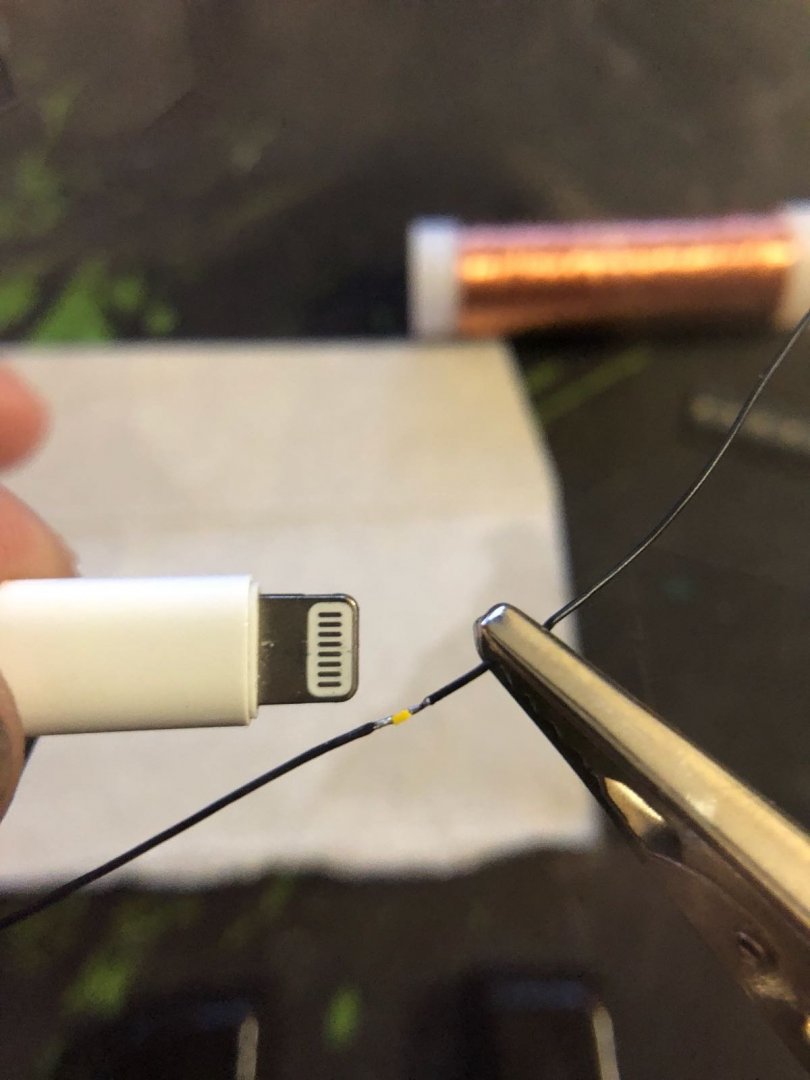
haha! nice, thanks for the advice. I am good at soldering stuff. I am doing this since I am 8 years old, so no worries. My uncled worked in a chip factory for Siemens and teached me how to "bake" SMDs. Use low temperature solder, put the solder on the circuit board soldering points, align every SMD where it has to be and preheat your oven to 250°C. Bake for 2-3 minutes, and done. This only works if you are actually using a circuit board. Else you have to do manually with a soldering iron. I have thin litz wire, insulated and bare wire in various sizes. PR41 batteries are really small. I am only going to power 3 SMD LEDs in the voltage range of 2.7-3.1V. One PR41 battery has 1.45V, so I would need two to have ~2.9V. PR41 batteries provide power in a range from 160mAh to 200mAh. 3SMD LEDs suck ~60mA (20mA each). Quick math - 160mAh/60mA = 2.6h. For switching it on and off from time to time this should do.
-
Looks great, good job! But be careful, papercuts you know...
-
huh ... well ... urgh... but no worries. I managed to fix it. Thanks for pointing that out. Hahahahaha! thanks guys
-
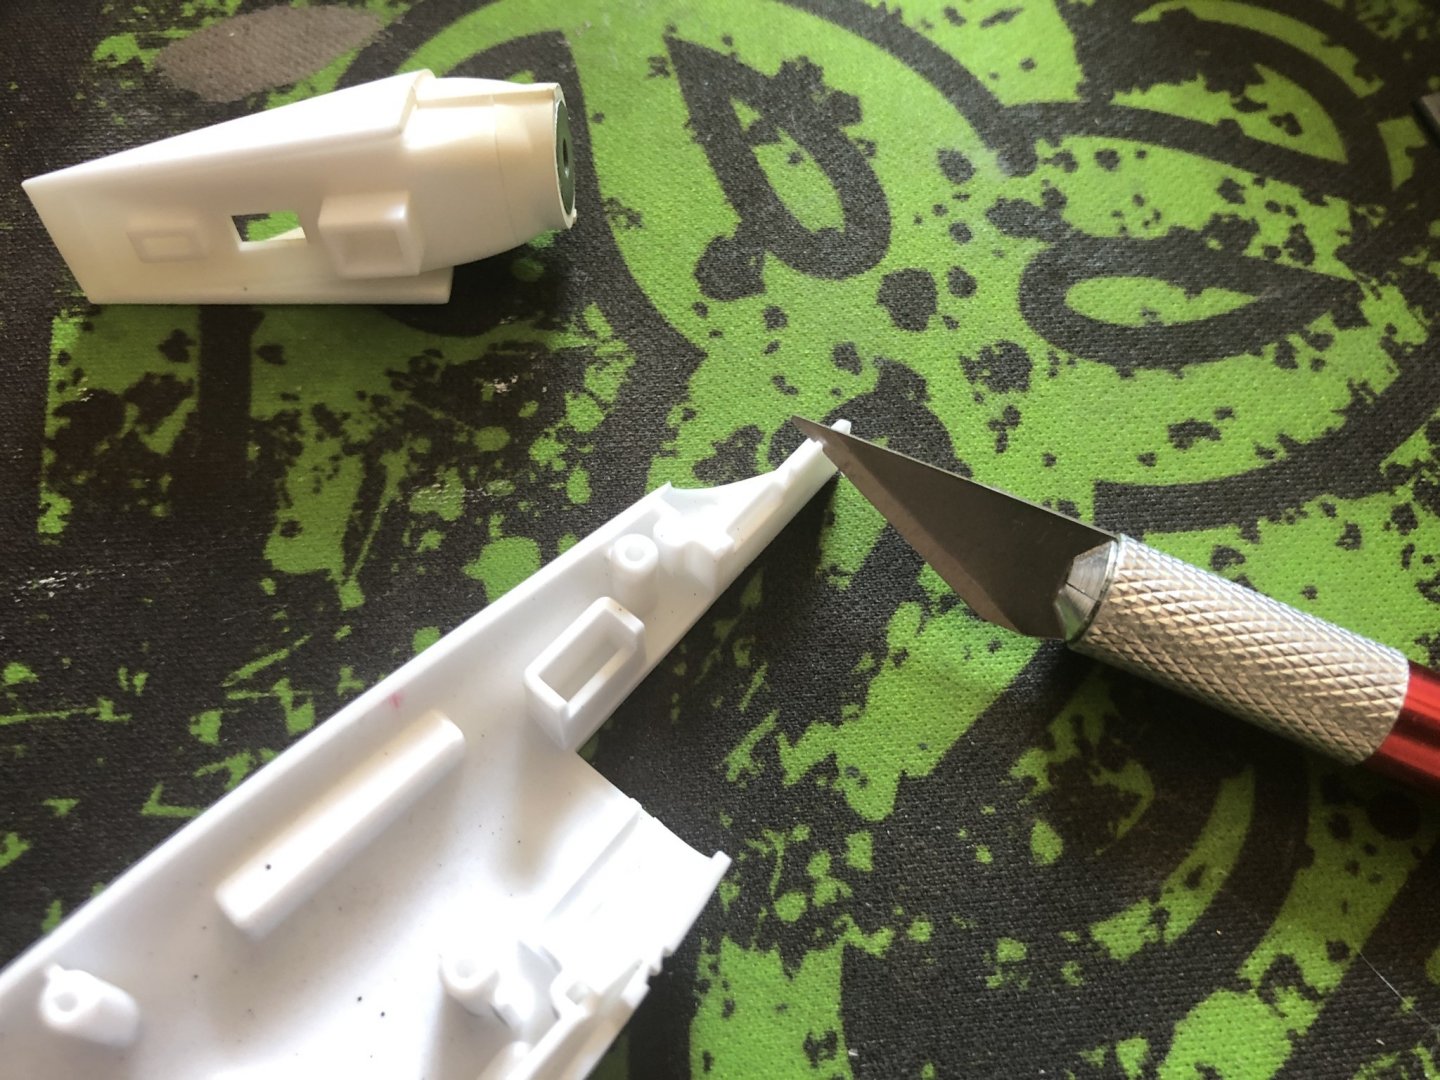
@arbit look what you have done. You caused me to be inspired and work on my Gundam RX78-2 ver. One Year War 0079 and make something crazy like this: I have to get smaller cells if I want to build all that stuff into the head. Probably R41 hearing aid batteries. Also the LEDs are too big and too bright. Ordered some SMD LEDs. Muhahaha!
.thumb.jpeg.55bdb050158aaafea8853199d9ef03ce.jpeg)

.thumb.jpeg.e537becbe9a82480b7b4665d402e02a7.jpeg)

-
xigfrid... This is pure awesomeness. The VF-9 looks really great! Congratulations!
-
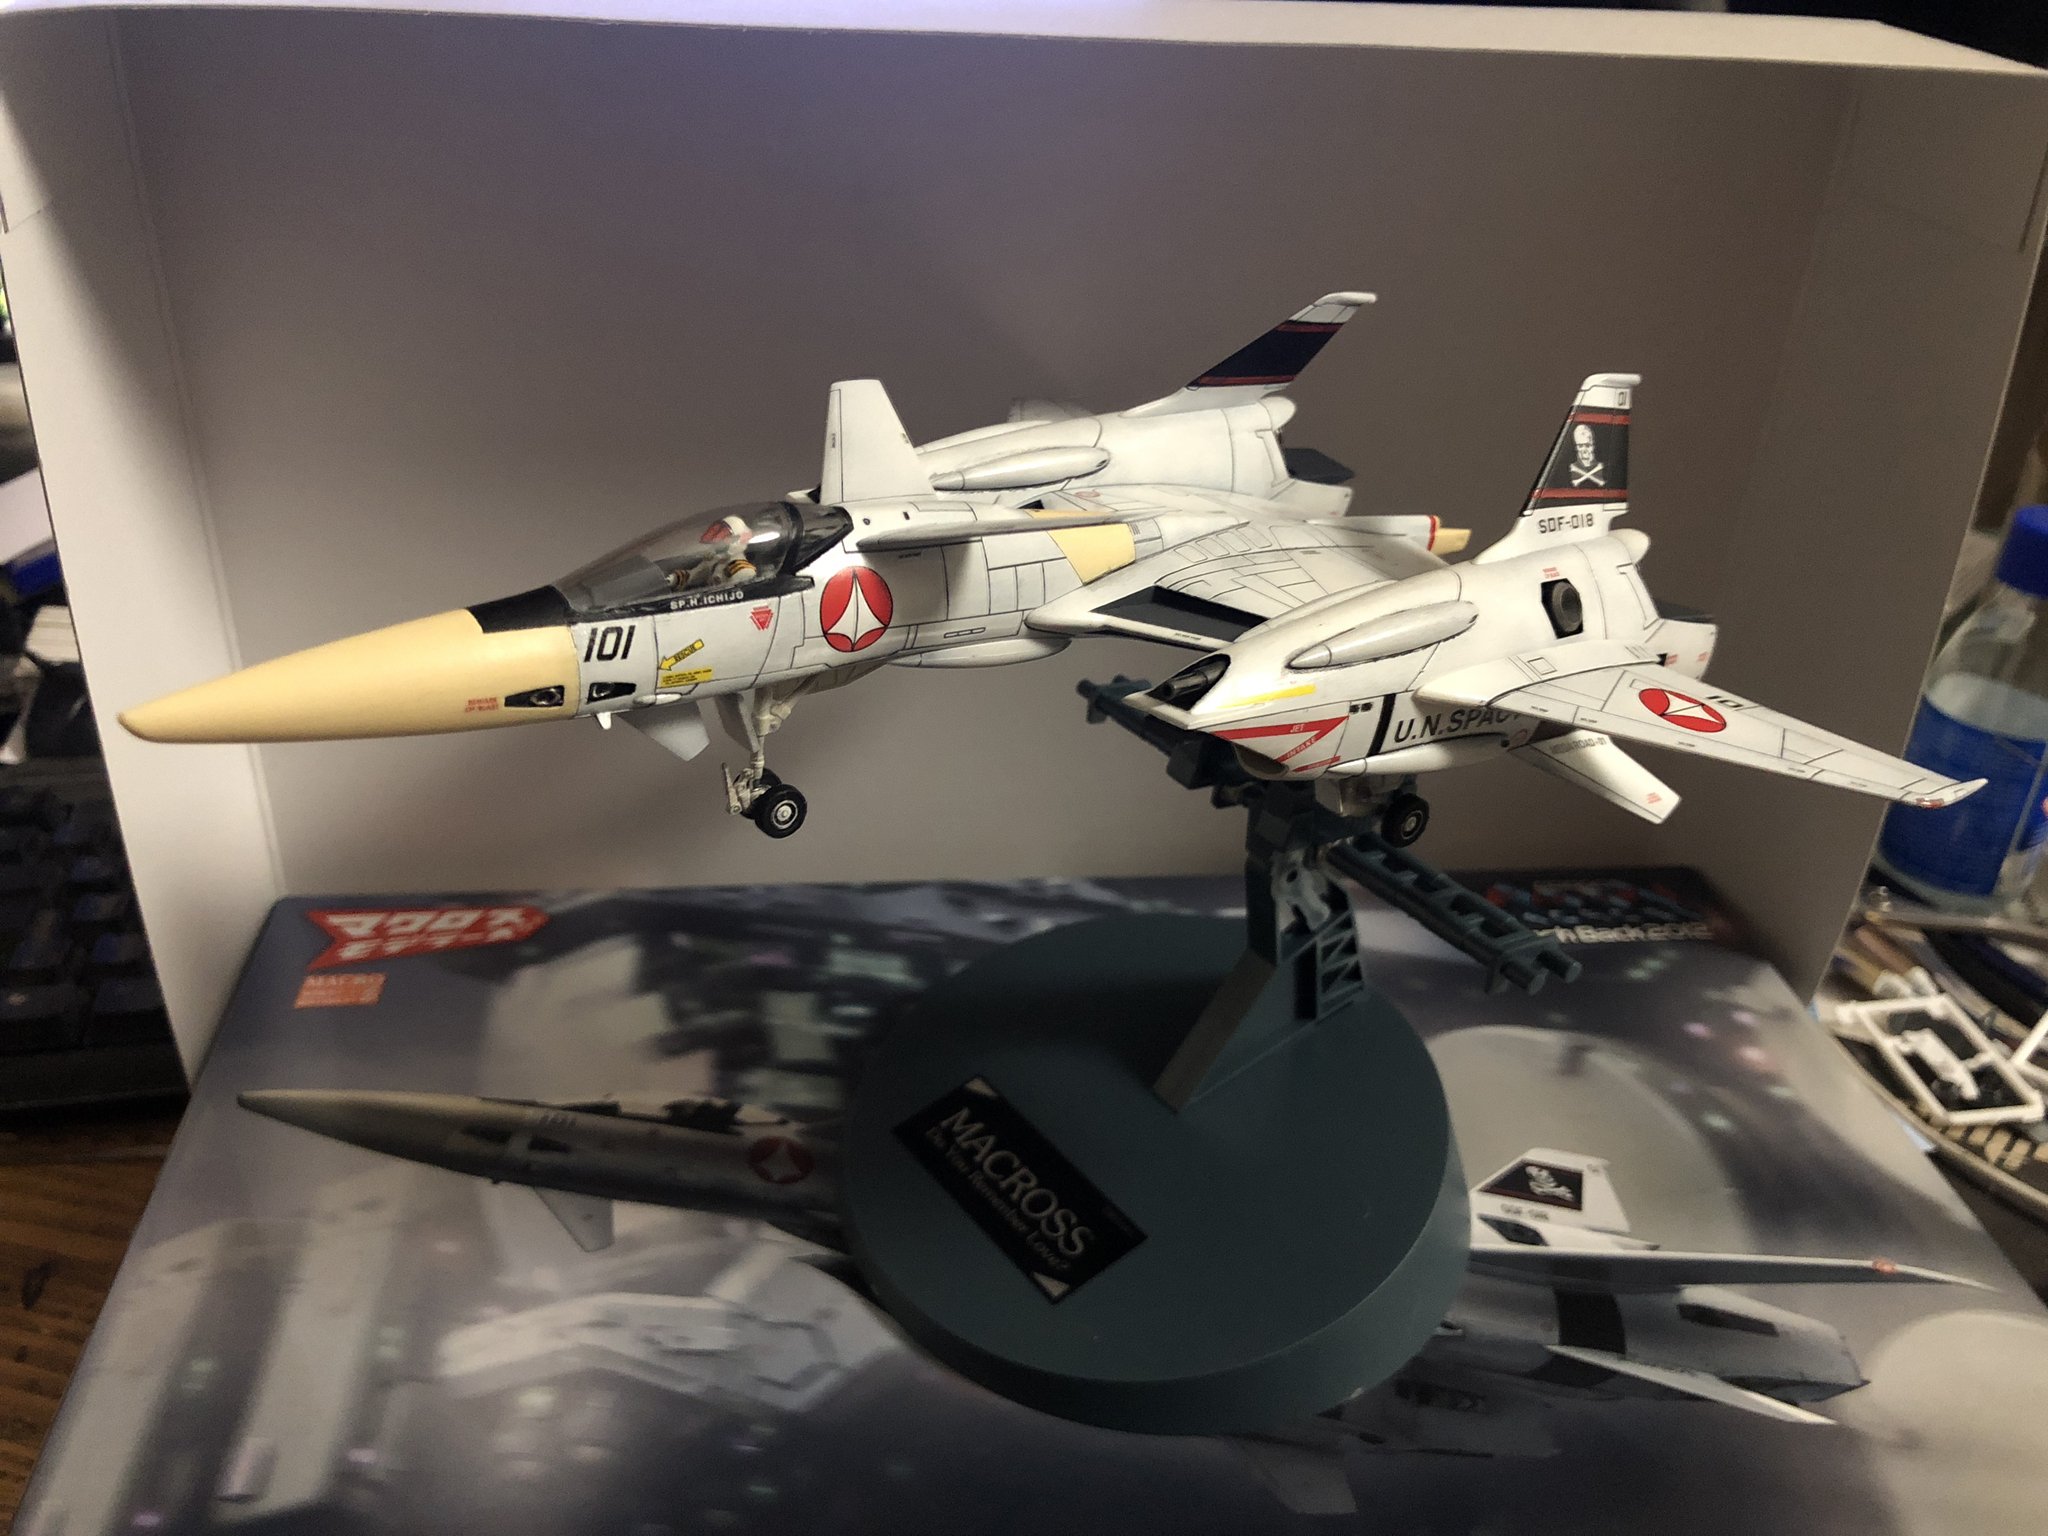
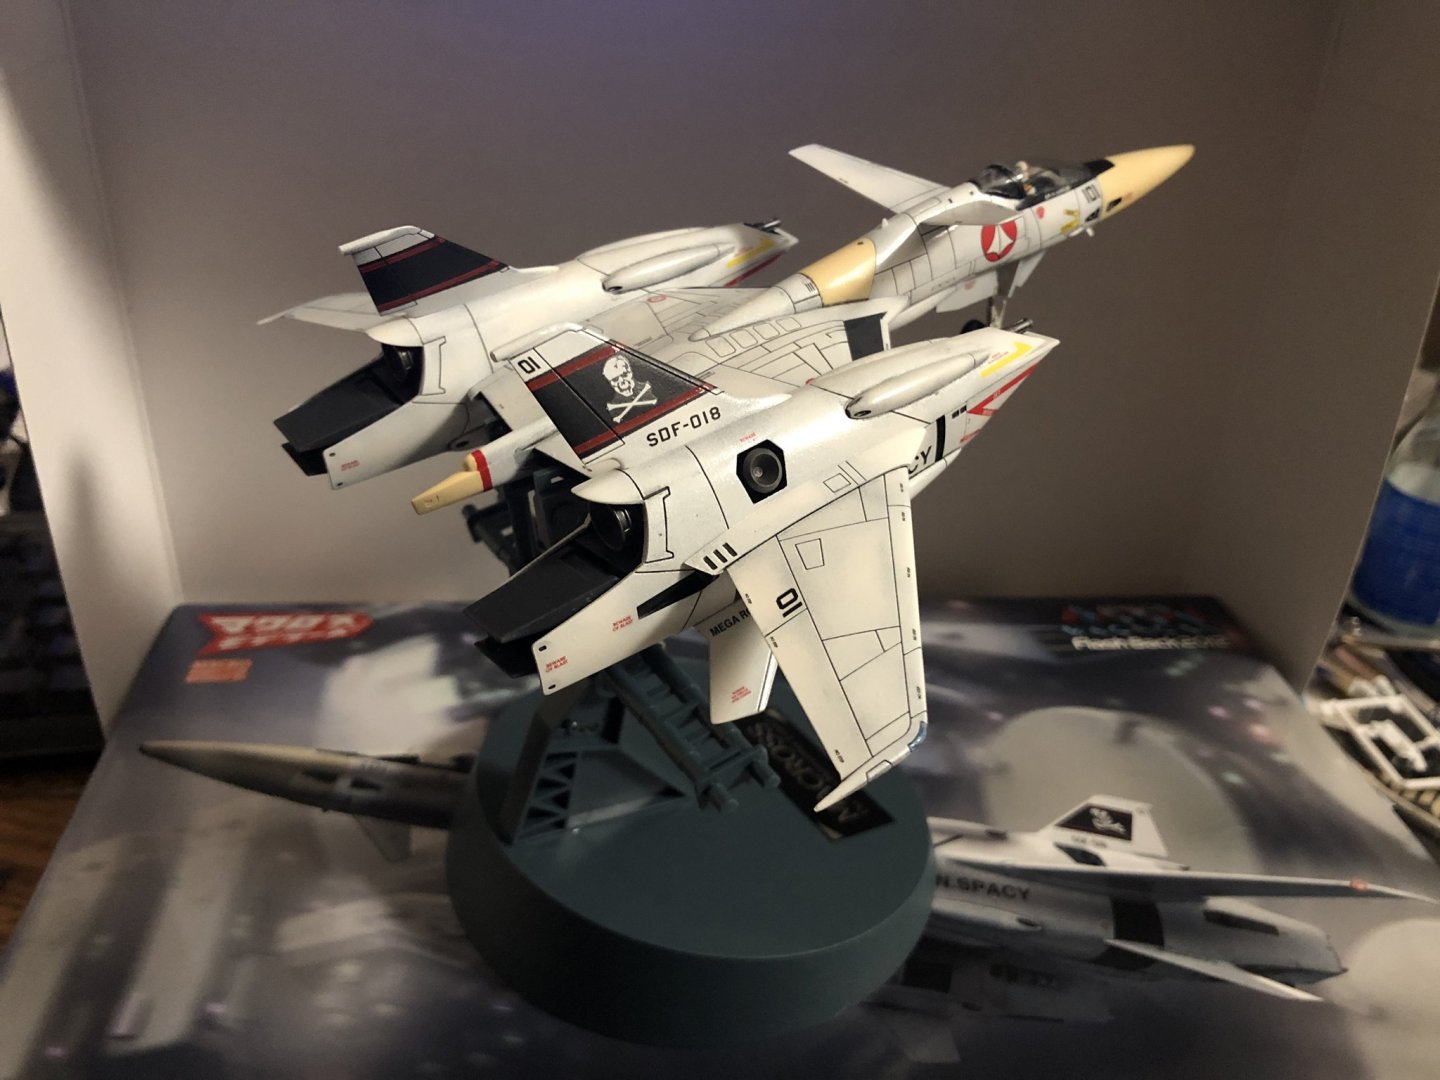
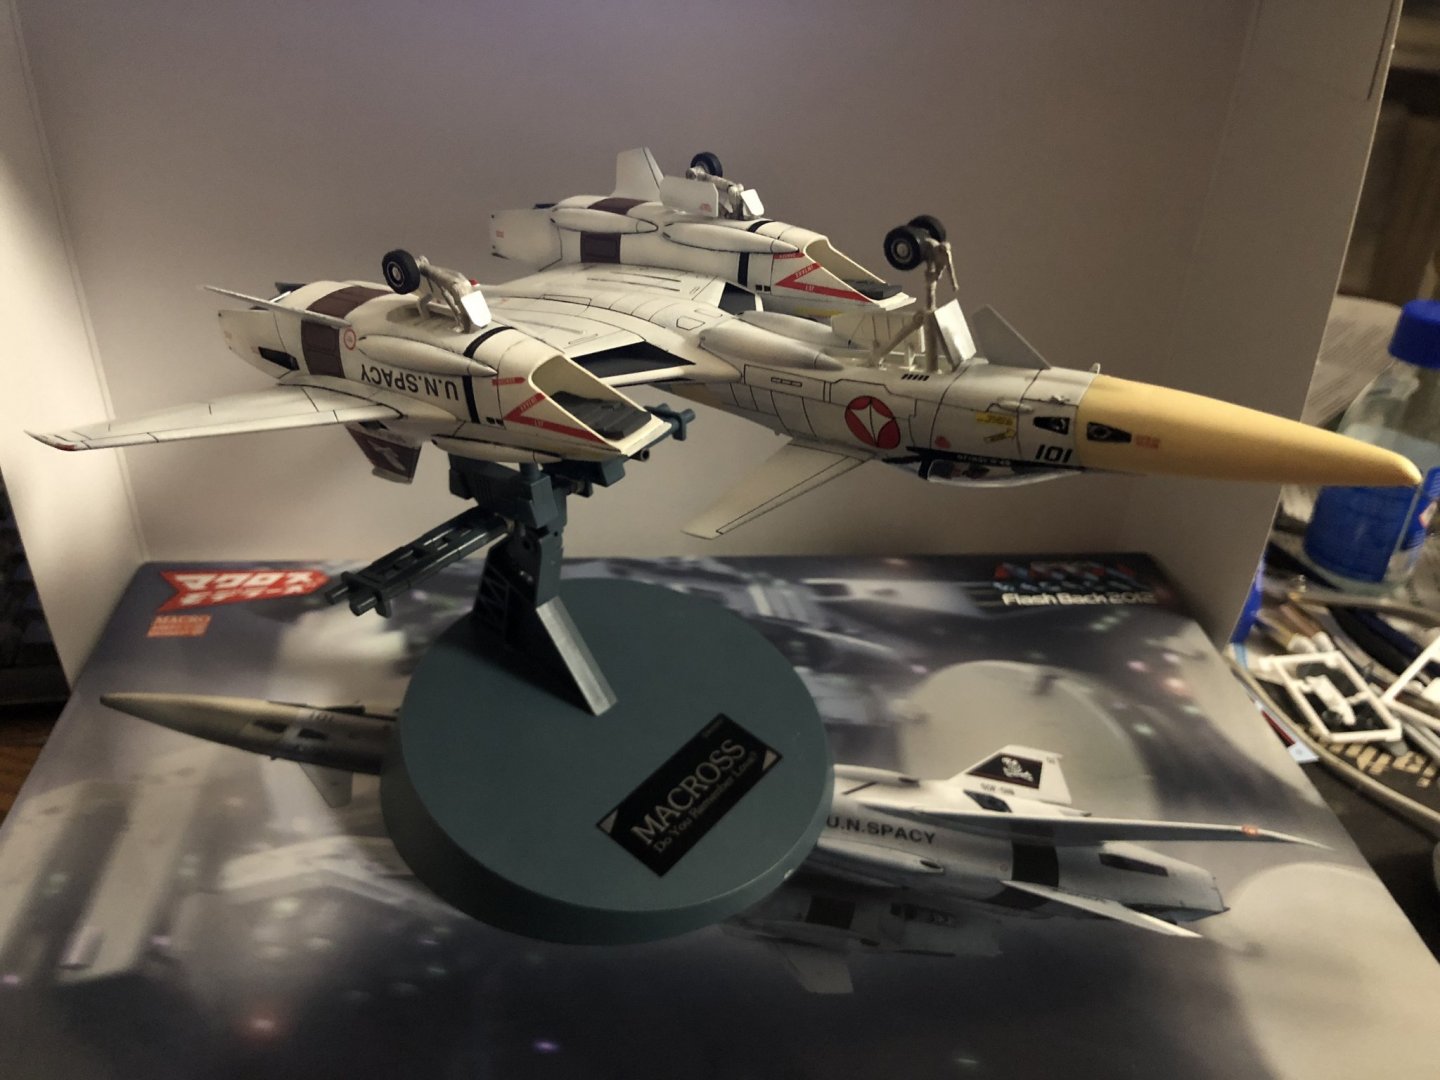
Here - one completed VF-4 WAVE kit. My initial thoughts on the kit were the quality issues: - thick panel lines that could fit a zentradi finger - inaccurate dimensions of the main body and wings BUT! - most of the parts were fitting together really nice except for some edges. Especially the weapon housing on both engines. I fixed this easily by cutting away a pin on both sides. In the end I am satisfied with the result.


-
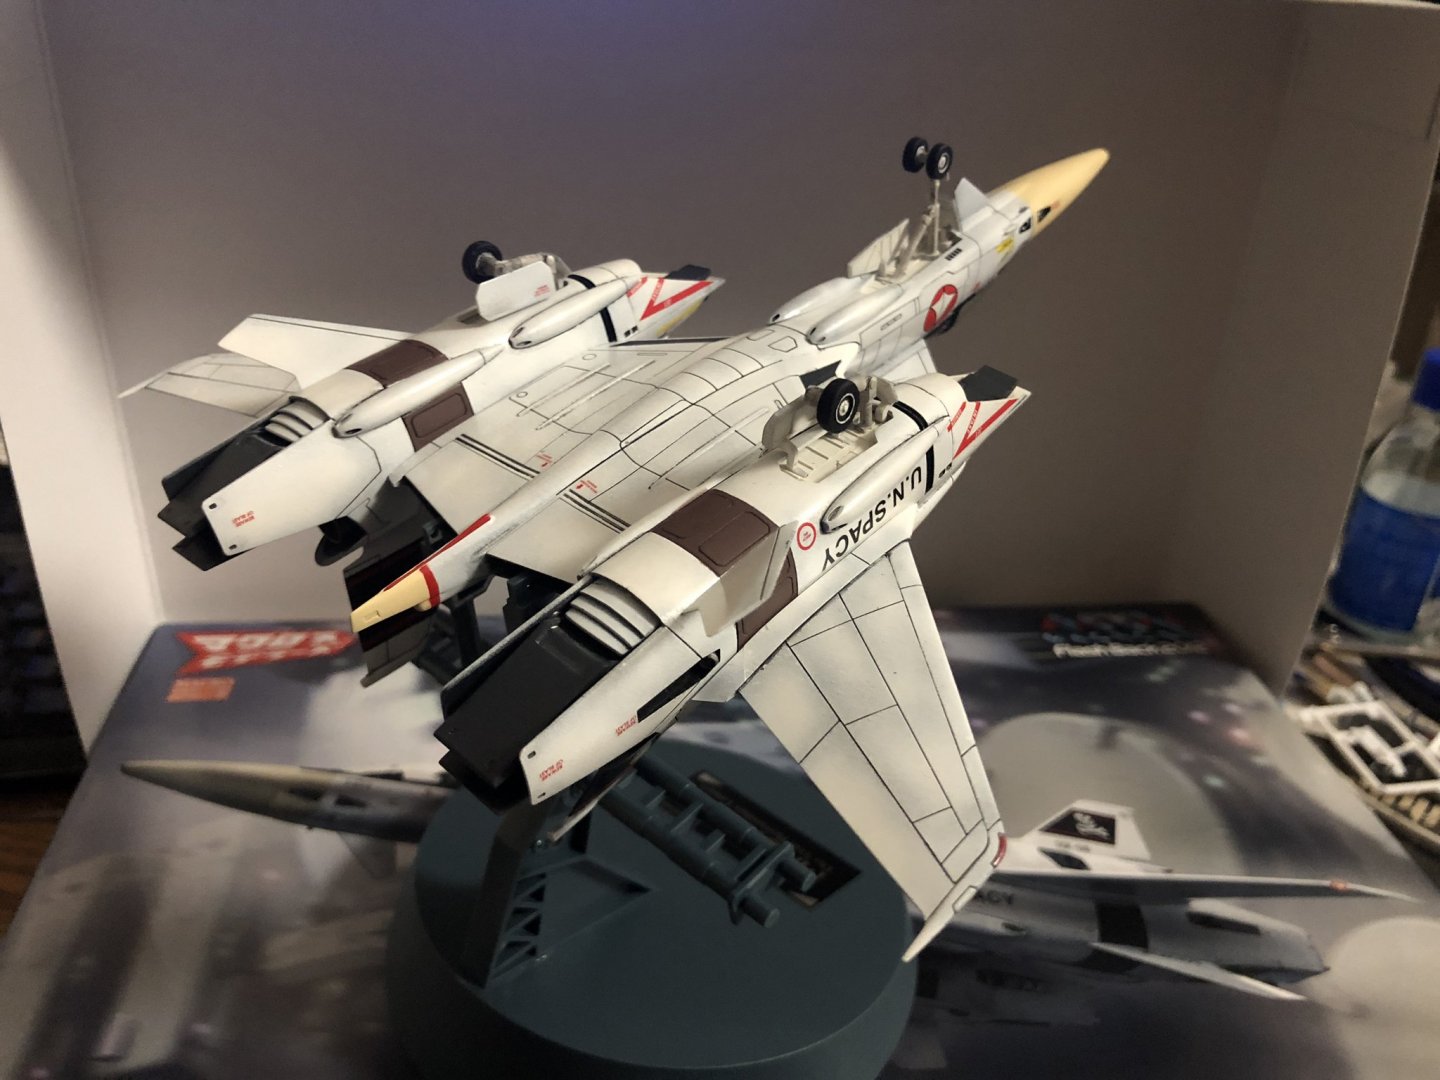
@arbit Great work on that Millenium Falcom cockpit! AWESOME! Yesterday I managed to finish my WAVE VF-4G Lightning III Let the pictures speak for themselves. The cool thing about this is that the Hasegawa Macross display stand works perfectly with the VF-4.
-
Thanks! Well ... I didn't really measure the ratio. I just put colors together and do it drop by drop until I have the right tone. I was using the following Revell colors: SM 374 - Light Grey SM 378 - Grey Glossy 30 - Orange Glossy 04 - White Additionally I used the following Humbrol Enamel Color Matt 42 - Violett


.jpeg.5fdf9f5b2b303e1a1492a60b384760e7.jpeg)
.jpeg.1073f22ef1c3c272a5782ddfd48464ee.jpeg)