

Urashiman
-
Posts
763 -
Joined
-
Last visited
Content Type
Profiles
Forums
Events
Gallery
Posts posted by Urashiman
-
-
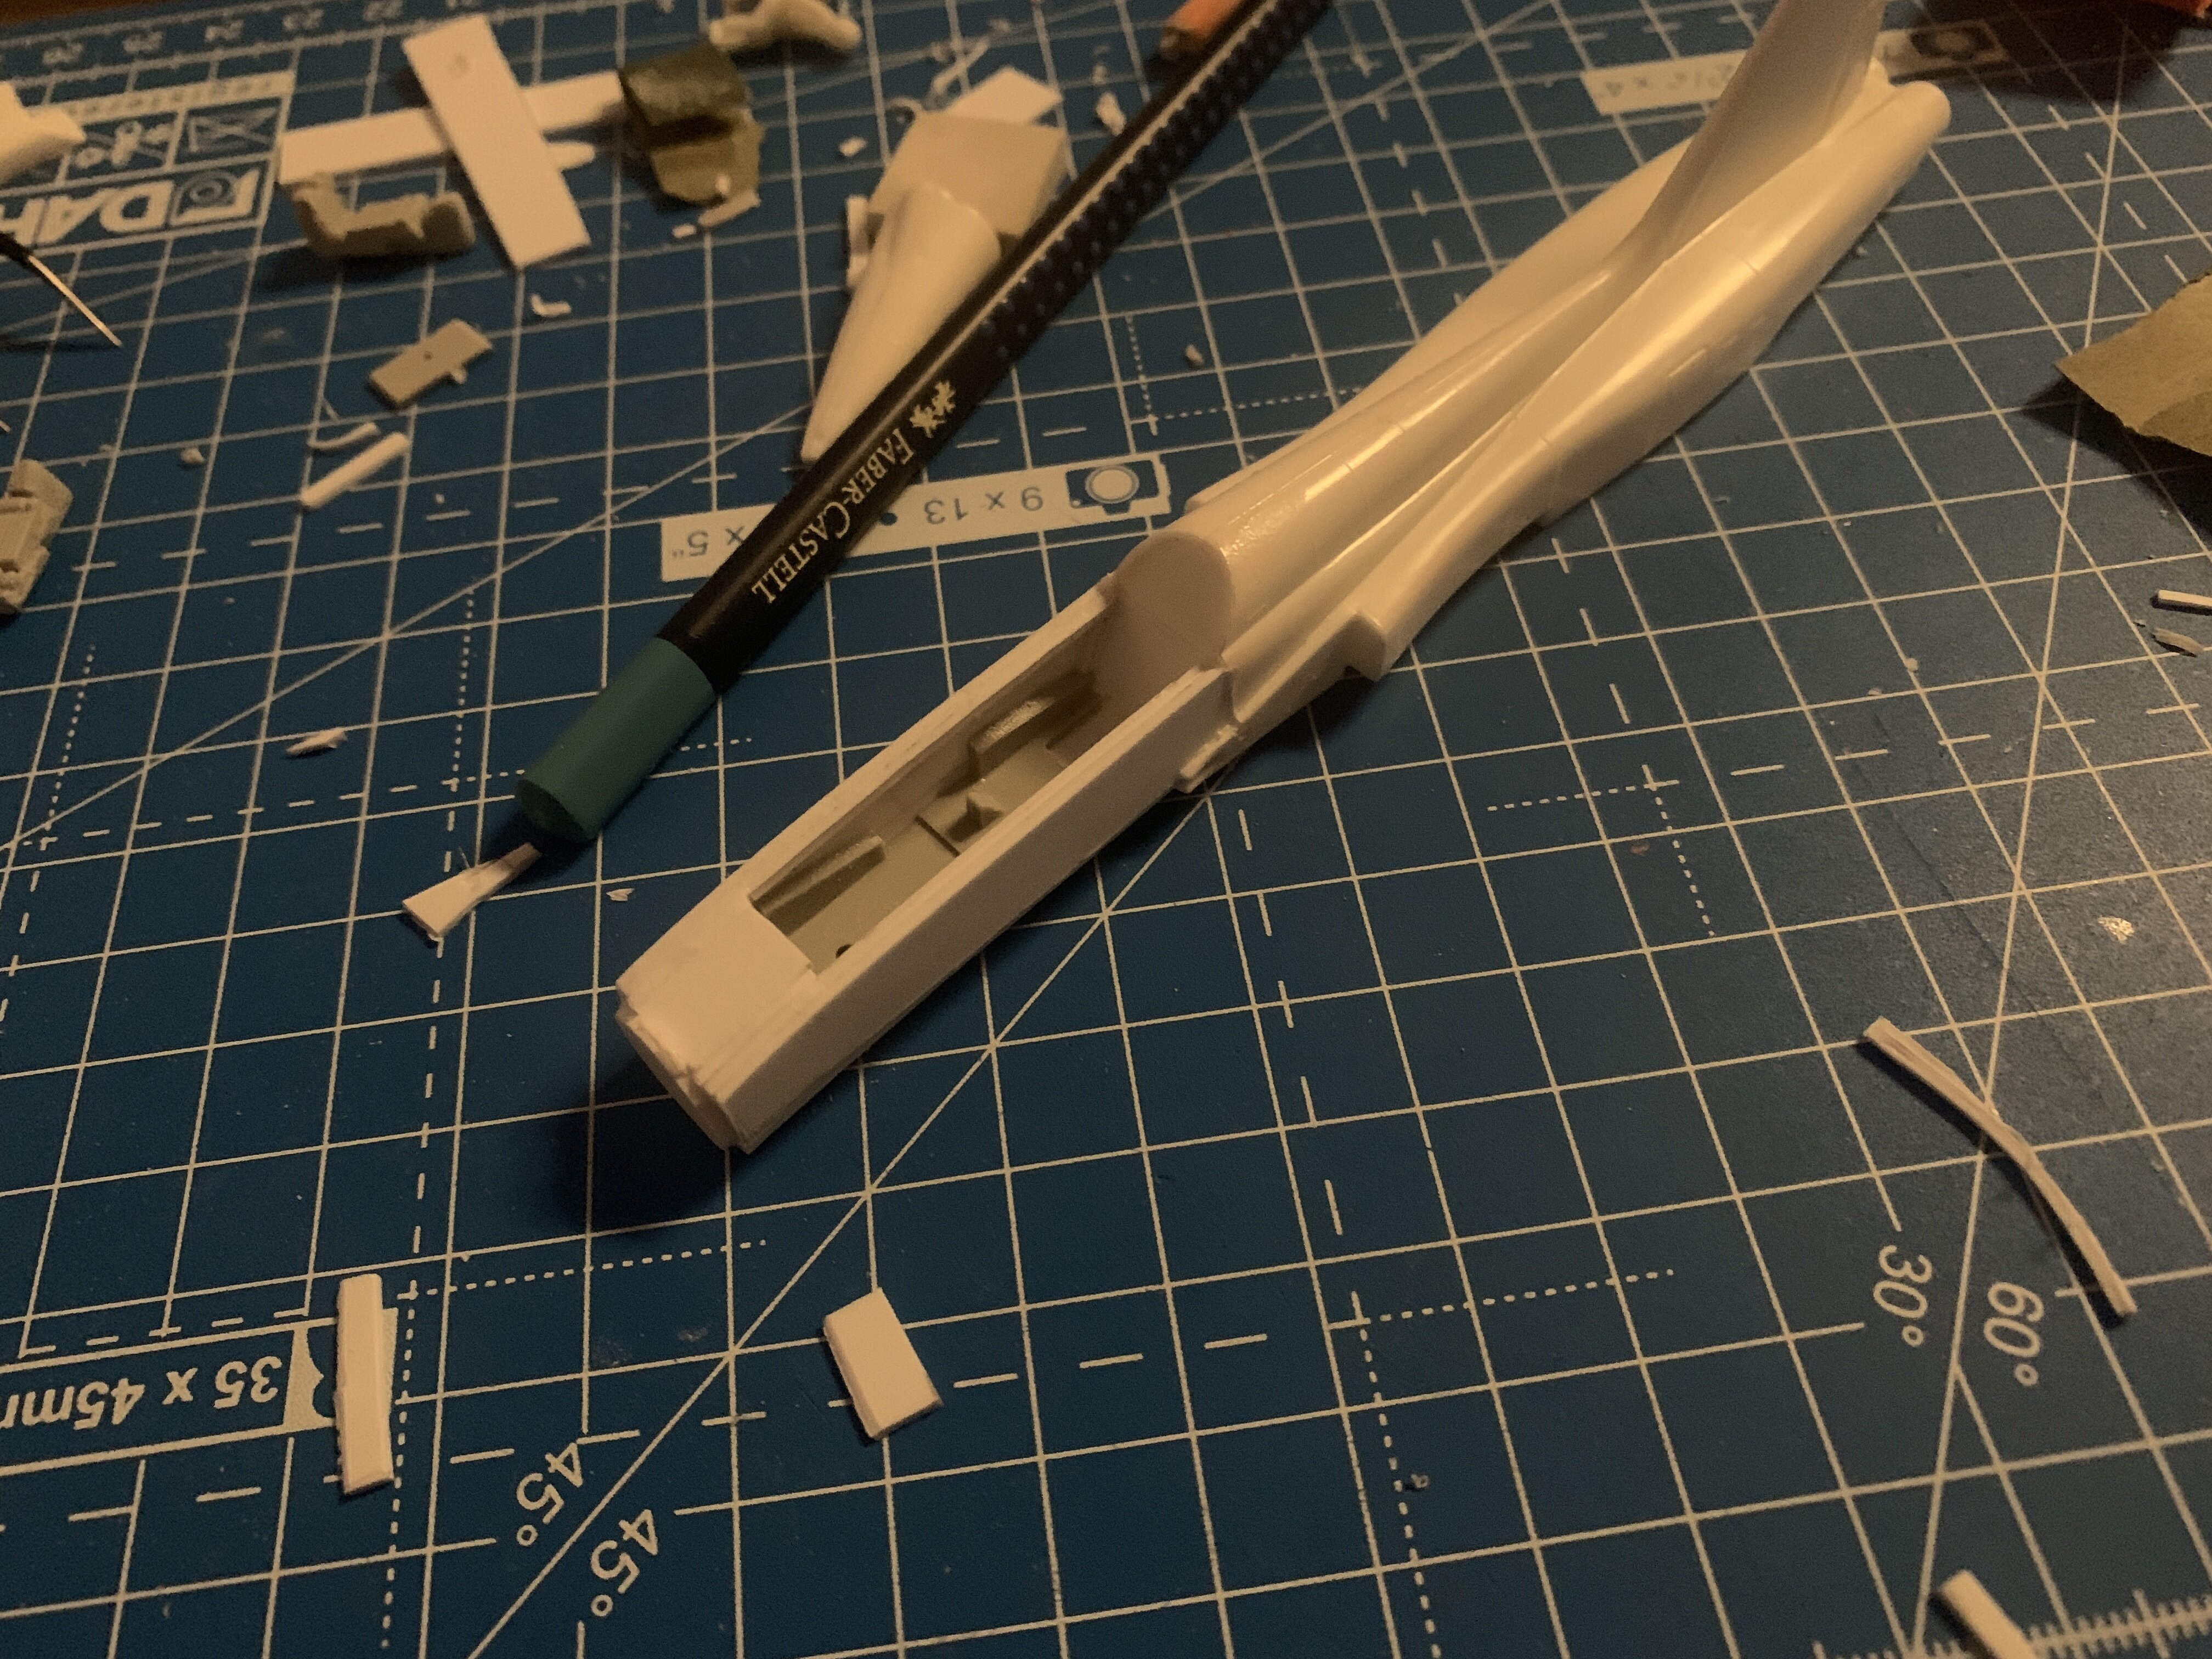
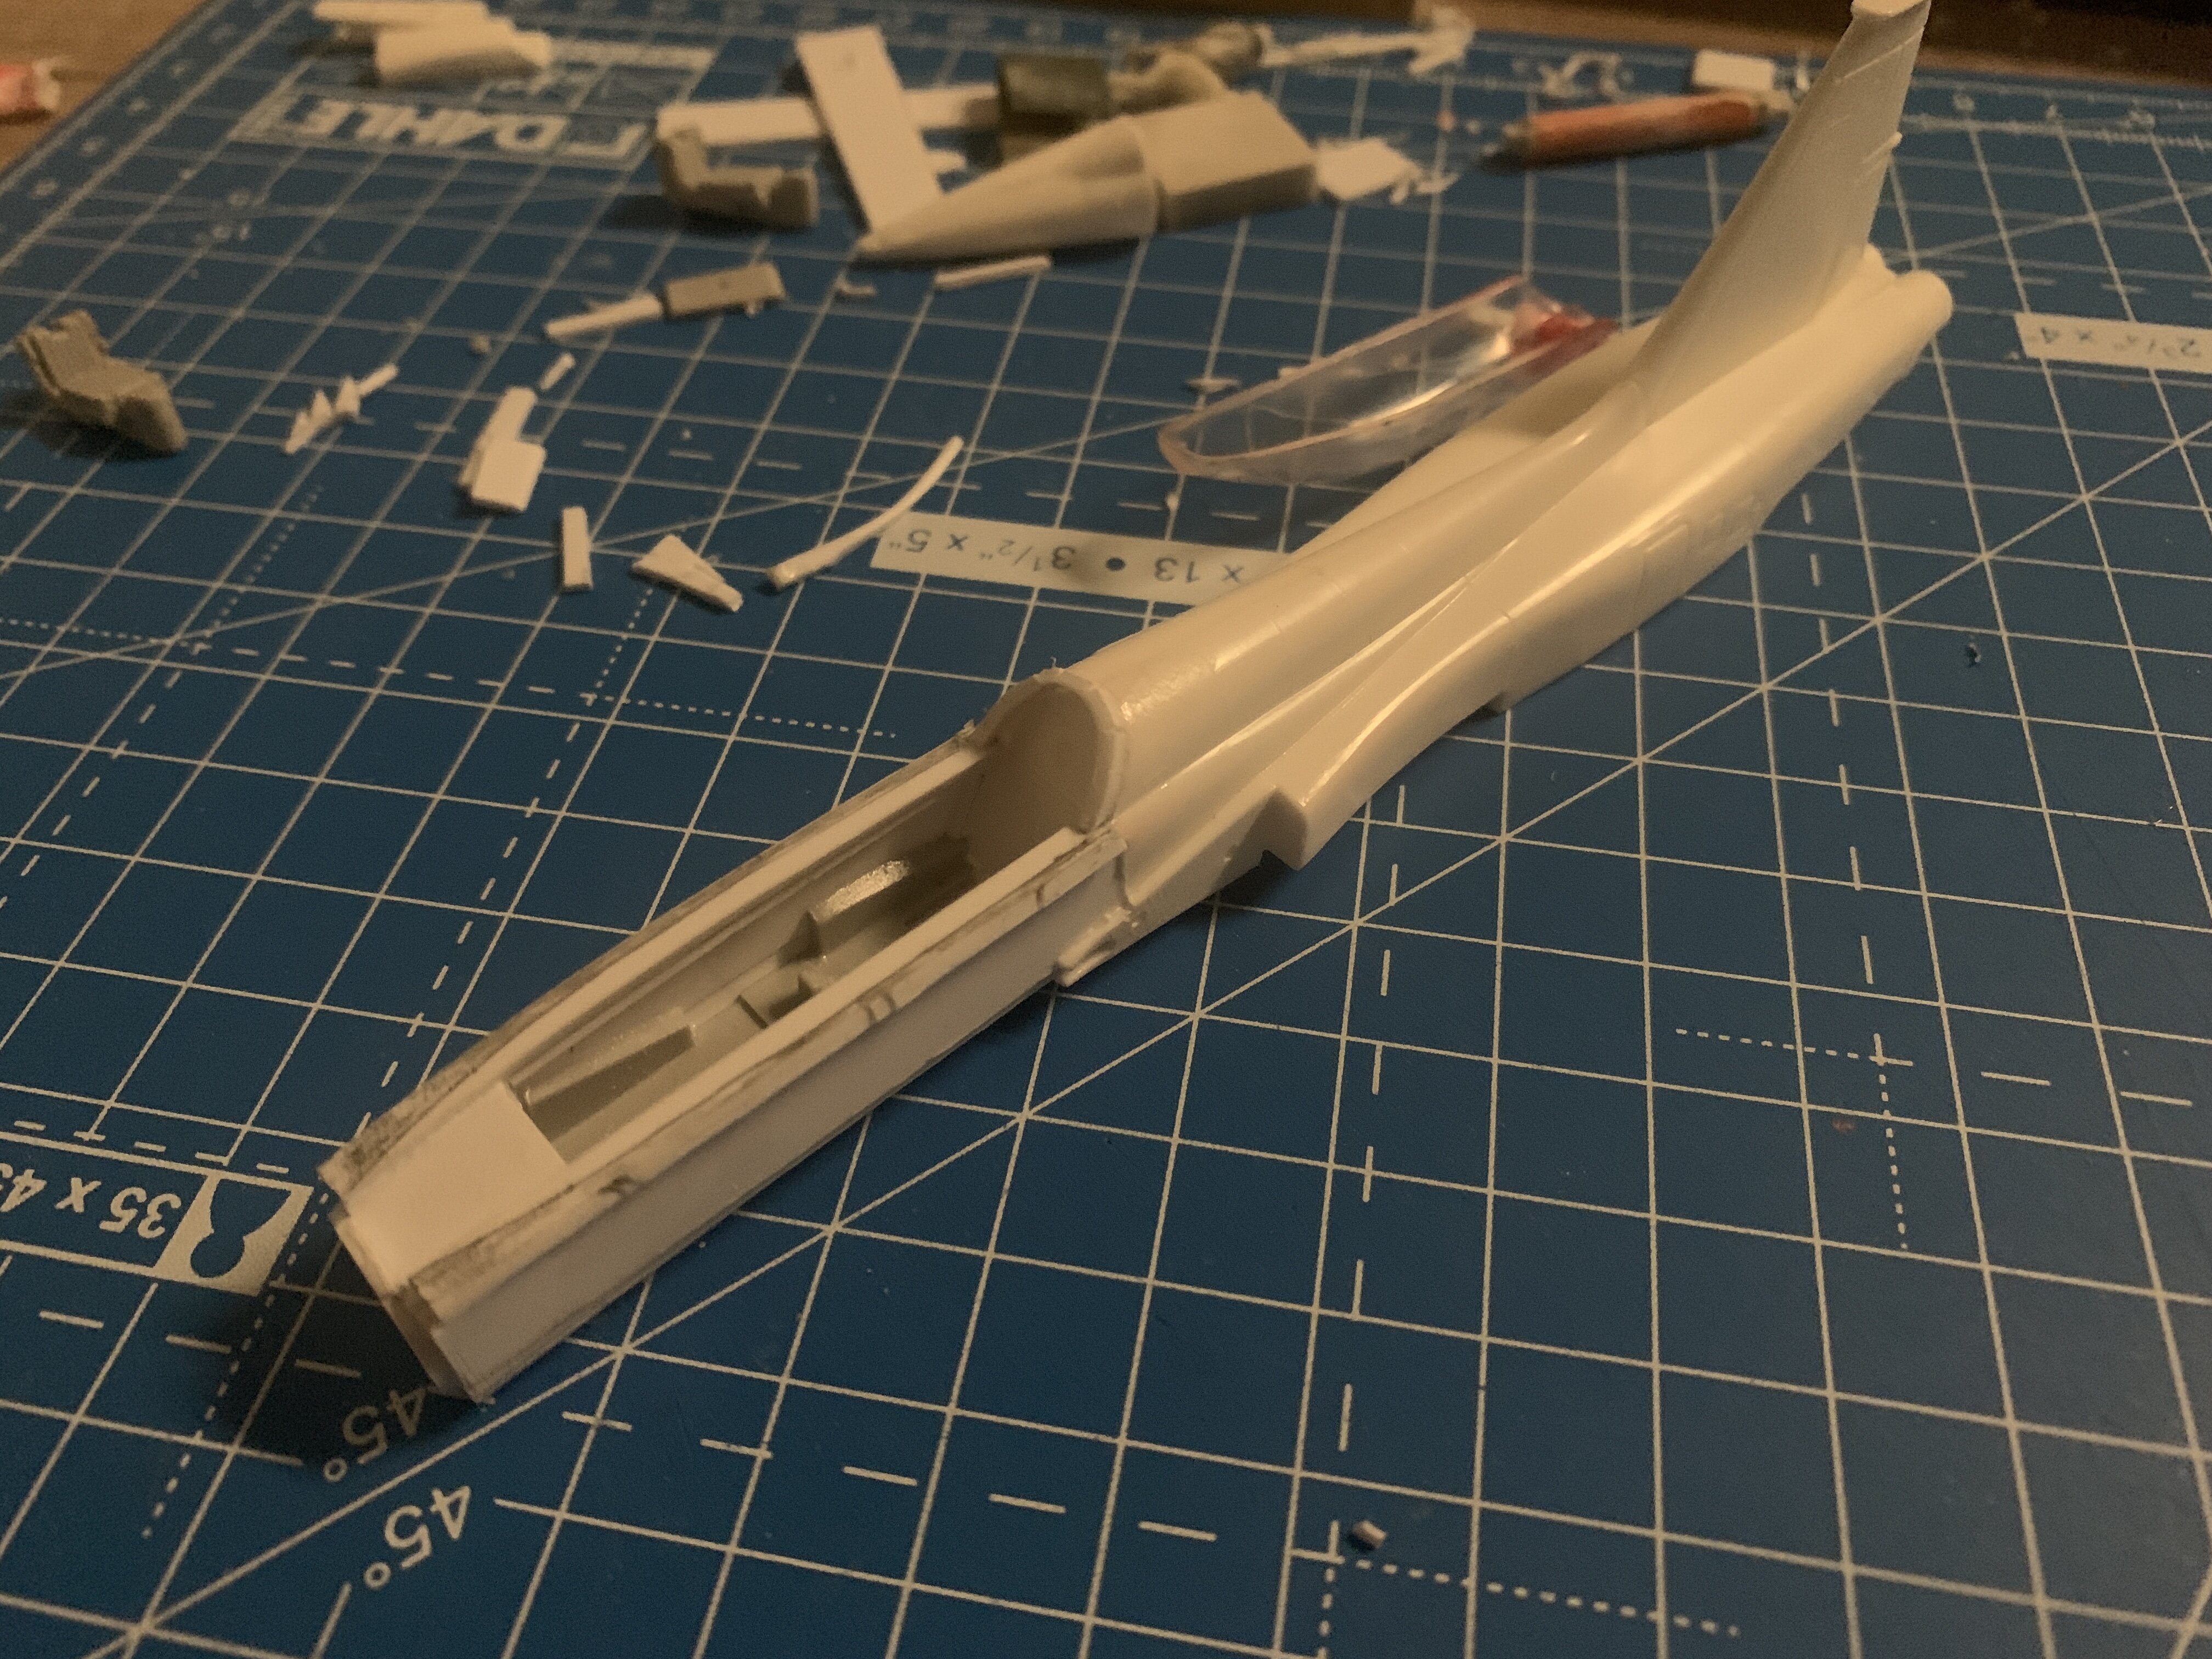
Okay, next phase on the F-5B cockpit section finished.
I’ll have to do a lot of sanding now, and then, the good old panel line scribing. YAY!
A bit better lighting today, so the “detail” is showing better.
-
59 minutes ago, MechTech said:
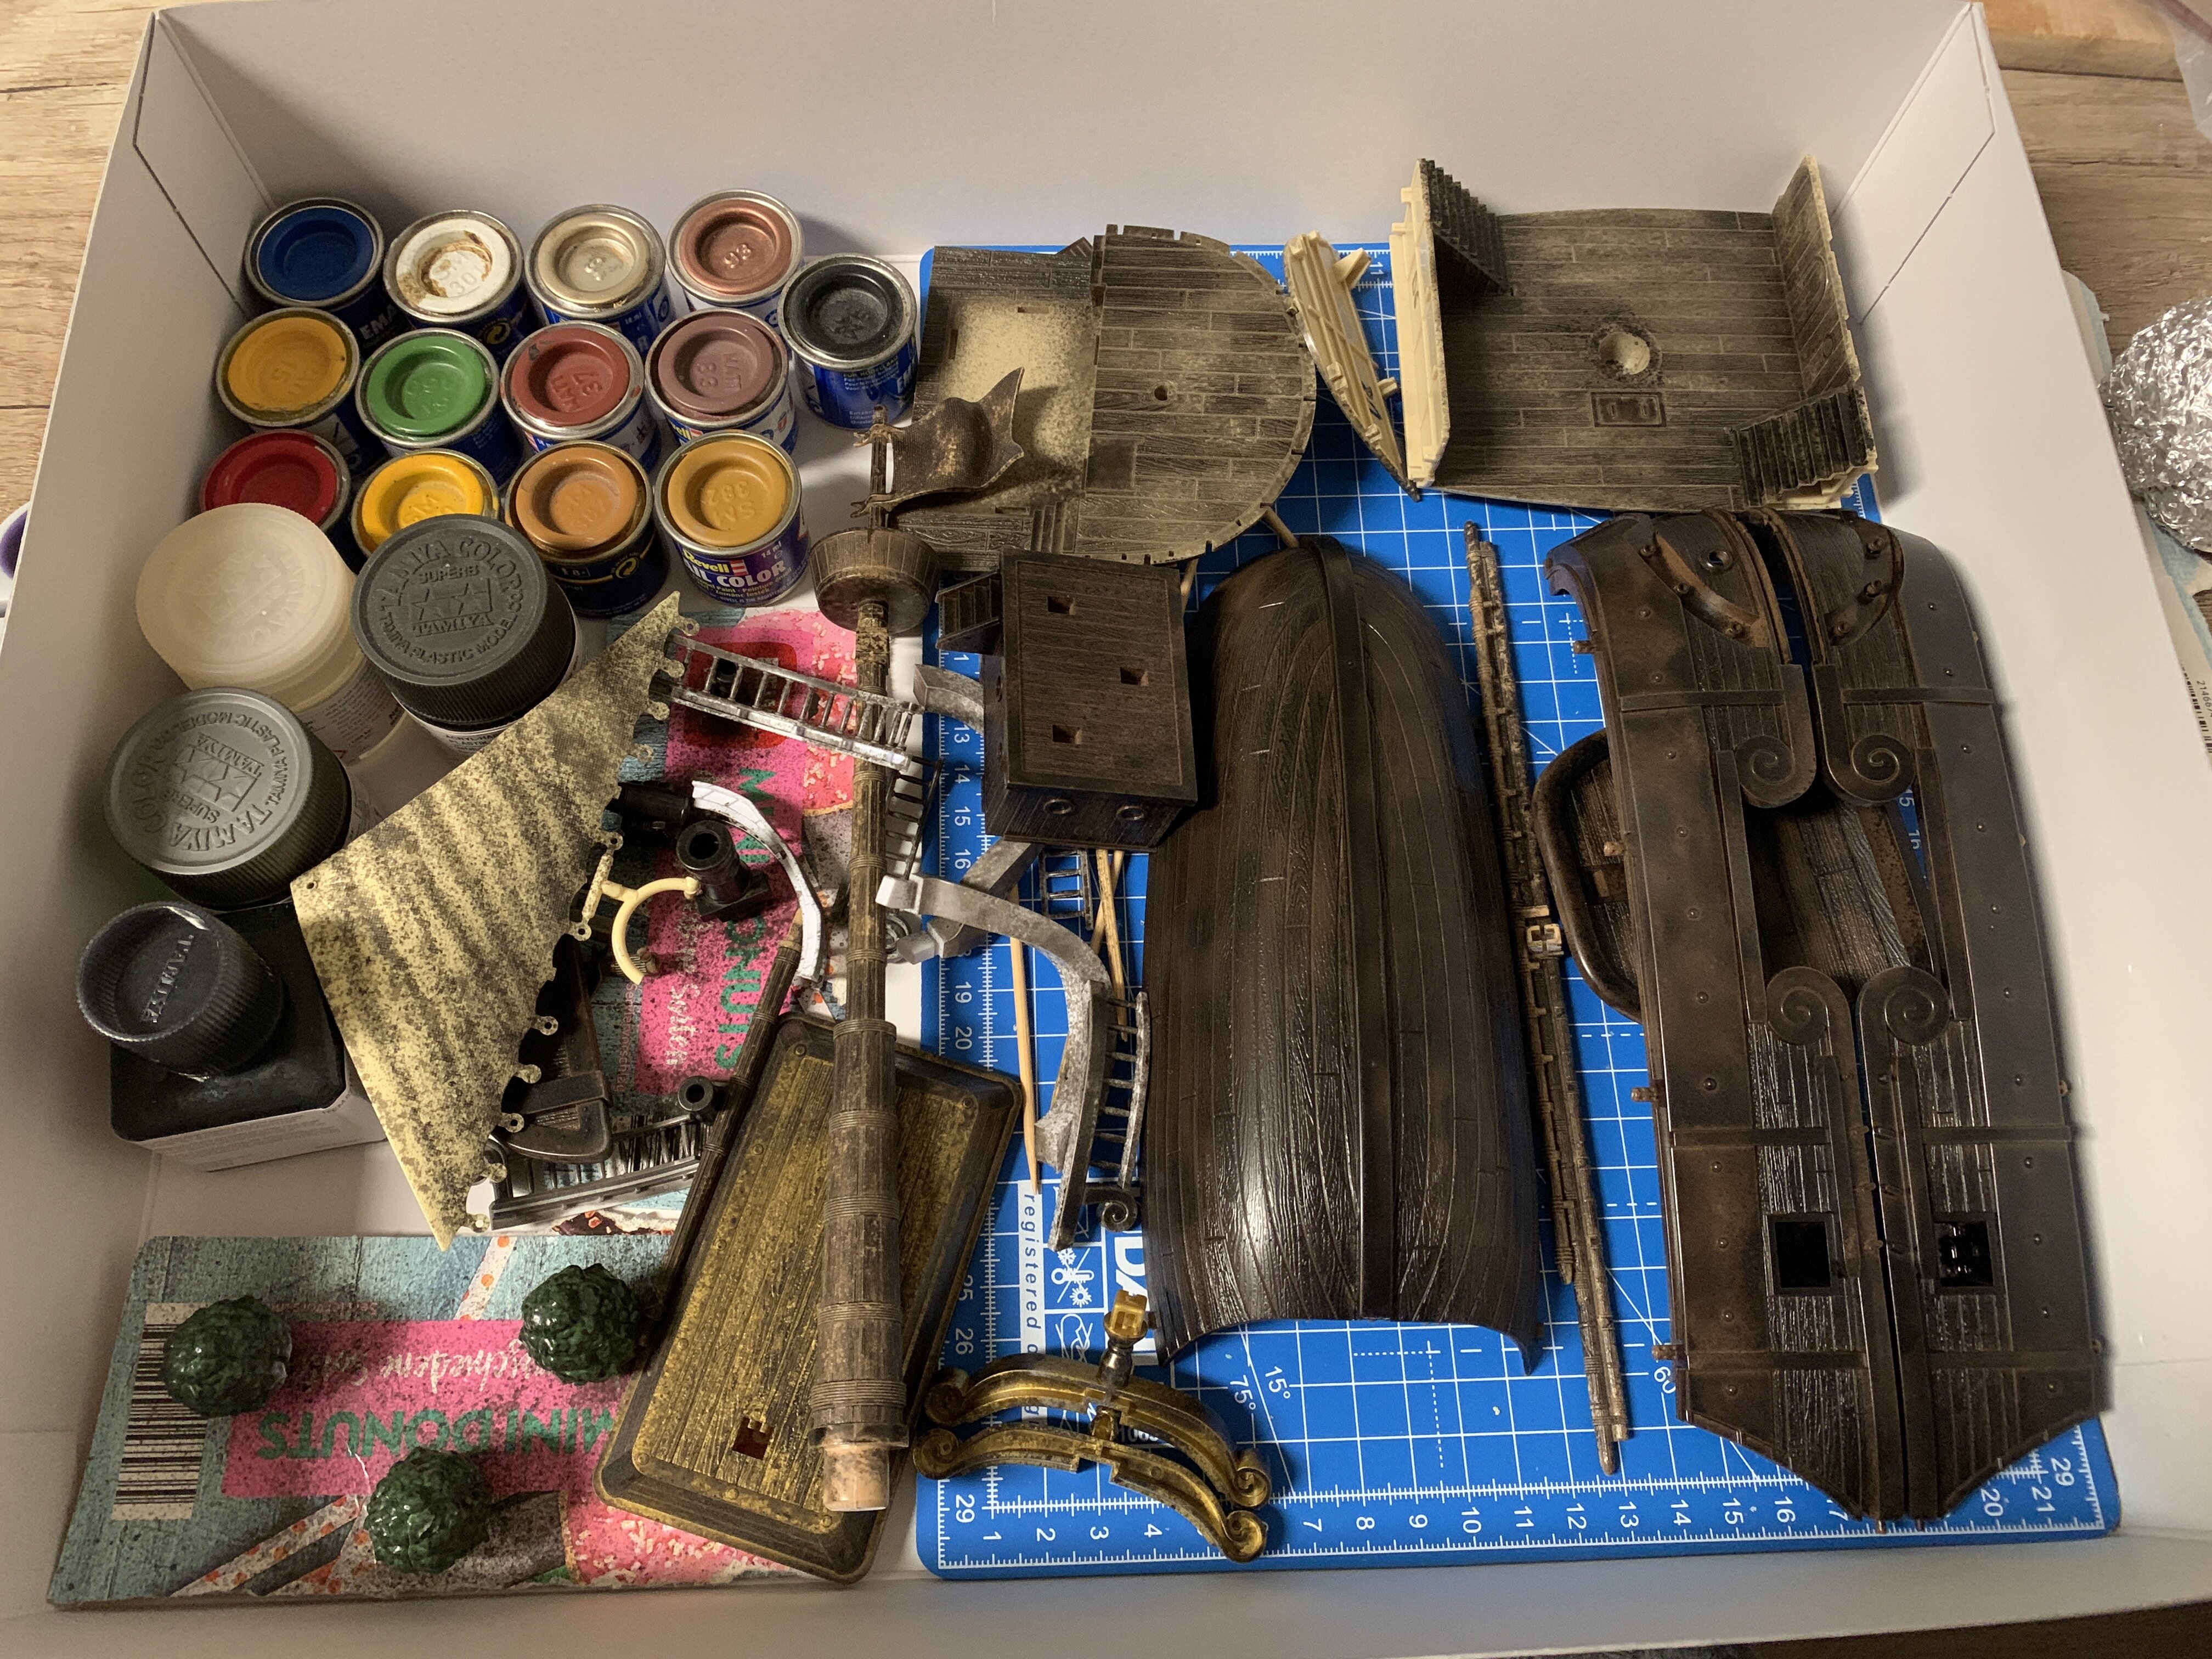
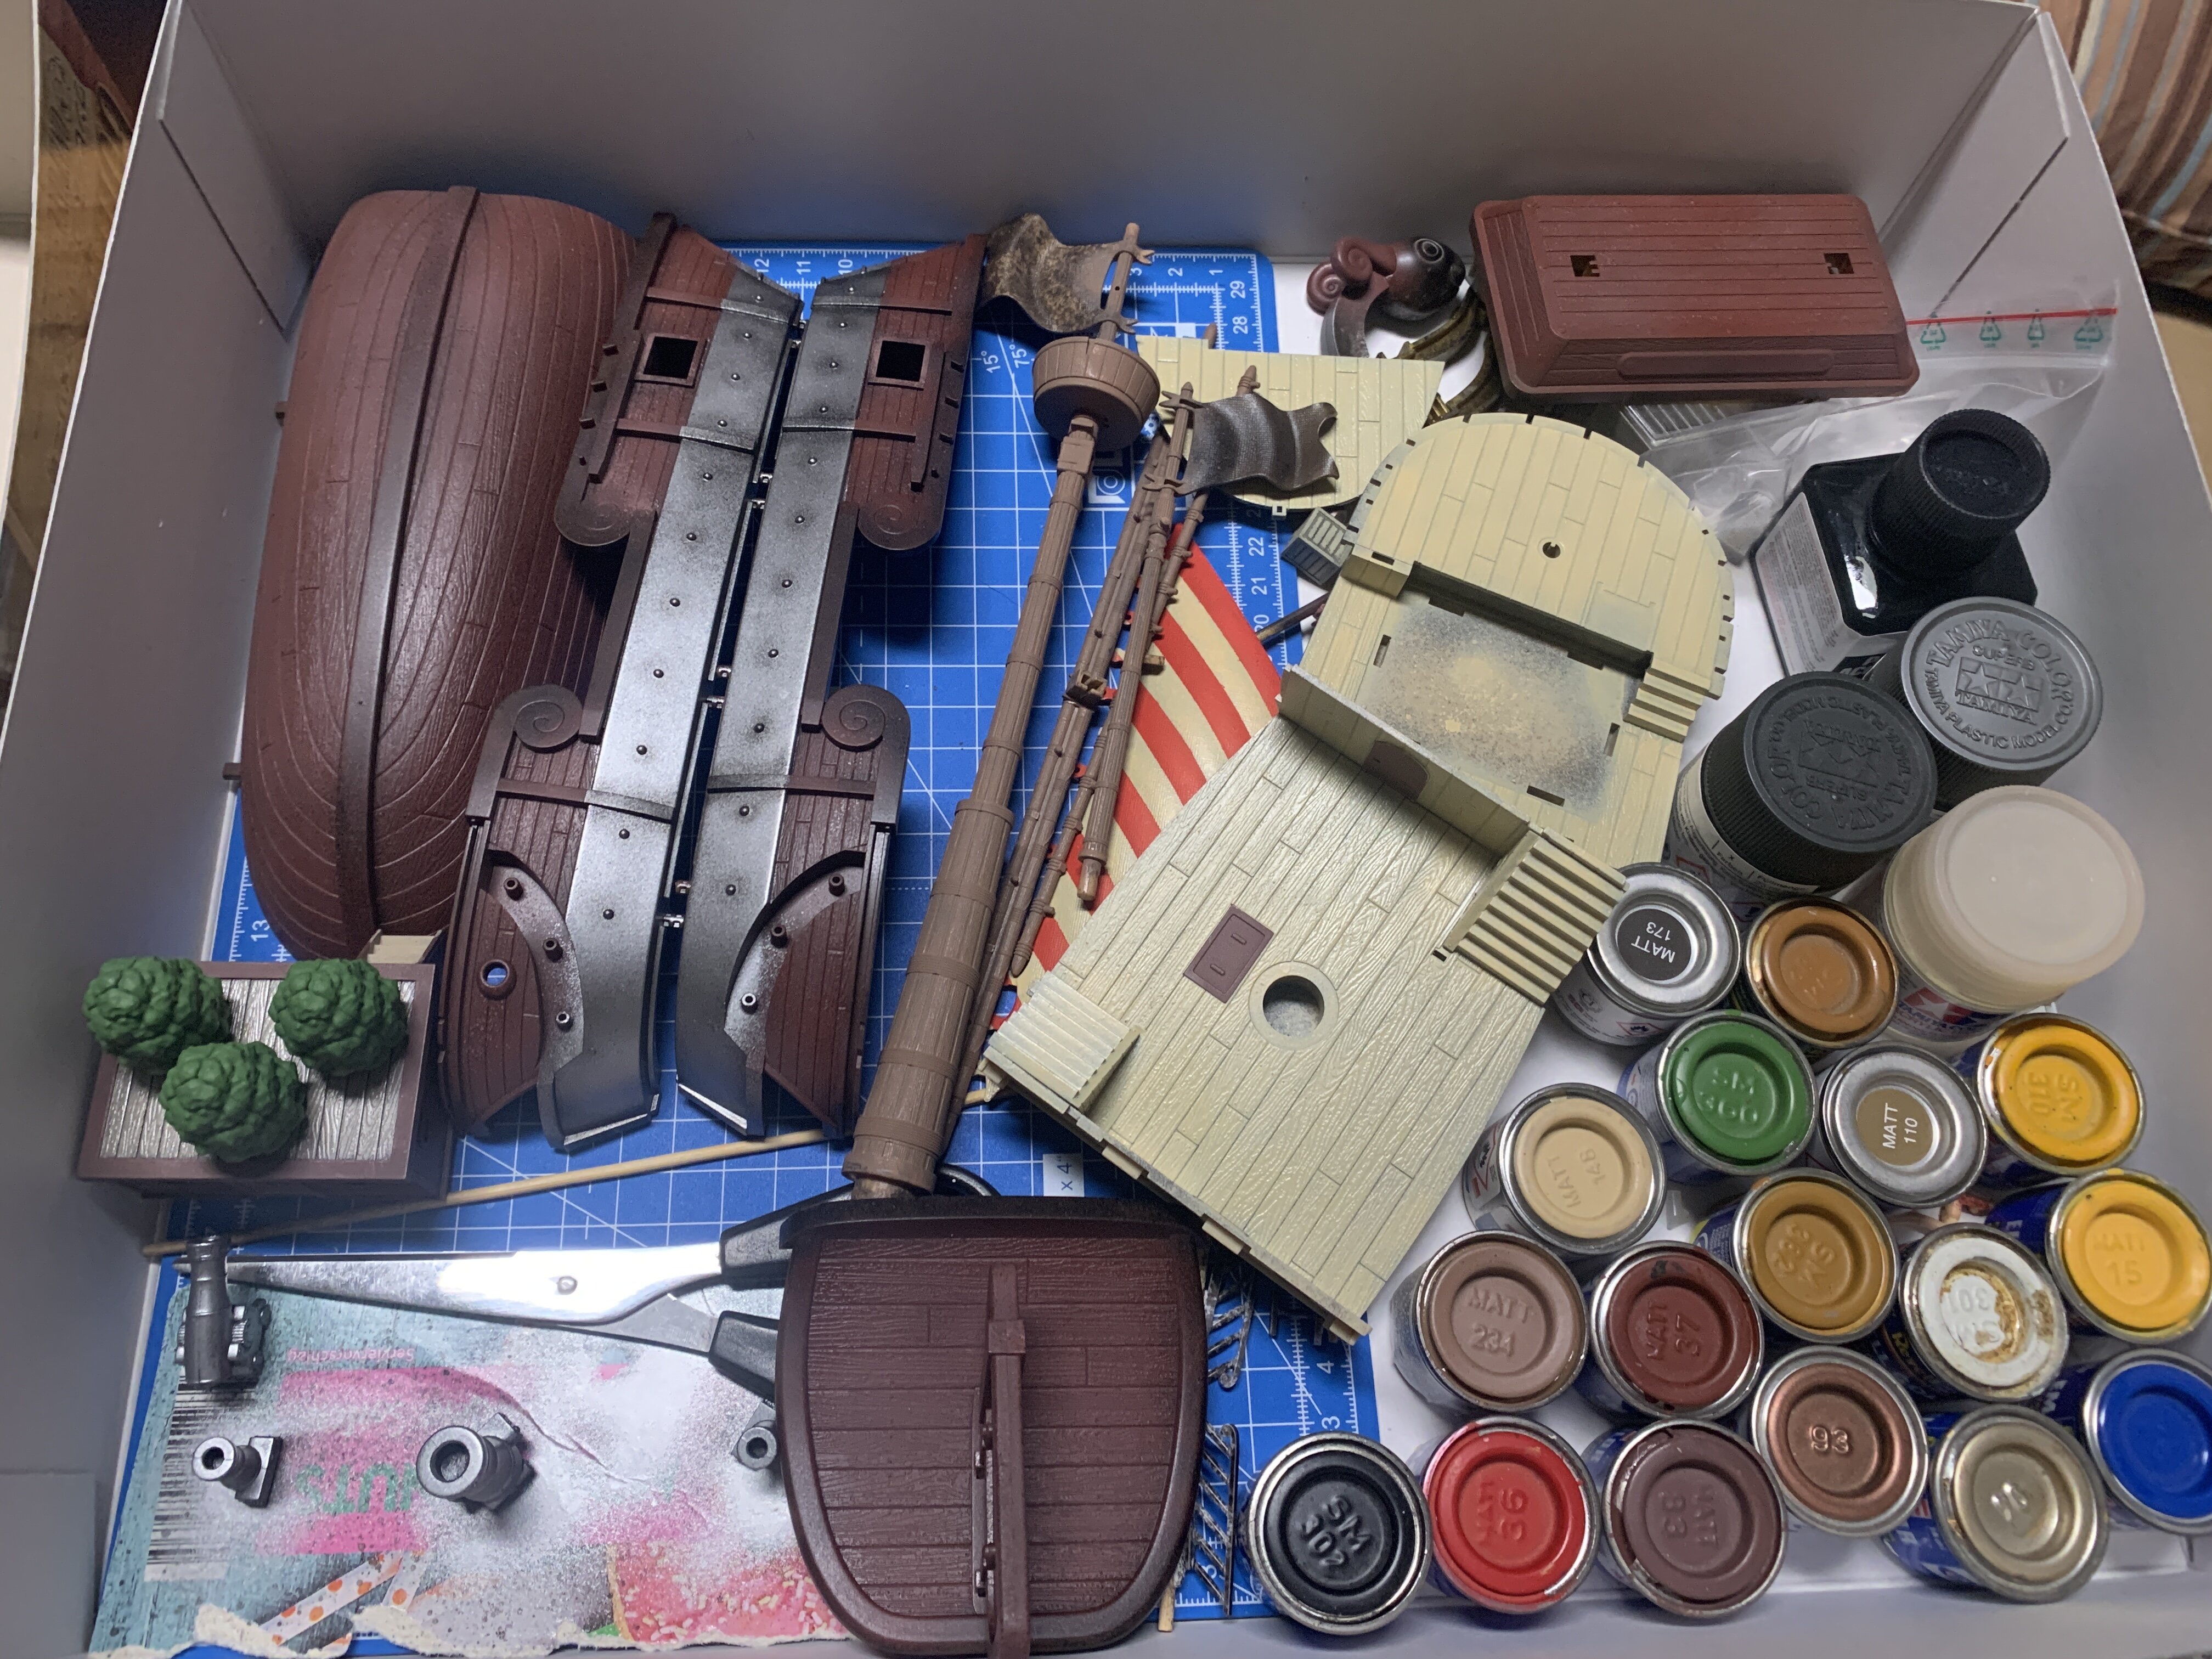
Hi everyone, I got some more work done over the past couple of weekends. Sorry for photo-bombing you guys with so many photos!
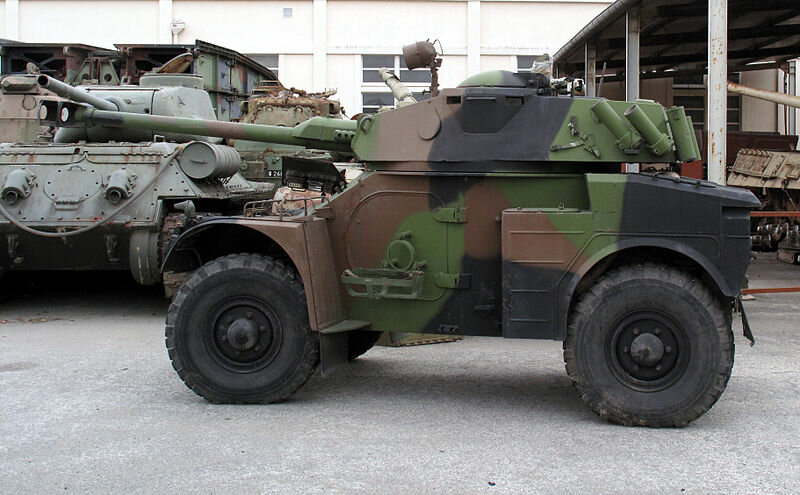
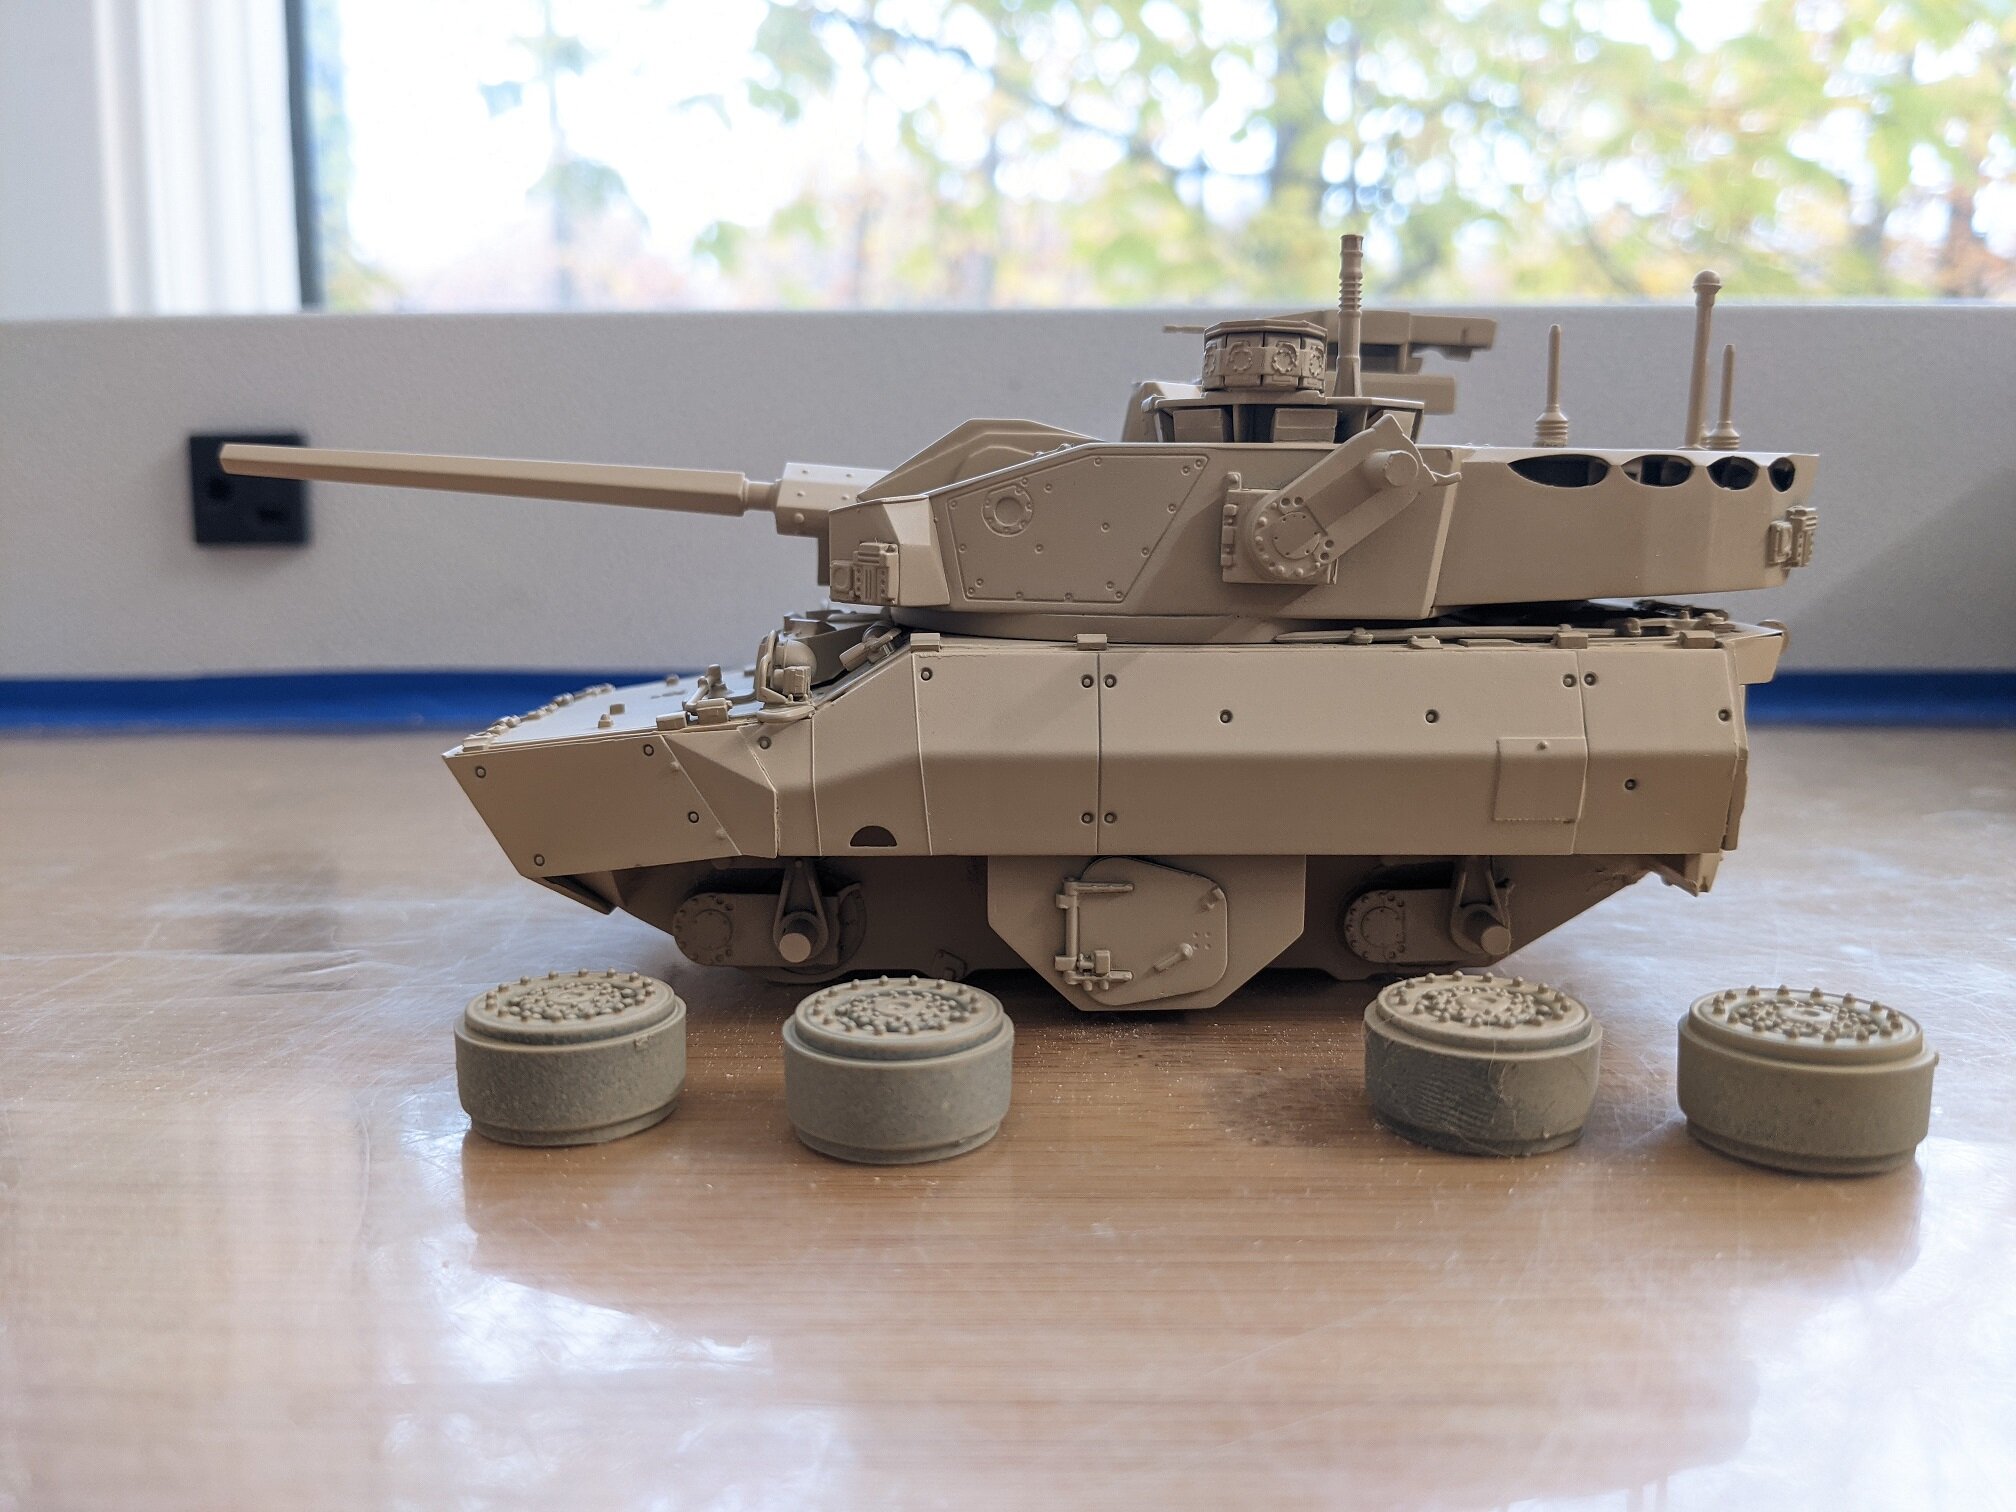
The armored car I'm modifying is based on the French Panhard AML-90 (below). I modernized it a bit. You can see where the over-sized turret comes from.
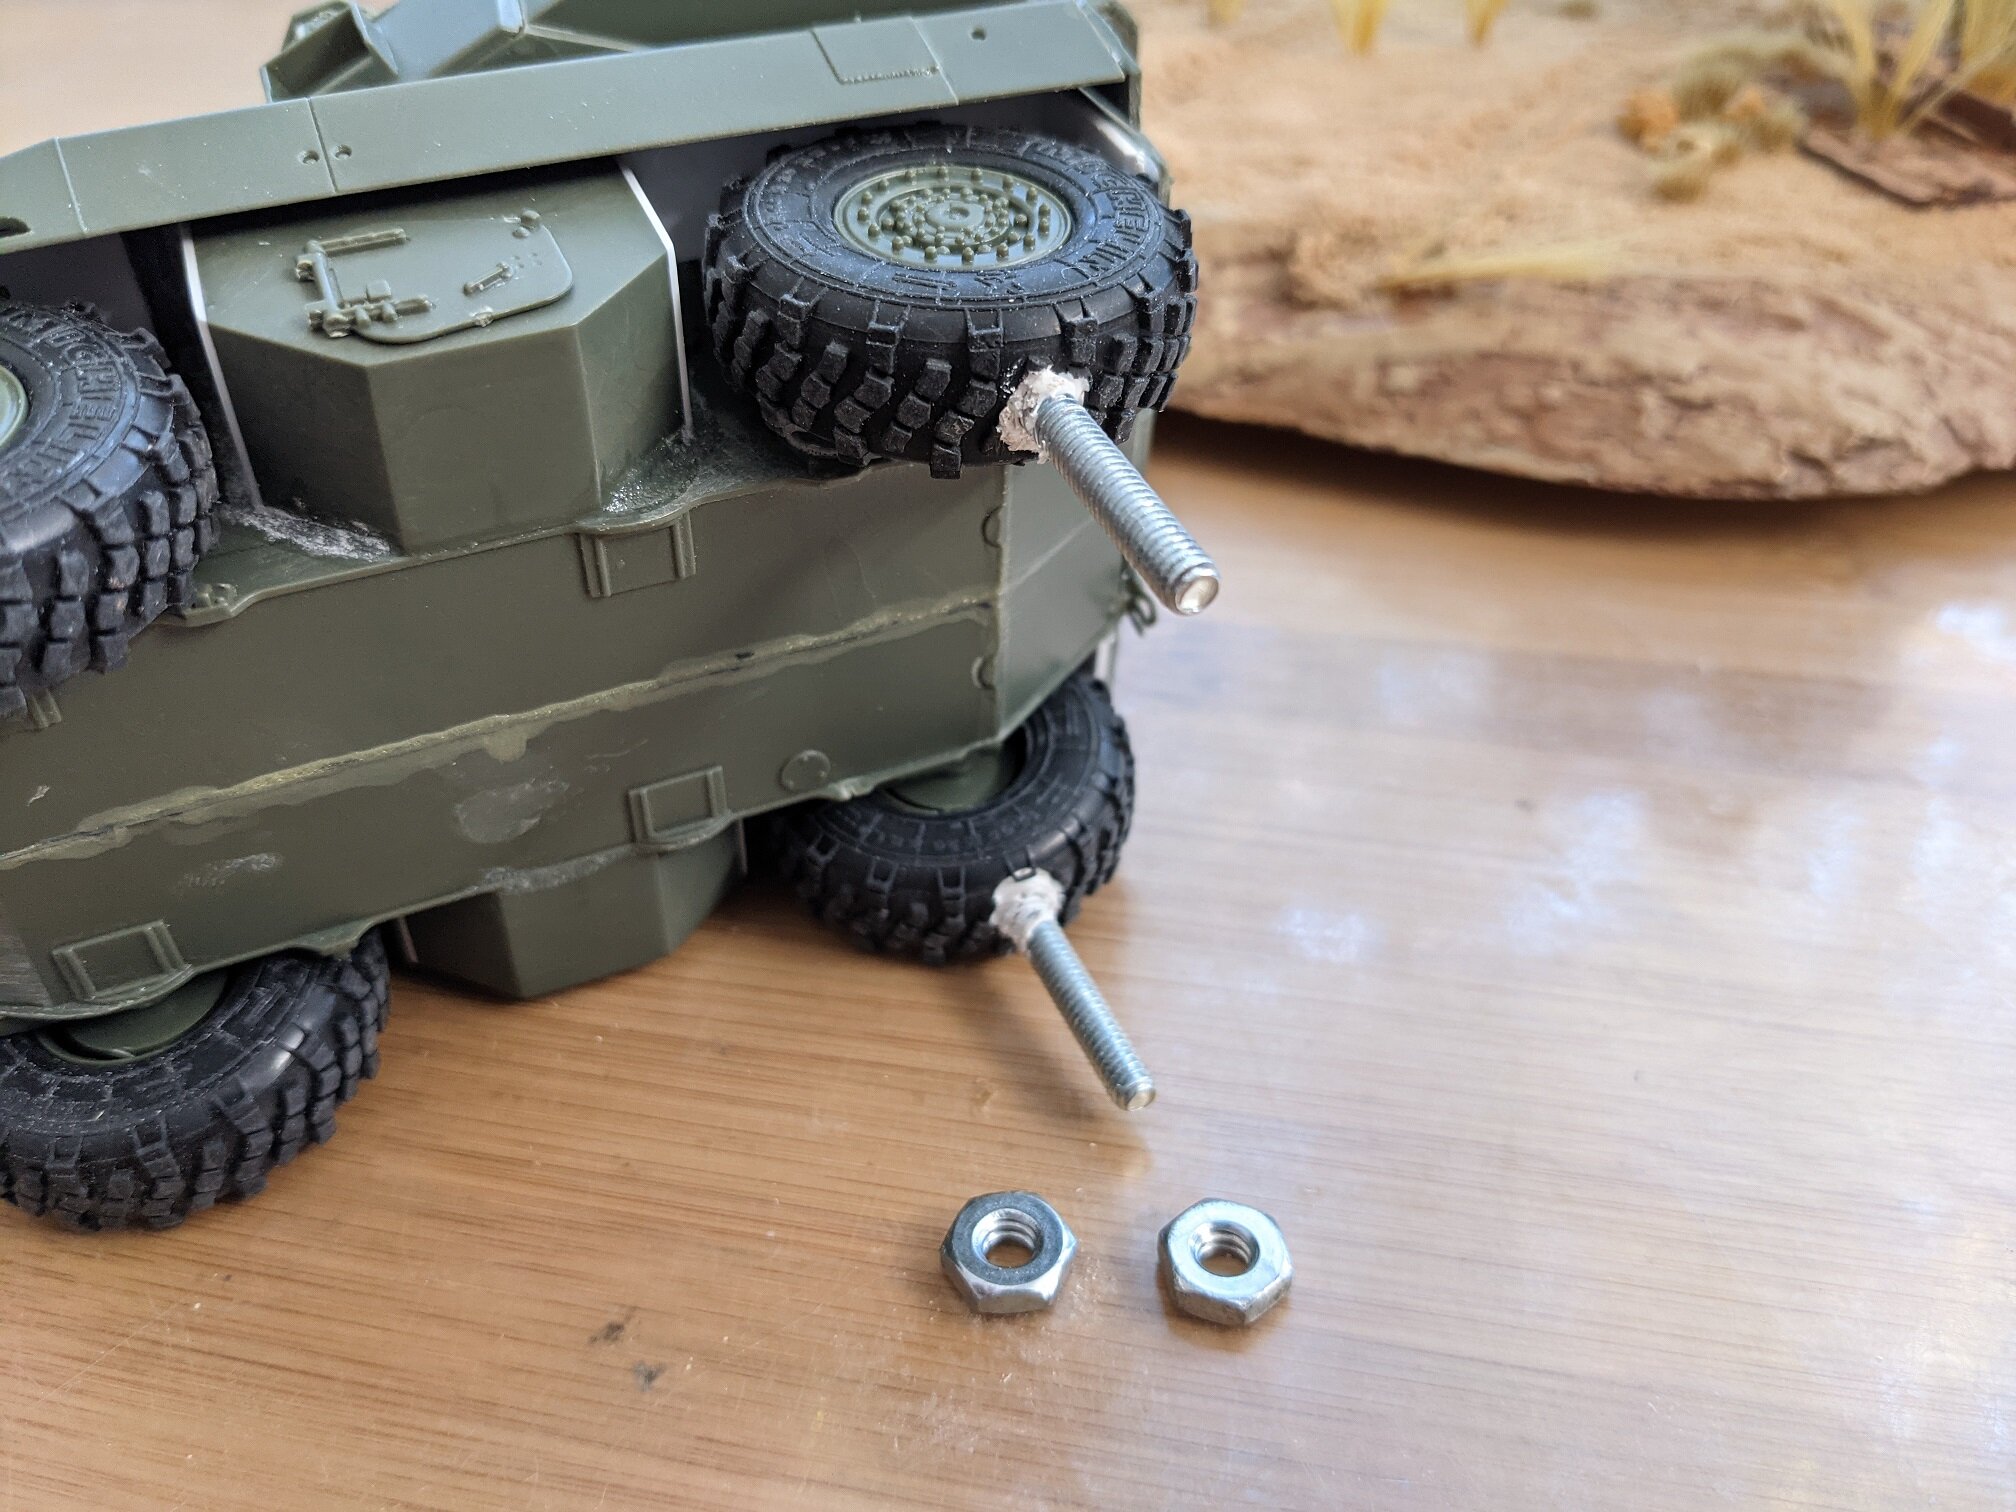
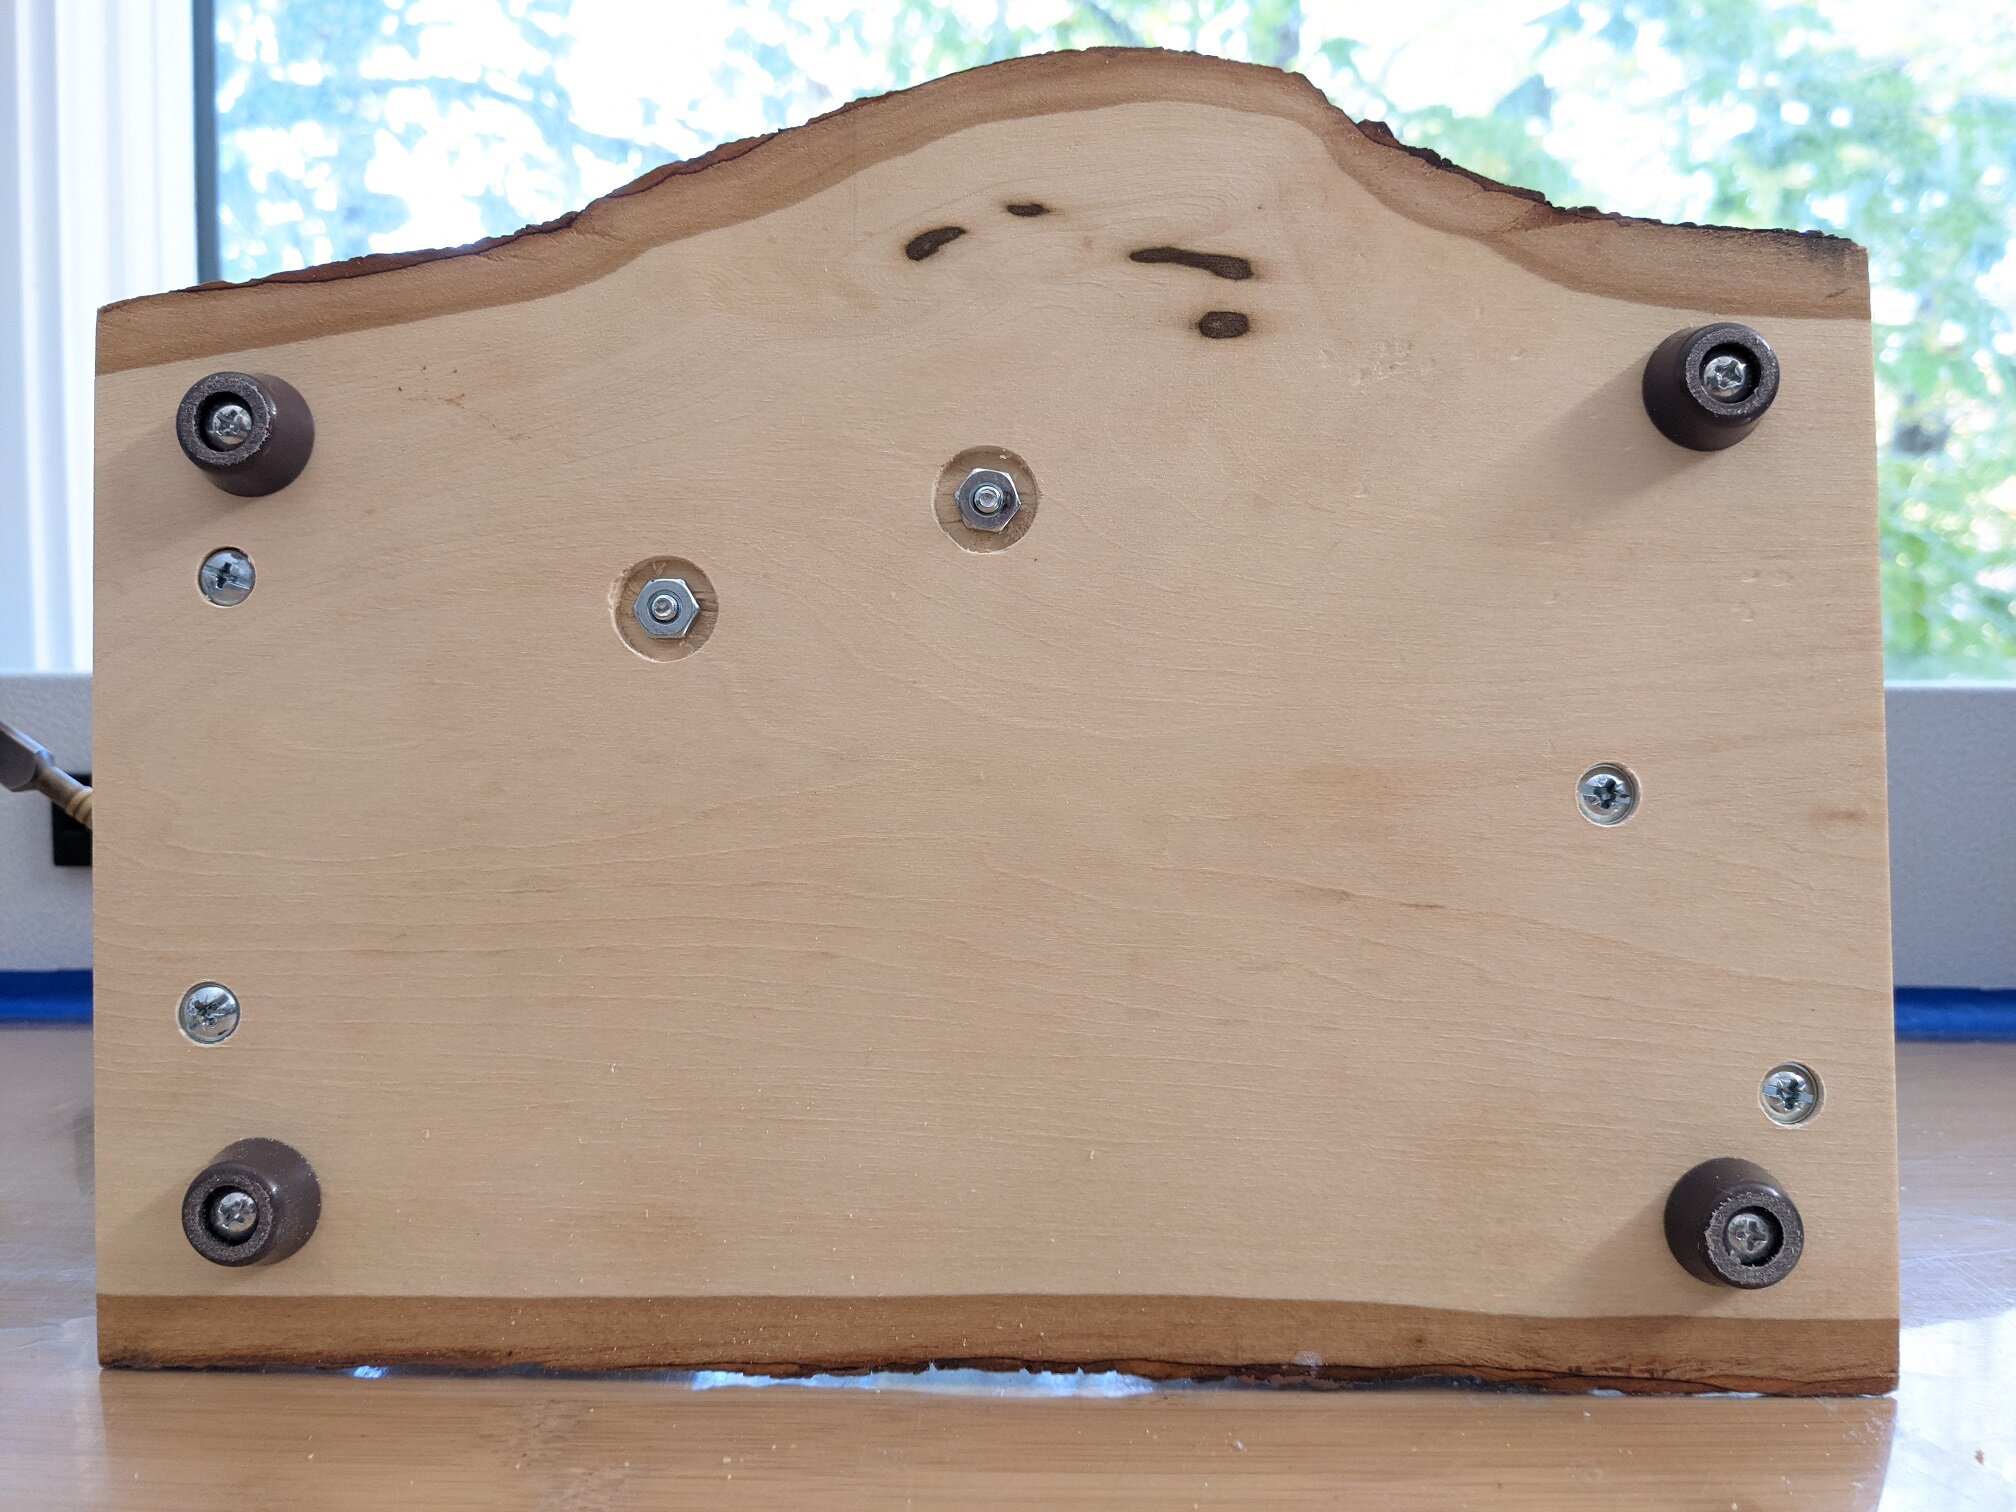
Normal people remove screws from their tires and plug the hole. I punched a hole and glued some hanging out! These are what will hold the model to the base. I used silicone RTV to glue them in place.
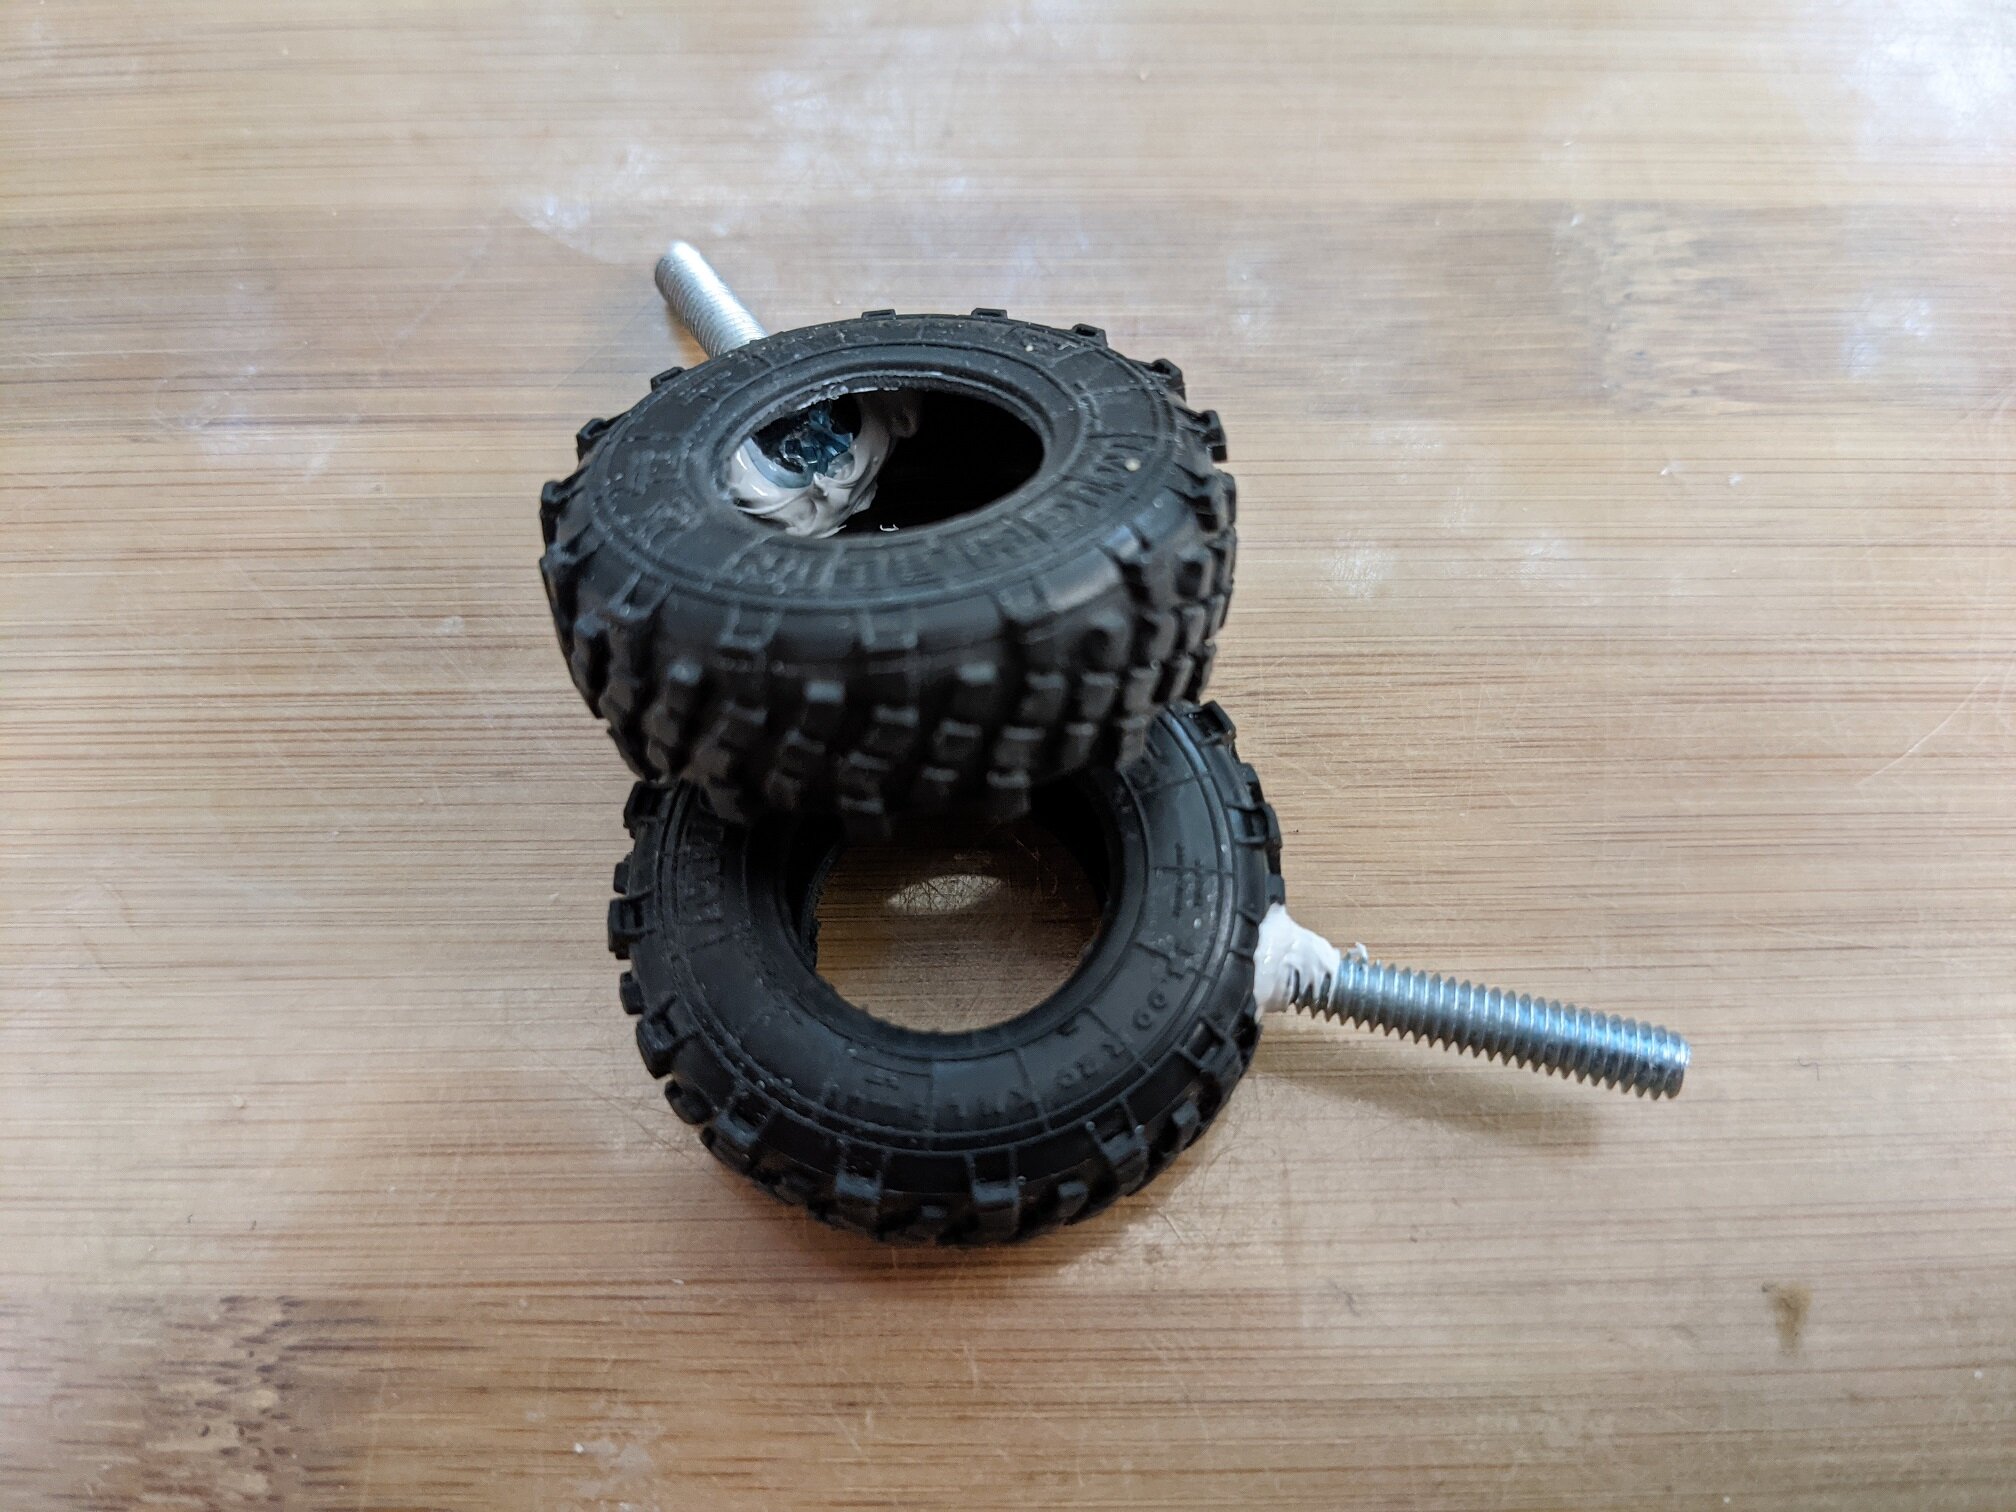
Here's the completed tires and base with screw heads underneath.
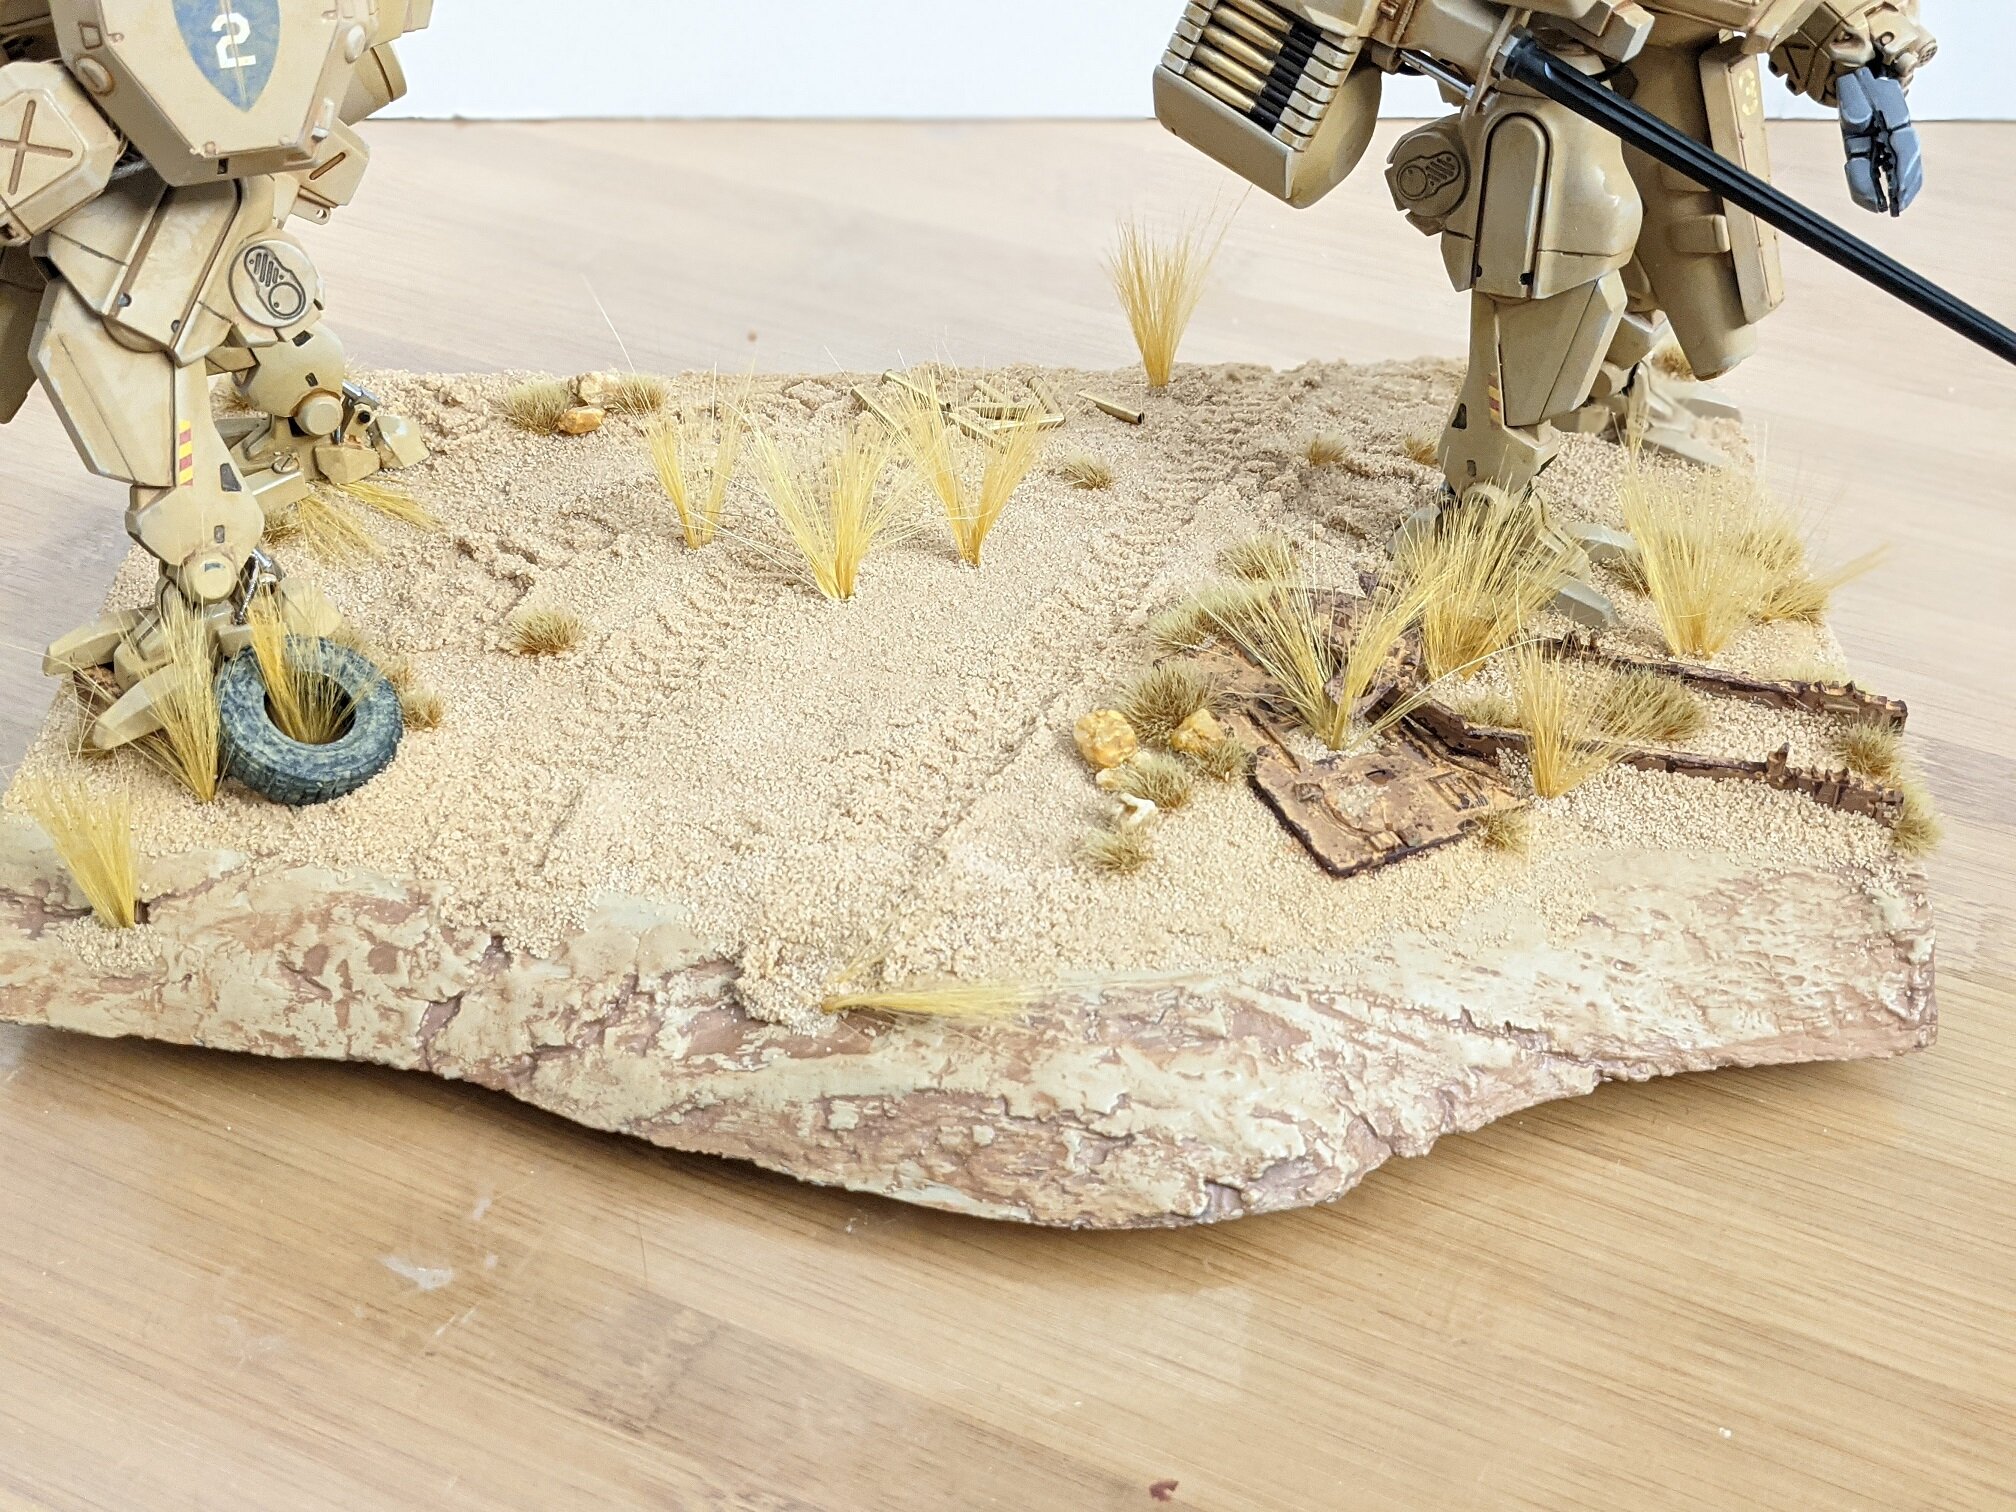
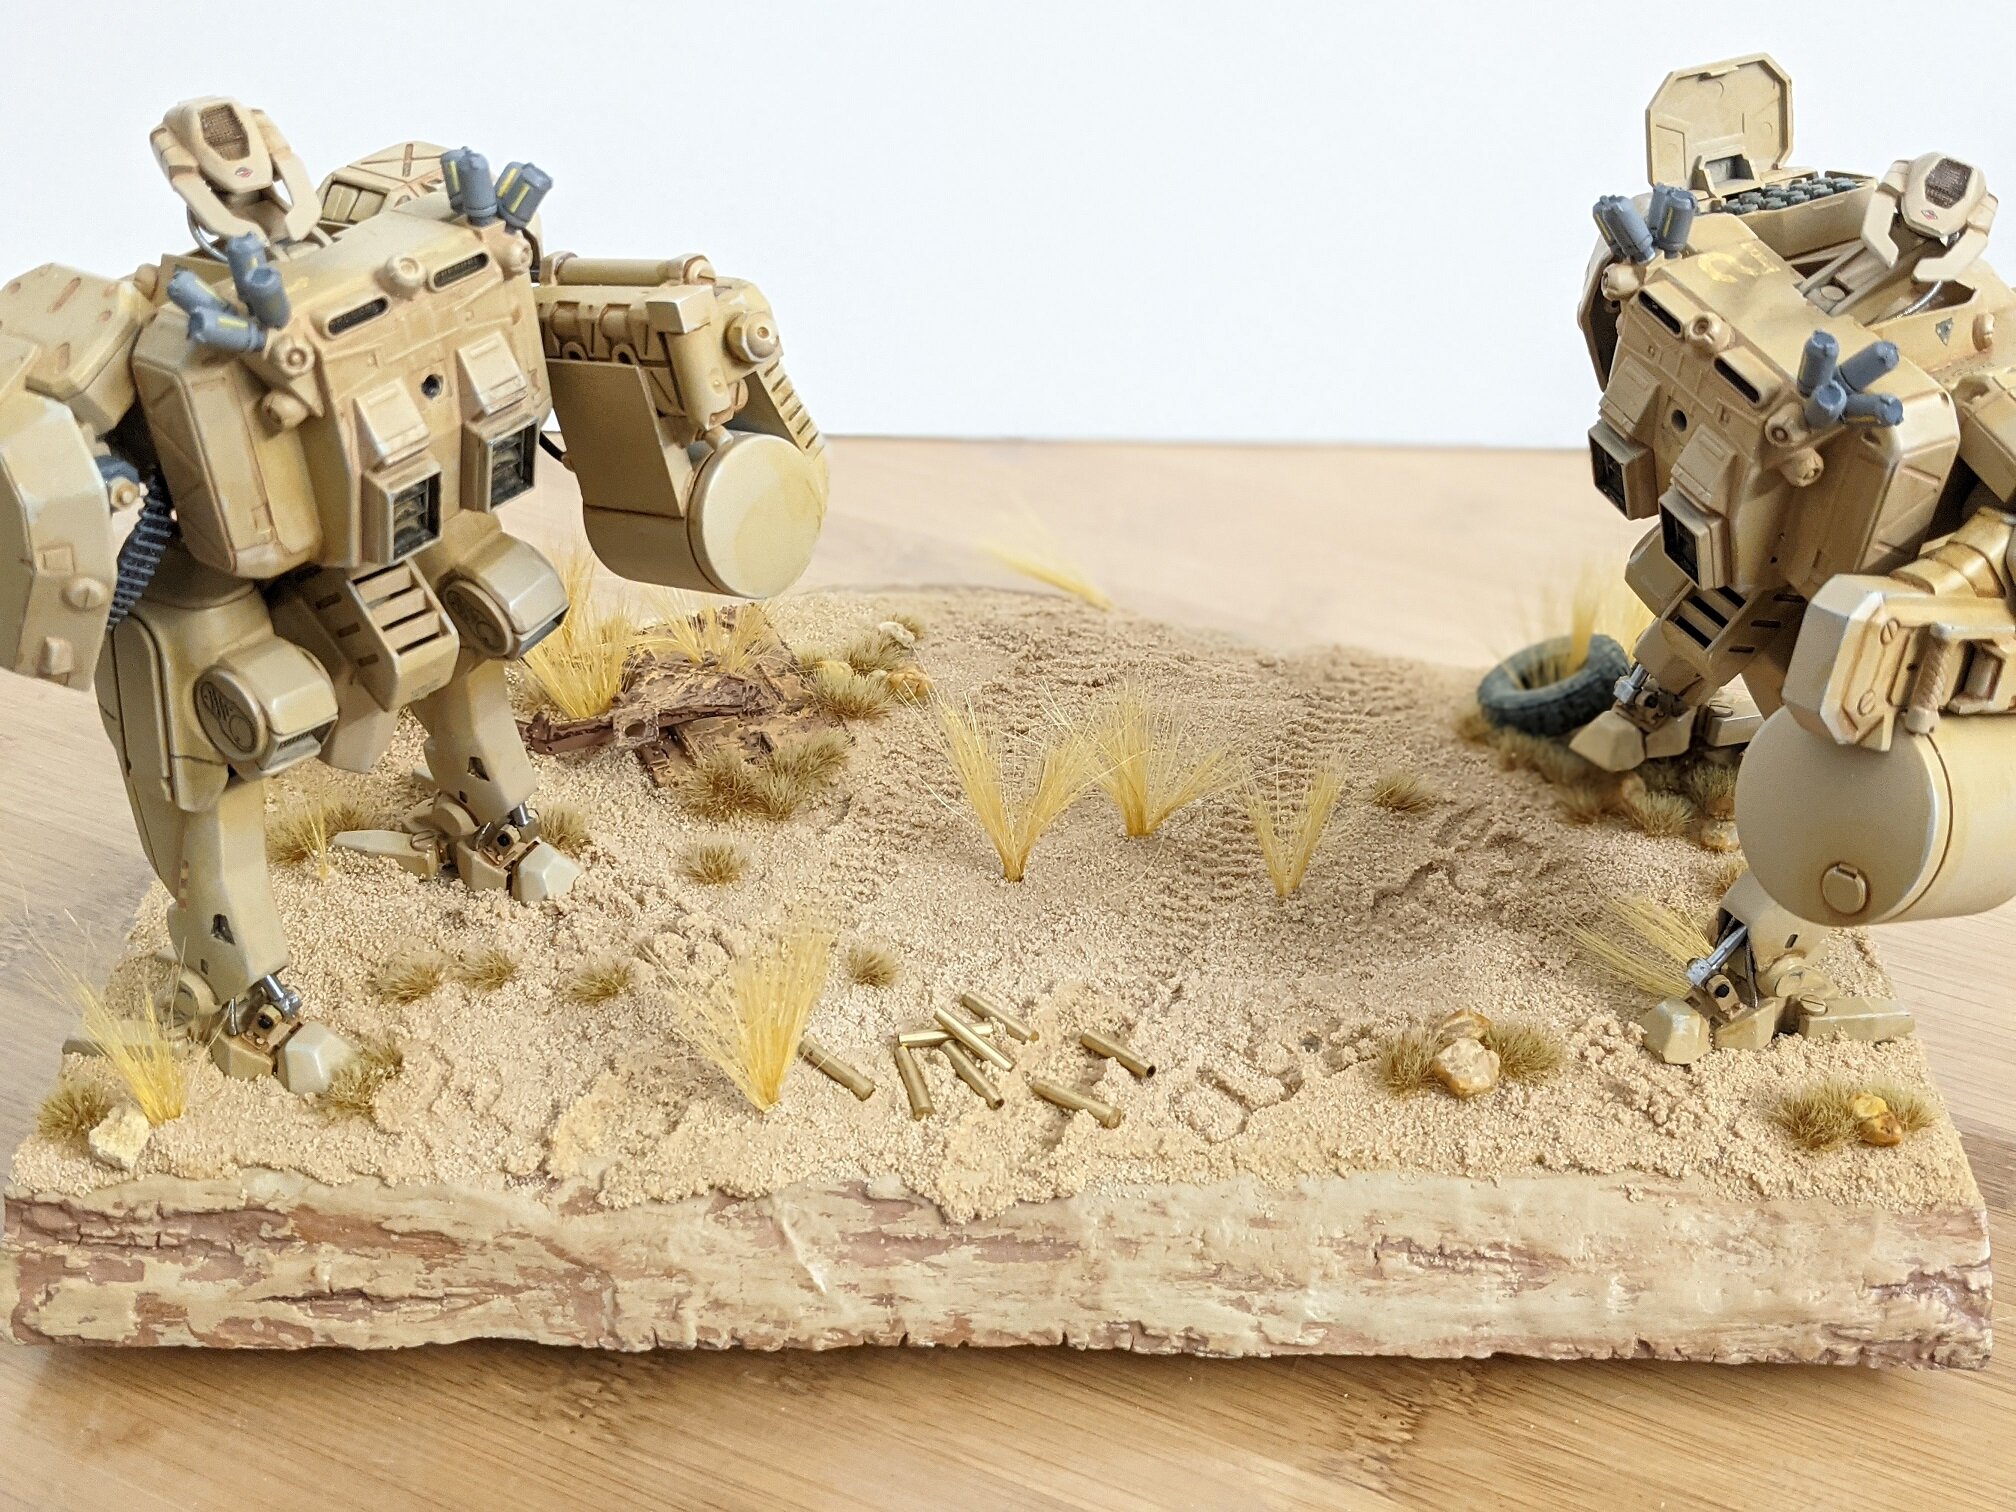
I FINALLY got to put a base coat of paint on my model this weekend. Time for A LOT of weathering and detailing.
Last weekend was spent doing landscaping on the base by adding more sand and more dead plant life. This was BEFORE I drilled the holes for the screws in the base. I also rusted parts from an old artillery carriage frame. I'm thinking of calling this diorama "The Sands of Time" or "Haunt of Jackals", but I'm not sure yet.
That's it for this time. Thanks for checking in everyone! - MT
Great work man!
-
Scratchbuild time… comming along slowly.
sorry for bad lighting, though.
-
59 minutes ago, electric indigo said:
Finished my weekend build of Ace Combat's X-49 Night Raven.

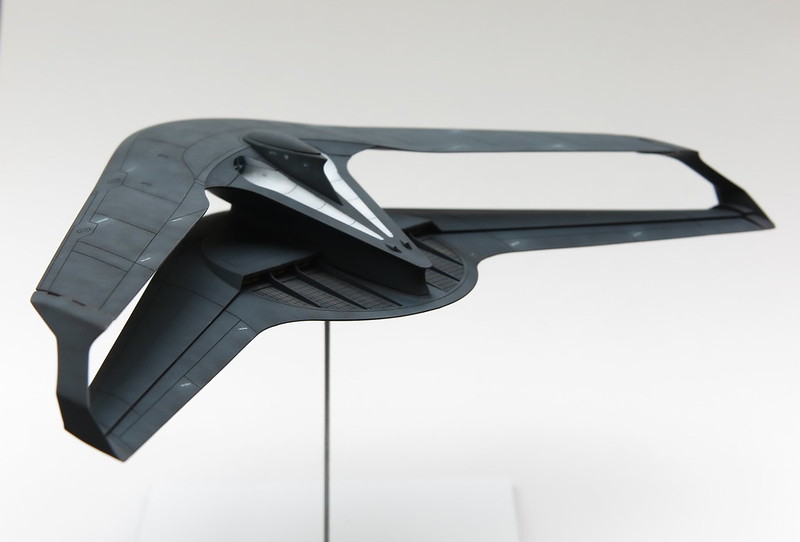
nice! where did you get that model from?
-
When messing up a €2.99 kit, just purchase €6.00 Evergreen stuff to fix it.
hahahahahahahahahaaha

-
7 hours ago, MechTech said:
@joscasle That is a BEAUTIFUL show-worthy build! All the little details look clean and so does your paint! It's hard to tell the difference between the model and the real thing other than the backdrop. Congratulations on a good modelling year too!
@Urashiman Too bad about the melted plastic. With it being a rough kit already, I think I would personally bin it and get a modern kit😧 But I'm sure you can resurrect it!
@daBlah! That is a small, but cool looking kit!
@electric indigo That's a great composite photo! The lighting adds dynamic movement to it along with the tracers. - MT
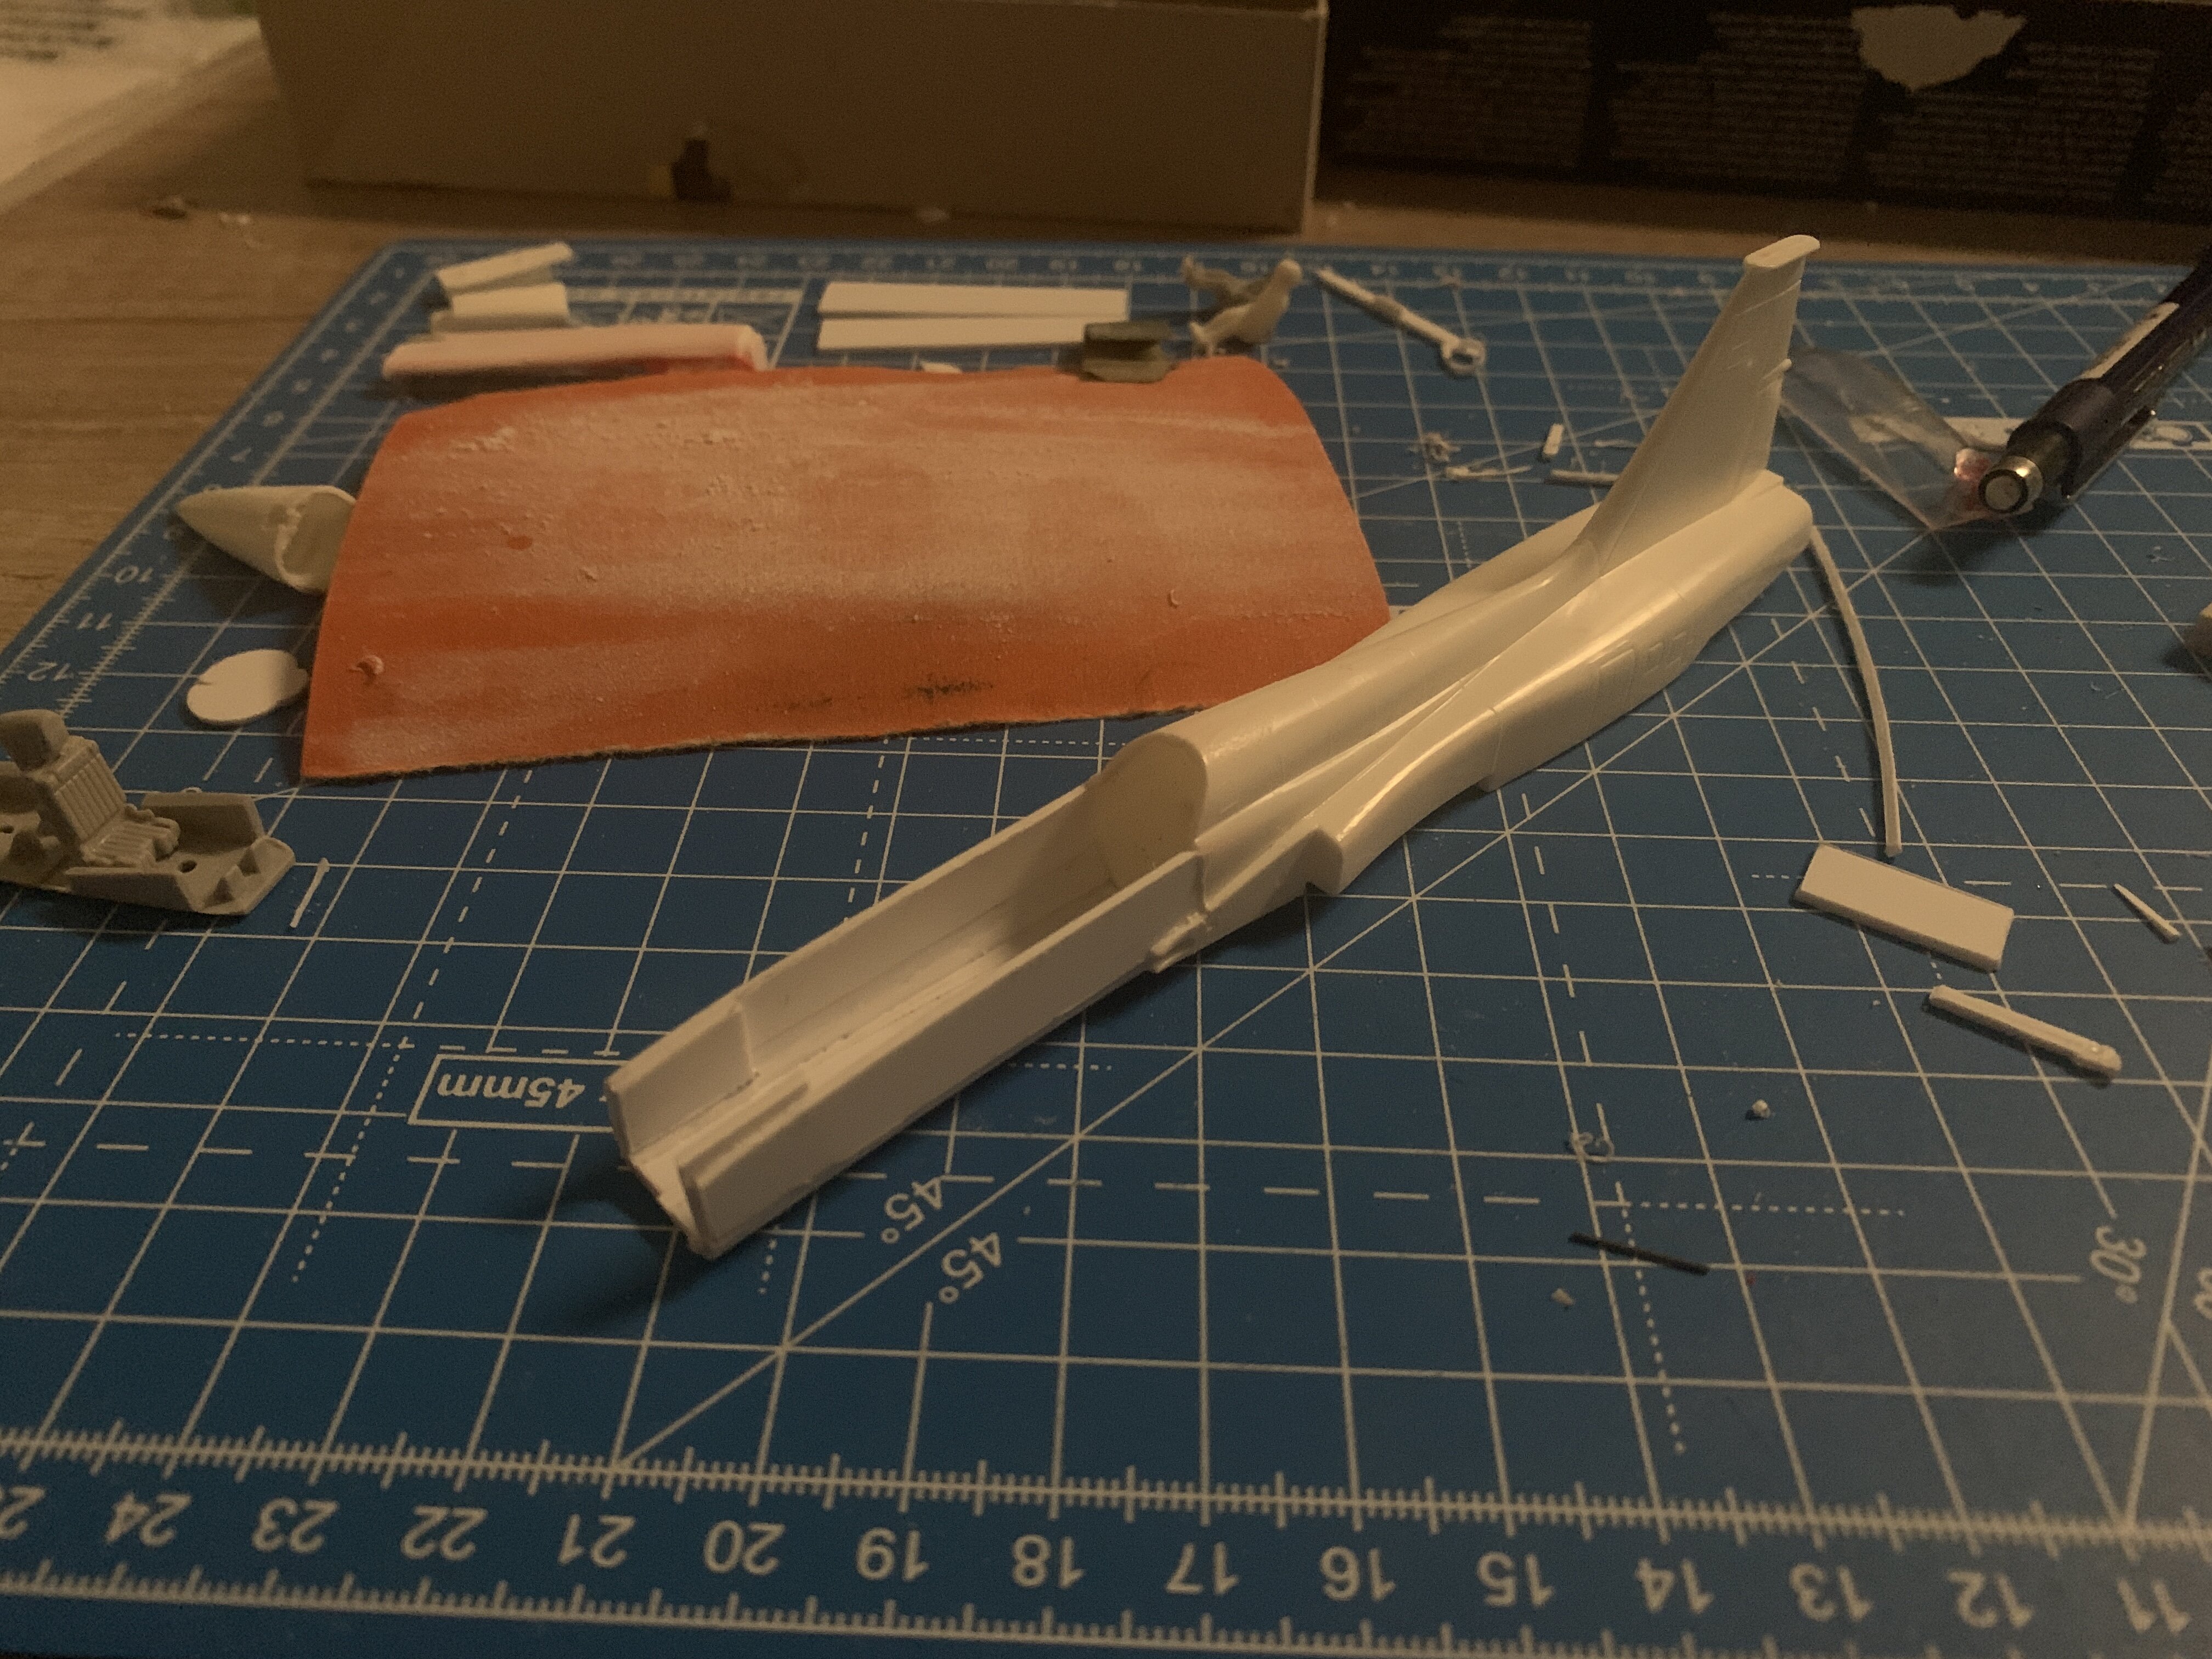
I'll give it a try to resurrect it - if it doesn't work, I will discard it.
-
8 hours ago, Salamander said:
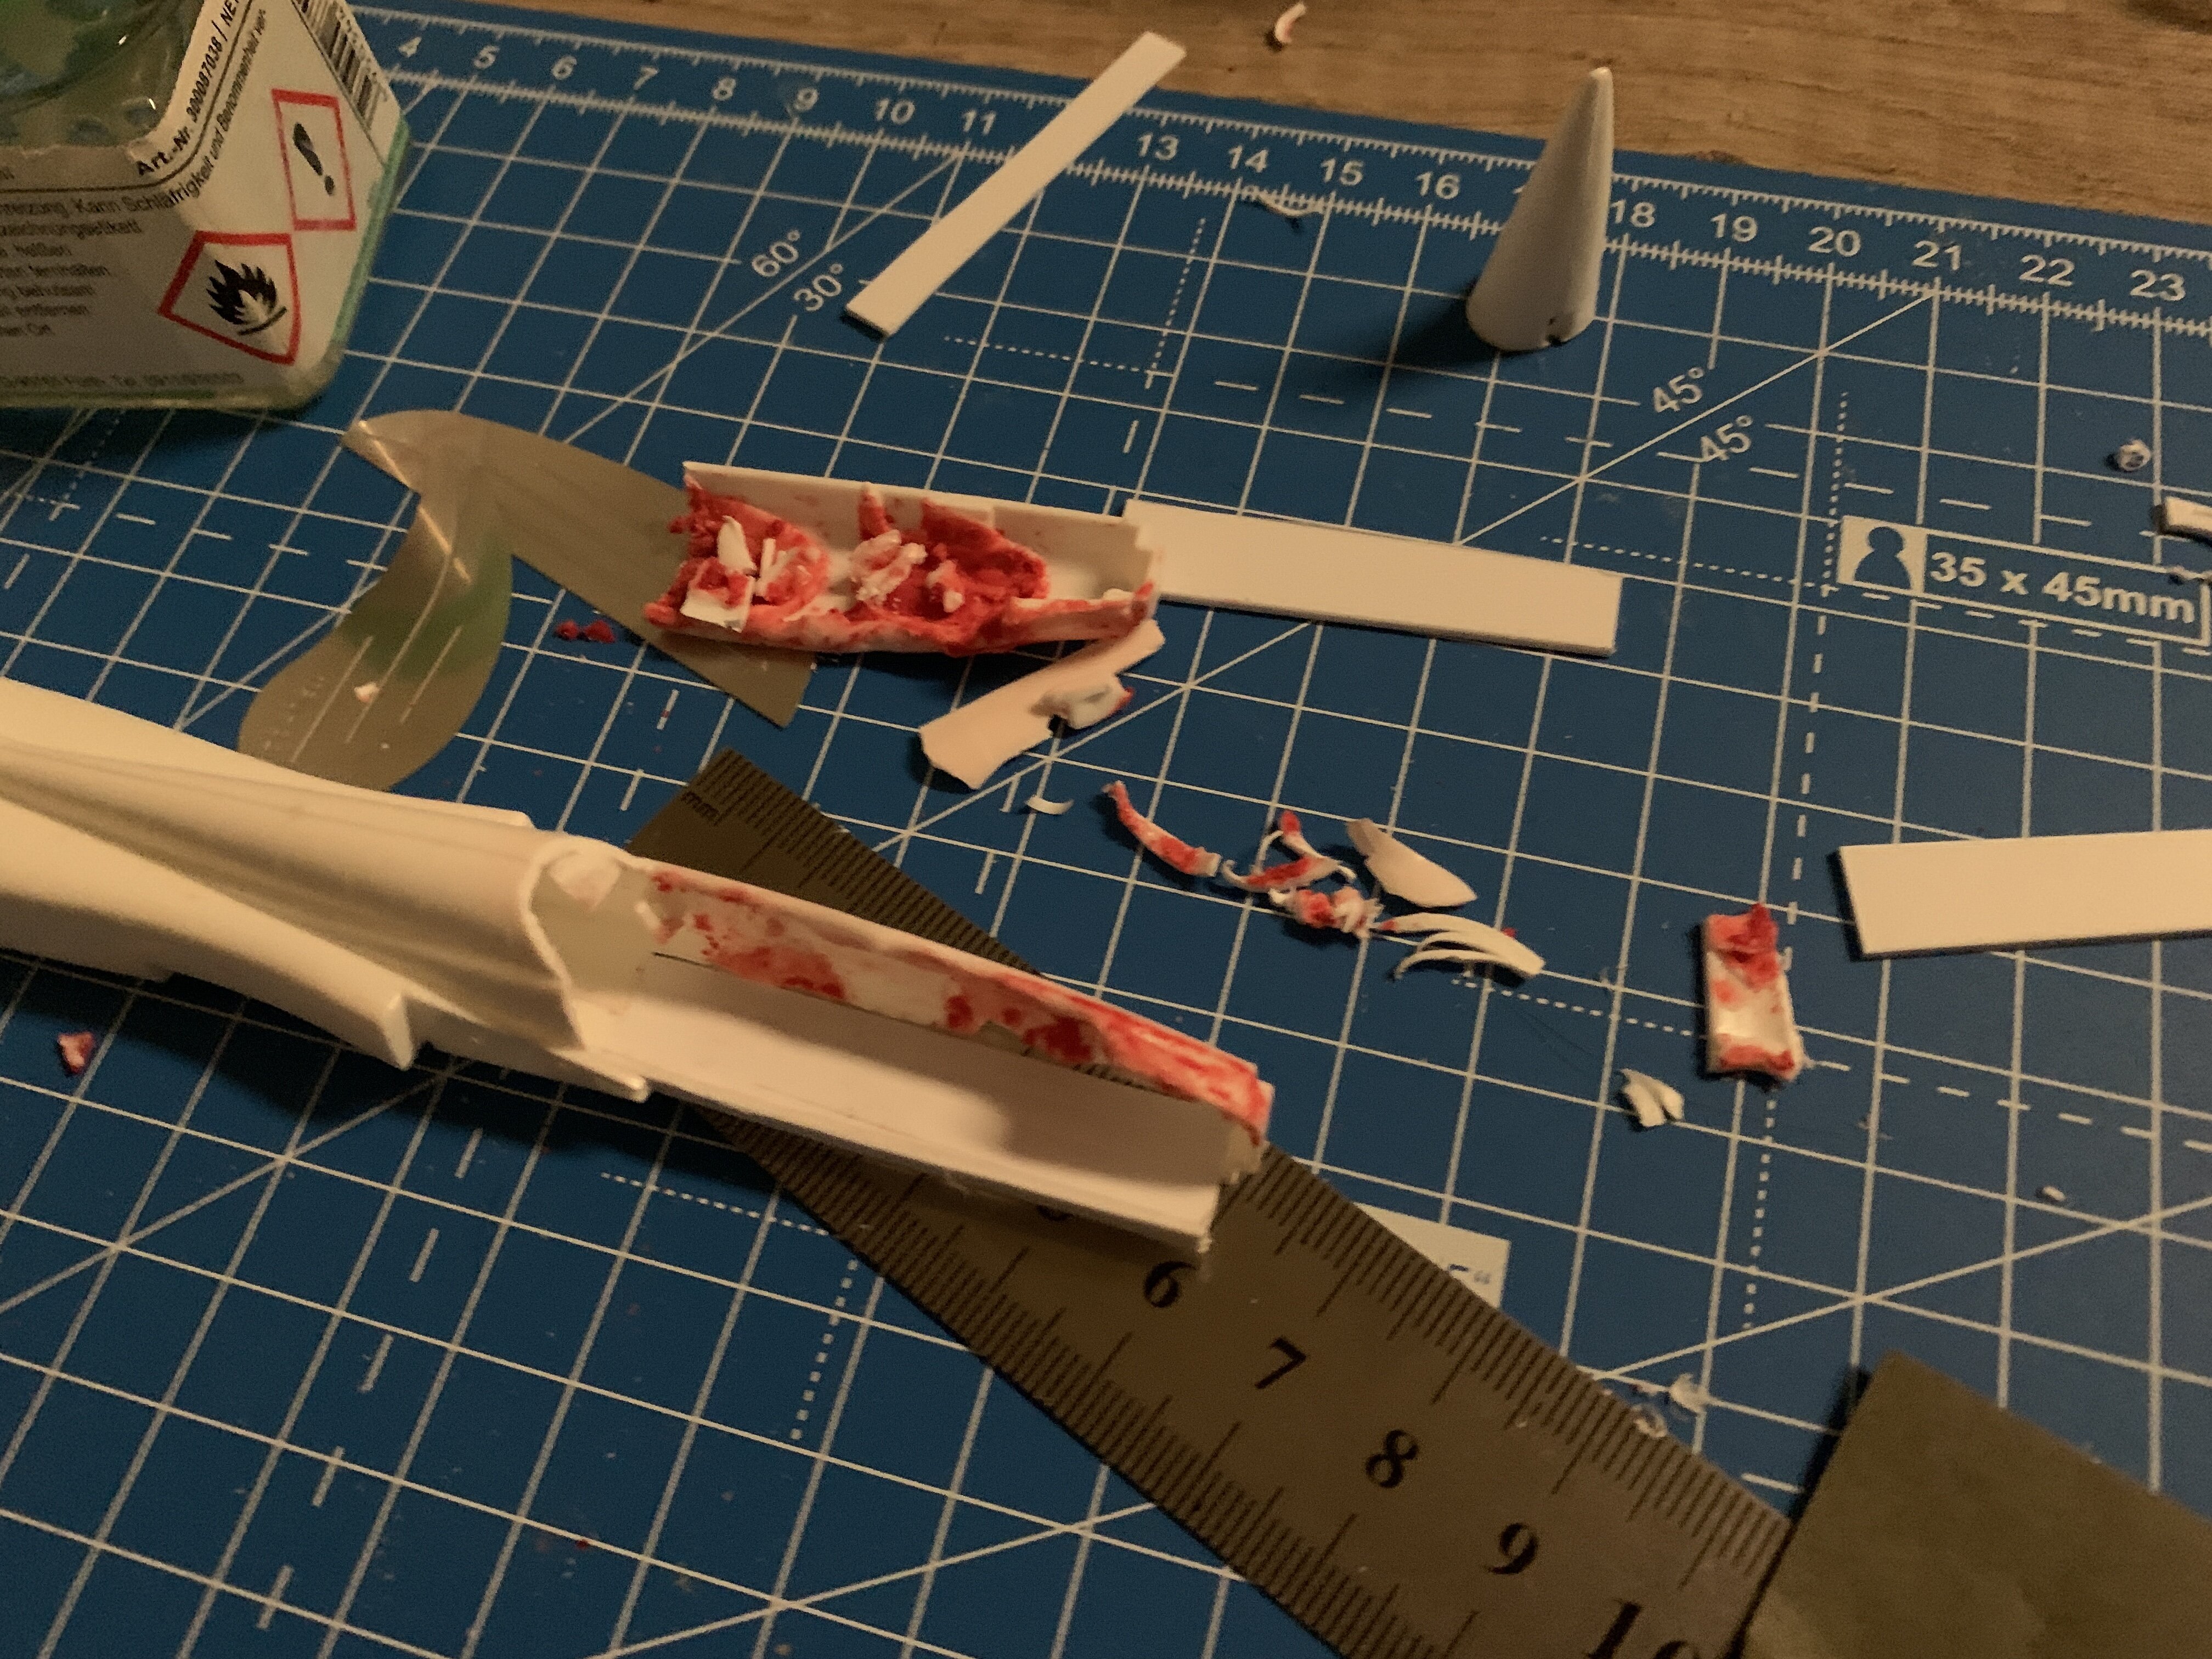
@UrashimanThe first thought I had was "What happened to those poor pilots to turn them into meat moss like that?". The whole cockpit section looks like something from a horror movie...
Hahaha meat moss - no, there was no actual cockpit in those to halves. Only the struts to hold the seats. Red FIMO is bad...
-
4 hours ago, Thom said:
I think, if you are confident in fully rebuilding the nose, maybe just cutting it from below the canopy sill and forward would be enough. Certainly less to rebuild and more to build up upon.
Best of all fortunes!
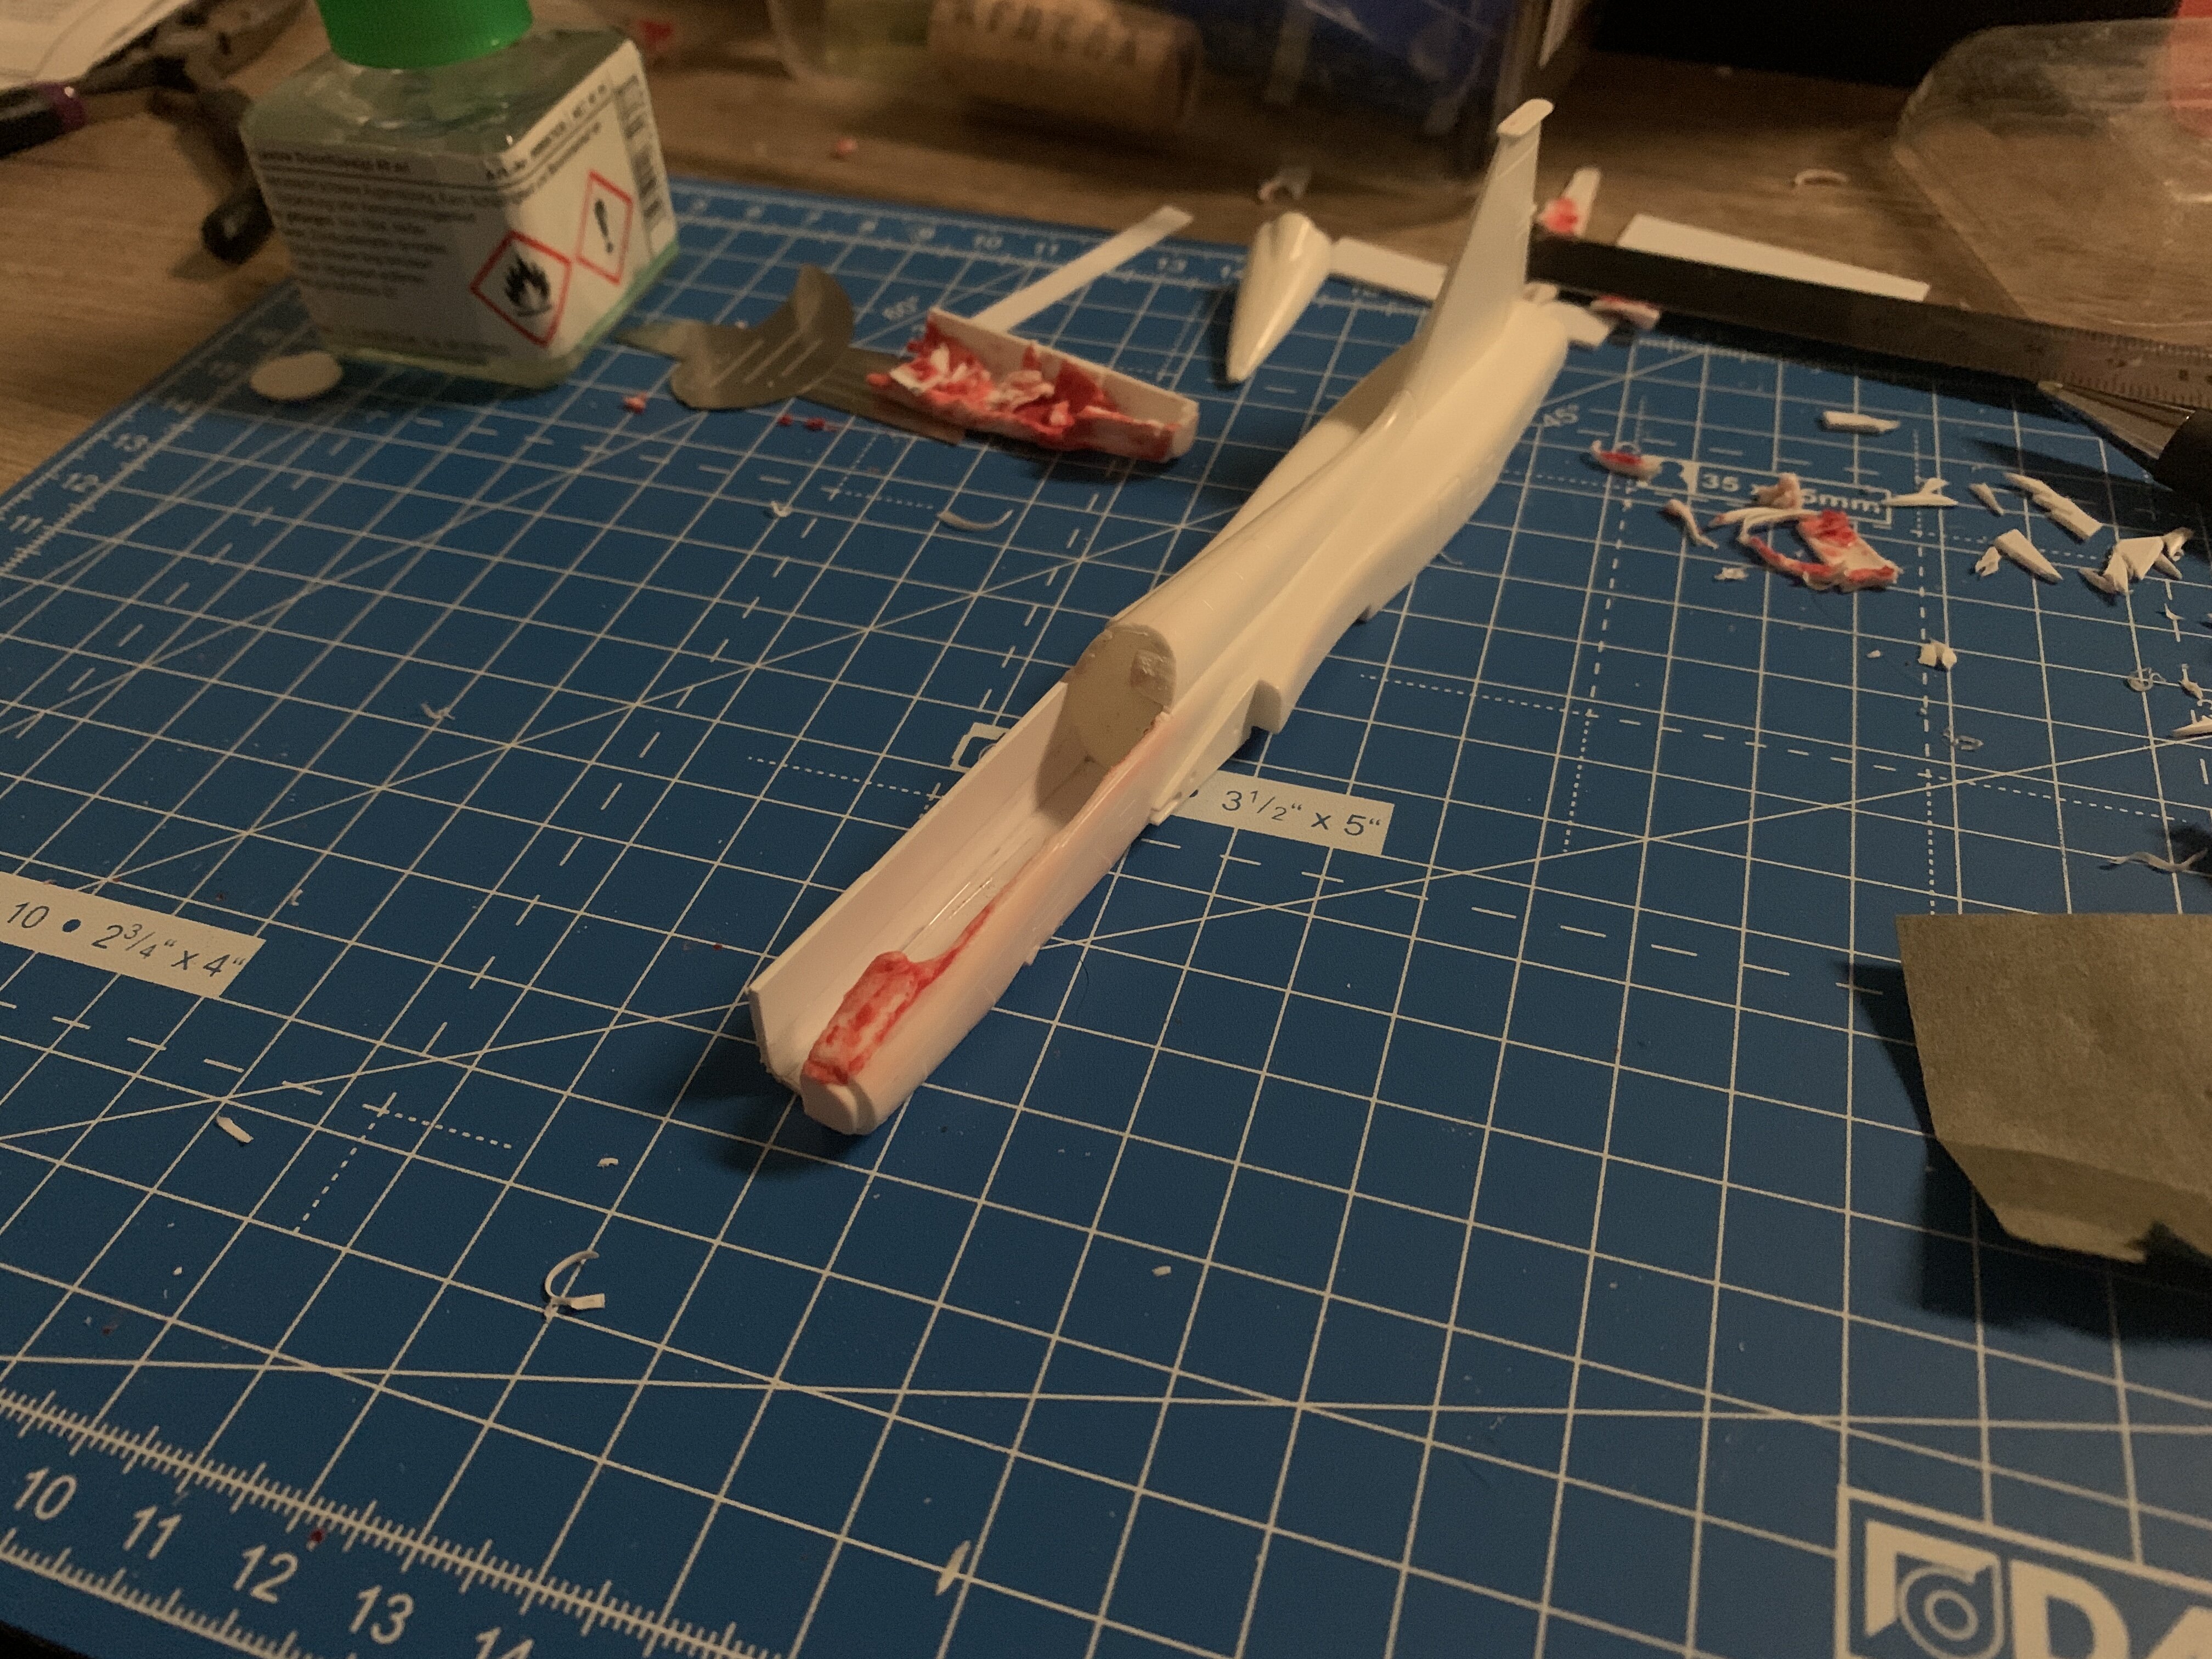
The whole front section is soft now, starting from the edge of cockpit, all the way to the front. I think I‘ll go with building the whole cockpit section anew. Shouldn‘t be too hard. Three plates left, right and buttom, landing gear box, the front plate to attach the actual nose, then some sanding and panel line scribing. Done.
-
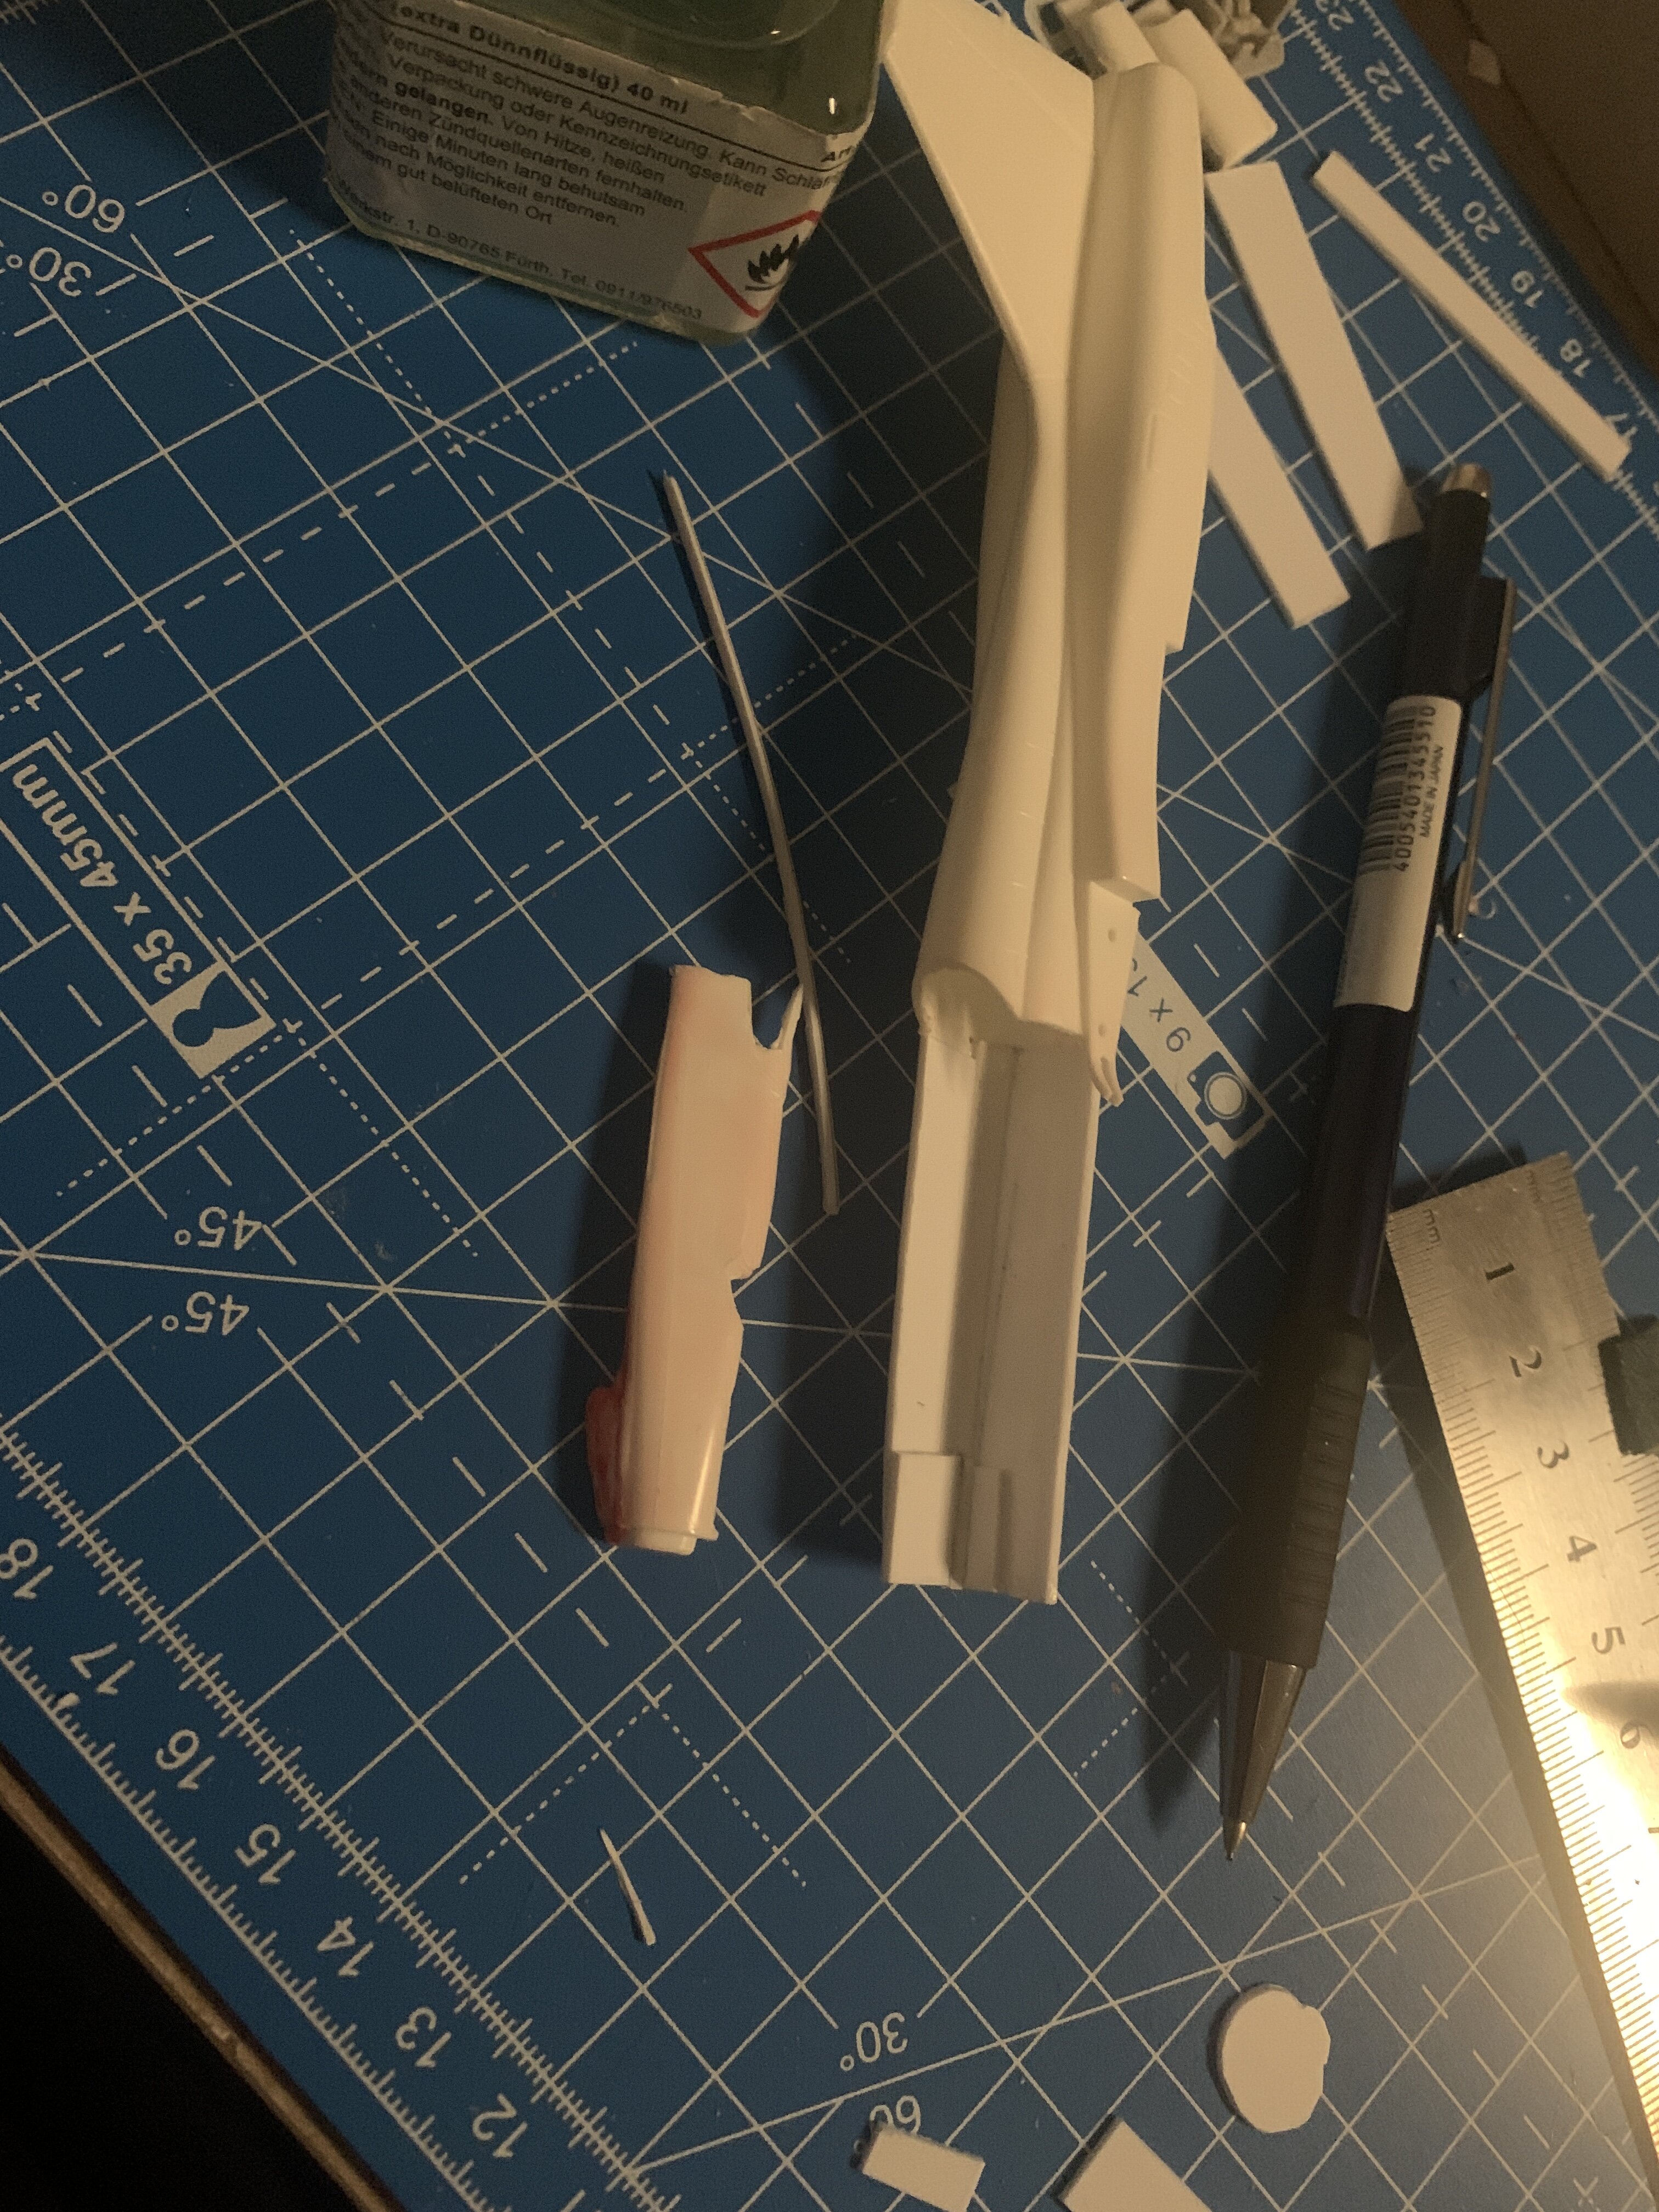
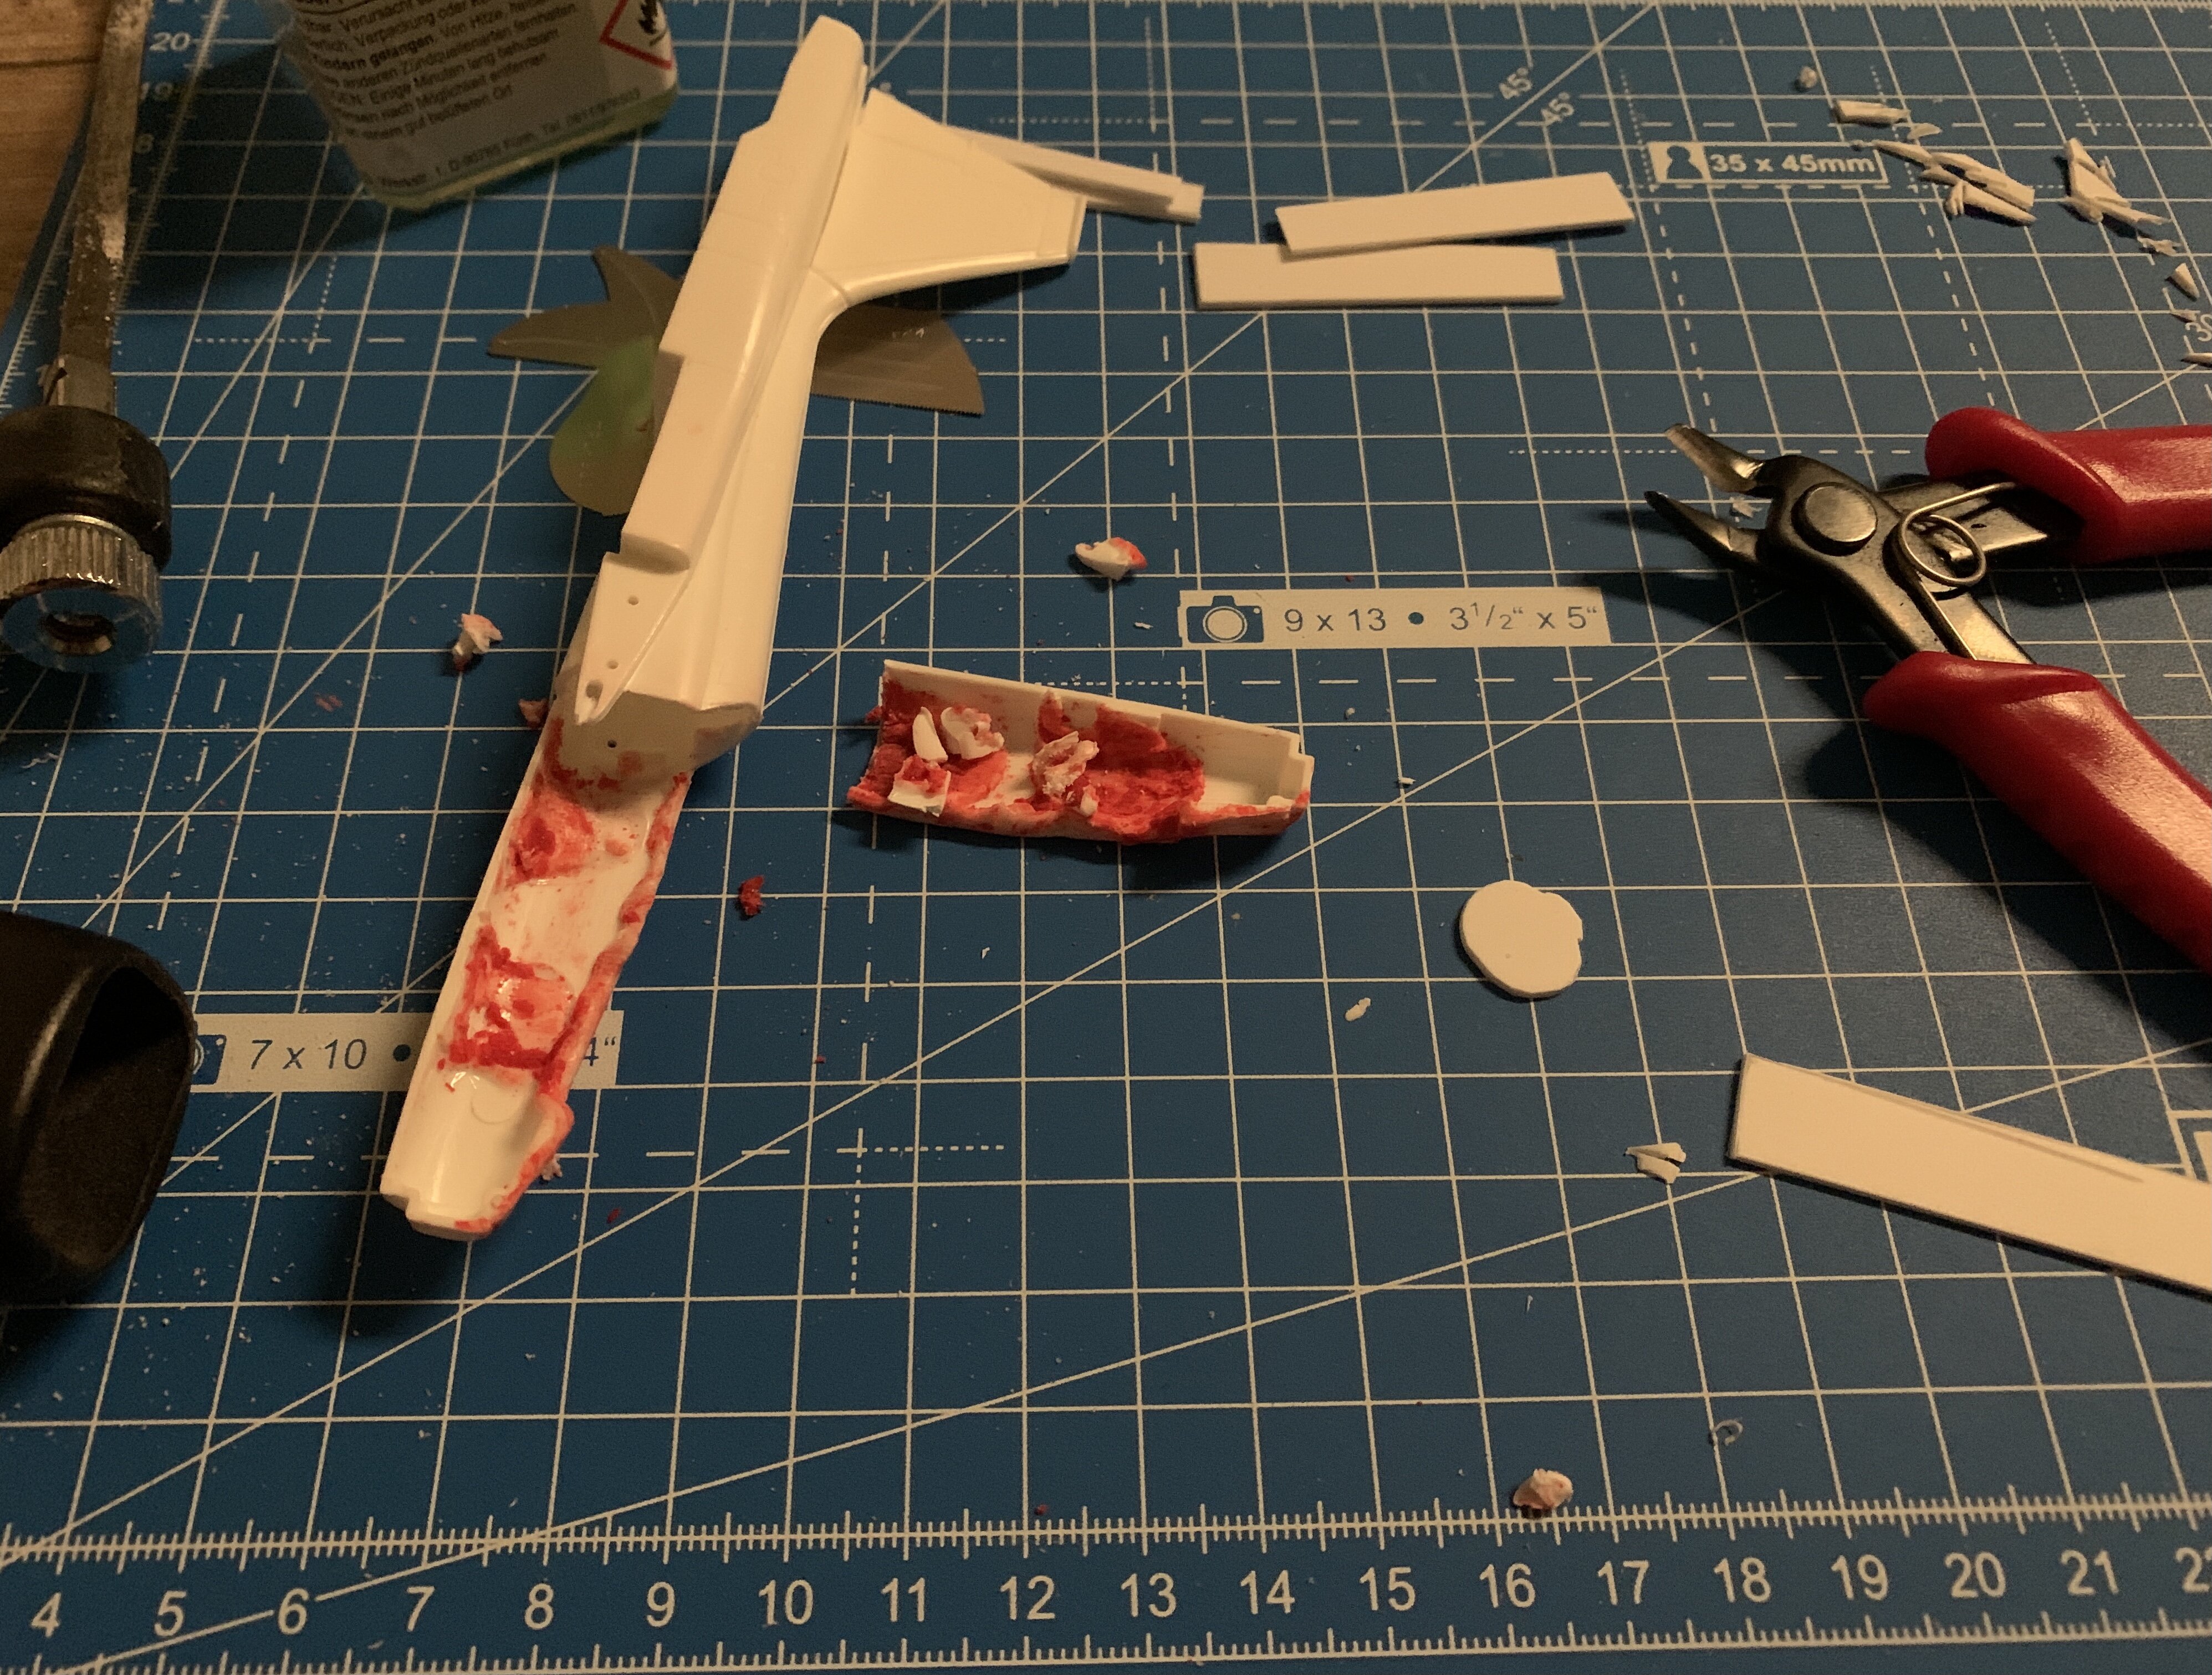
I decided to work on my 1/72 Matchbox F-5E Tiger again.
Before putting it on hold some months ago, I was in the process of creating a new canopy, forming it with FIMO by hand and sticking it to the cockpit, so I can pull down some heated clear stuff over it. You know the process
")
Anyway, what I didn't keep in mind was, that FIMO uses plasticizer to stay clay like. So now I am having an issue here...
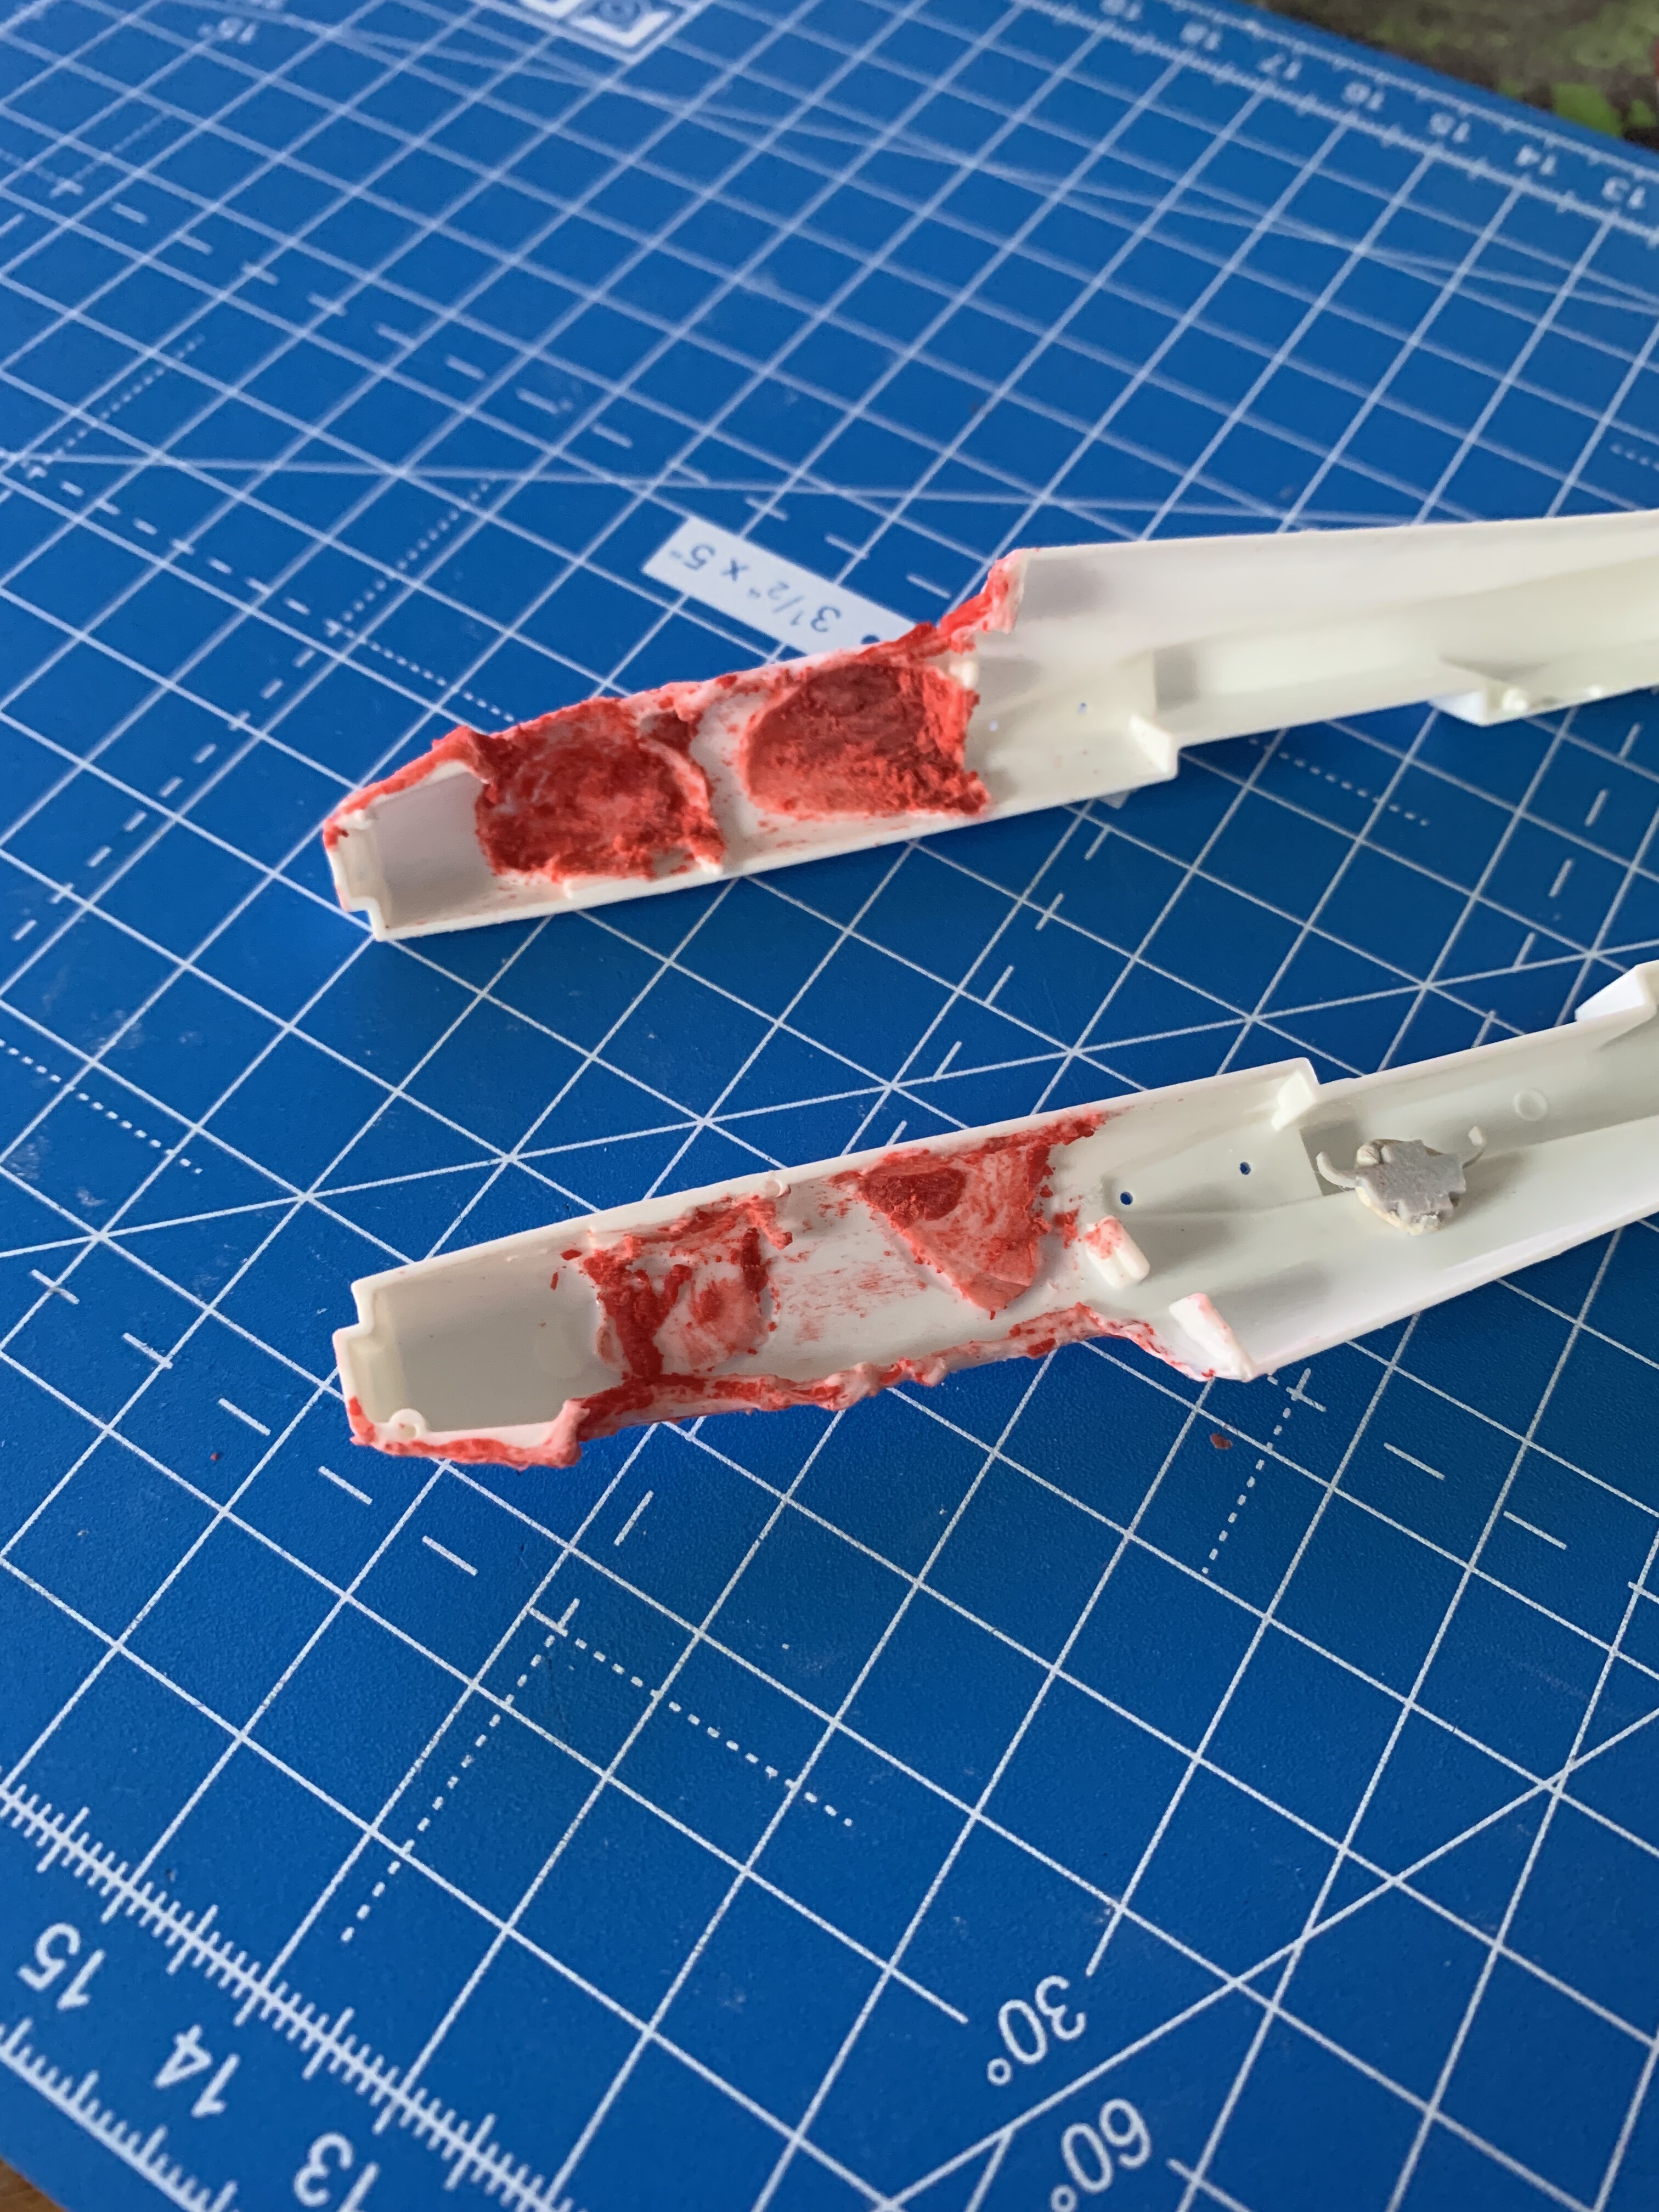
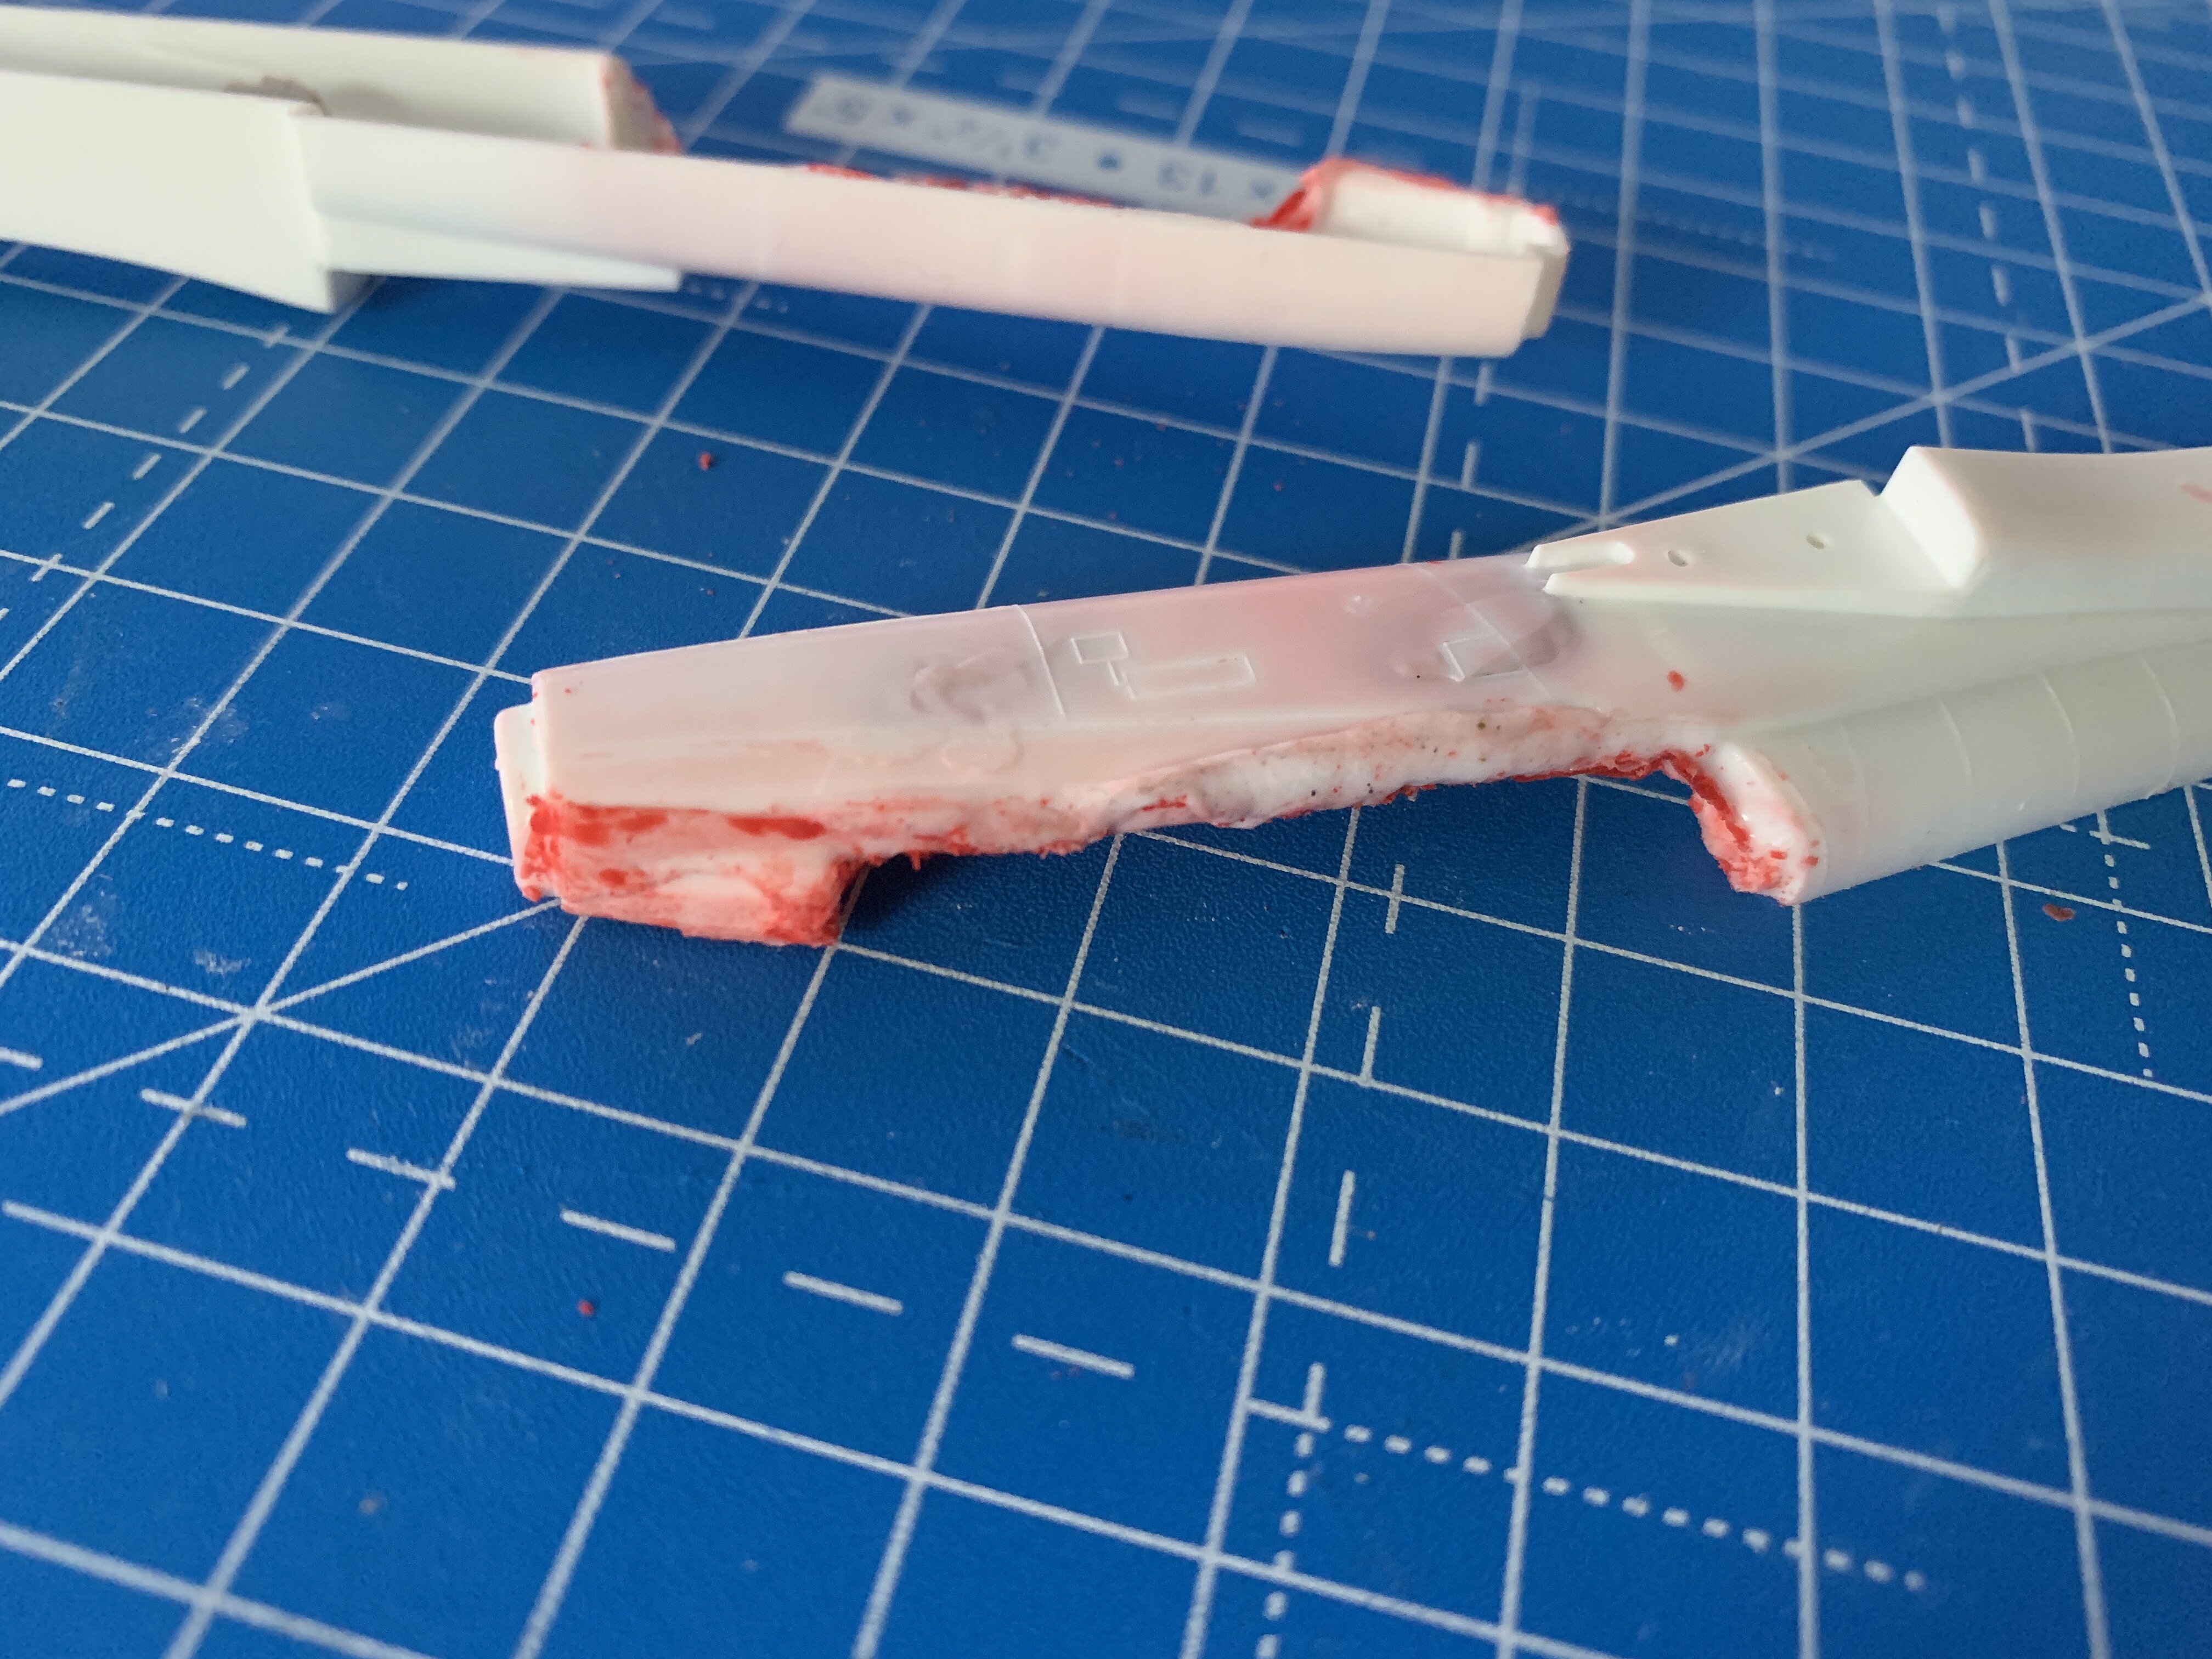
The cockpit section just melted away.
So three options now:
- Trying to figure out how to dry out the plasticizer without melting the rest of the body
- Purchasing Evergreen plates and cutting off the nose, then completely scratchbuilding a new nose with cockpit
- throwing it away and going on to the next project.
Any suggesstion what else can be done?
-
6 hours ago, Gabe Q said:
I think @wm cheng means this one:
http://www.macross2.net/m3/sdfmacross/dragonii.htm
It's the plane Roy flies during the unification wars.
That is the F-203 I think
-
8 hours ago, slide said:
I'll take a VF-X please... that's an easy one Hasegawa!! it's practically a Gimme!!!
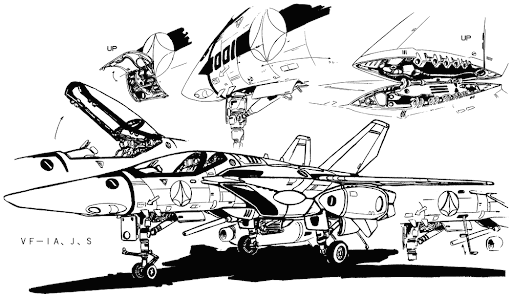
Well - for the VF-X they need to change the mold drastically. I mean, they need to update the panel line design, as the VF-X to VF-1 panel lines are super different.
There need to be new molds as well, for the arms. The VF-X had no arms.
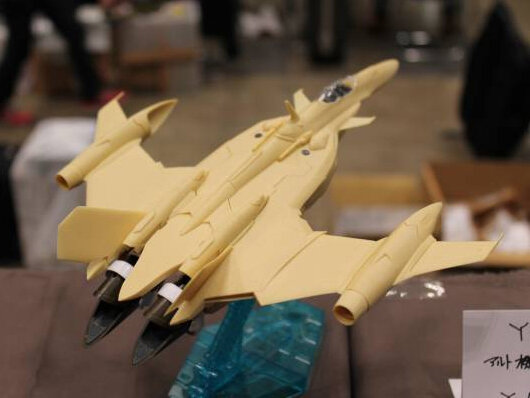
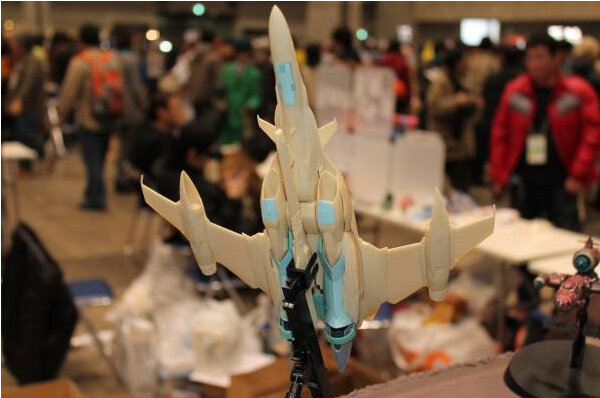
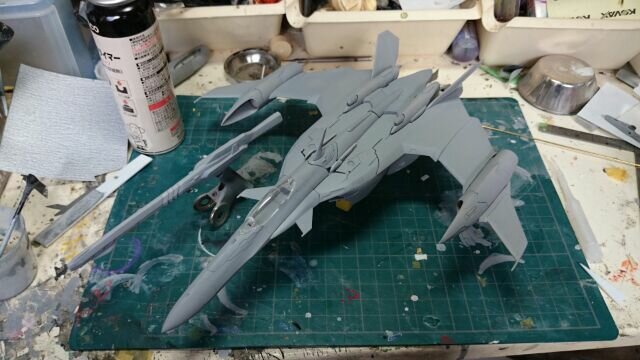
VF-X

VF-1
-
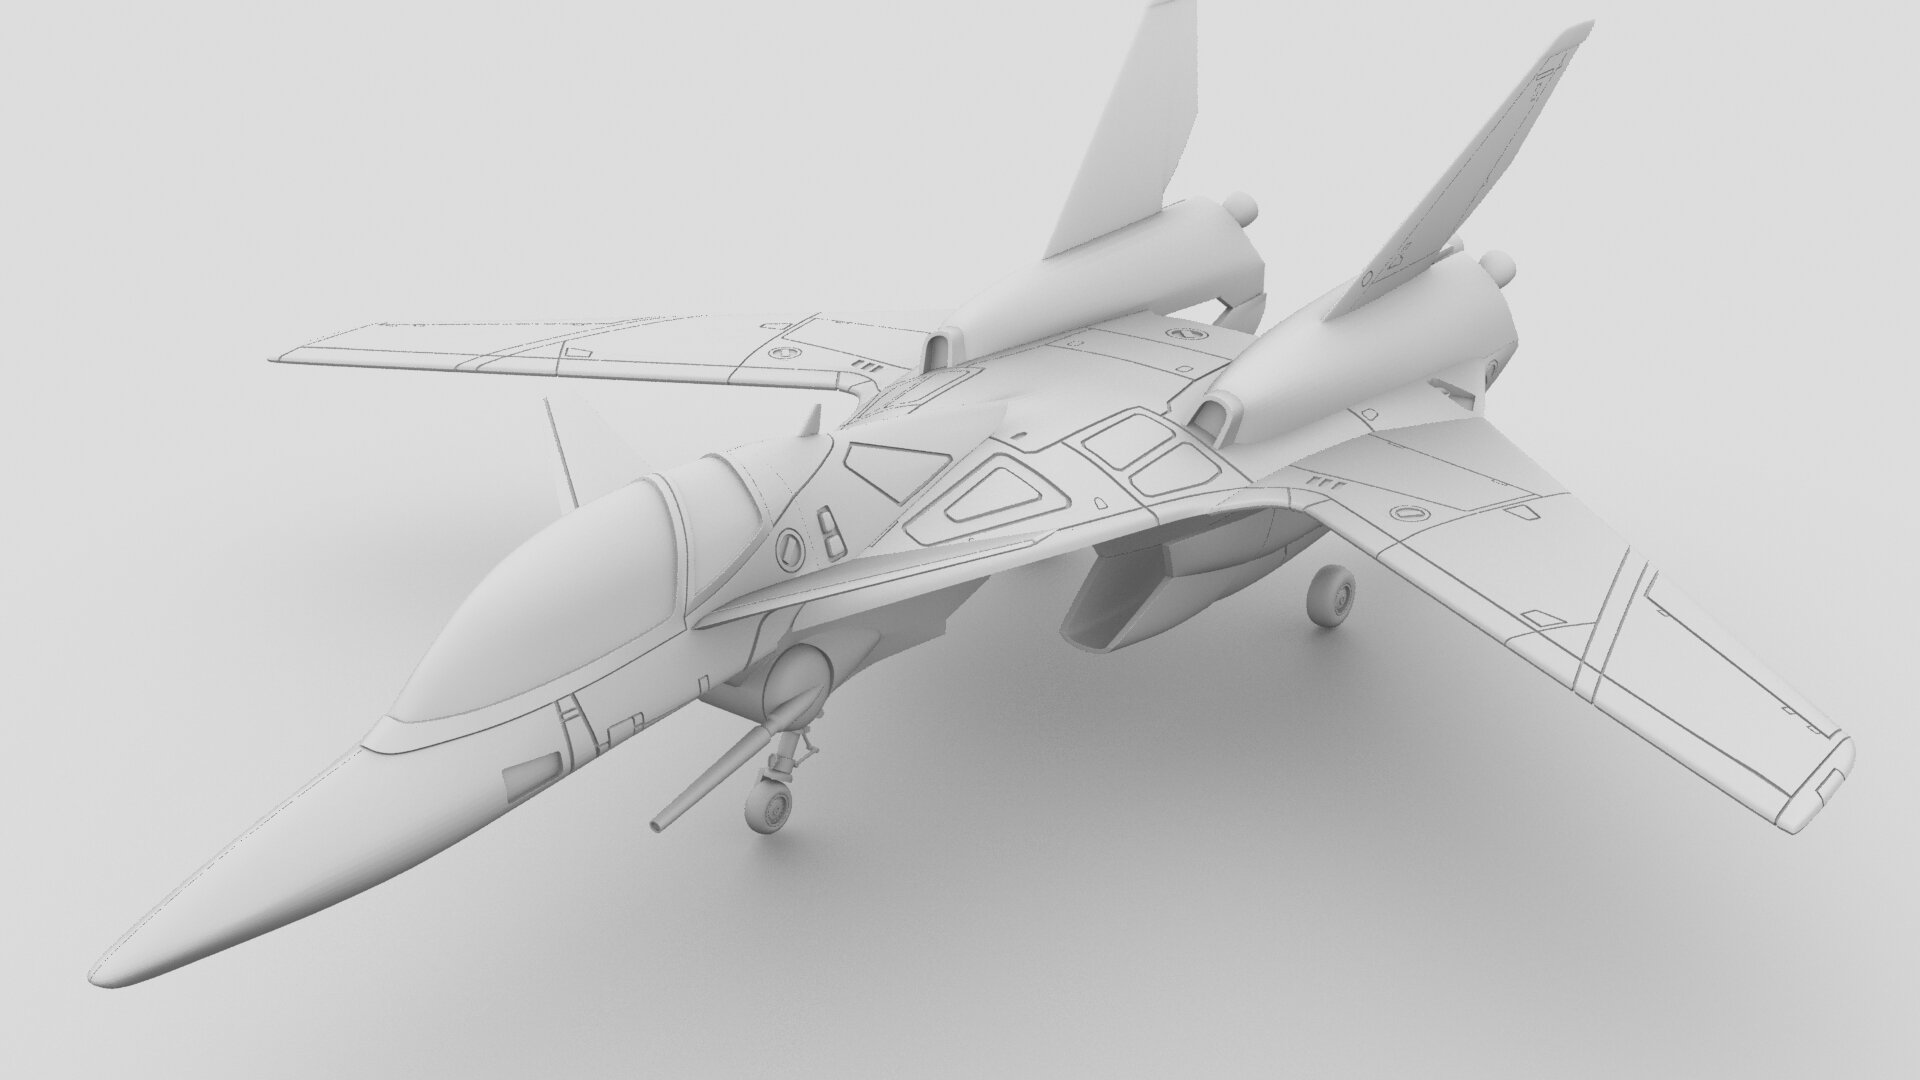
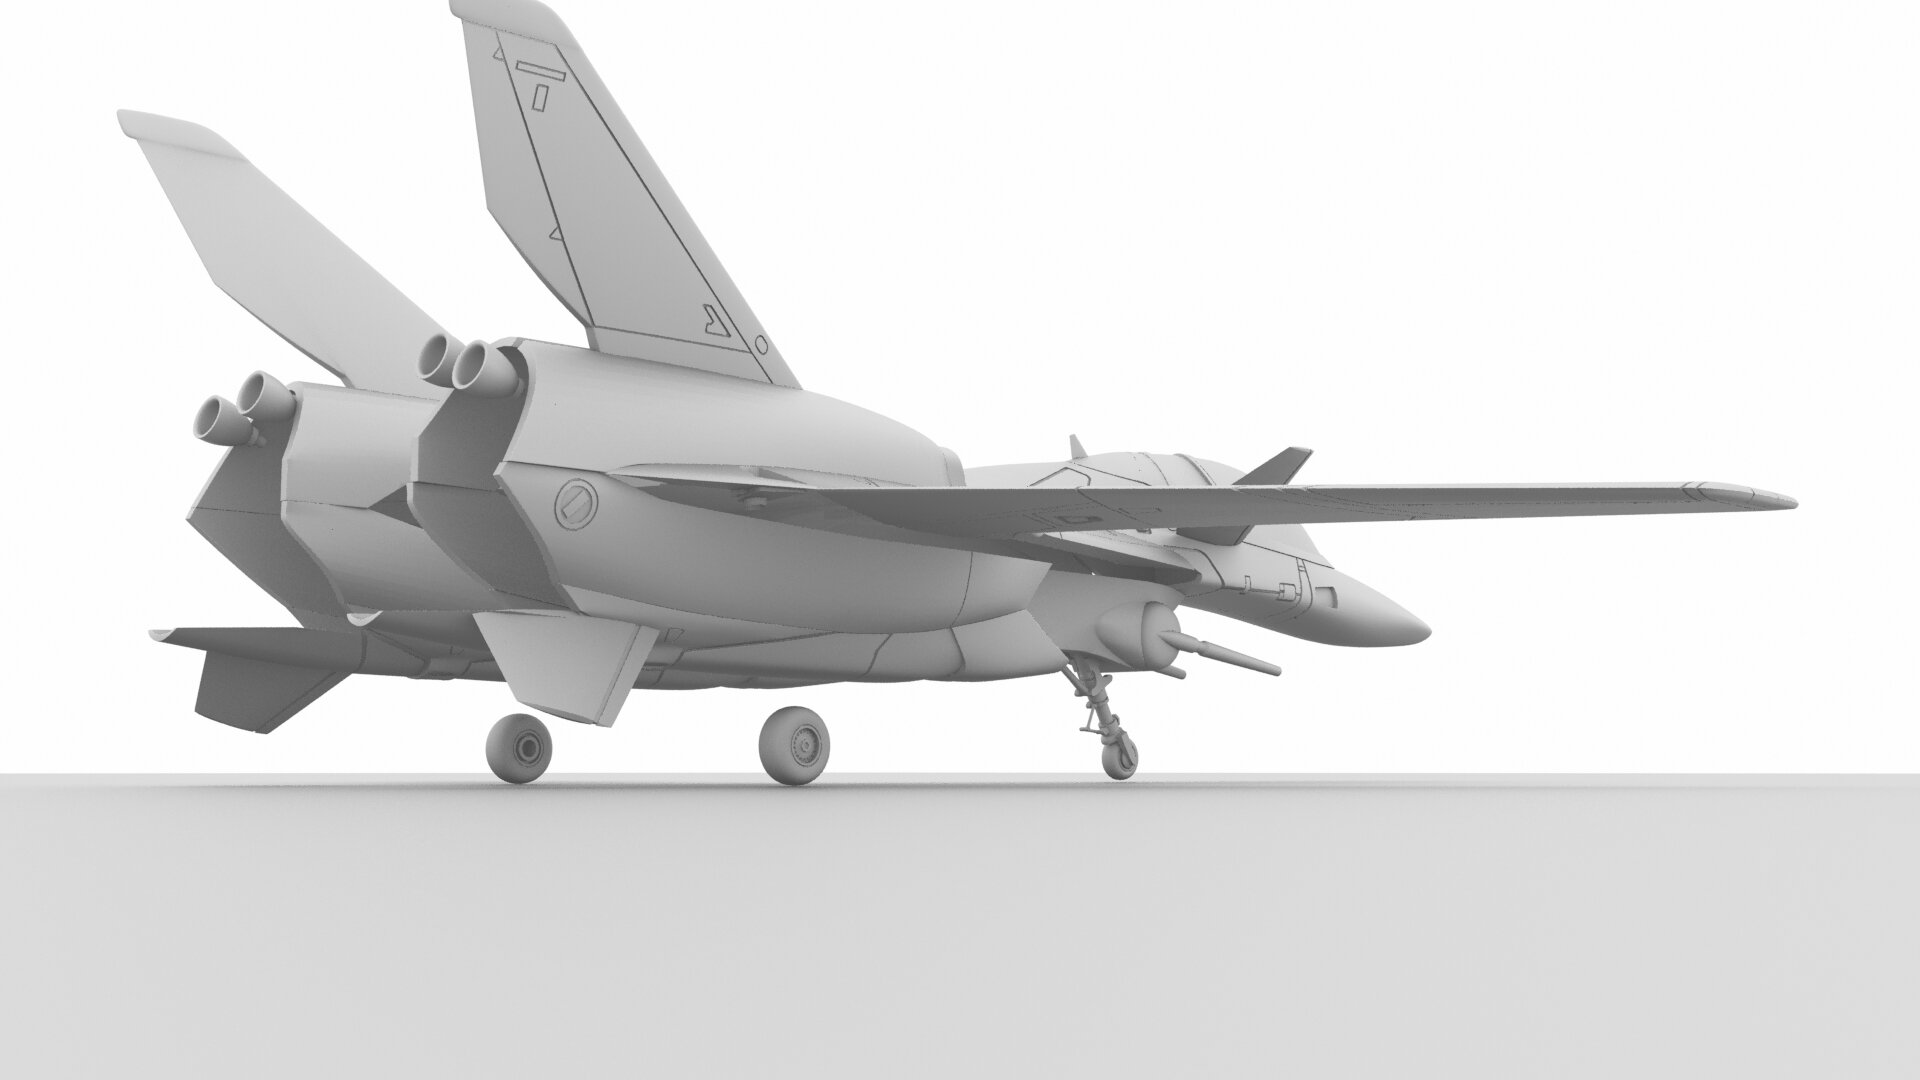
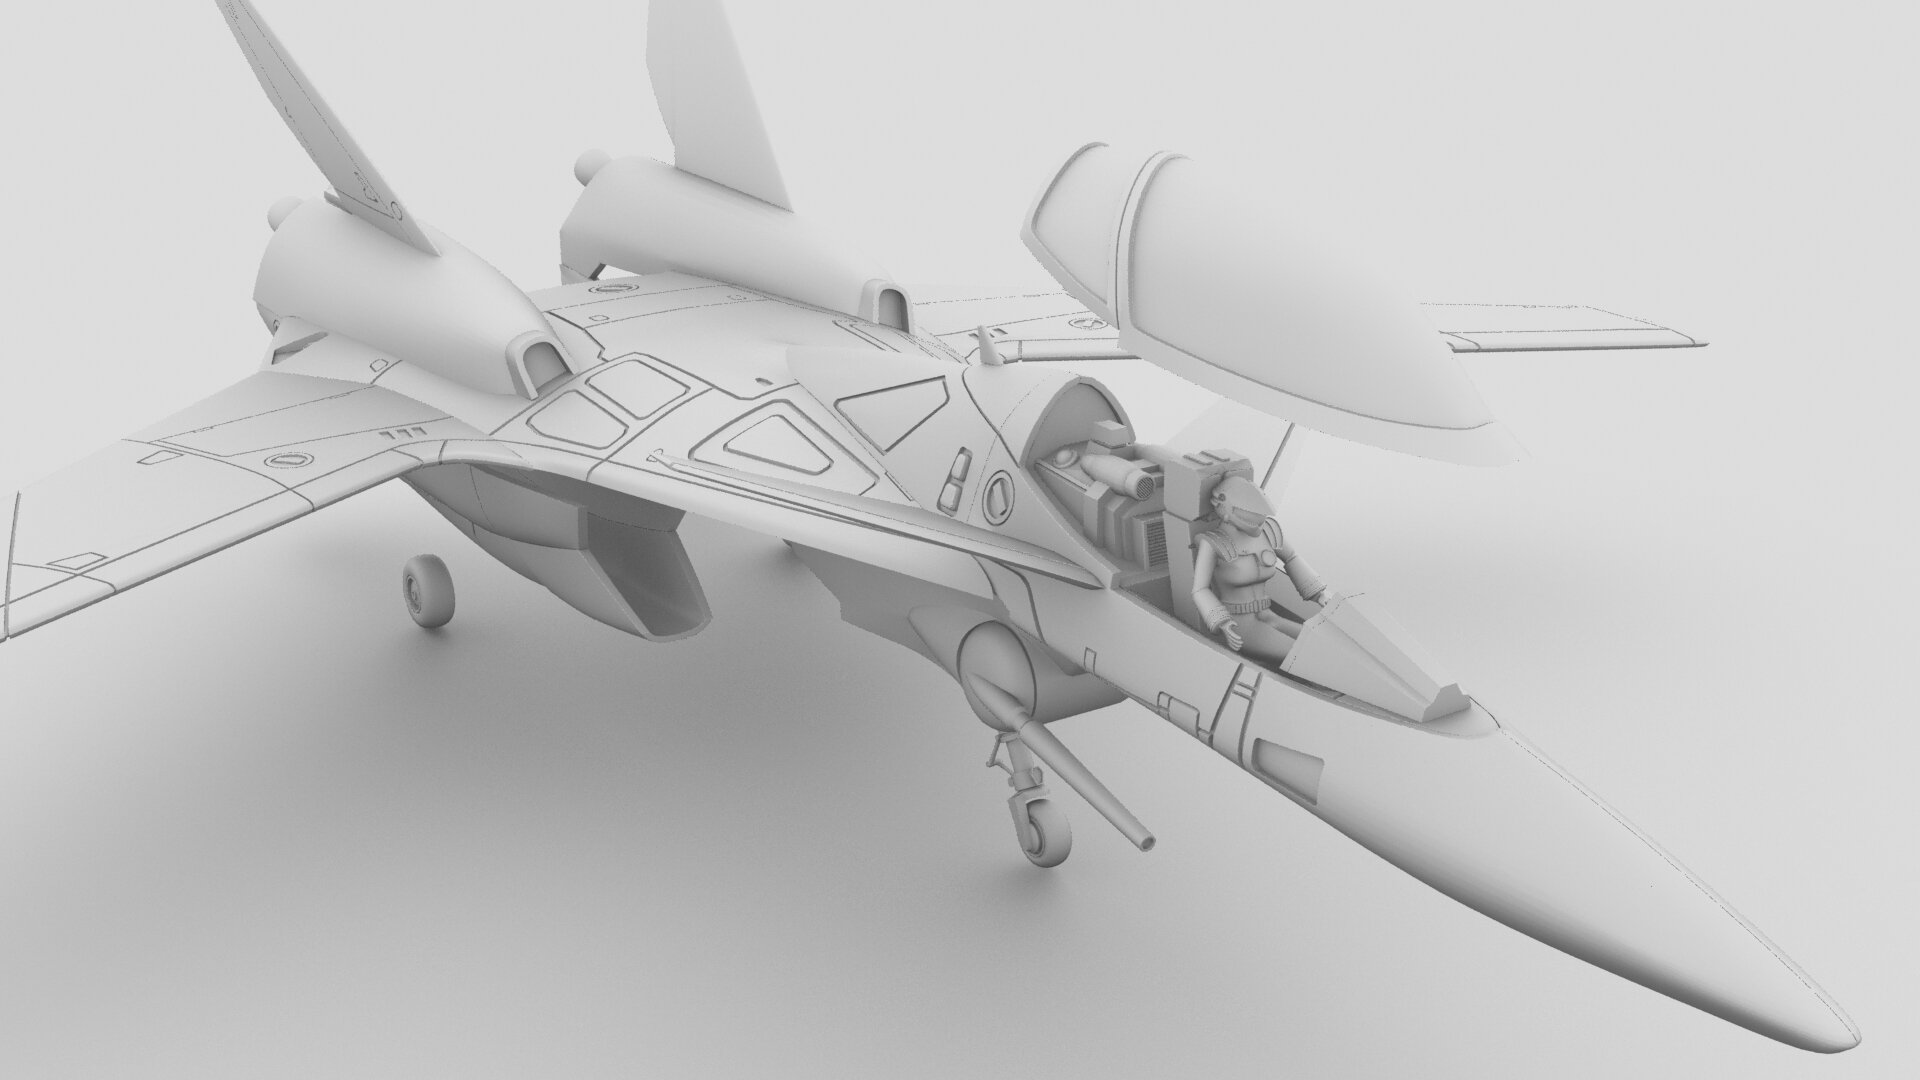
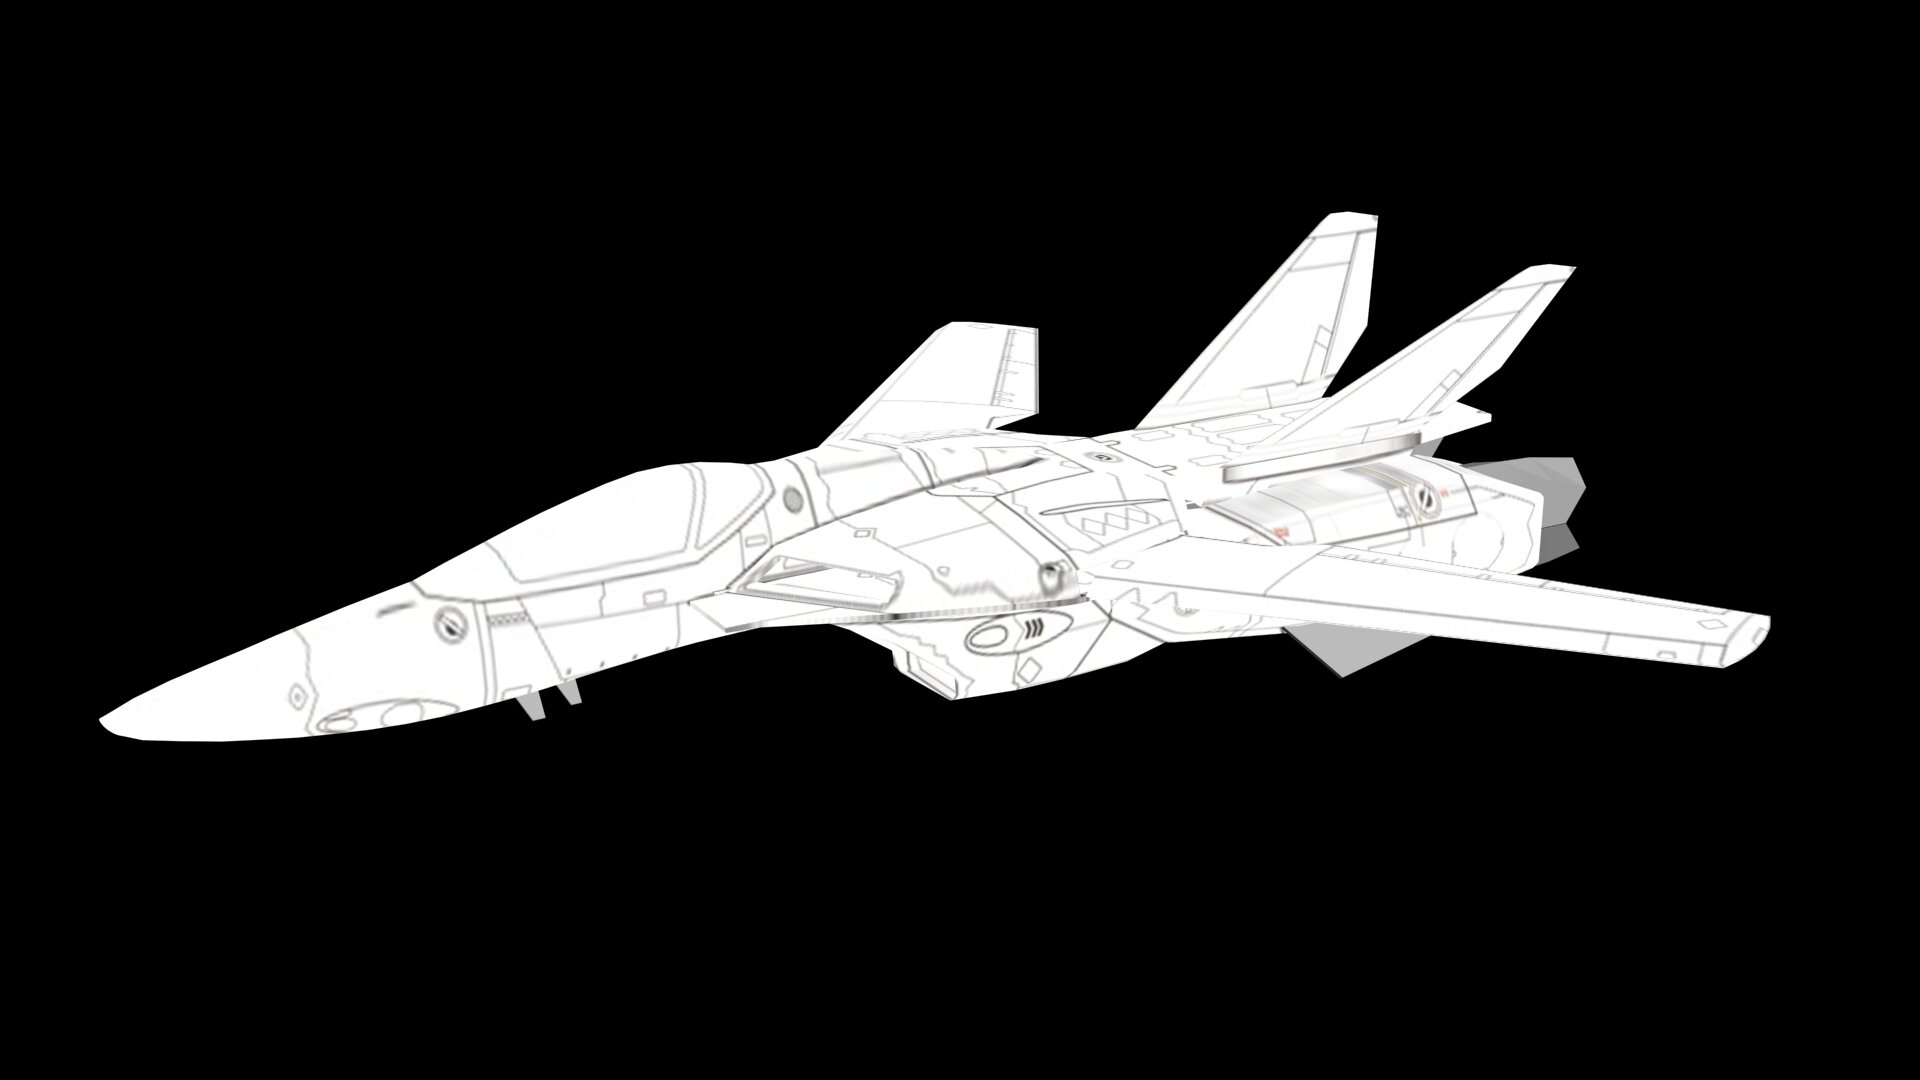
@MechTechSo far it is non-scale. Just a little 3D VF-1 study to practice some modelling skills. Nothing specific planned yet. I still have to finish my 1/72 VF-9 Cutlass. That is still on my desk. Not sure if I was posting this here already but here you go. Some VF-9 renders.
-
Did a little 4 hour practice today, and decided to do the VF-1. Yes - just another 3d modelled VF-1, but this time I did the VF-1P (which not to many people have done yet).
I used line art from the Variable Master File for the VF-1 to make this.
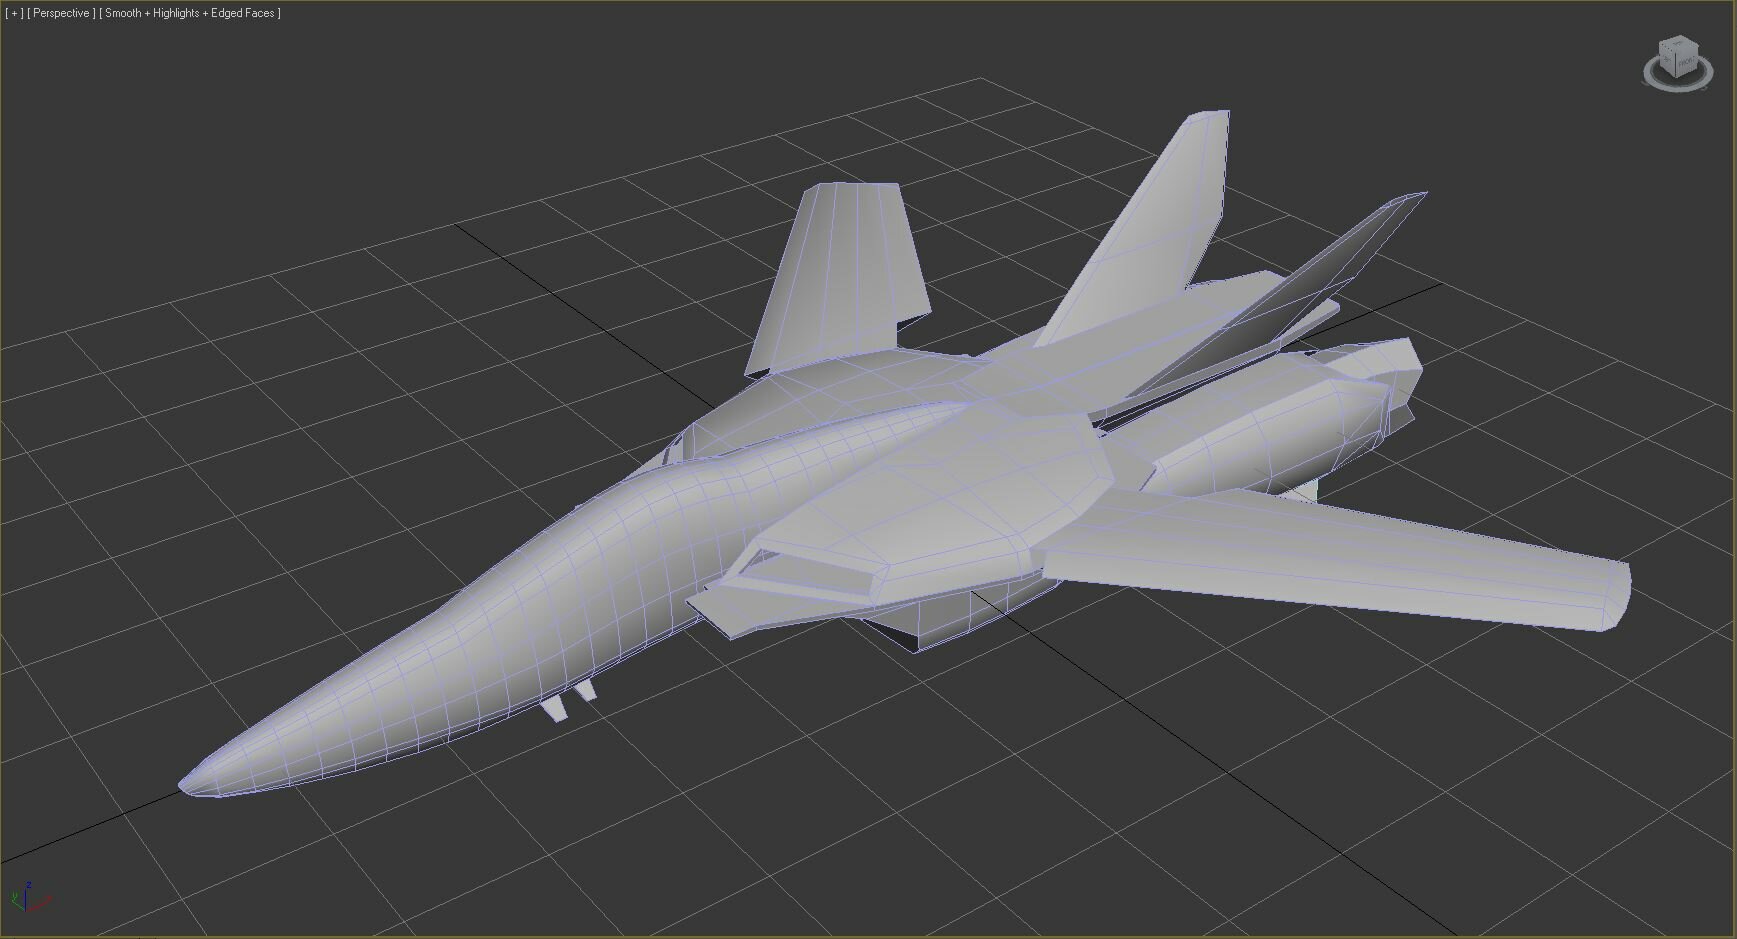
and a quick projection mapped render.
-
10 hours ago, GMK said:
Got into CAD & 3D printing as my pandemic hobbies. Different way to think, but a useful way of solving kit problems or subject availability.
Current project is the 8x8 Boxer combat reconnaissance vehicle slowly being introduced by the Australian Army. Scale will be 1:16.

Nice - what CAD program do you use?
-
15 hours ago, Duymon said:
Can't believe I ordered 4 of these :0
why 4?
-
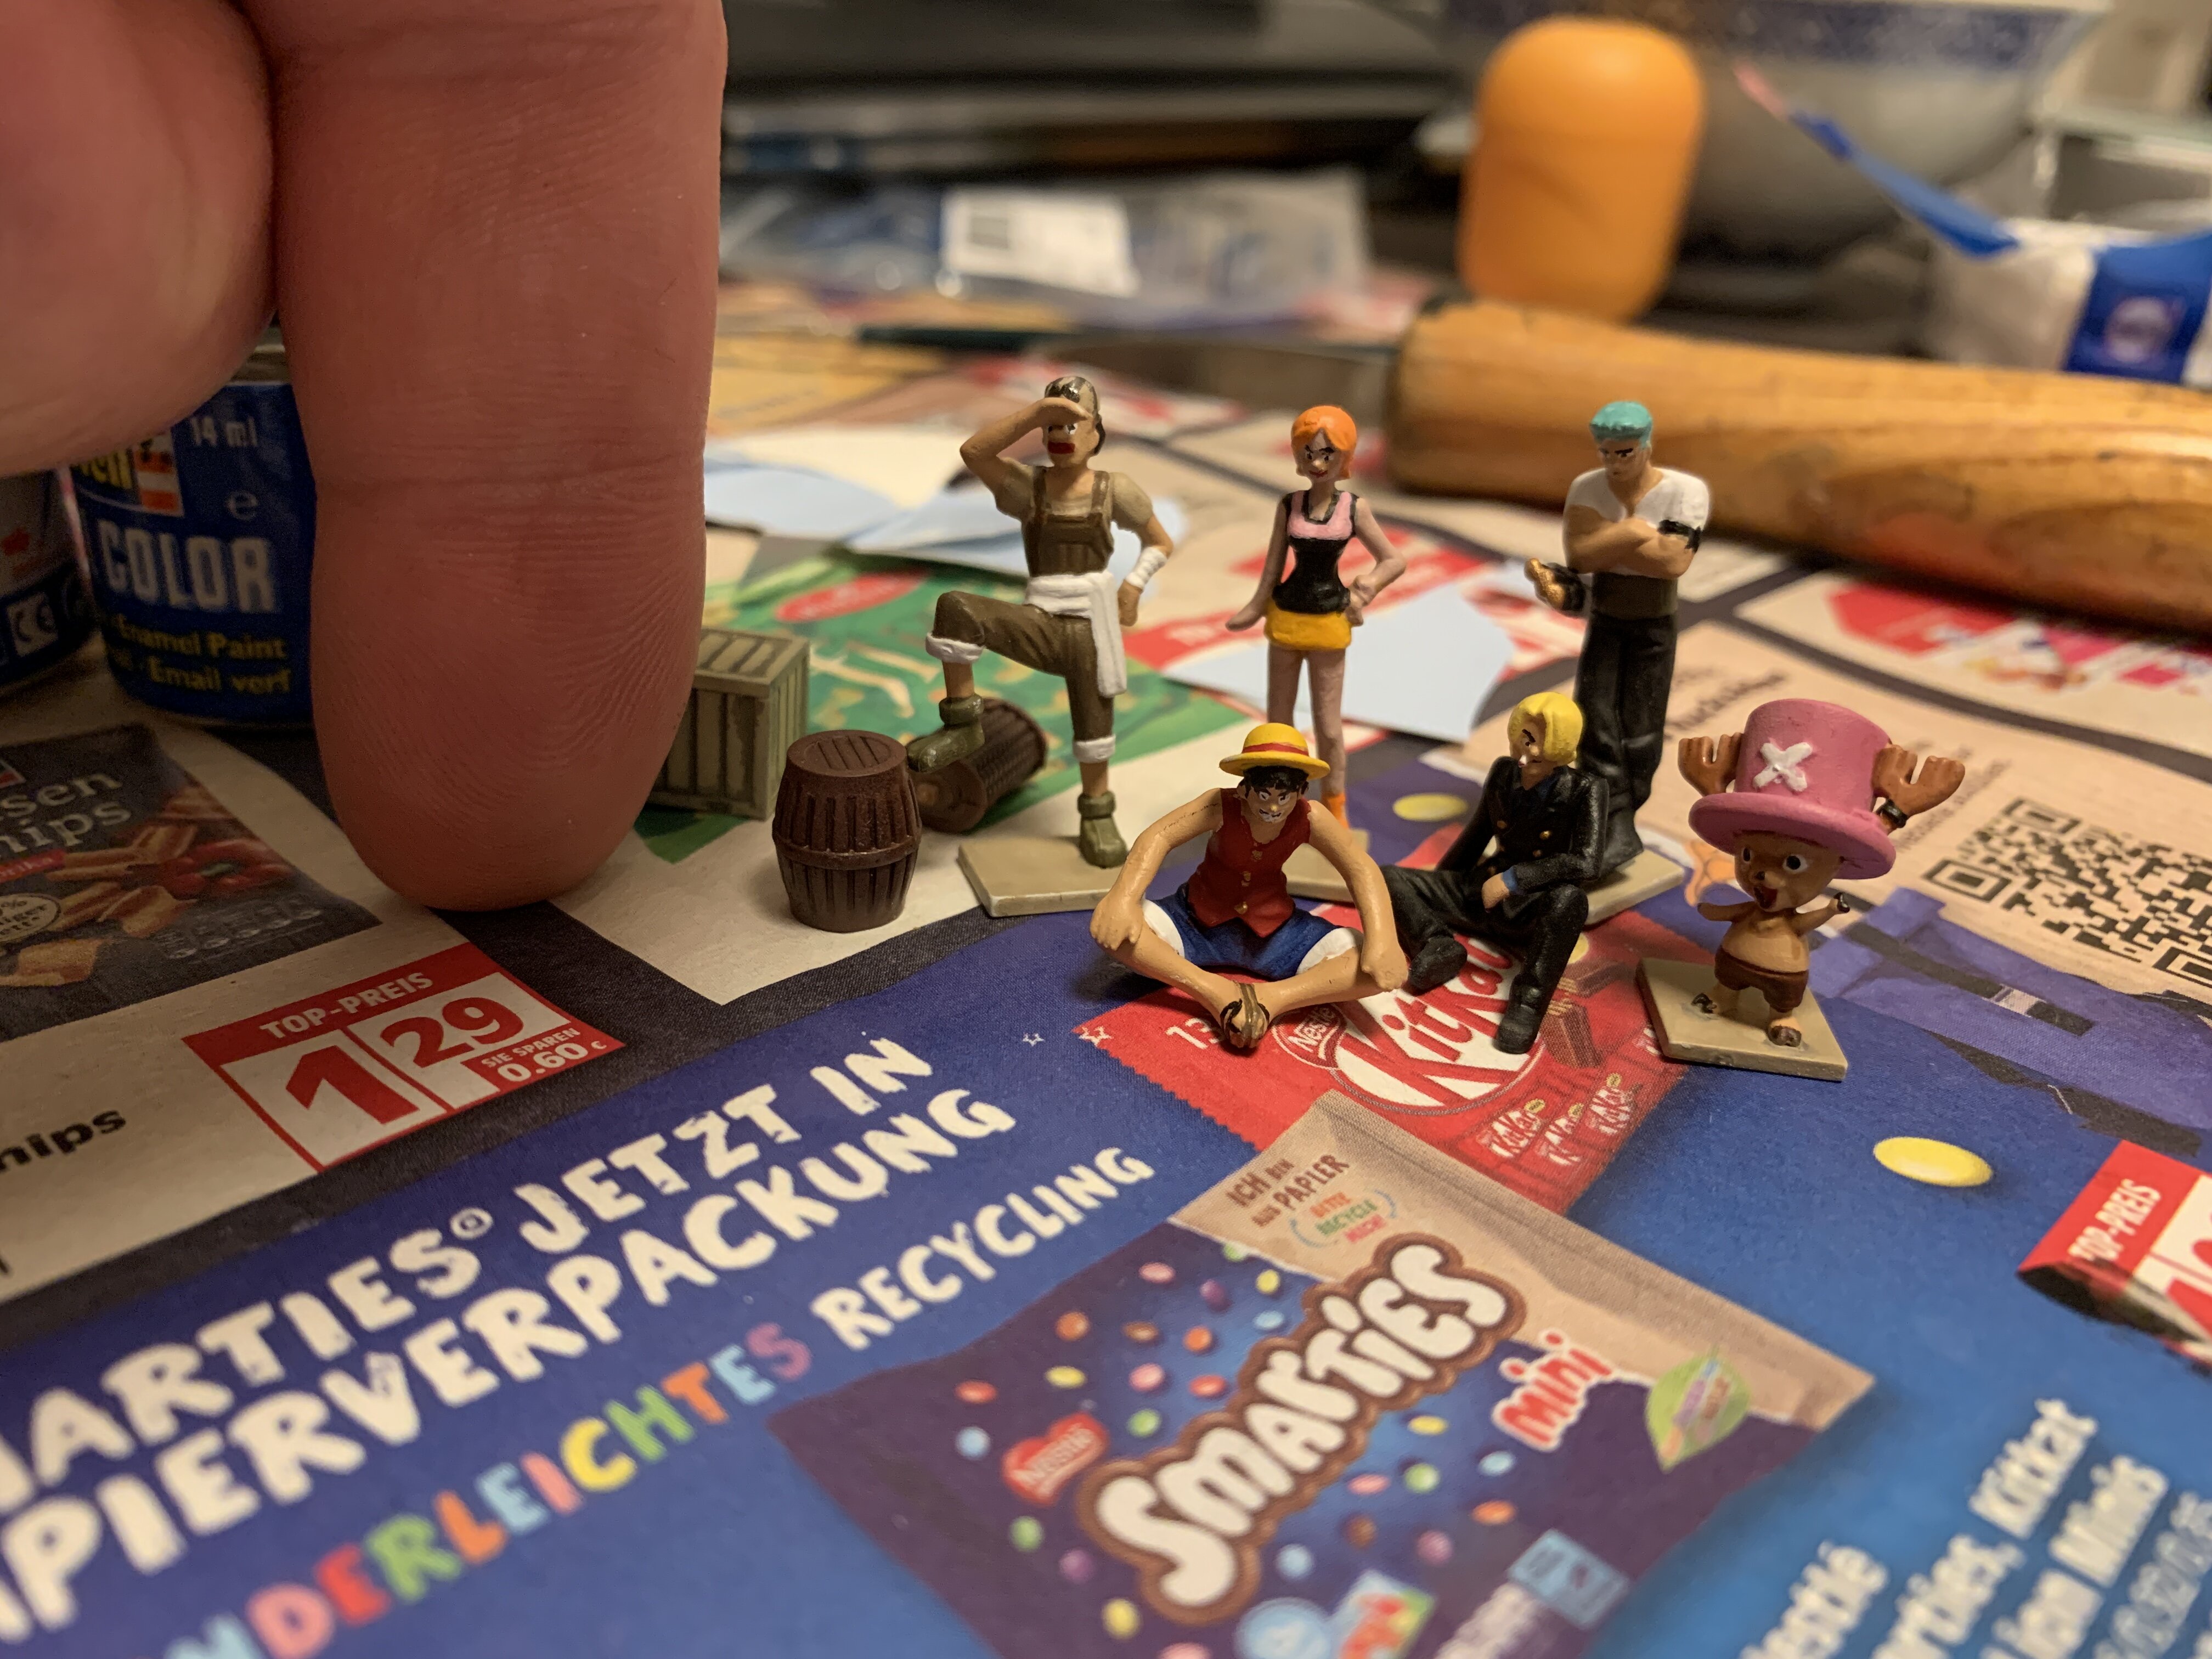
I was building this over the past weeks, as a present for the fiancé of my wifes sister (not sure if there is a proper term for that relationship in a family).
He really likes One Piece and didn’t want to purchase the 300 bucks Going Merry. So I got the bandai kit for cheap and smashed it together rather unprofessional. Still looks better than the 300 bucks version.
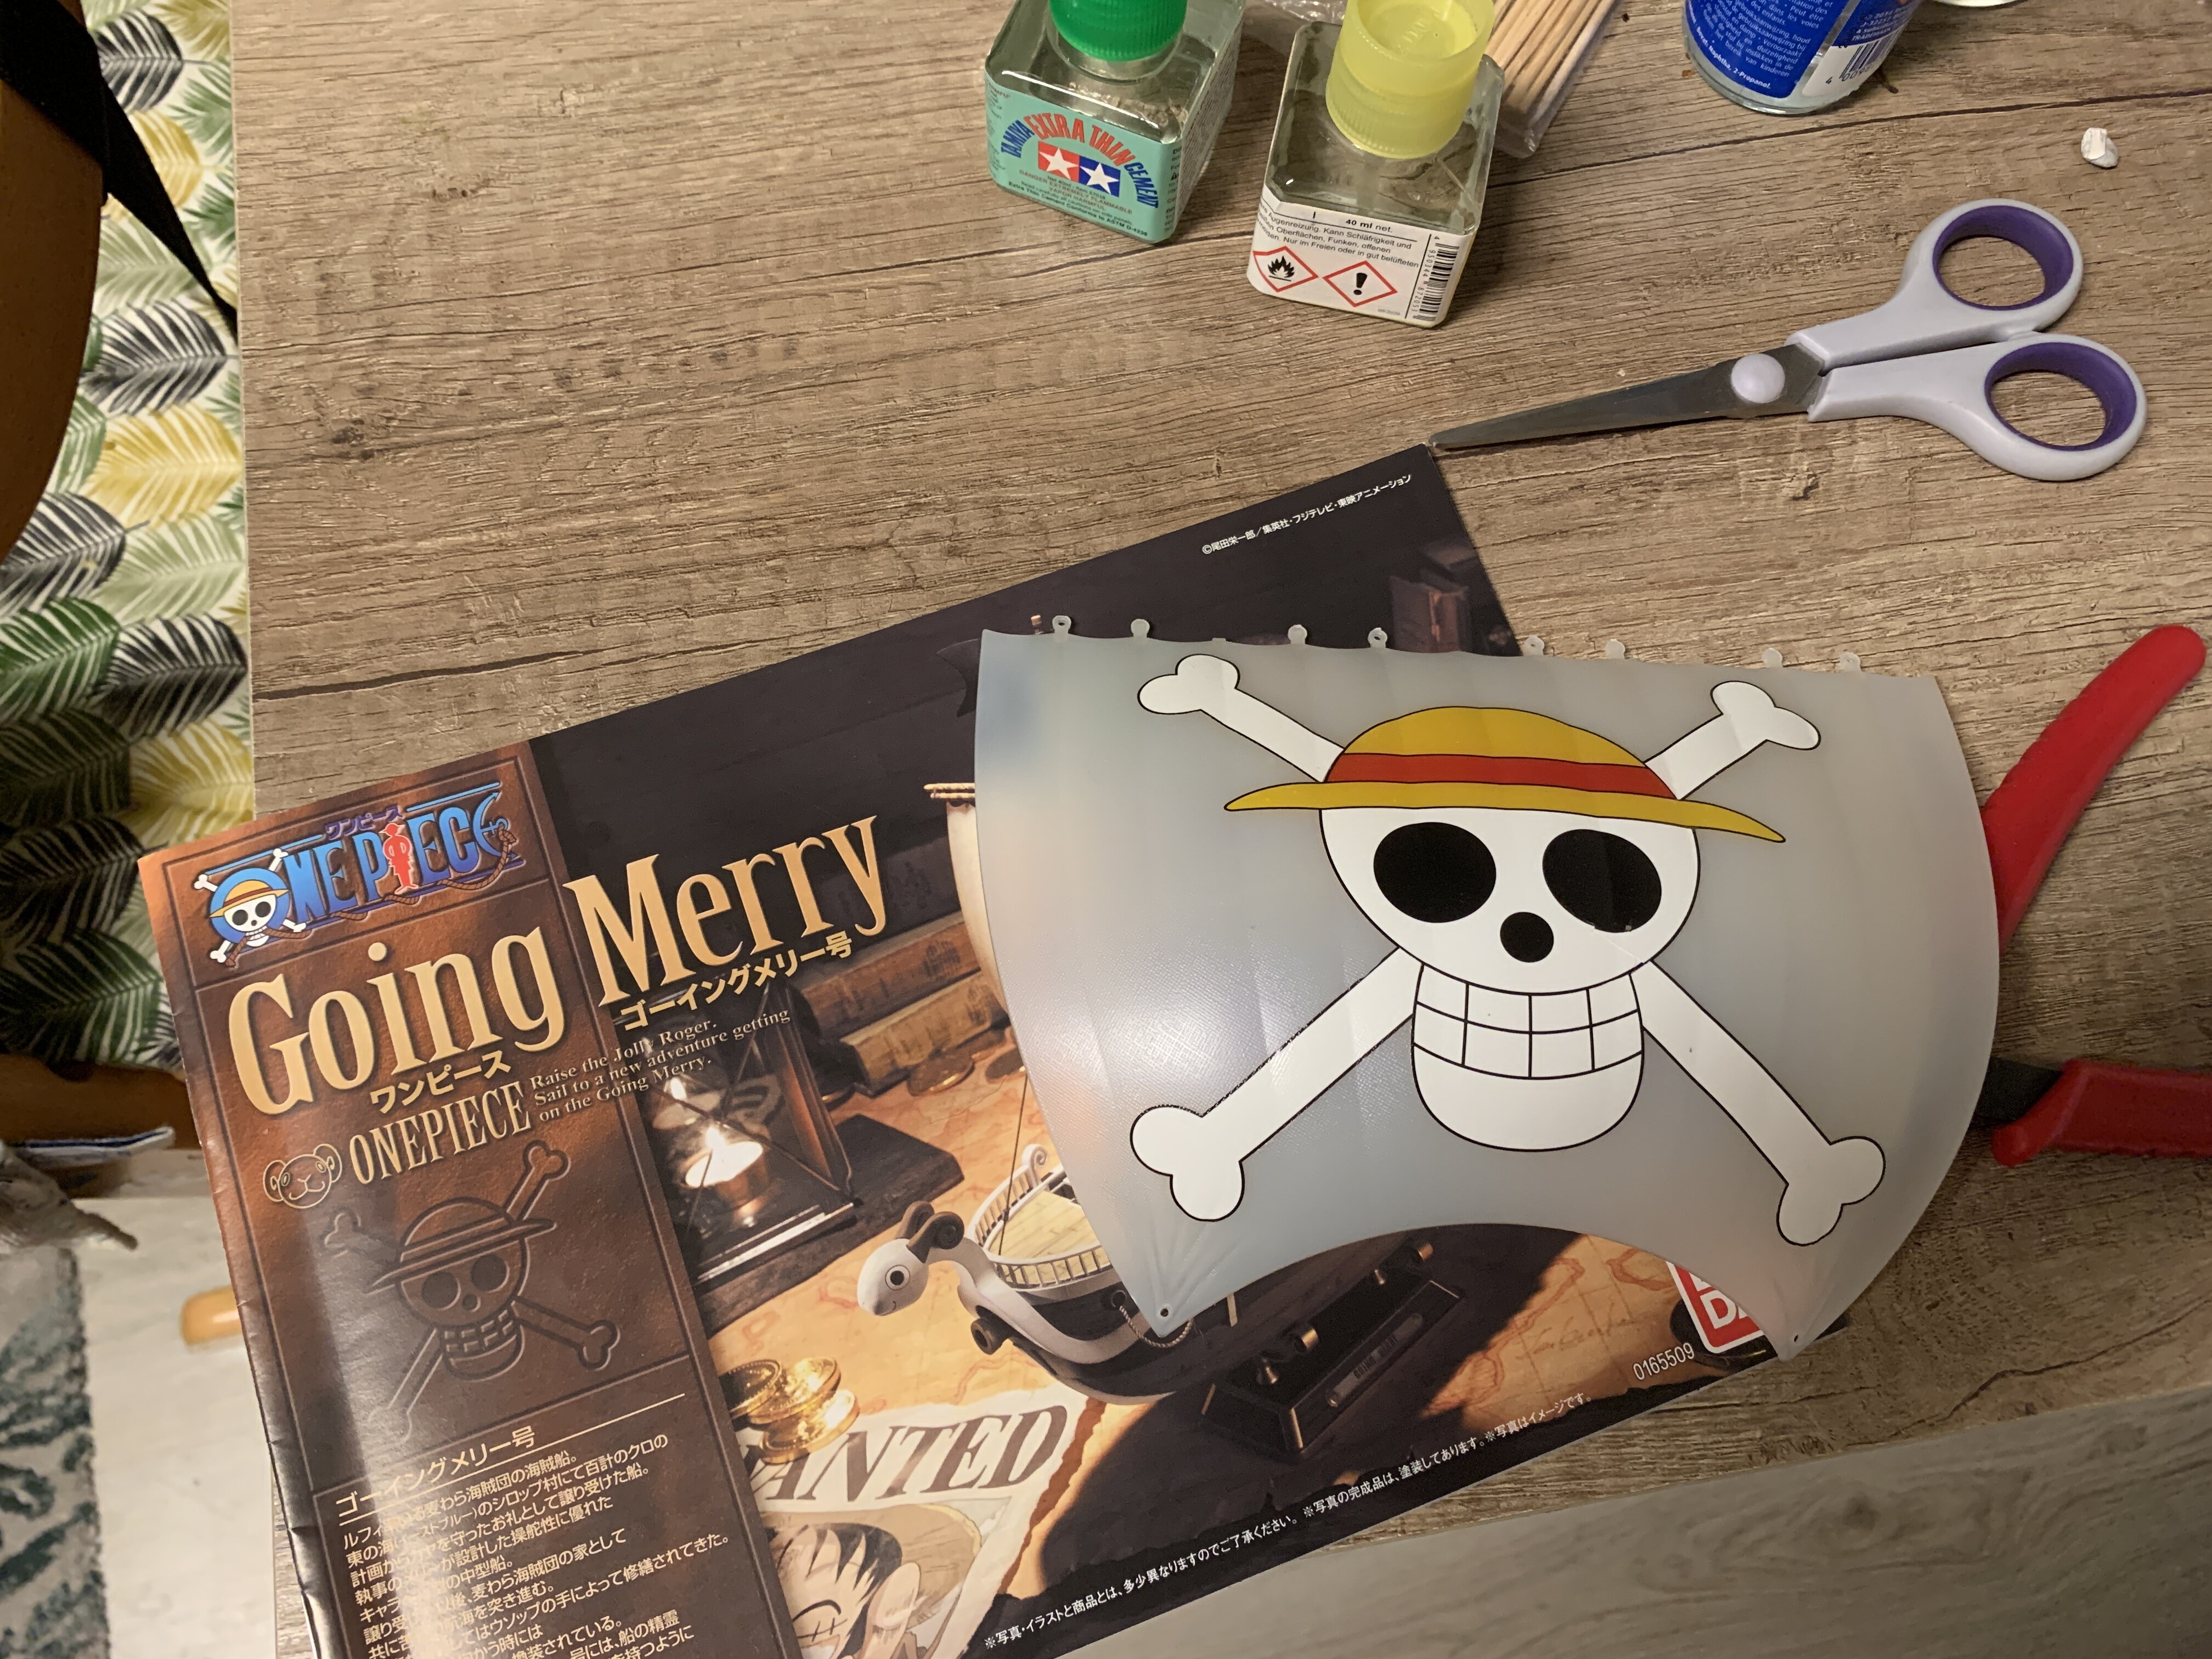
priming the crew

pre-shading the ship.
first airbrush stage done
heavy masking tape job for white parts.
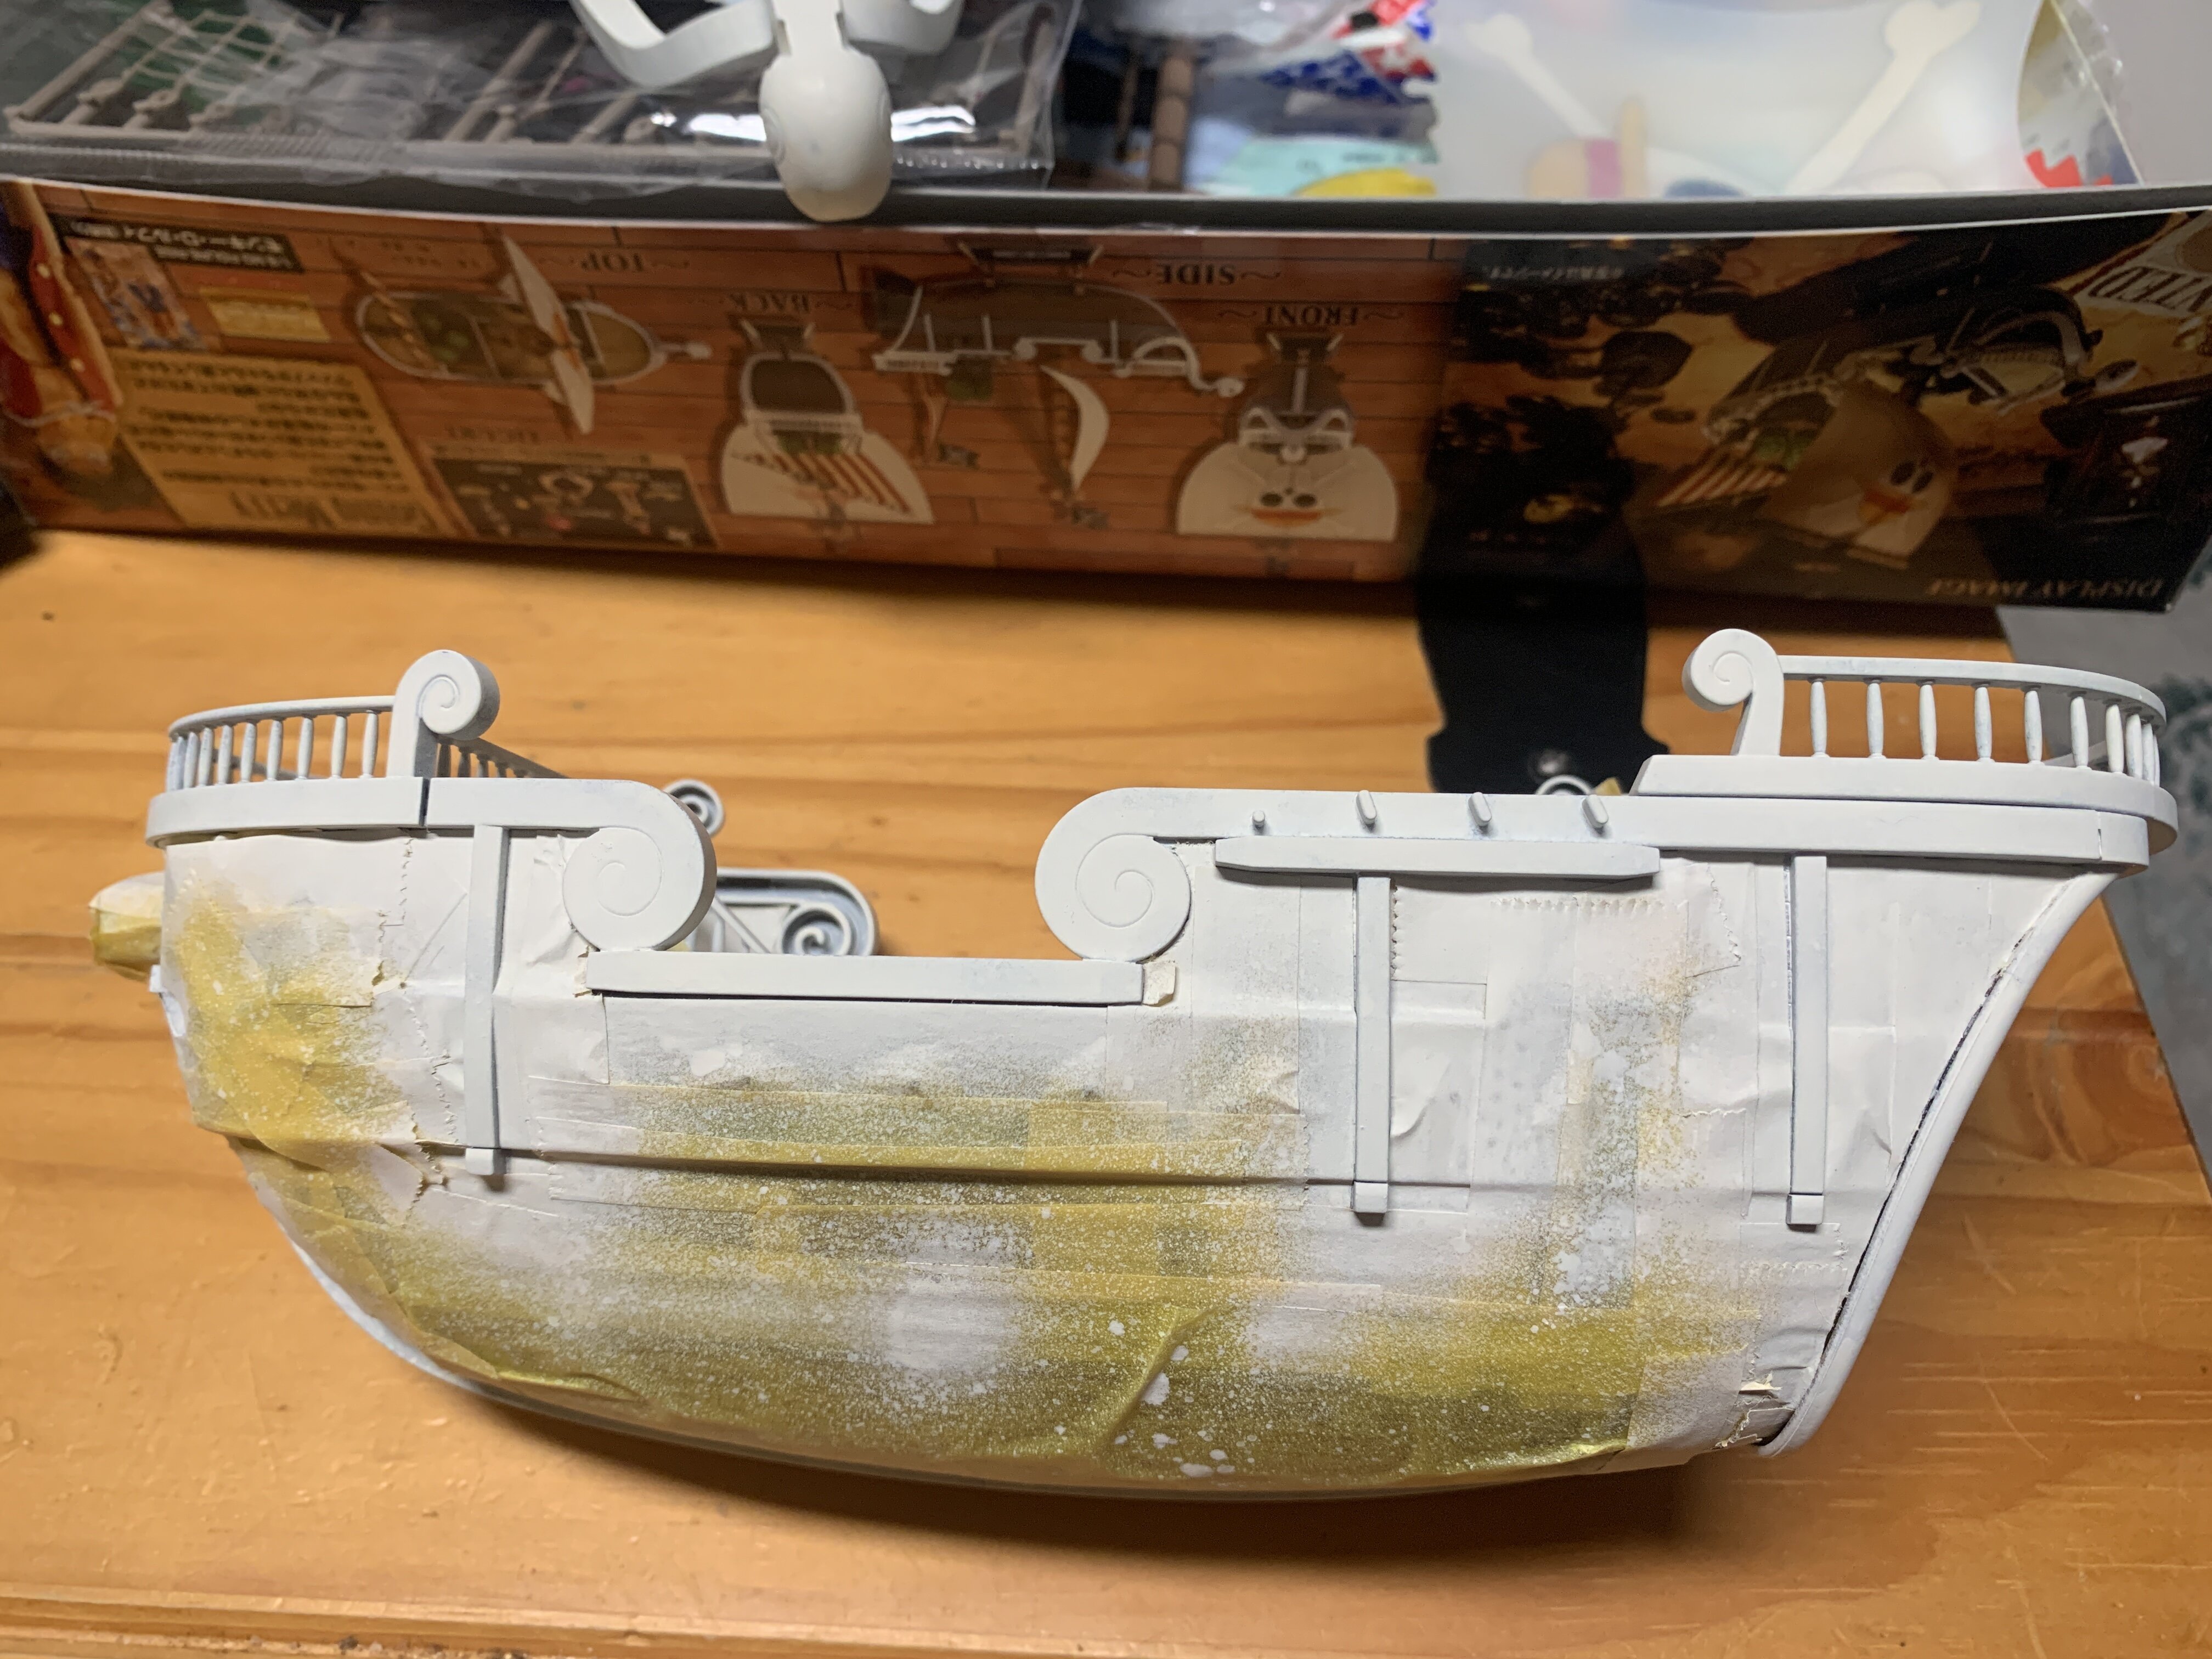
color was a bit to thin and went under the masking. Had to fix that later.
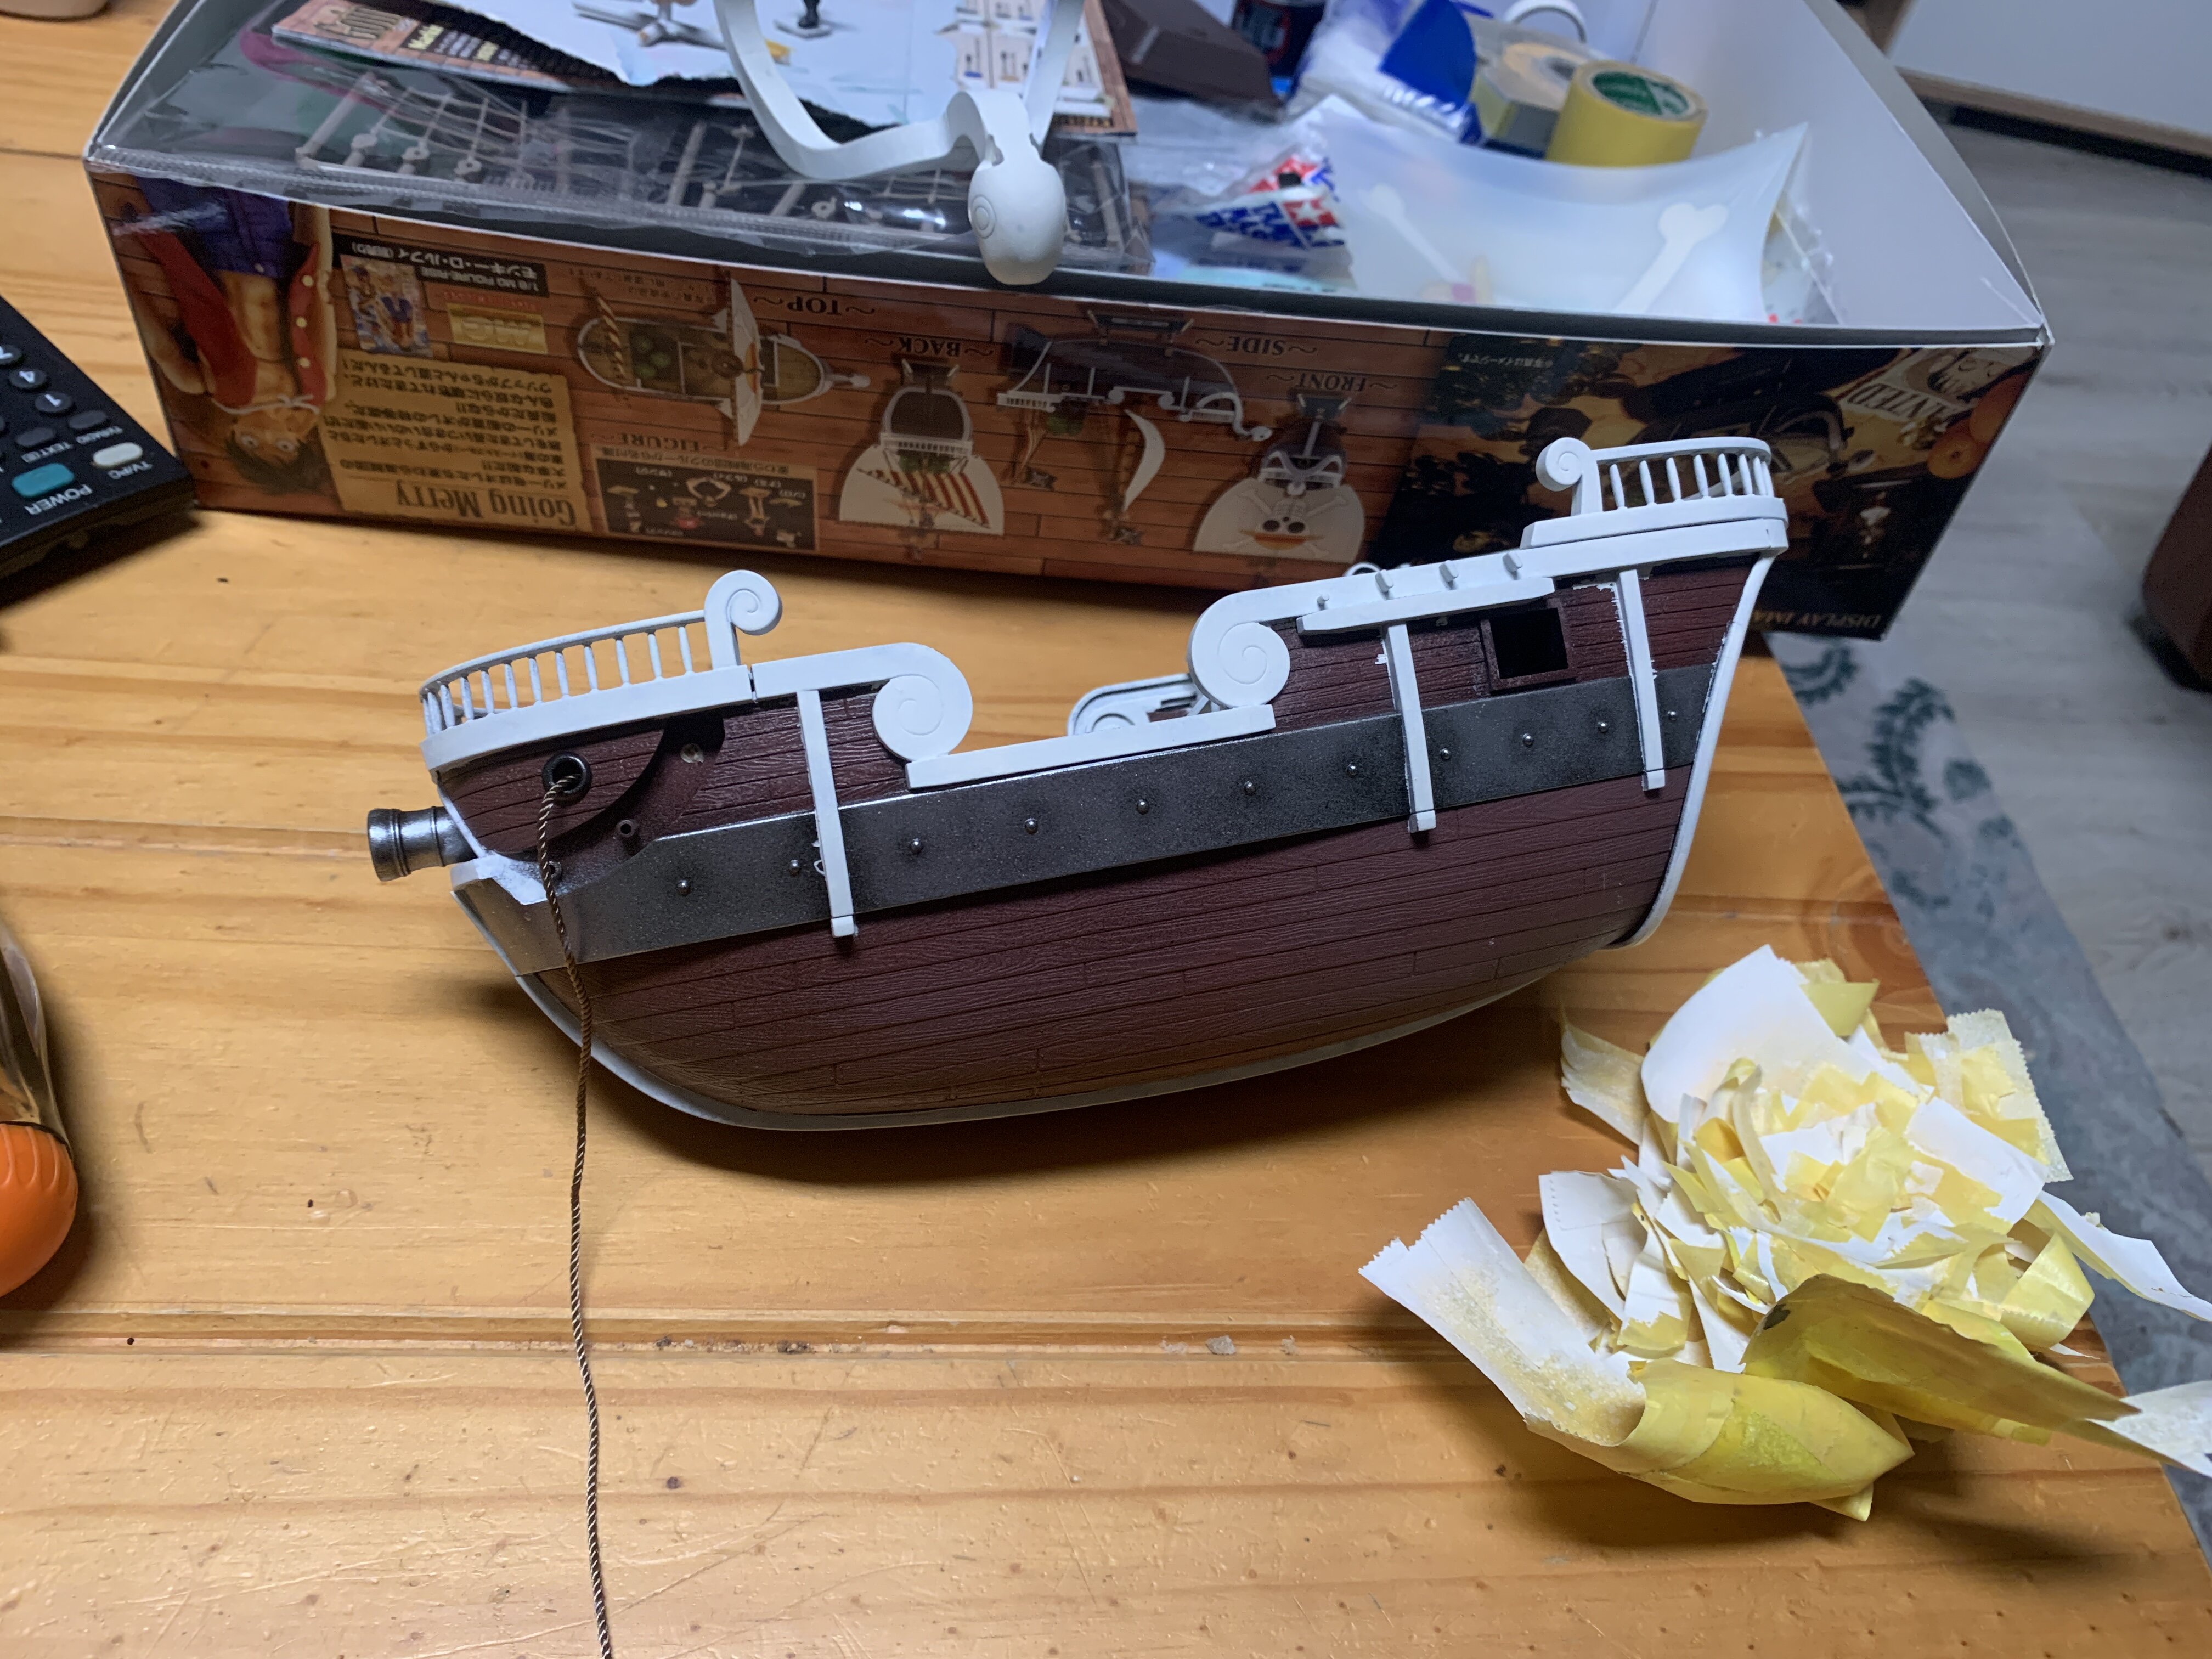
the finished crew. My index finger next to them for size comparison.
the finished ship.

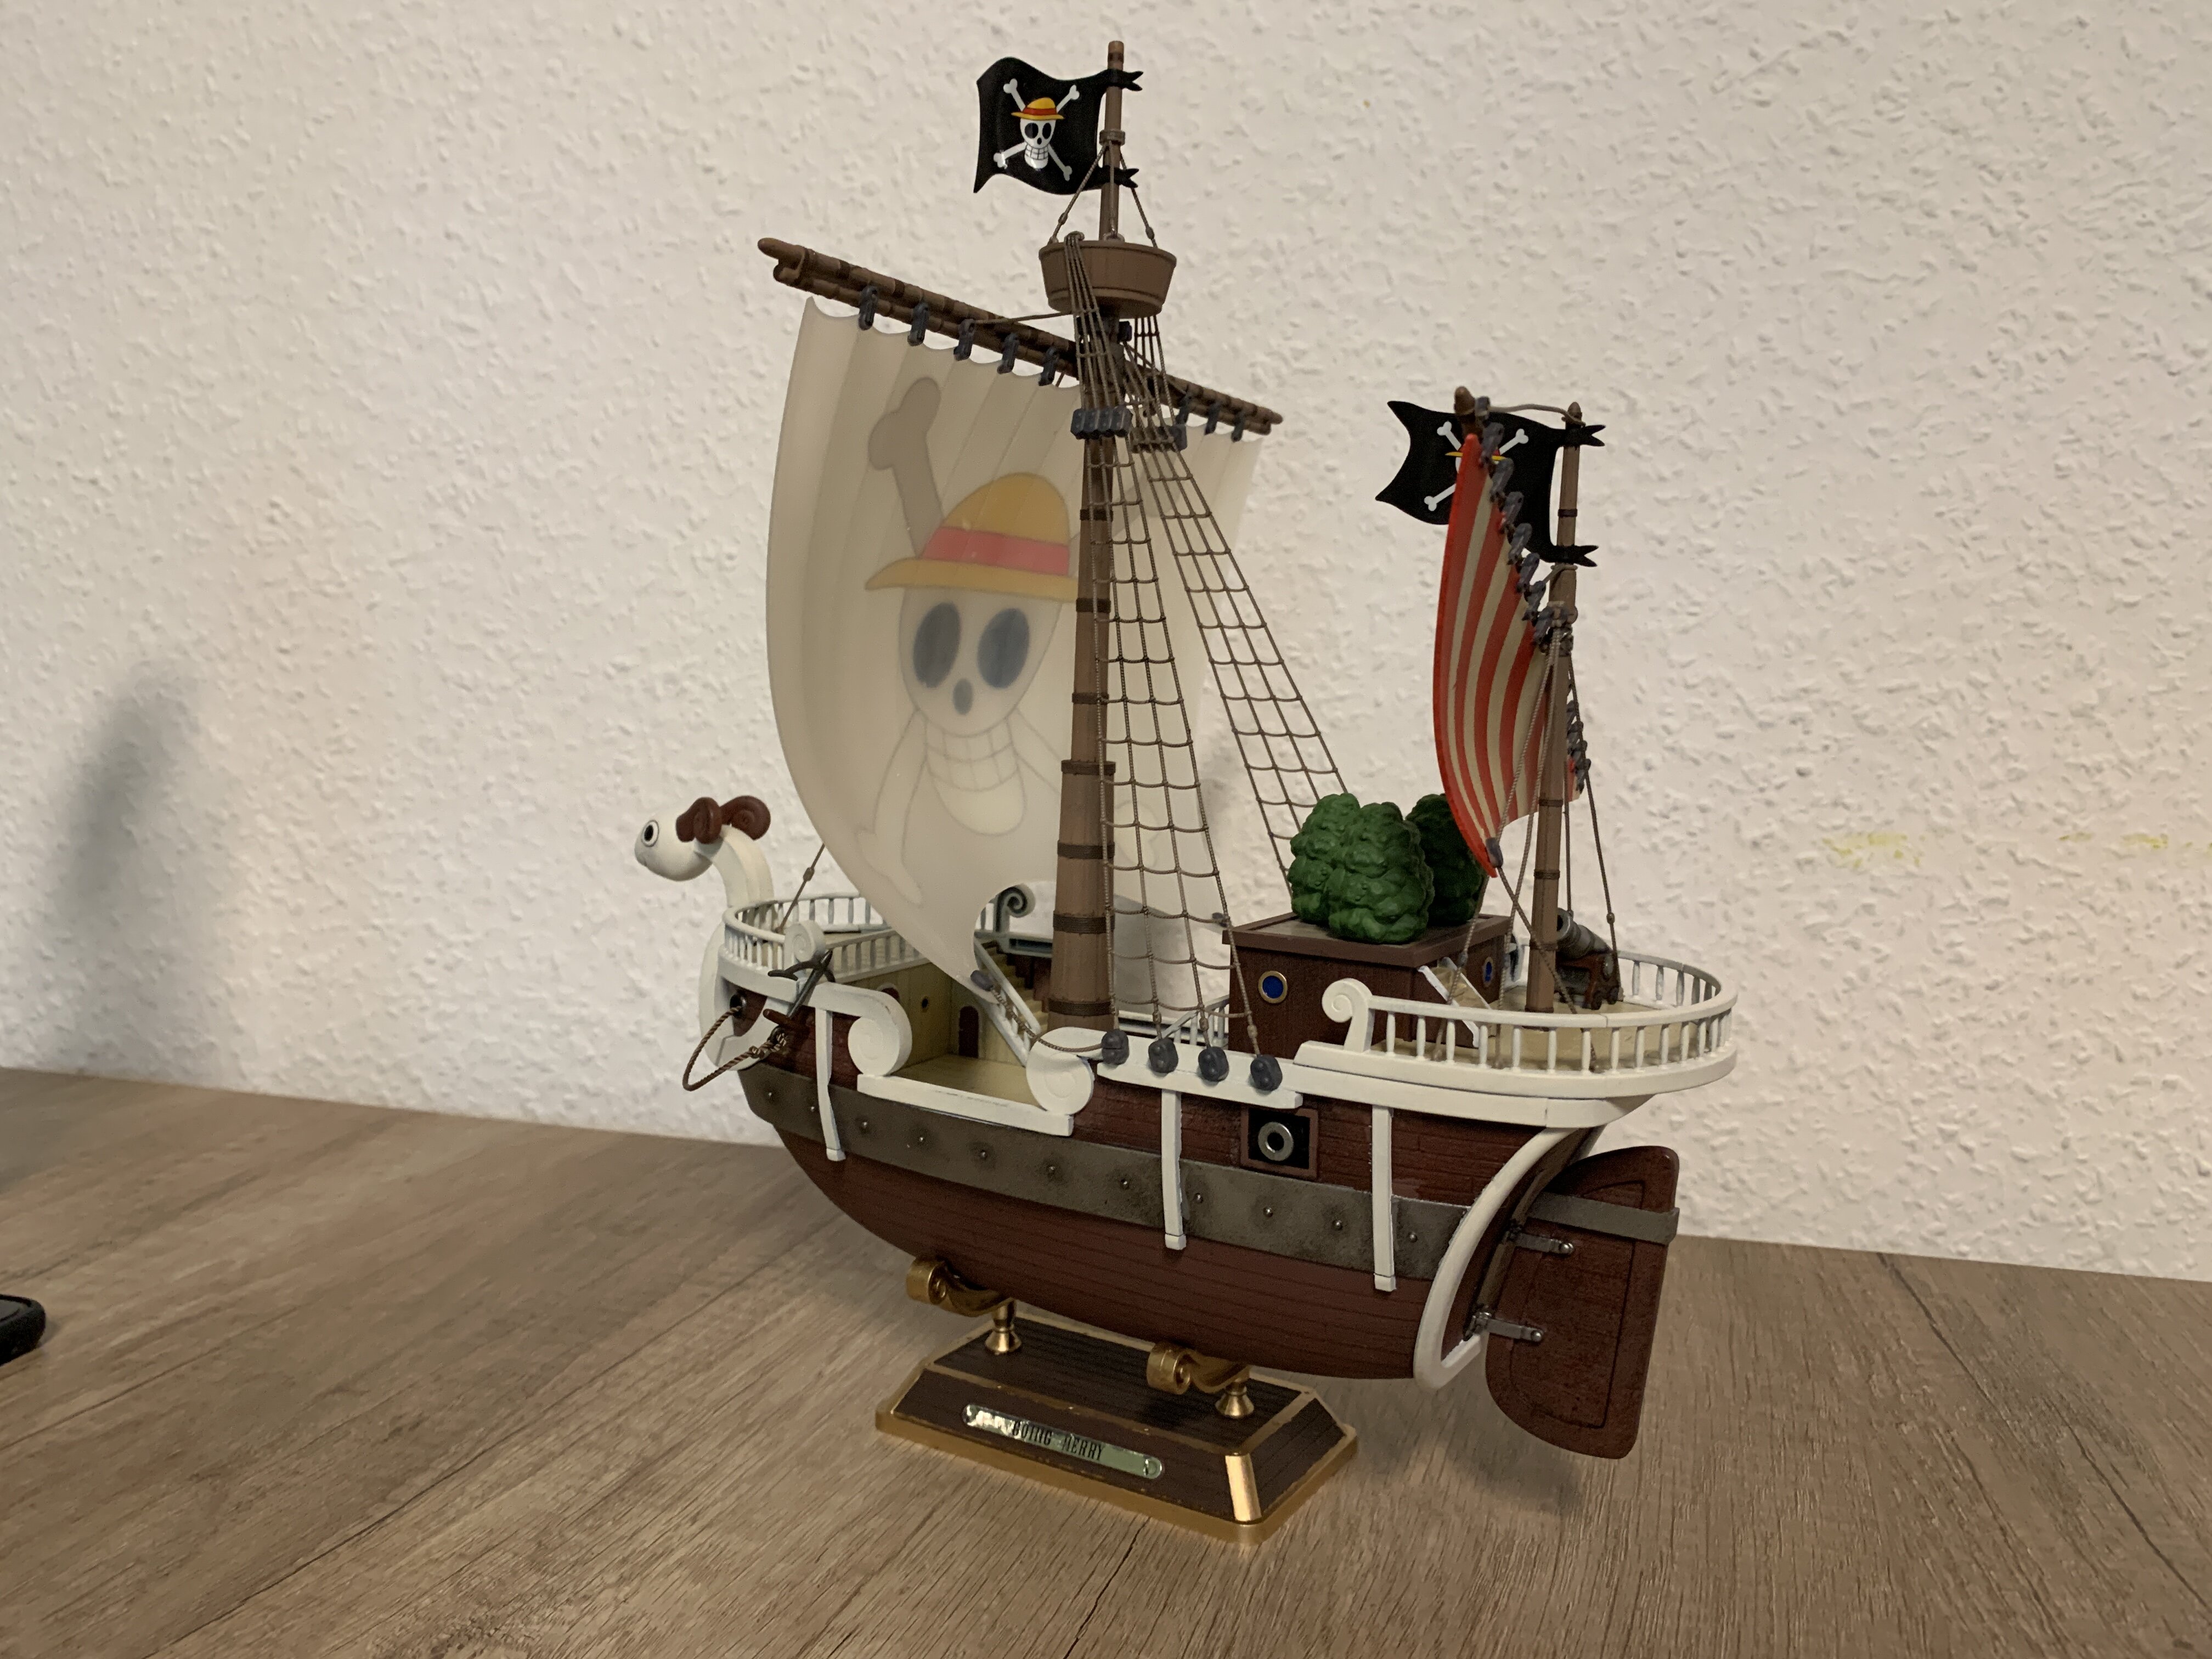
I liked the kit. It was fitting really well and was a pleasure to build. 100% recommended for any One Piece fan.
wasn’t my best build though, as I was a bit under time pressure to get it done until his birthday.
-
5 hours ago, Chronocidal said:
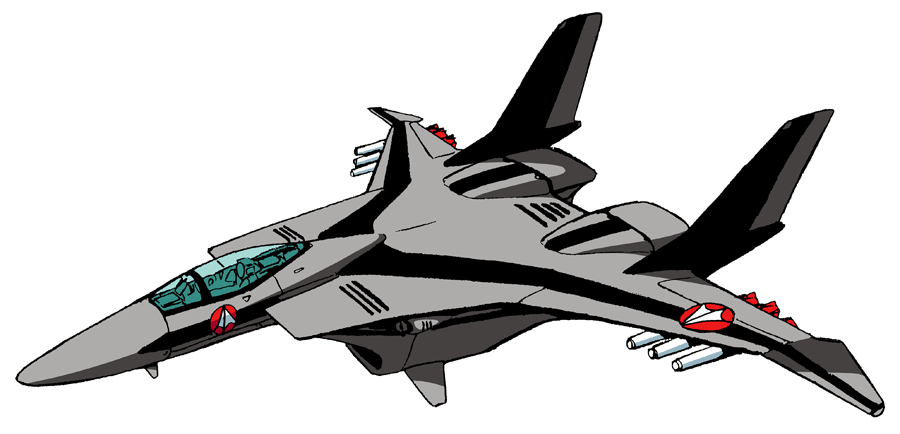
I'm also seeing a lot of this plane as an influence, especially in the tails.

Really looks like someone mashed up that, the Mave, and the X-02 from Ace Combat.
FA-37 Talon from the movie stealth (which was basically a Macross Plus Rip-Off)
-
2 hours ago, NZEOD said:
A VF-17 and VF-171 would be nice
Wave is planning a VF-171 1/72 kit
-
2 hours ago, NZEOD said:
its still unassembled
Yeah, no worries. I just wanted to have better pictures of the kit
-
3 hours ago, NZEOD said:
I have one in a box here somewhere too
Pictures please, if you don't mind. I am interested how it looks
-
3 hours ago, Thom said:
@Urashiman Nice, have fun building that.
@Gabe Q Great looking VF-0 Battroid! I like the non-hero paint scheme on it.
@pengbuzz Very cool work with the elevator.
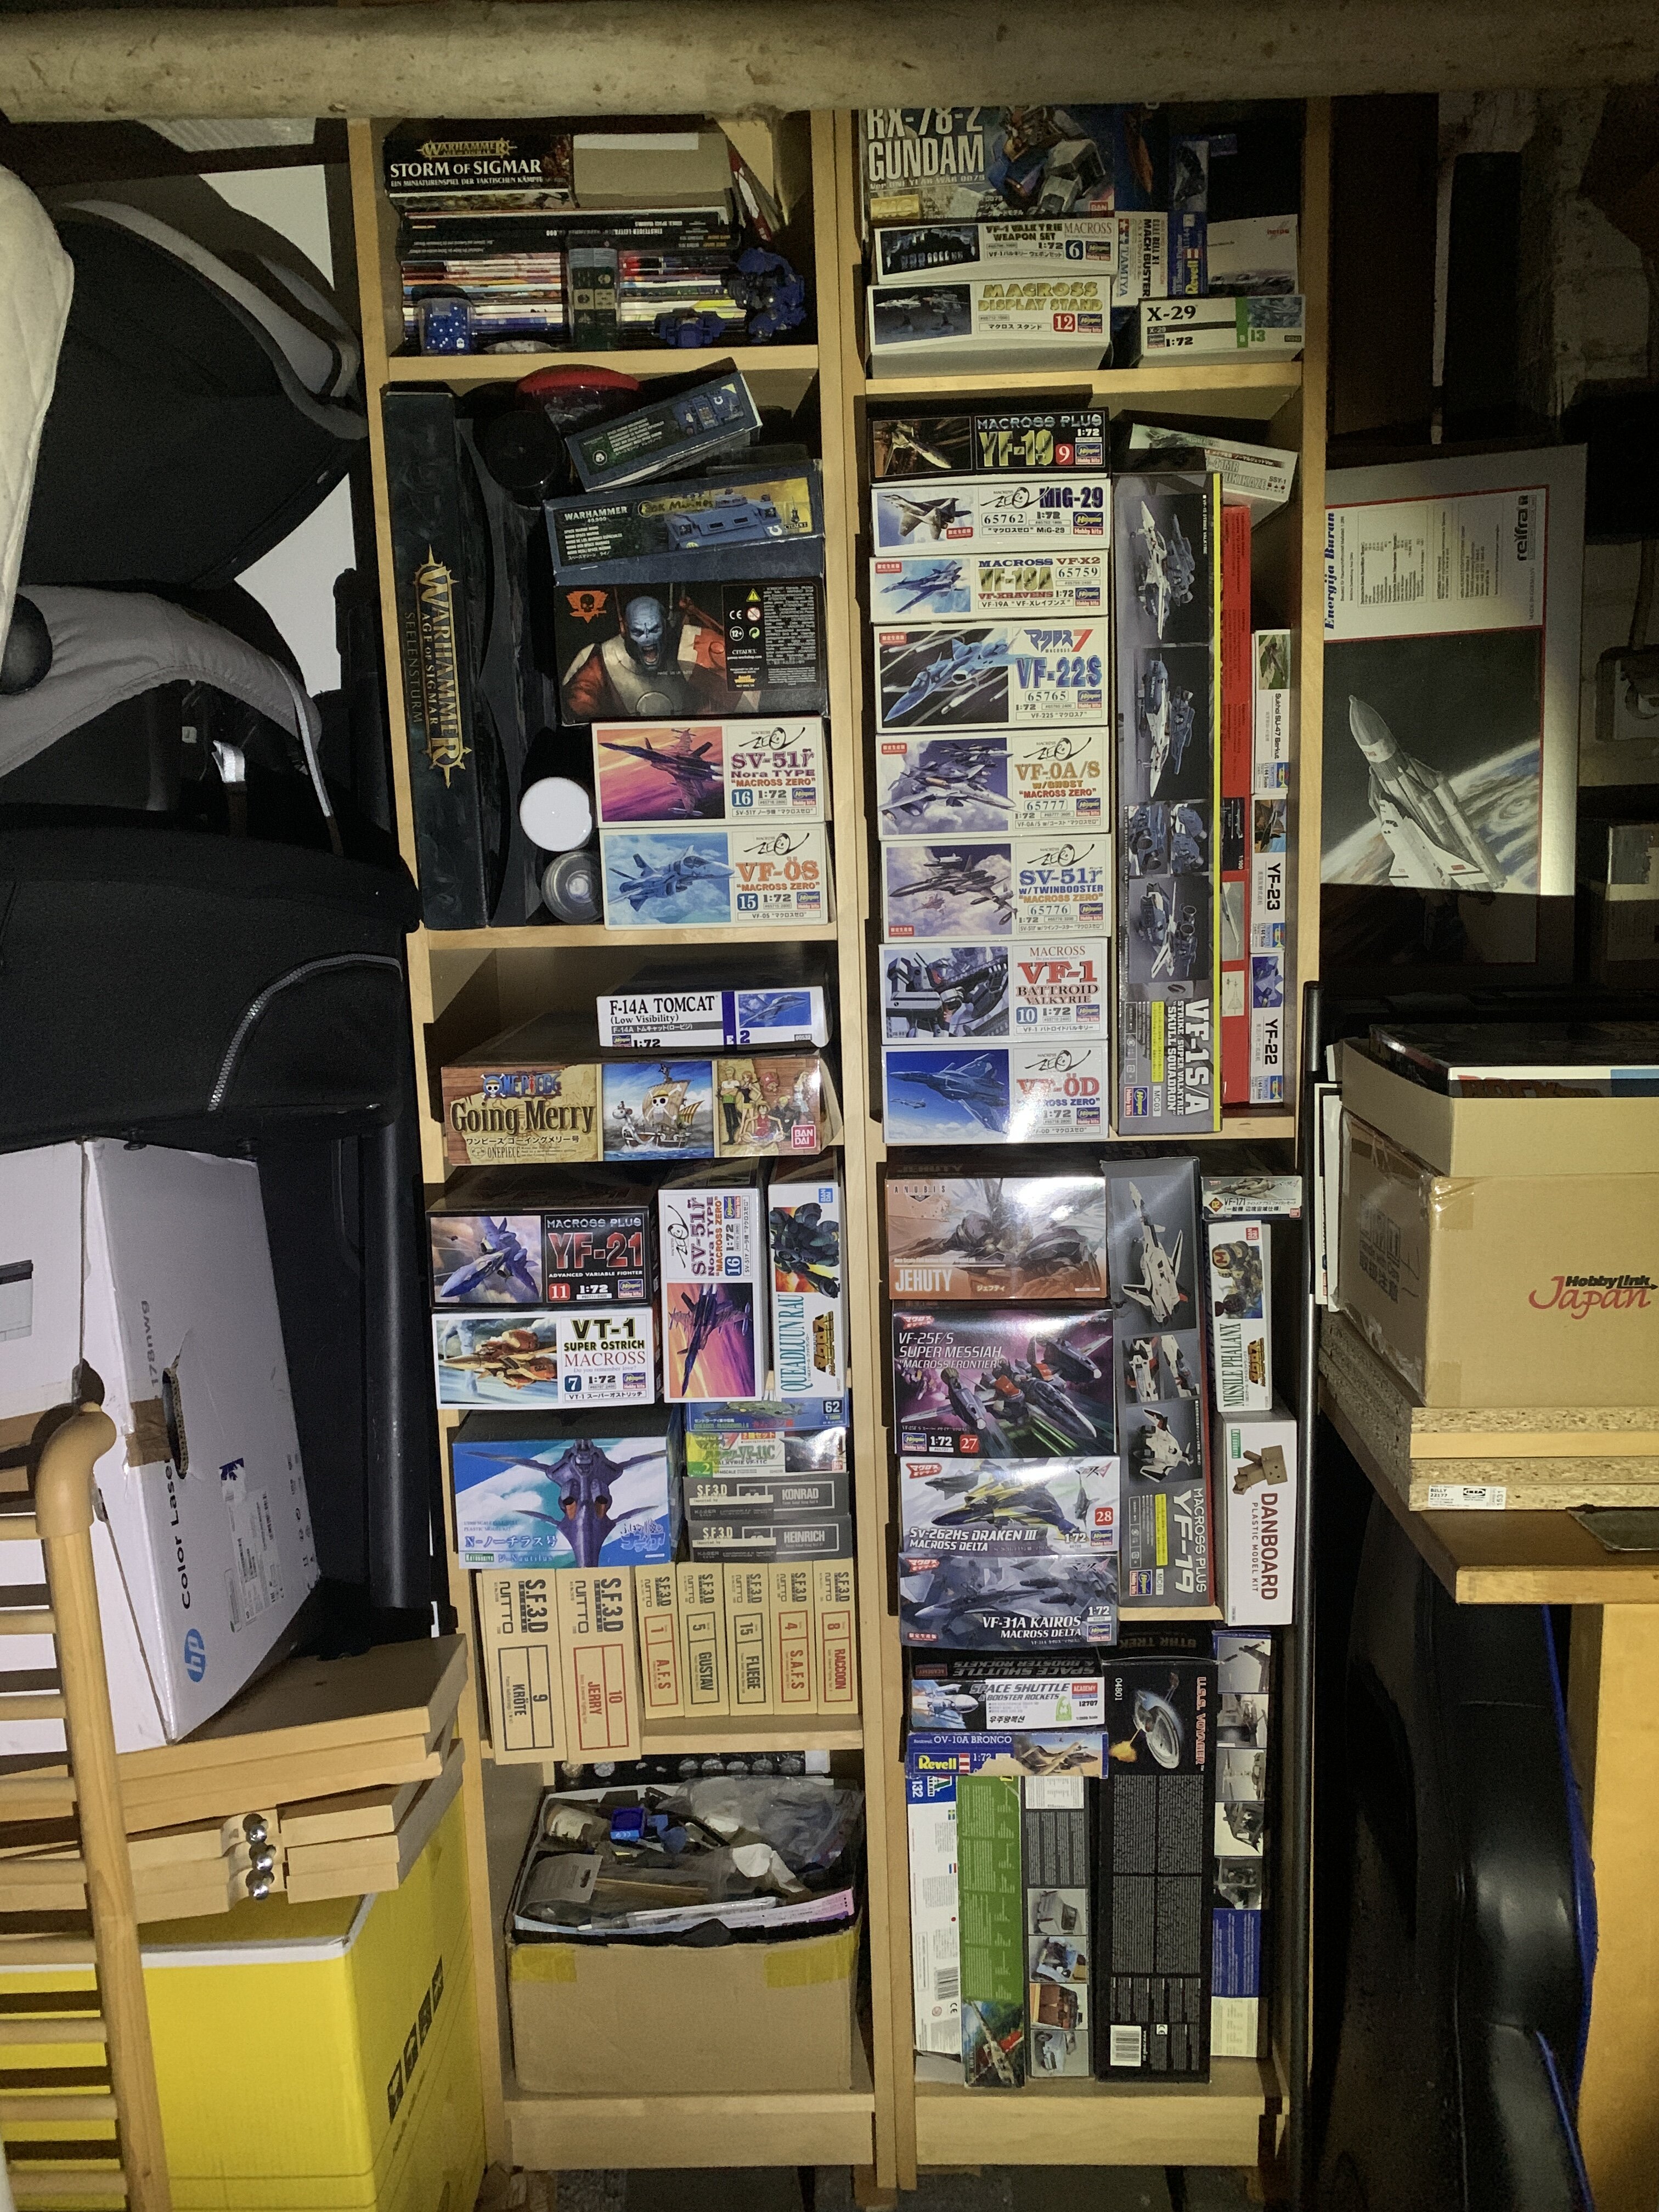
Thanks - will take some year until I get to it. First, it'll move to the basement to my large model kit collection.
-
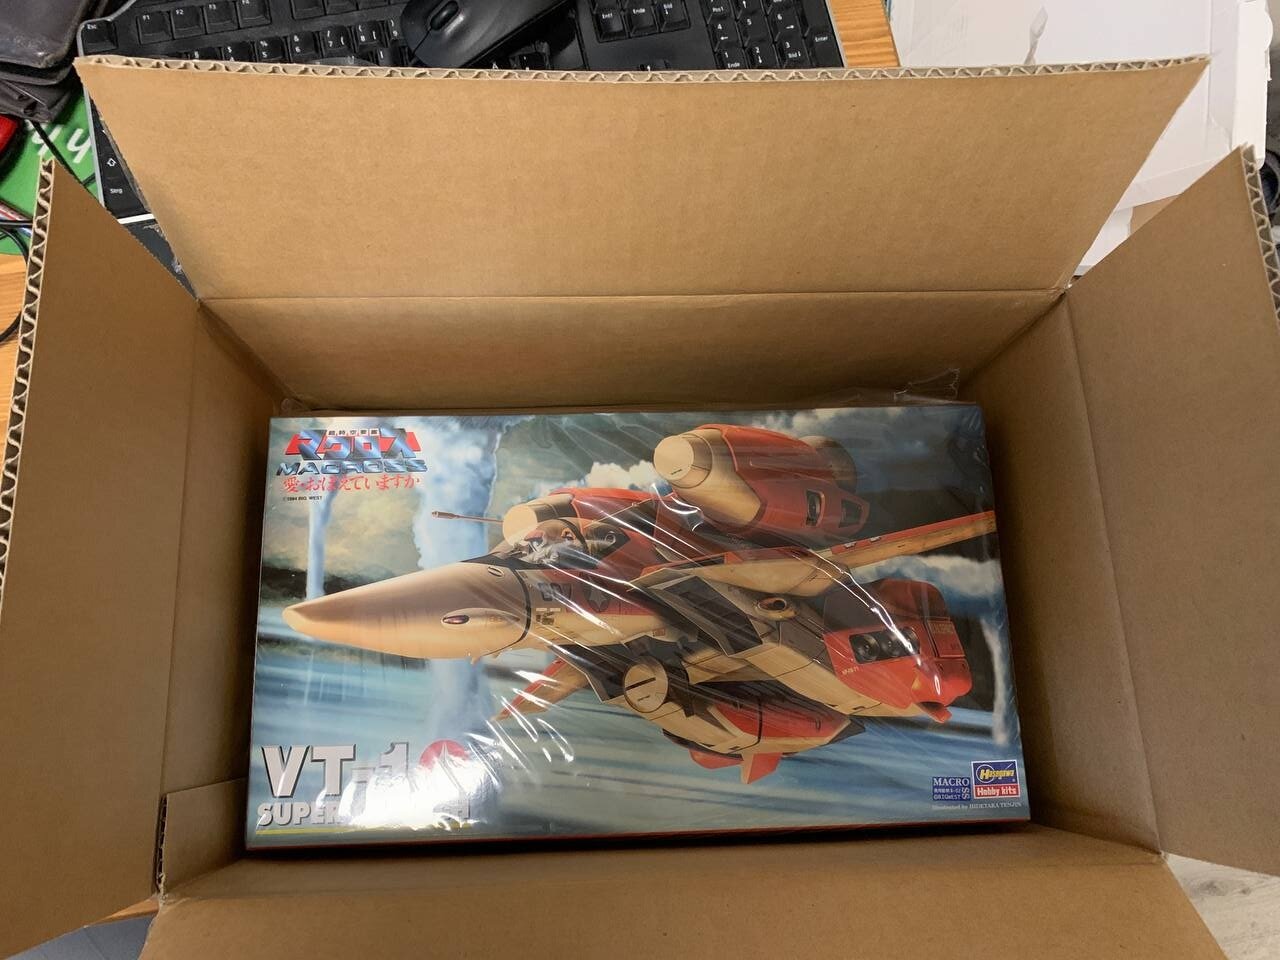
Got something new in the mail box today
-
On 8/28/2021 at 7:47 PM, Rock said:
Yup from WF 2014-15 from Frameout Models. Haven't seen an original on YJA in years and the webshop has been closed for some time. FWIW I'm pretty sure the GKM recast doesn't require the Bandai kit if you go that route. I do know the conversion kit could (with a little bit or work.)
Homes (http://inventive.web.fc2.com/index.html) did an amazing job modeling the kit and is one of the only few examples I know of outside of the resin kit.
Oh I wasn't aware of this. Thanks for the background information!
-
Hey everyone,
I was browsing the internet last night in search for news on Macross kits and found this:
https://www.shop2000.com.tw/GK-M/product/p17157810
Looks like someone kitbashed and scratch build a YF-29 from the bandai VF-25 and VF-27 and made it a mostly resin kit.
Whats Lying on your Workbench MK IV
in The Workshop!
Posted
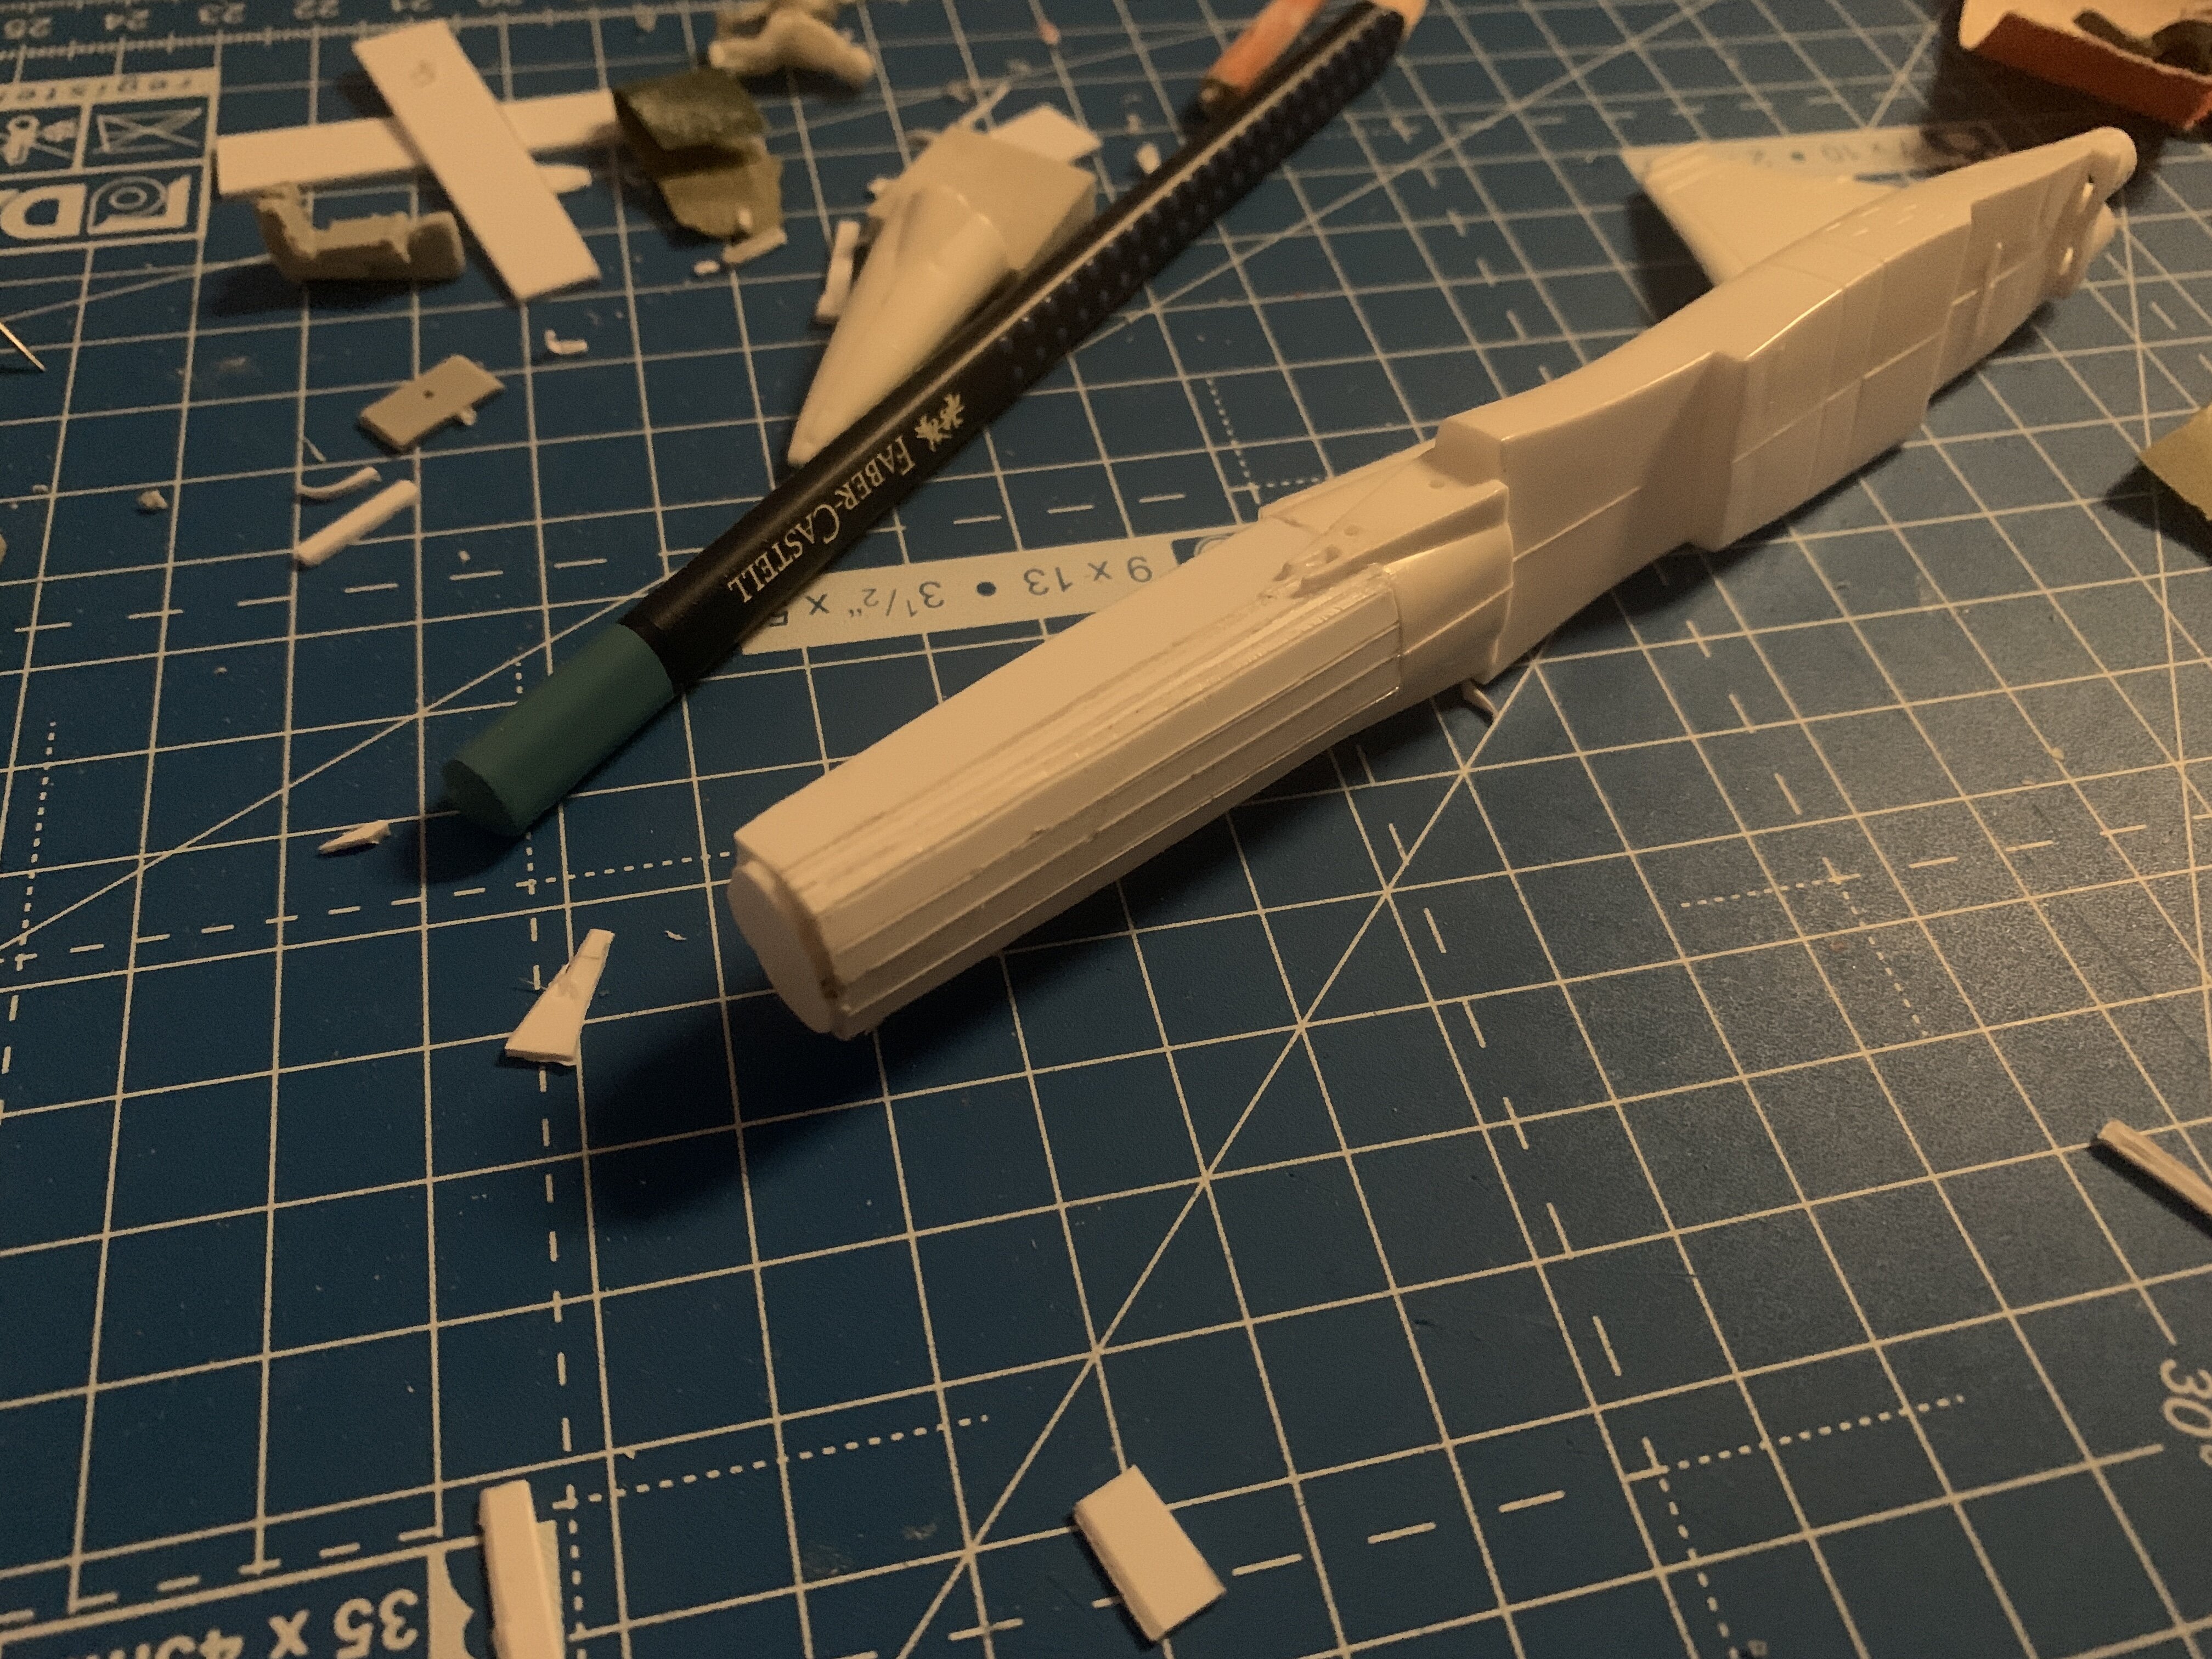
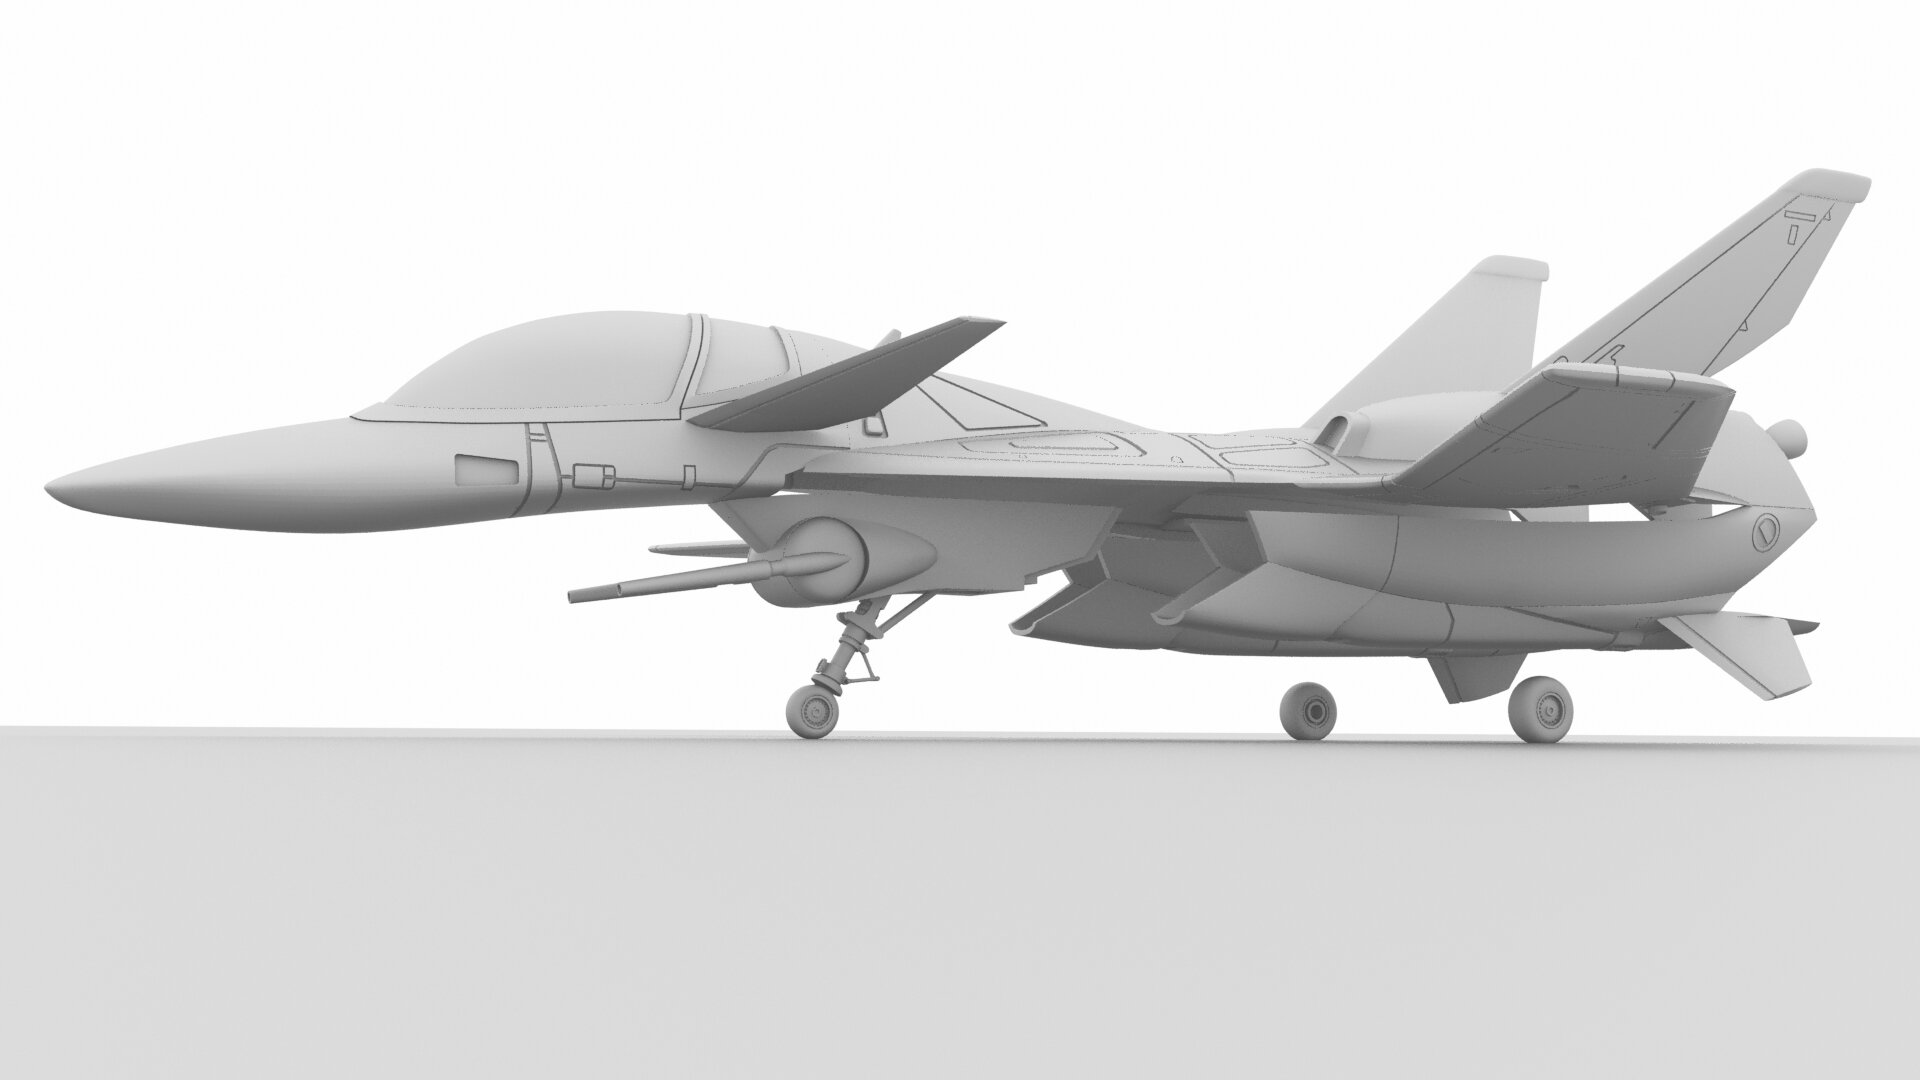
Okay, update on the F5B.
I basically drenched it in Revell putty yesterday and let it dry for ~24 hours.
and today I started to sand away on this like crazy. Uh!
So this is where I am at now.
One side almost done, the other still needs so sandpaper love.
I think I am on a good way here fixing this crappy kit. Lets see how it‘ll turn out.