
Urashiman
-
Posts
730 -
Joined
-
Last visited
Content Type
Profiles
Forums
Events
Gallery
Posts posted by Urashiman
-
-
7 hours ago, Graham said:
Heh, I actually just bought a Vita TV so I can play Macross Delta Scramble on a large TV. I haven't set it up yet though. 😅
I'm the same, Macross Delta Scramble is pretty much the only game I want to play on Vita. Actually over the decades most of my consoles were bought specifically to play Macross games. Of course I bought and played other games.
I just got my old PS3 set up and it still works after so many years. The only issue was the battery in the controller has died, so I've got a replacement battery on order. Been having fun the last few days playing the Macross Last Frontier PS3 game.
yeah, last November I dedusted my PS3, got new thermal paste onto it and did some general cleaning of the insides, replacing pads and as well, replacing controller batteries. I got some fancy ones off eBay with double the capacity the original ones have. Then I also added a bigger SSD as the old 120gb HDD was horribly slow and degrading. I got platin on Macross 30 in December and 100% all the hybrid pack games. The only Macross game missing for me now is Scramble... (except for my emulation attempts with Vita3K).
-
11 hours ago, GMK said:
Not my box or table, sadly.
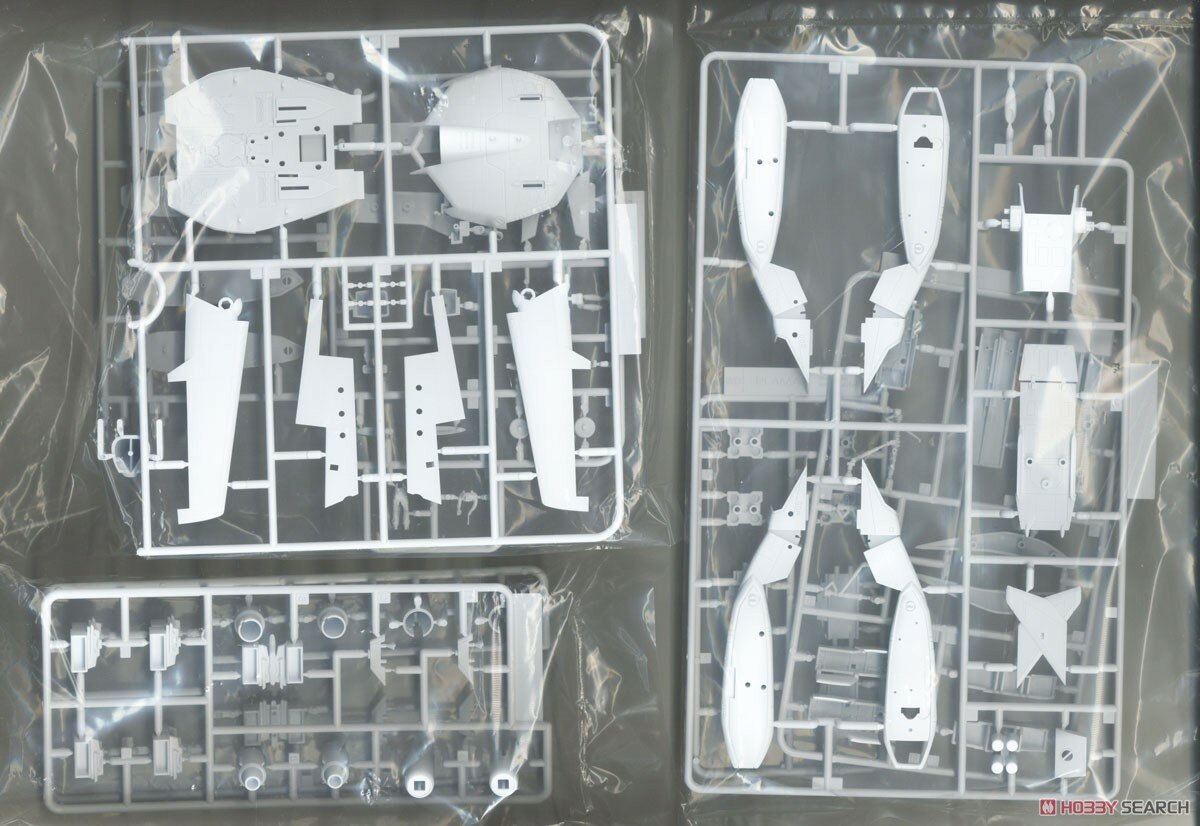
ah okay - but pictures are up on 1999.co.jp. It appears they remodeled the engine bays/legs from scratch.
-
On 1/30/2025 at 11:31 AM, Graham said:
Was able to jailbreak my Vita last night. Actually, it's pretty easy to follow all the steps on the various videos on YouTube.
So, I've now got the DLC I downloaded installed.
Having a real blast replaying this game again after many years.
cool, congratulations - I am thinking about getting a vita TV for scramble, as it apparently works properly on the big screen. Scramble is probably the only game I want to play on Vita, maybe uncharted too, but I've been told Golden Abyss pretty much sucks and does nothing to Nathan Drakes story. I don't want to purchase a console to play only one game on it (again).
-
On 1/29/2025 at 9:35 AM, GMK said:
VF-1S Strike Valkyrie box art.
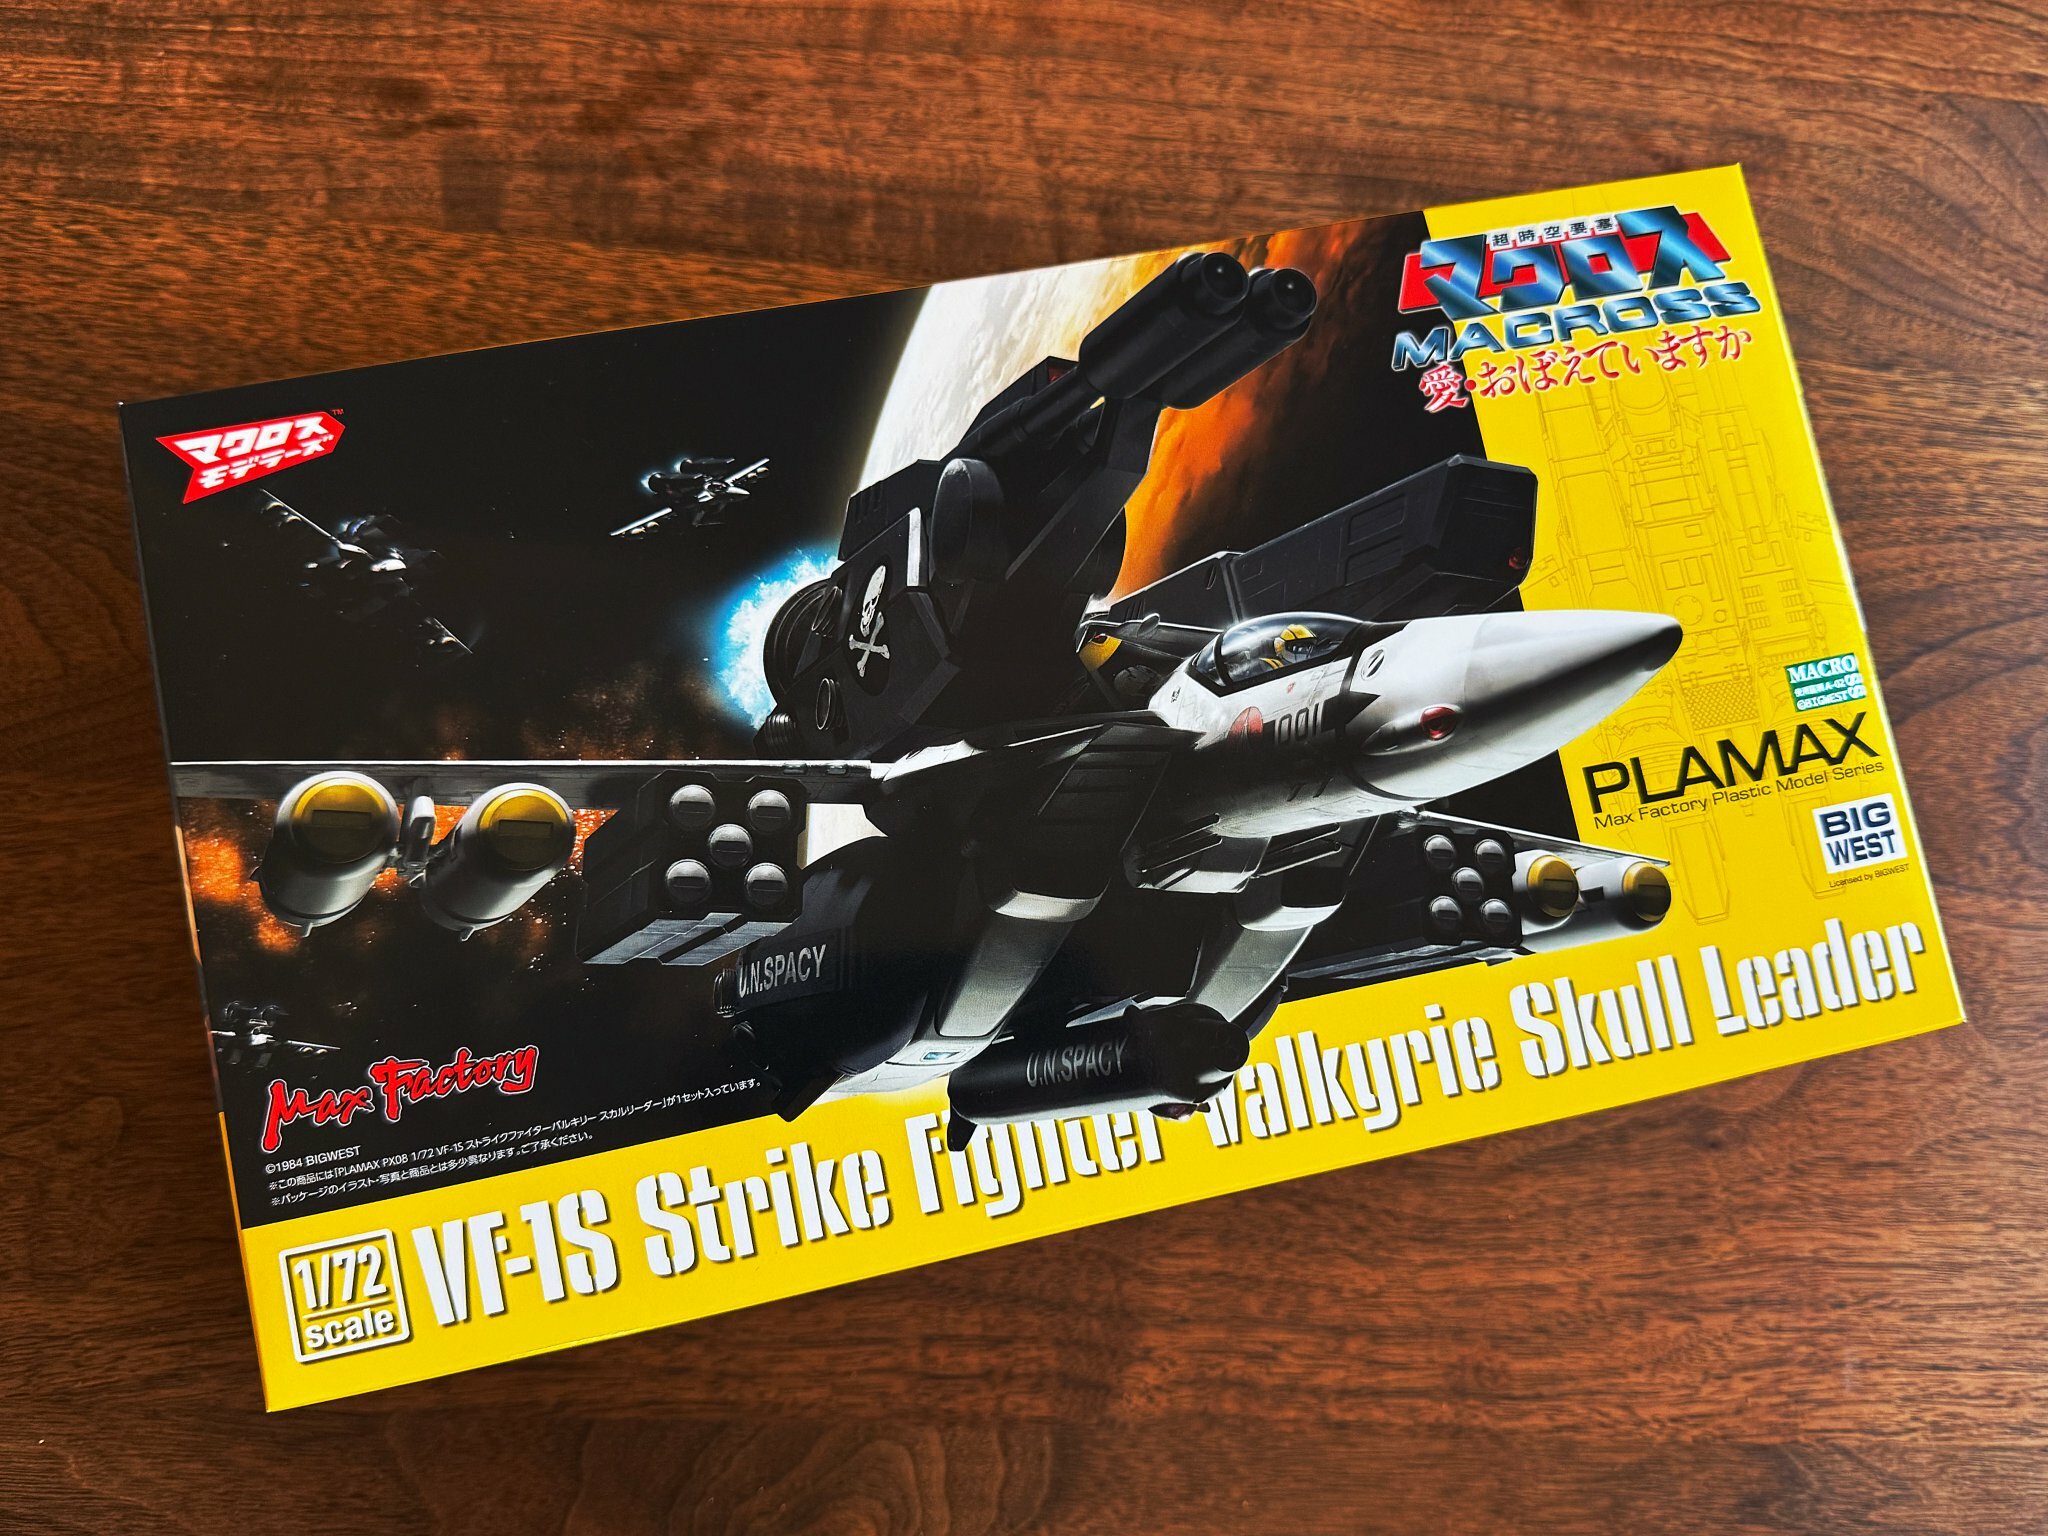
do some unboxing pics, pretty please
")
-
15 hours ago, Big s said:
discontinued just means that they aren’t making anymore at the moment and may not have plans to do so for a bit, but that doesn’t mean they won’t in the future, for hasegawa, it’s just a matter of time before they recontinue production. And it may be soon since Delta is streaming in more areas than just Japan
yeah, I mean, they did a bunch of their limited boxes like the VF-0C and so on as well recently. Hope they do the VF-0A as well (or I just butcher one of my VF-0A/S w Ghost boxes).
-
I am wondering if Hasegawa will reissue some of their Macross Delta kits. I wanted to get a Mirage VF-31C. A lot of them are listed as "Discontinued" on HLJ (which doesn't mean much though).
-
12 hours ago, Graham said:
I've actually got the Macross Delta Scramble ROM and all DLC downloaded on my Android phone, as I was hoping to be able to play it on my phone using the Vita3K emulator.
However, Vita emulation is still in its early days and and the game crashes after the game's loaded when I try to go into Hanger or Missions from the game menu. That's kinda what I expected though as Macross Delta Scramble is one of the games listed as currently having a low compatibility with Vita3K. Hopefully Macross Delta Scramble may run better with future versions of Vita3K.
Anyway, once the PS Vita 2000 I ordered arrives, I'll look into trying CFW/HEN. Just been doing some light reading on it now.
Depending on the Vita3K build Delta scramble will actually load up or not. I have been testing around with configurations and can actually get to the point where it loads a mission, but then rendered stuff is either black or, fittingly, highly scrambled.
-
On 1/14/2025 at 9:04 AM, Graham said:
So, I sold my PS Vita TV and Macross Delta Scramble years ago.
But I've recently had a desire to play Macross Delta Scramble again, so I just ordered the game and a second hand PS Vita, which is on the way.
Anybody know if the Delta DLC is still available on the Japanese Playstation store?
I think the playstation store for vita was shut down, so no - unless you download the DLC from somewhere and CFW/HEN your vita, you'll be out of luck.
-
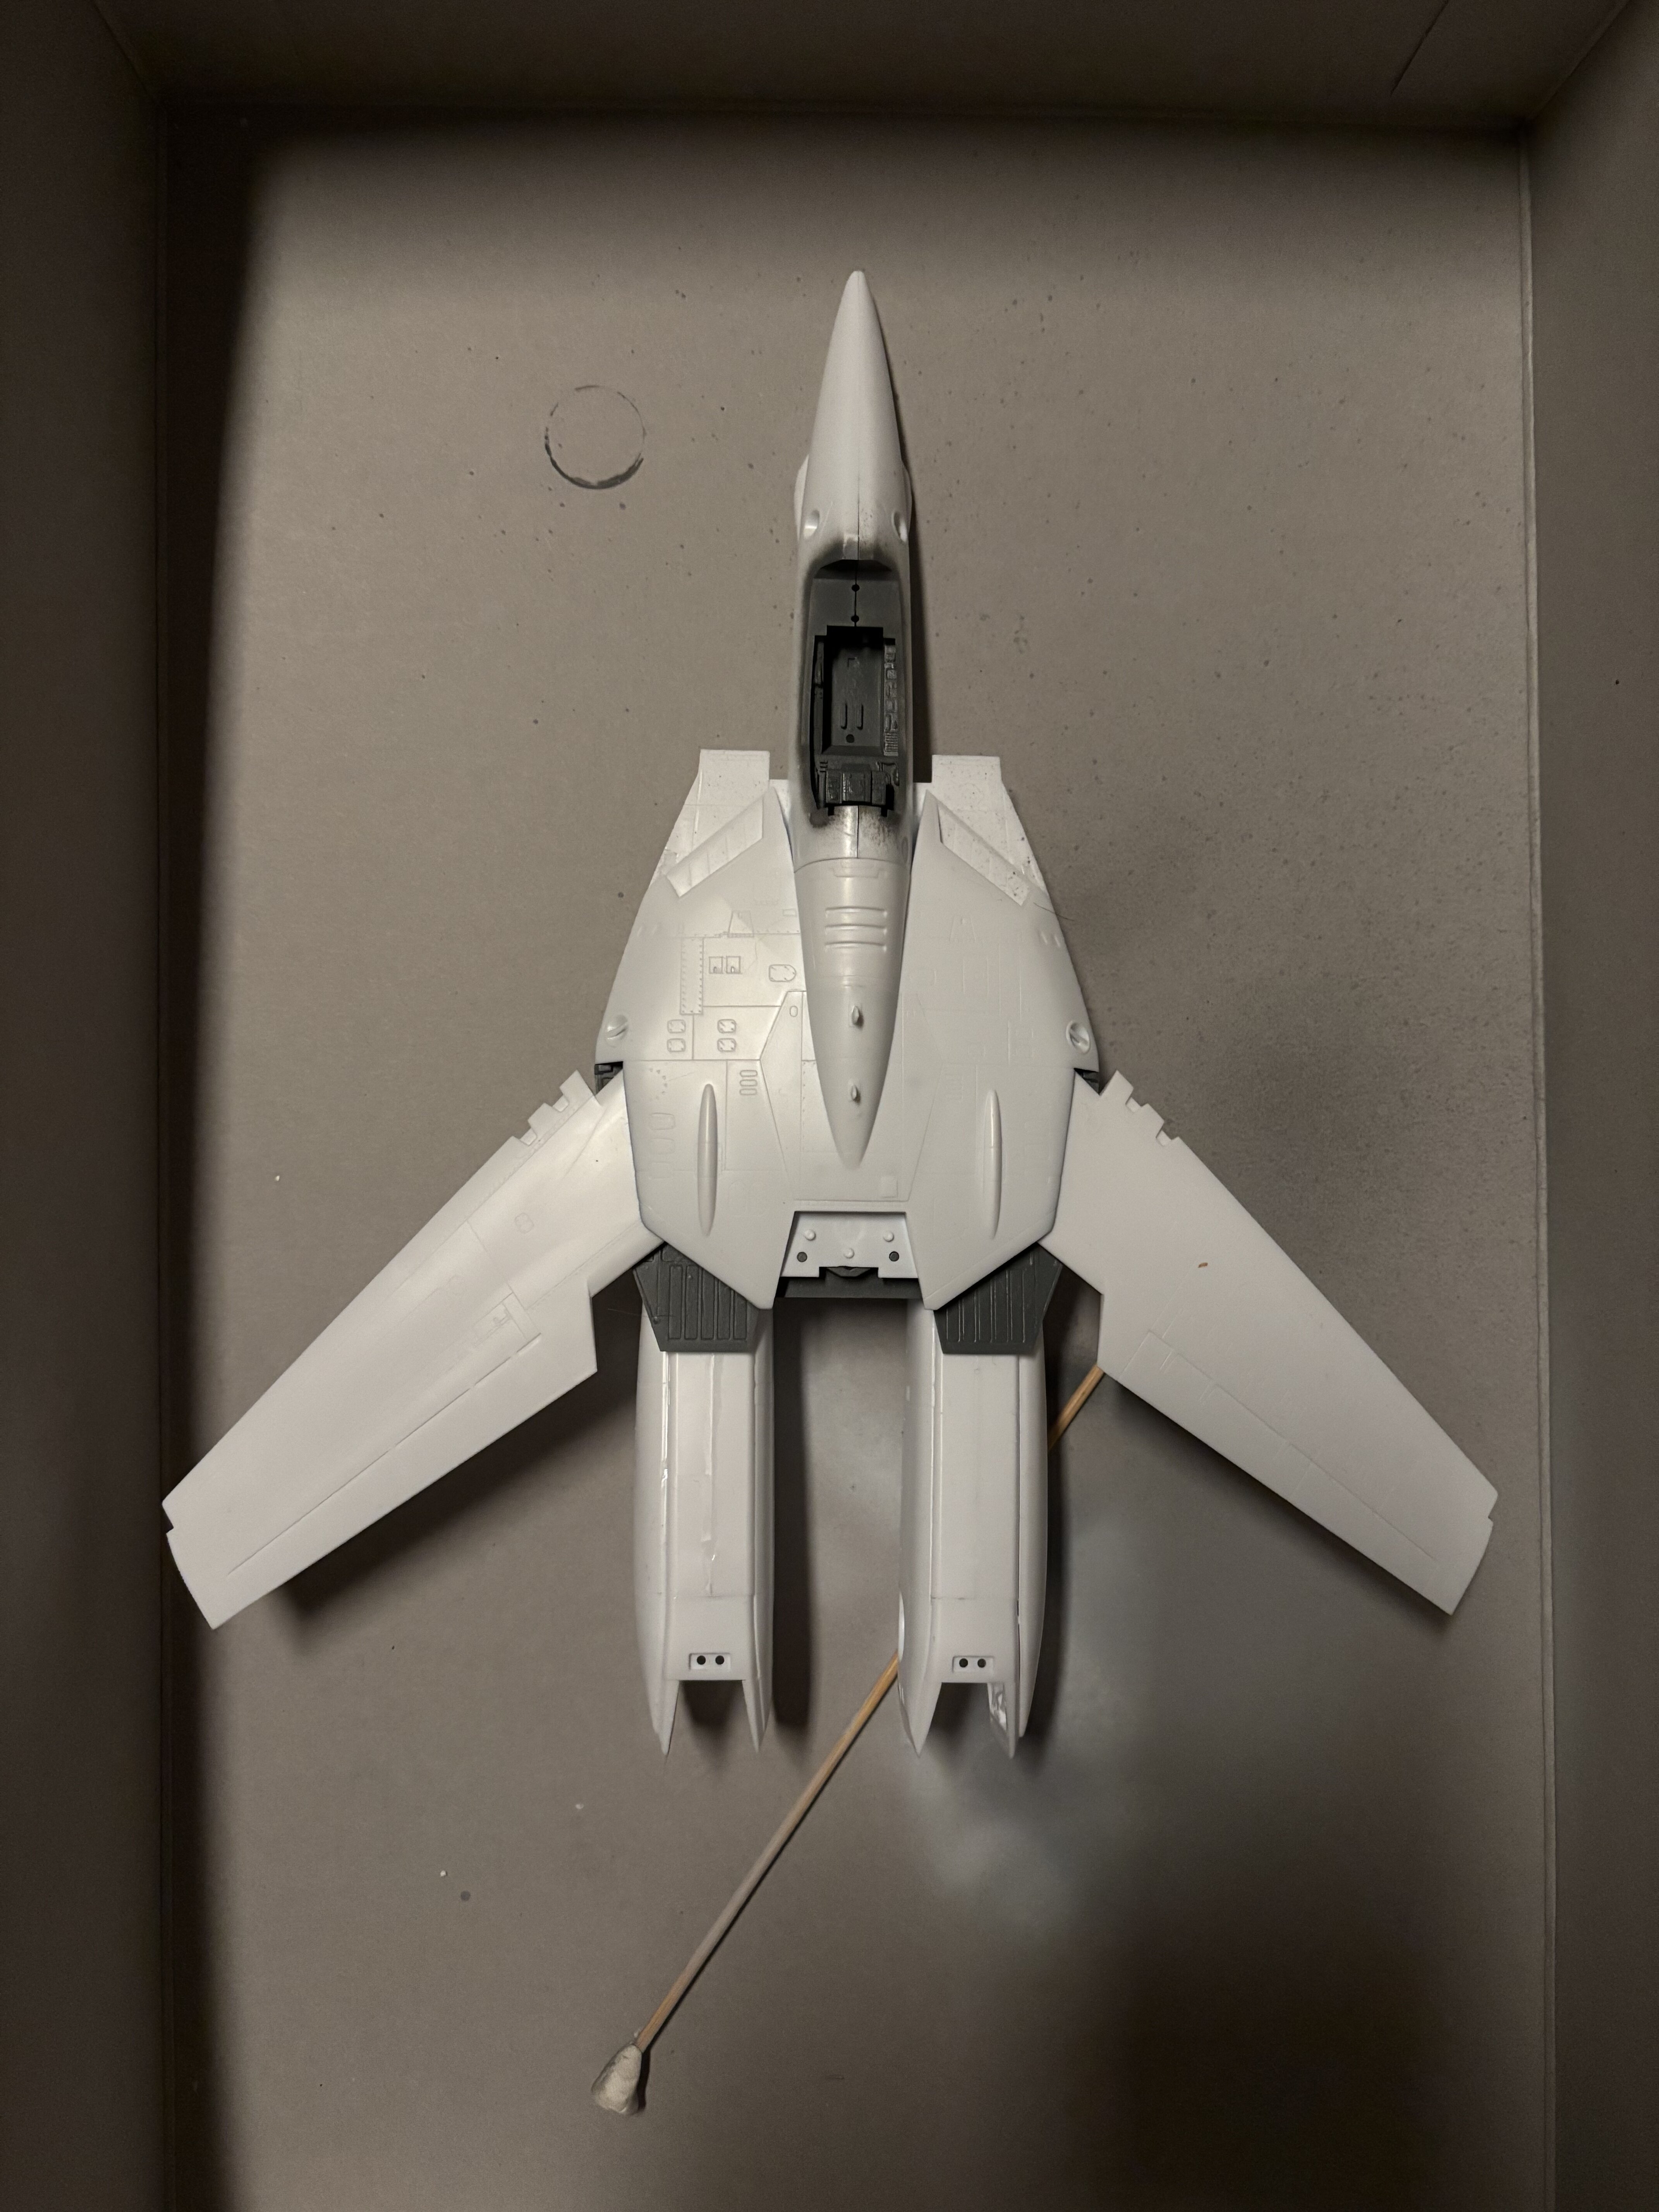
Putty and sanding on the VF-1J.
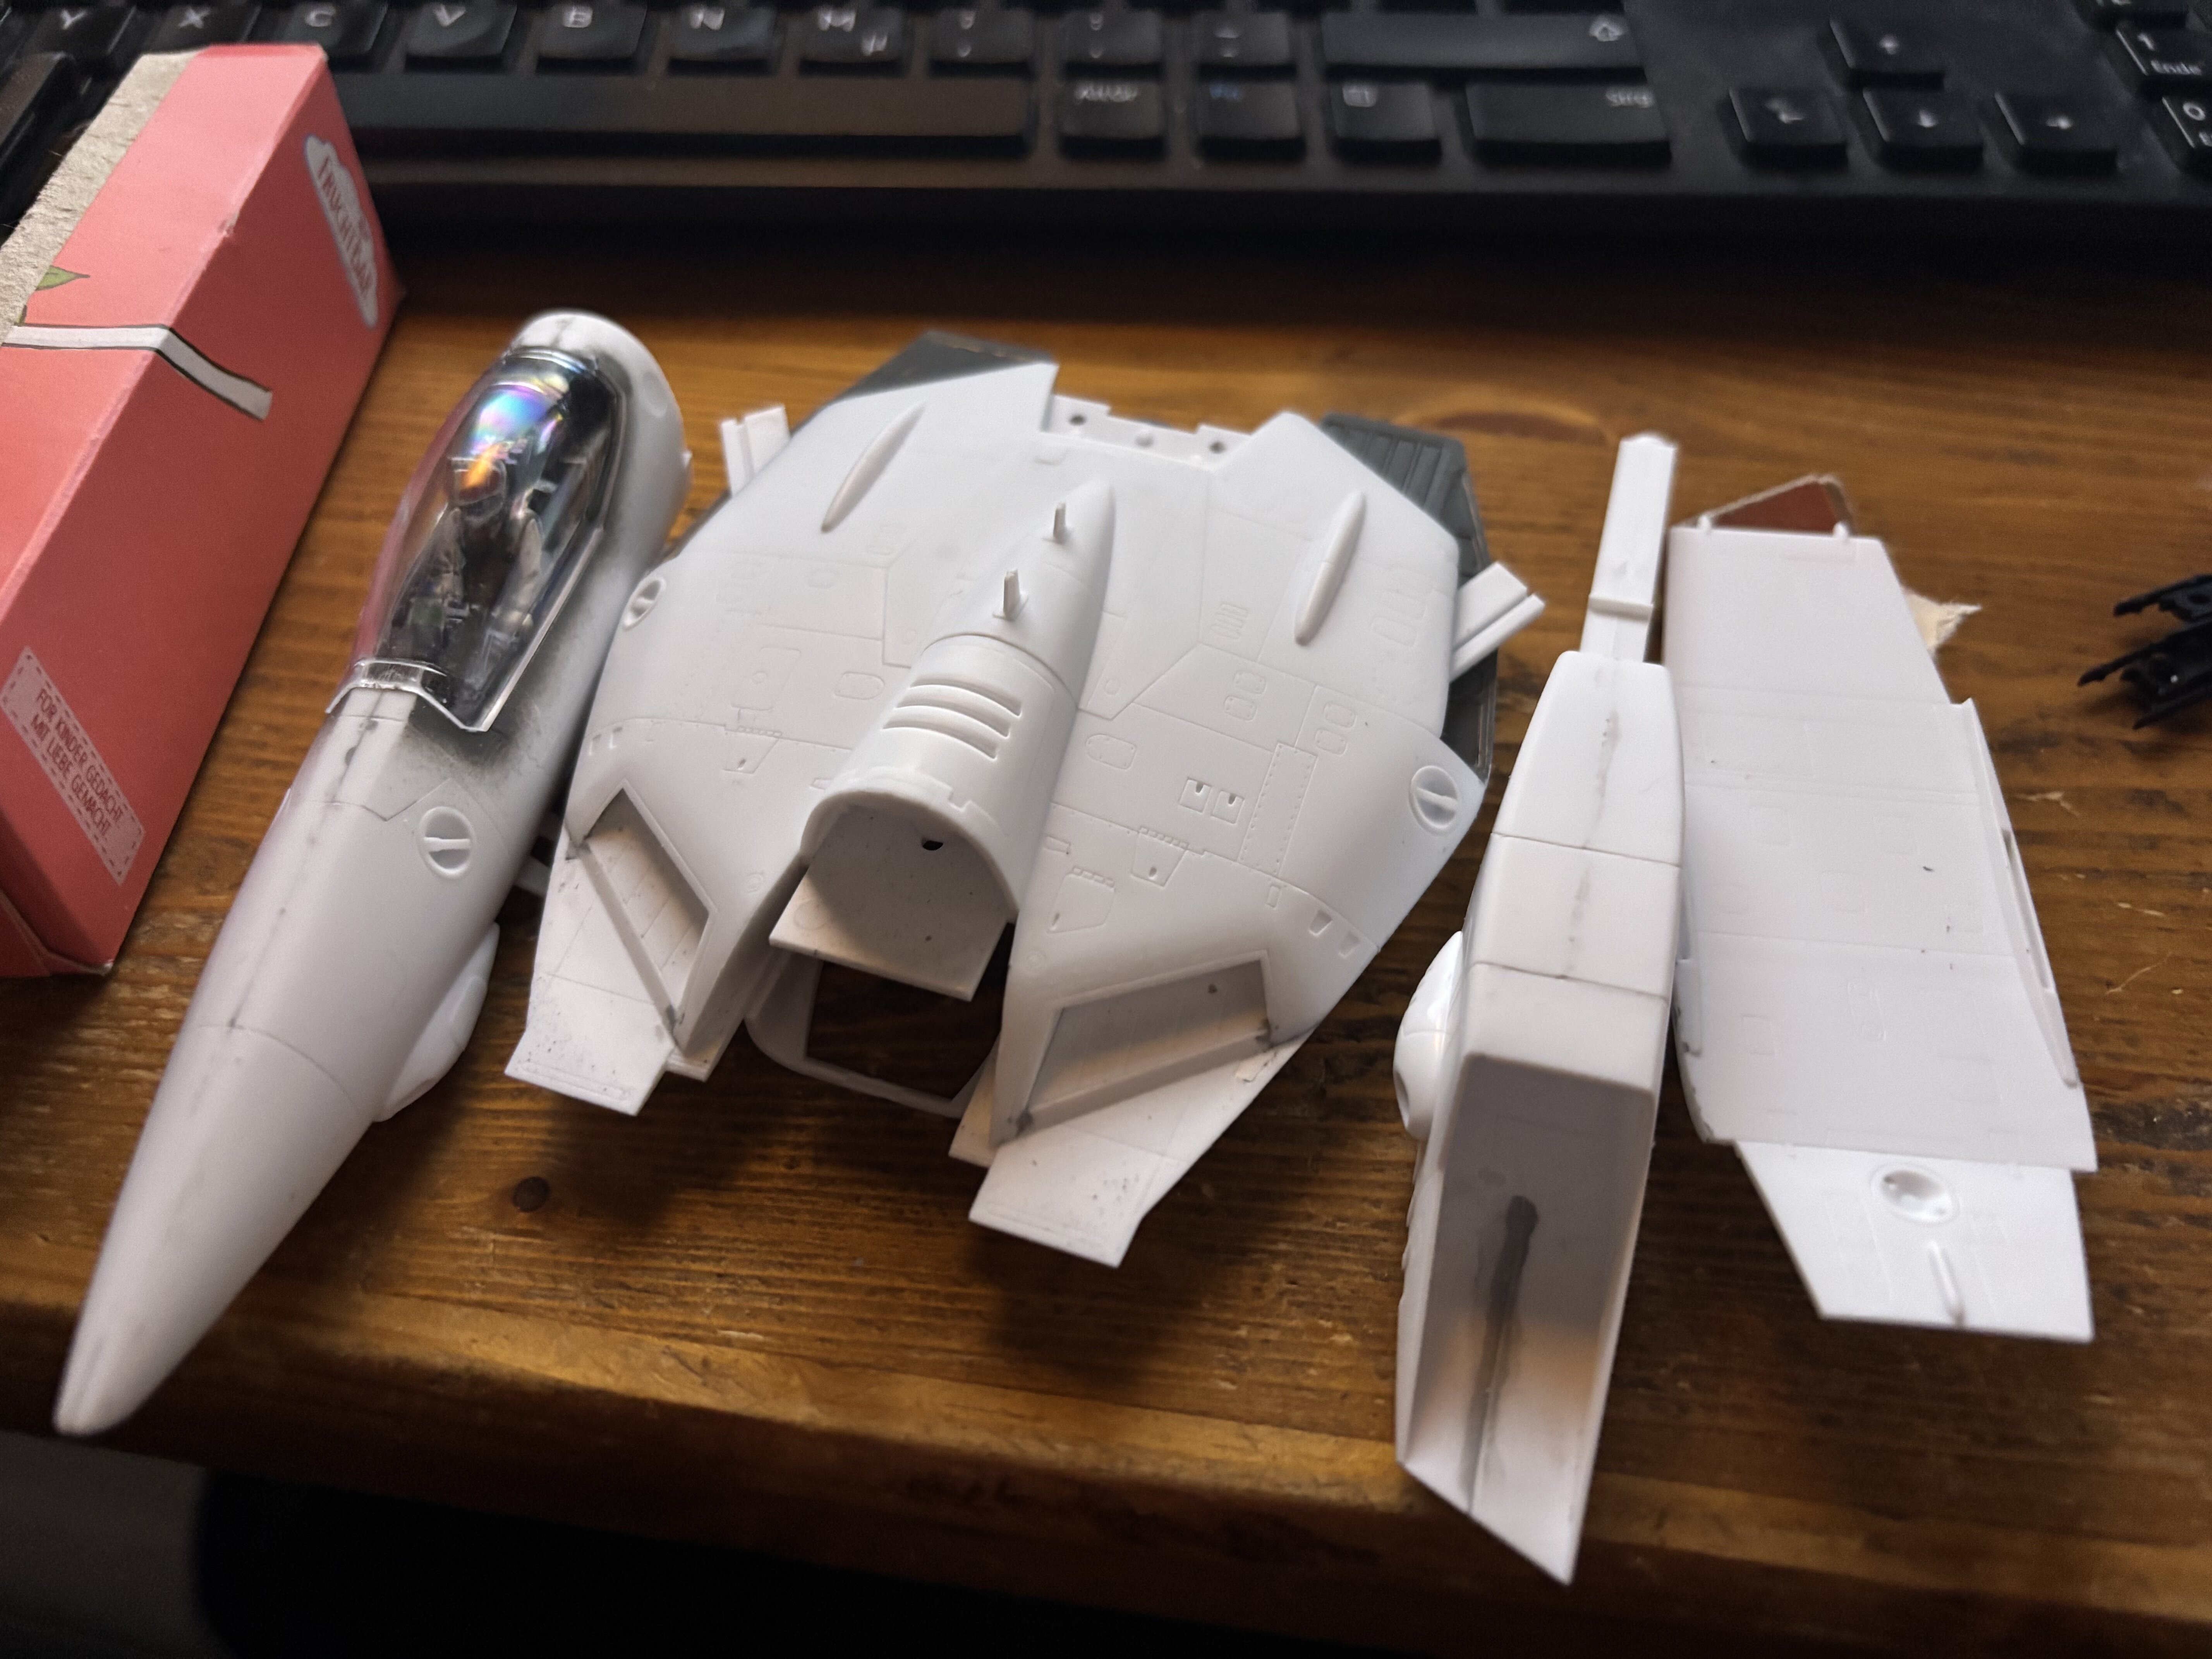
While doing this, I noticed I am on my last bottle of Alclad 2 primer and microfiller. Unfortunately this doesn’t seem to be distributed anymore (through the UK, due to some regulations on lacquer colors).
Now I am in search for a proper replacement as I don’t want to pay the ridiculous shipping prices from the US to Germany.
Any suggestions?
Mr. Surfacer doesn’t work for me as I am using Revell enamel colors. Same for Tamiya surfacer. They tend to develop cracks on these two surfacers.The revell primer is okayish, but I want something that is primer and microfiller.
-
On 12/28/2024 at 5:32 AM, Graham said:
A couple more quick pics.

I wonder why I cannot like grahams post… not giving me the heart…
-
Sigh… preorder time…
-
@electric indigo 30 years old? What kit maker is that? The panel lines look so crisp ...
@nightmareB4macross so much evergreen. looks like it is coming along well.
@SteveTheFish looks nice
@pengbuzz aah ... good old cannon fodder. Haha
-
1/48 VF-1 build updates.
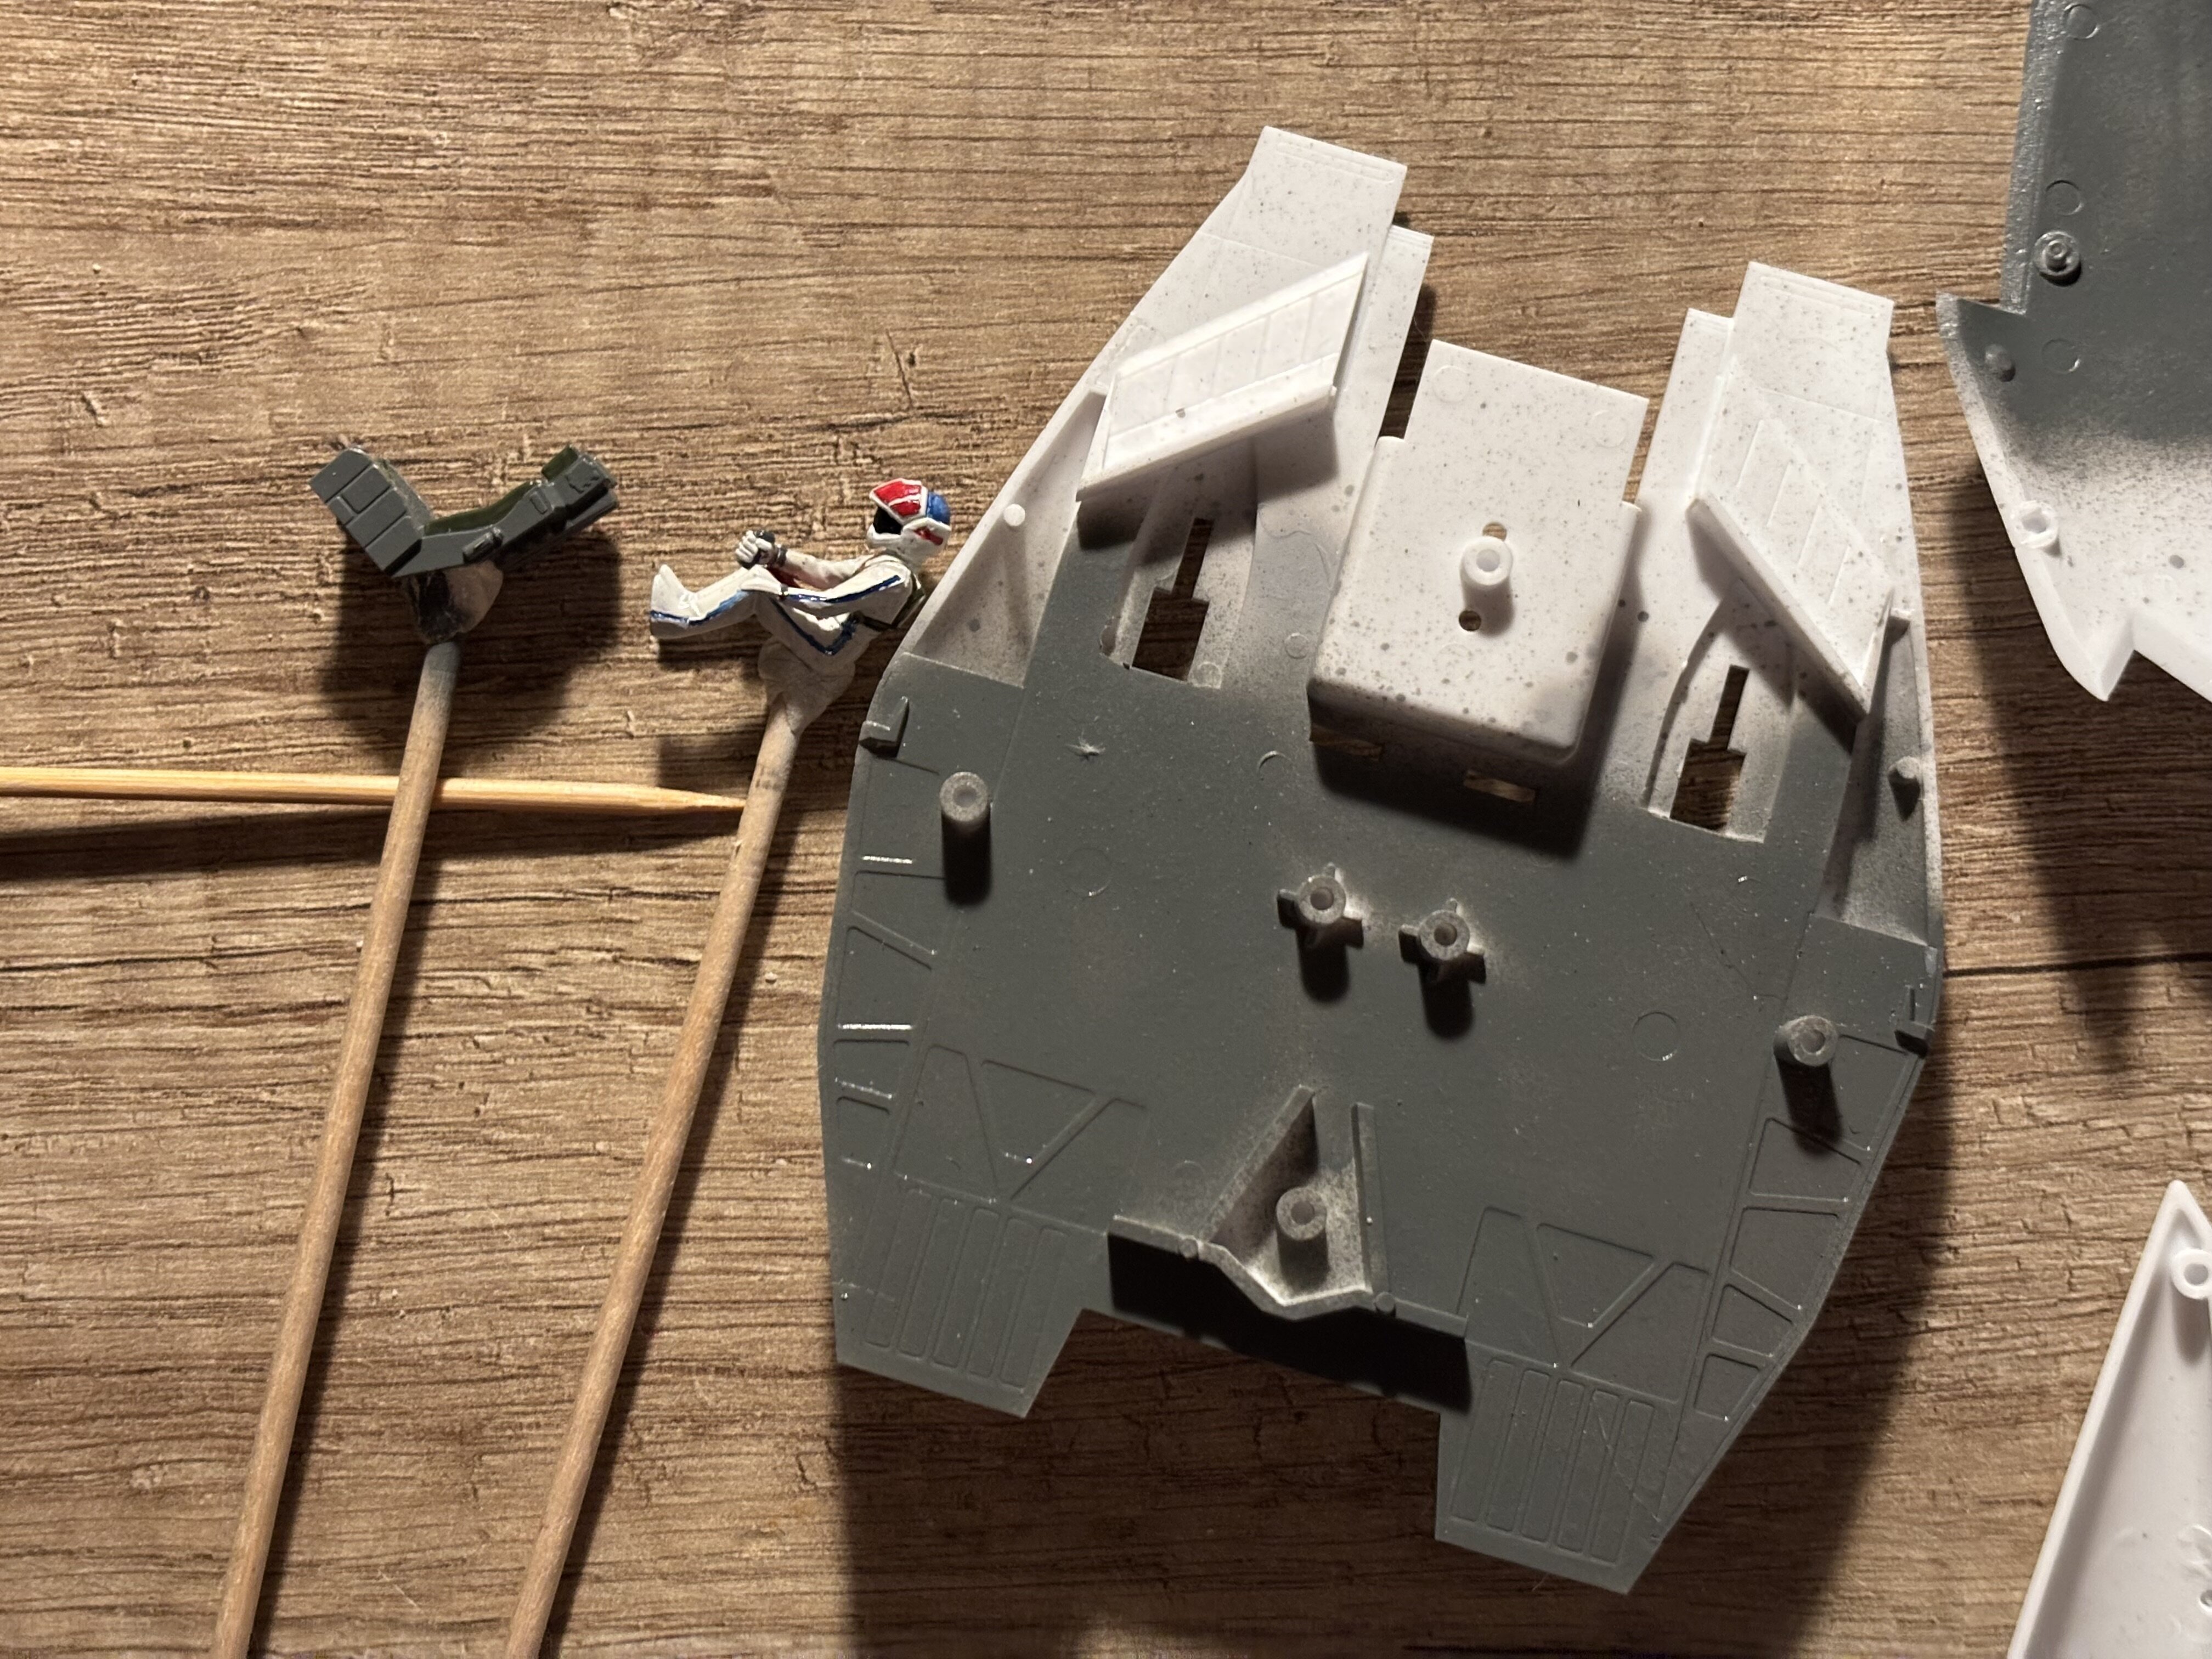
Hand painting Hikaru and his seat here.
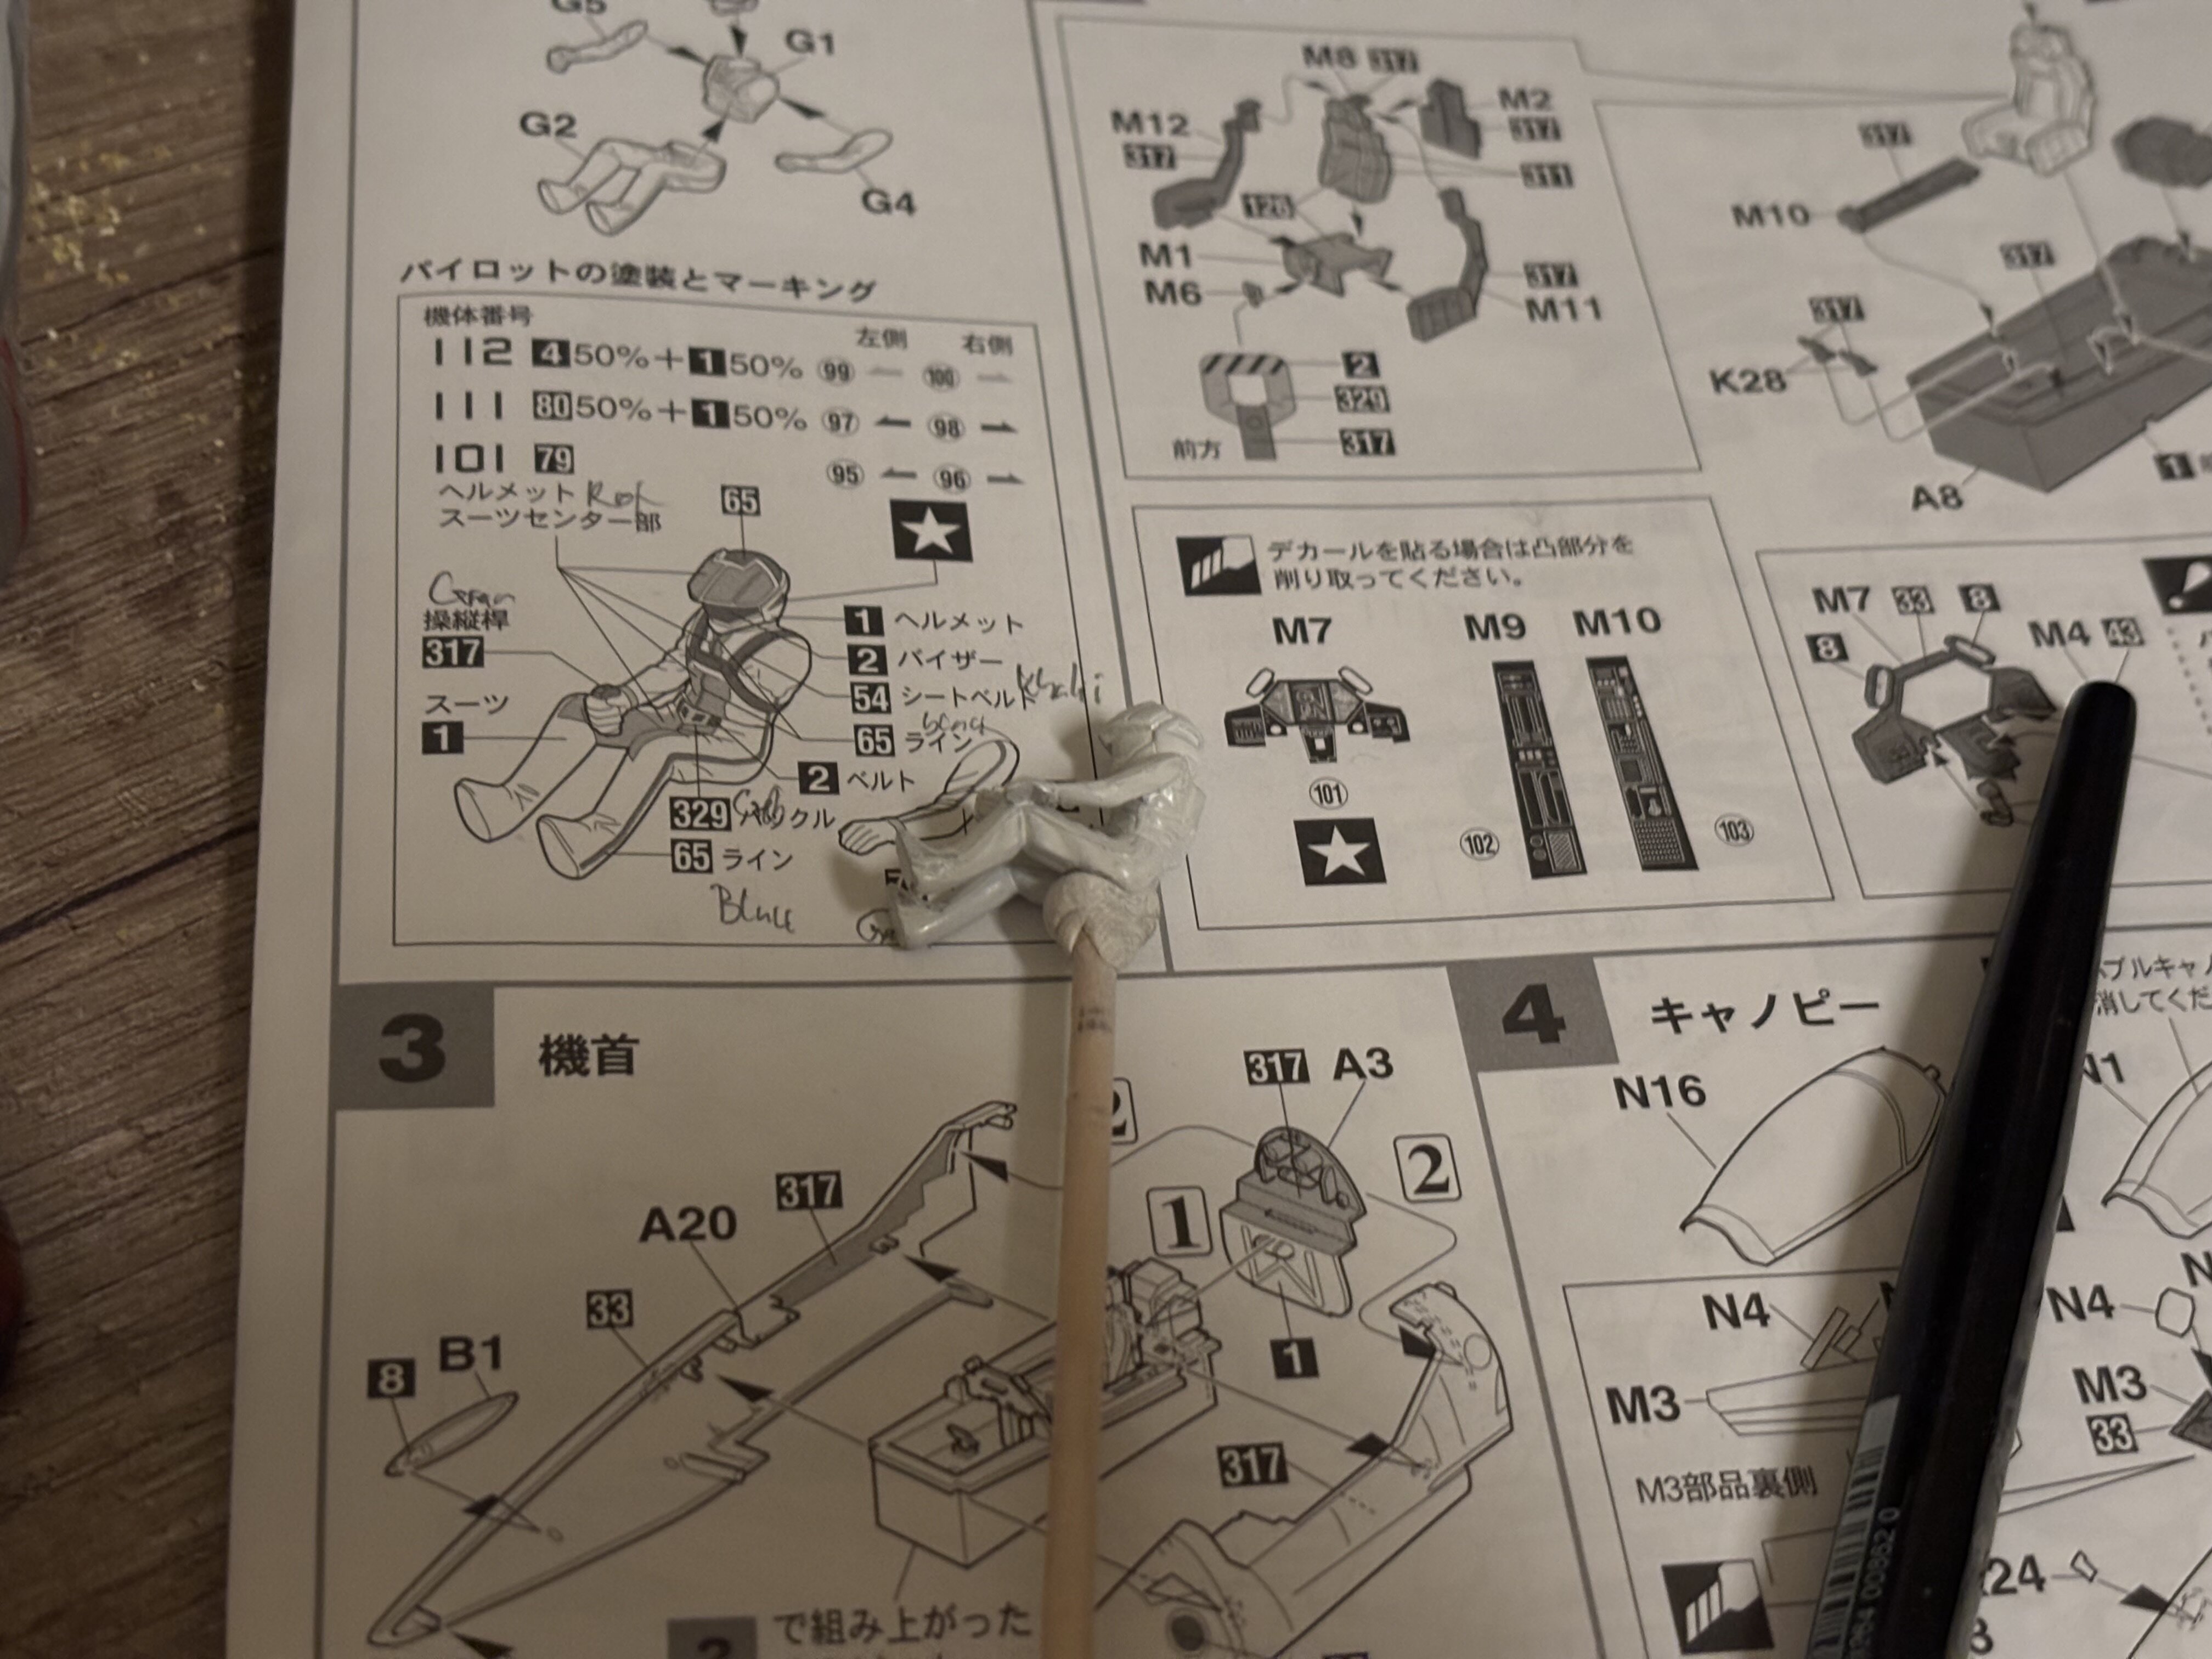

Clear coated these parts with Tamiya XF-22 for washing.
CLAMPS!
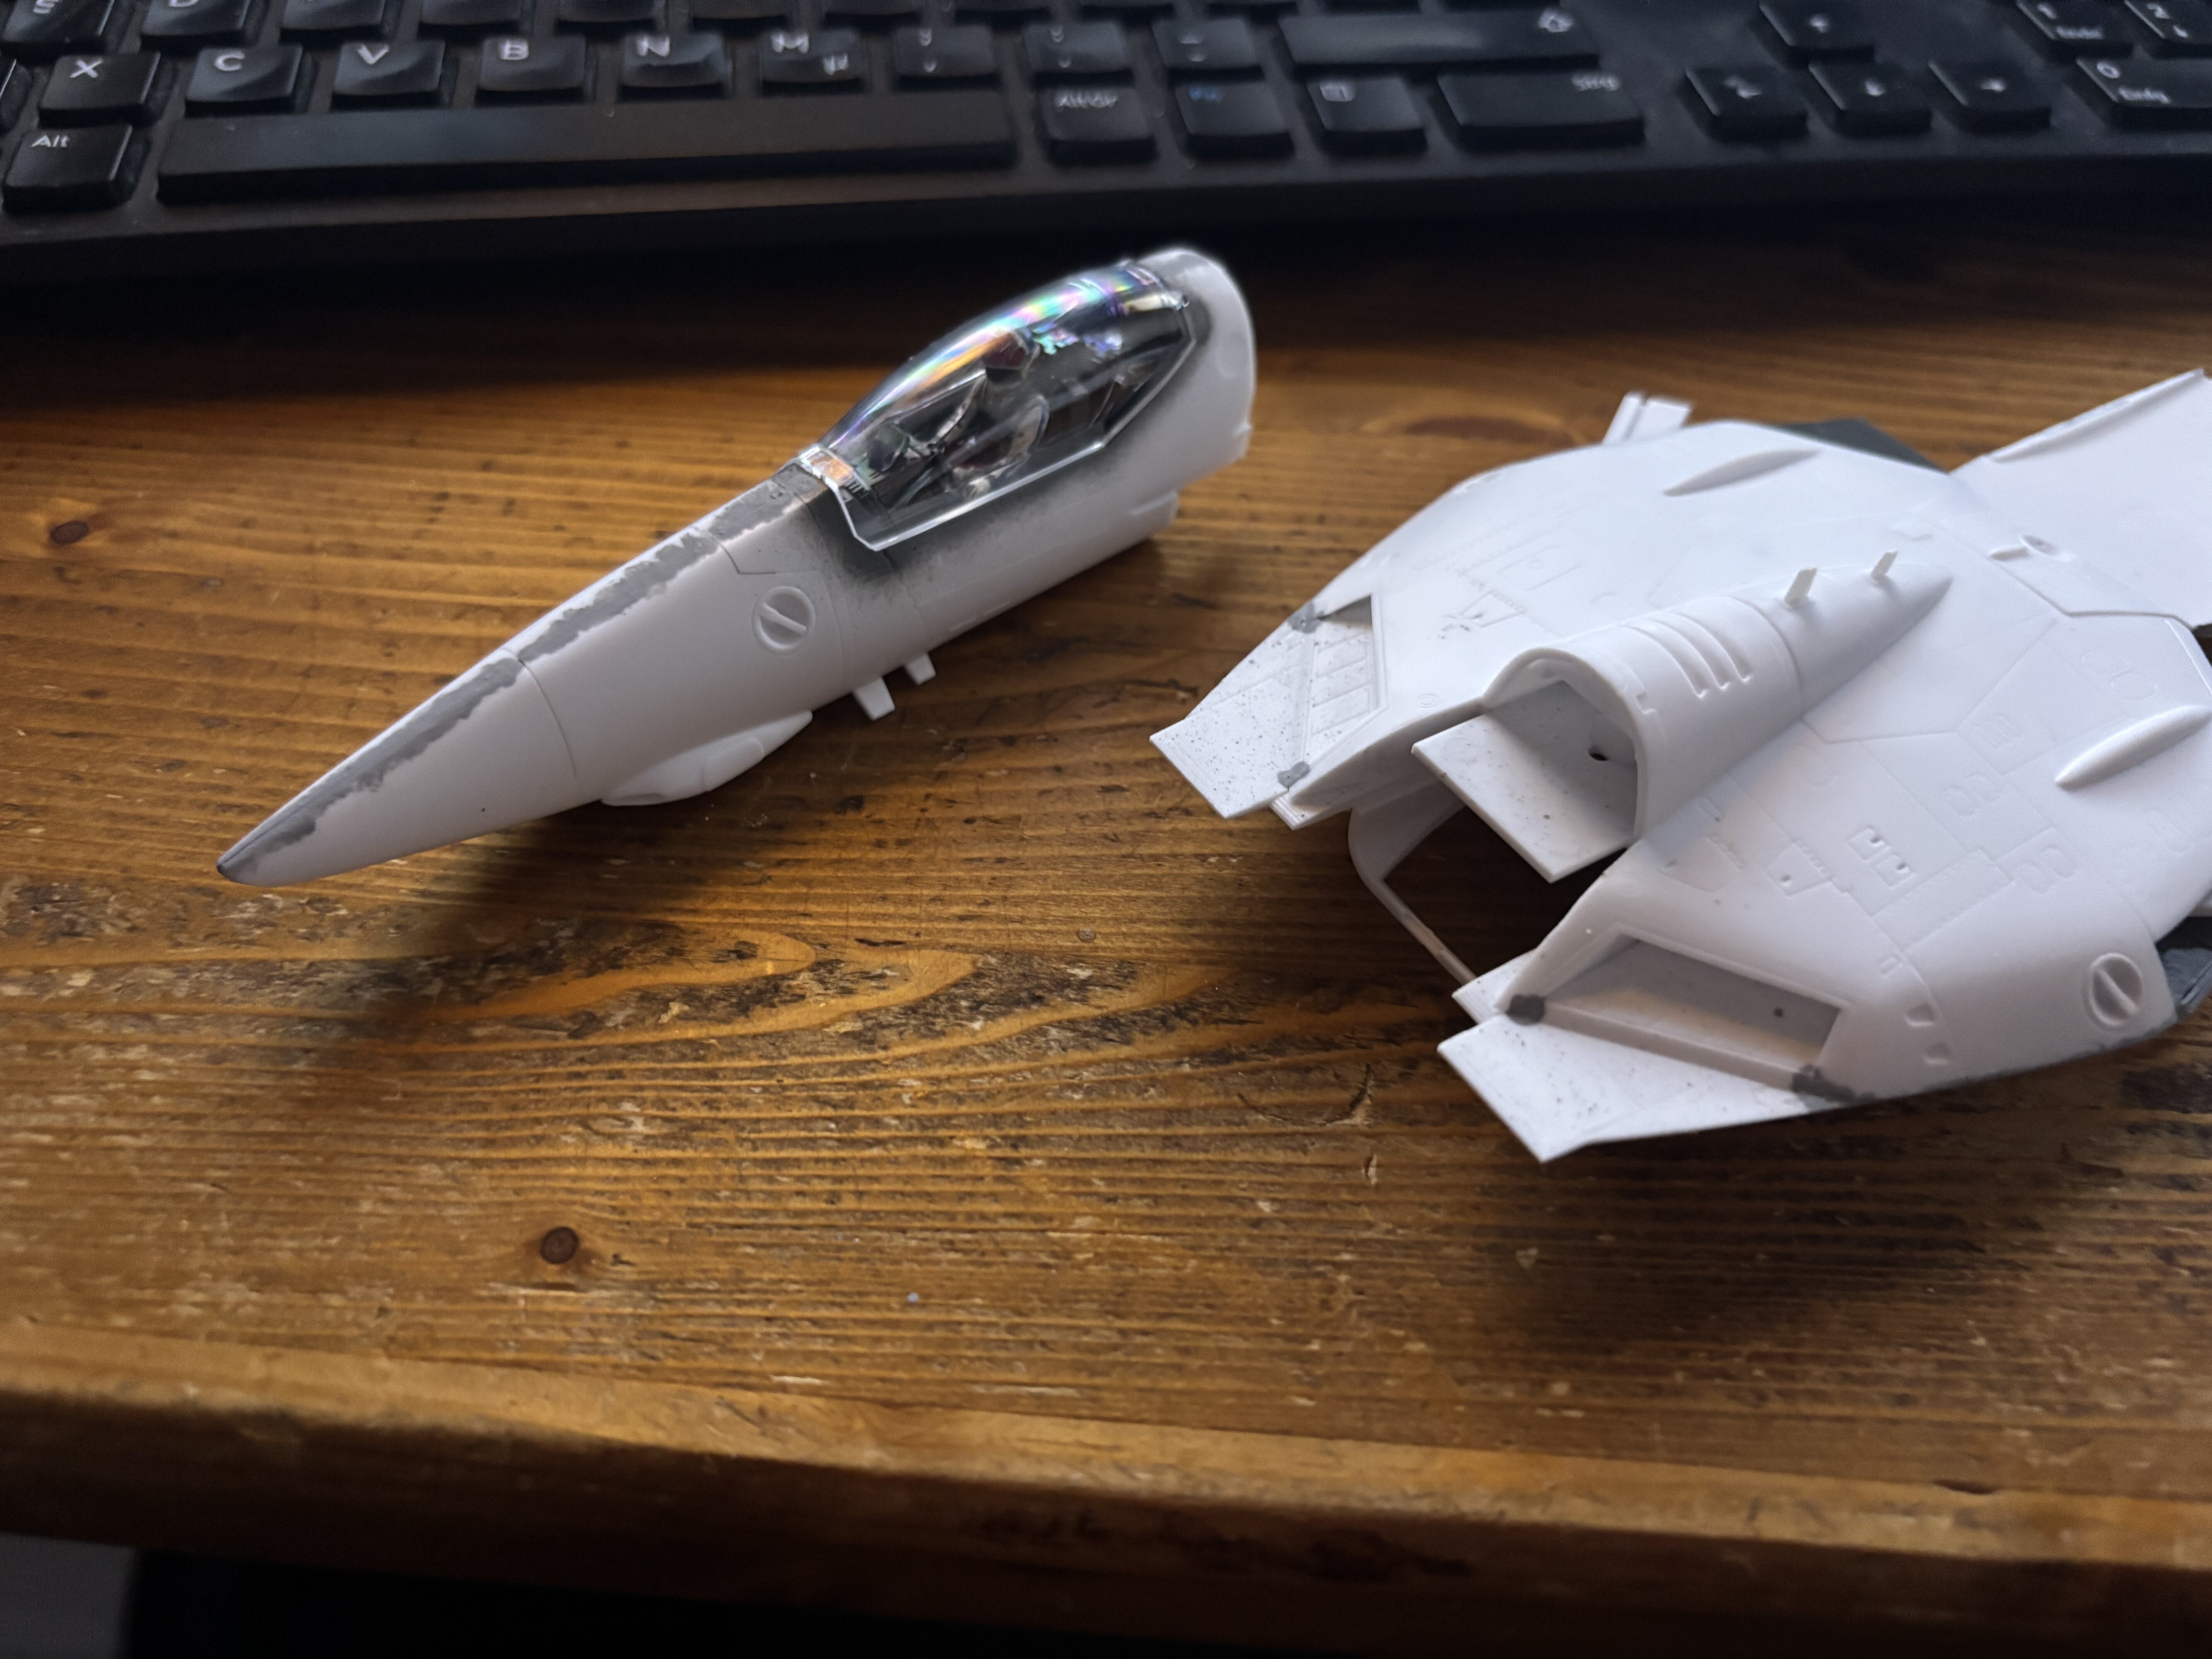
Cockpit details + built nose with cockpit and Hikaru.

I am going for the bubbly canopy, but it has that ugly seam line. I find that weird, because they managed to do the flat canopy without a seam line in the middle.
scratching off the seam line. (Ugly ugly…)
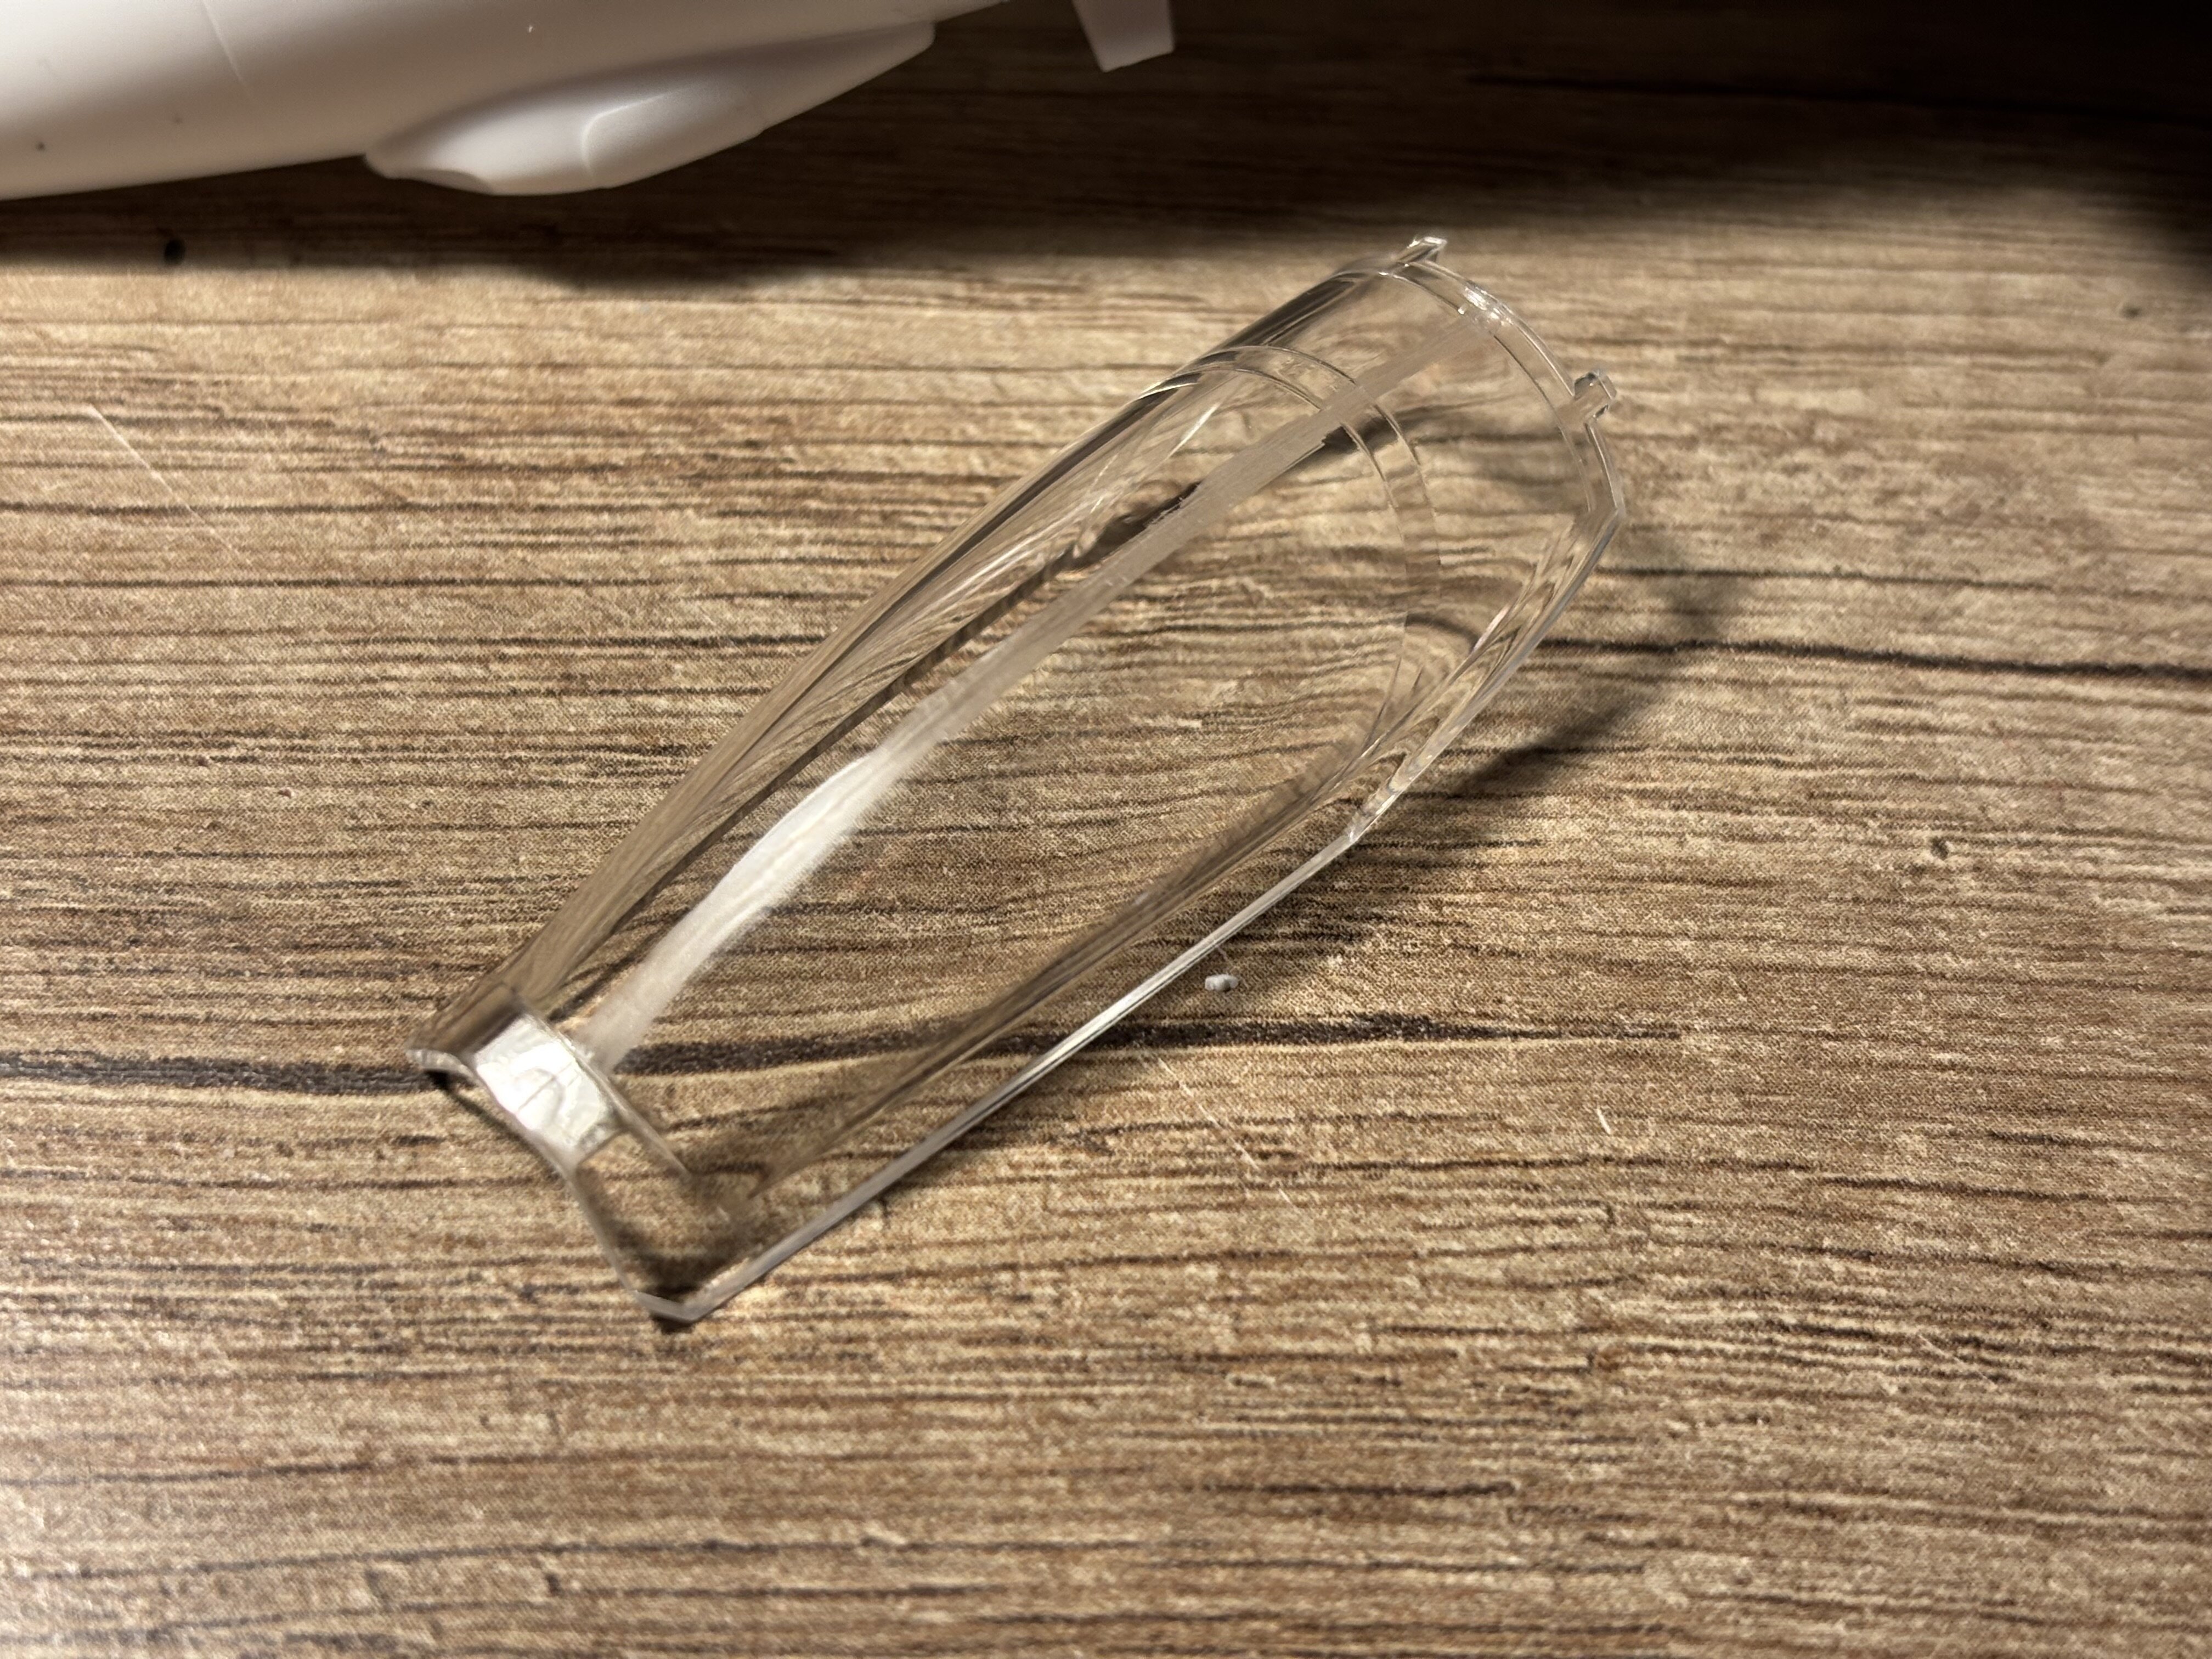
Then sanding and buffing and putting it on the nose. As good as new.
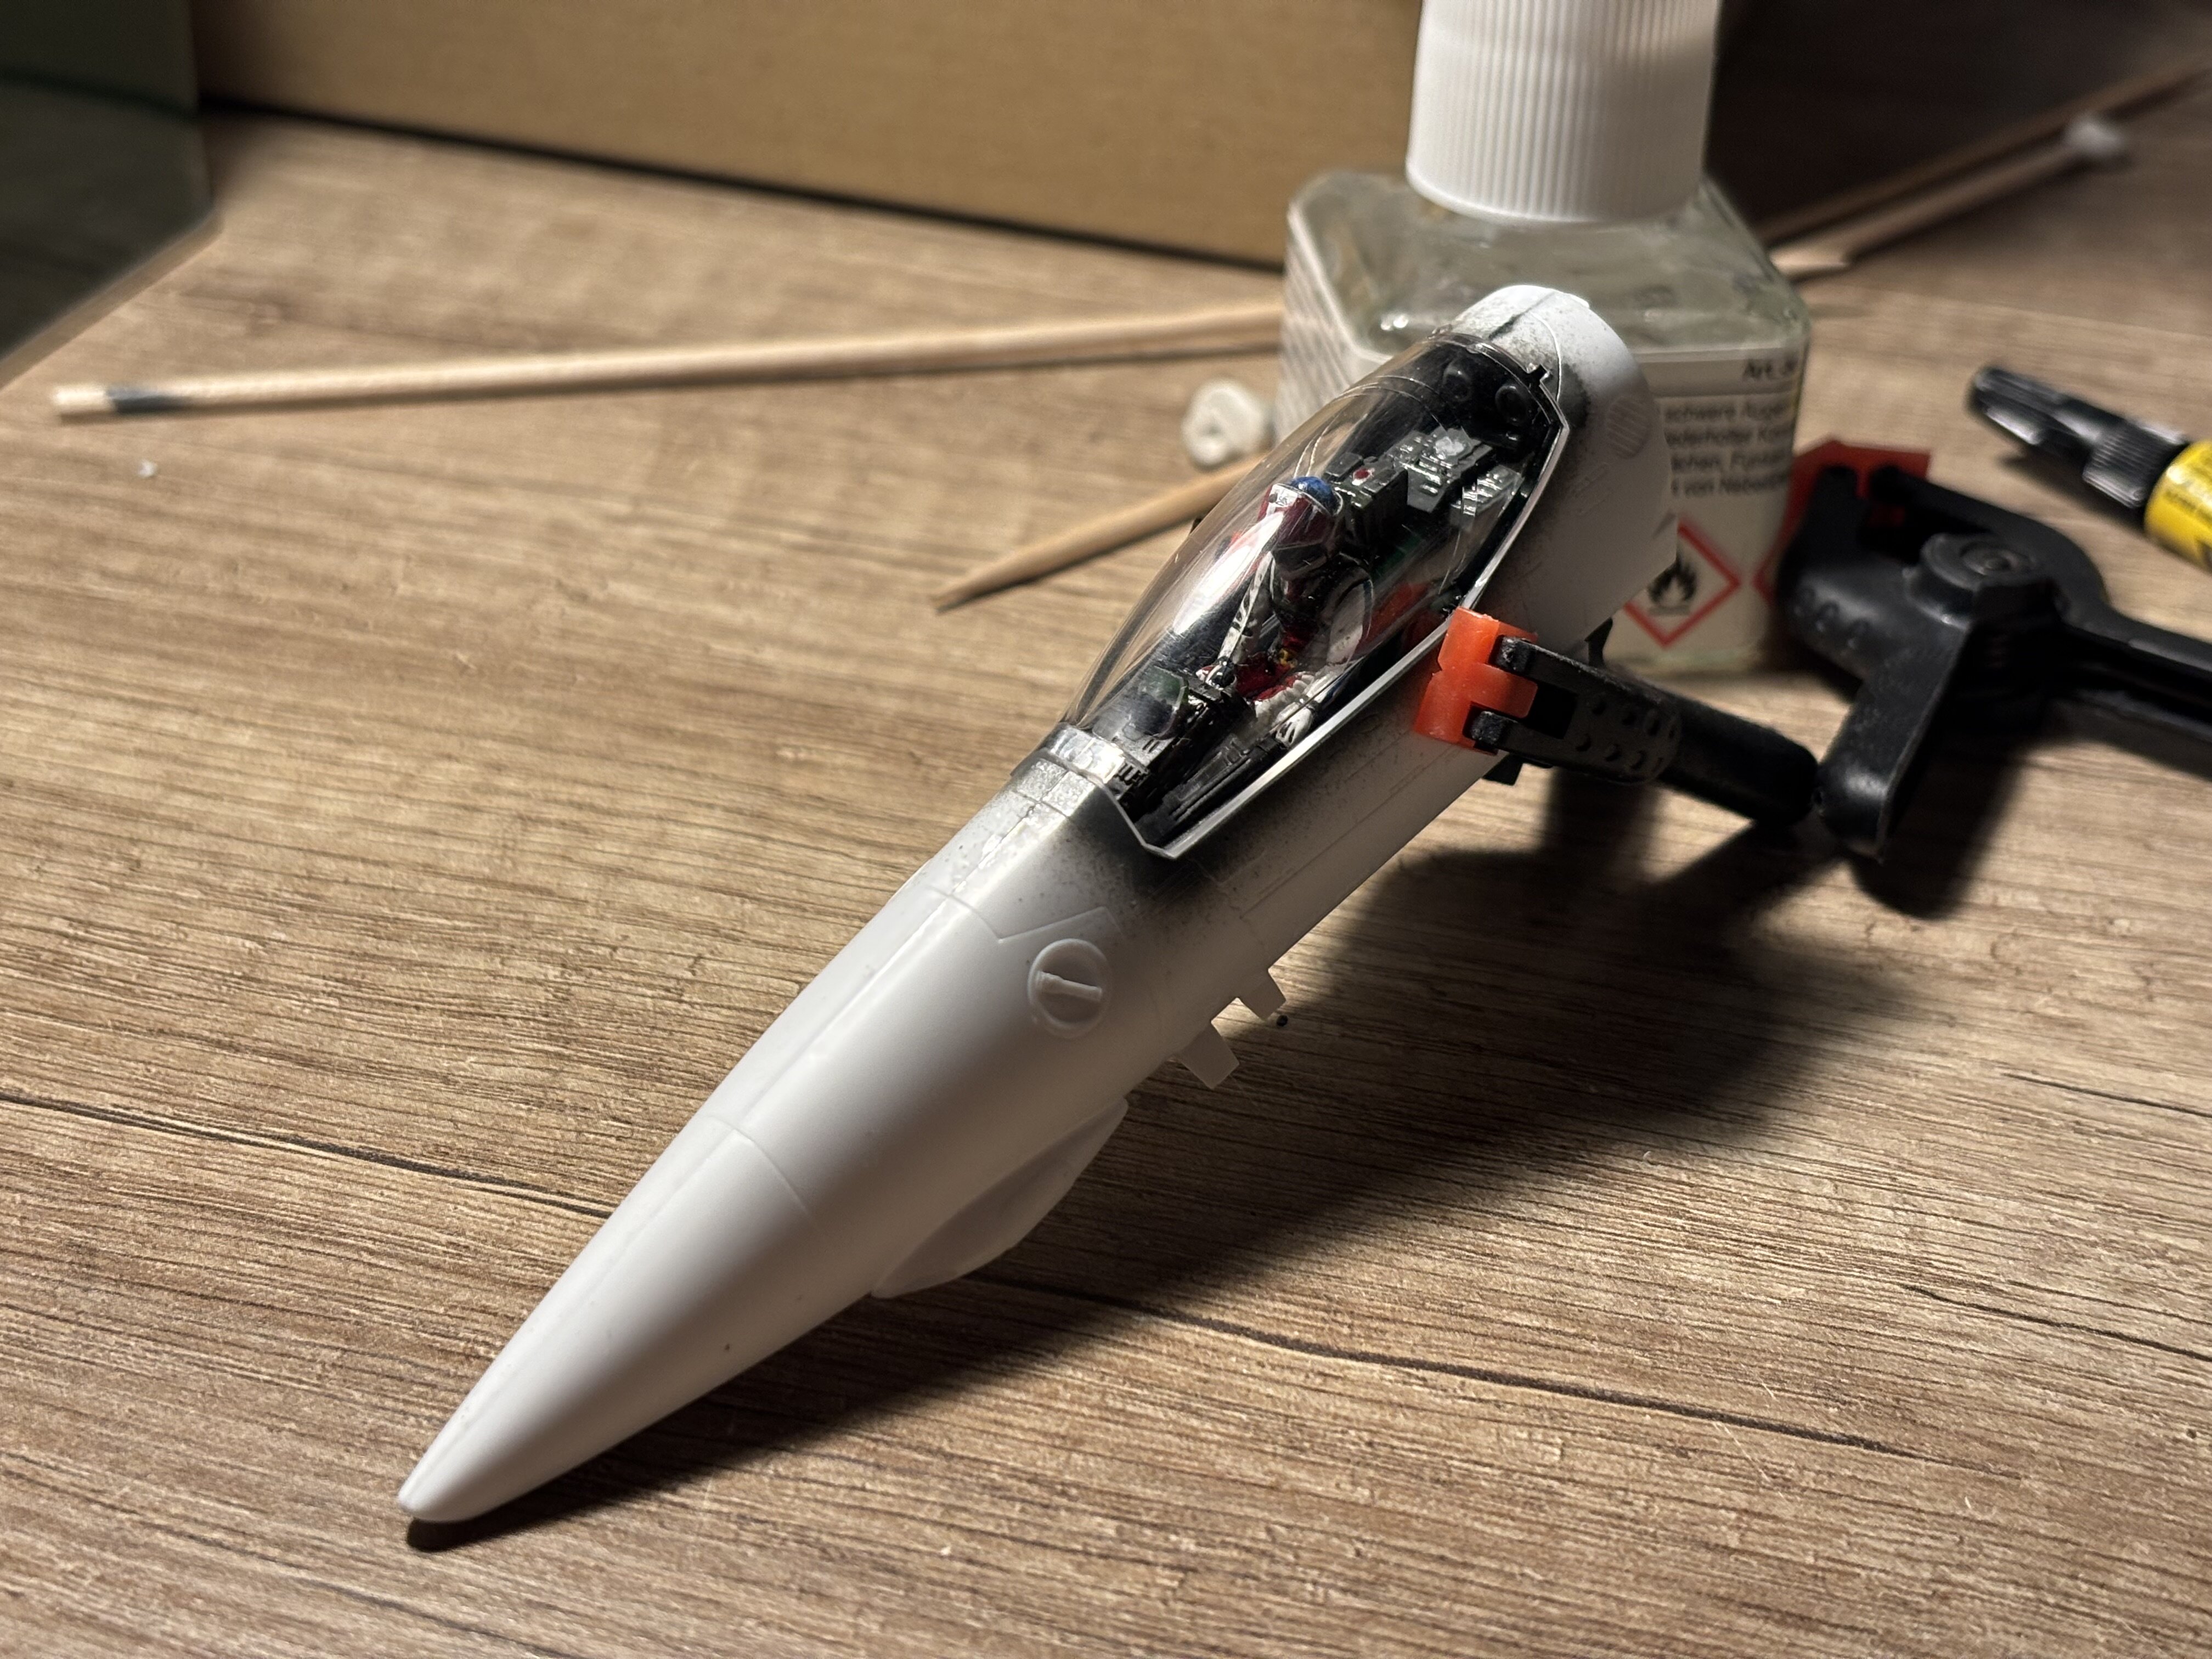
Little snap together just to show off the VF-1
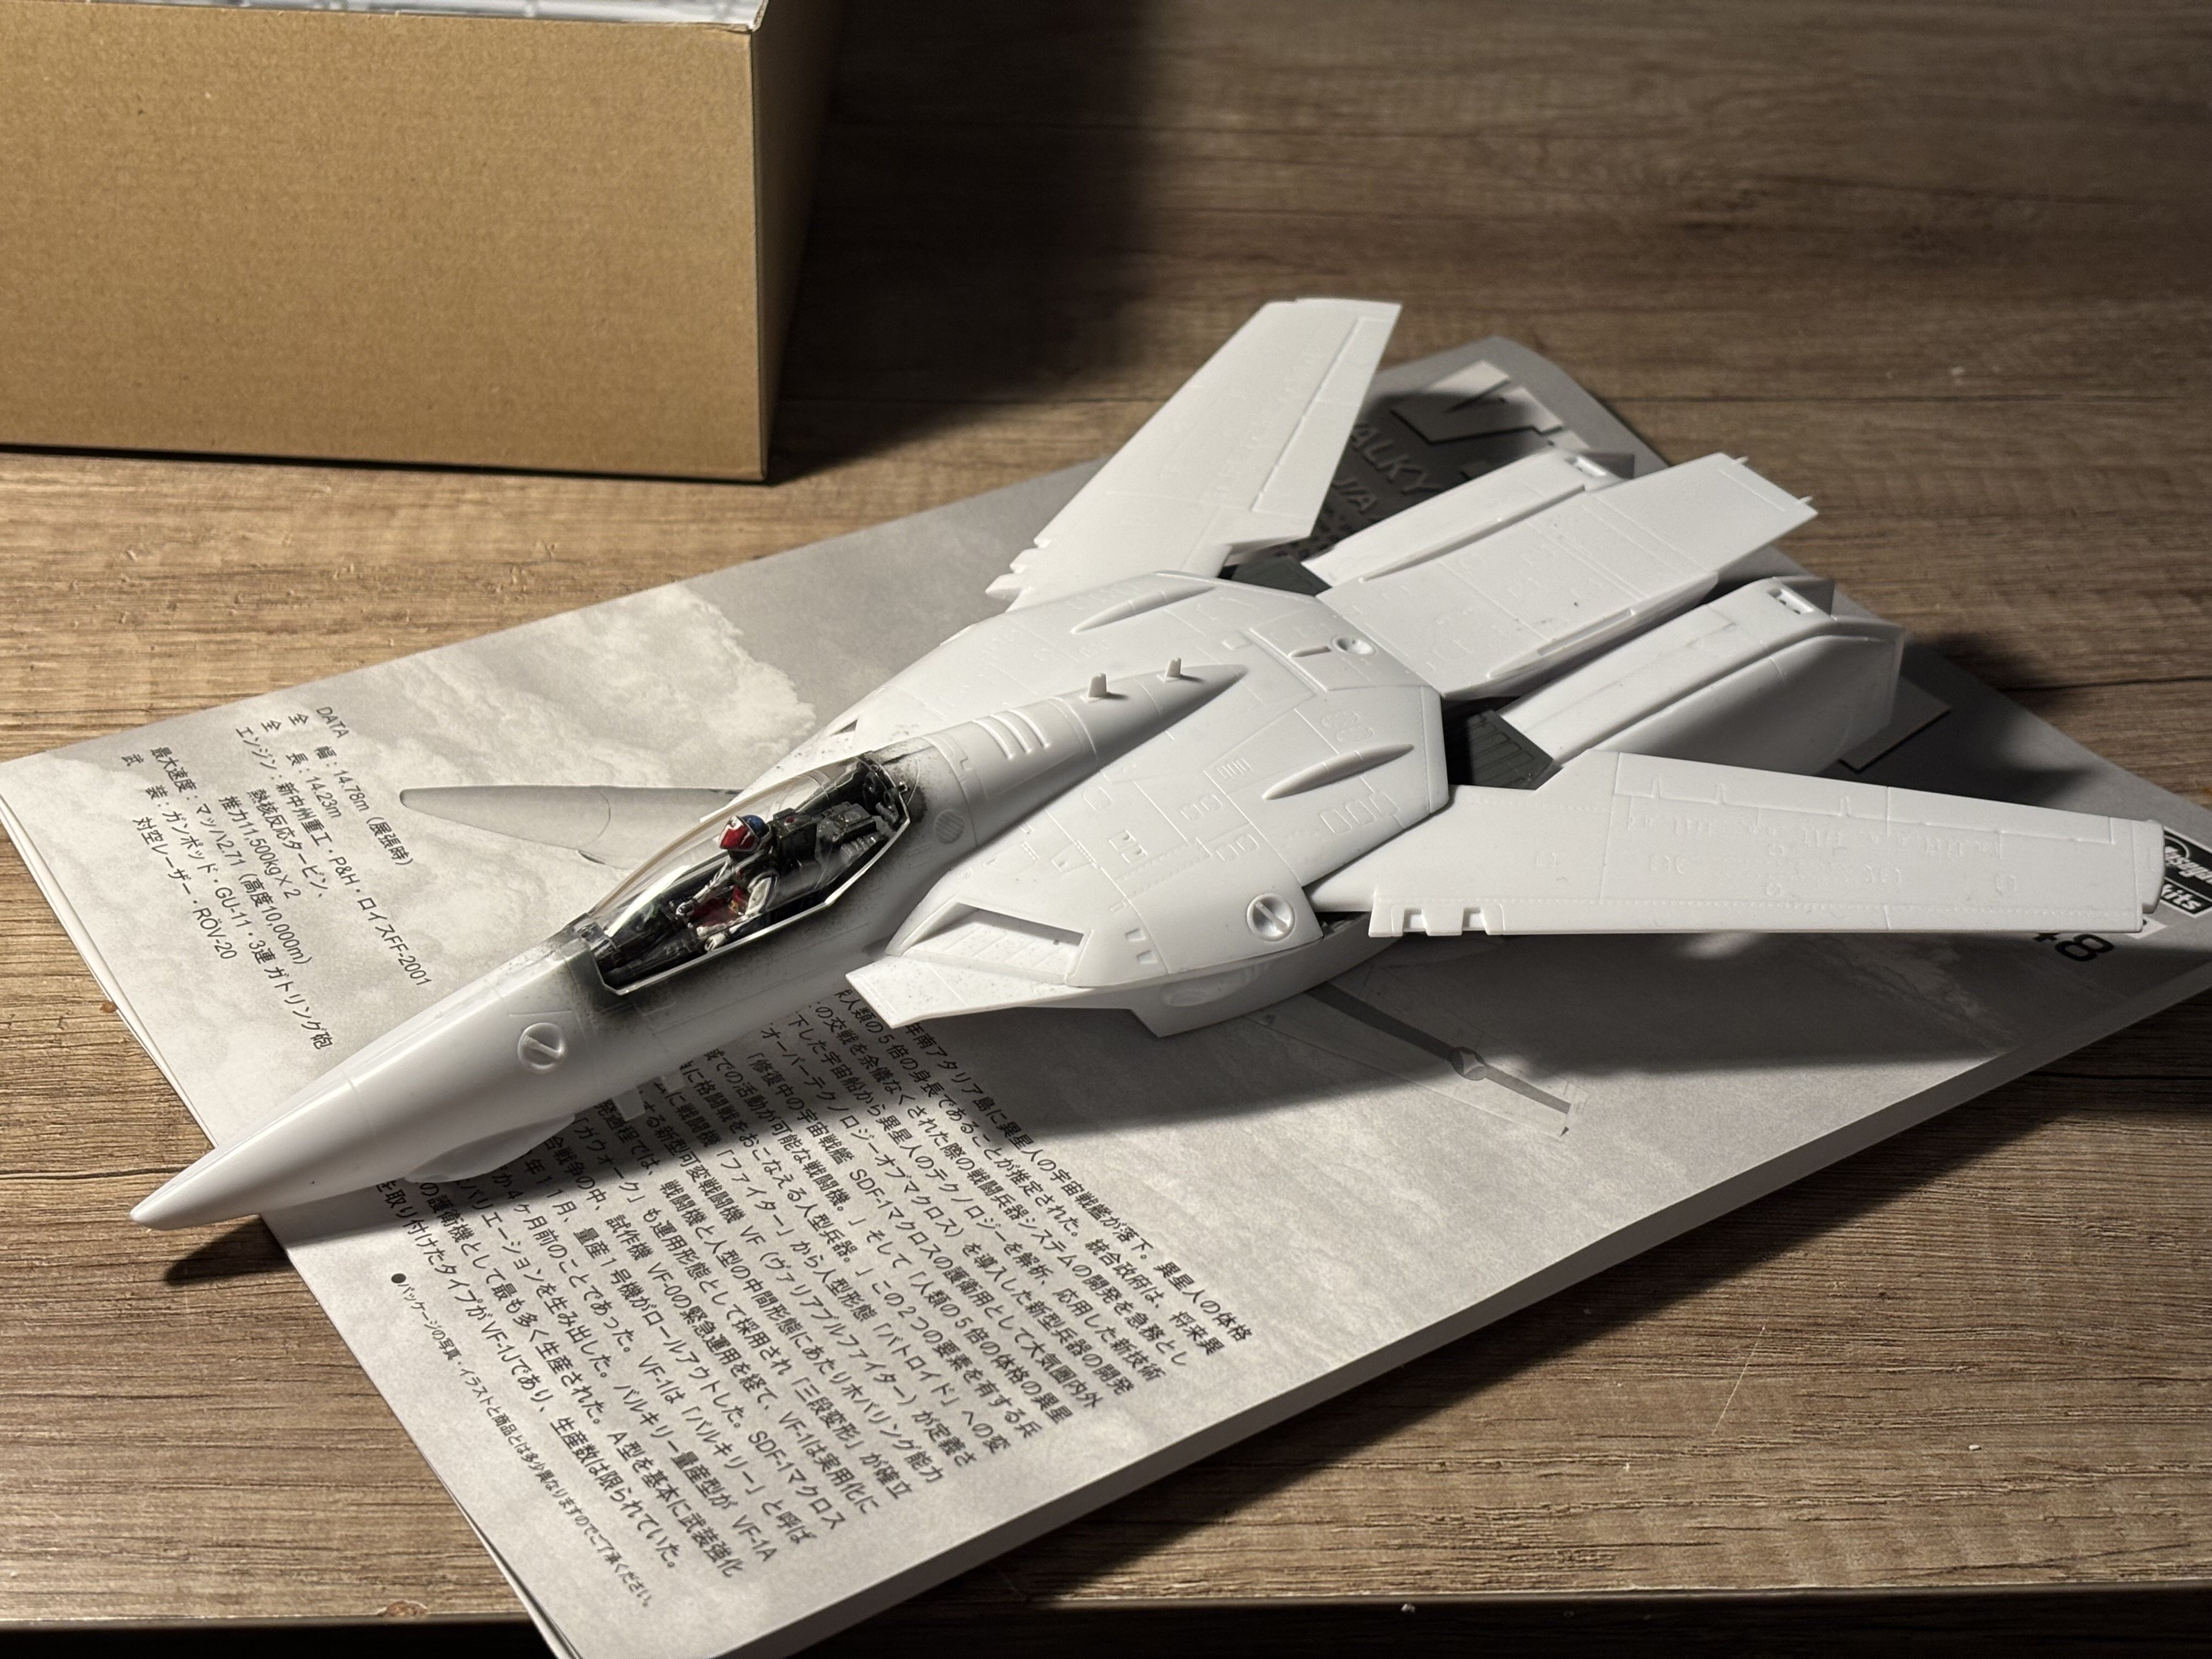
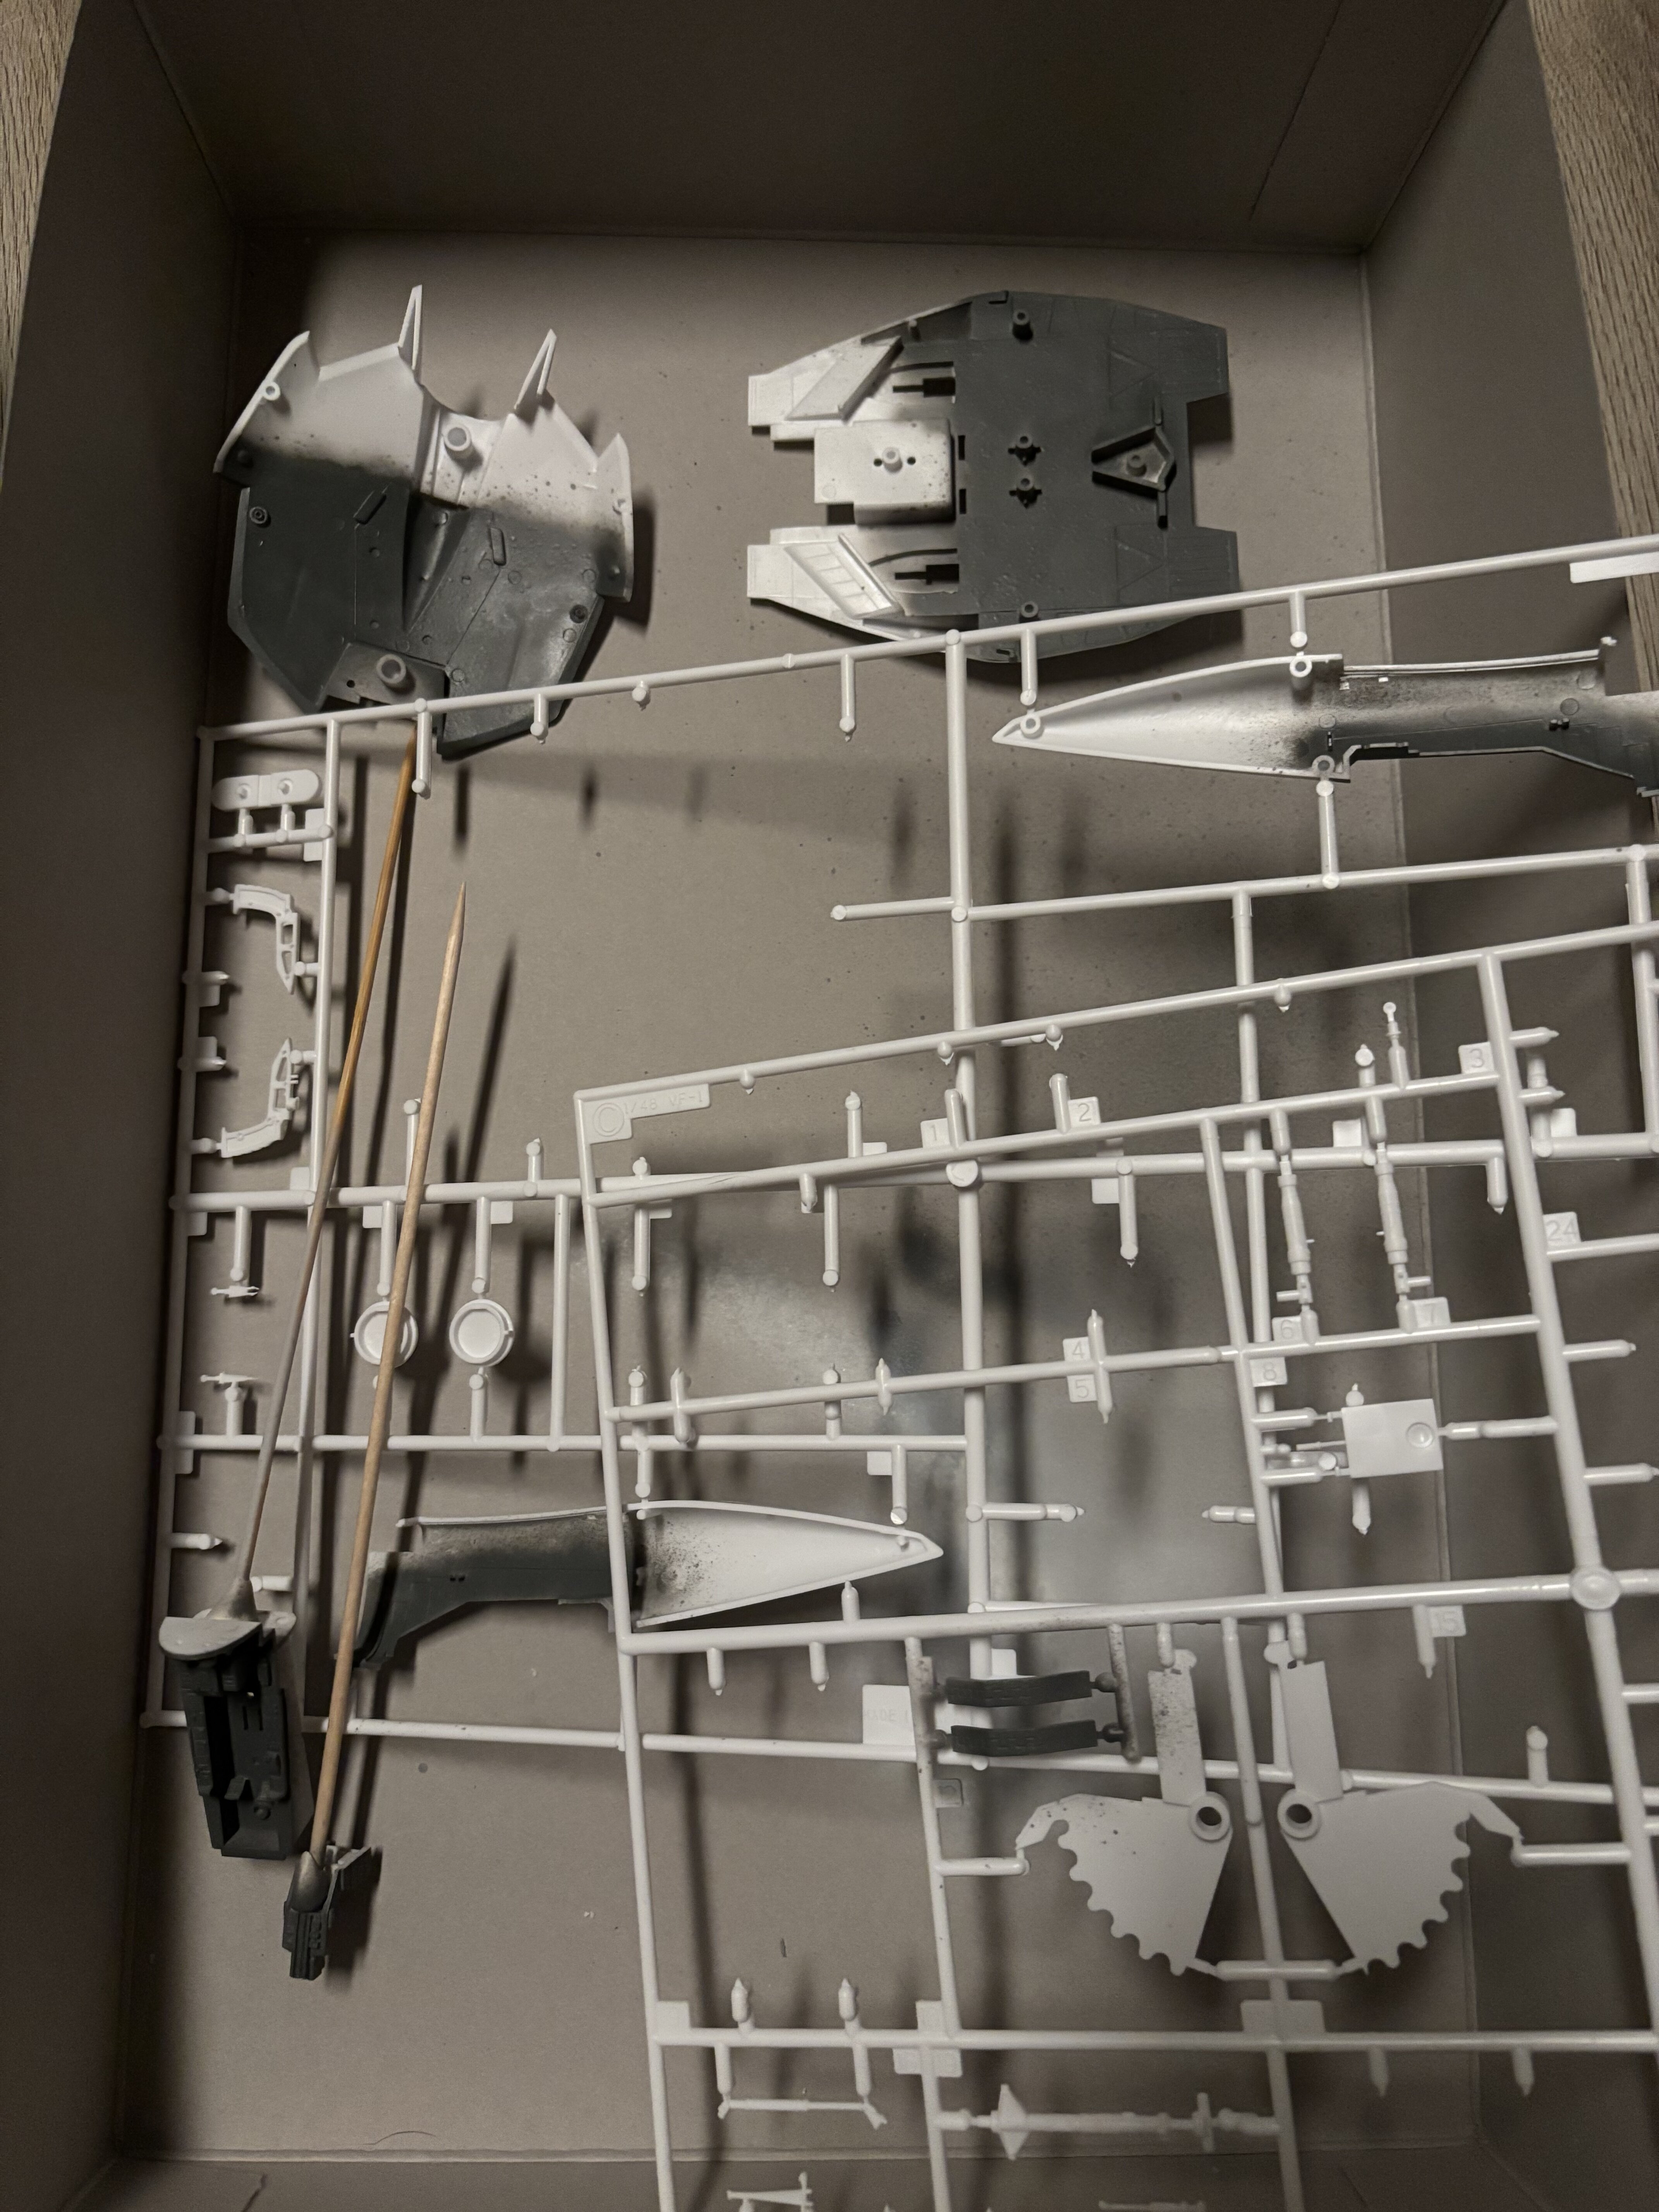
Need to add some putty here and there as well as sanding. After that, masking and priming
-
Did a bit priming and coloring this evening as well as further building.
This is a big one…
(probably not as big as the plamax 1/20 one, but 1/48 big)

-
3 hours ago, Adriano said:
Sim
The hasegawa YF-19 isn't too accurate and not true to the kawamori line art.
The underside is quite different.
-
On 12/11/2024 at 2:13 PM, Adriano said:
That fighter mode YF-19 is based on the Hasegawa YF-19, right?
-
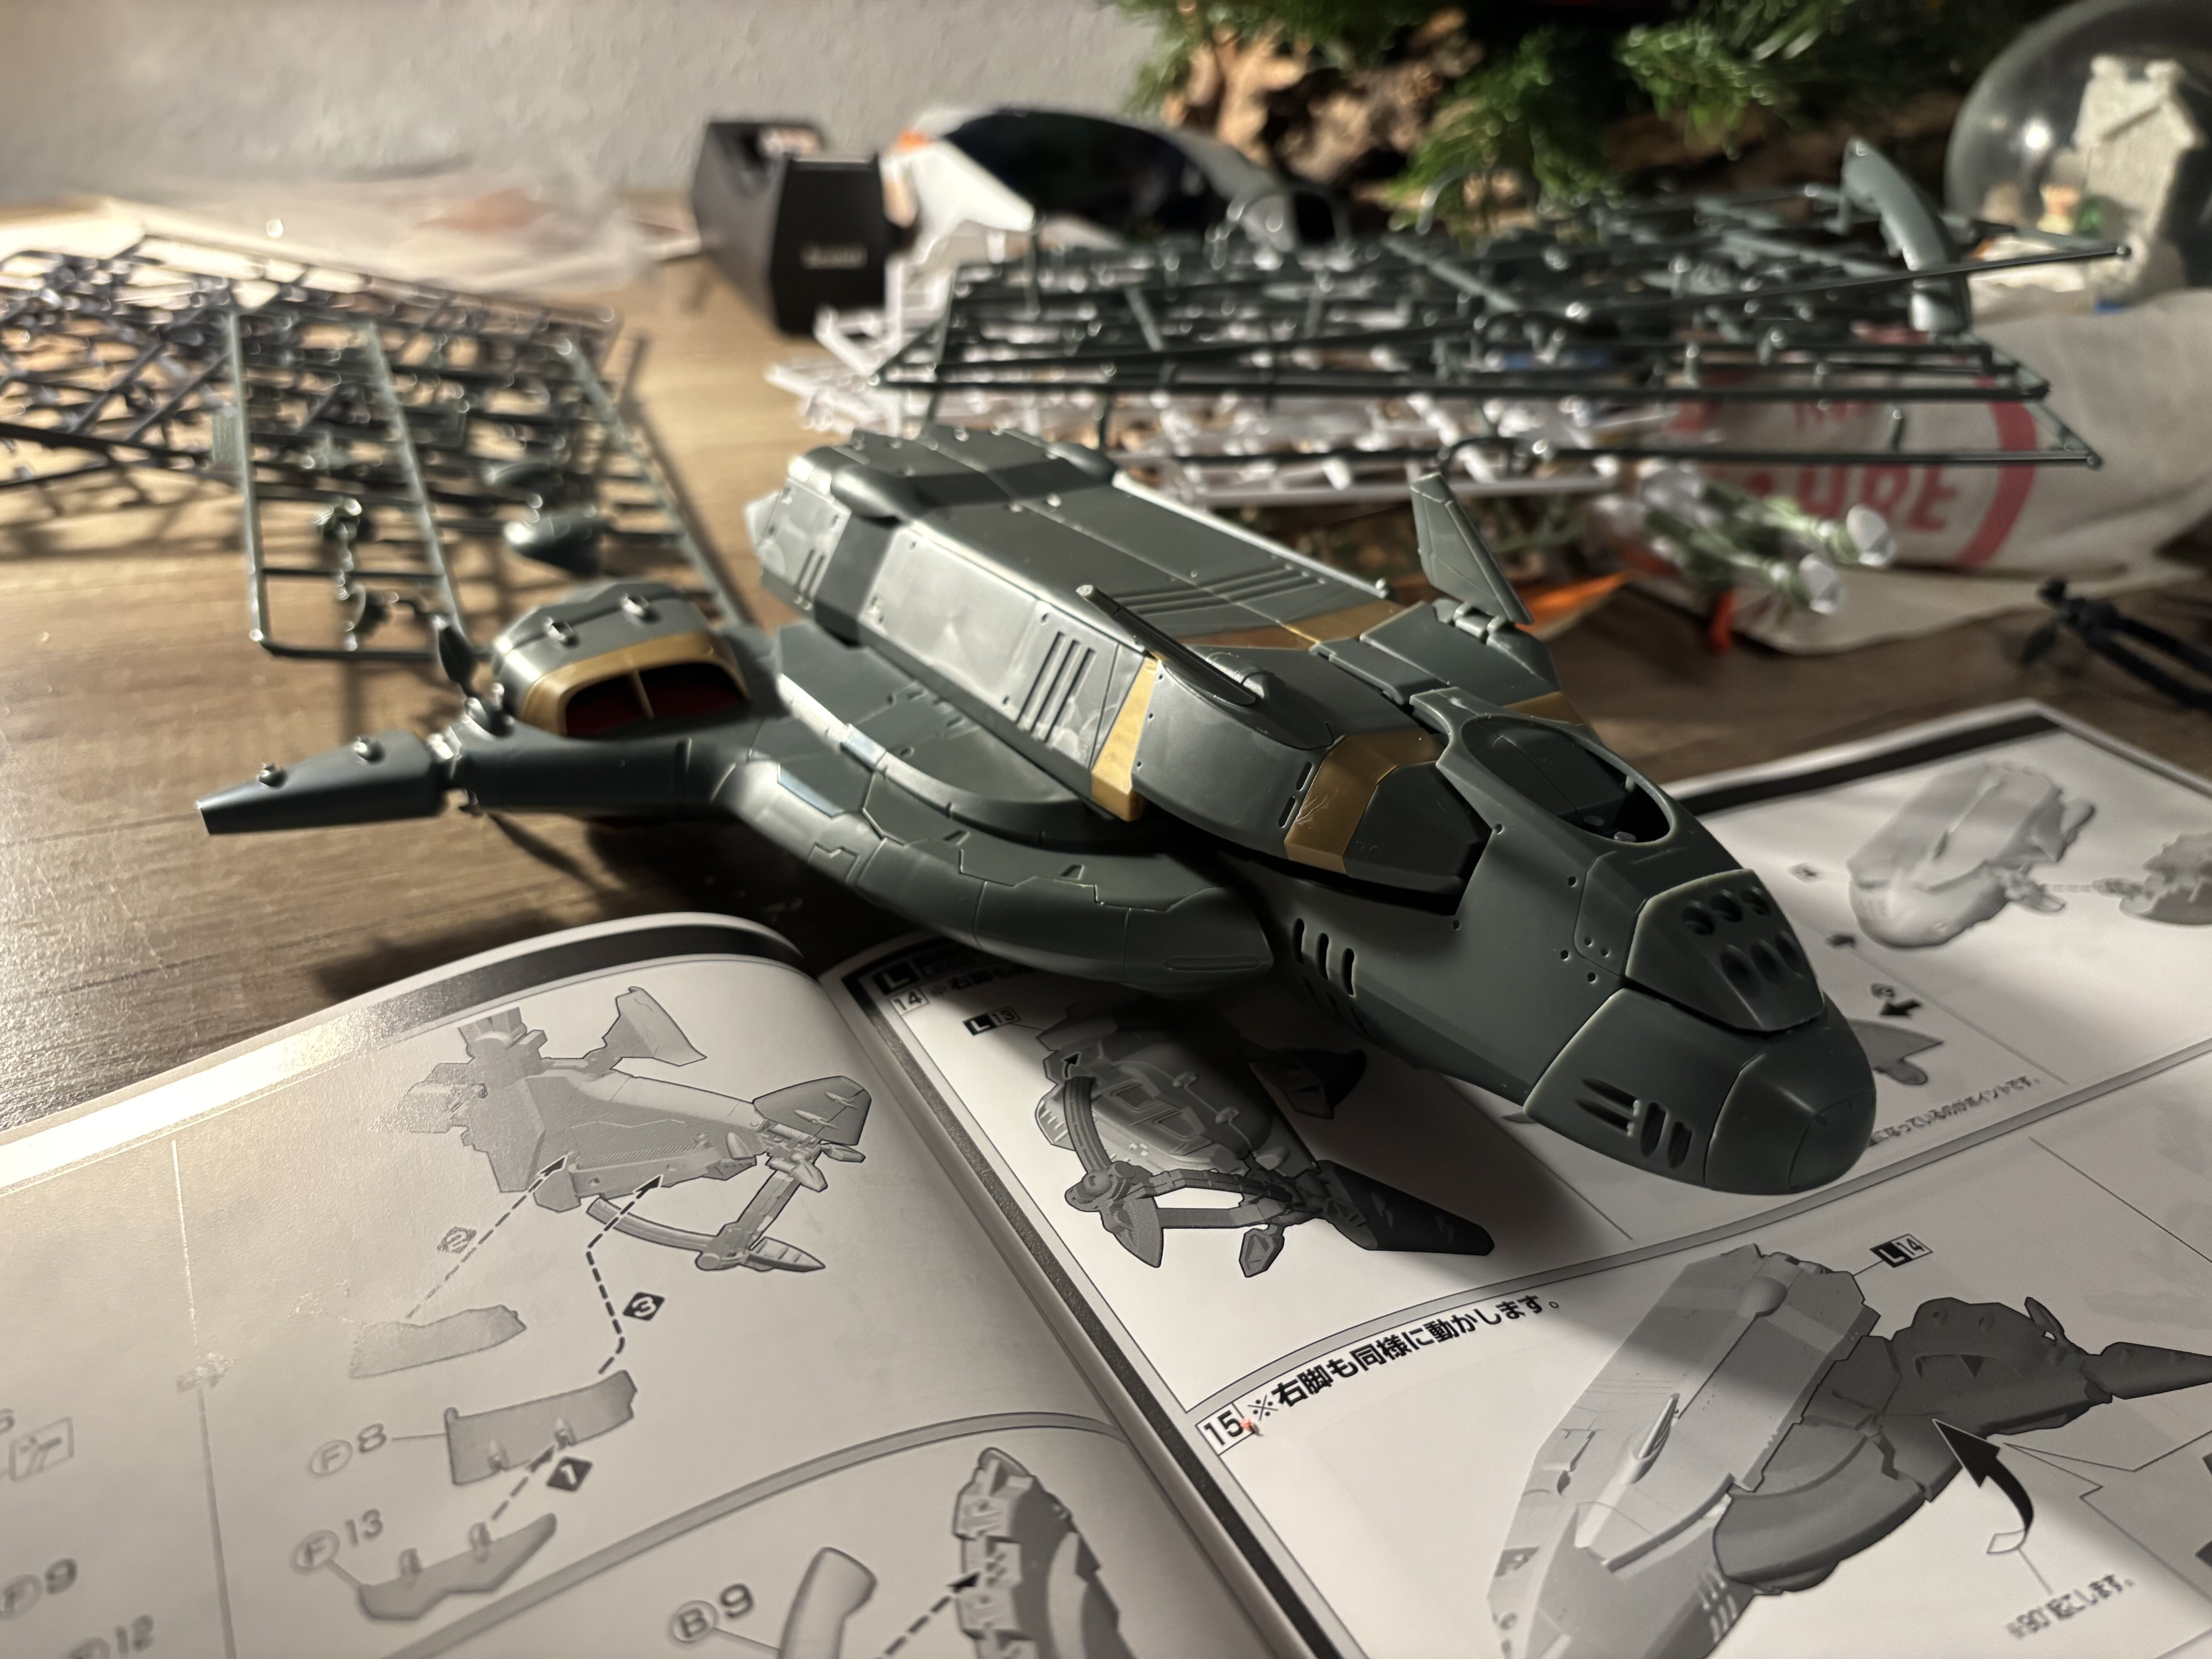
Workbench stuff. After the VB-6, I am Building something more „traditional“.
I haven’t build anything 1/48 in ages. Totally forgot how big 1/48 stuff is haha.
Anyway, this seems like hasegawa took everything they did wrong with the 1/72 and fixed it. Like a revision B, just in 1/48. would be cool if they could update their 1/72 mold with the improvements the 1/48 has. Just dreaming.
As the 1/72, it can be broken down into build groups. So I am doing this group by group.
-
@Graham cool! Have fun! I definitely had fun with my VB-6.
-
@Chronocidal Yeah, I figured. There are still the pieces for the head unit on the runners. There are also a bunch of duplicate parts, as they just "copy/pasta" a few runners. A lot of pieces are just the same and were reused.
In general, I think this kit is more aimed towards the "toy" audience, and not a scale model builder like me. While I had a ton of fun building this, I probably won't have fun painting this. If I ever want to paint this, I probably would glue the VB-6 into permanent shuttle mode and then do the paint job. I saw a bunch of Bandai builds with primed parts and then painted and so on. They rarely transform their kits, for the same reasons. The paint would just wear off too quickly. So - maybe only panel lining with a gunpla marker for me on the VB-6. As of now, I will store it in a box and move on to the next kit.
-
@derex3592 haha, yeah. It is funny. In the German version he says „wide“. Might be some dubbing thing. Anyway.
build log (2024/12/11):
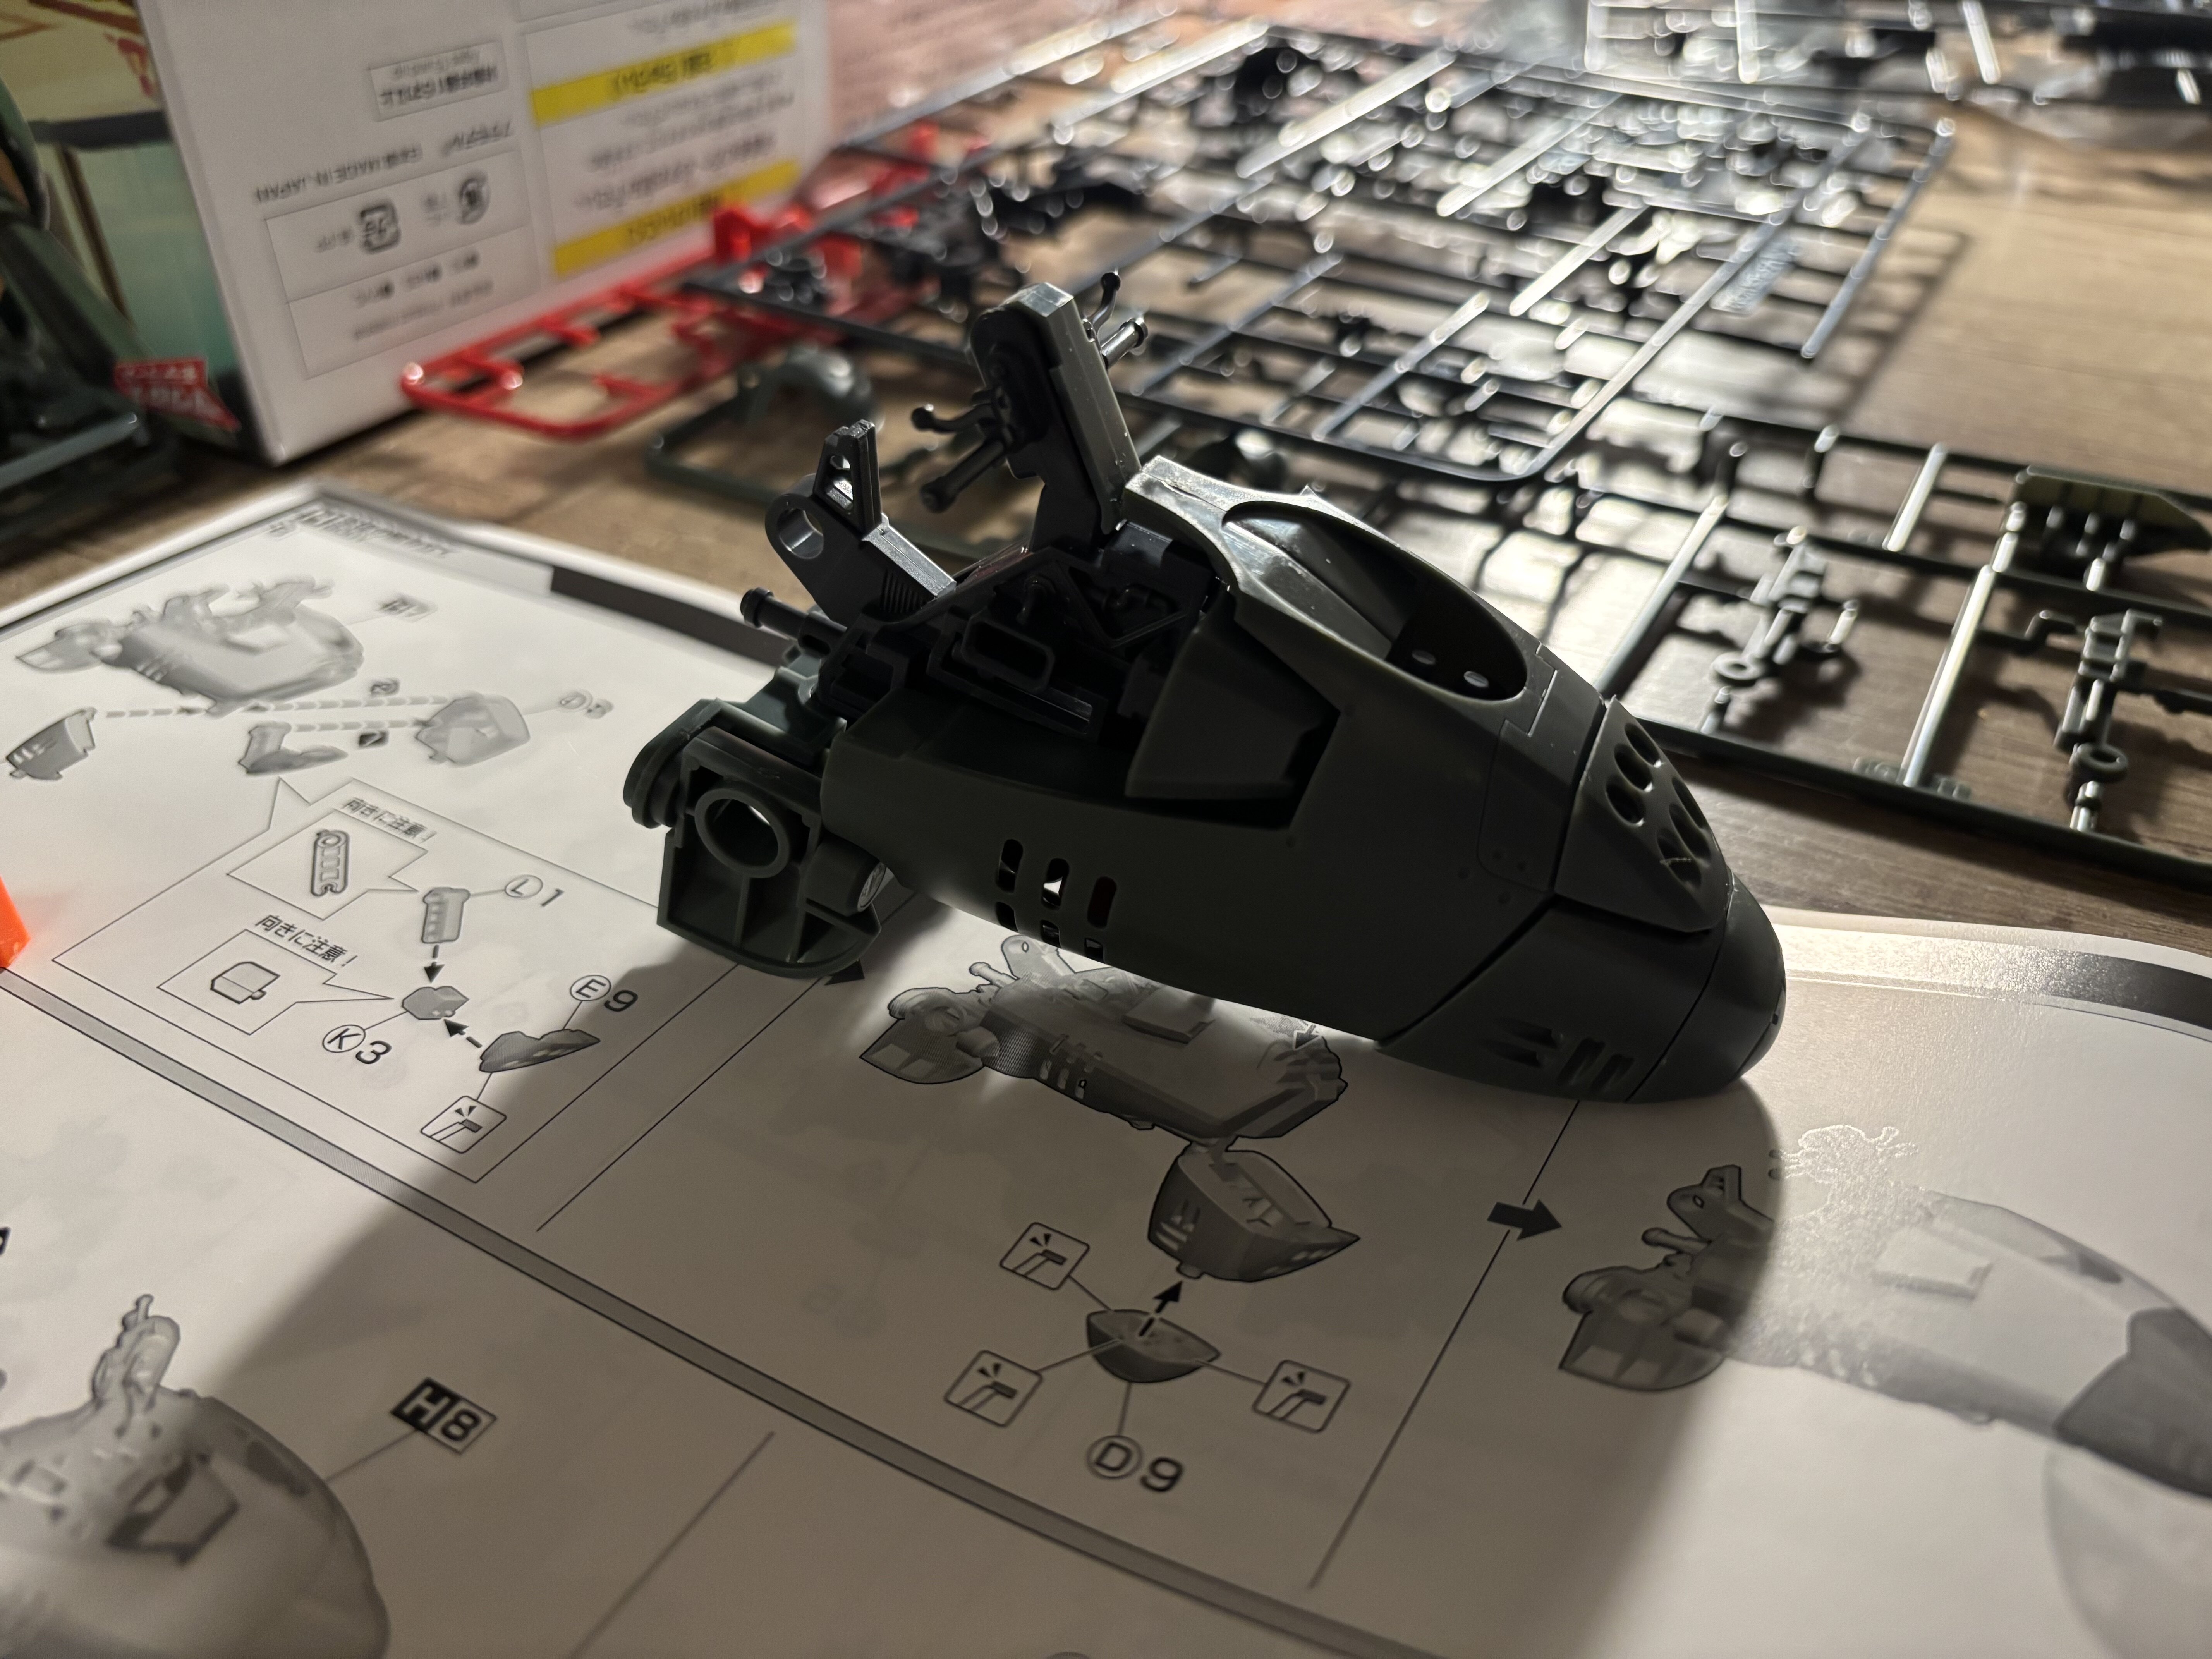
Time to finish up. The literal „last leg“.
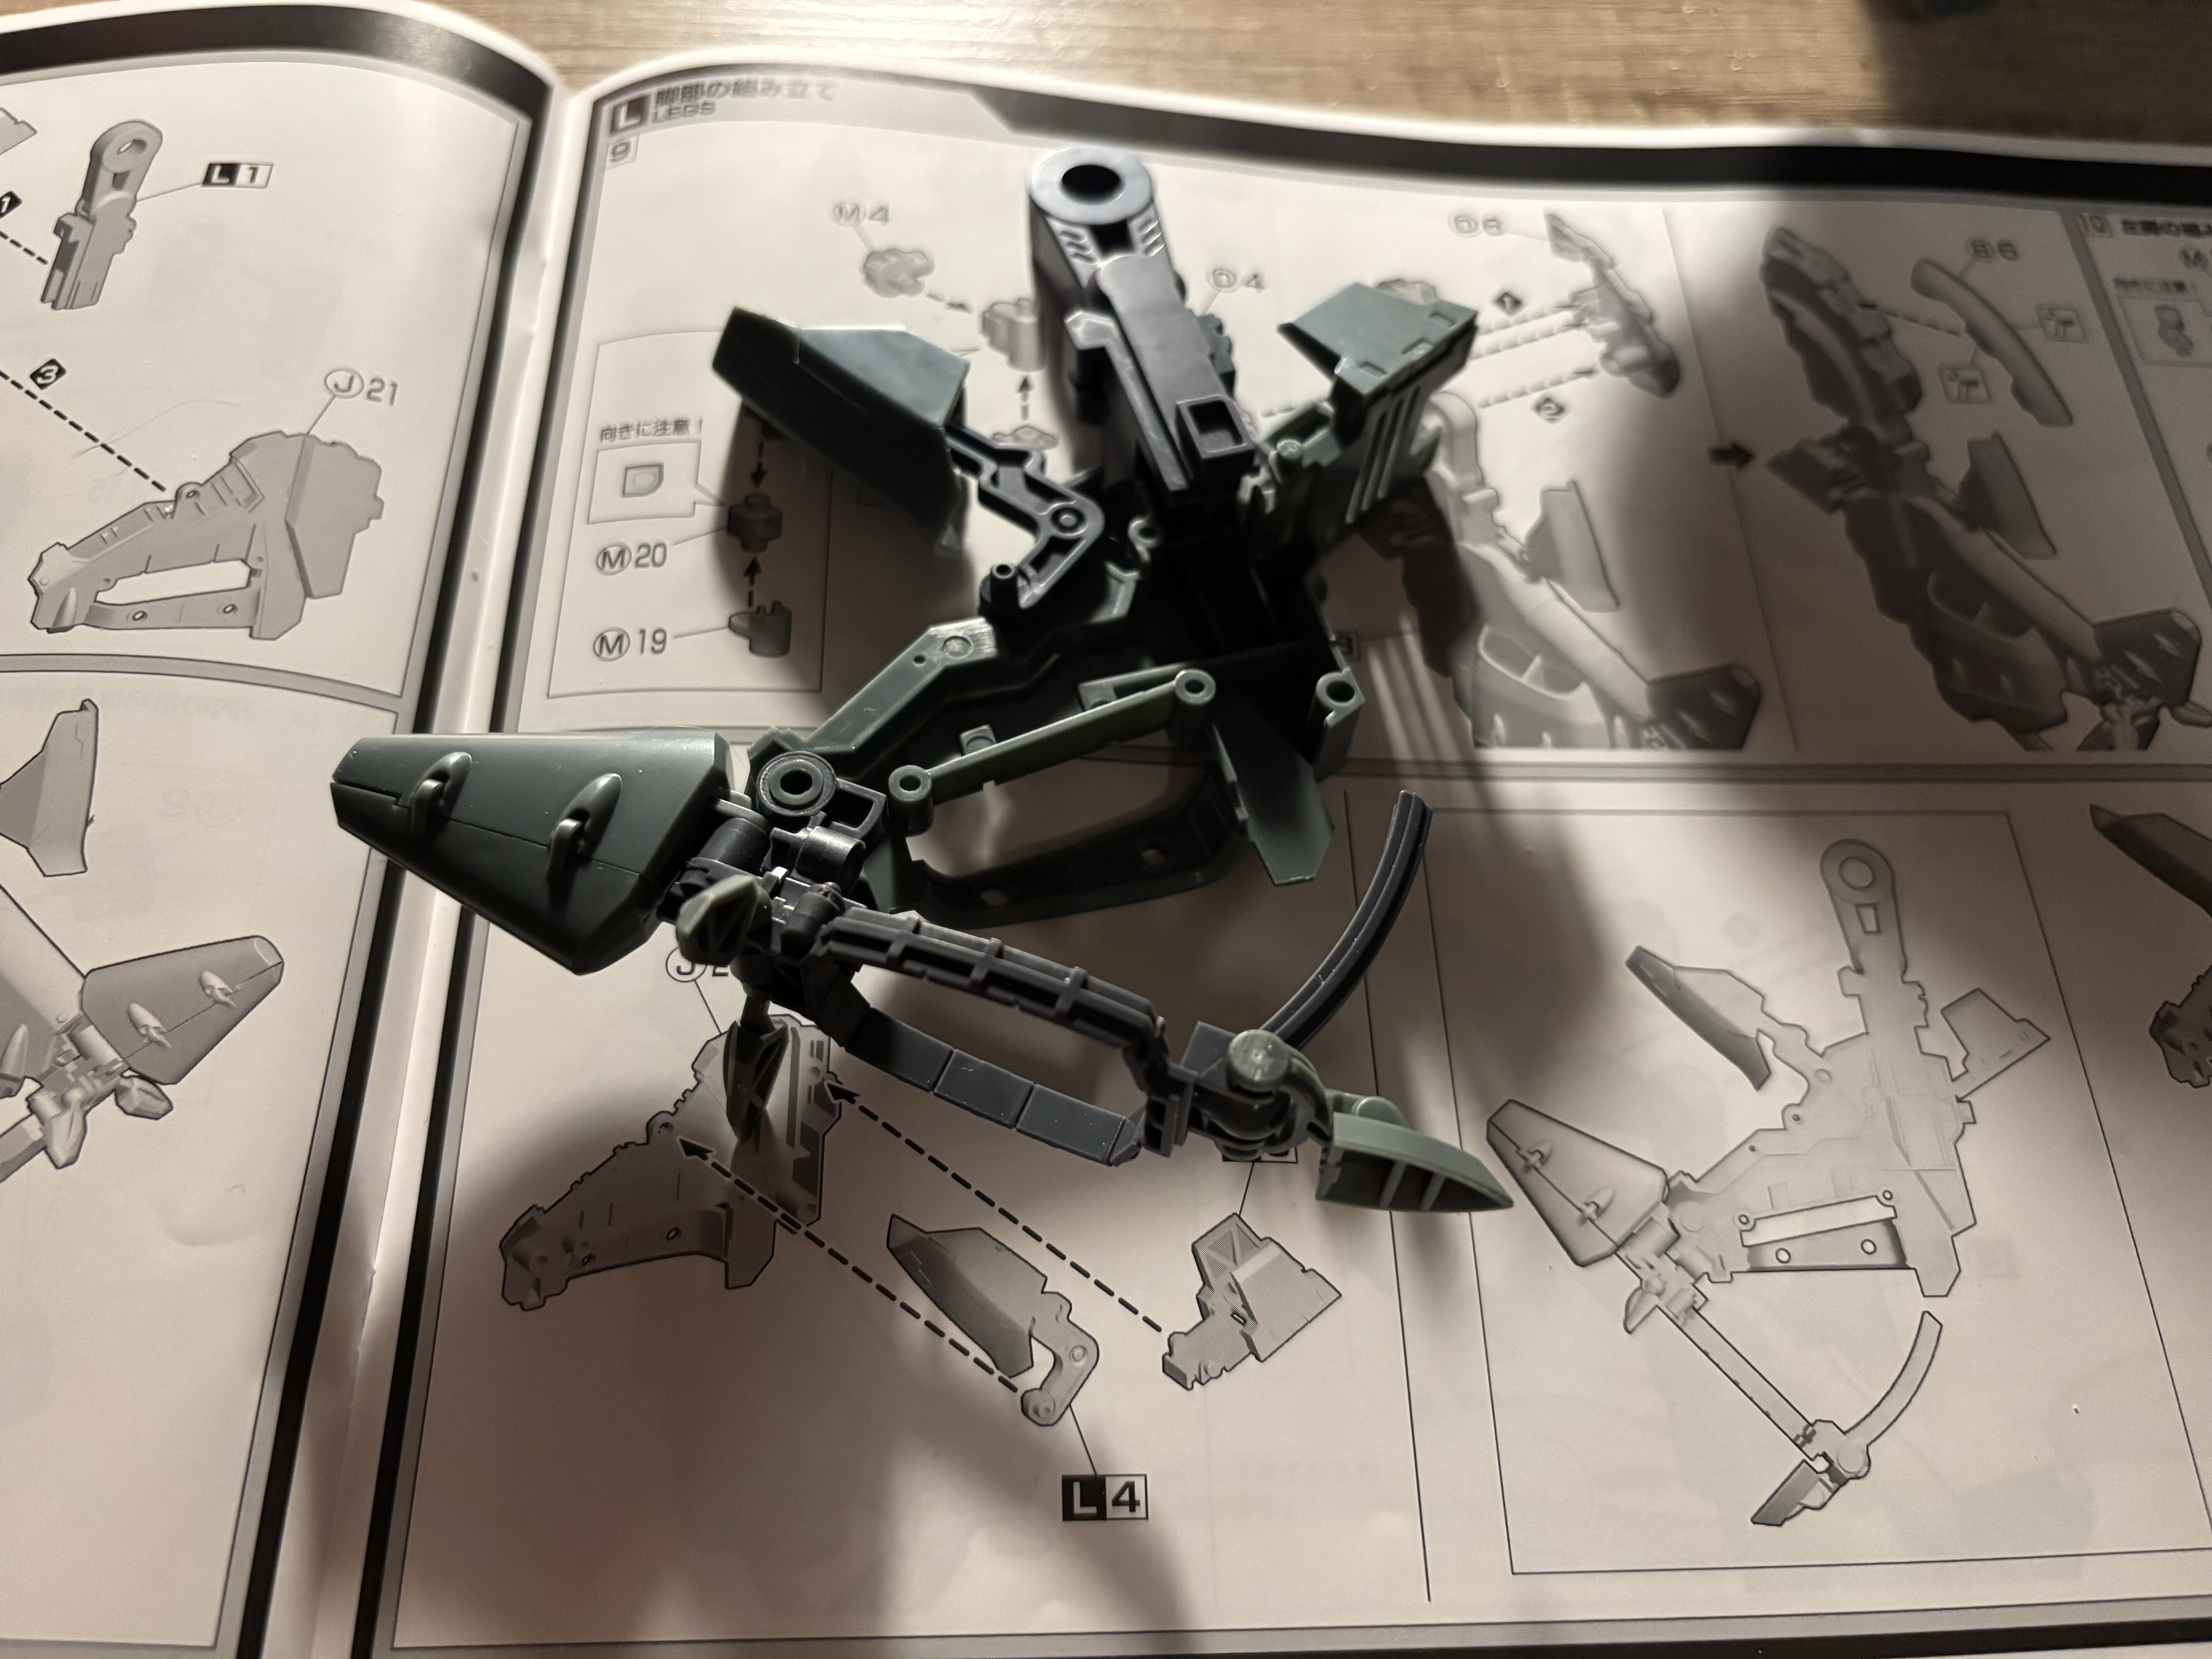
Still needs a cockpit.

And done.

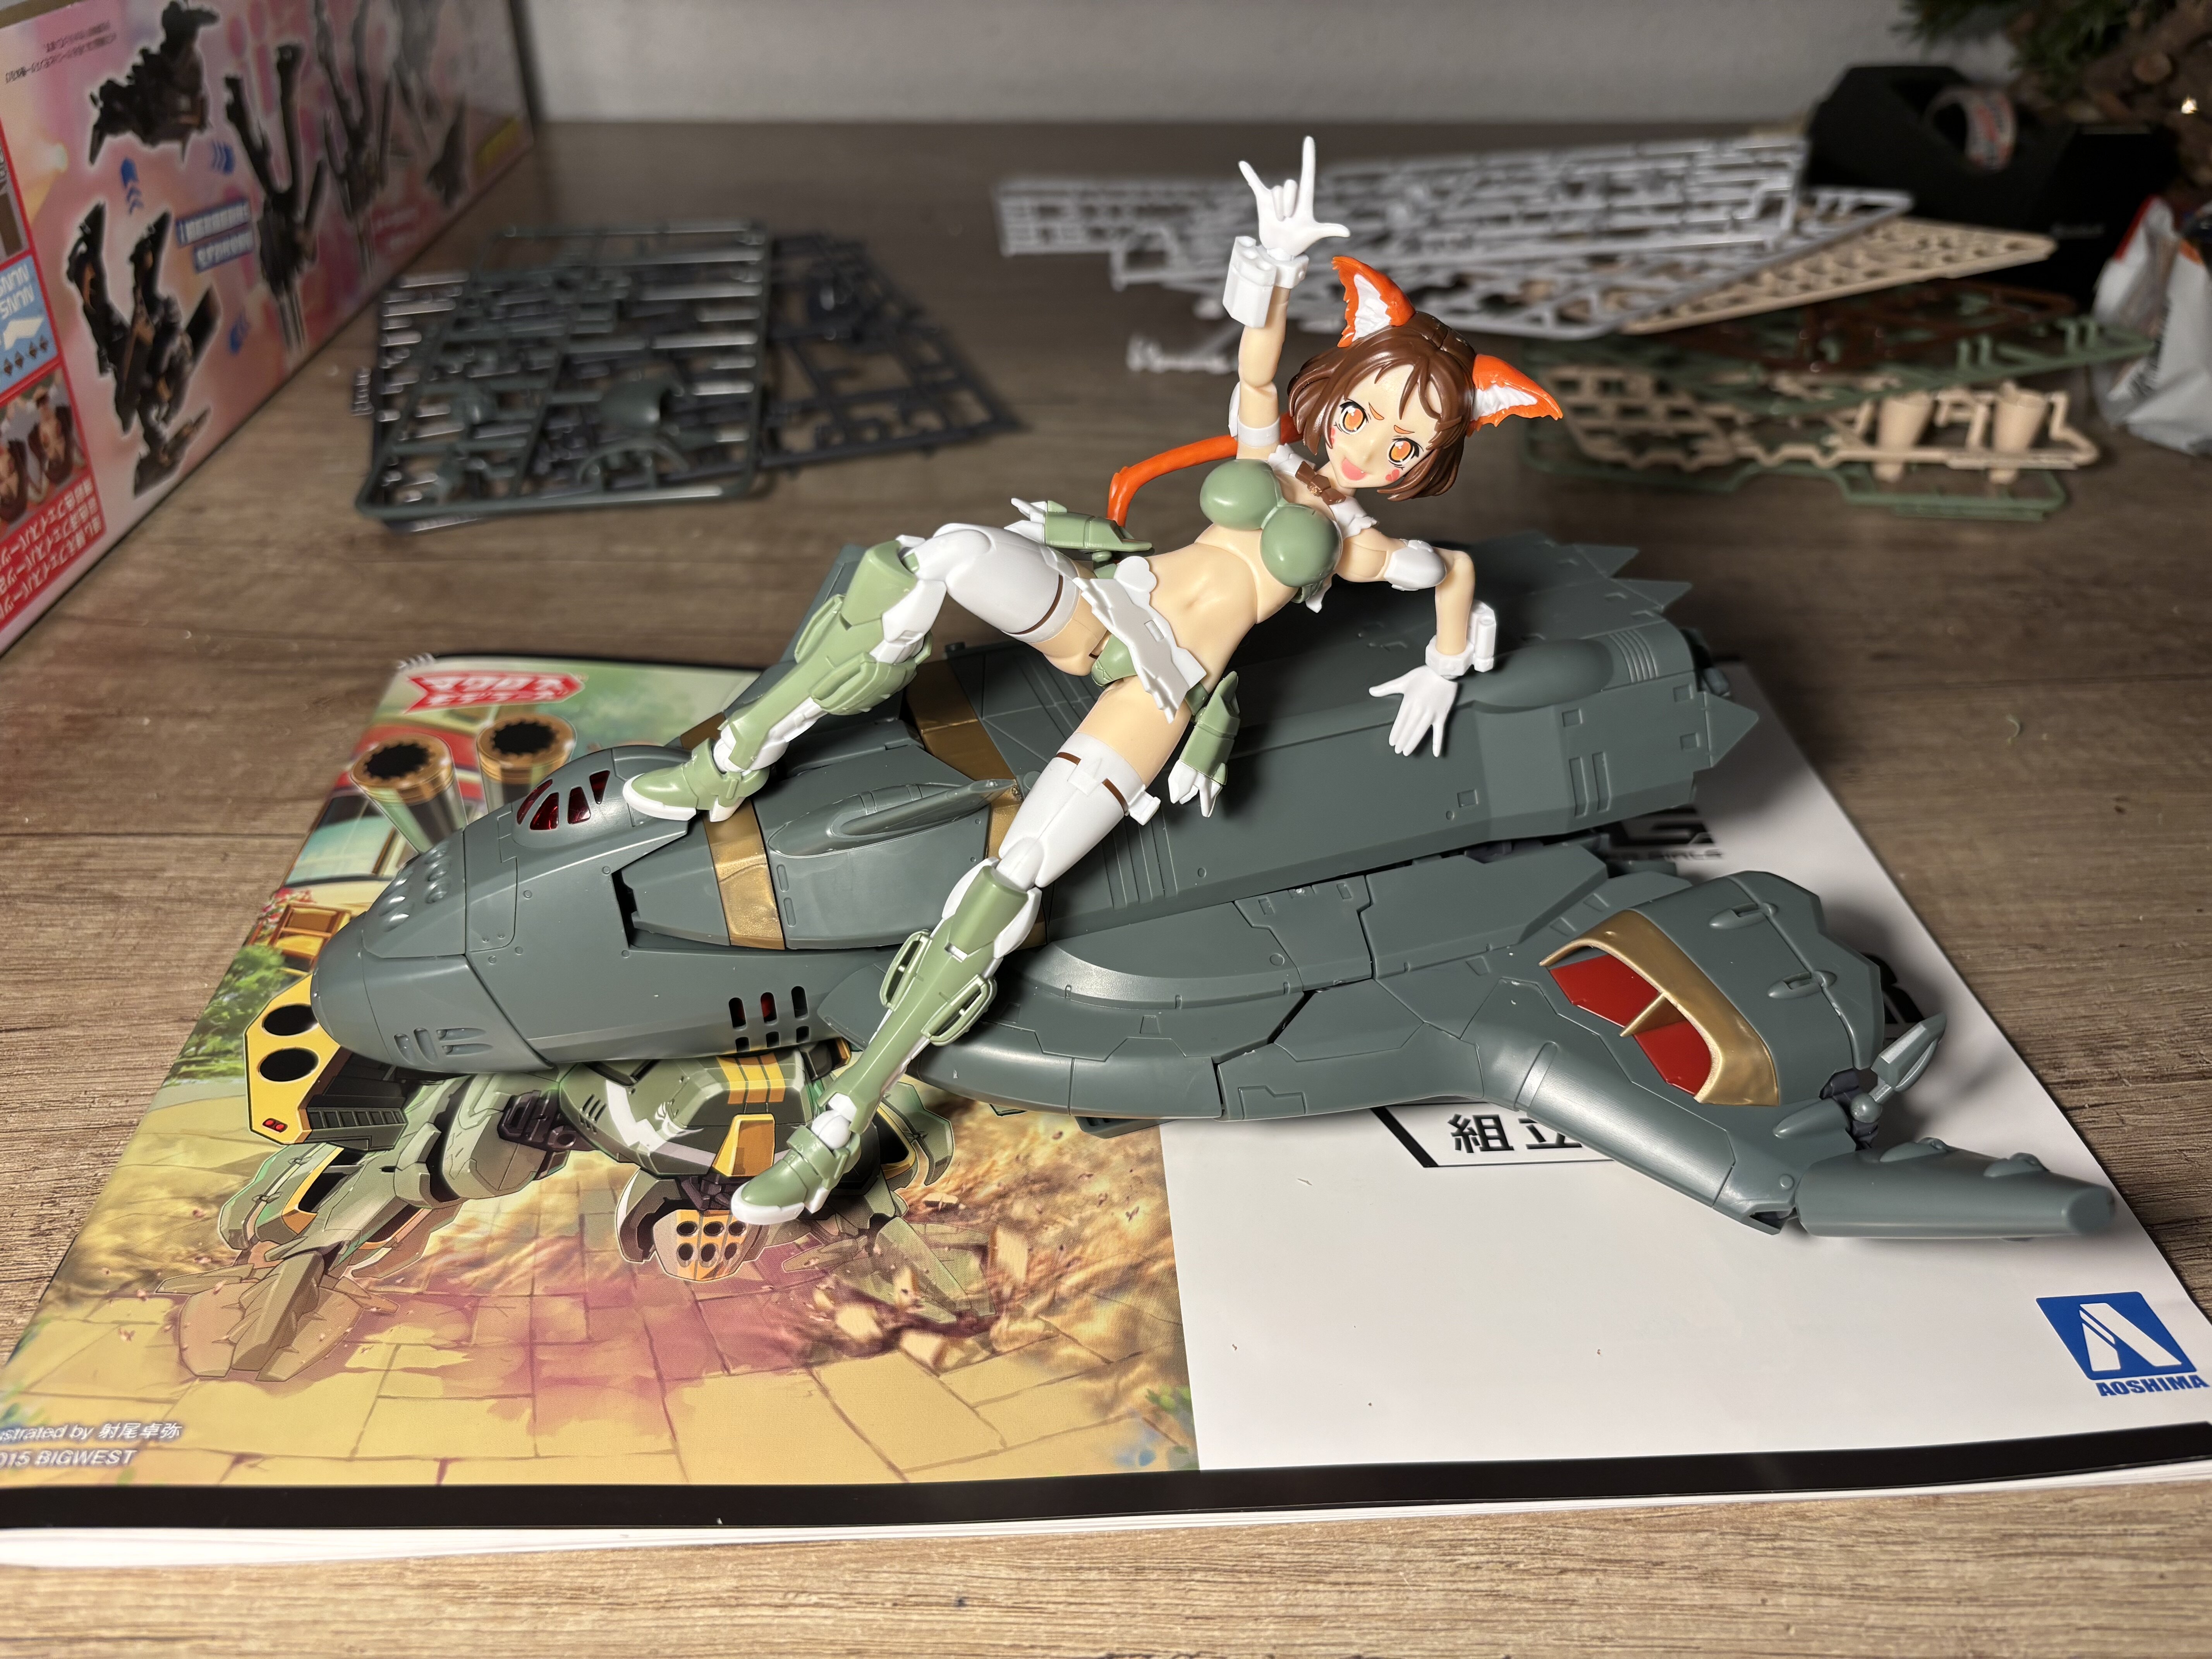
The V.F.G. claims her ship. By scale, she must be bigger than a Zentradi.
Gerwalk mode:
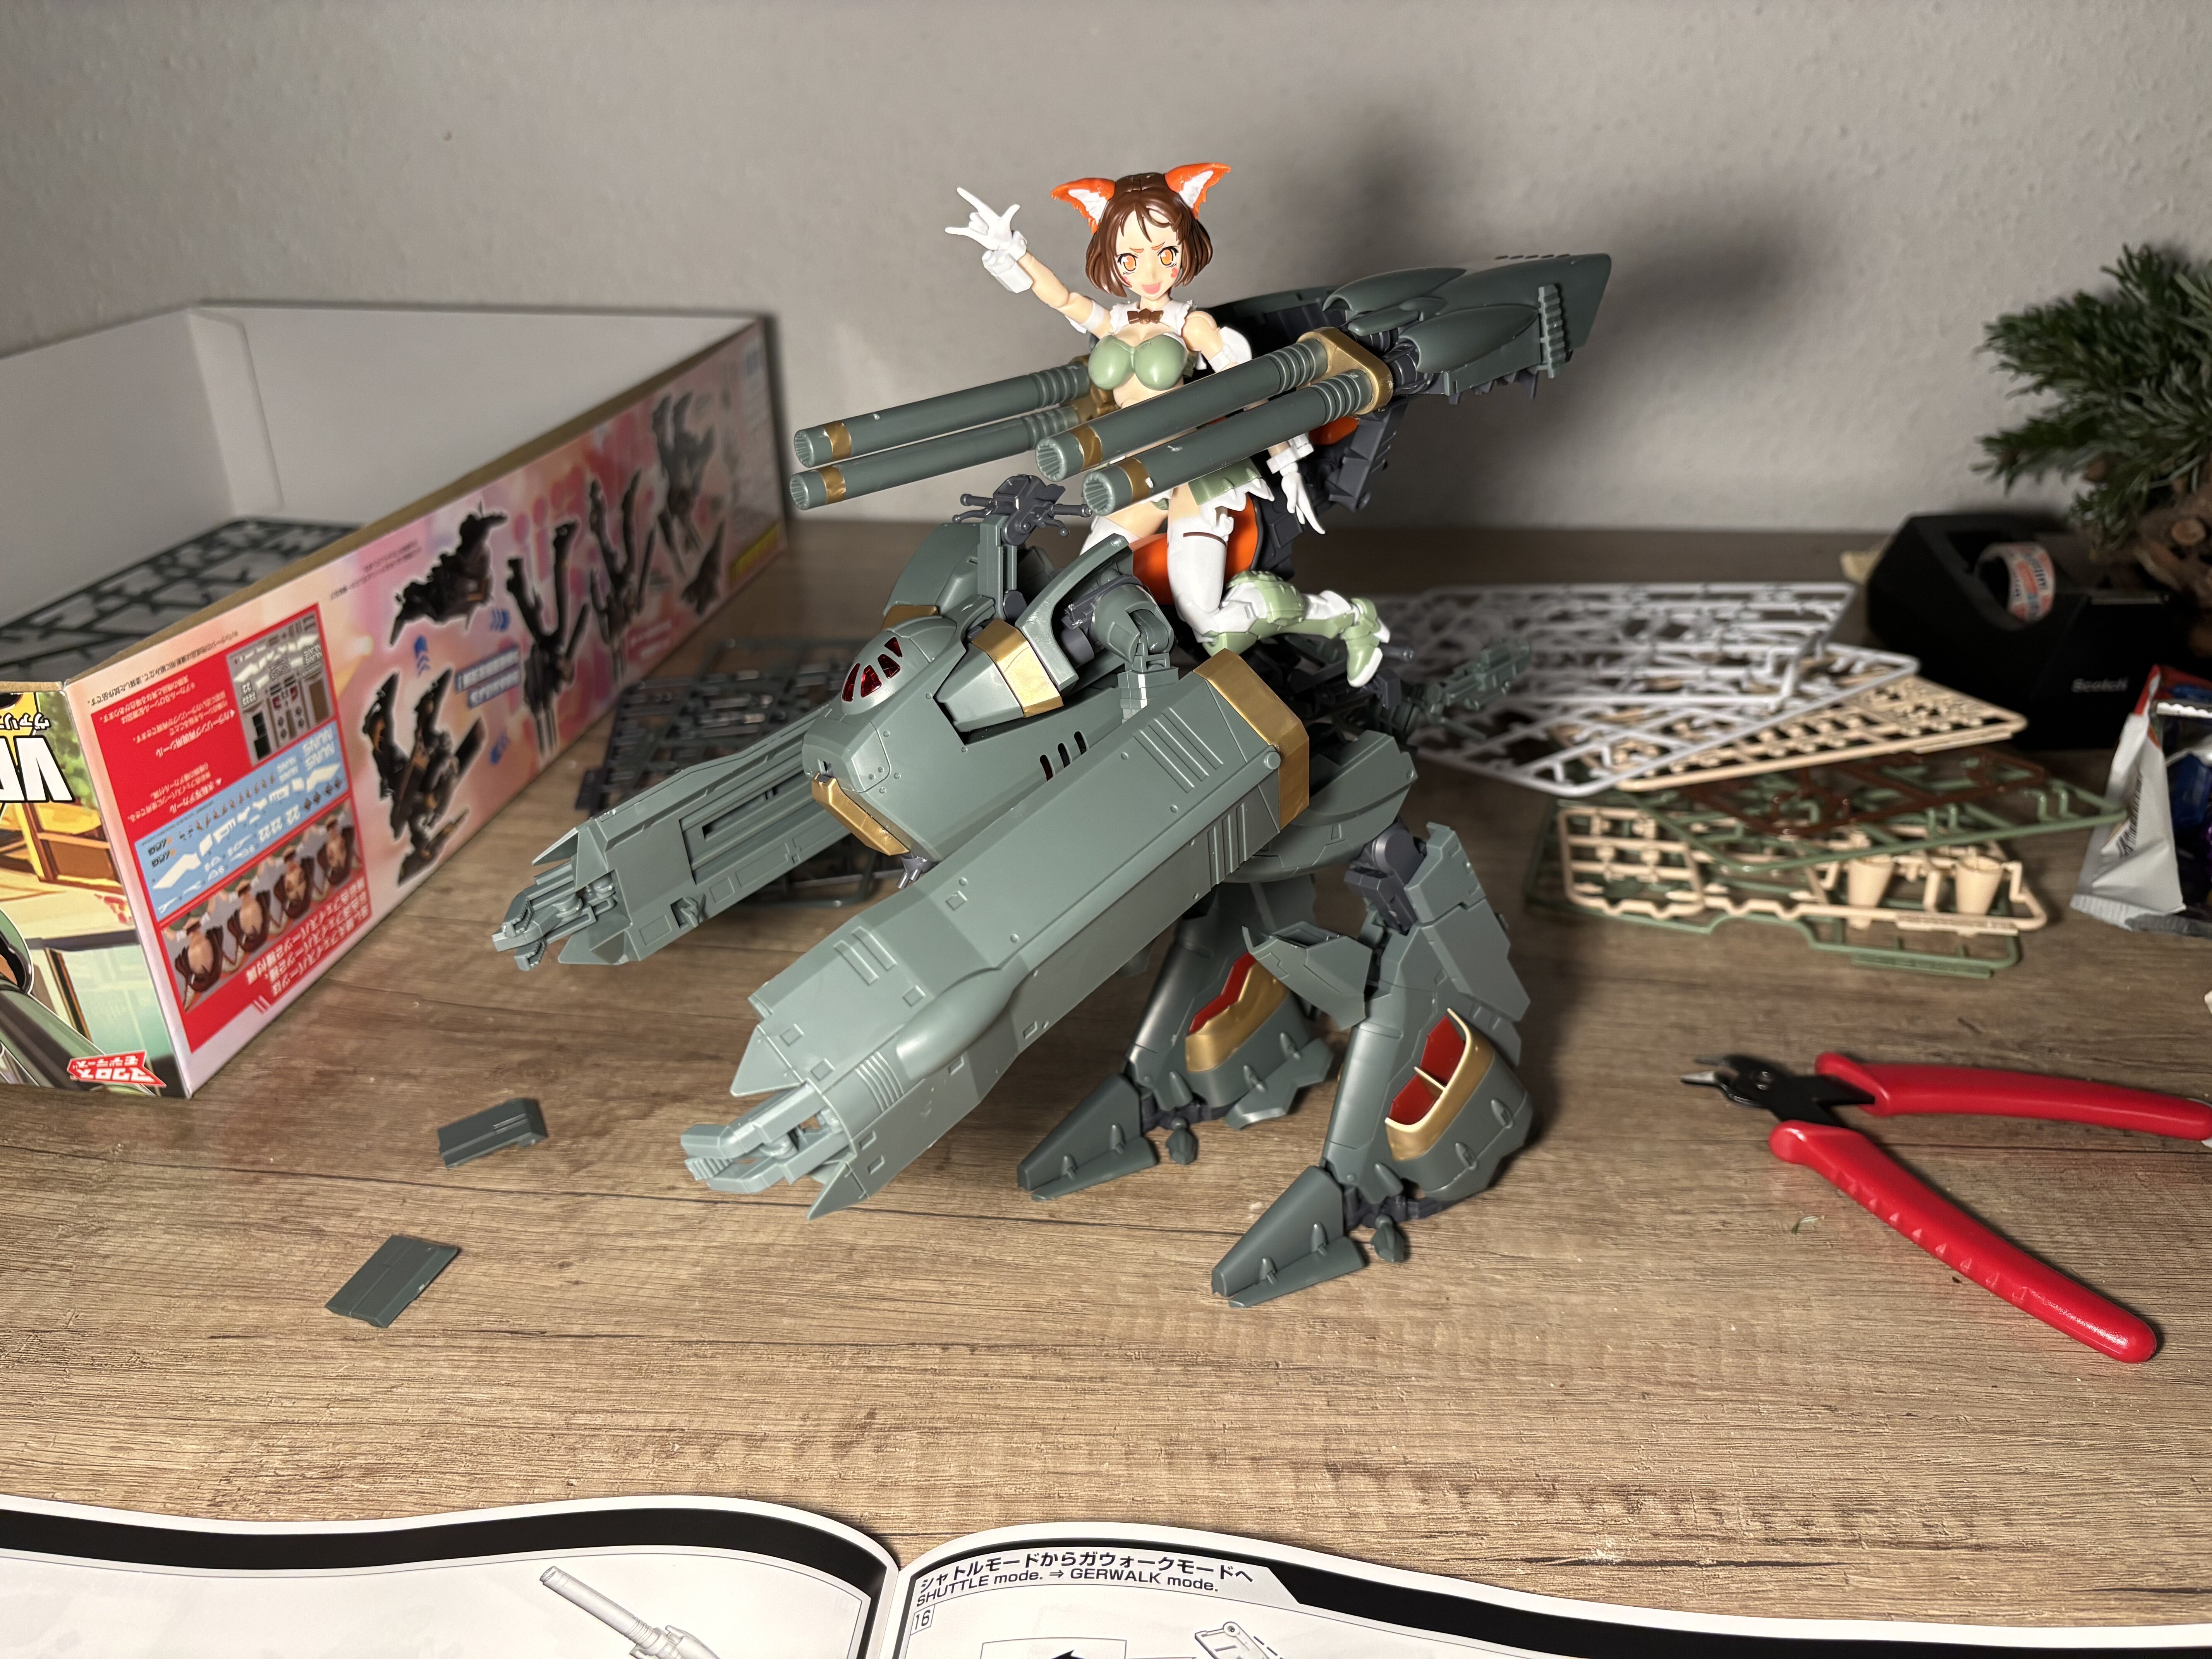
I was to lazy to change to Battroid, as the whole transformation on this one is kinda hard. The joints are a really tight fit, and I didn’t want to break a thing.
The VB-6 is heavy. I think it must be around 700g.
I am not sure I want to ground and paint this. As i played around with the transformation, I figured that the paint will be scratched. So no coloring. I might want to panel line it. For now, I declare this one to be finished.
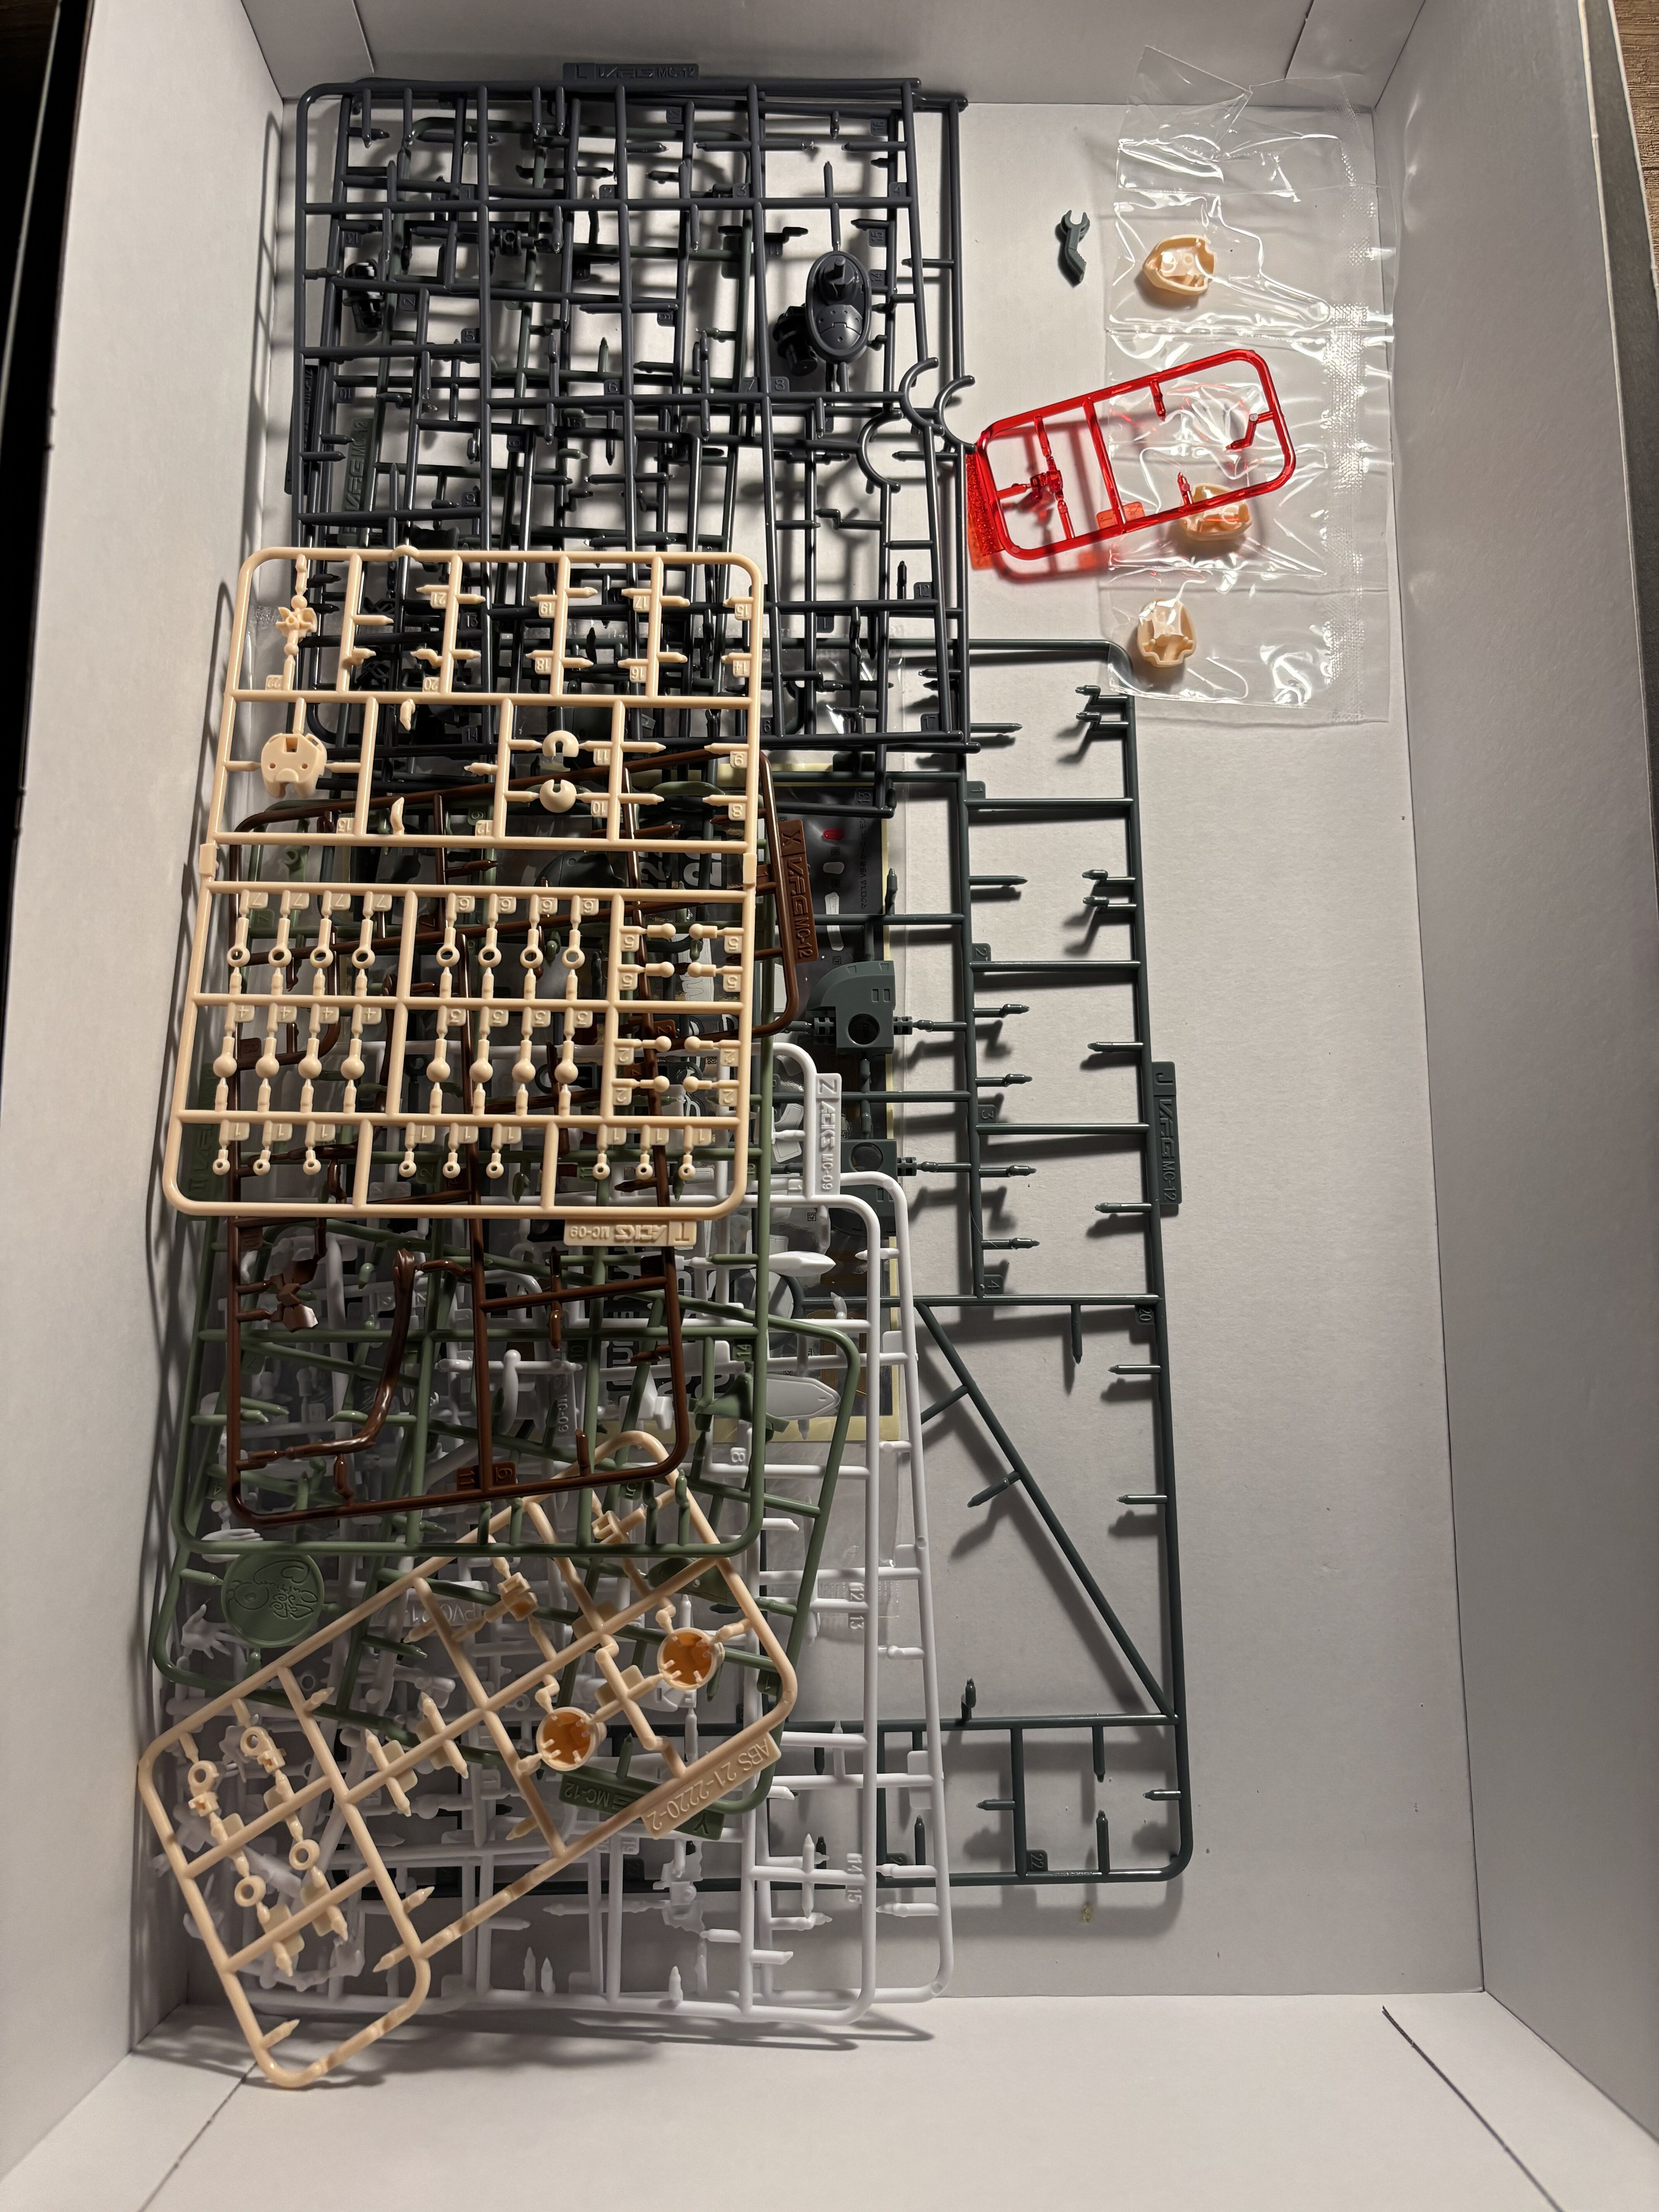
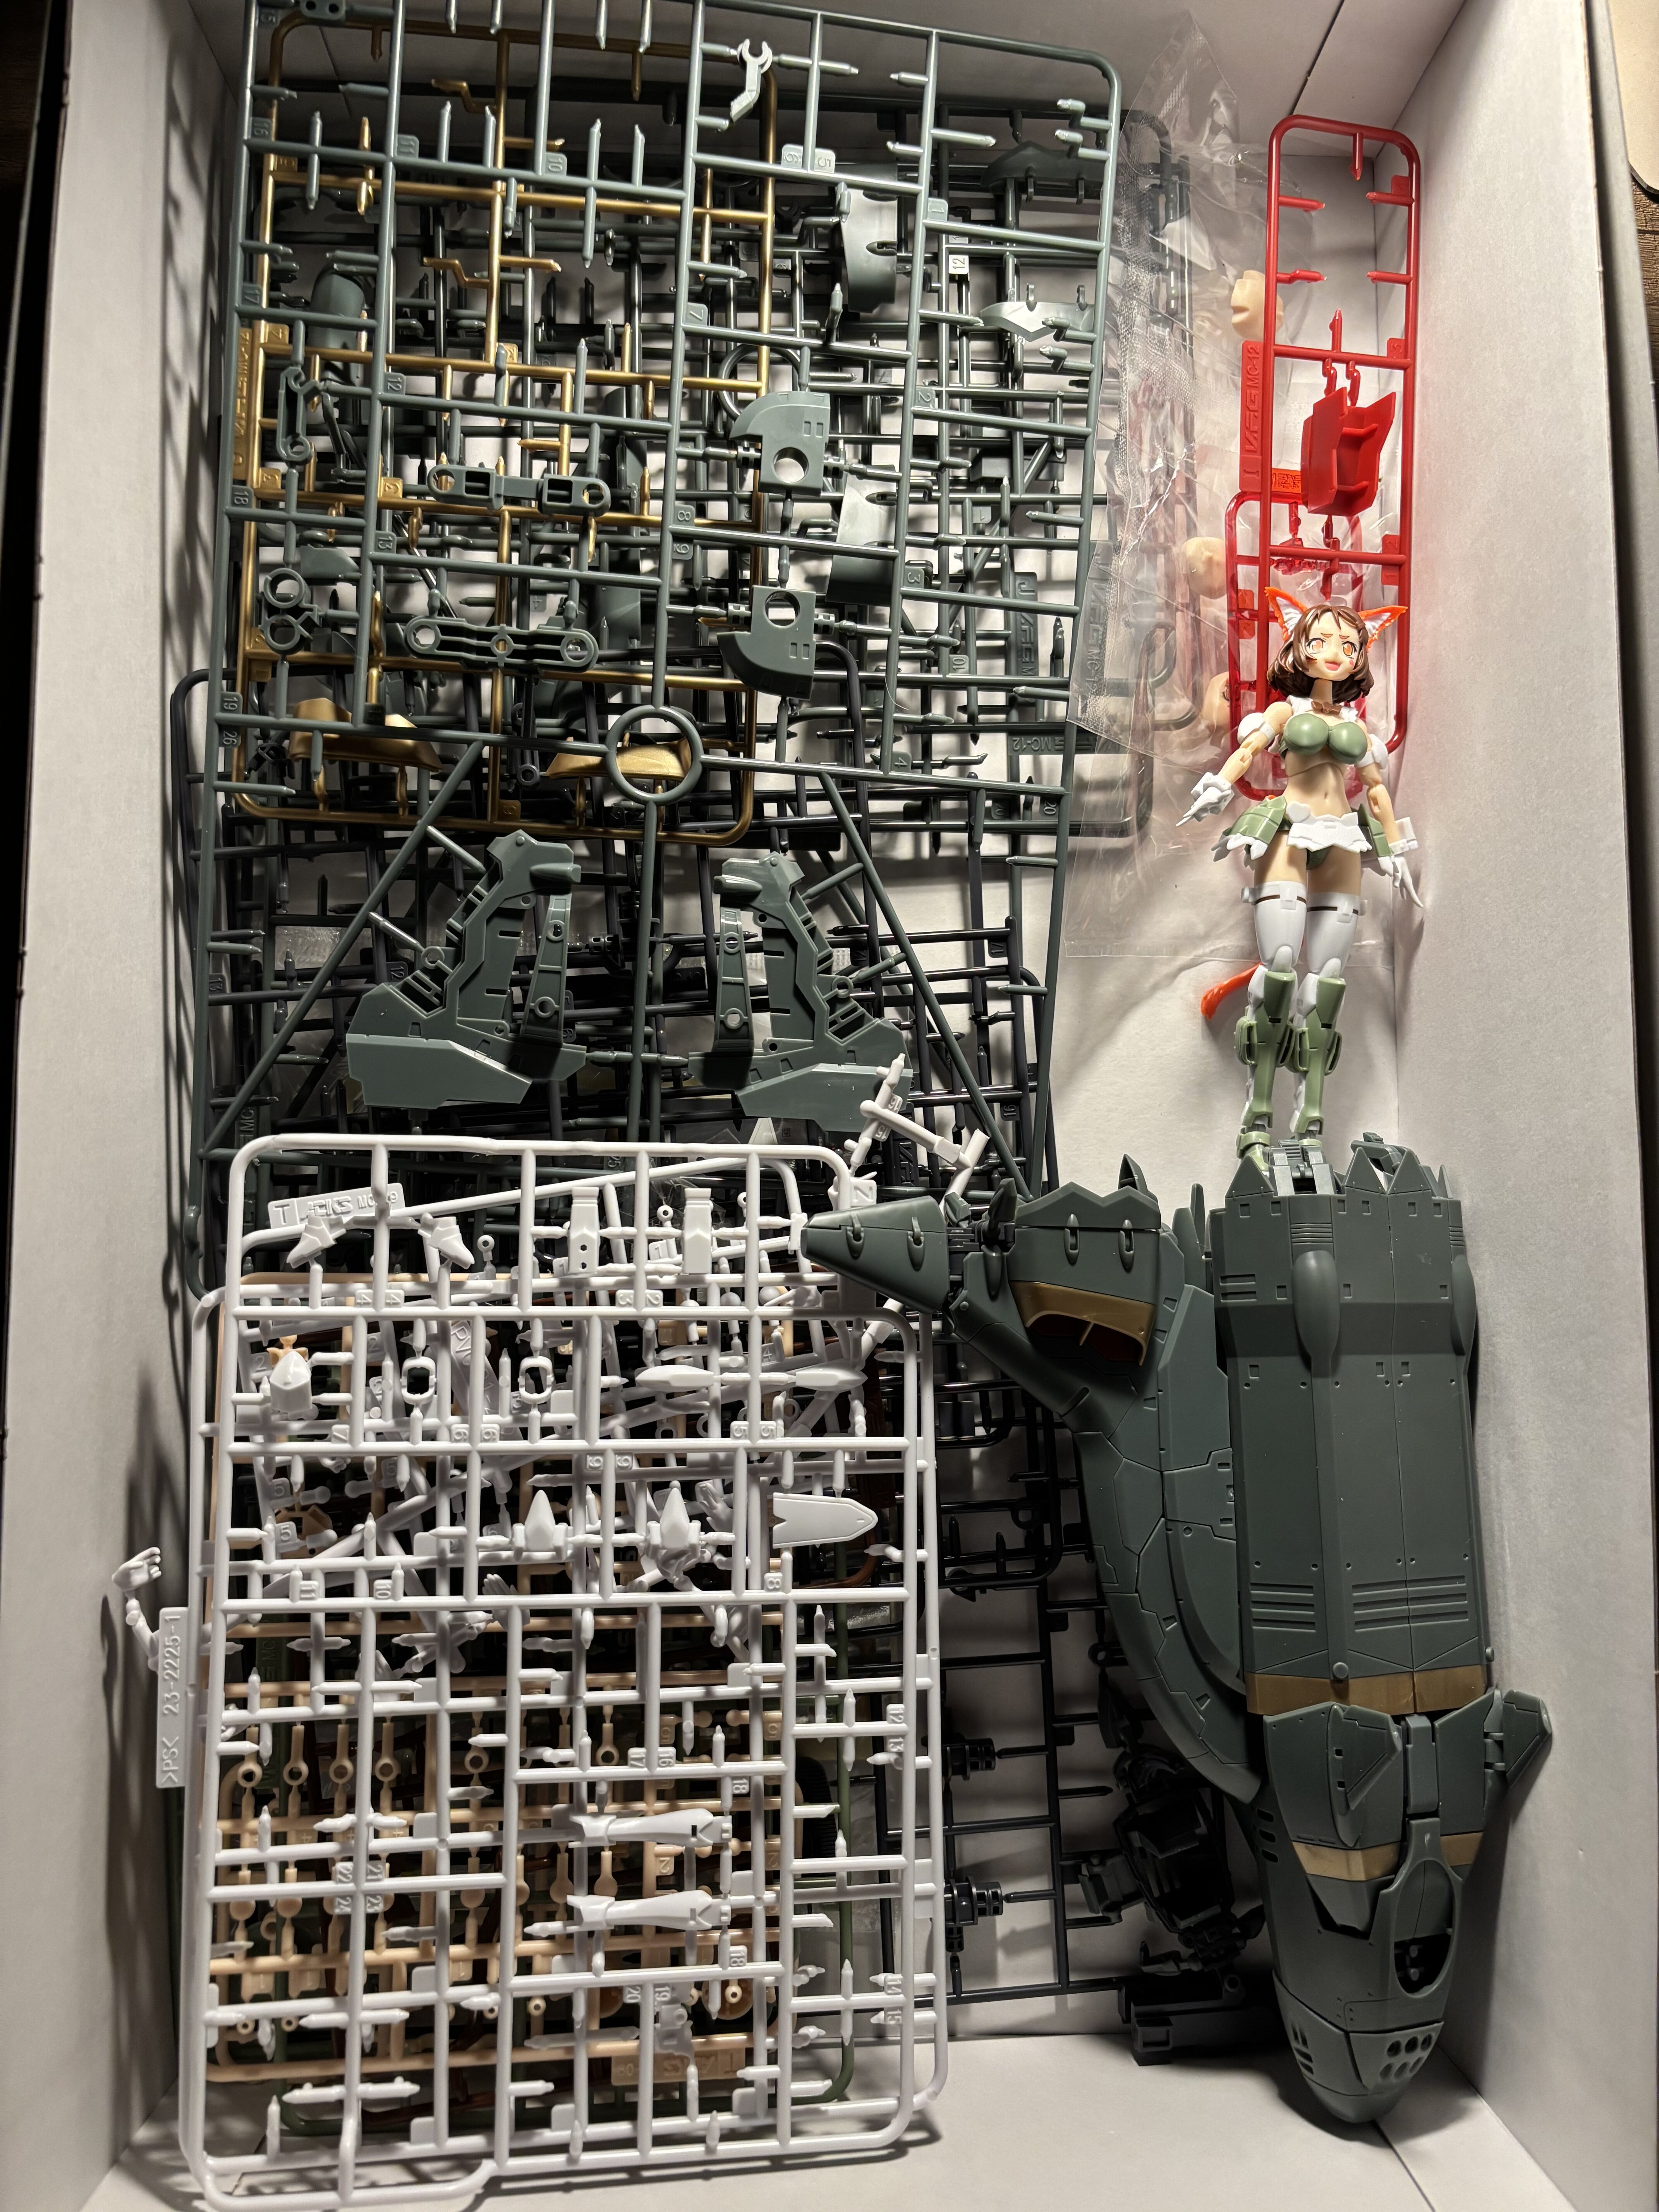
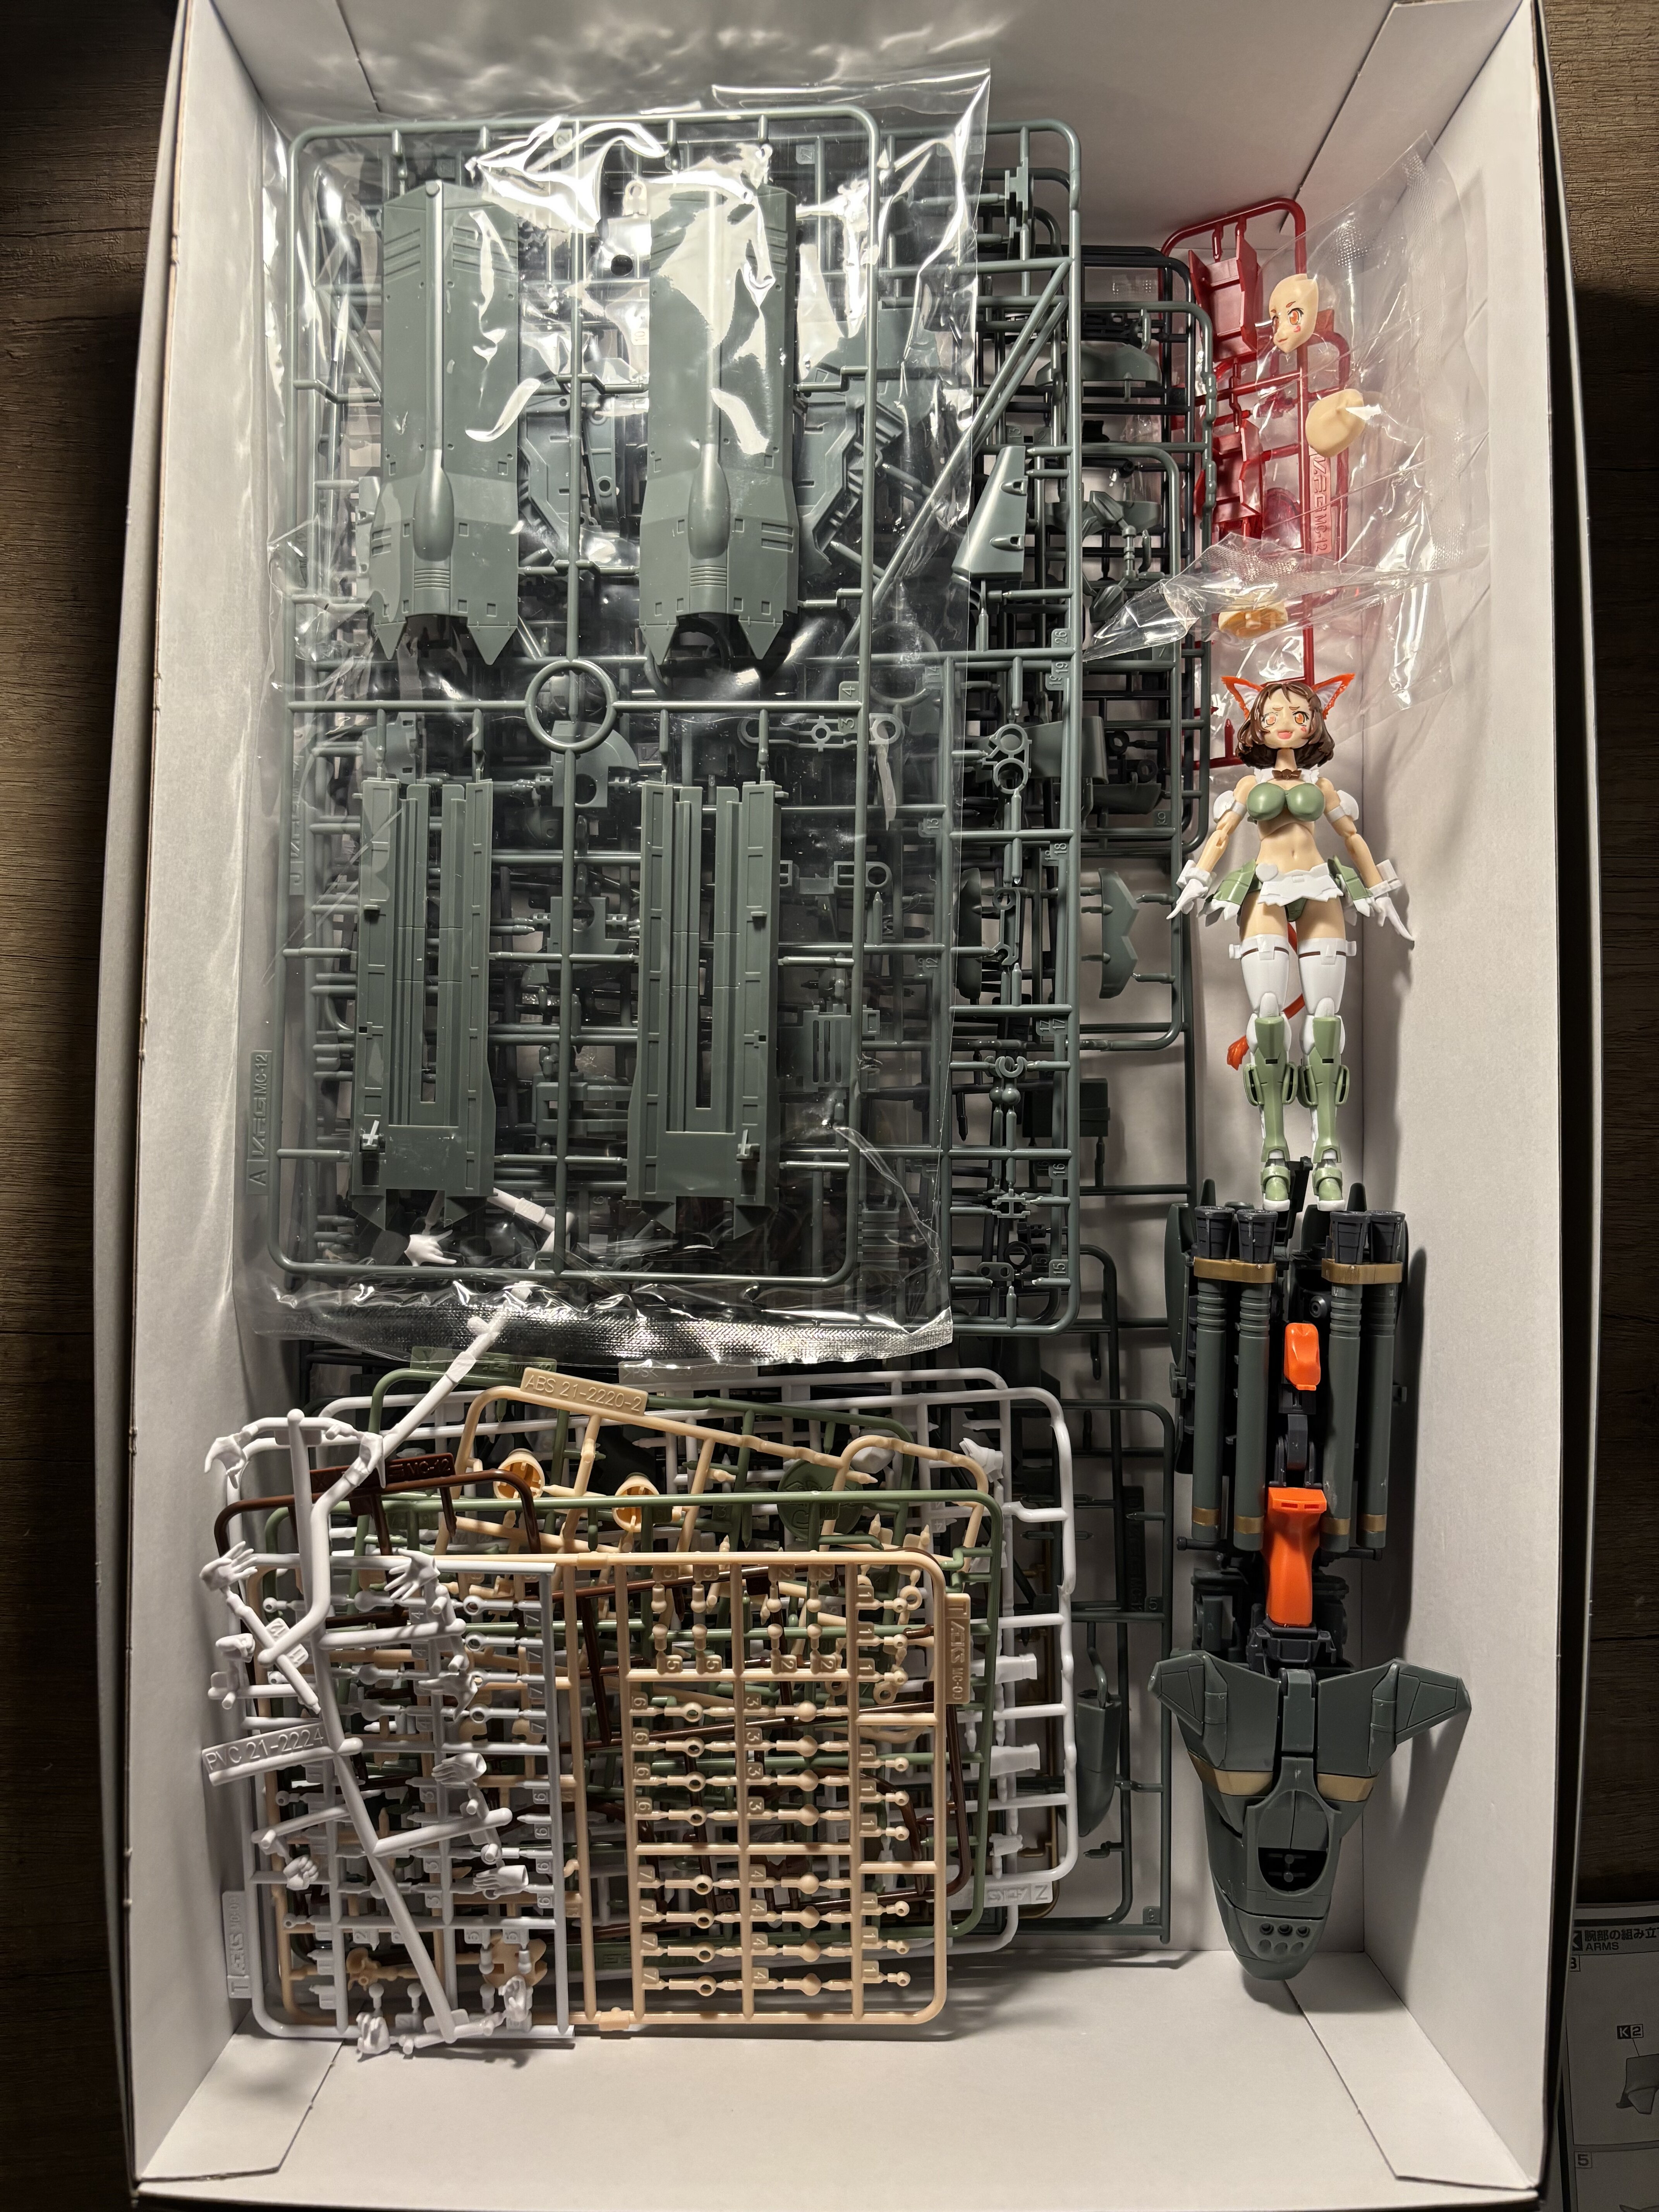
It is interesting how many pieces are leftover on the runners.
-
@Bolt here, check the saddle. It can be pulled off rather easily.

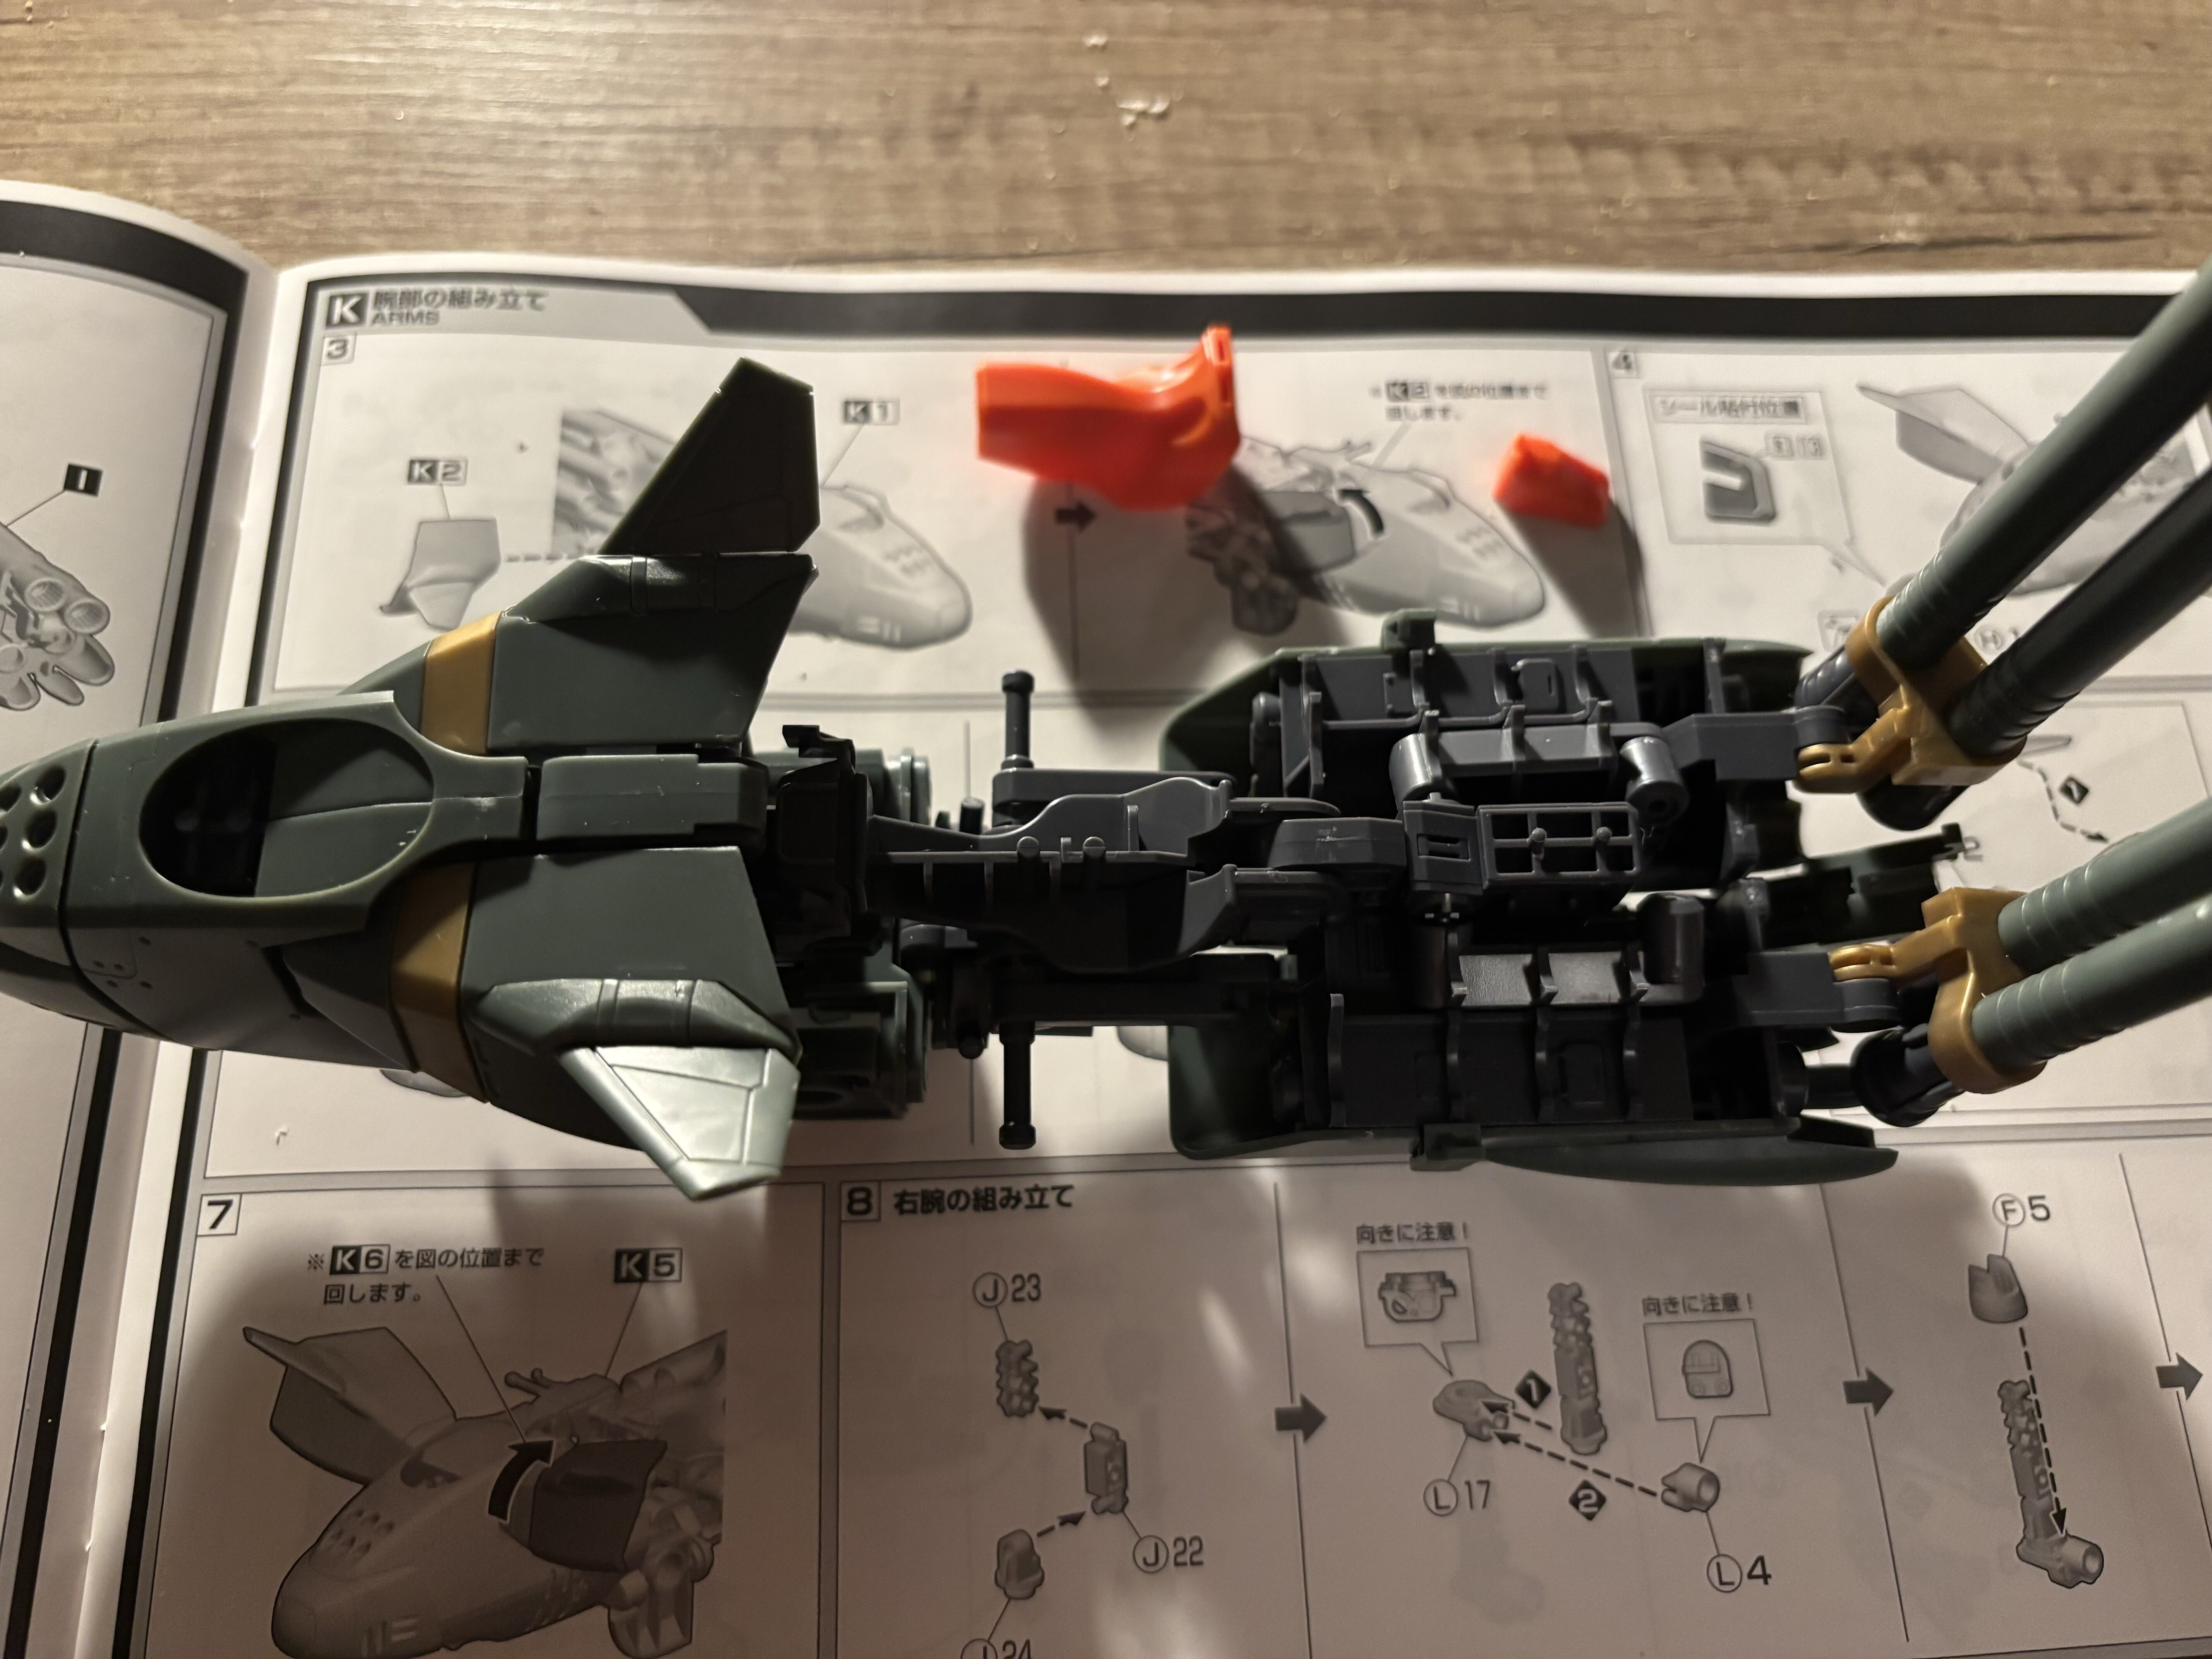
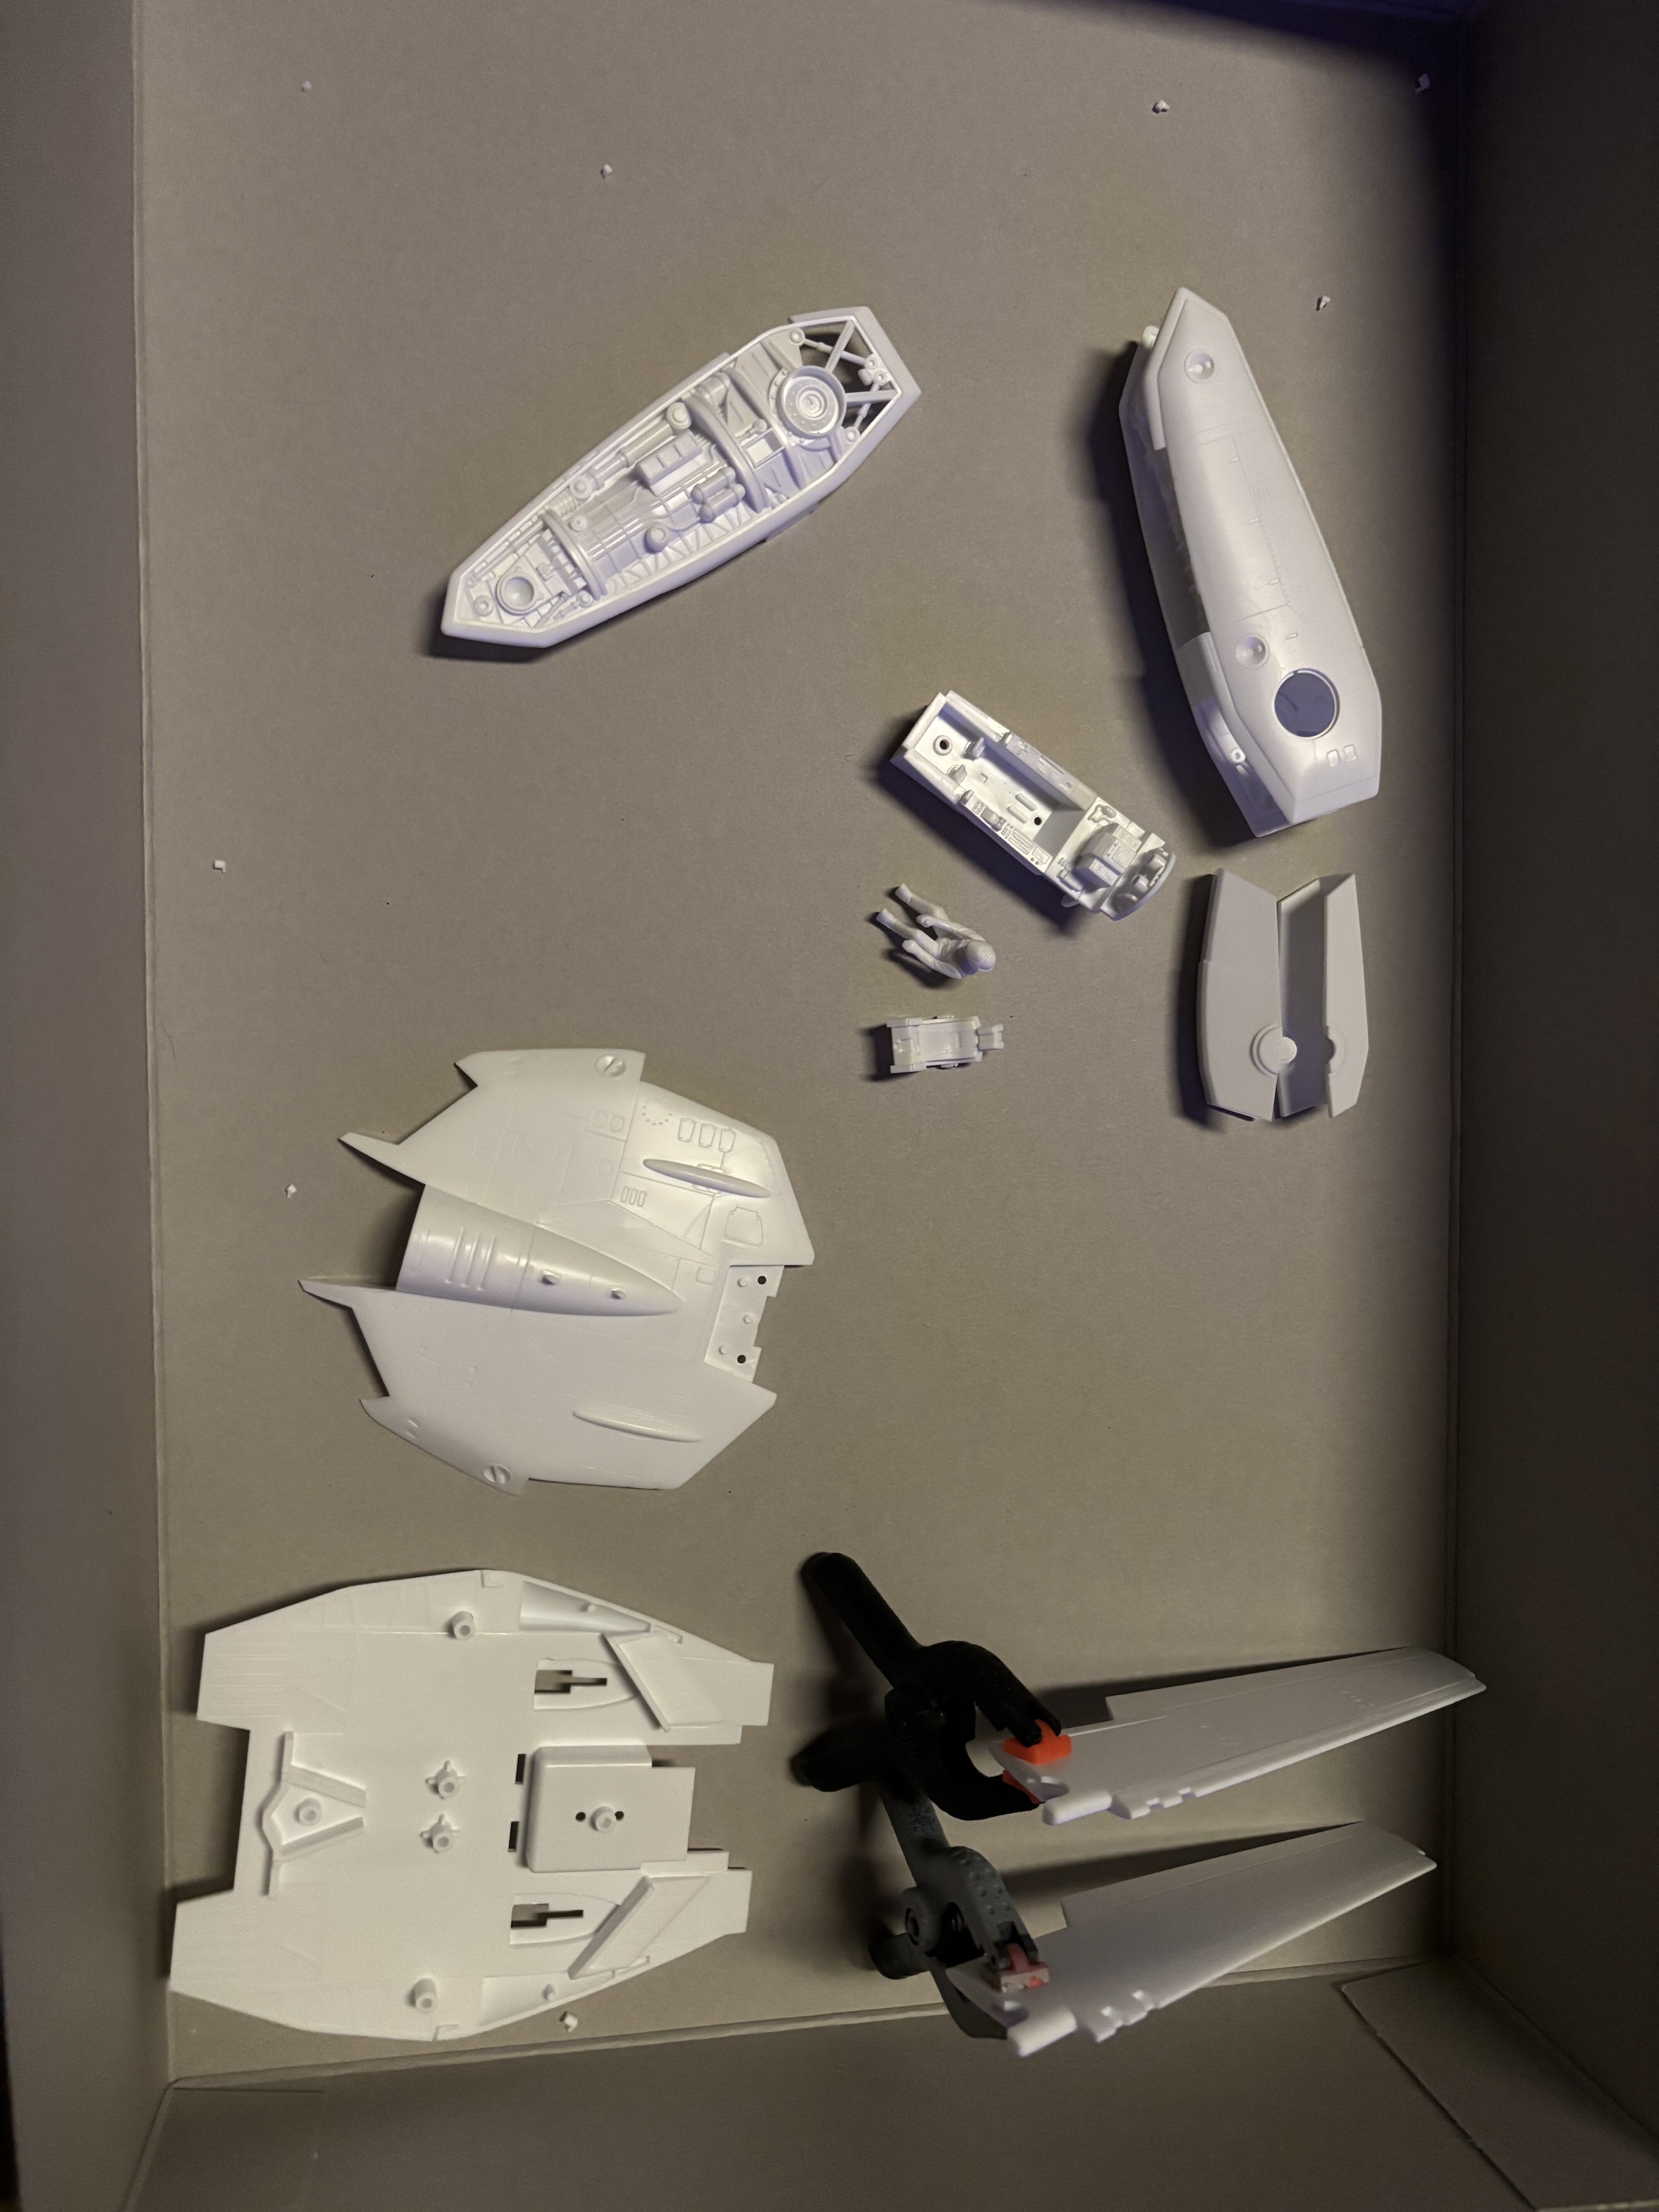
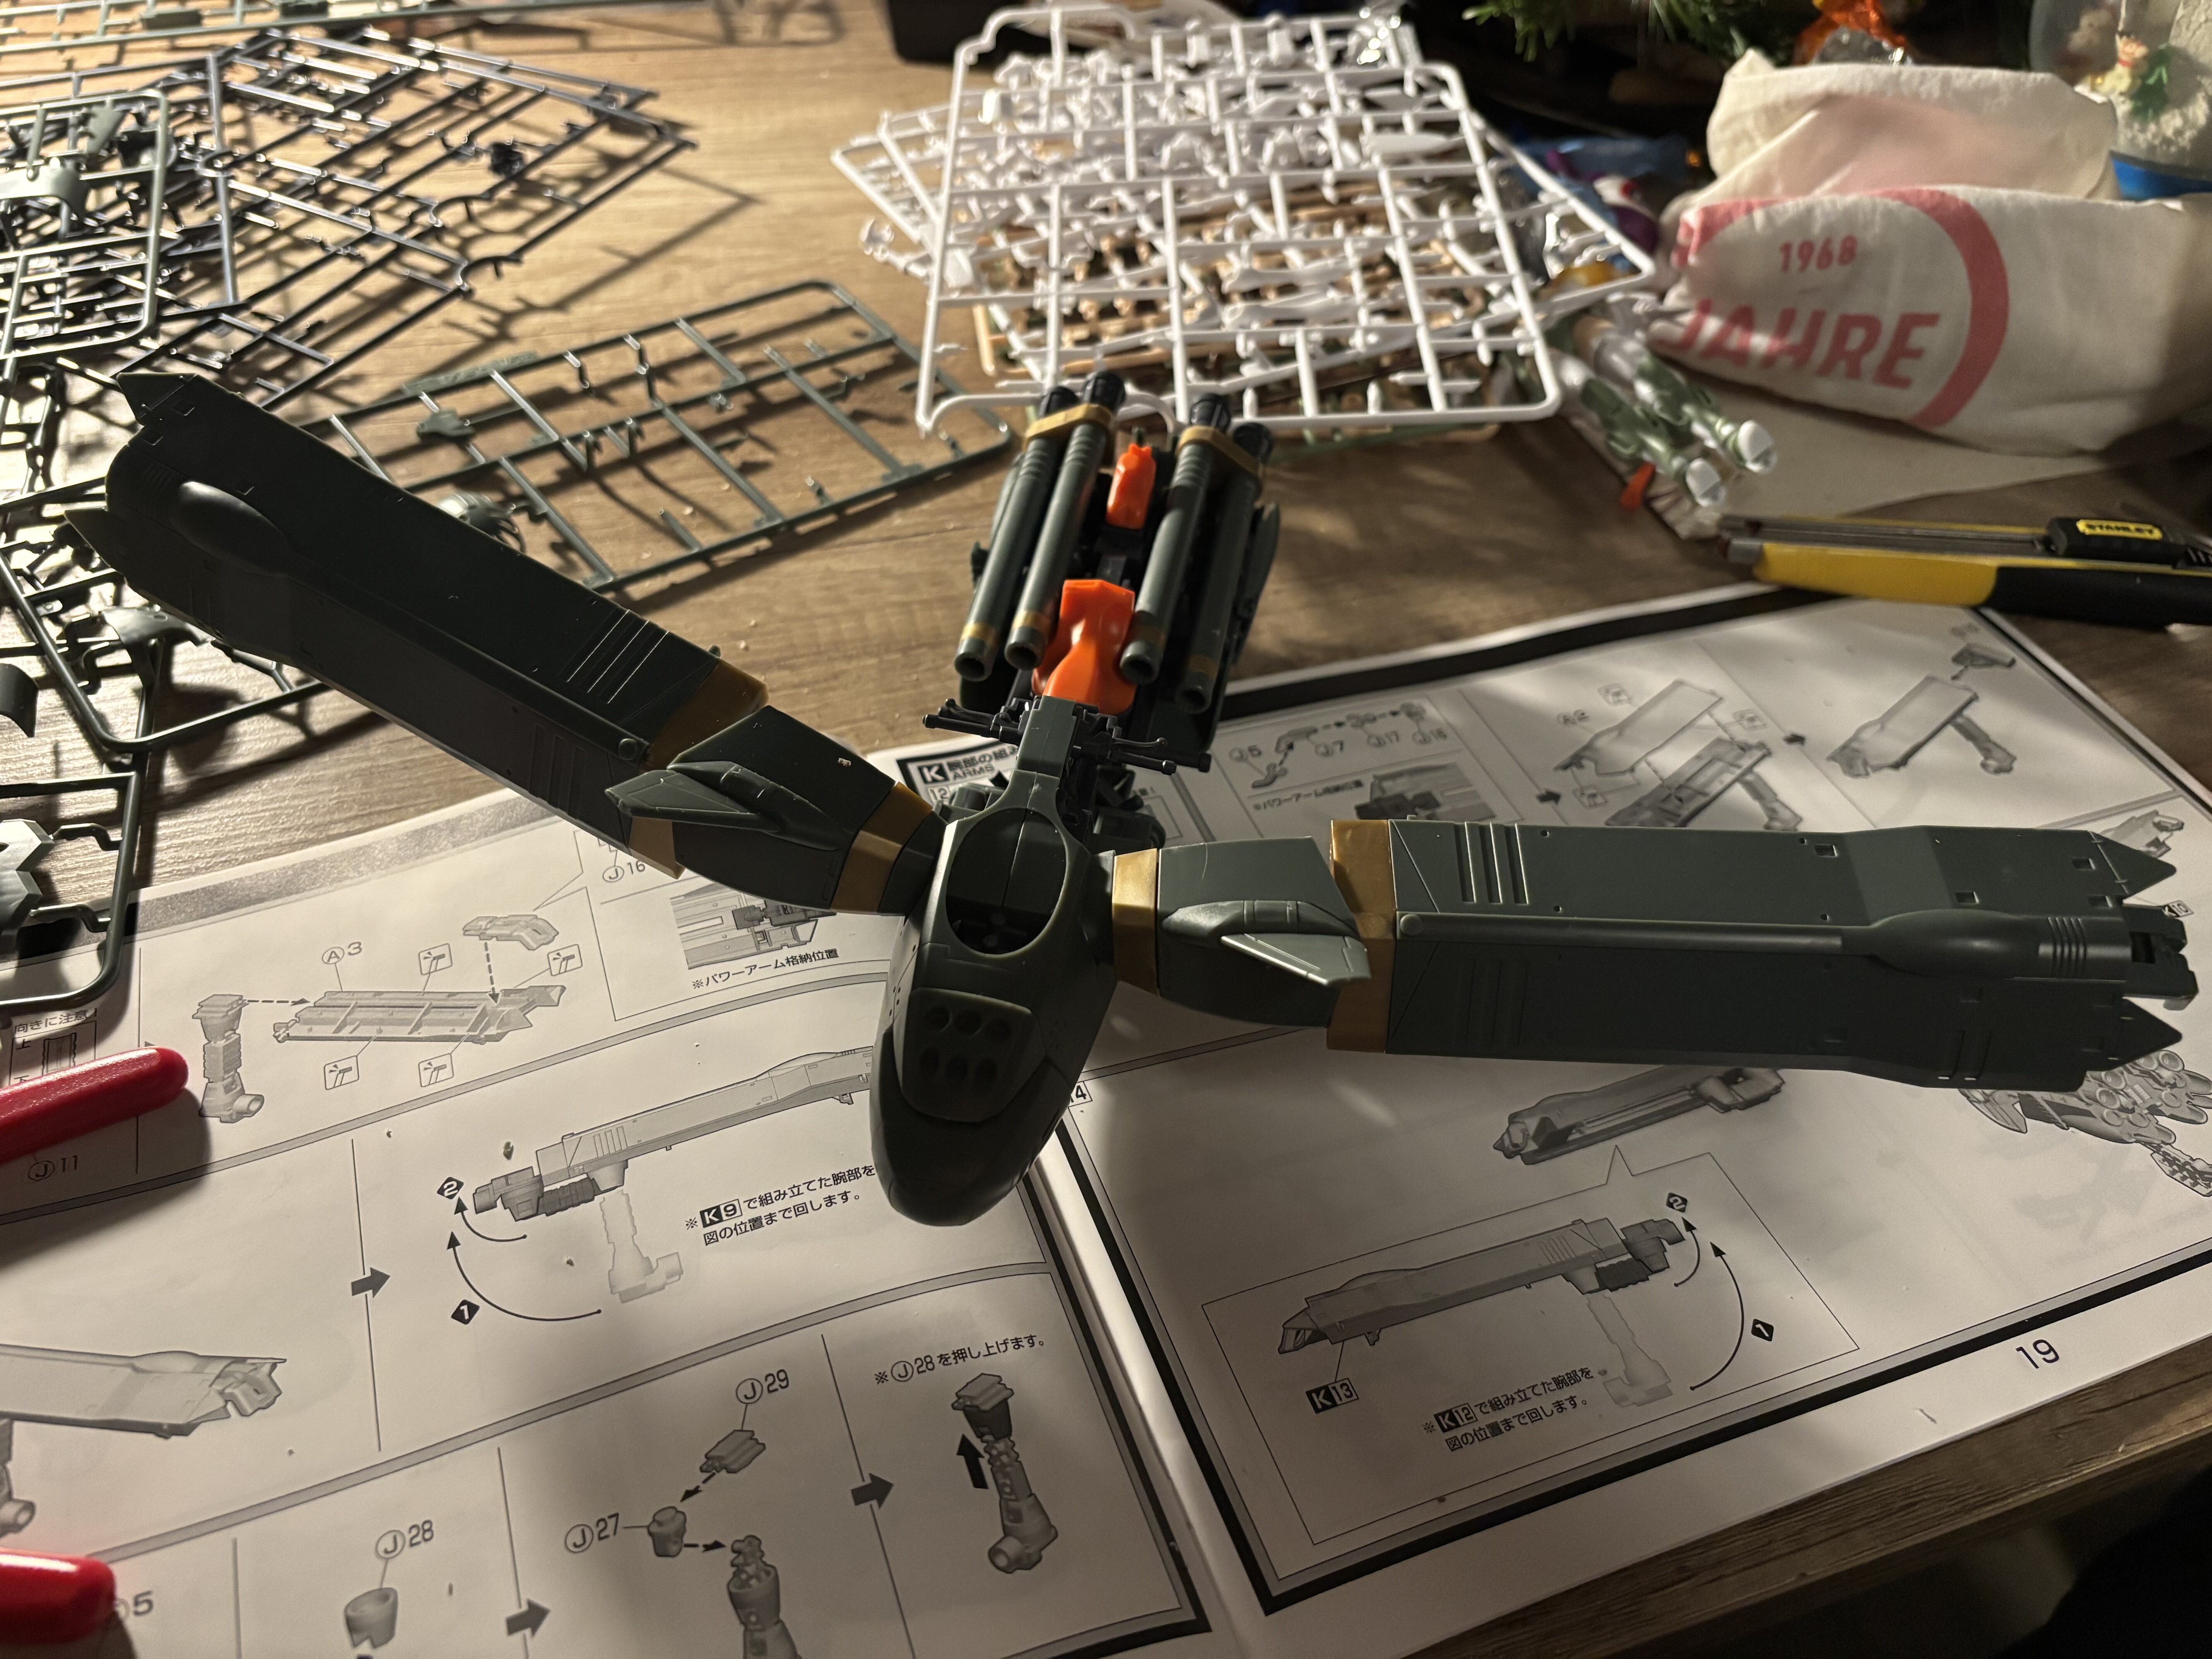
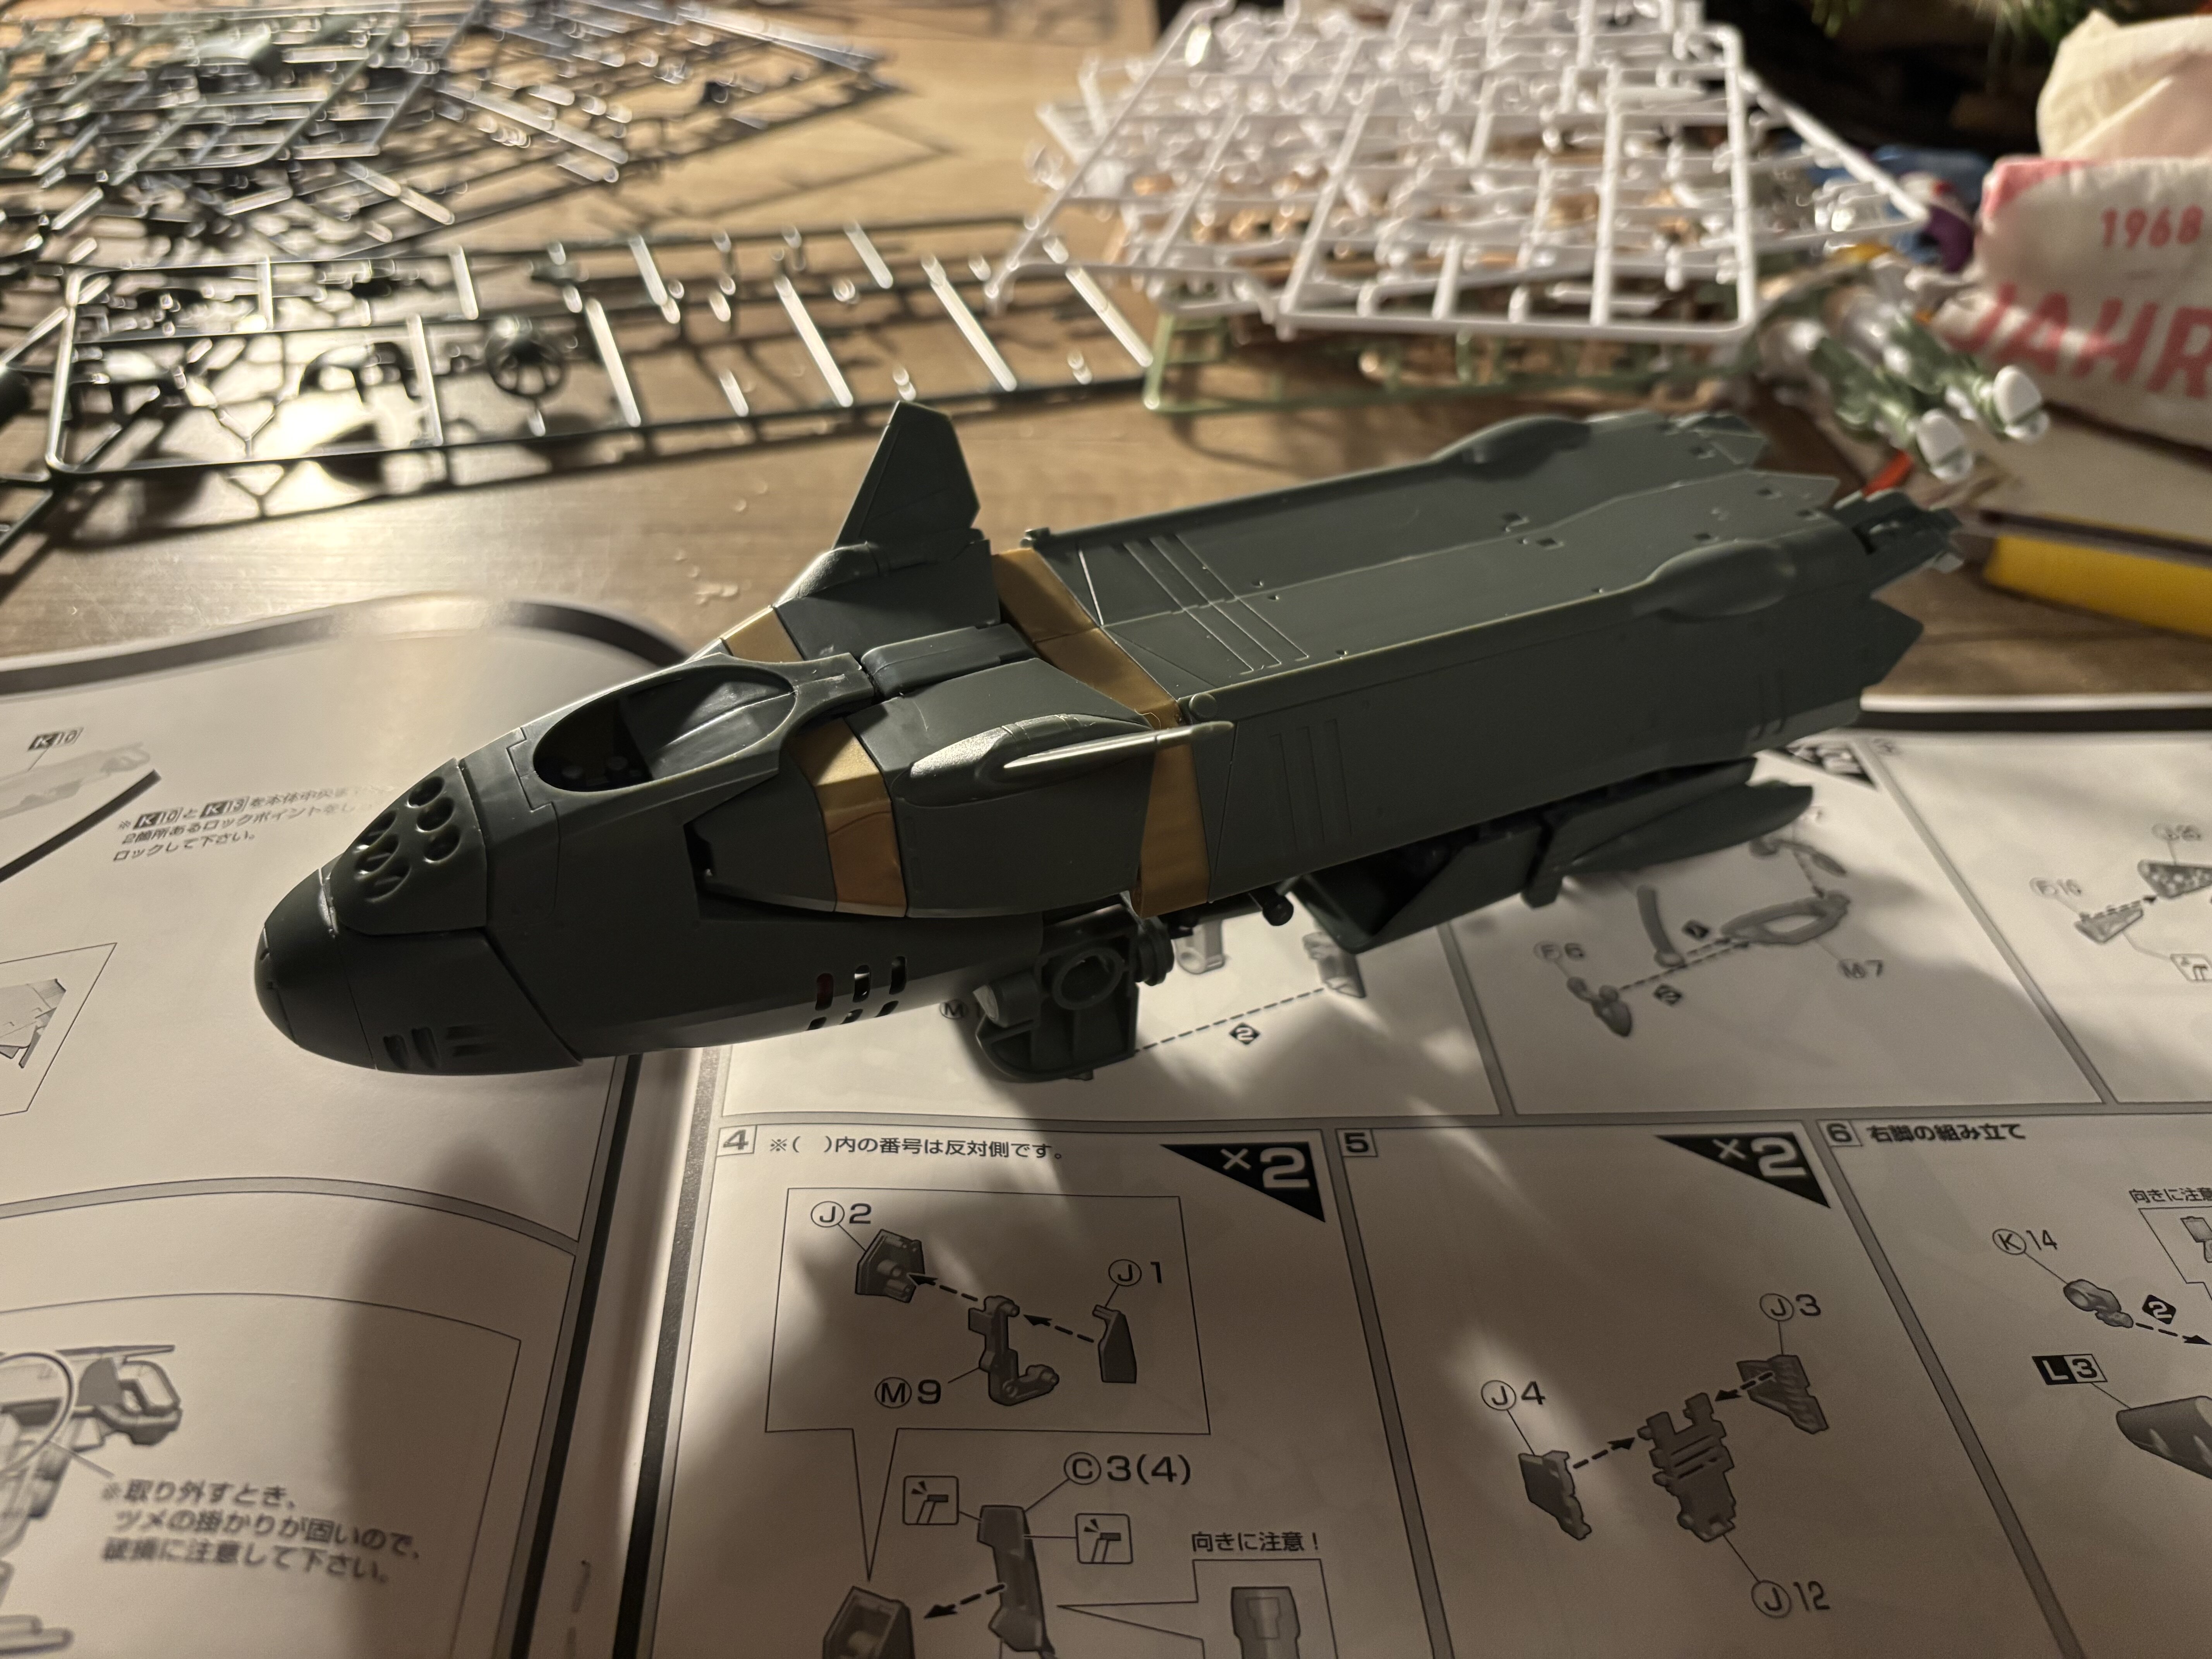
Build Log of today (2024/12/10)
I managed to put together the rest of the main fuselage and a right leg. Nothing too nerv wrecking. I got tired and forgot to add some parts and had to take apart the fuselage again. But hey, fun is fun

Temba his arms wide!
And closed…
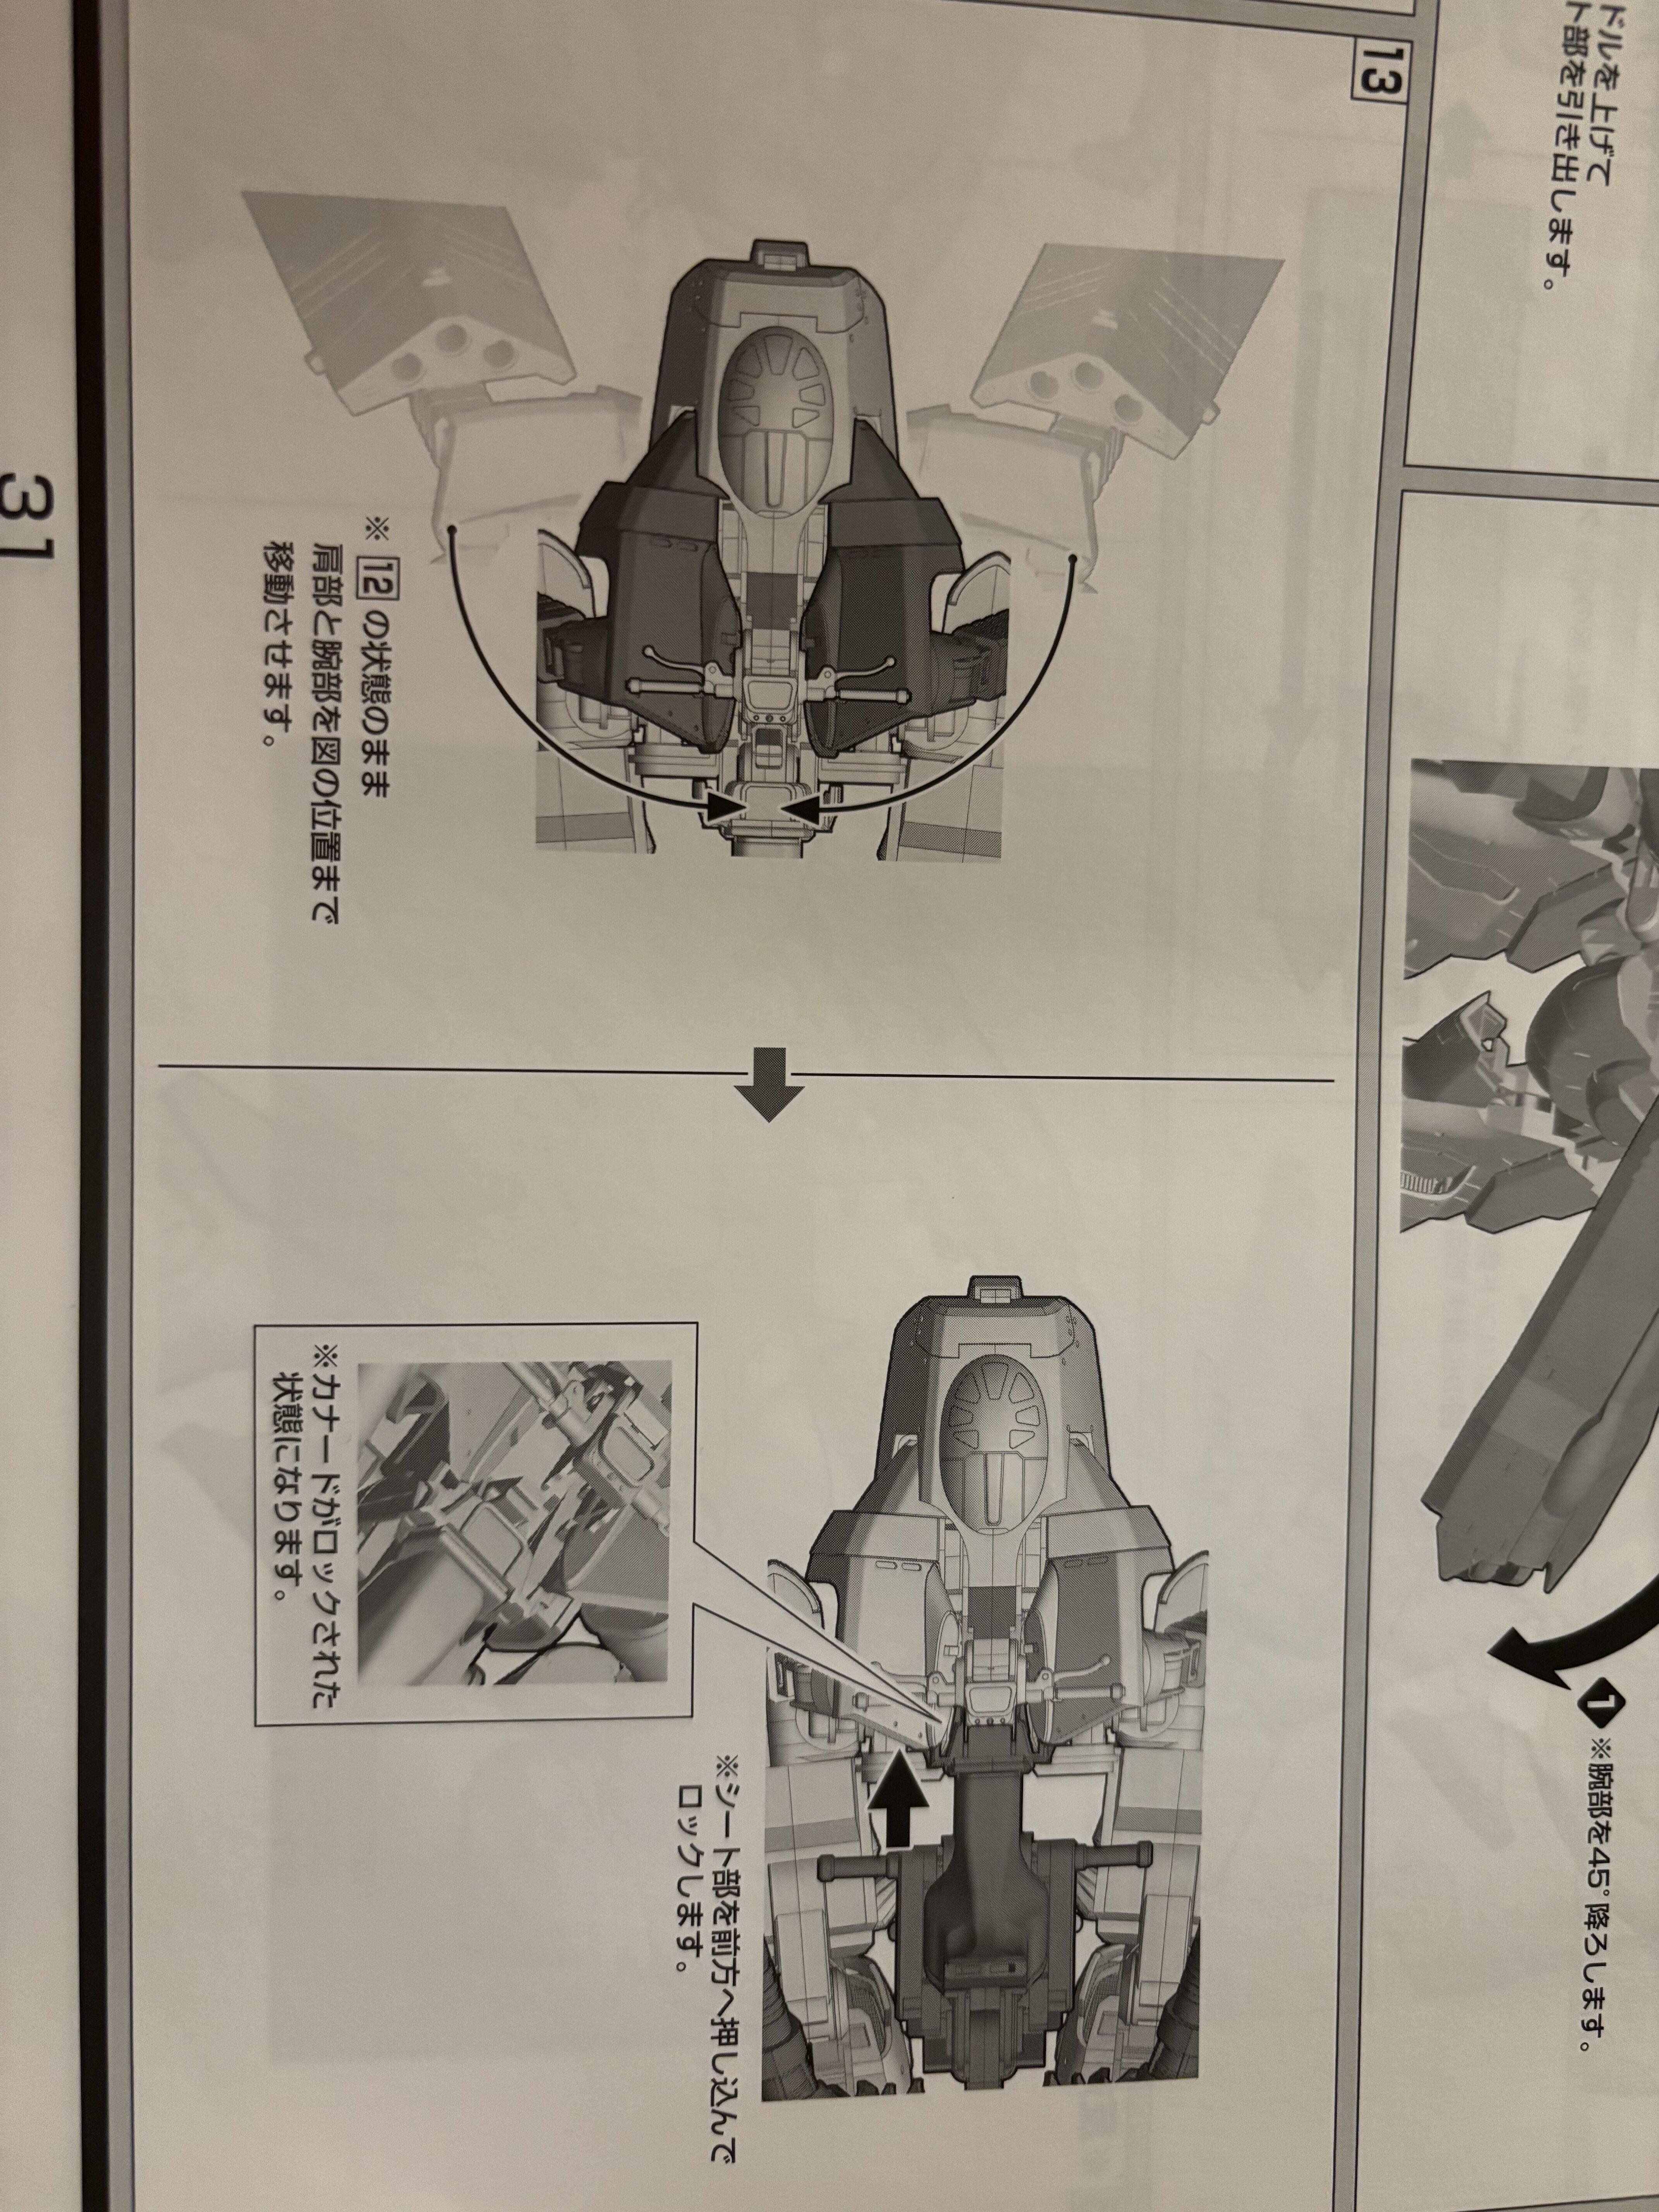
I like that they added some hinges, so you can clip the stuff together and there are no giant gaps.
Here, a few repetitive parts for the legs:
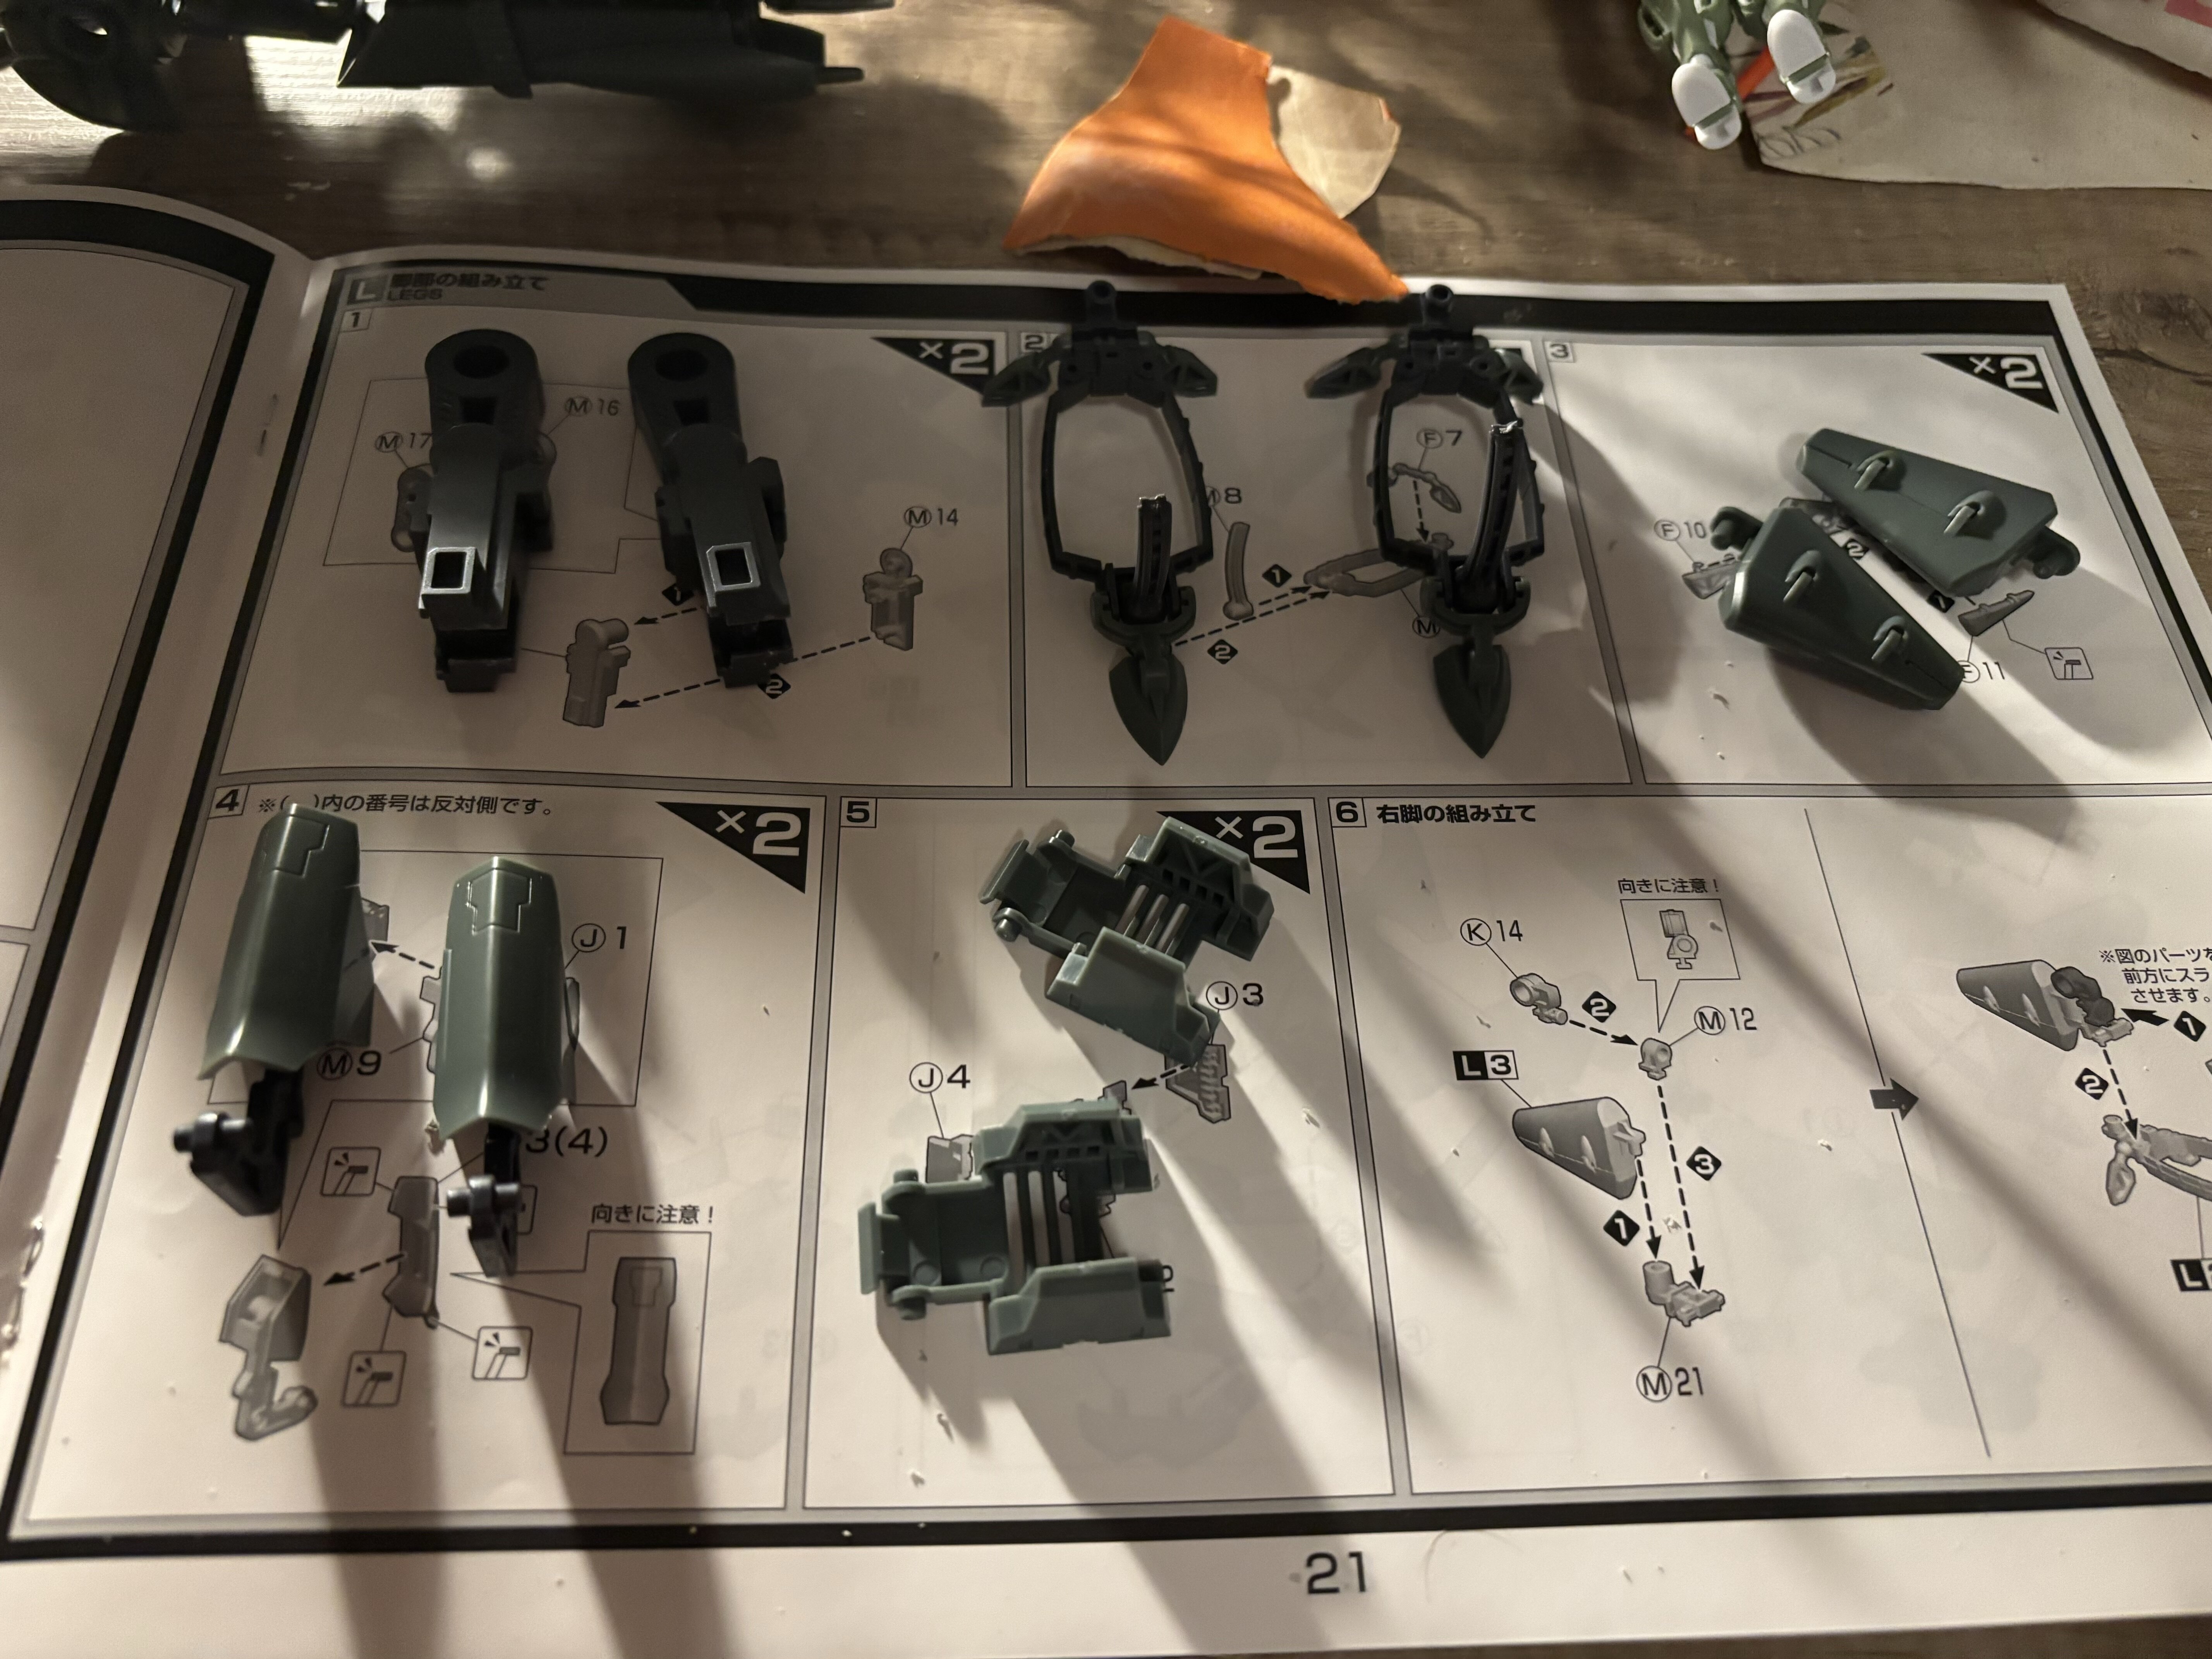
Pieces for the right leg:
inbetween
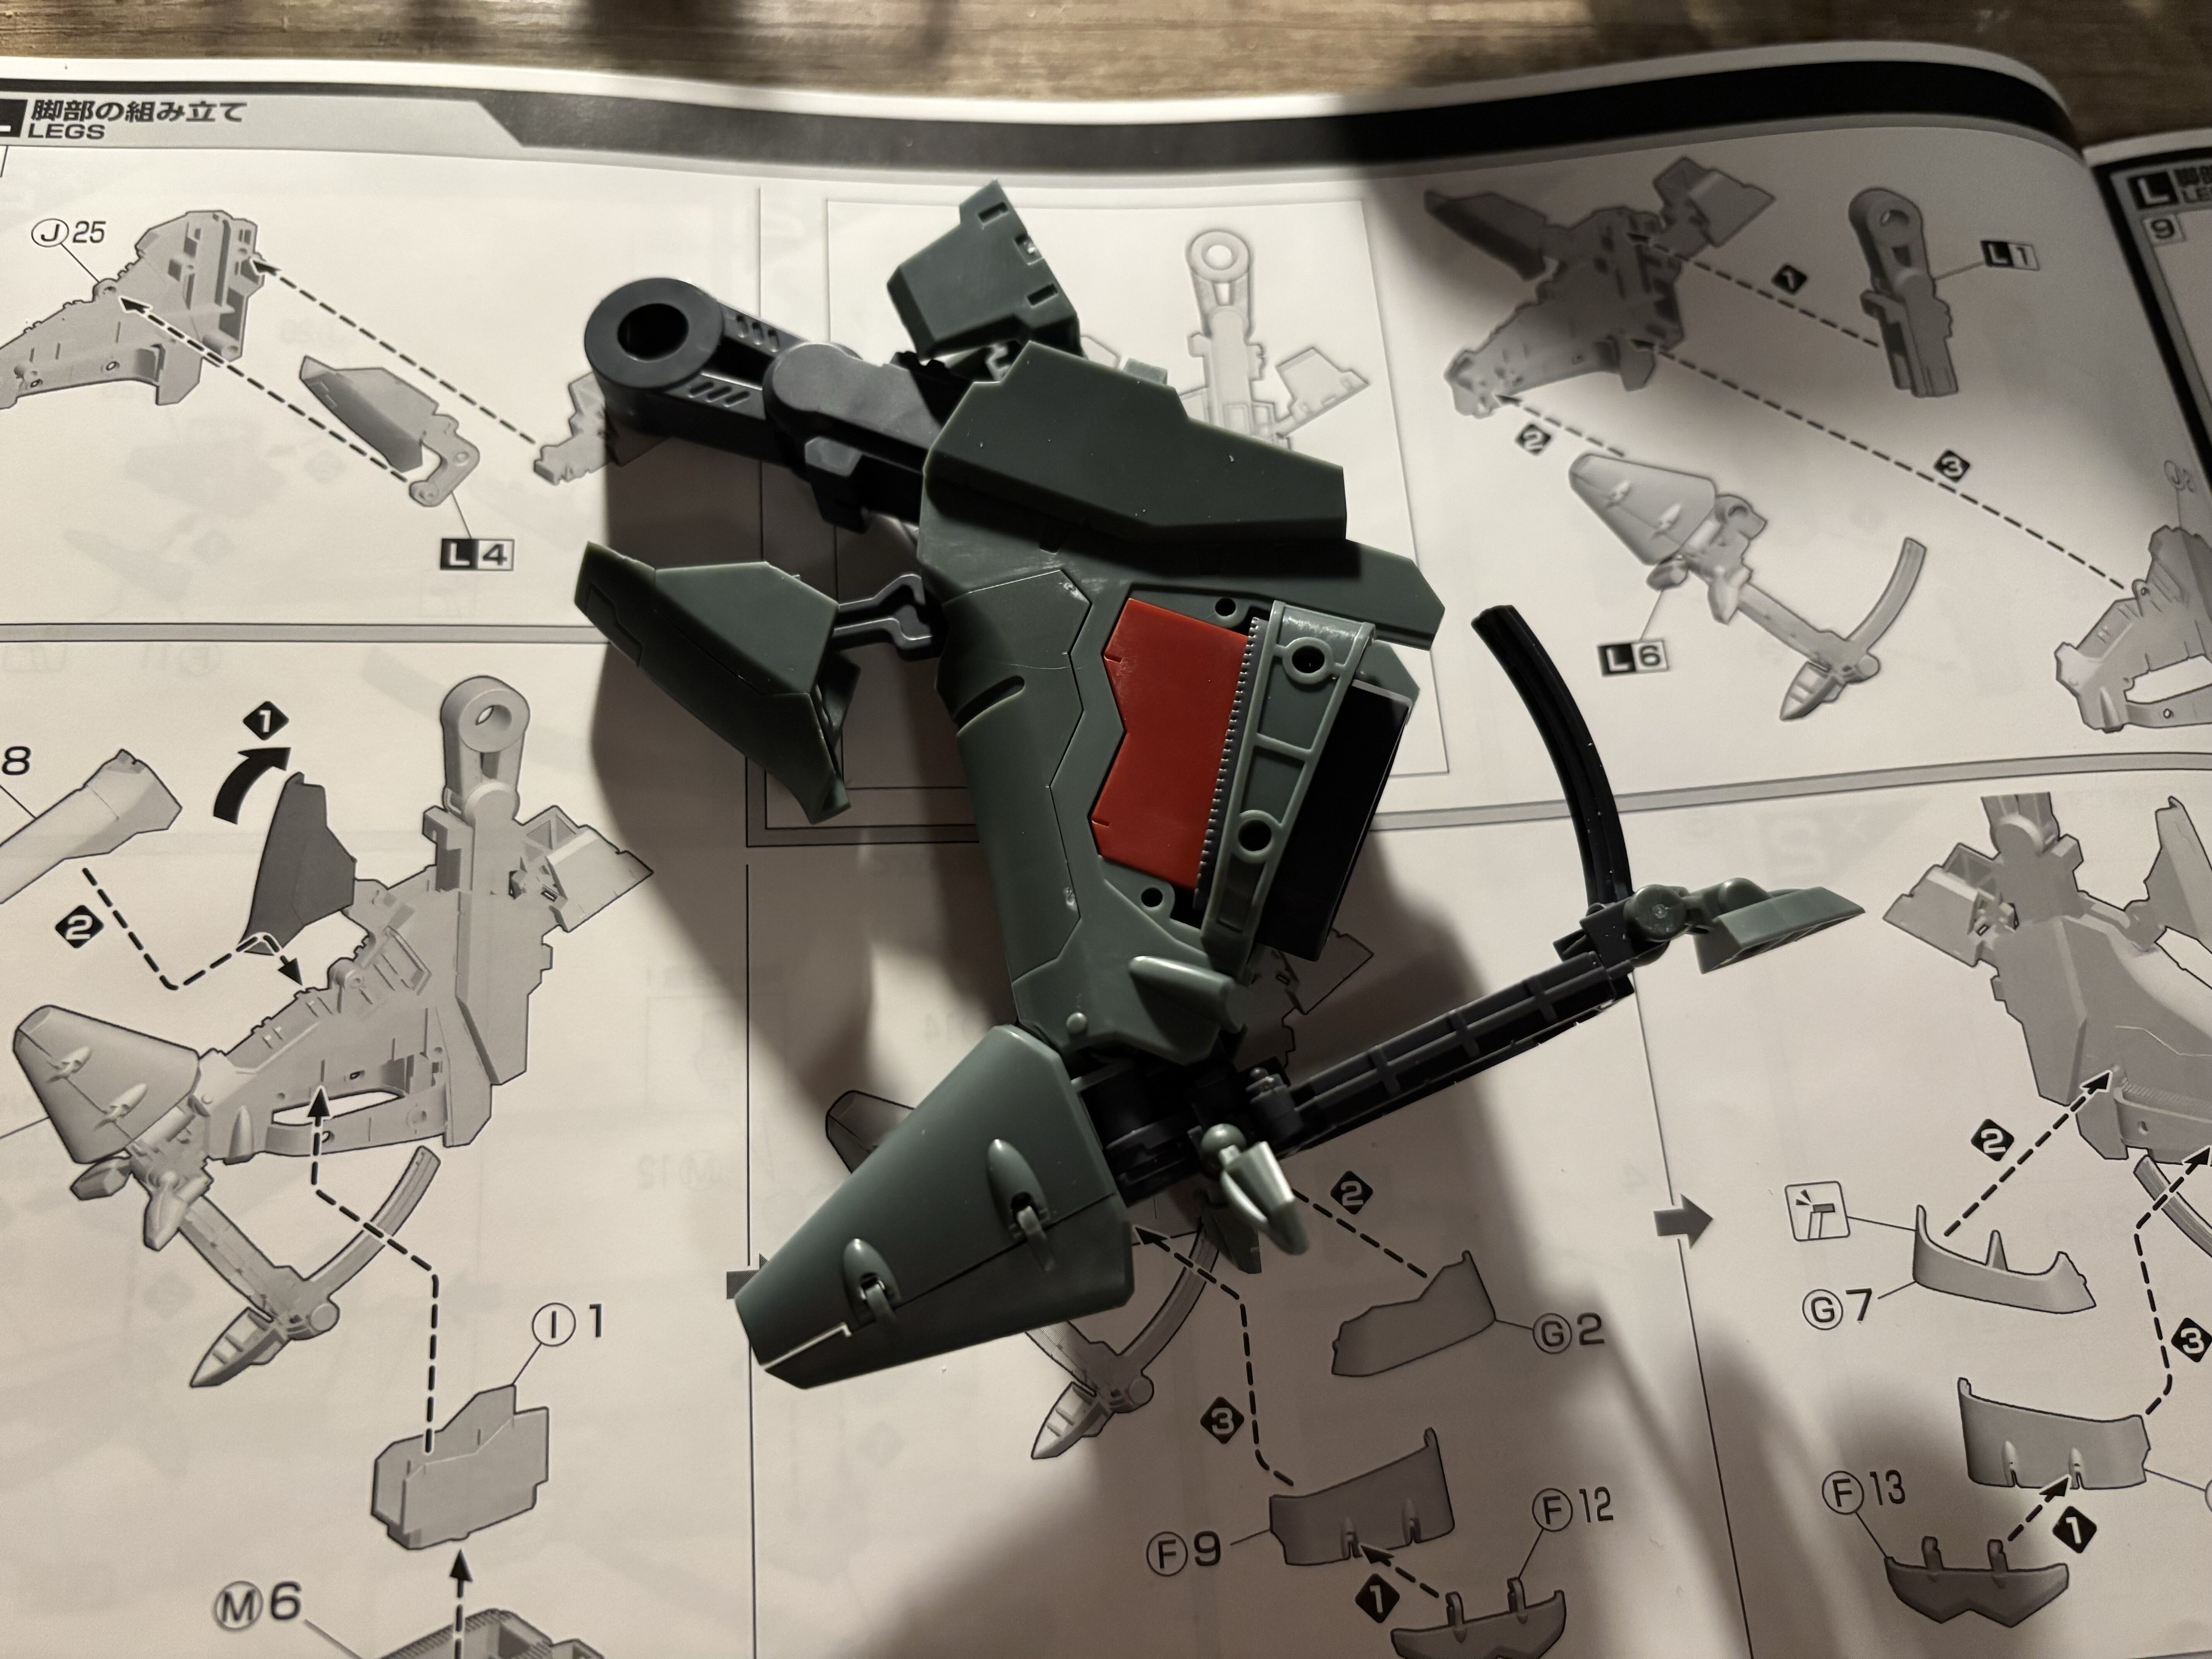
and done… (with the right leg).
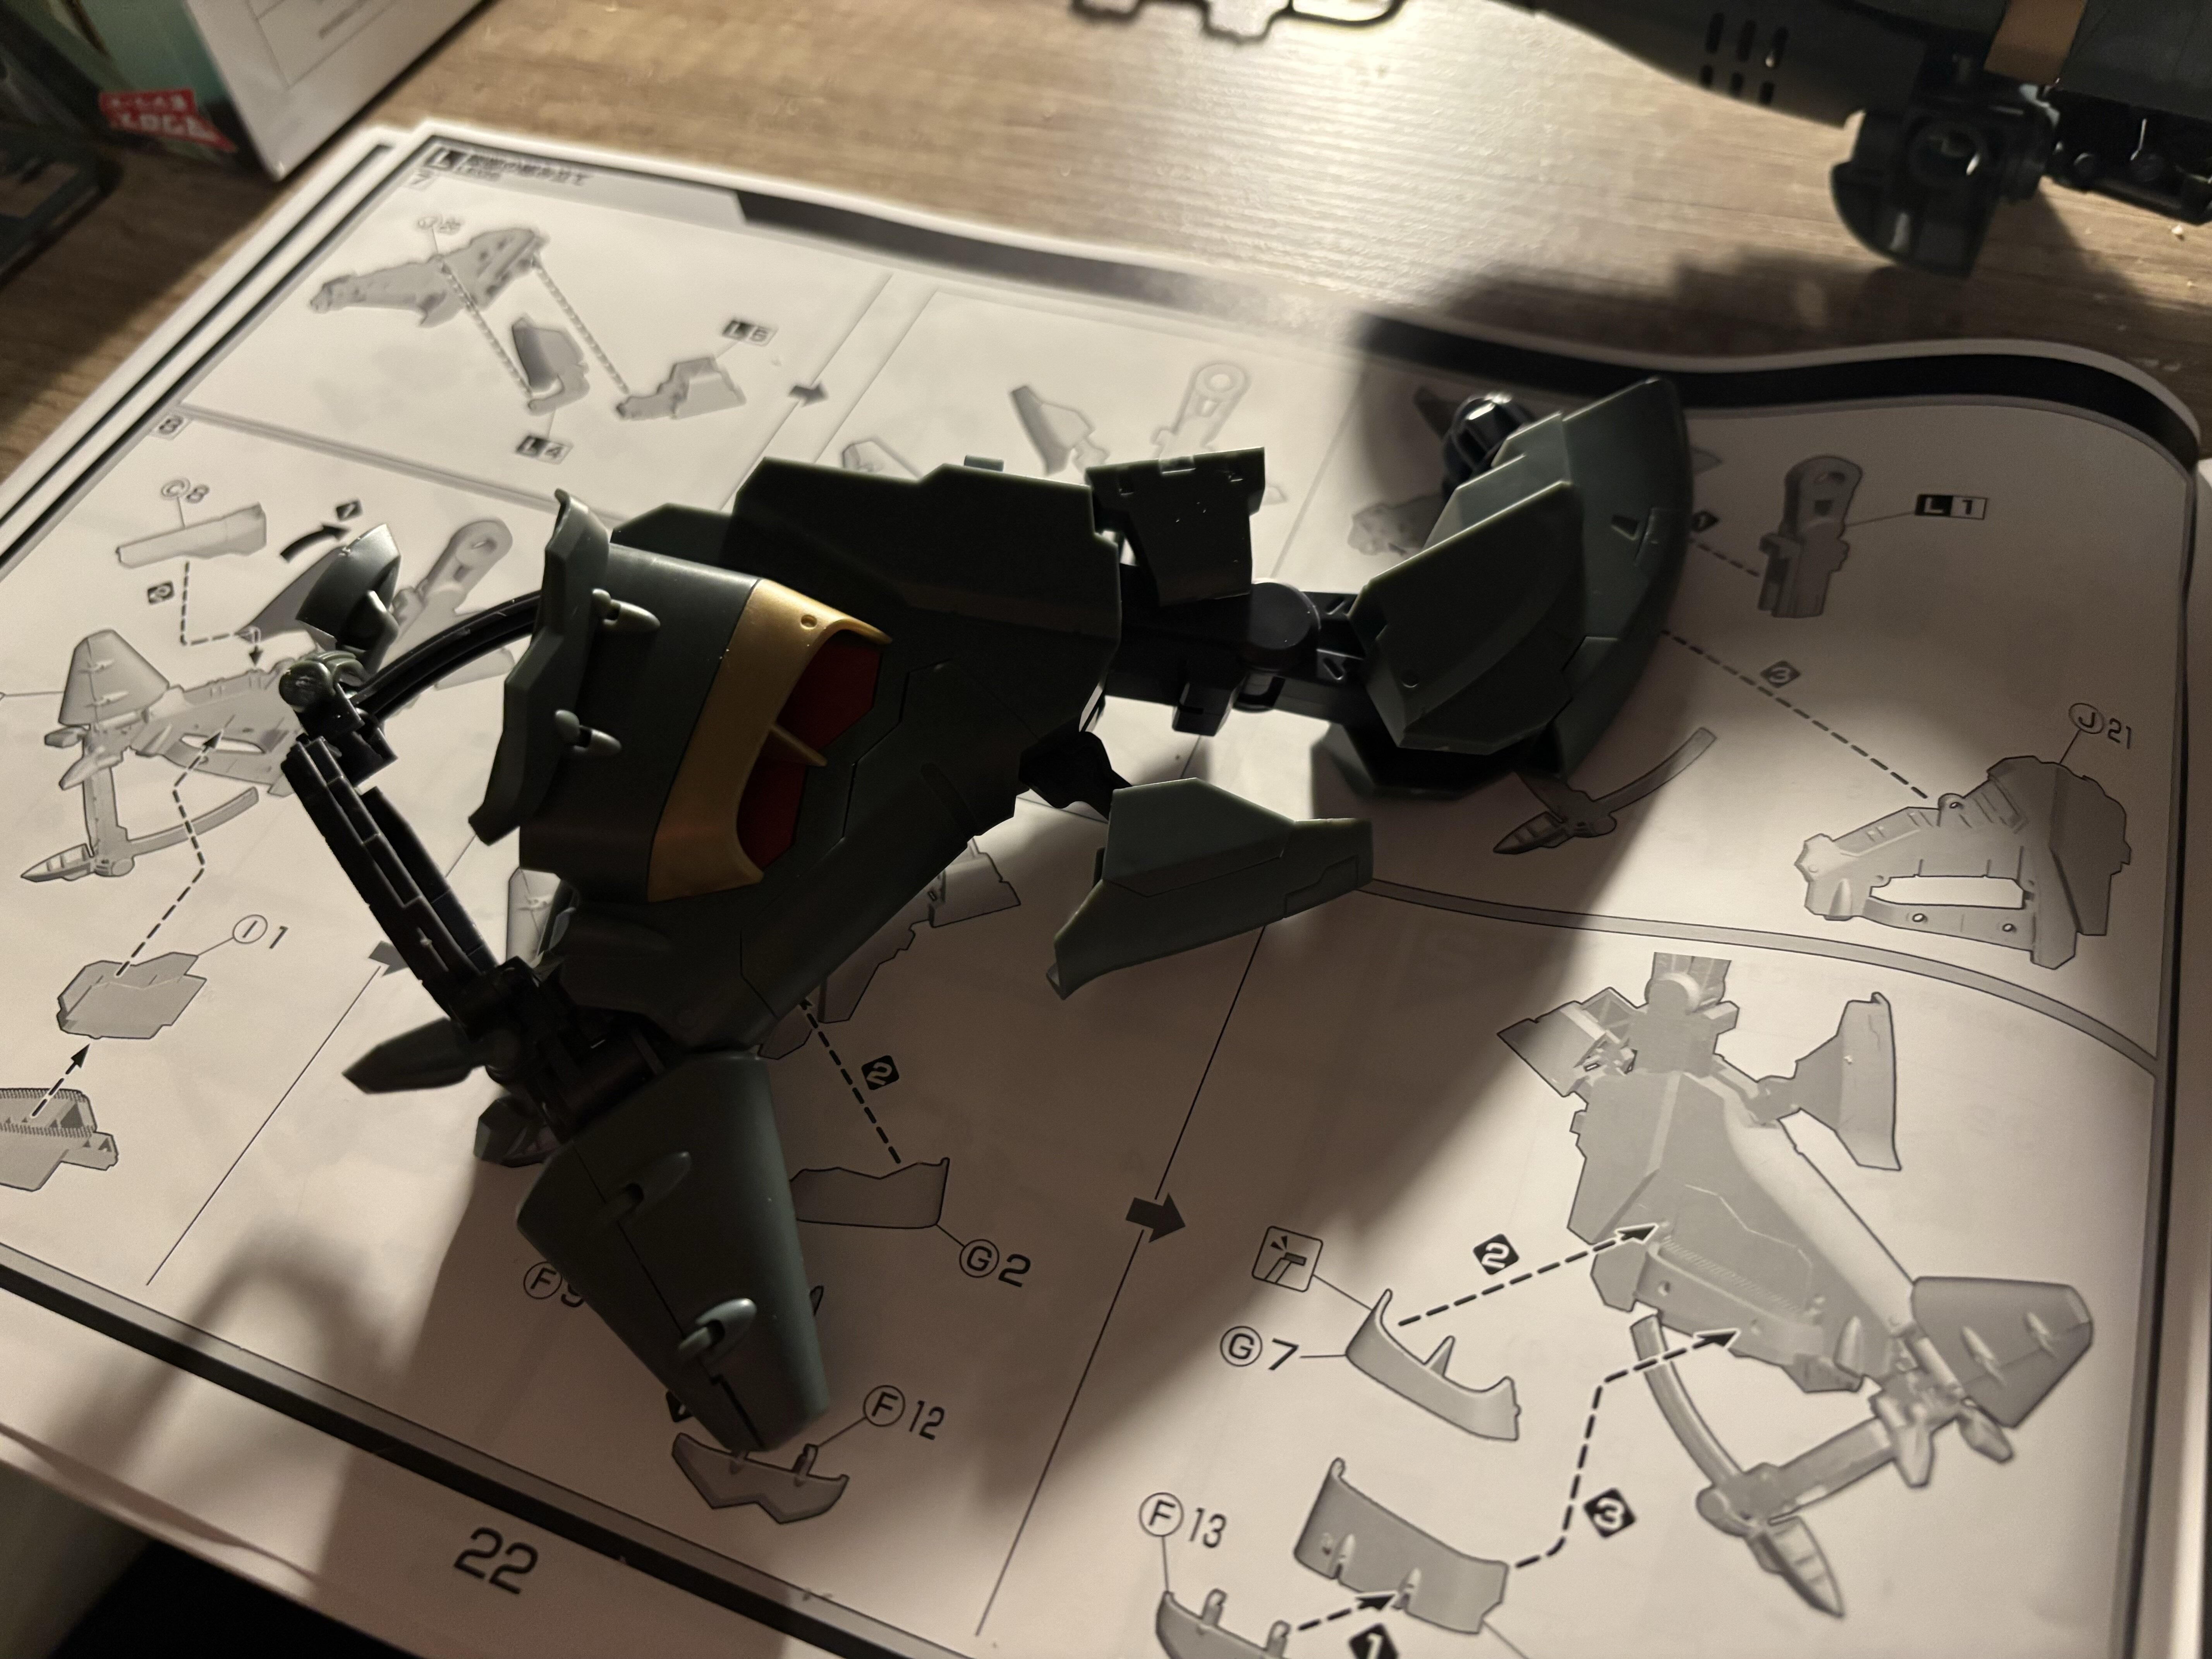
This is the progress so far.
I was able to discard two sprues today. Let’s see what tomorrow brings!
-
@AtarashiGohan Well - if you mean it is hard to press them on properly, then this is the same I am experiencing. I have to press those larger parts into the holes with much force, but once they stick, they are fine. It's just a hassle to get them in properly. Had that with the nose halves, the gunbarrels and shell of the gunbarrels.
@sketchley well, you can just clip off the handlebars. They are just for the looks and do nothing. The little round piece in the middle is needed. You maybe can recast the piece in resin and then clip off the bars on the resin piece.
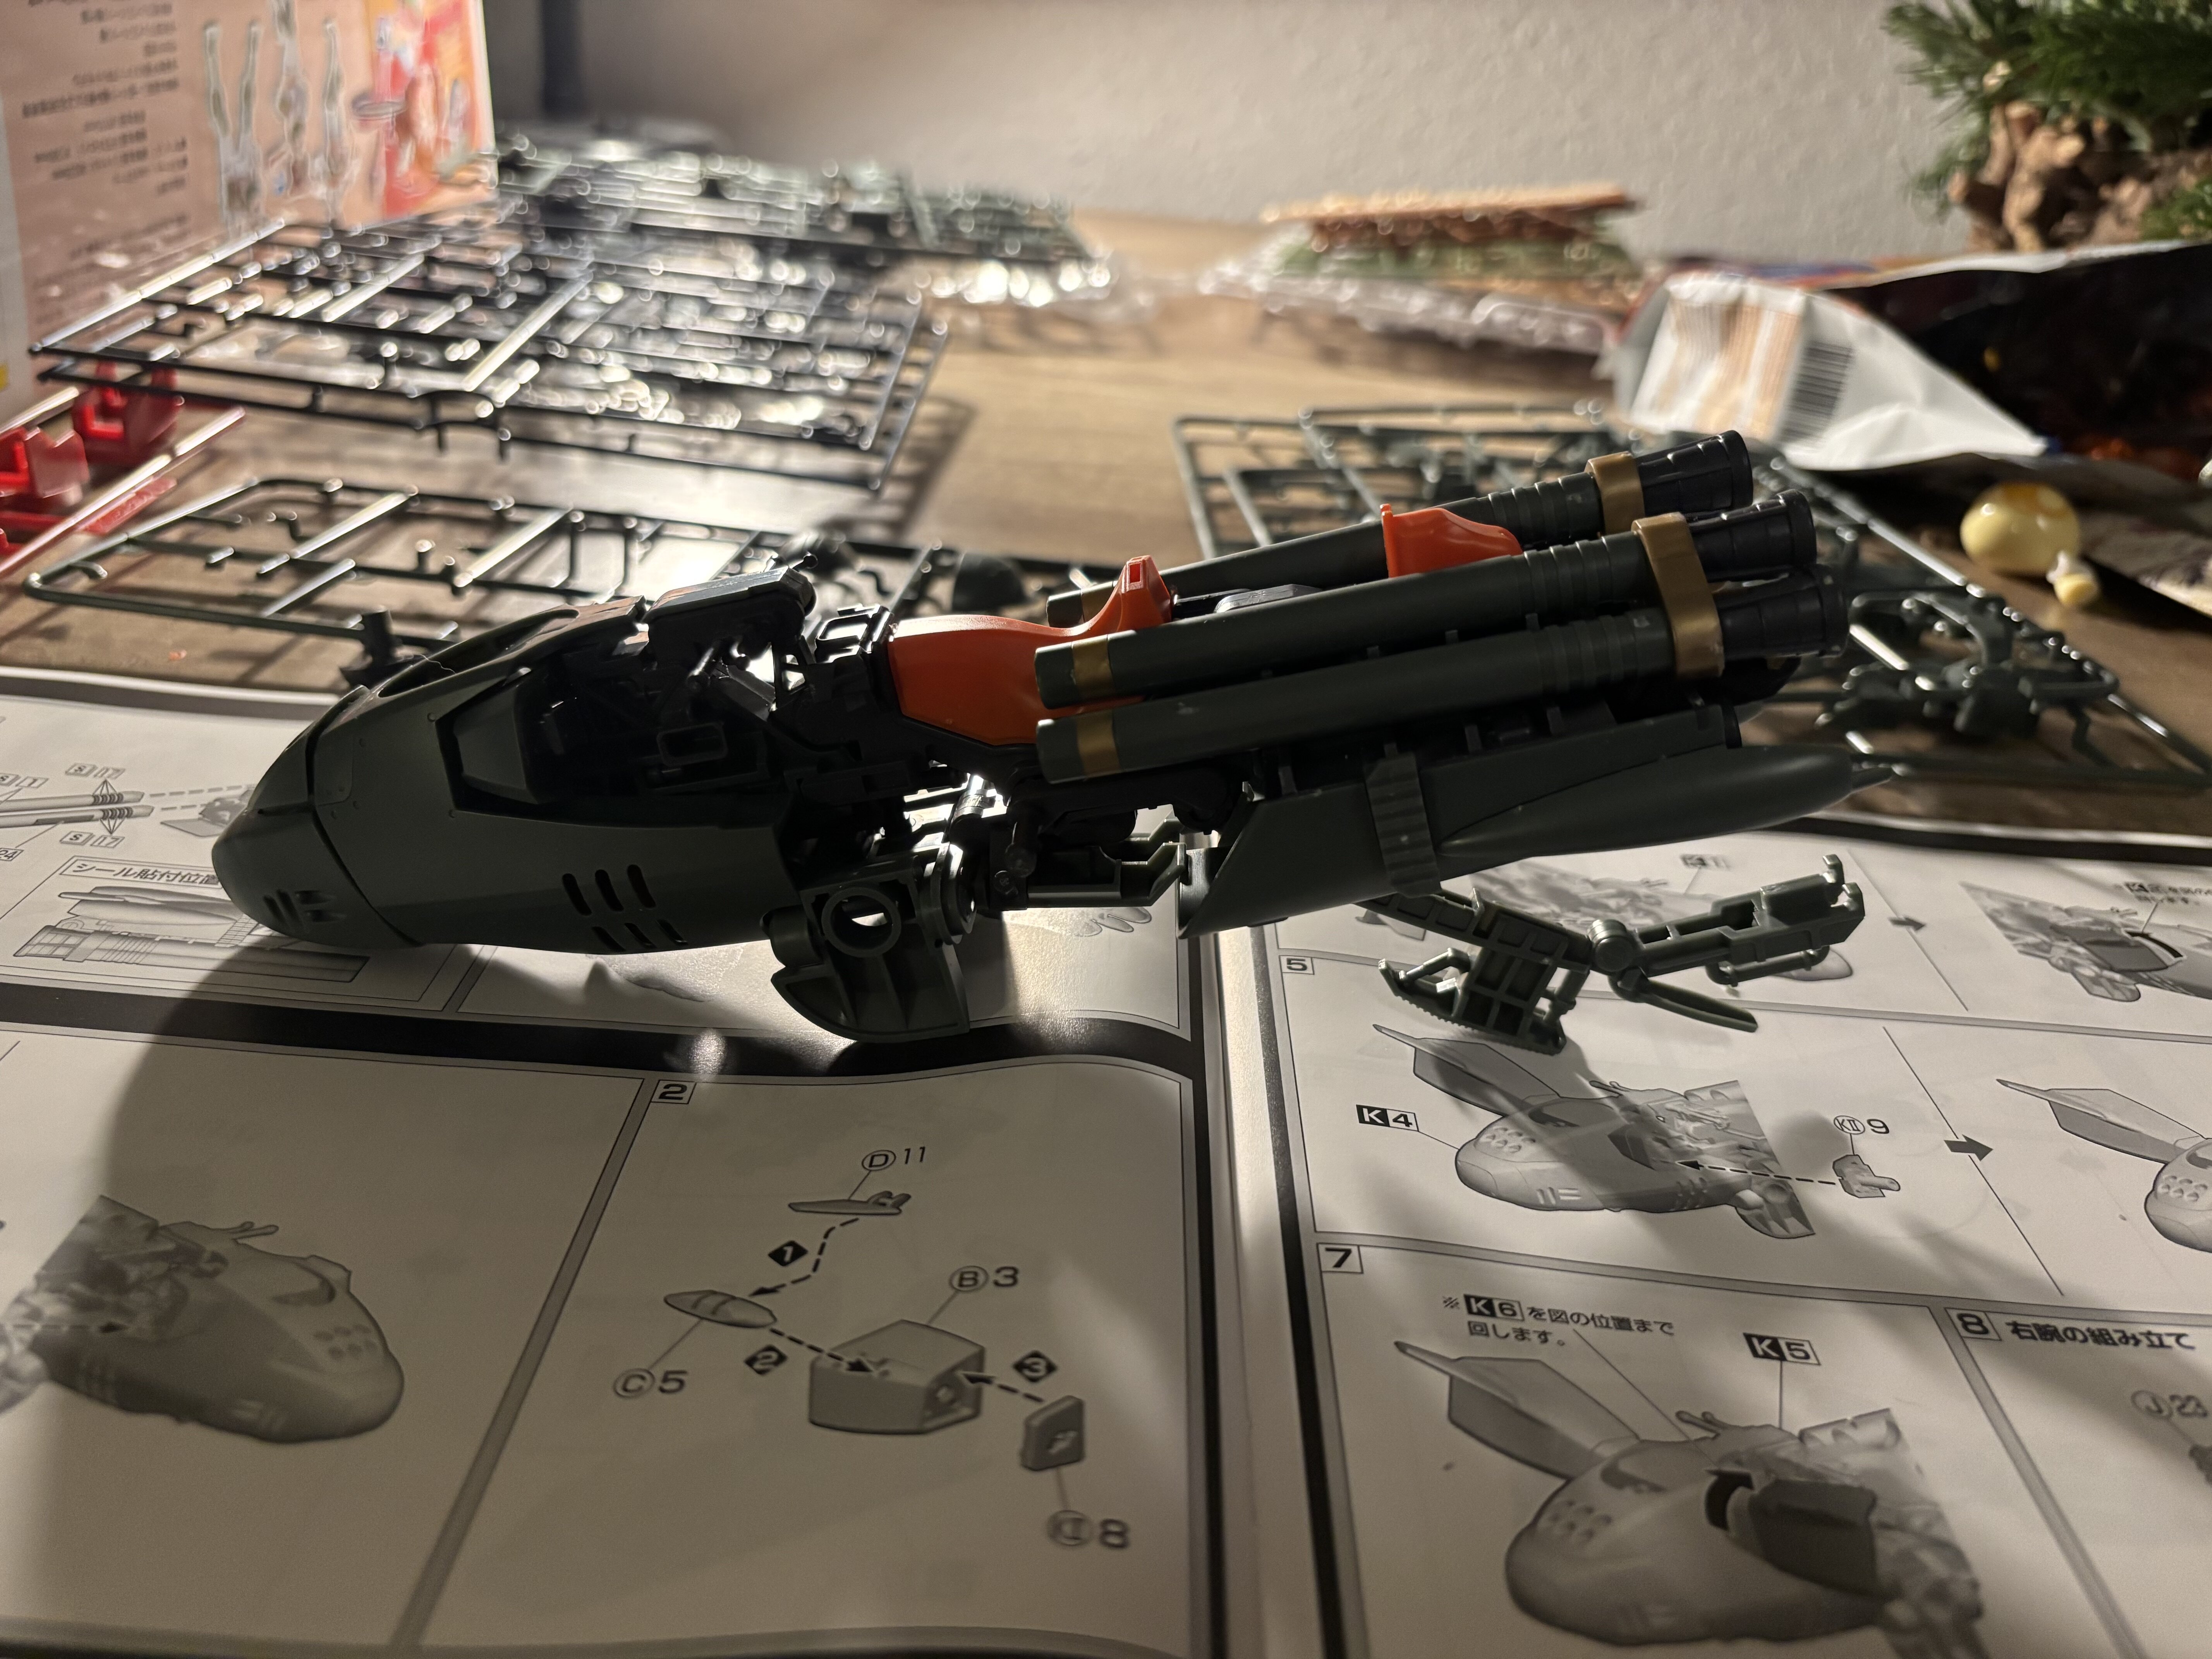
@Bolt Damn those contraceptions! Yeah no, the saddle can easily be taken off. But you would have to put it back once you switch back to bomber mode. See those two pins in the promotional shots in the middle of that bar? Those are the pins holding the saddle. I will take pictures later.
@Goodman Models I think they are still available on HLJ (2 left in stock for ~81$) or 1999 (also only a few left for ~81$).
-
Build log of today:
@sketchley so, apparently the handlebars are actually part of the contraception that is holding the nose in place. The saddle is also used to position the barrels properly in bomber mode. So unfortunately you won’t be able to remove them.


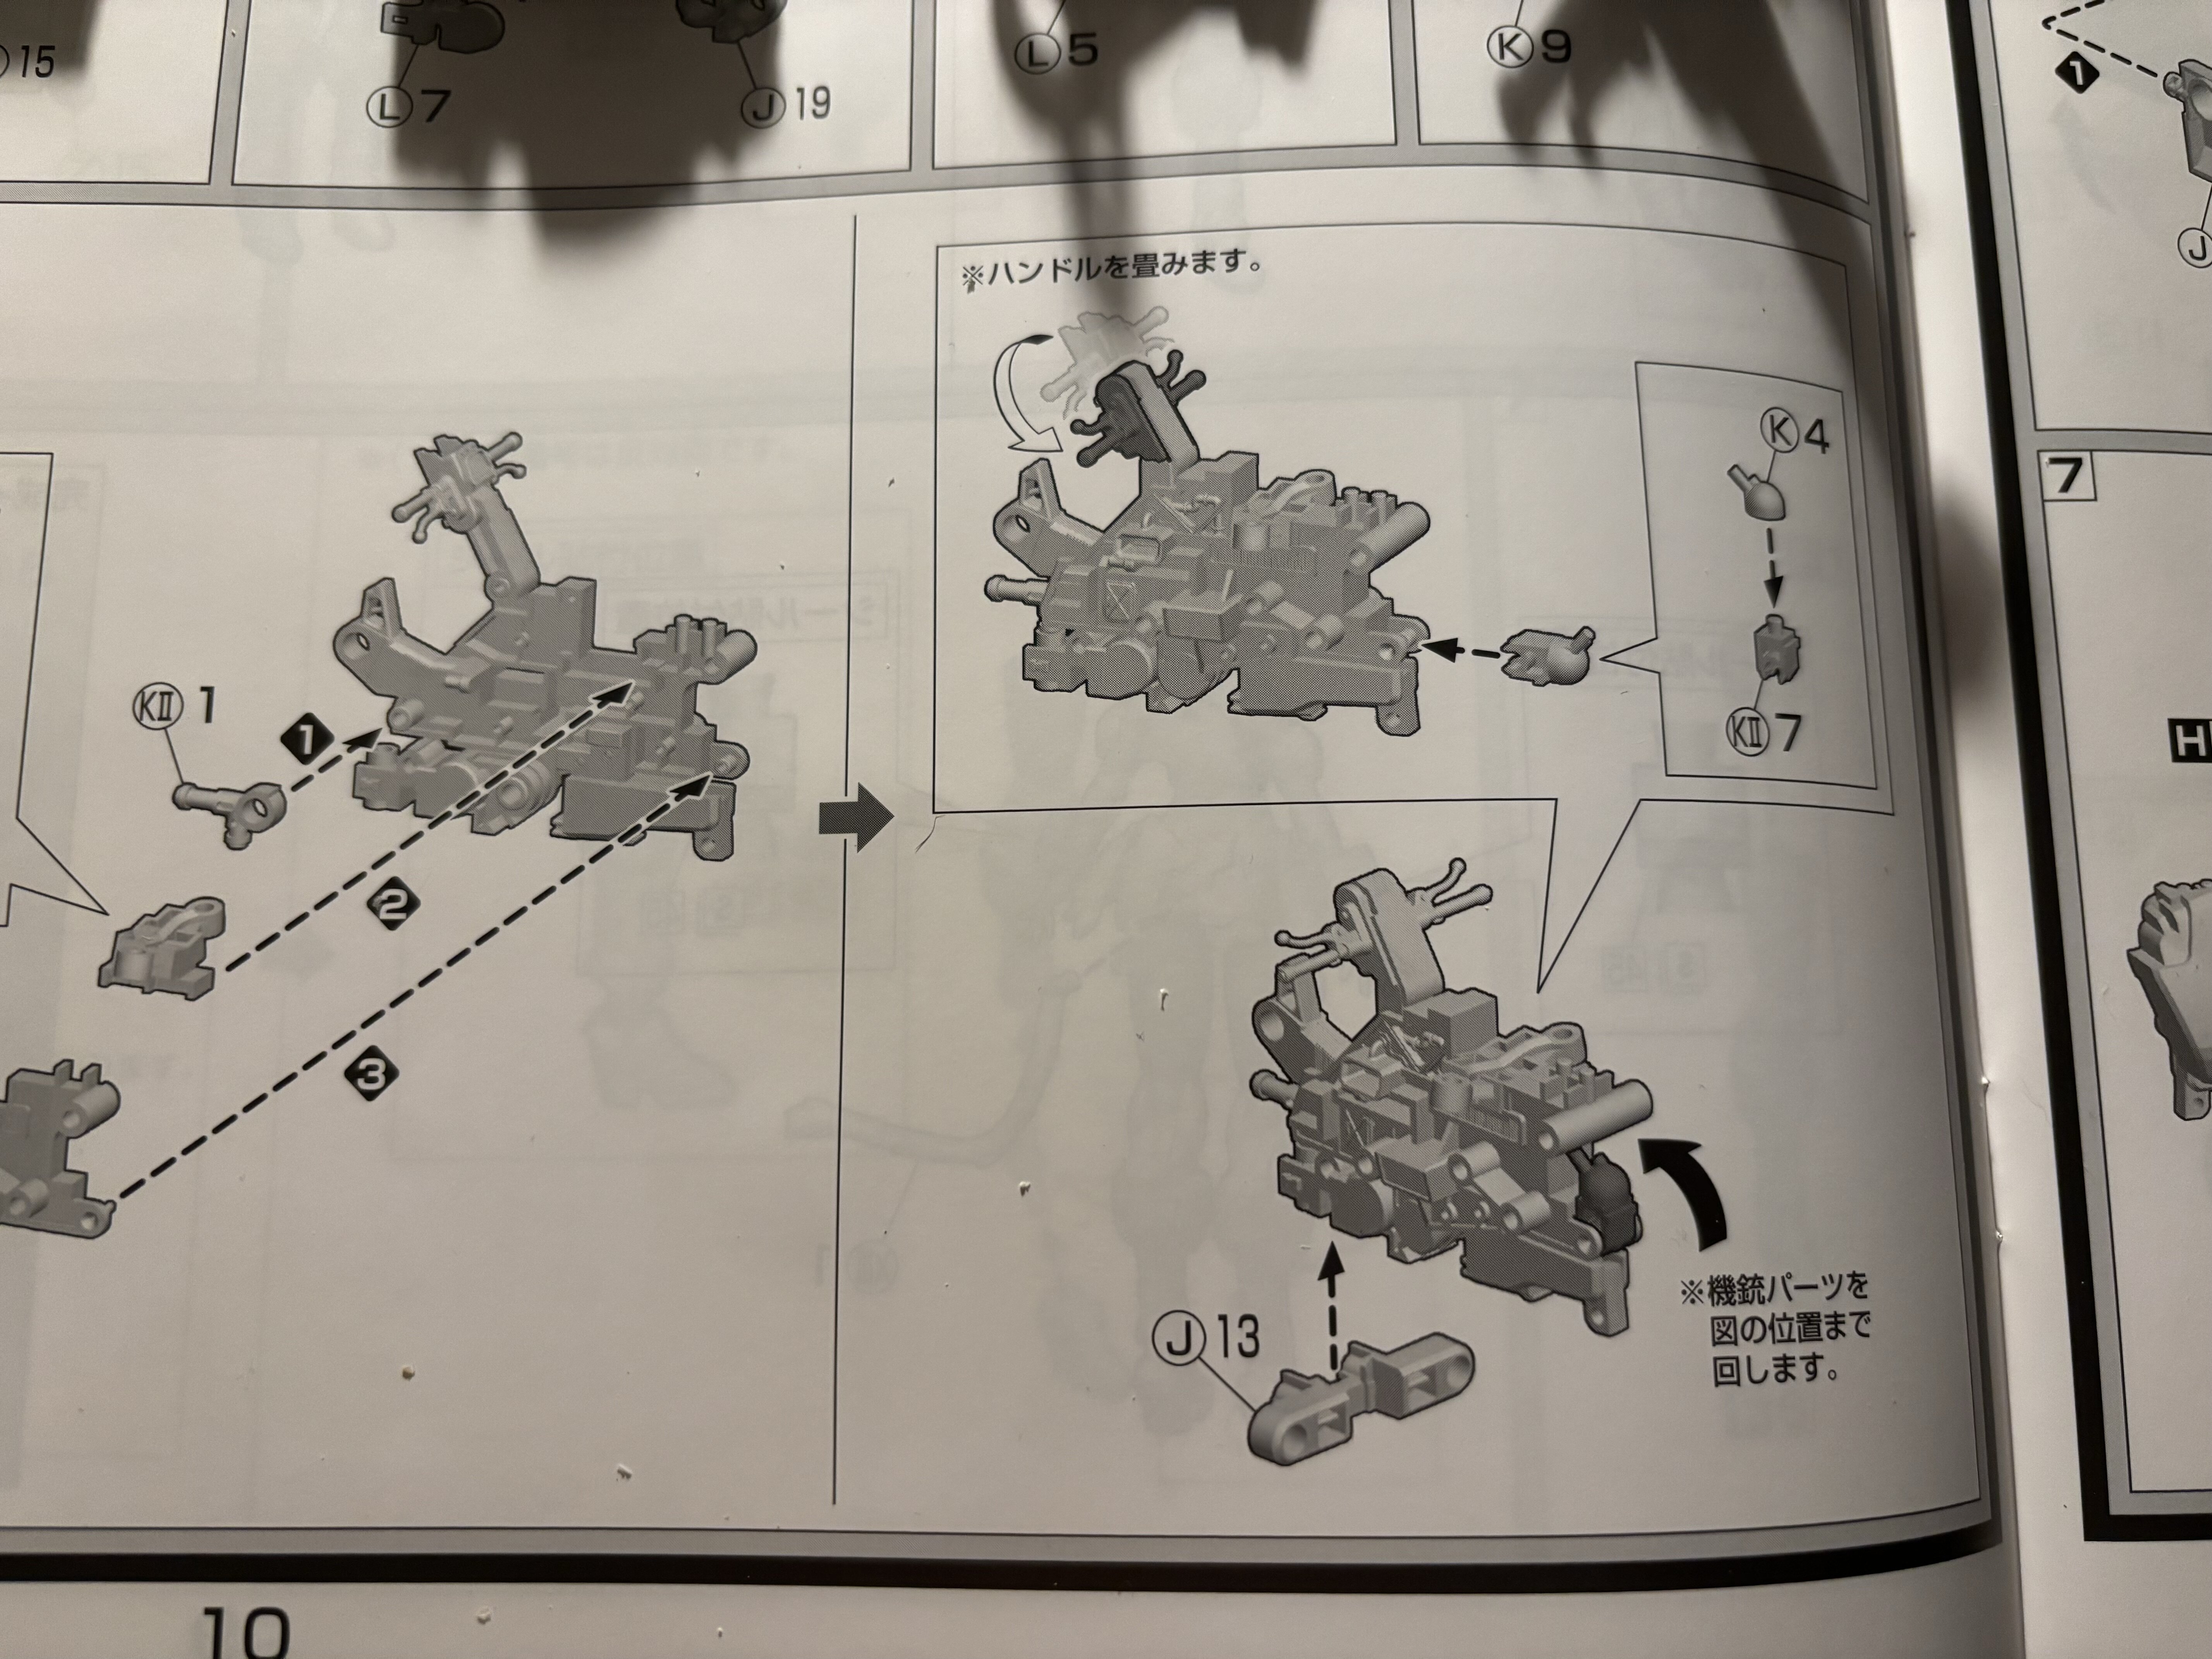
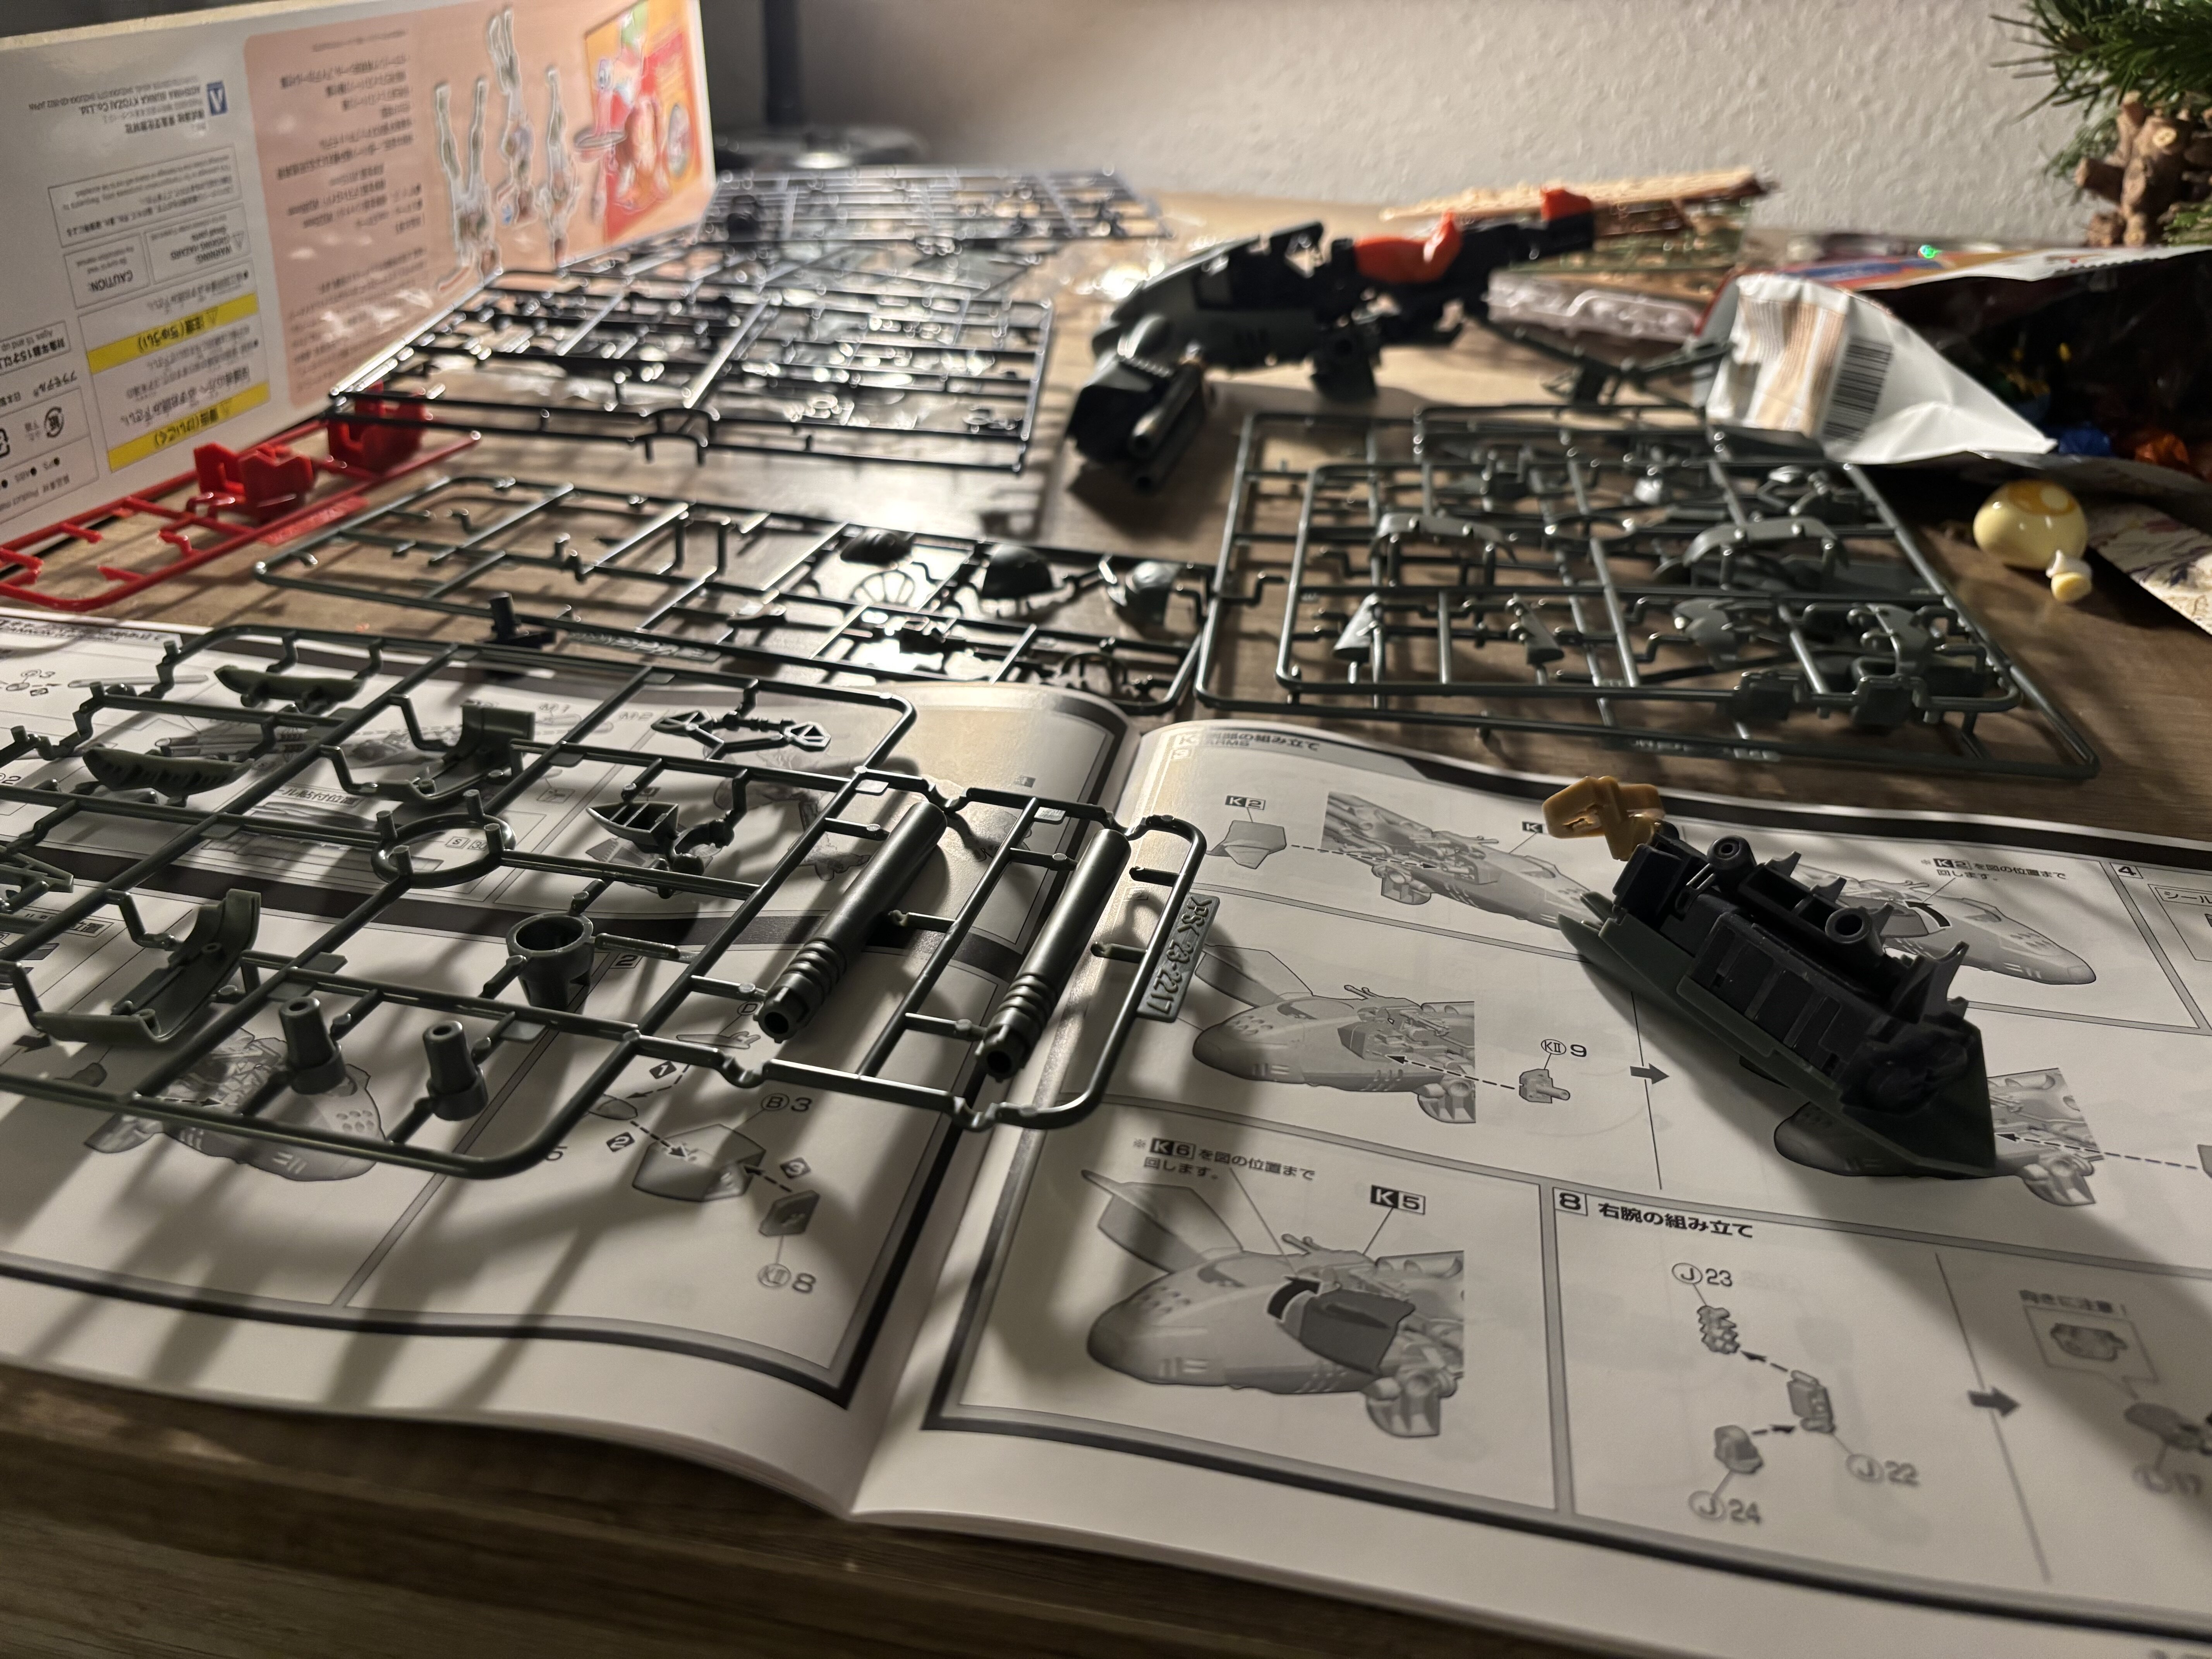
There are so many pieces. I stick together the stuff one by one. It feels like building a Gundam. Some of the pieces are super tight fit. I probably would never be able to take apart the parts anymore.
Nose + „motorcycle“ piece:
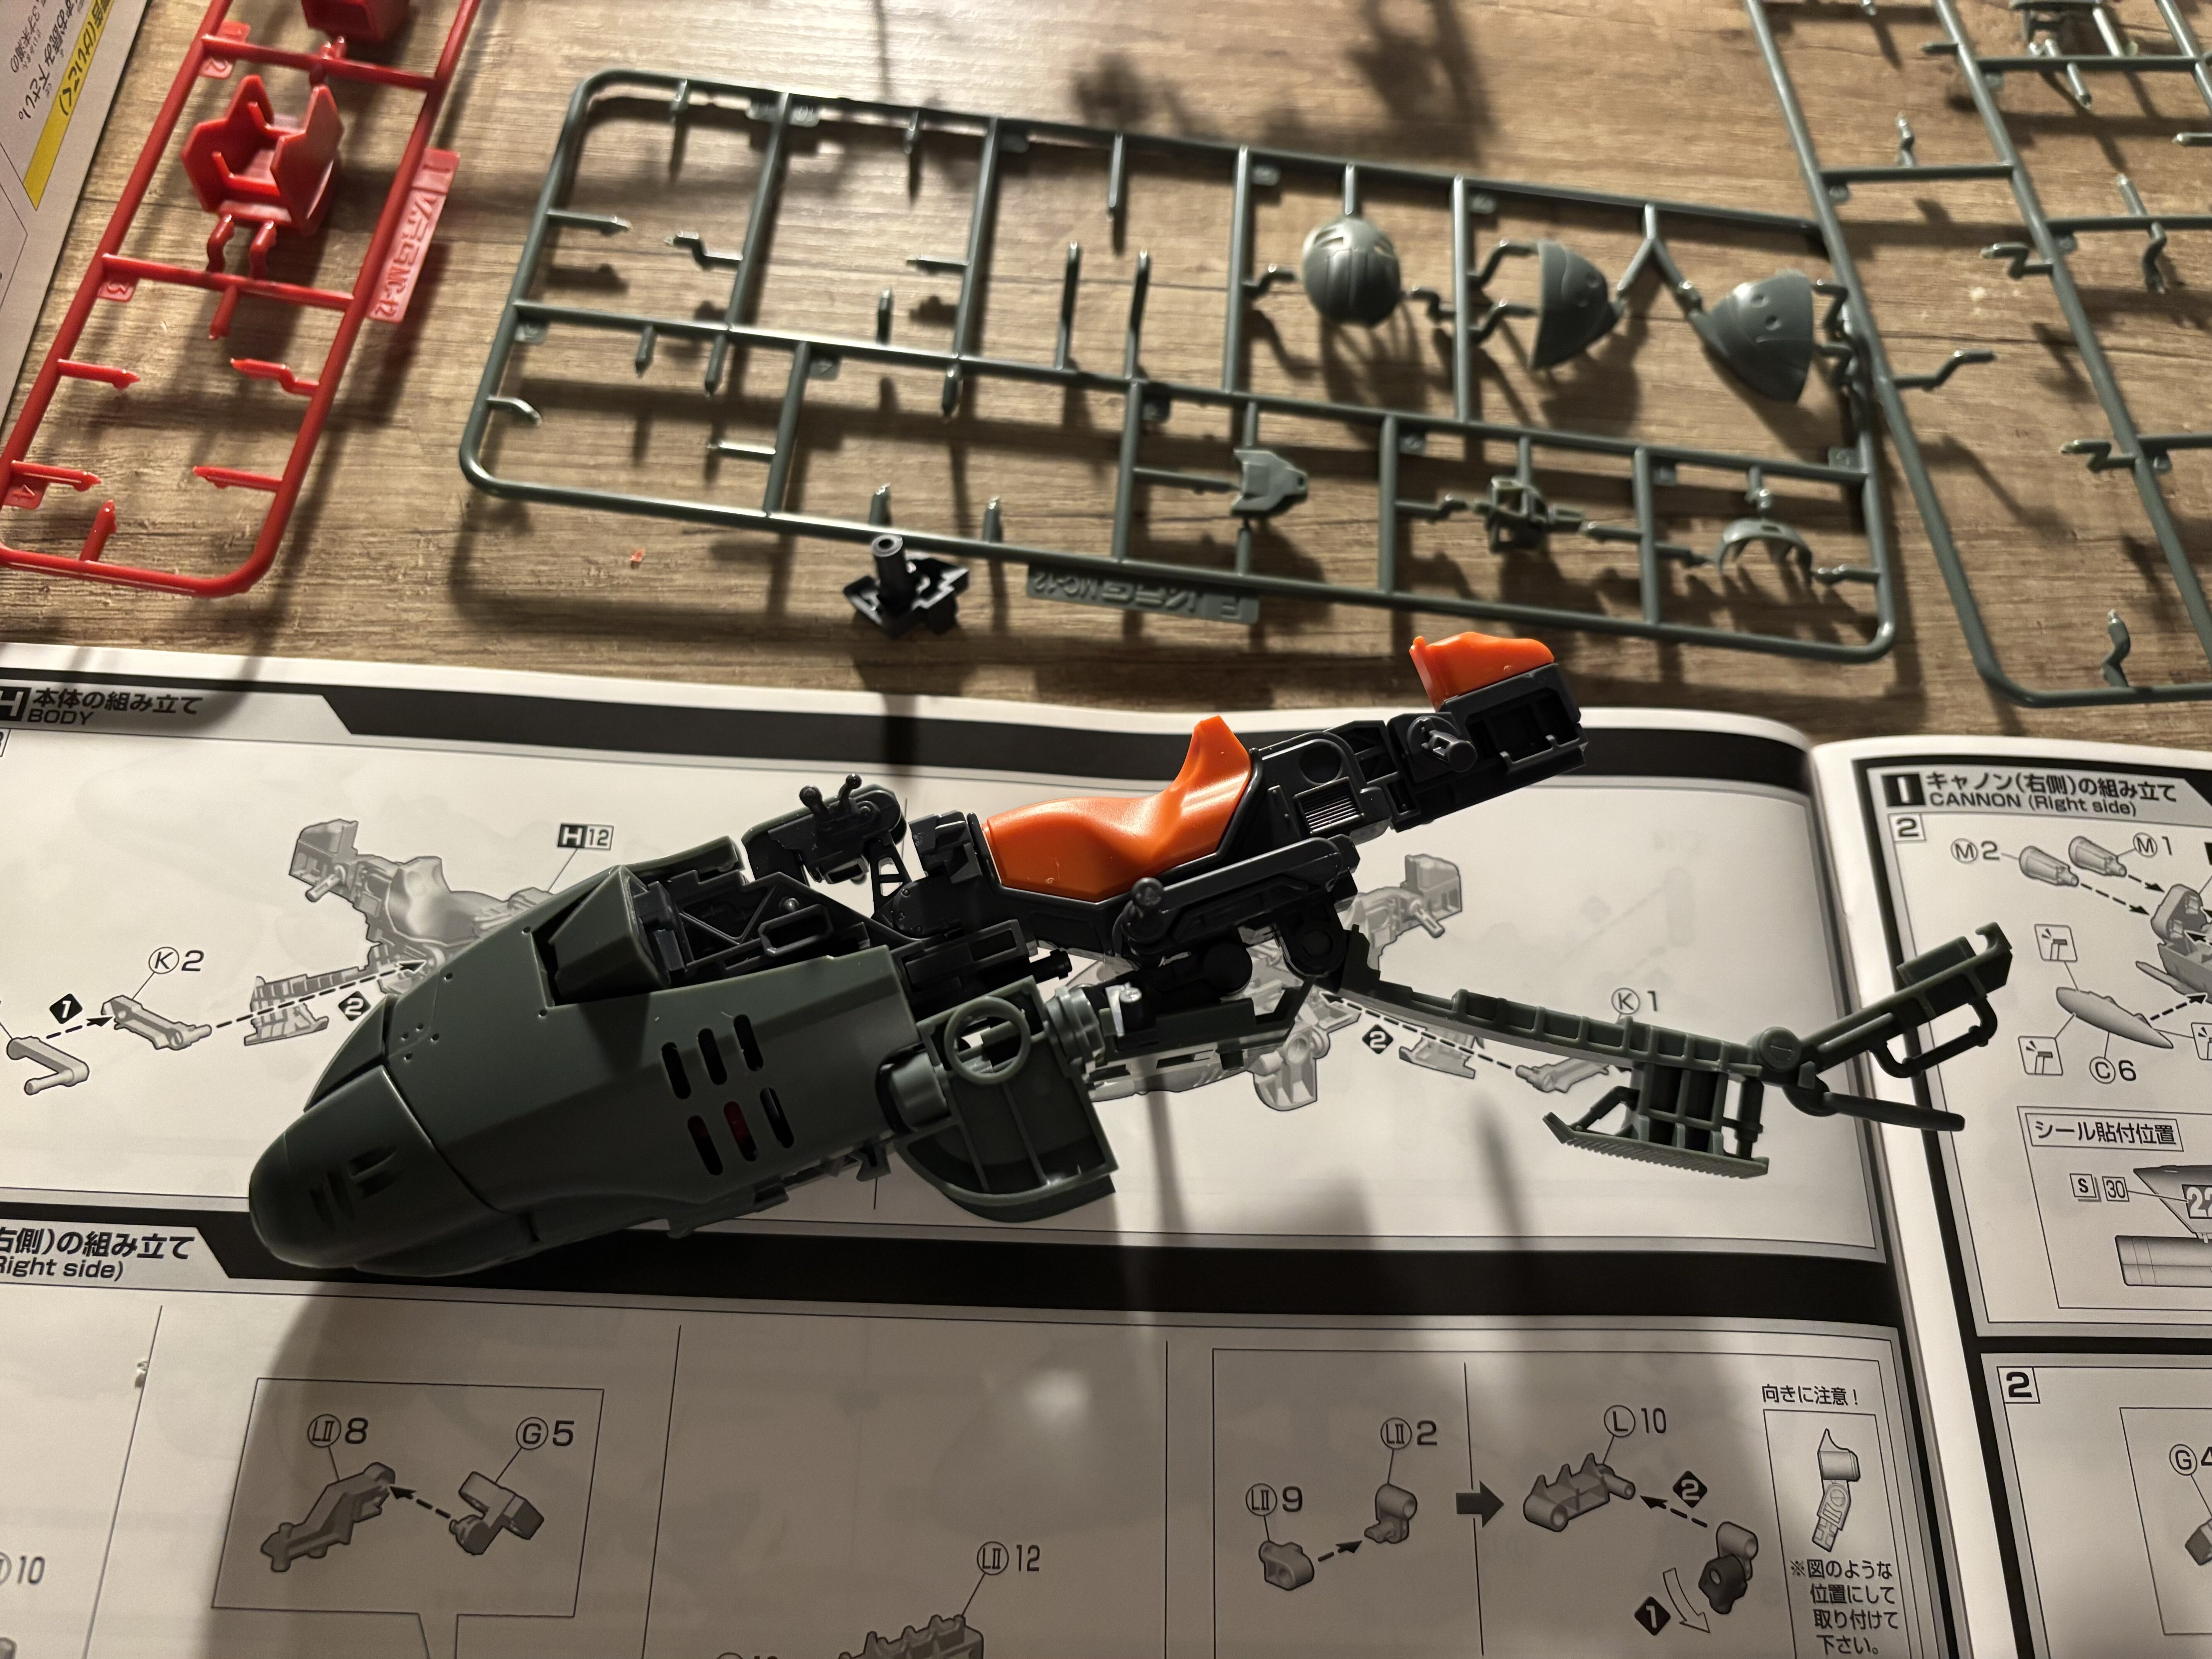
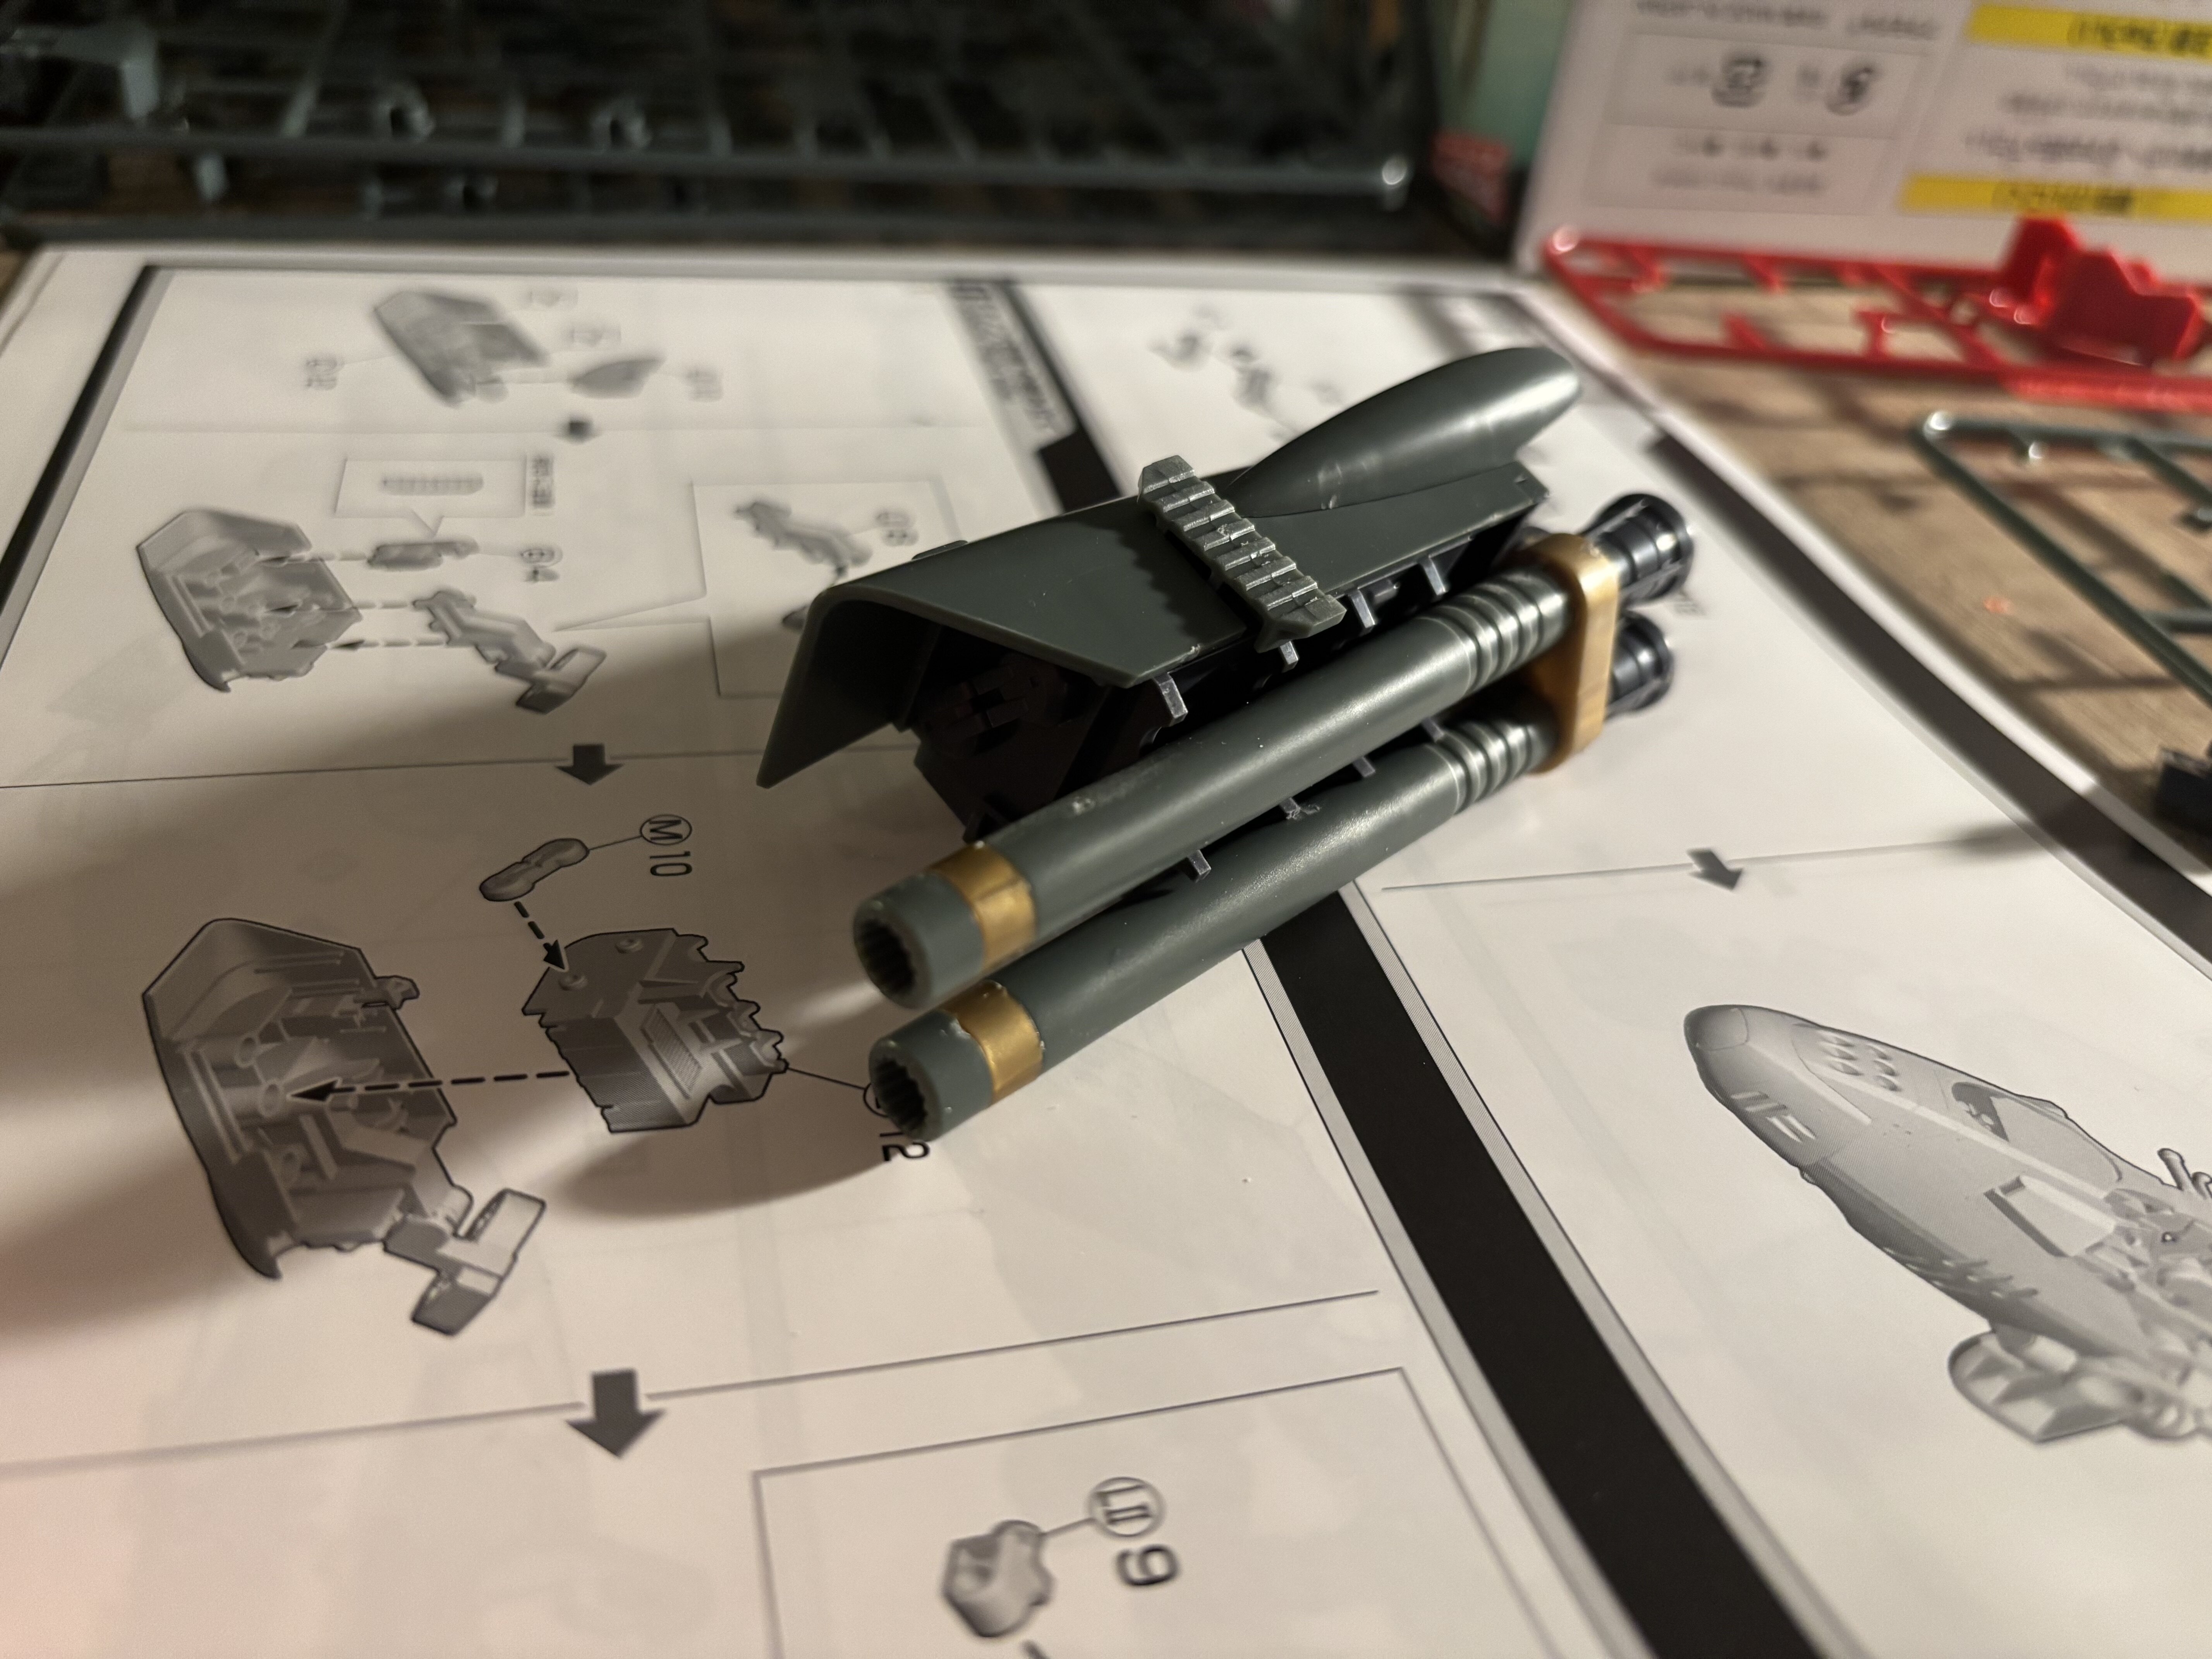
Gunbarrels:
Joined everything I got so far after a good 2 hours of clipping, cutting and sanding.
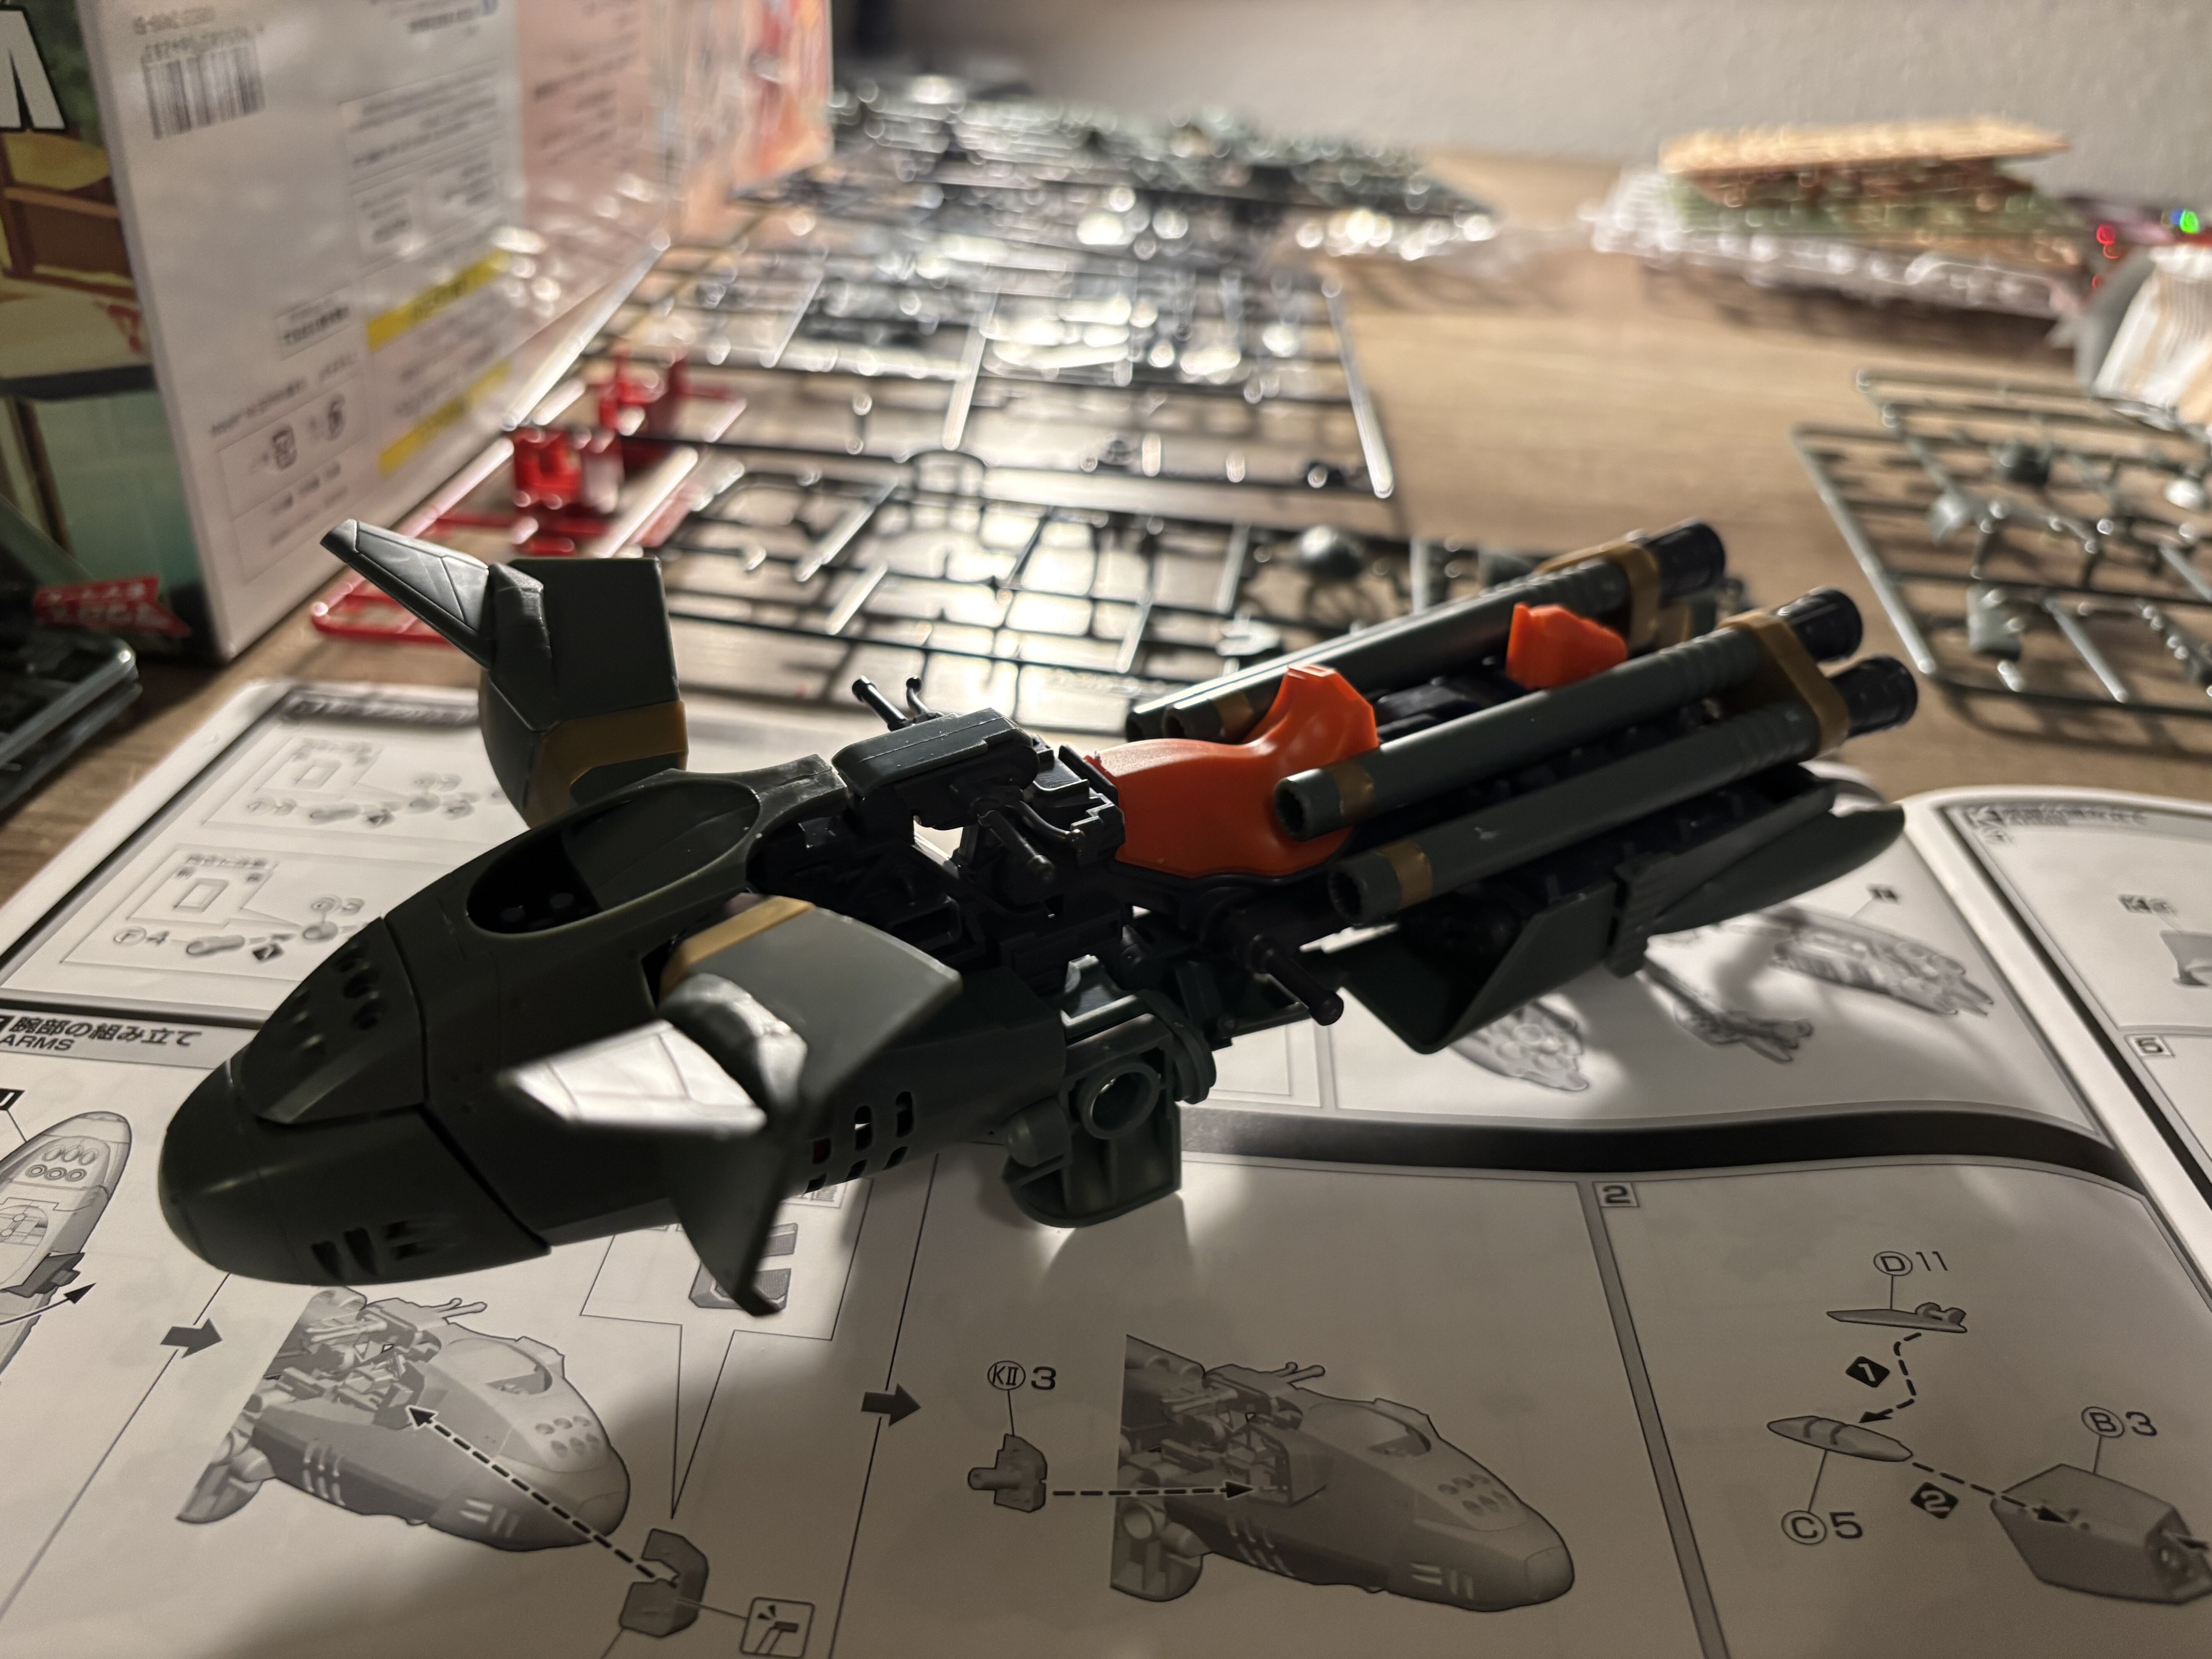
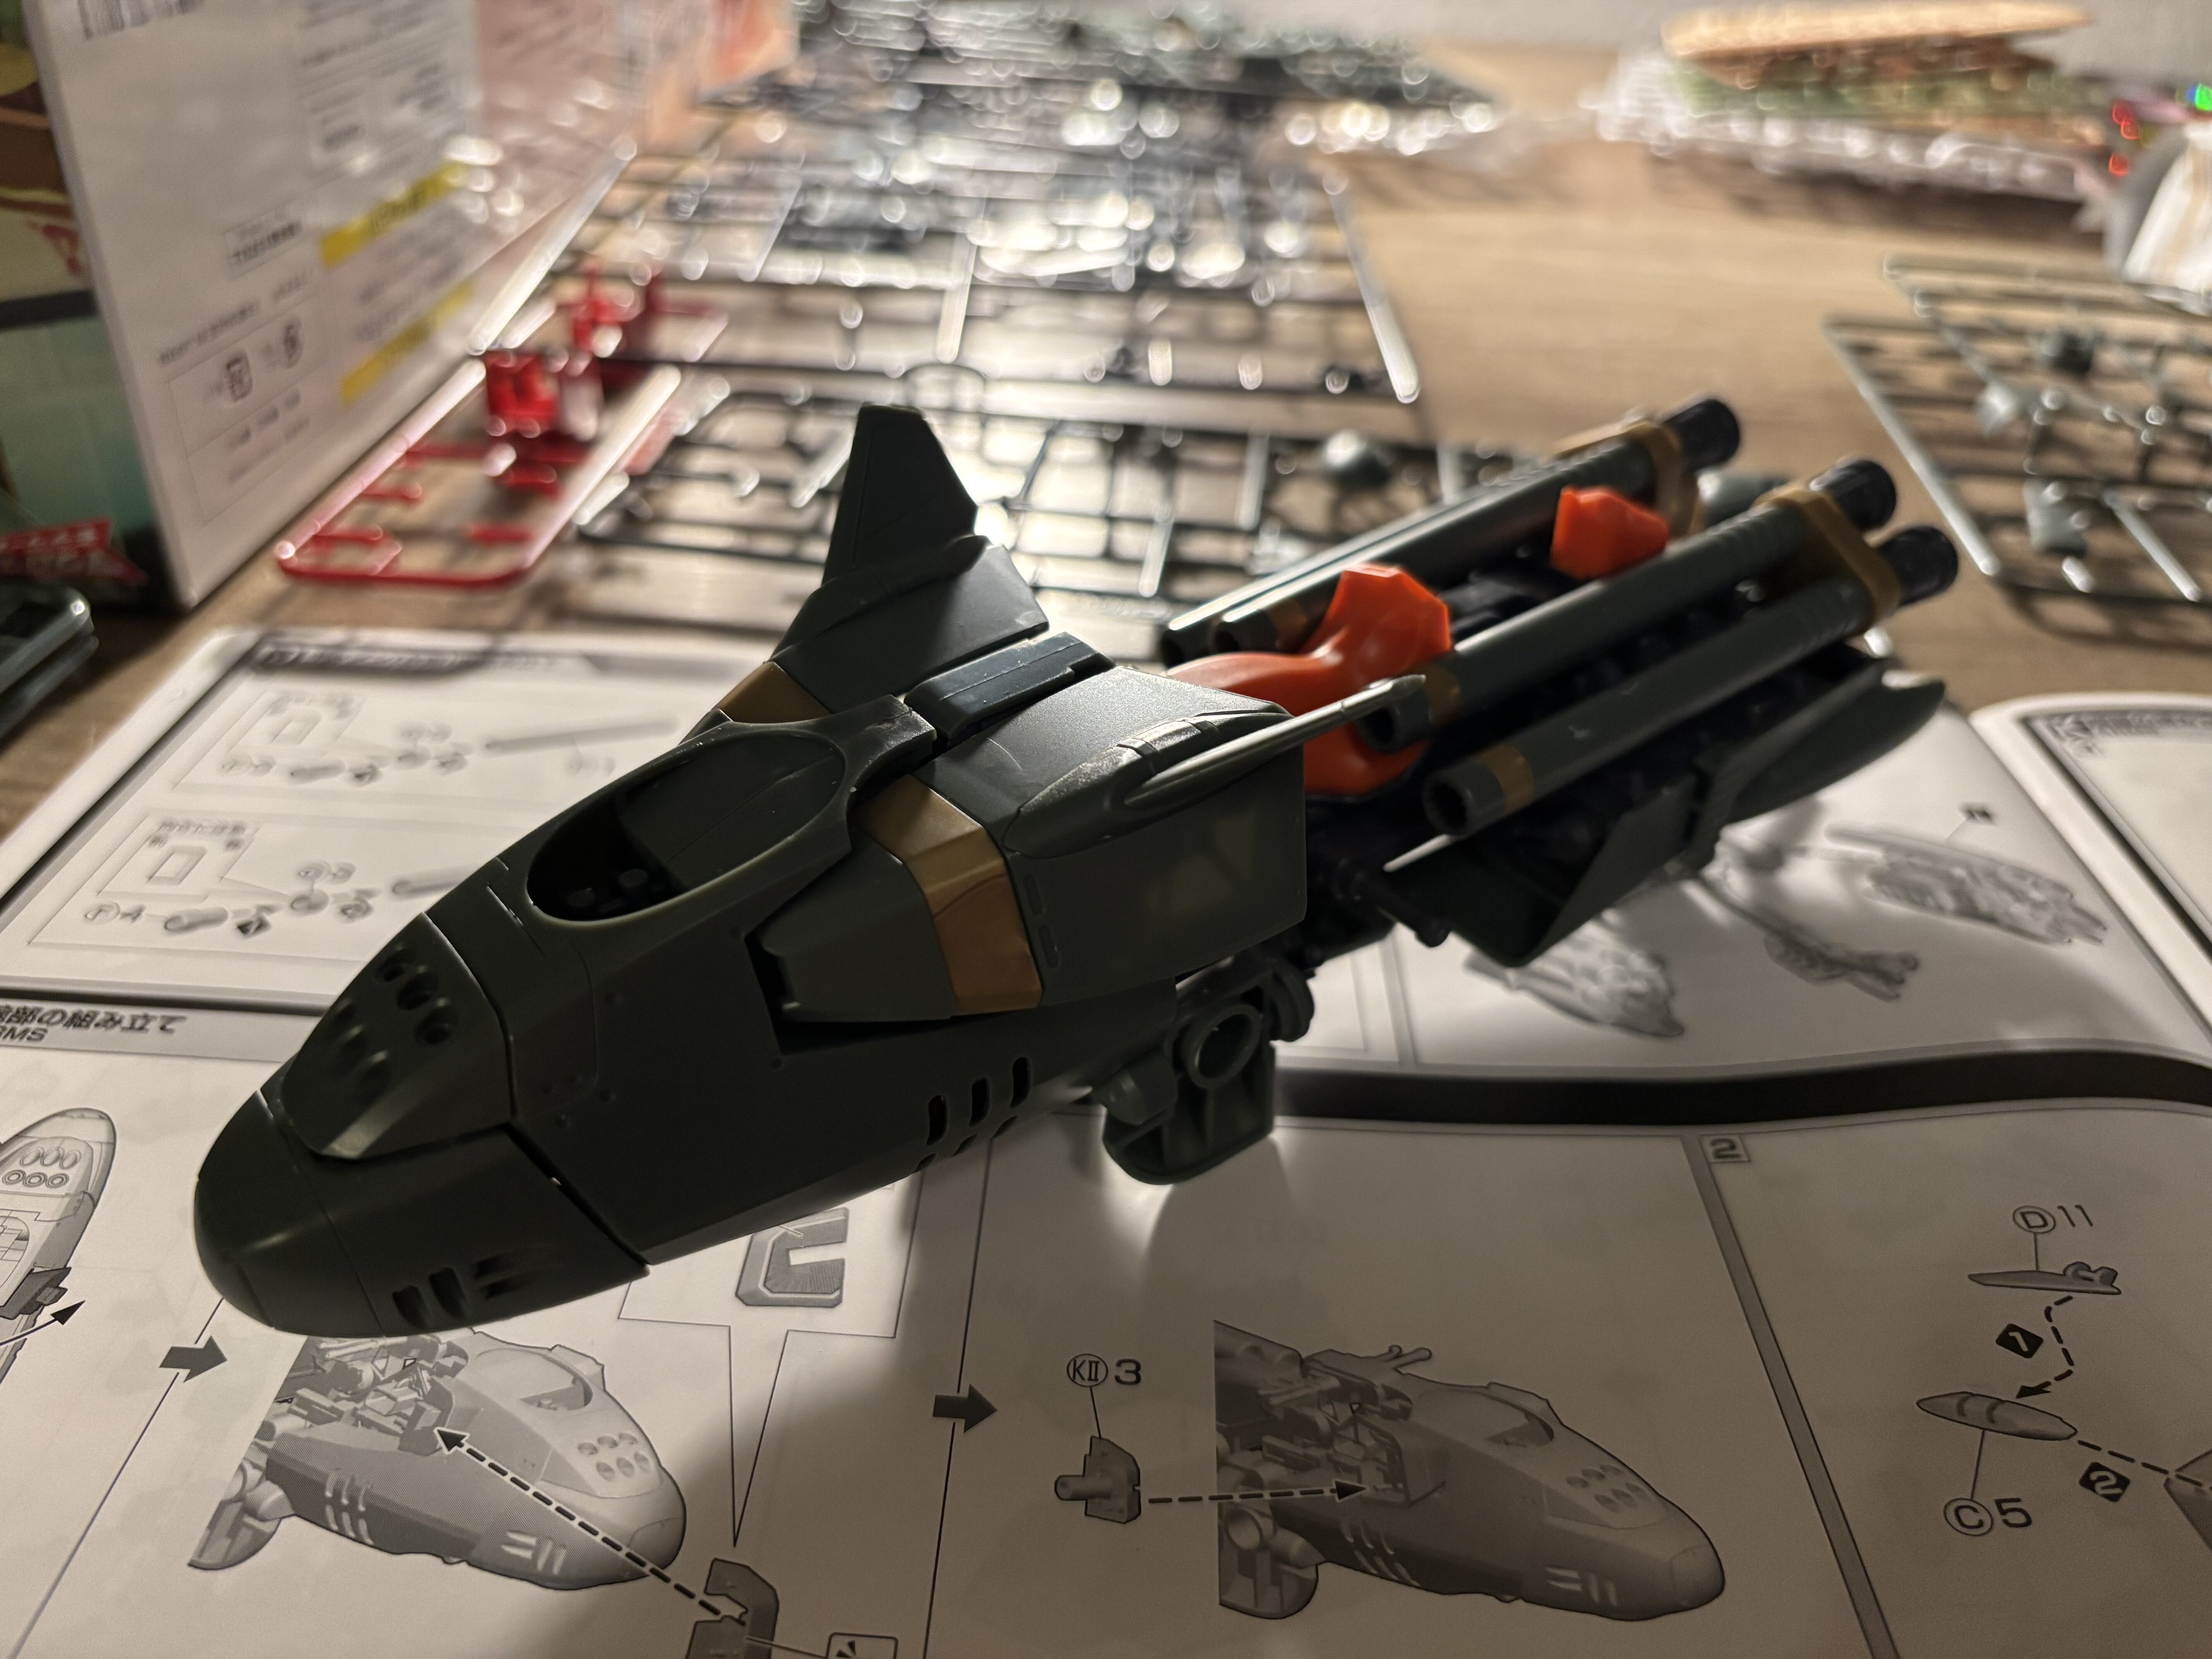
Still a ton of sprues left. I was only able to discard three sprues that were empty after today’s build session. I am still having fun, everything is coming together nicely. Good to superb quality so far.
-
@Thom It was discounted. Around 76€ I think.
@Bolt Yeah!
@sketchley Oh, I wonder too. Not just that, but it has a large bright orange saddle as well! I saw different pictures inside the manual with the saddle and without. Will check later.
Whats Lying on your Workbench MK IV
in The Workshop!
Posted · Edited by Urashiman
General Grammar, picture order
Awesome stuff everyone!
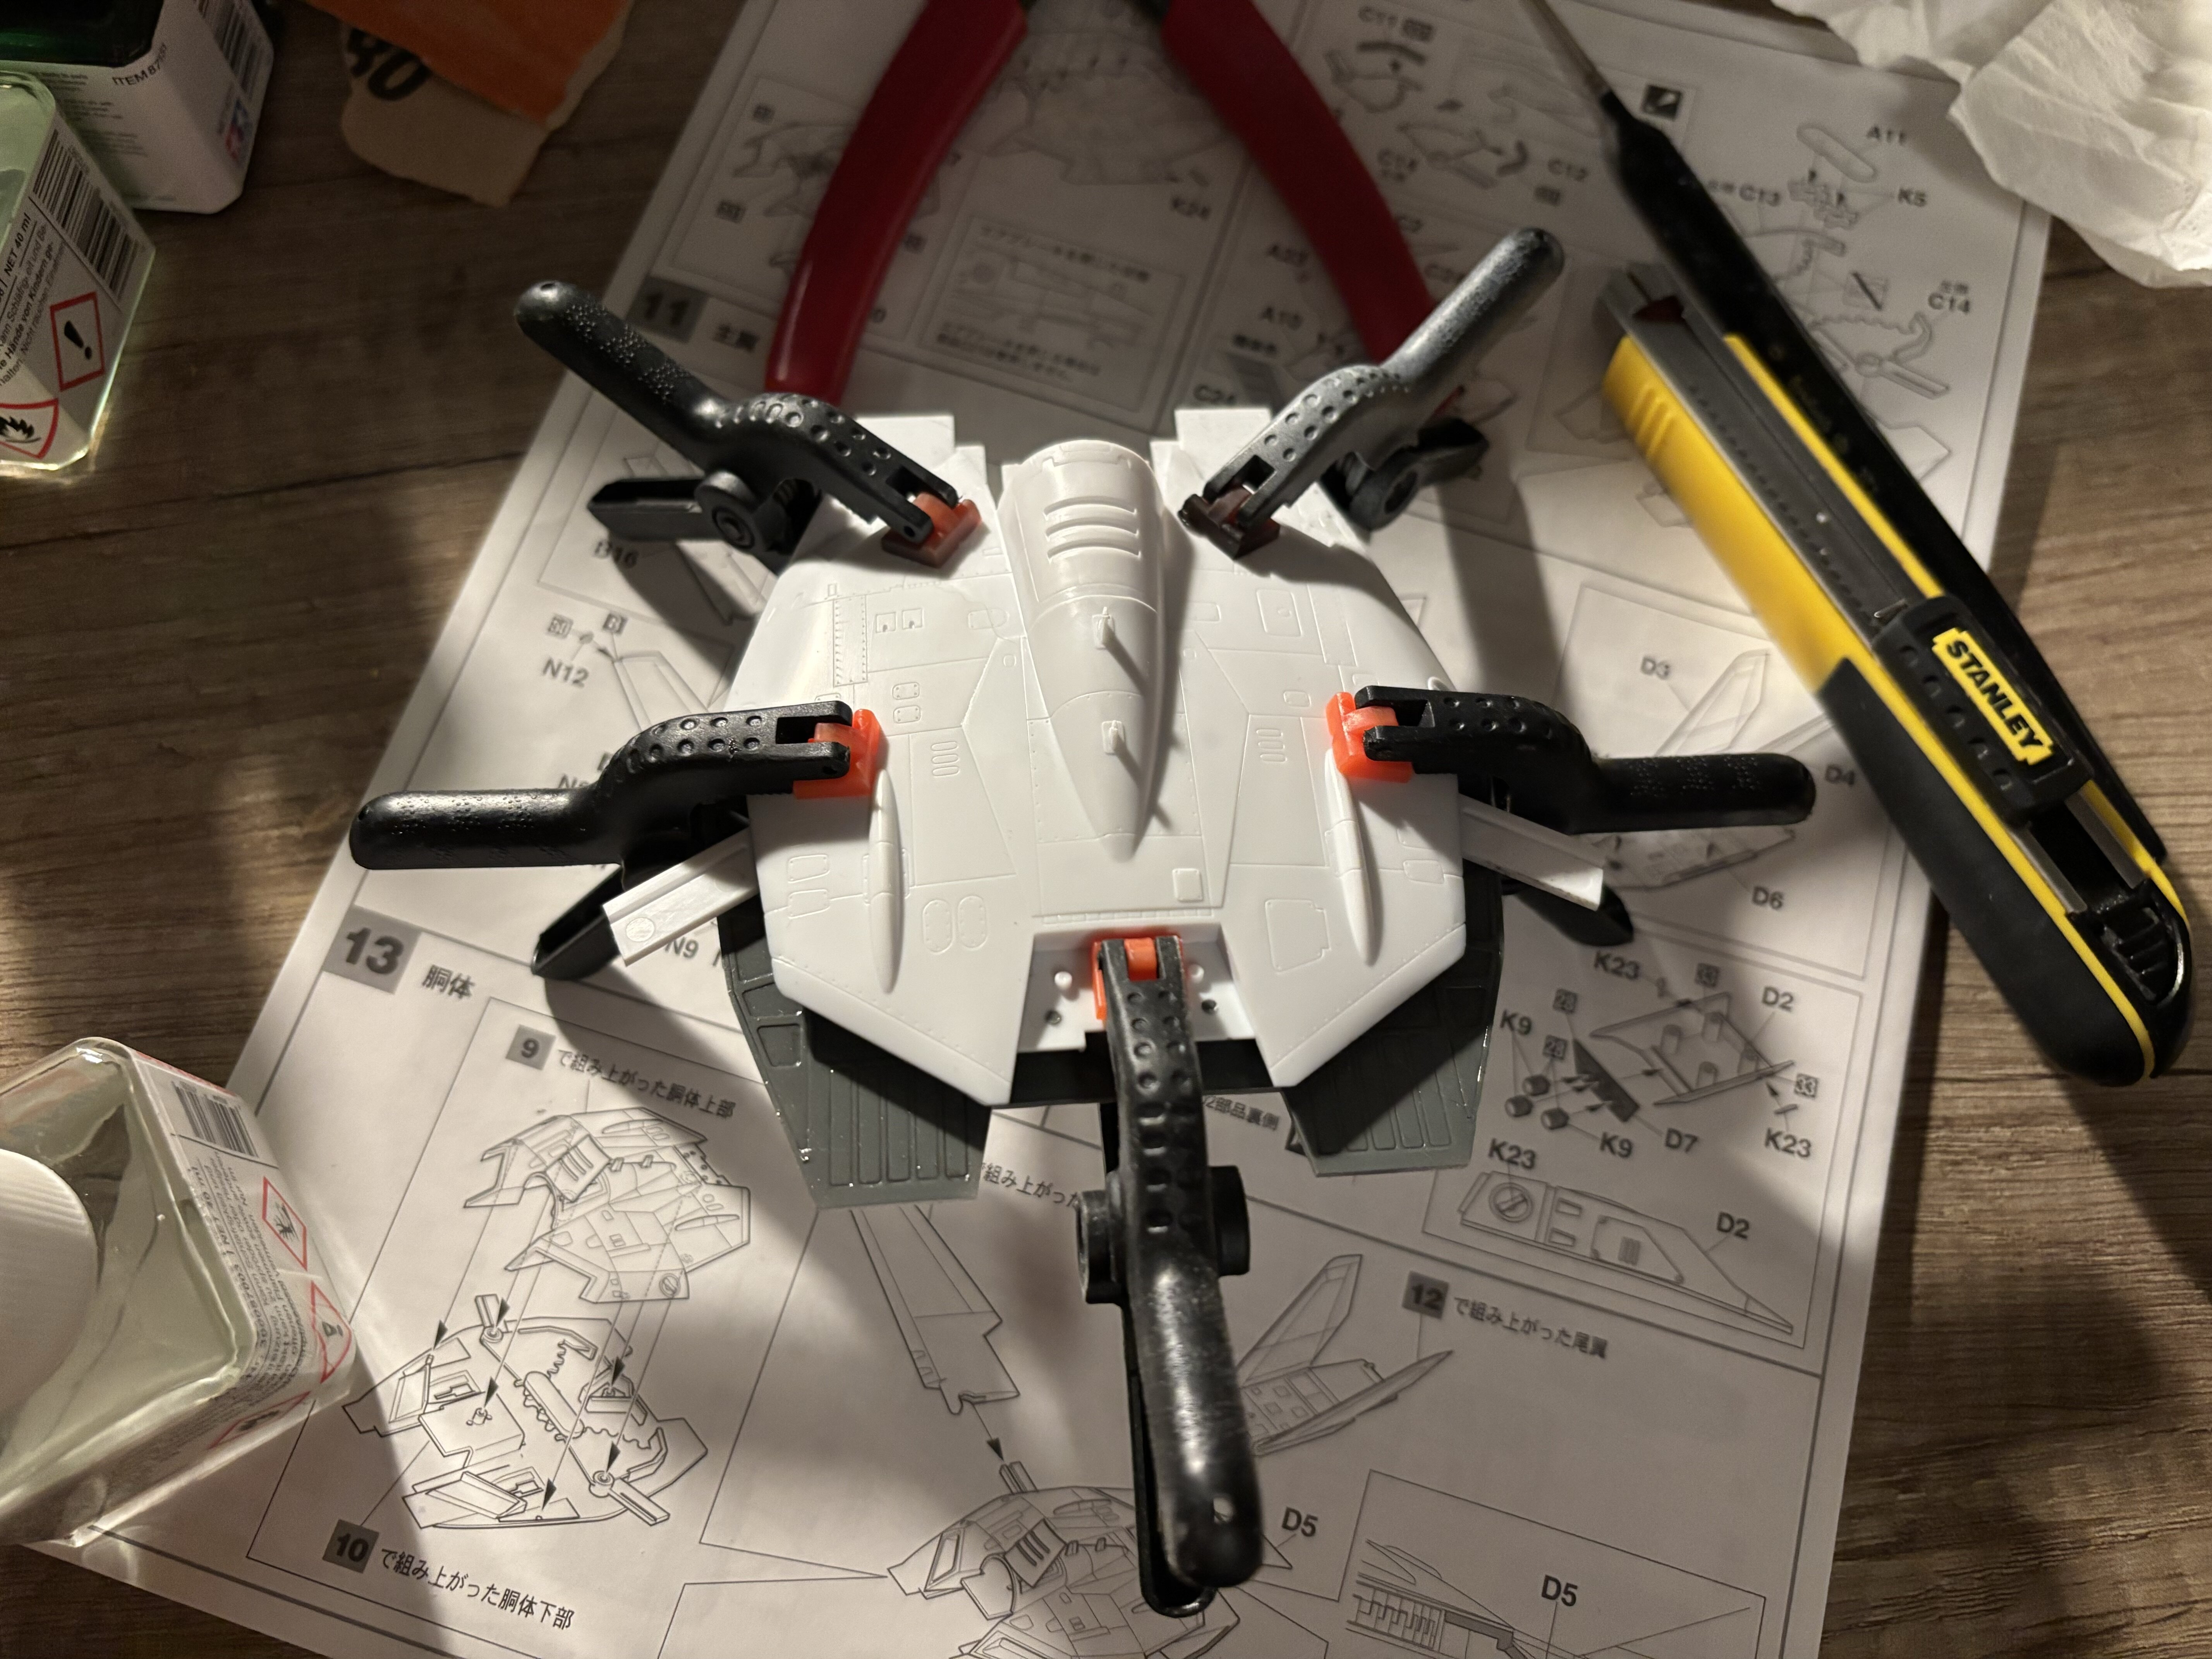
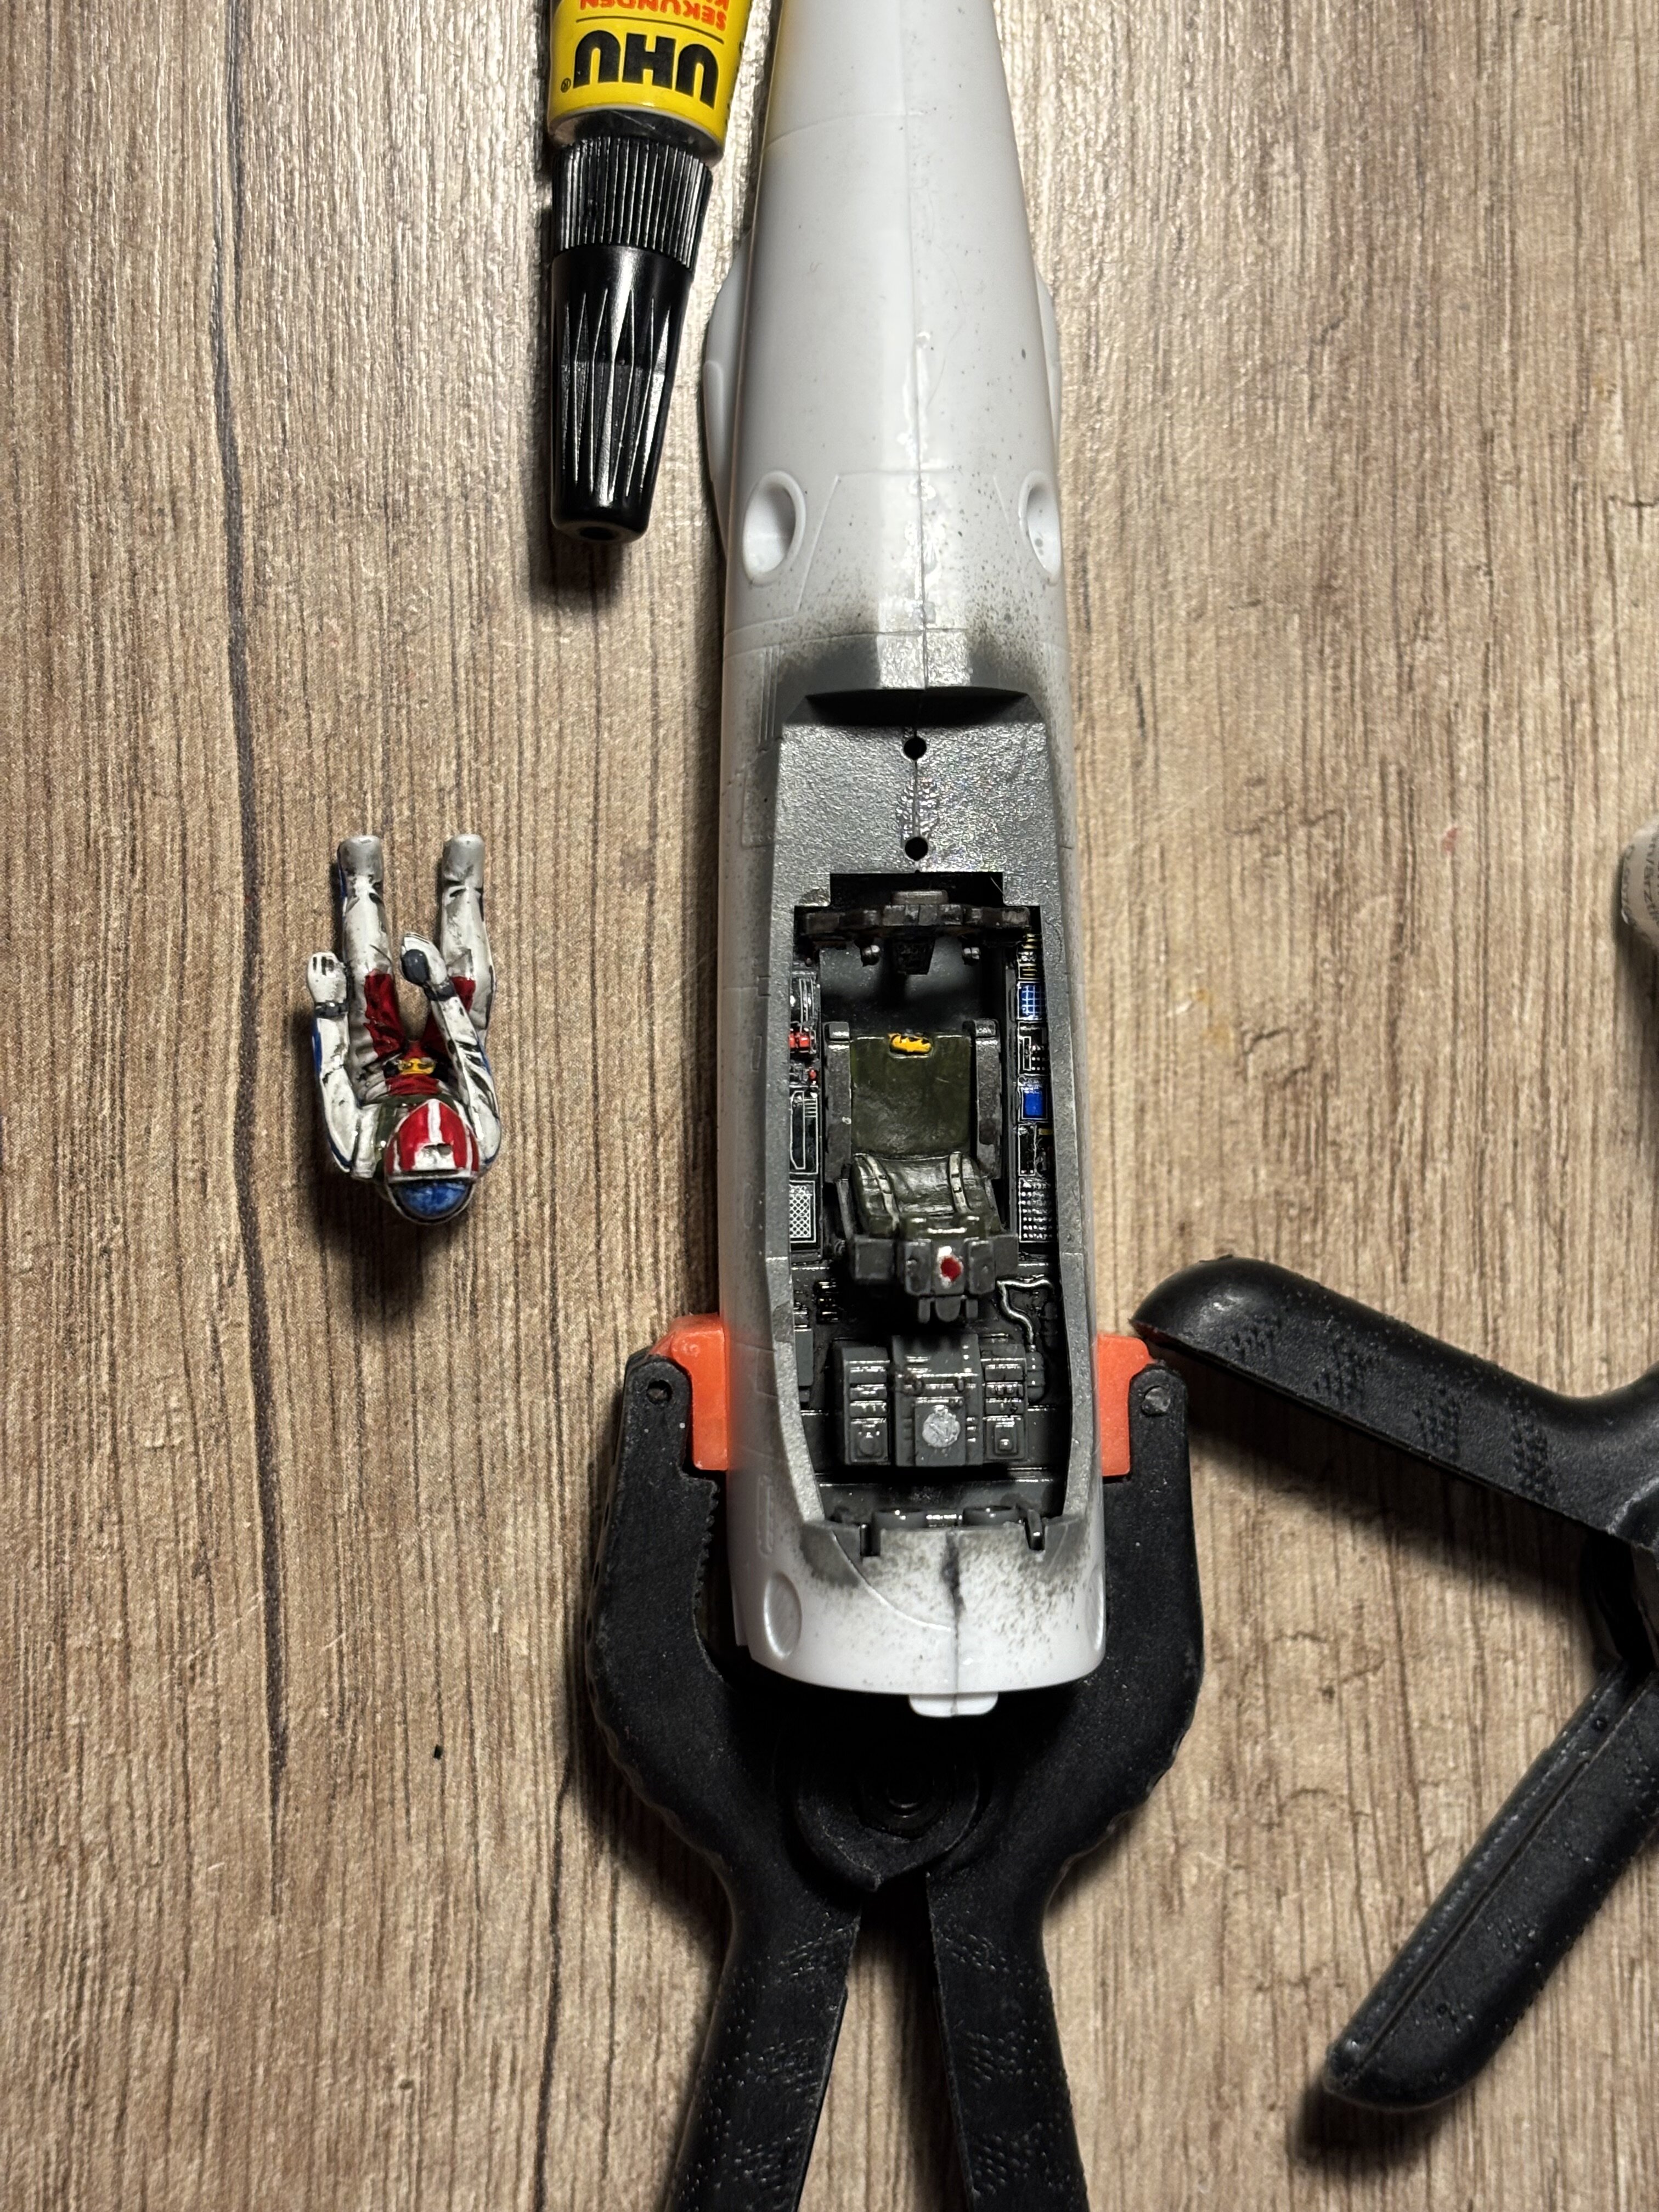
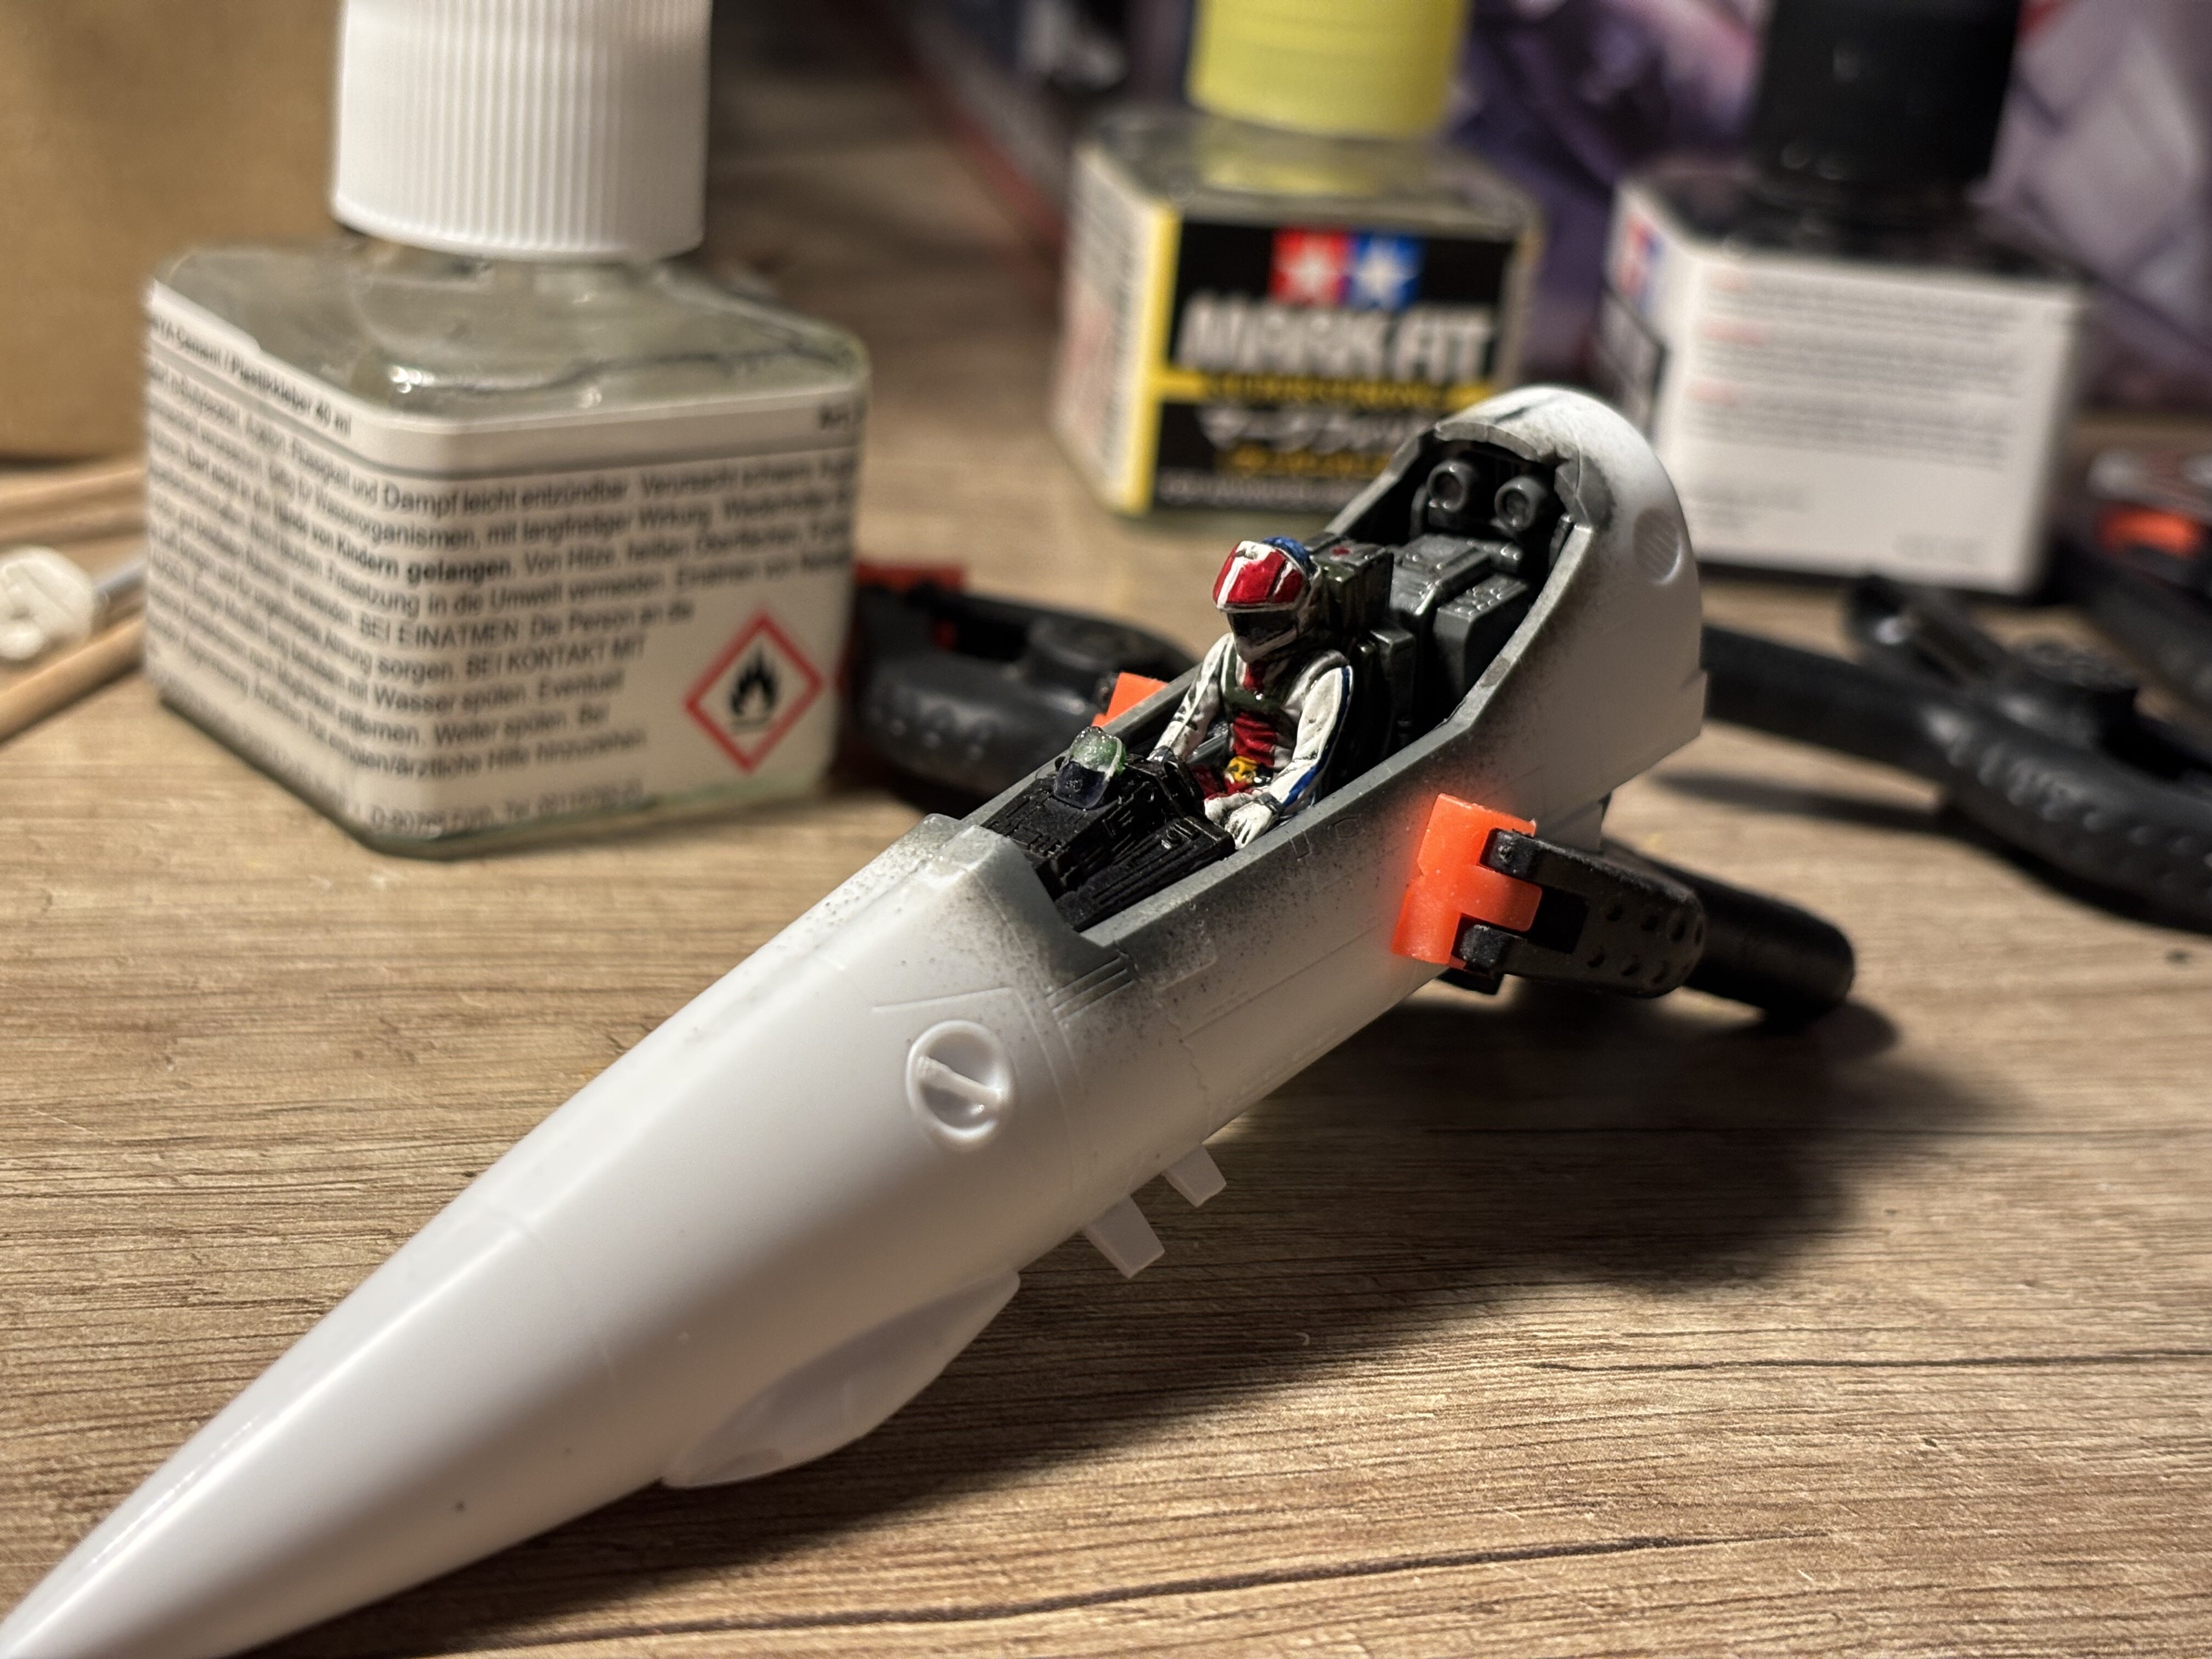
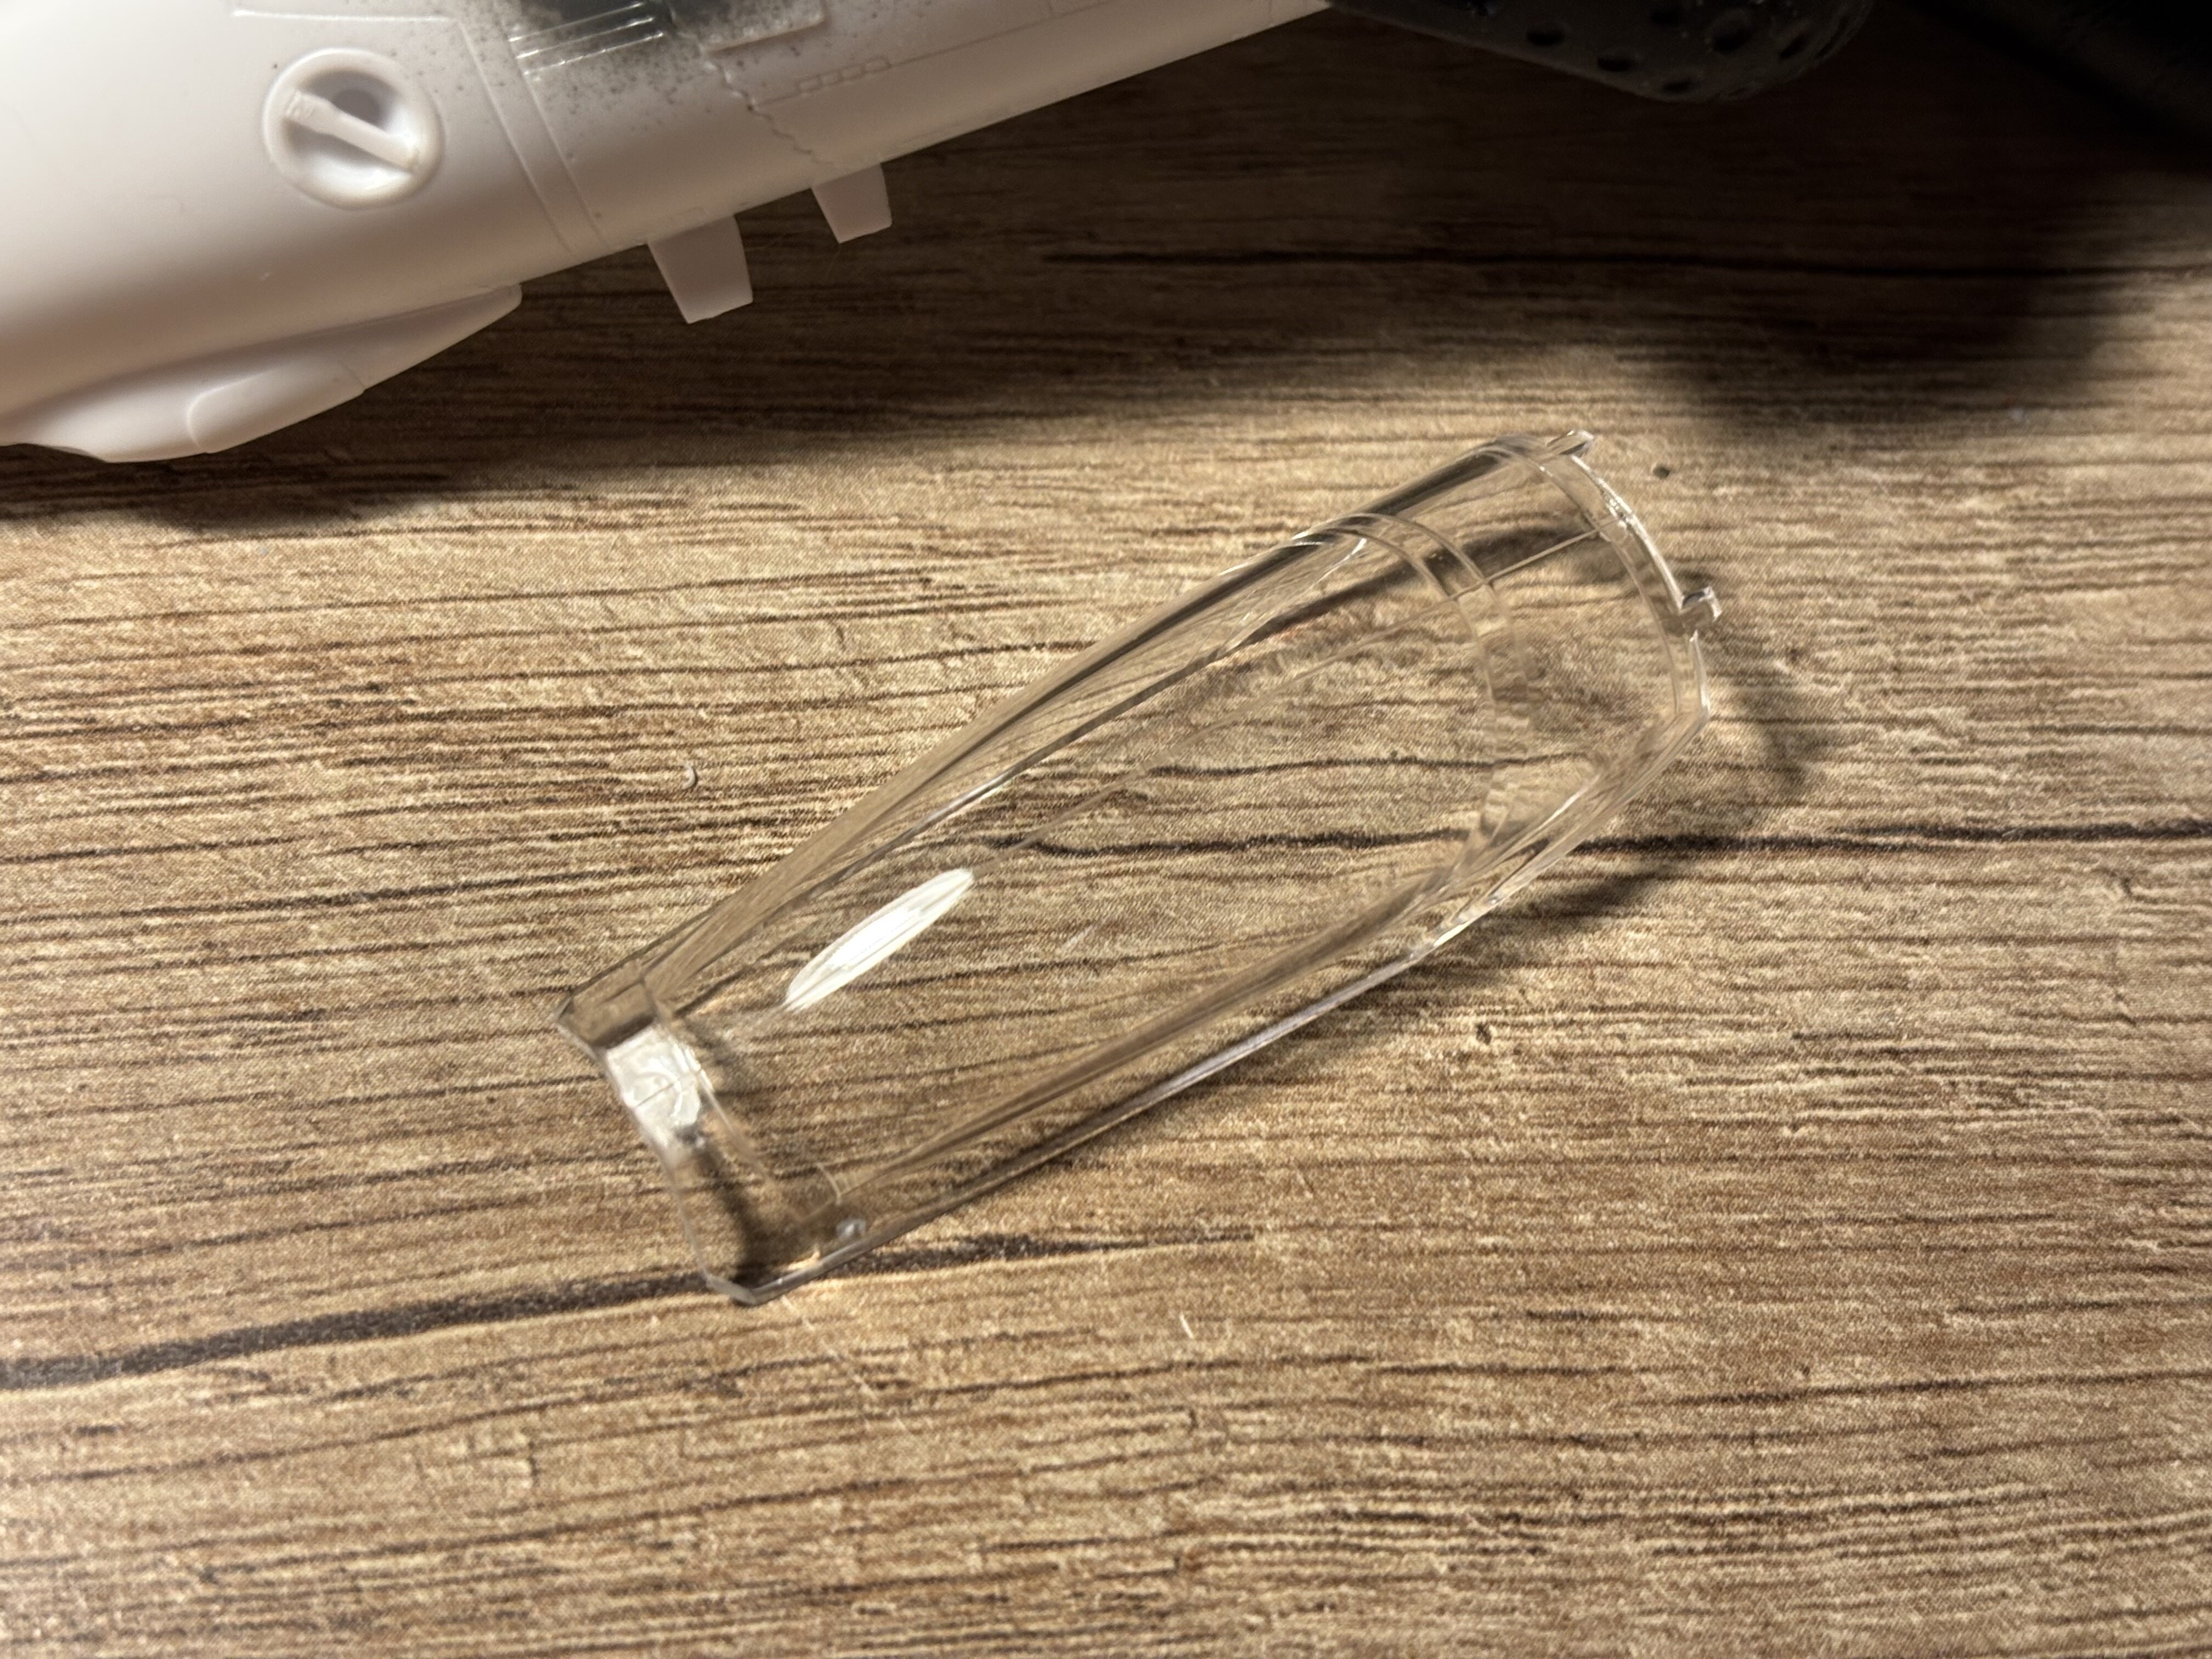
I did something not so awesome recently. My kid likes choppers, so I build up a Hughes 500C without paint etc. (because he doesn't care for paint).
Horrible Revell kit. The windows were too small and didn’t fit into the frame (check the last and second last picture, you can see the gap there). Not to speak about the terrible fit. Had to clamp down everything…