Pat S
-
Posts
1025 -
Joined
-
Last visited
Content Type
Profiles
Forums
Events
Gallery
Everything posted by Pat S
-
The remaster looks awesome, I bet this gets released on Blu-Ray sometime in the not to distant future.
-
FYI: If it helps anyone... Imai and Toynami comparison pics... http://www.mrtwo.net/mr2modproject/toyz/mo...arison/pics.htm
-
Yeah, I'm hoping they have different necks for the helmet and the head, if not, something should be able to be done, we'll see.
-
I ordered both megahouse' from HLJ. First thing I'm going to look into is shortening the necks LOL
-
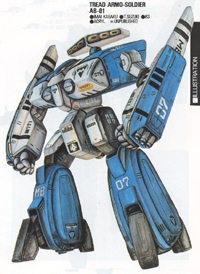
LOL the legioss gun barrel is larger than the intakes! I think the legioss is too large compared to the tlead, that's why there are so many fitment issues when they're joined. I'm still buying one, I doubt there will be any other tleads released from other companies in the future. It's not tooooo bad looking, just squint your eyes. I think it will look imposing in a display. my .02 BTW, I think the MPC Alpha's are very well done, though luckily all of mine are still intact. http://www.mrtwo.net/mr2modproject/toyz/mo...ascott/pics.htm http://www.mrtwo.net/mr2modproject/toyz/mo...alphas/pics.htm
-
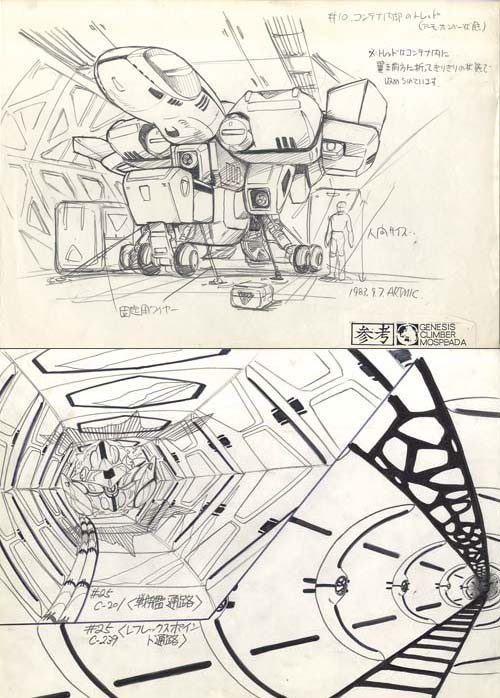
Don't know if these count...
-
pic
-
Anyone willing and able to help me pick up a red and/or green set when they come out?
-
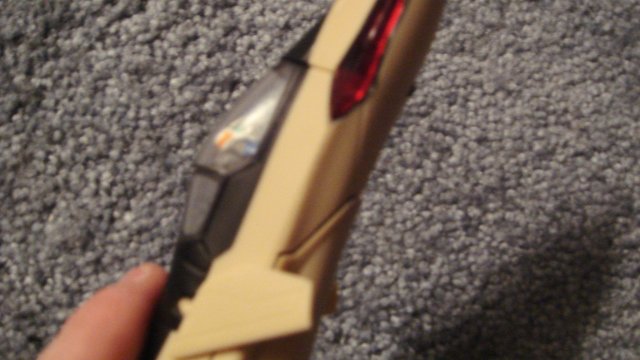
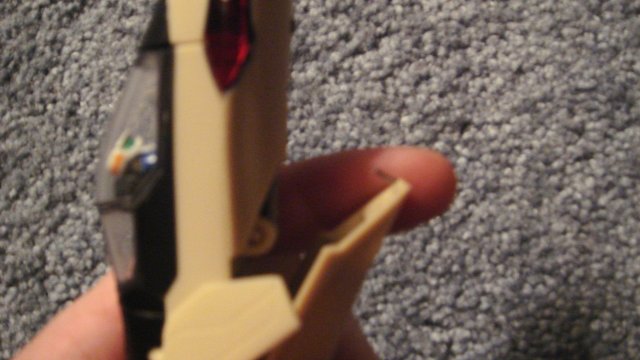
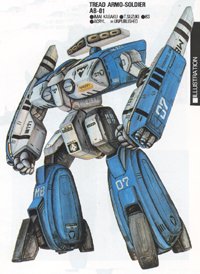
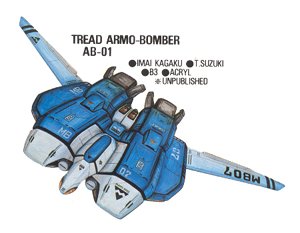
Very excited to pick one of these up. Thanks for the pics. They look pretty good, I agree about the intakes being too small, and obviously the tail fins are too big, but hey,... MOSPEADA TREAD COMING OUT ON THE MARKET FINALLY!
-
Macross 25th Anniversary TV Special thread *READ THE 1ST POST*
Pat S replied to azrael's topic in Movies and TV Series
Sunlight to grow things, and at night, a real starlit sky? -
Got mine today from crosszgundam on eBay (good seller, thanks for the tip, took about 14 days to get to Seattle). I'm amazed by fighter mode alone.
-
Bump for interest. I think this would be reaaally cool to see. I'm in for one.
-
Display Your Collections...
Pat S replied to bryan_f_davis@yahoo.com's topic in Hall Of The Super Topics
That is amazing. I'm jealous -
Display Your Collections...
Pat S replied to bryan_f_davis@yahoo.com's topic in Hall Of The Super Topics
Can you post the link to the item on sideshow? I can't seem to find it. Thanks. -
FYI: I have a completed SHE YF-19 for sale for $300, and an unbuilt SHE YF-21 for $250. References available, should still be on the good sellers list here too.
-
Seconding this, I loved this manga. My ex used to get Mixx zine, and this was one of the titles in each issue. I read the first 6 or so, thought it was a cool concept. I've never seen it online.
-
I'm in for any Inbit models in 1/48.
-
New Robotech Shadow Chronicles Vid
Pat S replied to terry the lone wolf's topic in Anime or Science Fiction
Phyrox: I'll buy it, got paypal? -
Yamato 1/60 scale YF-19 Fix/Modification Thread
Pat S replied to Wicked Ace's topic in The Workshop!
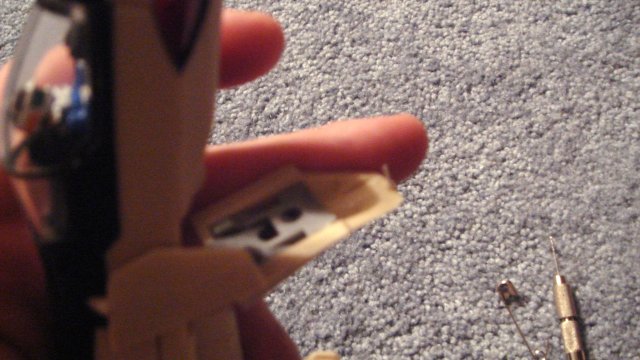
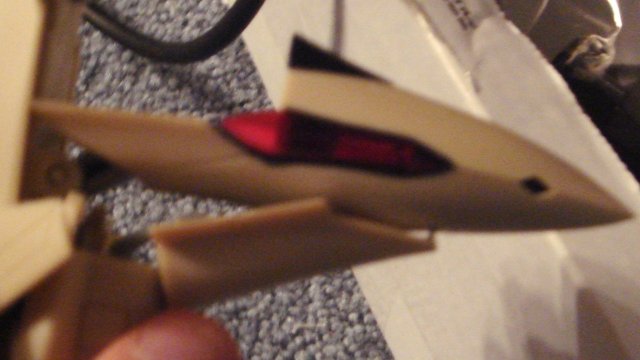
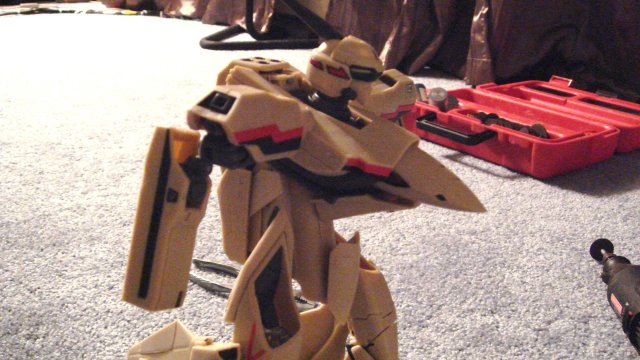
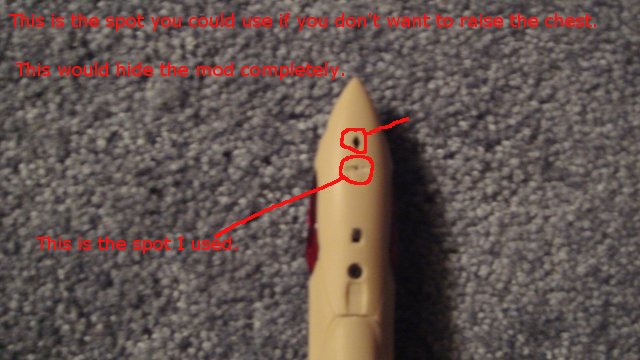
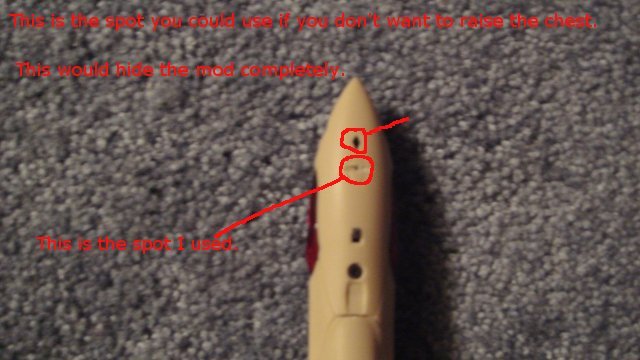
Here's one I just did. I tried it a few ways and screwed up the underside of the nose of the plane, please ignore that cut and focus on what I ended up with. I wanted to raise the nose/chest up higher in battroid so it doesn't slouch down so much. What I ended up with was drilling a small hole in the tip of the underside lip between the nose and the crotch piece. I put a small piece of safety pin in there and drilled another hole on the underside of the nose further back than the notch that this part normally connects too. This did 2 things. First it removed all of the floppiness in the nose part of the chest when in battroid (because it secures the two pieces together rather than relying on gravity. Second it raise the chest up higher so it's more level, and not pointing down so much. Also, the pin doesn't need to be removed. It hides perfectly in fighter mode. A few prefaces before you look at the pics. The gap you see in battroid can be shortened by cutting down the safety pin, which I intend to do after this post. I already mentioned the cut I did above and messed up the underside of the nose. If you just want to secure the nose to the chest, and don't want to raise it up, you can use the normal spot that this piece connects to. This will make this mod 100% invisible. Finally, this does not get rid of all the floppiness in the chest, because half of that problem is caused by the chest not locking to the nose in any way. I'll look into a fix for that next. [attachmentid=40138] [attachmentid=40131] [attachmentid=40132] [attachmentid=40133] [attachmentid=40134] [attachmentid=40135] [attachmentid=40136] [attachmentid=40137]


-
Yamato 1/60 scale YF-19 Fix/Modification Thread
Pat S replied to Wicked Ace's topic in The Workshop!
Thank you! -
Yamato 1/60 scale YF-19 Fix/Modification Thread
Pat S replied to Wicked Ace's topic in The Workshop!
I guess I'm misunderstanding how to make the neck cover out of a spray can cap. When I cut one up, the arc of the plastic on the outside is not even close to what it needs to be. There is an inner piece to the cap that has a smaller arc, and that one was closer, but still no match. I'm probably missing something simple, like I'm using the wrong type of cap? -
Yamato 1/60 scale YF-19 Fix/Modification Thread
Pat S replied to Wicked Ace's topic in The Workshop!
I used the x-acto for the entire thing except shaving down the legs and inside the shoulders. I used a dremel and a sanding stone attatchment for that. Like I said above, I didn't cut the thick section close to the wing root, juse the two flaps in the middle, so I left one on each ends of the wing still attatched. -
Yamato 1/60 scale YF-19 Fix/Modification Thread
Pat S replied to Wicked Ace's topic in The Workshop!
FYI: You don't need any spare plastic. Just use an x-acto instead of dremel. Worked find on mine, it's actually too tight, I need to do more sanding. And the flaps won't fall down if the needles on the ends are tight. I used safety pins and cut them with a dremel to connect the flaps to the wings. Take your time though, a little mistake will show up. Also, I wouldn't reccomend going as far down the wing as the others I've seen. Juse use the 2 flap sections in the middle -
Yamato 1/60 scale YF-19 Fix/Modification Thread
Pat S replied to Wicked Ace's topic in The Workshop!
Another way to do the wings would be to cut them into 2 pieces, and reattatch with pegs. When you want to put them into high speed mode, seperate the pieces, and then sweep the wings back. I'll think about this some more. So far I've made flaps for my wings, and done the shoulder mods. I had to remove a little bit of the leg, as well as dremel inside the shoulder to get them to sit flush. One other thought I had was to add some nuts/washers/bolts to attatch the backpack piece permanently. I'm tired of things falling apart all the time :| -
I'm 30 min South of Seattle, I'd be down for something in the Puget Sound if it's on a weekend. My place is available too, got a 10 foot screen and HD projector, we could watch shows, drink beers, have a model/toy show and tell, that sort of thing. Or whatever you guys want to do, I'm down.