-
Posts
1143 -
Joined
-
Last visited
Content Type
Profiles
Forums
Events
Gallery
Everything posted by 007-vf1
-
That looks pretty neat Sebastian...what was supposed to be on the shoulders? I see some peg attachments on them... One thing I would never understand is why would a robot with the most advanced technology need an extra eye piece? is it somewhat blind? Same thing goes for "mouth" pieces...would they drown if they are taken off??
-
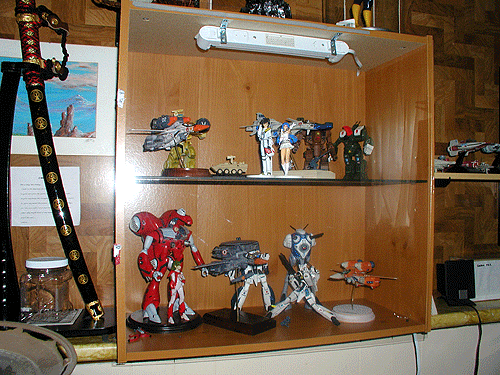
I use those pre-made bookcases you can find at K-mart (the type you put together), about $25-$30 Then I buy some transparent acrylic, plexy glass or crystalittle sheets at Home Depot or Lowe's and cut them to size then drill holes and put hinges; then seal the edges with a strip of foam insulation to keep the dust out and finally add lighting (all these items bought at home depot in one shot) about $25 You can go a bit further by adding a glass piece as a separator for the bookcase (this is the most expensive part $25). The light will go through to the lower lever and light the entire display. The total cost after building one, about $80 each I have 3 of these built around my room and It adds to the modeling building process; besides there are easy to dissasemble and reposition in another place if necessary without using a lot of space. here's a pic
-
Thank you guys. This is the type of stuff that makes you want to keep on building. Sam; I was thinking that the plaque would make a beautiful model stance.... (just a bit of sanding) I have almost run out of space on my room.. Grayson I wish it was as simple as competing just agaist you both but I see a lot of new guys that have excellent skills and of course some old folks that we seldom heard of...like Mslz22, Myersjessee, Gunner X, Less than super Ostrich, Macross X, and of course Chris B. just to name a few... ...But you are right, they might not even compete...
-
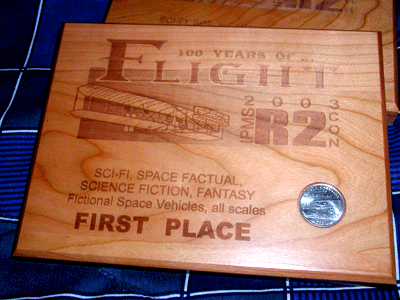
Hi guys, just got here from the IPMS east coast 2nd region modeling contest and to my surprice I won 3 different places. I am no less than proud of this accomplishment not because I won but because I did compete agains professional modelers that have been in the bussiness for over 10 years. Seems that I was the youngest adult modeler present and I have to rival about 10 other kits on one of the 2 categories I was in. Since I didn't have any other kits finished I used my old 1/72 hasegawas and the club-M Queadlunnn which won 3rd place on the power suit category but there were only 5 models here. The Ostrich made the first place on fictional vehicles category. I have finally earned a bit of respect.... (yeah right, like I am going to believe that) Without the help of some of you guys it wouldn't have been possible. Let me show you the nice plaque I received; beautifuly engraved in wood... (edited for pic)
-
Just a little common sense would help: *Always start with the lightest color on the mix as a base first; then add the darker color little at a time. *Keep it thinned properly acrylics and enamels will dry a bit as you go along the mixing...but don't over do it. *Think about the amount you are going to end up needing. If you start with a lot of base paint by the time you mix all of the colors to get the one you want, you might end up with twice as much ( some time more than need it). If you end up with extra paint make sure that you have a jar to save the rest just in case. * Make sure you have enough paint mixed for the task that is going to be used (this kind of contradict the prior statement but is better to be safe than sorry. After several mixed colors and brain storming ending up short of paint is always a drag). *The color you mix is not necesarily the one that will show once it dryes in the model; some times making it a bit darker or lighter has a better result. Specially if you are shading on panel lines. I am sure some stuff is skipping me right now. I just woke up and I have to go to work. anyone wants to fill in???
-

What is the most memorable scene for you?
007-vf1 replied to PC Valkyrie's topic in Movies and TV Series
-WORD!! -Hikaru's VF-1D transformation on episode 1. -The attack and destruction of earth by baldoza's fleet. -
Gerwalker- ; Thanks for the tip. I kind of figure that out along some of the pics I took but since I didn't have a sunny day I didn't took more. Then my little brother took the camera with him to an indianpolis car race over the weekend. I'll try the heating method as you suggested. Regarding your question about the 1/144 VF-11c model; I used some 1/72 hasegawa decals and 1/170 imaii old decals (great for the 1/144's), as I have use them on the VF-5000 as well. Thanks MJessee and memphis...
-

Armored Valkyrie ARII to Hasegawa modification
007-vf1 replied to Less than Super Ostrich's topic in Model kits
Yes LTSO, It is possible since I am doing it for the second time. But the key is to think it through as you go. I have modified mine a lot more that the last attempt. Is not quite necessary to thin the leg armor on the front but definitively shorten the width some (from the sides). Like Mslz22 said the legs are the hardest part to modify and everything except the chest plate has to be thinned, puttied and sanded a lot otherwise you'll have a chunky, stubby battroid. You can go to the 'magazines' section and follow the Armor of the hobby japan 10/2002 kitbash which used the Imaii and a base model. -
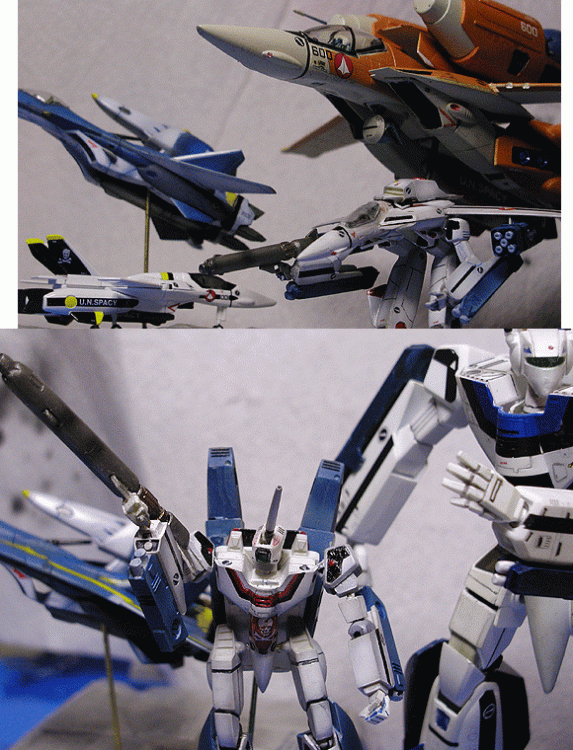
Thnaks for the compliments guys VT102- I can tell by yours modeling skills that indeed they are as good as mine or better. I just took my models a step further by making it more complex. I used the very same techniques you would on any bigger scale. nothing new that hasn't been already cover on other treads. Whatever people say, an airbrush is a must supply to bring the best of what a kit can offer. W Cheng- thanks for your kind words, The canopy is not the original, somehow I lost it somewhere along all of the dacals( arrgghhh!! ). I used the hasegawa and some of the other macross option decals and the imai 1/144 model canopy I found somewhere to make up. The gerwalk will remain like that until/unless I don't find them later. Twinkie P- that's the resin Yellow Submarine in 1/144 scale Now some scale pics for comparison... first pic, 1/72 hasegawa ostrich and a 1/144 doyusha second pic 1/72 hasegawa battroid
-
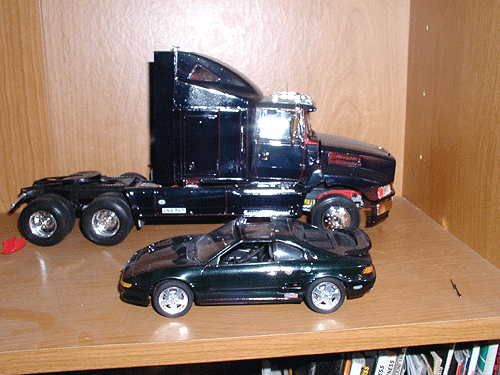
The first scale model I ever did on my own was a 1/72 North American AT-6 / SNJ Texan which I proudly painted by hand while i lived in Mexico city. then I bought a Savoia Marchetty a B-25 Mitchel and a Catalina. That was over 15 years ago then the model trend died once i moved to the US until I found e-bay and bought a 1/25 MR2 (since I owned that car) and followed by the Aeromax 18 wheeler; both were painted by testor's spray can (first time I ever used them) about the same time I found a Bandai 1/72 VF-1D transformable...the rest is history... I also collect some Gundam models Start dust memories( 0083 )and Sentinel, I also have the Arcadia and the yamato models and some Start Wars fine molds models...
-
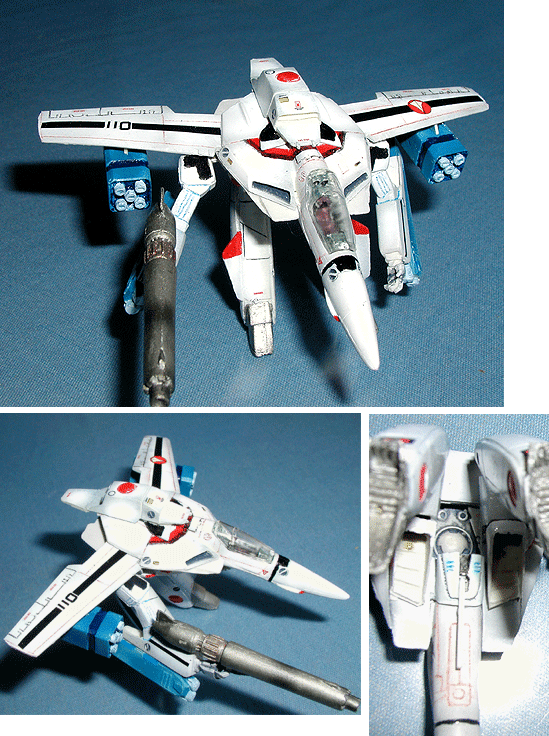
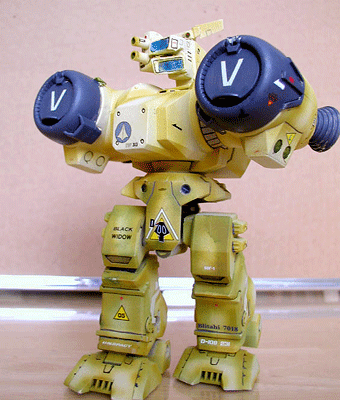
Last one for now and one of my favorites Like all the other models these are panel shaded, oil washed and micron pen detailed...pretty much like Seichi did with his Doyushas ( that was my inspiration) but for some reason the white color reflects too much light and blurs the detail almost completely. Since these kits are always stiff and dull I decided to drill holes on the joints and make them posseable. these are the smalles possible joints I have found on the net that I could accomodate on the elbos.... They are 1/144 Yellow submarine resin kits; about 50% bigger than the Nichimos and about 2/3 smaller than the Hasegawas DYRL VF-1A battroid..
-
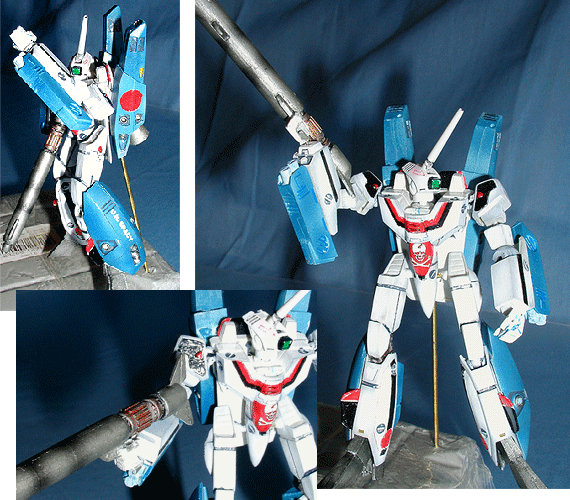
second my favorite one and the hardest one to built...putting those UUM-7 MMP was rally a pain is the butt. I didn't drill them in so I have to hand hold to the resin peg until the glue would dry on the wing. I am surprised of seeing the under mechanism detailed on the model; I brough it up with a simple oil wash DYRL VF-1A hikaru
-
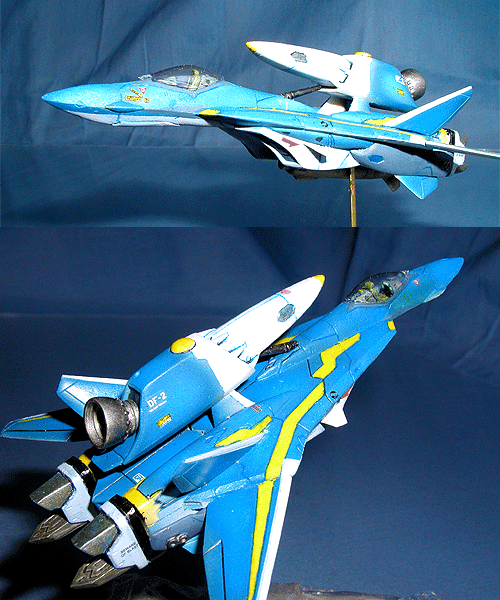
Here what I been working over the past 2 weeks. Small as they may seem they were a heck of a challenge just like a hasegawa. I realized after I have taken these pics that some decals are missing here and there. -first the mighty VF-5000 G
-
The best part about those ugly vermings is that you can customize them easily and make them look like this
-
The picture has already been shown in a previuos tread...but this is the first time I see it at HLJ...
-
Damn!!...you have so much room space...and all looks neat, and clean...awesome!!!... Oh BTW, nice collection...
-
Ha,ha...I second that... Maybe JValk knows of someone who already has it...?? (he knows something we don't know.. ) JValk why are you so Psycked about the color of the heat shield MM? remember than some pilots customize their fighter colors (like Max, Hikaru,etc), there were all skull Sq. but personalized. You could always modify the Minmay guard and still belong to the same squeadron...we won't hate you because of it. *I saw some "original" high resolution pics from that Hasegawa model and yes, there's a lot of pink...
-
My biggest question is: What's the approximated scale??
-

*Sigh* Some days you wonder why you even bother
007-vf1 replied to David Hingtgen's topic in The Workshop!
When I airbrush heavy like that with any masking, I only let it dry to the touch (and not even that long If I can handle the model in a part that I won't mess up) and then take the masking off right away. If there's a mistake it can be fixed rather in the 'spot' before is too late. I have painted the camo on my 1/144 VF-11 fighter and had to wait for the paint to dry every time of the 4 layers I used. Then I decide to get an "striking" detail by adding a different color on the nose cone. Since I was tired and wanted to be pretty much done I get a testor spray can and mask most of the nose cone. I go outside and test the hand pattern by spraying out in the air. Then I get close to the model and the wind decides to change course at that moment; you saw what I ended up with. Just like Forrest Gump said it once..."Sh*t happens." So, I feel your pain brother..... -
If you ever tried to build any other type of models in the past this will be relatively easy to do as long as you just wanna put it together. It's a 1/170 scale, smaller than a palm size; the only joints are the hips and shoulders. Now, if you want to build this critter and make it look like a contest winner then you'll need some skills. I would suggest you to look up the 'How to build models' treads and follow along the posts of painting and building techniques...then try them in your models. You can always ask stuff like; How do you get around to erase this or that seam line or how to apply paint, do I need to prime it? sort of questions...
-
I been trying to get some of those myself. I was thinking on a diorama for the 1/200 or 1/44's that are so much better looking. With a little bit of fixing this factory might look awesome. On some hobby shops they sell styrene already pre cut on the shape of beams and racks that will make the replication a breeze.
-
I am sure mixing any paint is a strong choice. What type of paints are you going to use? What does 'character blue' look like? I think if you can't find a color you are better off trying to find out for yourself. Is a good way to learn and get what you really need. For example there are blues that tend to have a warm feeling to it; they have a reddish pigmentation added like the Pthalo or royal blue. There are other blues like the Ultramarine that have greens and yellows on it and make them cold feeling; If you have 2 opposites variations you can pretty much mix any gradient of blue imaginable. On the tamiya side you should have a royal, regular, medium,and sky blue available.
-
Dusting is going to be a pain in the arse!!!
-
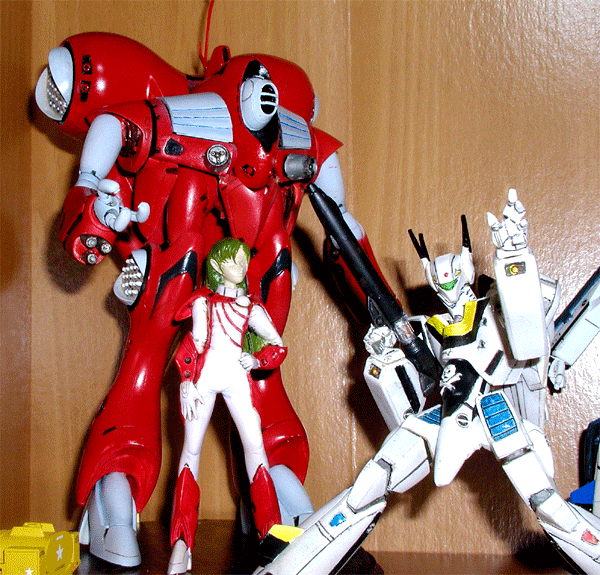
Finally we are pretty much done. everything outside in red gets a clear coat. The chest canons are painted with metallic gray and added some detail with tamiya smoke; finish the antenna by pluging a small wire pin for transportation. The Quadlunn 'optical' head is made of 2 parts, the innner head gear and the outer dual shell/rack cover; they were airbrushed with the same blueish color than the shoulder armor and missile covers, the inner gear was then hand painted on black and the 'rack' was glued over and voila you have a red DYRL Miriya Queadlunn Rau
-
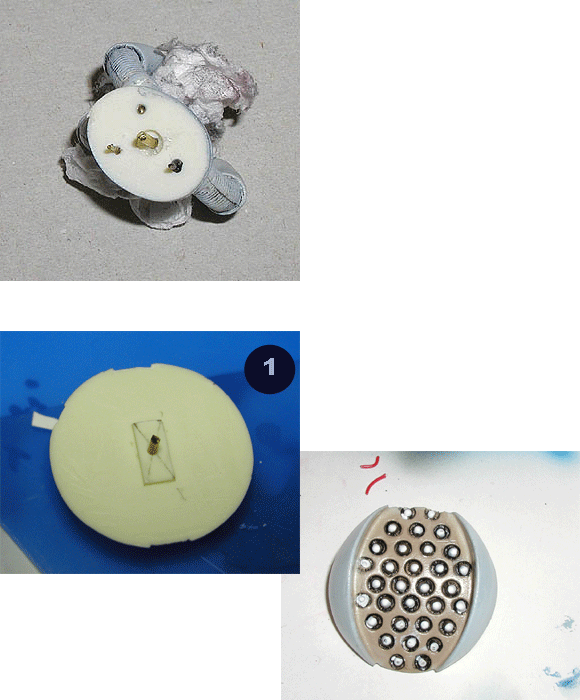
The finishing touch... The hands and fingers where painted even with a mix of medium grey and light blue, oil washed and each finger individualy pinned then glued to the "palms" with thin wire leaving extra lengh to add posseability to them, then the hand was also pinned so it can rotate on the wrist (upper pic). I wanted to have a choice whether I could pose the queadluun with the missile cluster hatches either shut or open; so we go for more pinning. the challenge here was to get the pin and holes in the exact center to keep even space on the borders between the round hatches and the leg attachment (keep in mind they have different sizes)... What I did is to draw a "X" from corner to corner of the rectangular peg to get the center (pic 1), on all the pieces and the depression on the booster and calf of the Quead's body. Then I cut a piece of paper of the same area by either triming it or folding it to tight fit; find the center by doing a X and then use this as a mask to drill the holes right through the center of the X's Last; the open clusters were painted with clear grey and white and a subtle pinkinsh mixture. After this the missile holder plate was painted brown, then clear coated, then oil wash and then the missiles painted white, clear coated gain. Then the outside edge on the hatch was shaded with a blueish darker tone. The closed missile hatches where done the same way but on a redish hue; then primed and hand painted the black line along the hatch.

