

007-vf1
-
Posts
1146 -
Joined
-
Last visited
Content Type
Profiles
Forums
Events
Gallery
Posts posted by 007-vf1
-
-
your project is really starting to kick @ss......
keep it up...
-
Capt,
Your going to have to make another run of the Zentradi soldiers in 1/72 scale, I think it would be good to add to the diorama of regults
I second that...
-
It looks better than a well made toy....
-
Man, this is so old news..it's been out for a few months now...there's also a fine molds x-wing build up somewhere
-
I think is a neat idea...and what impresses me most is that I didn't know you could write/fill a page that long..
My only nitpick besides the paint is that the missiles protrusion on the upper chest would drastically limit the option of the optical devices to look to the sides. Only a tunneled straight view option; That wouldn't be good for combat...
-
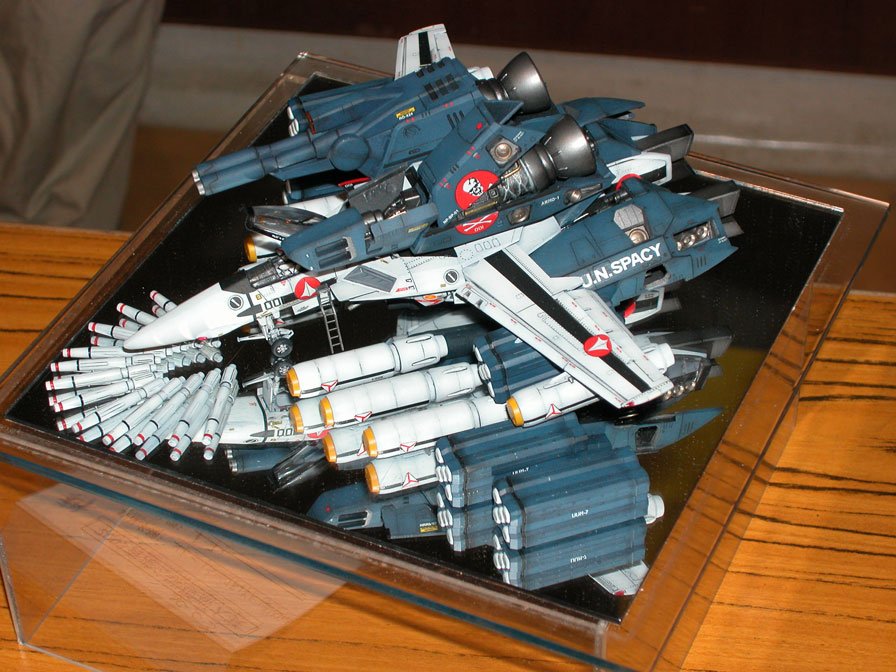
this is the only surviving picture of about a year after they re-released..it's been a long time since then..they have been either sold out or destroyed by now...I do have a few still intact in their boxes tho..
the "big" 1/200 MKII is included
-
We need a bigger motivator..that picture doesn't say much....
What else are you cooking...?
-
Yeah, that commission job Mike is doing happens to be one of my all favorite spaceships. I am glad he's the one getting it done..
He might have to make a second run if the deal works well which means he'll delay the monster a bit longer. But He'll get back to it eventually since he's a big Macross fan... so, patience people..We all have to pay the mortgage...
-
been trawling the forums all afternoon, but can't seem to find any info on this.
were there any 1/60 VF-1S Strike kits that featured at least this level of detail on the fastpacks?
"At least this level of detail..." you won't find it in any toy for sure..but only in a Model; and even most of them have to be modified further to get something just close to that level of detail on the picture...you'd have to take a 1/60 apart and do some work on it..
There's a 1/72 Hasegawa model 'moded' just like the 1/48 Club-M..and this is how far he took it. One of its kind..
-
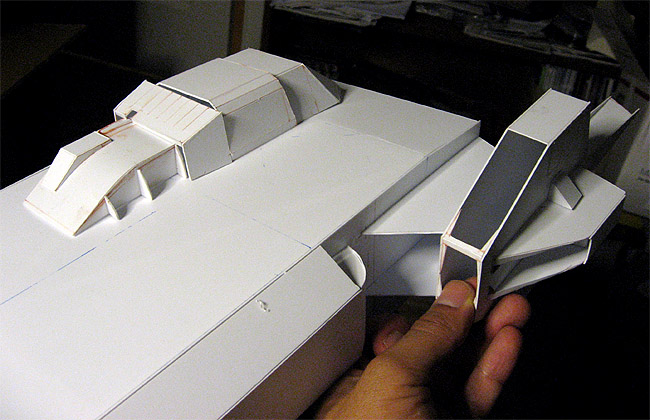
Hello everyone... Almost a month and a half since started and have a tiny update. I have the main side thrusters done and mildly detailed. The basic top command tower building its done and will need tweaking, putty filling, sanding, scribing and some more detailing.
My biggest problem now is that I don't know what to use for those main exhaust thrusters they are big and a handful . I have some Kotobukiya nozzle sets but they are too small. Any advise on what to use for replacement...? they have to be about 5/8 X 6/8 inch or 1.75 x 2 cm.
I was thinking on learning how to cast pieces...great !! now more work I can't hardly spent time doing..
now some pics...

-
Man; that thing is gorgeous....
-
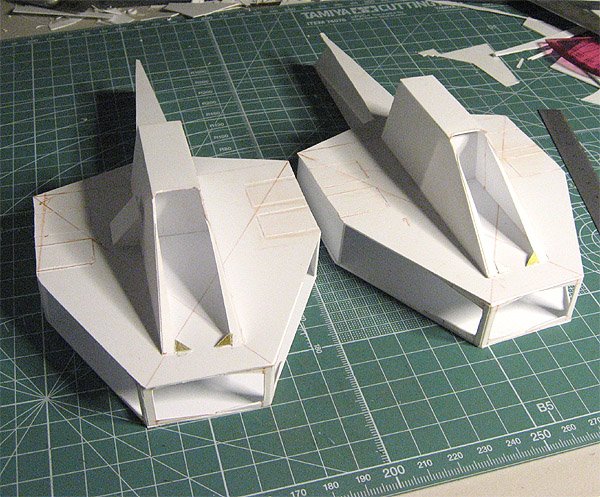
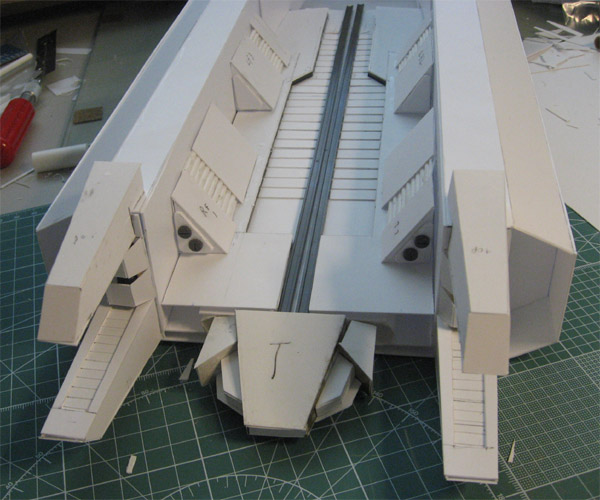
Well, well one little update...
The front forks got finally done. biggest mishap was to have to increase the thickness of the platform since it was too thin. to fit the frontal "command" nose.. luckily the styrene wasn't glued tight shut so it took just a bit of a struggle. Now I can imagine how handy must be to have the machinery J. Moscato uses to get things done quickly.


-
Whoa!! I just looked in this tread today and found out some exciting news...
So when is this Robojox movie you all are talking about coming out..??
-
Yeah a N-Ger DYRL version would be a Grail kit to me. I am just guessing that in 1/72 it would be big, heavy, and costly..
-
the Q-raus between the 2 movies have slight differences, specially in the head and antennas. But nothing a little of "make up" painting couldn't do at that scale..
I also do prefer the DYRL version better..but I would surely not like a hybrid of them and rather have either one or the other on its original version...Long time ago in a galaxy....I did a hybrid using the bandai/144 scale conveting it to a DYRL version ..it looked more like a gudam mecha than a Macross one.
Also in case you didn't know there are different camo-painting schemes on each of the versions...
-
Man those pics are sweet...nice sculpting...I don't have many updates right now. I am working on the 4 front forks so until i finish them I'll have nothing new to post..
So by all means Warpaint feel free to hijack this tread..
-
I agree with other people..take this one slow...there's a lot of "underground" star wars models that I'd like to get my hands on...they are costly and they are coming out fast..
-
That's looking so good!! As I stated I'm also working on this scale with the Pometheus so I'll be casting valks in 1/700. I'm on the sculpting now so we'll see how they turn out and I'll post some pic's.
But great work it looks awesome!!

Many of us would like to see some pics of it....
How far are you done and where did you get the 1/700 valks from??
-
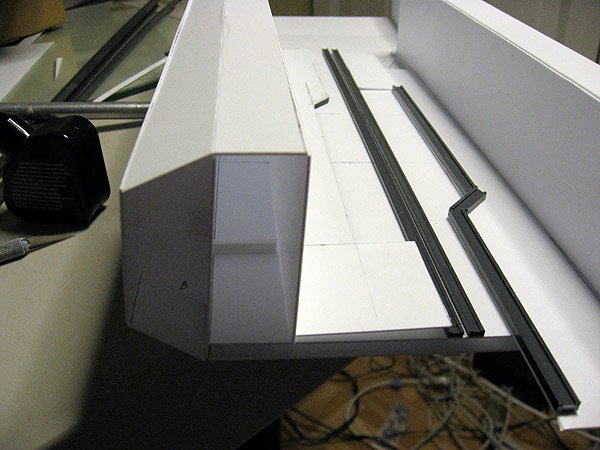
Update 8 -30
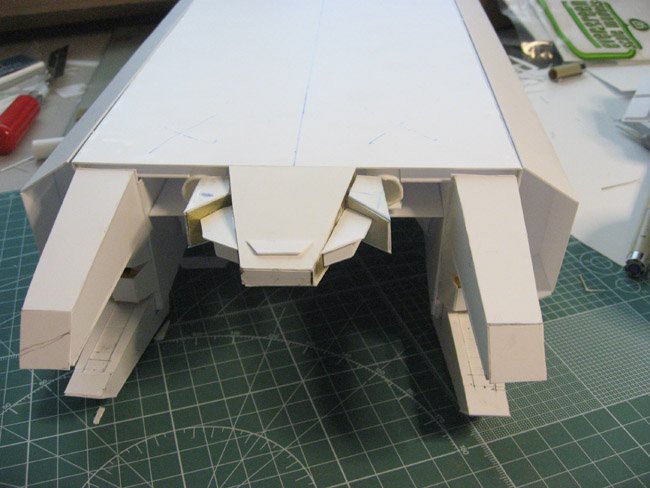
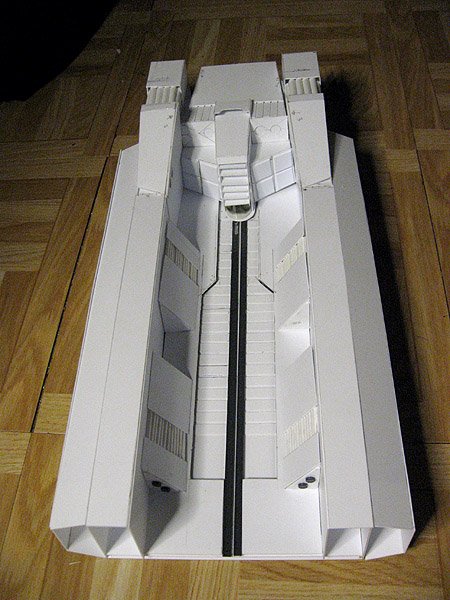
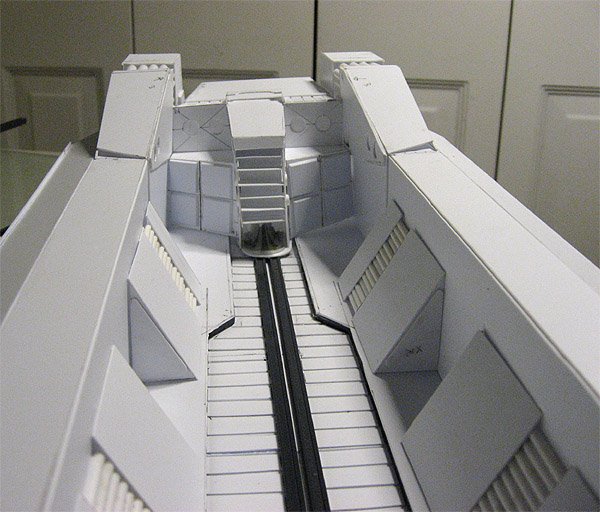
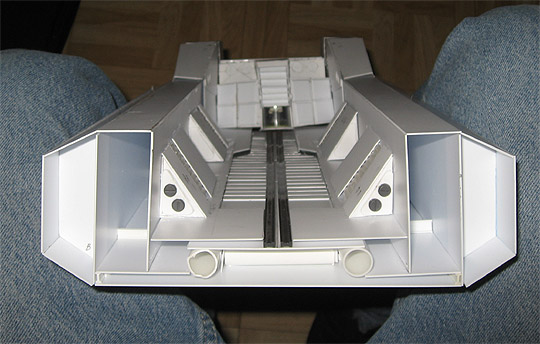
Finally...! I am slightly beyond the point I was before switching to styrene... After glued I realize I had to dismember the build in 2 parts to add more detail to the under structure. Good thing I weld the plastic lightly to see how it looks..
By the low detail pics available I had to create the end of the middle beam that connects to the long longitudinal rail and figure what exactly was. All i could come up with is a sort of viewing tower which hangs of the ceiling I added some clear styrene and sort of came up the way I wanted to and added some inner structure alike a command operation room..
If you see the detailed pic you can barely make it up except that it reflected the light of the room so might be easy to see what i was talking about...
Those tubular structures along the side walls were such a pain in the behind, I wish I had a better process to cut tubular styrene lengthwise...took forever to get it..
The pieces in the center back structure are loose hence they seem to be off alignment...
-
You know... I was thinking the same thing...is lacking something...and then I realize, panel lines...!!
Is probably the first one I have seen build up in the last 5 years..
Good job cooler
Buen trabajo...
-
well; small is just relative for example the amt millennium F. is the one with 40 to 80 parts model (not sure of this though)... same goes to the 1/200 Nichimos they are about 15-20 pieces a set..unlike the fine molds that's close to 900 so, no many parts to build in total...
Now, if all the models you have were like the new Gundam 1/60 and 1/100 with about 500 pieces each..that wouldn't be a little back log..it would be a land slide, a tsunami, a monsoon of models to build... that's not counting cleaning, putty and sanding time...
Nice collection by the way...

-
Dang, that styrene version looks tight already. What scale is it going to end up at so you can put little valks around it?
Dude...is on the title of this tread... 1/700..the imai's bug eye is 1/720, the other closest model ..but the yellow submarine Valhalla III is the ARMD scale; and already comes with its VFX game version valk fleet, perfect for the Armd..now I need someone to recast me a full squadron of them...
-
I am in...
I need a new job and to get a life...seriously...
{Dora cheer on} Go, john go......!! {Dora cheer off}
-
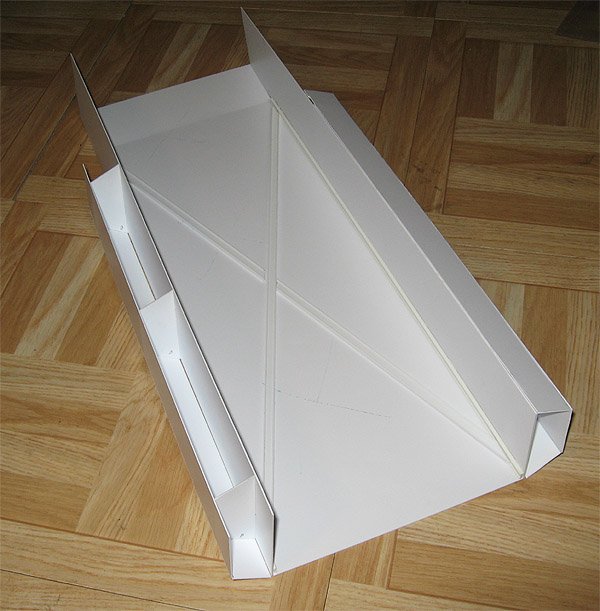
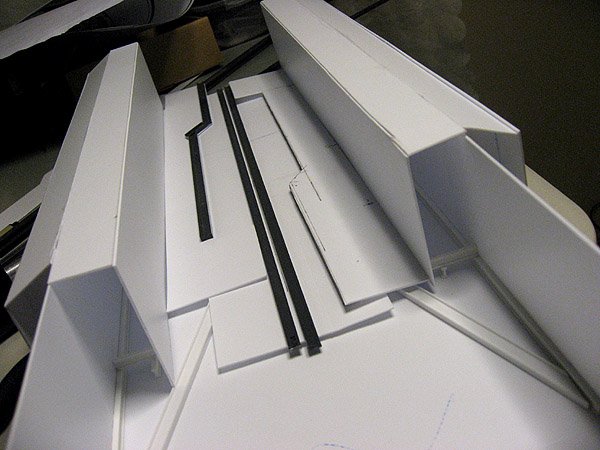
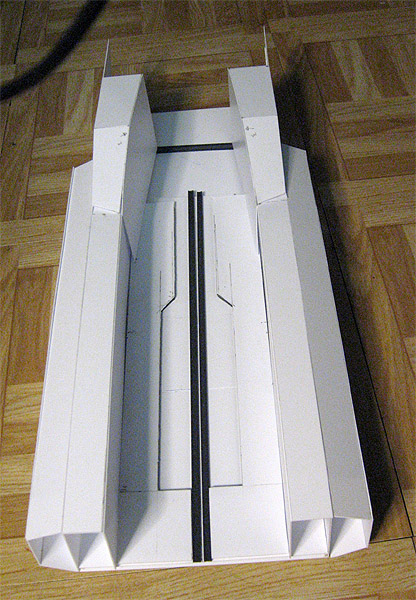
Well, I am sure any medium would work just fine if you put the effort on it. I just happen to know a bit more about Styrene and how far I can take it regarding strength and structure manipulation.. cardboard is pretty firm when thick otherwise the weight allows the model to bend and humidity sags it; It takes longer to dry after glued; is not a perfect cut unless is thin and when it is the strength you want it is not smooth enough... what i like about cardboard is that is simple and quick to work with..
Also I need several smooth round parts which would take forever to build in cardboard and rather use a plastic counterpart which wouldn't glue well to paper but it would to styrene.. Besides all this I really want to try modelers foam which i previously asked about regarding gluing it to other plastics which indeed works. If this all works out the way i want it my next project would be the Saratoga II or the Oberth on 1/700 scale (relatively simpler models except when it comes to rounds edges.. IMO)
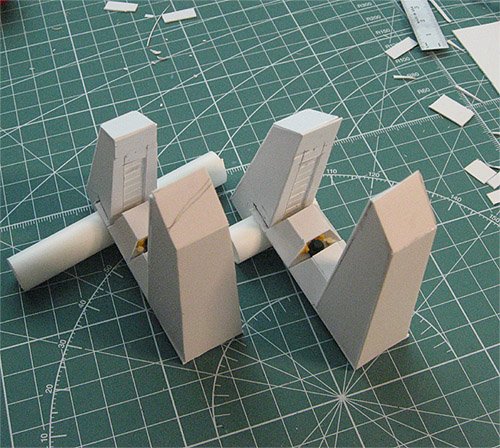
I worked the styrene model to almost as far as I was done with the cardboard one, but this time took me roughly 6 hours since I already had the scale sized down... what slowed me down more is that I had to make up for the thickness of the model by building layers with plastruct rails, as you can see in the pics, tedious...


Anime USA Washington DC.
in Conventions and Local Gatherings
Posted
It's next weekend...I just found out about this a few hours back thanks to my GF. It's strange that my dear all of the sudden became interested on taking me to this event which I won't take lightly. I used to go to the one in Baltimore which is relatively bigger but being in the nation's capital it might end up having a bigger turn out. Unfortunately I work 7 days a week now a days so I'll attend on Sunday morning...
http://www.animeusa.org/