mickyg
-
Posts
2632 -
Joined
-
Last visited
Content Type
Profiles
Forums
Events
Gallery
Everything posted by mickyg
-
What I'd love to see is a redesigned kit with legs that lock somehow in fighter mode! I know the VF-27 does, and the armored 25 models do, so why can't the revisit the standard and super pack versions and do something about the legs? /end rant...
-
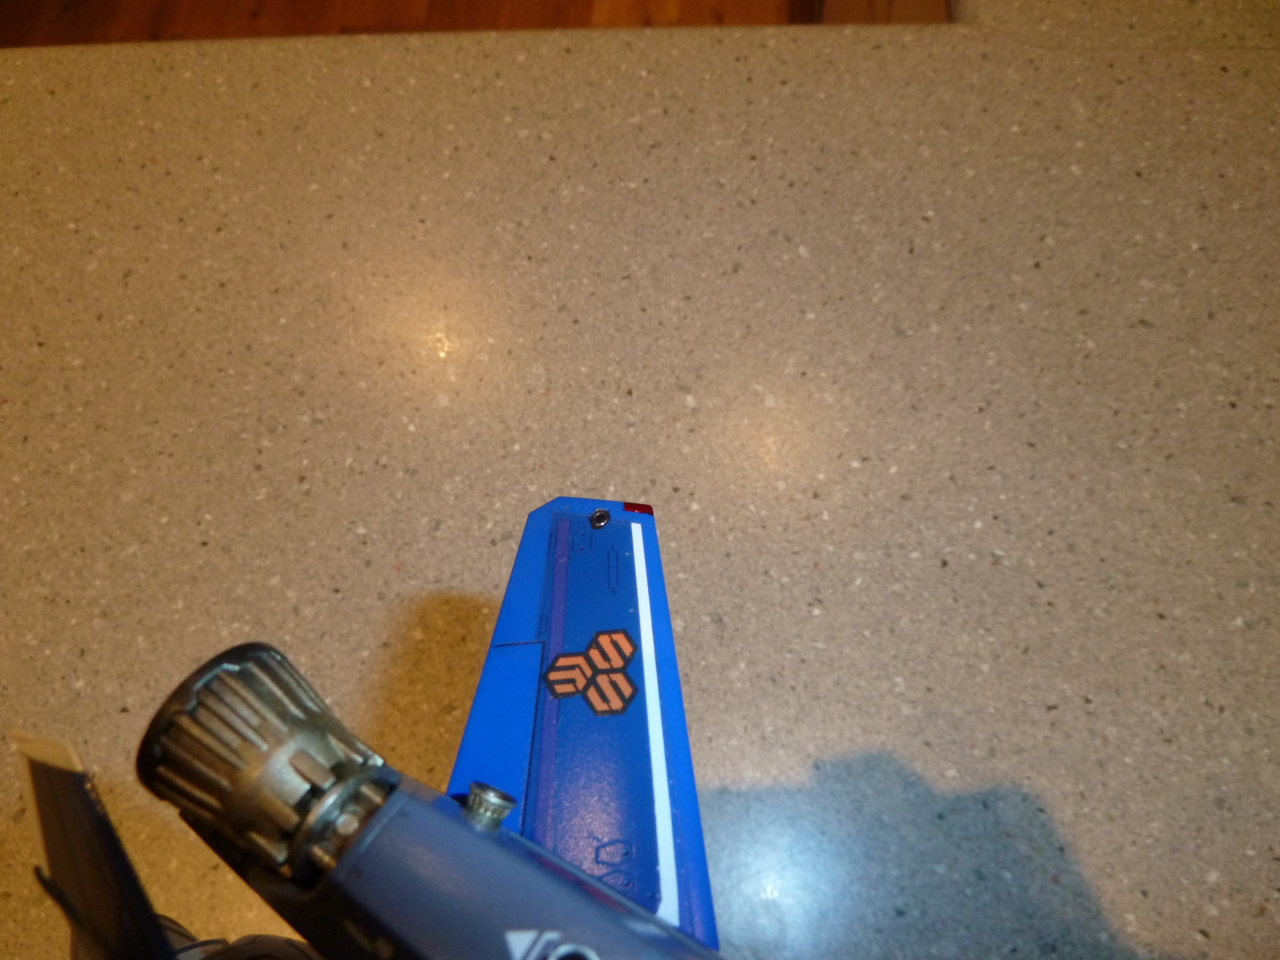
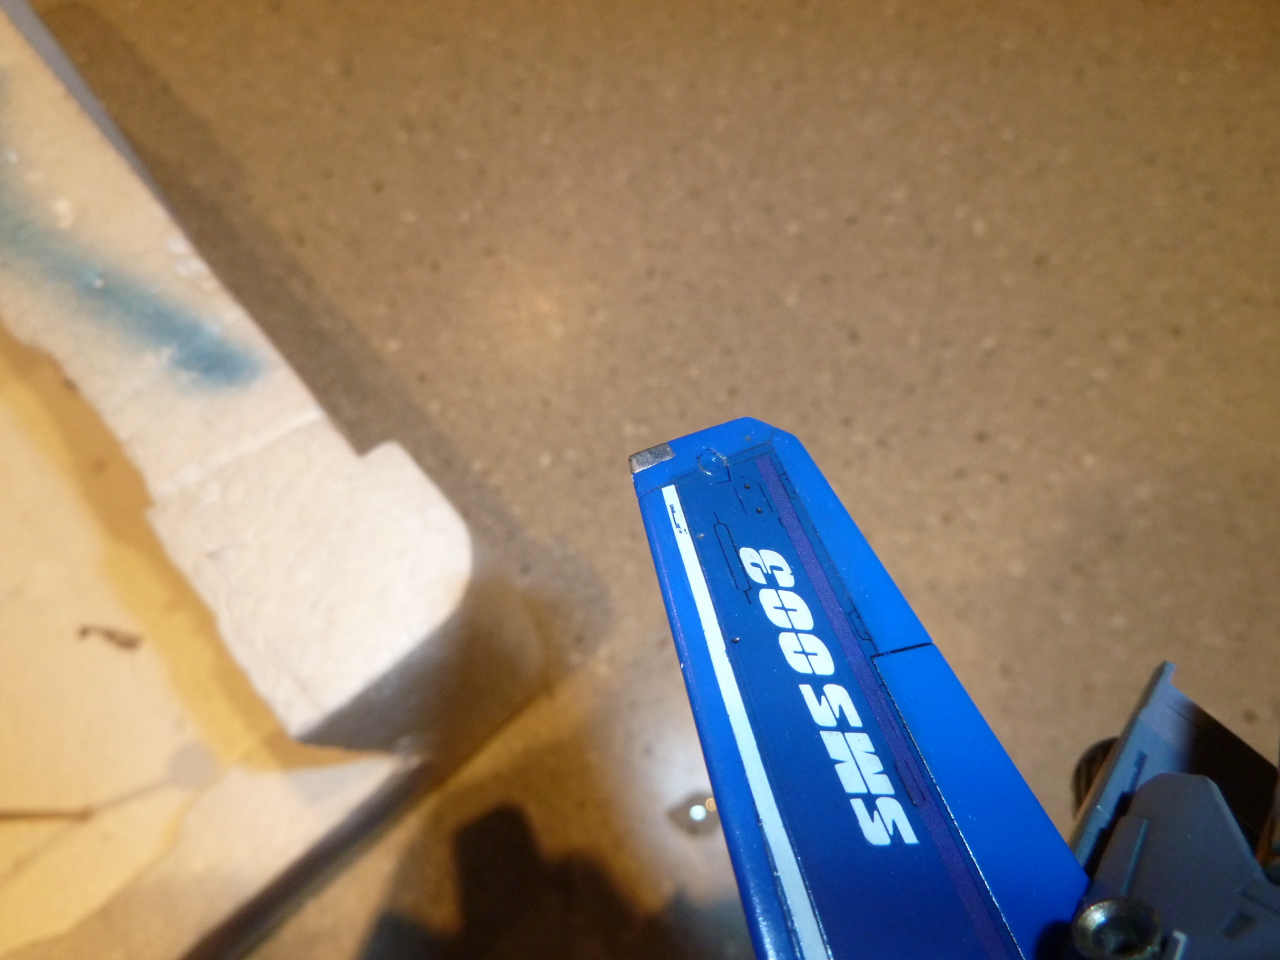
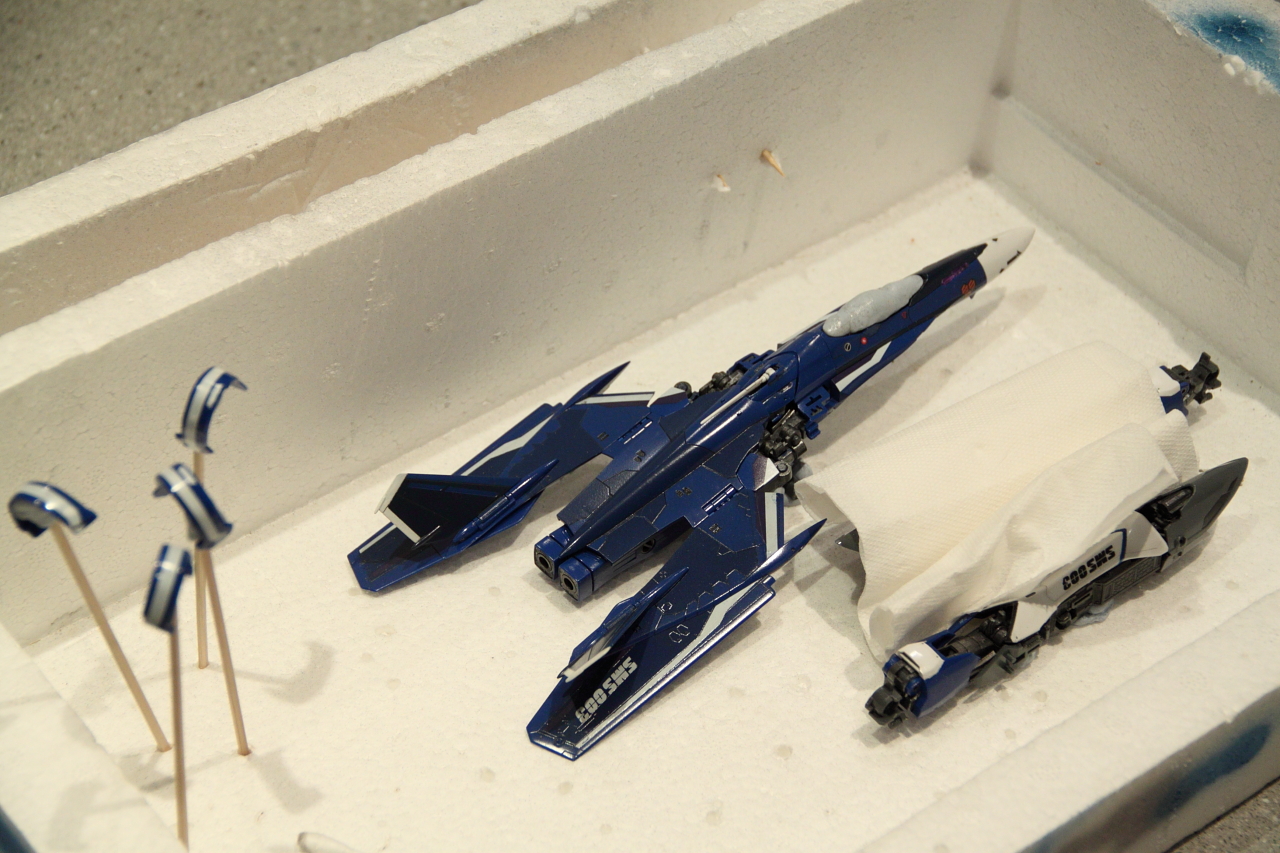
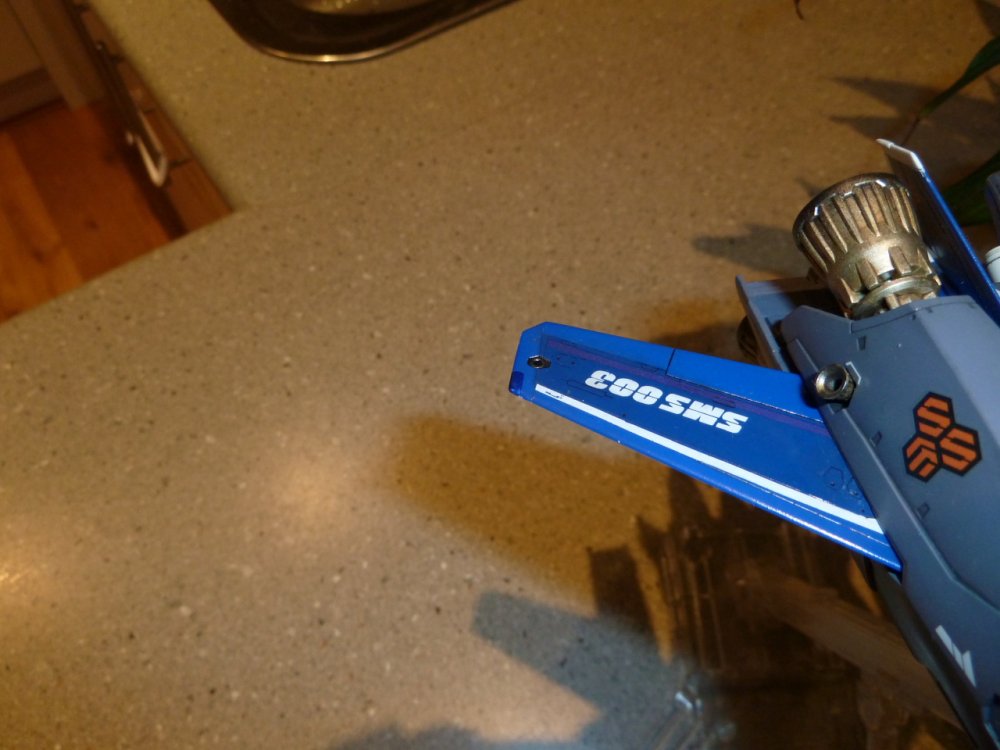
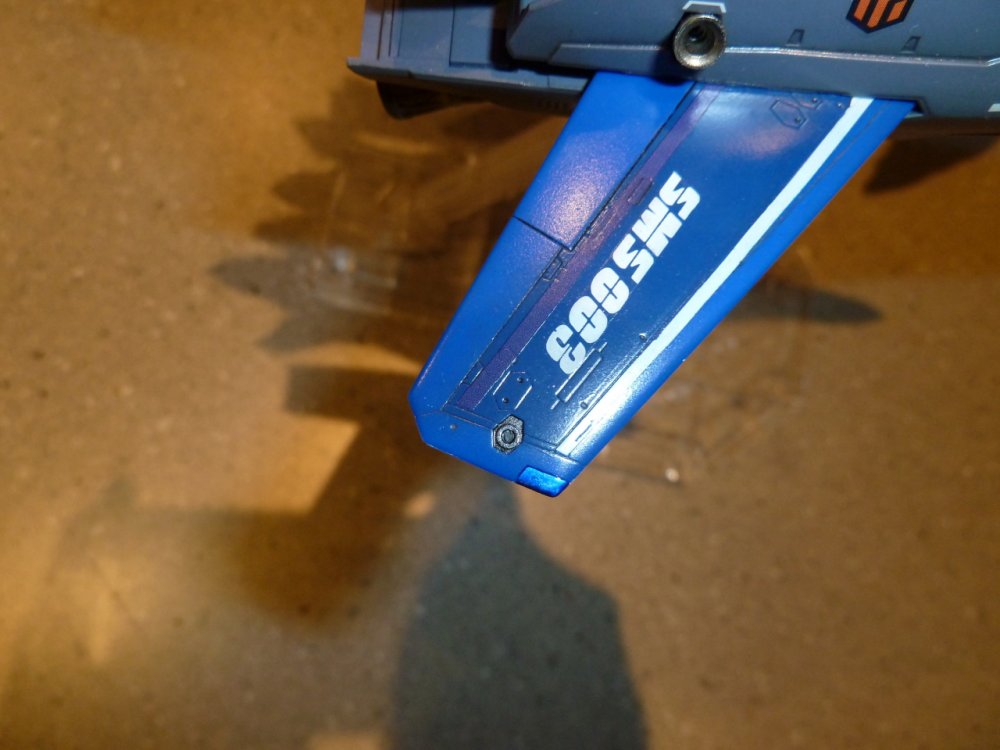
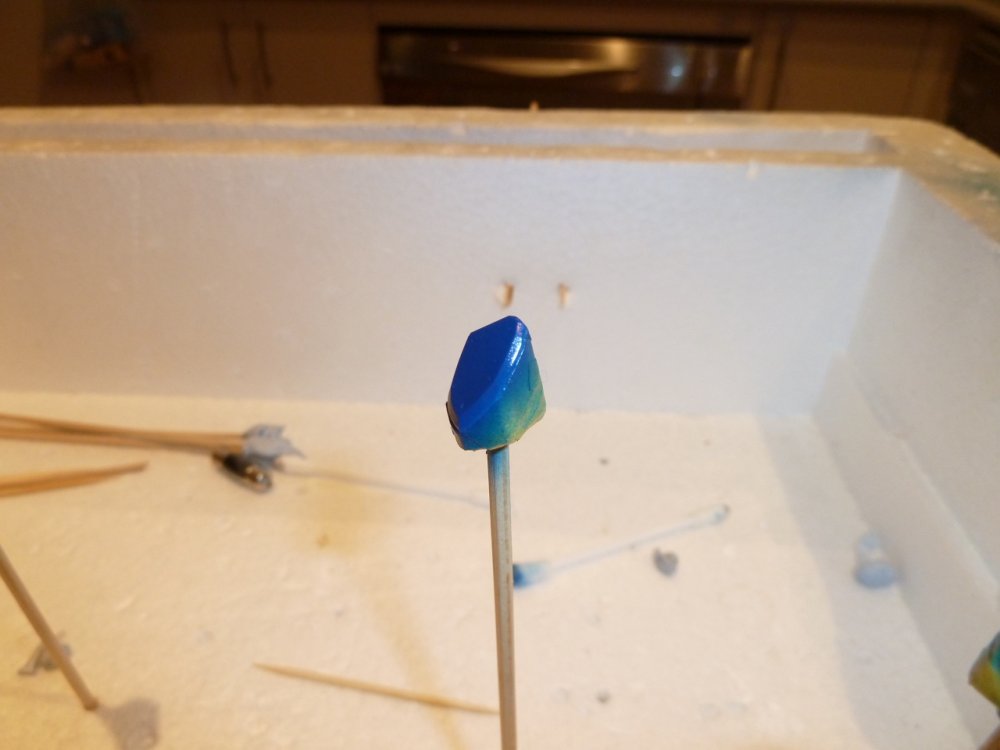
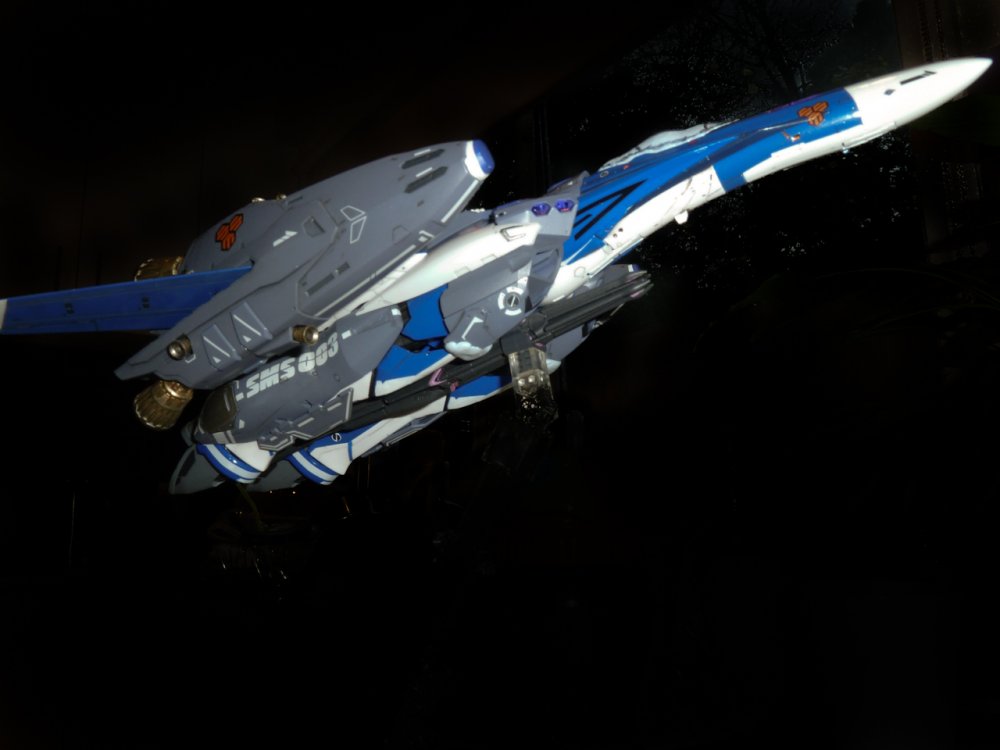
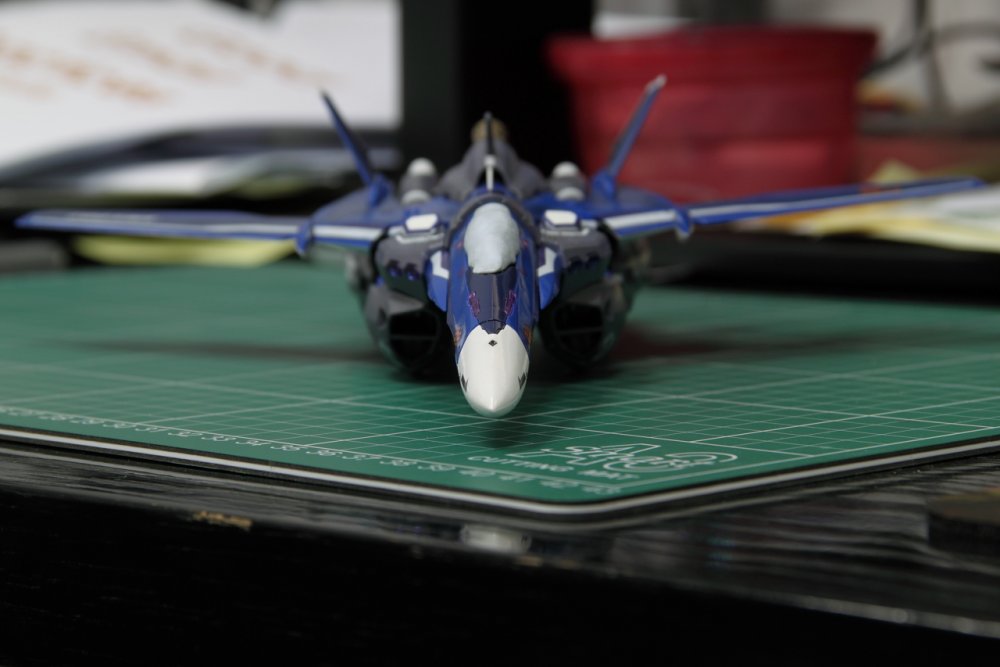
Stuff I finished up last night. I'm deliberately taking close ups of what I've done and not the whole thing because, the leg has drooped down to an unacceptable level and I'm embarrased I don't want to give too much away yet (build some suspense, or something...) I really want to set this up properly and use my dSLR to do it justice, when it's finally finished. Anyway, I popped the intake covers in yesterday, even though I haven't properly dull coated them yet and they're really difficult to get out. Ooops. Proves I still have a tendency to jump ahead instead of taking my time. I still need to do a wash on the small features, which means not doing the dull coat and, uh, I've missed another step. Great... I'll find a way to make it work, somehow. After that, I carefully sanded away the paint on the missile covers. And by carefully, I mean using about 1000 grit sand paper on my specially crafted plastic sticks (it's tamiya water proof paper super glued to ps sticks I cut from plastic sheet). I just wet sanded it and carefully held it flat against each edge until I got the thickness of "lack of paint" I wanted. I screwed up on a few small parts and made it a bit worse by "touching it up" with a brush - the paint was too dark a blue. So it's visible but probably not in these pics. I did the same with the raised triangles, though these were a lot easier. Same deal here, this needs a gloss coat, an oil wash, the white trapazoid decal, and a final dullcoat. And I painted the red and green nav lights. The flash kills the look on these but you get the picture (hah - I made a punny!) And finally, I carefully hand brushed the little verniers on the wingtips. The hex shape with the ring is painted steel and the "hole" is flat black to give it the appearance of a real hole. Sorta works... All that's left is weathering up the feet thrusters and finding some way to fix these stupid legs! Blutac is not quite working. I might need to use some inside the joints or just glue it together...


-
What are these imaging cameras you speak of? Are you talking about the crystal bits in the nose cone or the visor array on the head? The head's are pre tinted yellow, but I'm guessing you're talking about the nose ones. In that case, the method is as follows (for me at least): I went to an arts and crafts shop and got purple drawing ink. I found that, mixed with the closest approximation for Future that we can get here, worked pretty well. The stuff I used is called "Pledge One Go" and it's not too bad for clear parts. If you're stateside (and I can't remember off the top of my head - too many people and places to keep track of!) you can just use Future and be happy. Anyway, some people use a bit of purple acrylic paint and add it until they like the colour, but I found that to be way too difficult to get the colour to my liking. In fact, even with the ink, the canopy results are far from what I thought I'd be happy with. I'd actually planned to strip it and start again but got impatient and did the frames anyway. After I unmasked it, I was surprised by how little the streaks that had bugged me really stood out when it was mounted. By streaks, I just mean the colour tends to pool up in areas that don't have a nice, gradual curve. The most obvious is in the biggest part of the window in the back half of the canopy. You end up getting a bit of a line from front to back that's really obvious if you look at the canopy when it's not mounted on the cockpit. Put it on and somehow the line almost disappears. I really have to look for it on mine. And I'm pretty happy with the way it turned out, despite not redoing it. Then again, I just want to finish this so maybe I'm biased! Not much left to go. I'll try to get some new pics up soon.
-
Almost there!

-
Hah! These are exceptionally good! Thanks so much for sharing. Love your work man!
-
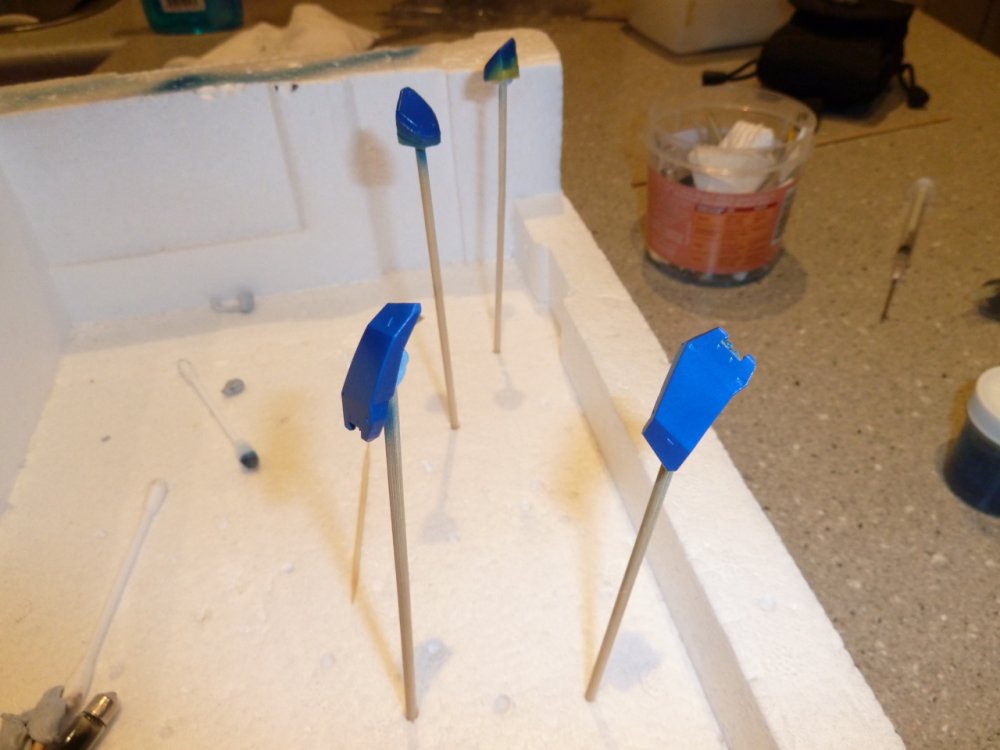
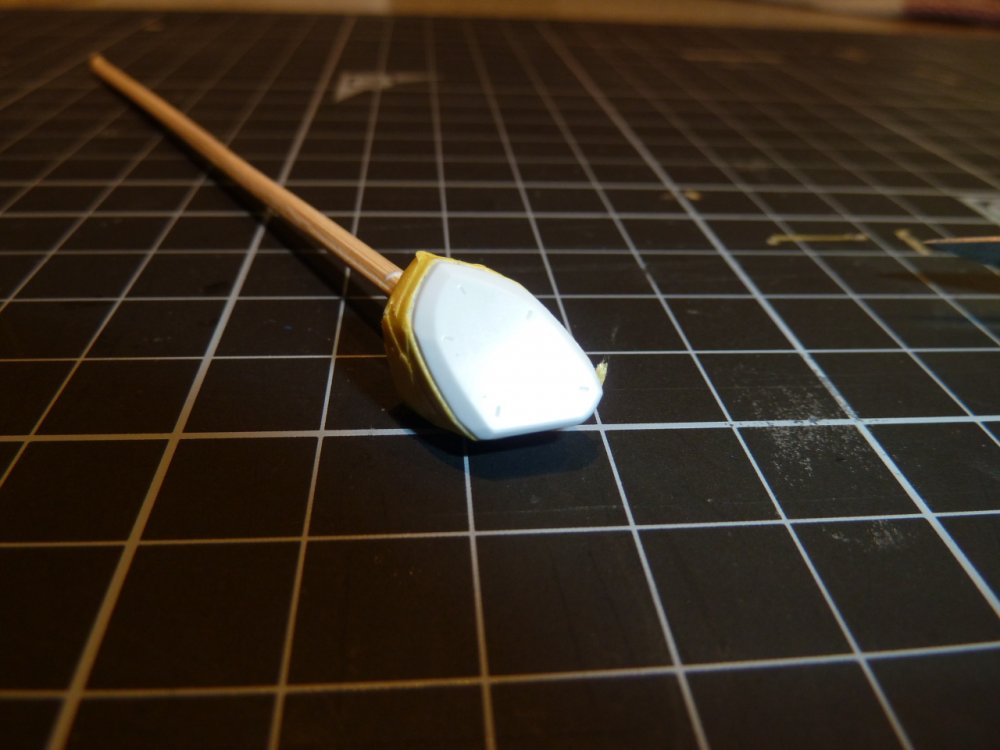
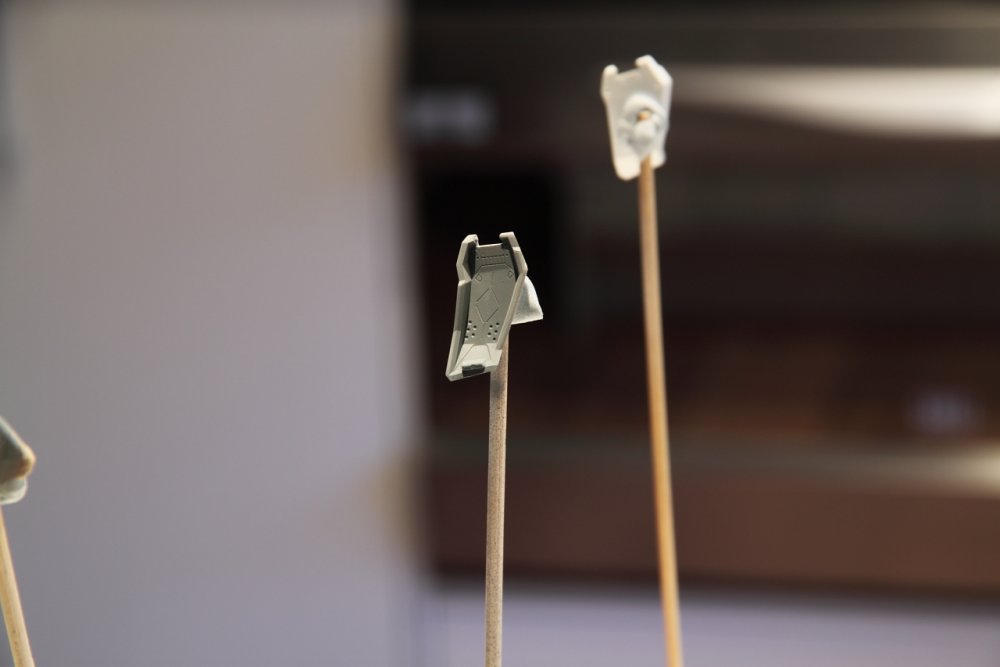
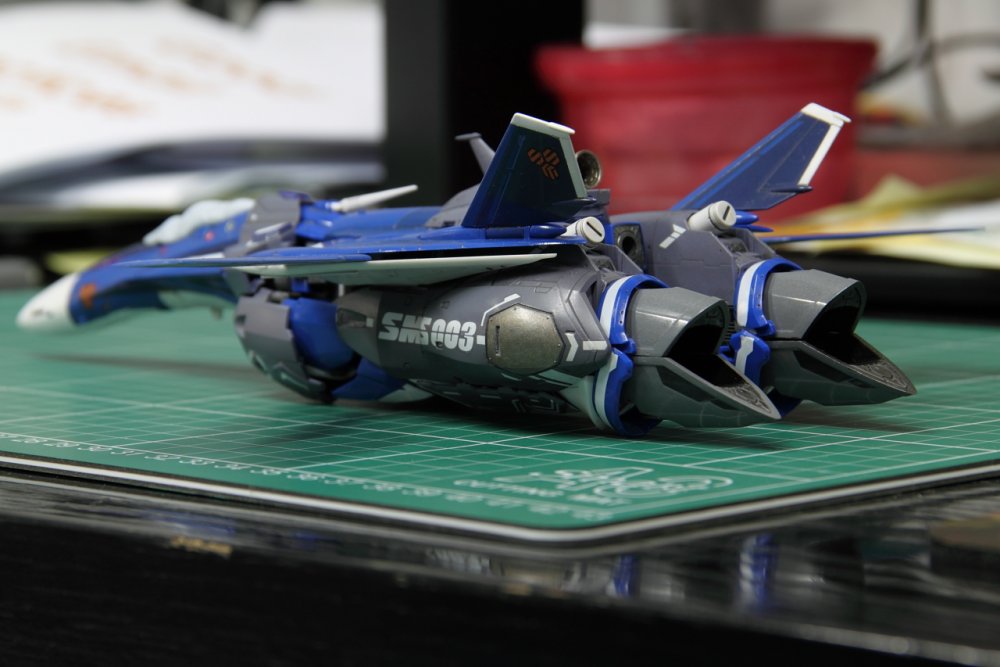
Well, impatience won out! I had already removed the masking on the front canopy last night so I experimented on that first. Turned out pretty good with just my thumb rubbed across it, so I went for the rest of the canopy. I'm pretty happy with it, actually. Still home sick and still working on stuff that doesn't involve me being outside and getting sicker. So I've masked the rest of the parts that still need to go on (the intake covers and missile doors). The missile doors were a lot harder than I'd thought. The angle is so sharp that applying a big piece of tape and pressing against the hard inside edges didn't work - the tape just wrinkled or moved. So I had to put the straight edges of the tape up against the inside edges of the door and cut each piece to be the right length. I think it'll be OK. The intake covers were much easier. I just had to wrap a piece of tape around the edge, push it down with a toothpick so I could see the dividing line, and then cut with my hobby knife. So the only parts left are these two and they'll both get the same color blue applied to them. The anime shows no difference between the blue on the super parts and the blue of the rest of the valk. But since the decals that shipped with the super parts have a much darker blue, I'm going to mix the dark and light blue used on the valk to some sort of in-between color. It'll probably look a lot like the "interest" color on the back of the valk. I'm not sure why the super parts colors call for something different than the valk. My only guess is that the super parts were completed and being distributed before the VF-25G model was finalised. Who knows...
-
Especially given how little paint is actually there. Hmmm. I'm torn - I really want to pull the masking off, it's probably my favorite thing to do when painting! But I also don't want to find I've ruined the look and have to redo it. If I clear coat, I've got to wait a bit longer. Then again, the canopy isn't going to get much wear and the likelyhood of it getting scratched is pretty slim... Decisions, decisions!
-
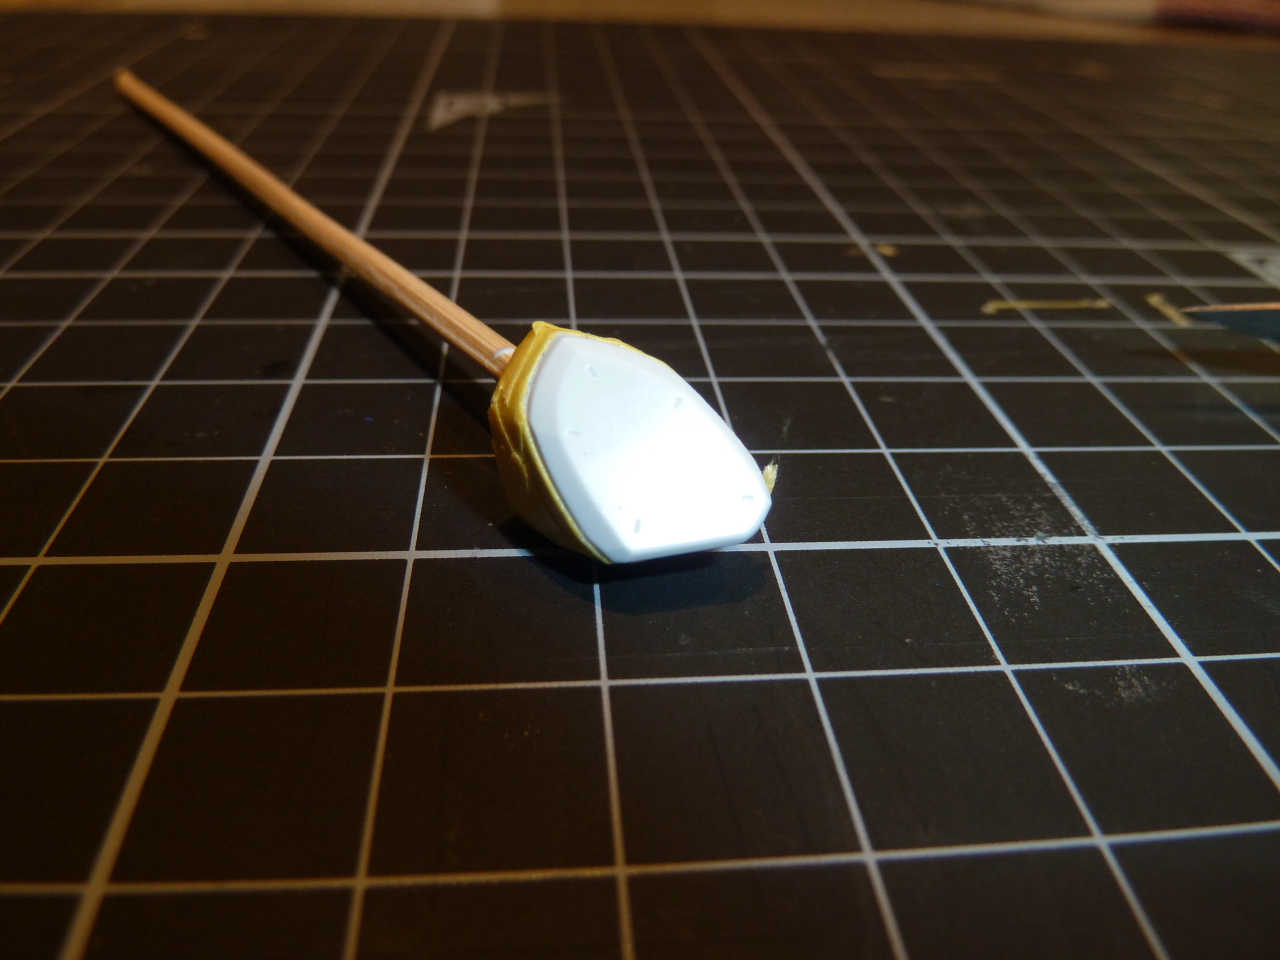
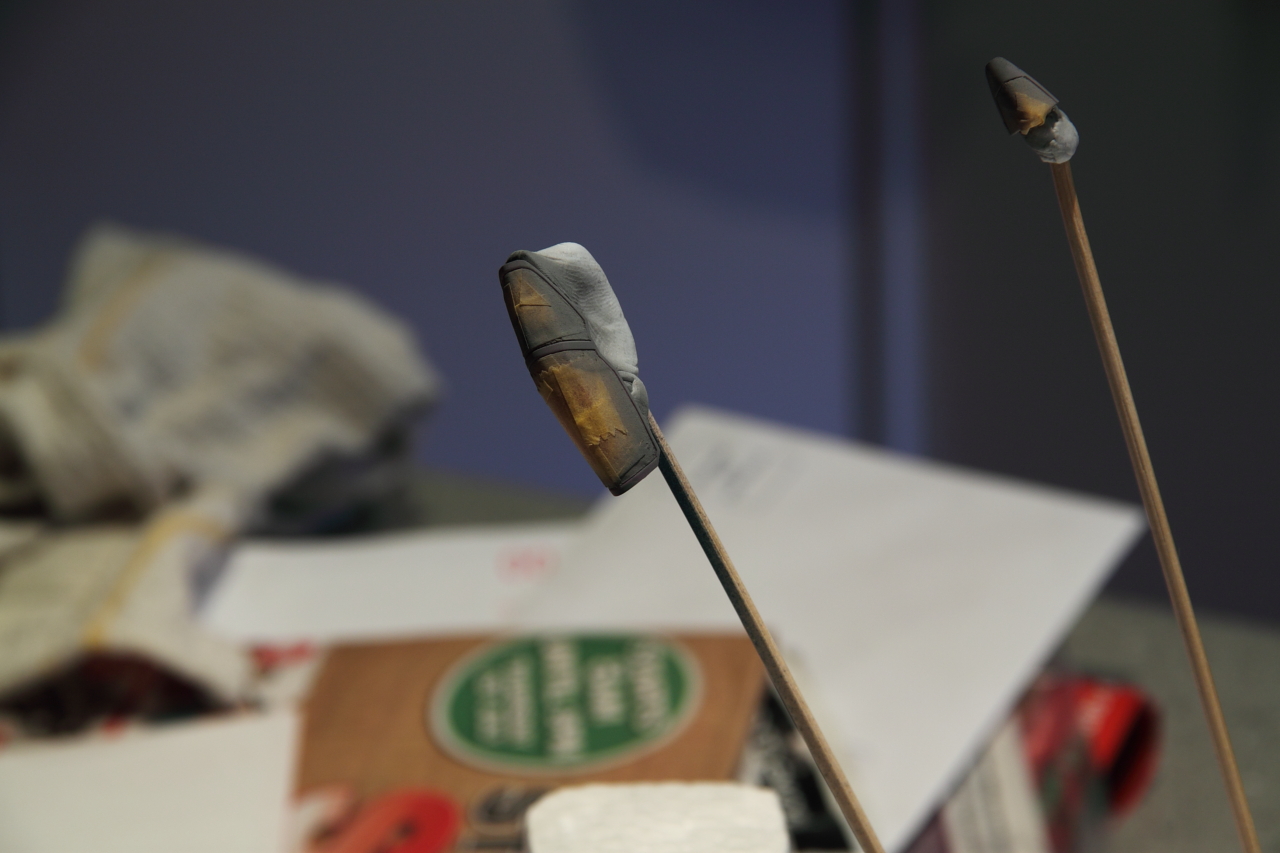
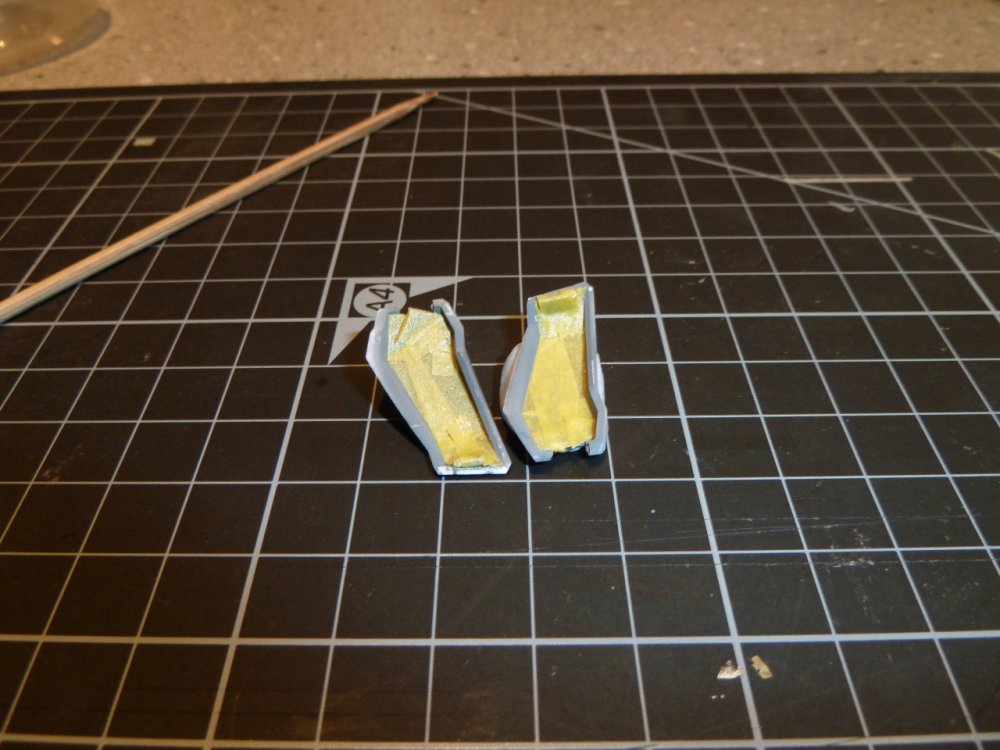
Managed to paint again today. Been feeling pretty sick for the last few days and went home early today. I wish I didn't have to feel like crap to get a chance to spend an hour on the model, but I'll take what I can get! Once again, can't tell you how much I love this new airbrush! The paint goes on so smoothly and atomizes so fine - it's like painting with dust! I used about 5 drops of paint off the end of a toothpick to do what you see here (5 for gray, 5 for black). Mixed with almost equal parts of thinner, of course. Either way, a tiny amount of paint! The gray is for the inner lid of the missile covers and "inside" of the canopy frame. Just thought I'd experiment a little to get that color on the inside. The canopy is so thick and small, that you probably won't be able to see the color difference from outside anyway. I'm not worrying about masking the missile covers at the moment - the gray goes on first and I'll mask for the blue. There's only the one panel inside to keep gray and the rest is blue. If you've been following along, you might remember I masked all the edges of the covers before I ruined them with clear coat. This time, I'm not going to bother. I'll paint them, then carefully sand the edges to reveal the white plastic. Hopefully it'll work! Last pic is the black over the gray - only about 10 minutes after the gray had dried. Did I mention the weather is terrible (cold and wet)? And still the painting is a dream! Question for all you aircraft guys - I've painted the canopy frame in very flat black. In my opinion, it clashes with the finish on the rest of the body of the plane. Is there any precedance for flat frames to cut down on glare, or should I apply a bit of a semi-gloss clear to the frame before I unmask it? Thanks! That little diorama would be sweet! I saw the new Klan and thought it was pretty cool. Even cooler that it's 1/72 scale!


-
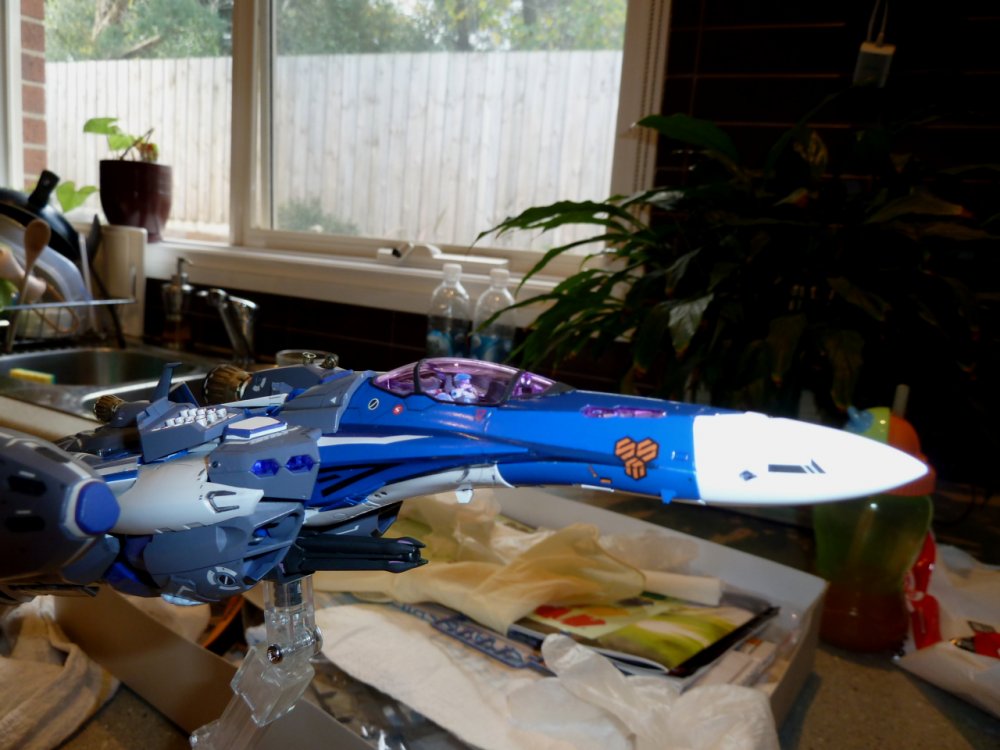
Quick photo from my wife's (new Panasonic ZS7) point and shoot: Getting there! GU-11: Don't be put off too much by our complaints. As long as you don't go nuts with painting and don't want to play with it (at all) and can find it on sale, it's a great display piece!
-
Oh, alright... 2 doesn't sound bad when you figure the sale price at HLJ on these right now! But I couldn't bear to build 2 I'm afraid...
-
Thanks for the encouragement guys! Lolicon - I'm probably going to use bluetac to hold them up! I know, it's seriously ghetto but it sounds like a really good idea and I think I could hide it so it's not visible. This thing will be sitting on my desk at work, on a display stand. It won't be transformed and will likely get handled on occasion but otherwise, it's there to look at. No idea yet what I'll do with my Vf-27. I'm thinking I might go the non-paint route on this one. Although yours looks so good I might have to reconsider. How often do you transform it?
-
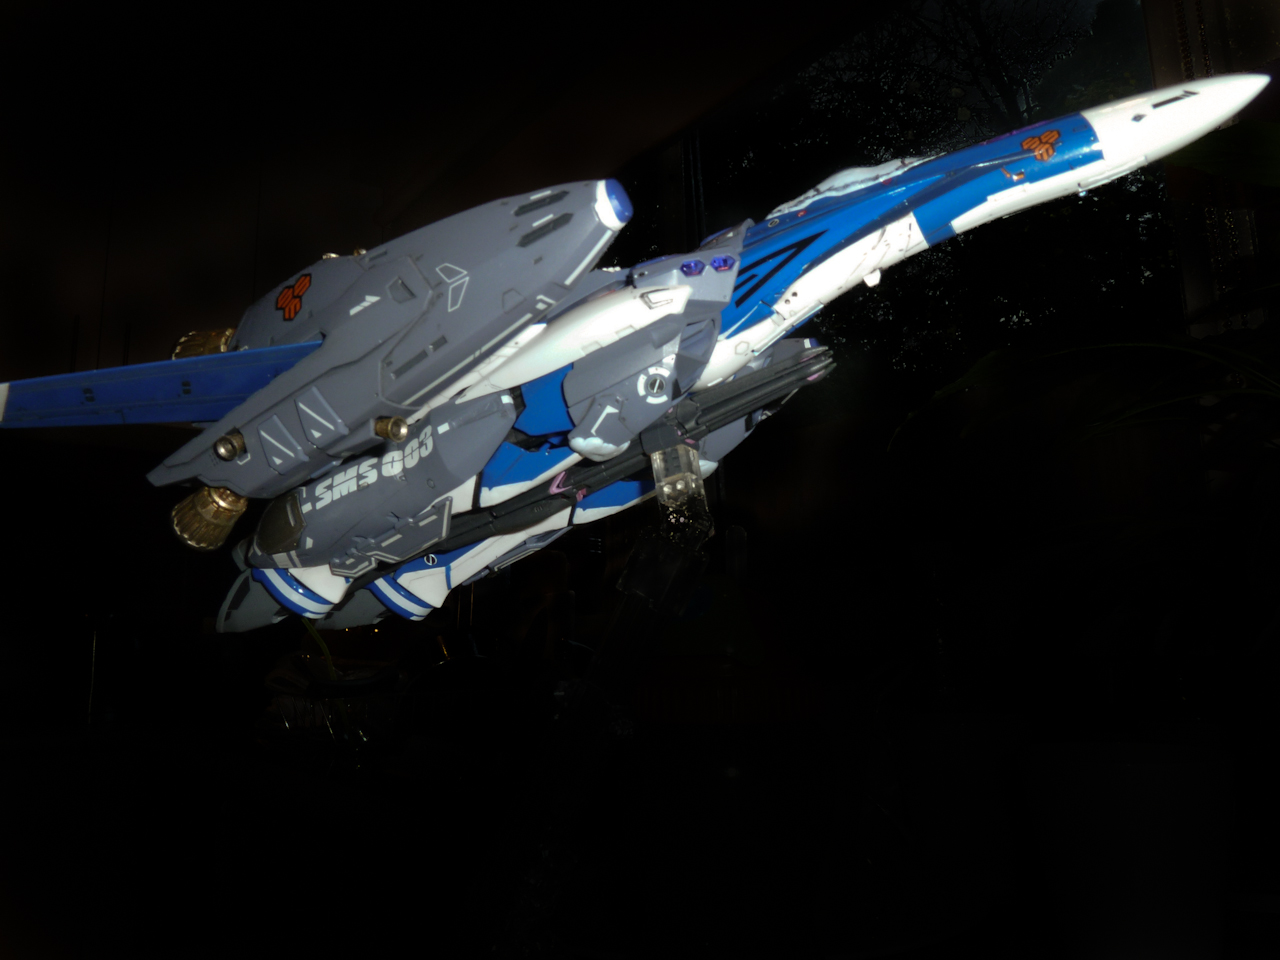
See, now you're going to have to tell me how you got that crazy camera angle! That's the kind of shot I'm looking to do! Obviously, if you were really standing watching a few jets take off like that, you'd be a fair distance away and using a decent telephoto lens, so that view is very convincing indeed. So did you use photoshop to trick the perspective, or just for the effects?
-
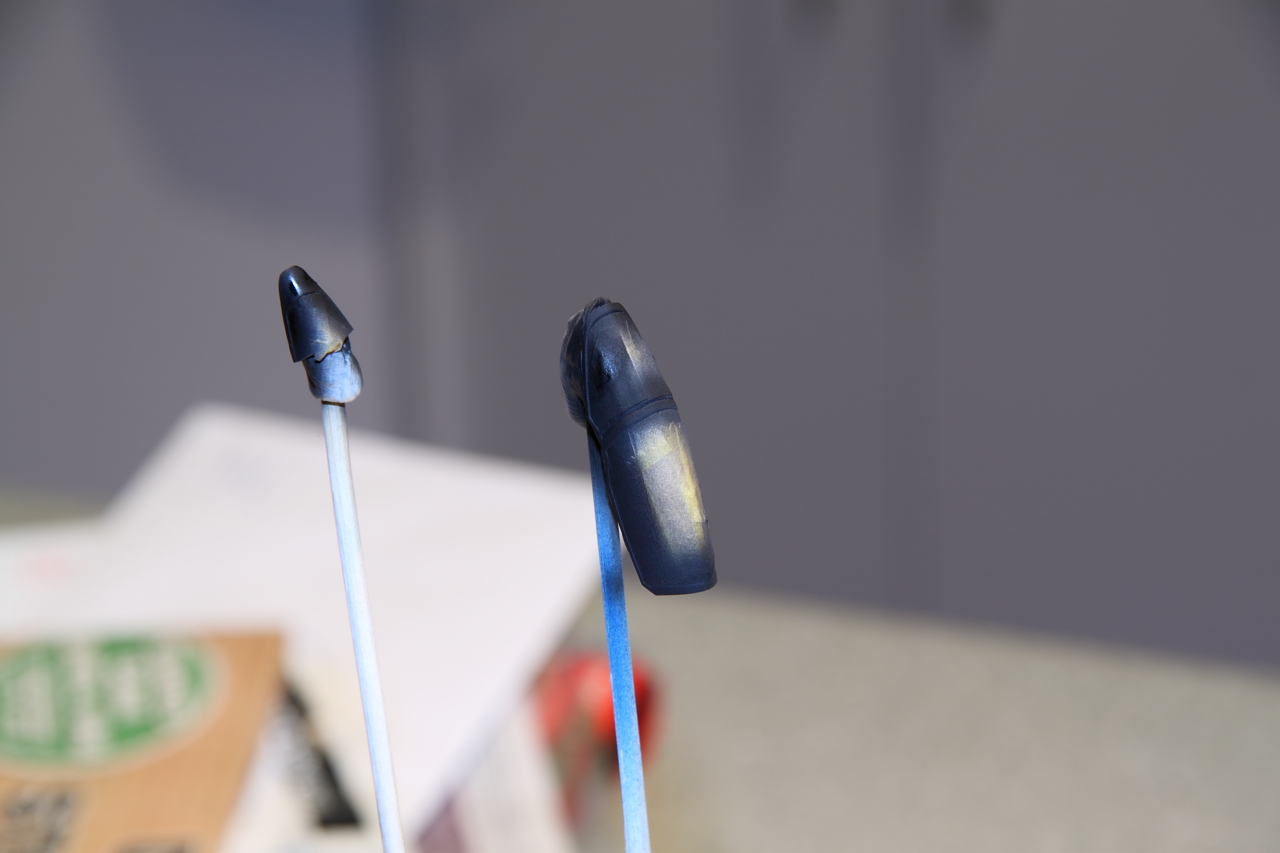
I just did a quick experiment: set up camera a short distance from a suitable target remove lens and separate it by a small amount (about 12mm) from body use manual focus find target is not in focus and use another object (like a finger) to move it in front of the lens find your focus distance has decreased to something absurd, like a few mm from the front of the lens (or less if you're at 18mm like I was)! repeat the process but turn the focus ring to the complete opposite side (just in case) and find focus distance between minimum and maximum is almost nothing repeat whole process with a longer focal length until you find a focus distance that equals the original 8-10 inches I'm after. After all that, I found the best focal length to allow me to be the distance I want to be from my subject is about 50mm. At that focal length, my field of view is too narrow to fit a whole valk into the frame. I knew you have to give up infinity focus with an extension tube but I had no idea it cut what should be maximum focus distance to something so incredibly small! Just goes to show how important that distance is between the lens mount and the imaging sensor. So those of you who were hoping for a positive outcome from all this - it looks like I can't do what I want with a dSLR. And that's take a photo from the same scale distance a scale human would be standing from the model. I can do it with a point and shoot though!
-
Sounds perfect! Kenko sell a set that retains all the electrical stuff for the autofocus and aperture controls (not to mention all the the stuff the lens tells the camera). I'm not too concerned by the change in fstop as this will all be done with a tripod and as small an aperture as I can get away with. I might experiment with focus stacking if the depth of field isn't good enough. I'm annoyed you can't buy single Kenko tubes but imagine the set is probably more versatile anyway. Thanks again for the tips!
-
Well, at the time the aussie dollar wasn't great, the kit cost about 5200 yen and the super parts were about 1700 I think. And shipping was an additional 2000 yen or so. So added up, that would have been almost 9000 yen which equates to at least $100 in USD (and likely a fair bit more). Yikes! That can't be right. I'll dig up the receipt cause that sounds insane and surely I wouldn't have paid that much for it all! EDIT: Yeah, the kit was 3600 yen + 1600 for the super parts + 440 for the display base + 2000 for the shipping (got some tools and supplies as well but none were that heavy or bulky) = 7640 yen for the whole thing. And convert that to Aussie dollars and you get at least $100 at the time I ordered it! Still expensive!
-
I feel like I've joined some new club guys! I agree 100% with every one of your statements. The most difficult to swallow is Ghost Train's last one and I couldn't have summed it up better! I paid almost $100 for this kit after shipping! Do I feel ripped off? You better believe it! Will I have a nice display piece when I'm done? Maybe. And I guess WM's comment is another reality check - there's just no other offering that looks like a VF-25 except for the model kits. The toys would be OK but they're way out of my price range and I honestly don't like how they look. If they were $75 it might be a different story. Anyway, thanks for sharing guys. It helps to know that I'm not the only one experiencing these issues. And at the end of the day, the experience of building this kit, and the end result, though expensive, isn't exactly going to leave a permanent mark. It is only money, right?
-
Thanks guys! Your advice is much appreciated. Froy: My lens' minimum focus distance is pretty big (about 18") - using your tip isn't going to work in my case, as anything closer than that MFD is going to not only be fuzzy but way out of focus and obviously so. Increasing the aperture isn't going to help here. It'll make the background sharper but not the model itself. Also, I'll have to experiment with really big aperture values as diffraction starts to really make things fuzzy above f/16 on my (too) dense camera sensor. Still, worth playing with to see how much of that diffraction I can actually see for web pics. Mike: Thanks for the links - very helpful! I've been considering extension tubes and will have to look into how much closer they allow me to get to my subject. For some reason, I was thinking they only allow the amount of the extension tube. So in my case, I can move an inch closer to my subject with the 25mm. In my case, if that's correct, it's not close enough. I'll have to have a look around to see what the actual value is. Surely it's not as simple as I'm making it out to be. I'd consider a close up lens but since most of what I want to do is on the wide angle, the tubes will probably be a better choice. Thanks again.
-
Well, I'm starting to officially hate this kit! I got an extra few minutes to add a few more parts to the kit this afternoon (no pics though) and to my dismay, in the process of fitting the missle launch mounts (which are white - what the?), hip guns, and boosters, managed to scratch paint, distort the legs so they can't possibly line up without practically disassembling them, and tear a decal on the dreaded shoulder/wing root puzzle piece. Gah!!! There are a few things working against me right now. The kit is very fragile. Maybe I got a dud, I don't know, but it's just so incredibly easy to make parts rub and slip out of alignment. I feel like if I actually do get it right, one wrong touch is going to completely mess it up! And the other thing is the super close tolerance of some of the parts but not all. The hip guns, shoulders, wing roots, and legs all must go together in exactly the right shape/allignment or nothing fits. Add the microscopically thin layer of paint and it makes it even harder to fit things up right. It's just incredibly frustrating! OK, venting complete. I'll hopefully look at this fresh tomorrow. Hopefully...
-
I've been following this thread for quite a while now and have only chimed in minimally. ...But, I've got a question. I was taking some shots of my partially completed VF-25G kit and wanting to do my best to make it look "real" in terms of perspective and angle, etc... Anyway, I figured if it were the real thing, I'd be taking the photo on the ground, at about head hight (I'm 6'2") and from a distance that would allow me to fit the whole fighter into the frame. And given the size of a typical fighter jet, it'd likely be a pretty wide angle lense. So that got me thinking, "what distance would I need to be at to do this" and I came up with something about a fighter distance away (give or take). For a model kit, that would be what, 10 inches or so? I don't have a lens that will focus that close. And if I did, what focal length would work? I was thinking a dedicated macro lens but they start at 50mm usually and I'm thinking the field of view would be so narrow that I'd need to be farther away than 10 inches to fit the whole valk in the frame. So here's the question: What do you guys who take great photos of your valks, use to photograph them? Can you really get close enough to this right with an SLR? For the record, I've got a Canon 500D (1.6x crop factor) and an 18-135mm zoom, and a 50mm prime. My best estimate is that I'll need a 24mm or so lens with the ability to focus from 6-10 inches. Does such a thing exist? Any tips?
-
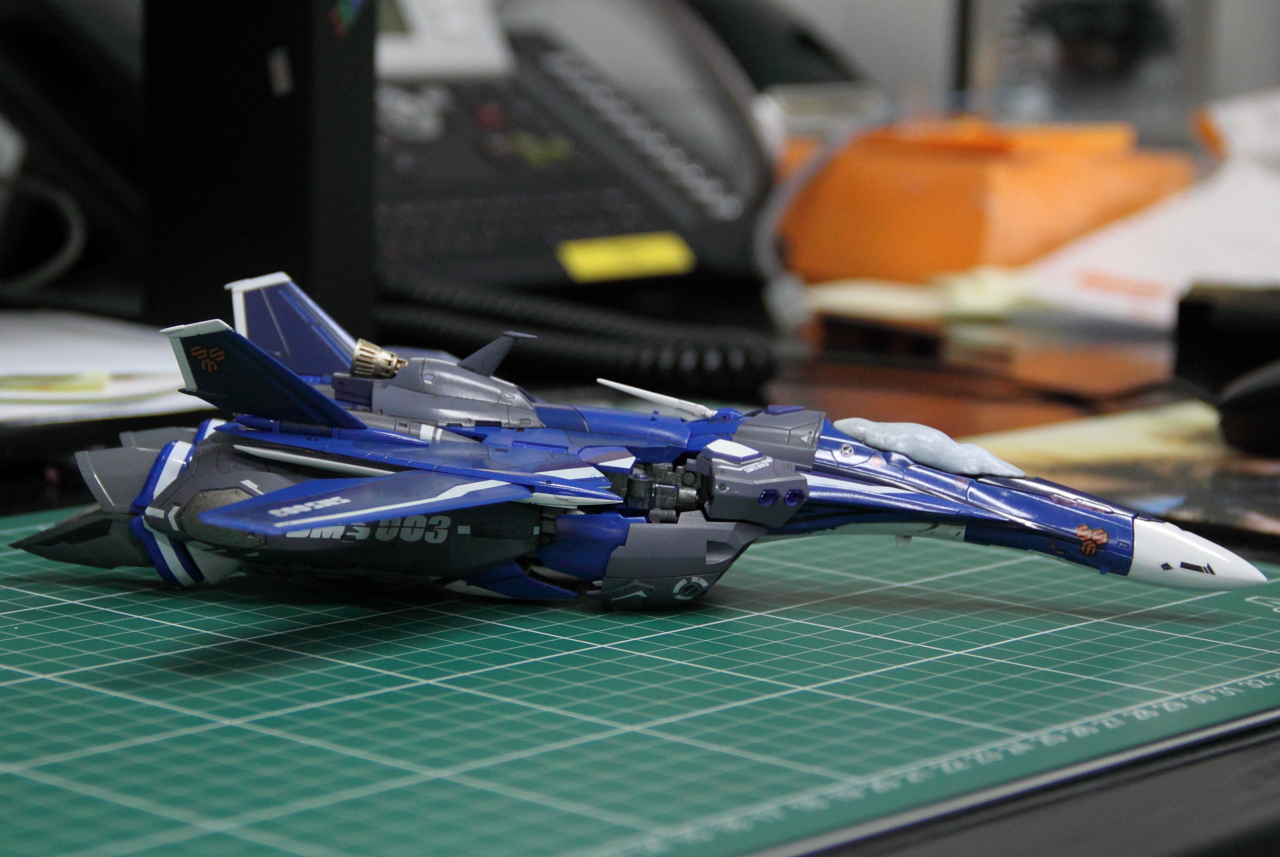
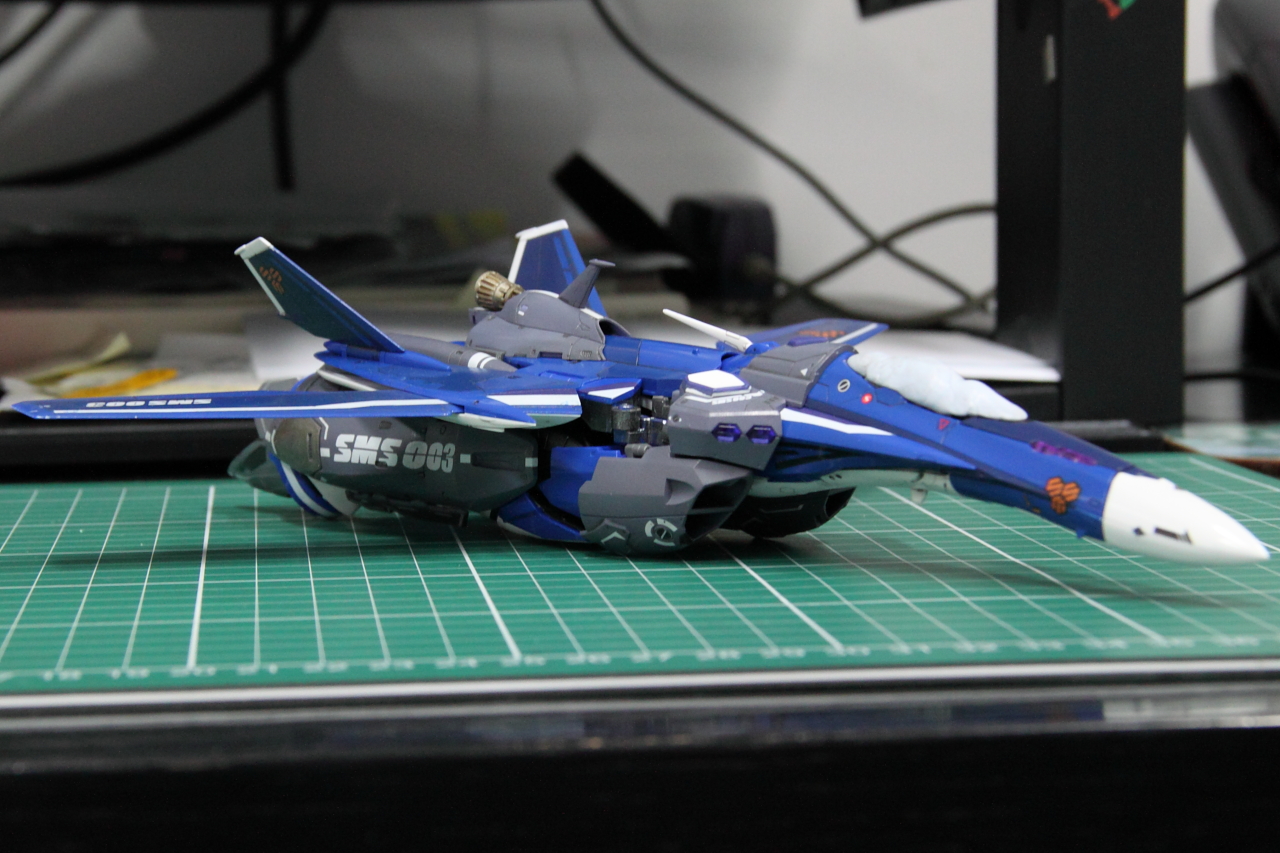
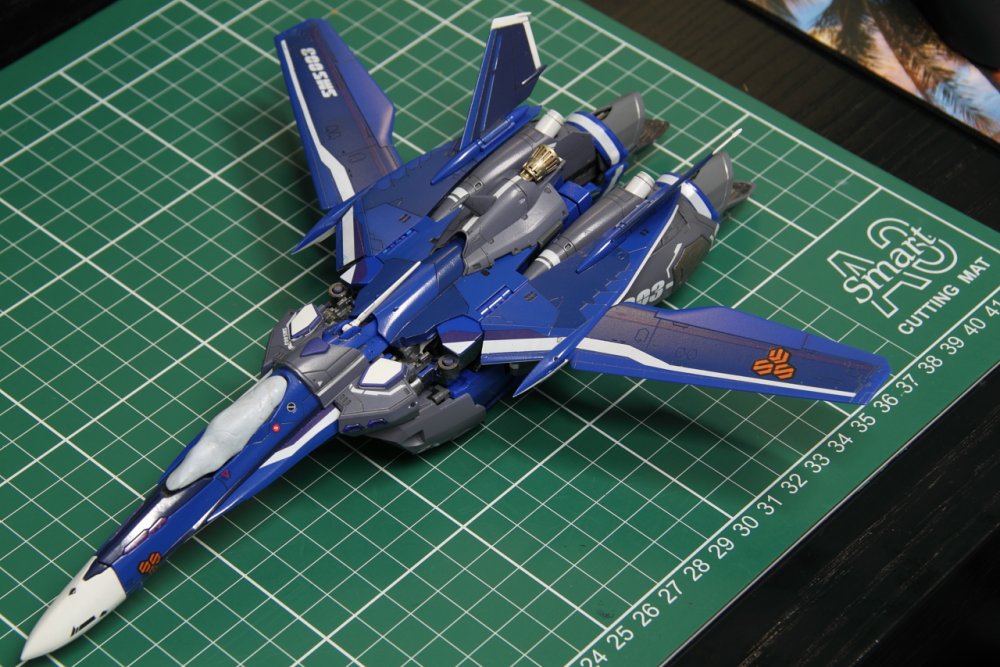
Brought the camera this morning so here's some pics. They were rushed and half of them are at a crazy ISO (1600) so the colours aren't very pretty. The other half are OK and give a better idea of how this looks. Still more super parts to add. I'll do my best to get that done today. Worth noting in pic 1 is the gap between the knee and thigh. Am I doing something wrong here? It's a huge gap that can't possibly be the way it should be. Or can it?


-
I got most of the model put back together at work today. And of course forgot my camera! A couple of observations that I'd forgotten about and they could stand to be repeated. The legs fit so badly on these kits. I forgot how fiddly it is to get them in exactly the right shape with the knee and hip joints to get them to sit right. The arms are even worse! Getting the shoulder/wing root puzzle piece to align properly is a royal pain. One of the joints has cracked and it's frustrating as anything trying to get the arm positioned without completely snapping the joint in two. Despite all that, it really looks impressive and I'm glad I've taken my time as I have. Oh, did I mention I'd purchased tiny magnets for this way back at the beginning of this crazy long build? Yeah, not going to use them. No way I can be bothered trying to get them positioned now that I've come this far. Plus, there's very little chance I'm going to transform this, given how fragile the joints are and how much time and effort I've spent on painting and decaling it. I'm feeling a bit sick now that I think of all the details I've added that will never be seen in fighter mode...
-
Well, since we can't PM you to offer any encouragement, this thread will have to do! Thanks for all your efforts, both on this site and behind the scenes! Keep your chin up. I've never had any major injuries but I'm sure having back problems has got to really suck. It's not like you can rest your back without resting your whole body too. Anyway, stay focussed on recovery and your family man. And thanks for passing on the work people on these forums do to the guys making all of our toy dreams reality! Much appreciated!
-
That sounds really scary on something as small as the canopies on all these 1/72 scale models. I can't imagine being able to do it on the VF-25 series kits, as there's just way too many extra ribs and pegs on the inside of the canopies. On a hasegawa kit, perhaps. It's certainly something I'll consider as I get closer to doing my 3 kits (one each of VF-1D, VF-0S, SV-51y).
-
Funny you should mention that. There was a recent thread where the different canopy treatments were being discussed. Some have that rainbow affect, like the Yamato VF-1 (v2) toys, and others have a metallic gold affect. I was only planning to do the purple tint on this build (and still do). I've got an SV-51 that I would like to do the gold on though. Unfortunately, the consensus is that it's very difficult to achieve a decent gold tint on a plastic model. Partly due to the size of the metal flakes in most any gold paint, and probably also due to the small size of the canopies. Still, I do plan to try to do something to my SV-51 when I eventually get to it.
-
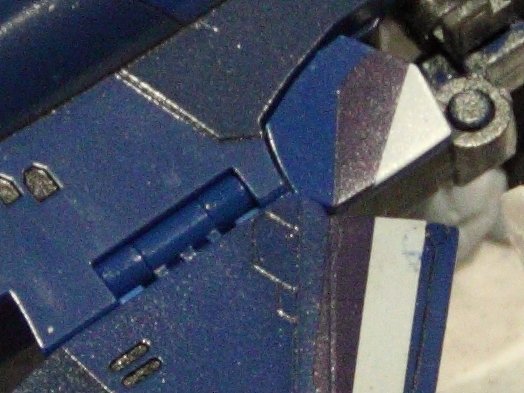
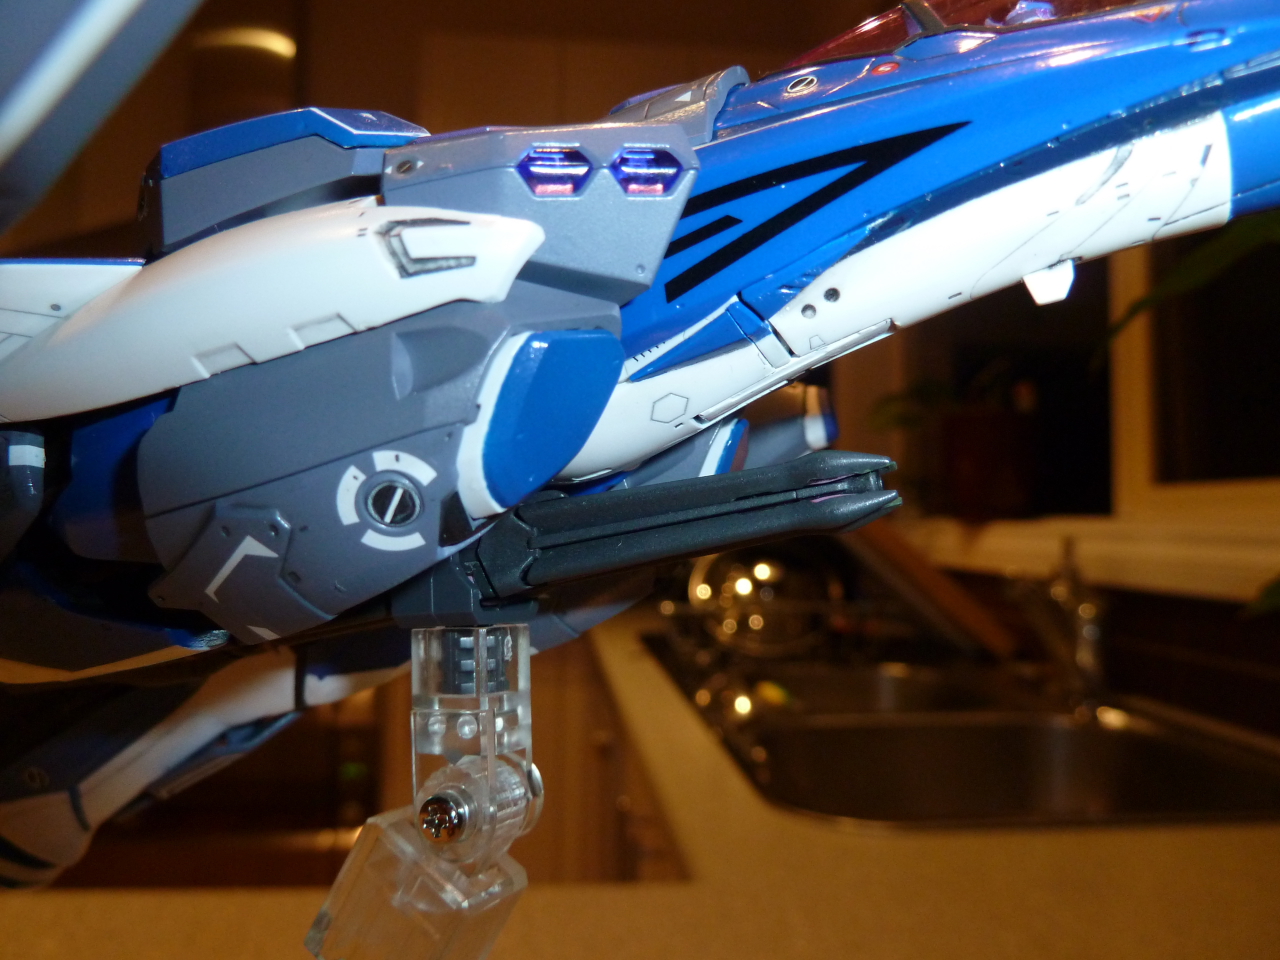
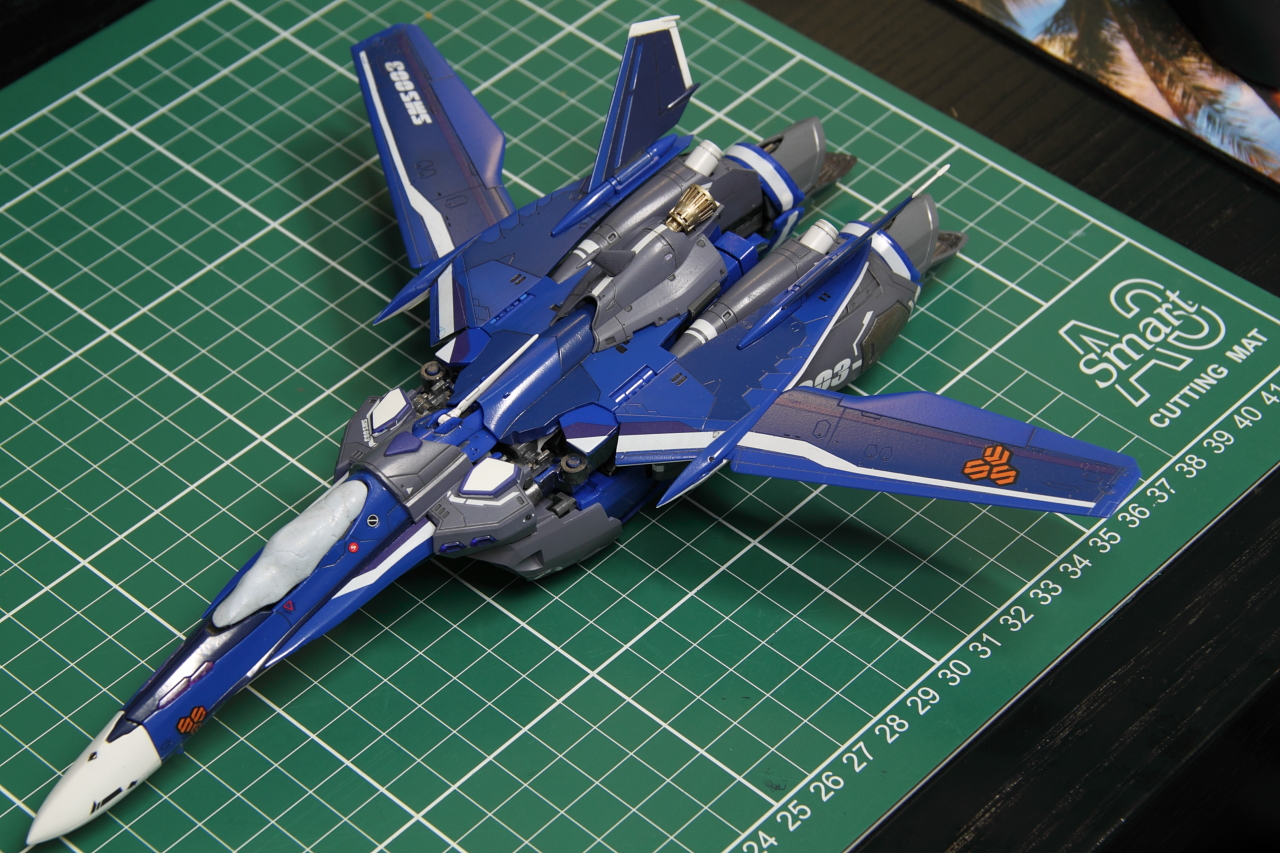
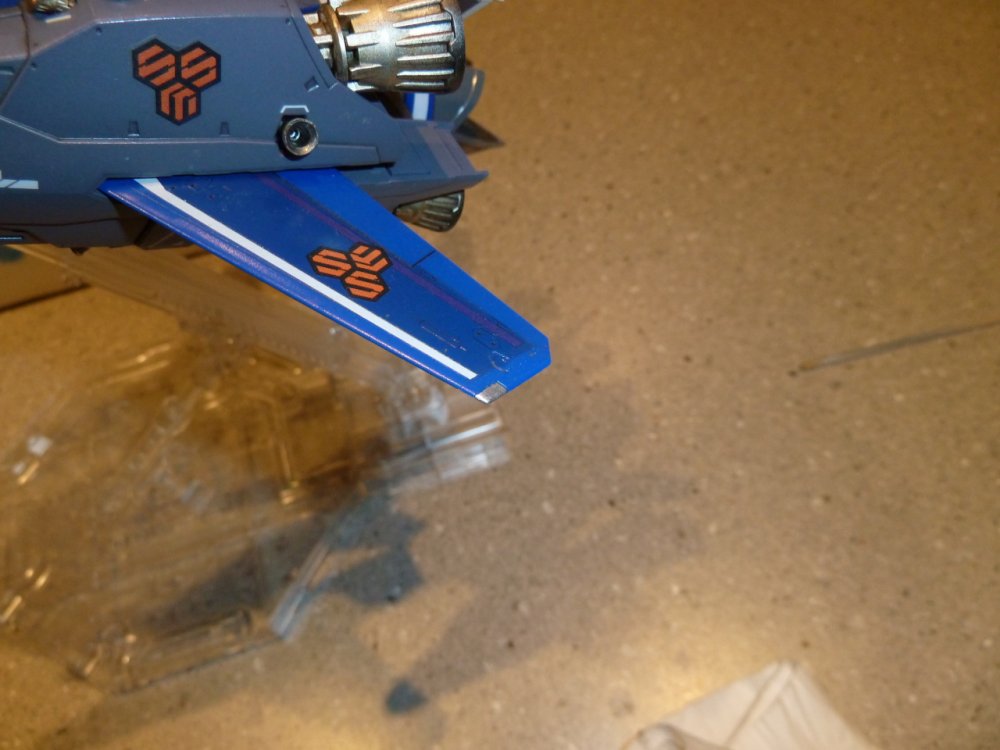
The fact that a thread like this can inspire a seasoned modeller such as yourself is high praise indeed and makes all this slow and tedious work that much more worthwhile! Thanks Petar - glad you've stopped in. Here's current progress: The white parts of the wing root hinge after being painted blue, seem OK (sorry about the grainy, not so in focus pics - they're crops of the bigger one): The overall sheen of the last clearcoat, as best a photo taken late at night under halogen ceiling downlights can do: