mickyg
-
Posts
2632 -
Joined
-
Last visited
Content Type
Profiles
Forums
Events
Gallery
Everything posted by mickyg
-

Bandai DX Chogokin YF-29 Durandal Valkyrie
mickyg replied to UN Spacy's topic in Hall Of The Super Topics
It's growing on me in fighter mode but battroid - how on earth is it going to stand up with all that weight on the wings? -
MickyG's Yamato VF-1S Unpainted, Unassembled Kit Build
mickyg replied to mickyg's topic in The Workshop!
I'm not sure. I'm actually leaning more towards a blue visor. I think red would look a little out of place with all the other blue tones. I can experiment a bit. With acrylics, if I don't like it, windex to the rescue! -
Yep - just good old fashioned, adhesive backed stickers, I'm afraid. If you've got a 1/72 kit, you'll be familiar with them. They're not bad, just thick and, well, stickers! They are flexible and as has been mentioned, probably stretch a bit, which makes the toothpick method a really good idea!
-
I think something got lost in the exchange here - I think Lolicon was referring to the "stickers" on this kit. That's going by the fine work he did on his 72 scale builds - he knows how to use softener on the decals. If I can be so bold to assume your meaning there Lolicon. If that's correct, I don't think anything will work on their stickers!
-
MickyG's Yamato VF-1S Unpainted, Unassembled Kit Build
mickyg replied to mickyg's topic in The Workshop!
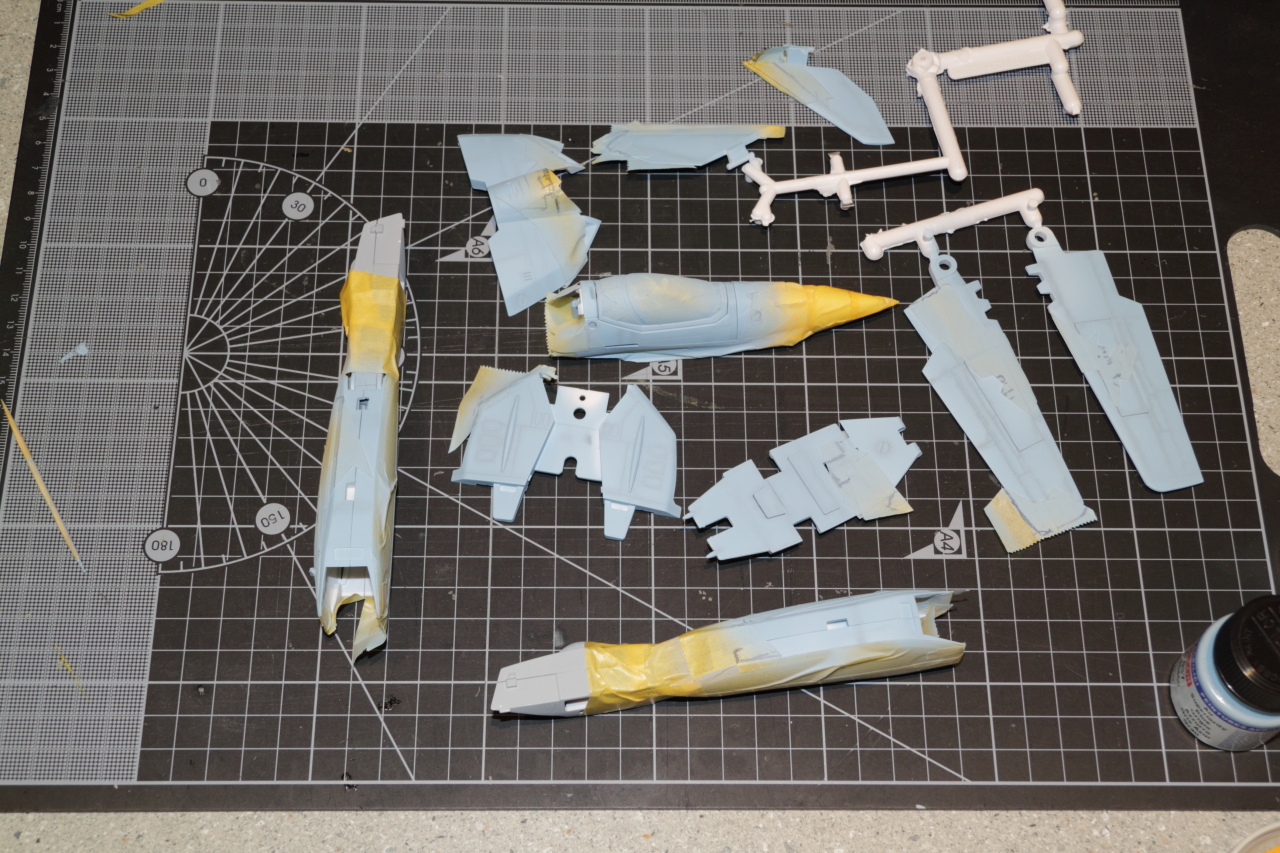
Pics uploaded... By the way, I didn't show the painted pieces with masking removed, though there are some (pieces, not photos). I also didn't show the stabs masked or painted (and they were). Hoping to get more done tomorrow and will take some fresh pics then. -
MickyG's Yamato VF-1S Unpainted, Unassembled Kit Build
mickyg replied to mickyg's topic in The Workshop!
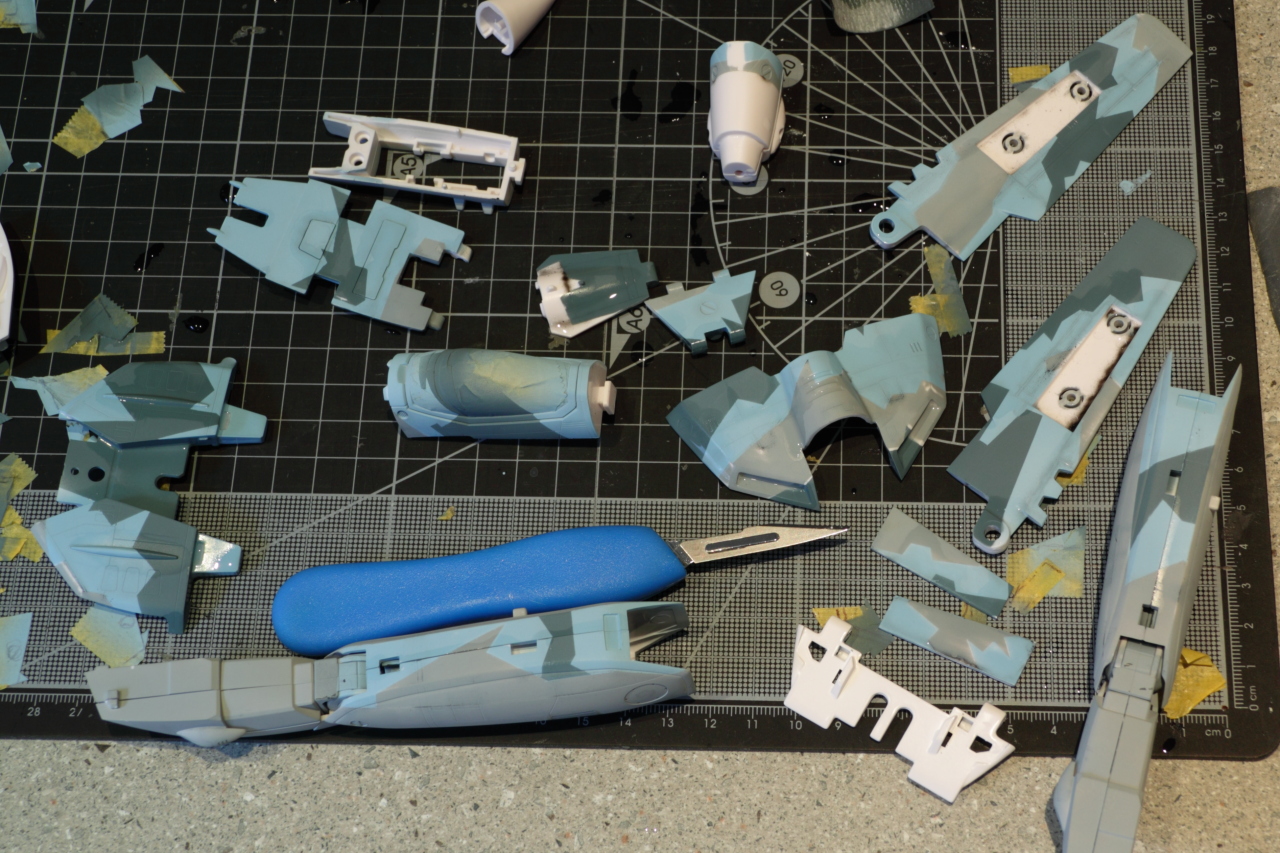
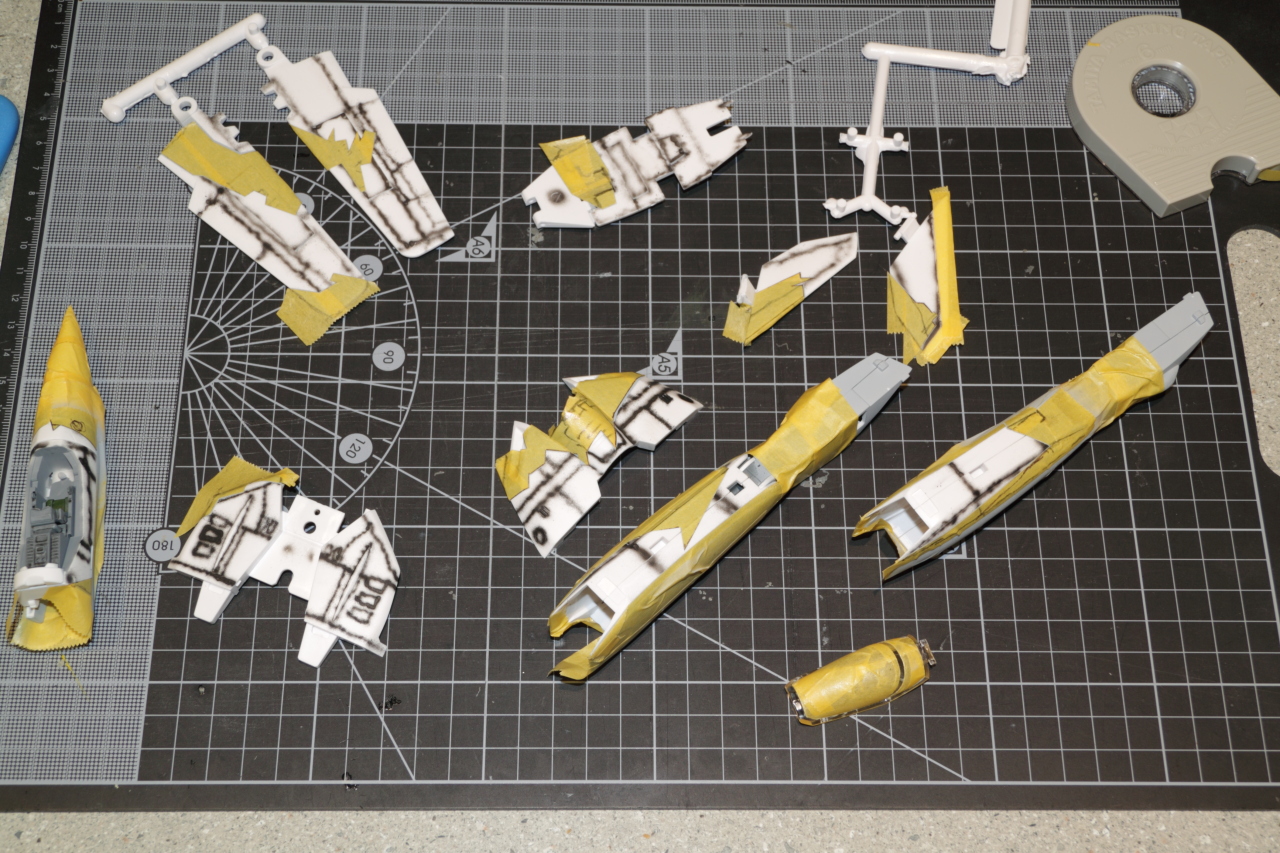
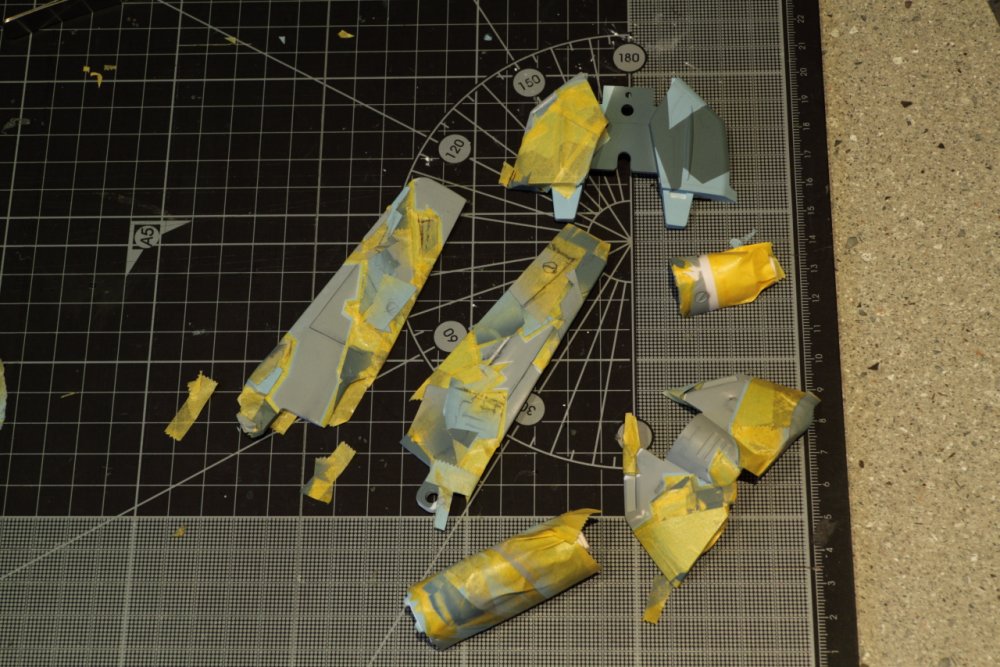
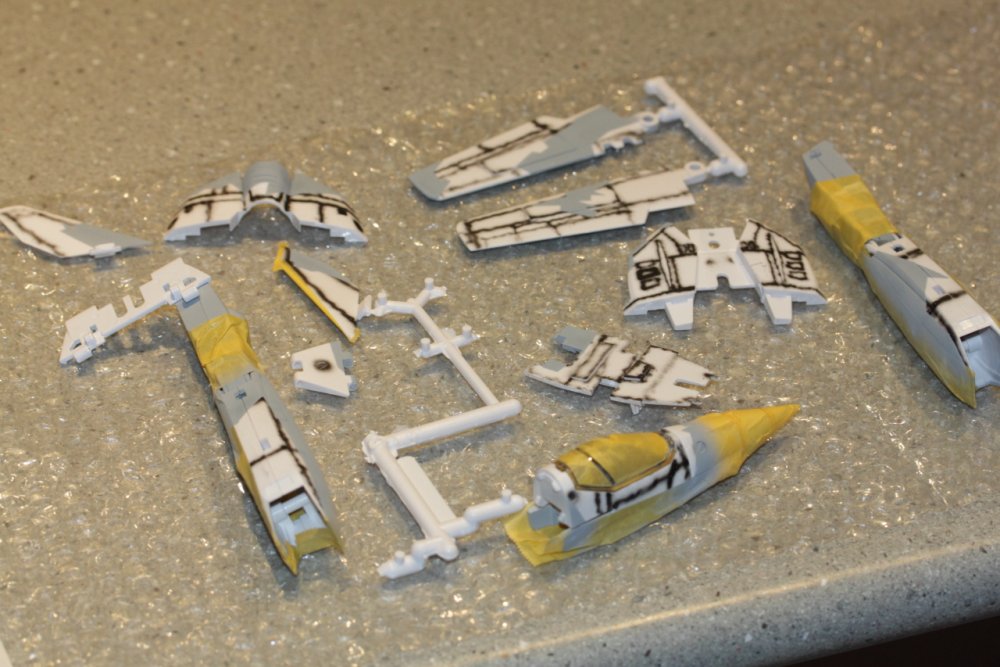
I have a few days off from work this week so I'll be trying to get more done. Today I spent the better part of the day fixing up the mistakes I made on my first painting attempt. I cut out the masks previously, and while convenient, it required exact placement to get the next colour down. Something I wasn't quite able to do. And since the base colour was white, missing the lineup, even by a smidge, meant ugly white lines between the patterns (some of which are visible below). Not good. I sanded the parts in preperation for masking and painting (they're still wet here). So this time around, I used the good old fashioned method of cutting strips and carefully placing them where I wanted them. You then have to use larger pieces to box in the patterns. Bear in mind, this method is great for straight edges. It won't do squat for curves, which most camo patterns are made up from. I went a bit easier on the paint this time. I thinned a bit less than previous and didn't change the pressure, which I think made for a bit less paint coming out. The result was a finer mist of paint and a few more passes required for coverage. And less paint build up. My previous attempts left a hard edge between colours, which I then had to sand off. I also found a nasty little "gotcha" on the v stabs-the shorter hinged one has a nasty tendency to scratch the backpack. I don't know of any way to prevent this. I've played around with it but I think it's just how it is.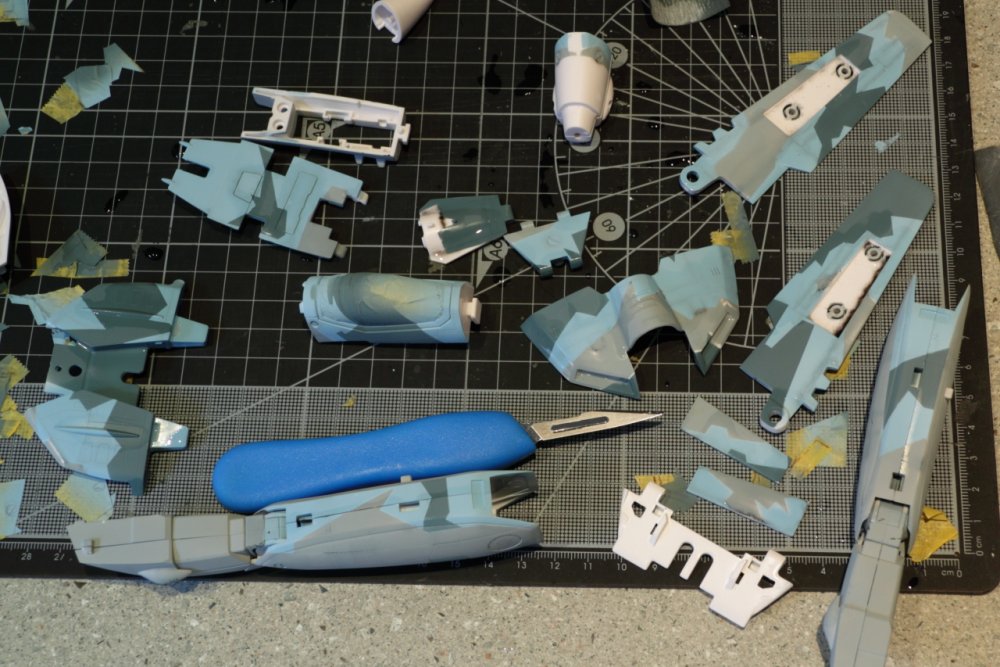

-
MickyG's Yamato VF-1S Unpainted, Unassembled Kit Build
mickyg replied to mickyg's topic in The Workshop!
You and me both! I haven't assembled the toy in that mode yet and I'm not at all sure how I want to tackle the head. I'd thought about doing the visor in camo to match the top, but then it'll stick out in fighter mode. So maybe the face "mask" will get the camo treatment instead? Same thing for the arms-since they're not terribly visible, I could camo the whole things or do the upper camo, lower gray scheme like the rest of the aircraft. Lots to decide still. You might have noticed I'm not sold on where to start the white on the nosecone too. -
MickyG's Yamato VF-1S Unpainted, Unassembled Kit Build
mickyg replied to mickyg's topic in The Workshop!
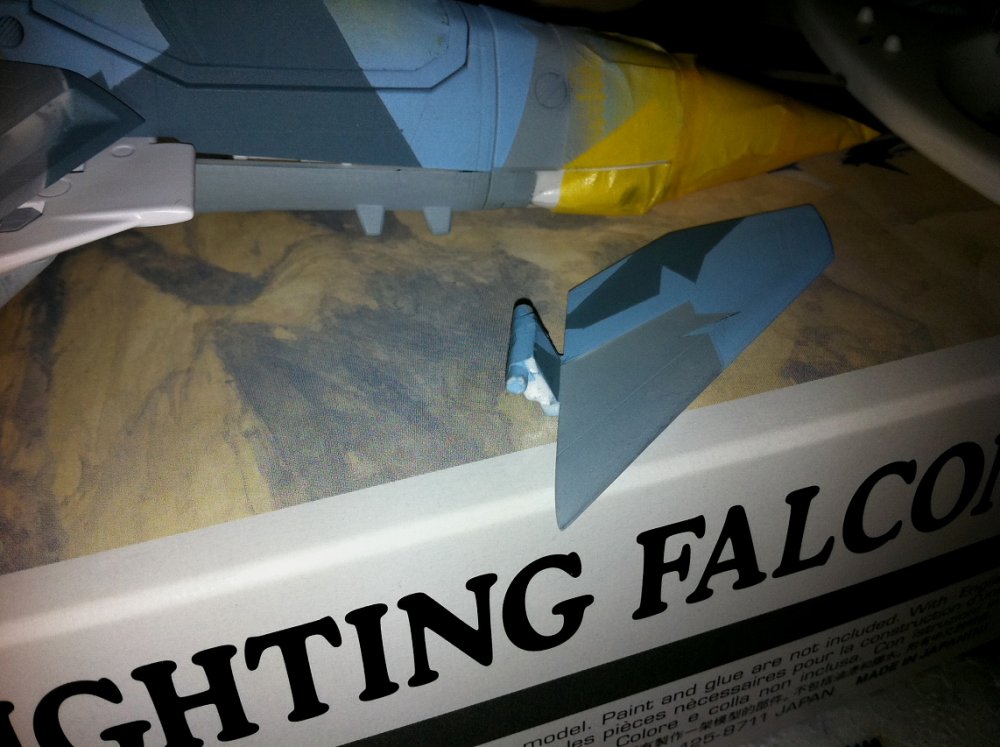
Thanks! It's coming together, finally! I've still got some concerns about what I'm painting and how durable things will be when it's all together. For instance, the vertical stabilizers and their hinge mechanism-that joint is so tight that paint has to scrape off in order for it to work. How is white going to look on that joint? I'll post pics of what I mean at some point. The other item is the LERX assembly. That's a diecast part, along with the hip swingbar mechanism. It's painted white, and a fairly glossy white. I don't really trust any of my (acrylic) paints to adhere to the white paint already there. But I'm starting to think it'll look pretty stupid white. I also don't know what'd it'd take to resurface the paint in order to get anything else to stick to it (sandblasting?). I was hoping it'd be ok because of all the other white things that are meant to be that way (radome, leading edge of the left vstab, top of both vstabs, inside of landing gear bays). So I'm still undecided. I guess I could go with some lacquer paints but I don't have them and don't want to shell out more for them. Plus, I've then got to deal with some pretty nasty chemicals for cleanup. Lots to consider. Still open to thoughts and suggestions. Here's some quick snaps I grabbed on my iPhone tonight to illustrate what I mean: This shows the LERX (but not the nosecone so no other white references). And here you can see the white that is actually a result of the paint rubbing off as I put the stabs onto the backpack to prep for lining the camo pattern up. I suppose I could sand down the edges just enough to allow the pain thickness, but that'd be nuts!
-
MickyG's Yamato VF-1S Unpainted, Unassembled Kit Build
mickyg replied to mickyg's topic in The Workshop!
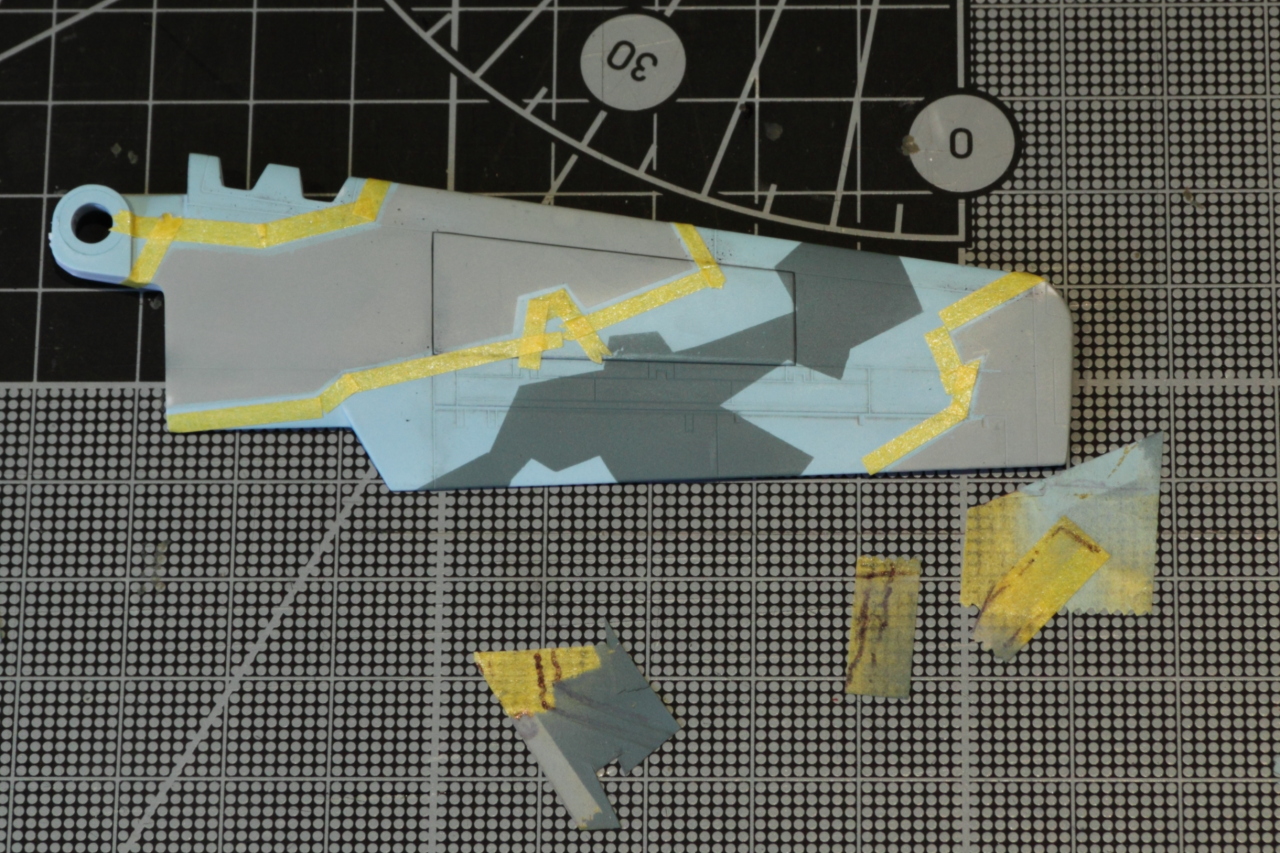
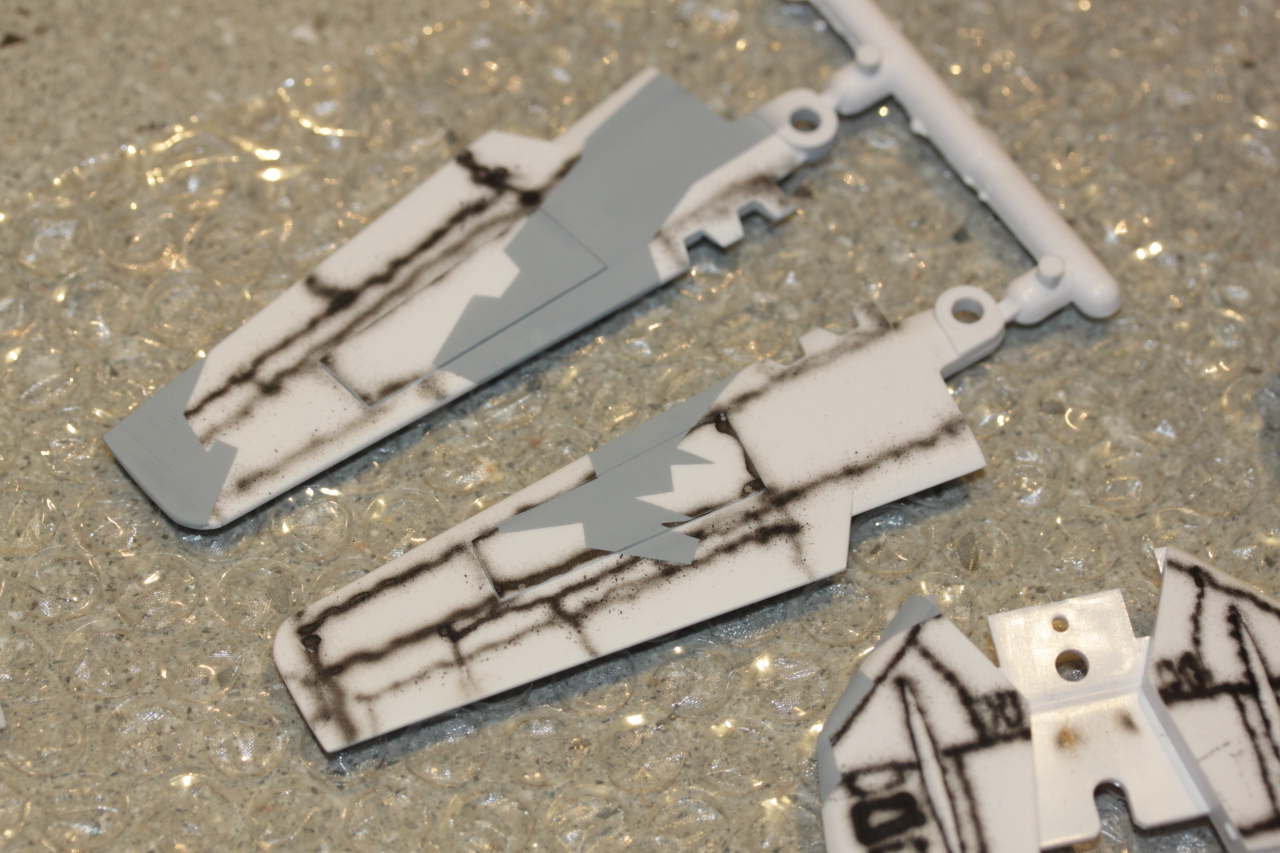
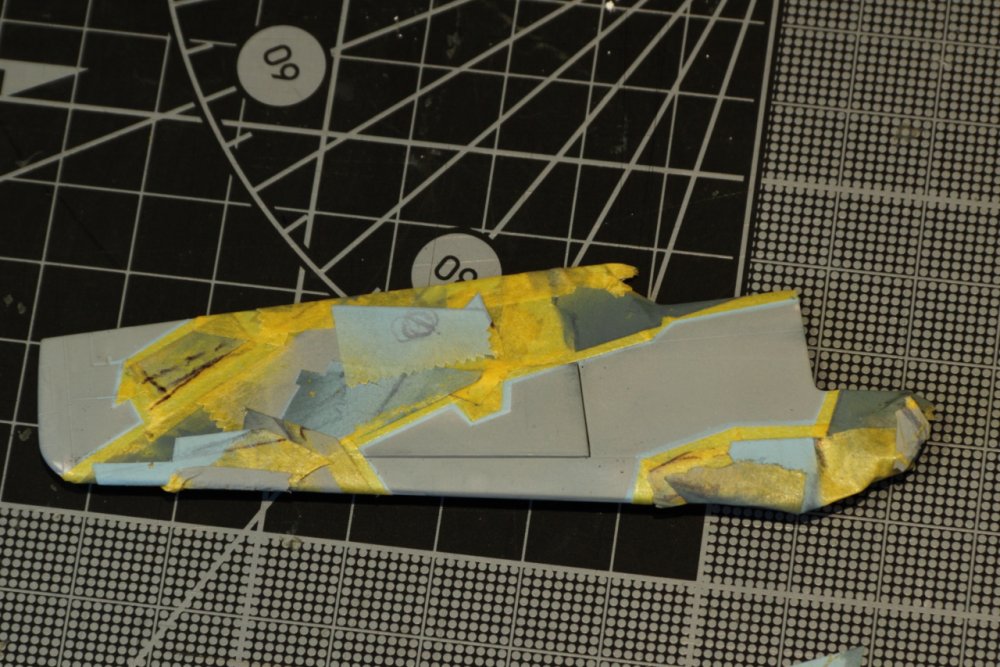
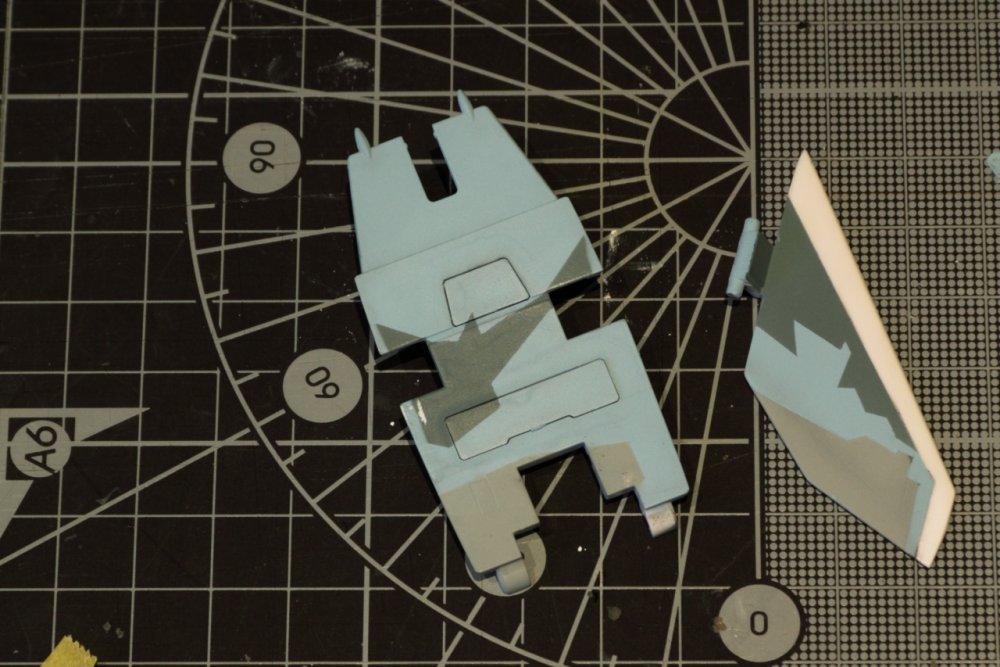
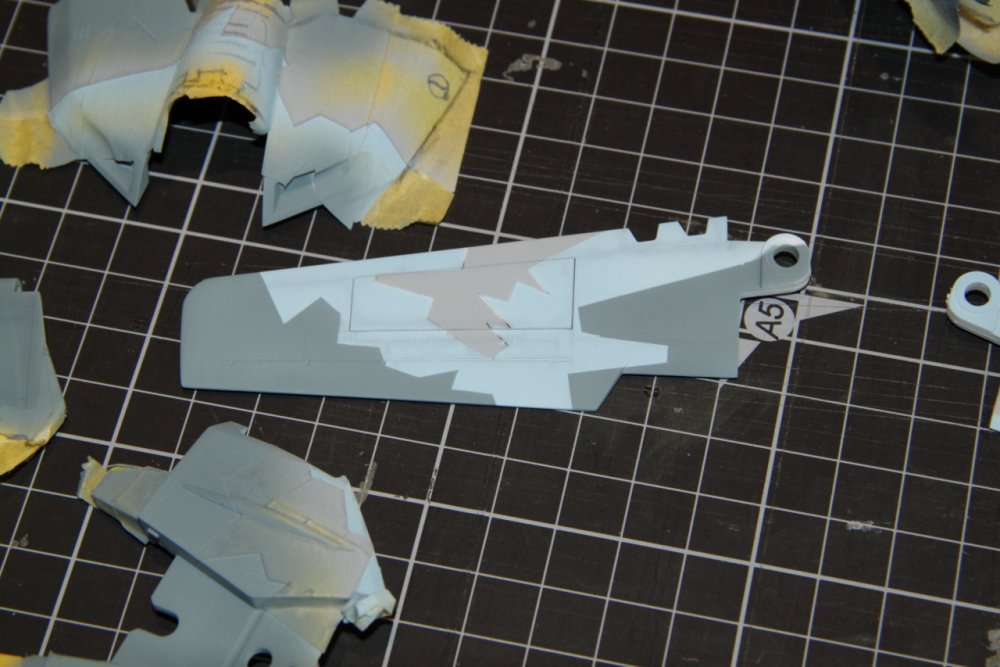
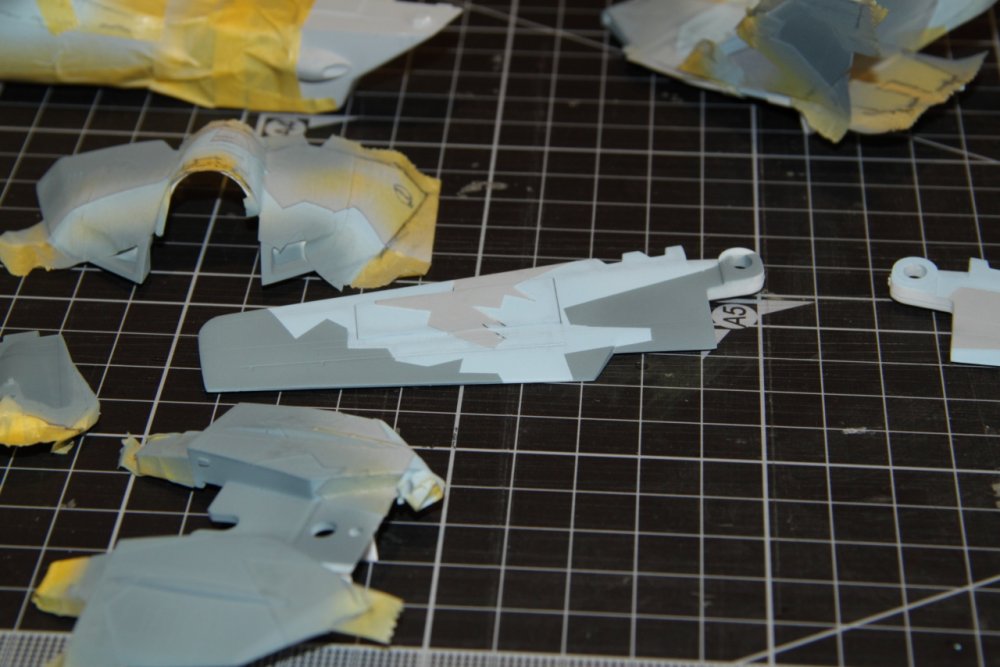
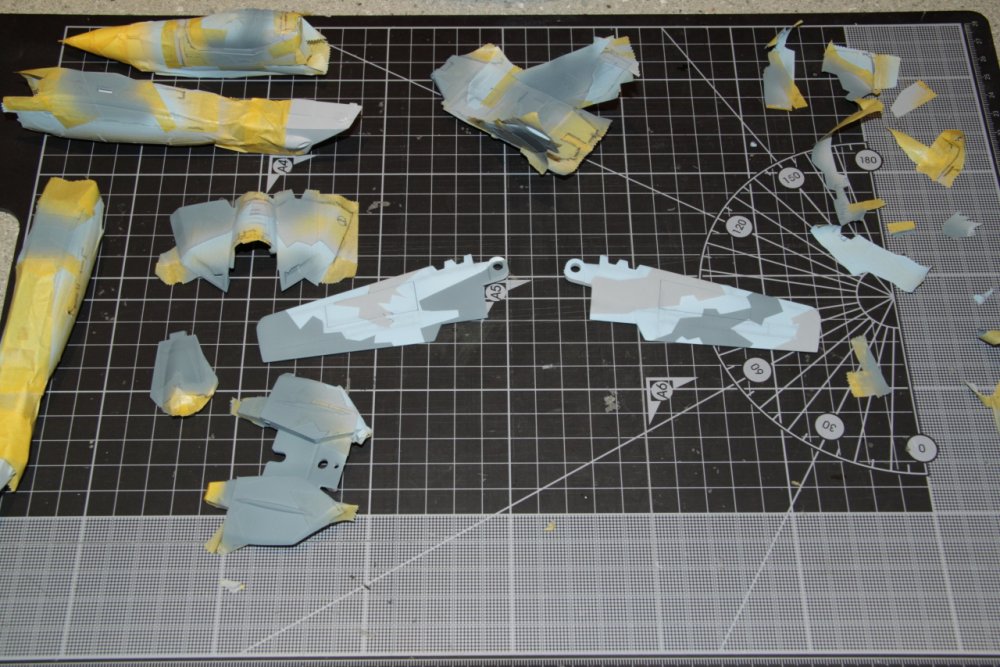
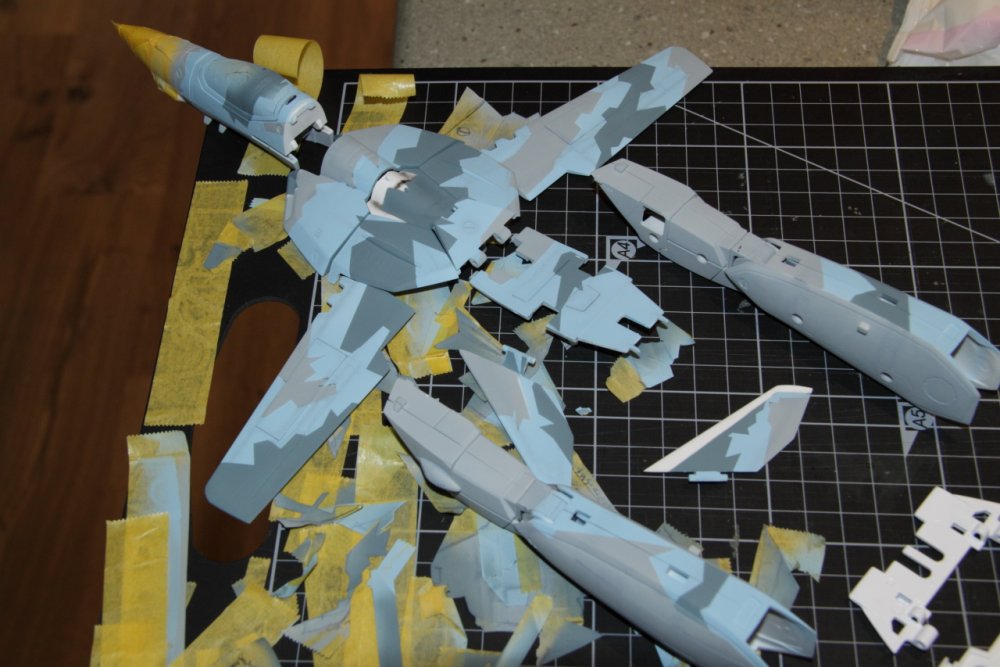
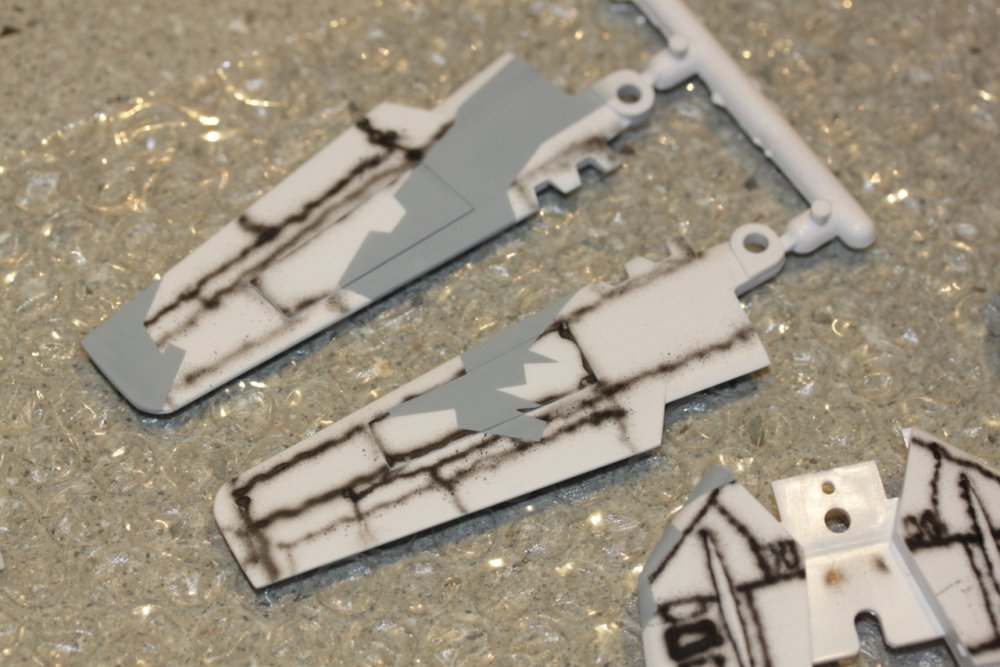
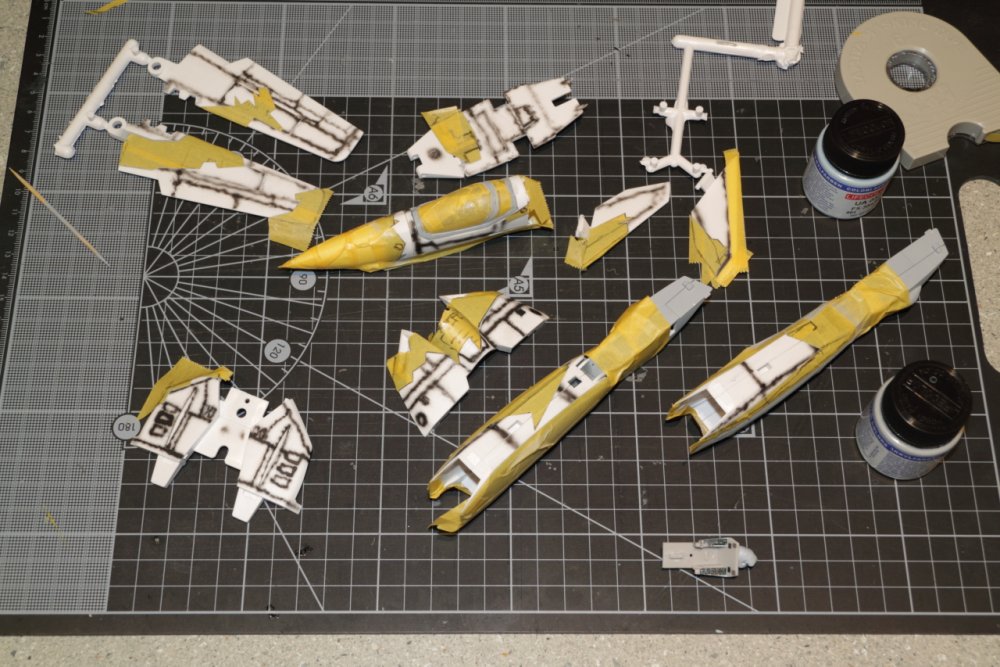
Finally got the final dark blue on. I was a bit worried because I didn't actually have FS 35109 when I bought my paints and got something close instead. Only after looking at the paint in the bottle, I decided it was much too gray and potentially greenish to really go with the other colours I'd already put on. I figured I'd do one small patch to see what I thought, just in case. And overall, I'm actually happy with it. As I've mentioned a few times before, I'm pretty particular when it comes to getting things "right" and that goes for colours too. Just look at the pattern of the camo if you need convincing - I could easily have just made my own scheme but I worked stupidly hard getting the pattern to look like the actual NSAWC Tomcat. And as I've also said, who cares! It's an aircraft no one's ever seen in this scheme! Anyway, I'm happy with how it turned out but there are a lot of corrections I'm going to need to make in the coming weeks. Lots of results of not doing an overal base coat, some masking issues (not making sure the masking tape was fully stuck down before painting, creating leakage or feathering on some areas), and some evidence of paint running here and there. But nothing I can't fix up later. Just a bit annoying that I have to all. Look at the wing to see what I mean about some mistakes that'll have to be fixed. The black "outline" in some areas is another concern. It's not an outline actually, it's just the preshading showing through and a small area where one mask overlapped another so the area didn't get any paint at all. But instead of seeing the white plastic, you see the black preshading. There's still a LOT to do yet!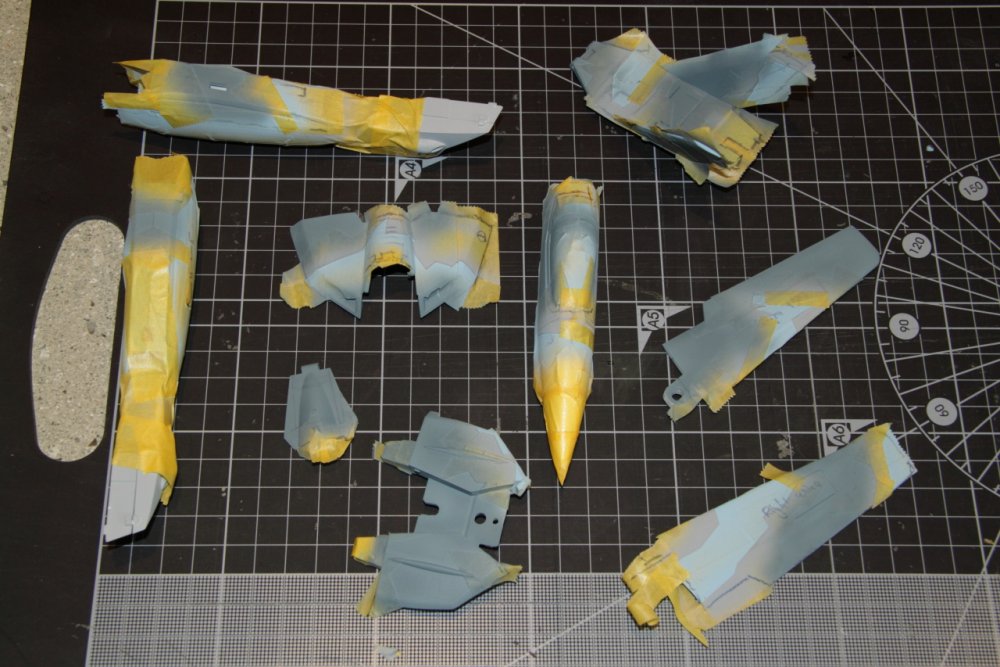
-
MickyG's Yamato VF-1S Unpainted, Unassembled Kit Build
mickyg replied to mickyg's topic in The Workshop!
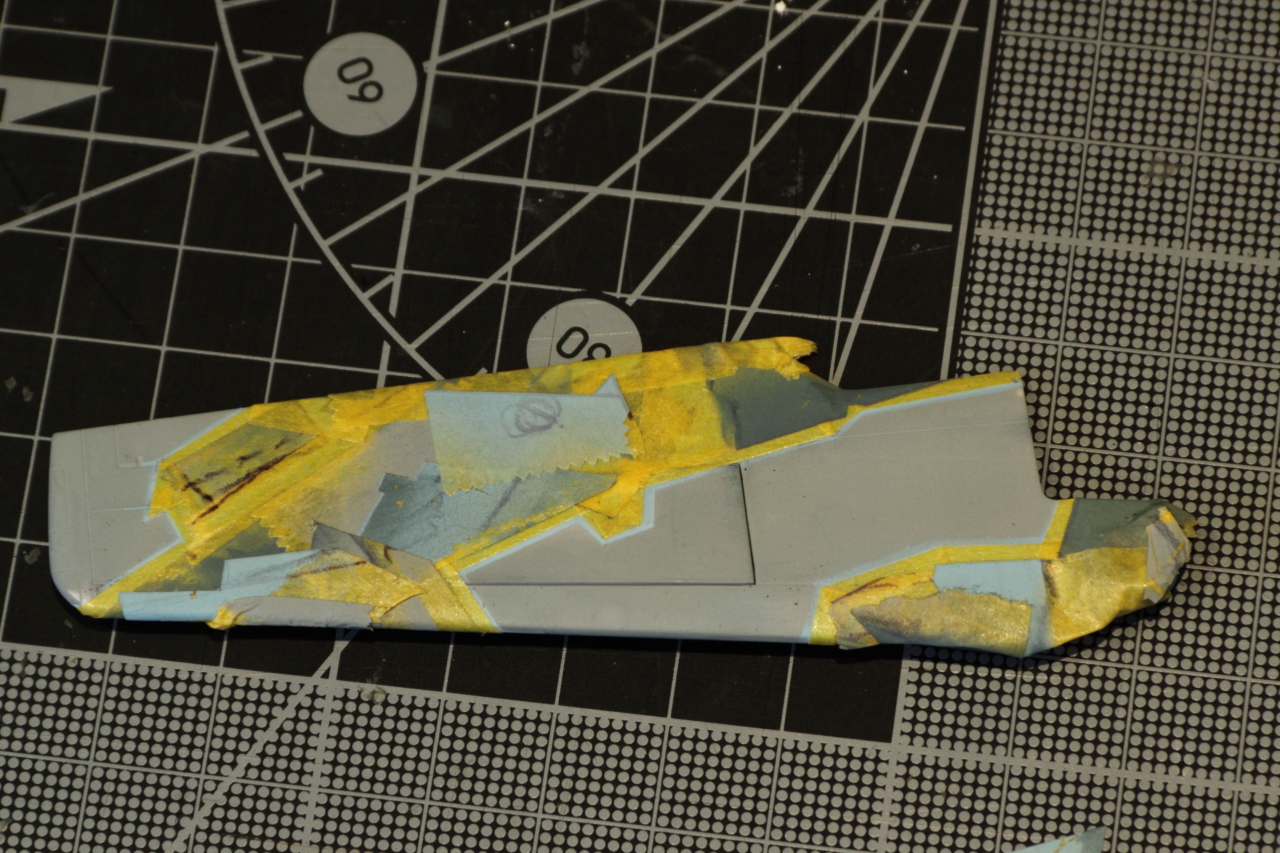
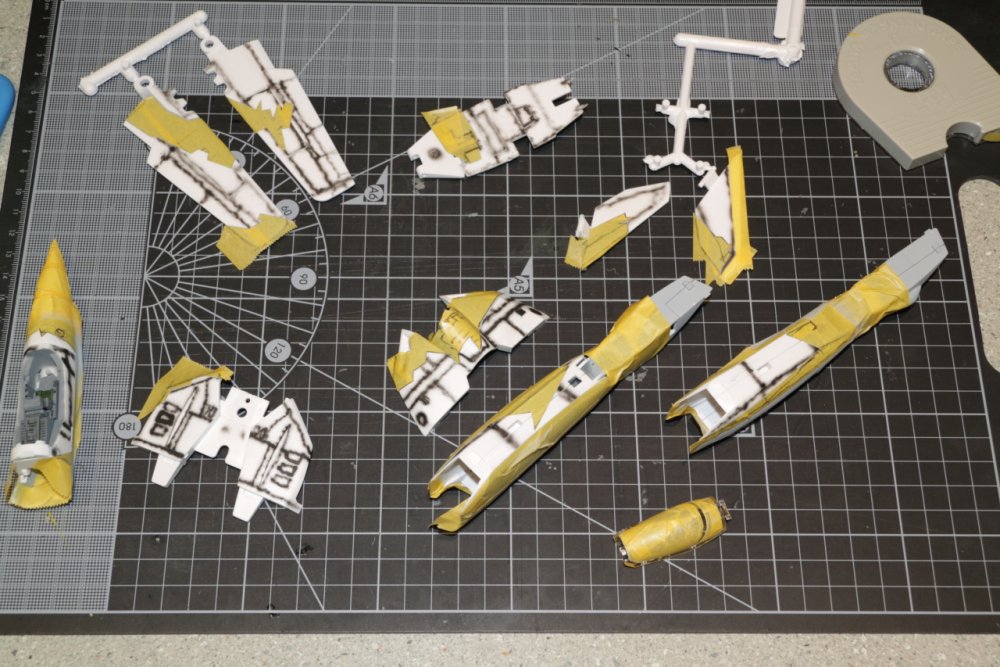
Got more masking done at the end of a weekend. And that's pretty much it. Ready for the last dark blue now. Hen it'll be lots of remaskin adn touch up painting. Kids: this is why you go base colour, then mask out the next batches instead of what I did! I also discovered a few areas I thought weren't visible that I'll have to go back and paint (I'm looking at you, backpack). -
MickyG's Yamato VF-1S Unpainted, Unassembled Kit Build
mickyg replied to mickyg's topic in The Workshop!
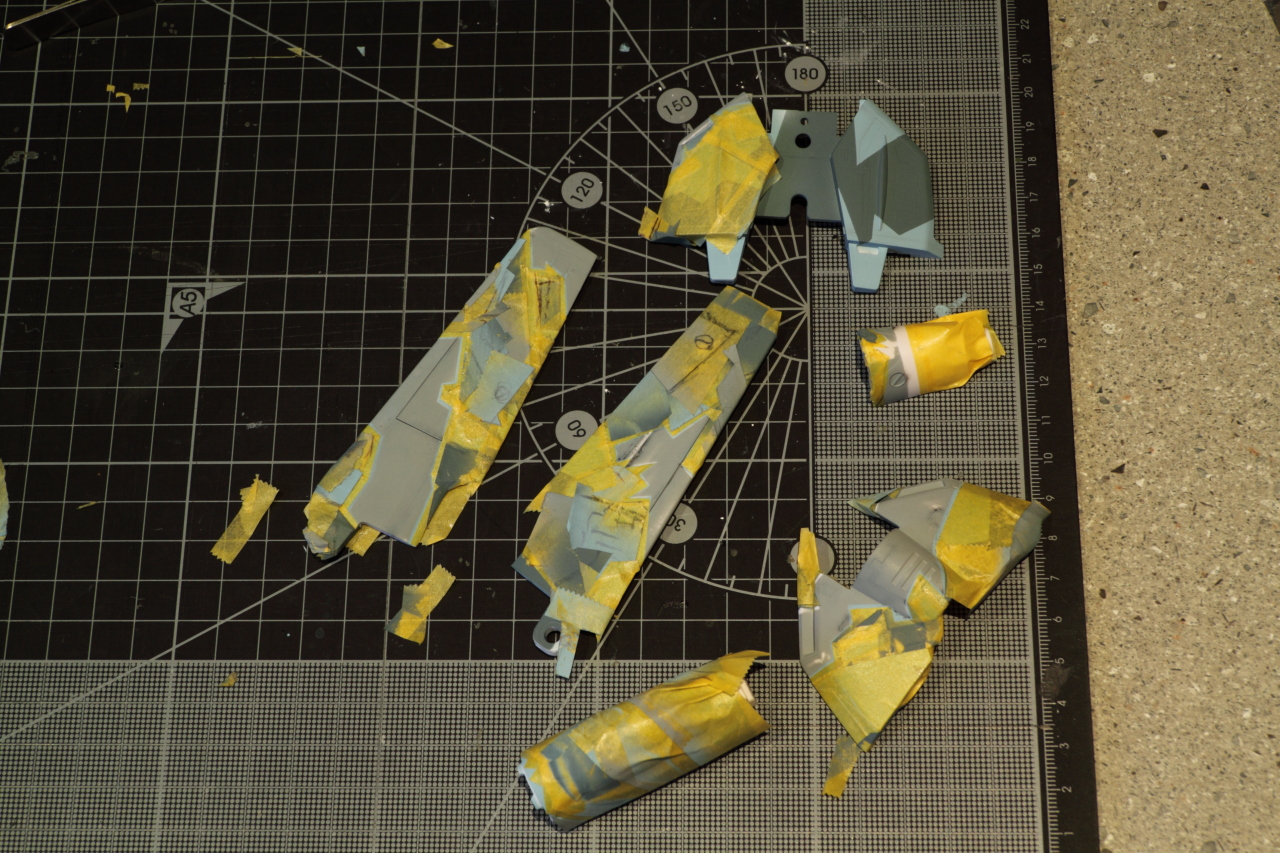
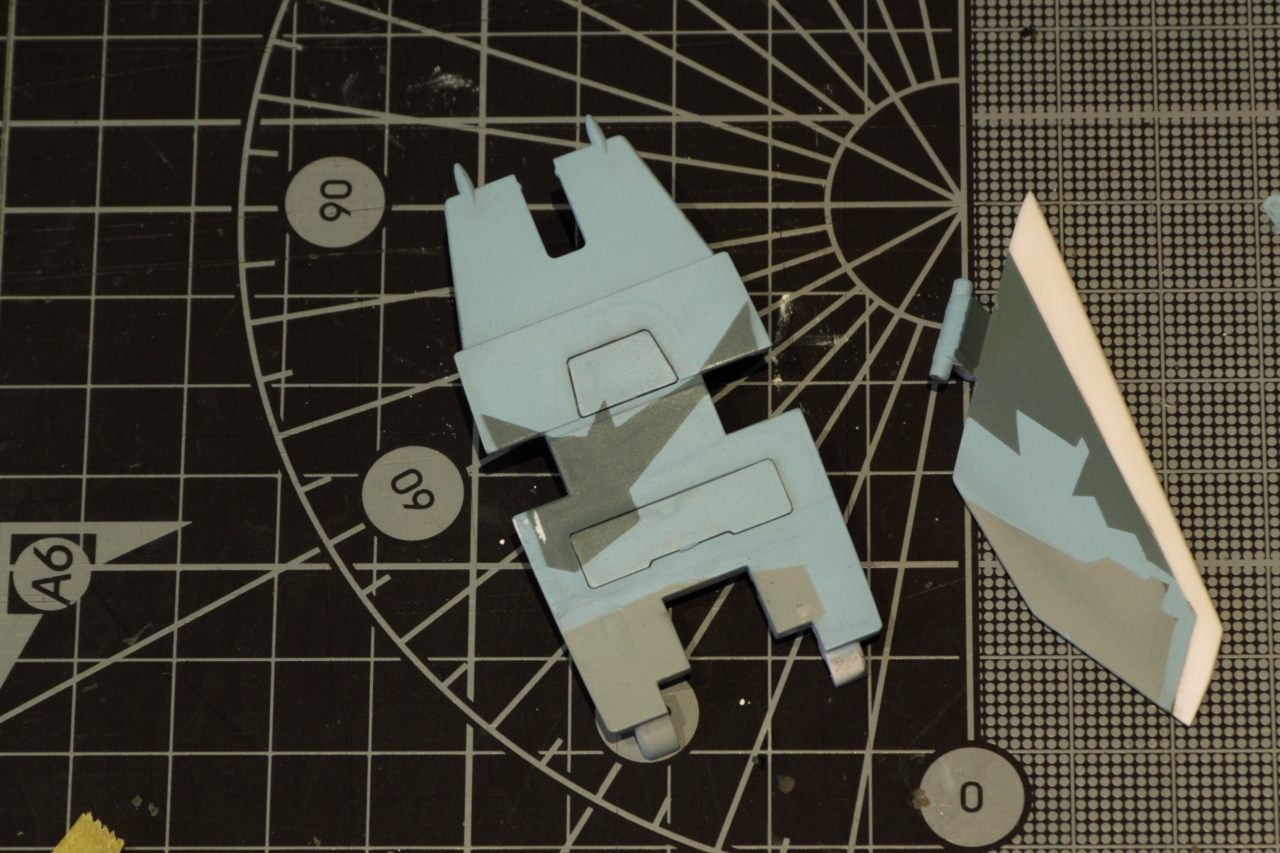
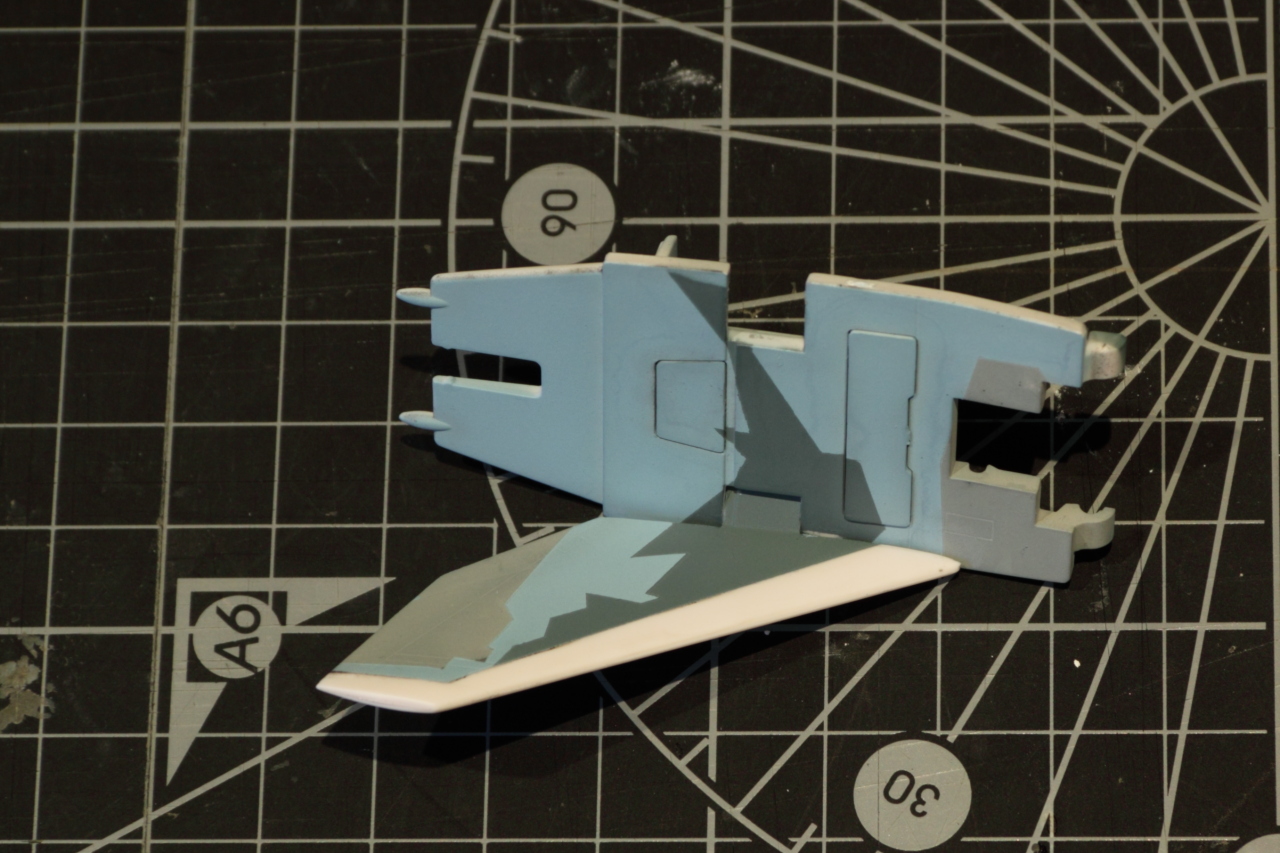
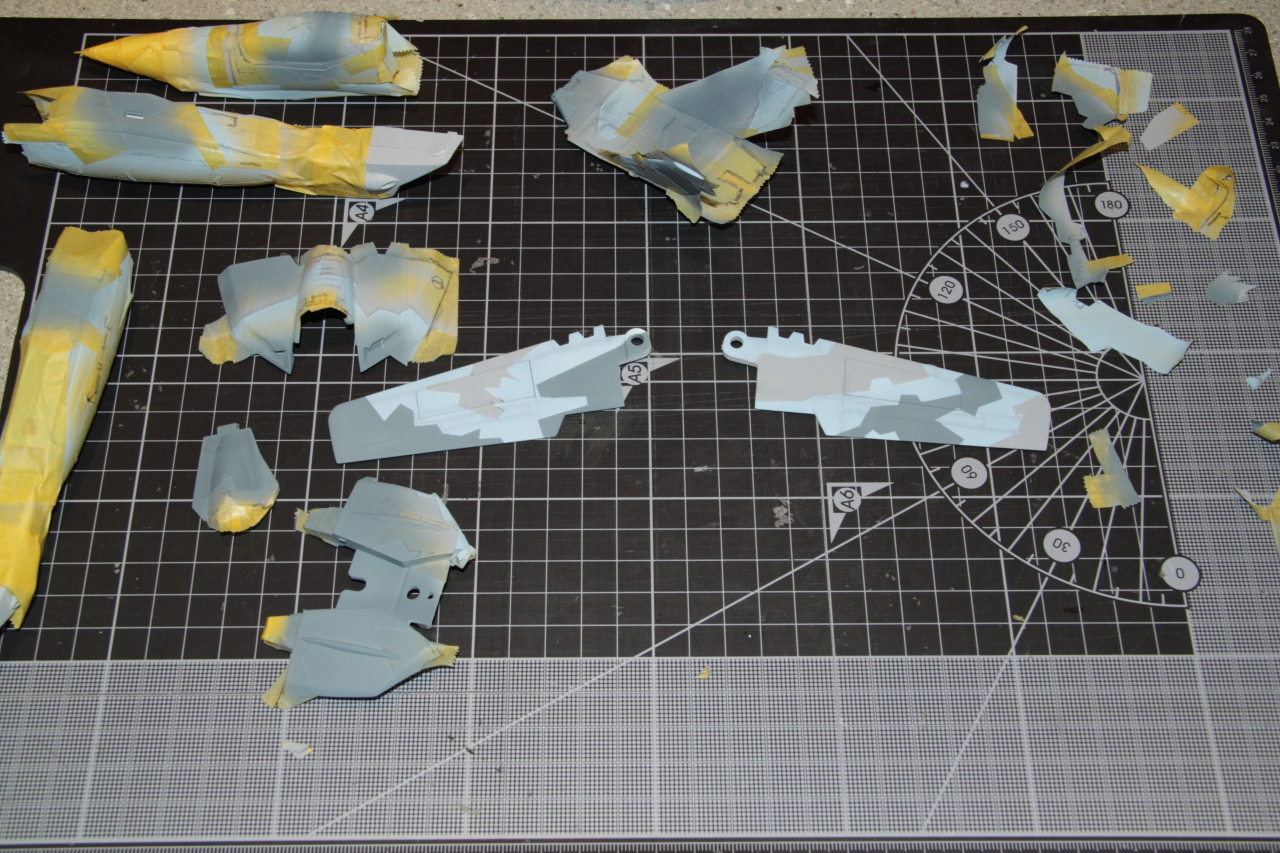
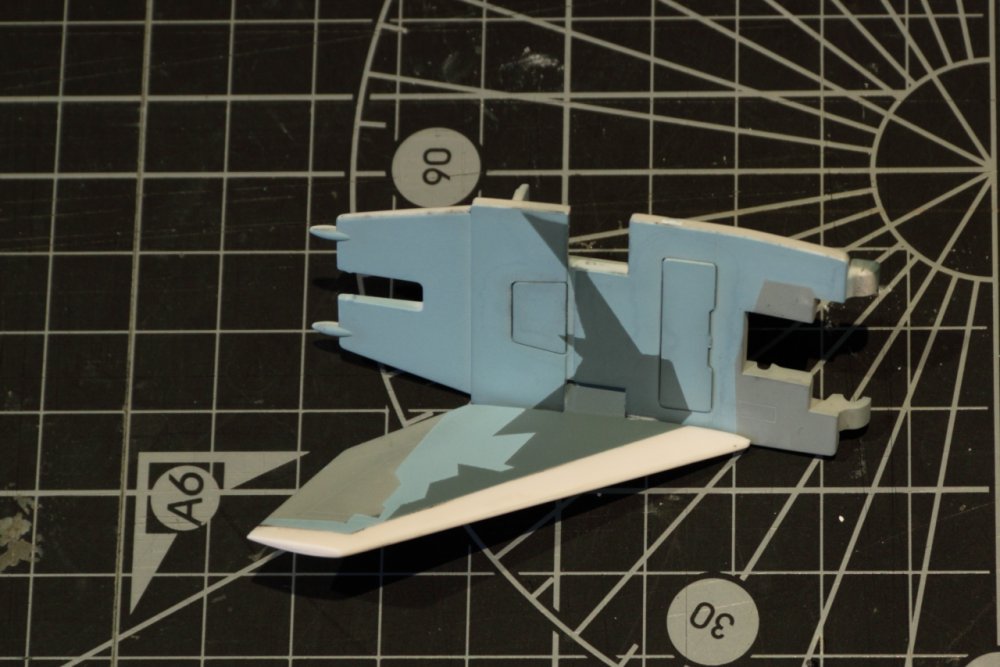
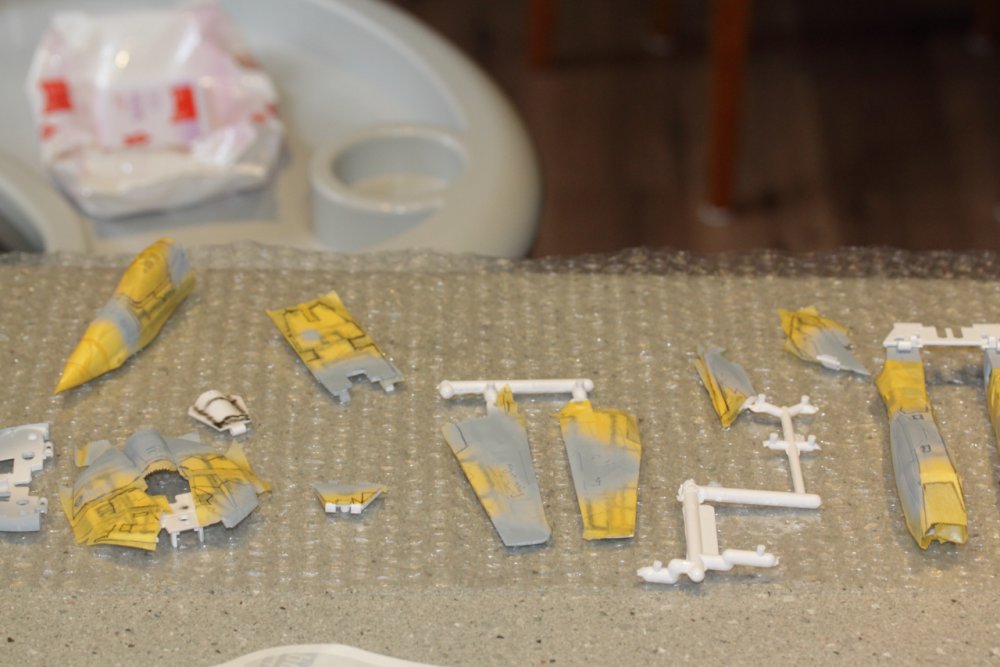
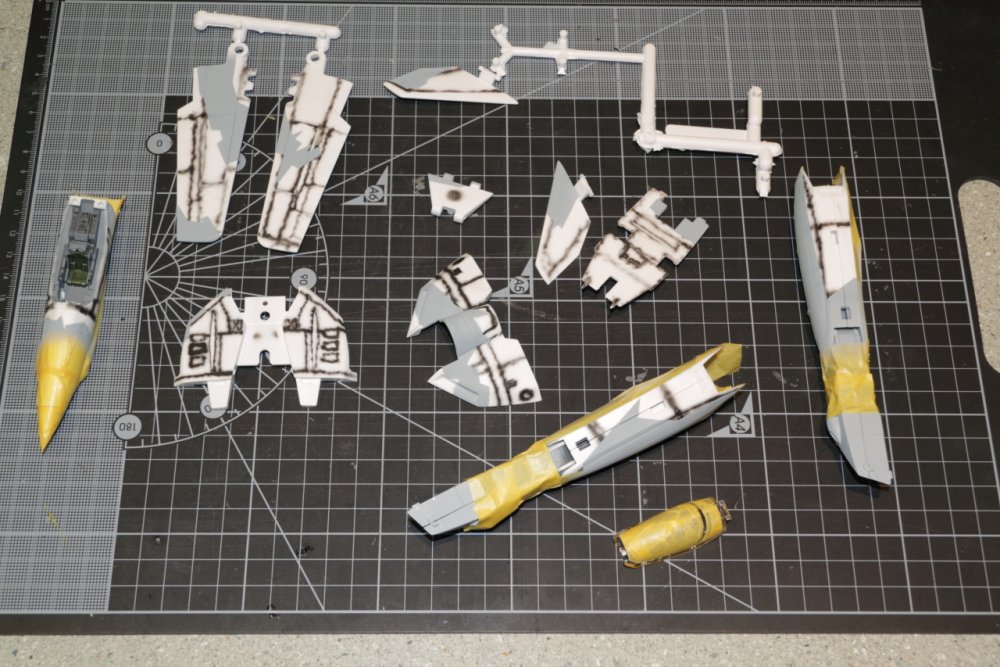
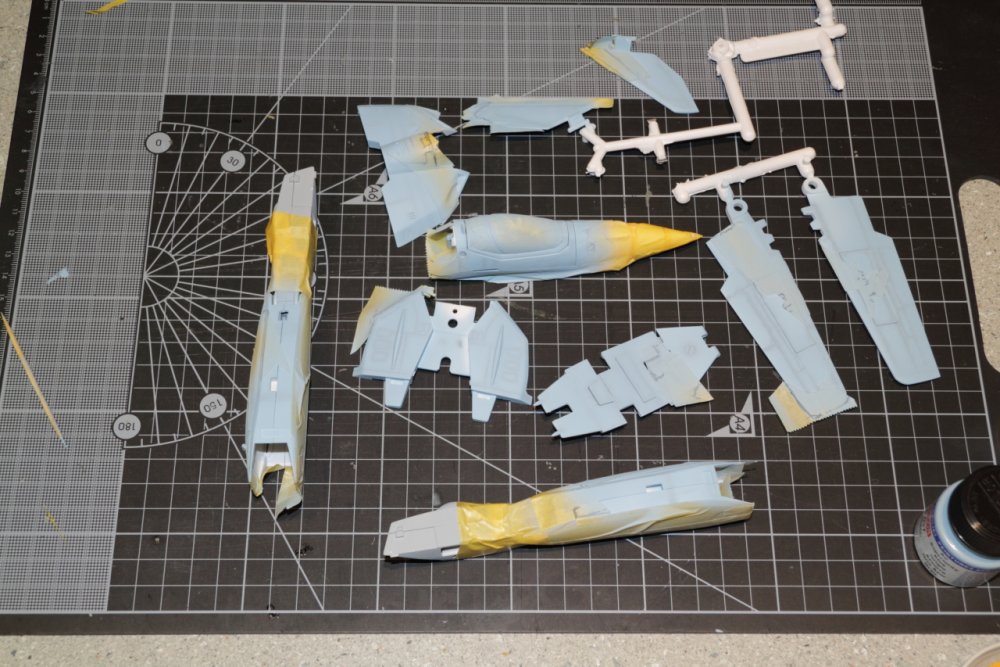
I'm finding the cold weather doesn't seem to bother the acrylics I'm using nearly as much as I thought it would. They still go on well and dry fine (as long as I don't spray it on too thick, which seems to be happening on at least one part I paint these days). More progress over the last few days! Managed to paint the darker gray on all the top surfaces. It looks only just a touch darker than the under side (it's dark ghost gray on top and light ghost on the bottom). In fact, unless they're butted up against each other, you'd think it was the same colour. Kinda not what I was hoping for but I guess it's somewhat accurate. Anyway, got the gray done a few days ago (yesterday, maybe?) and the light blue today. The blue is much lighter than I'd expected, while the grays are a lot darker it seems. As this isn't an F-14 aggressor, I'm sure there won't be too many people criticizing my lack of accuracy. As expected, my "paint each colour with a different masking cutout" had its problems. Even though I cut these out with a scalpel, somehow the painted areas didn't exactly match the masking. So in some areas, I've got hard paint edges with light blue on them (and a noticeable "step" in the paint) and in others, I'm sure I'll have a white line after I remove the masking. Oh well, nothing another pass after I finish the three colours won't fix. Because I suspected this would be the case, I decided to be smart on the light blue and just paint everything remaining. The dark blue will then go over the light, with a seperate mask. Pics (no descriptions this time, as I'm getting lazy! Please ask if there are any questions though):
-
MickyG's Yamato VF-1S Unpainted, Unassembled Kit Build
mickyg replied to mickyg's topic in The Workshop!
I haven't screwed anything together yet. Just loosely assembled to get an idea of what covers what and where the camo lines begin/end. Hot/humid is 6 months awayfor me. Can't quite wait that long! -
MickyG's Yamato VF-1S Unpainted, Unassembled Kit Build
mickyg replied to mickyg's topic in The Workshop!
Got everything masked and ready to paint the first camo colour. But didn't actually get to paint. Probably just as well - it's cold and wet today and probably not ideal for airbrushing. I promised patterns at one point in this build and unfortunately, laziness and busy crept in. I'll attempt to get something put up before this is finished. So sometime in the next 5 years. -
MickyG's Yamato VF-1S Unpainted, Unassembled Kit Build
mickyg replied to mickyg's topic in The Workshop!
Thanks! There was no drinking involved. at least not this time. There might be during though. My plan today is to finish masking the legs for the top camo pattern today, then maybe get a coat of grey on. Maybe. Then I should know how foolhardy this really will be! I think the usual method is to lay down a base coat of the lightest colour, then mask the next darkest and continue till you get the last and darkest colour down. In hindsight, it probably would have been no more difficult than what I'm attempting now. -
MickyG's Yamato VF-1S Unpainted, Unassembled Kit Build
mickyg replied to mickyg's topic in The Workshop!
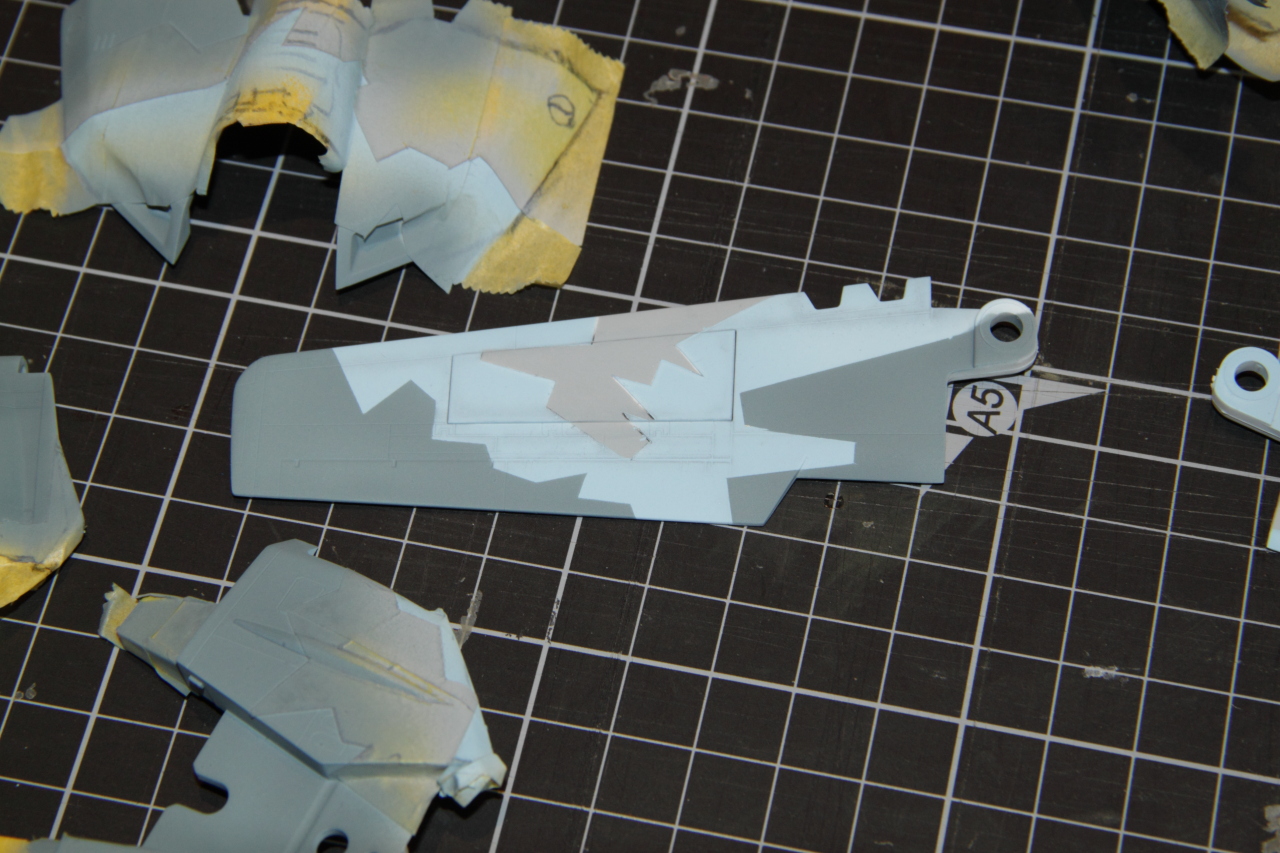
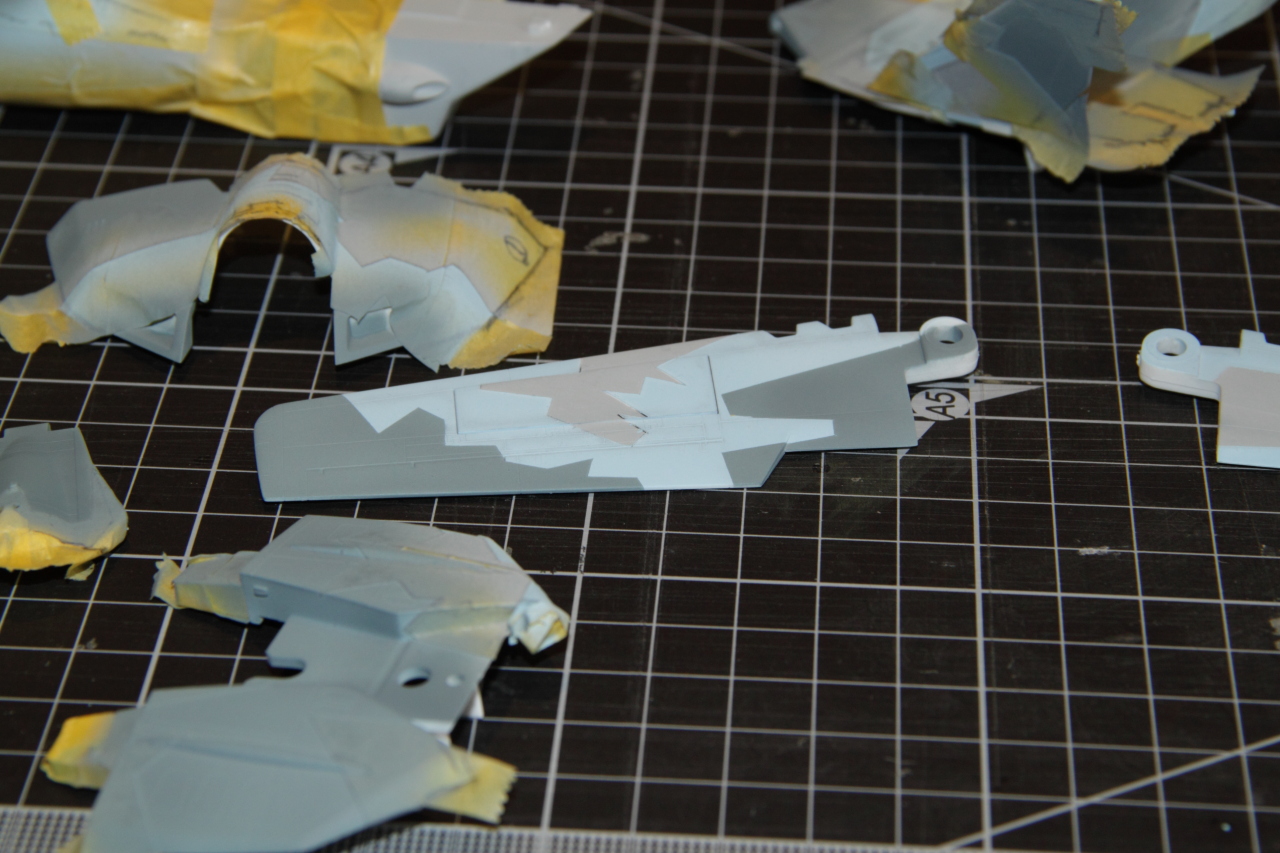
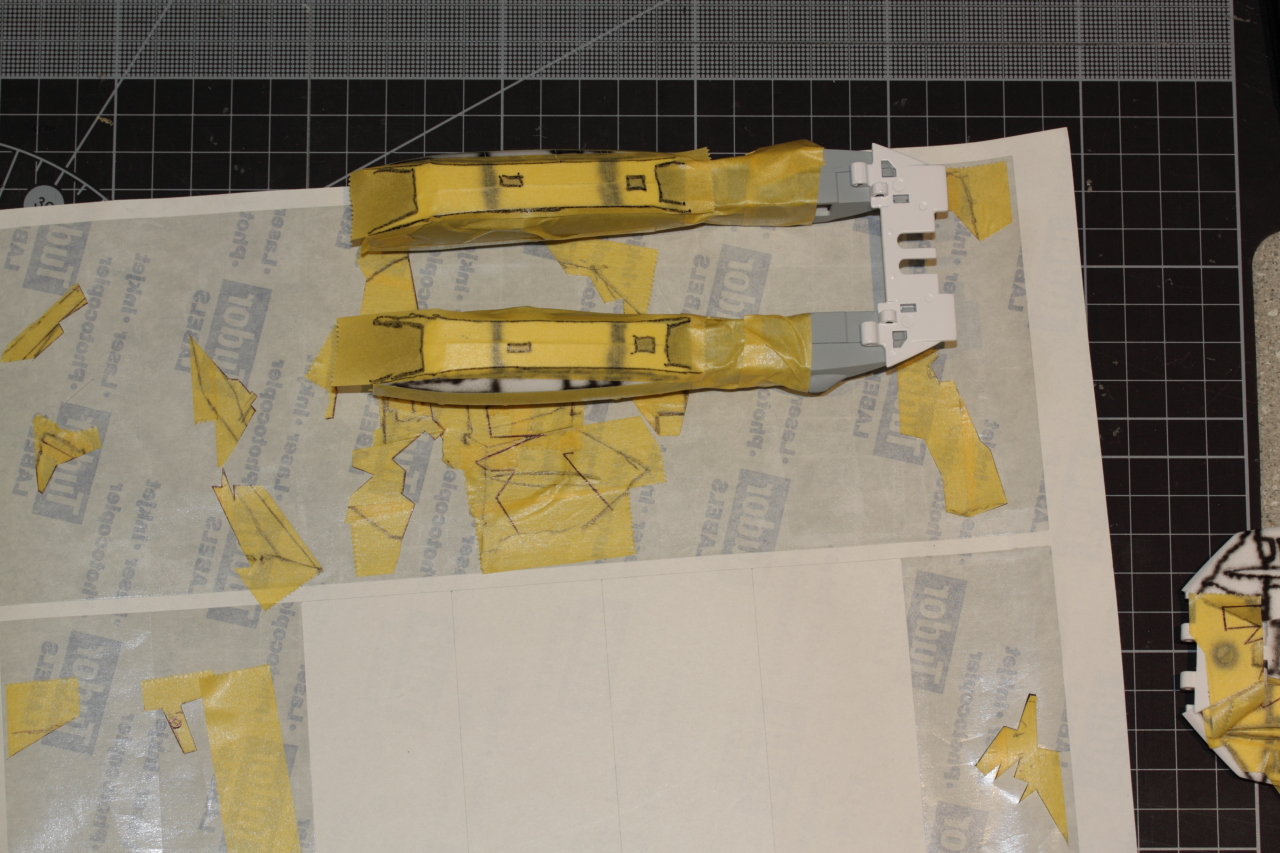
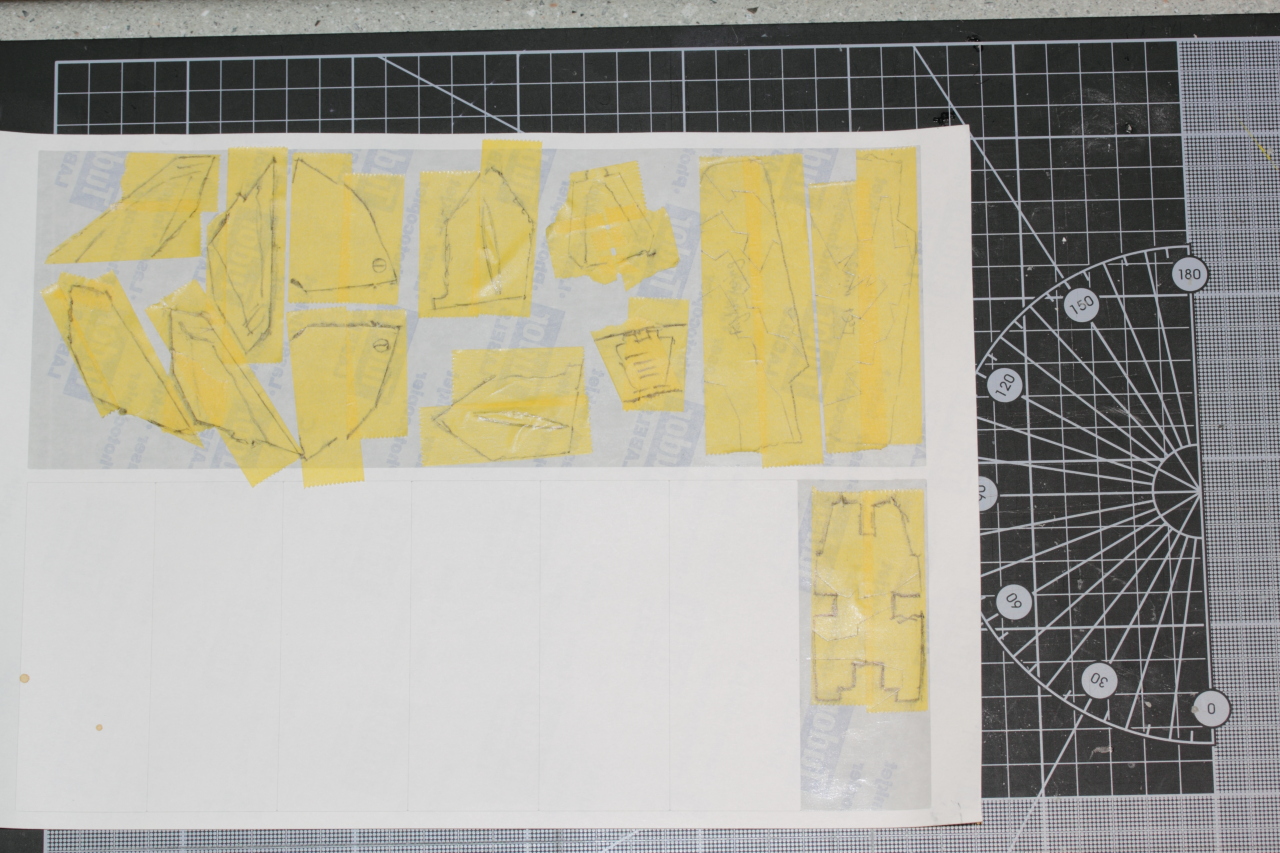
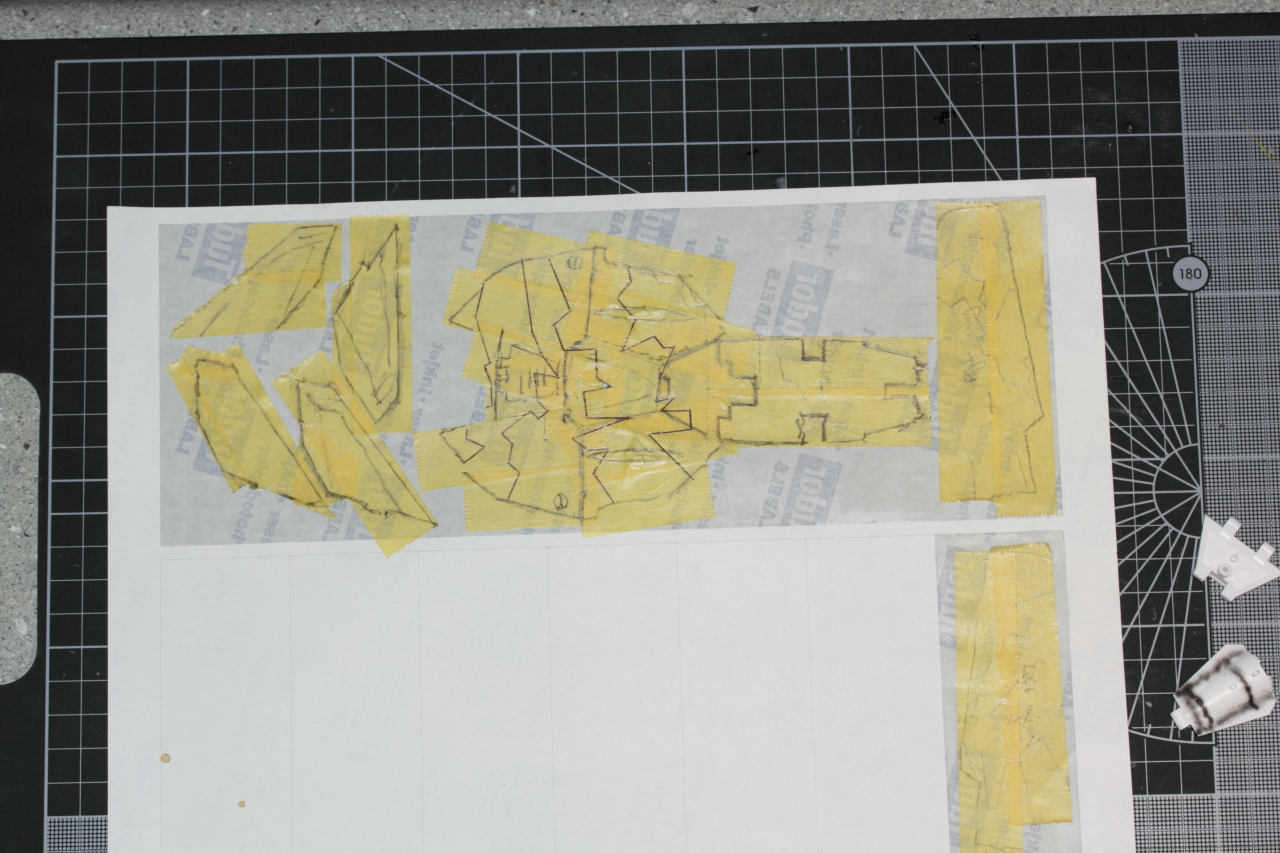
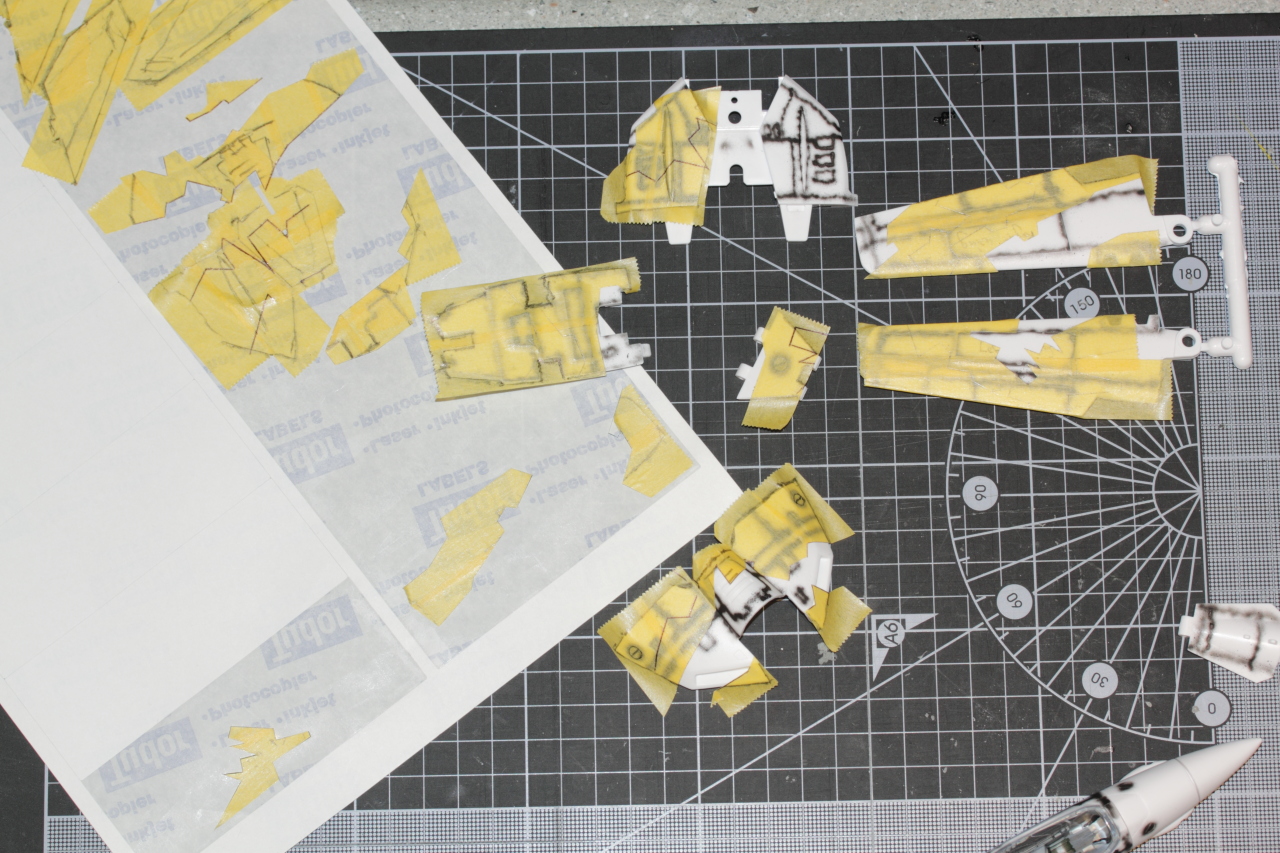
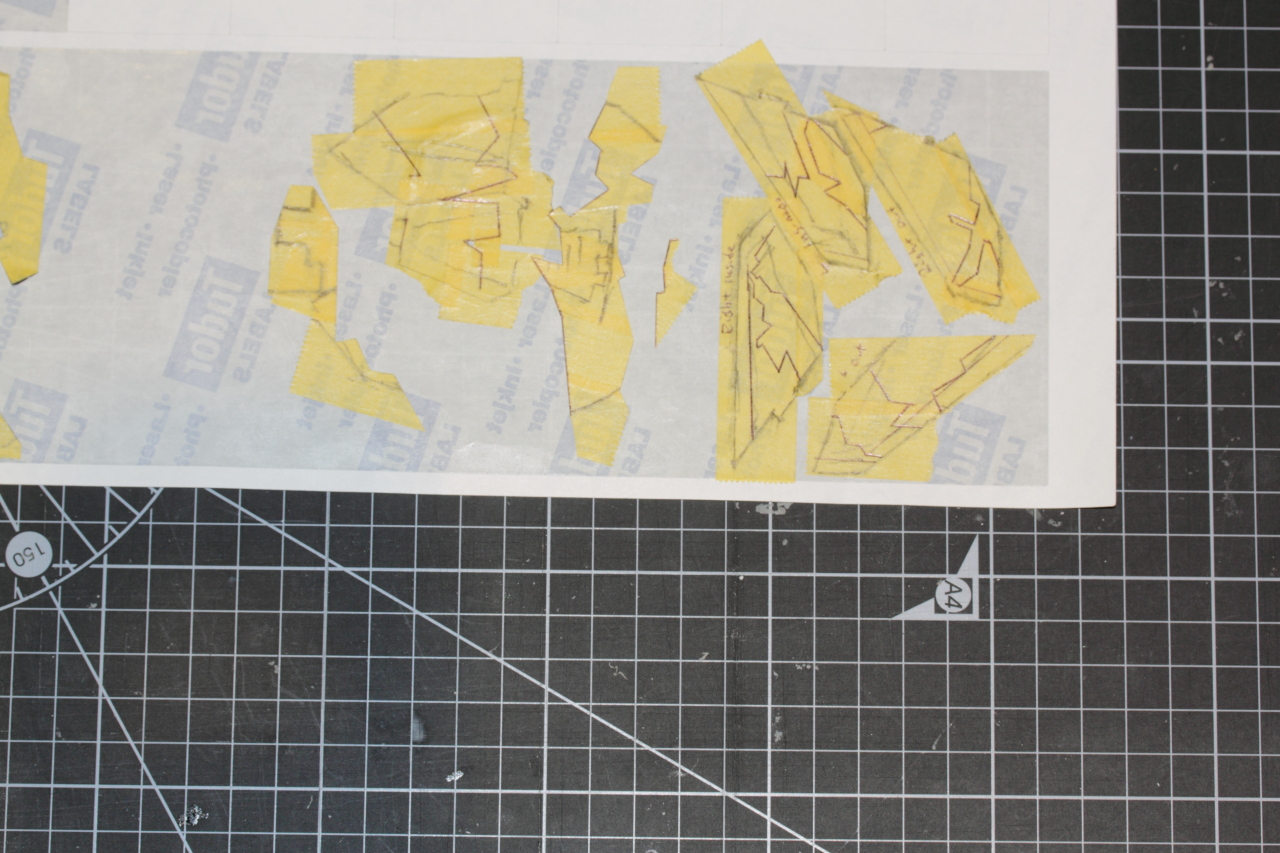
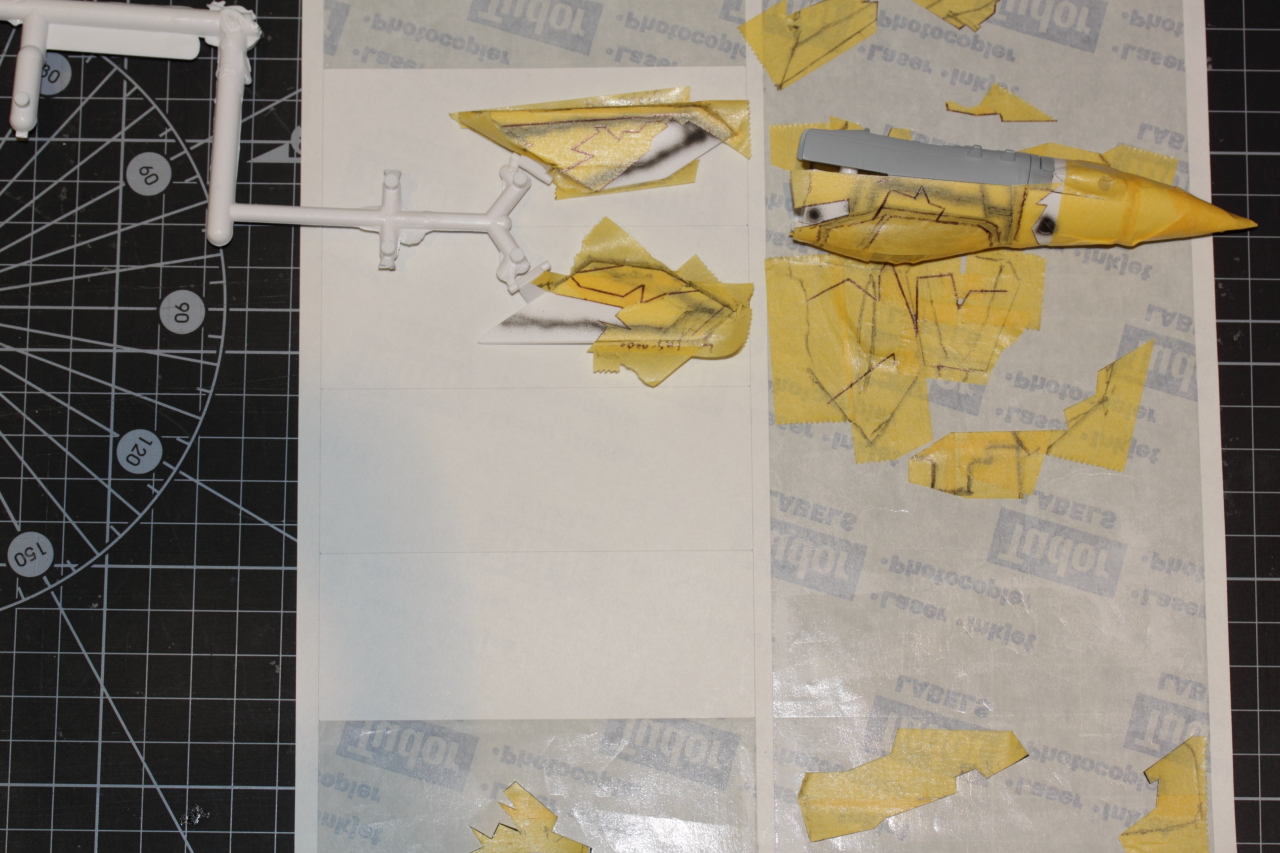
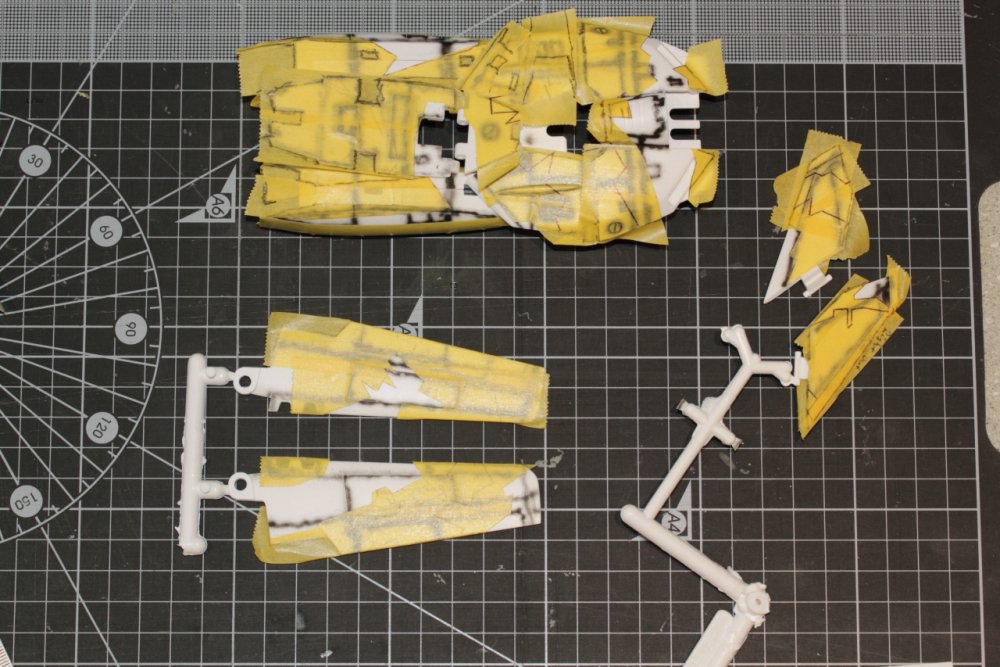
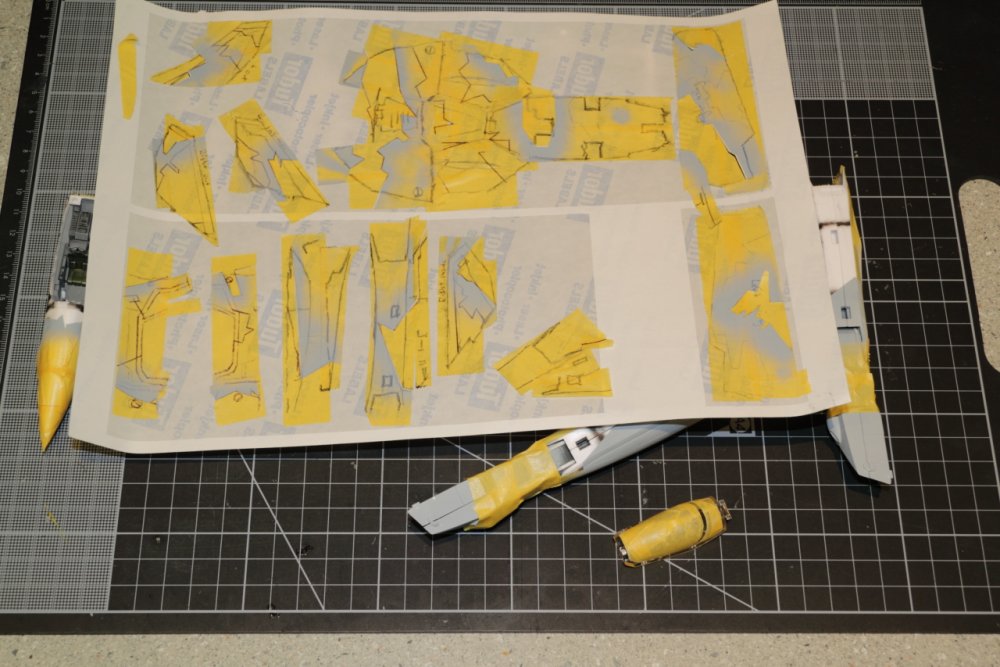
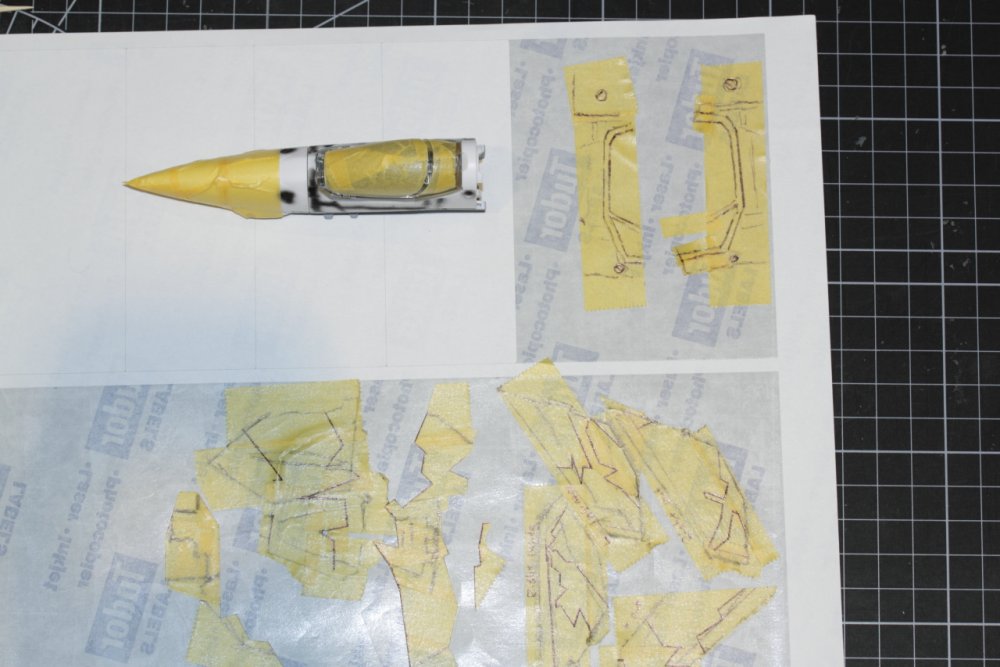
Update time! I've been off work for a week and have had 2 partial days to start working on this project again. Not a whole lot to report or show but it's something after a really long time of nothing. Basically I've been working on masking. I'm not sure my method is the most logical or efficient but for some reason, I decided I didn't want to paint the top in all one colour and then overlay with the darker shades of the camo. I'll probably regret it later but I figured the panel lines aren't terribly deep and 3 layers (maybe 2) of paint would fill them in a bit too much. I don't know because now I'm thinking the extra paint layers would likely be more durable. We'll see I guess. For now, here's my process: First, I'm loosely applying masking tape to all the major sections, tracing out the edges and major components, then applying each section to a piece of label paper, so I can easily remove the masking tape later. Second, I trace the camo lines on the masking tape. Since the camo is straight edged, this is easily done with a pen and ruler. Third, I decide what colour I want to do first and cut that section of the masking out with a knife and ruler. Finally, I apply this to the part. Where this might all fall down is when I go to start putting other colours on. I'll have to apply the remaining masking exactly over the previously painted part, which could be both tricky and frustrating. As I said before, we'll see.


-
For someone supposedly lacking in skills, it looks pretty insane to me! Very nice work my friend!
-
What's wrong with my Yamato, Bandai, etc.
mickyg replied to UN Spacy's topic in Hall Of The Super Topics
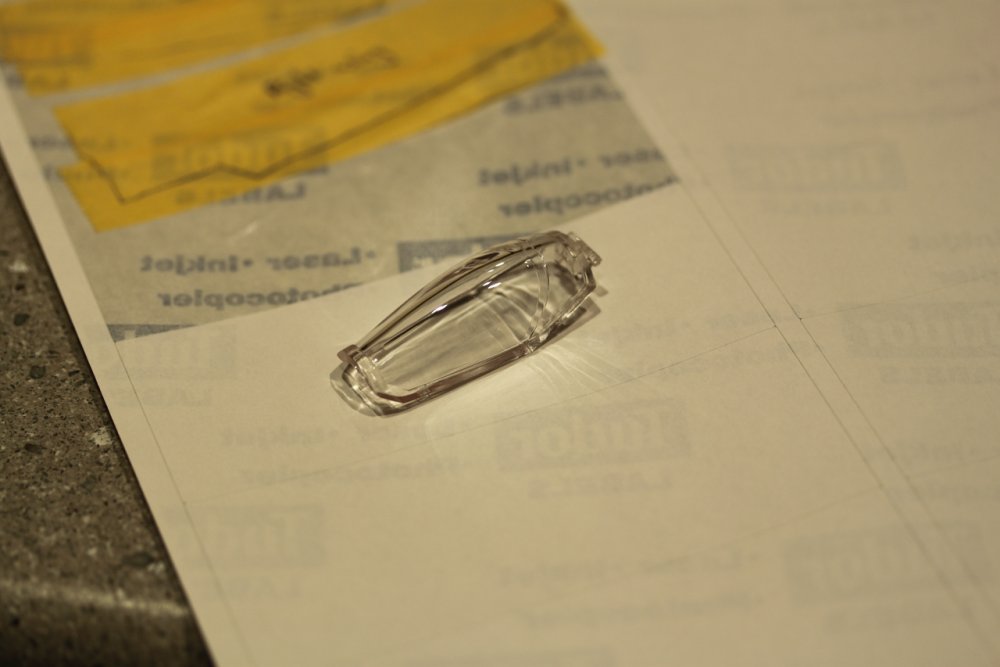
I've got a (first release?) VF-1A and VF-1J (both Hikaru) and I never noticed the seam line. I ordered a 1S kit and noticed it quite prominently. I then went back and noticed the first two I had also had a seam, it was just a lot less noticeable. Perhaps the newer mold for these toys is responsible? Or maybe it's an older mold for the canopies? Either way, if you want to get rid of it, a bit of sanding with increasingly fine sandpaper and a dip in future will sort it out. That's if you can get the canopy off, mind you... -
I had good luck with both. But the softer stuff is tricky. For the Bandai decals, if you apply it and wait too long, and it's still wet after a few minutes, it almost always disolved the decal and left a nasty mark. I found that if I wet the decal with softer (It's actually engrishised and called "Mr Mark Softer" not softener, which is what it really does) enough so that it was starting to look like the decal had "dried" after about a minute, that was enough. I used a paint brush though - too much solution, just soak it up with the brush. Not enough, dab on some more. It took some practice but I managed to get mine to sink in fairly well. The verniers were a pig though, every time!
-
MickyG's Yamato VF-1S Unpainted, Unassembled Kit Build
mickyg replied to mickyg's topic in The Workshop!
Yes, I've got the Tamiya stuff and it's called "rubbing polishing compound" on the tube/box it comes in. They've got 3 grades, coarse, fine, and "finishing" as I recall. I've only got the last 2. The paint scheme is going to be the NSAWC (Or Top Gun) F-14A aggressor scheme. I linked to some pics on the 2nd page, I think. It's a great scheme for an F-14 so I thought it'd look pretty good on a VF-1. It's basically a hard edged, Su-27 type camo scheme. Blame Dobber, he started it with his SV-51! -
Shameless plug: How bout HERE? I won't claim it's "well made" but it's certainly painted!
-
MickyG's Yamato VF-1S Unpainted, Unassembled Kit Build
mickyg replied to mickyg's topic in The Workshop!
Probably. However, I just went with the, "sand with about 400 grit first, then go to 800, then 1200, then 2000, then use polishing compound, then future it, viola!" approach. Not terribly difficult, just a bit time consuming. And as I mentioned, there's still some hints of sanding marks at the back of the canopy. Though it's probably something only I'll notice. Still, the OCD will likely get the better of me and I'll do the dunk in windex to remove the future (at least I think that works...) and polish it more before the final coat. Thanks for the feedback everyone. Sorry this is so slow going! -
MickyG's Yamato VF-1S Unpainted, Unassembled Kit Build
mickyg replied to mickyg's topic in The Workshop!
Thanks - it's still got some work to polish out some fine scratches were the seam was. Love those magic hands, by the way! -
MickyG's Yamato VF-1S Unpainted, Unassembled Kit Build
mickyg replied to mickyg's topic in The Workshop!
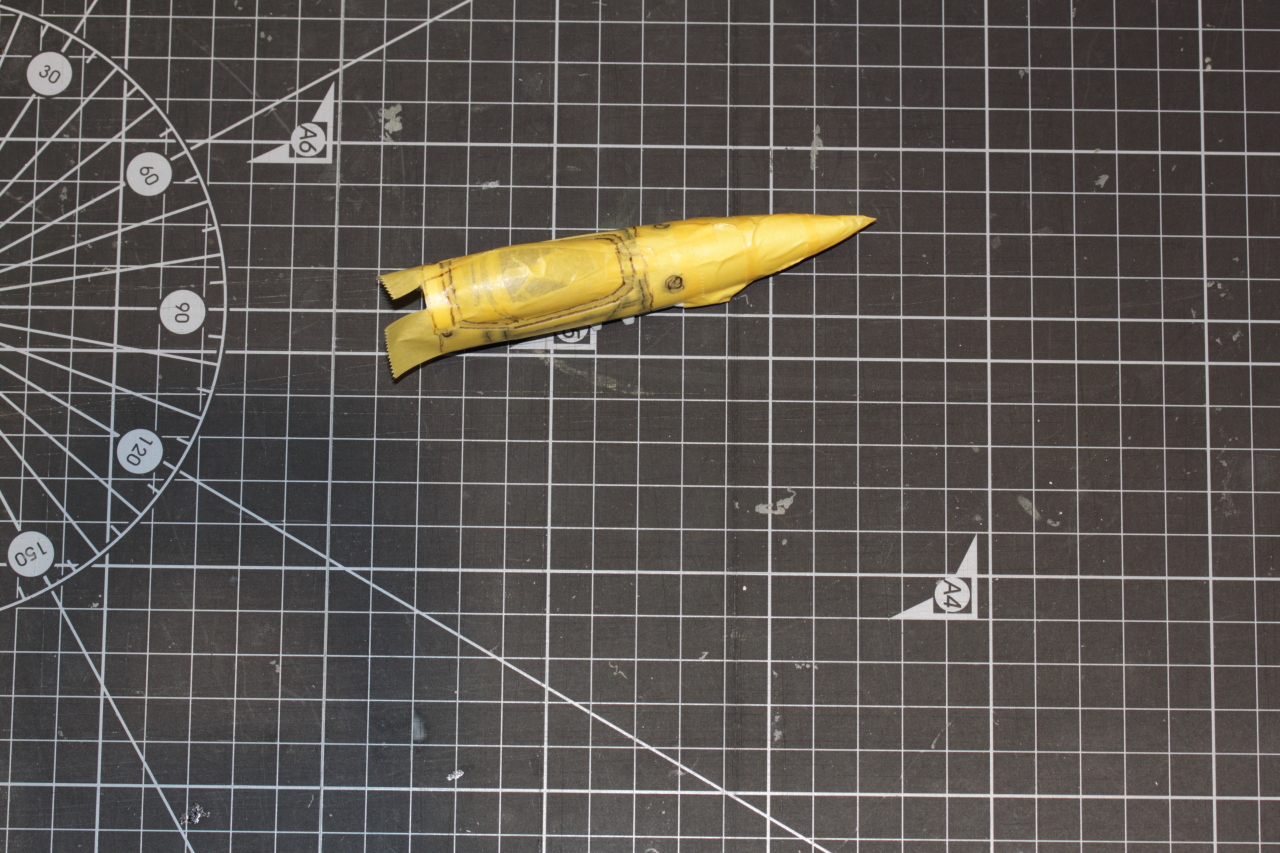
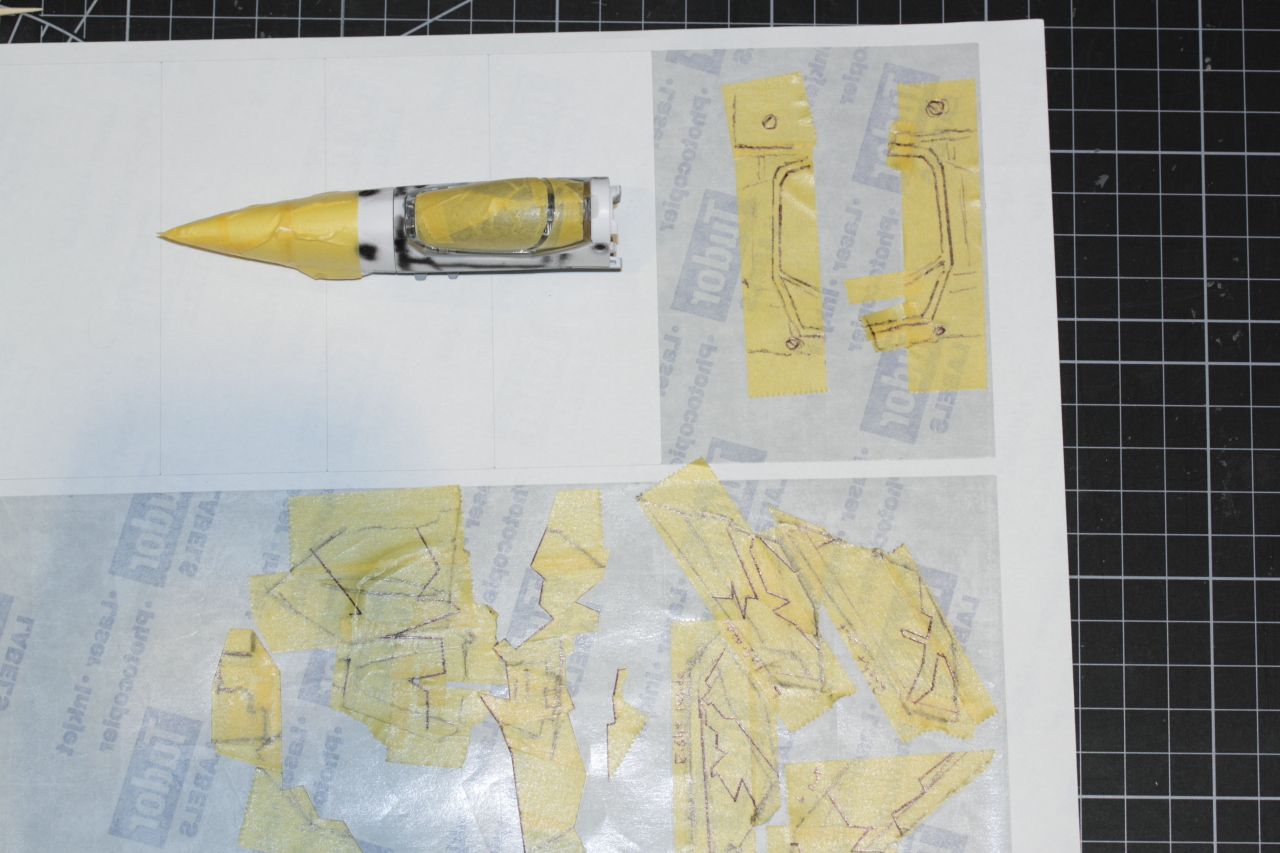
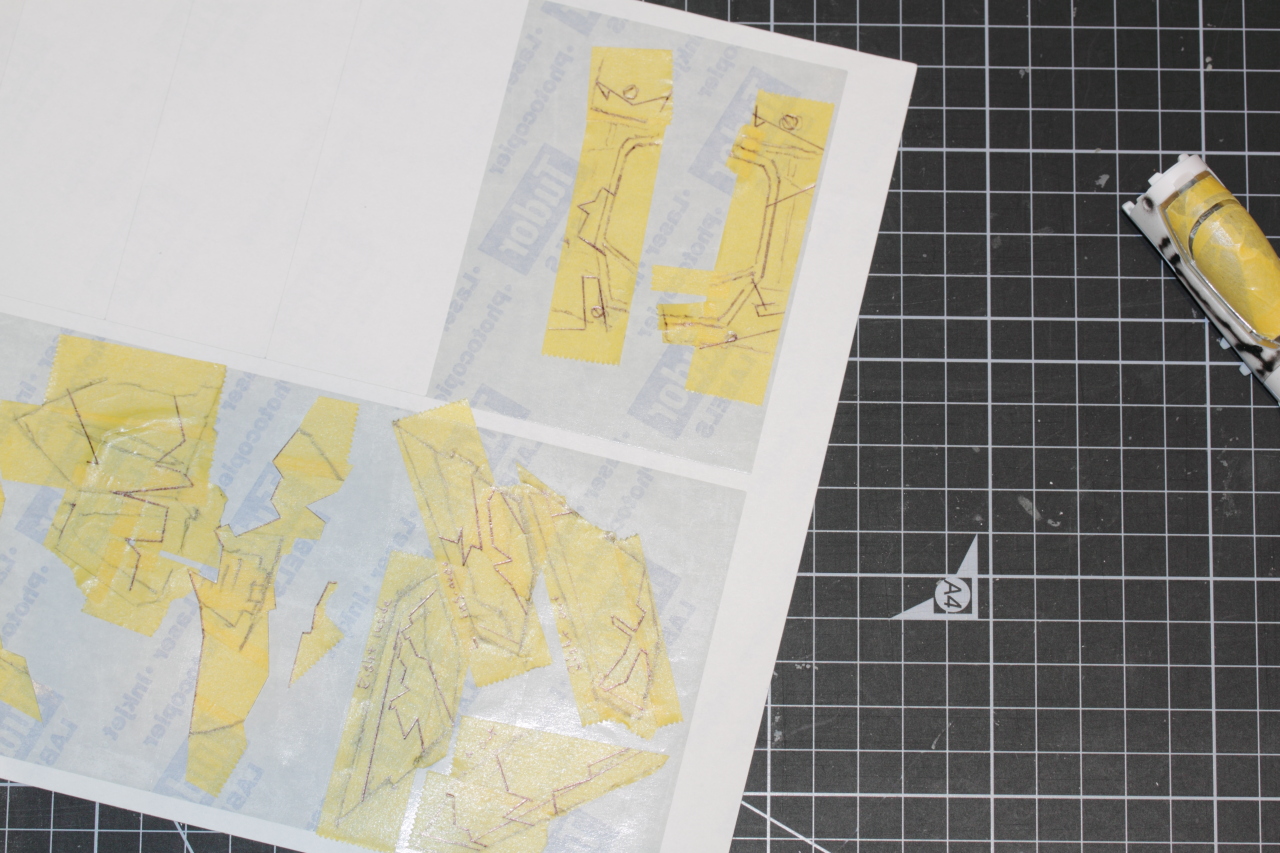
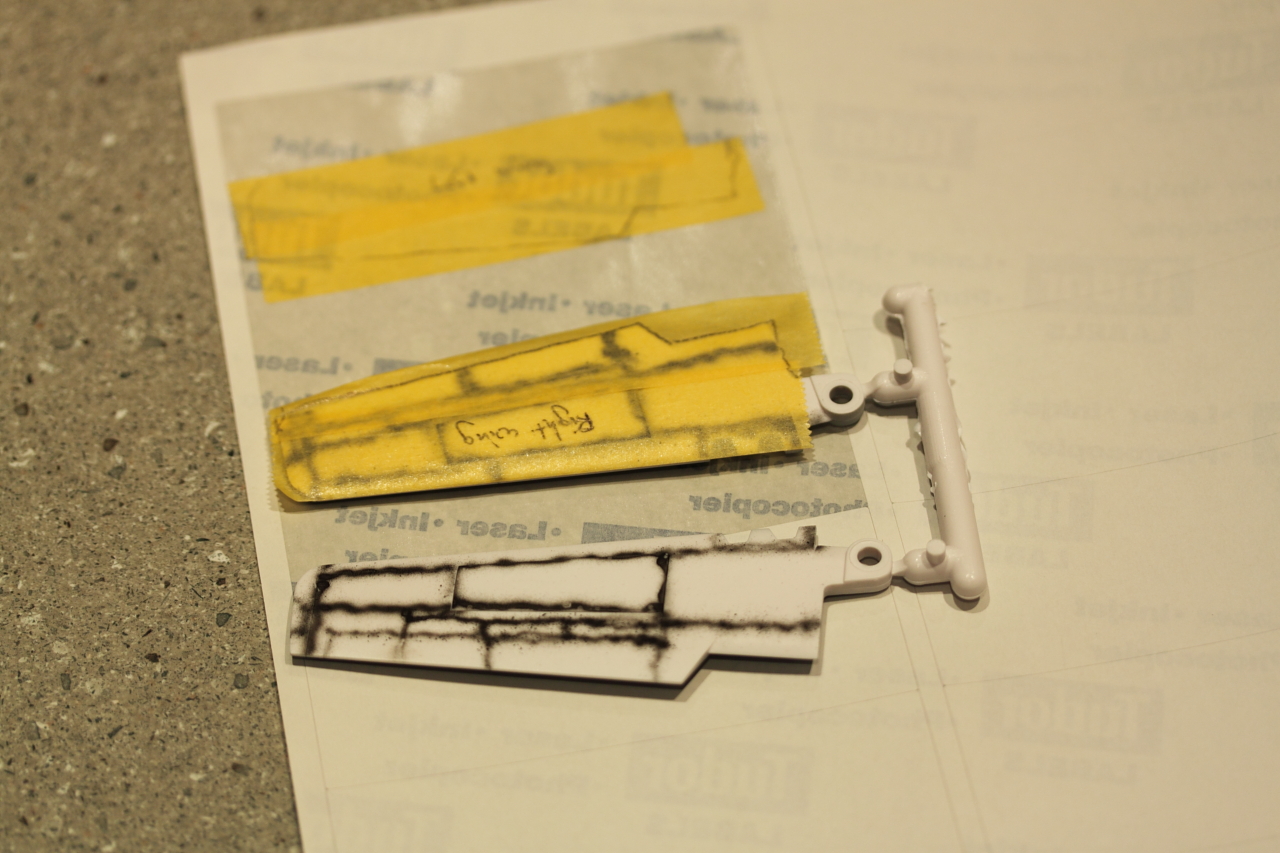
Not really much in the way of progress to report - still have lots going on at work and home so my "hobbies" have suffered as a result. Not sure if it's much help to anyone but here are some photos of where I'm up to. Just shows how I'm mapping out the masking. I apply enough to cover the part, then draw the outline of the part in pen, then remove the masking and put it on a sheet of labels (with the labels removed) so it will come off easily). That way I can trace the camo pattern on the masking, then cut it out and only apply what I need. I figure it'll work pretty easily. And because the splinter pattern is pretty forgiving (straight edges for the most part) it won't need to be super accurate to the original. Oh, and another gratuitous shot of the super glossy canopy!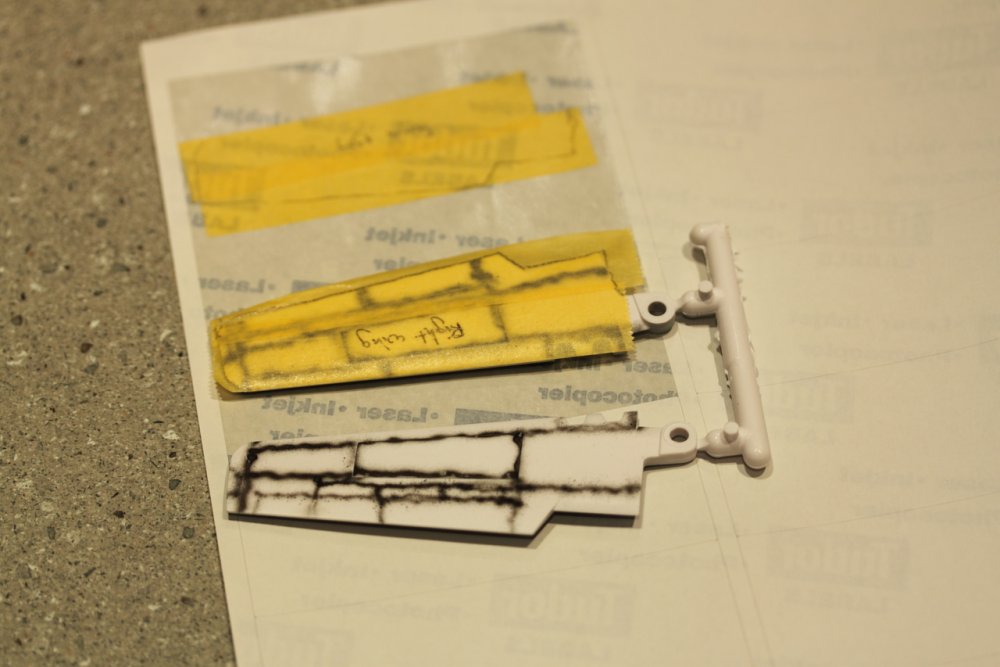
-
Yamato 1/3000 SDF-1 modification and paint up...
mickyg replied to wm cheng's topic in The Workshop!
It's a real pleasure to see you back in action! I get to live vicariously through this whole experience as I just don't have the funds, time or space for this to be a reality for me. All the best of luck with it! -
Very, very nice! Did the kit give you any trouble at all? I'm still working on a Hasegawa VF-1D. The canopy has me worried but I think I'll be OK (wet sanding is never too hard for me, just concerned about the seam line where it meets the canopy frame, not sure I can get the step between the two smooth). Also, the nose halves don't seem to be lining up all that well on mine. Yours looks great - I don't see any seems on the nose or anywhere else for that matter. Excellent looking model!