MacrossJunkie
-
Posts
3260 -
Joined
-
Last visited
Content Type
Profiles
Forums
Events
Gallery
Everything posted by MacrossJunkie
-
I think if anyone wants to do a custom with Yamato's VF-19 toys (that requires repainting the nose and also clear coats), they will need to modify the toy. What stopped me from doing any sort of customizations to my 19S was due to the way the chest part of the transformation works in battroid mode. The bottom of the chest has to scrape tightly against the upper sides of the nose cone as the plastic flexes around it in order to lock it down in place, undoubtedly scrapping paint off with it. Perhaps it would be possible to file down the plastic so it just fits over top. I haven't really examined it further so I can't say what sort of adverse effects that would have, aside from not being able to lock down the chest anymore, or if it was even feasible. For me, any VF-19 I have will be the odd ones out in my collection since I've made it a habit to put my own touches on my valks.
-
You know, the colors on this anniversary edition's super parts seem like they would look better on Alto's YF-29 than the original ones. I didn't buy the original super parts at the time and now I sort of regret it, but the graphite color on these look much better than the blue on Alto's. I think all it would need is a repaint of the yellow sections to red and it would look great. The price is better than it was at the time Alto's was out too, due to currency exchange rates, I guess.
-
The more I look at it, the more I am rethinking my pre-order. I originally wanted to get it because I wanted a long winged 19, but I can't really get myself to like the color scheme even a little bit despite trying to convince myself otherwise. I can't repaint it with another color scheme or even put a flat finish on it if I ever want to transform it unless I want to redo the nose section every time it's transformed to battroid. Perhaps I'll just drop the pre-order for this and get a 19F the next time it's on sale.
-
Both the Prometheus and Daedalus look amazing.I'd put a vote in for a Uraga next
-
Making them with paperclips sounds like a great idea. I take it that the glue is flexible enough to allow for posing without cracking?
-
The ones I got are a polymer type eraser. I'm not sure how it will work out, but I will clear coat an old 1/72 macross plus toy and test it on that for a few weeks before I try it on something I actually care about.
-
The MQ came with them. I just had to paint them up a little bit. They're still out of scale with the Quarter as they're a bit too big.
-
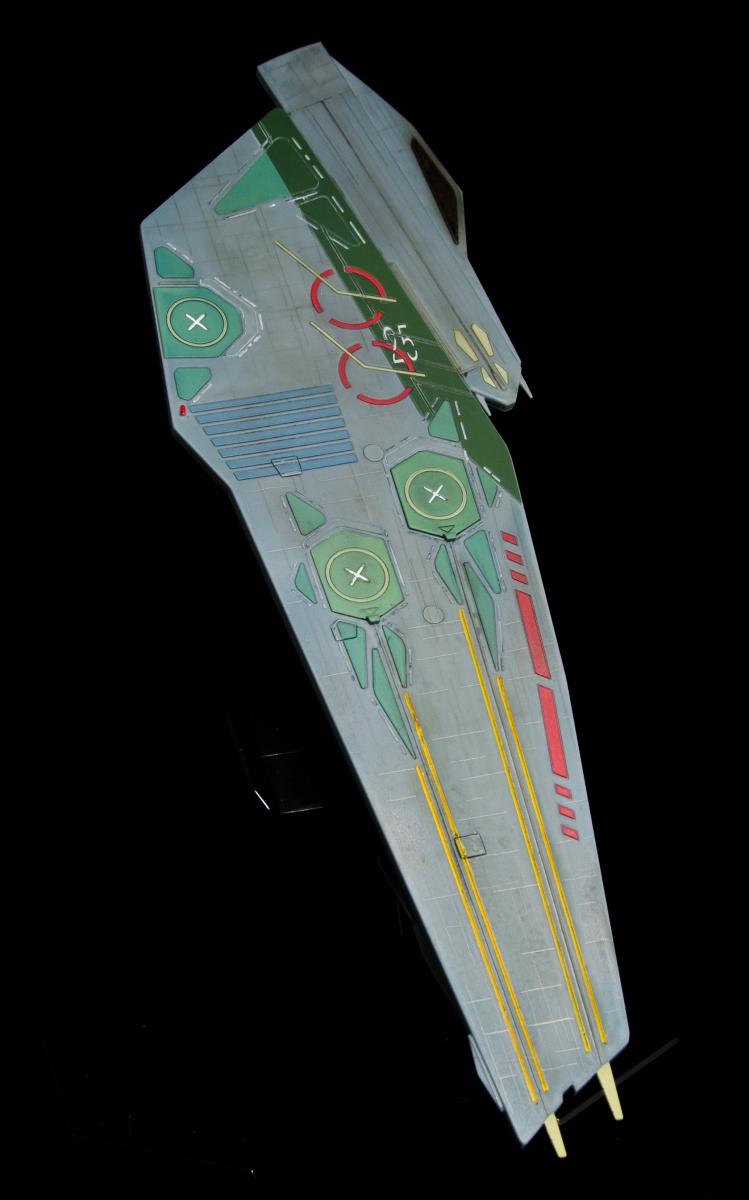
Well, I decided I would attempt to do this on the rest of the MQ. I had been thinking about doing it for a while since the images of the Quarter on the Macross Mecha Manual site, as well as the anime itself, showed similar panel lines in some scenes. I worked on the deck portion a bit more. I added more lines using a strip of masking tape as my guide. Then used the masking tape to fade the lines more by putting the sticky side down on top of the lines and peeling it off repeatedly. I lastly put a flat coat on it to further reduce the contrast and to remove the reflective graphite sheen that made the lines shiny in the light. I'll do the underside of the carrier deck next, then the gunship before moving on to the Quarter itself. I really don't know what I'm doing here, but I think the results are passable. Here's how the deck came out (the lines might be too subtle to see well with the 800px resolution. Click on image to see larger size):
-
Didn't see any non-colorful erasers in local stores so I went and ordered some white eraser caps from Amazon. Hopefully they will work out.
-
I love cap ships too. I really want Bandai to make Battle Frontier and/or Battle Galaxy. Those two ships looked pretty awesome and their carrier modes really look like carriers. Sort of like a further development of the Uraga class carriers (another design I like) and made transformable. I know there was some mention that a person at Yamato was tossing around the Battle 7 idea, but I really don't like that particular ship with its yellow, blue, white and red primary colors and that it looks like it has a big red "M" on its chest area. It just looks too corny. Going back to the Quarter, I was bored and decided to start drawing panel lines on the Quarter because it has such large open areas of no details or anything. It just looked so bland like that. I practiced on the flight deck. This is how it came out using a pencil. Trying to decide now if I should continue with this or abandon the idea.

-

1/48+fp's, 1/60+fp's, 1/72, 1/2k, 1/3k,1/100 and now 1/144
MacrossJunkie replied to VF-18S Hornet's topic in Toys
That looks pretty good to me. I also like the flight deck you have as the display base. -
It's biomechanical. So... enemy biomecha?
-
I pulled the tips off one of my stands. They come off pretty easily since they are placed on the rods just like the eraser heads. I also put one of the tips on the end of a pencil and it was about the right size so the standard eraser heads should fit over the acrylic rods pretty well.
-
I suppose I could stop by an Office Depot sometime and see if they have a pack of eraser heads. I'm not home right now so I can't reference the stands. Are the silicone tips glued on or just fitted over the acrylic rods?
-
I had no idea. That's boggling, but not surprising at this point. It feels like there was little rhyme or reason to Bandai's choices sometimes. The version 1's seemed like they were put together with parts outsourced from different factories using different plastics or in the case of renewal Ozma, parts were molded in one color and then entirely repainted with another color instead of just molding it in that color to begin with.
-
Sorry. My immature side couldn't help but to chuckle because this was so dripping with innuendo.
-
Fantastic! A good old fashioned ritual sacrifice. That should appease the toy gods.
-
I'd be tempted to get a set. I would just be worried about the strength of the little pegs. I really hate the pvc head lasers as I can never lay them down flat in fighter mode because the pvc twists on the peg area and causes the gun to slowly rise up. It's the only real fail in the toy, considering that they made plastic head lasers for the version 1 armored VF-25S that came before this. They should have at least included a separate set of plastic ones like they did with the renewal VF-25S and G.
-
Glad you finally got yours. I think they managed to get them to look even better than the models. They tend to be pretty oily out of the box. I just wipe it down with a wet paper towel which seems to work well enough to get all of the oily substance off. I didn't notice any extra oil coming from the stablizers, but yours might have gotten some extra trapped in the gun itself. You can at least pop off the back set of stabilizers and wipe those down. I'm looking forward to seeing what you do with it!
-
Yamato 1:3000 SDF-1 Macross - unpainted model kit
MacrossJunkie replied to CF18's topic in The Workshop!
Hey Anubis, How did you get the Yamato pre-mixed paints? Was it through the proxy service in your sig? Also, how much did it end up costing you? -
That's all fine and dandy until someone plays music and makes it fall asleep.
-
That's a nice looking VF-11C custom, Kurisama.
-
Genius! That could probably work.
-
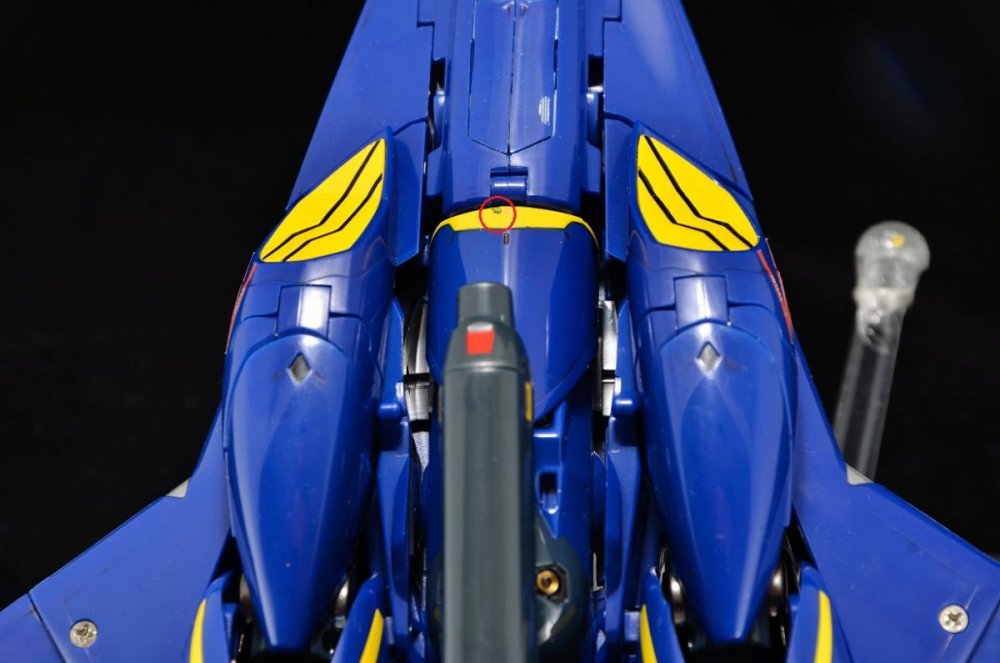
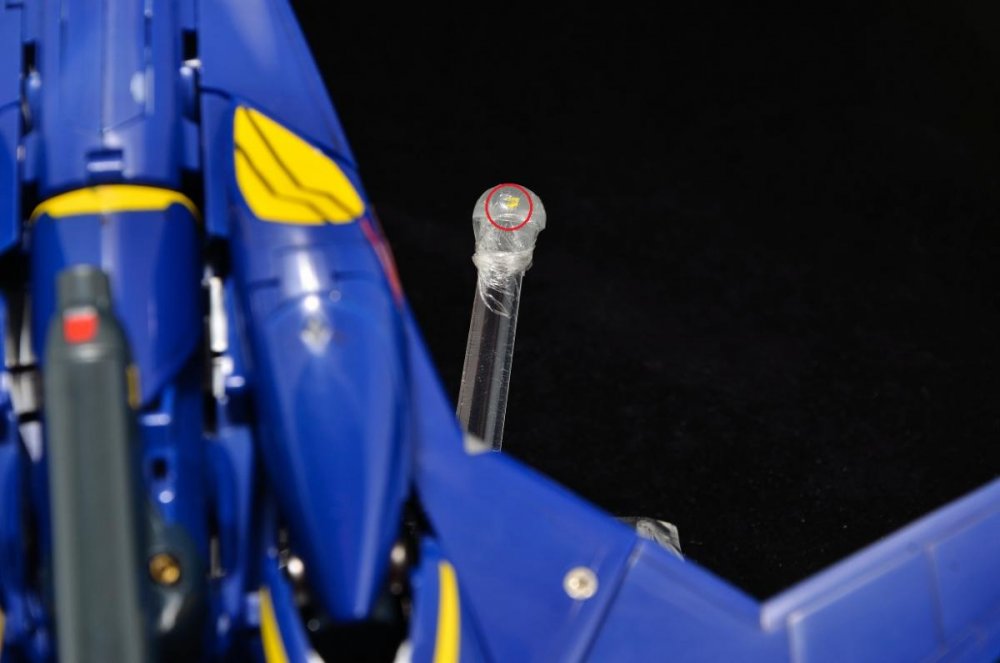
I completely retract my suggestion to use plastic wrap if using the clear tipped stands. This is what happened on my VF-19S when I tried to move it and noticed it was sticking to the stand. Paint missing on the valk: Paint stuck to the tip: The chemicals in the clear tips seems to be seeping through the plastic wrap and reacting with the paint. Either that or somehow plastic wrap became sticky enough to tear paint off. However, I have the black tipped stands also wrapped in plastic wrap and have some clear coated valks sitting on them with no visible reaction or adverse effects. I also had my VF-17S sitting on a clear tipped stand with plastic wrap over the tips but no signs of it eating off the flat clear coat on it. I'm guessing one of two things: Chemicals inside the clear tips (they were washed thoroughly!) are seeping through the relatively porous plastic wrap material and affecting the yamato paints but not future clear coats or... Plastic wrap somehow has enough tack to pull off paint that Yamato uses but not enough to do the same to Future based clear coats. I'm thinking the former is more likely than the latter.
-
As others have said, they only took the limbs off so they could more clearly show the transformation mechanisms without stuff being in the way. Just like what they sometimes do in the transformation manuals.